
How to Merge Video Files Using FFmpeg
Contents
YouTube is expected to have nearly 2.85 billion global users by 2025. With the growing number of video viewers, there is no doubt that the demand for video editing will increase.
Video editing is a part of the video production process that involves tasks like arranging and merging videos, adding graphics, adding subtitles, and more.
Other than using video editing softwares that often require a paid license, you can also use FFmpeg which is completely free and combines the best free software options available.
In this tutorial, I will show you some examples of using the FFmpeg command line editor to merge video files. You will be able to merge input1.mp4 and input2.mp4 using FFmpeg at the end of this tutorial:
Pre-requisite
You will need to download FFmpeg. For reference, the version of FFmpeg used in this tutorial is v5.0.1.
FFmpeg is a complete, cross-platform solution to record, convert and stream audio and video. It can also decode, encode, transcode, mux, demux, stream, filter and play pretty much any media file in any format. As FFmpeg offers flexibility in manipulating media files, we can use it to merge video files using different methods.
Before learning how to use FFmpeg to merge video files, it is important to know what is a container format and what is a video codec. The types of video codes and the container formats of the videos will determine which method we will use to merge the video files.
What is a Container Format
A container format is the format of a video container. A video container contains the video streams, audio streams, captions, and other metadata of a video file.
The container format of a video can also be known as the file extension. The container format of a video can be found in its file name. Some of the most used video container formats are MP4, MOV, MKV, etc.
The data contained in a video file are compressed and decompressed using a codec.
What is a Video Codec
A video codec is a tool that compresses or decompresses a video file. The word codec comes from the words encoder and decoder.
A video encoder compresses a video file while a video decoder decompresses it. The compressed data format usually conforms to a standard video coding format or video compression format. Some of the most common and popular video codecs are H.264 (MPEG-4 Part 10), H.262(MPEG-2 Part 2), and Motion JPEG (MJPEG).
You can check the codec of your video by running this command in the terminal:
ffprobe -i input.mp4
The video codec can be found in the information printed :
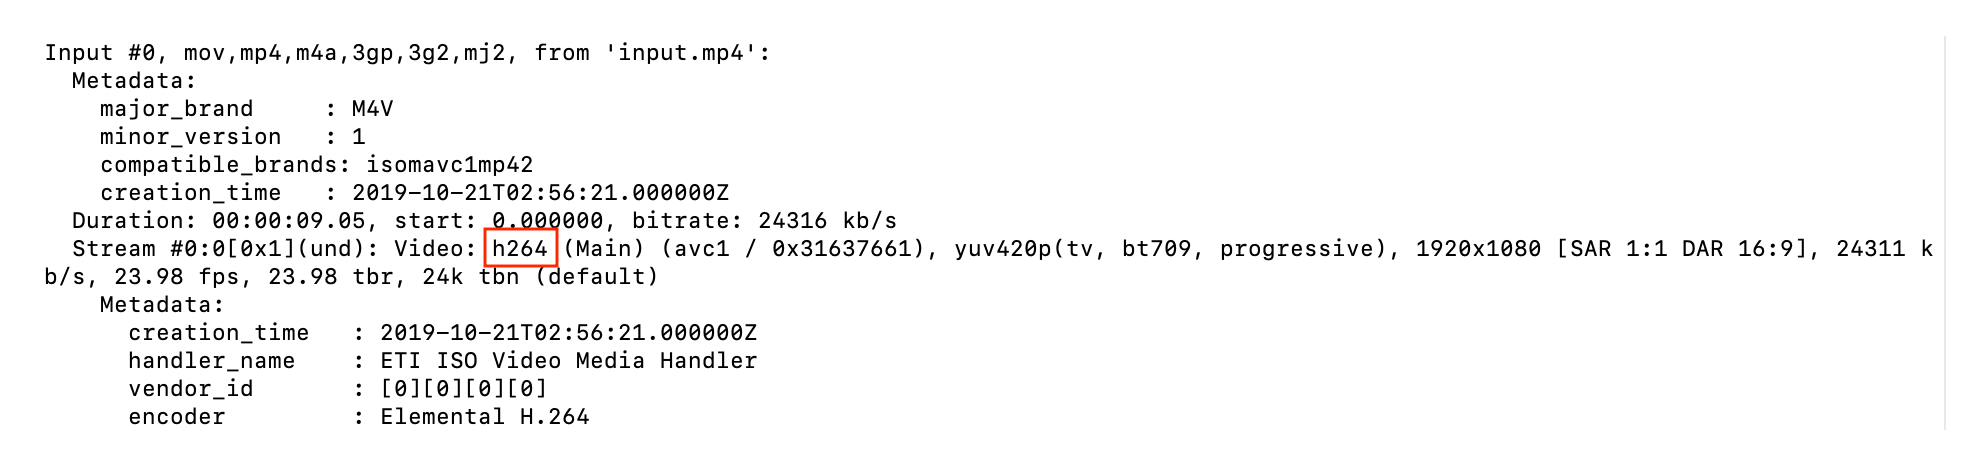
The video above is compressed using a H.264 codec with a Main Profile.
Although the names of a container format and a video codec might sound similar (MP4 and MPEG-4), they are actually different.
After running the command above to check the codecs of your videos, you can decide which method you should use to merge the video files. There are two methods to merge video files with the same codecs and a method for video files with different codecs.
Merging Video Files with the Same Codecs
Method 1. Using the “concat” Demuxer
The concat demuxer reads a list of video files from a text file and demuxes them in sequence. Each video starts where the previous one finishes.
To use the concat demuxer, the video files must have the same streams. However, they can be wrapped in different container formats such as .mp4, .mov, .wmv, etc.
First, create a .txt file and list the paths of the video files that you want to merge. You can use relative paths which refer to the location that is relative to your current directory or absolute paths like the example below:
join_video.txt
file /Users/Video/input1.mp4
file /Users/Video/input2.mp4
Note : You can add more than two video files.
Then, run the FFmpeg command.
ffmpeg -f concat -safe 0 -i join_video.txt -c copy output_demuxer.mp4
-safe 0 is added so that any file name will be accepted. The default value 1 will reject absolute paths in the text file.
-c copy will copy all the streams. It makes FFmpeg omits the decoding and encoding process and does only demuxing and muxing.
As this method allows you to "stream copy" the files instead of re-encoding them, the concatenation is very fast.
Bear Tip 🐻 : You can omit
-safe 0if you are using relative paths.
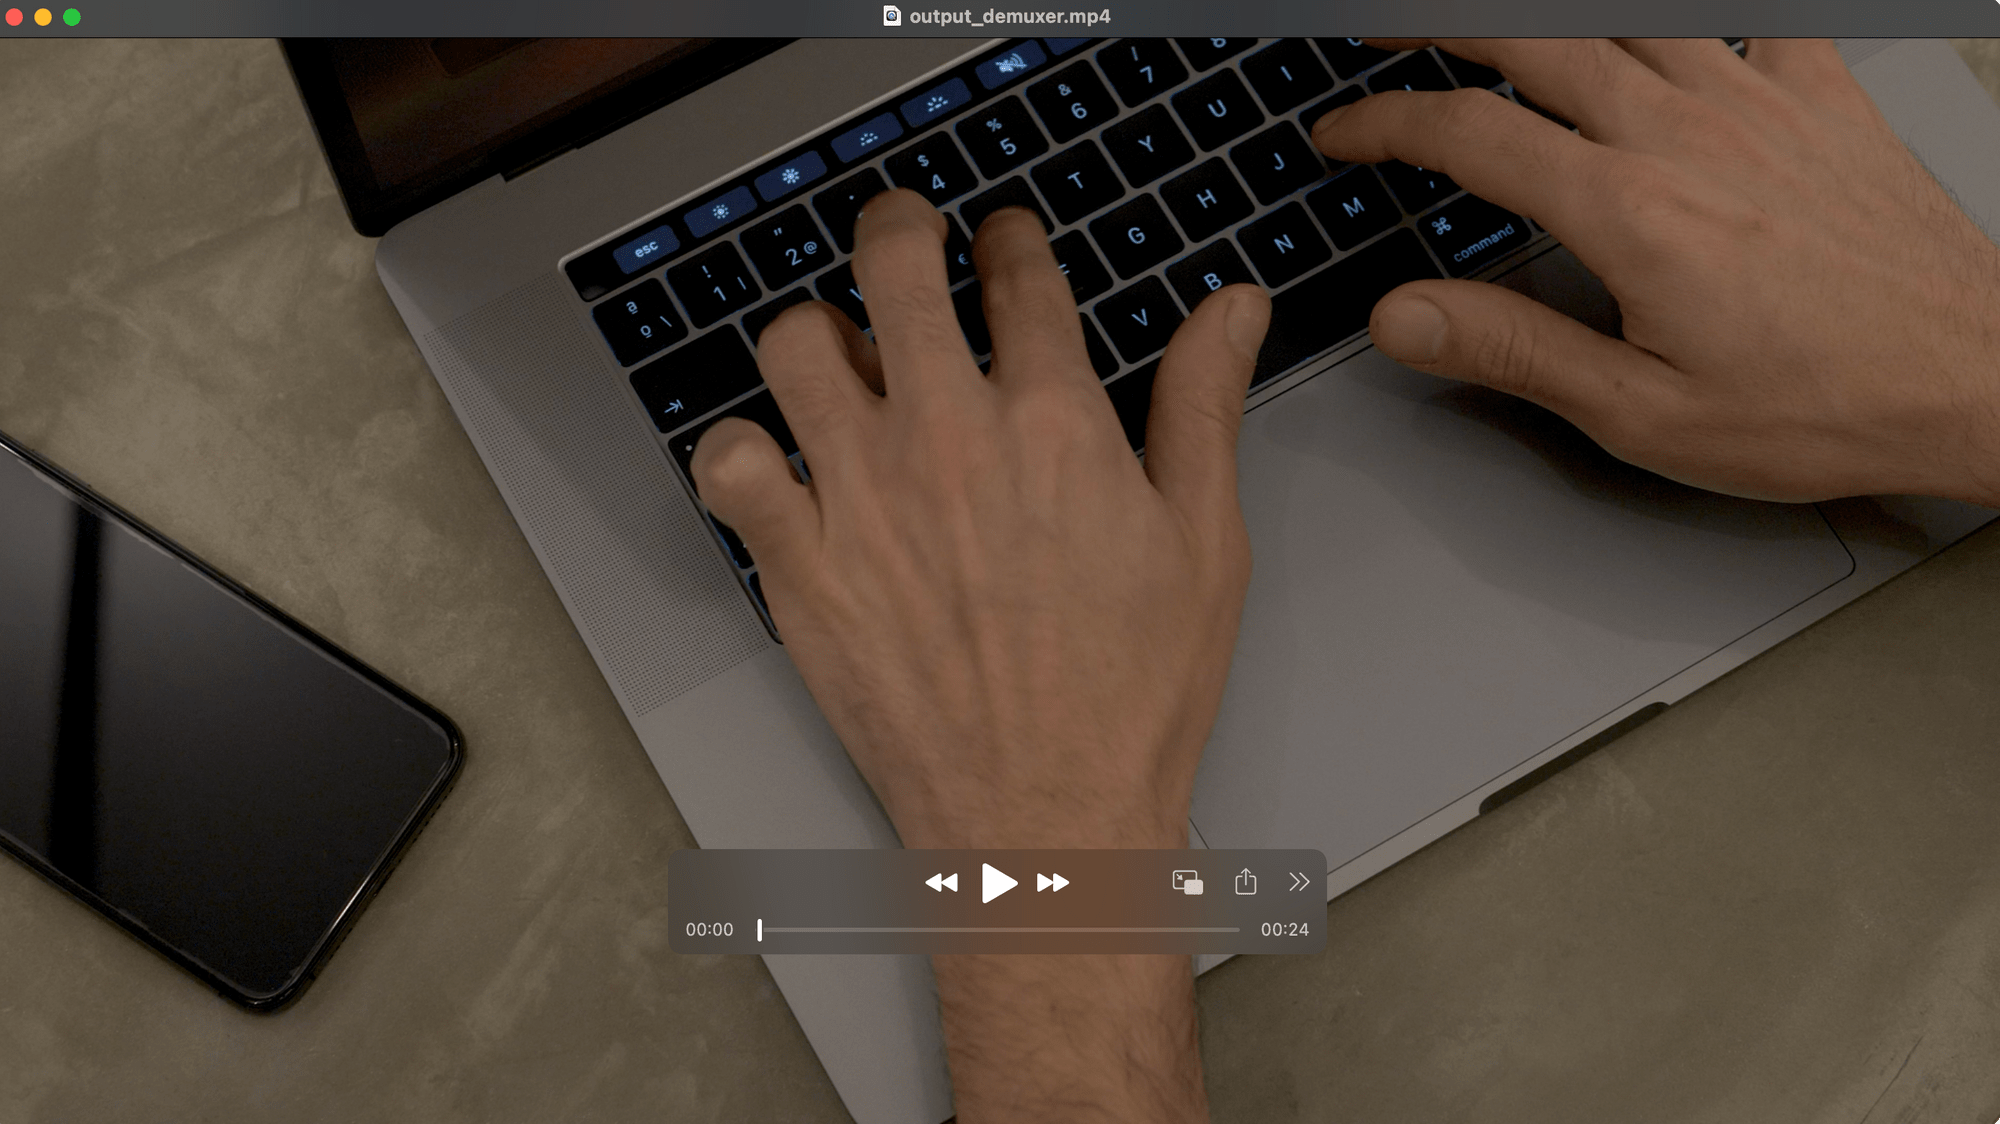
The merged video starts with the first video, input1.mp4 which is 9-seconds long.
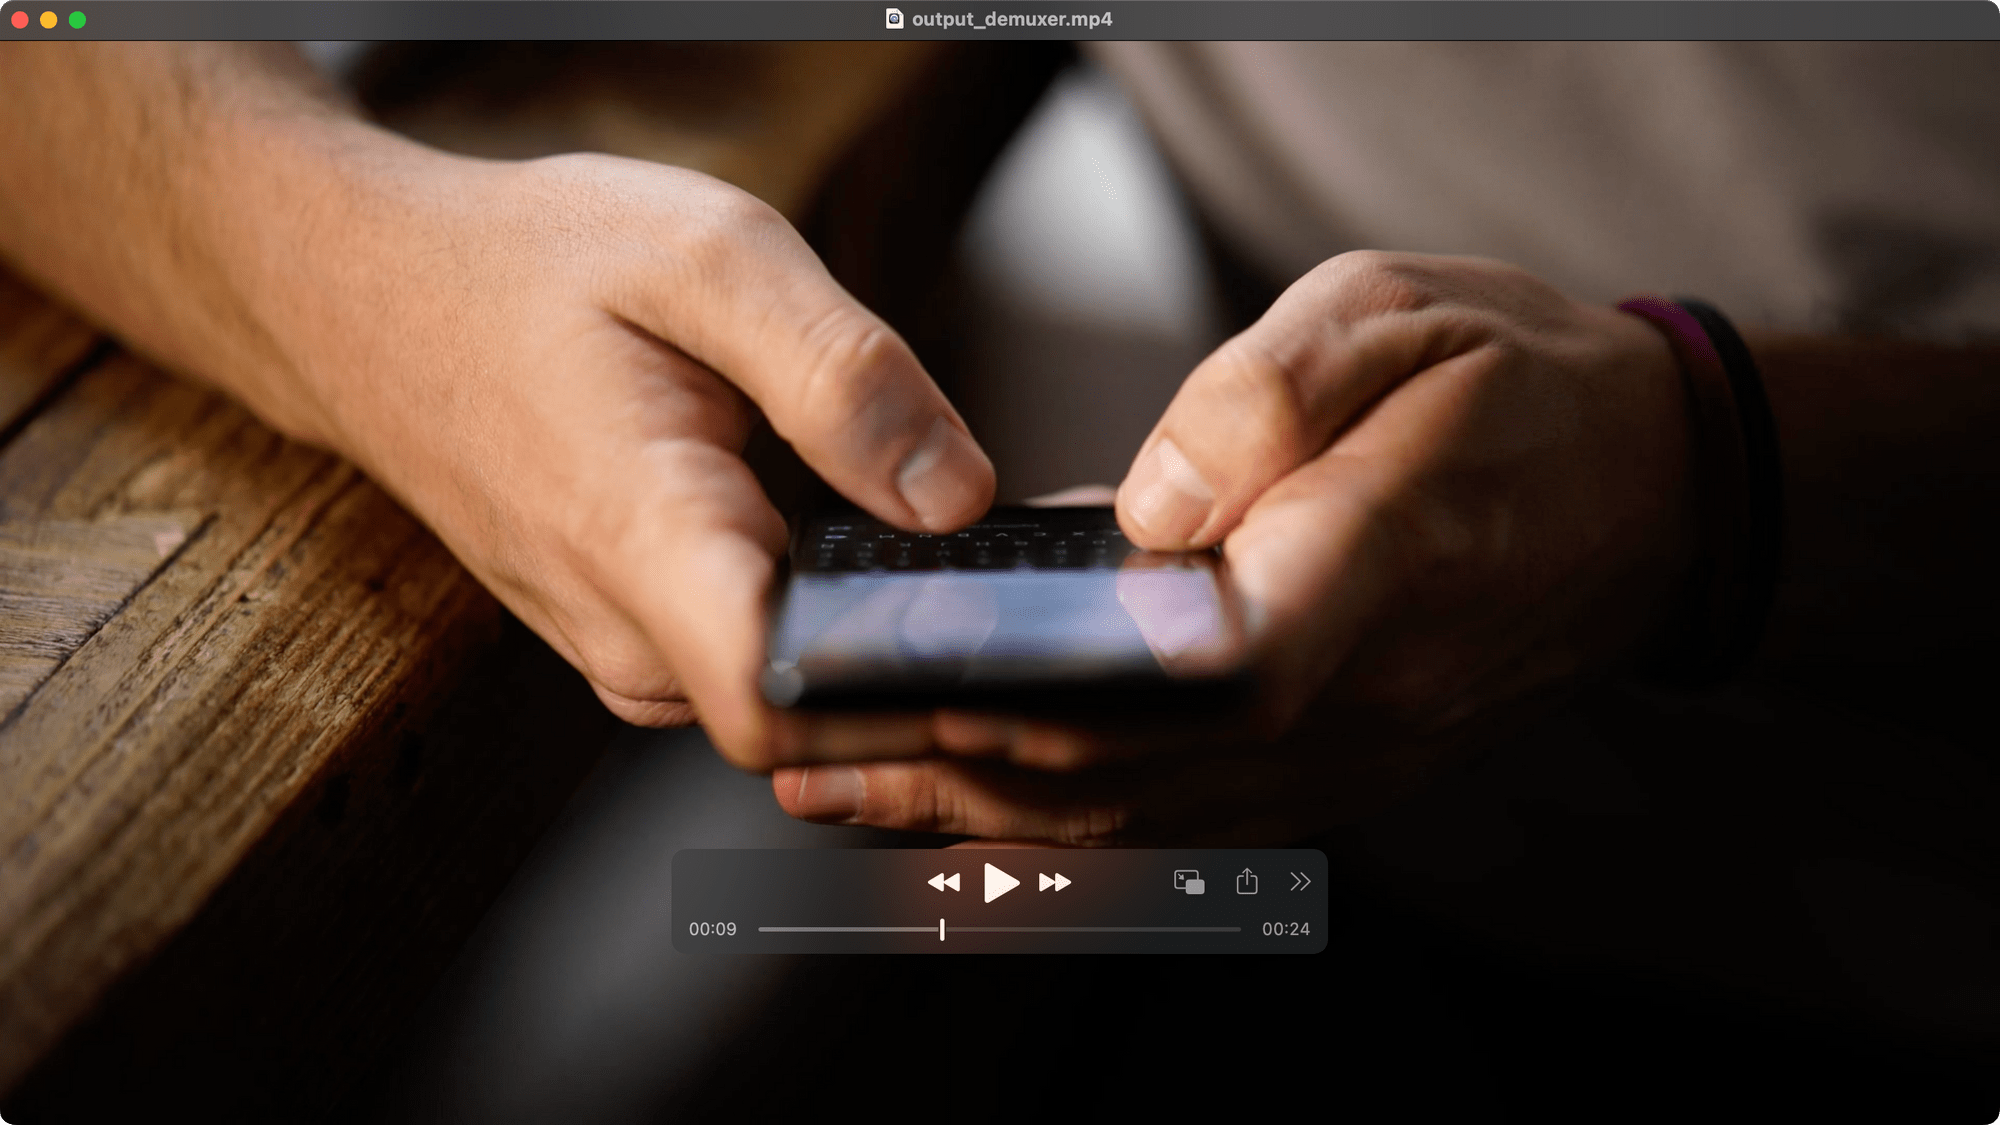
The second video, input_2.mp4 follows the first video immediately.
Videos with Different Container Formats
The video container formats can be different but their streams must be the same.
The screenshots below show the information of an MP4 video, input1.mp4, and a MOV video, input2.mov which have the same video streams.
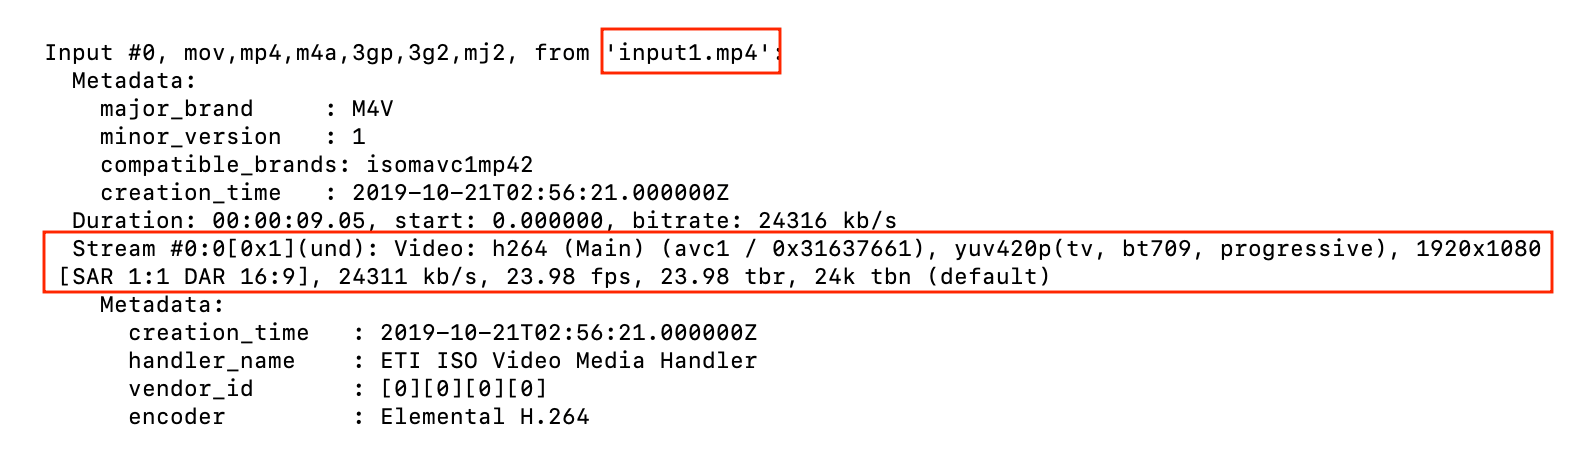
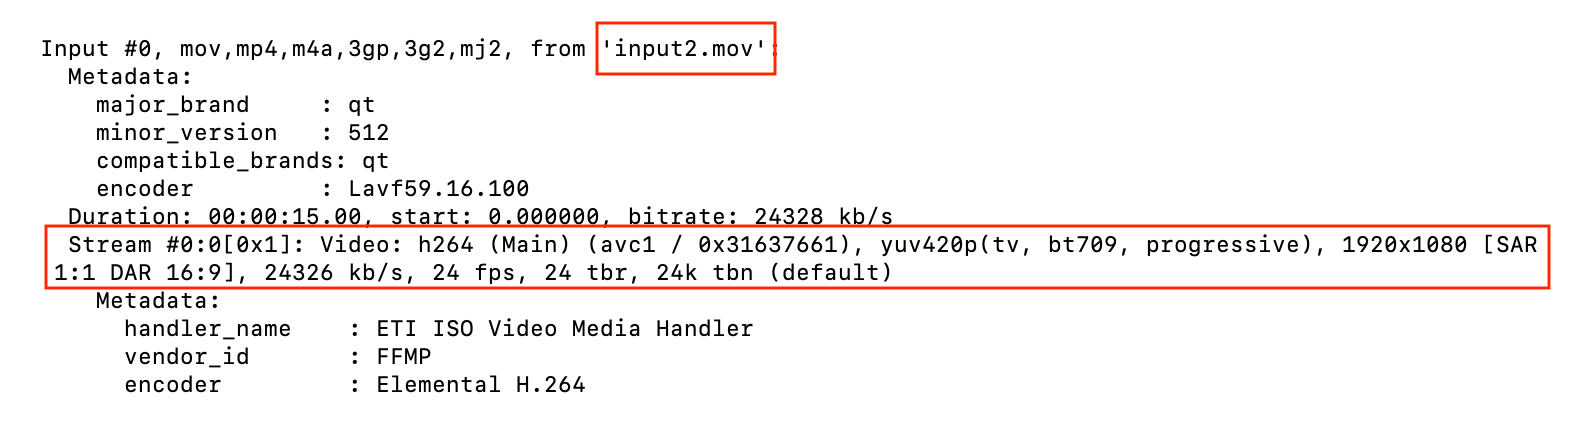
The video streams of the videos above have the same codec (h264), codec profile (Main), pixel format (yuv420p), and resolution (1920x1080). These are the stream properties that need to be the same to use the concat demuxer.
If the videos contain audio streams , the codec (aac), codec profile (LC), sampling rate or frequency (44100 Hz), channel layout (stereo) and sample format (fltp) should match. The bitrate doesn't matter.
Method 2. Using the “ concat” Protocol
The concat protocol works only on video formats that support file-level concatenation like MPEG-2 TS. It cannot be used for other video formats like MP4 and WEBM.
ffmpeg -i "concat:input1.ts|input2.ts" -c copy output_protocol.ts
Similar to the previous method, the concat protocol allows you to "stream copy" the files by adding the option -c copy.
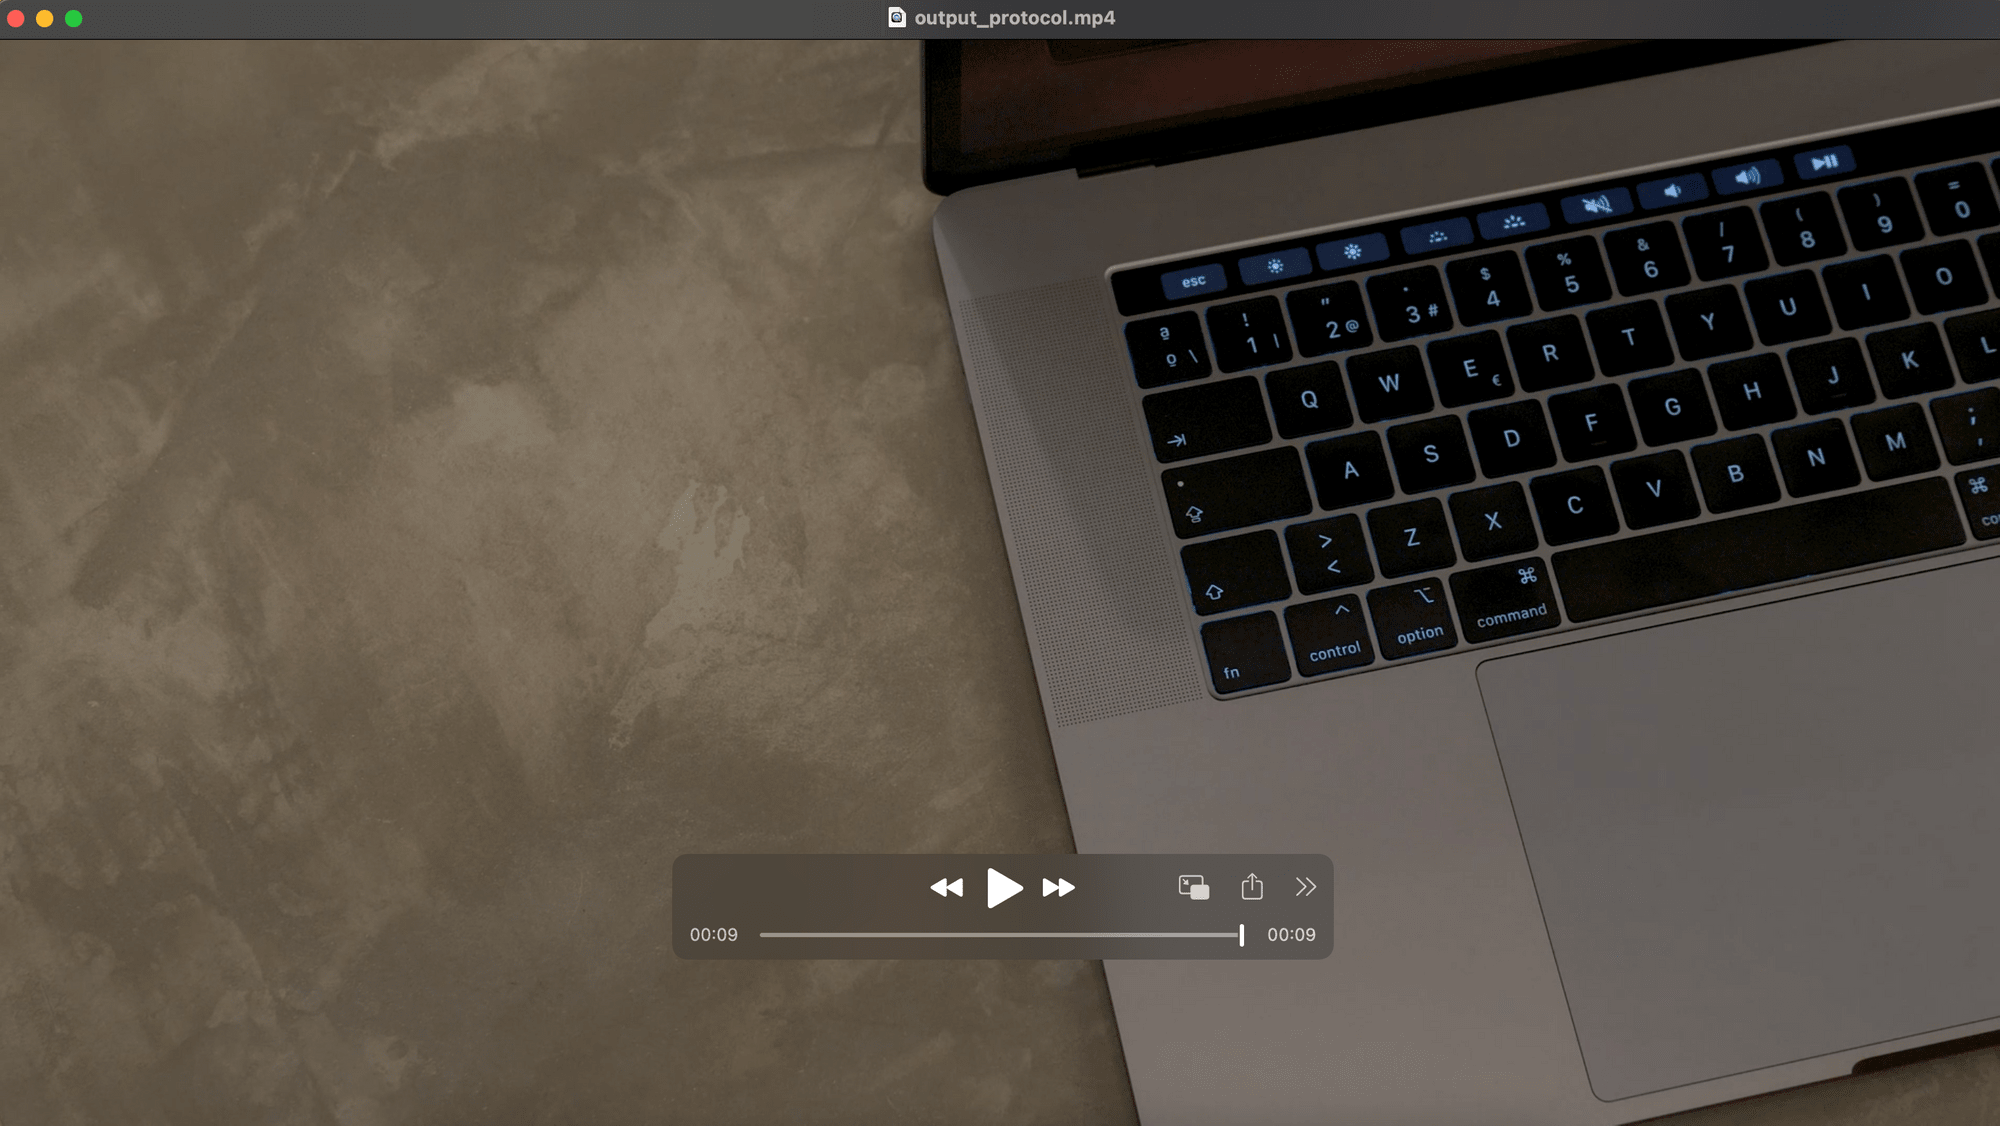
If you use it on video formats that are not supported, only the first input video will be saved in the output video. For example, you can try to use this method to merge the two MP4 files used in the previous example:
ffmpeg -i "concat:input1.mp4|input2.mp4" -c copy output_protocol.mp4
The total length of the output video, output_protocol.mp4 is only 9-seconds long, which is the same as the first input video, input1.mp4.
The video ends after the first video.
Although many video formats are not supported, it is very easy to use if you are merging videos in the supported formats as the concatenation can be done in a single command in the terminal without the text file.
The ability to use the -c copy option also makes it a very efficient method to merge video files as it doesn’t require re-encoding, which takes a lot of time.
Merging Video Files with Different Codecs
Video files don’t always have the same codecs. There might be scenarios where the videos you want to merge have different codecs.
For example, you might want to merge an MP4 (MPEG-4 Part 14) video and a WMV video. In this case, you can’t use the previous methods to merge the video files.
Using the “concat” Filter
To use the concat filter, the videos need to be in the same dimension and have the same frame rate. Therefore, you need to make sure that these requirements are fulfilled before proceeding to the next step.
Run the command to merge the videos:
ffmpeg -i input1.mp4 -i input2.wmv -filter_complex "[0:0][0:1][1:0][1:1]concat=n=2:v=1:a=1[outv][outa]" -map "[outv]" -map "[outa]" output.mp4
-filter_complex lets you use the concat filter with multiple inputs and outputs.
[0:0][0:1] and [1:0][1:1] tell FFmpeg to take video stream #0 and audio stream #1 from the first input video and second input video respectively.
n=2 sets the number of segments, which is equivalent to the number of input videos.
v=1 and a=1 set the number of output video and audio streams, which are also the number of video and audio streams in each segment.
[outv][outa] are the resulting concatenated streams which are then selected for the output video.
Contrary to the concat demuxer and concat protocol, the concat filter doesn’t allow you to "stream copy" the videos. The videos will need to be re-encoded, thus it will take a long time to merge the videos.
Using Bannerbear API
Merging video files using FFmpeg becomes complicated and time-consuming when you have videos with different streams, formats, resolutions, frame rates, and other properties.
An easier and faster alternative is using Bannerbear’s Movies API as it does all the jobs above (and more) with way less effort.
The cropping and encoding of files will be handled automatically to create a single MP4 video in your desired resolution. You can merge video files with different formats and even other media files like MP3 and PNG in a single API request, without manual rescaling and format conversion.
var data = {
  "width" : 800,
  "height" : 500,
  "transition" : "fade",
  "soundtrack_url" : "https://ffmpeg-bb.s3.ap-southeast-1.amazonaws.com/audio.mp3",
  "inputs" : [
    {
      "asset_url": "https://ffmpeg-bb.s3.ap-southeast-1.amazonaws.com/input1.mp4"
    },
    {
      "asset_url": "https://ffmpeg-bb.s3.ap-southeast-1.amazonaws.com/input2.wmv",
      "trim_to_length_in_seconds": 3
    },
    {
      "asset_url": "https://ffmpeg-bb.s3.ap-southeast-1.amazonaws.com/image.png",
      "trim_to_length_in_seconds": 3
    }
  ]
}

fetch('https://api.bannerbear.com/v2/movies', {
  method: 'POST',
  body: JSON.stringify(data),
  headers: {
    'Content-Type' : 'application/json',
    'Authorization' : `Bearer ${API_KEY}`
  }
})
Using the video files from the last example and an extra MP3 audio and PNG image, here's the result generated using the API 🔊:
What's Next
Video editing is not an easy job. After merging the videos, many things need to be done to make your video stands out such as adding subtitles to it and making a thumbnail that catches the attention of your audience.
If you want to carry on with the next steps, here are some tutorials that could help you:
