
How to Add Subtitles to a Video File Using FFmpeg
Contents
Studies show that 81% of marketers feel that video has a direct, positive impact on sales. But with 83% of consumers watching videos with the sound off, the effectiveness of your video content might be limited.
However, 37% of viewers said that they tend to turn the sound on whenever there are subtitles on the video because the video seems more interesting. Even if they keep the video silent, the subtitles can help them to understand the video better.
The statistics above show that you should definitely add subtitles to your videos.
In this tutorial, we are going to use FFmpeg to add subtitles to a video file. At the end of this tutorial, you will know how to add Hard Subtitles and Soft Subtitles to a video file.
 A video with Hard Subtitle
 A video with Soft Subtitle
Pre-requisite
You will need to download FFmpeg to add subtitles to a video. For reference, the version of FFmpeg used in this tutorial is v5.0.1.
Besides that, you will also need to prepare a subtitle file for your video.
In this tutorial, we will be adding subtitles in SRT(.srt) and ASS(.ass) format to the video using FFmpeg.
Hard Subtitles vs. Soft Subtitles
The subtitles on a video can be categorized as Hard Subtitles or Soft Subtitles.
Hard Subtitles are subtitles that are hard coded to a video and can be displayed on any media player as long as the video format is supported. These subtitles are burned into the video and cannot be removed once you’ve added them.
On the other hand, Soft Subtitles are not burned into a video. They can be enabled and disabled during the video playback. This gives users more flexibility and more control over how they want to watch the video.
FFmpeg allows you to add subtitles to a video using both methods and we are going to do both in this tutorial.
Preparing an SRT Subtitle File
First, we need to prepare an SRT subtitle file for the video. You can use any text editor to add texts to the subtitle file.
Every SRT file consists of these four components:
- The counter/index for the subtitle
- The start and end time of the subtitle in “hours:minutes:milliseconds” format
- The subtitle text
- A blank line to indicate the end of the subtitle
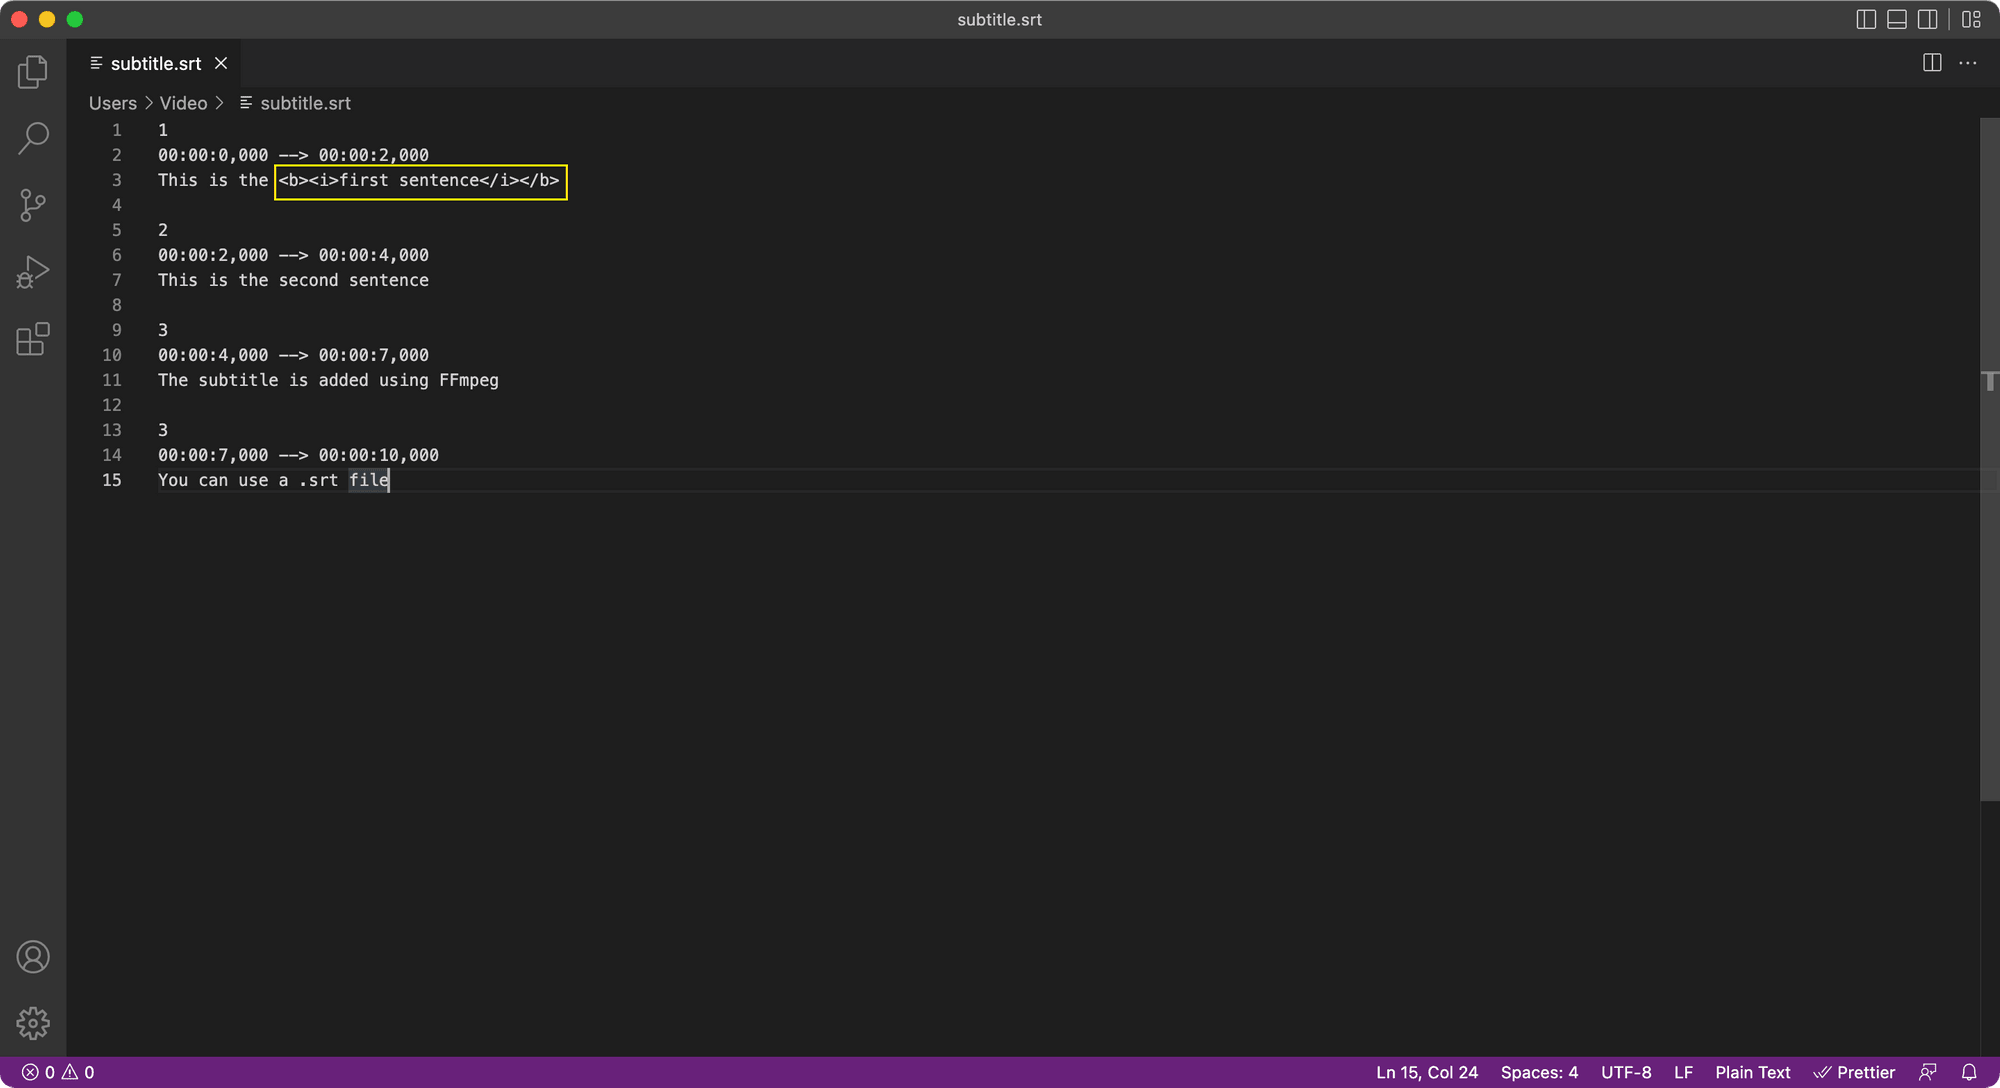
Let’s name the file as subtitle.srt.
1
00:00:0,000 --> 00:00:2,000
This is the first sentence

2
00:00:2,000 --> 00:00:4,000
This is the second sentence

3
00:00:4,000 --> 00:00:7,000
The subtitle is added using FFmpeg

3
00:00:7,000 --> 00:00:10,000
You can use a .srt file
Next, we can add the subtitles to the video file using hard coding.
Adding Hard Subtitles
FFmpeg uses the subtitles and ass filters to hard code subtitles into a video file.
These two filters are used for different subtitle formats. The subtitles filter is used for adding subtitles in SRT format while the ass filter is used for adding subtitles in ASS format.
Adding Subtitles in SRT Format
FFmpeg uses the subtitles filter and the libass library to add SRT subtitles on top of the input video. The libass library is a portable subtitle renderer for the ASS subtitle format. It converts the input subtitle file to an ASS file.
Step 1. Ensure that libass Is Enabled
To use the libass library, you need to have libass enabled at compile time. You can run ffmpeg —version in your terminal to check whether you have —-enable-libass in the configuration.

If you can see —-enable-libass in the configuration, libass is enabled. Otherwise, you need to enable libass before proceeding to the next step.
The subtitles filter requires a build with libavcodec and libavformat to convert the passed subtitle file to an ASS file. These two libraries should be downloaded automatically when you install the recent version of FFmpeg.
If you don’t have these two libraries, you can install the latest version of FFmpeg. For more information about libraries contained in FFmpeg, you can refer to FFmpeg’s release notes.
Step 2. Add Subtitle to the Video Using the “subtitles” Filter
Once you have libass enabled, run this command to add the subtitles in subtitle.srt to your video:
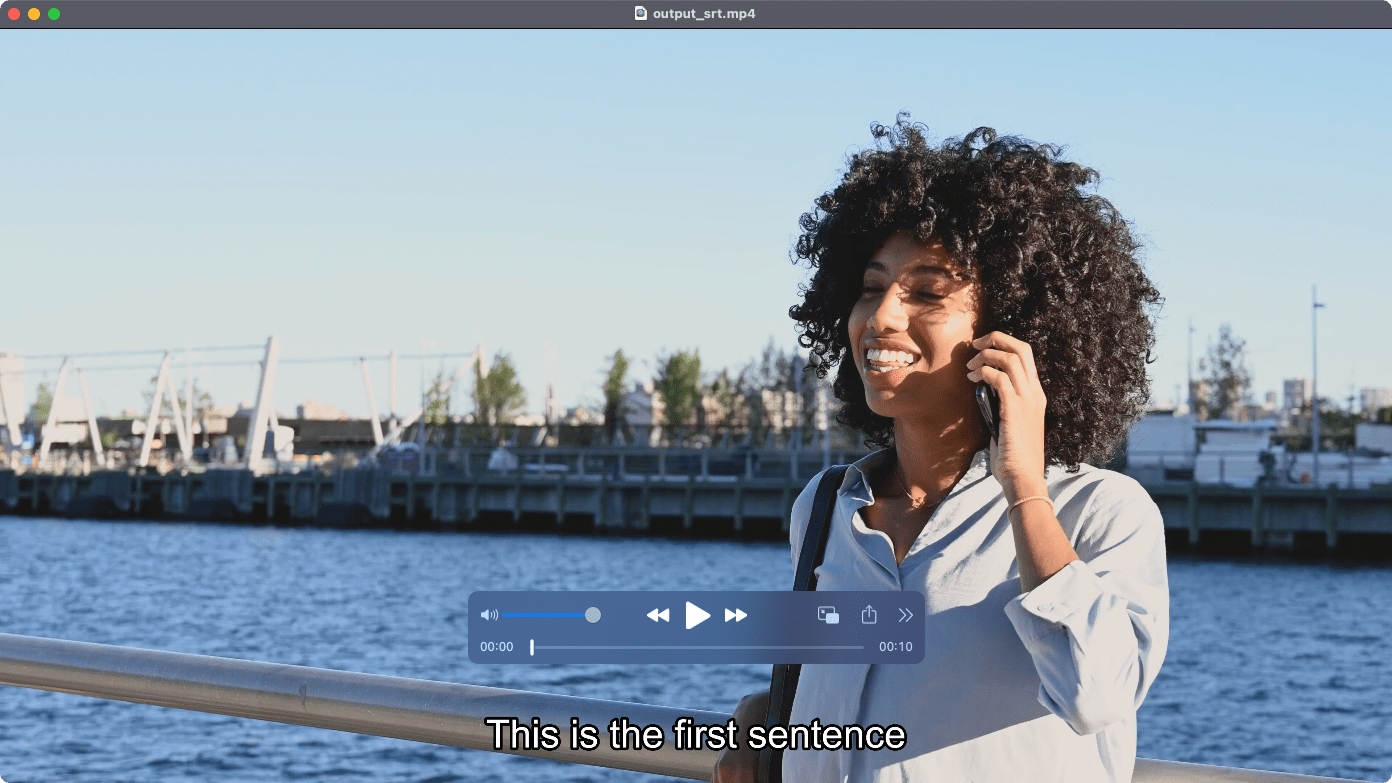
ffmpeg -i input.mp4 -vf subtitles=subtitle.srt output_srt.mp4
-vf is an alias for -filter:v while subtitles=subtitle.srt is the name of the filter followed by the name of the SRT subtitle file.
The subtitles will be added to the video using the default font styles:
Adding Subtitles in ASS Format
Alternatively, you can convert the SRT file to an ASS file manually and add the subtitles to the video using the ass filter.
Step 1. Convert the Subtitle to ASS Format
The command below converts the SRT file to an ASS file:
ffmpeg -i subtitle.srt subtitle.ass
subtitle.ass
[Script Info]
; Script generated by FFmpeg/Lavc59.18.100
ScriptType: v4.00+
PlayResX: 384
PlayResY: 288
ScaledBorderAndShadow: yes

[V4+ Styles]
Format: Name, Fontname, Fontsize, PrimaryColour, SecondaryColour, OutlineColour, BackColour, Bold, Italic, Underline, StrikeOut, ScaleX, ScaleY, Spacing, Angle, BorderStyle, Outline, Shadow, Alignment, MarginL, MarginR, MarginV, Encoding
Style: Default,Arial,16,&Hffffff,&Hffffff,&H0,&H0,0,0,0,0,100,100,0,0,1,1,0,2,10,10,10,0

[Events]
Format: Layer, Start, End, Style, Name, MarginL, MarginR, MarginV, Effect, Text
Dialogue: 0,0:00:00.00,0:00:02.00,Default,,0,0,0,,This is the {\b1}{\i1}first sentence{\i0}{\b0}
Dialogue: 0,0:00:02.00,0:00:04.00,Default,,0,0,0,,This is the second sentence
Dialogue: 0,0:00:04.00,0:00:07.00,Default,,0,0,0,,The subtitle is added using FFmpeg
Dialogue: 0,0:00:07.00,0:00:10.00,Default,,0,0,0,,You can use a .srt file
Step 2. Add Subtitle to the Video Using the “ass” Filter
Next, run the command below to add the subtitles in subtitle.ass to your video:
ffmpeg -i input.mp4 -vf ass=subtitle.ass output_ass.mp4
The result generated should be the same as the previous example done using the SRT file:

Optional: Styling the Subtitles
The styles of the subtitles can be set. It can be set in the subtitle file itself or in the FFmpeg command.
Option 1: Set the Style in the Subtitle File Itself
For SRT files , the options for the subtitle styles are limited. You can do basic styling using HTML markups like <b>, <i>, <u>, and <font>.
This is what it looks like when you add the <b> tag and the <i> tag to the subtitle:

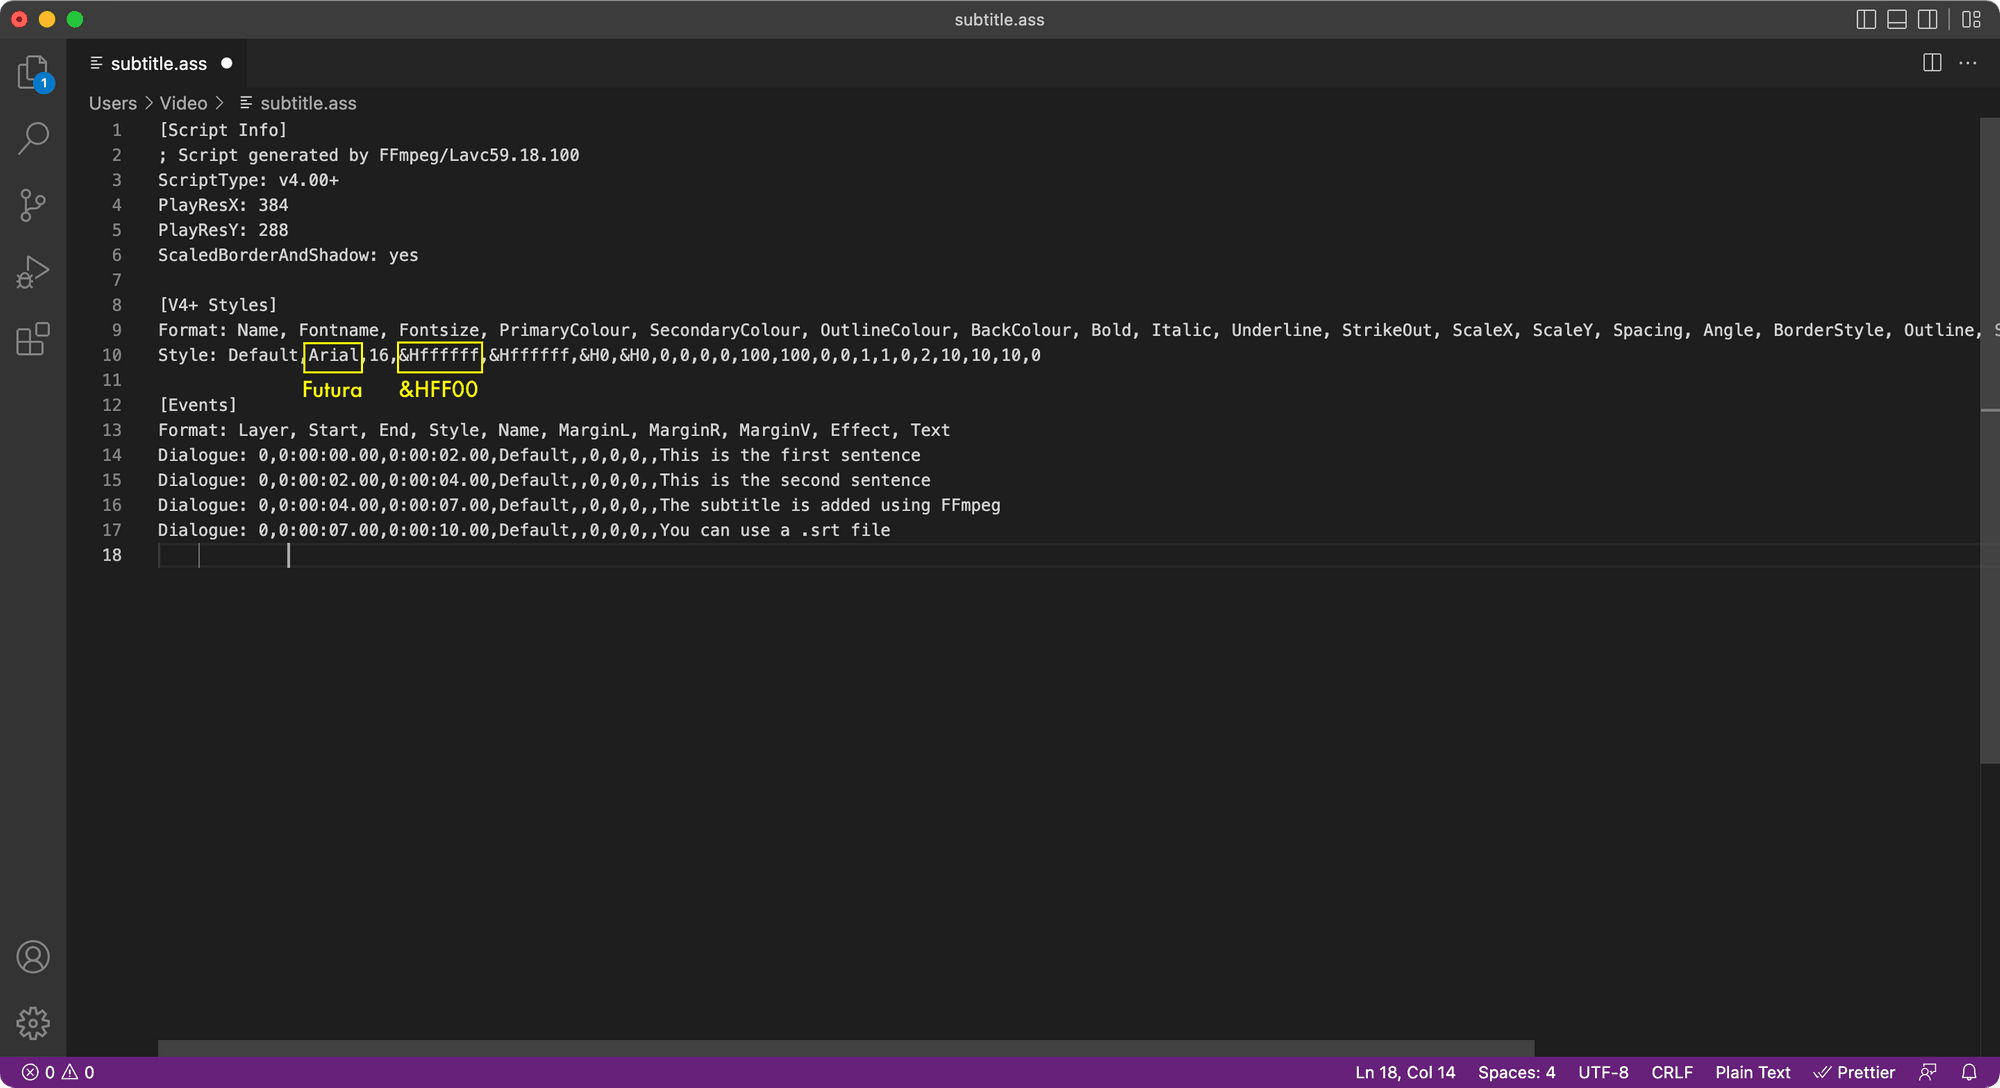
For ASS files , you have more options for the subtitle styles. These are the styles options that can be set in an ASS file:
[V4+ Styles]
Format: Name, Fontname, Fontsize, PrimaryColour, SecondaryColour, OutlineColour, BackColour, Bold, Italic, Underline, StrikeOut, ScaleX, ScaleY, Spacing, Angle, BorderStyle, Outline, Shadow, Alignment, MarginL, MarginR, MarginV, Encoding
Style: Default,Arial,16,&Hffffff,&Hffffff,&H0,&H0,0,0,0,0,100,100,0,0,1,1,0,2,10,10,10,0
For example, you can change the font style to Futura and font color to “&HFF00” (green) like the screenshot below:
The result will look like this:

Bear Tip 🐻:
PrimaryColouris in hexadecimal in Blue Green Red (BGR) order. This is the opposite order of HTML color codes. They must always start with&H.
Option 2: Set the Style Using the force_style Option of the “subtitles” Filter
You can also set the subtitle styles in the command line when running the FFmpeg command to add subtitles to the video. However, this option is only available when you are using the subtitles filter.
You can see the options for ass filter and options for subtitles filter in the official documentation.
When you are using the force_style option, you can use the style fields that are available in the ASS file. The option below is the same as the styles set in the subtitle.ass file above.
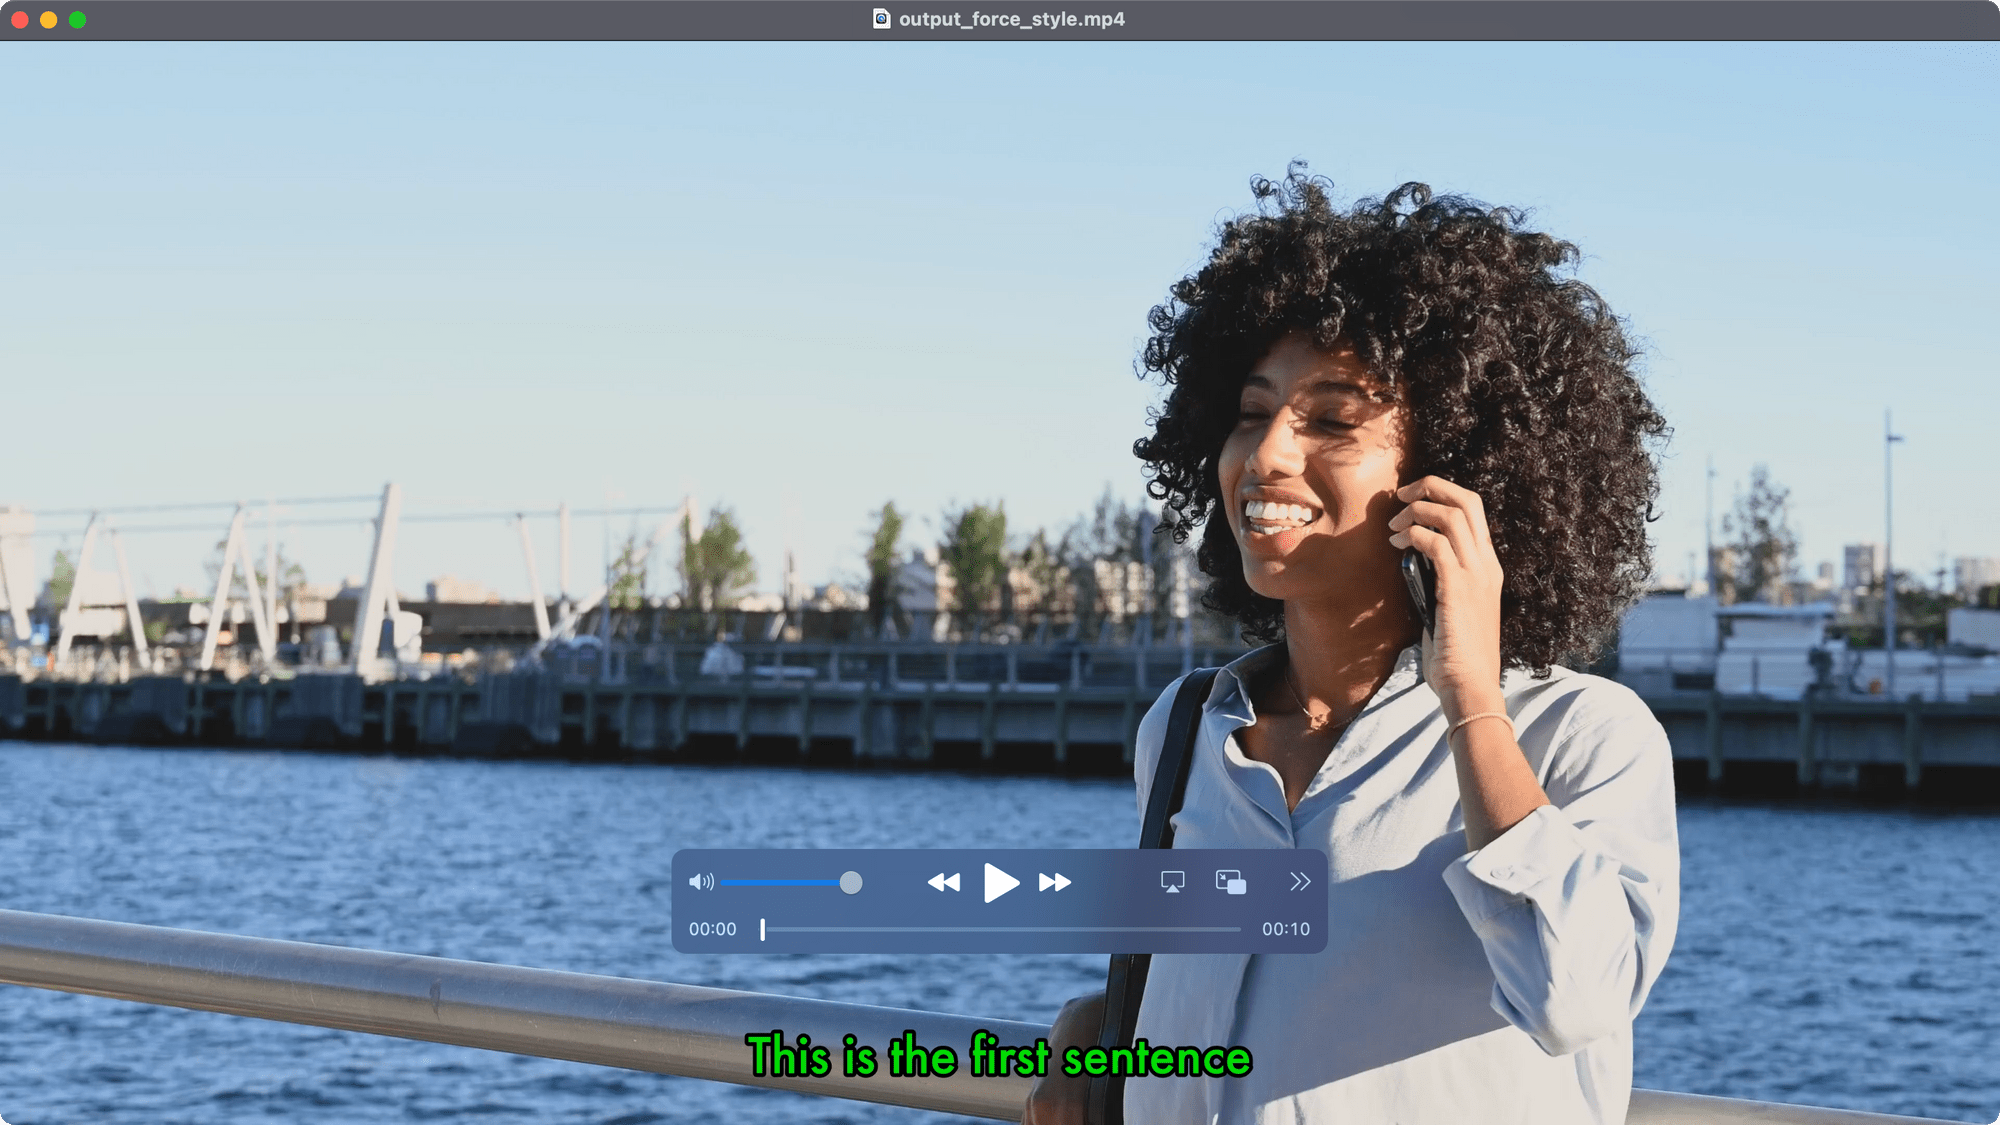
force_style='Fontname=Futura,PrimaryColour=&HFF00'
This is the full command:
ffmpeg -i input.mp4 -vf "subtitles=subtitle.srt:force_style='Fontname=Futura,PrimaryColour=&HFF00'" output_force_style.mp4
The result should look the same as the previous example:
Adding Soft Subtitles
Adding Soft Subtitles to your video won’t re-encode the entire file. Therefore, it is faster than hard coding subtitles to the video.
The command below adds Soft Subtitles to the video file:
ffmpeg -i input.mp4 -i subtitle.en.srt -c copy -c:s mov_text -metadata:s:s:0 language=eng ouptut_english.mp4
Note: As we will be adding another SRT subtitle in a different language (subtitle.chi.srt) to the video later, we need to rename the subtitle file to subtitle.en.srt.
-c copy specifies that the video is not to be re-encoded.
-c:s mov_text sets the SRT file to MOV_TEXT format.
-metadata:s:s:0 means to set the metadata for Stream:Subtitle:Number of stream, starting with 0.
language=eng sets the subtitle language to English. The value for this option uses the ISO 639 language code which consists of 3 letters for every language.
The result will look like this:
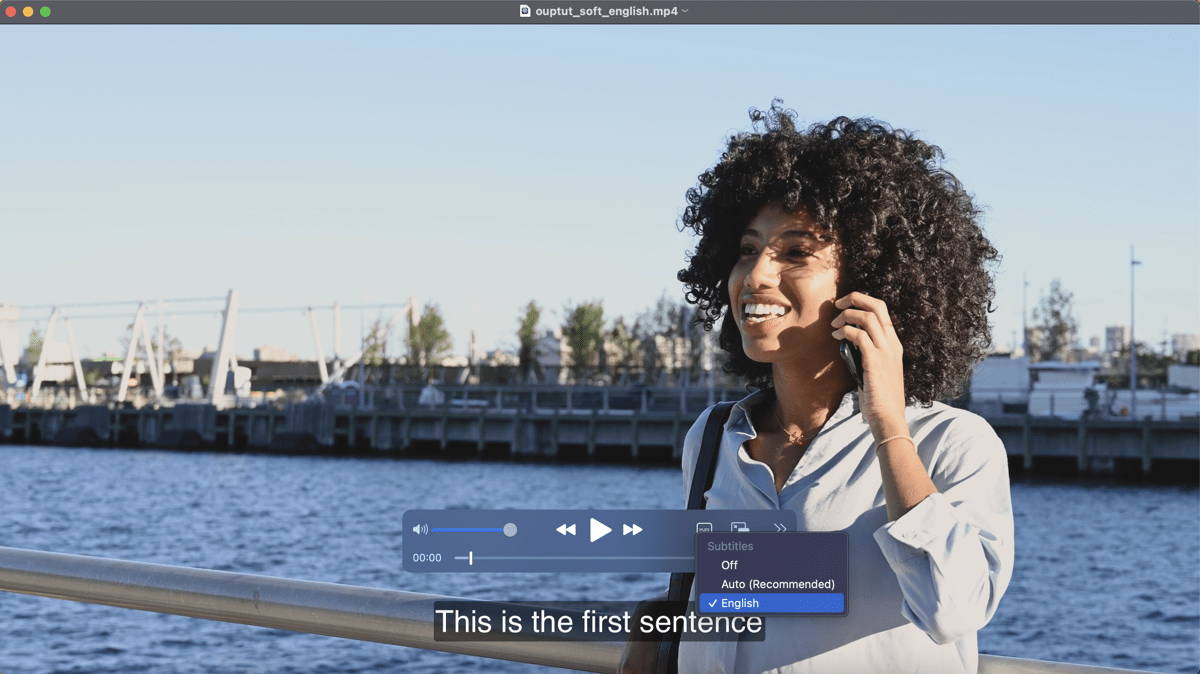
You can turn on and turn off the subtitle from your media player.
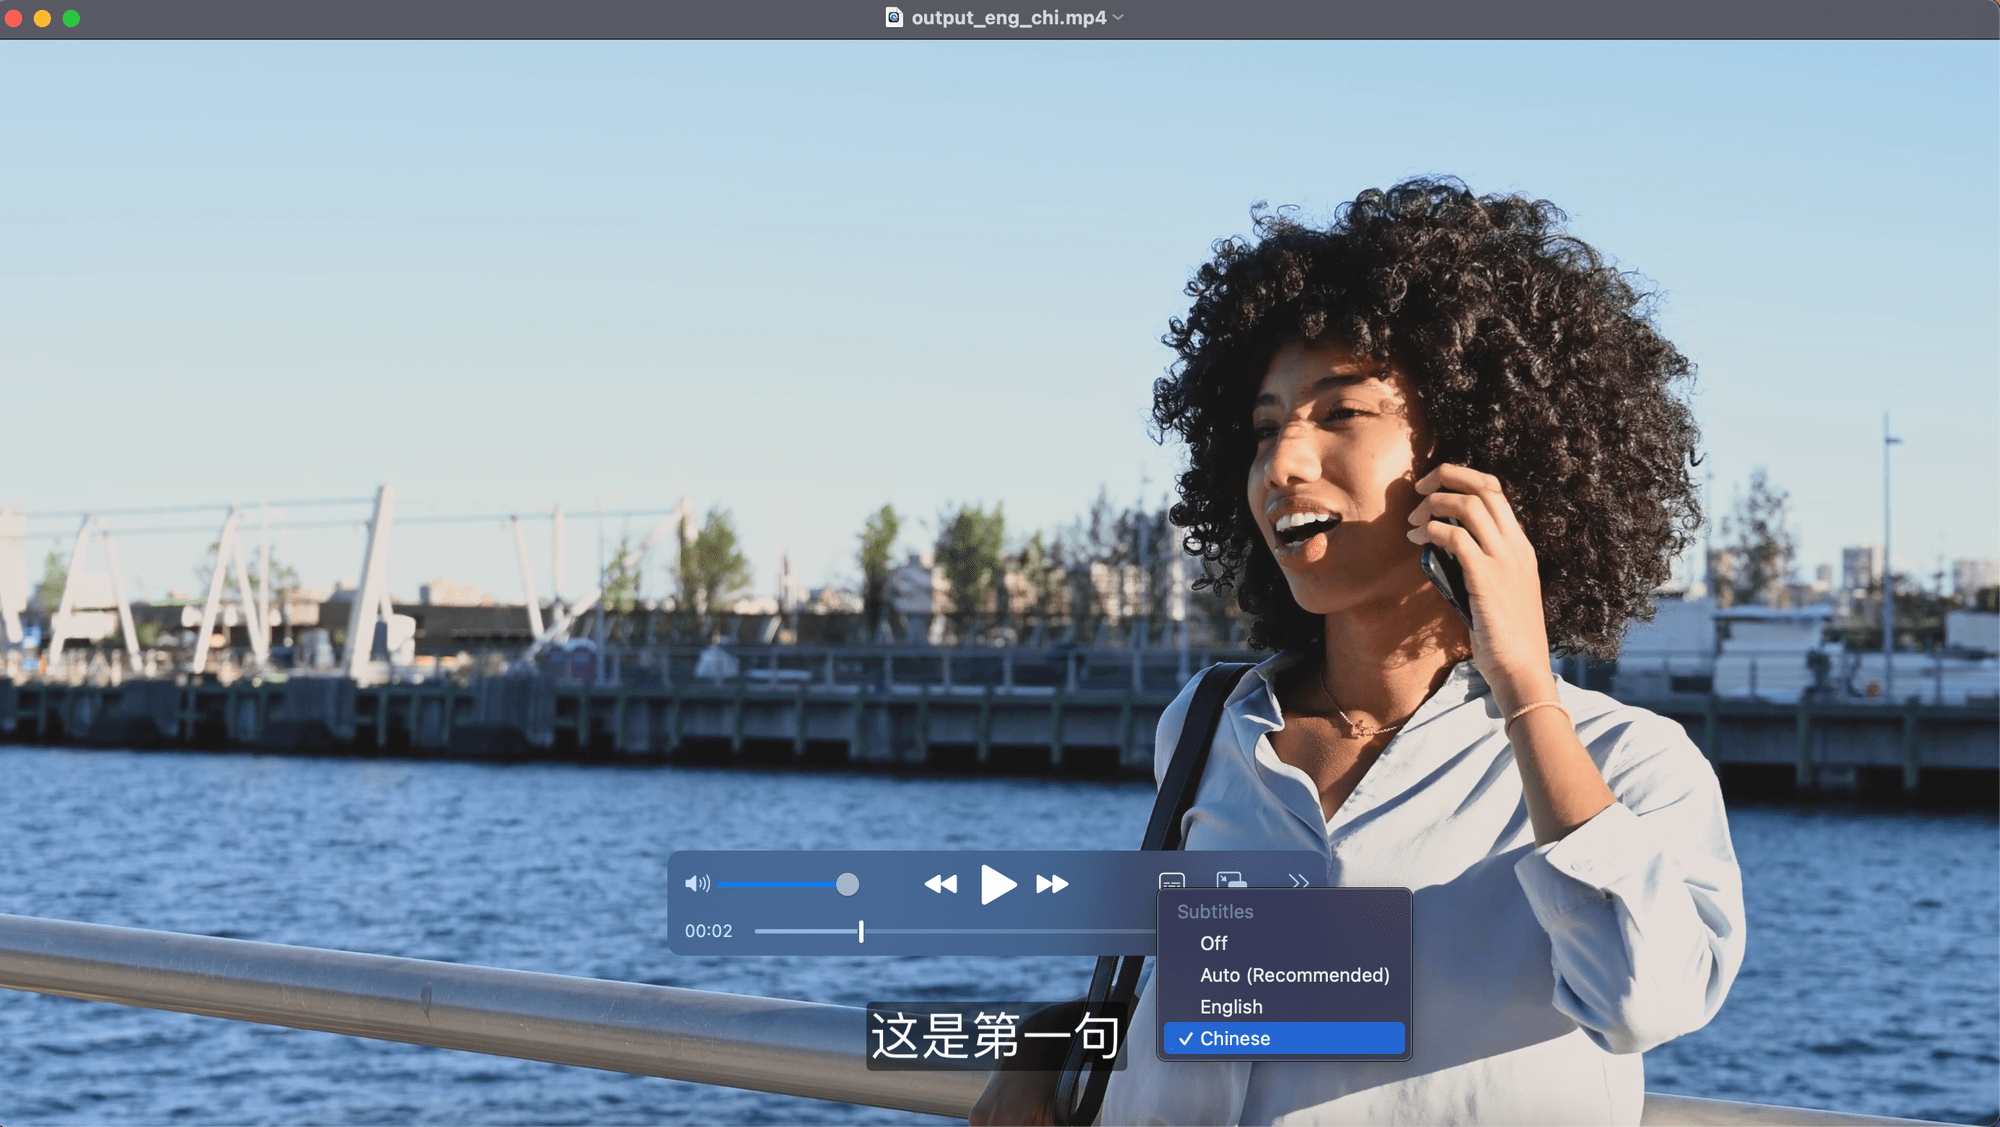
Adding Multiple Subtitles
You can add subtitles from multiple SRT files using Soft Subtitles. To add multiple subtitles, you need to add the -map option to choose which stream from the inputs should be included in the output.
This is how you add another SRT subtitle as a Chinese subtitle to the previous video:
ffmpeg -i ouptut_english.mp4 -i subtitle.chi.srt -map 0 -map 1 -c copy -c:s mov_text -metadata:s:s:1 language=chi output_chi.mp4
-map 0 refers to the video, output_english.mp4.
-map 1 refers to the subtitle file, subtitle.chi.srt.
Bear Tip 🐻: Without
-map, FFmpeg will select only one subtitle stream among all inputs.
One-Liner
Alternatively, you can add both SRT subtitles in a single command like this:
ffmpeg -i input.mp4 -i subtitle.en.srt -i subtitle.chi.srt -map 0 -map 1 -map 2 -c copy -c:s mov_text -metadata:s:s:0 language=eng -metadata:s:s:1 language=chi output_eng_chi.mp4
Result:
Using Bannerbear API
If you are looking for other methods to add subtitles to your video, you can check out this article: How to Create Videos with Auto Subtitles in One API Request. It shows you how to auto-transcribe a video and add subtitles to it automatically using Bannerbear Video API.
Here's an example of a video with subtitles added automatically using Bannerbear:
(video source: https://www.youtube.com/watch?v=oc6RV5c1yd0)
As Bannerbear Video API features auto speech transcription and subtitle generation, it could speed up video production by leaps and bounds. If you need to generate subtitled videos on a frequent basis, sign up for a free account and try it out!
