
How to Add a Thumbnail to MP4 Videos Using FFmpeg
Contents
A video thumbnail is a still image that acts as the preview image for your video. It is the "book cover" for your video. A good thumbnail image highlights the content of your video and makes it stands out. It makes people WANT to watch your video.
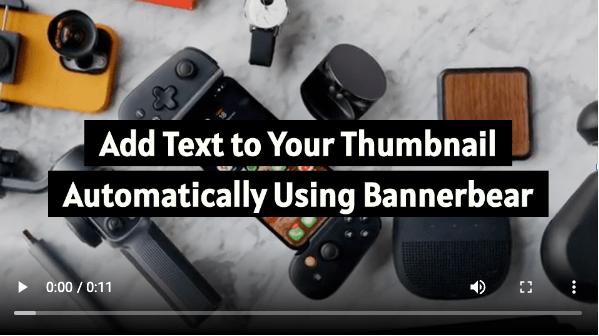
In this tutorial, I'm going to show you how to add a thumbnail to your MP4 video (or other formats) and use Bannerbear to auto-generate text for it so that your video will look like this on a website:
What is FFmpeg
FFmpeg is a complete, cross-platform solution to record, convert and stream audio and video. It can decode, encode, transcode, mux, demux, stream, filter and play pretty much any media file in any format. It is also highly portable as it compiles and runs in a wide variety of build environments, machine architectures, and configurations like Linux, Mac OS X, Microsoft Windows, etc.
It contains multiple tools for end-users to convert, play and analyze media files and libraries for developers to use in different applications. In this tutorial, we will be using the FFmpeg command-line tool.
Pre-requisite
You will need to download FFmpeg for this tutorial to add a thumbnail to your video file. For reference, the version of FFmpeg used in this tutorial is v5.0.1.
Generating a Thumbnail from the Video
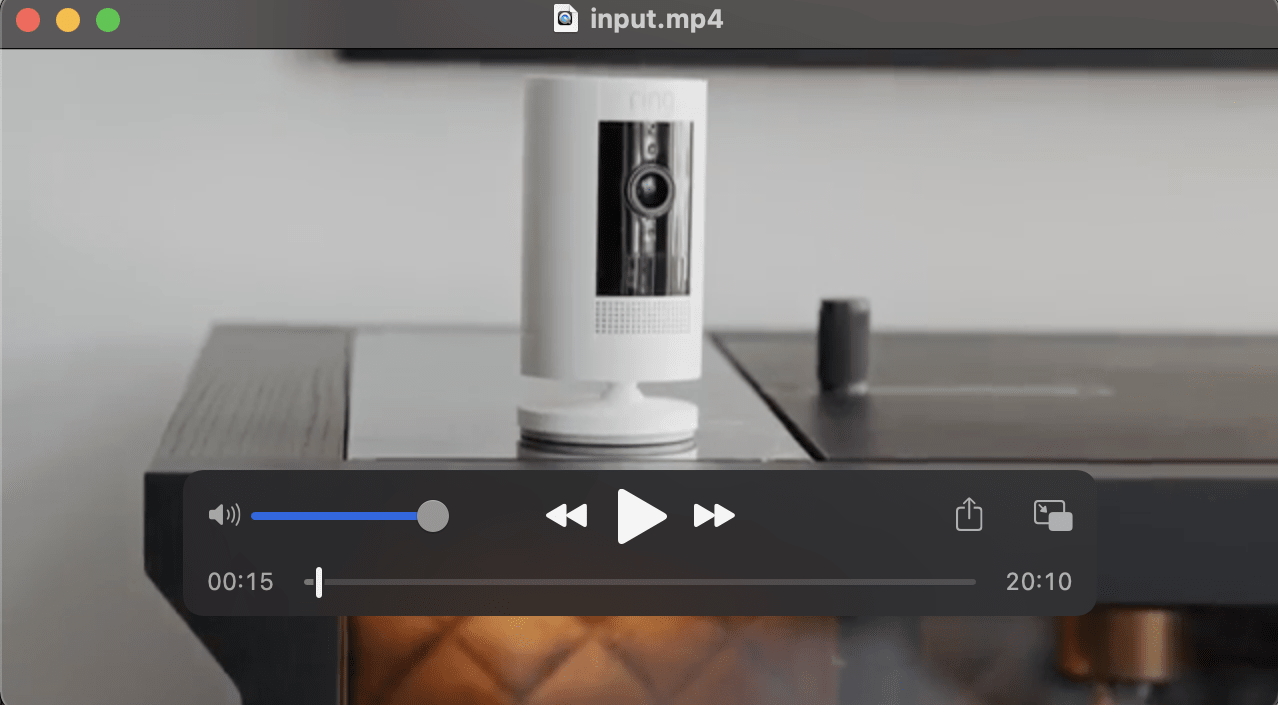
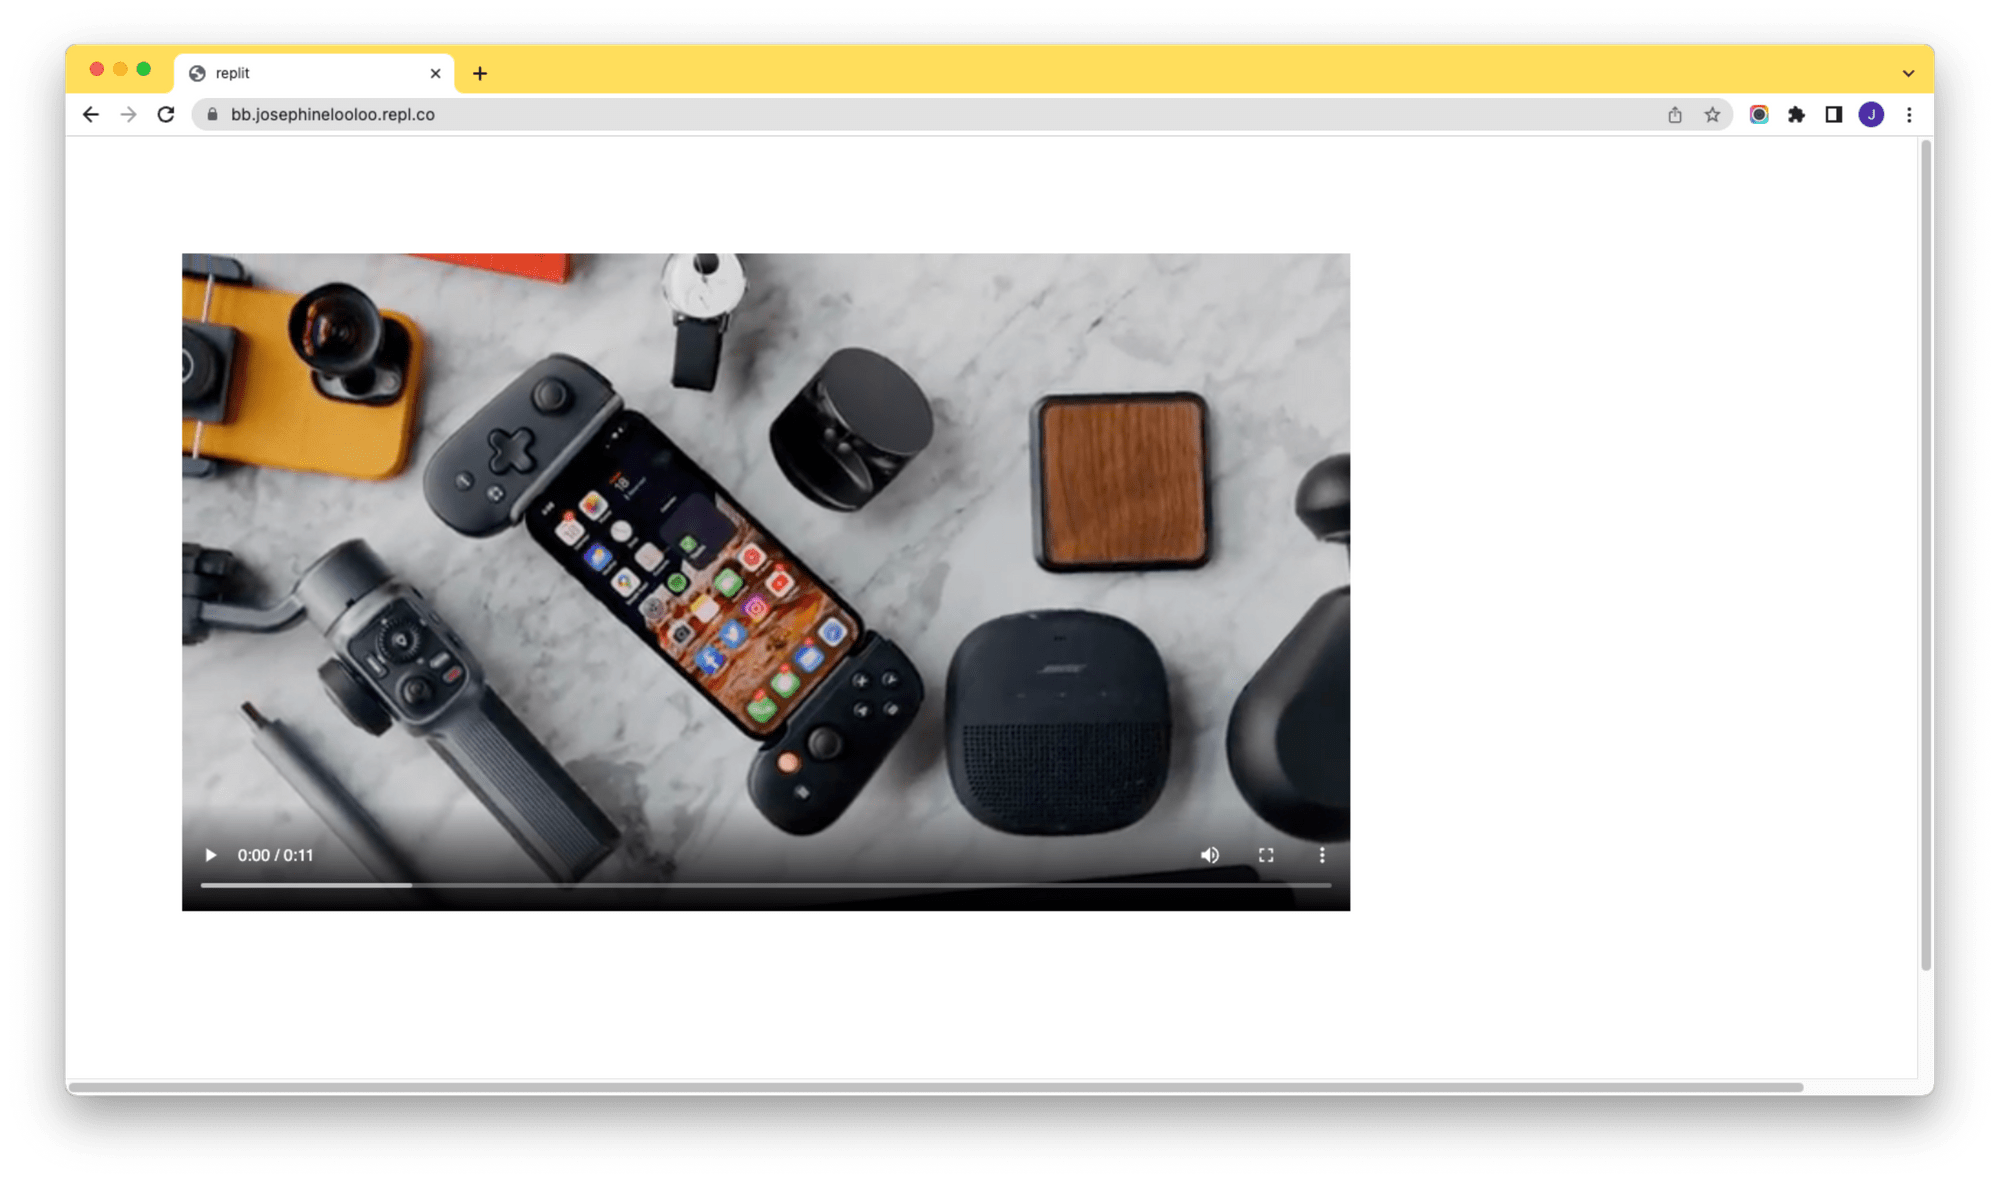
We will be using this video for this tutorial to showcase how different FFmpeg commands work.
The basic command to capture a frame from the video using FFmpeg is:
ffmpeg -i input.mp4 -frames:v 1 screenshot.png
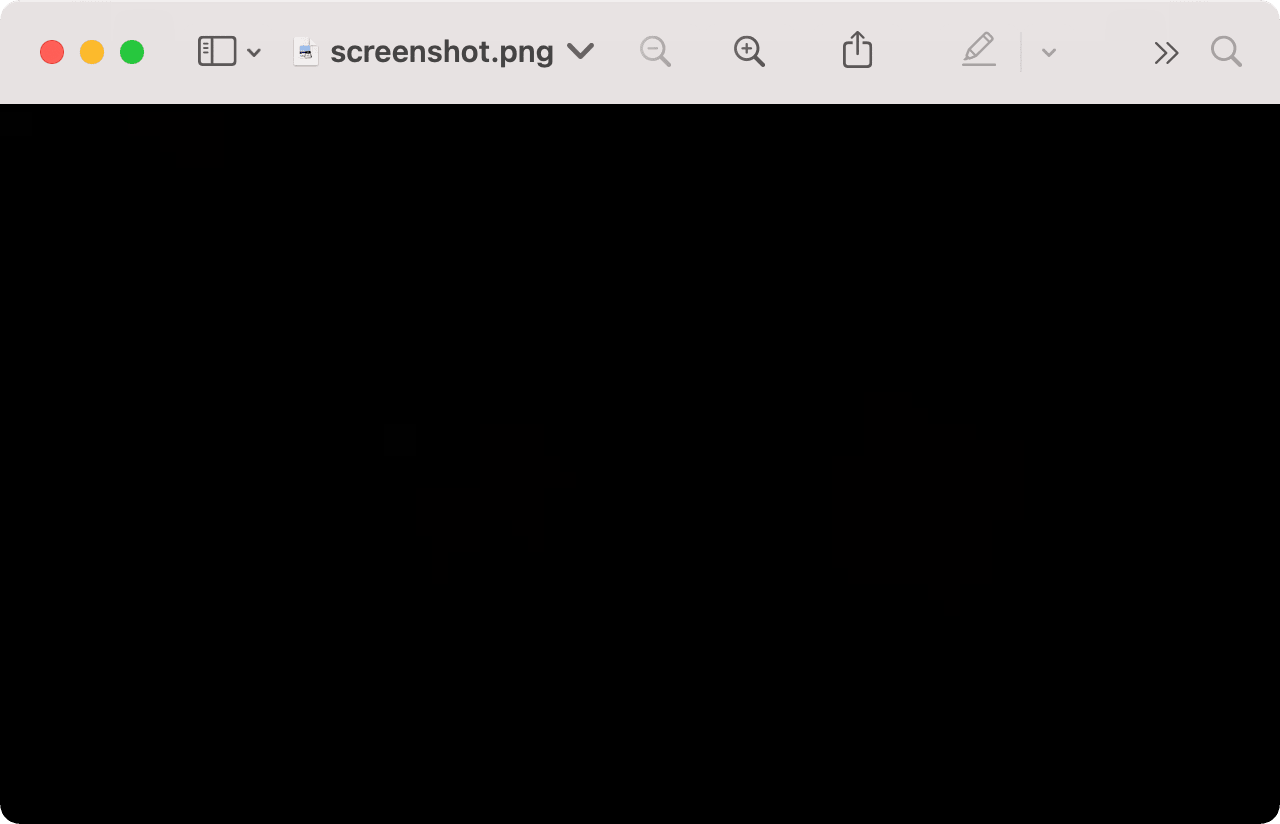
The command above will capture the first frame of the video.
Normally, we wouldn’t want to use the first frame of a video as the thumbnail as it might be a blank screen or something insignificant. The video that we are using has a blank screen for its first frame and this is the result:
The thumbnail should be something which highlights the content of the video. We can choose a particular frame which highlights the content of the video in three ways:
Option 1: Choose a Frame from the Video Manually
You can choose a specific frame from the video manually by specifying its timestamp. If you want to capture the frame at 00:15, add -ss 00:00:15 before your input video to take a screenshot at the 15th second of the video.
ffmpeg -ss 00:00:15 -i input.mp4 -frames:v 1 ss-0015.png
The image generated:
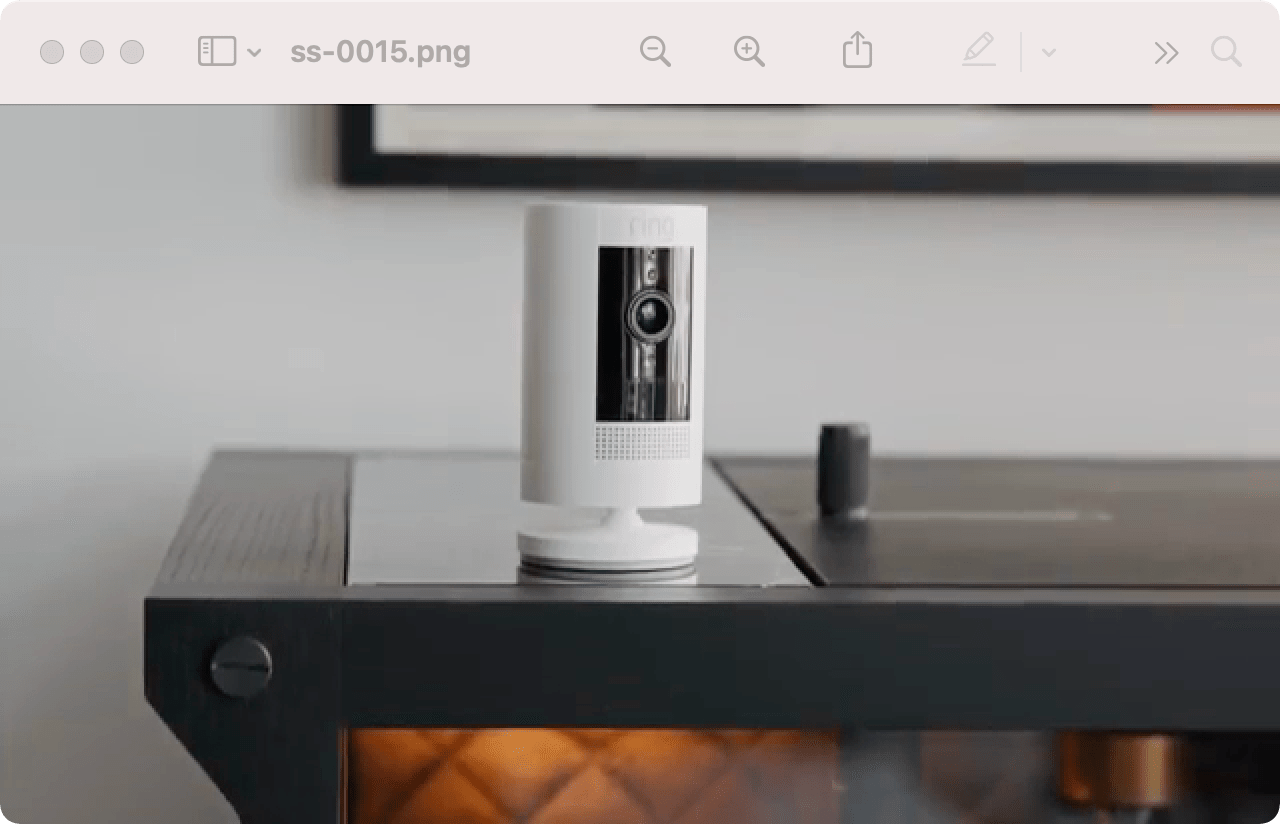
A screenshot of the video paused at 00:15:
Bear Tip 🐻: Putting the
-ssargument before your input video will improve the performance significantly as it will parse the input using keyframes. This makes the image extraction faster.
Option 2: Use the “Thumbnail” Filter to Generate a Thumbnail Automatically
FFmpeg has many built-in filters to help you manipulate the media files easily. One of them is the Thumbnail filter. It will select the most representative frame in a given sequence of consecutive frames automatically from the video.
To use the Thumbnail filter, add -vf “thumbnail” to the basic command:
ffmpeg -i input.mp4 -vf "thumbnail" -frames:v 1 thumbnail.png
-vf is an alias for -filter:v while thumbnail is the name of the filter.
By default, FFmpeg analyzes the frames in a batch of 100 and pick the most representative frame out of them. The process continues until the end of the video and we get the best frame among all the batches.
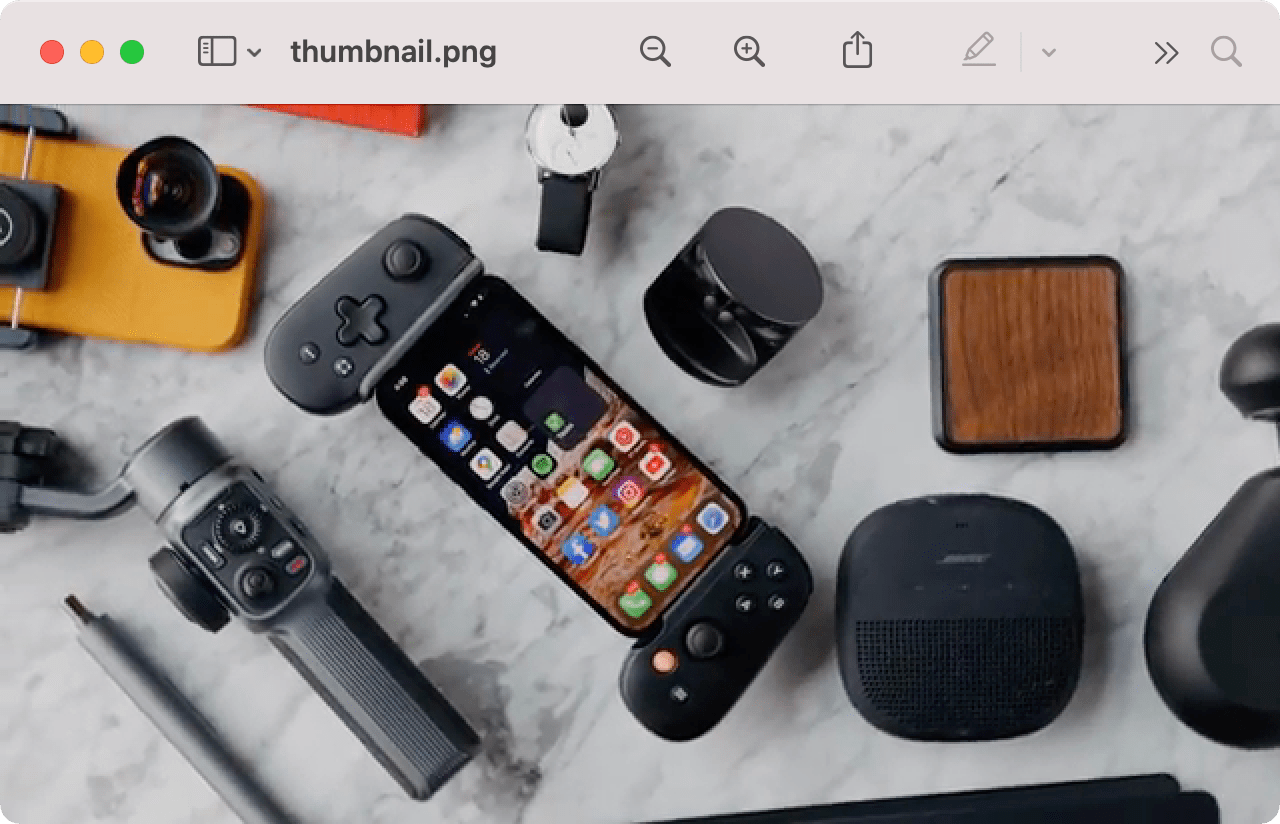
The batch size can be set using thumbnail=n, where n is the number of frames.
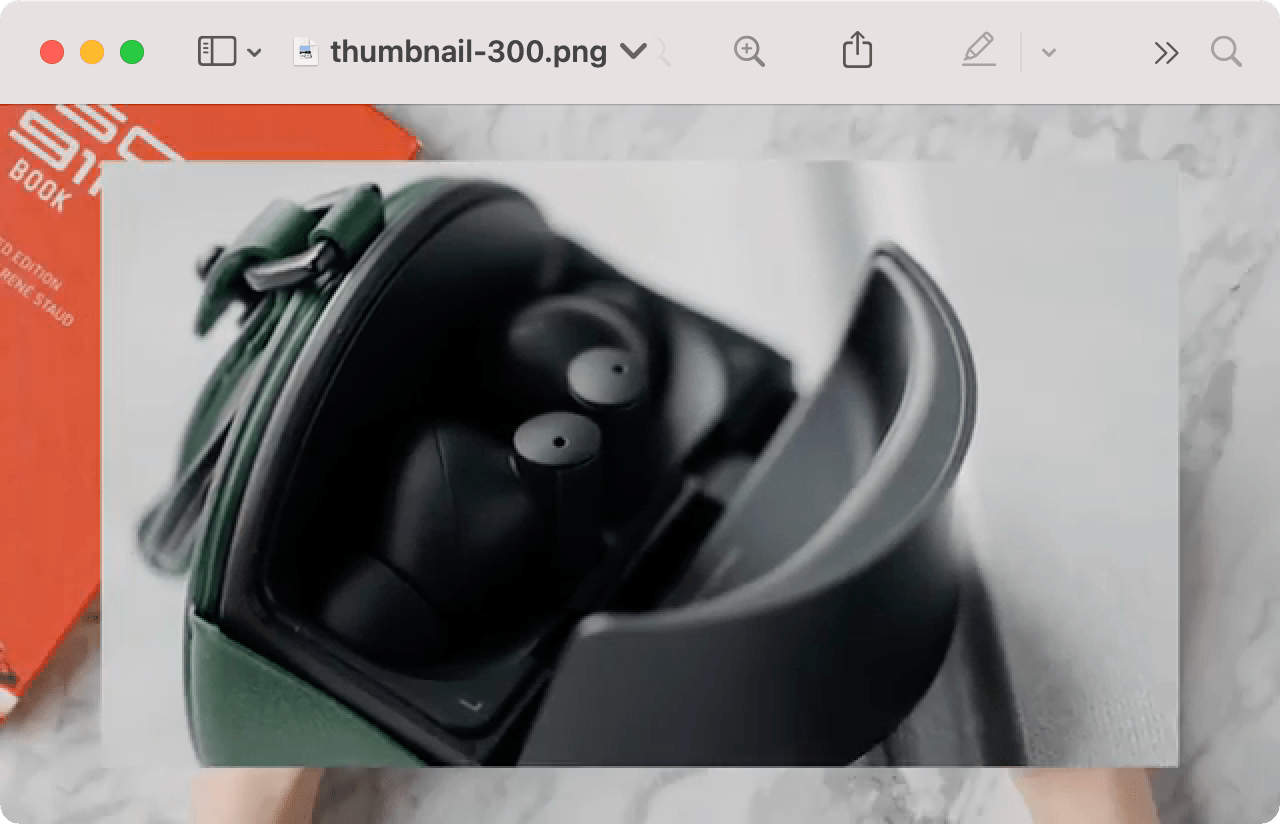
ffmpeg -i input.mp4 -vf "thumbnail=300" -frames:v 1 thumbnail-300.png
The command above finds the most representative frame in a batch of 300 throughout the whole video.
This is the result generated using the command above:
Although you can change the value for n, it is not recommended to use a high value for it. As the filter keeps track of the whole frames sequence, a high value will cause a higher memory usage.
Option 3: Choose the Best Image from Multiple Significant Frames
The Thumbnail filter only picks a most representative frame from the video. If you want to have multiple representative frames to choose from, you can use this method.
This method uses the select filter to select certain frames to pass in output.
ffmpeg -i input.mp4 -vf "select=gt(scene\,0.4)" -frames:v 5 -vsync vfr frames-diff-%02d.png
select=gt(scene\,0.4) selects frames that have more than 40% scene change compared to the previous frames. Depending on the content of the video, you need to tweak this value to find the best threshold.
The value of scene should be between 0 and 1. A low value means that it is less likely for the current frame to be a new scene while a high value means that it is likely to be one.
The command above selects only frames that have more than 40% changes compared to the previous frames and generate 5 unique PNGs.
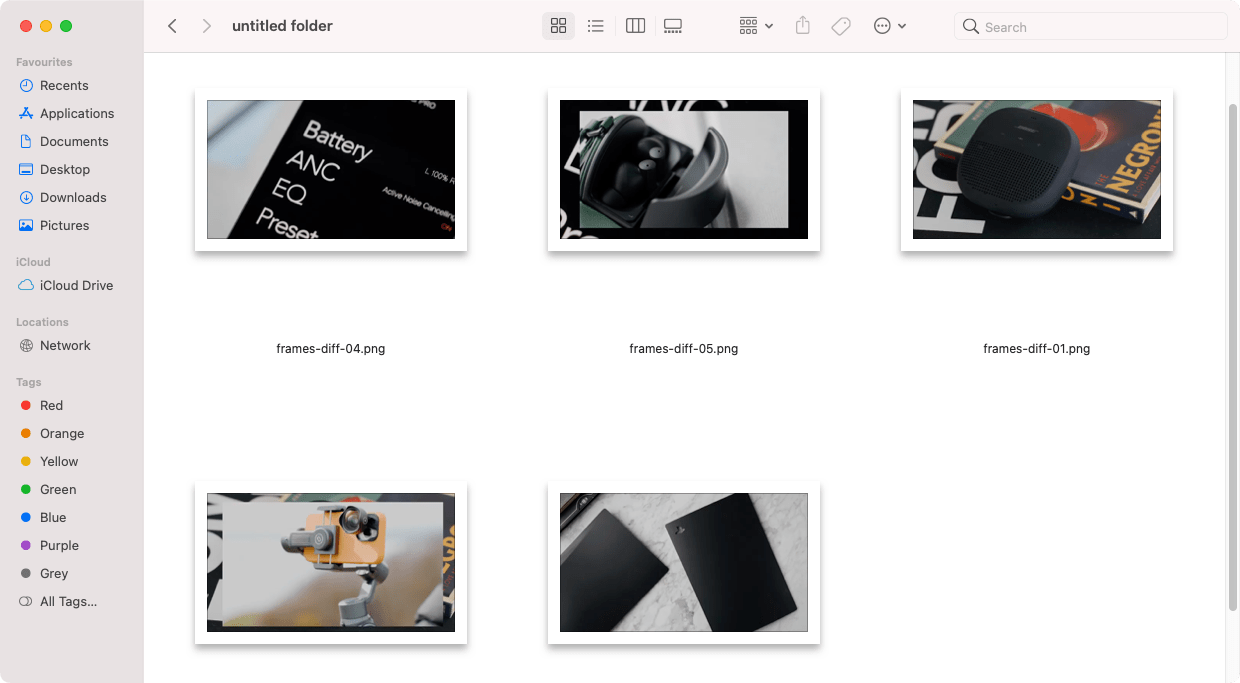
vsync vfr is used to make sure that the images are different. Without this option, the images generated will be in sequence and they might look the same.
From the 5 unique images generated, you can choose the image that best represents the video manually.
Bear Tip 🐻: You can rescale your video by using
-vf scale=width:height, eg.-vf scale=640:360.
If you want to know more about other ways to extract images from a video using FFmpeg, here’s a detailed tutorial: How to Extract Images from a Video Using FFmpeg.
Adding the Thumbnail to the MP4 Video
Once you have the image, you can set the thumbnail for the video. The map option is used to choose which streams from the inputs should be included in the output.
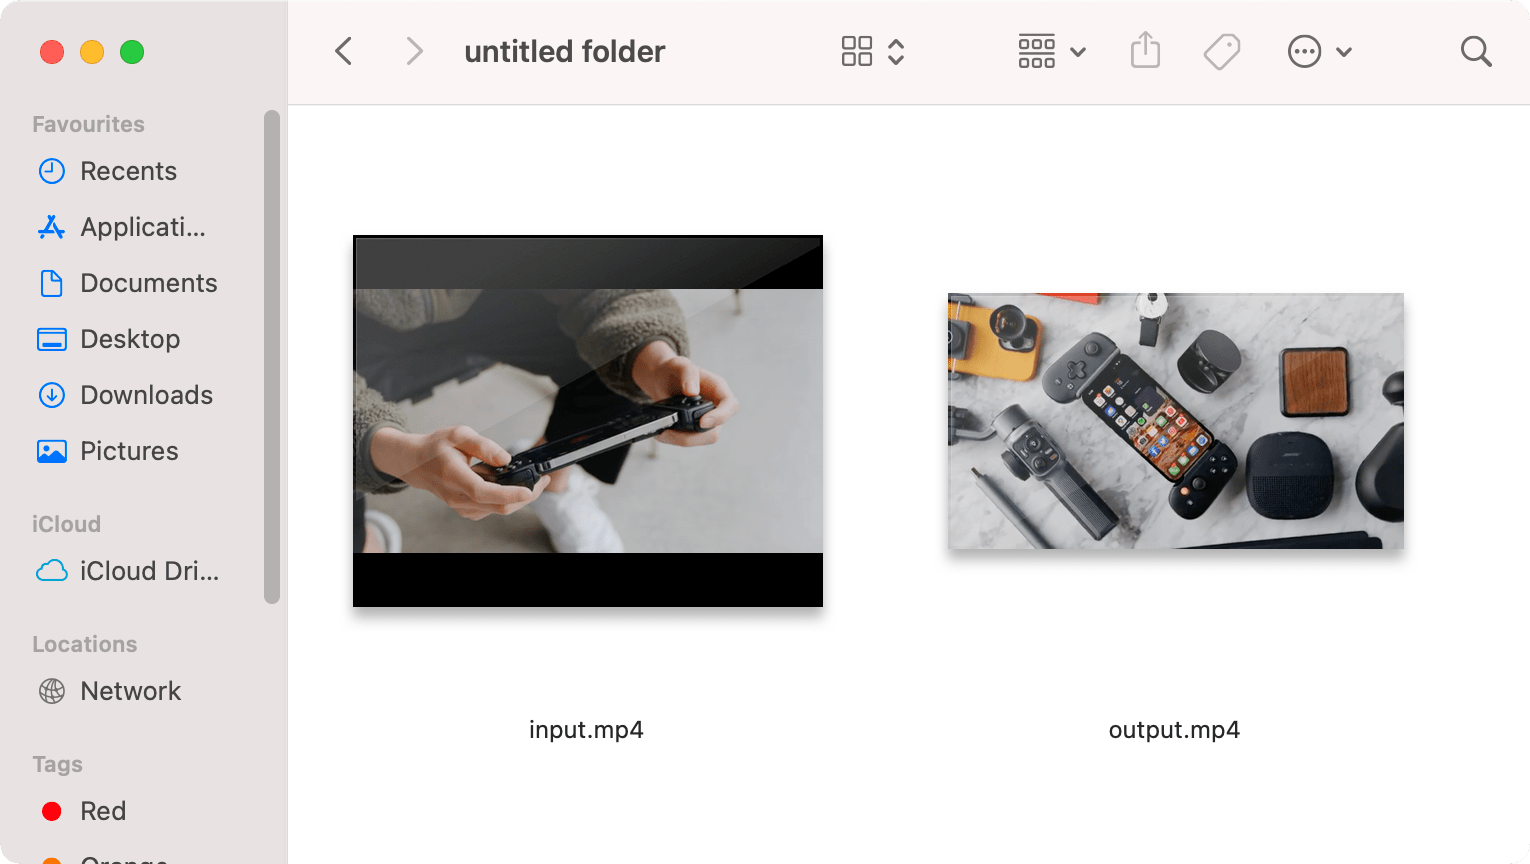
ffmpeg -i input.mp4 -i thumbnail.png -map 1 -map 0 -c copy -disposition:0 attached_pic output.mp4
The first -map 1 refers to the input index #1, which is the second input, thumbnail.png.
The second -map 0 refers to the input index #0, which is the first input, input.mp4.
There are many more options for map, you can see them in the FFmpeg documentation.
Here’s the result:
Using Bannerbear API
FFmpeg can help you to generate a thumbnail image for your video but there is no text on the thumbnail.
Adding text to the video thumbnail can attract the attention of your audiences and helps them to understand the context of the video better before playing the video.
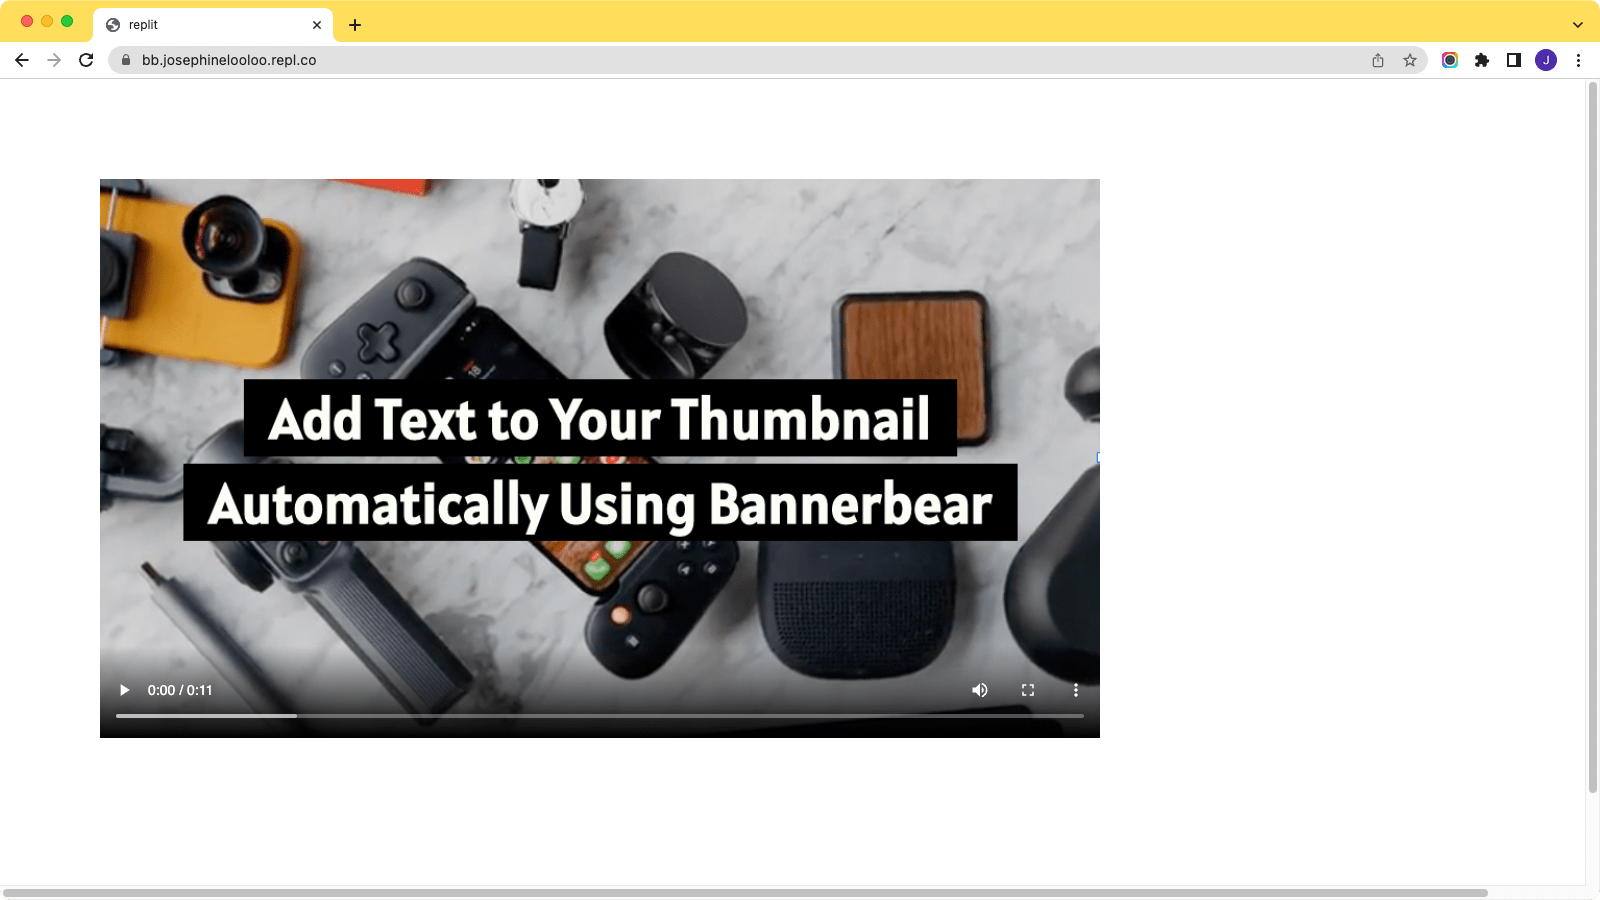
If you are embedding your video on a website, you can generate text on your thumbnail automatically using Bannerbear via Signed URL. The thumbnail with text will be generated automatically when a user visits your website.
First, you need to create a Bannerbear design template for your thumbnail.
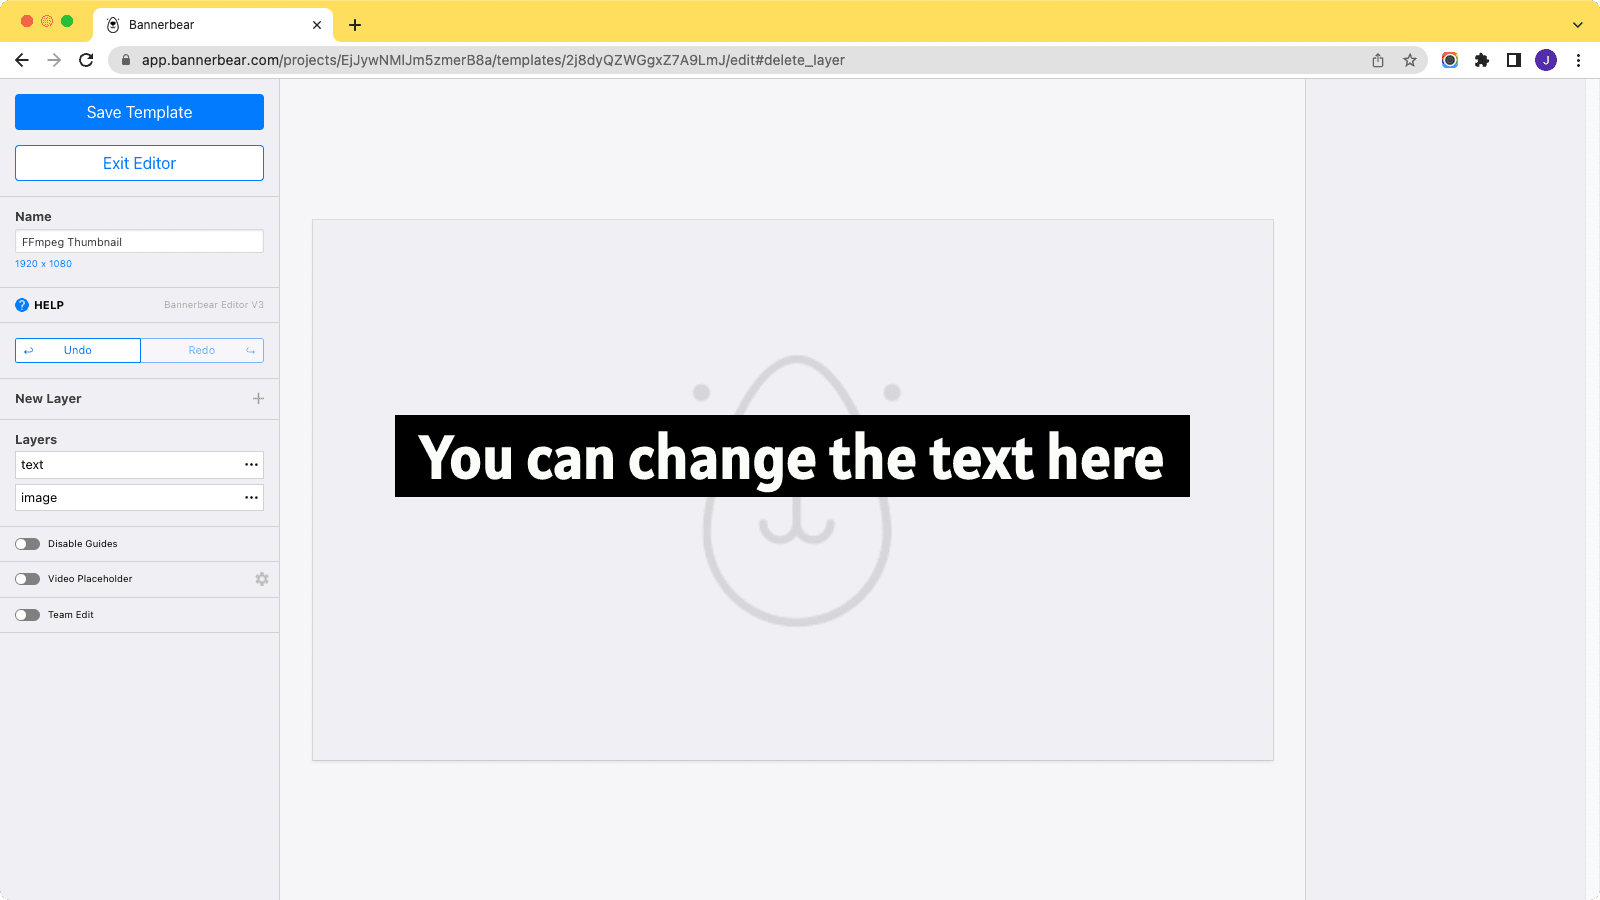
You will also need to create a Signed URL Base to use the Signed URL feature.
The text and the image in the template can be modified by sending the values via URL parameter modifications as a Base64-encoded JSON array. The Signed URL can be generated using Bannerbear SDK in Ruby, Node.js and PHP.
This is an example of generating a Signed URL using the Bannerbear SDK in Node.js:
await bb.generate_signed_url("base uid", { modifications: [] });

// example
await bb.generate_signed_url("A89wavQyY3Bebk3djP", {
  modifications: [
    {
      name: "text",
      text: "testing!",
    },
    {
      name: "image",
      image_url:
        "https://images.unsplash.com/photo-1638356435991-4c79b00ebef3?w=764&q=80",
    },
  ],
});
// => https://ondemand.bannerbear.com/signedurl/A89wavQyY3Bebk3djP/image.jpg?modifications=W3sibmFtZSI6ImNvdW50cnkiLCJ0ZXh0IjoidGVzdGluZyEifSx7Im5hbWUiOiJwaG90byIsImltYWdlX3VybCI6Imh0dHBzOi8vaW1hZ2VzLnVuc3BsYXNoLmNvbS9waG90by0xNjM4MzU2NDM1OTkxLTRjNzliMDBlYmVmMz93PTc2NCZxPTgwIn1d&s=40e7c9d4902b86ea83e0c400e57d7cc580534fd527e234d40a0c7ace589a16eb
You can then add the Signed URL generated in the poster attribute of the video tag in your HTML code.
<video poster="https://ondemand.bannerbear.com/signedurl/A89wavQyY3Bebk3djP/image.jpg?modifications=W3sibmFtZSI6ImNvdW50cnkiLCJ0ZXh0IjoidGVzdGluZyEifSx7Im5hbWUiOiJwaG90byIsImltYWdlX3VybCI6Imh0dHBzOi8vaW1hZ2VzLnVuc3BsYXNoLmNvbS9waG90by0xNjM4MzU2NDM1OTkxLTRjNzliMDBlYmVmMz93PTc2NCZxPTgwIn1d&s=40e7c9d4902b86ea83e0c400e57d7cc580534fd527e234d40a0c7ace589a16eb" controls>
    <!-- your video source -->
</video>
Whenever a user visits your website, the thumbnail with text will be generated automatically. It is really useful if you upload videos frequently on your website as you don’t have to edit the thumbnail manually every time you upload a new video.
If you are interested to know how Bannerbear API works, you can sign up for a free account or try this Image Generation Demo to generate some images.
