
How to Automatically Create Pinterest Pin Images for Every Blog Post in Next.js with Bannerbear (v5 Adaptive Template)
Contents
Pinterest is one of the most underrated traffic sources for bloggers. With over 619 million monthly active users as of Q4 2025 and 96% of top searches being unbranded, people aren't searching for specific brands there; they're searching for ideas and inspiration. That means even if your website is relatively new, it has a real shot at getting discovered on Pinterest.
The catch is that getting your content to show up with a proper Pin image takes a bit of work. Pinterest's preferred ratio is portrait or square image (between 2:3 and 1:1), which is completely different from a standard Open Graph image. For every blog post you publish, you'd need a separately designed Pin image to go along with it. If you're publishing regularly, that can get tedious fast.
However, there’s a way to automate it. In this article, we'll use Bannerbear's adaptive sizing feature to automatically generate a Pinterest-optimised image for every blog post in your Next.js site and embed it in the page metadata—so Pinterest picks it up on its own:
Let's get started!
Note: The adaptive sizing feature is only available in Bannerbear v5, which is currently not open to the public yet. Stay tuned for updates on when it becomes available!
What Are Adaptive Templates?
A normal Bannerbear template generates images at one fixed size. On the other hand, adaptive templates let you define rules for how each layer in your design repositions and resizes automatically when you request a different canvas size via the API.

Instead of building a separate Pinterest template, you can take your existing Open Graph image template and request a size that fits Pinterest’s requirement (e.g., 1000×1500) on the fly.
How to Auto-Generate Pinterest Pin Images for Your Next.js Blog with Bannerbear
Step 1. Create a Bannerbear Template
Head to Bannerbear and create a new template. For this tutorial, we'll be working with a simple Open Graph image layout with a background image, a title, and an author name:
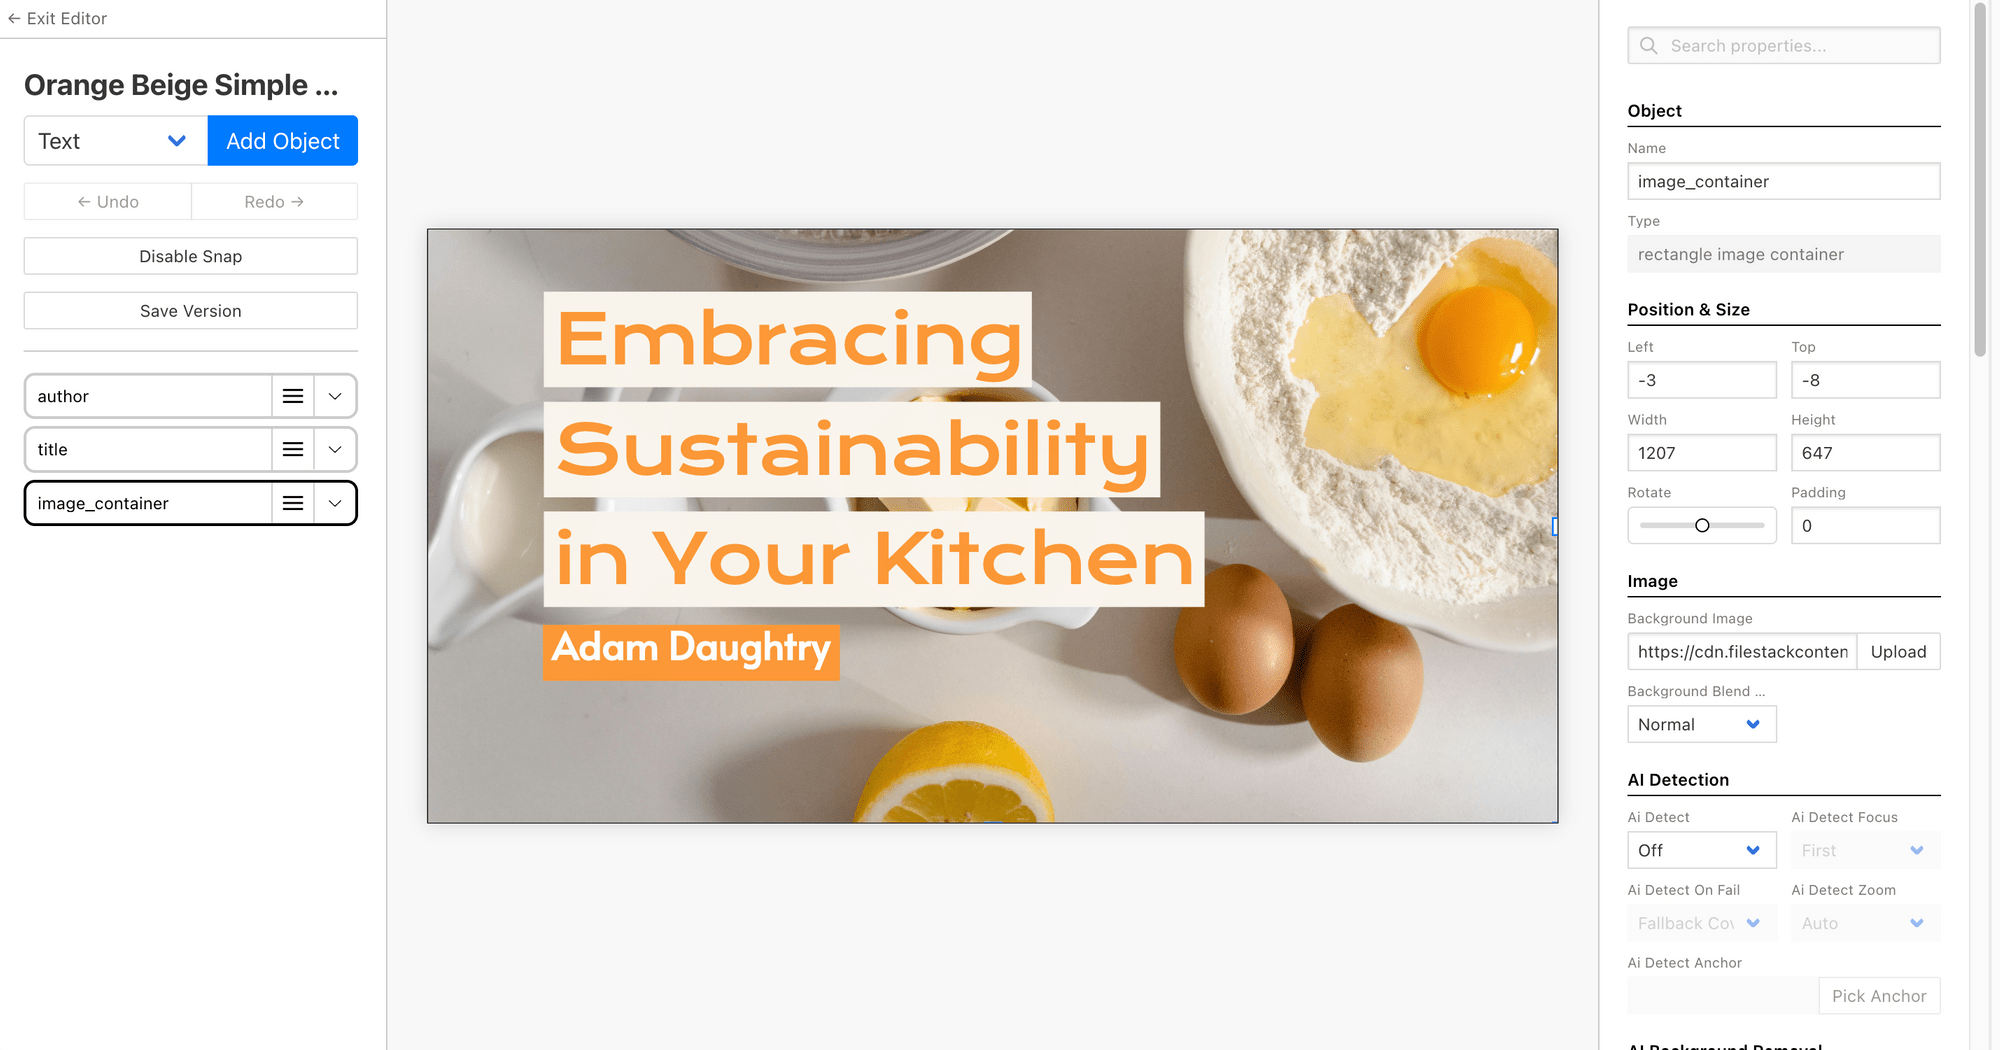
Step 2. Configure the Adaptive Settings
To make the template work at different sizes, you need to configure the Adaptive Settings for every layer.
For the background image, set Position and Size to “Scale” and Aspect Ratio to “Free” :
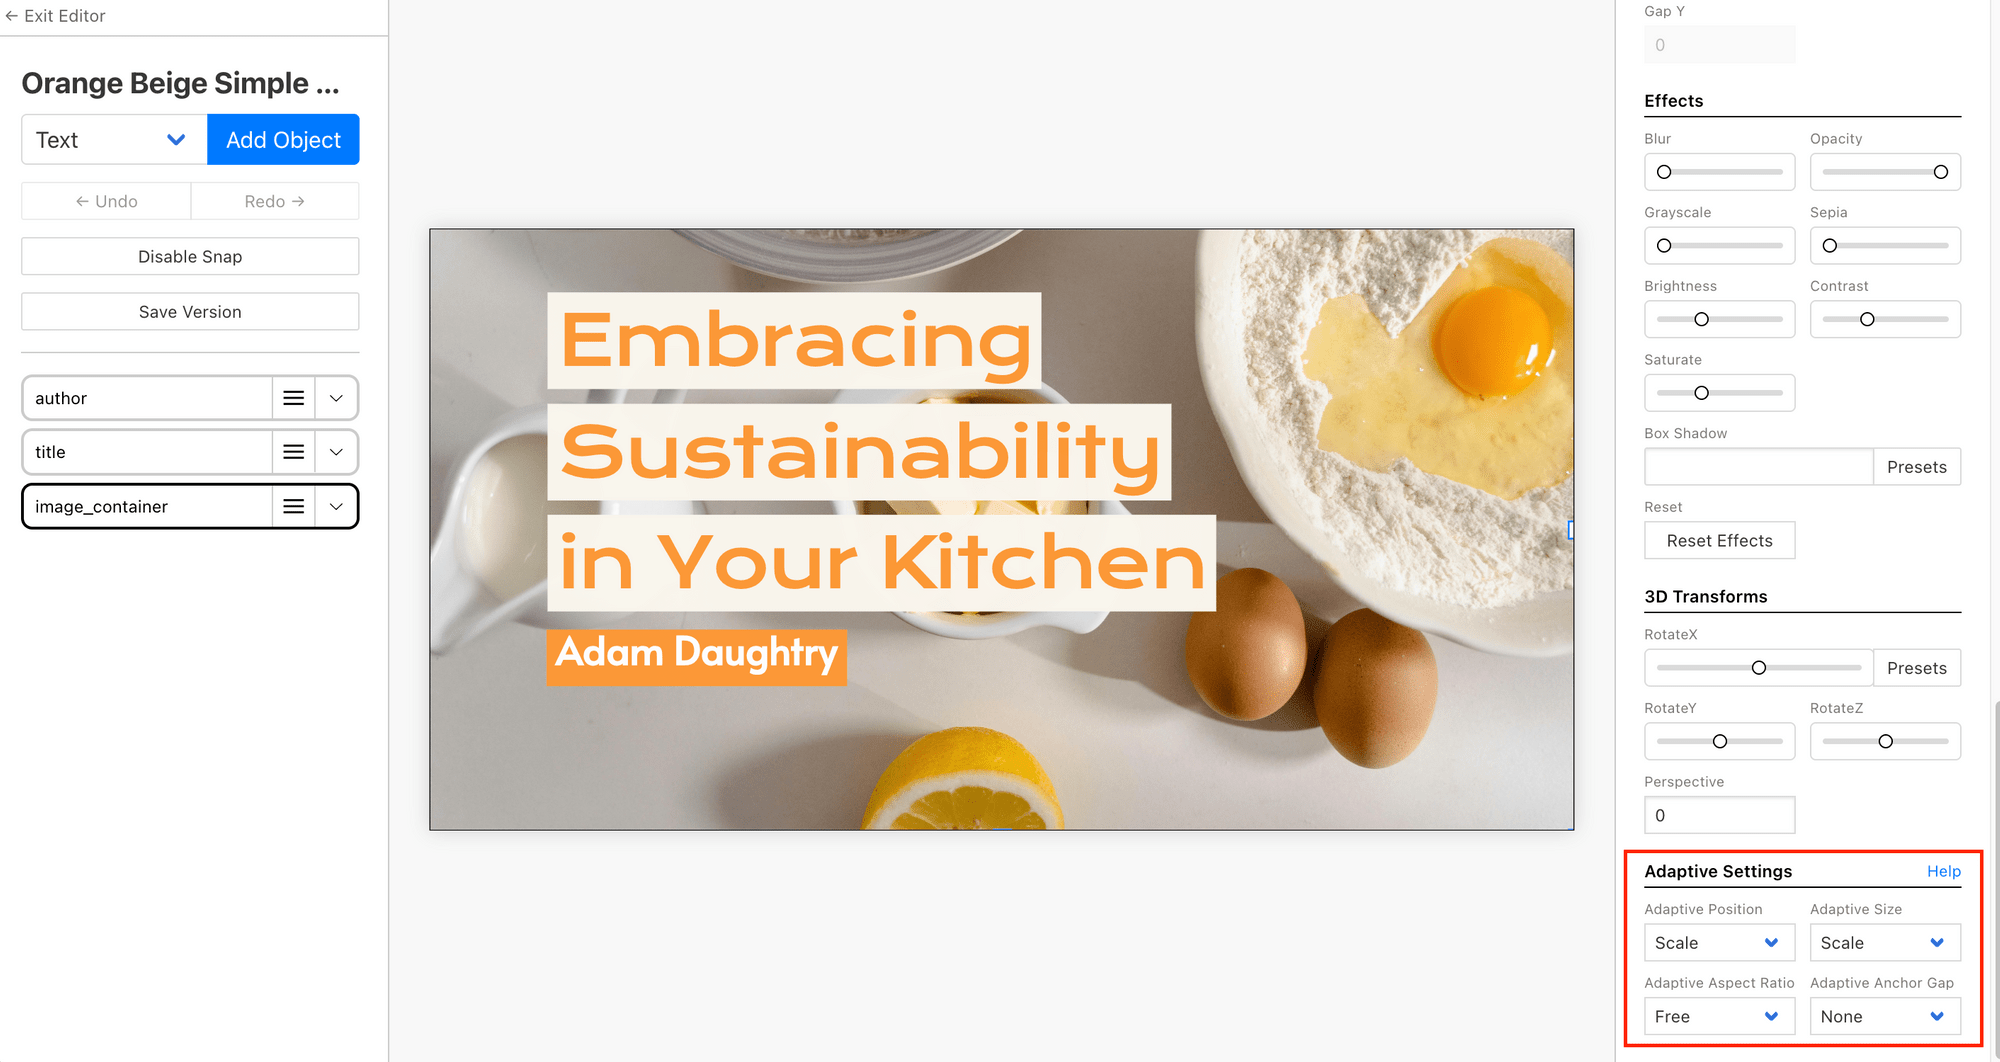
This tells Bannerbear to multiply the original position and size values by the canvas ratio whenever a different size is requested.
You can click “Help” to see the more information about the settings:

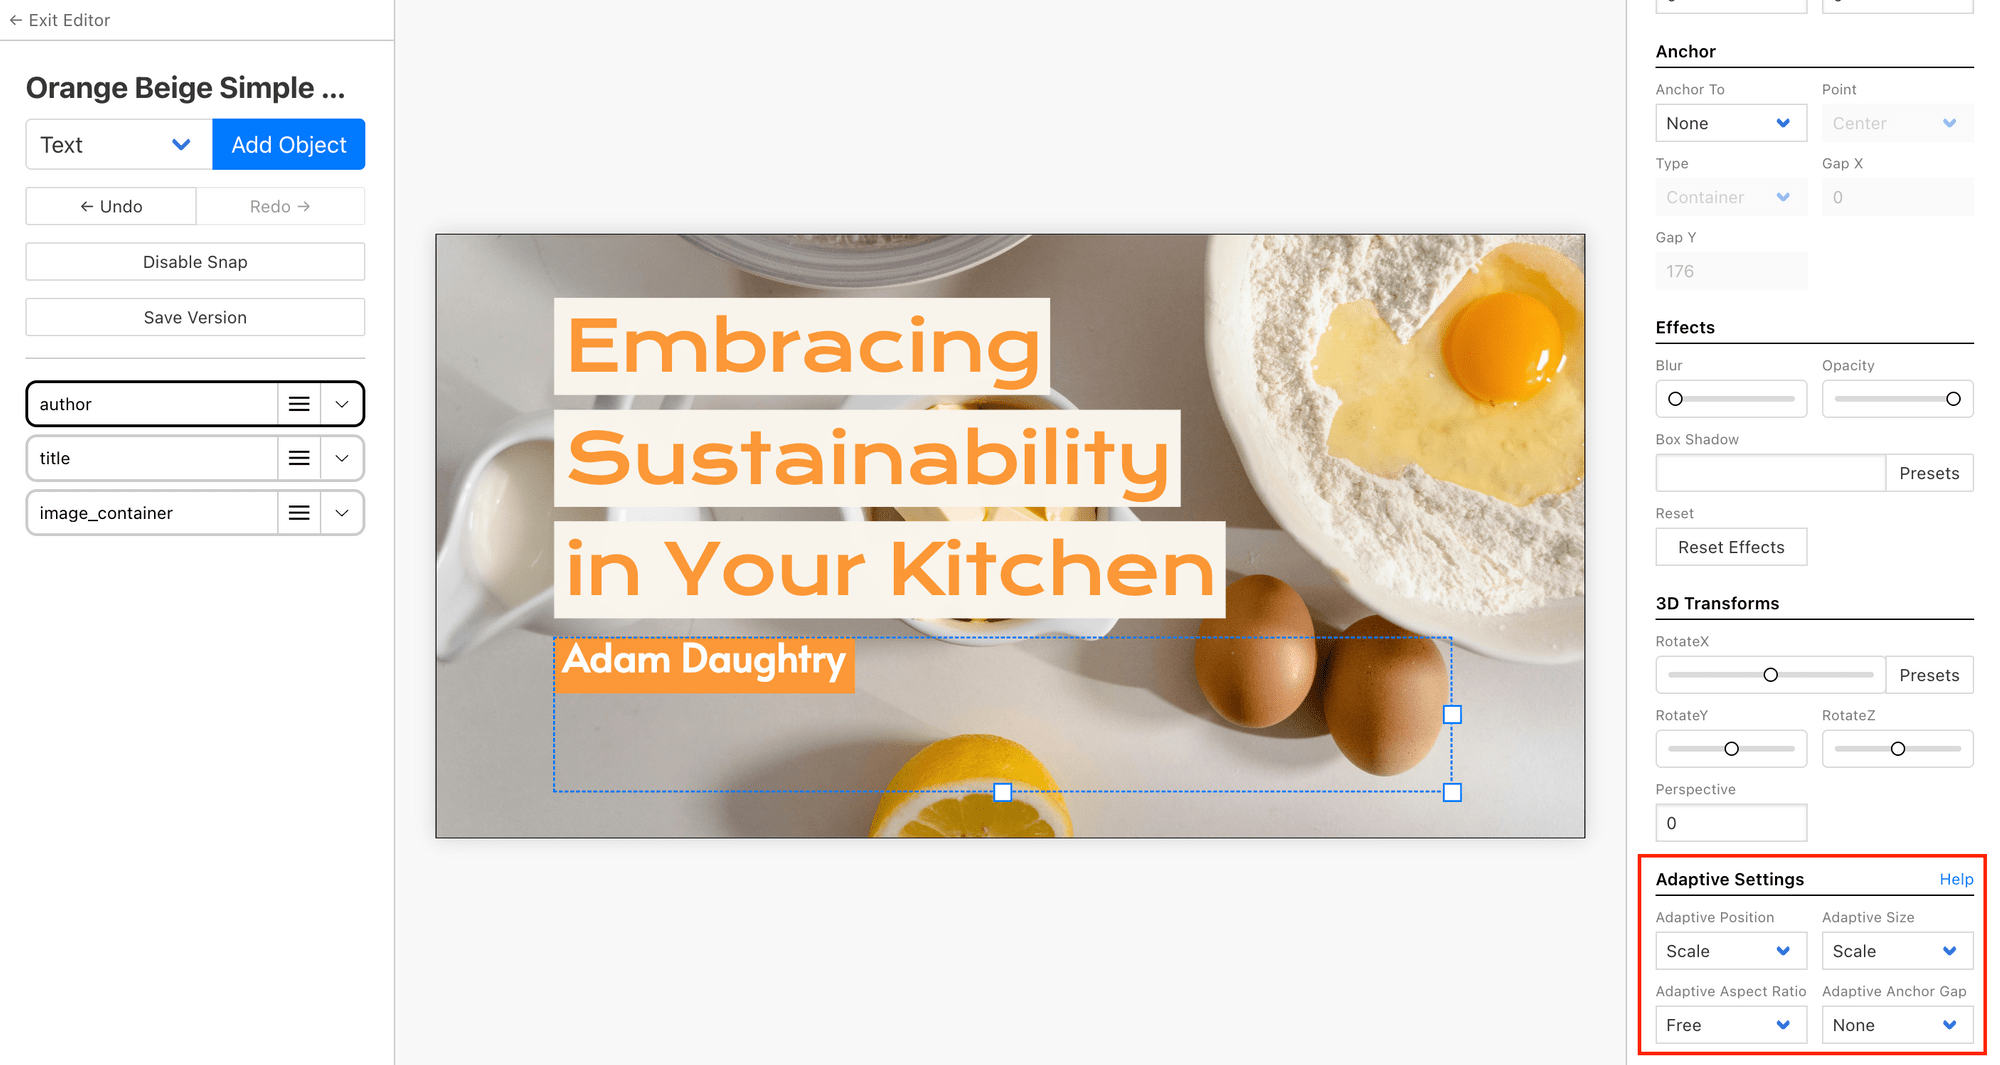
Do the same for your text layers to adjust the settings based on how you want them to behave at different canvas sizes:
Layer: title

Layer: author
Before committing to the settings, you can click “Open Adaptive Preview” to see how your template renders at various dimensions:
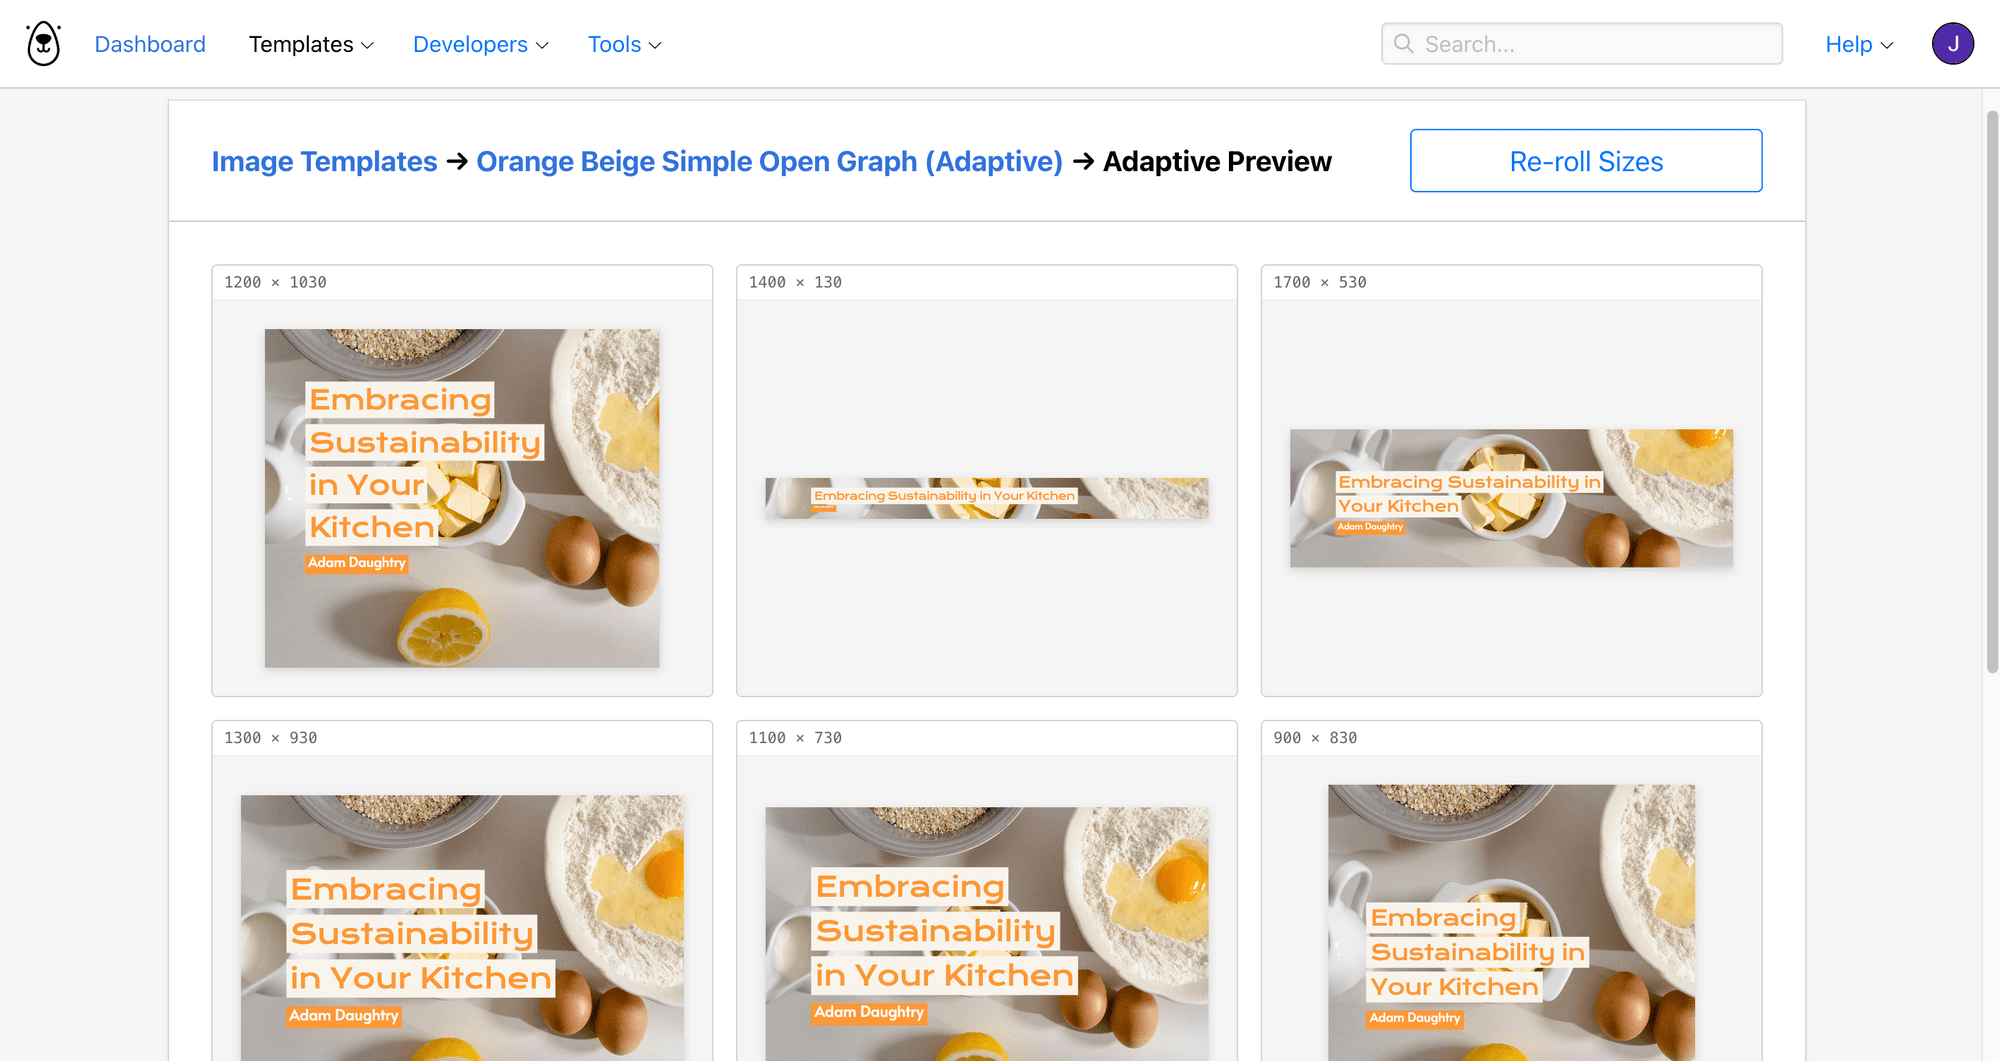
Once you're happy with how everything looks, save the template and exit the editor.
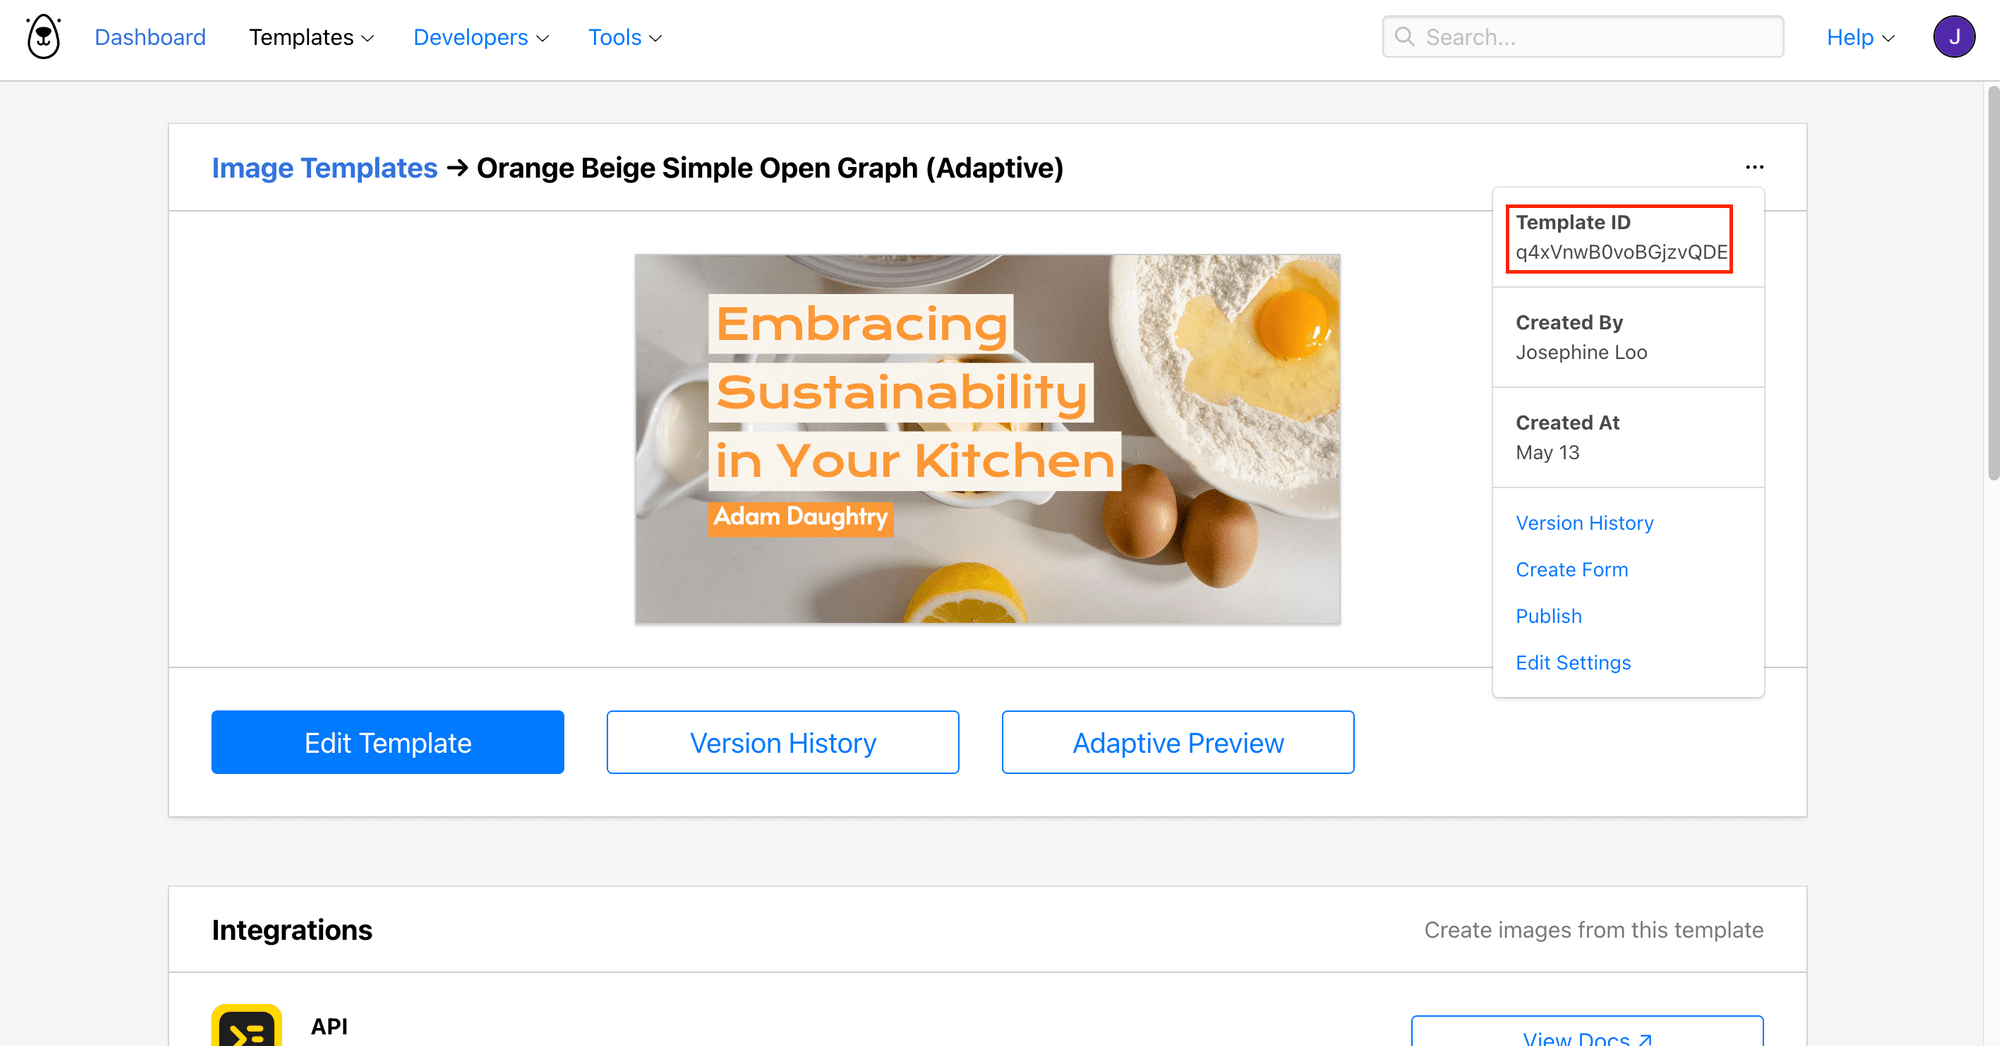
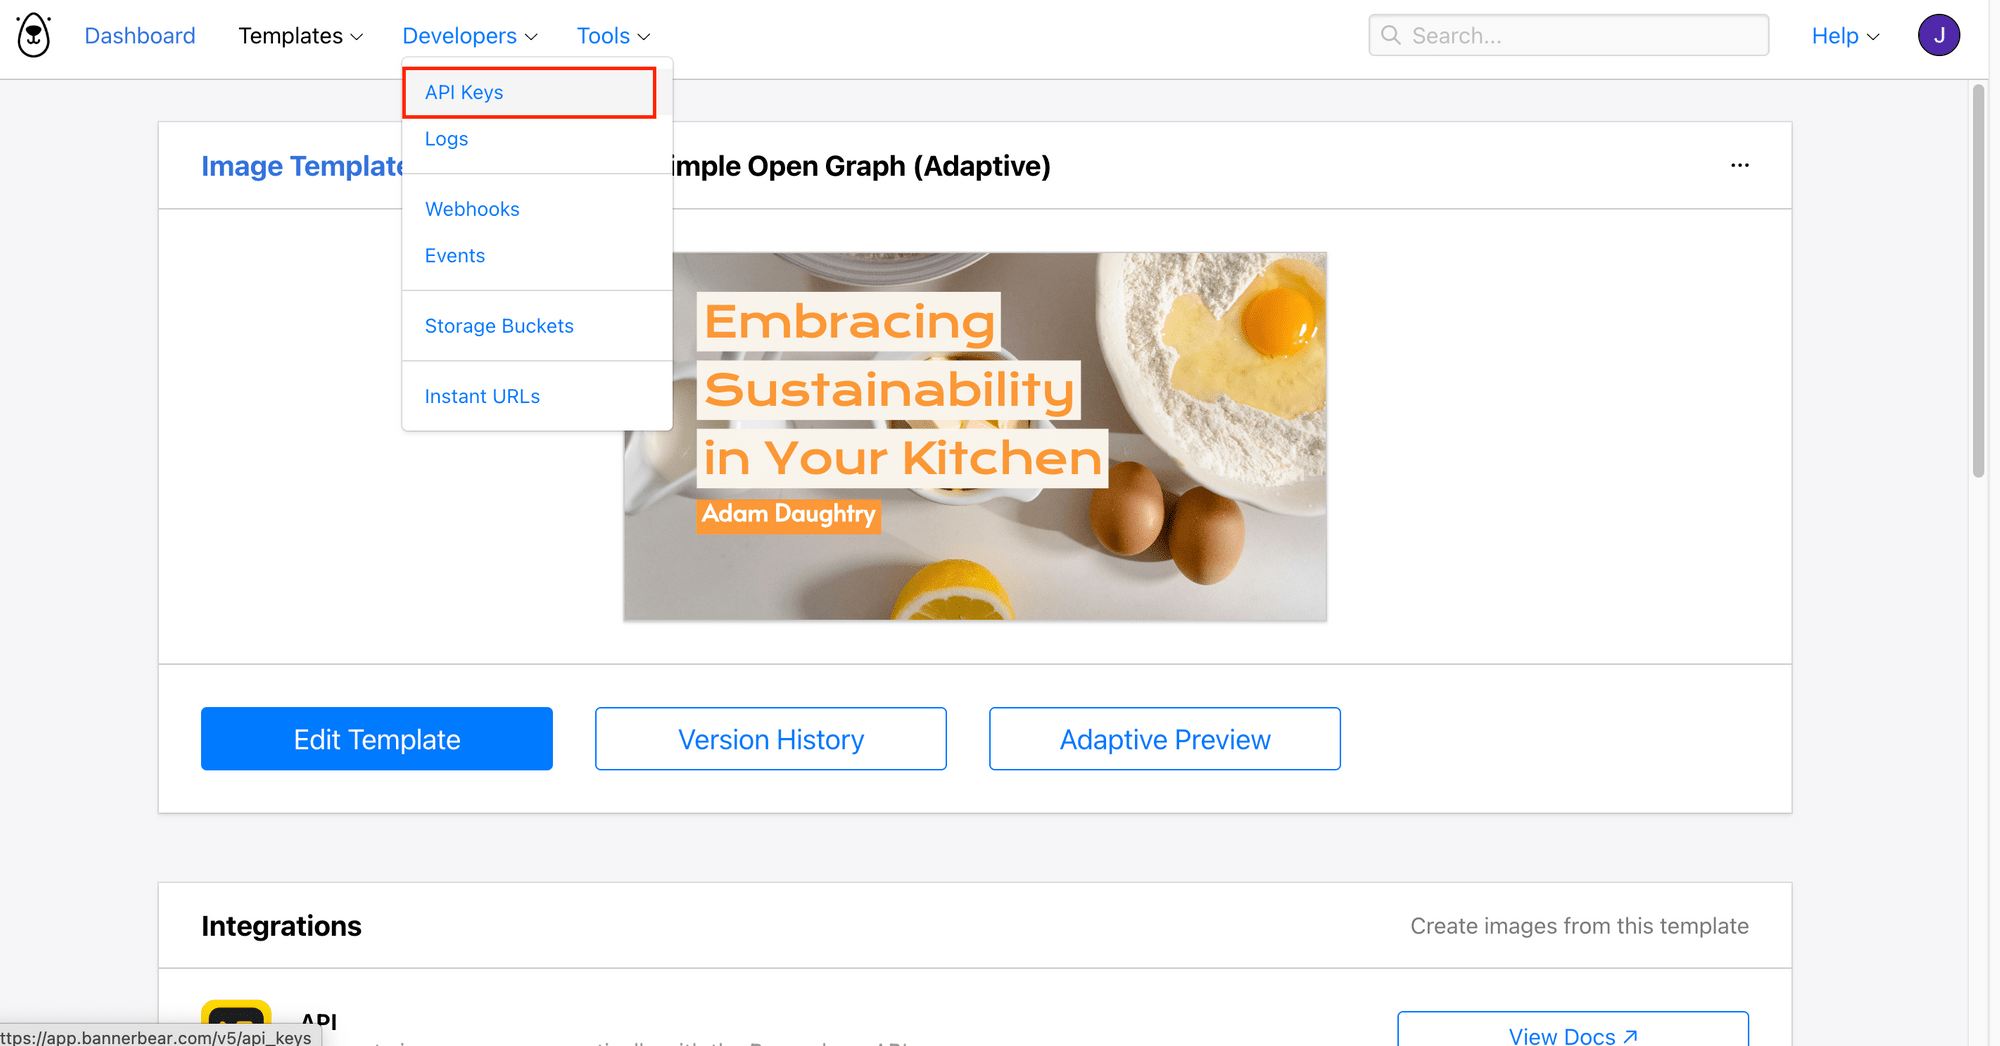
Step 3. Get Your Template ID and API Key
To call the Bannerbear API, you'll need two things—your template ID and an API key.
You can find the template ID in the top right corner of your template page:
For the API key, head to Developers → API Keys and create a new one there:
Copy both values and add them to your project's .env file:
BANNERBEAR_API_KEY=your_api_key_here
BANNERBEAR_TEMPLATE_ID=your_template_id_here
🐻 Bear Tip: If you don't have an existing project, you can refer to this tutorial where we built a website using Next.js and use Bannerbear API to generate custom OG image for every page.
Step 4. Create the "generatePinterestImage" Function
Now let's write the function that calls Bannerbear's API to generate the Pinterest image:
export async function generatePinterestImg(title: string, author: string, coverImage: string): Promise<string> {
  const apiKey = process.env.BANNERBEAR_V5_API_KEY;
  if (!apiKey) return '';

  const res = await fetch('https://sync.api.bannerbear.com/v5/images', {
    method: 'POST',
    headers: {
      Authorization: `Bearer ${apiKey}`,
      'Content-Type': 'application/json',
    },
    body: JSON.stringify({
      template: process.env.BANNERBEAR_PINTEREST_TEMPLATE_ID,
      modifications: {
        template: {
          width: 1000,
          height: 1500,
          transparent: true,
        },
        objects: [
          {
            name: 'title',
            text: title,
          },
          {
            name: 'author',
            text: author,
          },
          {
            name: 'image_container',
            'background-image': coverImage,
          },
        ],
      },
    }),
  });

  if (!res.ok) return '';

  const data = await res.json();
  return data.files?.jpg ?? data.files?.png ?? '';
}
Inside modifications, the template object is where we specify the target dimensions—width: 1000 and height: 1500 for Pinterest's Pin, and the objects array maps each dynamic value to the corresponding layer name in your template.
Finally, the function returns the JPG URL from data.files, and falls back to PNG if JPG isn't available.
🐻 Bear Tip: Make sure the layer names in
objectsmatch the actual layer names in your Bannerbear template.
Step 5. Add the Pinterest Image to Your Page Metadata
Now, call the function in your generateMetadata function in page.tsx. Here's how to add the Pinterest image alongside your existing Open Graph image:
export async function generateMetadata({ params }: Props): Promise<Metadata> {
  ...

  const pinterestImageUrl = await generatePinterestImg(post.title, post.author, post.coverImage);

  return {
    title: post.title,
    description: post.excerpt,
    openGraph: {
      title: post.title,
      description: post.excerpt,
      type: "article",
      authors: [post.author],
      publishedTime: post.date,
      images: [
        {
          url: ogImageUrl,
          width: 1200,
          height: 630,
          alt: post.title,
        },
        {
          url: pinterestImageUrl,
          width: 1000,
          height: 1500,
          alt: post.title,
        },
      ],
    },
    twitter: {
      card: "summary_large_image",
      title: post.title,
      description: post.excerpt,
      images: [ogImageUrl],
    },
  };
}
By adding the Pinterest image as a second entry in the openGraph.images array, Next.js renders it as an additional og:image meta tag in the page header. Pinterest will crawl the page, find the 1000×1500 image, and let you use it as the Pin image.
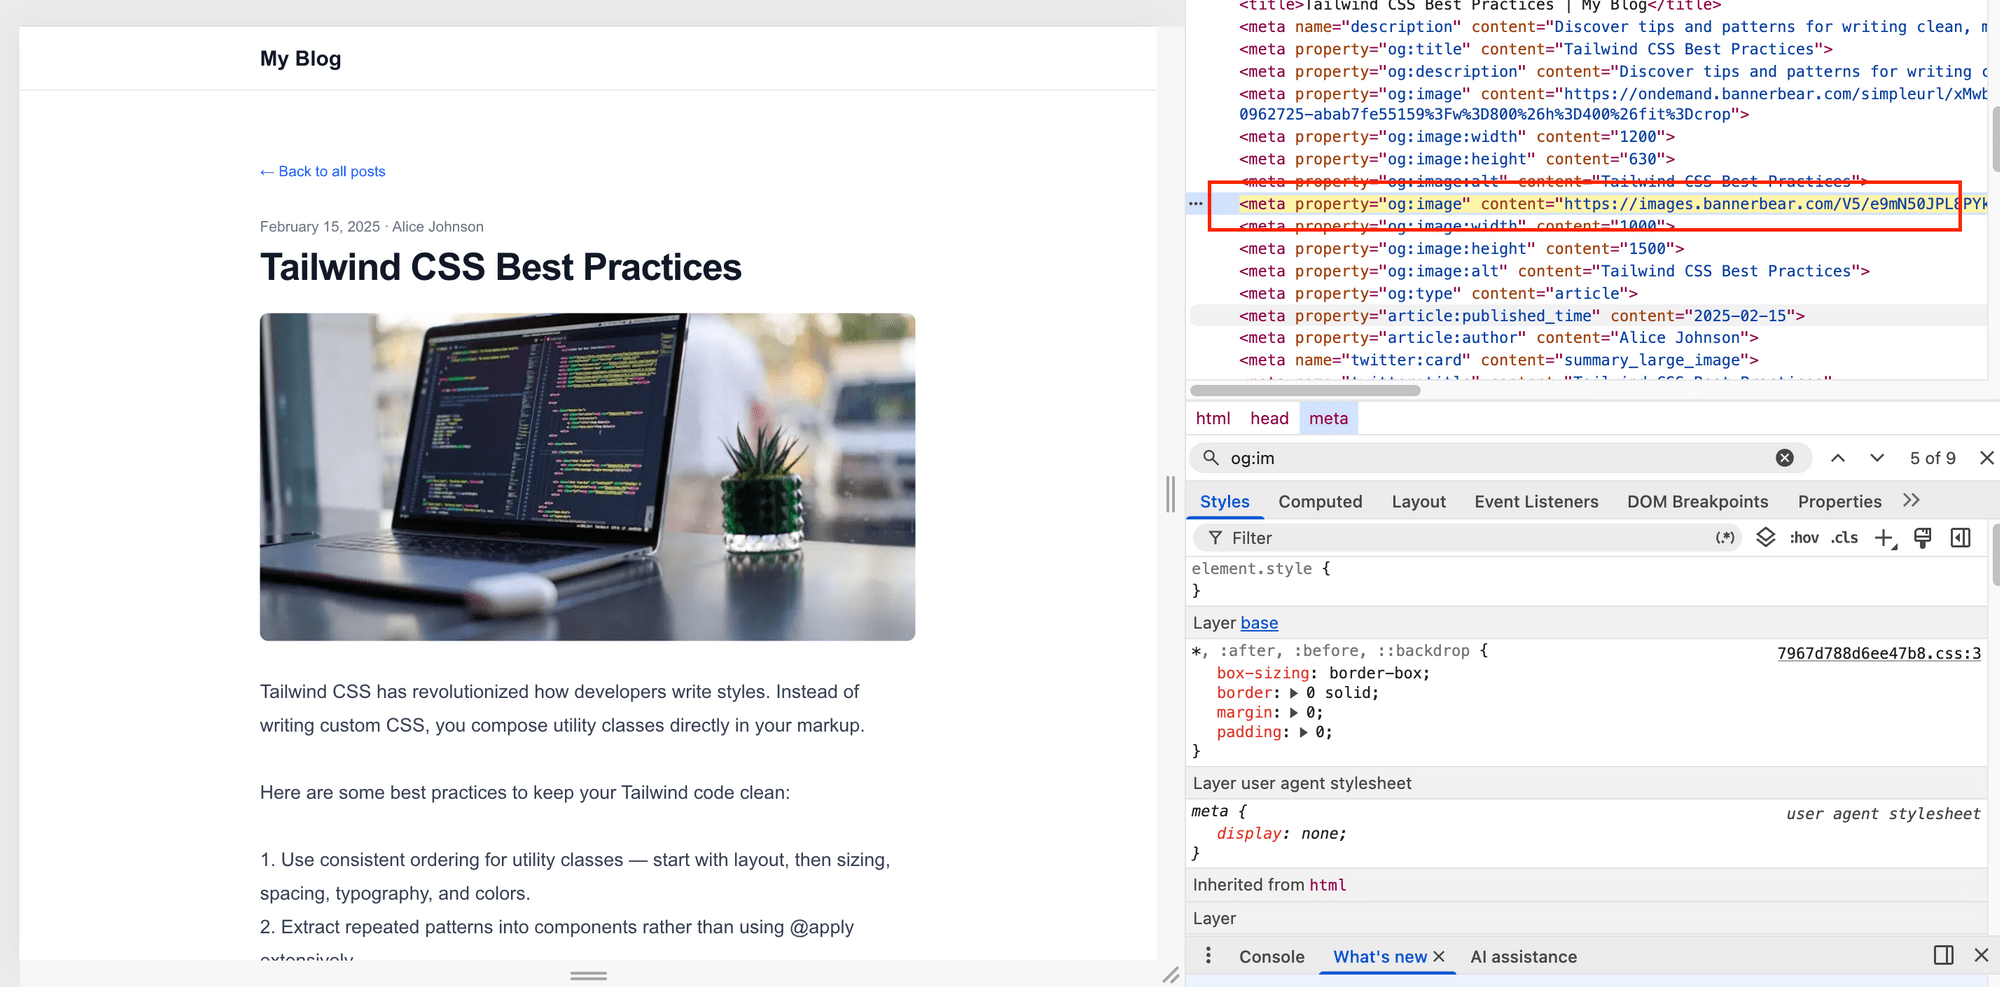
Step 6. See It in Action
Deploy your changes and navigate to any blog post page. If you right-click and inspect, you'll see the Open Graph meta tags in the <head>, including the Pinterest-optimised image at 1000×1500:
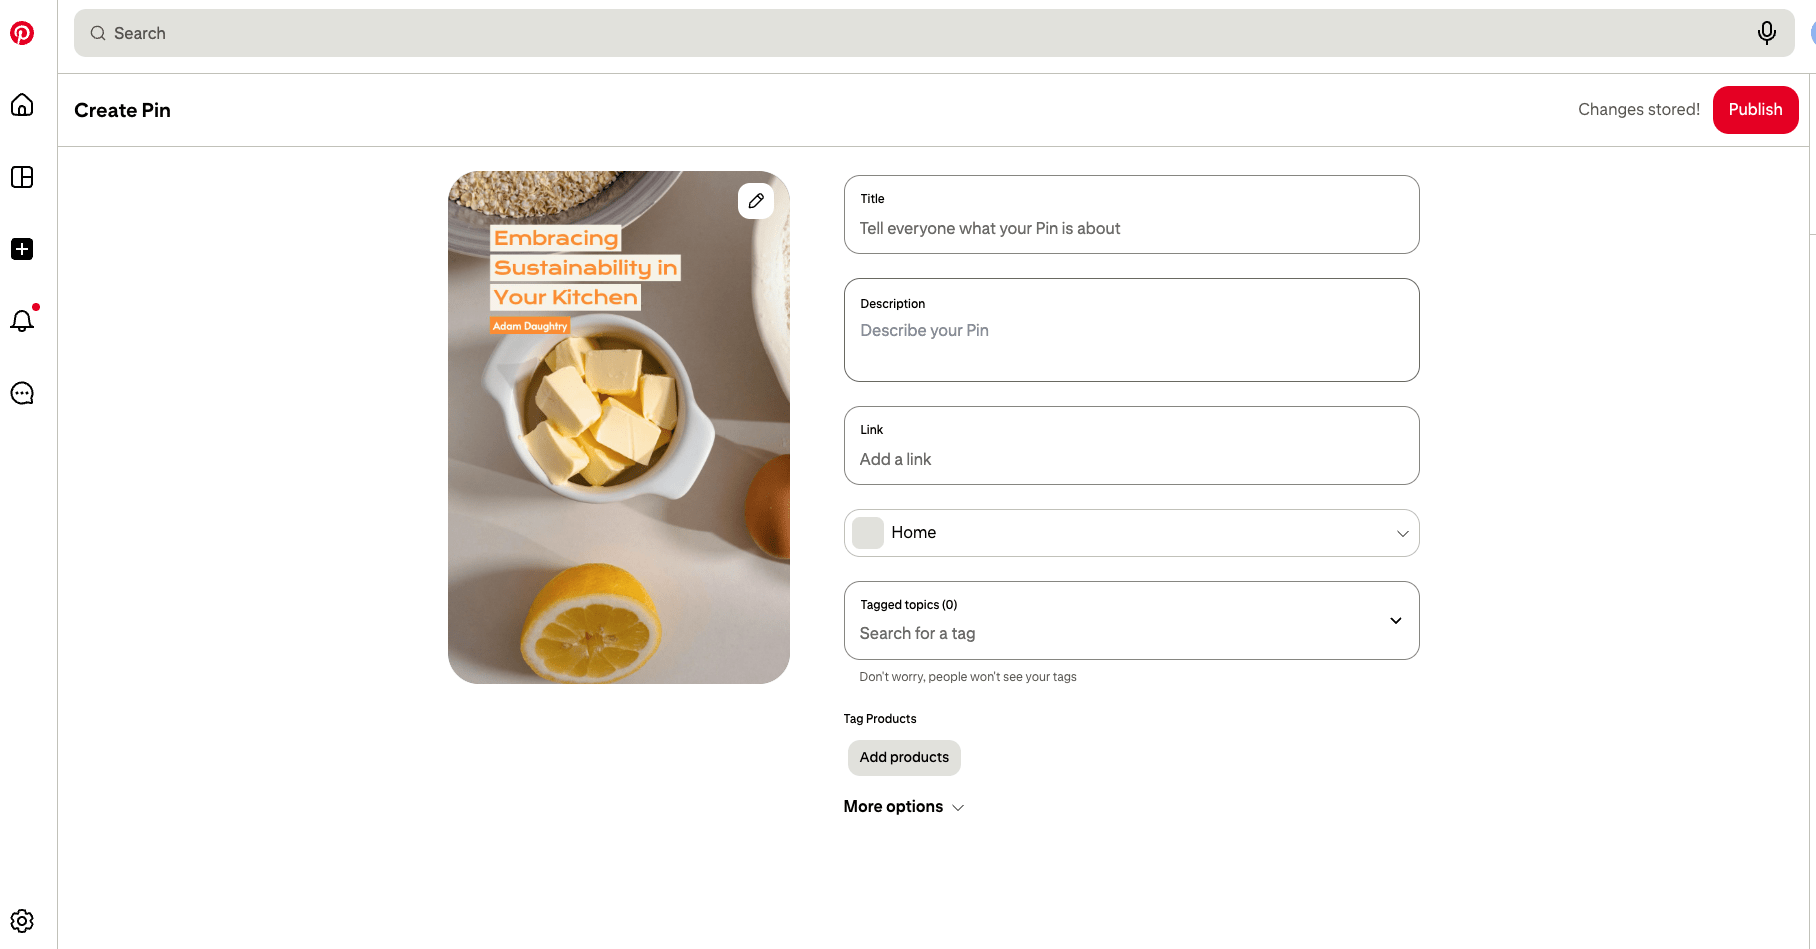
Then, head to Pinterest and create a new Pin. When you paste in your blog post URL, Pinterest will crawl the page and show all the images it found:
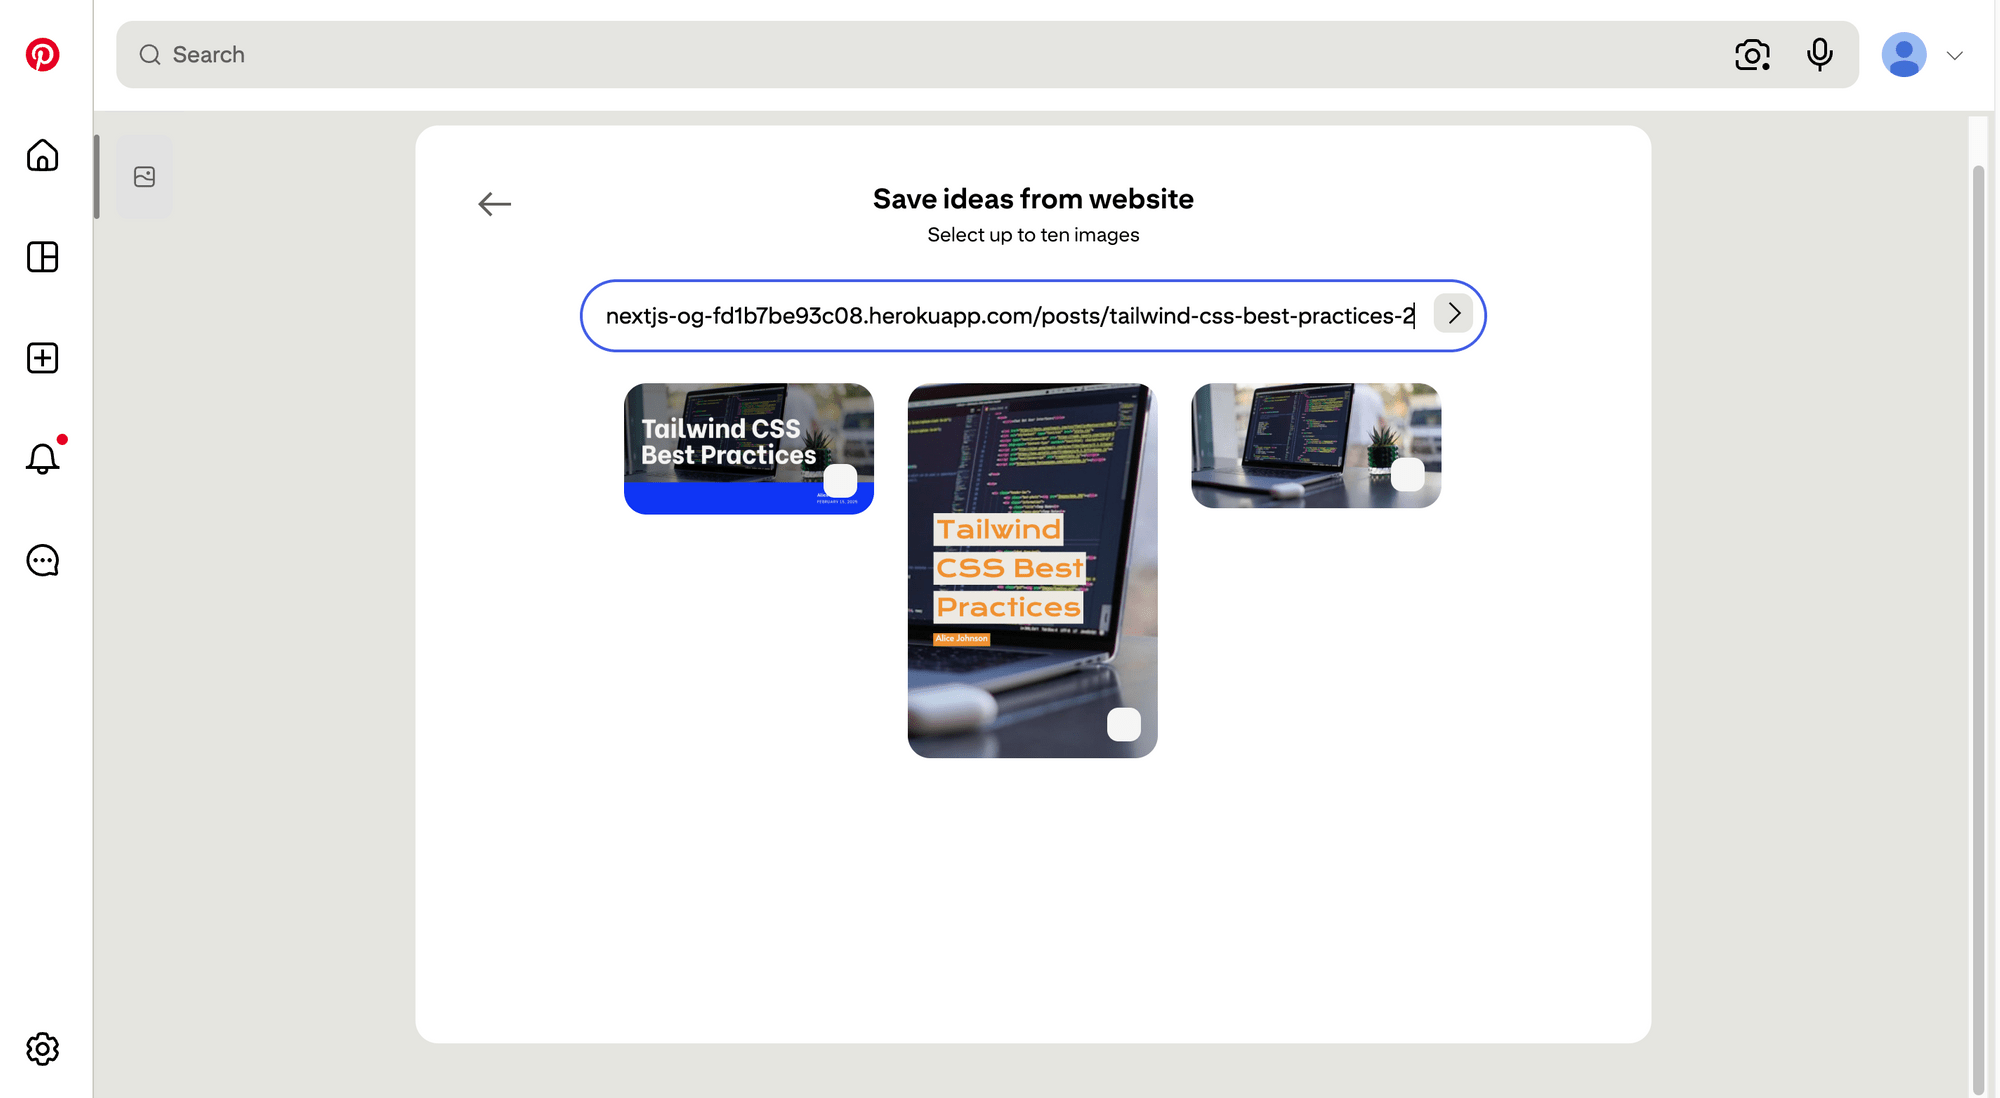
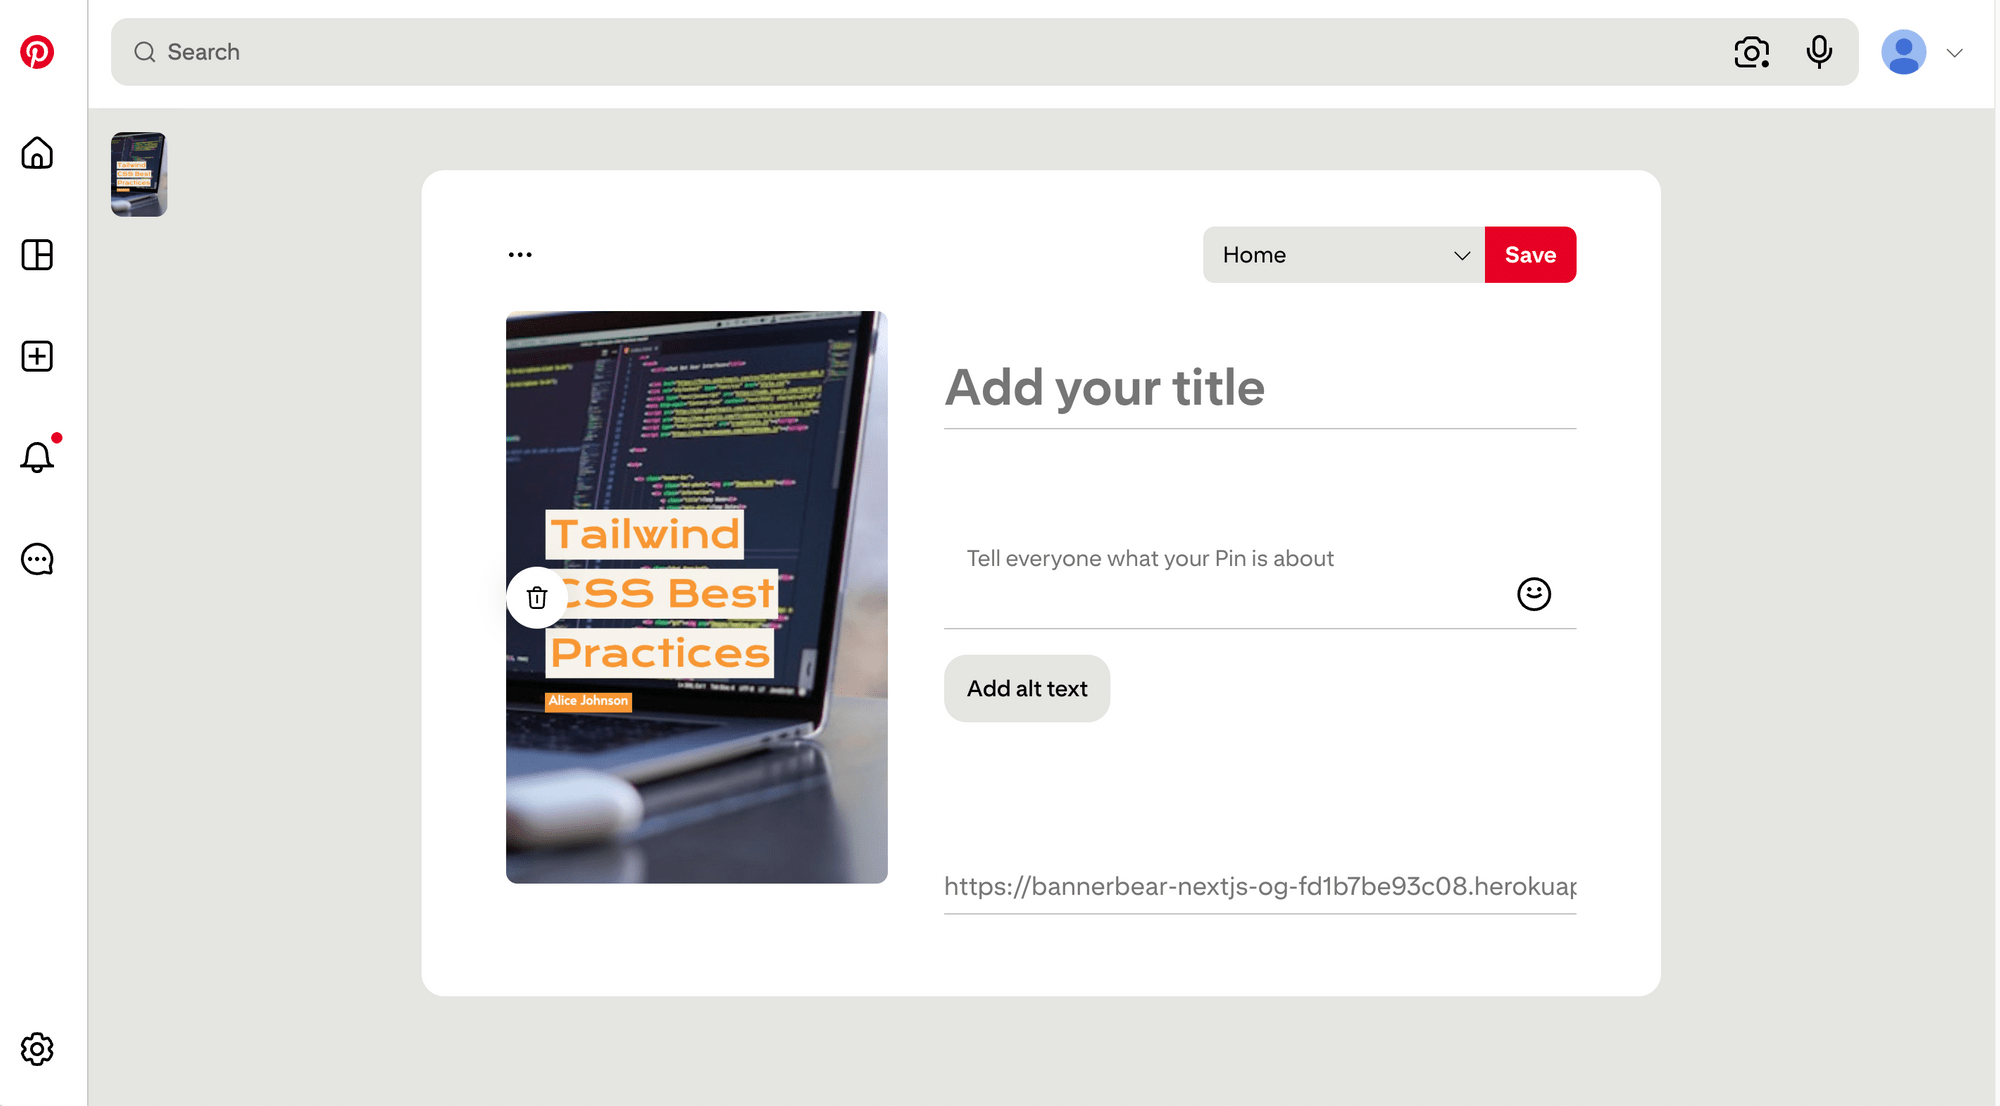
Just select the Pinterest-sized image that is automatically generated:
Conclusion
That's it! By creating an adaptive Bannerbear template and specifying the target dimensions in your API call, you can serve Pinterest-optimised images from the same design you're already using for Open Graph.
Feel free to extend this pattern to other platforms—Twitter cards, LinkedIn, Instagram Stories all have their own preferred dimensions, but adaptive templates let you handle all of them from a single template!
🐻 Bear Tip: Since v5 isn't publicly available just yet, the best way to be the first to know when it launches is to sign up for a Bannerbear account if you haven't already. You'll get notified as soon as v5 is available. 😃
