Removing the background from a product image for creating marketing visuals sounds simple until you're doing it for thousands of SKUs. Most e-commerce teams rely on designers to handle this manually but this creates a bottleneck when the volume is huge. They also get buried in repetitive work instead of the creative stuff that actually needs them.
With Bannerbear V5, background removal is now built directly into the image generation API. You can strip a background and composite the product onto a custom template in a single API call. It means you can automate not just the creation of your marketing visuals, but the asset preparation that comes before it too.
In this tutorial, we'll build a product marketing image pipeline that takes a product photo URL, removes its background, and places the product onto a branded template automatically.
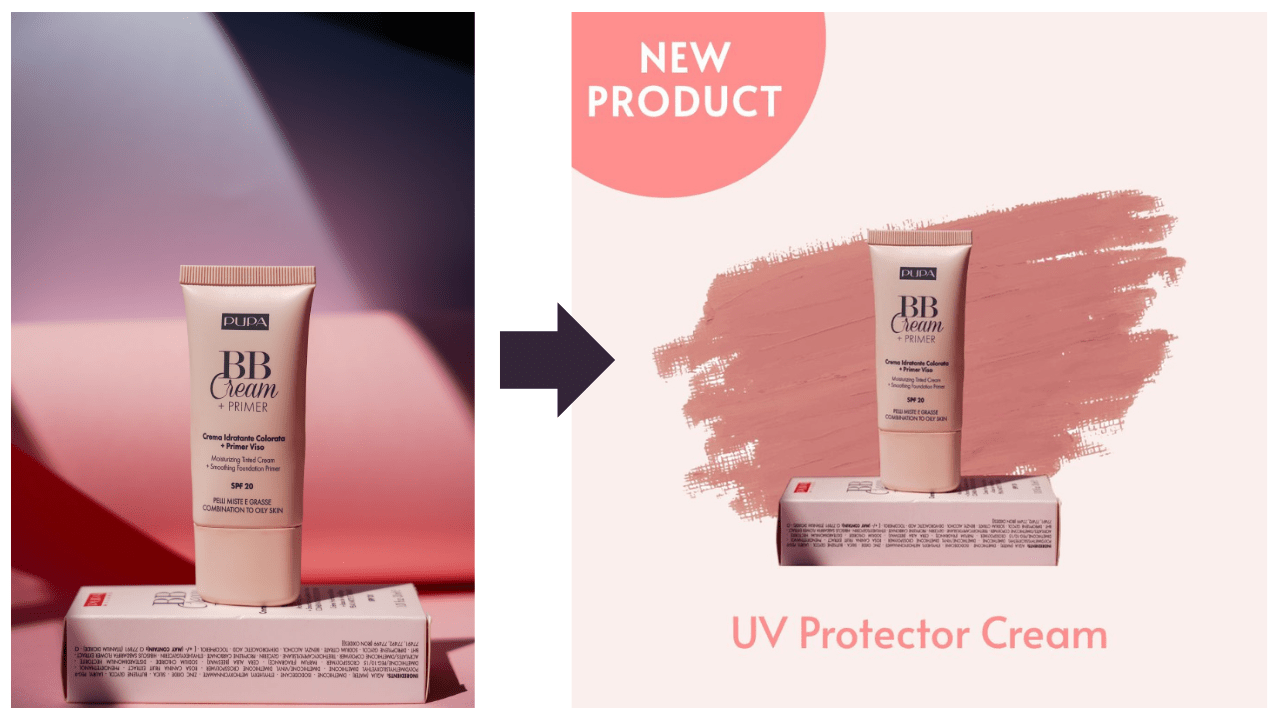
By the end, you'll have a working Node.js script you can integrate into any e-commerce workflow.
Let's jump right into it!
🐻 Bear Tips: All existing V3 features and API endpoints still work as normal and you can toggle between V3 and V5 anytime from your Bannerbear dashboard.
What Is Bannerbear's AI Background Removal Feature?
Bannerbear V5 adds AI-powered background removal directly into the render pipeline. Instead of removing the background beforehand and uploading a pre-processed image, you pass your original image URL to the API and Bannerbear handles the rest at render time.
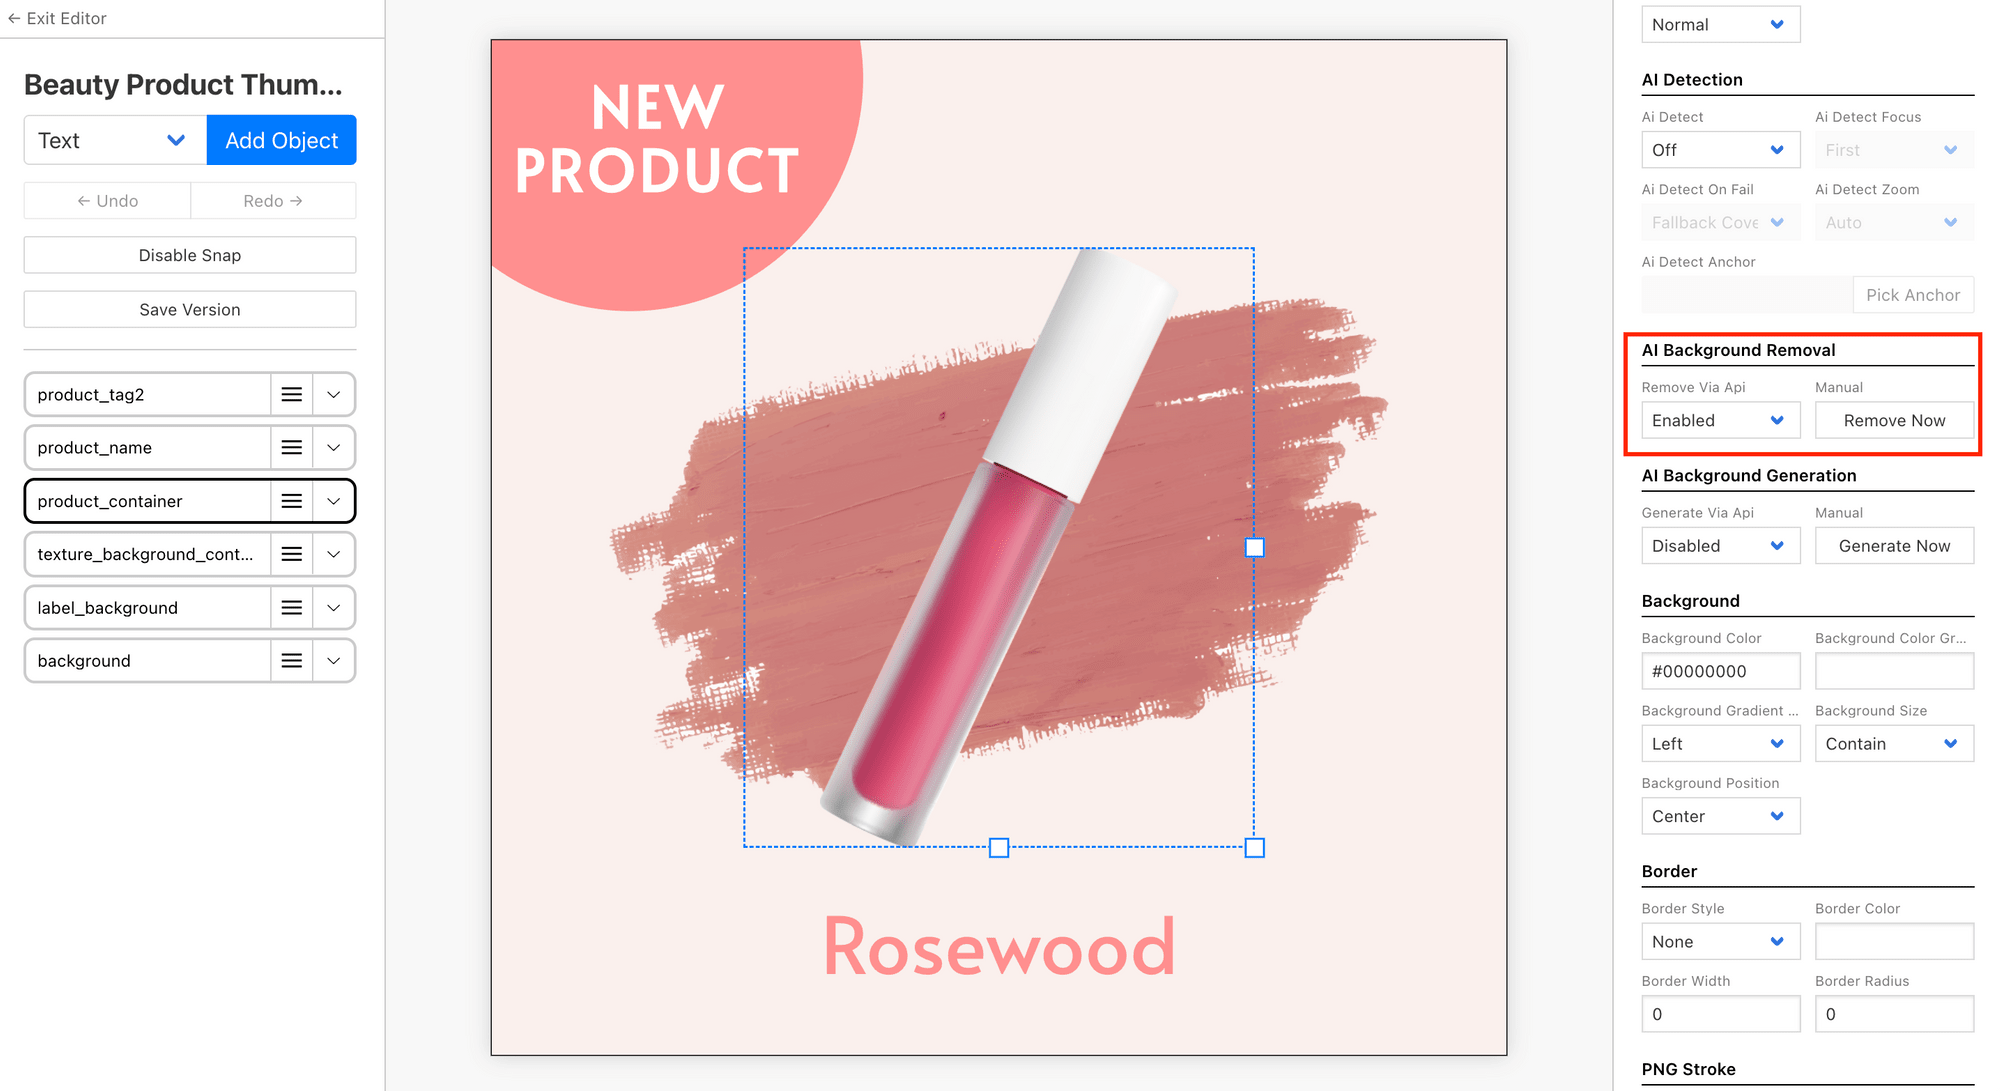
All it need is to have “AI Background Removal” enabled in your Bannerbear v5 template editor:
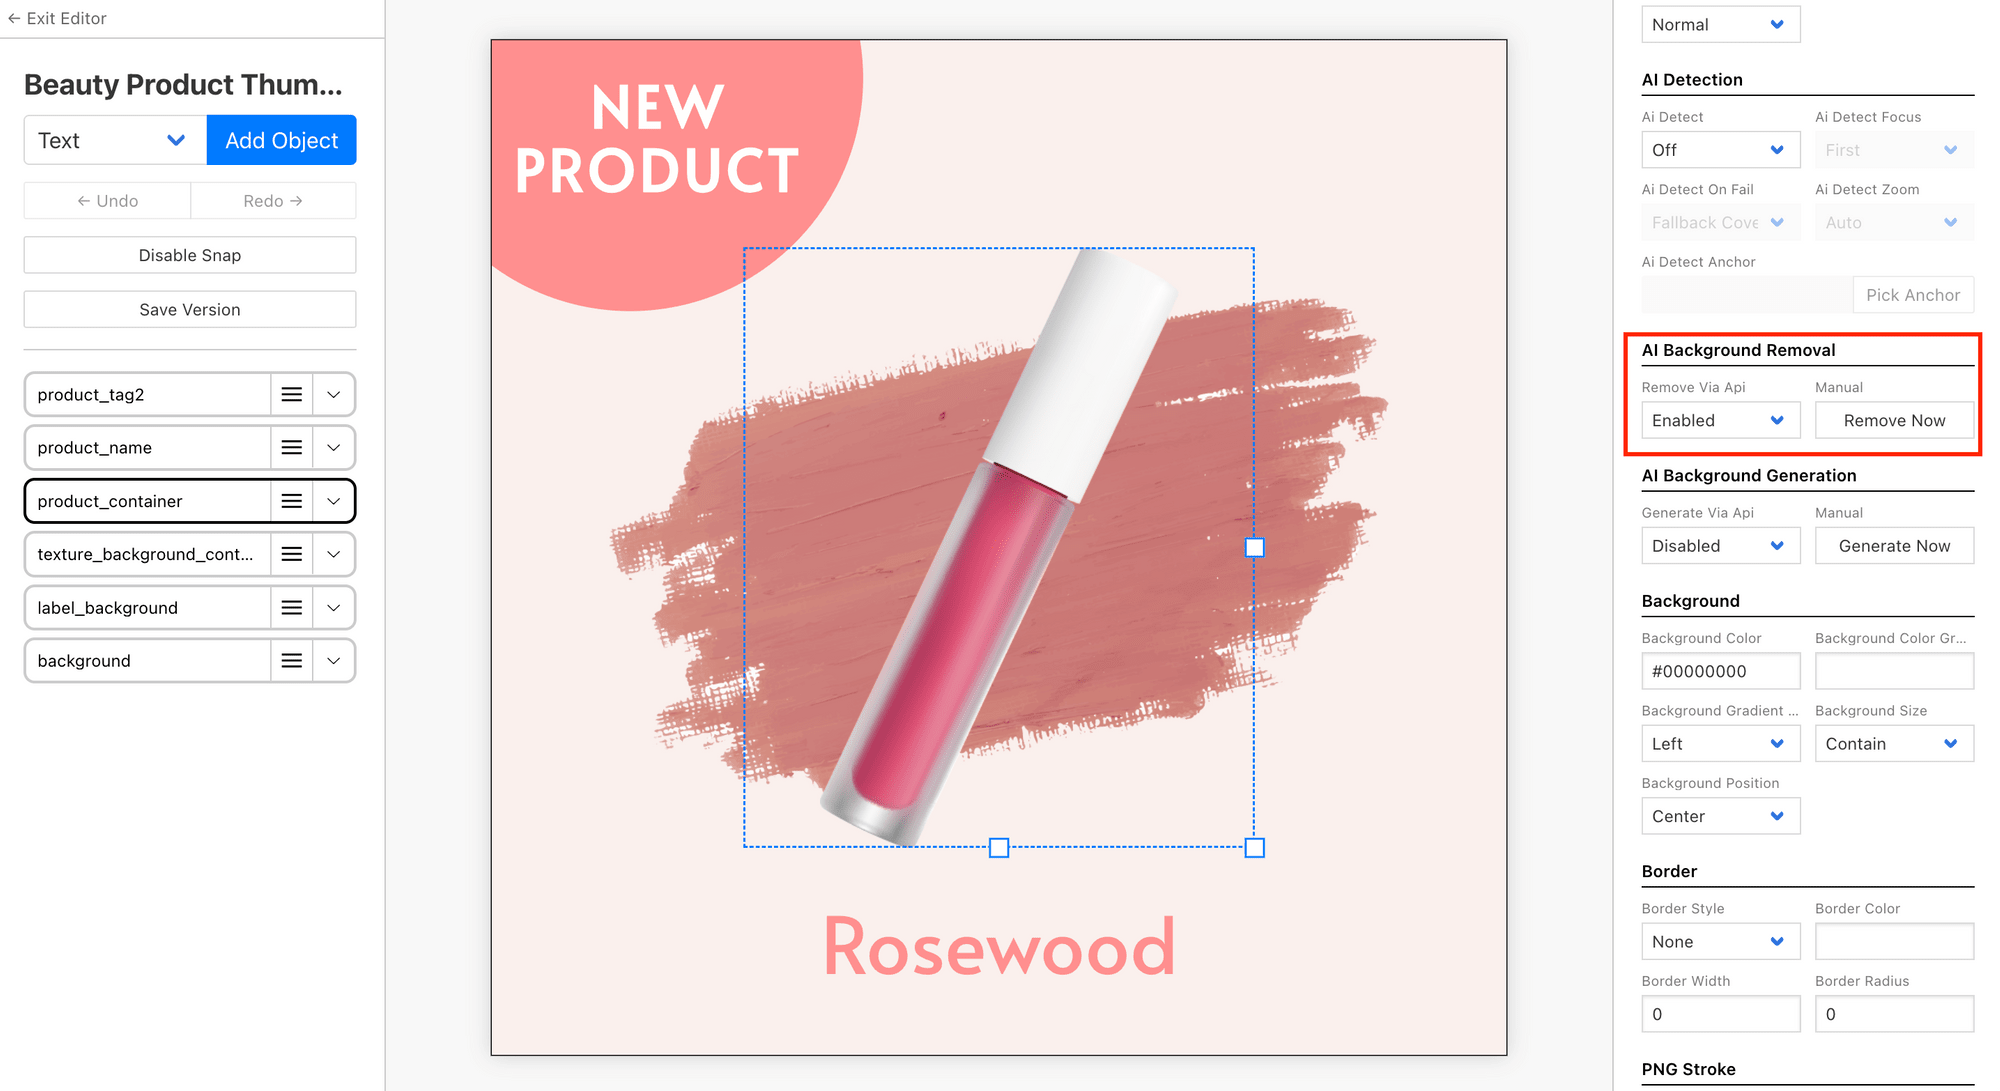
This means you can take a raw product photo straight from a supplier or a camera upload and render it onto a polished, branded template without touching an image editor or calling a separate API.
Pre-requisite
To follow along, you will need:
- Node.js installed
- A Bannerbear account (sign up for free here)
For reference, this tutorial uses Node.js v25. That said, the API calls are straightforward HTTP requests, so the same approach works in Python, Ruby, or any language with an HTTP client.
How to Automatically Remove Image Backgrounds of Product Photos with the Bannerbear V5
Step 1. Create a Bannerbear v5 Template
Open your Bannerbear template editor and create a design. You can also duplicate the template we’re using in this tutorial to your project:
In your template editor, make sure that “AI Background Removal” is set to “Enabled” :
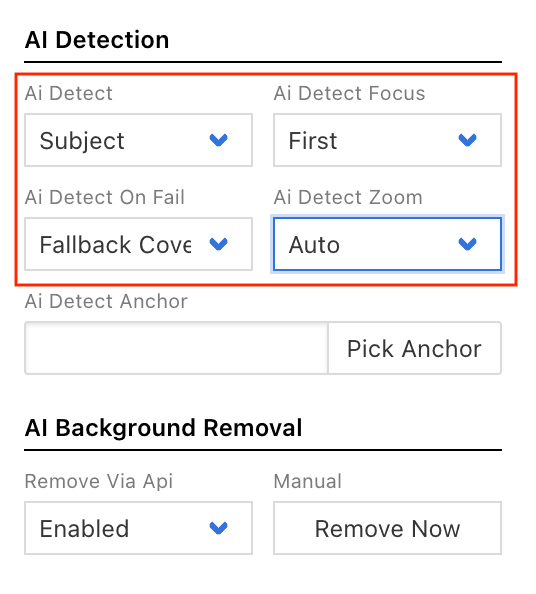
Set “AI Detect” to “Subject” and “AI Detect Zoom” to “Auto”. This ensure that the product is always in the center of the image after background removal, regardless of its original position:
Step 2. Get Your Template ID and API Key
To call the Bannerbear API, you'll need two things—your template ID and an API key.
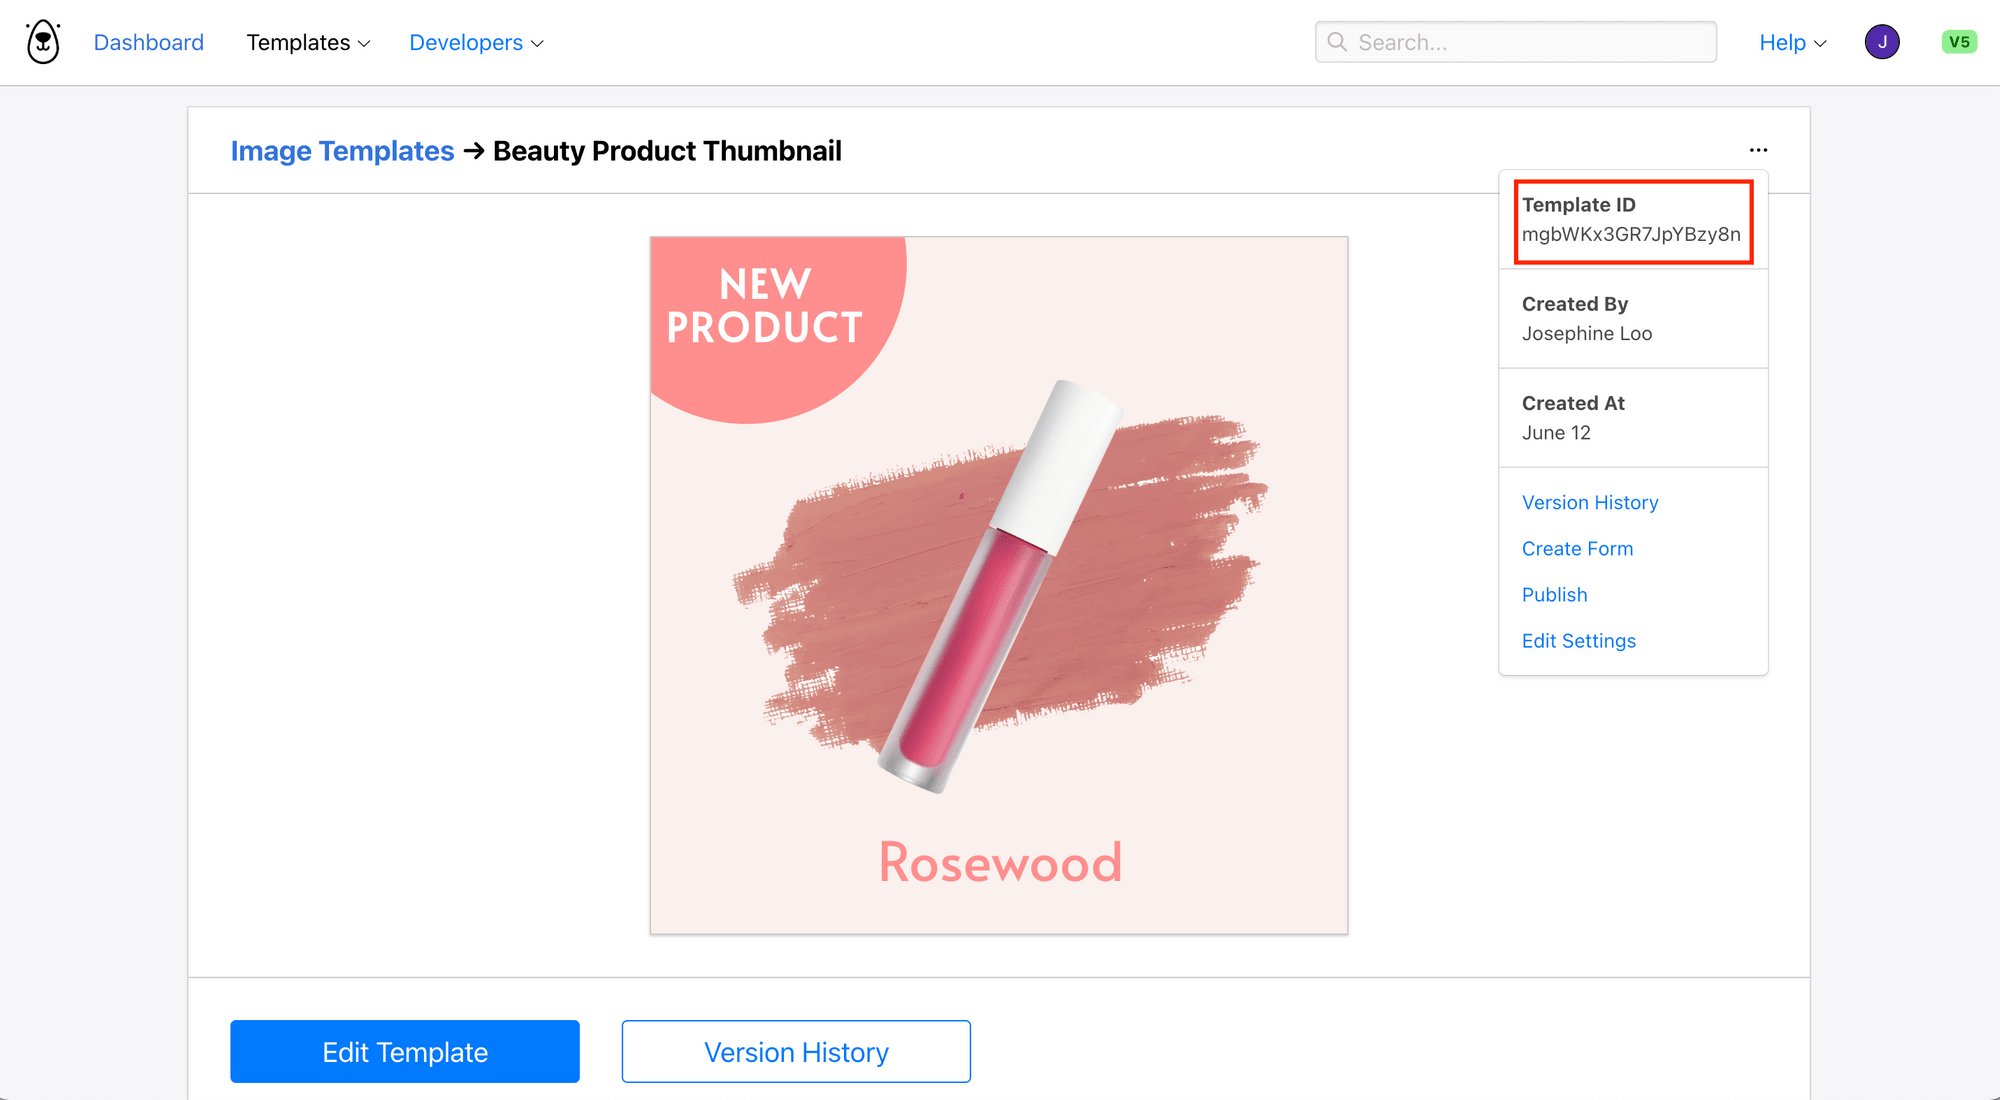
You can find the template ID in the top right corner of your template page:
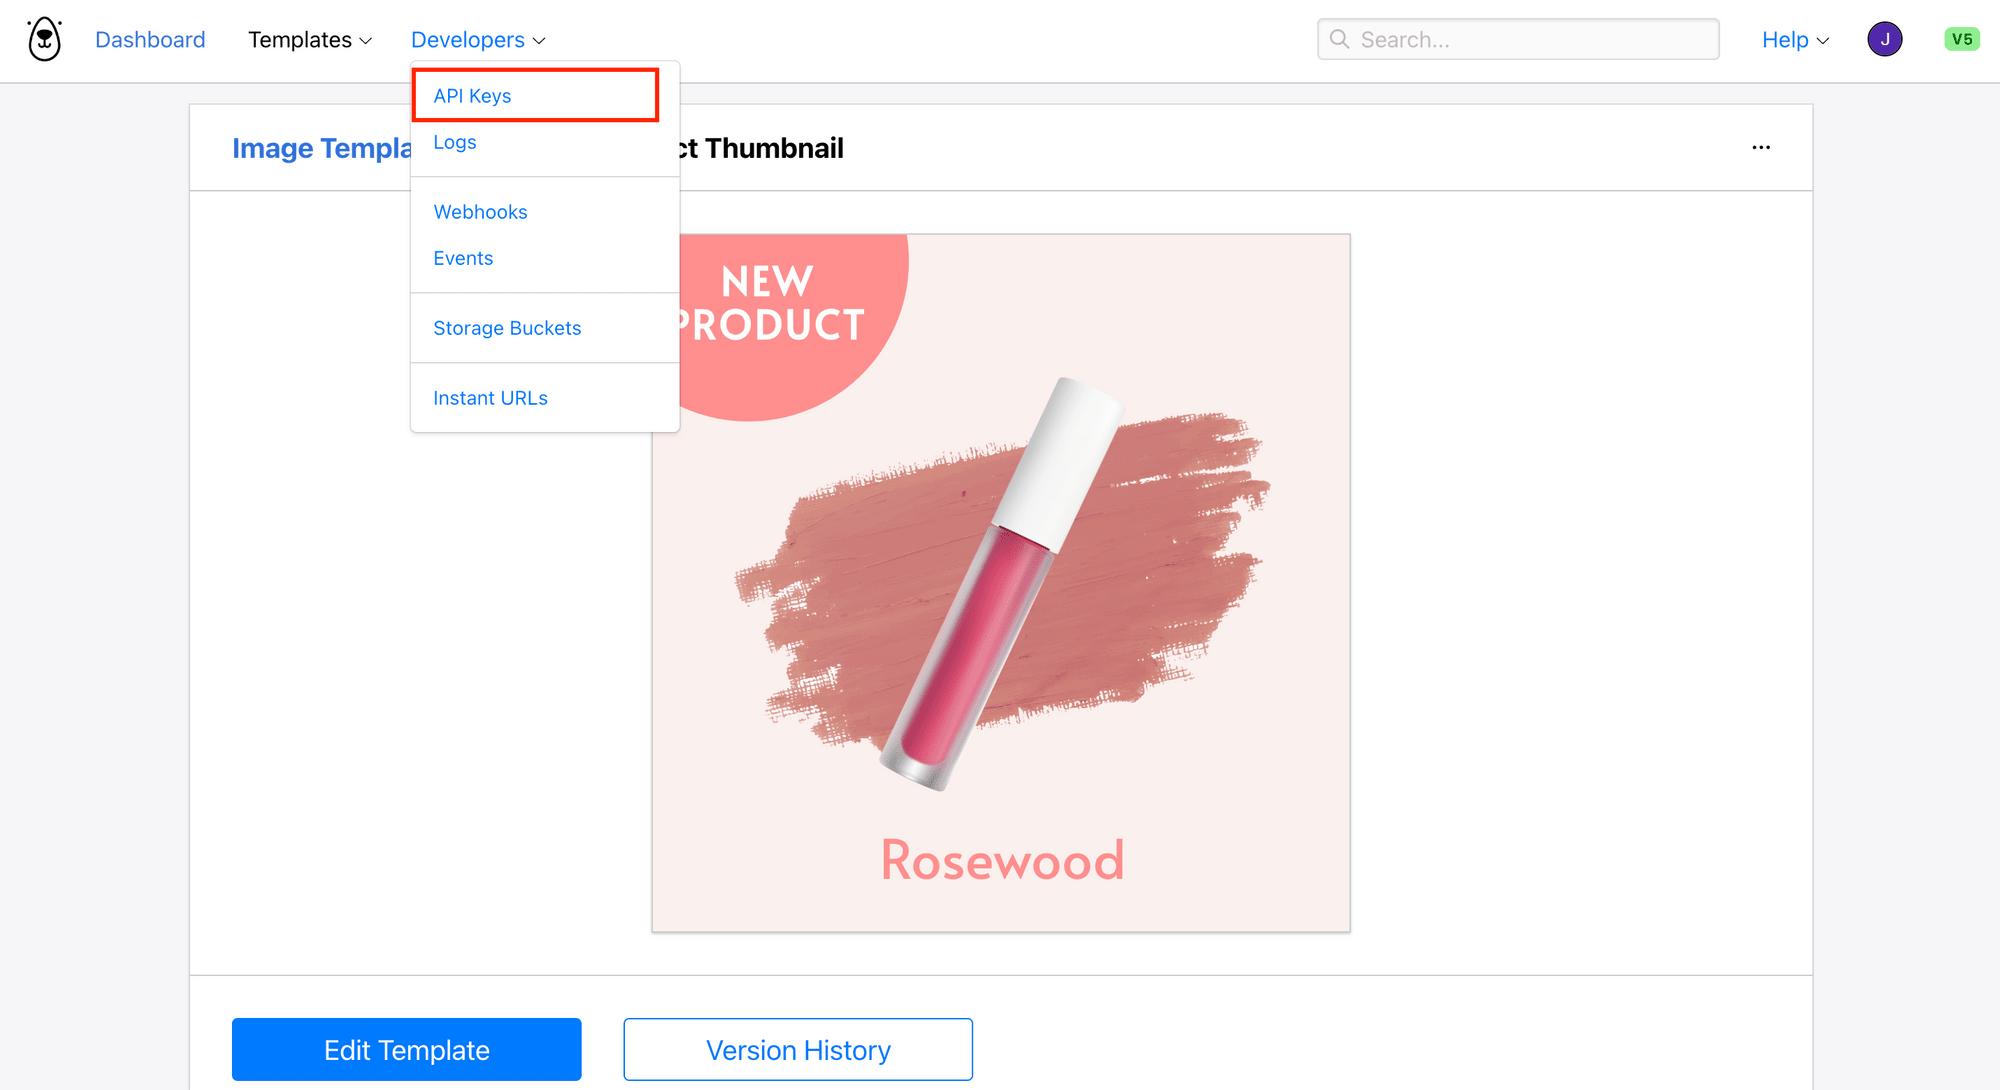
For the API key, head to Developers → API Keys and create a new one there:
Copy both values. We’ll add both to our project's .env file later.
Step 3. Set up Our Project
In your terminal/command line, create a new folder for your project and navigate to it.
mkdir bannerbear-bg-removal
cd bannerbear-bg-removal
Initialize a new Node.js project and install dotenv to manage your credentials:
npm init -y
npm install dotenv
Create a .env file in the root of your project to store your API key and add your Bannerbear API key and template UID:
BANNERBEAR_API_KEY=your_api_key_here
BANNERBEAR_TEMPLATE_UID=your_template_uid_here
Step 4. Create the Image Generation Script
Create a new file called generate.js in your project folder and add the code below:
require('dotenv').config();

const BANNERBEAR_API_KEY = process.env.BANNERBEAR_API_KEY;
const BANNERBEAR_TEMPLATE_UID = process.env.BANNERBEAR_TEMPLATE_UID;

// The product image with background
const product_image_url = 'https://images.pexels.com/photos/27393248/pexels-photo-27393248.jpeg';

(async () => {
  try {
    console.log('Generating image...');

    const response = await fetch('https://sync.api.bannerbear.com/v5/images', {
      method: 'POST',
      headers: {
        Authorization: `Bearer ${BANNERBEAR_API_KEY}`,
        'Content-Type': 'application/json',
      },
      body: JSON.stringify({
        template: BANNERBEAR_TEMPLATE_UID,
        modifications: {
          objects: [
            {
              name: 'product_container',
              'background-image': product_image_url,
            },
            {
              name: 'product_name',
              text: 'UV Protector Cream',
              color: '#FF8E8E',
            },
          ],
        },
      }),
    });

    const rendered_image = await response.json();

    // The response contains the completed image. No polling needed
    console.log('Image ready!');
    console.log('Image URL:', rendered_image.files.jpg);
  } catch (error) {
    console.error('Error generating image:', error.message);
  }
})();
Let's break down what the code does…
We’re calling https://sync.api.bannerbear.com/v5/images instead of https://api.bannerbear.com/v5/images to generate an image from the Bannerbear v5 template created earlier. The sync endpoint holds the connection open until rendering is complete and returns the finished image object directly in the response so no polling to another endpoint is needed to get the result.
modifications.objects is the V5 array of layer changes. The image is set via background-image (the V5 property for image container layers) and the product name is updated.
After we get the response, we print the finished image URL, rendered_image.files.jpg.
🐻 Bear Tips: The V5 API supports multiple output formats in a single request. Add a
formatsarray to your request body (e.g.,formats: ['png', 'jpg', 'webp']) and Bannerbear will render all three at once. Each format URL will be available underrendered_image.files.png,rendered_image.files.jpg, andrendered_image.files.webprespectively.
Step 5. Run the Script
Run the script from your terminal.
node generate.js
You should see output like this:
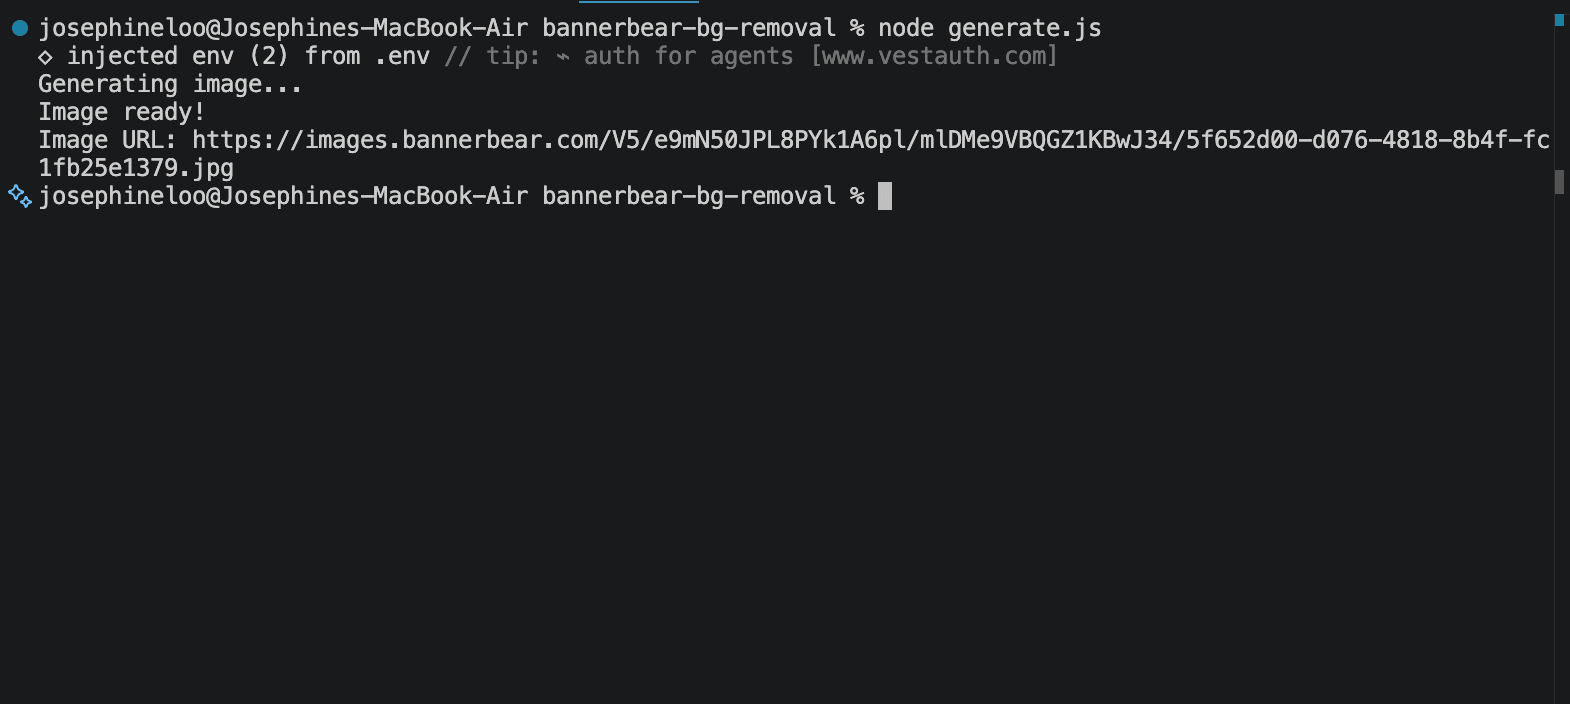
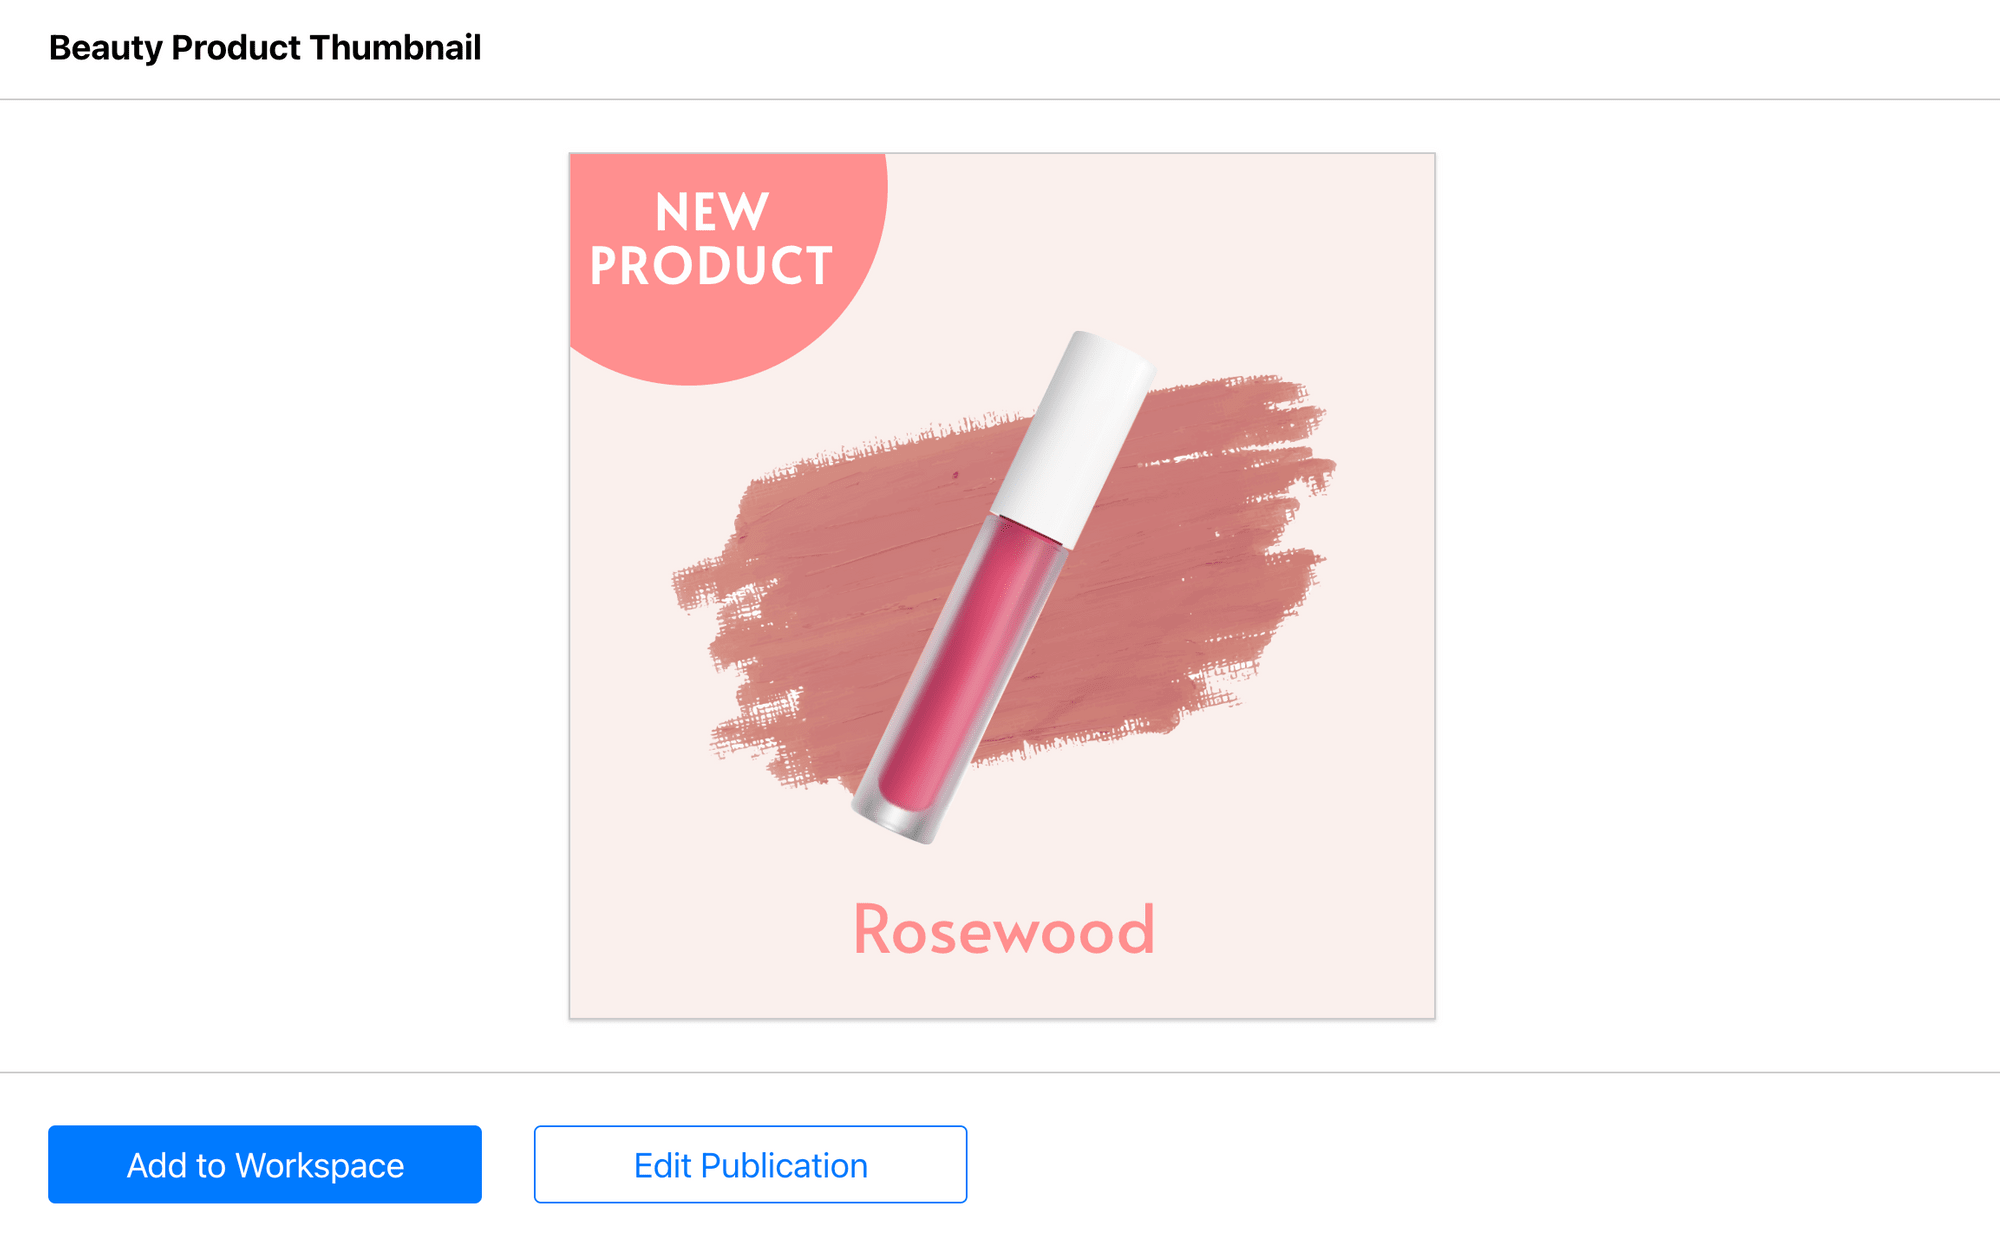
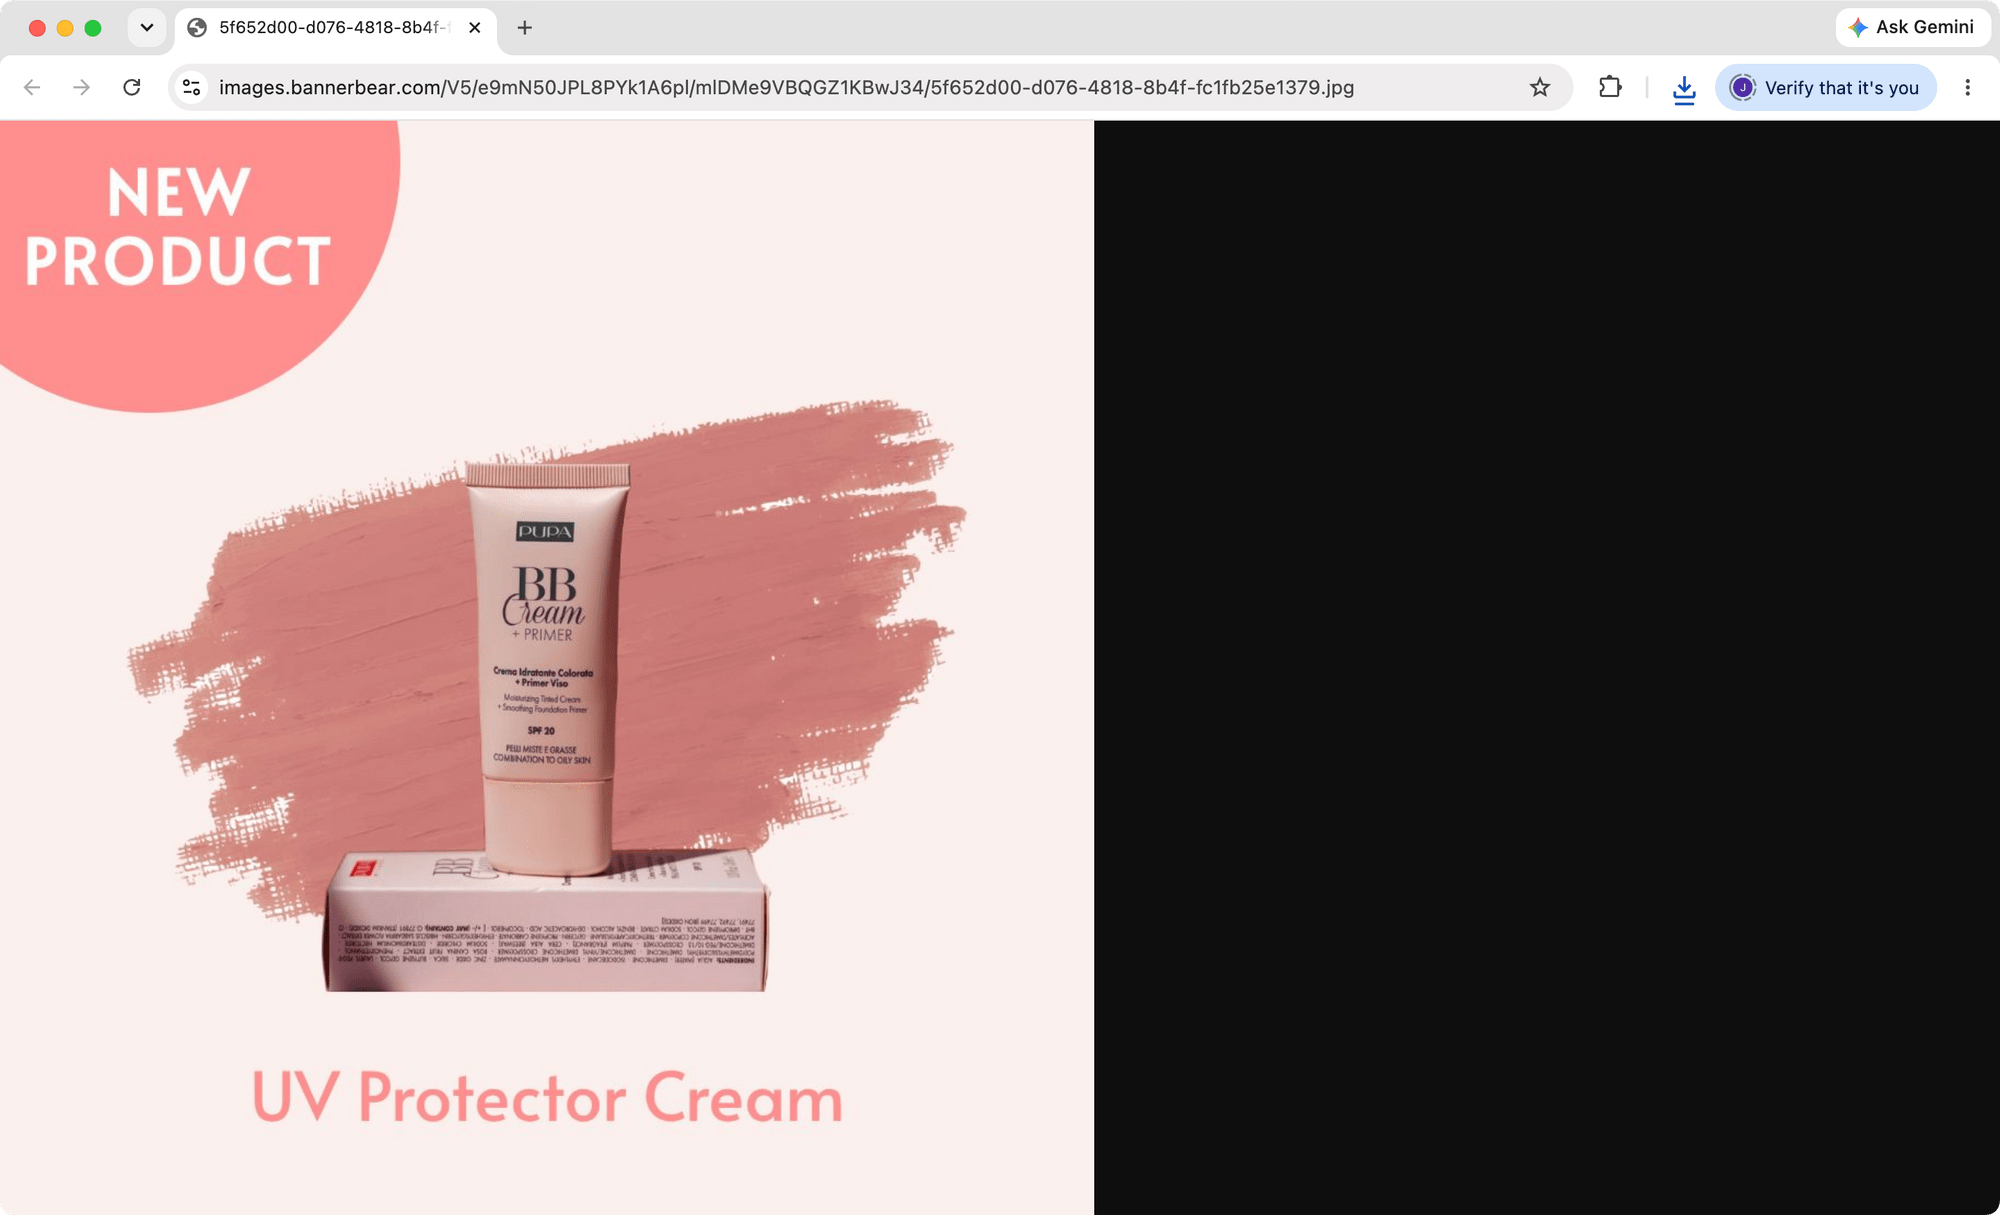
The returned URL is your final rendered image. Since “AI Background Removal” is enabled in the template editor, background removal is triggered at render time. Your finished image should have the product subject with background removed and centered:
Processing Multiple Products in Bulk
If you're running this for a product catalogue, you'll want to loop through a list of images rather than processing one at a time. Because each sync request waits for its render to finish, we can fire them all concurrently with Promise.all and collect the results in one go.
require('dotenv').config();

const BANNERBEAR_API_KEY = process.env.BANNERBEAR_API_KEY;
const BANNERBEAR_TEMPLATE_UID = process.env.BANNERBEAR_TEMPLATE_UID;

// List of raw product image URLs
const products = [
  { name: 'White Sneaker', image_url: 'https://example.com/products/sneaker-white.jpg' },
  { name: 'Black Sneaker', image_url: 'https://example.com/products/sneaker-black.jpg' },
  { name: 'Red Sneaker', image_url: 'https://example.com/products/sneaker-red.jpg' },
];

async function renderProduct(product) {
  const response = await fetch('https://sync.api.bannerbear.com/v5/images', {
    method: 'POST',
    headers: {
      Authorization: `Bearer ${BANNERBEAR_API_KEY}`,
      'Content-Type': 'application/json',
    },
    body: JSON.stringify({
      template: BANNERBEAR_TEMPLATE_UID,
      modifications: {
        objects: [
          {
            name: 'product_container',
            'background-image': product.image_url,
          },
          {
            name: 'product_name',
            text: product.name,
            color: '#FF8E8E',
          },
        ],
      },
    }),
  });

  const rendered_image = await response.json();
  return { name: product.name, image_url: rendered_image.files.jpg };
}

(async () => {
  console.log('Rendering all products...');

  // Render all products concurrently — each sync request resolves when its image is ready
  const results = await Promise.all(products.map(renderProduct));

  console.log('\nAll images ready!');
  results.forEach((result) => {
    console.log(`${result.name}: ${result.image_url}`);
  });
})();
🐻 Bear Tips: If you're processing a large product catalogue, take a look at Bannerbear's Batches API, which lets you generate up to 100 images in a single request using the
/v5/batchesendpoint. Each item in the batch follows the samemodificationsschema as a regular image request and it's a much cleaner fit for very large bulk pipelines.
Conclusion
That's it! With Bannerbear V5’s AI Background Removal feature, background removal, subject detection, and centred framing are all take care of in a single API request. No manual preprocessing or third-party background removal service is needed.
Here’s the full list of Bannerbear v5 new features. If you haven't tried Bannerbear v5 new features yet, check them out!