
How to Design Facebook Event Ads and Automate Image Generation
Contents
In 2022, all types of events—both online and offline—need to be publicized digitally. Reaching a highly targeted audience using social media is both convenient and cost-effective. And with more and more people on these platforms, marketing teams and event coordinators can benefit from using them to drive engagement and excitement leading up to an occasion.
With over 2.9 billion monthly active users (MAUs), Facebook has earned its title as the largest global social media network. Six in ten internet users have accounts on the platform, and they contribute to ad platform growth by increasingly engaging with paid posts. Facebook’s sheer size as both a personal and business platform makes it the ideal place to market events such as webinars, product releases, and Q&A sessions.
Facebook’s event ad feature can help you drive engagement weeks or even months before the function takes place. However, not every ad catches the eyes of users scrolling down their Feeds.
Event cover images need to be designed for viewers to absorb and retain information in a glance. A simple photo just won’t do. Dynamic templates can help you outfit every cover image with the crucial details without having to design from scratch every time. Best of all, you can apply them to your own events without a single line of code!
What You Will Create
Facebook allows you to create an event, then boost visibility and engagement by publishing it as an ad. While you may not be able to automate ad management from start to finish, you can save time by using a dynamic template to generate cover images that capture event details in a glance.
The tools you will be using are:
- Bannerbear : To design and generate dynamic event cover images
- Airtable : To store event management information and trigger cover image generation
- Zapier : To trigger actions in different programs based on pre-specified commands
You will also need a Facebook account that has administrative or advertiser permissions for the Page hosting or co-hosting the event.
By the end of the tutorial, you should be able to generate cover images that look something like this:

Let’s start by designing a template.
Customize Your Bannerbear Template
A dynamic template allows you to feed new data into a design that’s already been optimized for your use. You can create one using Bannerbear, which turns images, shapes, text, and other visual elements in a template into fields you can modify via API.
Log into the Bannerbear app, then create and name a new project. You can then start designing your template with a blank canvas. Alternatively, use one of ours:

You’ll design a more effective cover image by following these best practices:
- Use Facebook’s recommended dimensions of 1920 x 1005 px (as of their 2022 updated layout)
- Include crucial event details
- Keep copywriting clear and concise
- Use contrast to draw attention to different elements
- Integrate brand elements
Once the design is to your liking, click “Save Template” and move on to the next step.
Set up an Event Management Airtable Base
We will be using Airtable in this tutorial, but most spreadsheet or database software can be used to produce the same end result. All your event management information just needs to be consolidated in one place, and Zapier must be able to recognize a confirmed event as a trigger for image generation to take place.
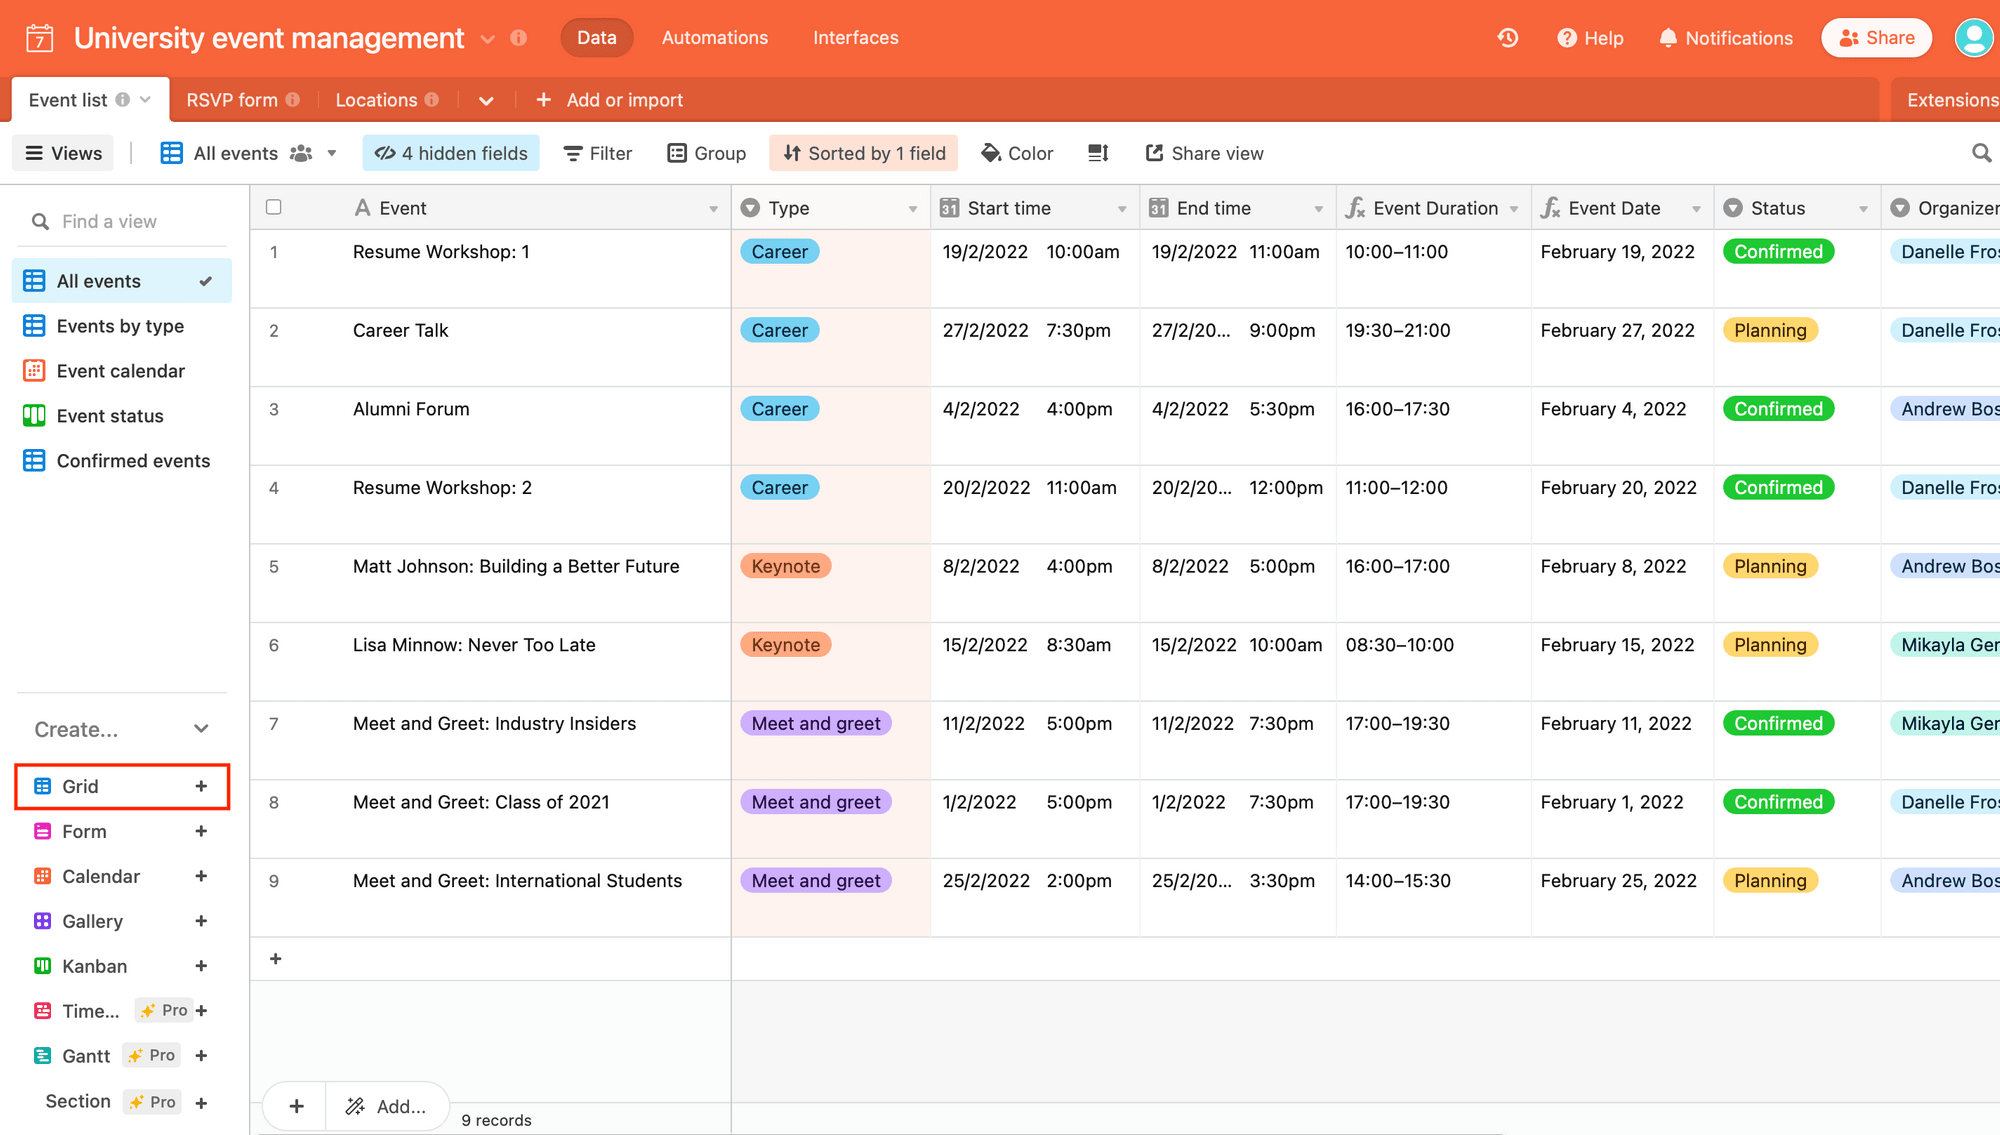
Step 1. Prepare an Event Management Table
To build an event management database on Airtable, log into your account and create a new base. You can also start with one of Airtable’s pre-designed templates, such as the University Event Management one we will be modifying in this tutorial.
Here are some fields you’ll need for event cover image generation:
- Event Name
- Photo
- Type
- Event Date
- Event Duration
- Status
- Organizer
- Location
- Cover Photo URL
You can add more fields for additional event details.
Consider adding more functionality to your Airtable base with tables for RSVP forms, event locations, and host information as well.
Bear Tip 🐻: Airtable does not currently have a field type for time ranges, so if you’d like to produce it from dated Start Time and End Time fields, use the formula
CONCATENATE(MID({Start time}, 12, 5), "–", MID({End time}, 12, 5))for Event Duration andDATETIME_FORMAT((MID({Start time}, 1, 10)),'LL')for Event Date.
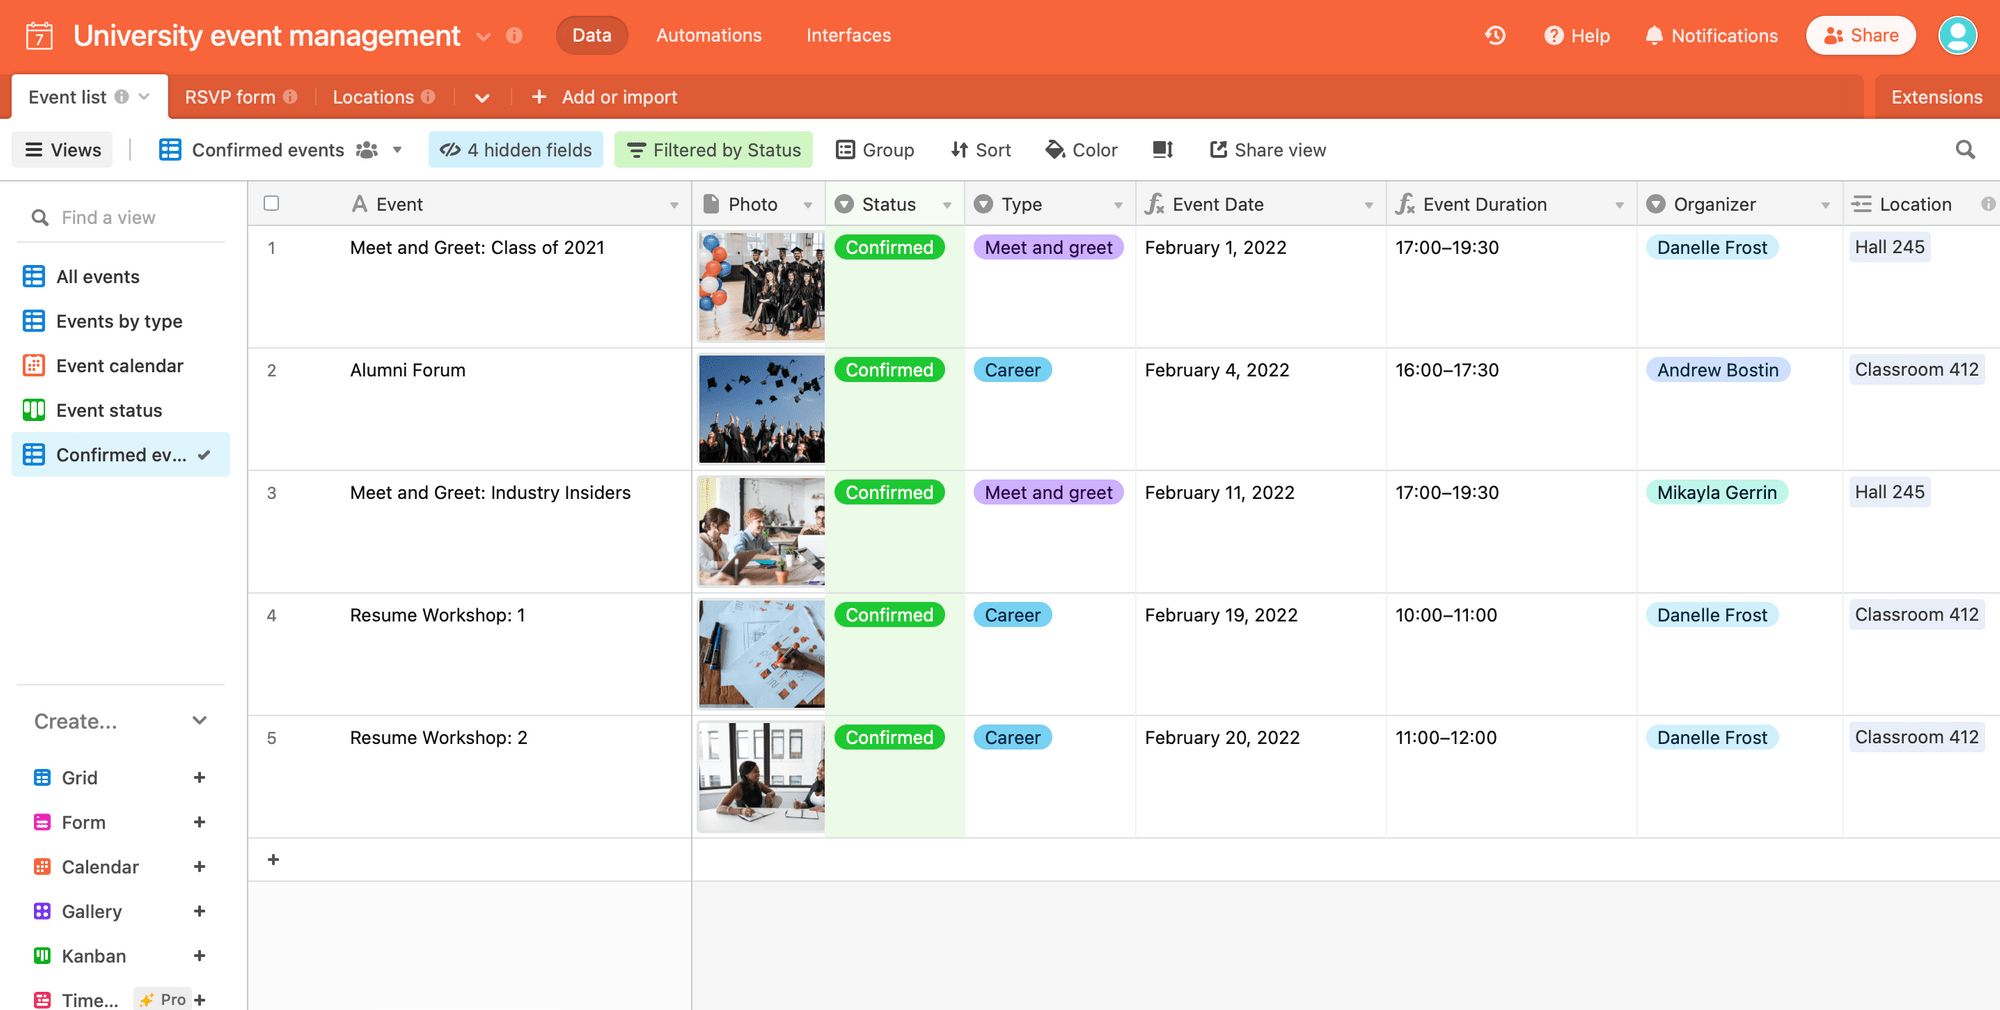
Step 2. Add a View for Confirmed Events
Now that your full table is ready, you’ll need a separate view that only shows confirmed events. It will also act as a trigger for cover image generation.
From your Airtable base, click the “+” button next to “Grid” on the bottom left sidebar.
Name it “Confirmed events,” then add one filter: Where Status is confirmed.
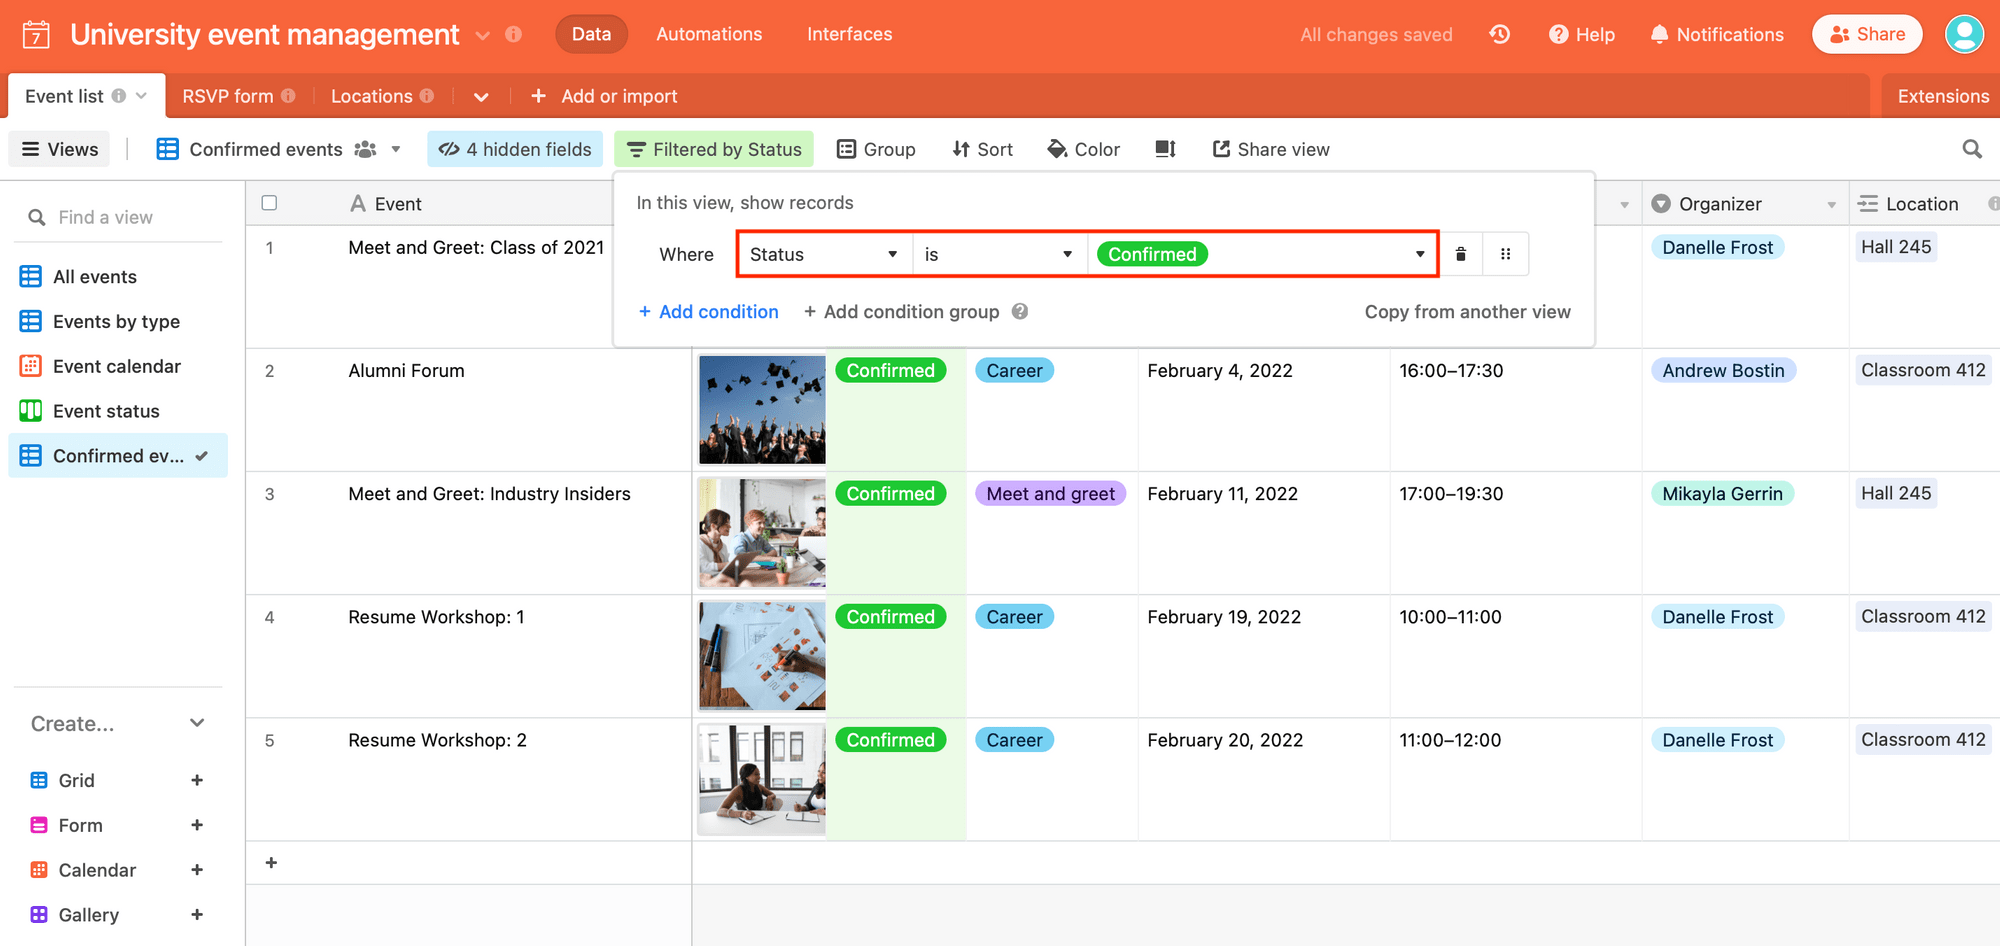
You should now see only confirmed events in this view.
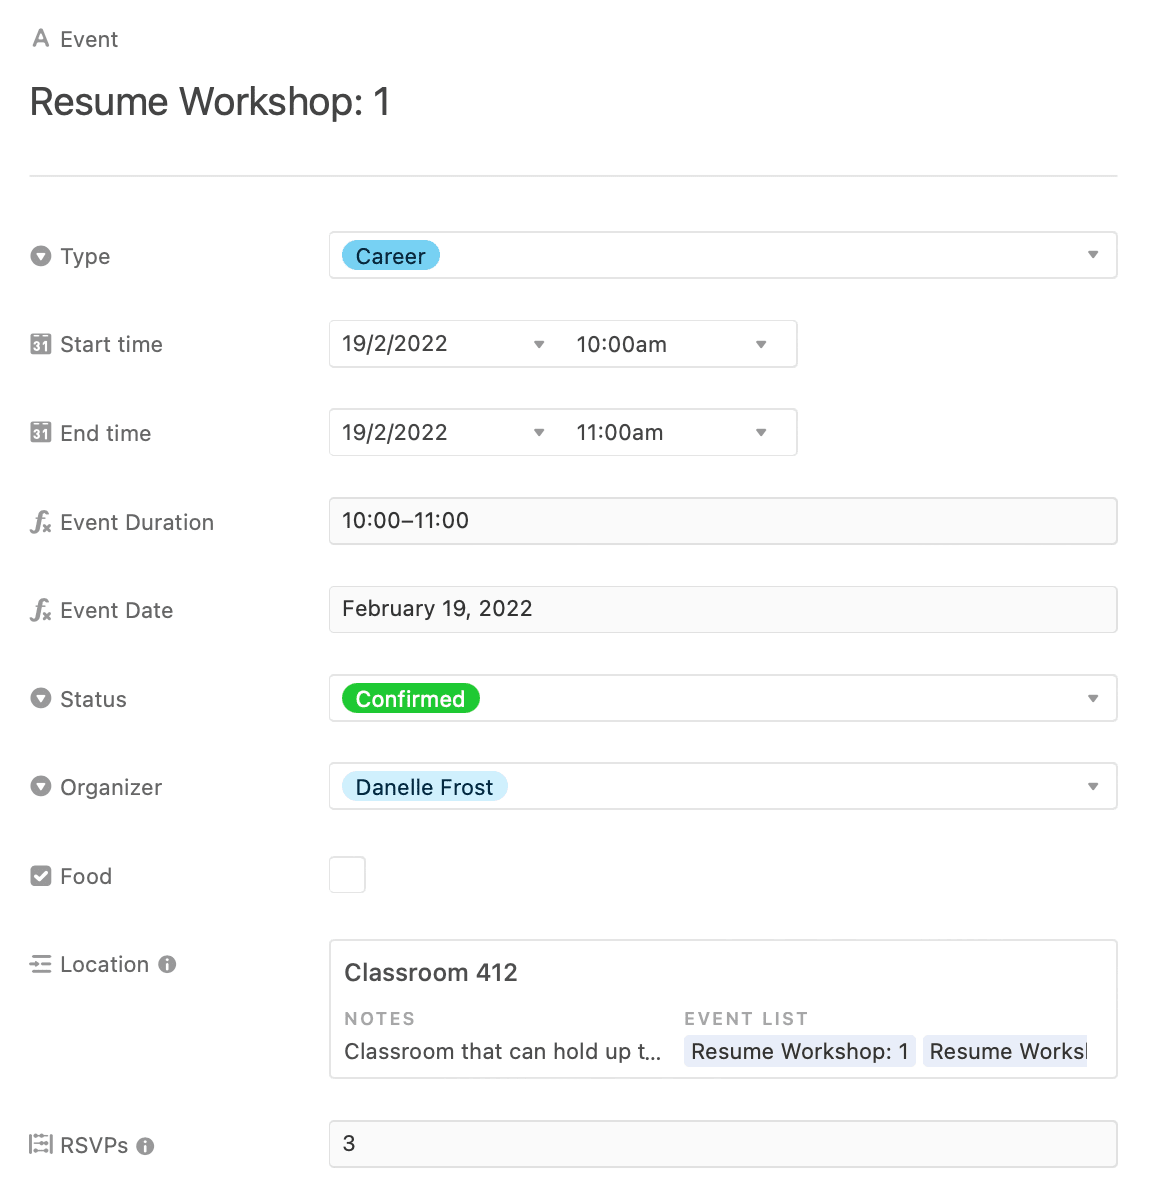
Step 3. Populate a Record for Testing
Zapier will need a populated record to test your zap, so create a confirmed event.
Once you’ve verified the record can be seen in the “Confirmed events” view, move on to the next step.
Set up a Zap to Generate and Store Event Cover Photos
While setting up an event ad can’t (and shouldn’t) be fully hands-off, image generation can save event coordinators and brand managers a lot of time while ensuring they produce beautiful, effective assets.
One zap can generate your event cover image and store it for when you’re ready to prepare an ad. From your Zapier dashboard, click “+ Create Zap” and set up the following events:
Trigger: New Record in Airtable
Choose Airtable as the app and “New Record” as the event. If you haven’t connected Airtable yet, you will be prompted to do so using the API key found on your Account page.
Set up the trigger by choosing the right base and table. Limit to view only confirmed events.
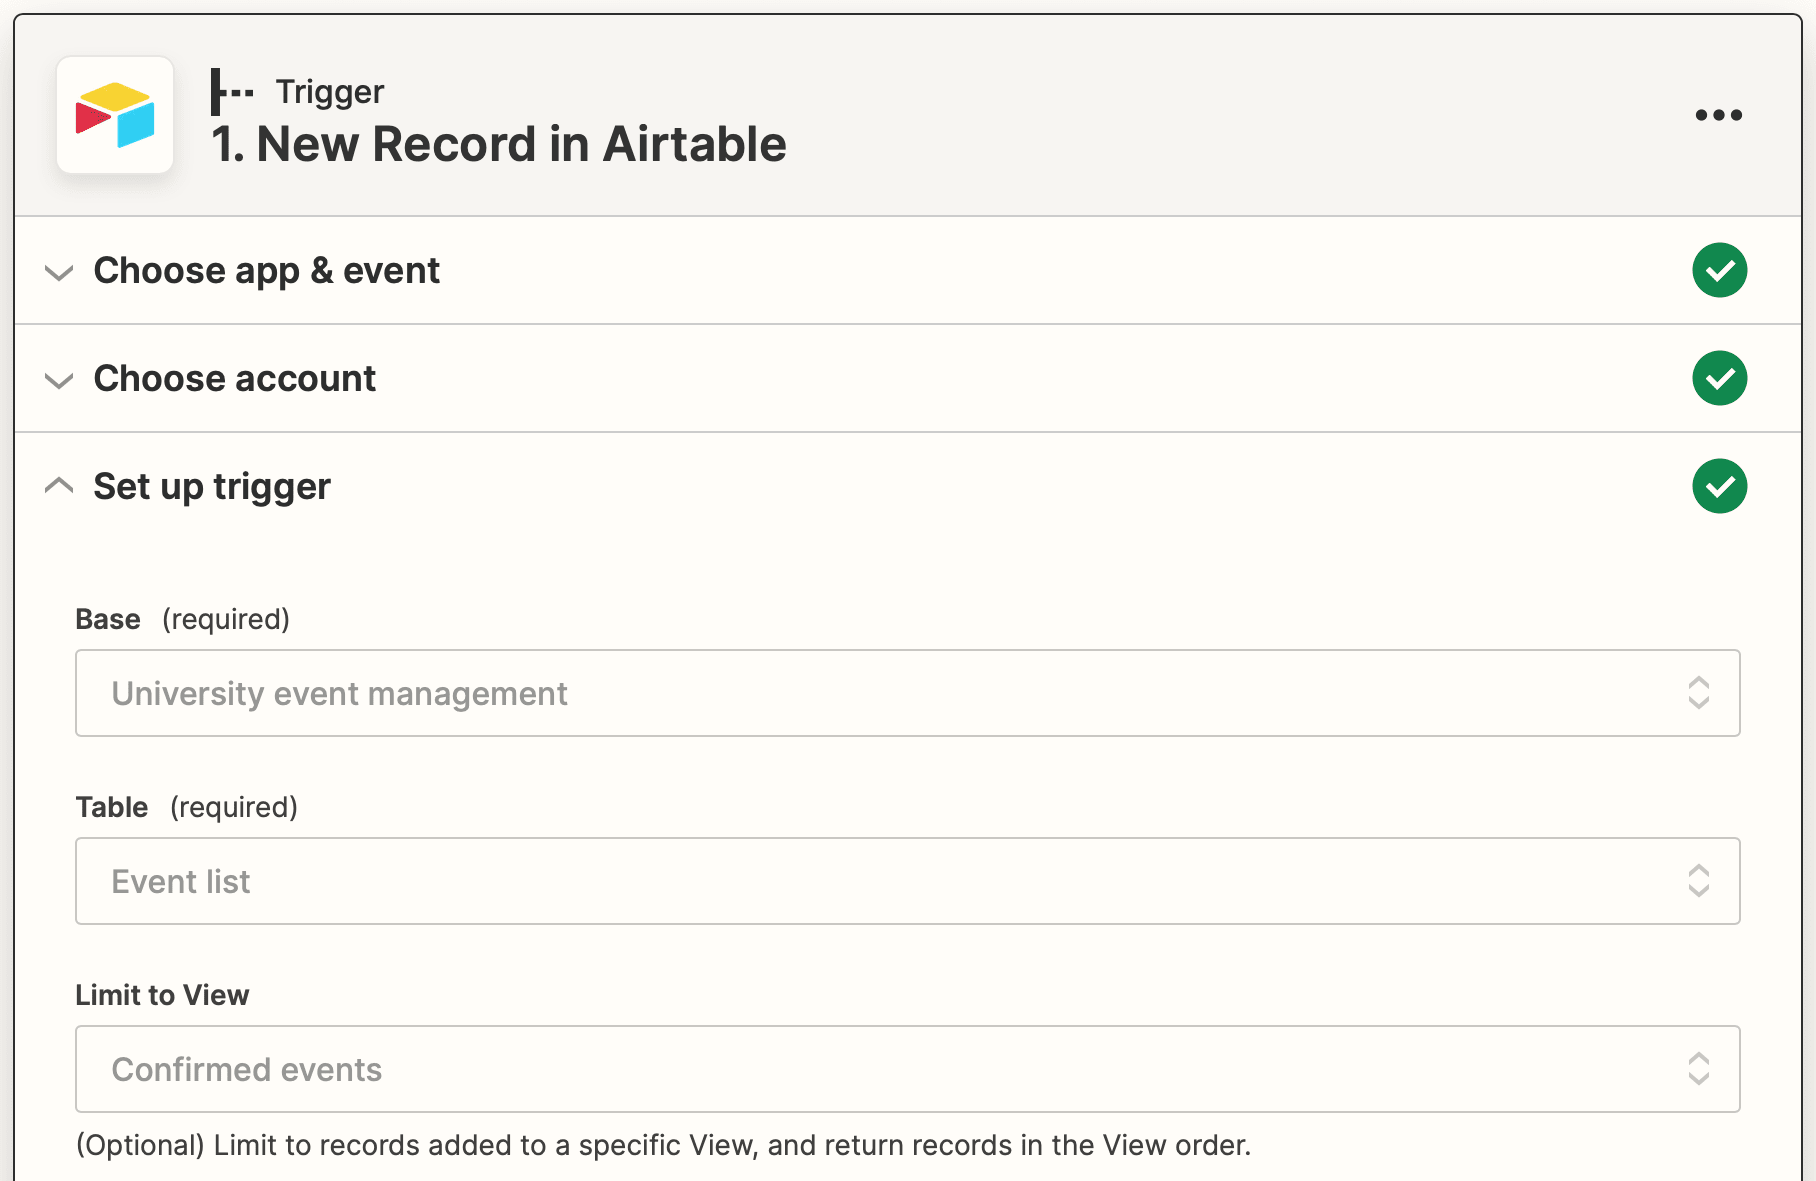
Test the trigger, then continue.
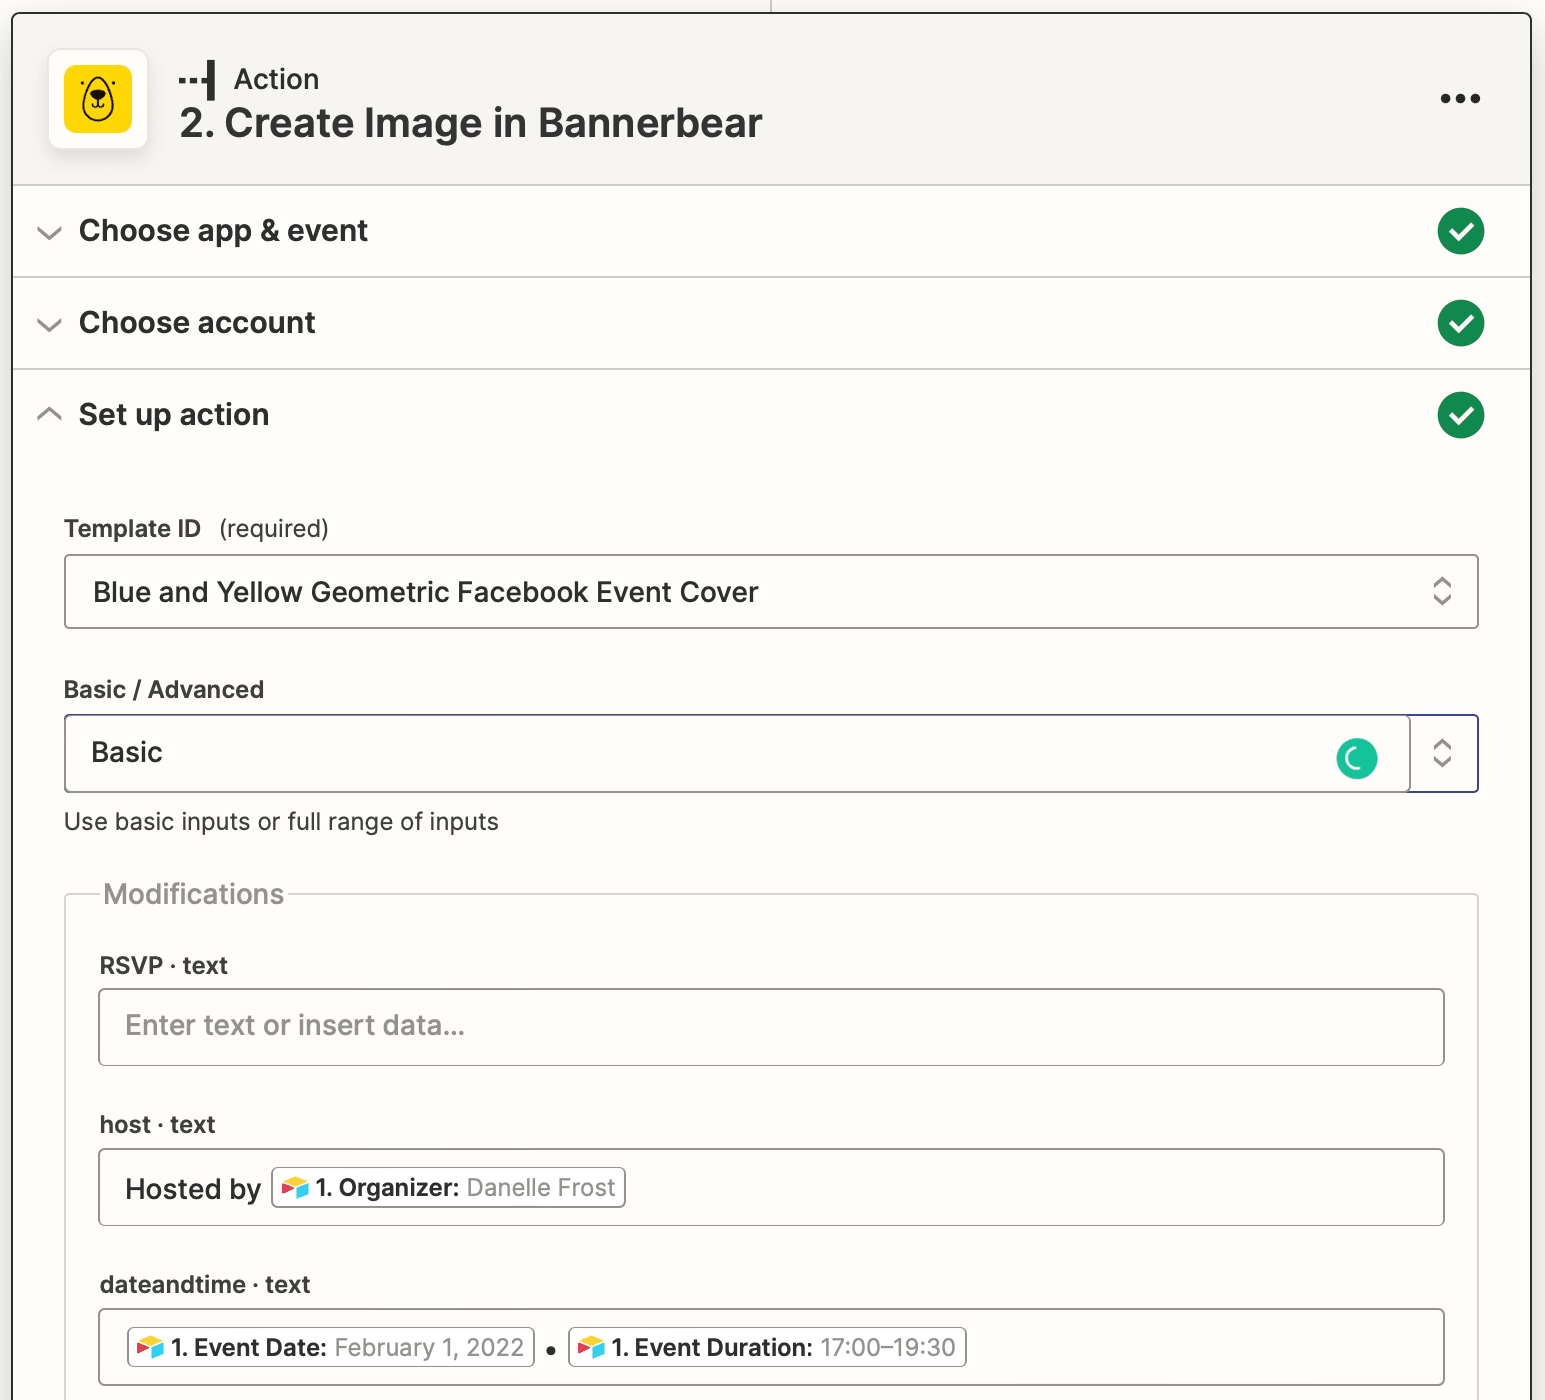
Create Image in Bannerbear
Choose Bannerbear as the app and “Create Image” as the event. You will need to connect your account using the key found by clicking the “Settings / API Key” button of the corresponding project of the Bannerbear app.
Set up the action by choosing the right template, then mapping all of your event details to their corresponding template fields.
If you’d like to save the image URL to Airtable, insert the record’s Airtable ID in the metadata field.
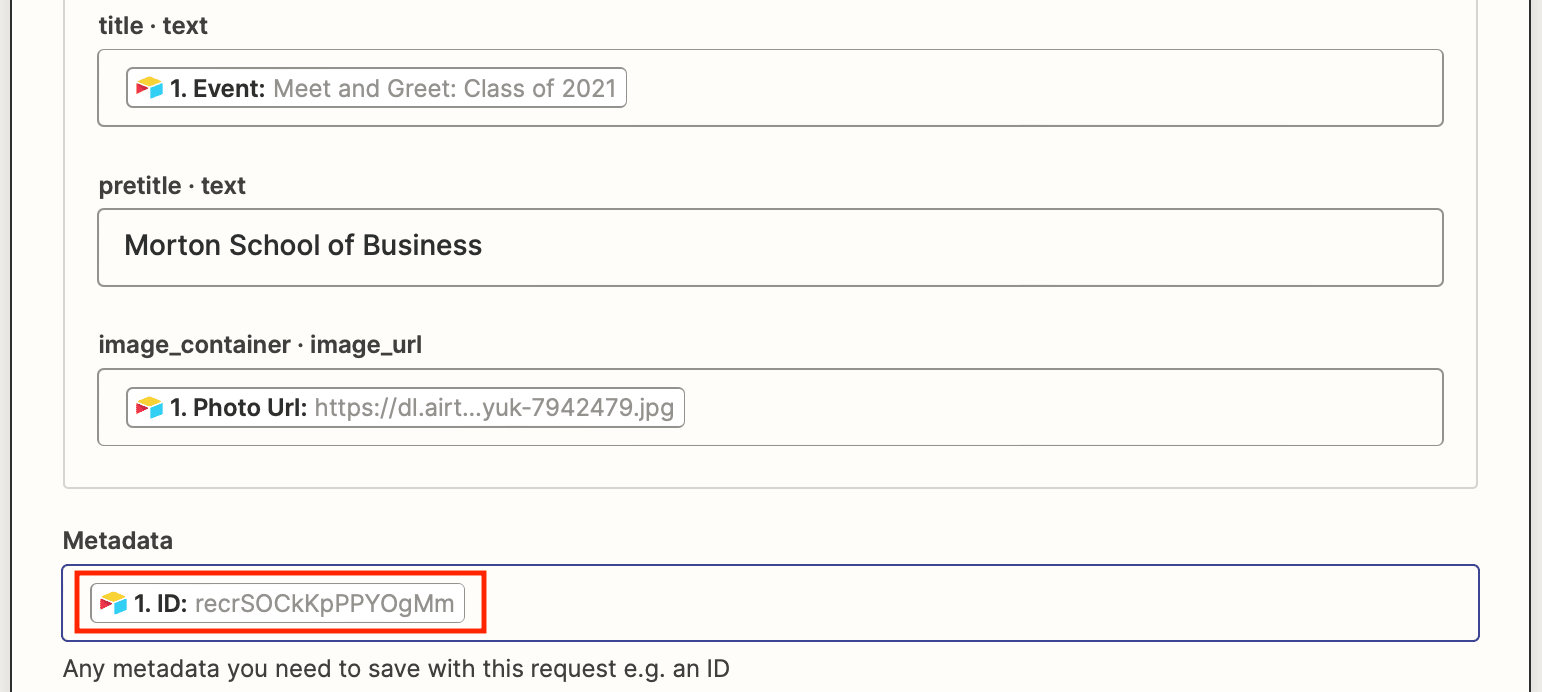
Test the action, then continue.
Action: Update Record in Airtable
Choose Airtable as the app and “Update Record” as the action.
Set up the action by inserting the Airtable ID in the Record field, then mapping the generated image URL to the corresponding cell.
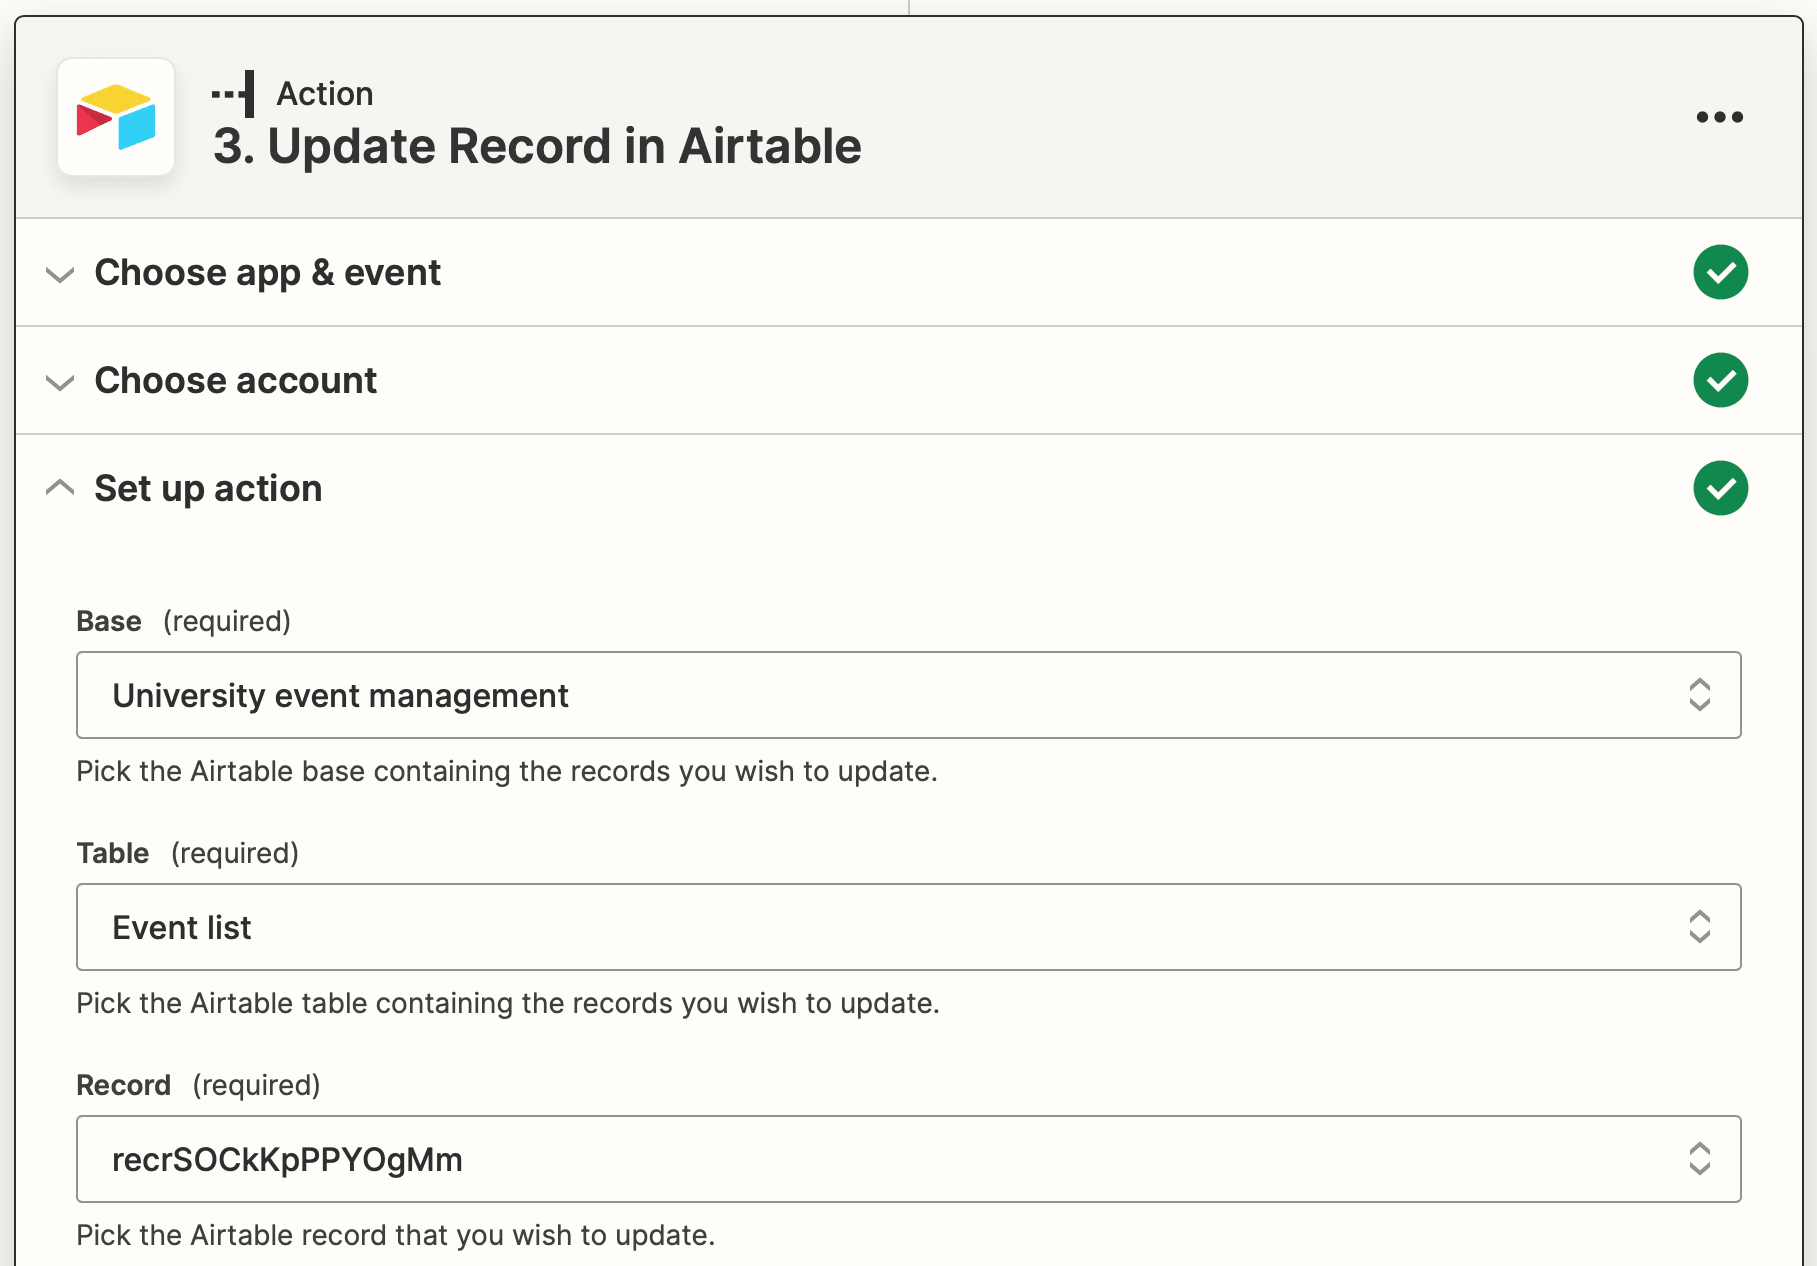
Test the action, then continue.
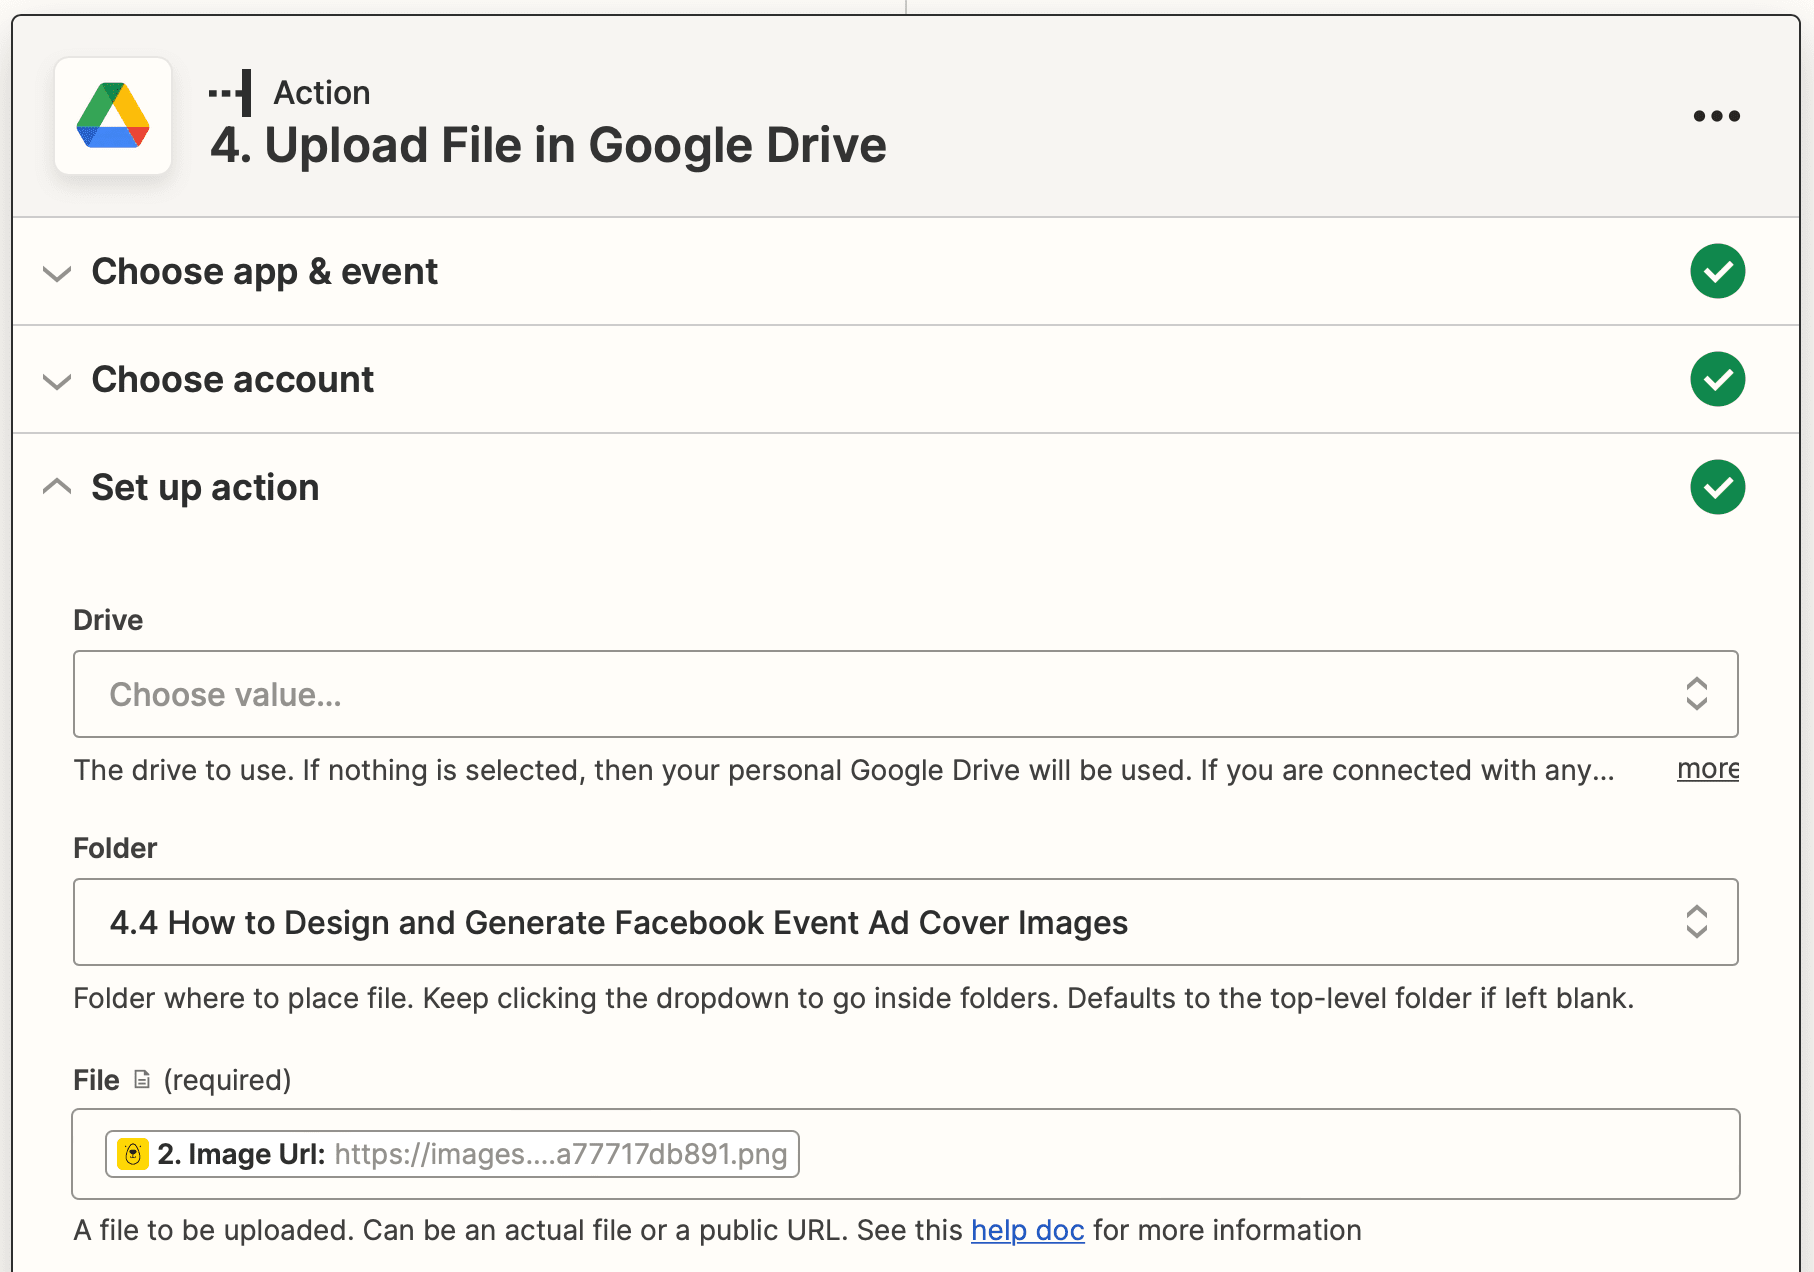
Action: Upload File in Google Drive
The last action uploads your image to a pre-specified Google Drive folder, making it easy for you to locate when setting up an ad.
Choose Google Drive as the app and “Upload File” as the event. If you haven’t connected Google Drive yet, you will be prompted to do so by logging in.
Set up the action by choosing the drive and folder you want to save your image in. Then, insert the generated image URL in the File field.
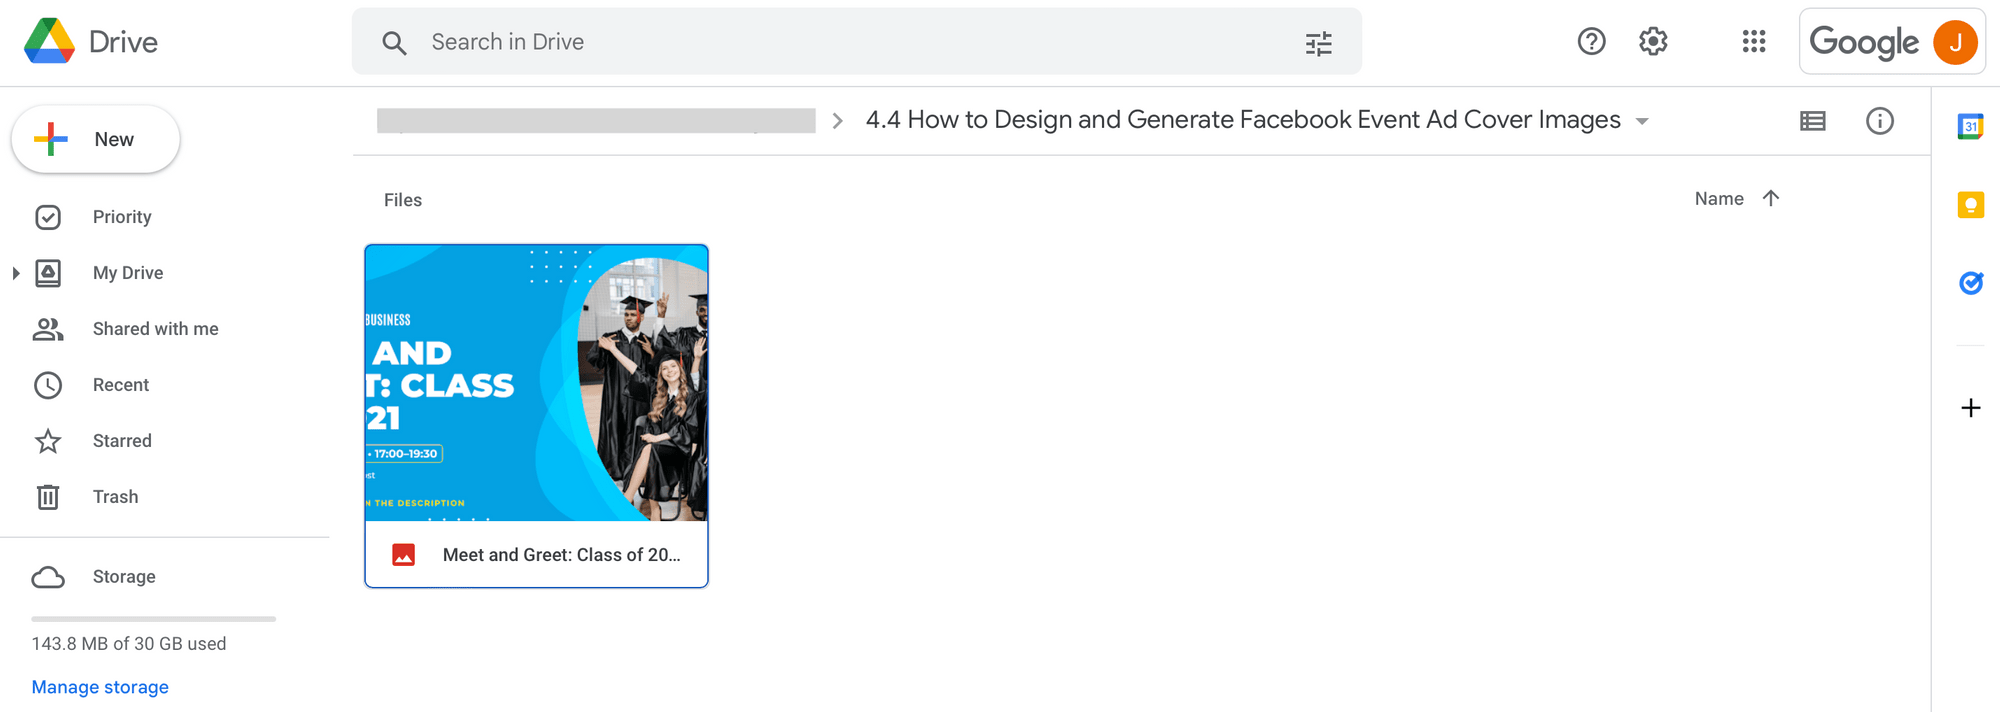
Test the action. You should see a completed event cover image upload itself to your chosen folder:
And that’s it! Add any other storage or distribution steps according to your needs, then publish your zap.
Now, any events with confirmed details will automatically have a cover image generated and stored. You'll simply have to retrieve it and create an event ad from Facebook's Ads Manager when you're ready.
Bear Tip 🐻: Need to advertise the same event on another platform? Create a second template with different dimensions (but the same fields), then use Bannerbear’s Collections feature to generate multiple images at once! An additional Zapier action can then publish it on another platform or print it for physical distribution.
Spend Less Time Setting up Event Ads
Getting the word out about your event can be time-consuming, but it’s a crucial part of ensuring it has a good turnout. Whether you’re a SaaS company advertising regular webinars or an event coordinator juggling several clients at the same time, using tools to auto-generate advertising assets is incredibly helpful.
And if you’d if you’d like to create more visual assets for your events, check out a few of our other code-free tutorials:
👉 How to Turn Your Recent Instagram Photos into a Video or GIF
👉 How to Automatically Send Personalized Webinar Packets to Attendees
👉 How to Automatically Turn Liked Tweets into LinkedIn Carousel Images (No Code)
