
How to Turn Your Recent Instagram Photos into a Video or GIF
Contents
Posting photos on Instagram is a great way to develop brand awareness and build excitement about new products and services. As a platform with over 1.15 billion active monthly users, 90% of which follow at least 1 business account, Instagram’s power can’t be underestimated.
But photos alone won’t cut it. Video is an increasingly popular format, with 81% of social media users reporting they prefer it over other content types.
Short-form video, in particular, is an excellent way to increase exposure to new audiences. Instagram and competitors like TikTok recommend content to users based on the people they follow, the content they interact with, and their location.
The problem with video is that creating this content can take a lot of time. With social media platforms’ unceasing emphasis on frequent and consistent publishing of this content type, it’s easy for brands to struggle to keep up.
Fortunately, there’s a way to repurpose your existing content—photos—by turning them into videos or GIFs. This will give you some extra content to reach new audiences, presented in a fresh way.
In this tutorial, we’ll be using nocode tools to automatically turn your existing Instagram media into videos or GIFs that can then be published as Stories or Reels.
What You Will Create
Static images are an integral part of a brand’s overall identity and marketing strategy, but GIFs and videos command more attention. Repurposing the same material for different types of content can also round out your publishing calendar and make the most of your marketing dollars.
With a video generation API, you can automate turning photos you already have into something more dynamic. Here’s what you’ll need to do it without code:
- Bannerbear : To design and generate videos and animated GIFs
- Google Sheets : To store and sort recent Instagram media
- Zapier : To trigger actions in different programs and manipulate data into the most suitable format
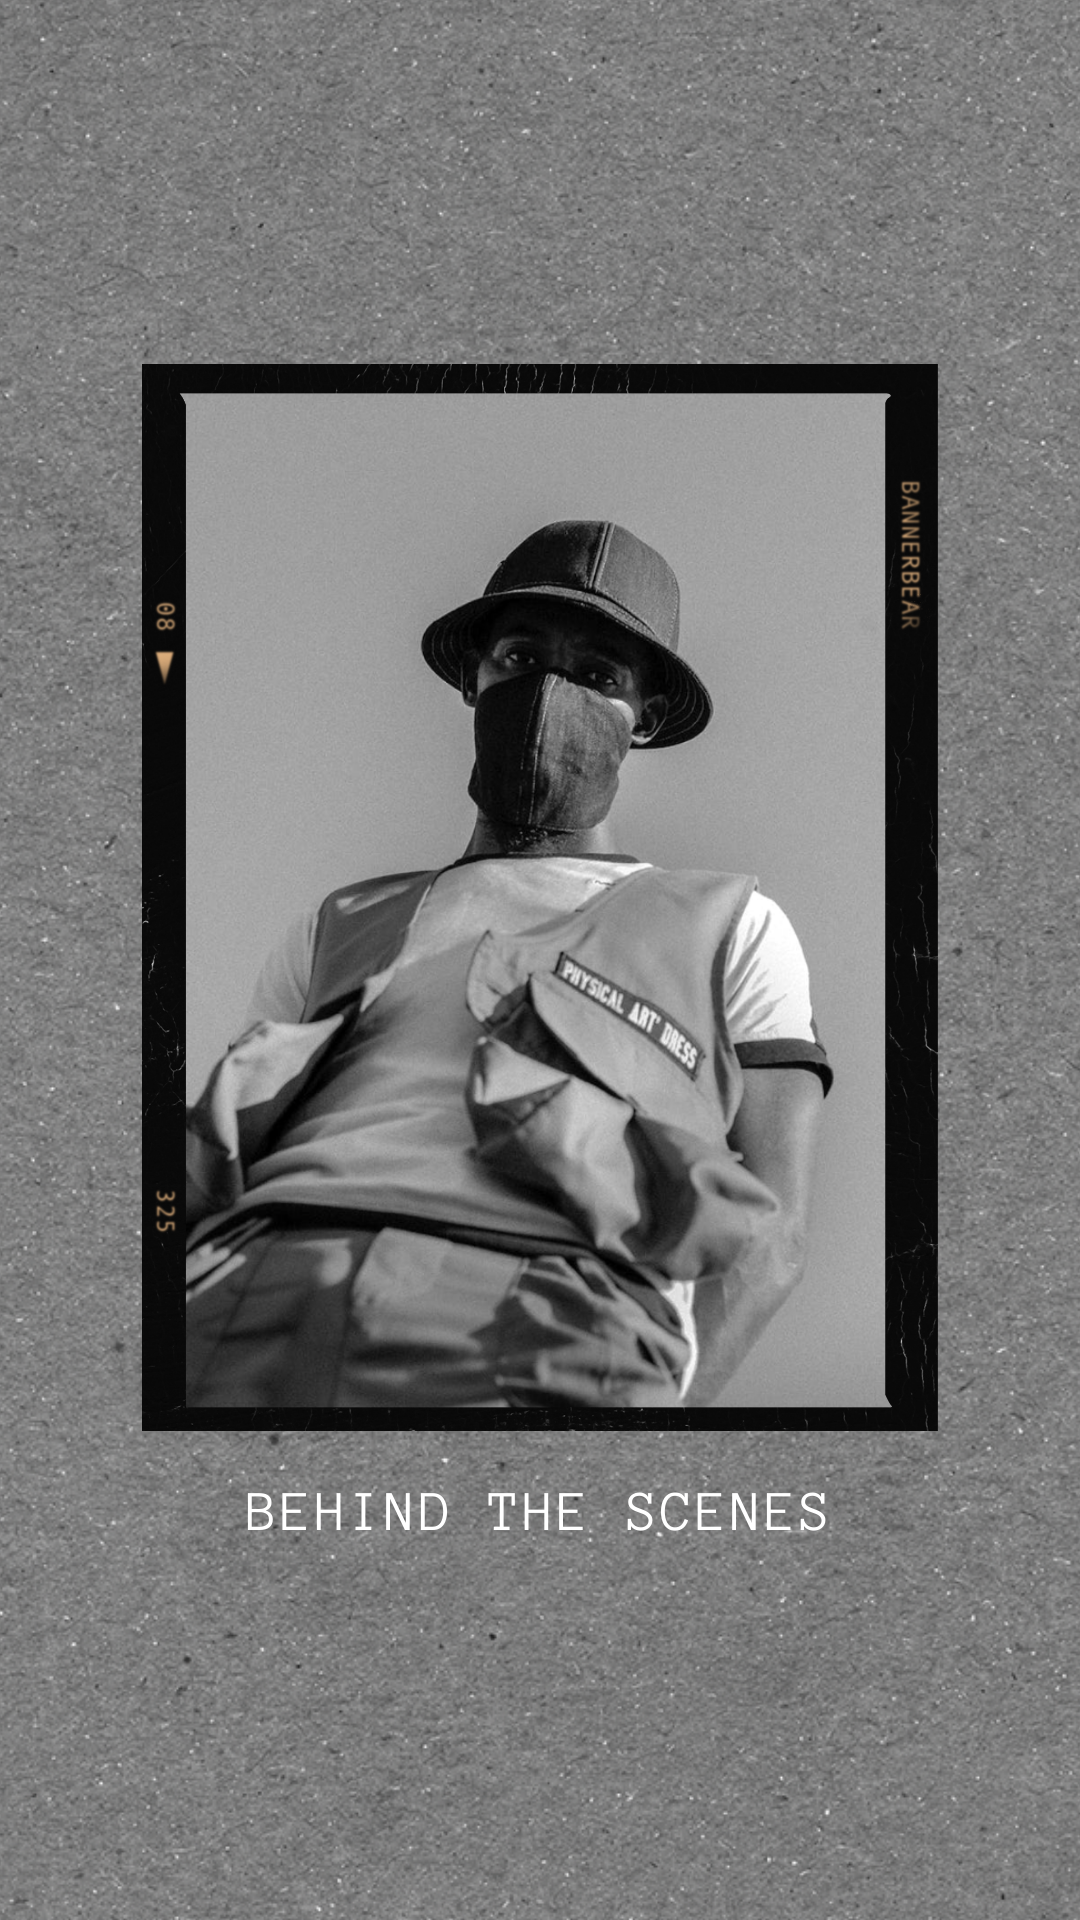
By the end of the tutorial, you should be able to produce a GIF that looks like this:

Or a video that looks like this:
Before we jump into the steps, let’s address the differences between the media formats you can produce.
Deciding between a Video and an Animated GIF
Bannerbear’s Video Generation API gives you several different media types to choose from, each one suitable for a range of applications.
Animated GIF : An animated GIF is a simple looping slideshow that can be further customized with a design template, different frame frequencies, and number of loops. Its quick, content-focused characteristics make it a great fit for sharing behind-the-scenes shots as an Instagram Reel or social media ad campaign.
Video : A video is a clip produced using a design template that you can customize with dynamic elements such as text, photos, videos and shapes. Its customizability makes it suitable for practically everything, including Stories, Reels, Ads, and even the front page of your website.
Bear Tip 🐻: One more media format to consider is Movie, which allows you to join video clips and static images together in sequence. Further customization options include transitions between clips and soundtracks.
❗ Note : Bannerbear’s Video format currently cannot accept multiple inputs, so it is most suitable for use cases that involve a single photo or video clip. It can also be combined with Movie to create more complex clips with transitions and audio.
Once you’ve chosen which media format you’ll be using, it’s time to set up the automation.
Customize Your Bannerbear Template
Log into your Bannerbear account, clicking the Projects tab to create a new set of designs. You can start with a blank canvas or try one of our templates:
Keep in mind that the size of the design will depend on your intended use case, so make the necessary modifications.
Creating an Animated GIF Template
An Animated GIF is generated just like an Image, with inputs (in this case, Instagram media URLs) going directly into a dynamic image container. No additional actions are needed to prepare the template for use.
Creating a Video Template
A Video requires an overlay container, so it must be prepared as a Video Template. To do this, open your prepared template in the Editor, then toggle the “Video Placeholder” option on the left sidebar. Resize as needed.
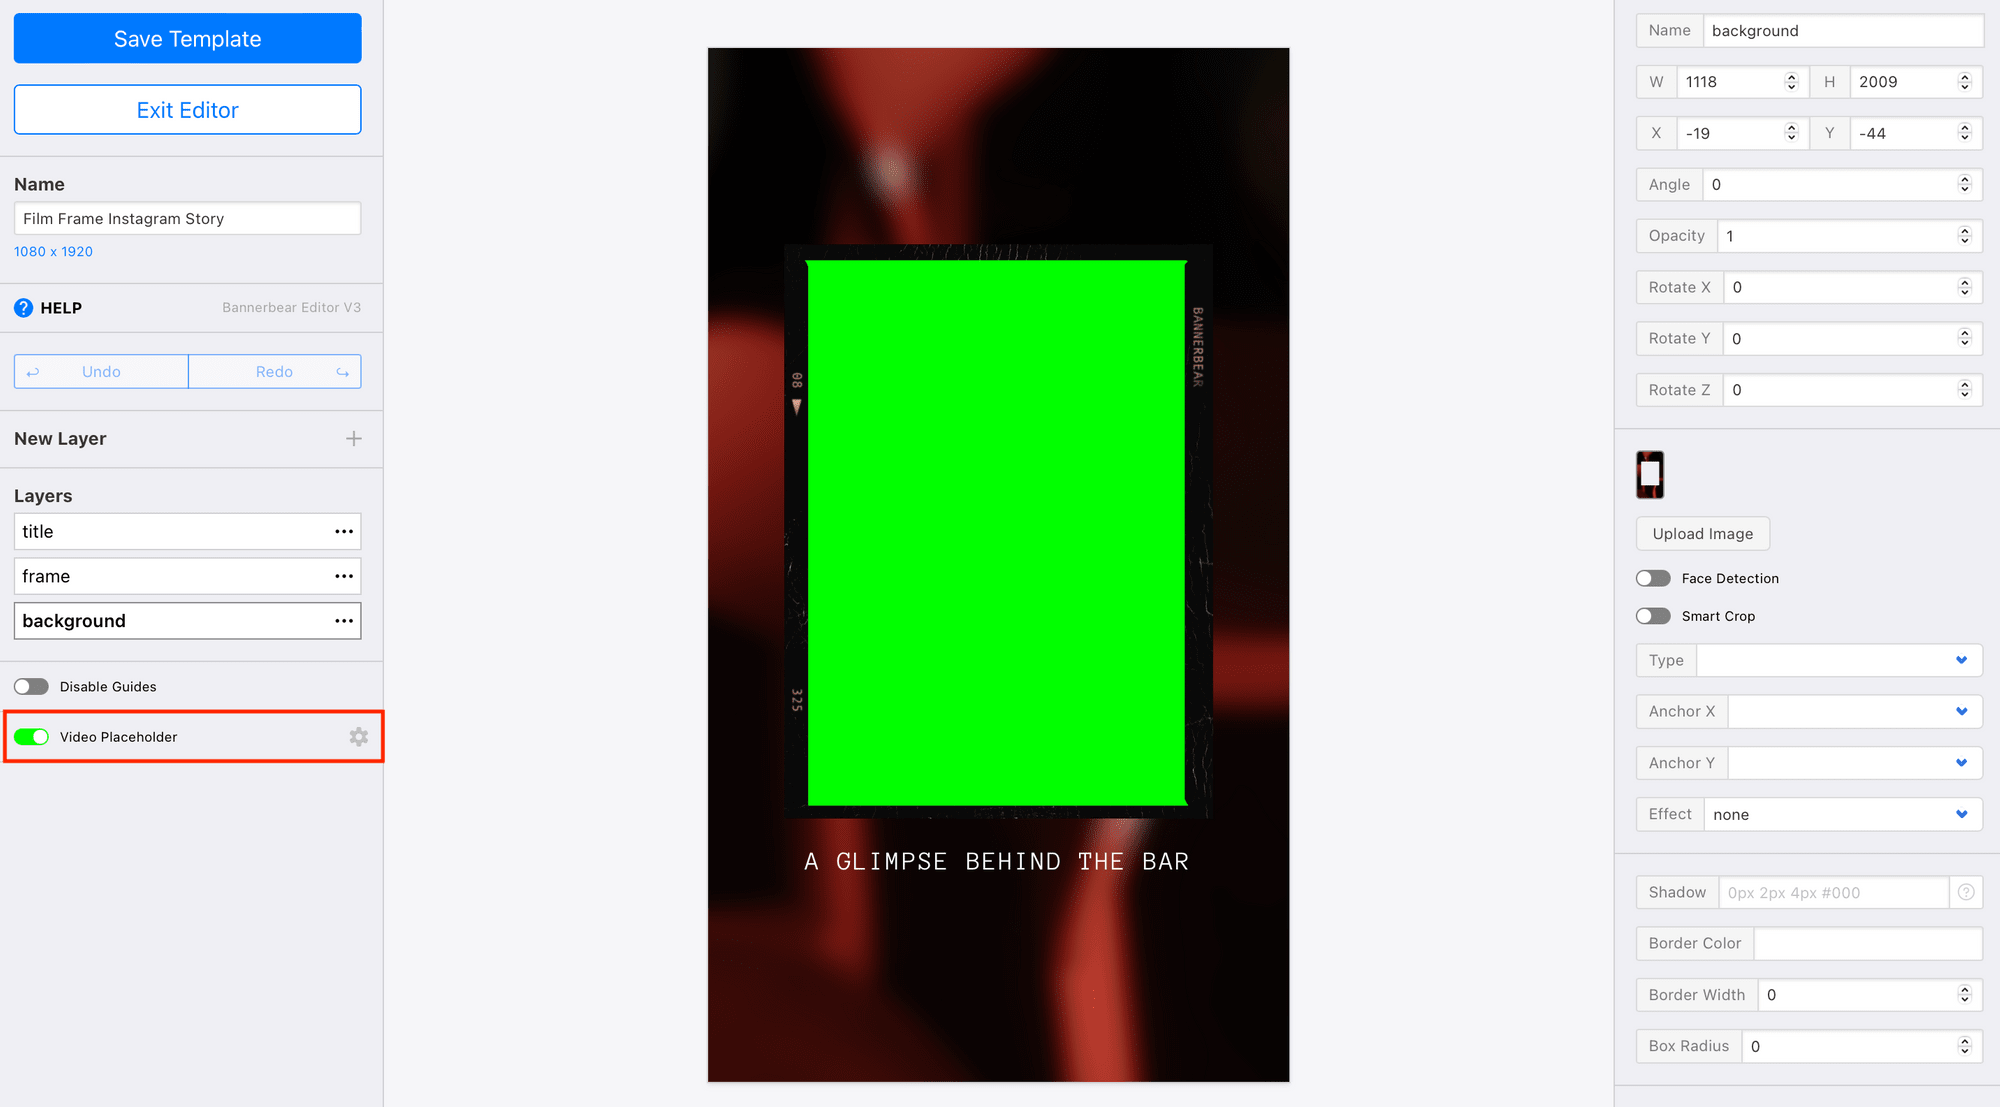
❗ Note : The video placeholder cannot be layered on top of other elements. If you have a background image, it will need to be cropped around the placeholder for the dynamic content to show up properly.
When your template has a video placeholder, return to your project’s page and click “Create a Video Template.” Select the template, then choose “Overlay” as the Build Pack.
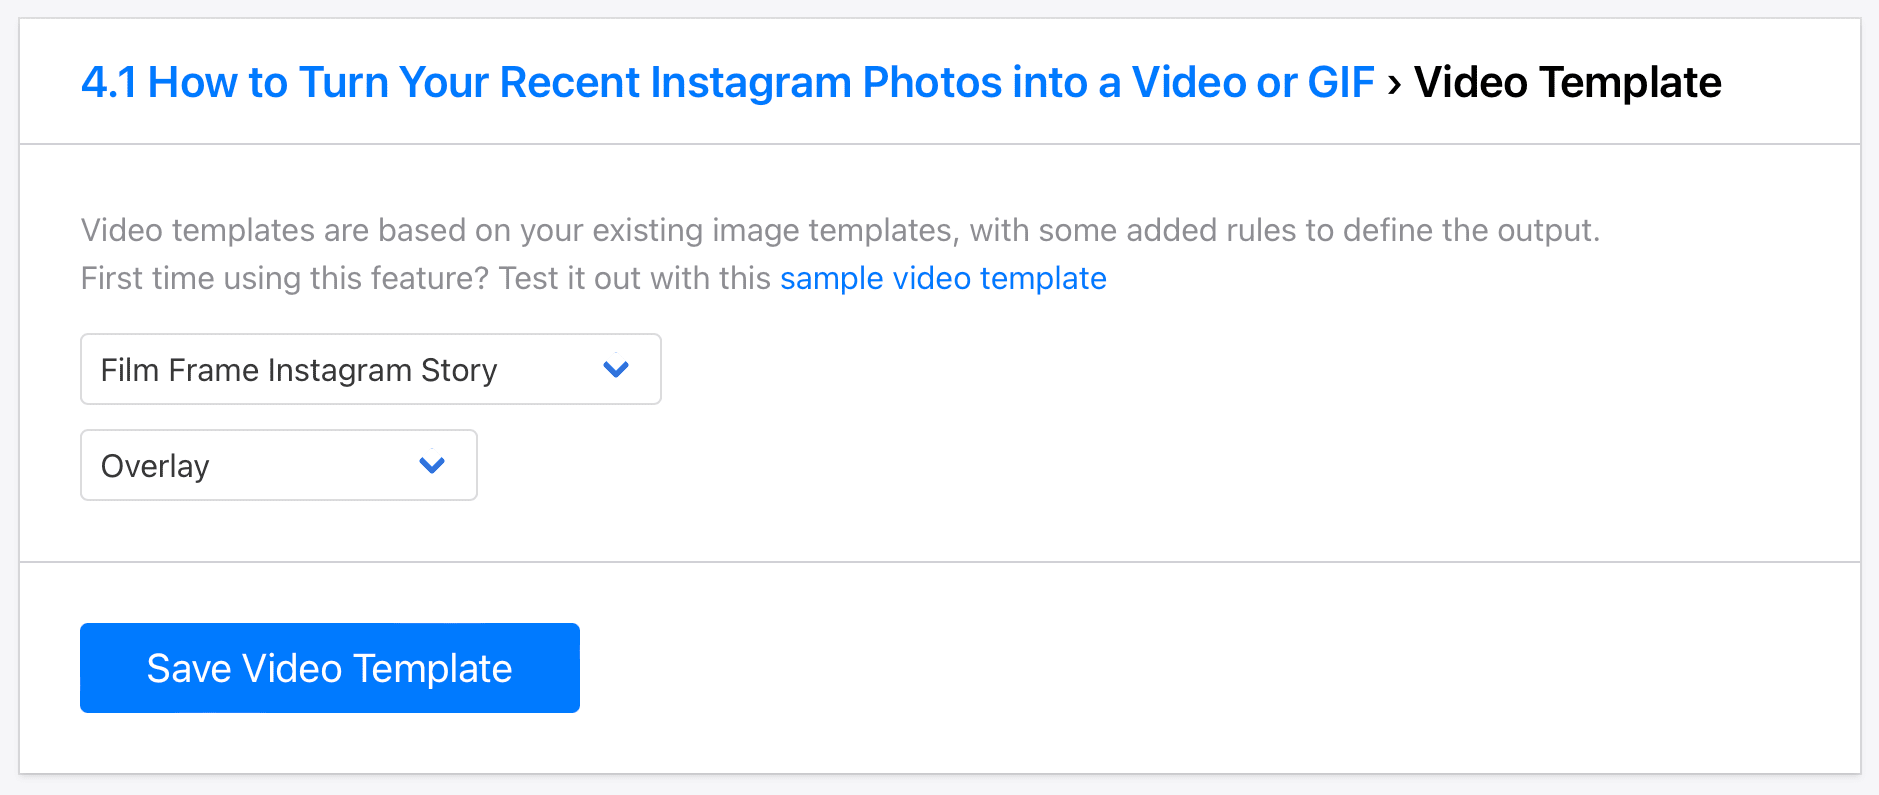
Click “Save Video Template.”
Bear Tip 🐻: Here’s a modified version of the Film Frame Instagram template with a video container already created.
Create a Google Sheets File to Store and Sort Instagram Media
We will use a simple Google Sheets file to store Instagram media URLs and sort for the most recent.
Step 1. Create a Worksheet for All Media
Create a new spreadsheet, and give it a suitable name. Name your first table “All Media” and populate cells A1 and B1 with two primary headers: Image URL and Timestamp.
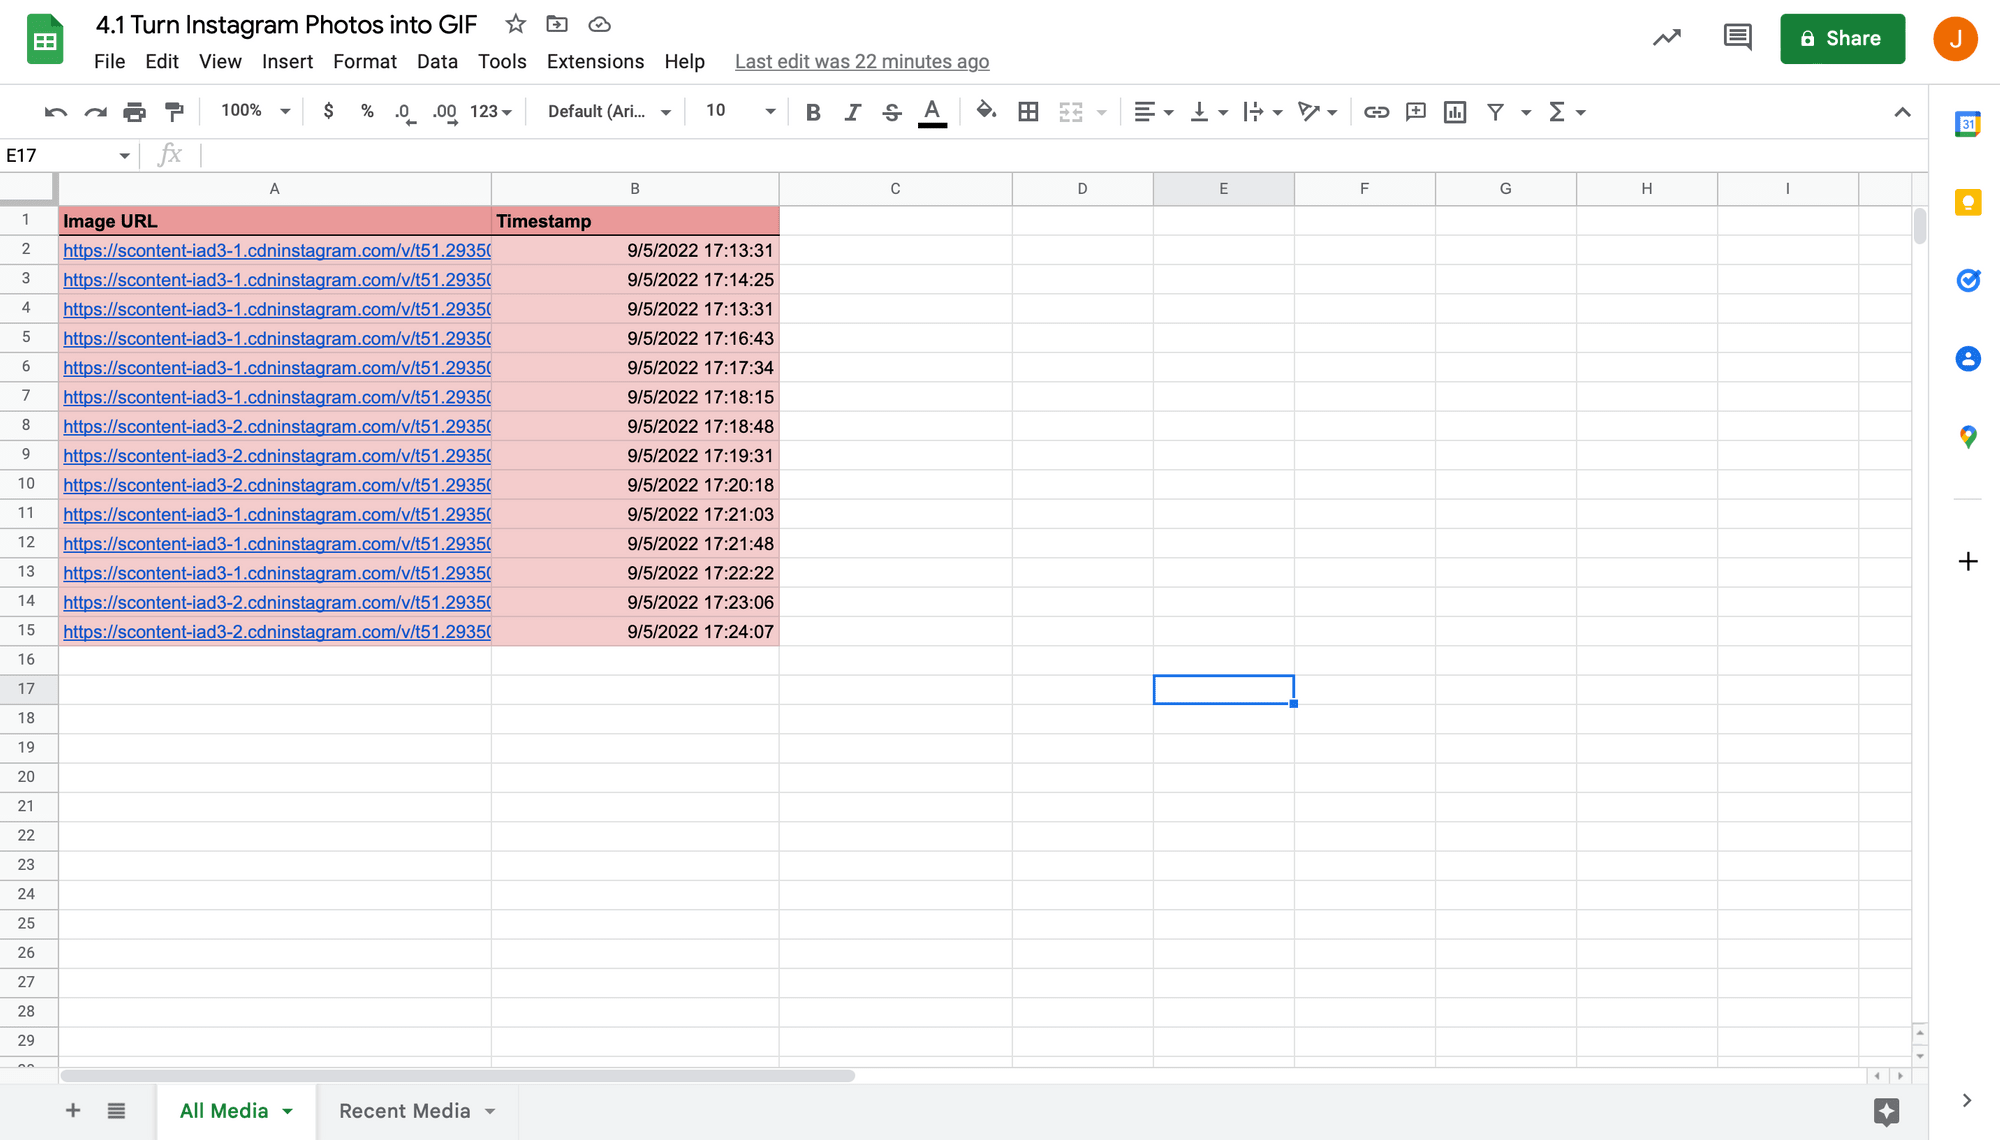
You will need to populate the table with dummy data in order to test your zap. The easiest way to do this is to insert temporary image URLs and hypothetical timestamps, but you can also manually test your trigger on Zapier later on to send real Instagram photos to the sheet.
Step 2. Create a Worksheet for Recent Media
Duplicate your first sheet, naming the second “Recent Media.” The two will look identical, so make visual modifications if you would like to tell them apart more easily.
We will apply a SORTN function to filter for only the 10 most recent image URLs.
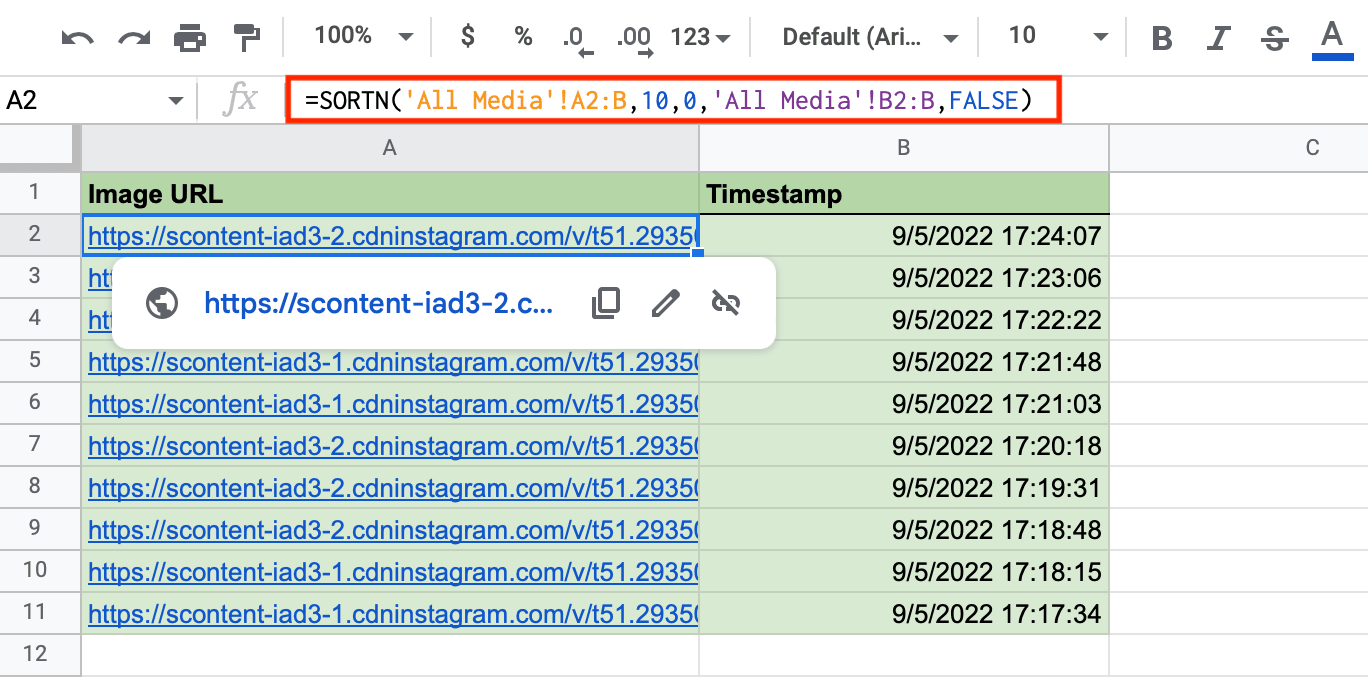
In cell A2, insert the following in the formula field: =SORTN('All Media'!A2:B,10,0,'All Media'!B2:B,FALSE)
This is according to the syntax: SORTN(range, [n], [display_ties_mode], [sort_column1], [is_ascending1],…).
Make modifications to the formula if your Sheet is laid out differently or your template contains a different number of images.
Use dummy data to ensure the filter works, then proceed to setting up your zaps.
Set up a Zap to Send Instagram Media to Sheets
For this tutorial, we will use two separate zaps: one for sending new media Instagram to Google Sheets and another for generating a GIF or video.
Log into your Zapier account, then click “+ Create Zap” and set up the following trigger and actions:
Trigger: New Media Posted in My Account on Instagram
Choose Instagram as the app and “New Media Posted in My Account” as the event.
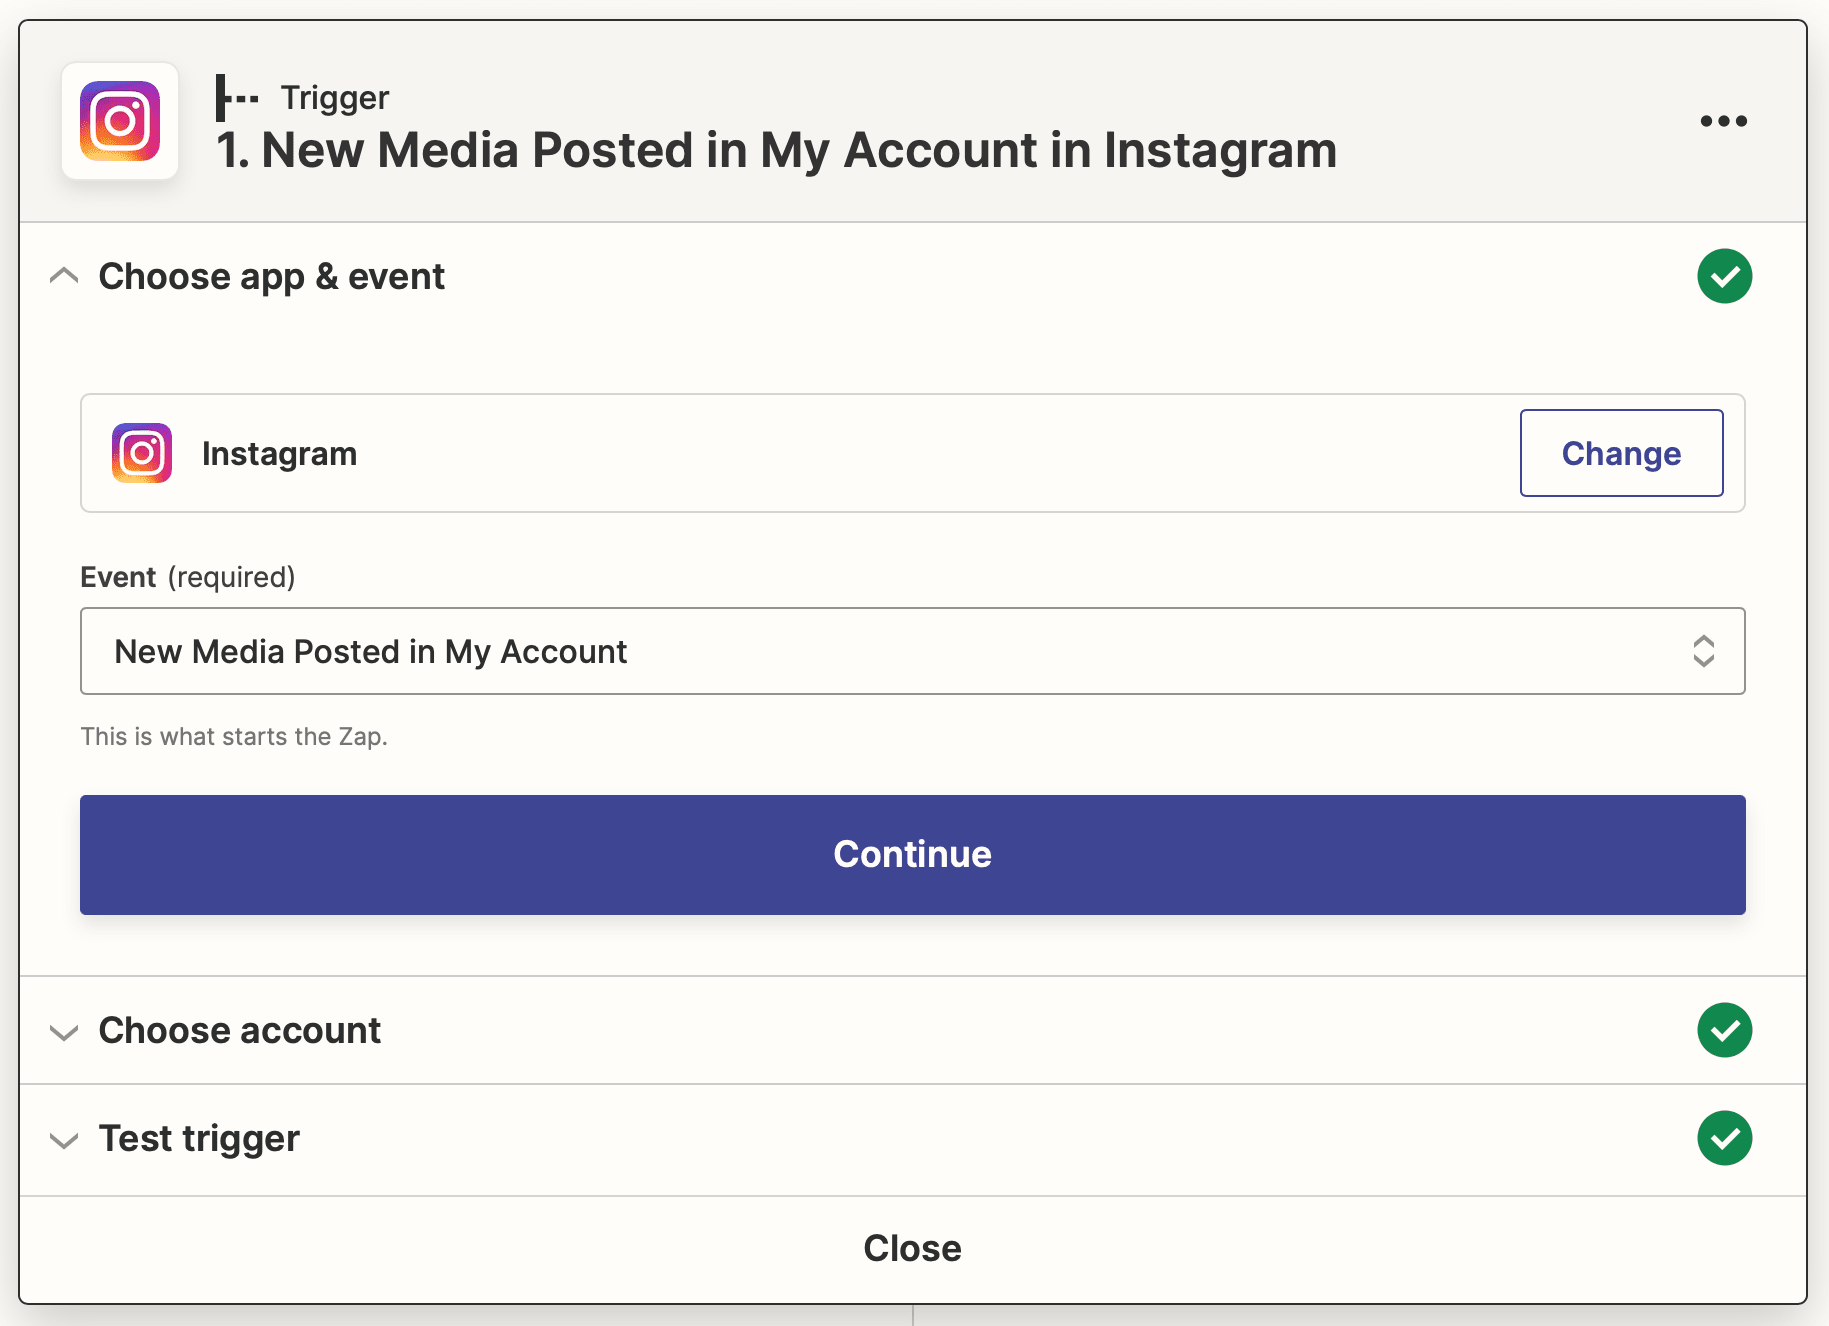
If your Instagram account has not been connected, you might be prompted to log in. After choosing the right account, test the trigger.
Action: Create Spreadsheet Row in Google Sheets
Choose Google Sheets as the app and “Create Spreadsheet Row” as the event. If your Sheets account has not been connected to Zapier yet, you will be prompted to log in.
Set up the action by choosing the correct worksheet, then mapping the input data under their corresponding headers.
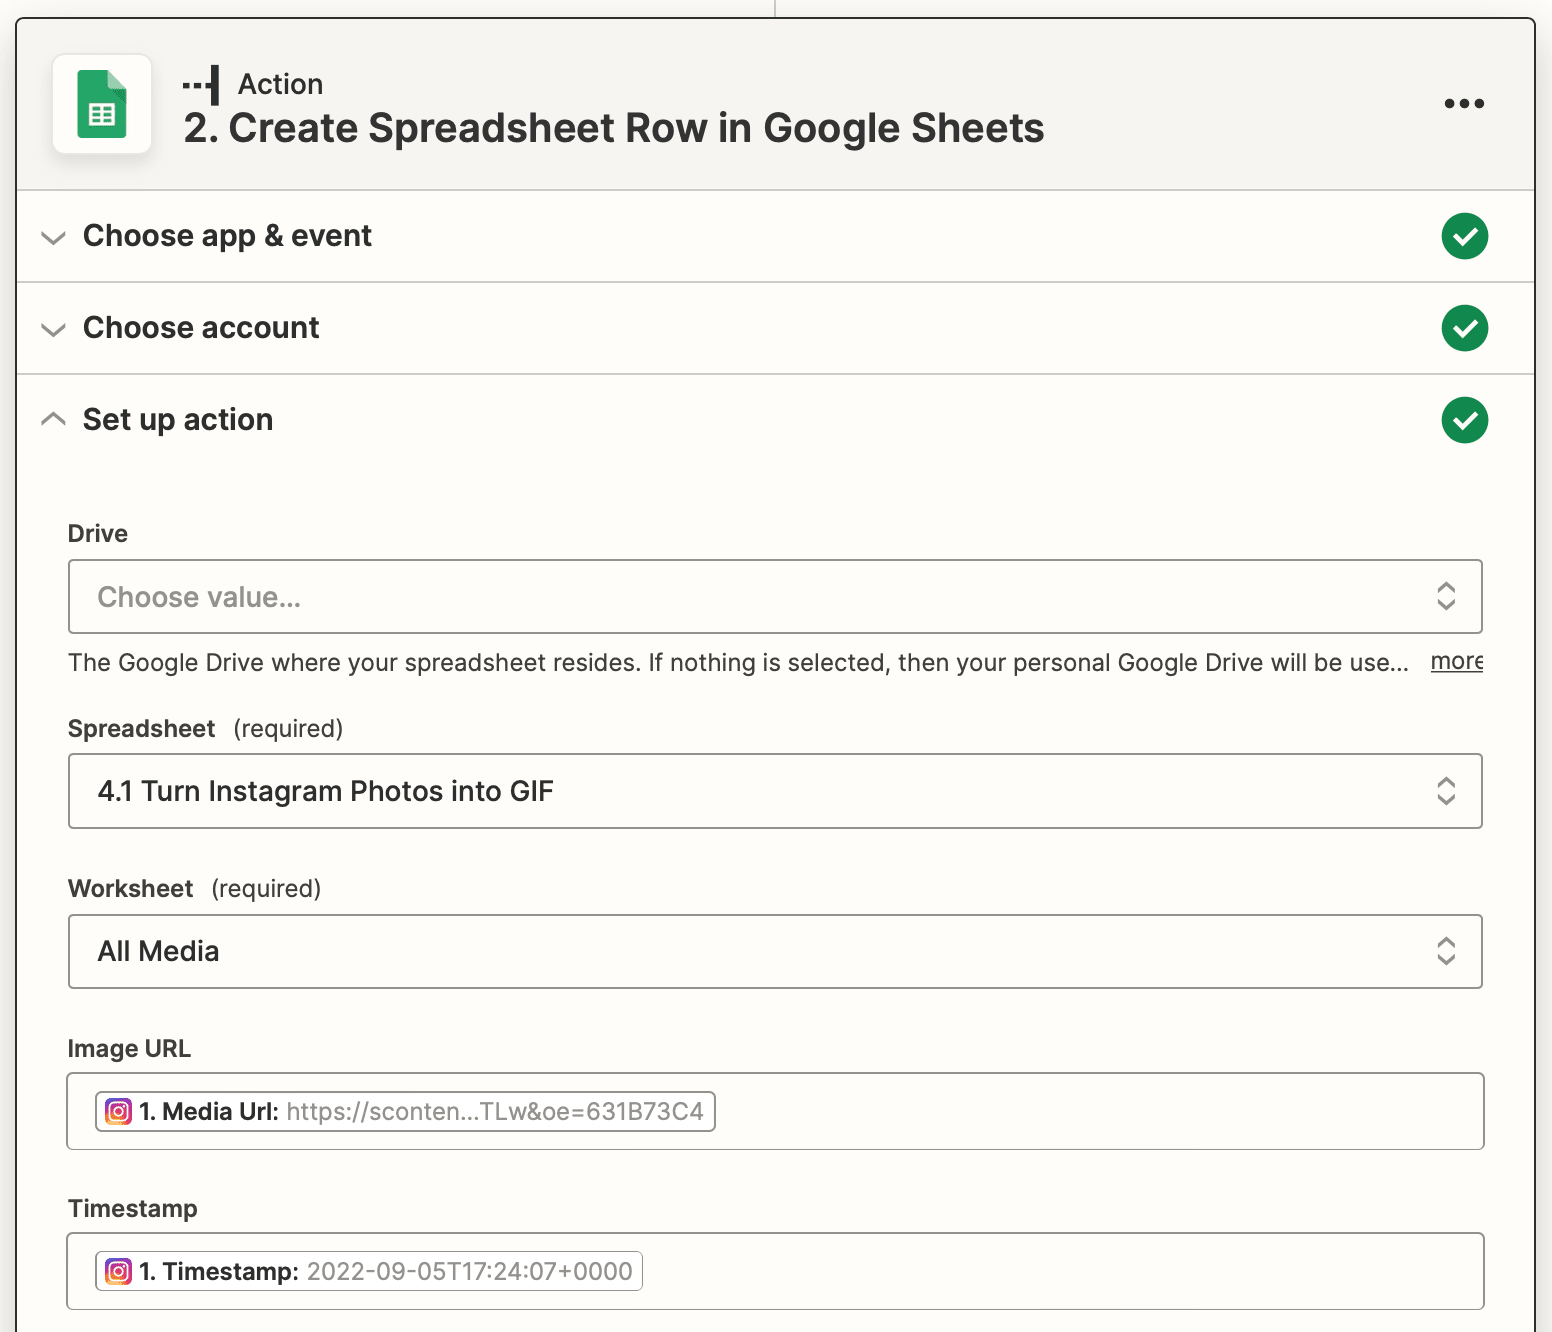
Test the trigger to ensure URLs and timestamps are sent to your Sheet.
Set up a Zap to Generate Animated GIFs or Videos
Your second zap will generate an animated GIF and/or video on a schedule. From your Zapier dashboard, create a new zap and set up the following trigger and actions:
Trigger: Every Week in Schedule by Zapier
Choose Schedule by Zapier as the app and “Every Week” as the event. Enter the preferred day and time you would like the automation to run.
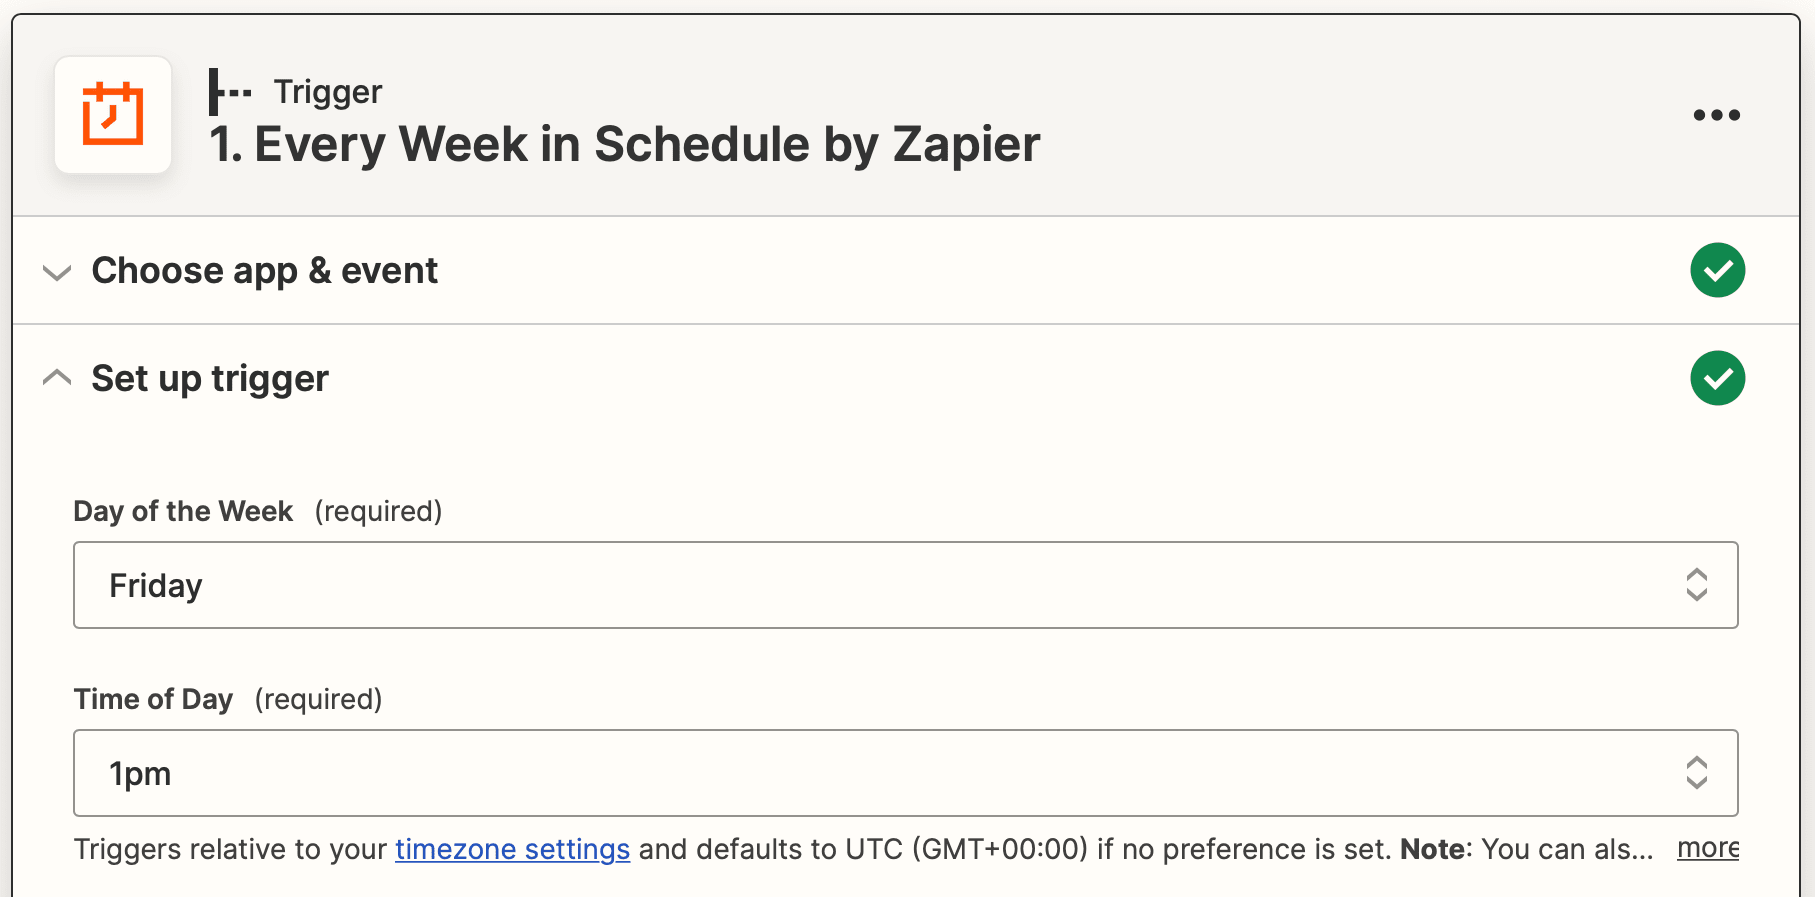
Test the trigger.
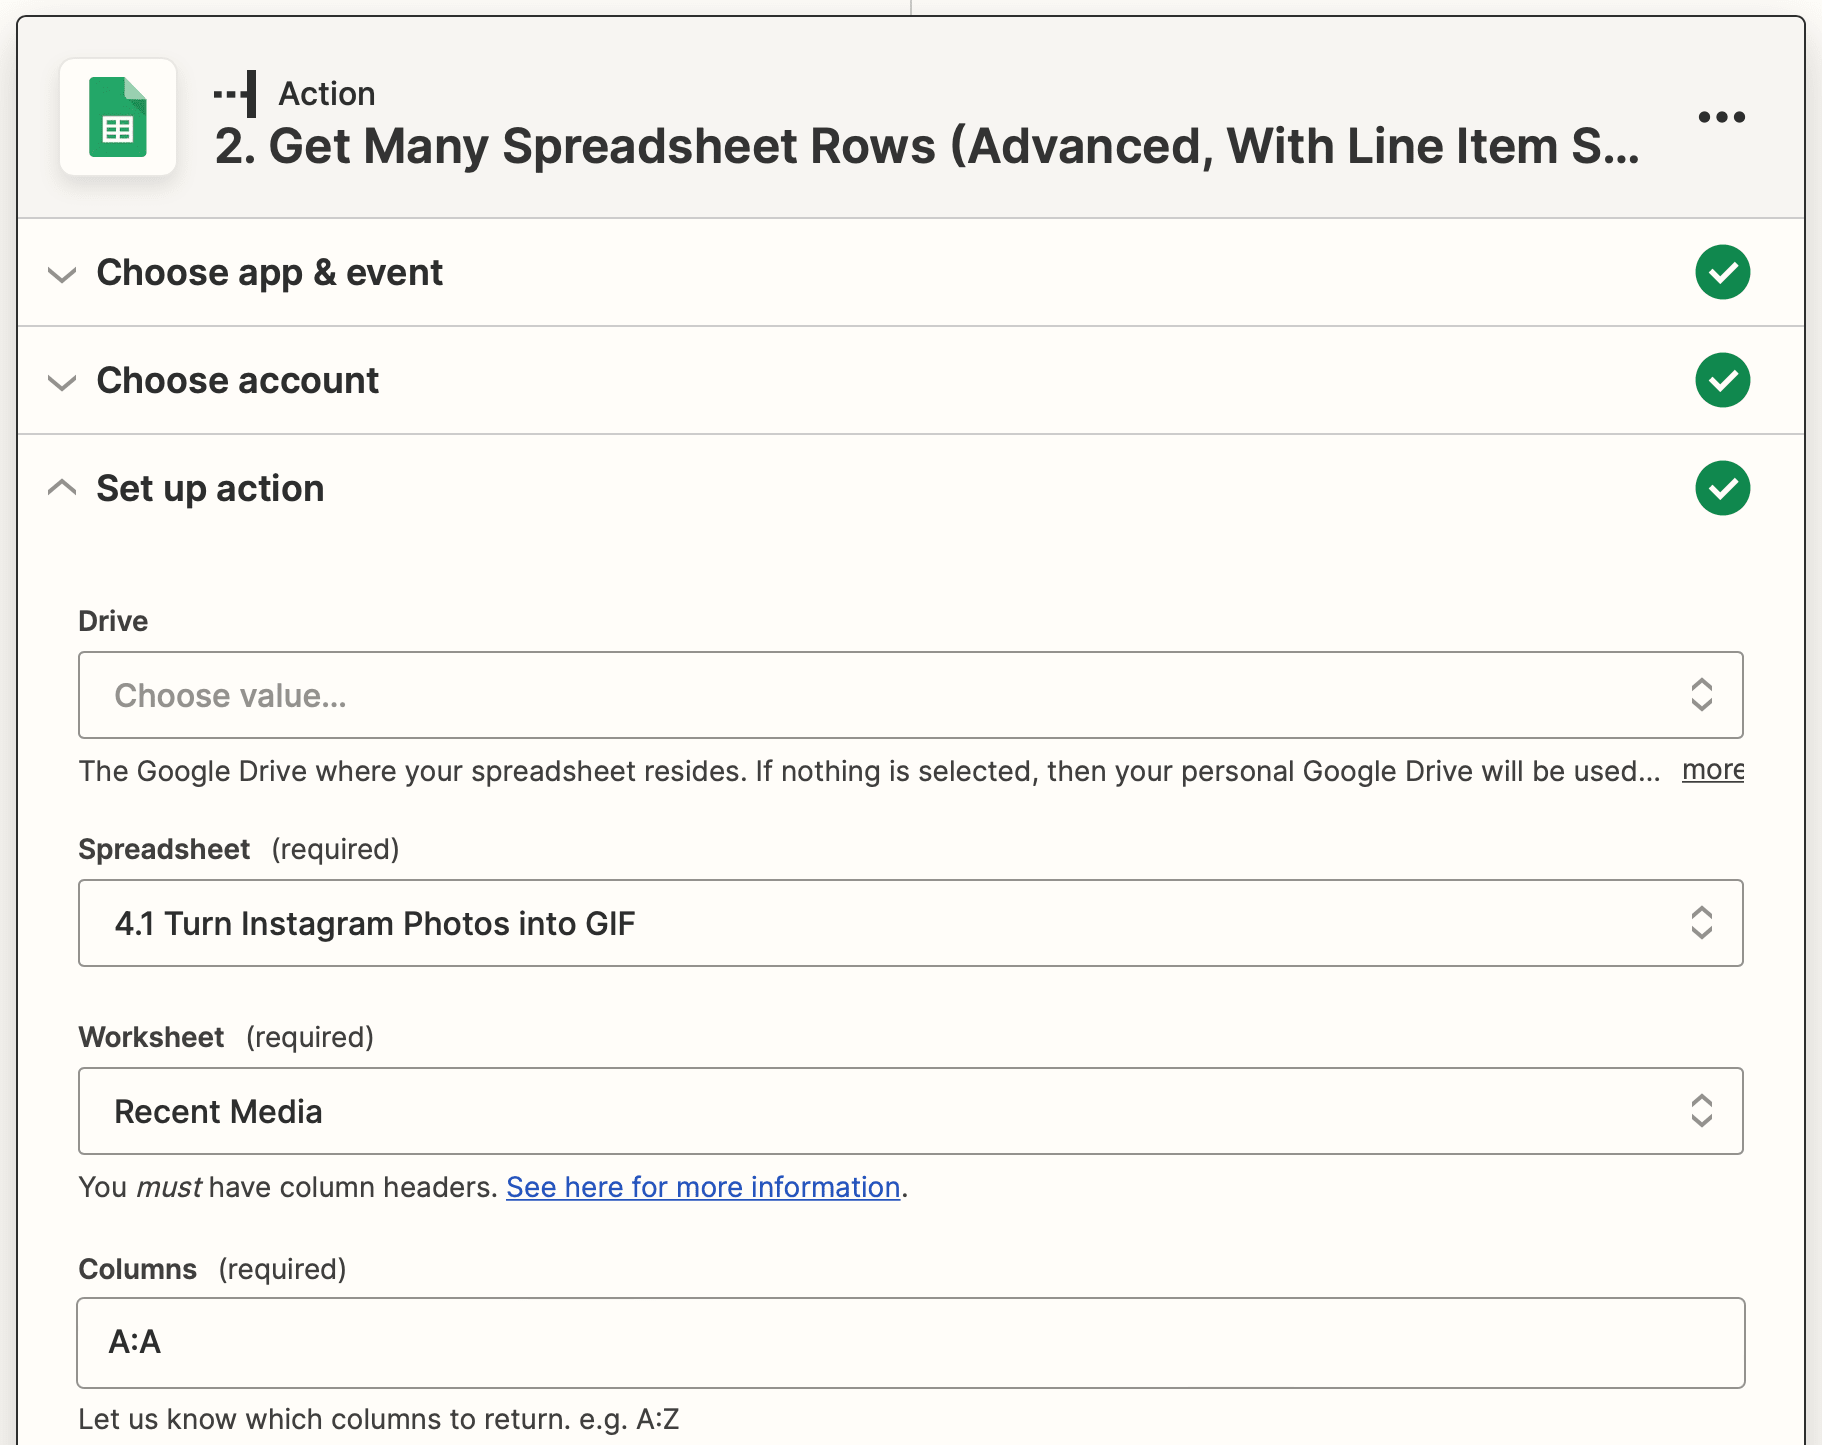
Action: Get Many Spreadsheet Rows in Google Sheets
Choose Google Sheets as the app and “Get Many Spreadsheet Rows (Advanced, With Line Item Support)” as the event.
Select the correct spreadsheet and worksheet, then set up the action by inserting “A:A” in the Columns field, “10” in the Row Count field, and “2” in the First Row field.
Modify the row count depending on how many frames you’d like to include in your GIF.
Test the action.
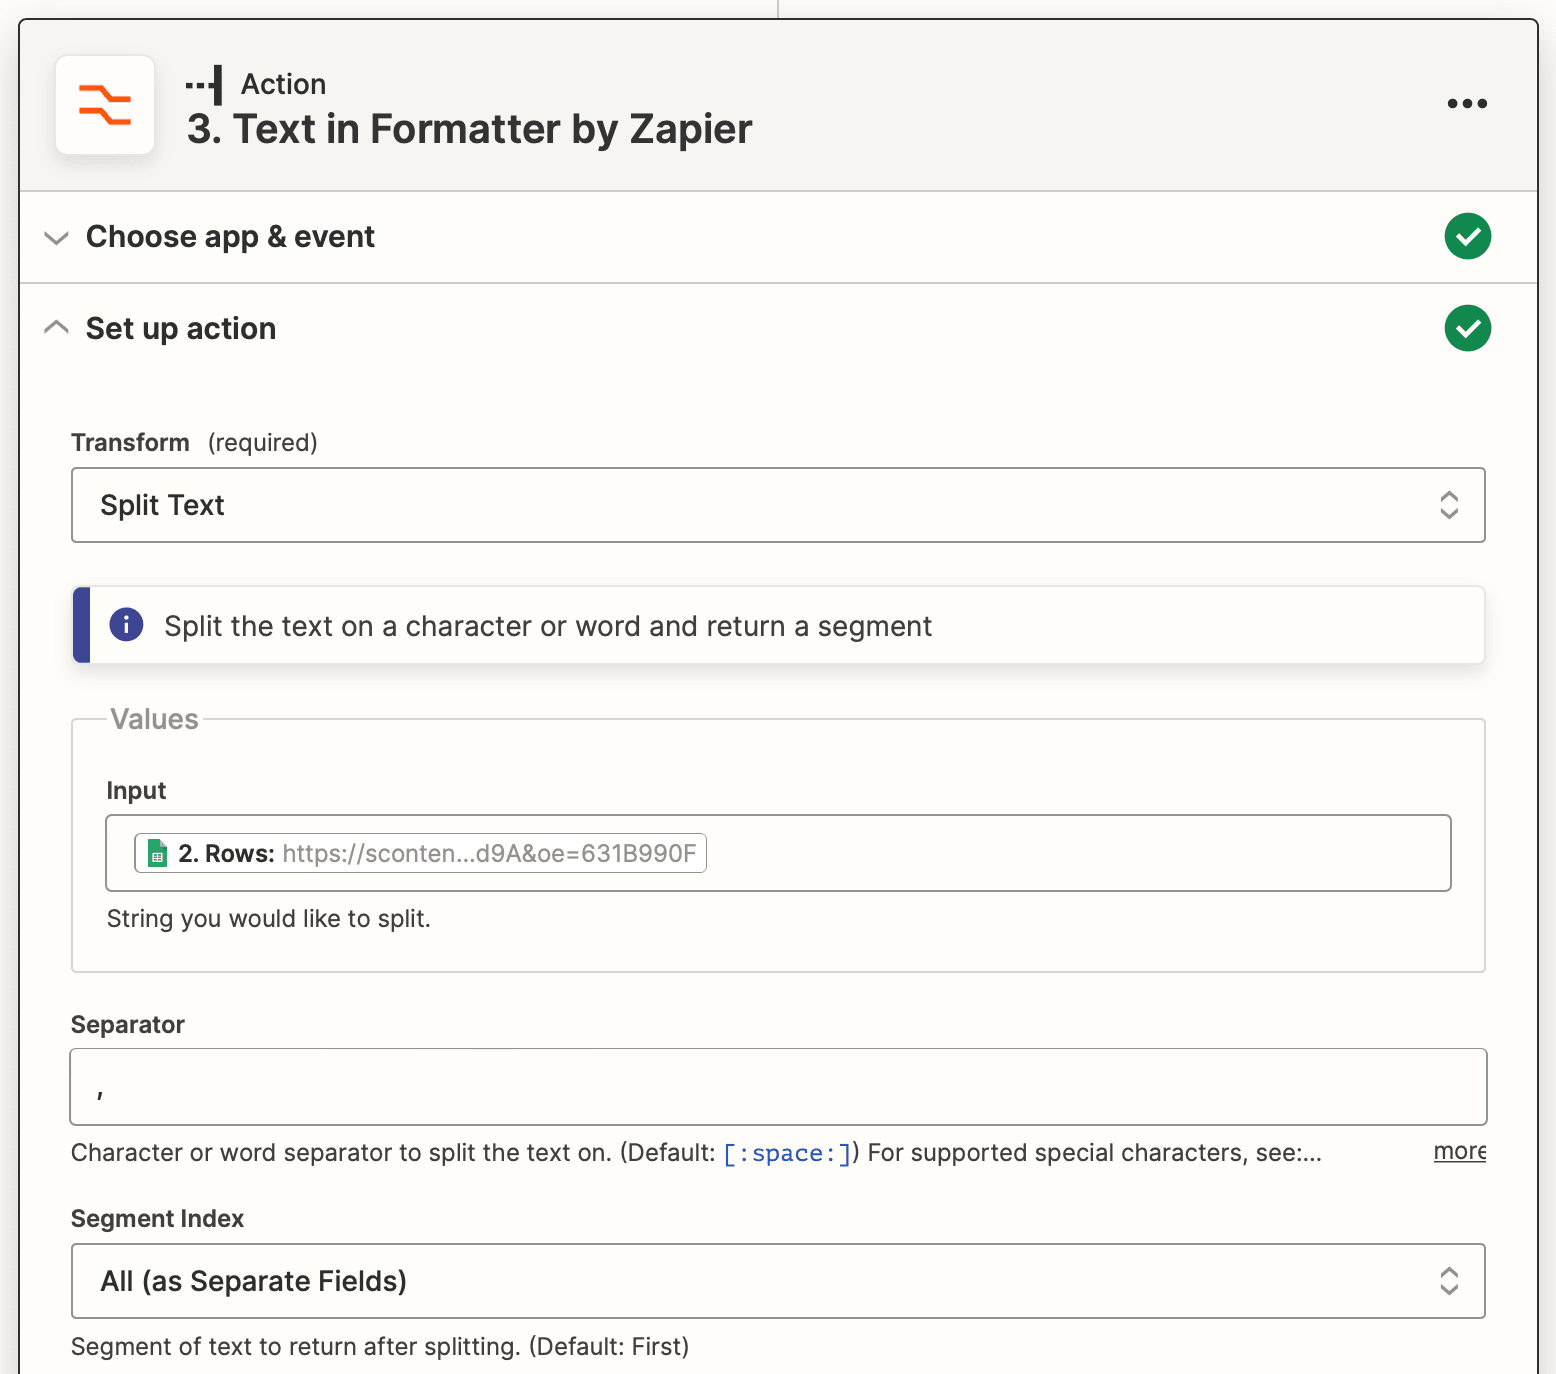
Action: Text in Formatter by Zapier
The image URLs pulled from Google Sheets will be in text format, and it must be split into separate fields to be used.
Choose Formatter by Zapier as the app and “Text” as the event. Set up the action by selecting the “Split Text” transform type, mapping Rows as the Input, including a comma (,) as the Separator, and setting the Segment Index to “All (as Separate Fields)”.
The next step will now depend on whether you want to generate a GIF or video.
Generating an Animated GIF
A GIF requires several inputs, one for each frame. You can customize the FPS and add a maximum of 10 frames. The same template will be used throughout the GIF—only the input data will change.
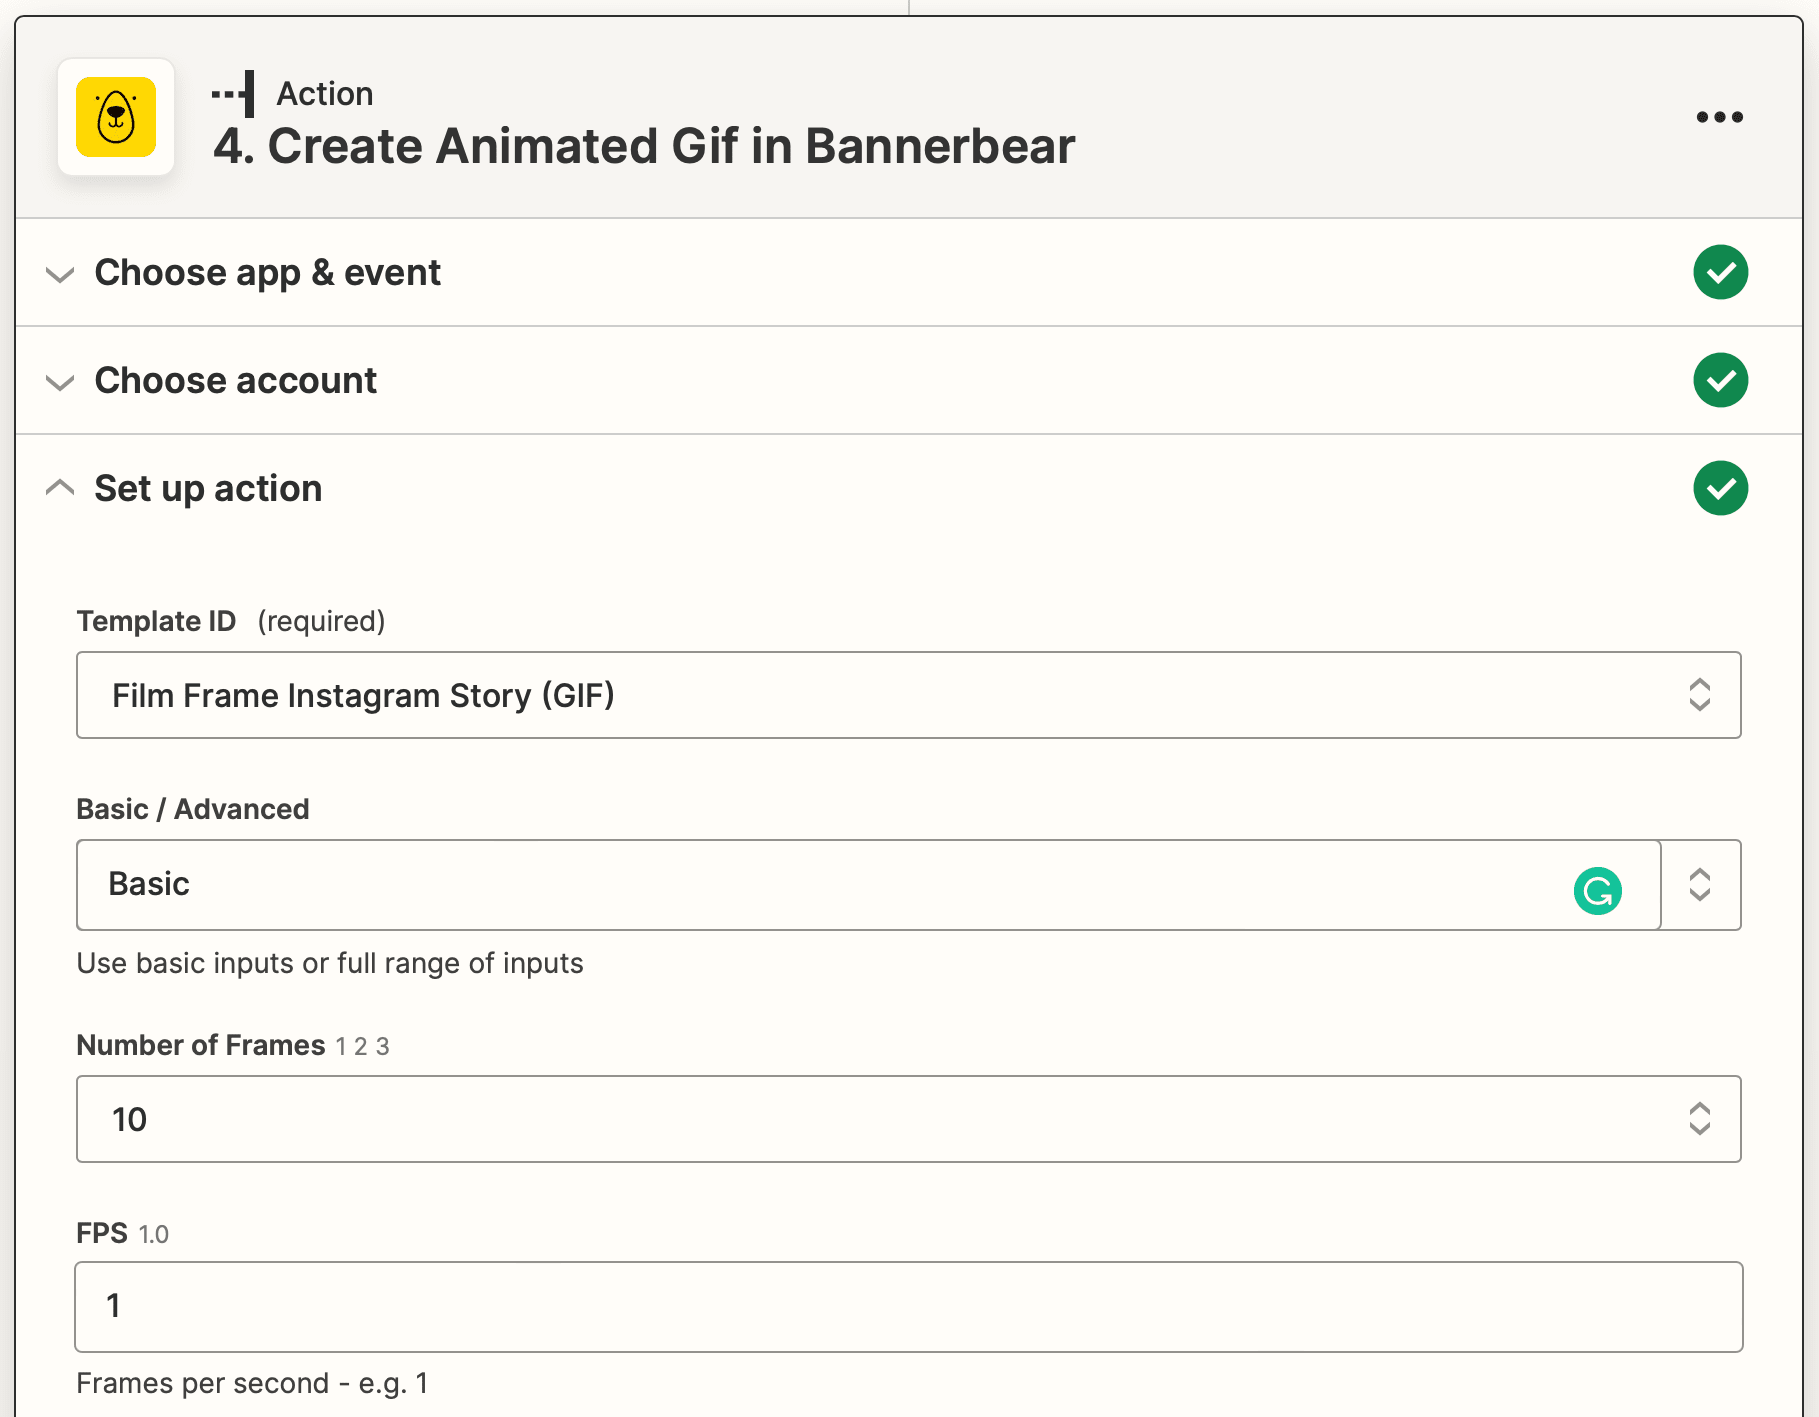
Action: Create Animated GIF in Bannerbear
Choose Bannerbear as the app and “Create Animated GIF” as the event. You will be prompted to connect your account, which you can do by going to your Bannerbear app to retrieve the API key found in the Settings tab of the corresponding project.
Set up the action by choosing the template you want to use, then customizing the number of frames, FPS, and input values.
Test the action. You should end up with a GIF that looks a little like this:
Generating a Video
A video can only have one media URL input and one template. You can set up the automation to generate only one video or multiple every time it is run, depending on your use.
Action: Create Video in Bannerbear
Choose Bannerbear as the app and “Create Video” as the event. You will be prompted to connect your account using the API key found in the Settings tab of the corresponding project page of your Bannerbear app.
Set up the event by choosing the video template you want to use and inputting the media URL.

You can also add modifications such as zoom and blur.
Test the action, and repeat this step for as many videos as you want to create.
Your video should look something like this:
Finish your zap off by adding a storage or distribution step. Once you’re happy with it, hit “Publish” to make it live!
Repurpose Your Photos for More Brand Assets
Digital marketing in 2022 often relies on consistency, strong branding, and a variety of content types. Repurposing content posted on Instagram by transforming it into something fresh and new is a great way to add to your publishing calendar at no further cost.
The newly created material also isn't limited to social media. Use it in your newsletter, website, or even digital signage to showcase your brand identity in a dynamic way.
