
How to Install FFmpeg on Ubuntu/Linux, Windows, and Mac
Contents
FFmpeg is a complete, cross-platform solution to record, convert and stream audio and video. You can use it to decode, encode, transcode, mux, demux, stream, filter, and play media files in any format. As it runs in a wide variety of build environments and machine architectures including Mac, Windows, and Linux, it is highly portable.
Whether you’re looking to convert, play and analyze media files or add these functionalities to your application, you can use FFmpeg to do both. It contains multiple tools and libraries that serve these purposes, such as libavcodec, libavutil, libavformat, libavfilter, libavdevice, libswscale, and libswresample. When you download the FFmpeg packages/executable files to your machine, these libraries will be downloaded automatically too.
In this article, we’ll show you how to download and install FFmpeg on your machine, whether it’s running on Ubuntu/Linux, Windows, or macOS.
How to Install FFmpeg on Mac
Option 1: Use a Package Manager (Homebrew)
The easiest way to install FFmpeg on your Mac is by using a package manager like Homebrew. Homebrew is a free and open-source package manager that simplifies the installation of software on macOS and Linux. Using Homebrew, FFmpeg can be installed on your Mac with just a single command.
Install Homebrew on your Mac and then run the command below in the terminal to install the latest version of FFmpeg:
brew install ffmpeg
You can also download a specific version of FFmpeg. To do so, specify the FFmpeg version in the command, following ffmpeg@. For example, the command below will install version 5 of FFmpeg instead of the latest one:
brew install ffmpeg@5
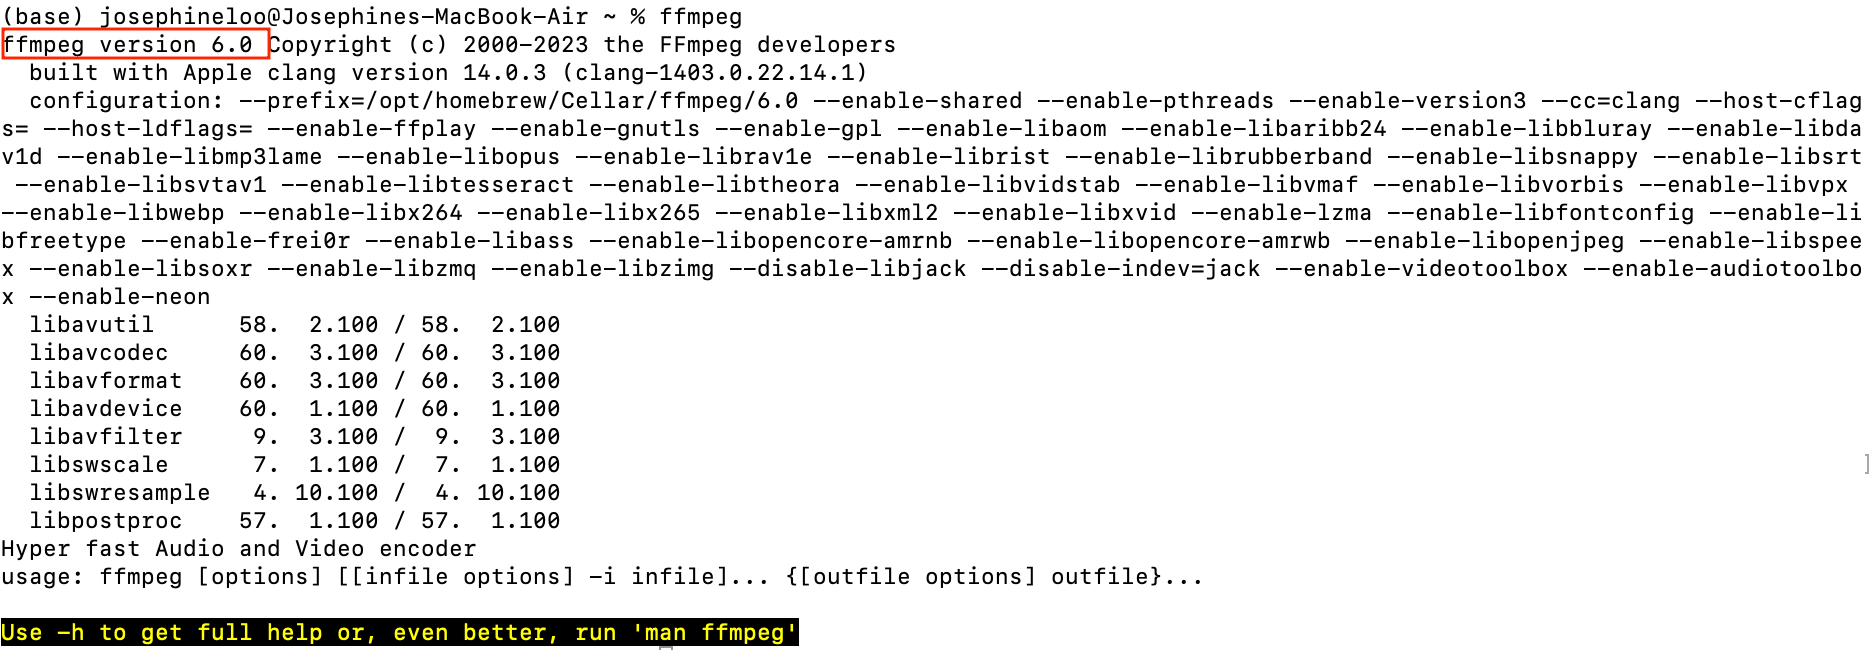
After the installation has been completed, verify it by running ffmpeg in the terminal:
ffmpeg
If the output shows you information about the FFmpeg installed including its version, FFmpeg has been installed successfully on your Mac and your can start using it to manipulate media files!
Option 2: Download from the Official Website
In general, using a package manager like Homebrew is recommended for most users, as it provides a convenient and hassle-free way to install and manage FFmpeg. However, if you have specific needs or prefer more control over the installation process, downloading from the official website may be a better option. The FFmpeg packages and executable files are available for download on the official website and you can select the specific version that you want.
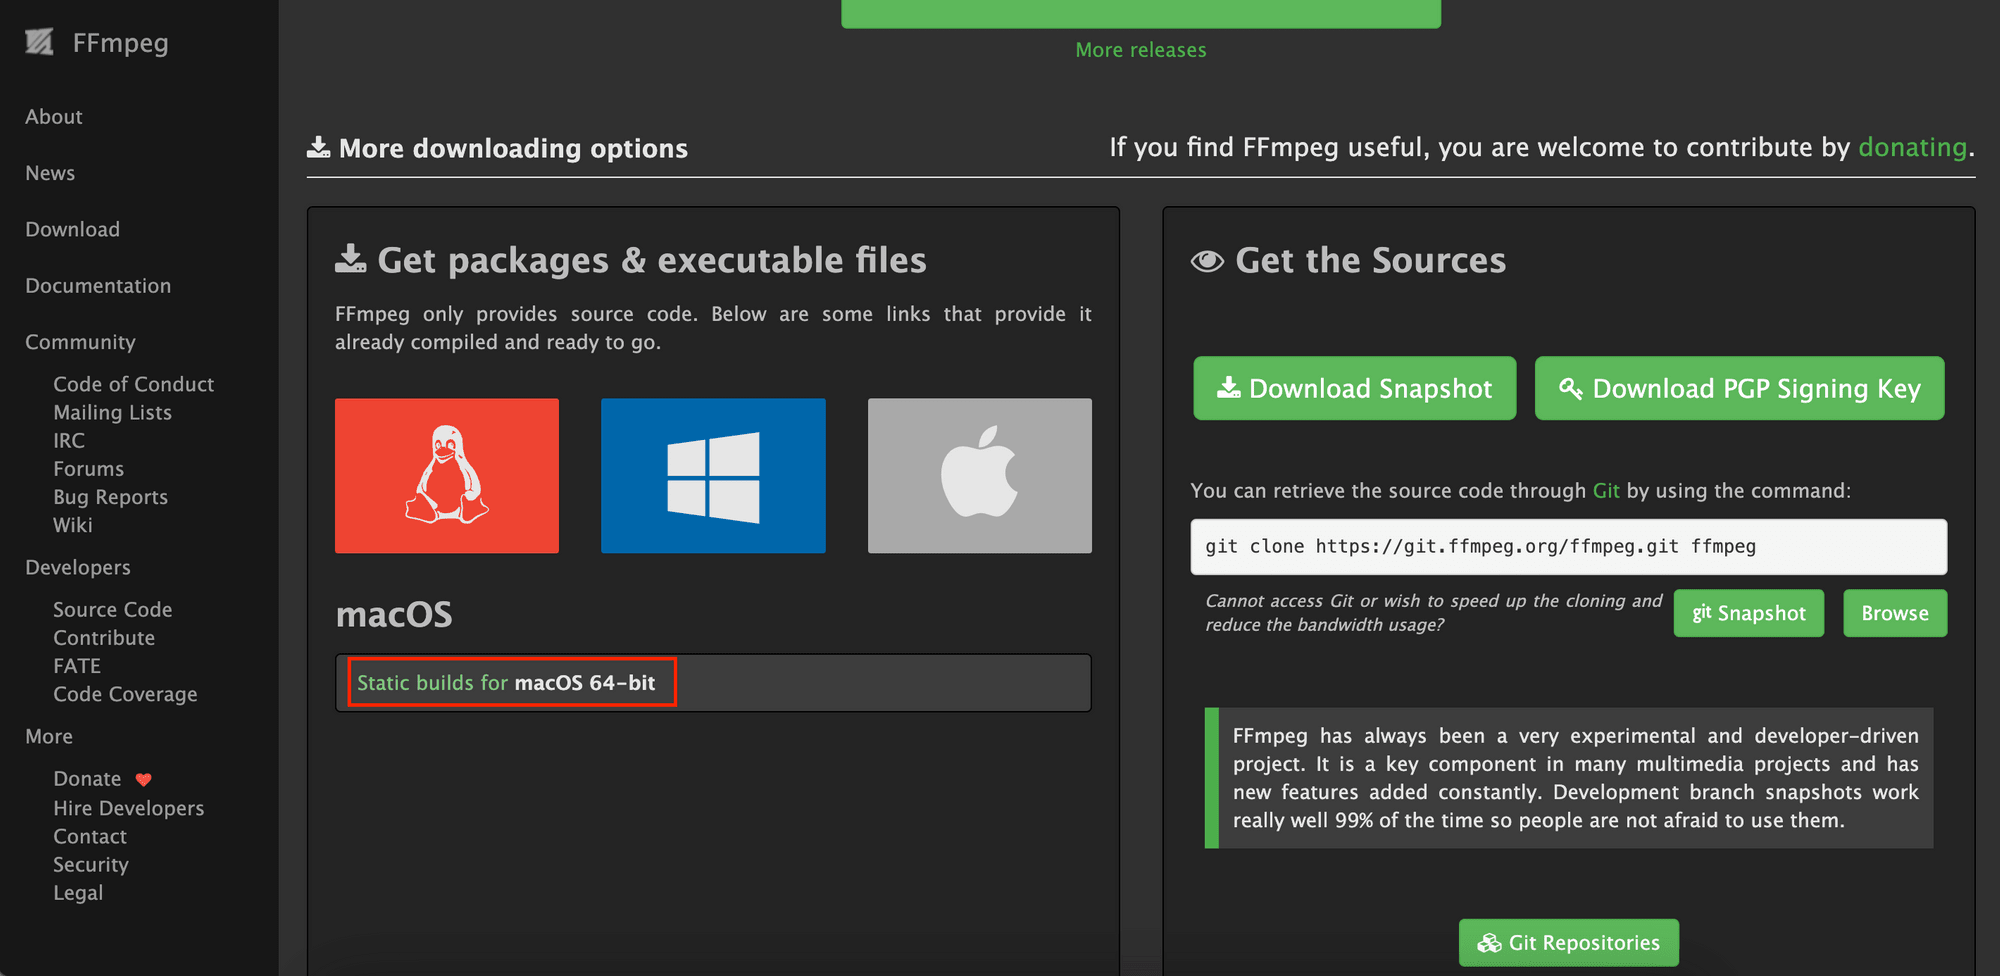
Go to the FFmpeg website's Download page and click on “Static builds for macOS 64-bit”.
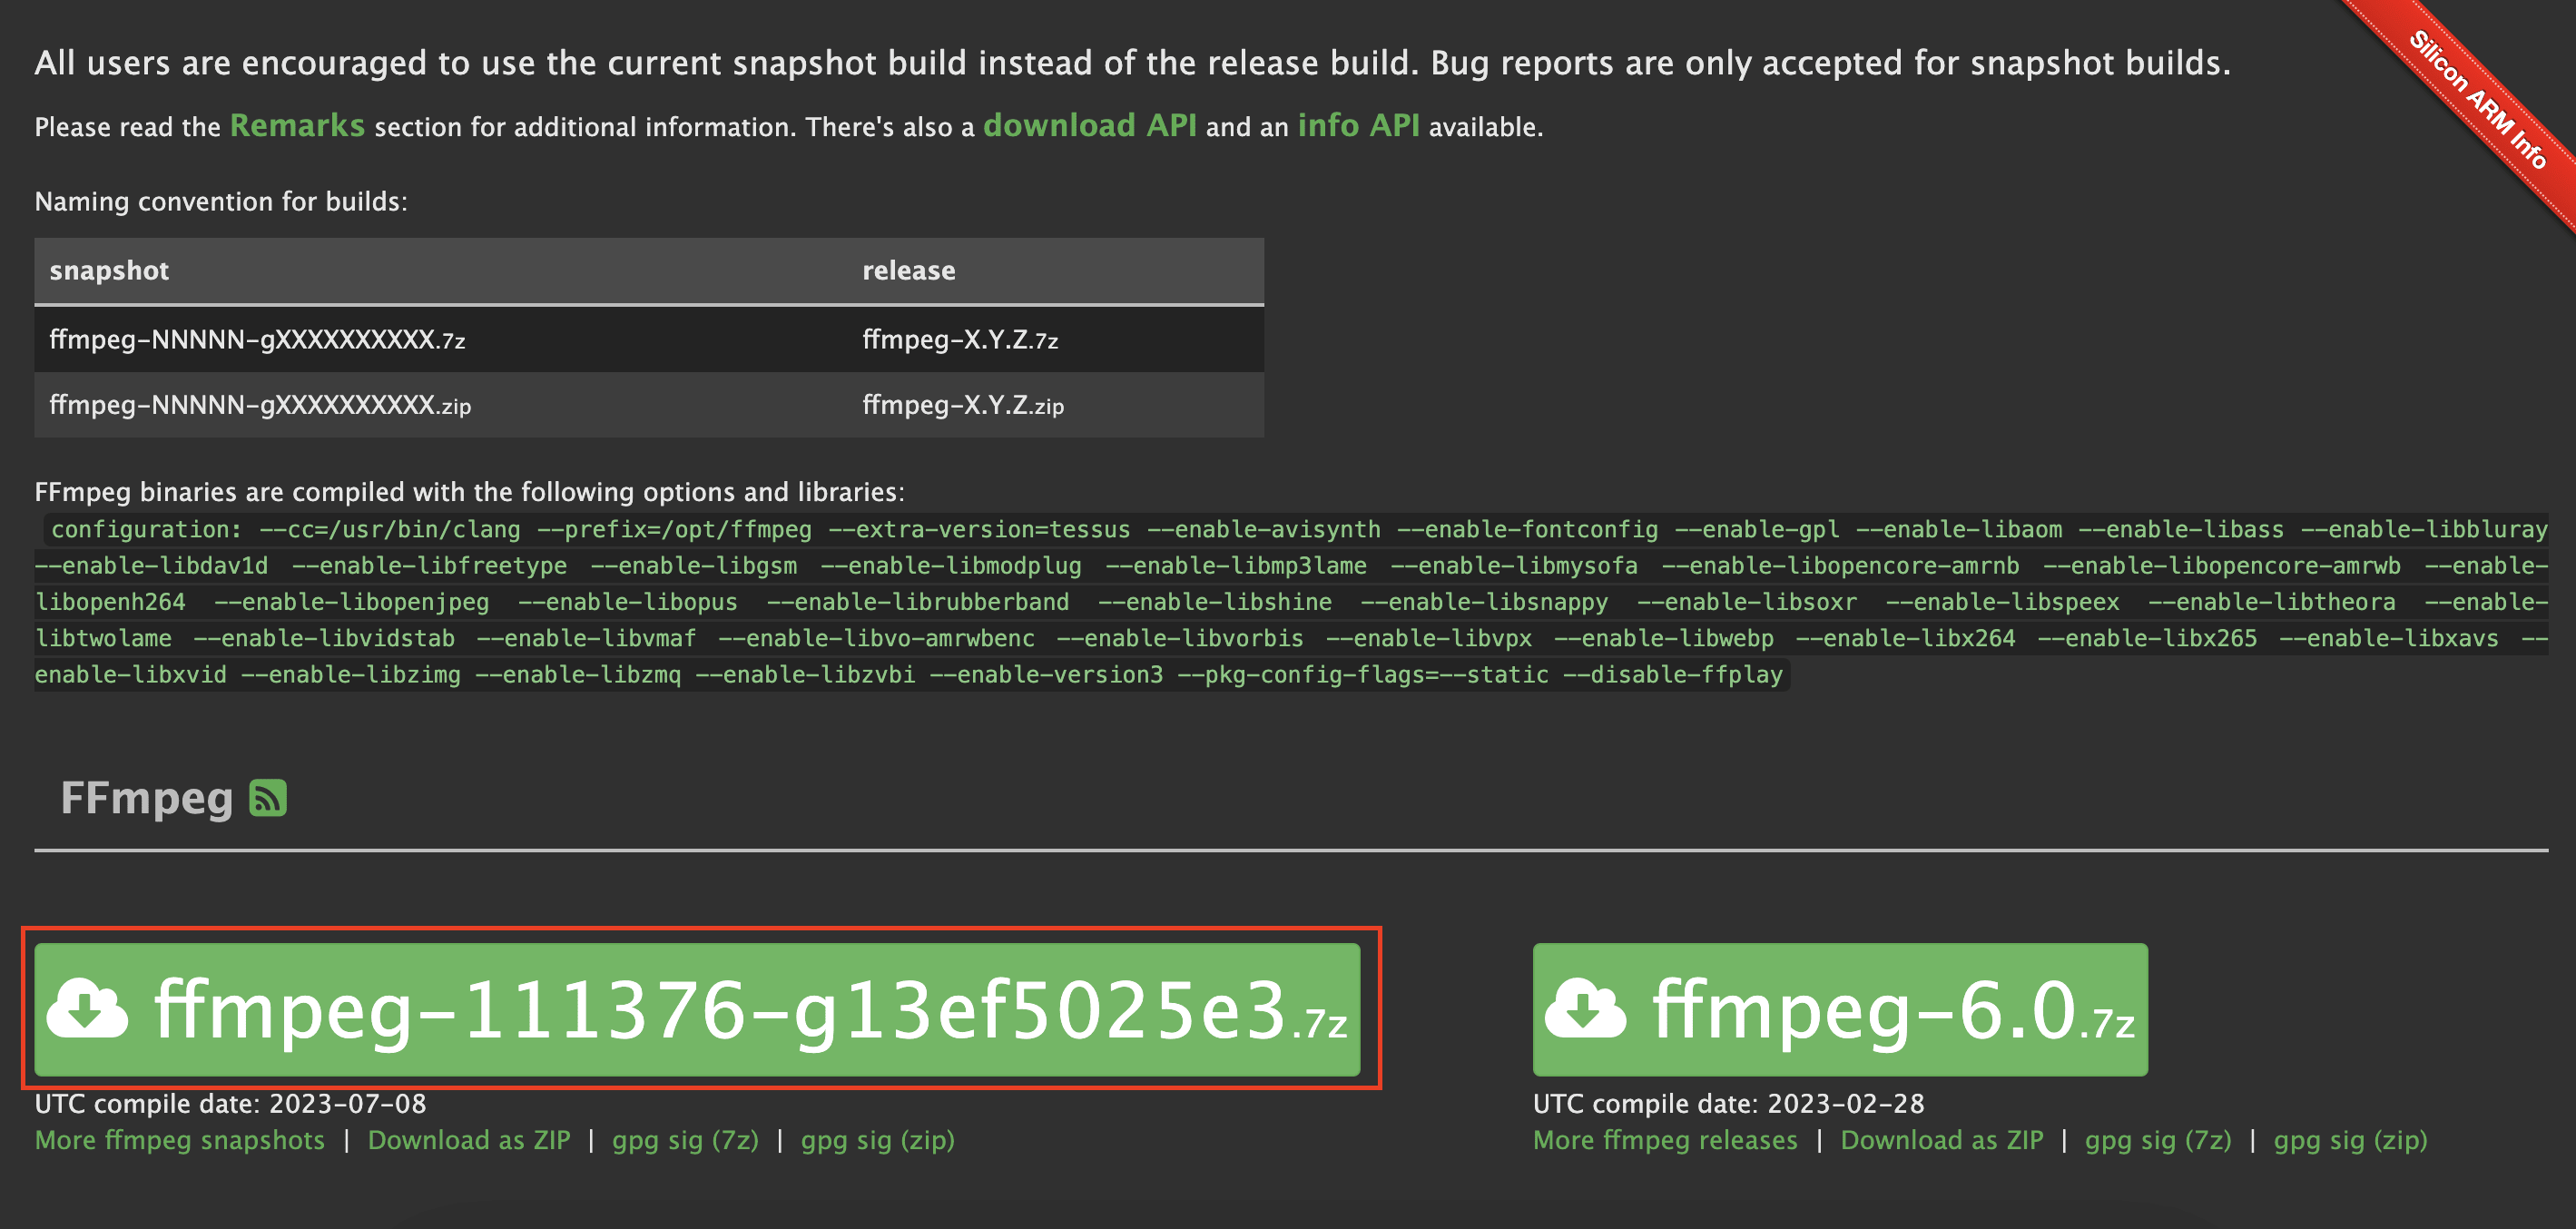
You’ll see the current snapshot and release builds. From the official remark, it’s encouraged to use the current snapshot build as they will only accept bug reports for snapshot builds. Click on the current snapshot build on the left. The build file in .7z format will be downloaded.
Once the download has been completed, open the .7z file and extract the executable file from it. You can also move the executable file to a location of your choice (eg. /usr/local/bin ).

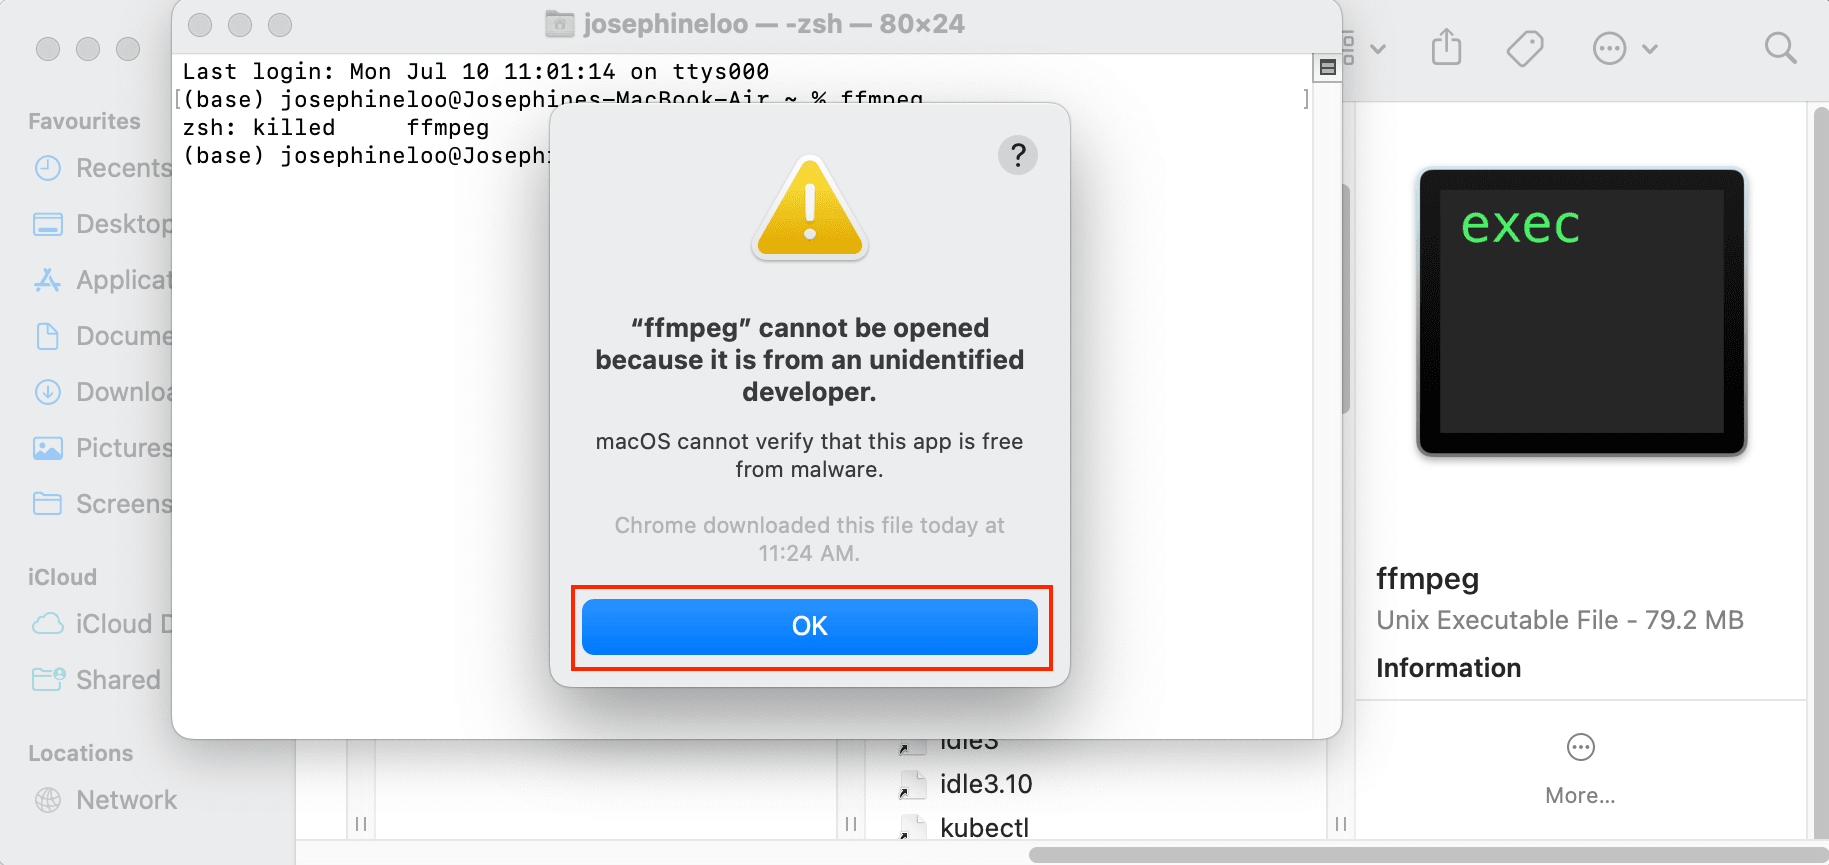
Double-click the executable file to start the installation. You might get a pop-up that warns you that the file cannot be opened because it is from an unidentified developer. If that happens, click “OK” to continue.
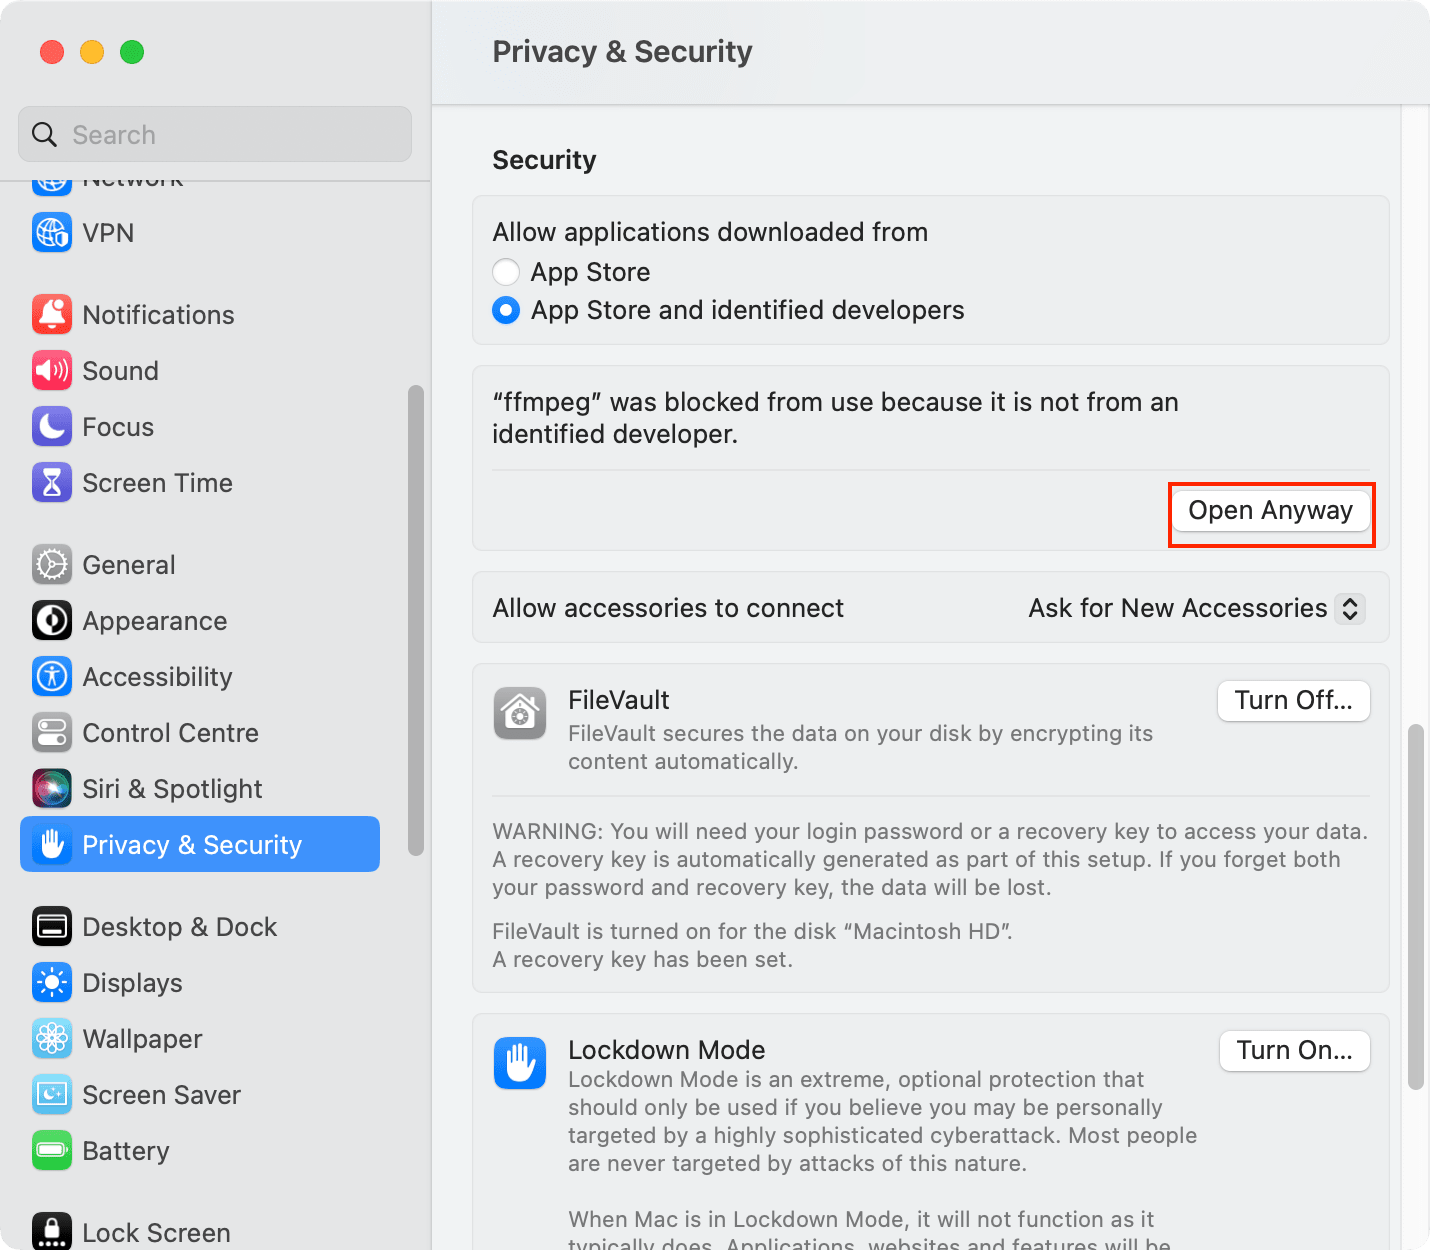
To continue with the installation, we need to modify the security setting. Go to “Privacy & Security” in your System Settings and click “Open Anyway” to allow the installation.
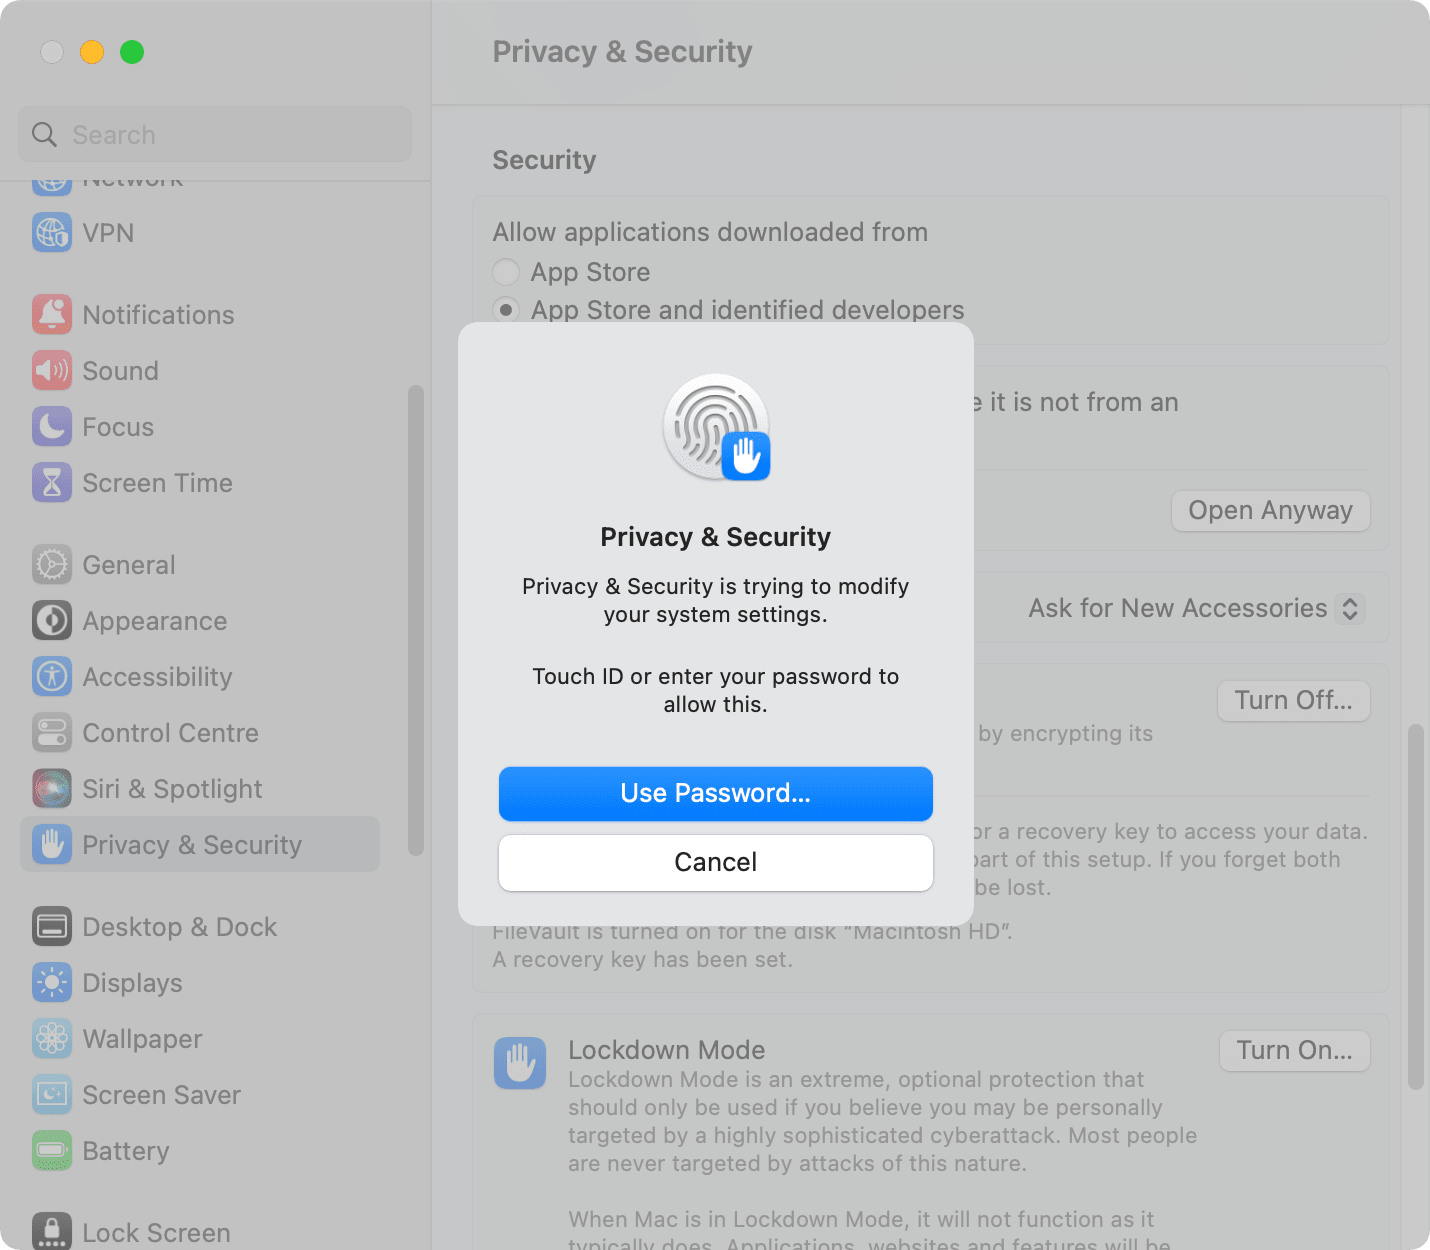
If another pop-up warns you about the action, click “Open” to continue.
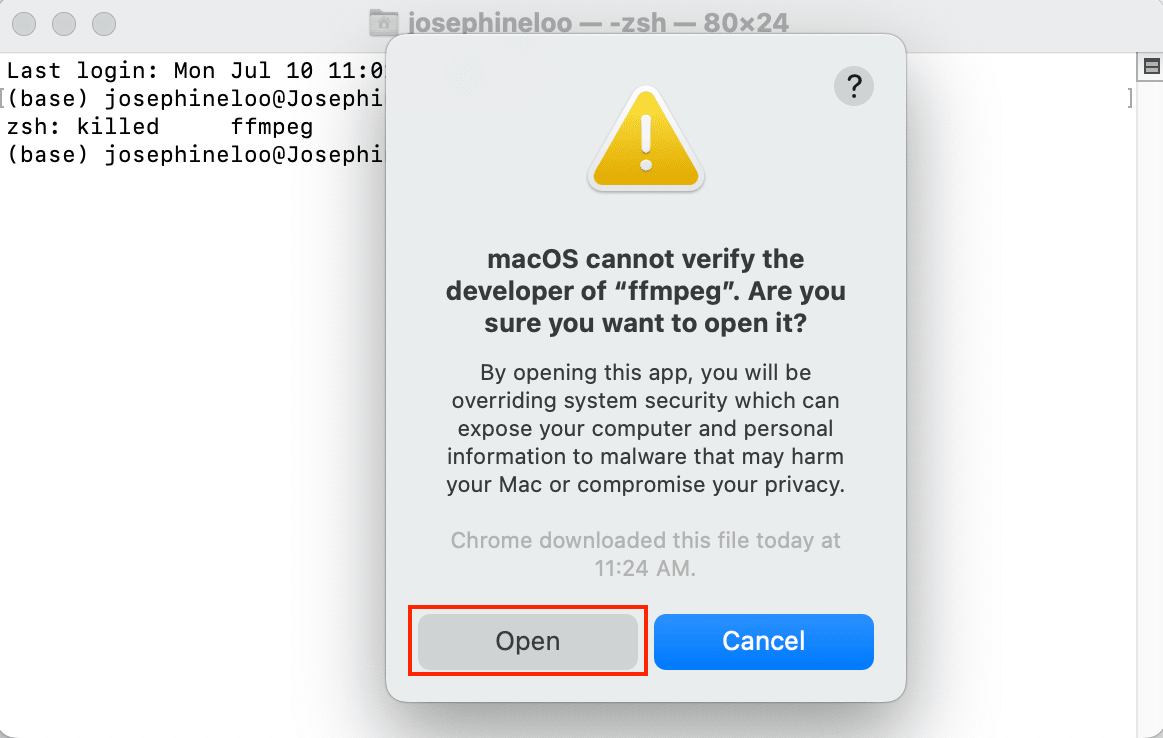
Double-click on the executable file again. Now, it should open up a new terminal and start the installation.
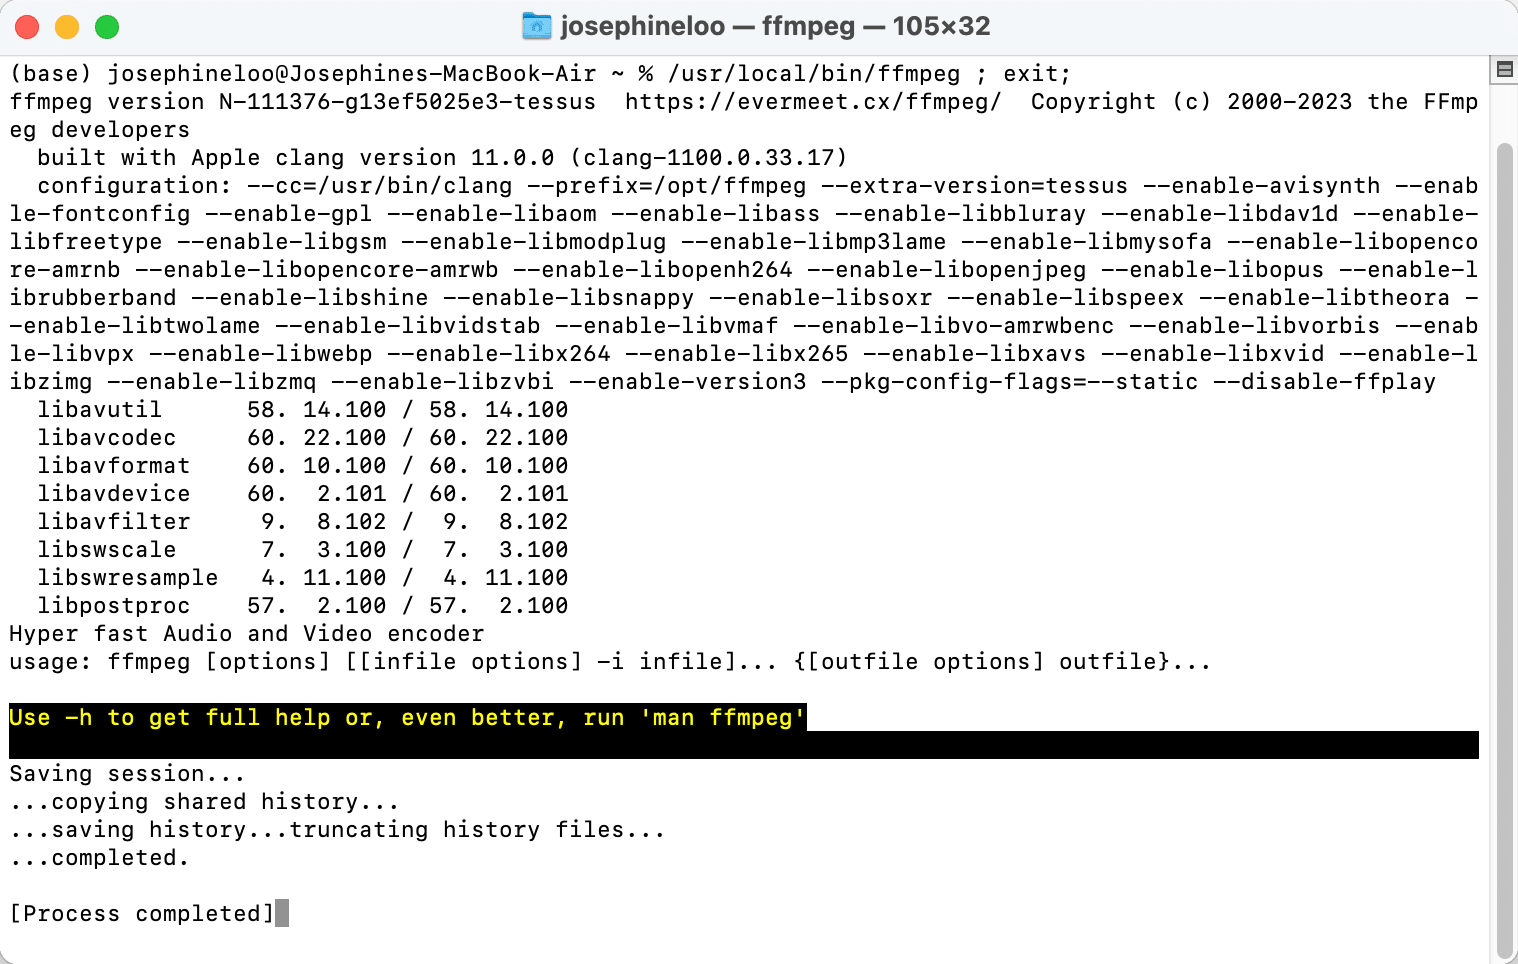
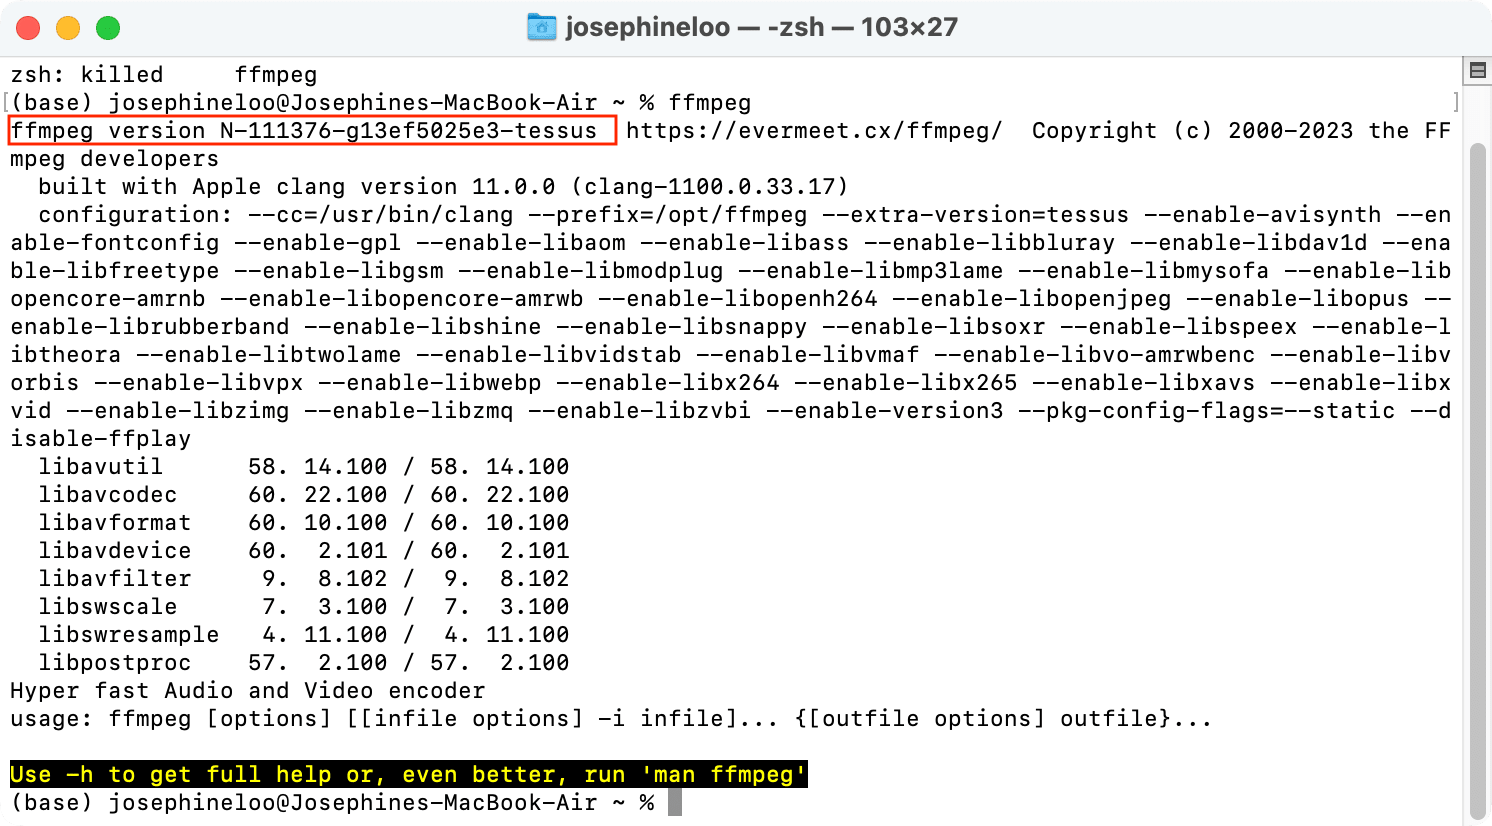
Once the process has been completed, you can verify the installation by running ffmpeg in the terminal and see its information including the version installed in the output:
How to Install FFmpeg on Windows
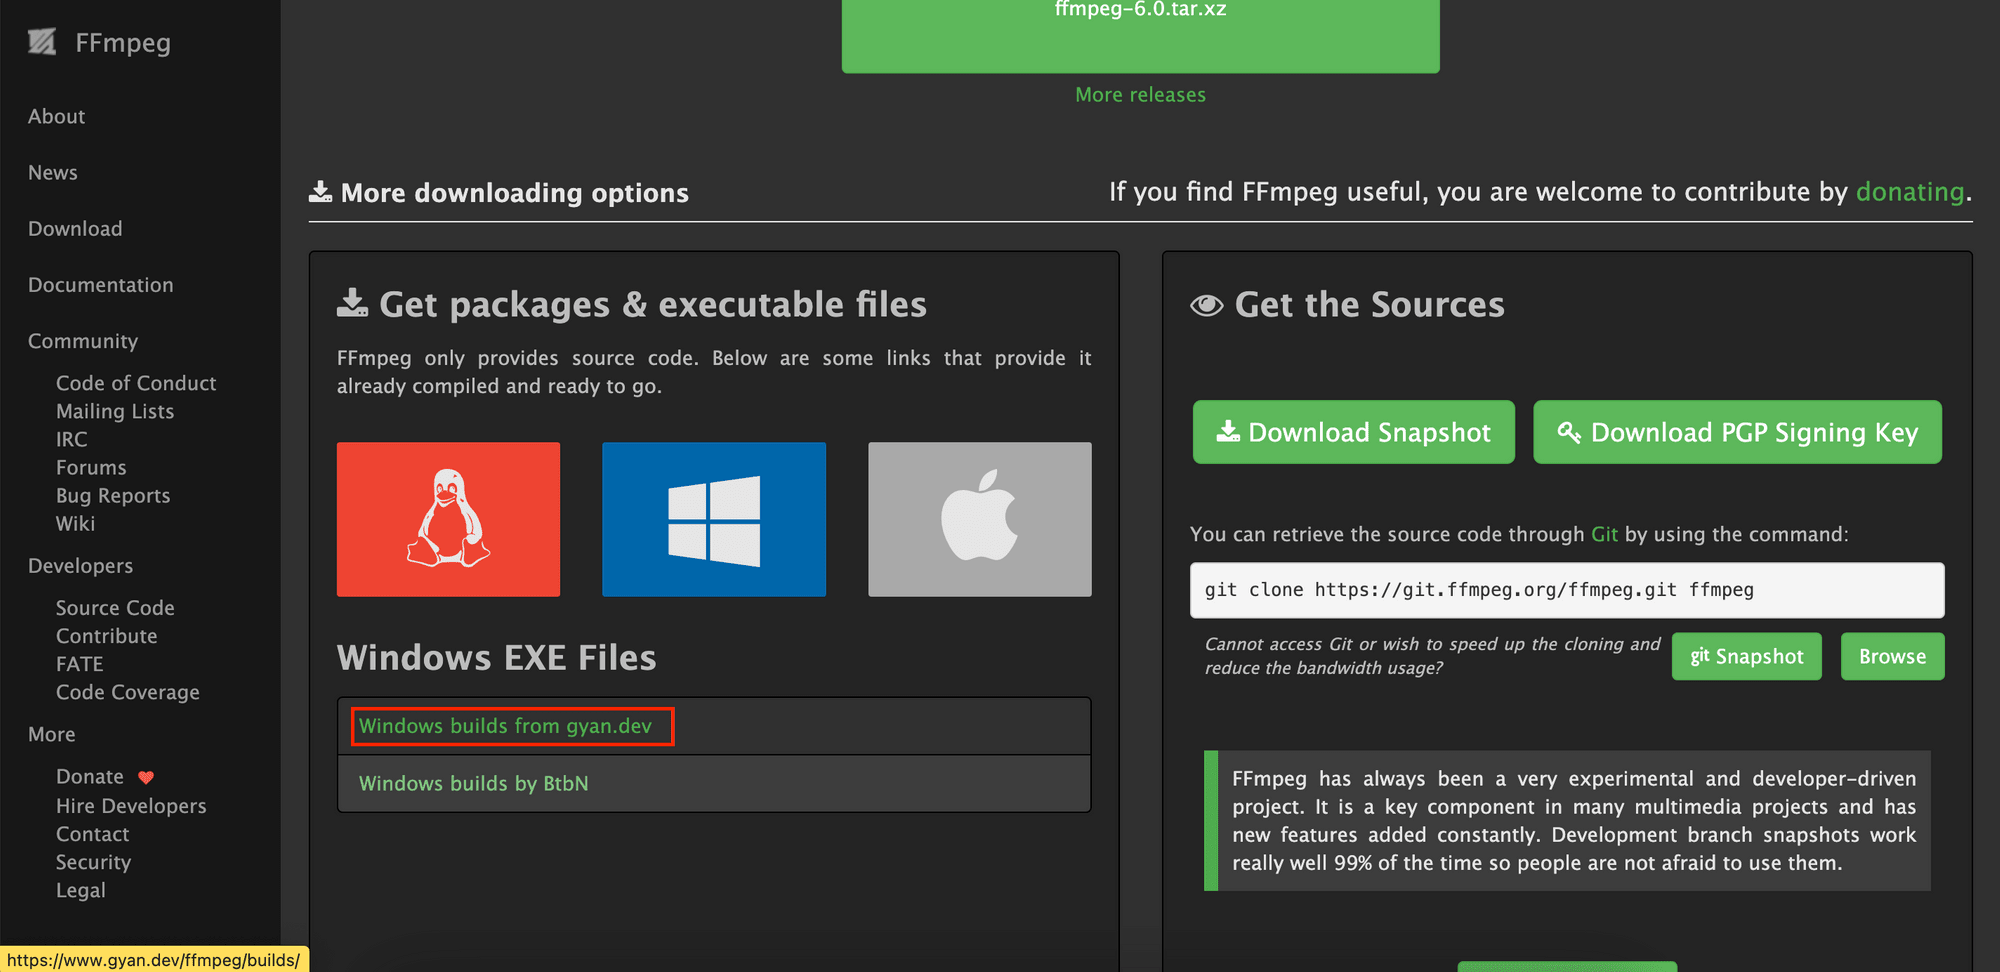
Go to the FFmpeg website's Download page and click on “Windows builds from gyan.dev”.
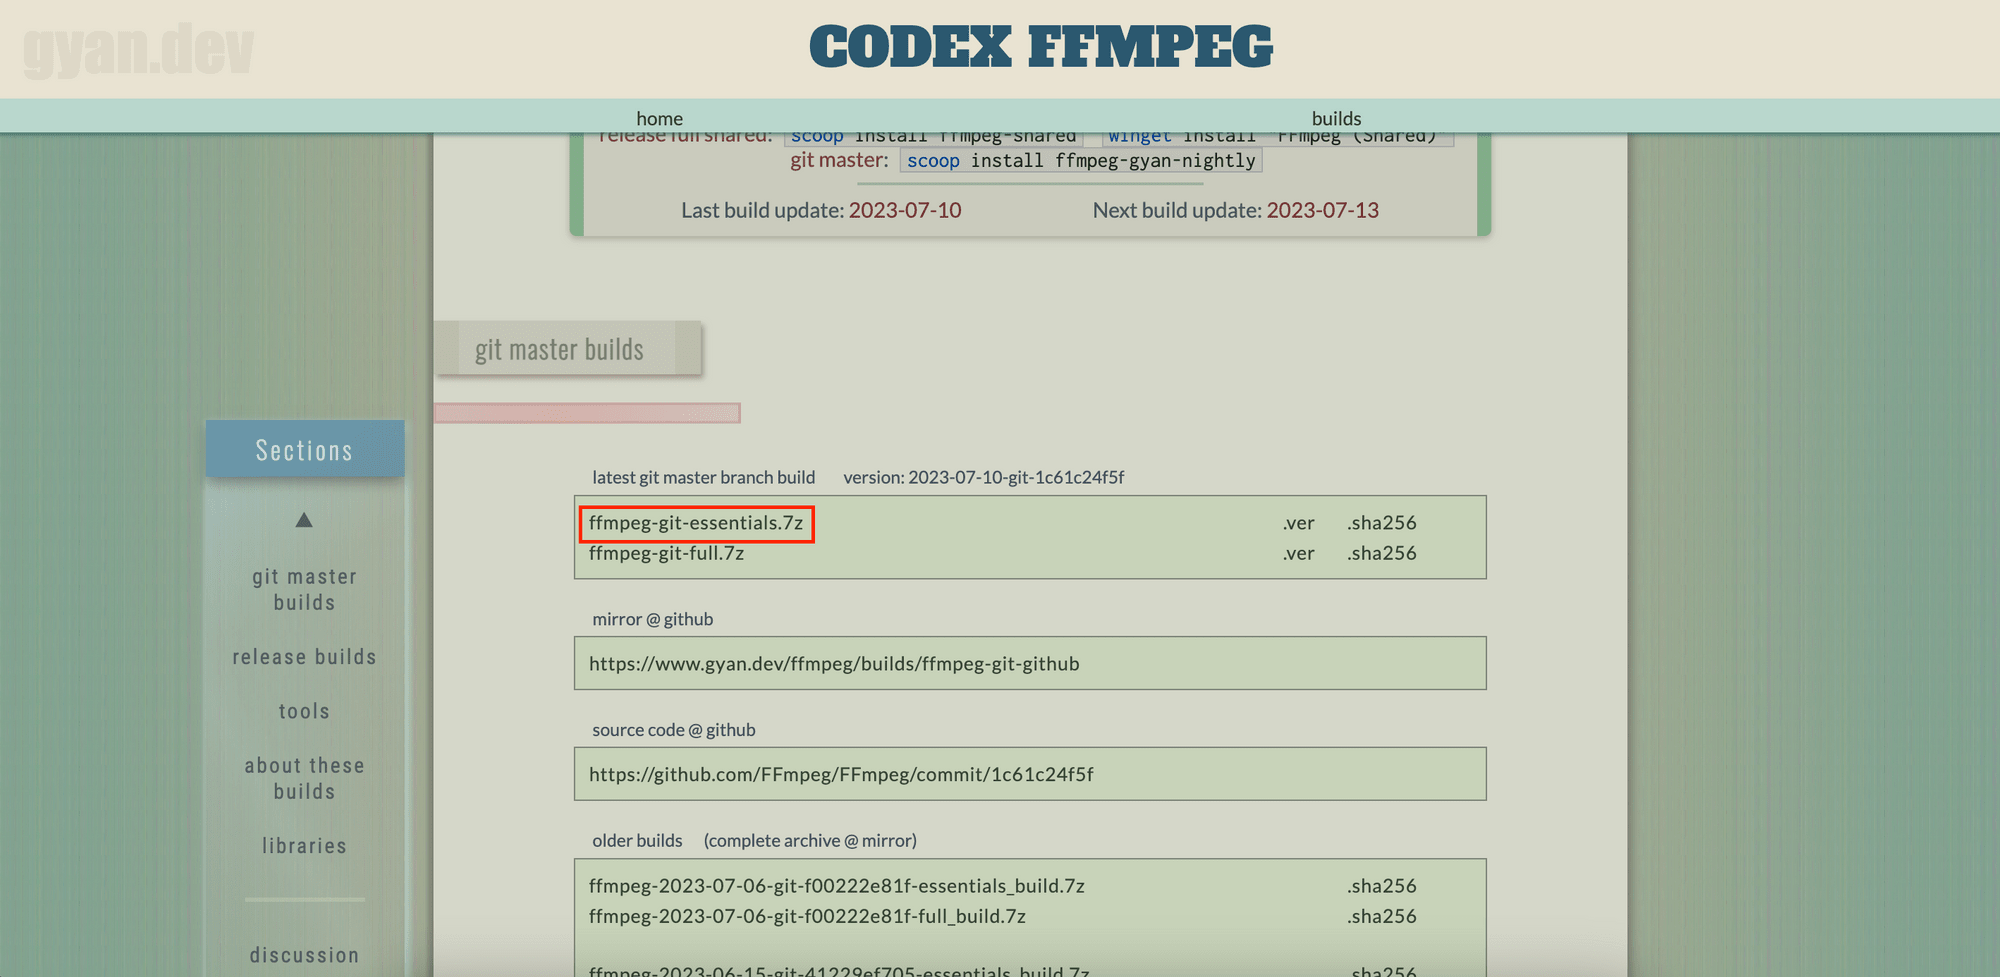
You'll see a list of available builds on the new page. Choose the desired version and click on one of the .7z files to download it.
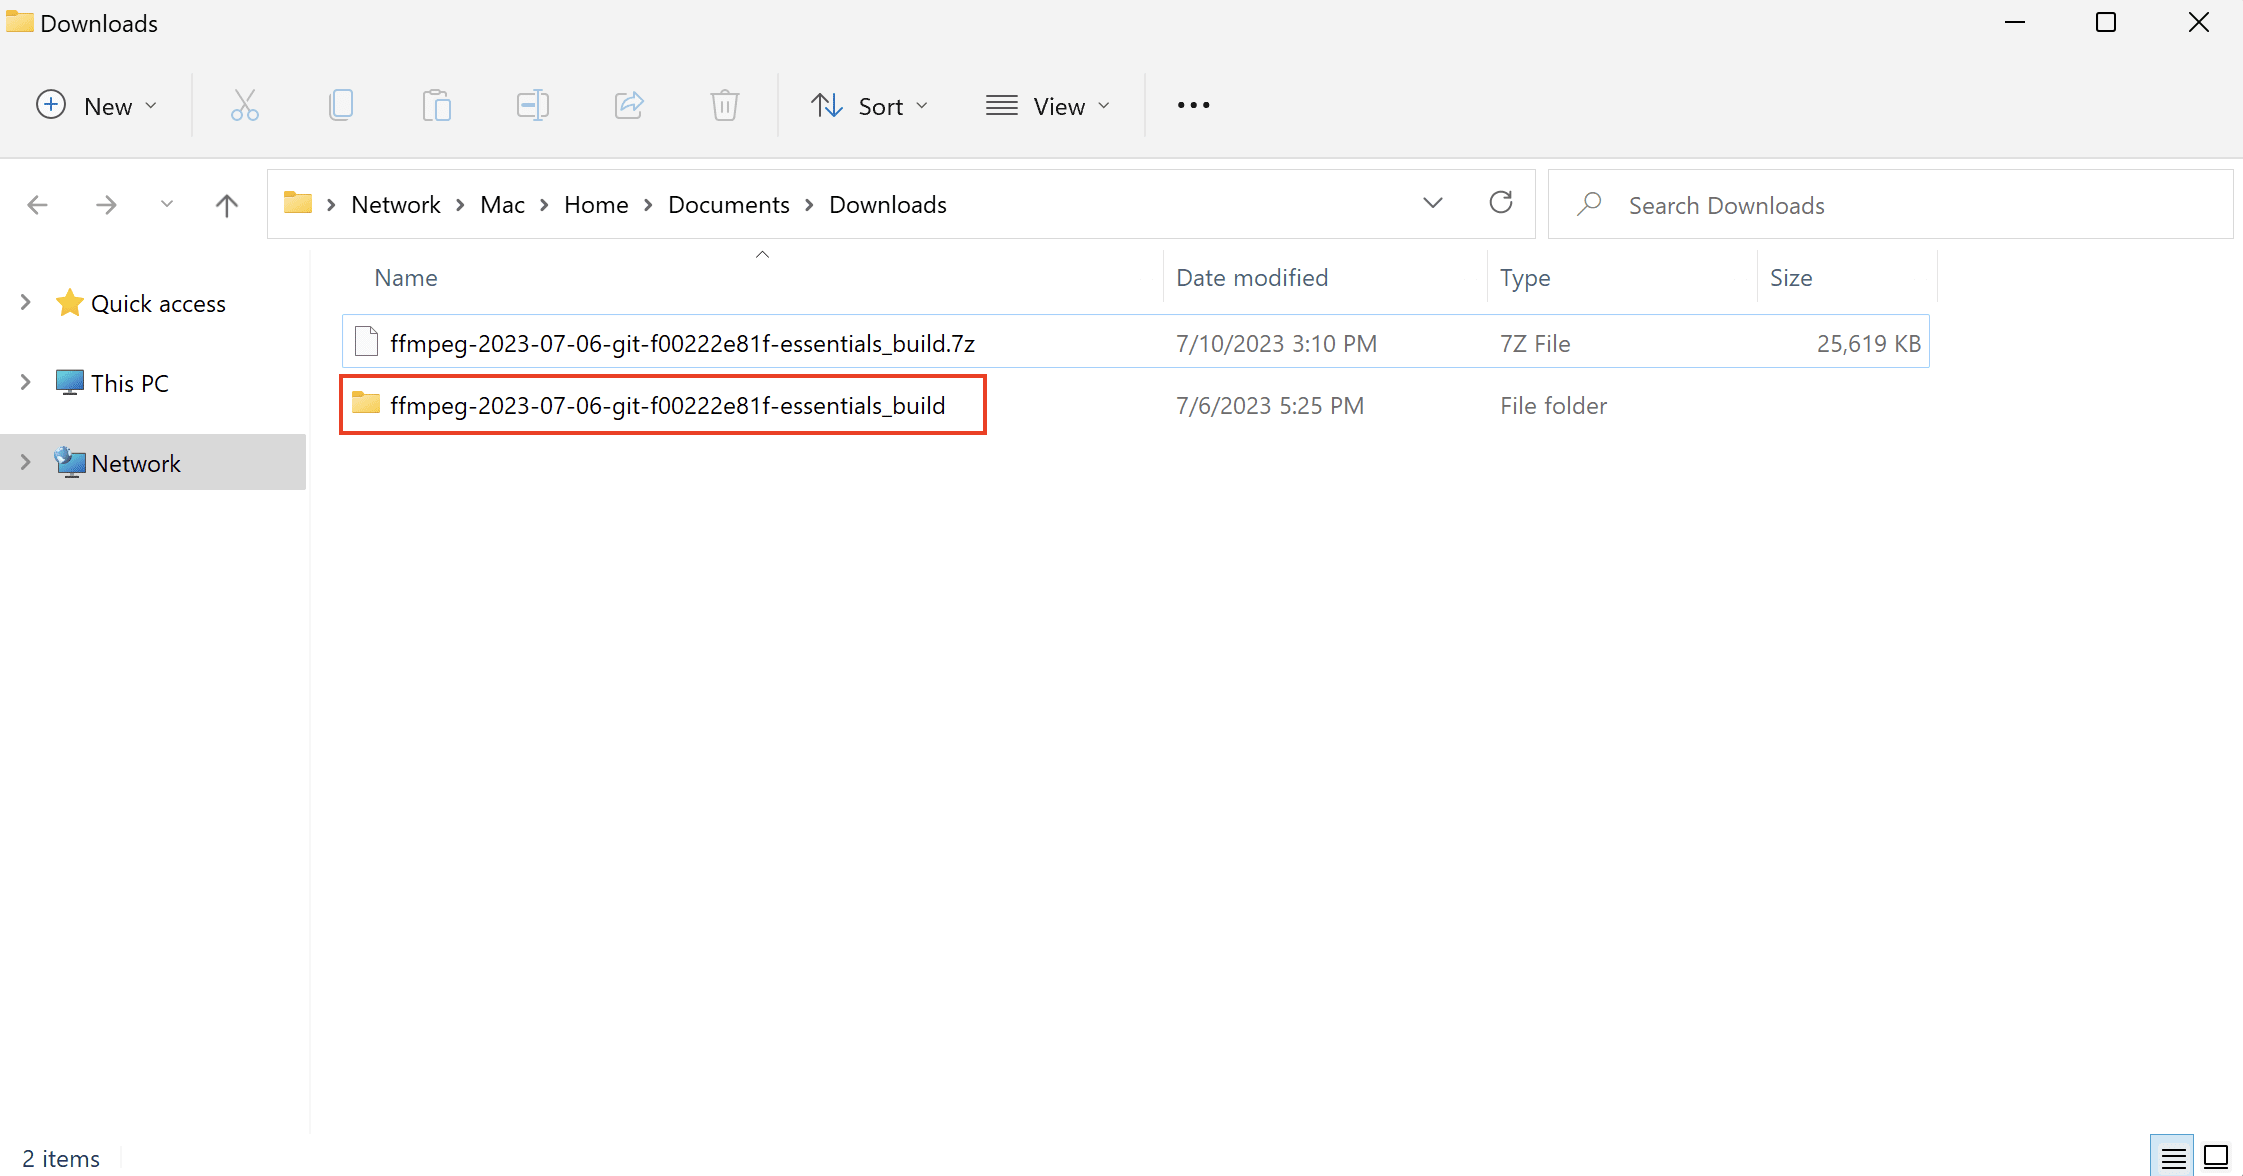
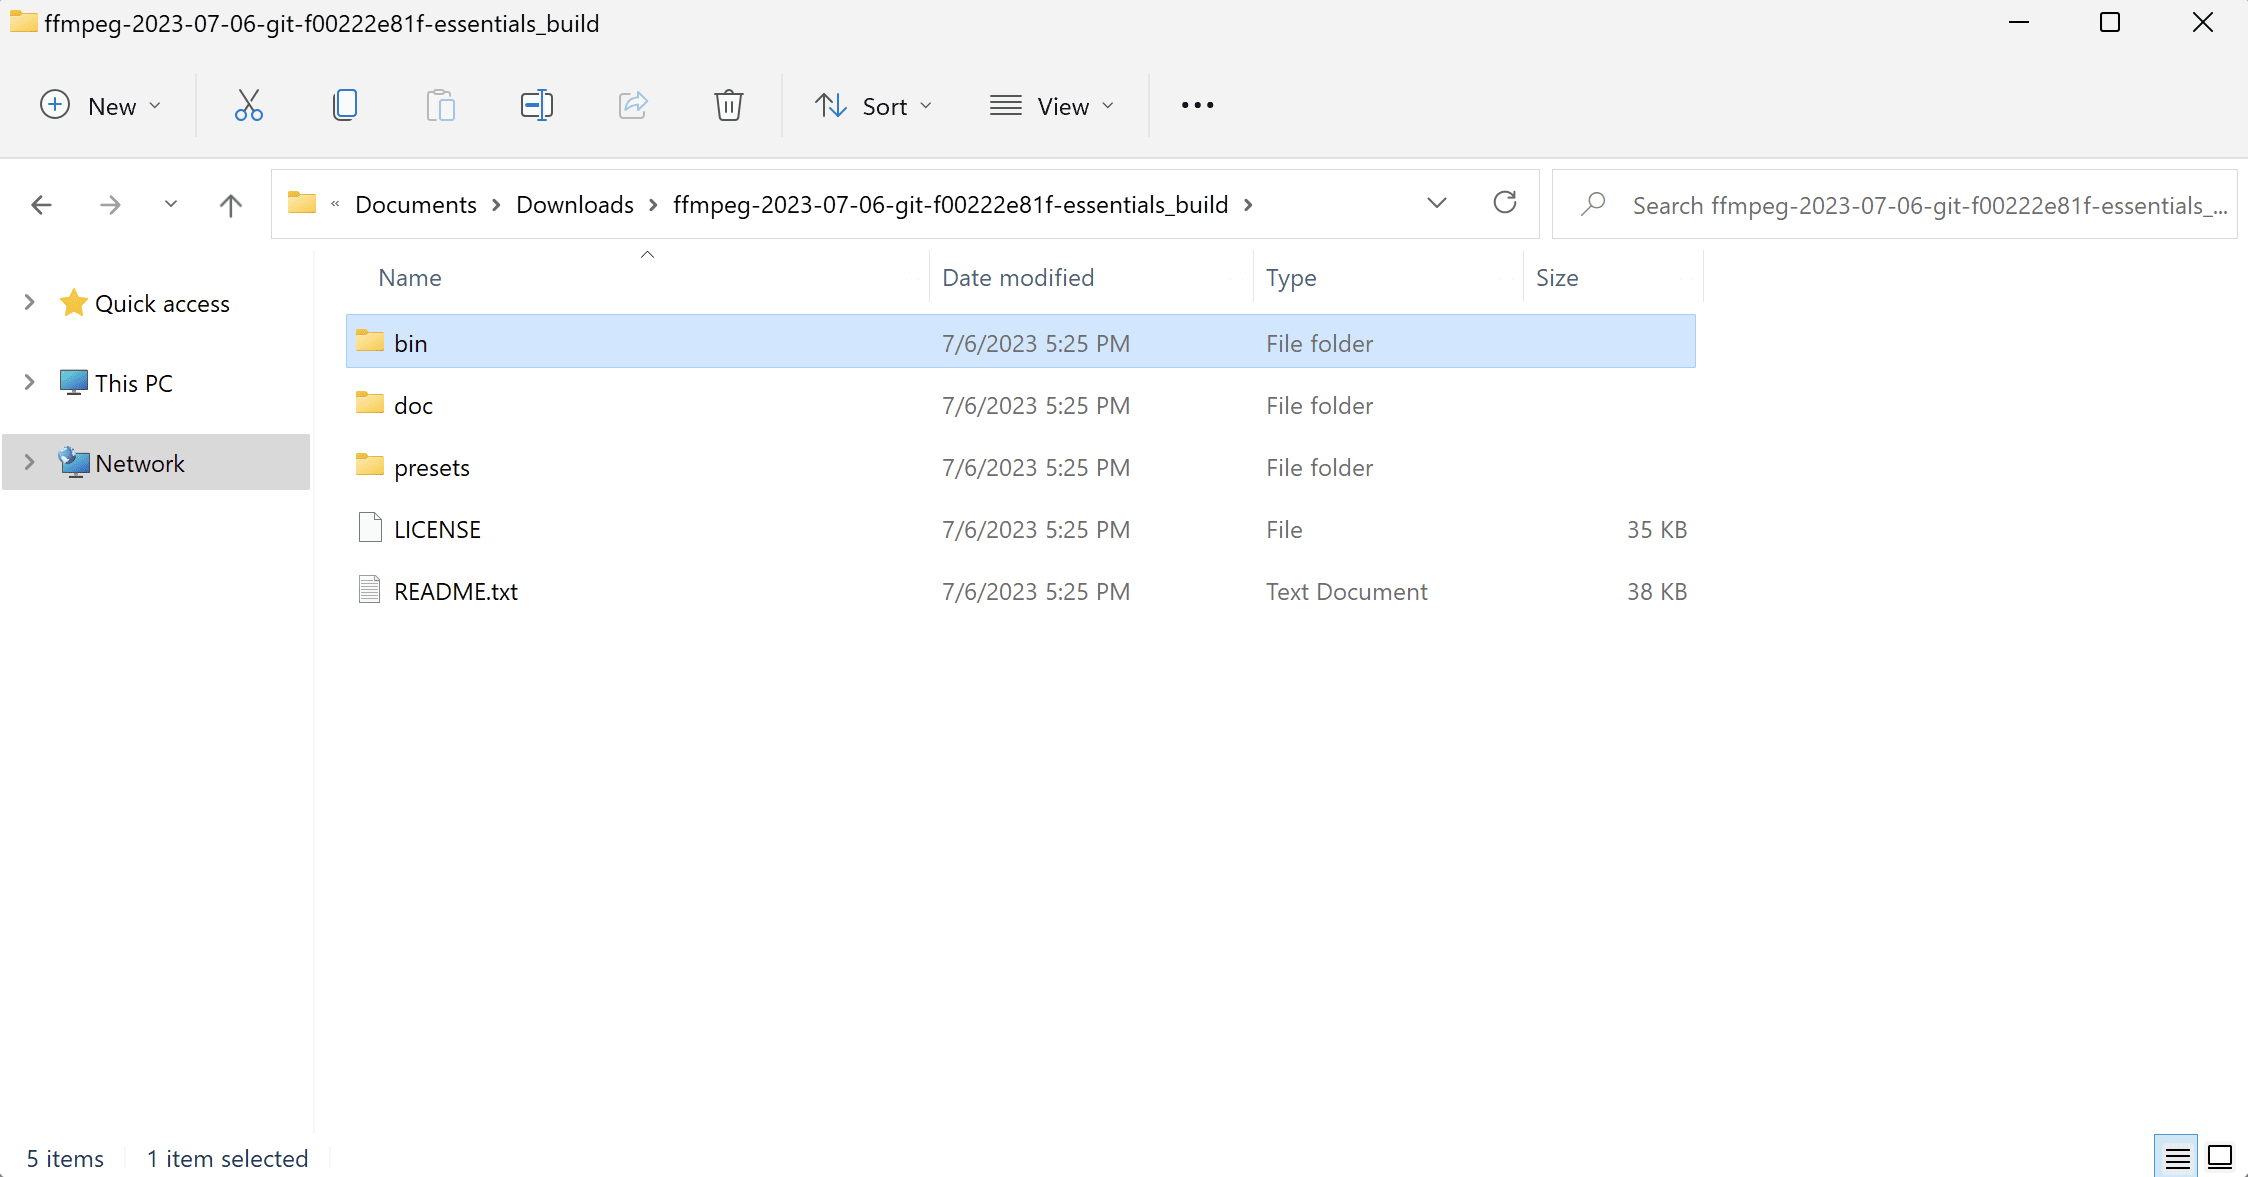
Once the download has been completed, extract the content from the .7z file. It should be a folder with the same name.
In the extracted folder, locate the bin folder and copy its directory. The executable files are stored in this folder and we need to add its directory to the PATH environment variable to install and use FFmpeg.
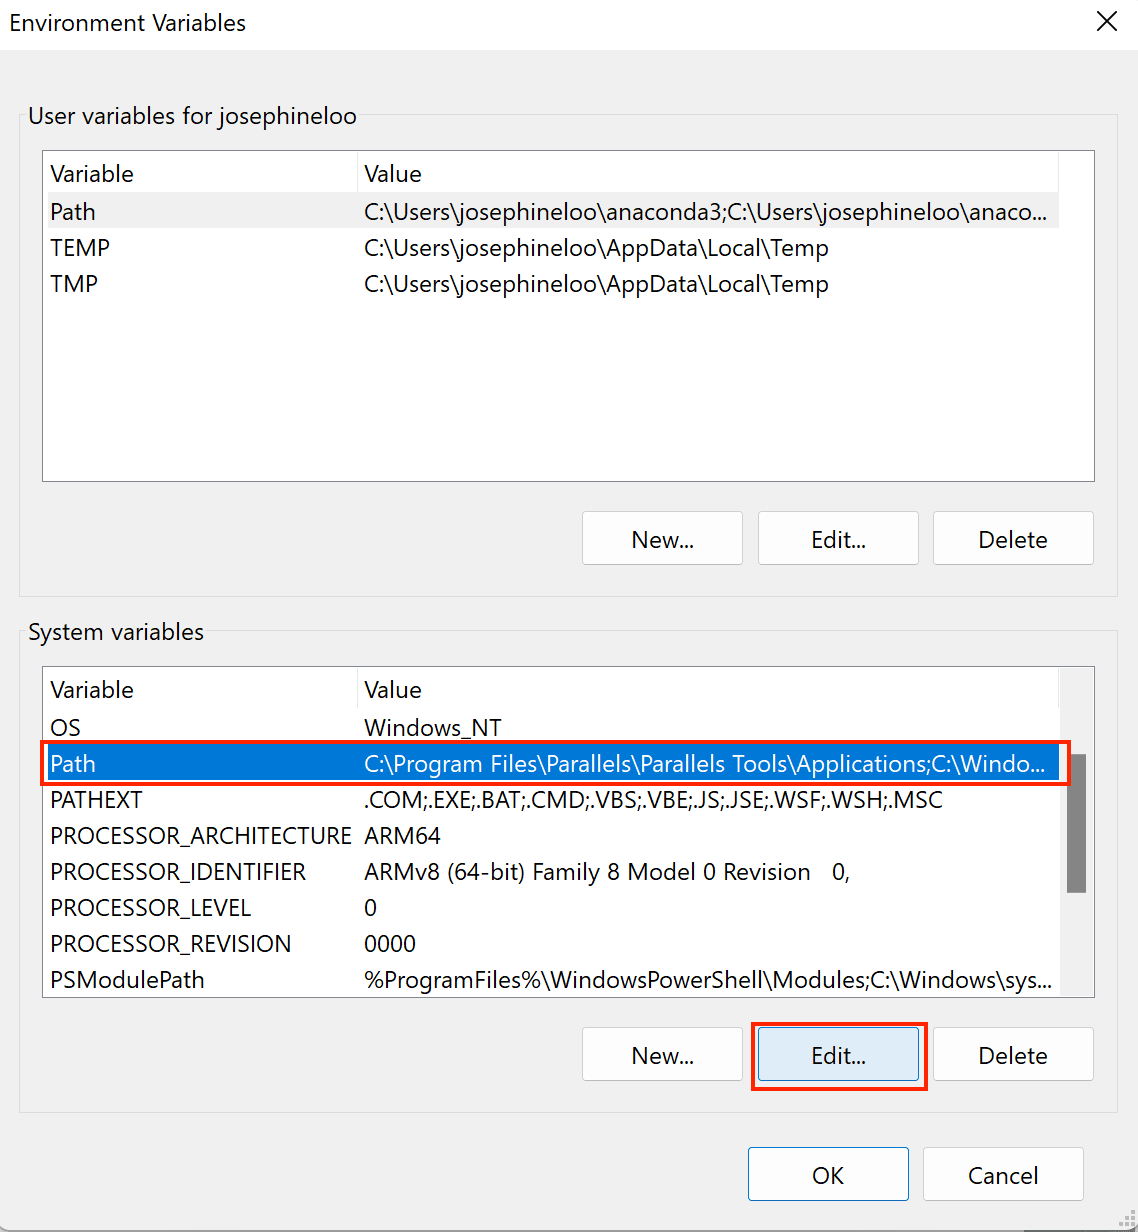
Open up “System Properties” and under the “Advanced” tab, click on the “Environment Variables” button.

In the “Environment Variables” window, find the “Path” variable in the “System variables” section. Select it and click on the “Edit” button.
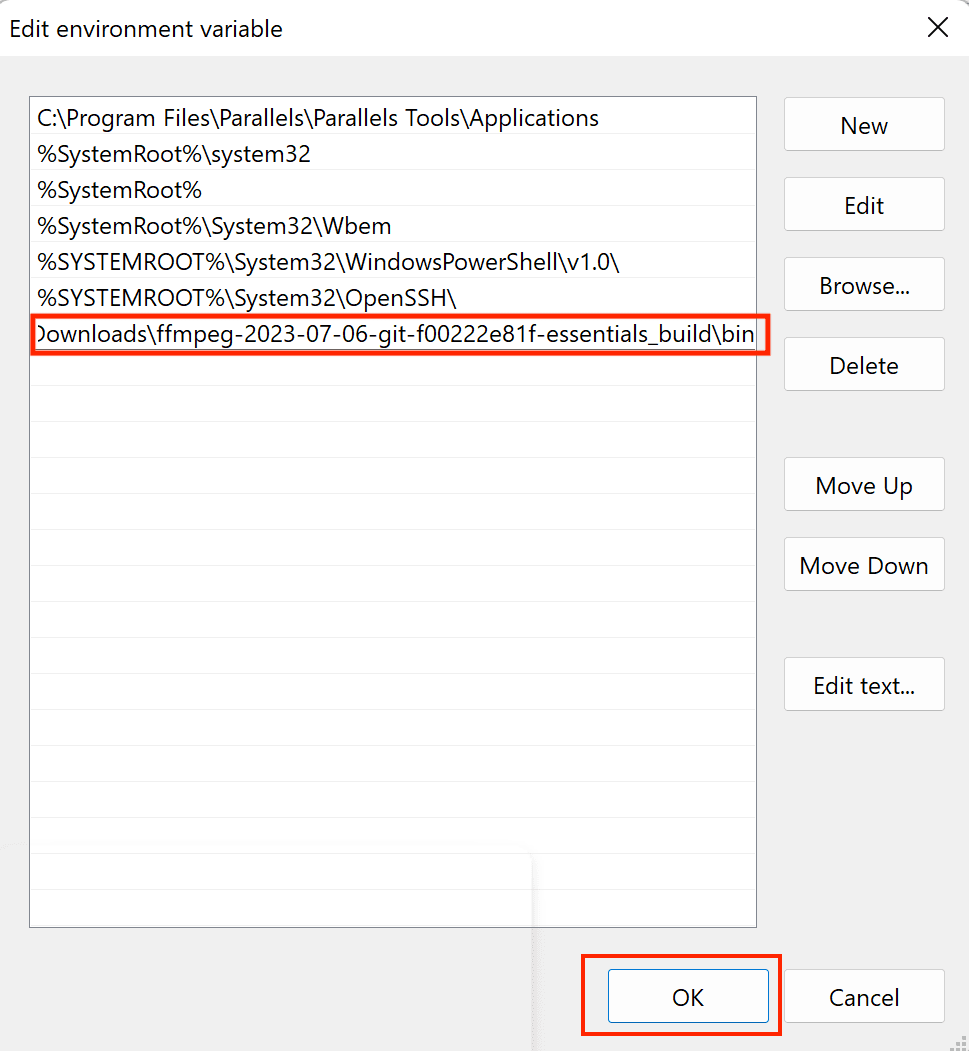
In the “Edit Environment Variable” window, click the “New” button and paste the path to the bin directory. Then, click “OK” to save the changes.
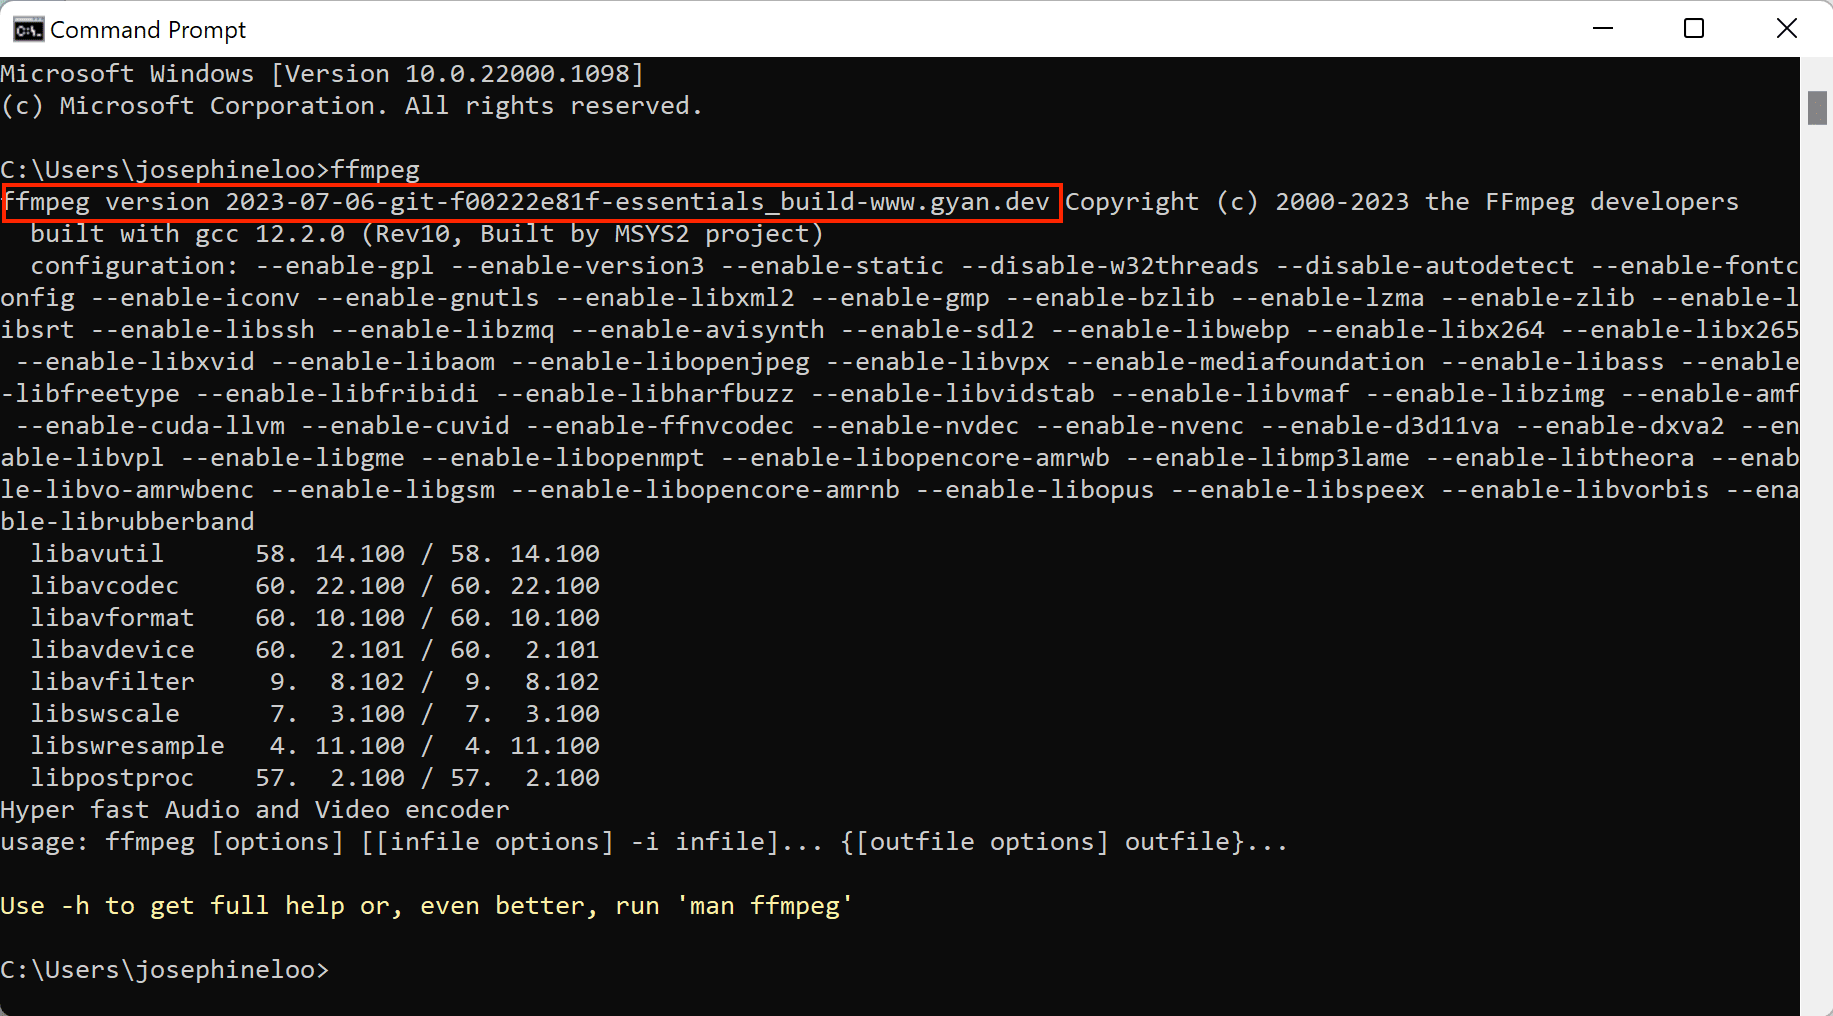
FFmpeg is now installed on your Windows system. You can verify it by opening a Command Prompt window and running ffmpeg. You should see its version and other information:
How to Install FFmpeg on Ubuntu/Linux
Installing FFmpeg on Ubuntu is really easy as you can use the default Advanced Package Tool (apt) to install it from the official repository.
Open a terminal on your Ubuntu system and update the package manager's repository by running the command below:
sudo apt update
After the update has been completed, run the command below to install FFmpeg:
sudo apt install ffmpeg
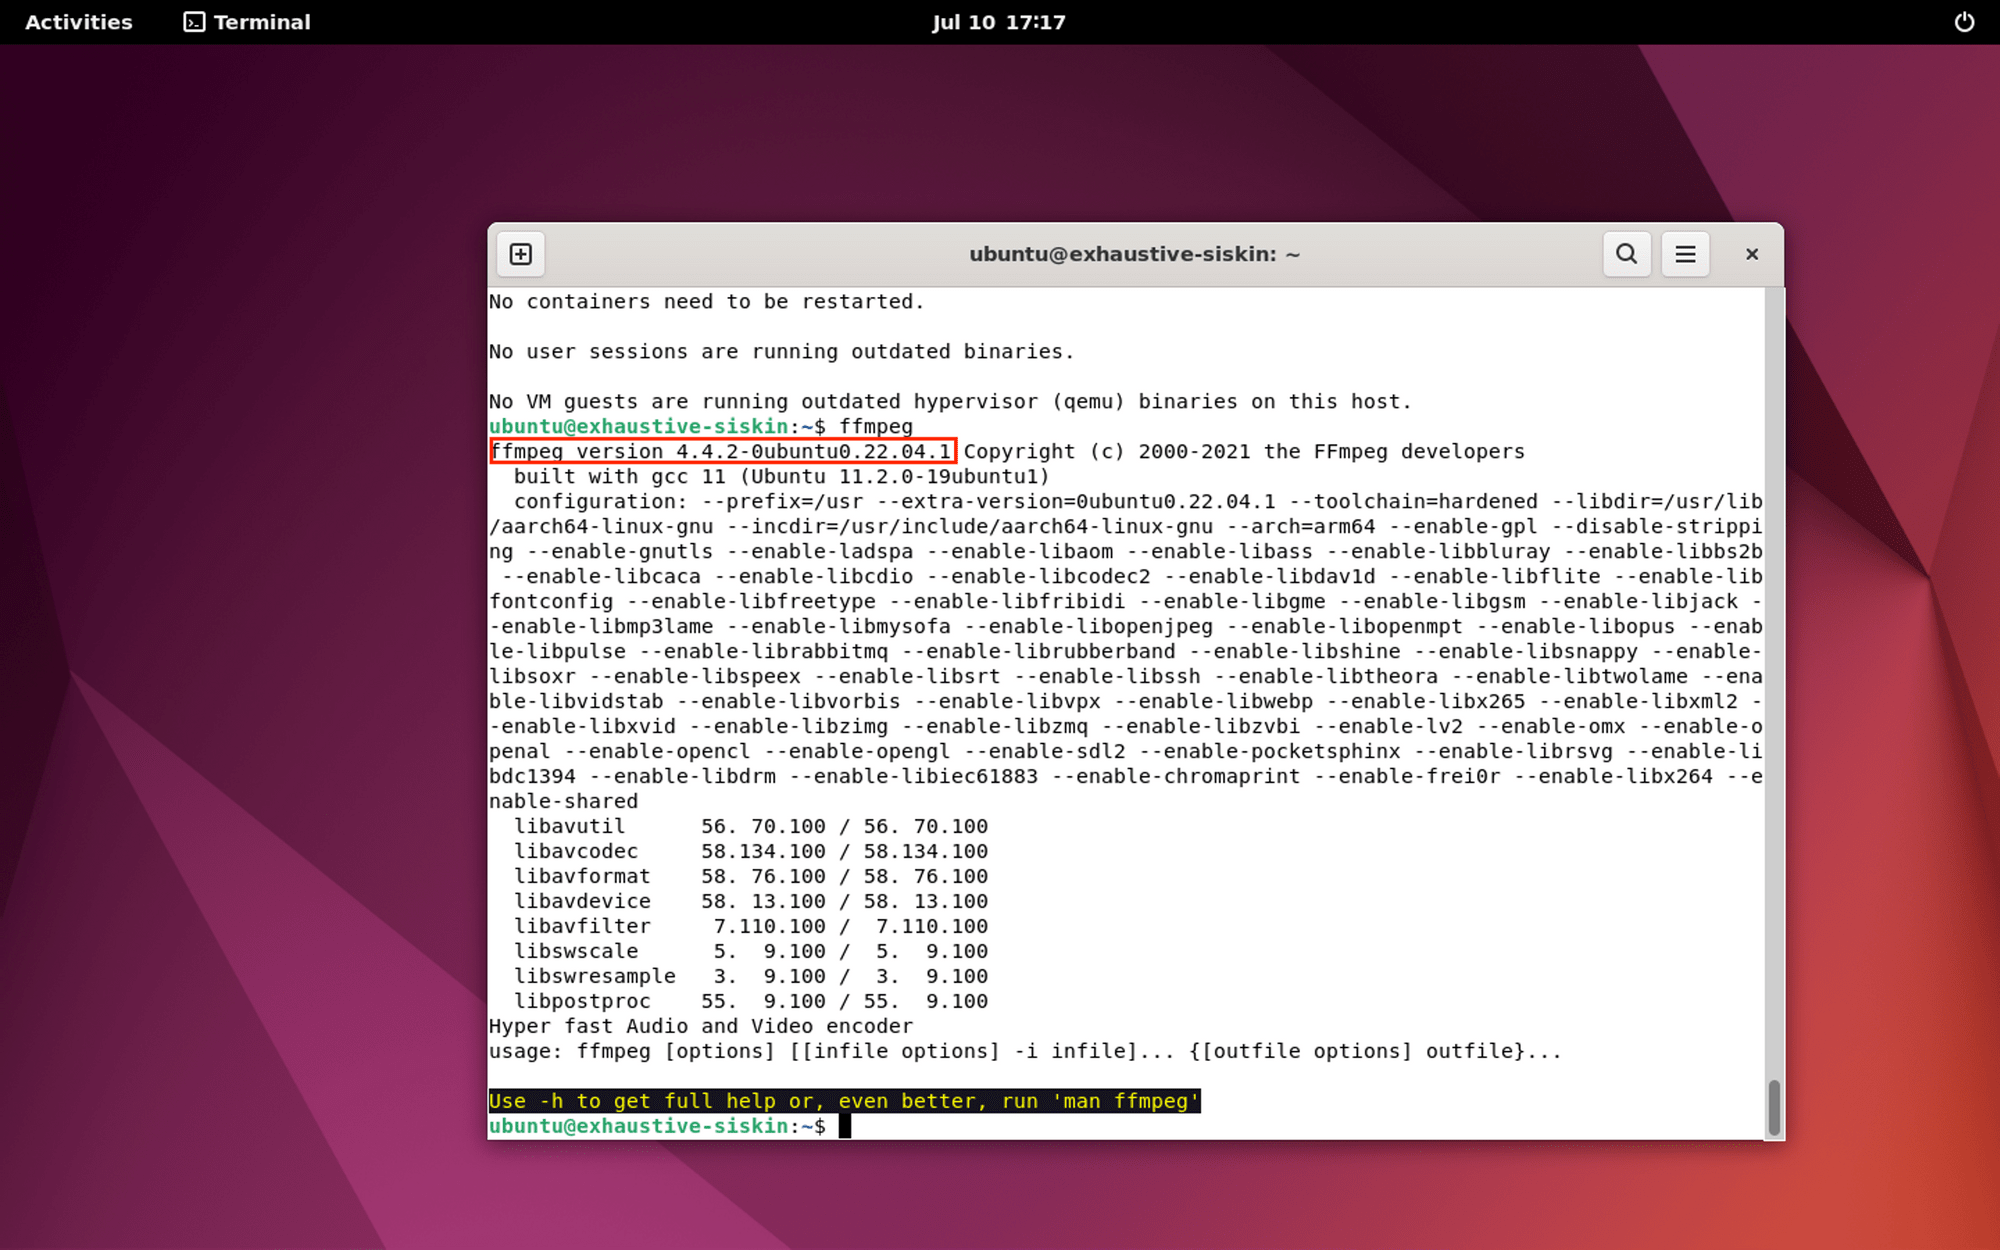
The latest of FFmpeg will be installed on your Ubuntu system. You can verify the installation by running ffmpeg in the terminal to check:
What’s Next
After installing FFmpeg successfully on your machine, you can start using it to manipulate media files—make GIFs from images, add watermarks to videos, add subtitles to videos, and more.
However, this is a general guide that shows you how to install FFmpeg on your machine and you could still run into errors that are specific to your system. If that’s the case and you would like to explore other options that don’t require installation, try using a cloud-hosted tool like Bannerbear. It helps you generate custom images, videos, and more using API and these articles should give you an idea of how it works:
