
How to Build a Video Thumbnail Generator Tool Using React and Bannerbear
Contents
A great video thumbnail is essential for attracting attention to your video and helping it to stand out from the crowd. It needs to be eye-catching and informative, to entice viewers to click on the video but manually creating one that fulfils these requirements can be time-consuming and requires extra effort from the video creator.
Wouldn't it be cool if we can generate and add a well-designed video thumbnail automatically by simply uploading a background image for the thumbnail? Well with the correct tool, you can do that on your video hosting site!
In this tutorial, we’ll learn how to make a video thumbnail generator that adds text to an image uploaded by the user using Bannerbear API and display it on the video automatically.
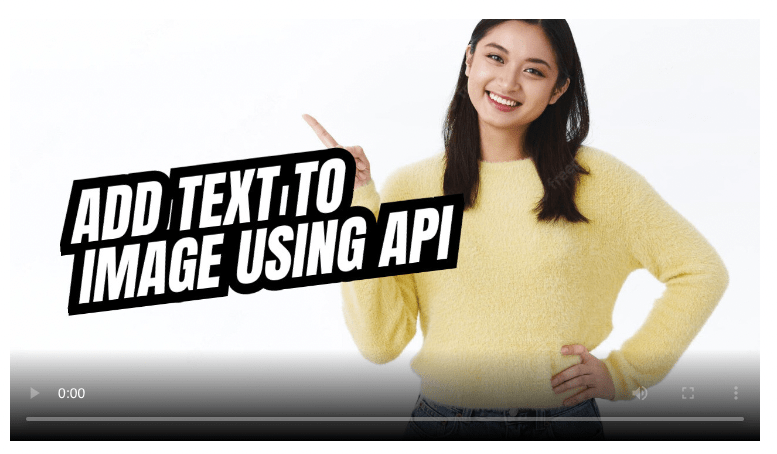
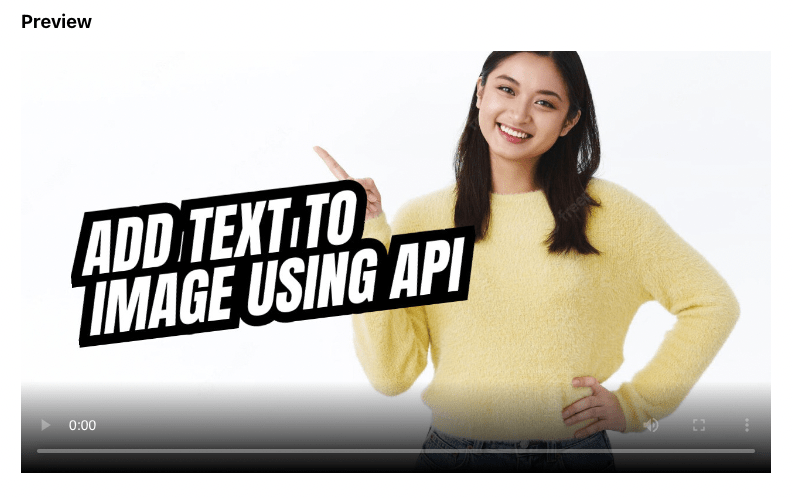
Let's turn this image…

…into this video thumbnail:
What is Bannerbear
Bannerbear is an automated media generation service that helps you create custom images, videos, and more using API. Depending on the media format that you are creating, you can use different APIs as documented in the Bannerbear API Reference to integrate different functions into your app or create an automated workflow easily.
The images and videos are generated automatically based on a design template which you can add static and dynamic images, texts, shapes, etc. By passing different data to the API, the values of the dynamic objects can be changed to generate unique images and videos.
All API requests on Bannerbear are scoped to a project and you can create multiple templates in the same one. The templates can be updated and duplicated from your Bannerbear account dashboard or via API after they have been created.
Setting up the Project
Create a Bannerbear Design Template
You can refer to this tutorial to create a new Bannerbear project and add a template to the project. The current tutorial can be continued from the linked tutorial or worked separately. If you decide to follow the current tutorial independently, enabling Web Sessions can be skipped.
After creating a template, the API key and template ID can be found in the Settings.

Create a React Project
Follow the instructions from the React Guide to create a new React project. As we will be creating some React components, you can install Generate React CLI to create the components faster.
Create an AWS S3 Bucket (Optional)
The image uploaded by users will be stored to an AWS S3 Bucket using the AWS SDK. That said, you can use other methods to host the images too. If you want to use AWS S3, this tutorial provides clear instructions on how to set up and configure your AWS S3 to use the AWS SDK in React.
Writing the Code
We will be creating an upload page for users to upload their videos and image for the thumbnail. The page will consist of a few components that each have their own purposes:
- ImageUploader - to upload the background image for generating a video thumbnail.
- VideoForm - to fill in the title and description of the video.
- TemplateForm - to map the fields from the
VideoFormto dynamic objects in the template.

Note : As we will be focusing on how to generate a thumbnail automatically from the uploaded image and the mapped values, the code for video uploading will be omitted in this tutorial.
Step 1. Create a New Page
Create a new page named UploadPage and declare the constant and state variables below:
UploadPage.js
import React, { useState } from 'react';
import './UploadPage.css';

const TEMPLATE_ID = '7wpnPQZzwrdw5dOgxo'; // Bannerbear template ID (replace with your own ID)
const videoFormInputArray = ['Title', 'Description']; // fields for the Video Form

const UploadPage = () => {

  const [imageObjName, setImageObjName] = useState(null); // name of the image object in the template

  const [templatePreview, setTemplatePreview] = useState(null); // URL of the template preview image
  const [thumbnailUrl, setThumbnailUrl] = useState(null); // URL of the thumbnail generated
  const [imageUrl, setImageUrl] = useState(null); // URL of the image uploaded by user

  const [videoFormInput, setVideoFormInput] = useState({}); // an object to hold the Video Form fields
  const [modifiableFields, setModifiableFields] = useState(null); // modifiable fields in the template

  const [loading, setLoading] = useState(false);

  return (
    <div className='UploadPage'>
    </div>
  );
};

export default UploadPage;
In the next steps, we will be creating some functions and components that can be used in the HTML code of this page.
Step 2. Retrieve the Design Template
The first function that we will be creating is the getTemplate() function. The function will make a GET request to /templates with the specified Bannerbear design template ID.
From the template result returned, we will store its preview image URL, image object/layer name, and modifiable fields to the declared state variables templatePreview, imageObjName, and modifiableFields.
Then, insert the strings in videoFormInputArray into the videoFormInput object.
UploadPage.js
// Get modifiable fields from the template
  React.useEffect(() => {
    async function getTemplate() {
      const res = await fetch(`https://api.bannerbear.com/v2/templates/${TEMPLATE_ID}`, {
        method: 'GET',
        headers: {
          Authorization: `Bearer ${process.env.REACT_APP_BB_API_KEY}`,
        },
      });

      const data = await res.json();
      var availableModifications = data.available_modifications
        .filter((modification) => modification.hasOwnProperty('text')) // only allow users to change texts
        .sort((a, b) => (a.name > b.name ? 1 : b.name > a.name ? -1 : 0));

      setTemplatePreview(data.preview_url);
      setImageObjName(data.available_modifications.find((x) => x.hasOwnProperty('image_url')).name); // get the name of the image object (image_container)
      setModifiableFields(availableModifications); // for field mapping in Template Value Form

      setVideoFormInput(videoFormInputArray.reduce((obj, x) => ({ ...obj, [x]: '' }), {})); // insert the values in the array into an object
    }
    getTemplate();
  }, []);
data.available_modifications will contain all modifiable fields of the template. As users will be uploading the image using the ImageUploader component, we can filter the array to exclude the image object. Only text objects will be added to availableModifications to be shown in the TemplateForm.
// data.available_modifications
[
    {
        "name": "image_container", // exclude this from *availableModifications*
        "image_url": null
    },
    {
        "name": "text_1",
        "text": null,
        "color": null,
        "background": null
    }
]
The template preview returned:

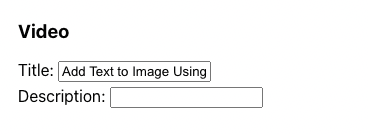
Step 3. Fill in the Video Details
Create a VideoForm component that allows users to enter the title and description of the video. The component will receive videoInputArray from the parent, UploadPage via props, and the fields in the array will be used to populate the form.
VideoForm.js
import React from 'react';
import './VideoForm.css';

//props.videoFormInputArray = ['Title', 'Description'];

const VideoForm = (props) => (
  <div className='VideoForm'>
    <form>
      {props.videoFormInputArray.map((input, i) => (
        <div key={input}>
          <label>
            {input}: <input type='text' name={input} onChange={props.handleInputChange} />
          </label>
        </div>
      ))}
    </form>
  </div>
);

export default VideoForm;
Add a function named handleInputChange to the parent. When the input element is changed, it will be called to update the value in the videoFormInput object.
UploadPage.js
const handleInputChange = (e) => {
    const name = e.target.name;
    const value = e.target.value;
    setVideoFormInput((values) => ({ ...values, [name]: value }));
};
Example:
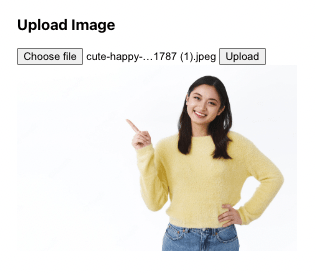
Step 4. Upload an Image for the Thumbnail
Create a new component named ImageUploader for users to upload an image.
import React, { useState } from 'react';
import './ImageUploader.css';
import AWS from 'aws-sdk';

const BUCKET_NAME = 'your_bucket_name';
const s3 = new AWS.S3({
  accessKeyId: 'your_access_key_id',
  secretAccessKey: 'your_secret_access_key',
});

const ImageUploader = (props) => {
  const [selectedFile, setSelectedFile] = useState(null);
  const [imageUrl, setImageUrl] = useState(null);
  const [isUploading, setIsUploading] = useState(false);

  const handleFileInput = (e) => {
    setSelectedFile(e.target.files[0]);
  };

  const handleUpload = async (file) => {
    setIsUploading(true);

    const res = await saveImageToBucket('image', file);
    props.handleImageUrl(res.Location);

    setImageUrl(res.Location);
    setIsUploading(false);
  };

  const saveImageToBucket = async (fileName, image) => {
    const params = {
      Bucket: BUCKET_NAME,
      Key: `${fileName}`,
      Body: image,
    };

    return await s3.upload(params).promise();
  };

  return (
    <div className='image-uploader'>
      <input type='file' onChange={handleFileInput} />
      <button onClick={() => handleUpload(selectedFile)}>Upload</button>
      {isUploading && <div>Uploading...</div>}
      {imageUrl && (
        <div>
          <img src={imageUrl} alt='' />
        </div>
      )}
    </div>
  );
};

export default ImageUploader;
Add handleImageUrl to the parent UploadPage. When the “Upload” button is clicked, the image will be uploaded to AWS S3 and the URL will be returned in the response. Then, props.handleImageUrl will be called to pass the image URL back to the parent.
UploadPage.js
const handleImageUrl = (imageUrl) => {
    setImageUrl(imageUrl);
 };
Example:
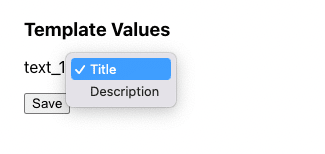
Step 5. Map the Video Fields to the Bannerbear Template Fields
Create a new component named TemplateForm. The modifiable fields in the template will be shown in this form and users can select the fields from the VideoForm to map them to the template fields.
TemplateForm.js
import React, { useState } from 'react';
import './TemplateForm.css';

const TemplateForm = (props) => {
  const [inputs, setInputs] = useState({});

  const handleSelectChange = (e) => {
    const name = e.target.name;
    const value = e.target.value;
    setInputs((values) => ({ ...values, [name]: value }));
  };

  const handleSubmit = (e) => {
    e.preventDefault();
    const modifications = [];

    if (Object.keys(inputs).length === 0) {

      props.modifiableFields.forEach((field) => { // use default values from video input
        inputs[field.name] = Object.values(props.videoFormInput)[0];
      });
    }

    Object.keys(inputs).forEach((field) => {
      modifications.push({
        name: field,
        text: inputs[field],
      });
    });
    props.handleFields(modifications);
  };

  return (
    <div className='template-form'>
      <form onSubmit={handleSubmit}>
        <h3>Template Values</h3>
        {props.modifiableFields.map((field) => {
          return (
            <div key={field.name}>
              <label>
                {field.name}:{' '}
                <select name={field.name} onChange={handleSelectChange}>
                  {Object.keys(props.videoFormInput).map((input) => (
                    <option value={props.videoFormInput[input]} key={input}>
                      {input}
                    </option>
                  ))}
                </select>
              </label>
            </div>
          );
        })}
        <input className='save-btn' type='submit' value='Save' />
      </form>
    </div>
  );
};

export default TemplateForm;
Example:
Step 6. Generate and Add the Thumbnail to the Video
Add the code below to the parent UploadPage. When the “Save” button is clicked, handleFields will be called and a POST request will be sent to Bannerbear’s /images endpoint to generate a thumbnail using the image uploaded by the user and the mapped values.
UploadPage.js
const handleFields = async (modifications) => {
    modifications = [...modifications, { name: imageObjName, image_url: imageUrl }]; // add the image object to the array of text objects
    const thumbnail = await generateThumbnail(modifications);

    setLoading(false);
    setThumbnailUrl(thumbnail);
  };

const generateThumbnail = async (modifications) => {
    setLoading(true);
    var data = {
      template: TEMPLATE_ID,
      modifications: modifications,
    };
    const res = await fetch('https://sync.api.bannerbear.com/v2/images', {
      method: 'POST',
      body: JSON.stringify(data),
      headers: {
        'Content-Type': 'application/json',
        Authorization: `Bearer ${process.env.REACT_APP_BB_API_KEY}`,
      },
    });
    const imageData = await res.json();

    return imageData.image_url_jpg;
  };
The URL of the thumbnail will be returned in the response and displayed on the video automatically.
Add the React components to the HTML of UploadPage and it's done, you have added a video thumbnail generator to your site!
The full code can be found in this GitHub repo.
Utilizing API to Improve Workflows
There are many ways you can use API to offer more functionalities to your users and improve their experience. Instead of uploading a background image for the thumbnail manually, you can try extracting the most representative frame from the video as the thumbnail automatically using FFmpeg.
If you would like to try something more exciting, why not try using AI to generate the images? Here are 8 artificial intelligence image and video generators built using Stable Diffusion to try out.
Bannerbear offers other APIs to fulfil the requirements of different use cases, if you're planning to integrate more functionalities to your site using API, check out the Bannerbear API Reference and other tutorials.
