
How to Start Generating Images Dynamically in PHP with Bannerbear
Contents
Images are an important part of any application, as they can improve user experience and help to convey information and ideas more effectively. However, as the application scales, managing its digital assets gets more difficult, especially when they are designed based on a brand guide (eg. font, color, etc.) or have the logo on them.
Imagine having 1000 images and when a brand refresh is needed, all 1000 images have to be created again to align with the latest branding. In this capacity, using code to generate images can be a great way to keep them updated at all times.
One way to do this is creating a template as a reference for the images so that updating it alone will apply changes to all images. Instead of changing 1000 images, you will only have to change one now—an instant 1000x productivity boost!
You don't have to start from scratch. With a tool like Bannerbear, you can add image generation functionality to your application almost immediately. In this article, we’ll see how Bannerbear works and how you can use it in your PHP application.
What is Bannerbear
Bannerbear is a tool that helps you generate custom images, videos, and more using API. It has libraries in various popular programming languages like Ruby, PHP, and Node.js, making integrating image generation and other media manipulation functionalities into your application effortless.
The images and other media files are created based on a template where you can add static and dynamic objects such as images, text, and shapes. By passing different data to the API, the values of these dynamic objects can be altered to generate unique content.
All API requests on Bannerbear are scoped to a project and you can create multiple design templates in the same one. The design templates can be accessed using the project API key and their template IDs.
Pre-requisites
Getting Started
Create a Bannerbear Design Template
To start using Bannerbear, you will first need to create a new project and add a template to it. This will create a blank canvas which you can add layers of static and dynamic text, image, and other objects.
Alternatively, you can duplicate the template used in this tutorial and modify it to suit your needs.
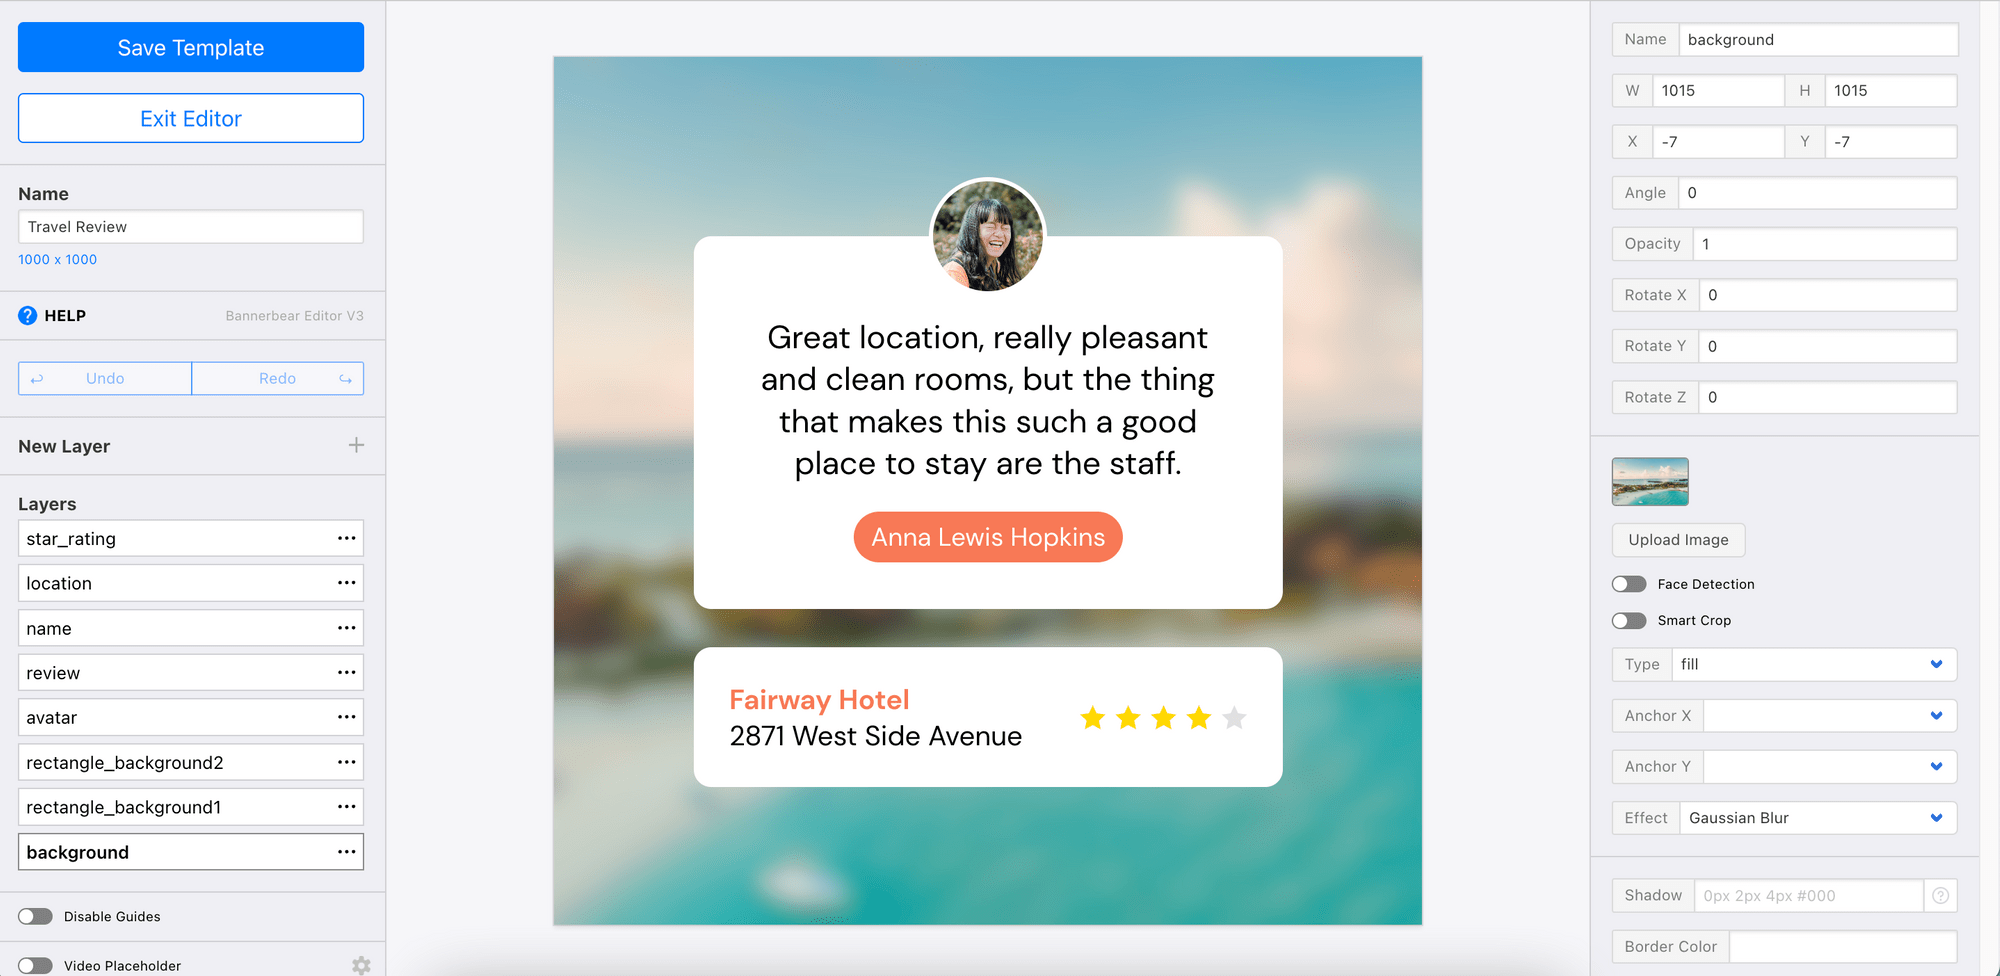
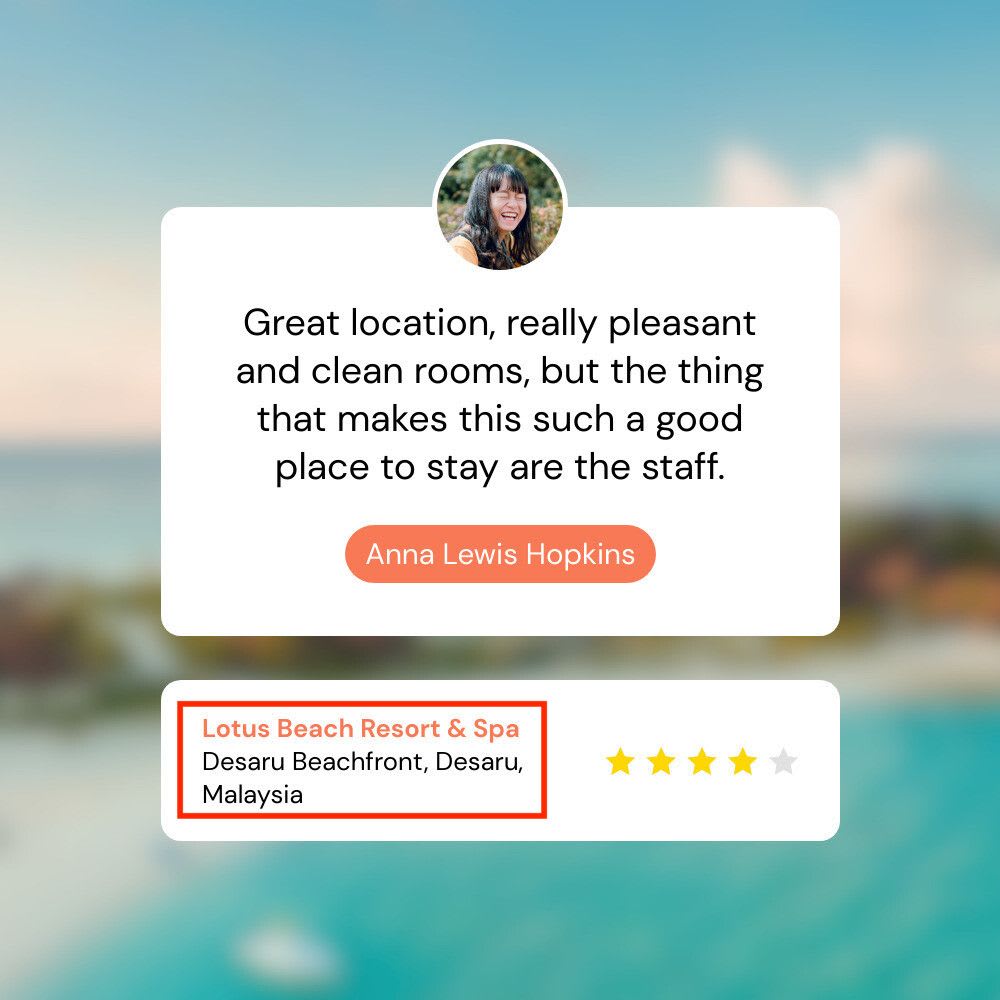
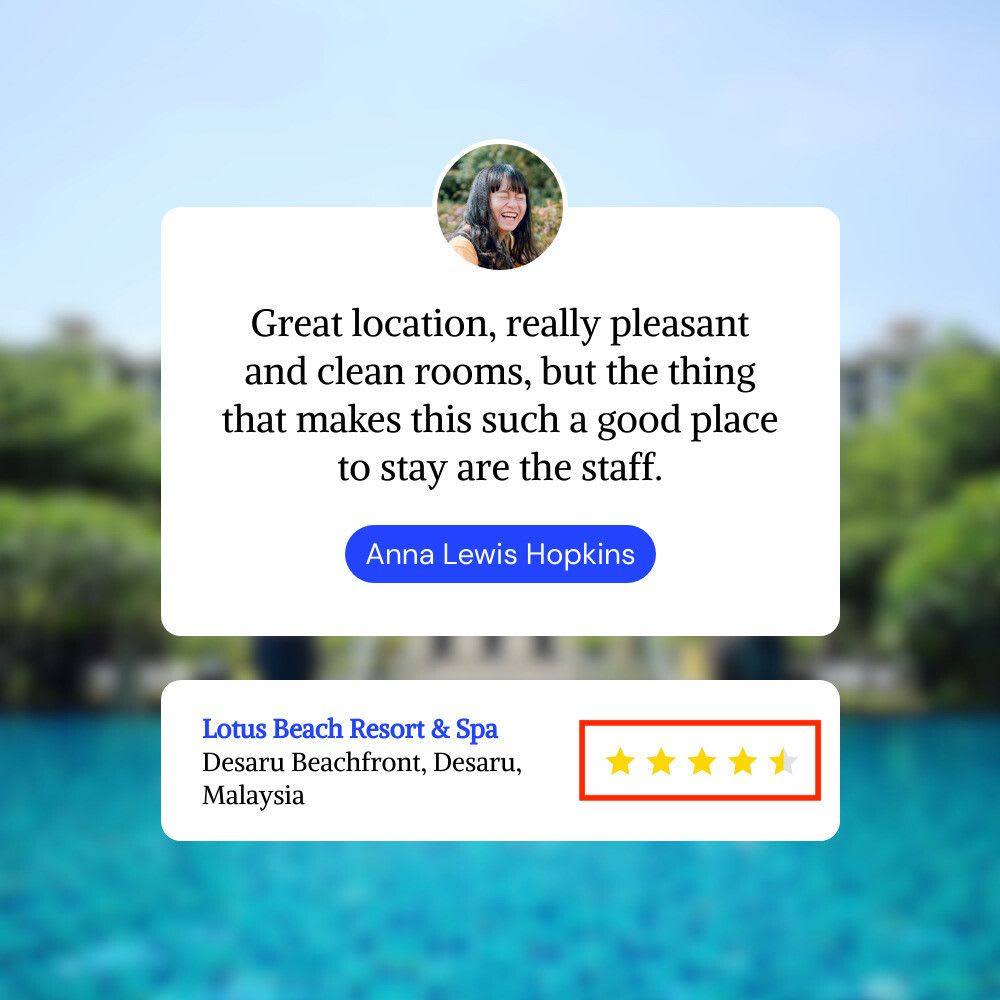
In the template above, we have these modifiable dynamic objects:
- Text - review, name, location
- Image - background, avatar
- Special object - star_rating
When we're using the PHP library, we can specify the values for these objects in an array and pass it to the create_image method. Images will be generated based on the values in the array. We’ll go into the details in the following section.
🐻 You can get more free templates from the Template Library.
Retrieve Your Project API Key and Template ID
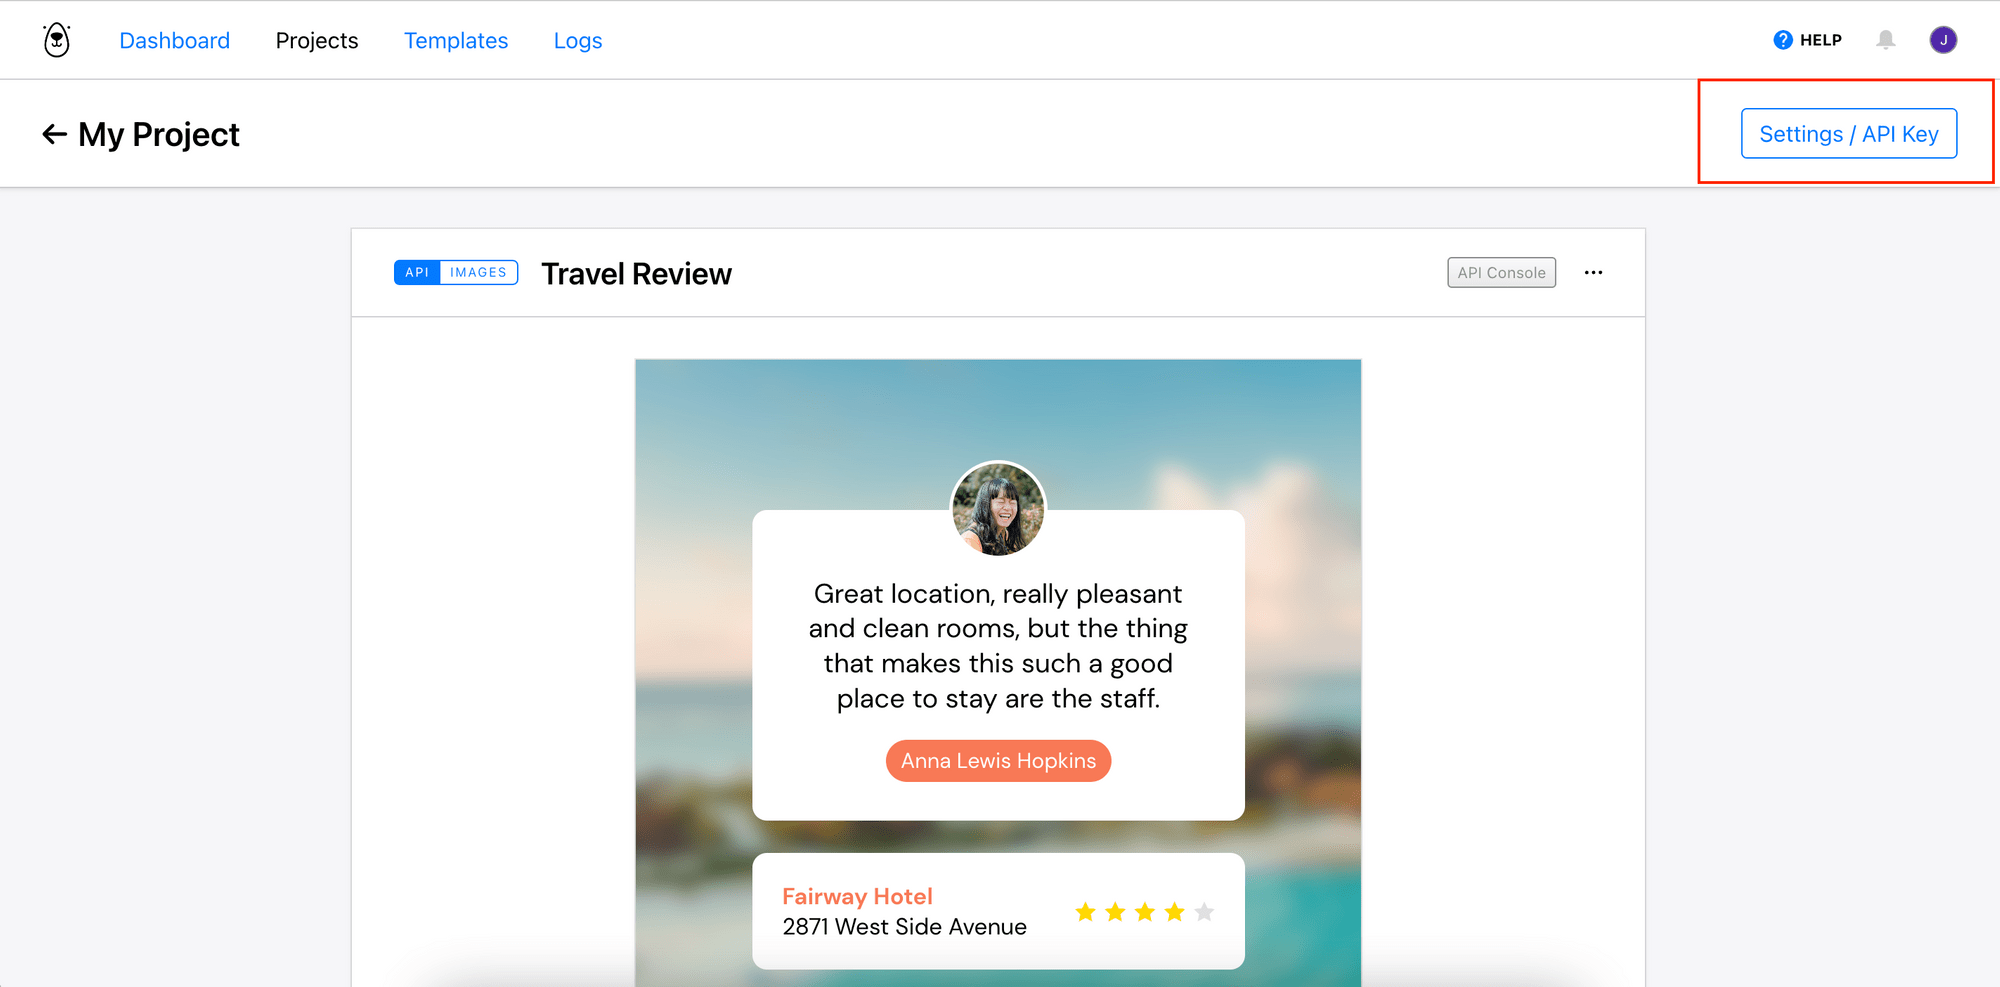
The project API key and template ID will be needed for authentication, so that your PHP application can access your Bannerbear project and the design template.
You should see “Settings/API Key” on your template page. Click on it to reveal your API key.
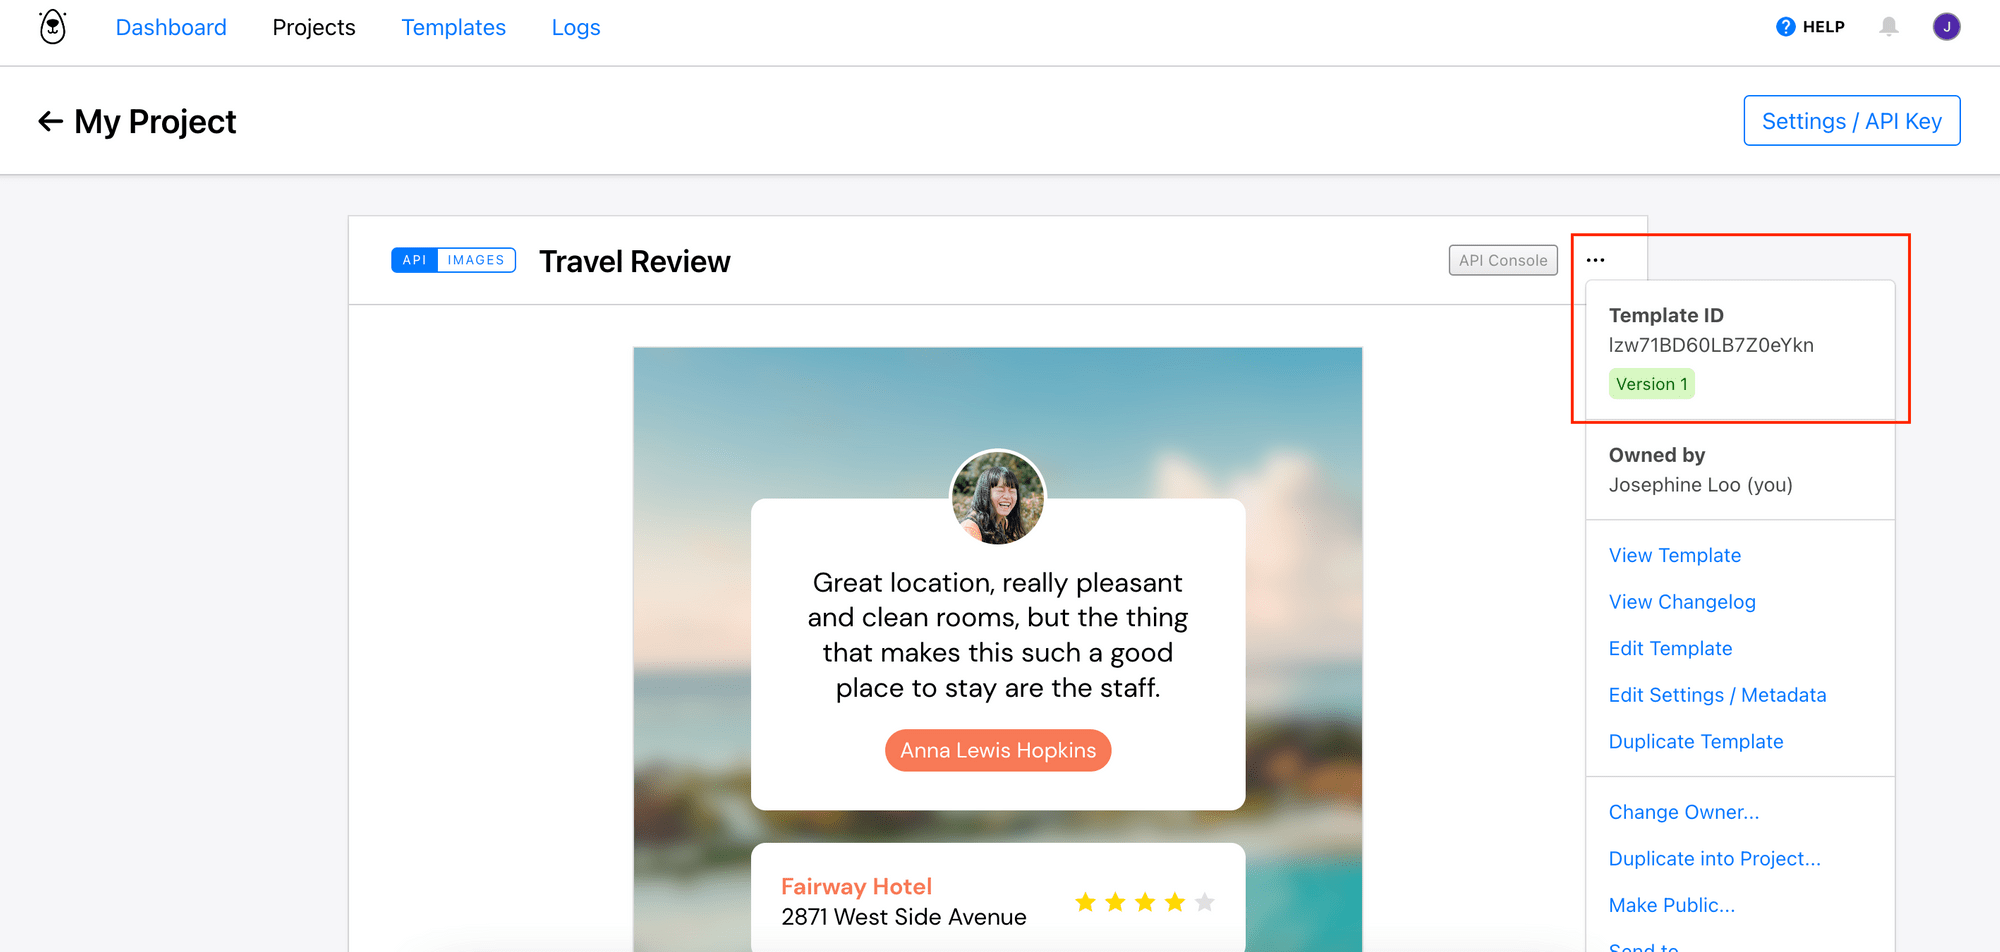
For the template ID, it can be found in the template option as shown in the screenshot below:
Install Bannerbear PHP Library
In your project directory, install Bannerbear PHP library by running the command below in the terminal:
composer require yongfook/bannerbear
Bannerbear specifies autoloading information, you can autoload the library by adding this to your code:
require_once('vendor/autoload.php');
This will allow you to access the methods provided by the Bannerbear PHP library and add image generation and other functionalities to your application in a few lines of code.
Now that we have everything we need, let’s dive into the code!
Generating Images with Bannerbear Library
First, we’ll instantiate a new instance of Bannerbear using the project API key. Create a new Bannerbear instance using the code below:
$bb = new Bannerbear\BannerbearClient("your_project_api_key");
Next, we’ll try to do a simple method call, to use one of the core functionalities of Bannerbear—image generation.
You can generate images using the create_image method by passing in your template ID and an array of modifications. In the modifications array, you can insert children arrays of the dynamic objects with their names and values.
Let's see how to add them…
Change Texts
We'll start with the basic one—changing the text. The code below shows a simple example of changing the value of a text object (location):
$res = (object) $bb->create_image("your_template_id", [
        "modifications" => [
            [
              "name"=> "location",
              "text"=> "Lotus Beach Resort & Spa"
            ],
          ],
    ], TRUE);
The last parameter of the method is set to TRUE, so that the image will be created asynchronously and image URLs in various formats (.png/.jpg) will be returned in the response.
This will assign the JPEG image URL to the $imgUrl variable:
$imgUrl = $res->image_url_jpg;

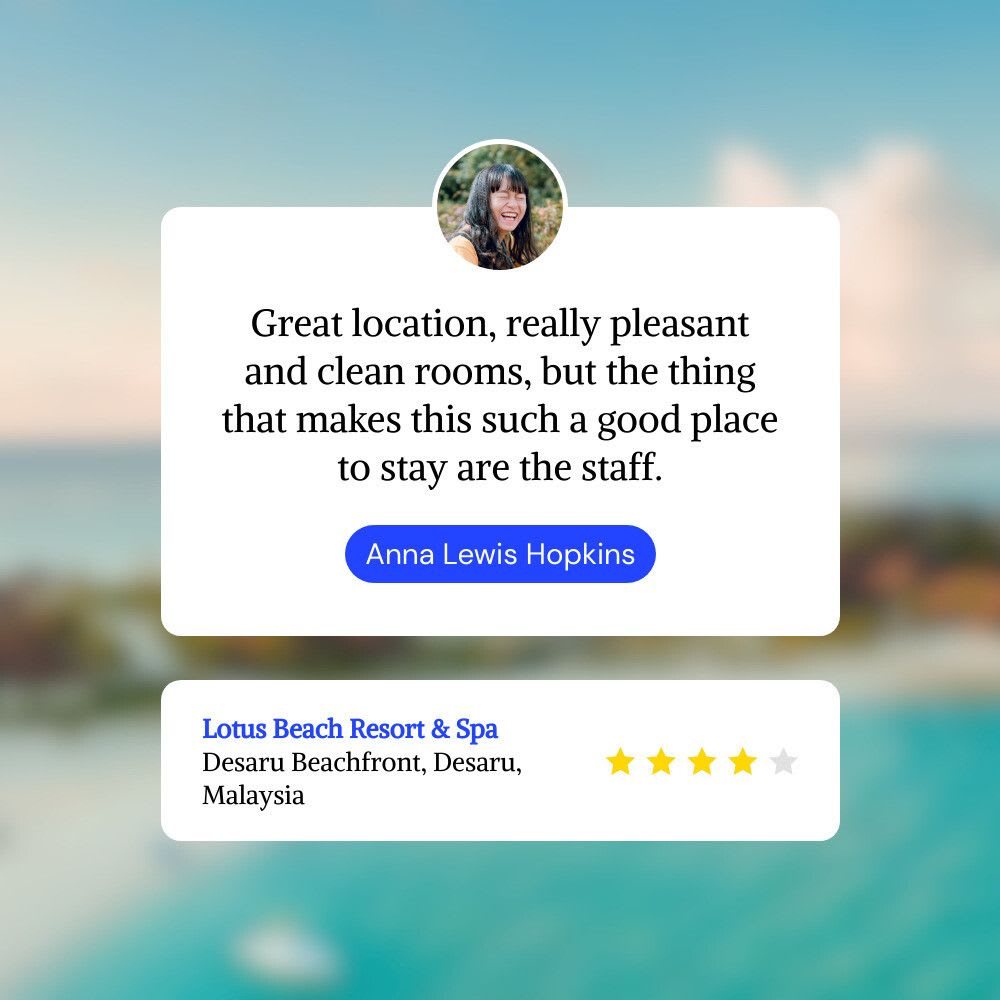
Notice that the location on the template has two lines with different text colors but we have only one in the result generated? This is because we are not using the secondary styles that have been configured in the template.
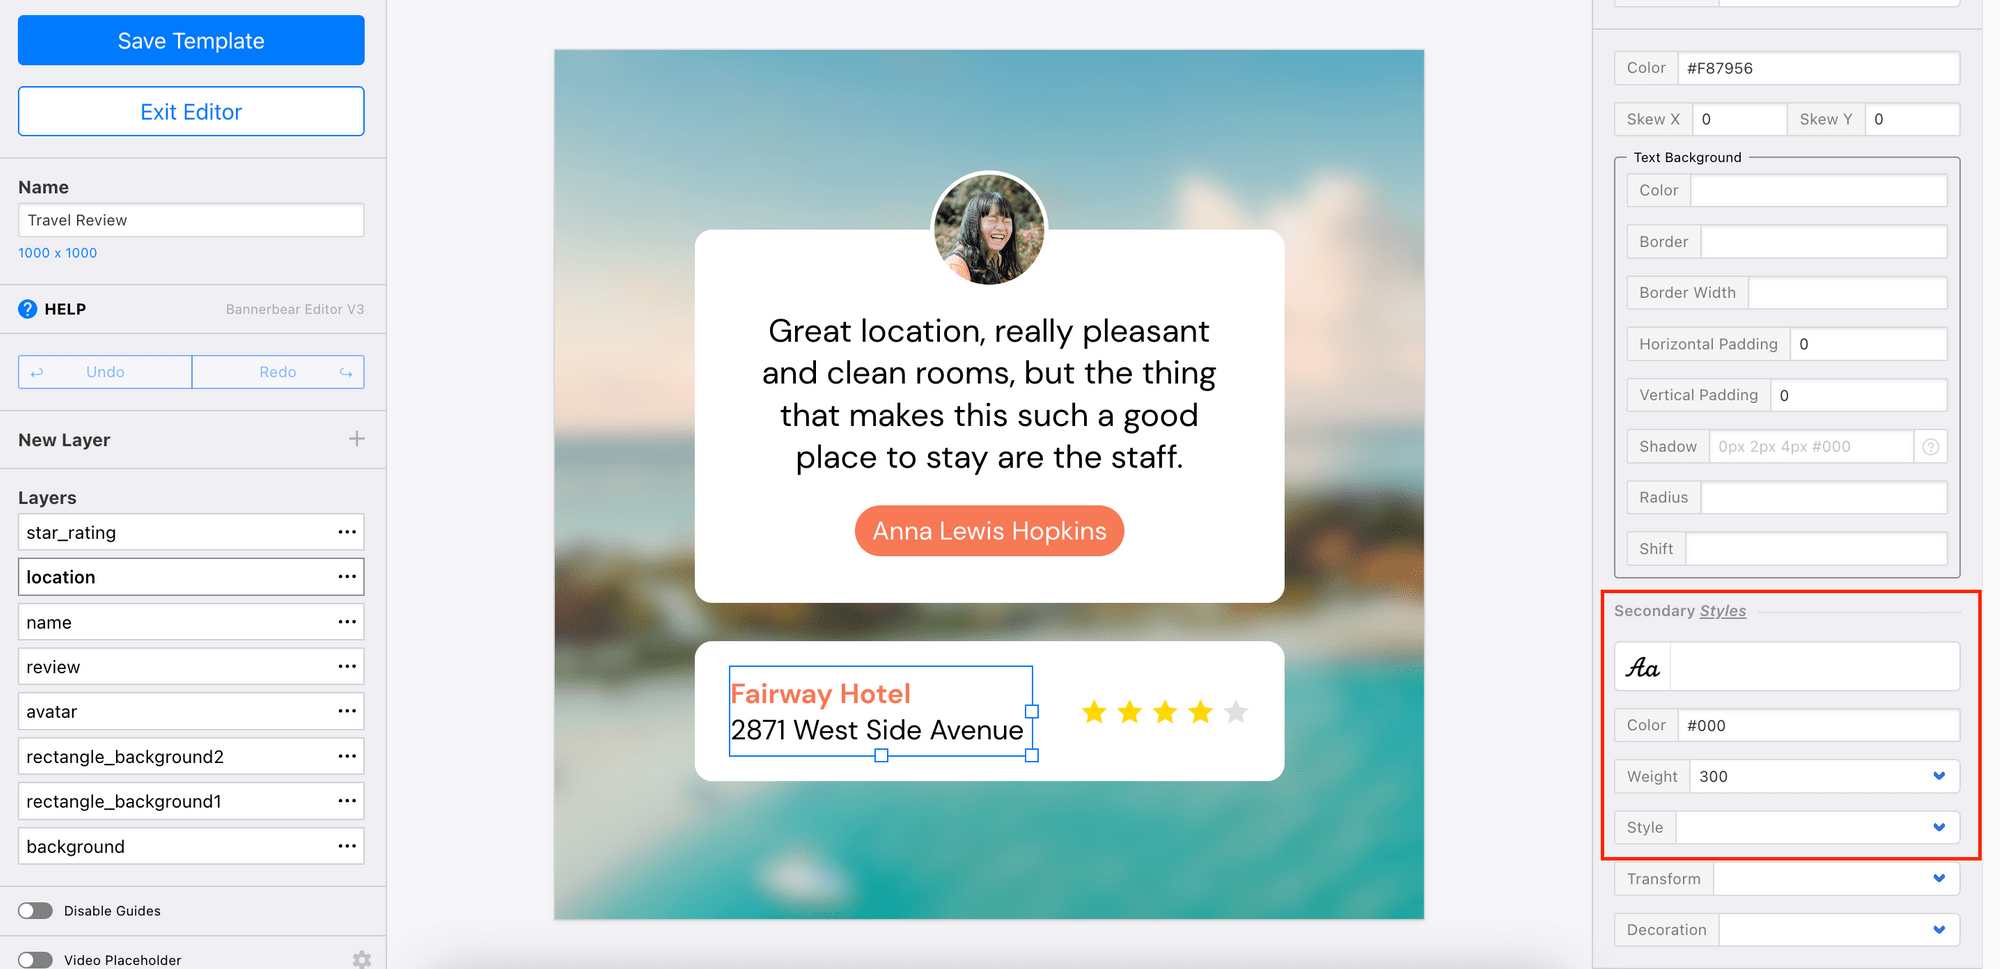
The secondary styles will let you change the value of a text object in two different styles. You can apply the secondary styles by wrapping the text between two asterisks (*).
[
  "name"=> "location",
  "text"=> "Lotus Beach Resort & Spa \n *Desaru Beachfront, Desaru, Malaysia*"
],
You can also change other properties like color, background, font_family, text_align_h, text_align_v, font_family_2, and color_2 by adding them to the array.
[
    "name"=> "location",
    "text"=> "Lotus Beach Resort & Spa \n *Desaru Beachfront, Desaru, Malaysia*",
    "color"=>"#2345FF",
    "font_family"=> "Alike"
],
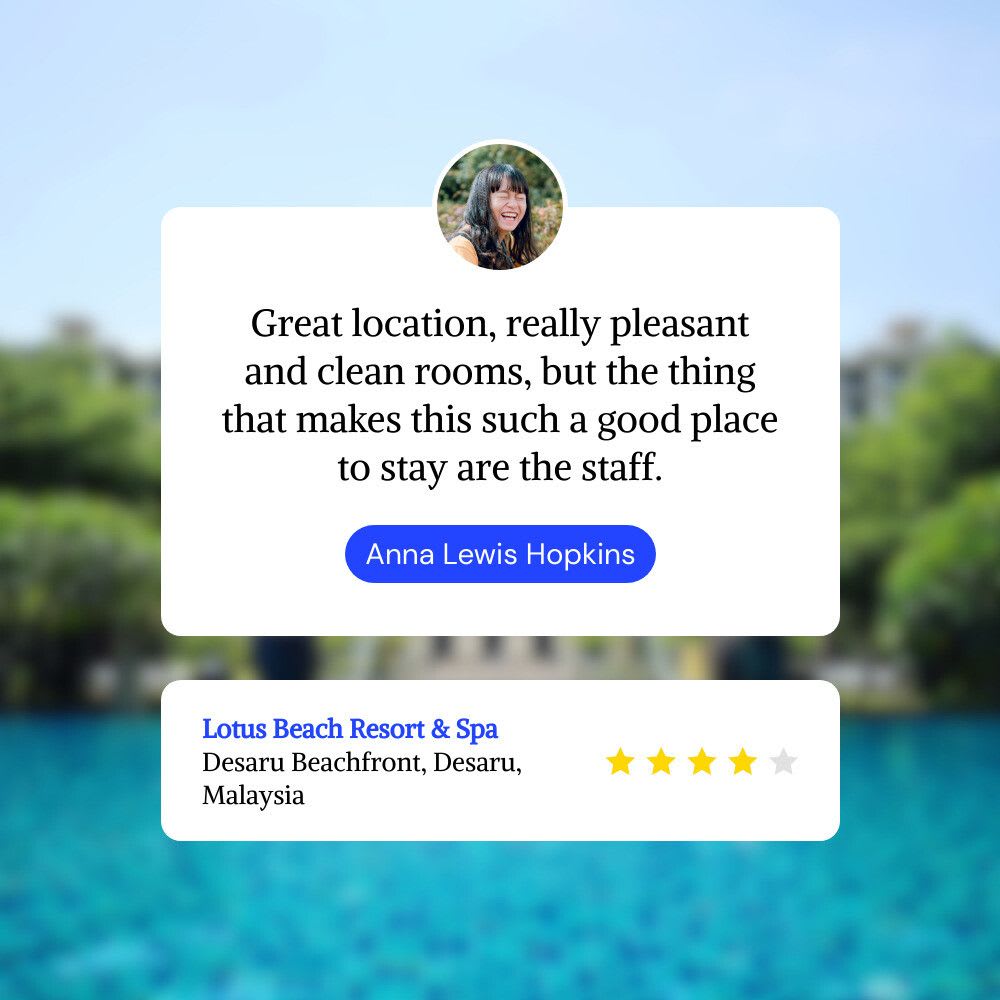
Change Images
Changing images used in a template works similarly, but with a different property name. Instead of using “text”, we will use “image_url”.
Add this to the modifications array to change the background image:
[
  "name"=>"background",
  "image_url"=>"https://images.unsplash.com/photo-1545175707-9eec1209f720?ixlib=rb-4.0.3&ixid=MnwxMjA3fDB8MHxwaG90by1wYWdlfHx8fGVufDB8fHx8&auto=format&fit=crop&w=880&q=80"
]
Other modifications that you can do to an image object include setting the effect, anchor_x, anchor_y, fill_type, disable_face_detect, and disable_smart_crop. You can find the values available for these properties from their dropdown menus in the template editor.

Here’s an example of applying the Sepia effect on the image:
$res = (object) $bb->create_image("your_api_key", [
        "modifications" => [
            [
              "name"=> "location",
              "text"=> "Lotus Beach Resort & Spa \n *Desaru Beachfront, Desaru, Malaysia*",
            ],
            [
              "name"=>"background",
              "effect"=>"Sepia",
              "image_url"=>"https://images.unsplash.com/photo-1545175707-9eec1209f720?ixlib=rb-4.0.3&ixid=MnwxMjA3fDB8MHxwaG90by1wYWdlfHx8fGVufDB8fHx8&auto=format&fit=crop&w=880&q=80"
            ]
          ],
    ], TRUE);
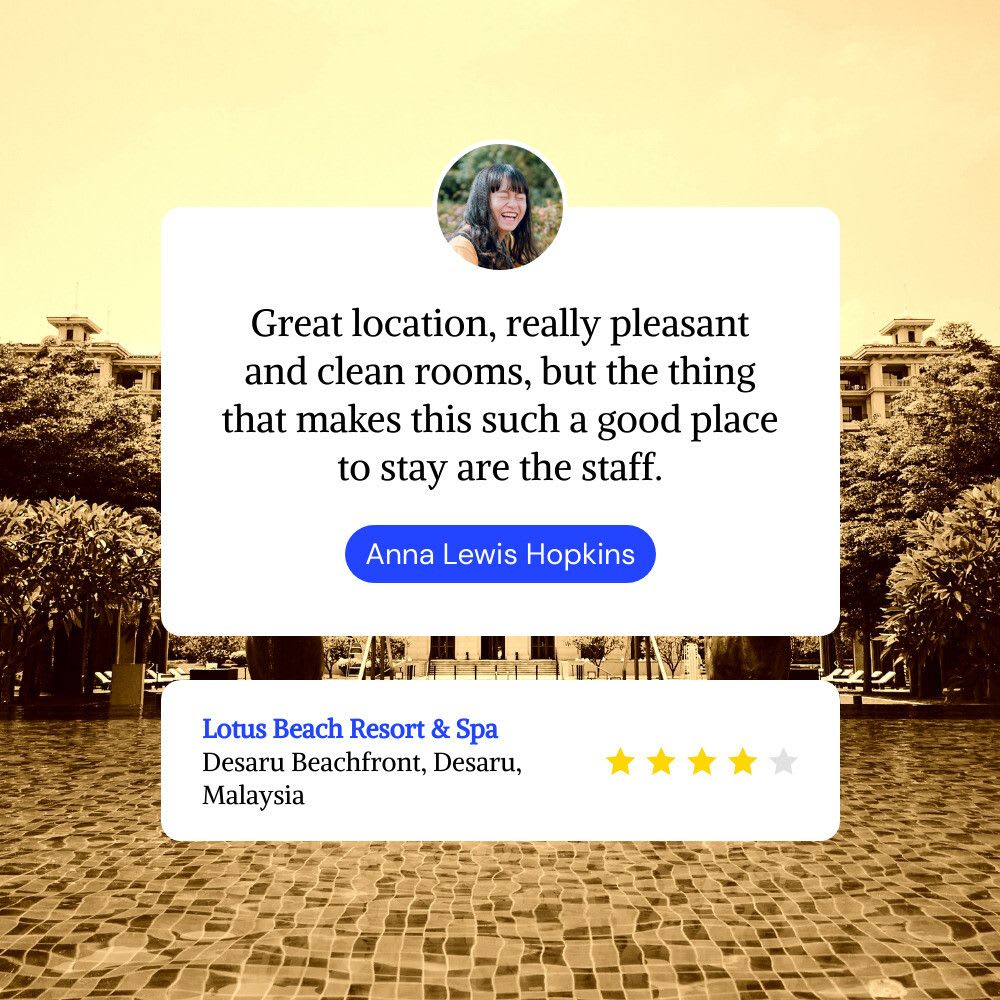
🐻 Bannerbear detects faces and clearly-defined subjects (smart crop) in images automatically. You can disable them from the template or code.
Change Special Objects
Special objects like bar/line charts , star rating , and QR/bar codes can be added to templates and their values can be changed via API too.
In this template, we have the star_rating object. The star rating has a maximum rating of five stars. It accepts a value from the range of 0-100 and convert it into a value within the range of 0-5 to match the number of stars.
Add this to the modifications array to change the star rating:
[
    "name"=>"star_rating",
    "rating"=>90,
]
Generate Other Media Files with Bannerbear
Generating images from a template is one of many things that you can do with Bannerbear. Besides that, you can also use Bannerbear to generate:
- Videos
- Collections of images
- Movies
- Animated Gifs
- Screenshots
Most of them use parameters similar to image generation. You can read the Bannerbear PHP library usage on GitHub for more details on what parameters to pass to the method.
Signed URL
In addition to the media types in the list above, you can also generate Signed URLs. Signed URL is not a type of media file but another convenient way you can use Bannerbear to integrate image generation functionality into your application. Instead of calling the create_image method, you can insert the Signed URLs into any part of your application to display the generated images.
These tutorials show you how to use them:
- How to Add Auto-Generated Custom Open Graph Images to WordPress Using Bannerbear
- How to Auto-Generate Pinterest Pins Using Signed URLs (Ruby)
- How to Send a Dynamic Personalized Welcome Image to Each New User (Ruby)
Conclusion
The right tool will help you accomplish greater results in less time. Using the Bannerbear PHP library, you can add image generation functionality to your application without having to deal with the technical details of image manipulation. Not to mention that video/GIF/PDF generation and other media manipulations are available too.
To get the most out of Bannerbear, you should try them out yourself. Creating an account is free!
