
How to Overlay Text on an Image in HTML and CSS
Contents
As humans are highly visual creatures, using images on your website can help to capture your visitors’ attention. Studies show that almost 50% of our brain is involved in visual processing, which is one of the reasons why texts are added to images to create infographics to convey information more effectively.
There are many scenarios where you can overlay text on an image on your website to enhance the visual presentation and experience. For example, adding headline or call-to-action text on website banners/sliders grabs the visitors’ attention and communicates the main message immediately as they arrived at the website. On e-commerce sites, overlaying product names, prices, and labels on product images helps users quickly identify and understand the attractive offerings.
These scenarios illustrate how overlaying text on images can serve various purposes and you can do that with only HTML and CSS! In this tutorial, we are going to learn how to do it step-by-step. Let’s get started!
Overlaying Text on an Image in HTML and CSS
HTML
First, create a new HTML file with the basic structure including the head and body sections.
<!DOCTYPE html>
<html lang="en">
    <head>
        <meta charset="UTF-8">
        <meta name="viewport" content="width=device-width, initial-scale=1.0">
        <title>Image Overlay with Text</title>
    </head>
    <body>
    </body>
</html>
In the body section, create a div with a class named “image-container” and add an image within it. Next, create another div with a class named “overlay-text” and add your text inside.
<body>
    <div class="image-container">
        <img src="https://images.unsplash.com/photo-1501785888041-af3ef285b470?ixlib=rb-4.0.3&ixid=M3wxMjA3fDB8MHxwaG90by1wYWdlfHx8fGVufDB8fHx8fA%3D%3D&auto=format&fit=crop&w=1470&q=80" alt="image">
        <div class="overlay-text">Your text here</div>
    </div>
</body>
We know that in real-life scenarios, it’s unlikely for a web page to contain an image only. However, we’ll do this in this tutorial for the sake of simplicity. No matter if you’re overlaying the text on a banner, product image, or any other type of image on your website, it works similarly.
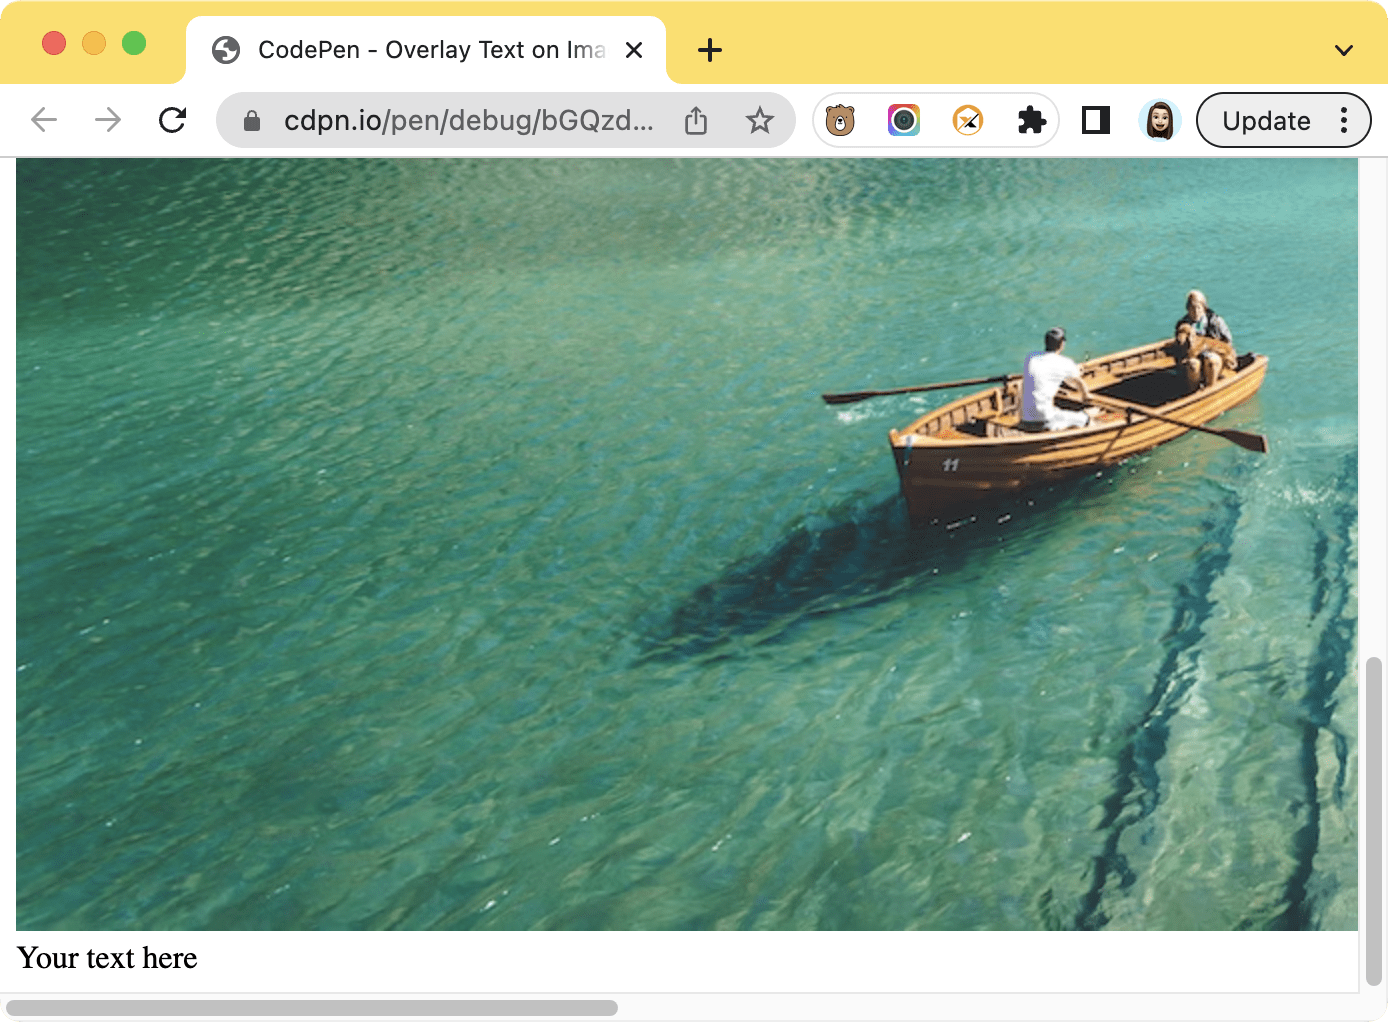
When you open the HTML file in a browser, it should look like this:
Next, we are going to style the page using CSS to overlay the text on the image. Create a CSS file named “style.css” and add a link tag in the head section of the HTML file to link these two files.
<head>
    ...
    <link rel="stylesheet" href="styles.css">
</head>
This is the full code:
<!DOCTYPE html>
<html lang="en">
    <head>
        <meta charset="UTF-8">
        <meta name="viewport" content="width=device-width, initial-scale=1.0">
        <title>Image Overlay with Text</title>
        <link rel="stylesheet" href="styles.css">
    </head>
    <body>
        <div class="image-container">
            <img src="https://images.unsplash.com/photo-1501785888041-af3ef285b470?ixlib=rb-4.0.3&ixid=M3wxMjA3fDB8MHxwaG90by1wYWdlfHx8fGVufDB8fHx8fA%3D%3D&auto=format&fit=crop&w=1470&q=80" alt="image">
            <div class="overlay-text">Your text here</div>
        </div>
    </body>
</html>
CSS
We will add a black background to the text and position it at the center of the image using CSS. In the “style.css” file, add the code below to style elements with the relative classes:
.image-container {
  position: relative;
  display: inline-block;
}

.image-container img {
  display: block;
  width: 100%;
  height: auto;
}

.overlay-text {
  position: absolute;
  top: 50%;
  left: 50%;
  transform: translate(-50%, -50%);
  background-color: #000000;
  color: #fff;
  padding: 10px 20px;
  font-size: 20px;
  text-align: center;
You can adjust the properties of the .overlay-text class as needed to achieve the desired positioning, size, and appearance of the text. For example, you can change the value of font-size to adjust the text size, color to change the text color, and top or left to change the text’s position.
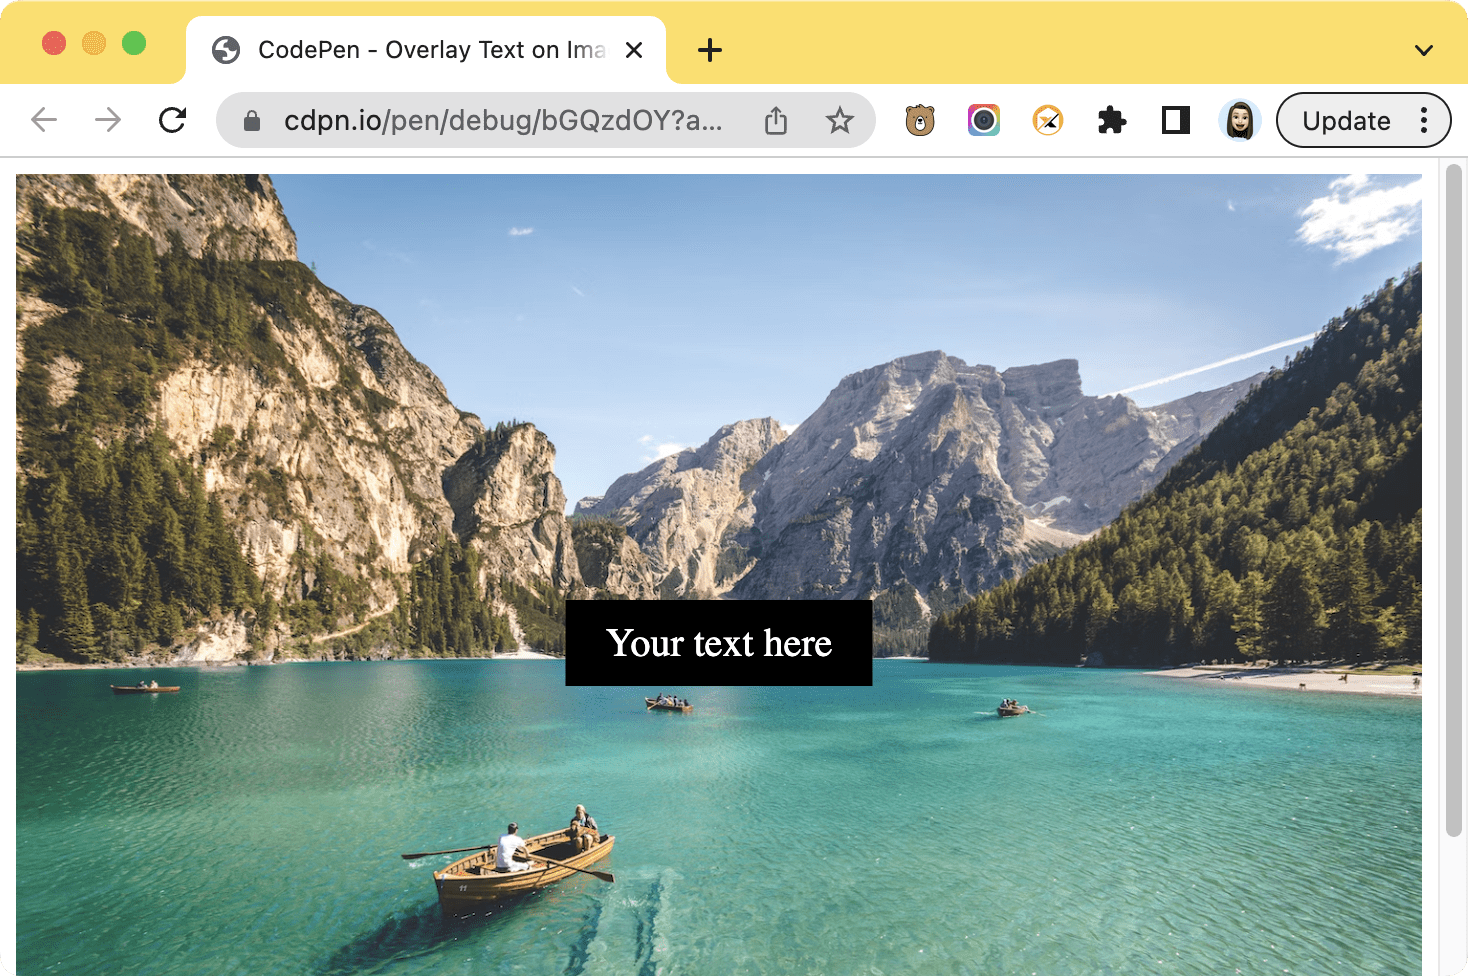
After applying the styles, the text should now be overlaid on top of the image, like the screenshot below:
🐻 View the complete code and result on CodePen.
Using Bannerbear API
While using CSS to overlay text on an image is easy as it doesn’t require any additional libraries or dependencies, your creativity could be limited. As the design gets more complex, so does the code. If you want to place the text in other positions, you would also need to find the perfect position by trial and error using different values.
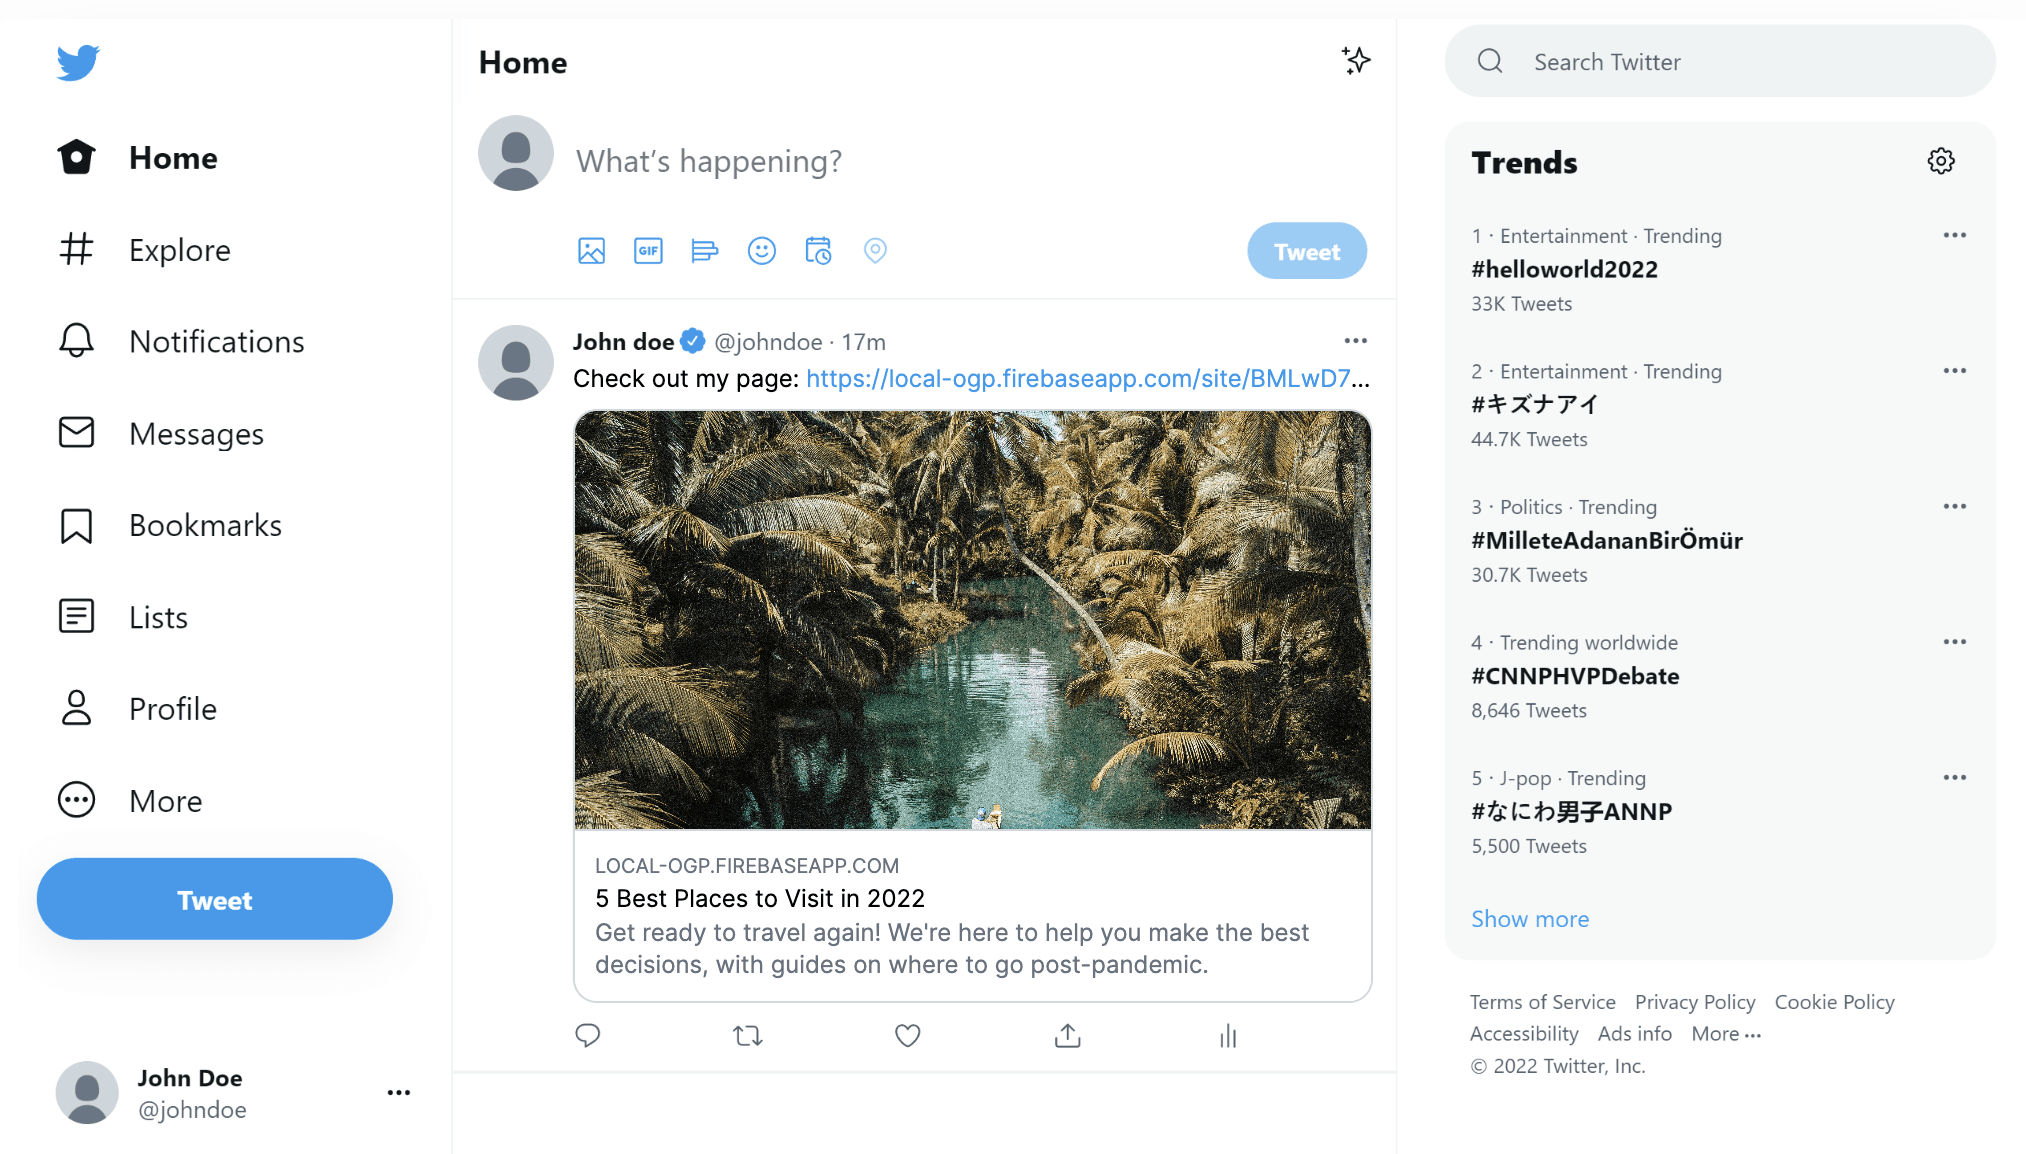
Besides that, the overlaid text only stays on the web page. If you are overlaying text on the featured image of a blog post/article and want to use it as the Open Graph image (so that it appears on the preview when your share it on social media), it doesn’t do the job. This is what you’ll get—just the image itself:
In this case, you can use an image generation service like Bannerbear to add the text to the image instead of overlaying it using CSS. Bannerbear generates custom images based on a design template in which you can add static and dynamic images, texts, shapes, etc. And you can add a unique URL in your HTML code to generate it automatically.
Here’s how it works:
First, you will need a design template like the one below:
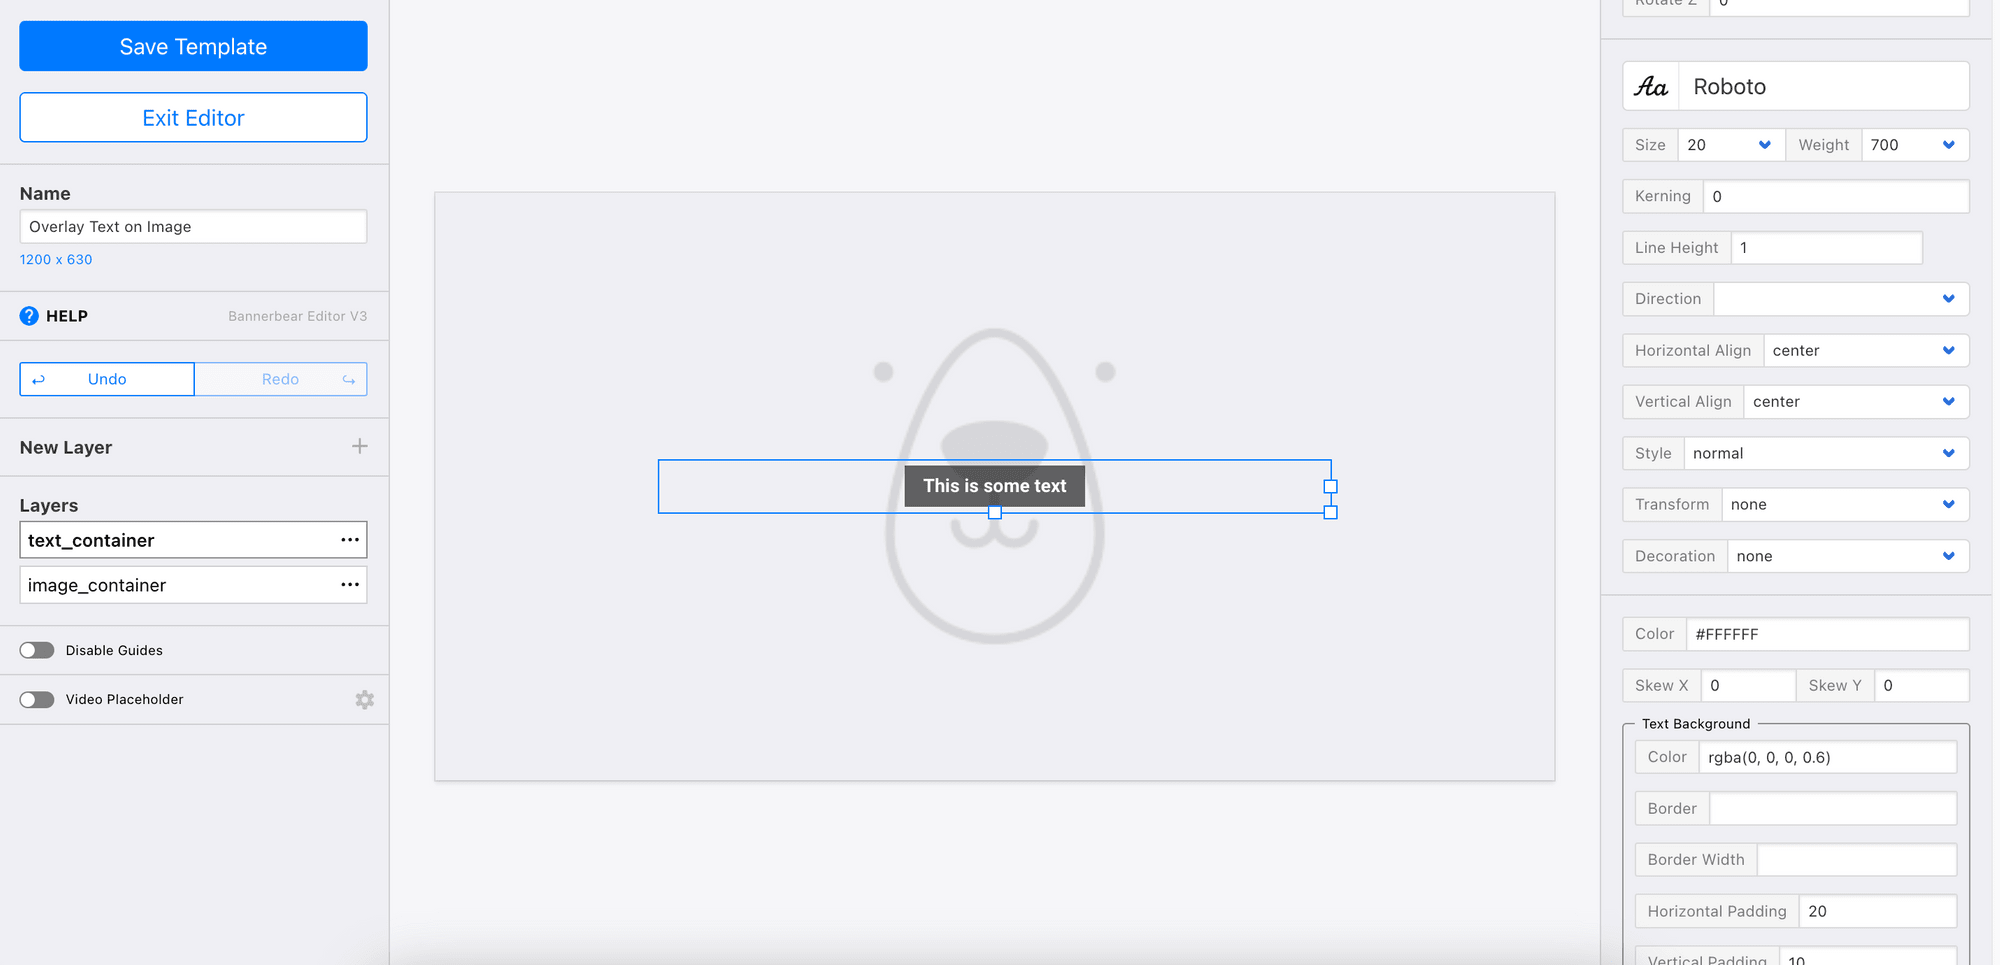
The template editor has a drag-and-drop interface and a panel on the right for designing the images, texts, and shapes. It makes designing and positioning the text on the image so much easier compared to styling using CSS.
Then, you can get a URL base to construct the unique URL for generating the image with the text on it automatically from the dashboard.
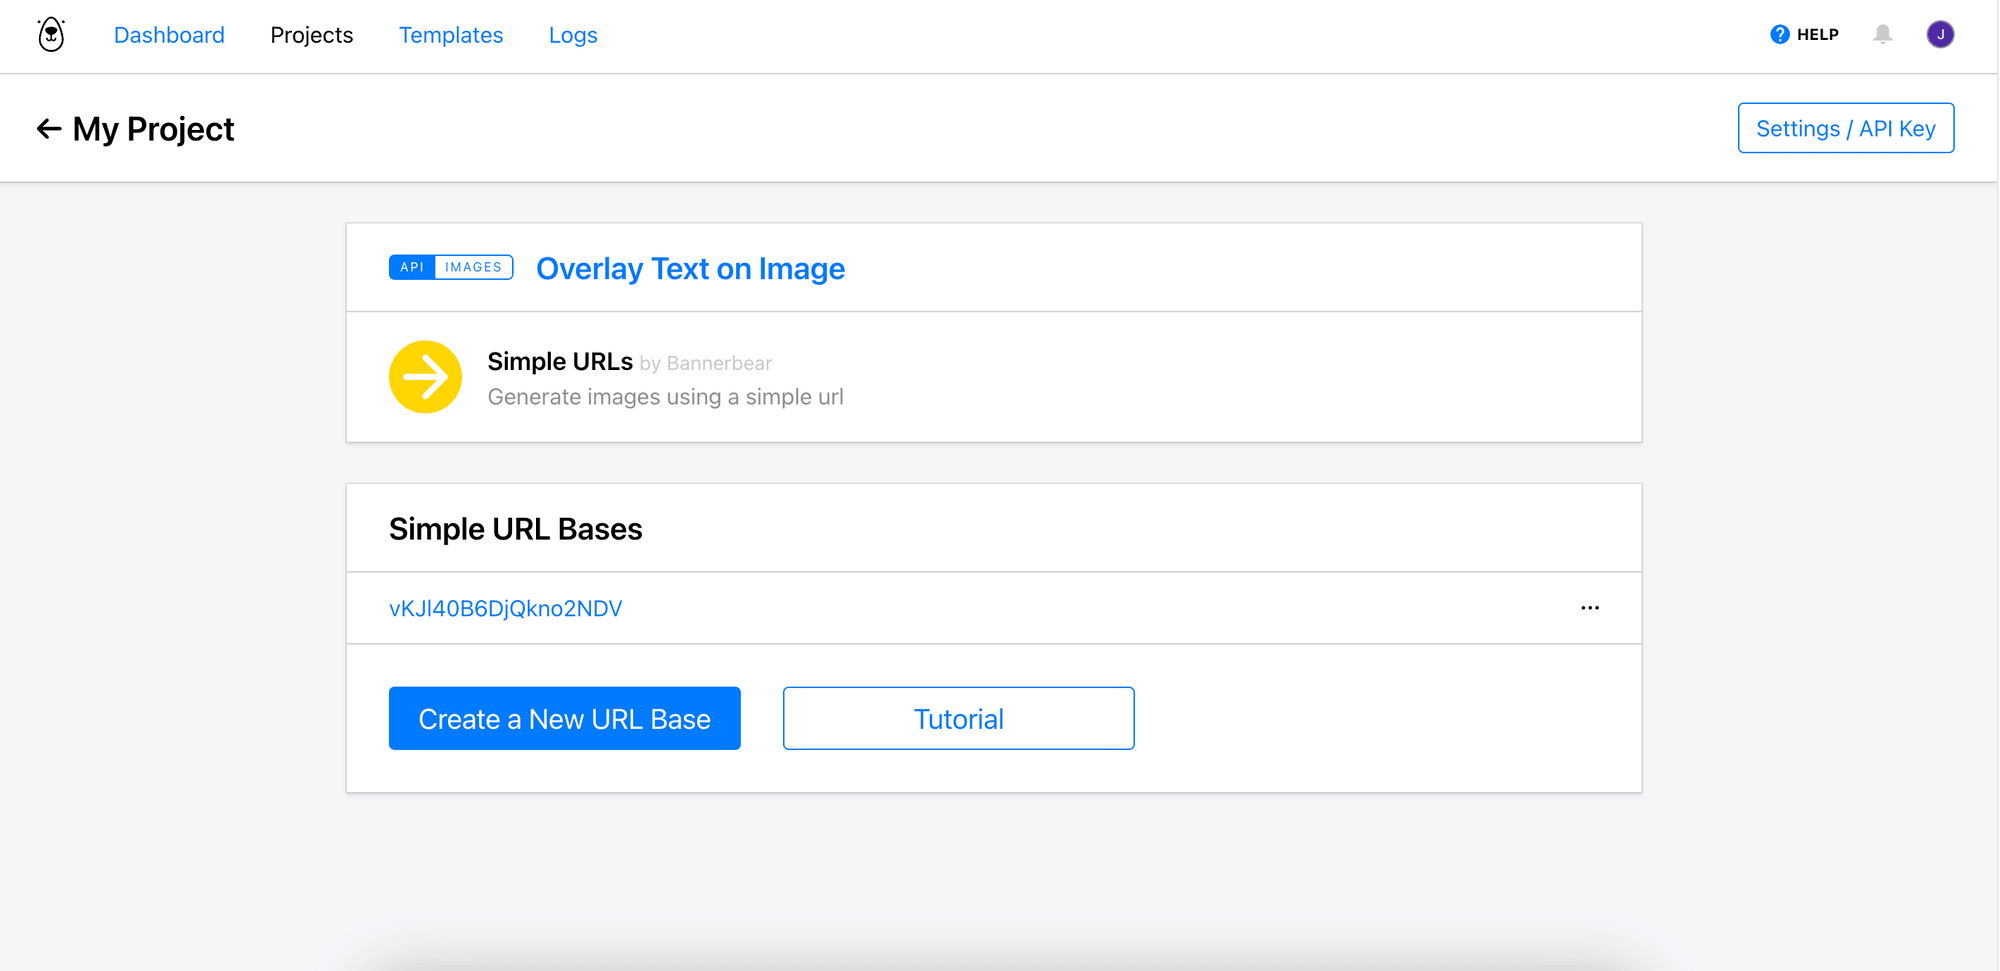
Here’s an example of the unique URL:
https://ondemand.bannerbear.com/simpleurl/vKJl40B6DjQkno2NDV/image/text_container/text/Your+text+here/image_container/image_url/https://images.unsplash.com/photo-1501785888041-af3ef285b470?ixlib=rb-4.0.3&ixid=M3wxMjA3fDB8MHxwaG90by1wYWdlfHx8fGVufDB8fHx8fA%3D%3D&auto=format&fit=crop&w=1470&q=80
…and you can learn how to construct it from this tutorial.
In the HTML code, replace the original image and the div containing the text with the unique URL.
<body>
    <div class="image-container">
        <img src="https://ondemand.bannerbear.com/simpleurl/vKJl40B6DjQkno2NDV/image/text_container/text/Your+text+here/image_container/image_url/https://images.unsplash.com/photo-1501785888041-af3ef285b470?ixlib=rb-4.0.3&ixid=M3wxMjA3fDB8MHxwaG90by1wYWdlfHx8fGVufDB8fHx8fA%3D%3D&auto=format&fit=crop&w=1470&q=80" alt="image">
    </div>
</body>
You should get a similar result:
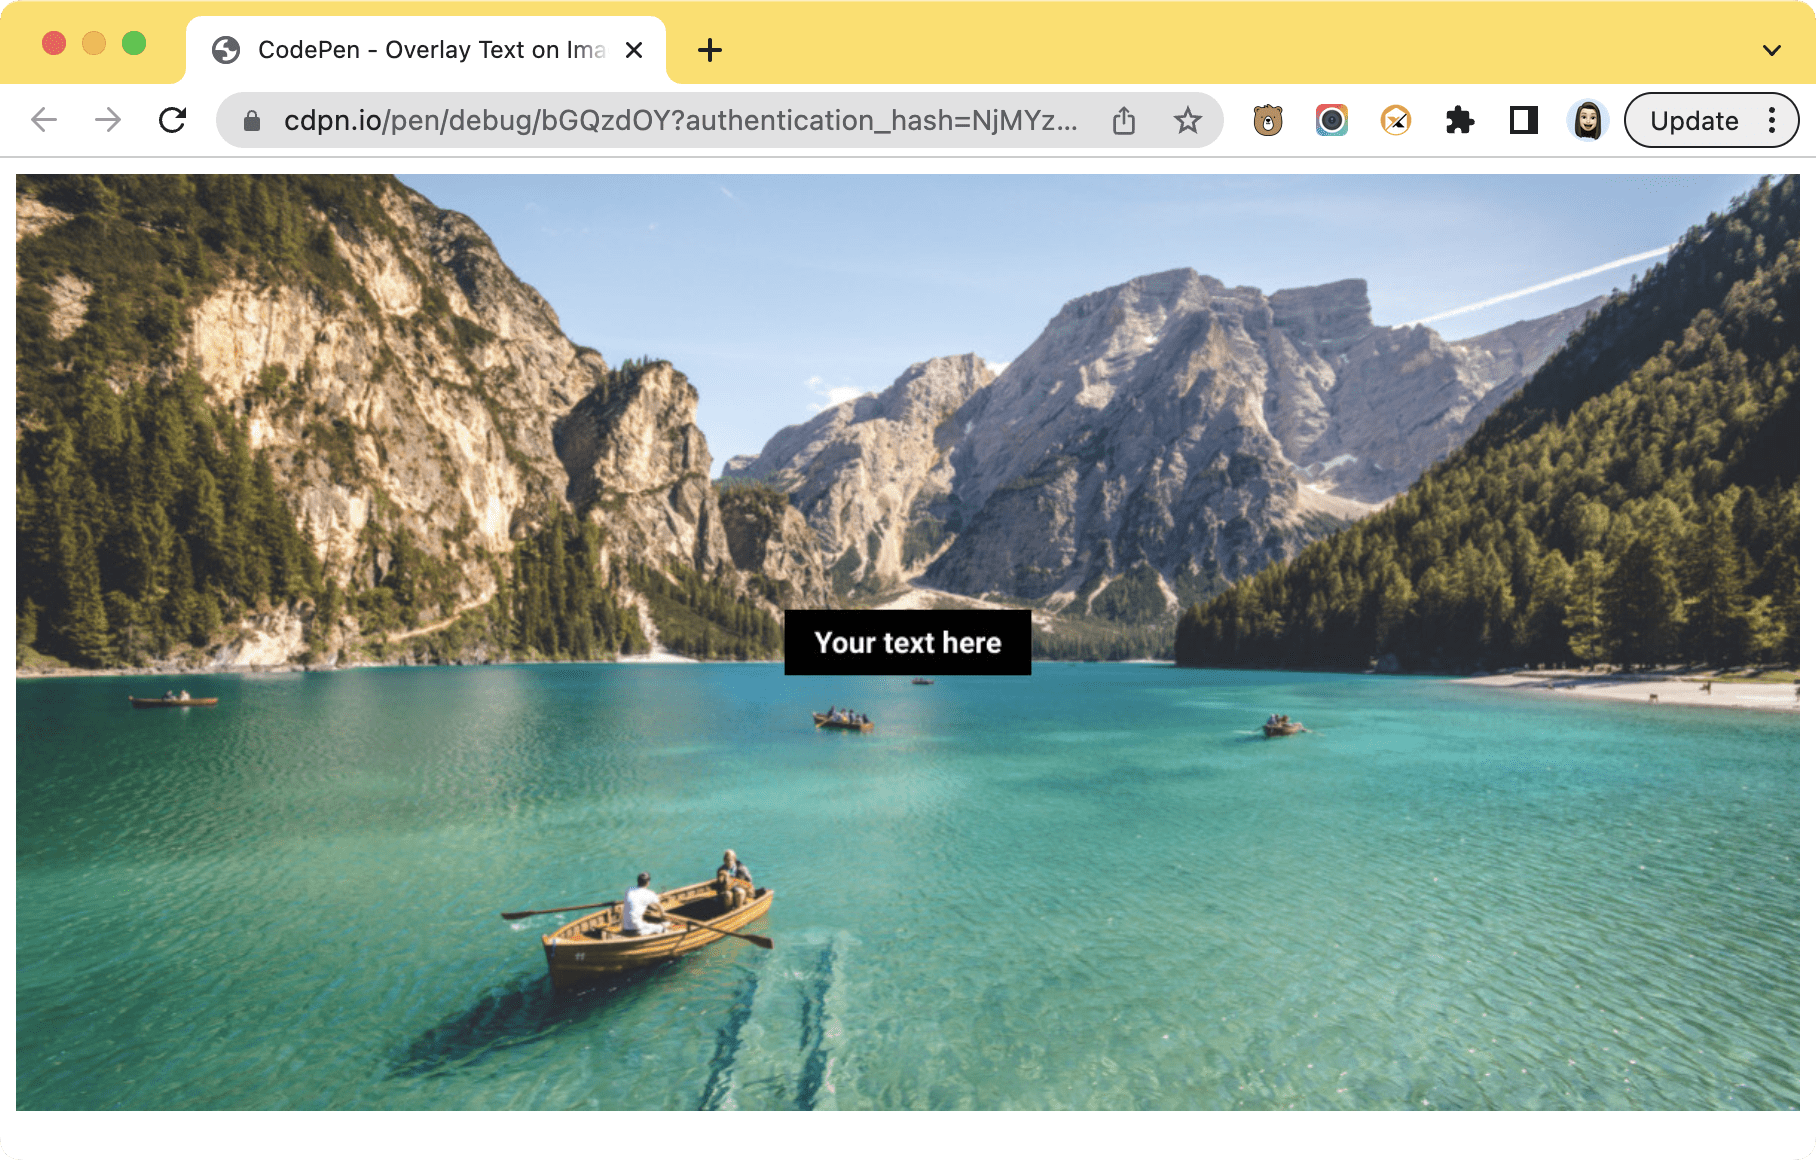
Different from using CSS, the text will always be on the image. However, this method takes a longer time compared to CSS as you’re using an external API. So it depends on your project requirements to decide which one to use.
If you’re going to try Bannerbear, you can duplicate the template below:

🐻 Bear Tips: Change the text from "Your text here" to "hello" in the unique URL and open it in a new tab to see the magic happens!
Comparisons Between CSS and Bannerbear
If you’re not sure which one you should use, here’s a quick comparison between the two methods:
CSS
✅ Pros
- No external library/dependency: You don't need to use any third-party APIs or external services to achieve the result.
- Performance: Overlaying text on images using only HTML and CSS typically results in faster loading times compared to relying on external APIs for image generation.
❌ Cons
- Limited creativity: While you can produce many effects using CSS, you might be limited in terms of more complex visual effects or animations.
- Design complexity: Depending on the complexity of your design, overlaying text on images using CSS can become cumbersome and may require more code and effort to achieve the desired results.
Bannerbear
✅ Pros
- Versatility: It offers a wide range of features and options for overlaying text, adding effects, and manipulating images. You can create more complex and visually appealing designs without extensive coding.
- Drag-and-drop interface: The drag-and-drop template editor makes creating different designs much easier as compared to styling using CSS.
❌ Cons
- External dependency: Relying on an external API means your application's functionality depends on the service’s availability and reliability.
- Cost: As it’s an external API, you will need to pay to use the service. However, it can save you more time when the design is complex.
Conclusion
Other than the examples that are mentioned previously, you can also overlay text on an image for other scenarios like adding customer testimonials or reviews on images to add credibility and authenticity to the content, adding text on images to create interactive elements, adding a watermark on images to establish branding and copyright ownership, and more.
These are just some of the ideas and you can unleash your creativity to use it in many more scenarios. Happy coding!
