
How to Add Auto-Generated Custom Open Graph Images to Shopify Using Bannerbear
Contents
Being one of the top e-commerce platforms, it’s no doubt that Shopify is making online shopping easy for merchants and customers regardless of the size of the business. From small-medium businesses to big brands like GymShark, Heinz, Sephora, Fitbit, etc., more than 1.75 million businesses use Shopify.
Setting up an online store using Shopify is easy and can be done without any coding knowledge as users can create their store in a few clicks from a list of store templates. Despite that, many modifications can be done to improve the performance of a Shopify store by doing customizations with a little bit of code and third-party services.
In this tutorial, we’ll learn how to add auto-generated custom Open Graph images (or social sharing images) to Shopify so that product information will be displayed on the image when a product link is shared on social media.
What Is an Open Graph Image
The Open Graph image (OG image) or social sharing image is an image that will be displayed when you share a website on social media. If it’s not set up correctly, social media users will only see a link or a blank image on the post.
It can be set by adding the og:image or twitter:image meta tag within a website’s <head> section:
<meta property='og:image' content="IMG_URL" />
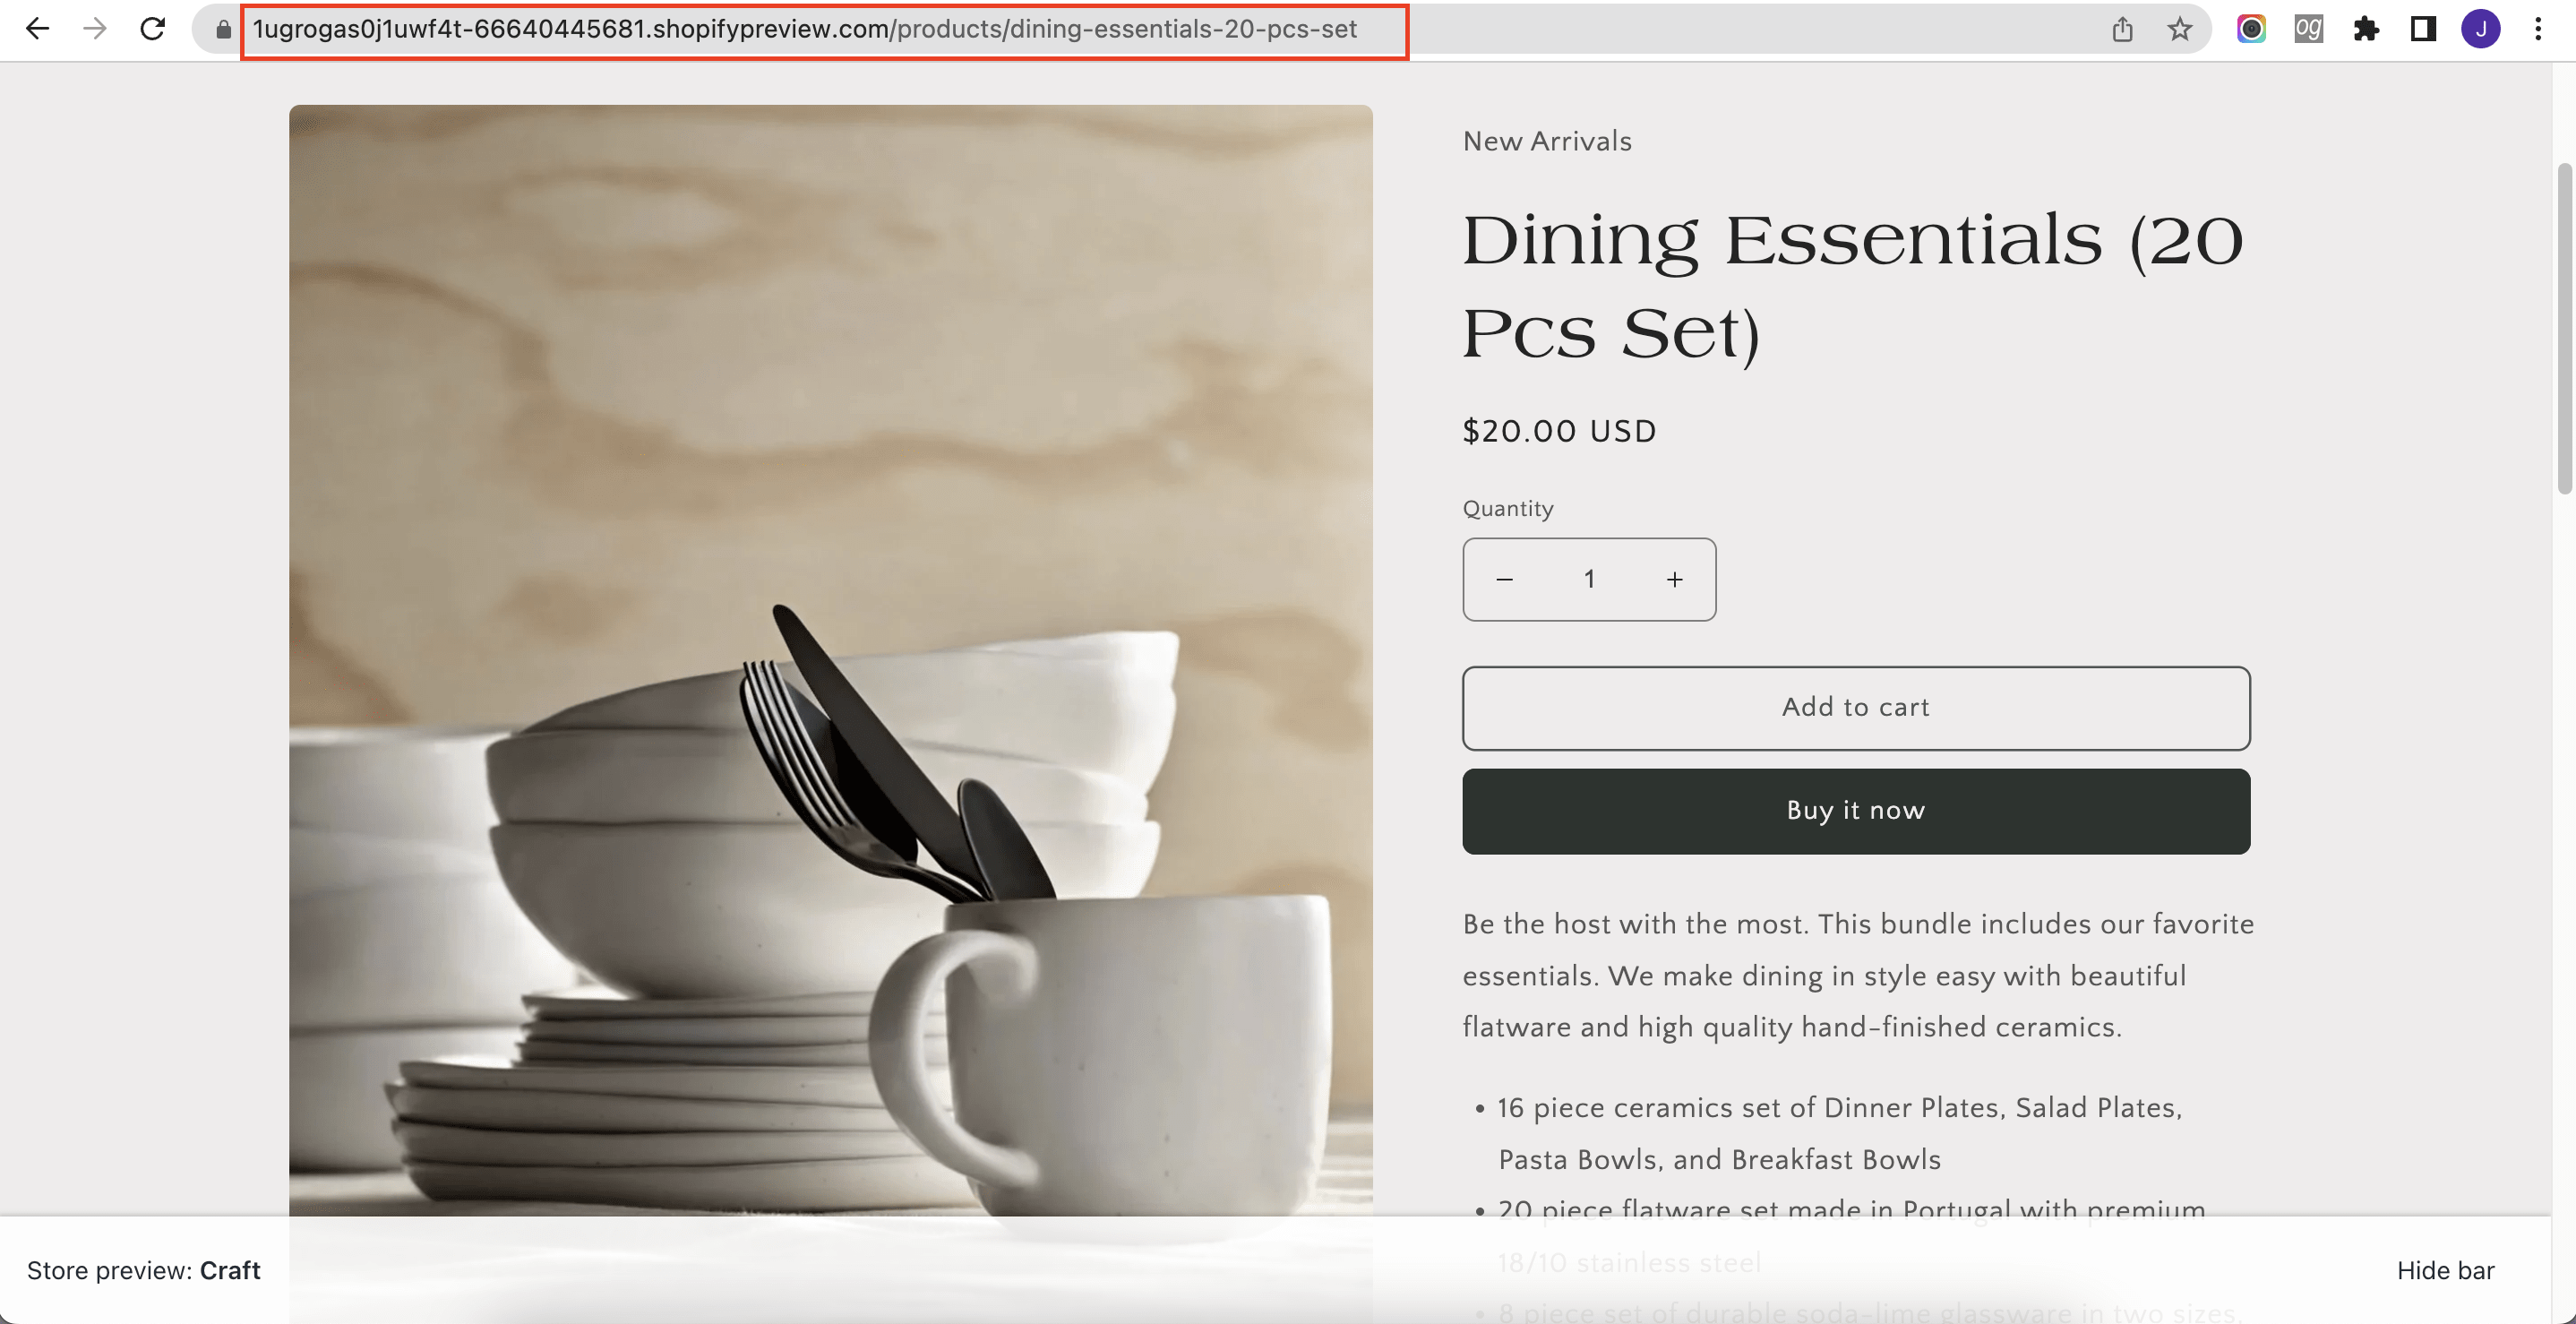
By default, Shopify will use the featured image of a product as the Open Graph image. It should look something like this with the product name being the title:
Using a Custom Open Graph Image
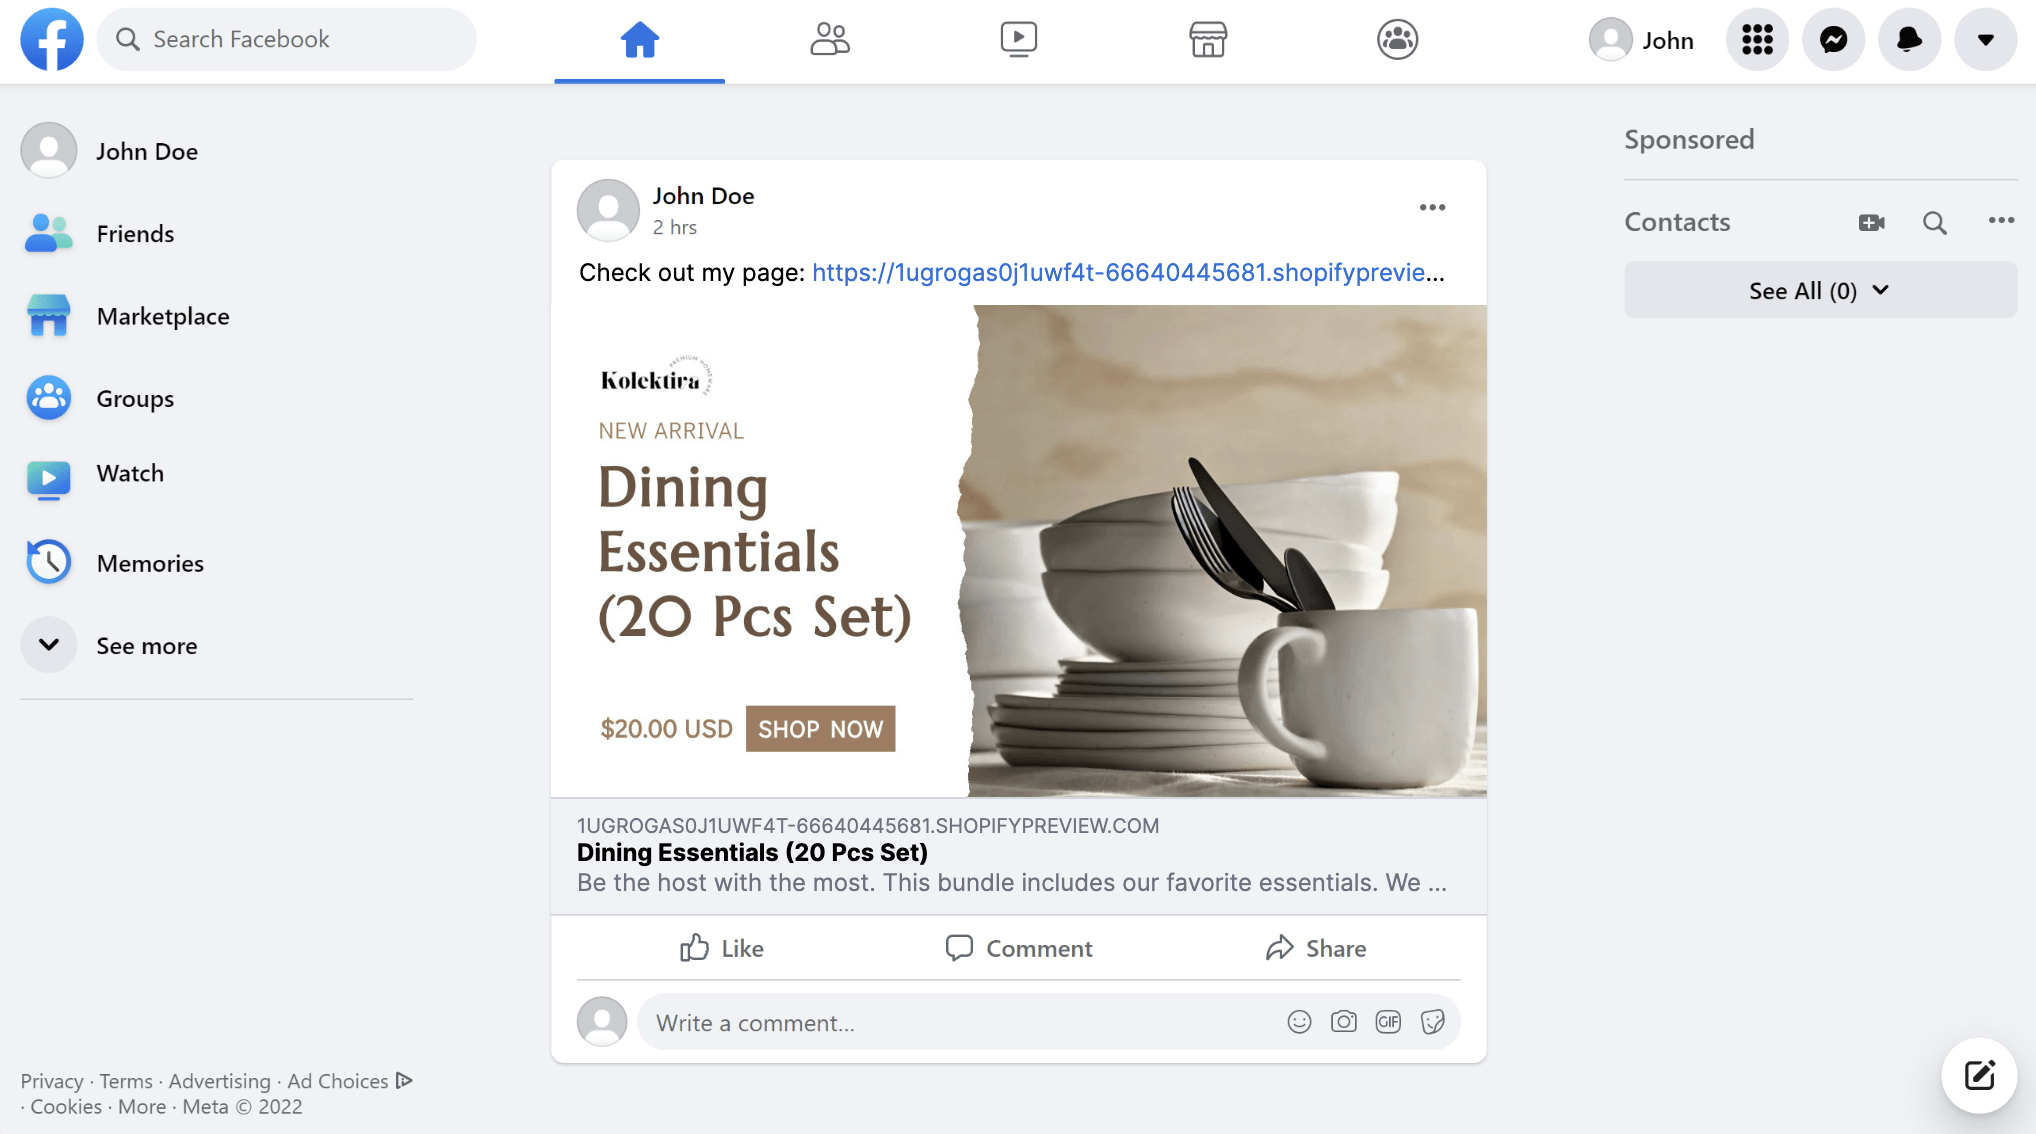
If your website is showing an Open Graph image successfully, it would be sufficient to provide social media users with a general context about the post—it’s a post about dinnerware. However, you might have missed an opportunity to promote your product.
Using the default Shopify Open Graph image, social media users would only know that it’s a product link or that the product is on a promotion if they click on the link. Instead of using the default image, we can use a custom Open Graph image to display information like product name, price, brand logo, etc. on it.
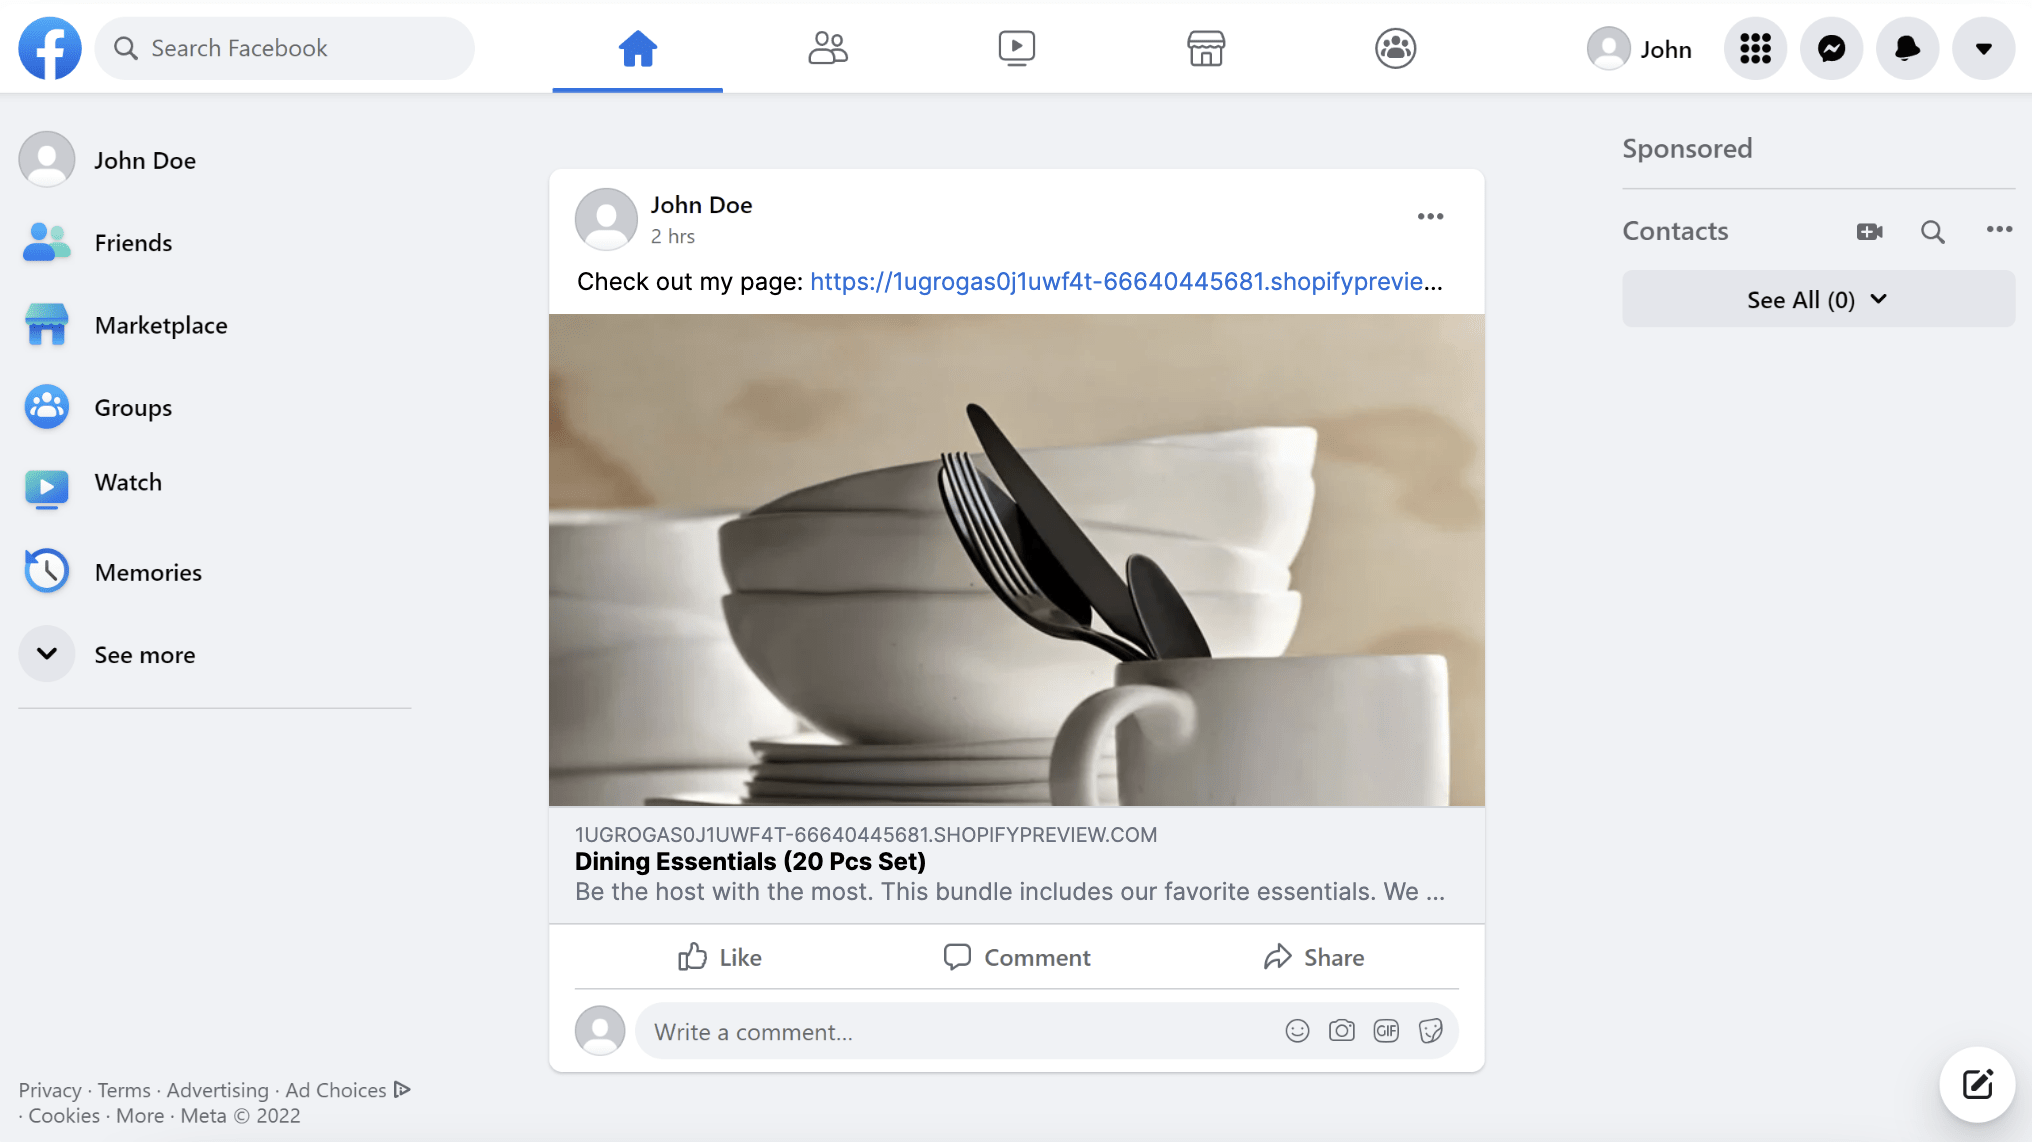
With this little modification, people will be able to know that the post is not just about dinnerware but it’s a product on a promotion. Here are some examples:
Example 1

Example 2

These custom Open Graph images can be generated for different products automatically once it’s set up and we will be using Bannerbear to do so.
What Is Bannerbear
Bannerbear is an automated media generation service that helps you create custom images, videos, and more using API. To generate a custom Open Graph image automatically, we will use Bannerbear’s Image Generation API.
The Image Generation API generates custom images automatically based on a design template which you can add static and dynamic images, texts, shapes, etc. The values of the dynamic objects can be set by passing different data to the API.
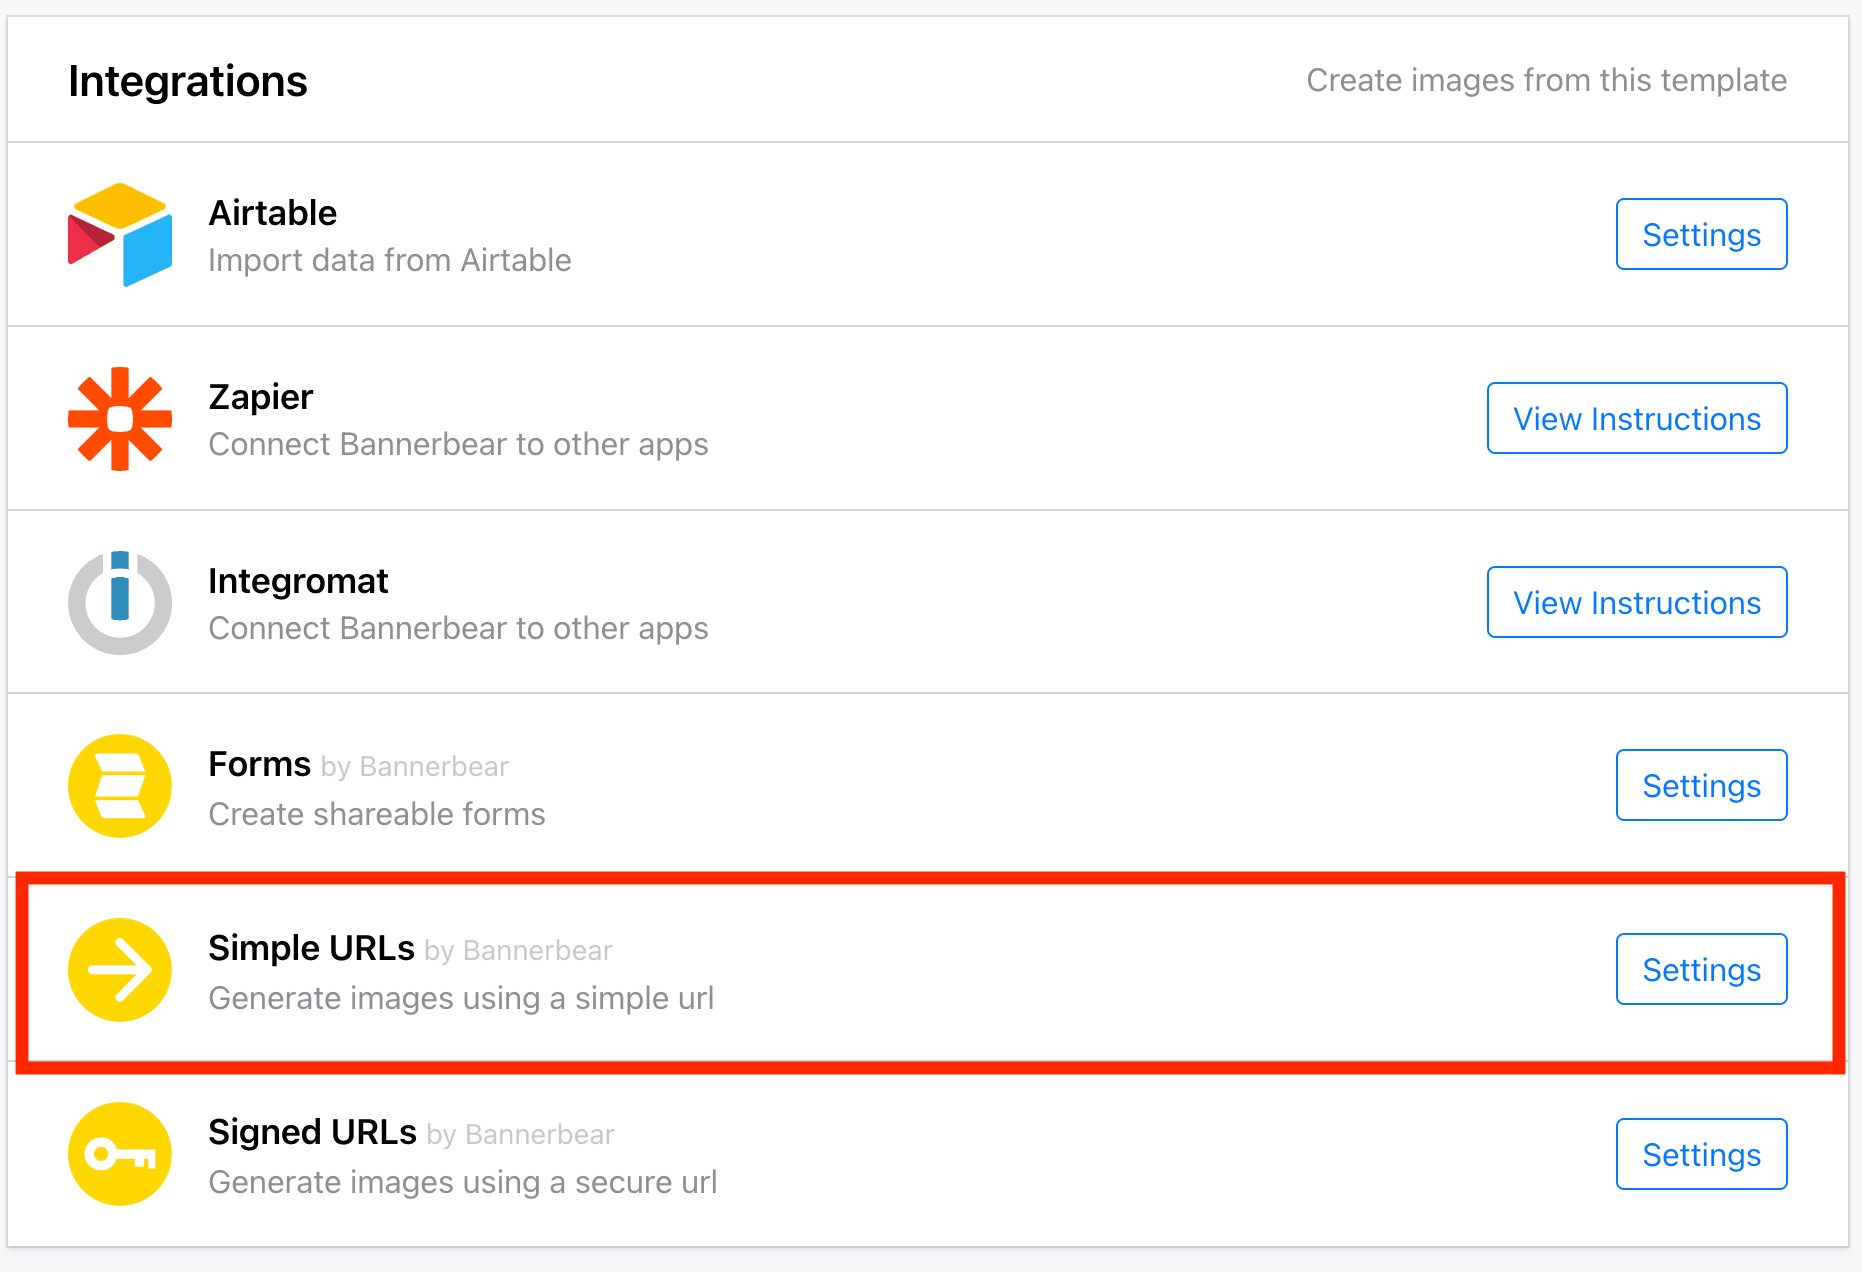
Bannerbear offers different ways to use the API. You can use HTTP requests, SDKs (Node.js, Ruby, and PHP), third-party no-code integration, etc. To create and add custom Open Graph images automatically to Shopify using Bannerbear, the easiest method is using a Simple URL.
As Shopify’s Liquid template language allows developers to access a store’s data and add custom code easily, we can construct a Simple URL for image generation and add it to the meta tags within the <head> section.
Adding a Custom Open Graph Image Automatically Using Bannerbear
Step 1. Prepare a Bannerbear Design Template
Create a new Bannerbear project and create a design template for your Open Graph image. You can design your template from scratch or duplicate the Open Graph Image Template used in this tutorial.
As we want to display the product name/title , price , collection name, featured image , and brand logo of a product on the Open Graph image, we will need these dynamic objects in the template:
- Text - title, price, collection
- Image - image_container, logo_container
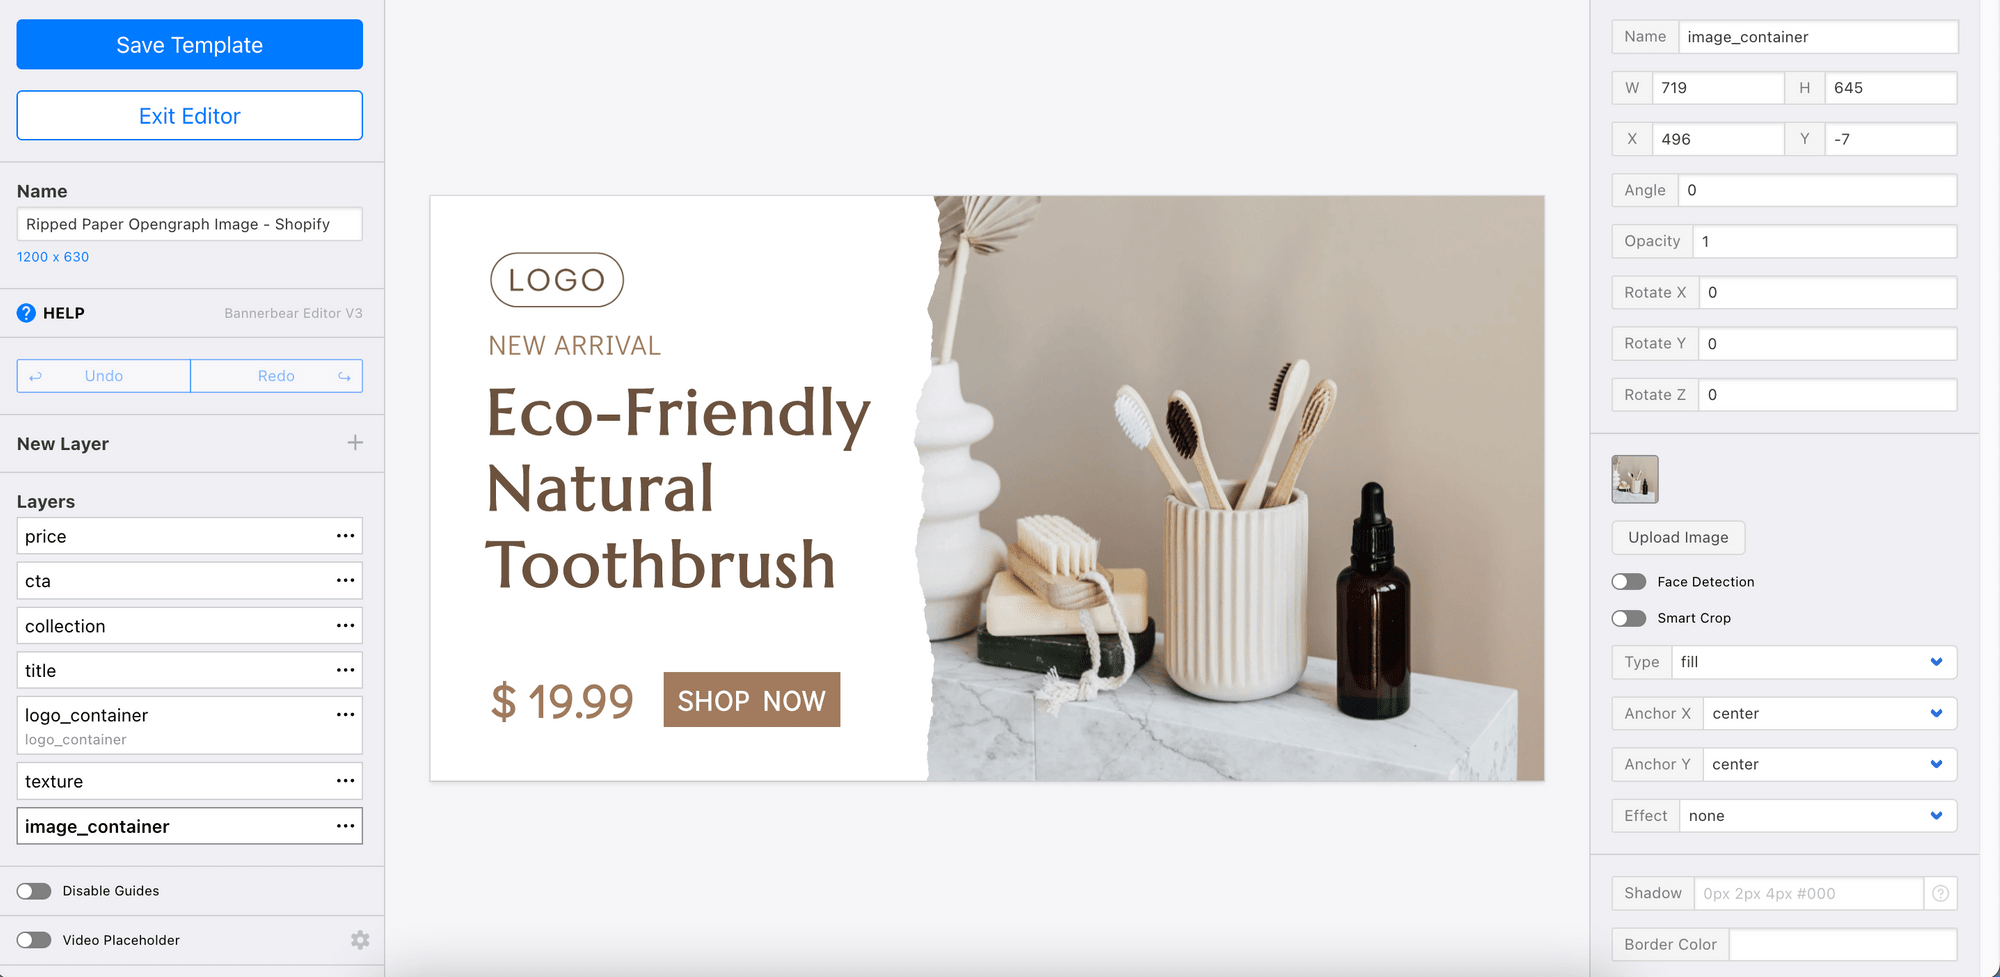
The Open Graph images will be generated automatically based on this template and the values of the dynamic objects above can be changed every time we access the Bannerbear Image Generation API using a unique URL.
Step 2. Go to Shopify’s Theme Code Editor
Go to “ Online Store > Themes > Actions > Edit code ” to modify your Shopify theme’s code.
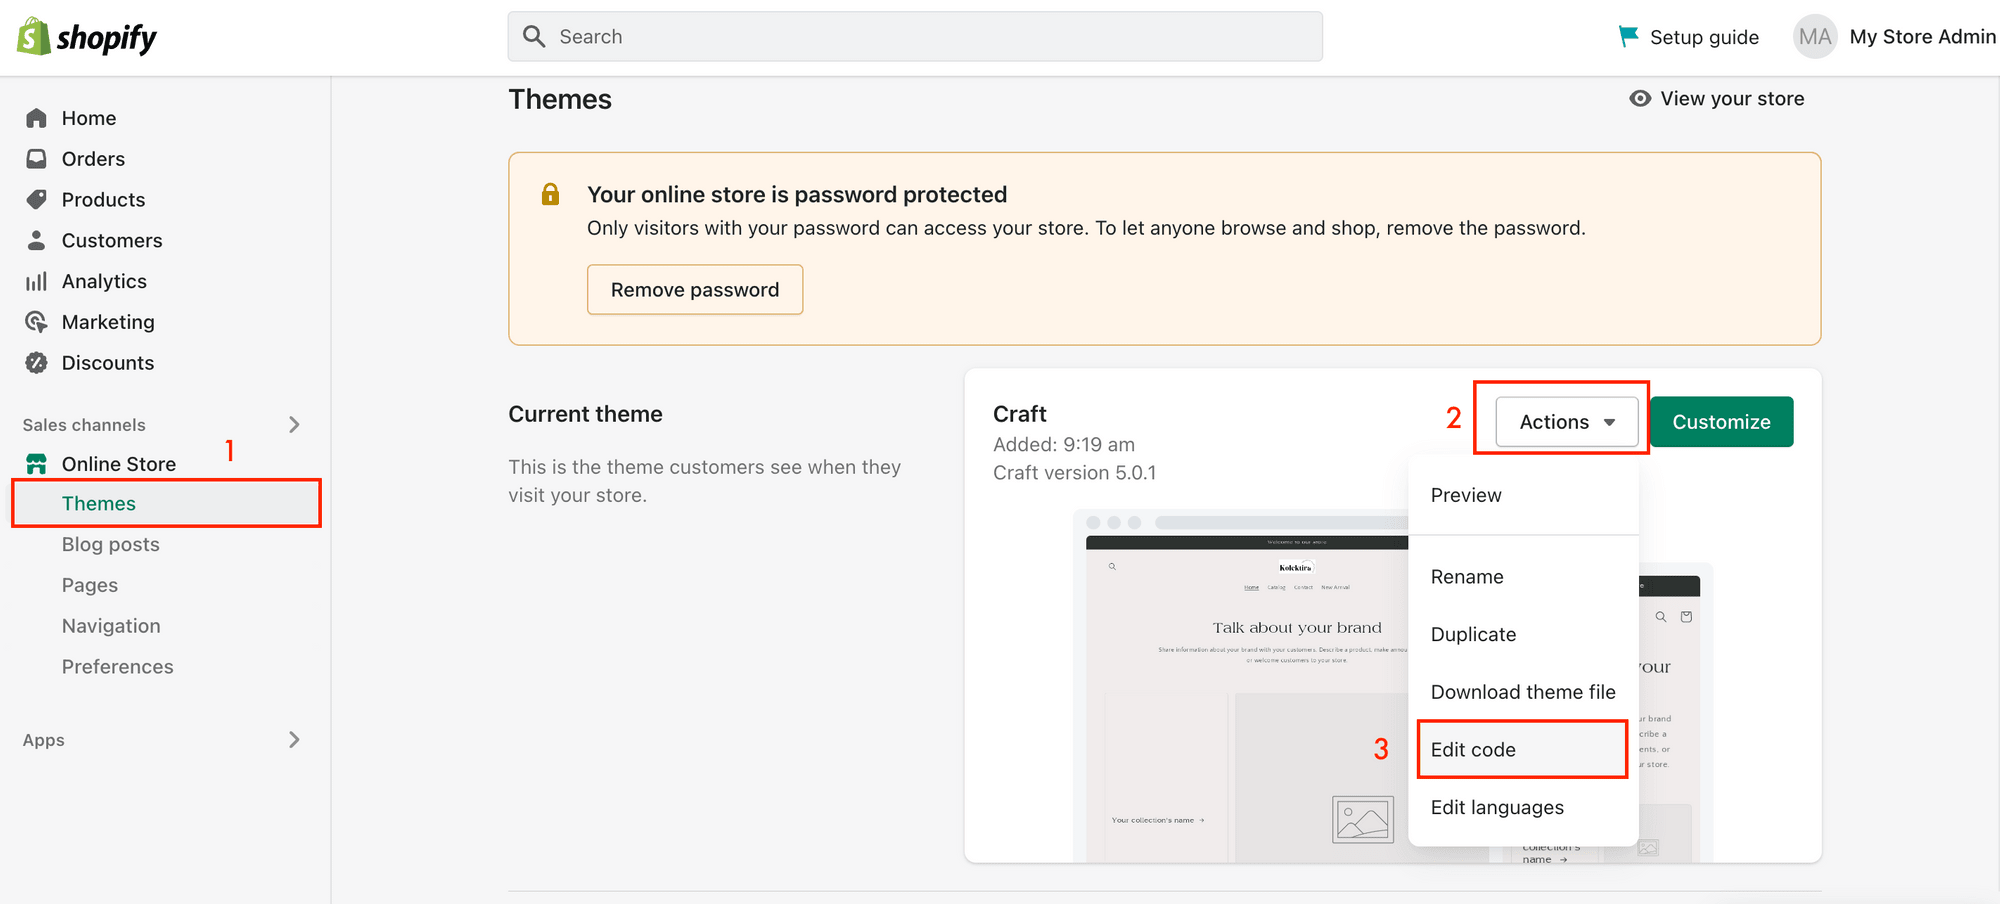
You should be able to see the files which belong to your current theme. The code for the meta tags will be in “Snippets > meta-tags.liquid”.
In the “meta-tags.liquid” file, you should see that the “page image” will be used as the default Open Graph image if it is present.
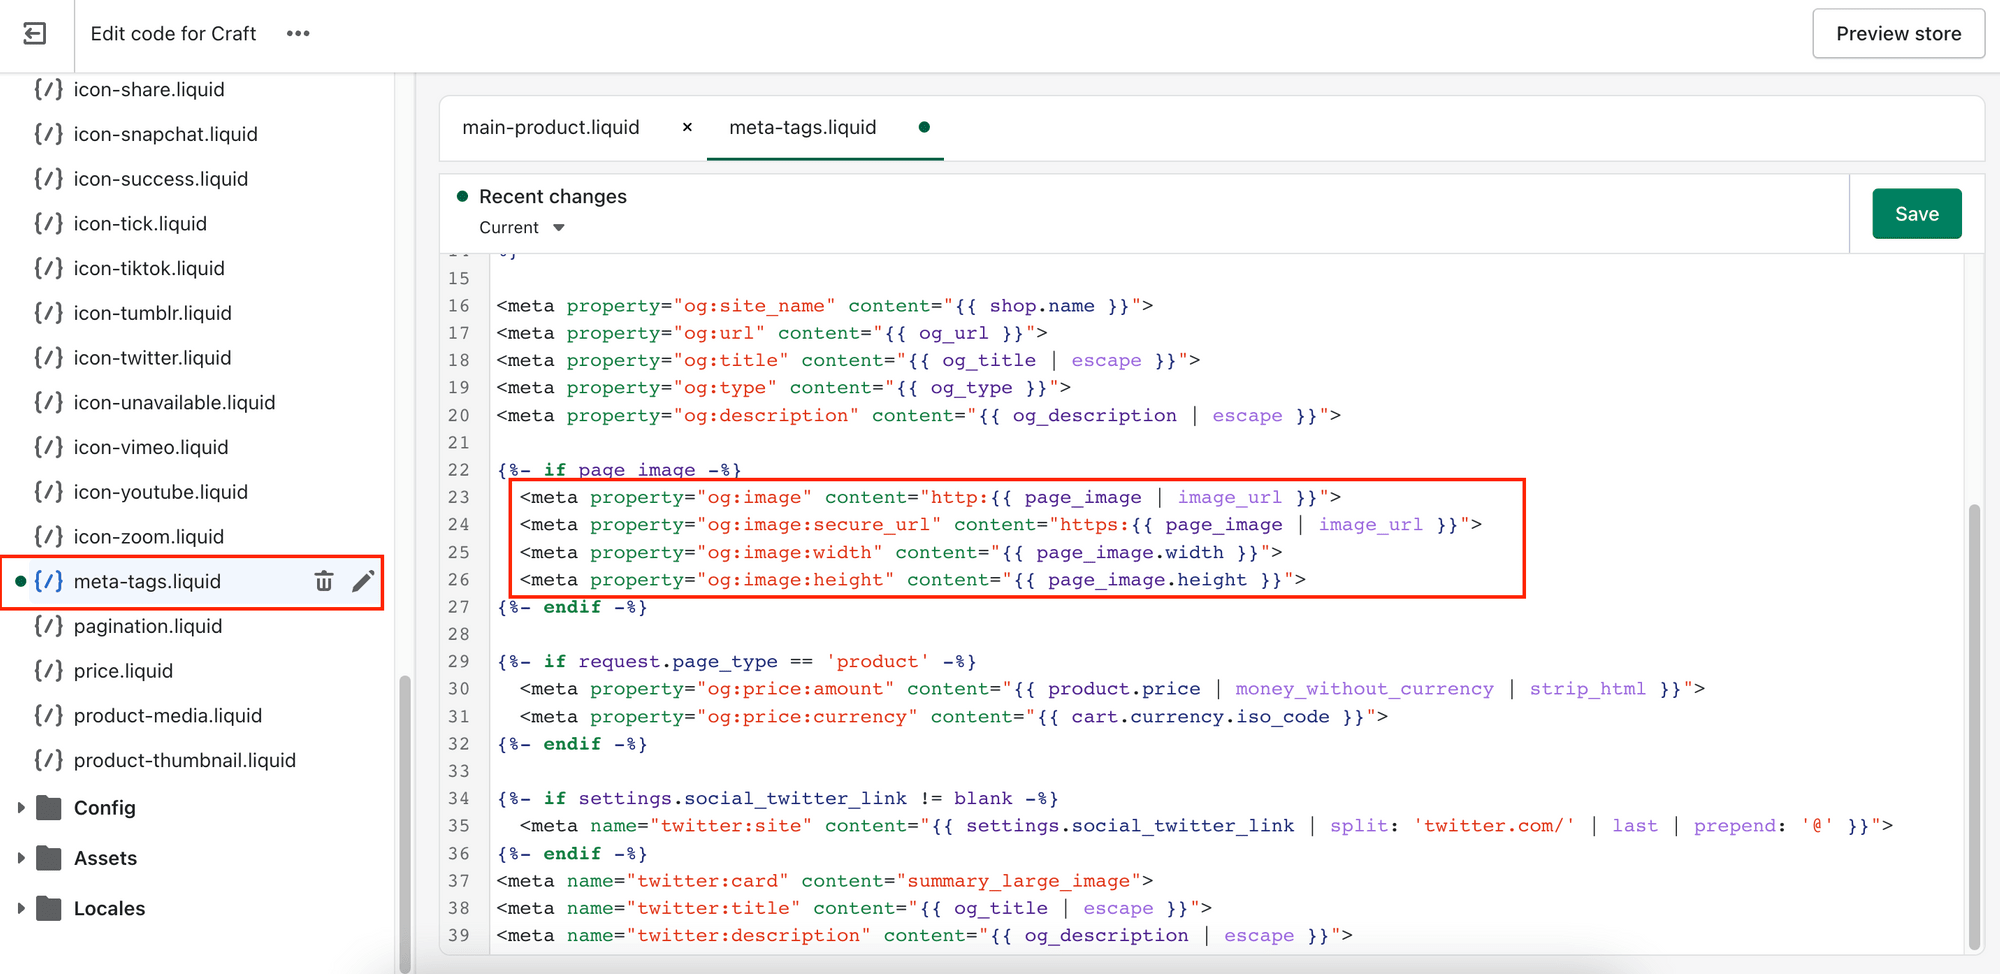
We will edit this file to add auto-generated custom Open Graph images to the product pages. Before that, we will need to prepare a Simple URL for image generation.
Step 3. Create a Simple URL for Image Generation
The Simple URL used to generate an Open Graph image automatically using Bannerbear consists of an API path and multiple sets of data in the format of “layer / attribute / data”.
To construct a Simple URL, we will need an API path that is structured like the example below:
https://ondemand.bannerbear.com/simpleurl/<URL Base>/image
The URL Base will be different for every design template and you can create one from your design template menu.
Next, we will add the title, price, collection name, featured image, and brand logo following the layer/attribute/data format. These data will be set as the values of the dynamic objects in the design template.
title: title/text/{{ og_title | escape }}
price: price/text/{{ product.price | money_with_currency}}
collection: collection/text/{{ product.collections.first.title | escape }}
image: image_container/image_url/http:{{ product.featured_image | img_url: 'master' | url_encode}}
logo: logo_container/image_url/http:{{"logo.png" | asset_url | url_encode}}
The values of the attributes above will be retrieved from Shopify’s Product object using the Liquid language except for the logo. You can refer to Shopify.dev documentation for more information about the Product object.
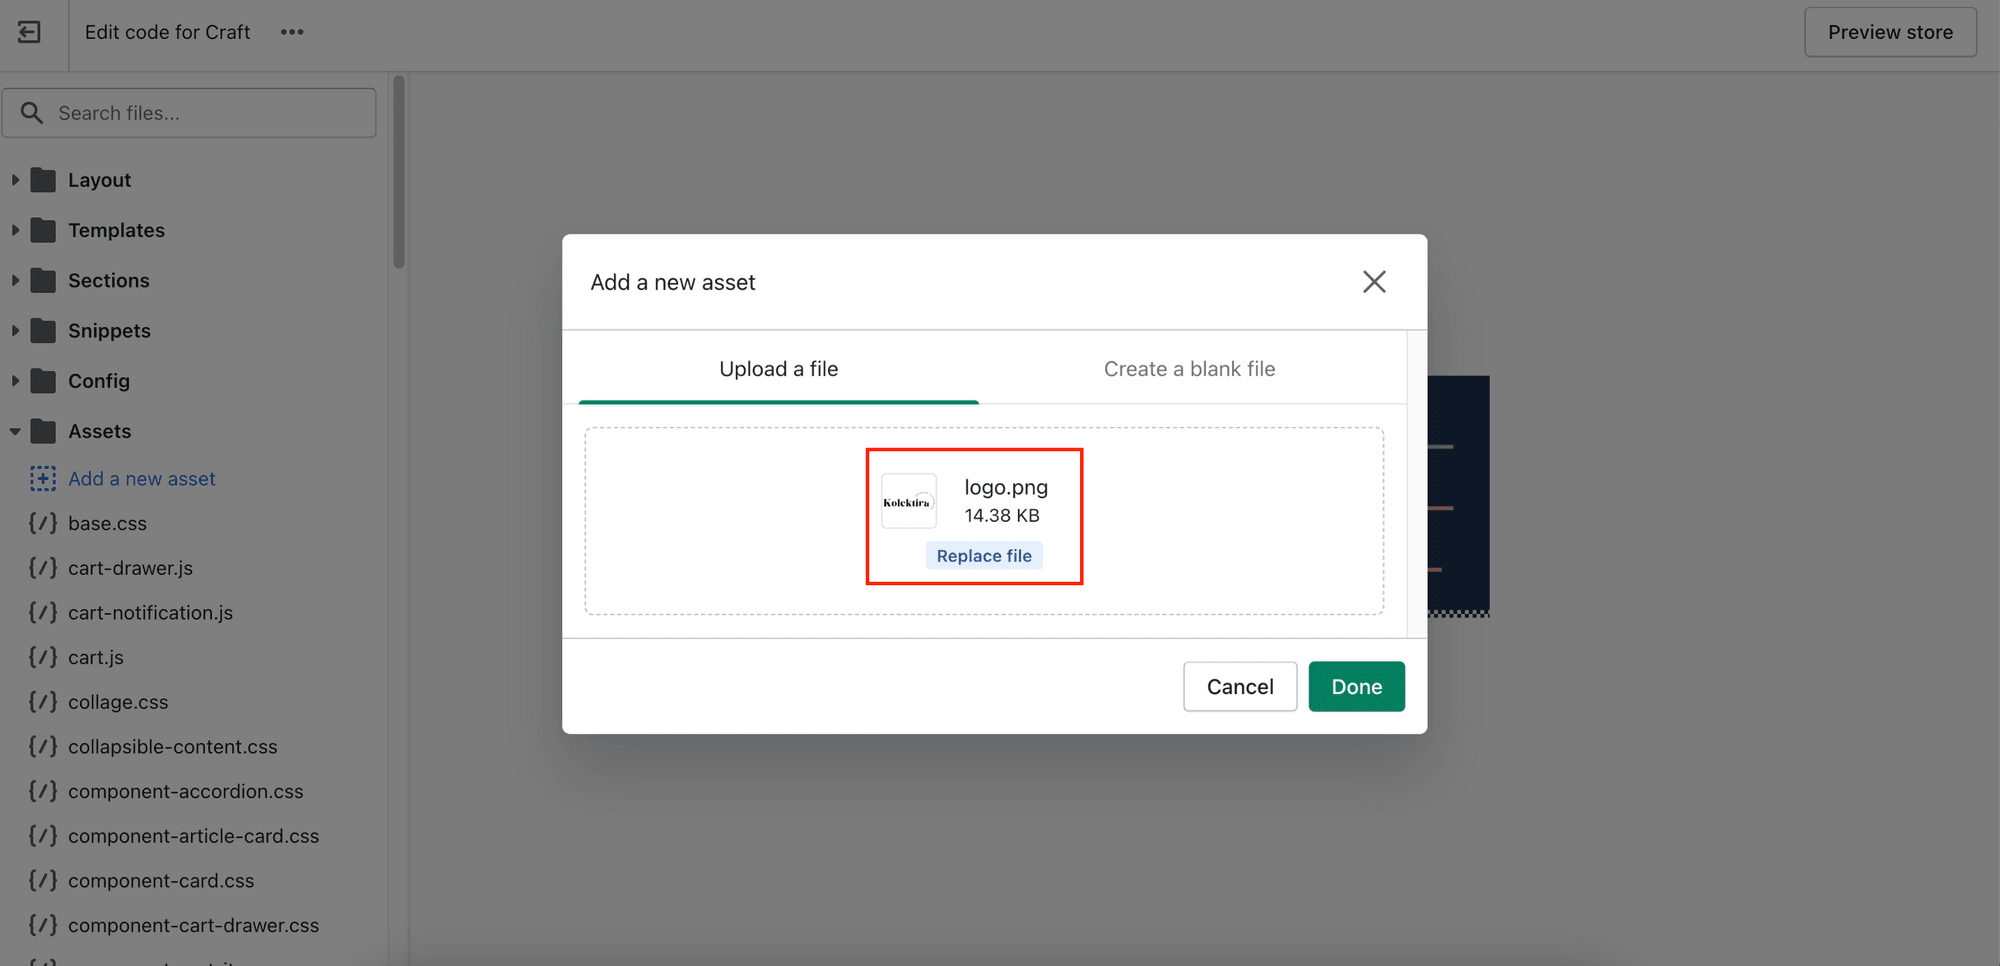
The logo from the Brand settings cannot be accessed from the current file. To get around it, we will upload the logo to the “Assets” folder in the code editor and use it instead.
Combine the API path and layer/attribute/data strings to construct the complete Simple URL:
https://ondemand.bannerbear.com/simpleurl/emR14qkKLMzdNODAZ2/image/title/text/{{ og_title | escape }}/price/text/{{ product.price | money_with_currency}}/collection/text/{{ product.collections.first.title | escape }}/image_container/image_url/http:{{ product.featured_image | img_url: 'master' | url_encode}}/logo_container/image_url/http:{{"logo.png" | asset_url | url_encode}}
As the data will be retrieved from individual products, a unique Simple URL will be created dynamically for every product, generating different custom Open Graph images automatically.
🐻 Reminder : Make sure that the same file name is used in the Simple URL for the logo.
Step 5. Add the Meta Tags
Add the Simple URL to the Open Graph meta tags.
<meta property="og:image" content="https://ondemand.bannerbear.com/simpleurl/emR14qkKLMzdNODAZ2/image/title/text/{{ og_title | escape }}/price/text/{{ product.price | money_with_currency}}/collection/text/{{ product.collections.first.title | escape }}/image_container/image_url/http:{{ product.featured_image | img_url: 'master' | url_encode}}/logo_container/image_url/http:{{"logo.png" | asset_url | url_encode}}">
 <meta property="og:image:secure_url" content="https://ondemand.bannerbear.com/simpleurl/emR14qkKLMzdNODAZ2/image/title/text/{{ og_title | escape }}/price/text/{{ product.price | money_with_currency}}/collection/text/{{ product.collections.first.title | escape }}/image_container/image_url/http:{{ product.featured_image | img_url: 'master' | url_encode}}/logo_container/image_url/http:{{"logo.png" | asset_url | url_encode}}">
 <meta property="twitter:image" content="https://ondemand.bannerbear.com/simpleurl/emR14qkKLMzdNODAZ2/image/title/text/{{ og_title | escape }}/price/text/{{ product.price | money_with_currency}}/collection/text/{{ product.collections.first.title | escape }}/image_container/image_url/http:{{ product.featured_image | img_url: 'master' | url_encode}}/logo_container/image_url/http:{{"logo.png" | asset_url | url_encode}}">
Add the meta tags to the if statement which checks for a product page.
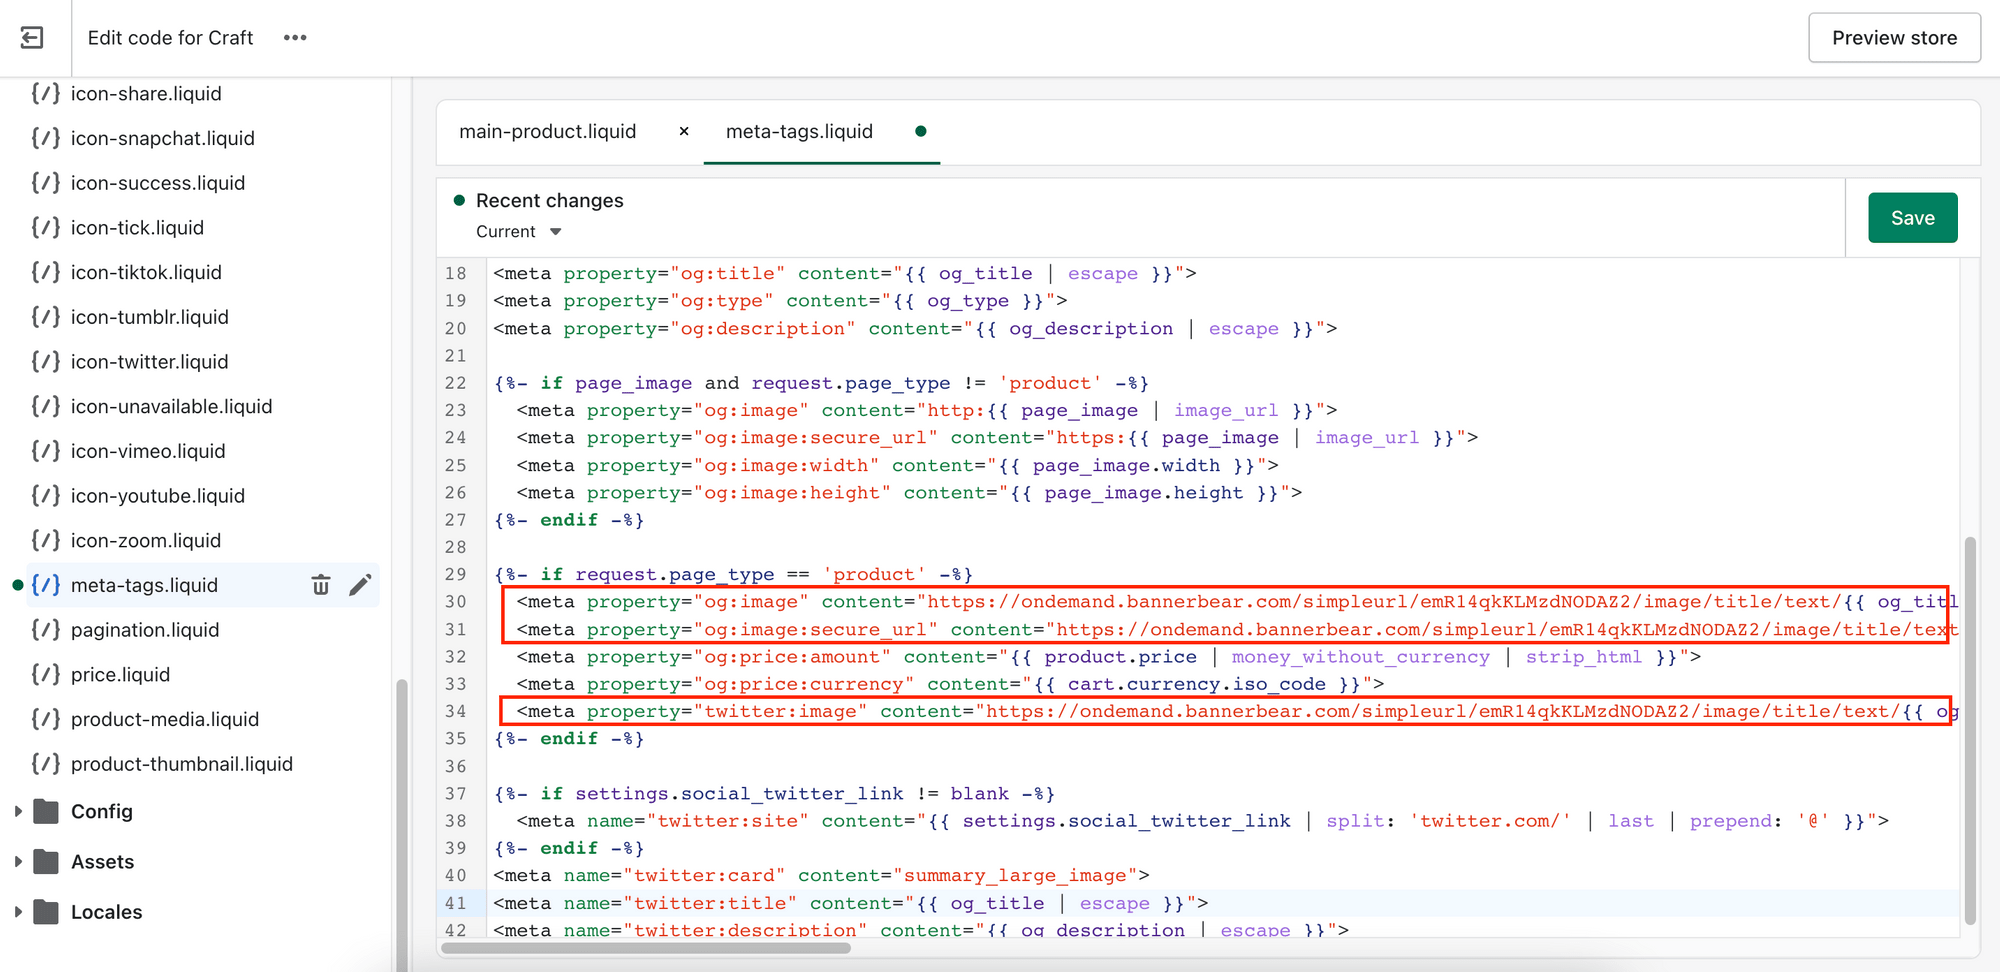
As we want custom Open Graph images to be generated automatically and displayed for product pages only, add and request.page_type != 'product’ to the if statement in the screenshot below so that other non-product pages will use the default Open Graph image.

Testing the Result
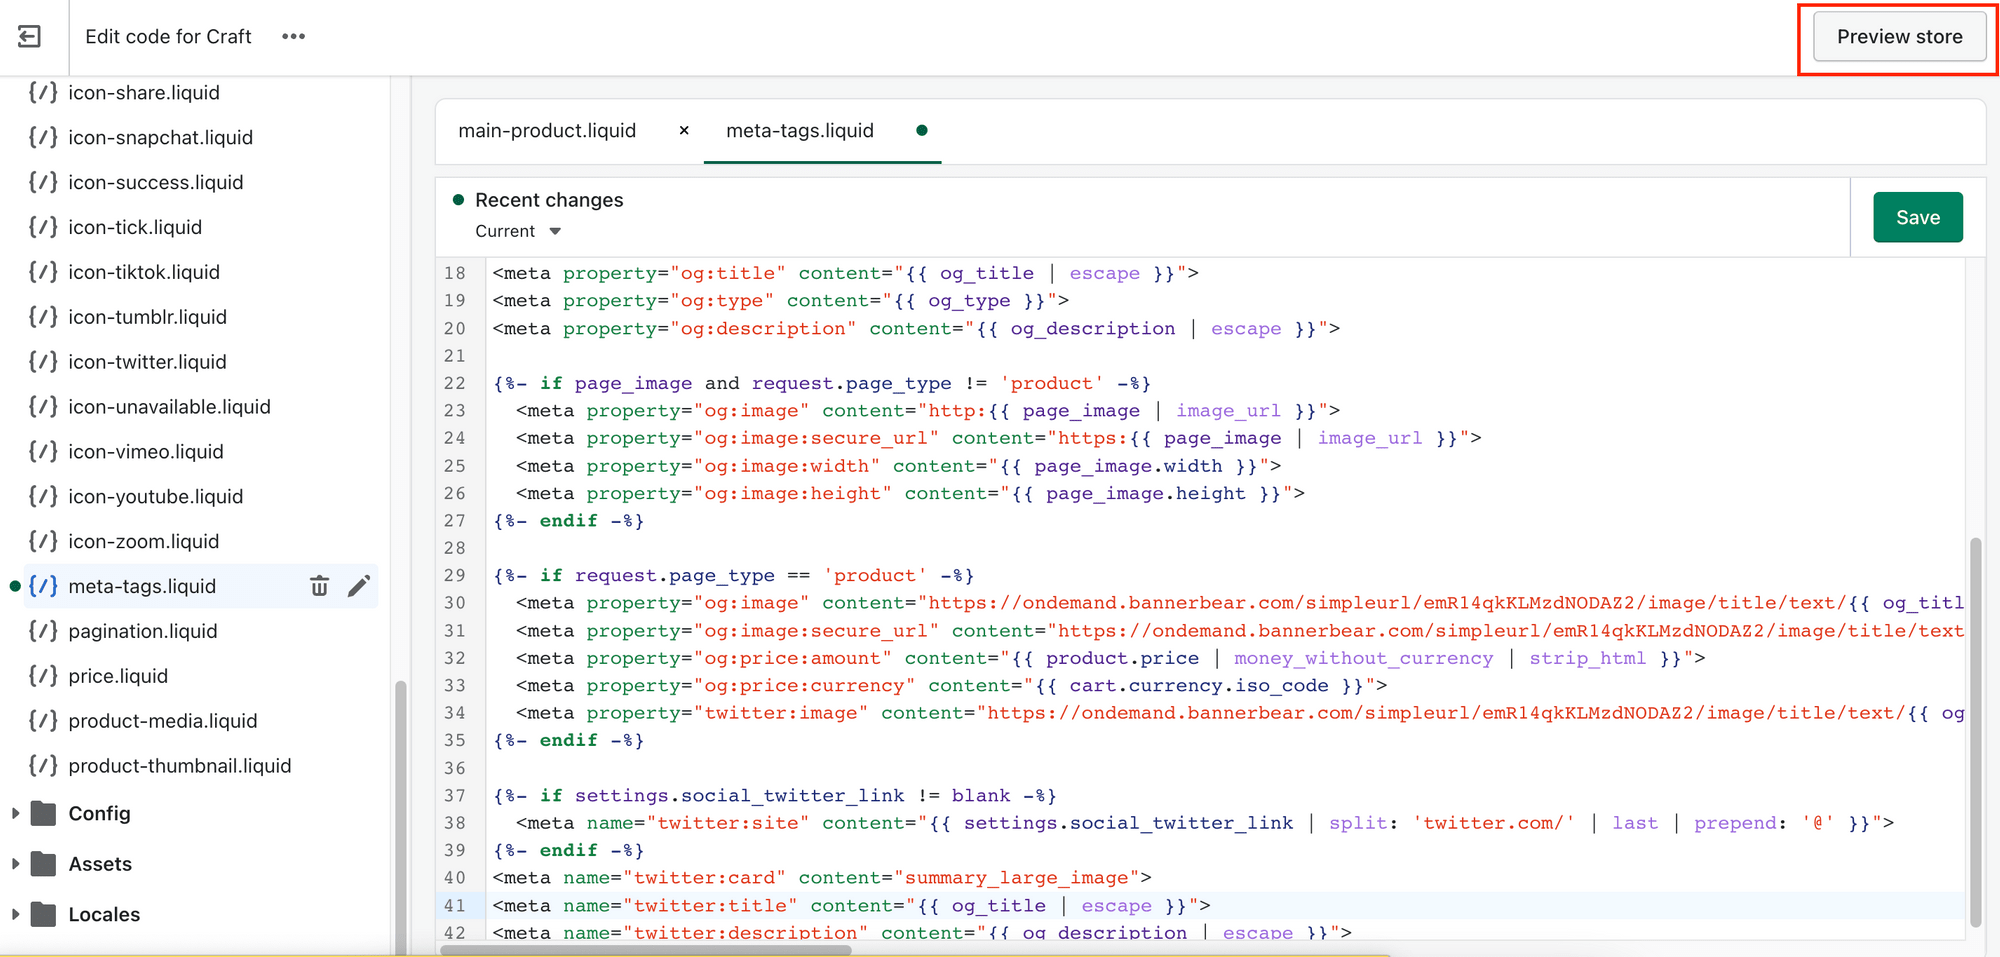
The meta tags should be injected into the <head> section of your website. Click “Preview store” to view your store.
You can test the Simple URL by retrieving the complete URL from the meta tag using your browser inspector.
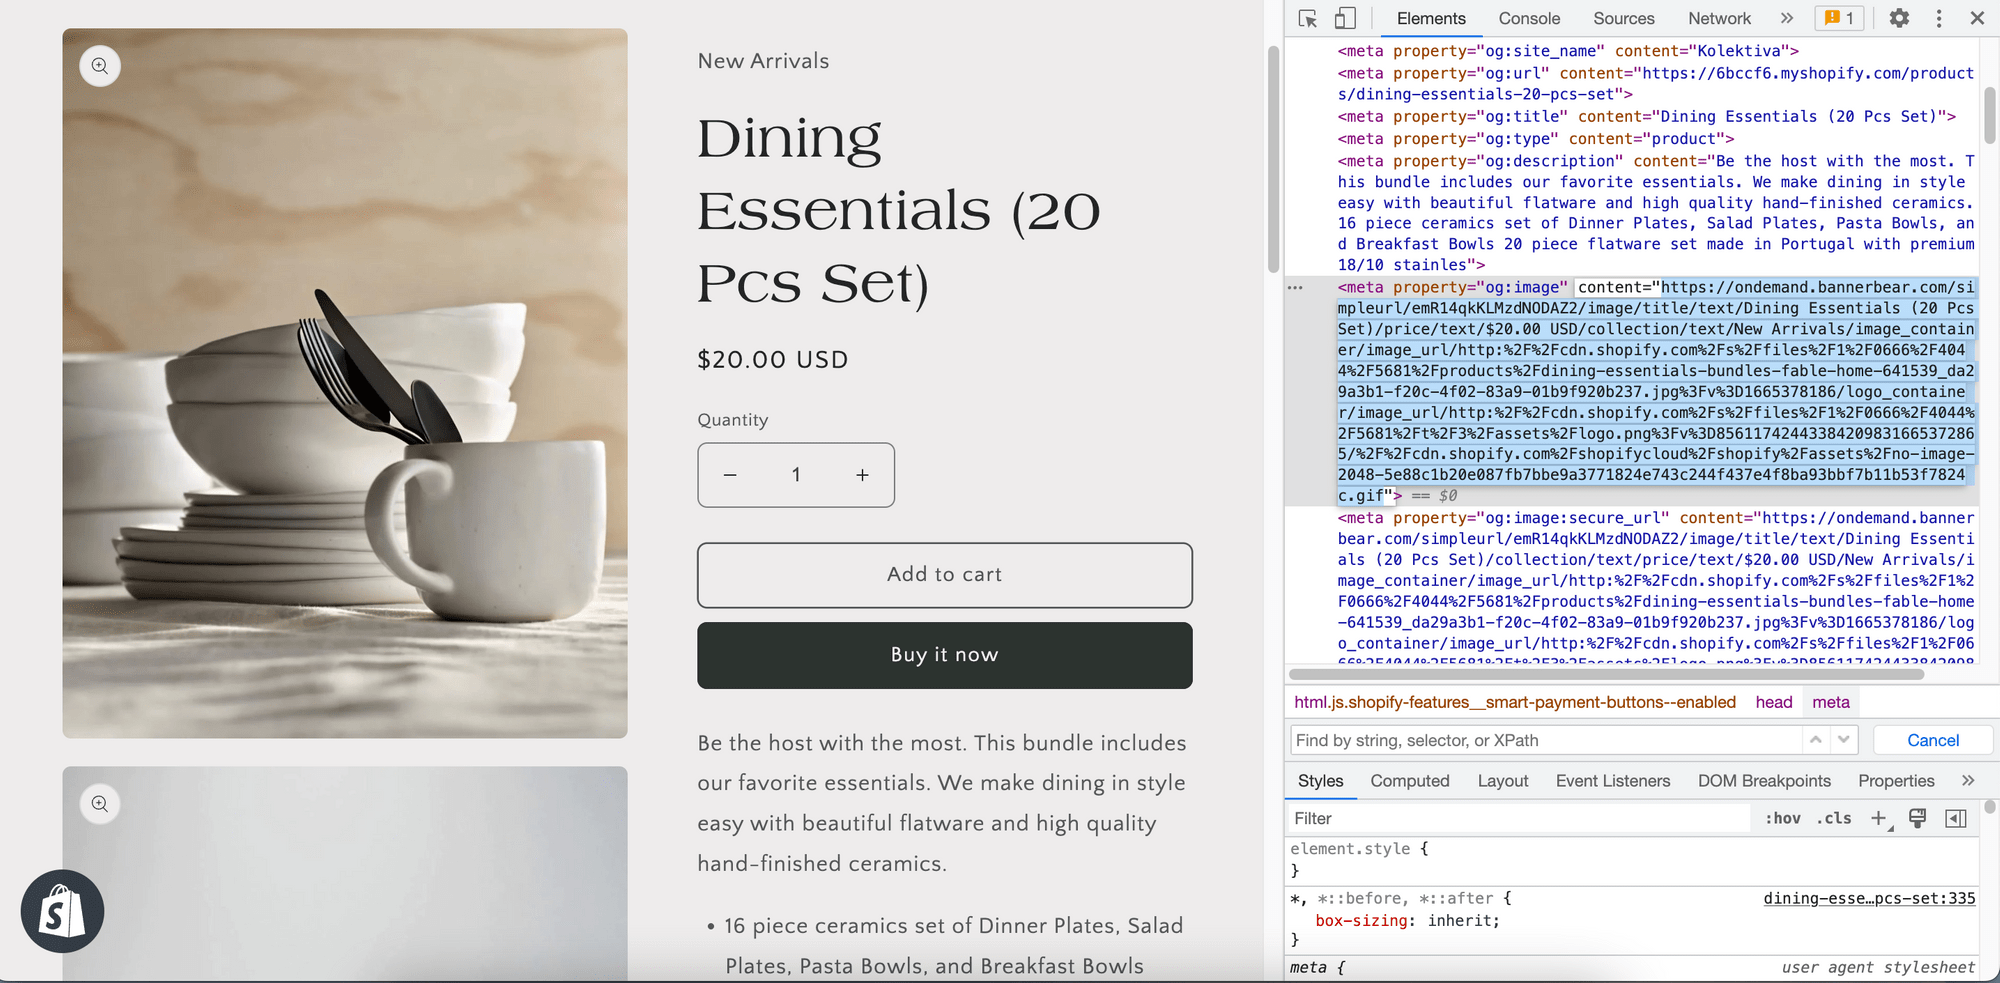
When you visit the URL, you should get a custom Open Graph image generated automatically by Bannerbear based on the design template using the product information.

Using an Open Graph Image Tester
If you want to make sure that the custom Open Graph image auto-generation has been set up correctly, you can use an Open Graph image tester to preview the image.
Here are some of them that are free:
- Official Twitter Card Validator
- Official Facebook Sharing Debugger
- Twitter Card Preview Tool
- Facebook Open Graph Preview Tool
- OpenGraph.xyz
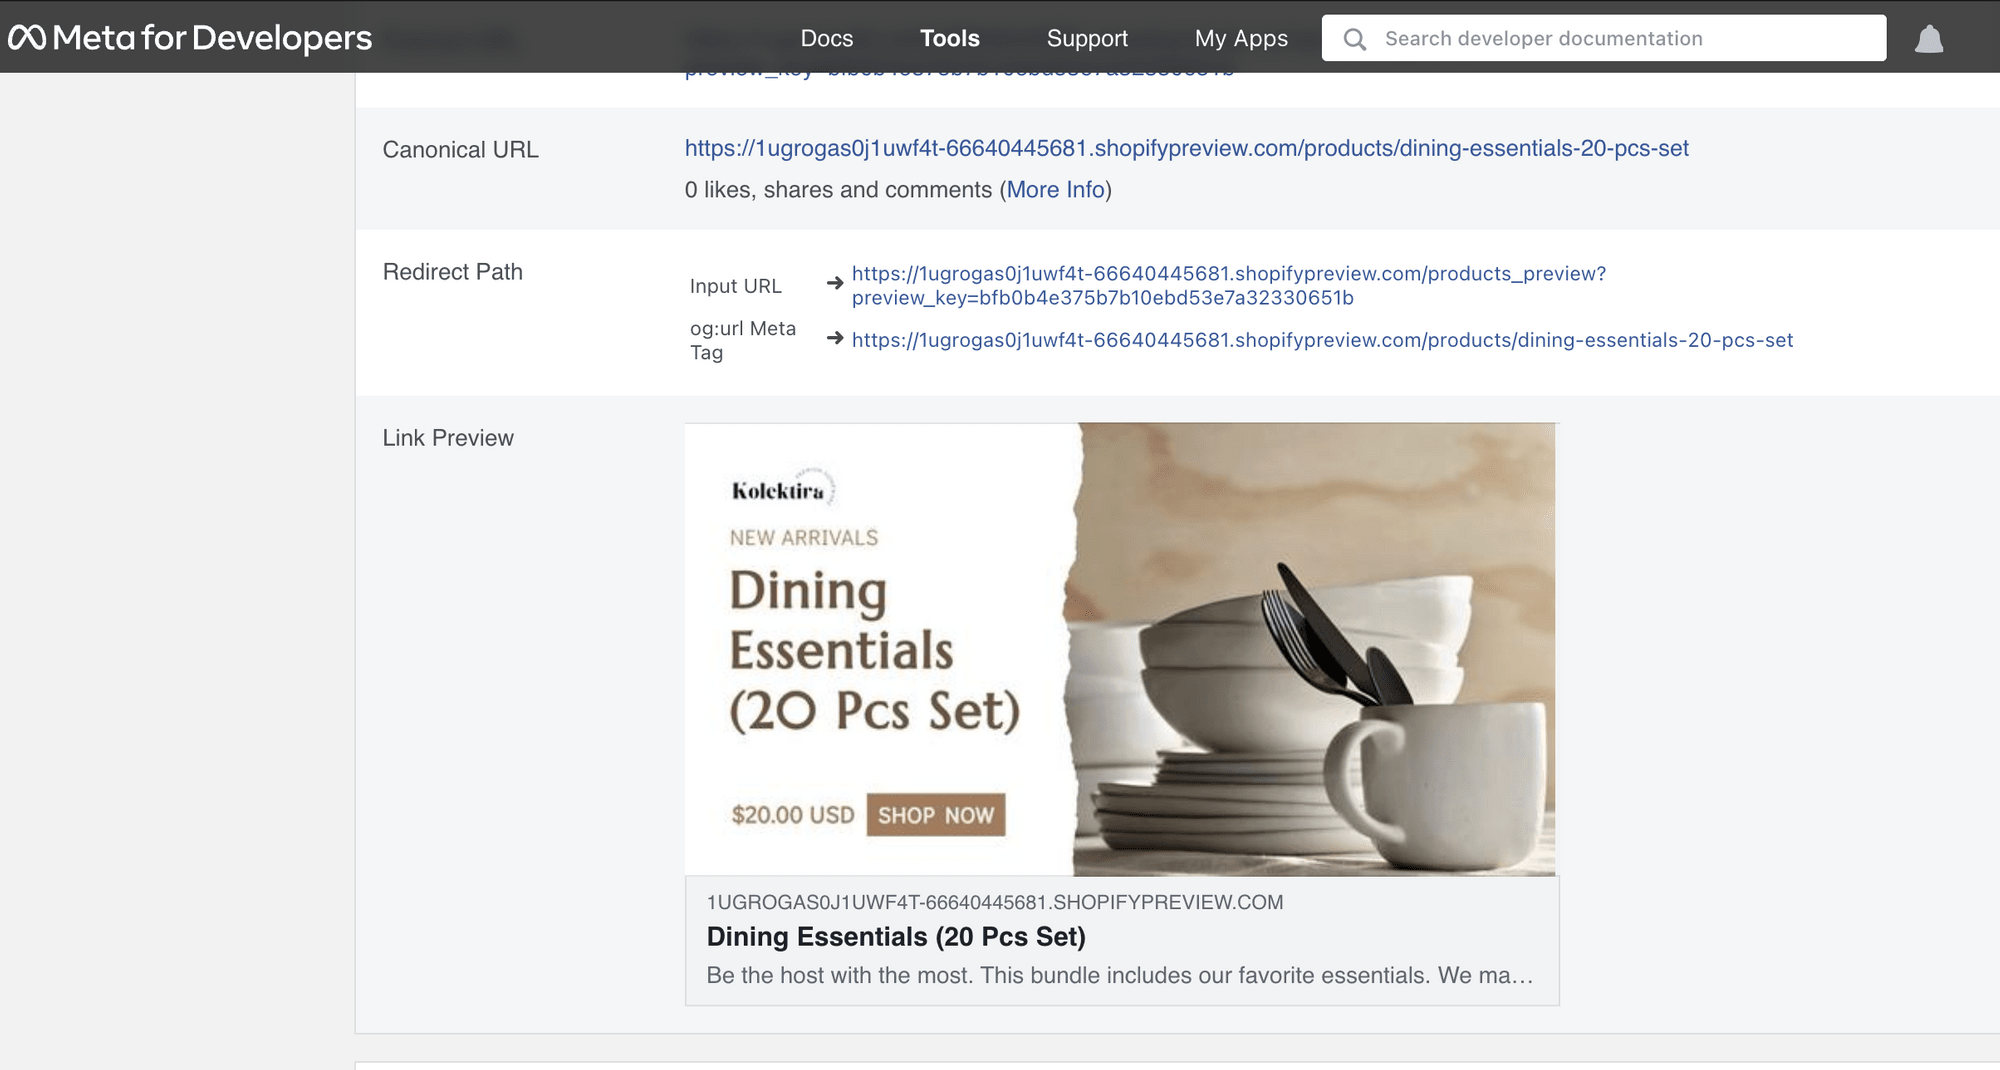
If your Shopify store is protected with a password, you will need to use a preview link of your store so that the meta tags are accessible.
Click “Share preview > Copy link” and paste the link onto your browser’s address bar to visit the link.
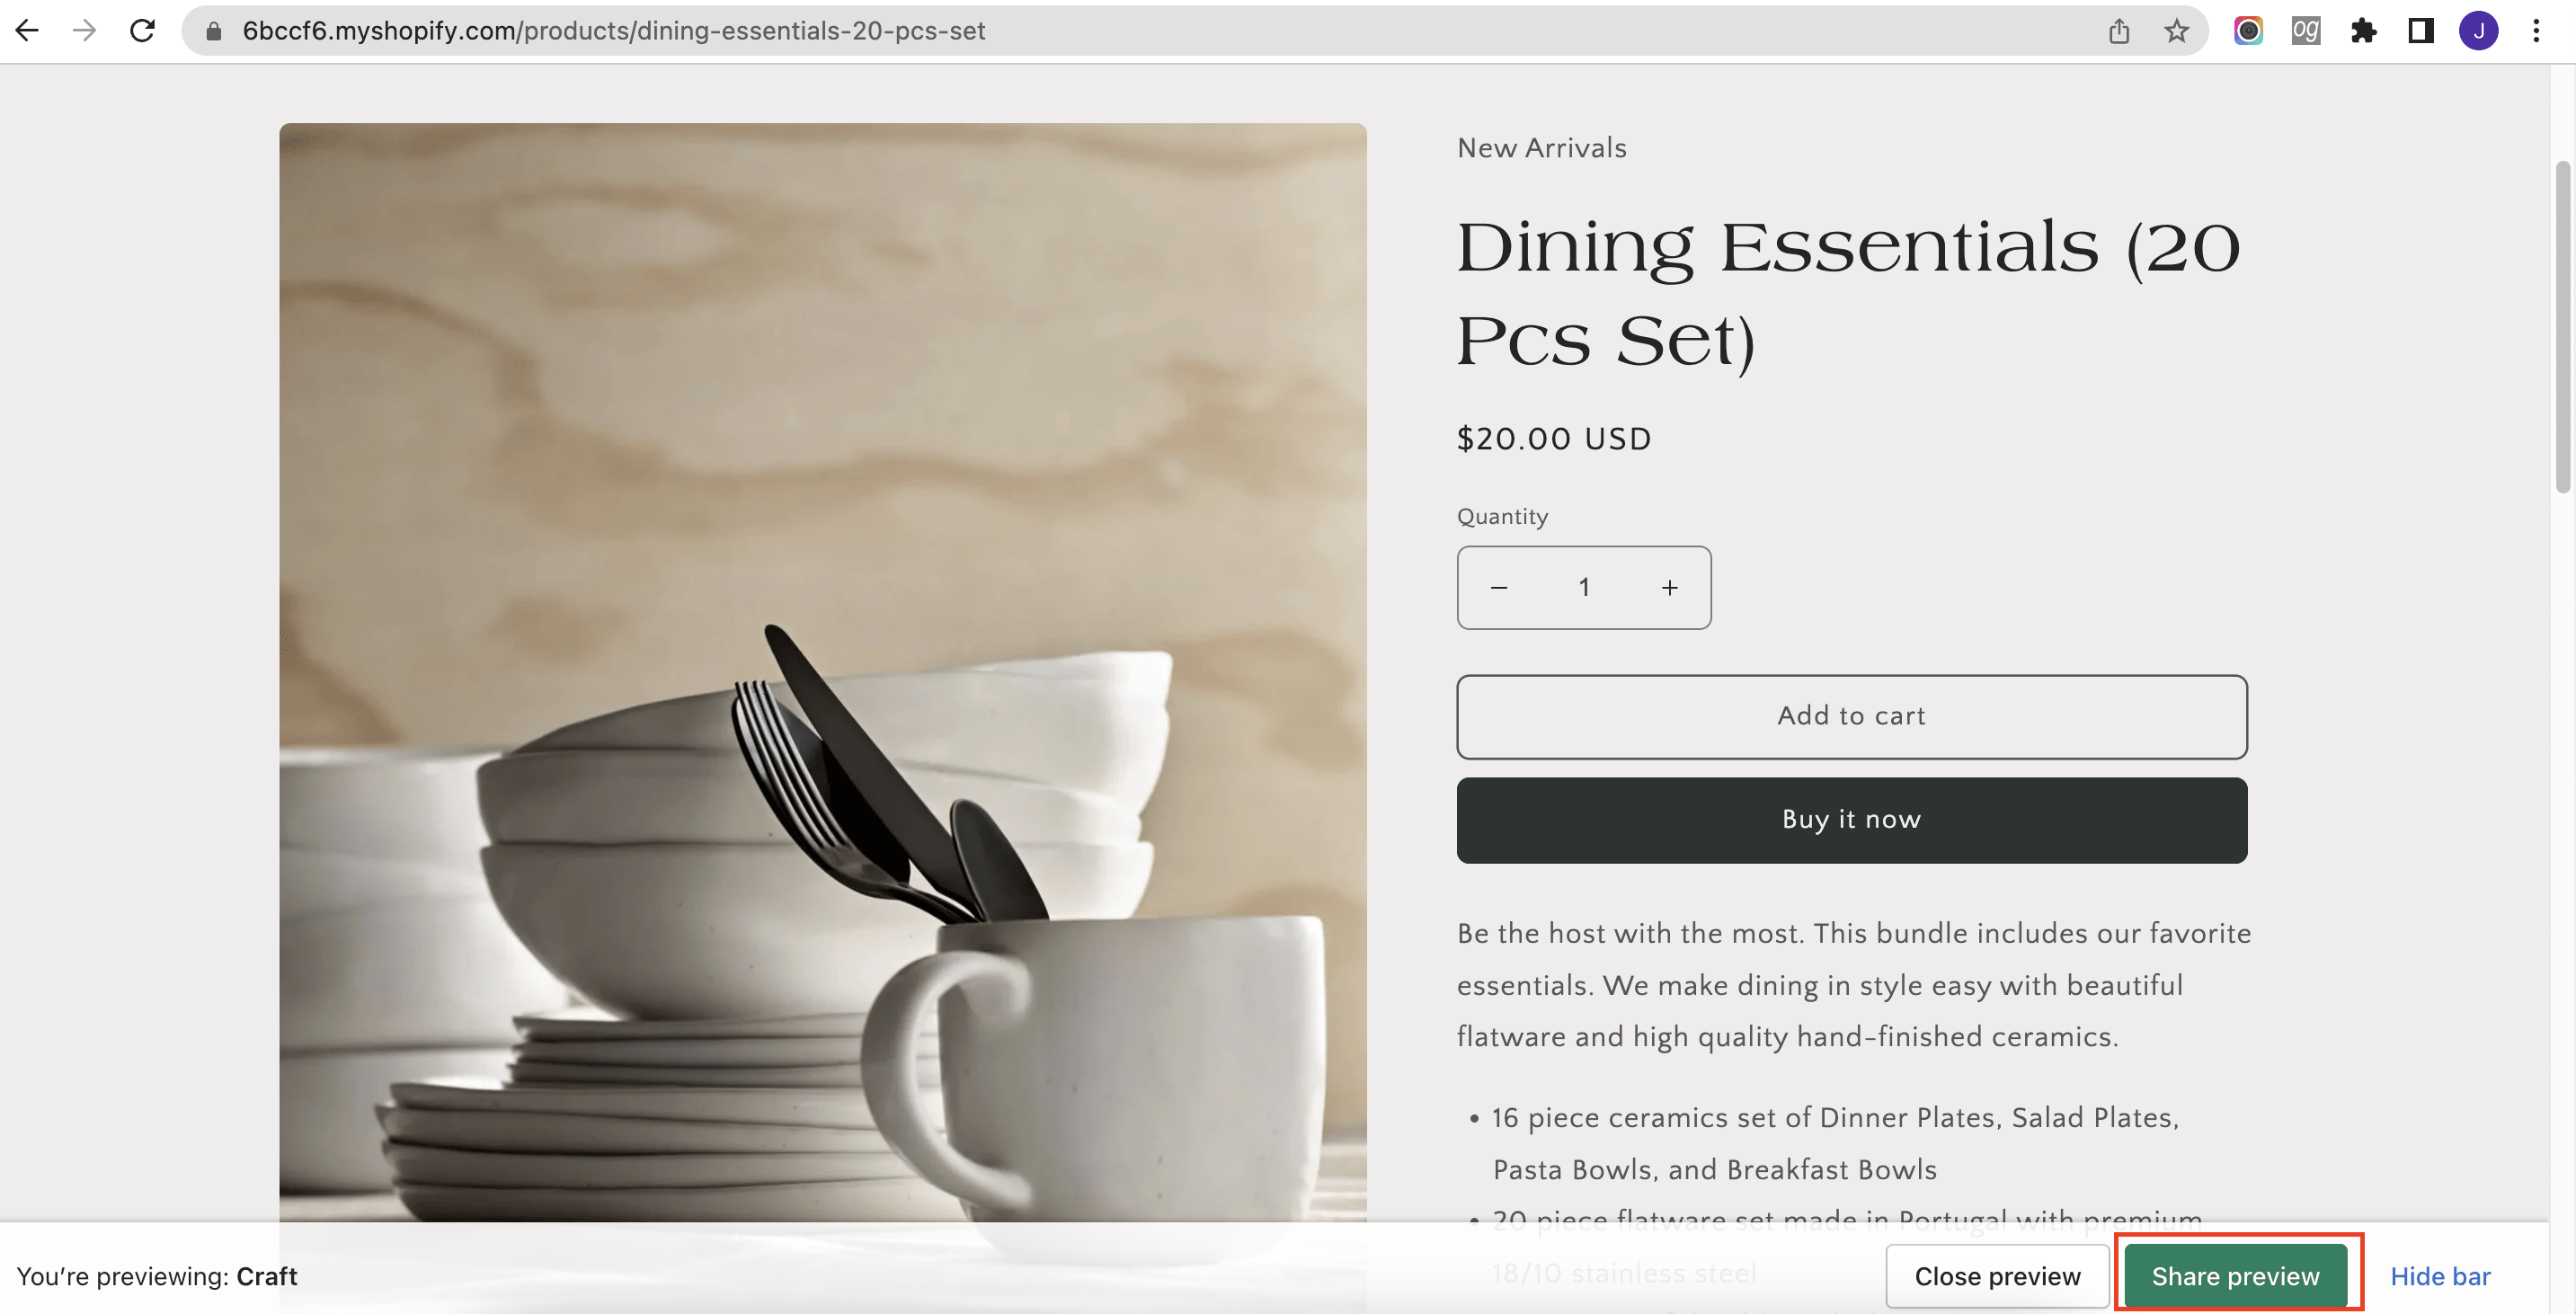

The URL should include “shopifypreview” and you can use the link in your preferred Open Graph image tester to preview the image.
If all the steps are followed correctly, the auto-generated custom Open Graph image should be displayed:
What’s Next
Besides adding auto-generated custom Open Graph images, there is more you can do with Bannerbear to automate media and content generation for your Shopify store. Some of them will require some coding knowledge while some can be done completely without code.
Regardless of your level of coding knowledge, you can follow these tutorials to implement them for your Shopify store. So make sure to check them out!👇🏻
- How to Create Videos with Auto Subtitles in One API Request
- How to Create Videos with an Overlay via API
- How to Auto-Generate Social Media Graphics for your New Shopify Products
- How to Auto-Update a Twitter Banner to Promote Your Latest Shopify Products
- How to Auto-Generate Instagram Stories from Shopify Product Data
