
How to Make a Device Mockup Generator for Websites using Bannerbear
Contents
Device mockups are useful to showcase how your websites will look on various devices, such as desktops, tablets, and smartphones. Not only do device mockups add visual interest, but they also help people better understand how your designs will look on different devices. They provide a realistic preview of the website's appearance and are especially helpful when you need to present your portfolio to potential clients or employers.
Additionally, device mockups can be used to create promotional materials for the website, such as social media posts and advertisements, which can help attract and engage potential users.
In this tutorial, we will learn how to create a device mockup generator using Bannerbear so that we can pass the URL of any website to the service and generate device mockups for the website automatically.
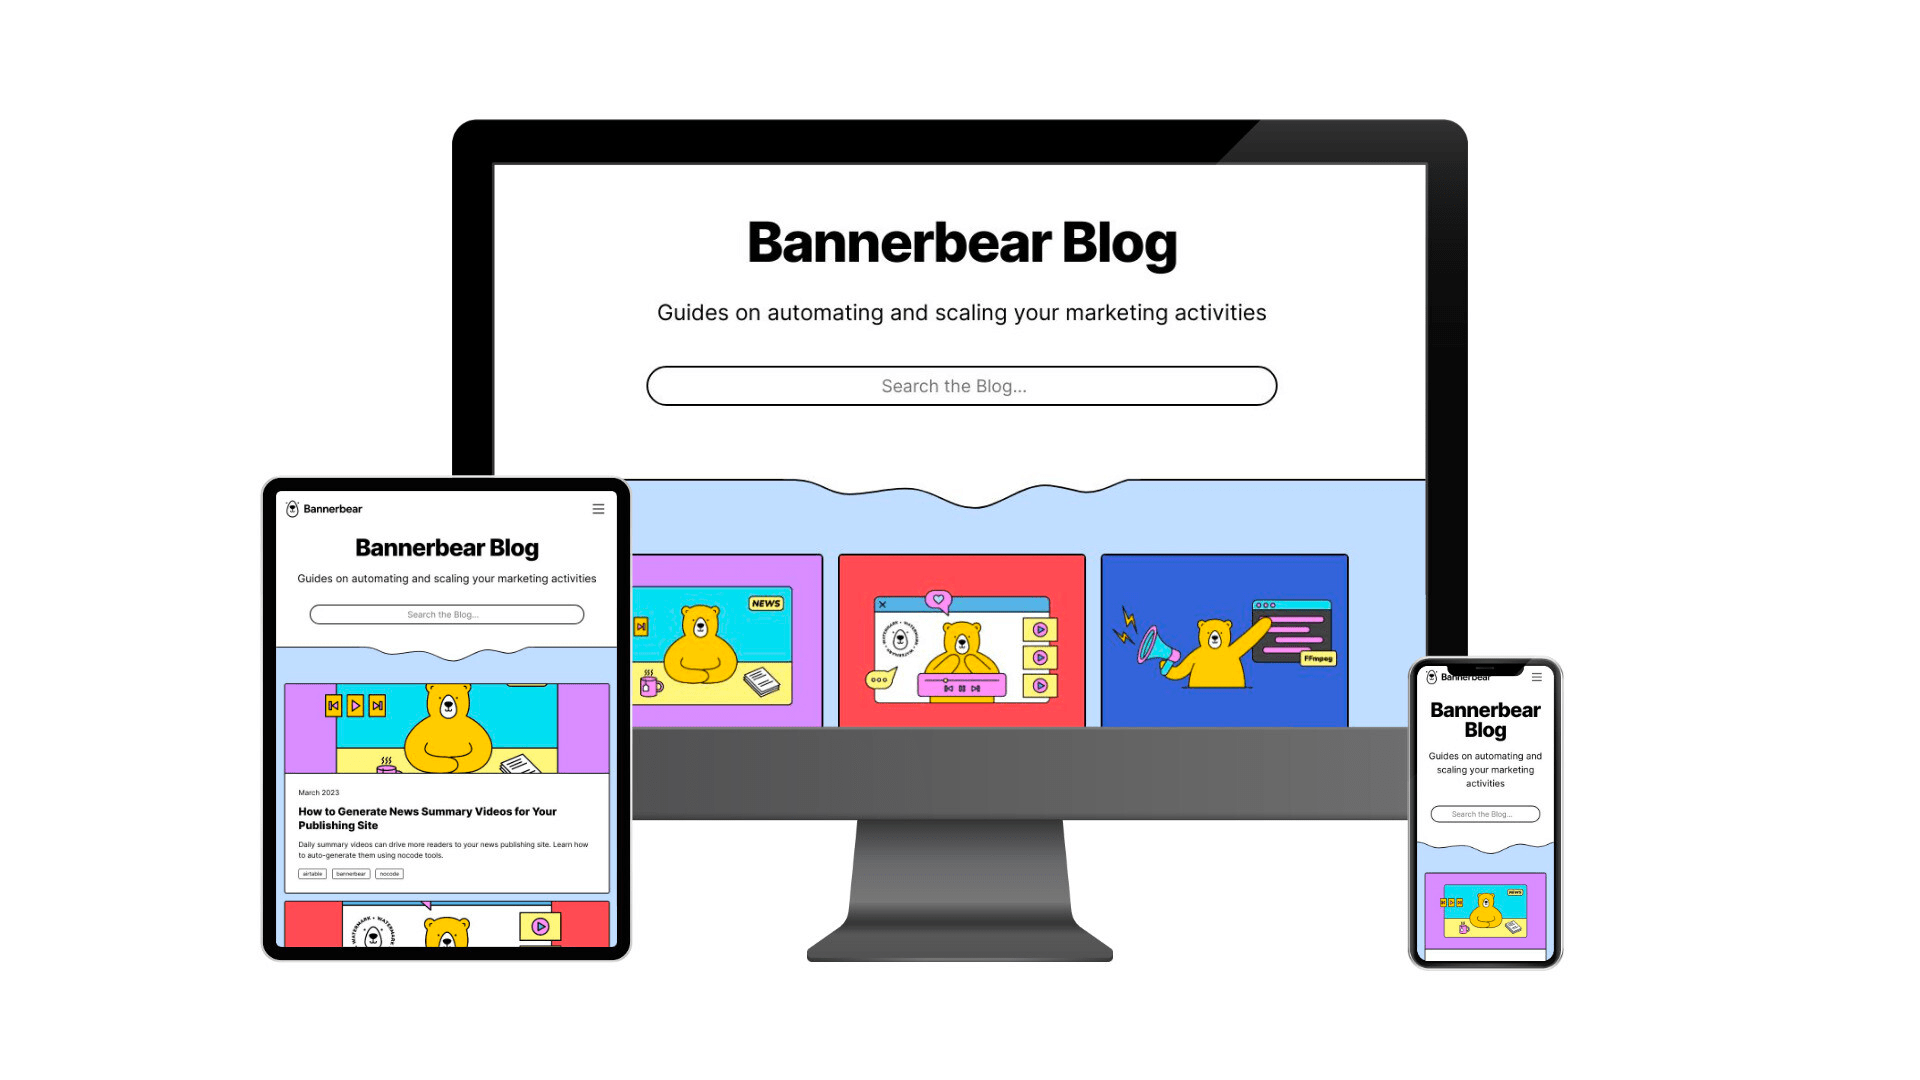
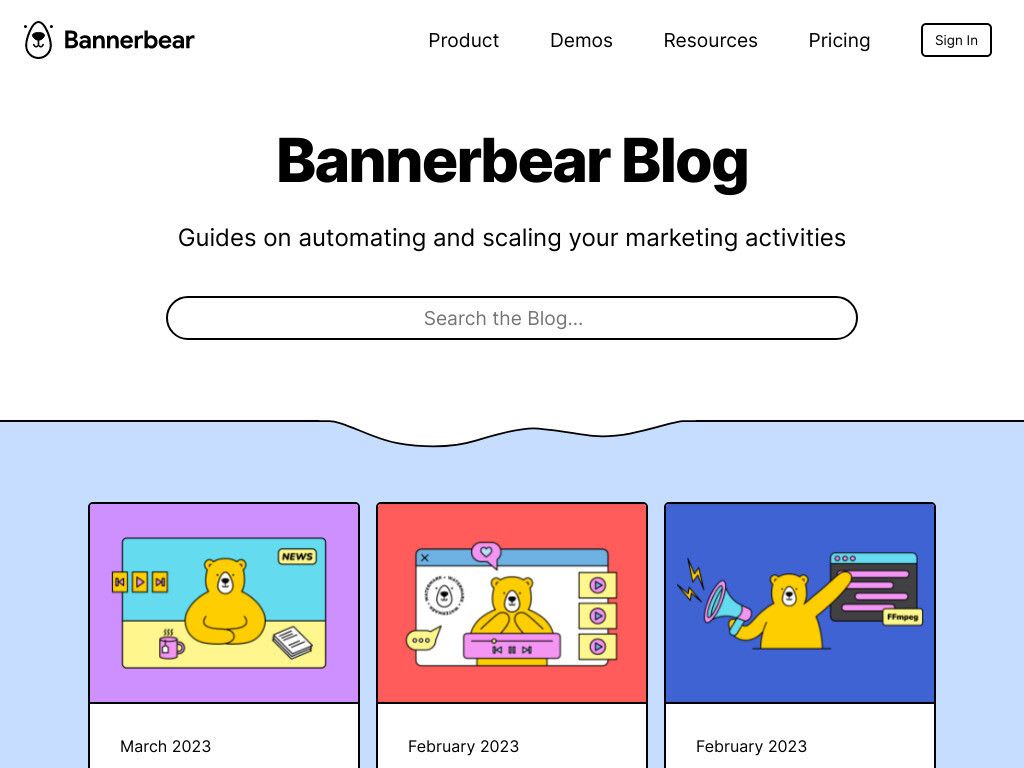
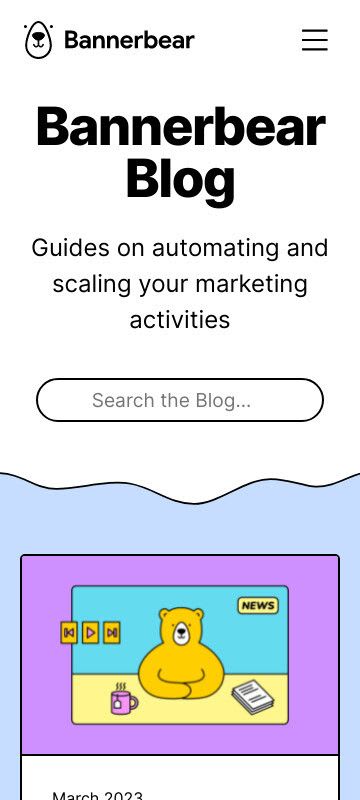
Example 1 : https://www.bannerbear.com/blog/
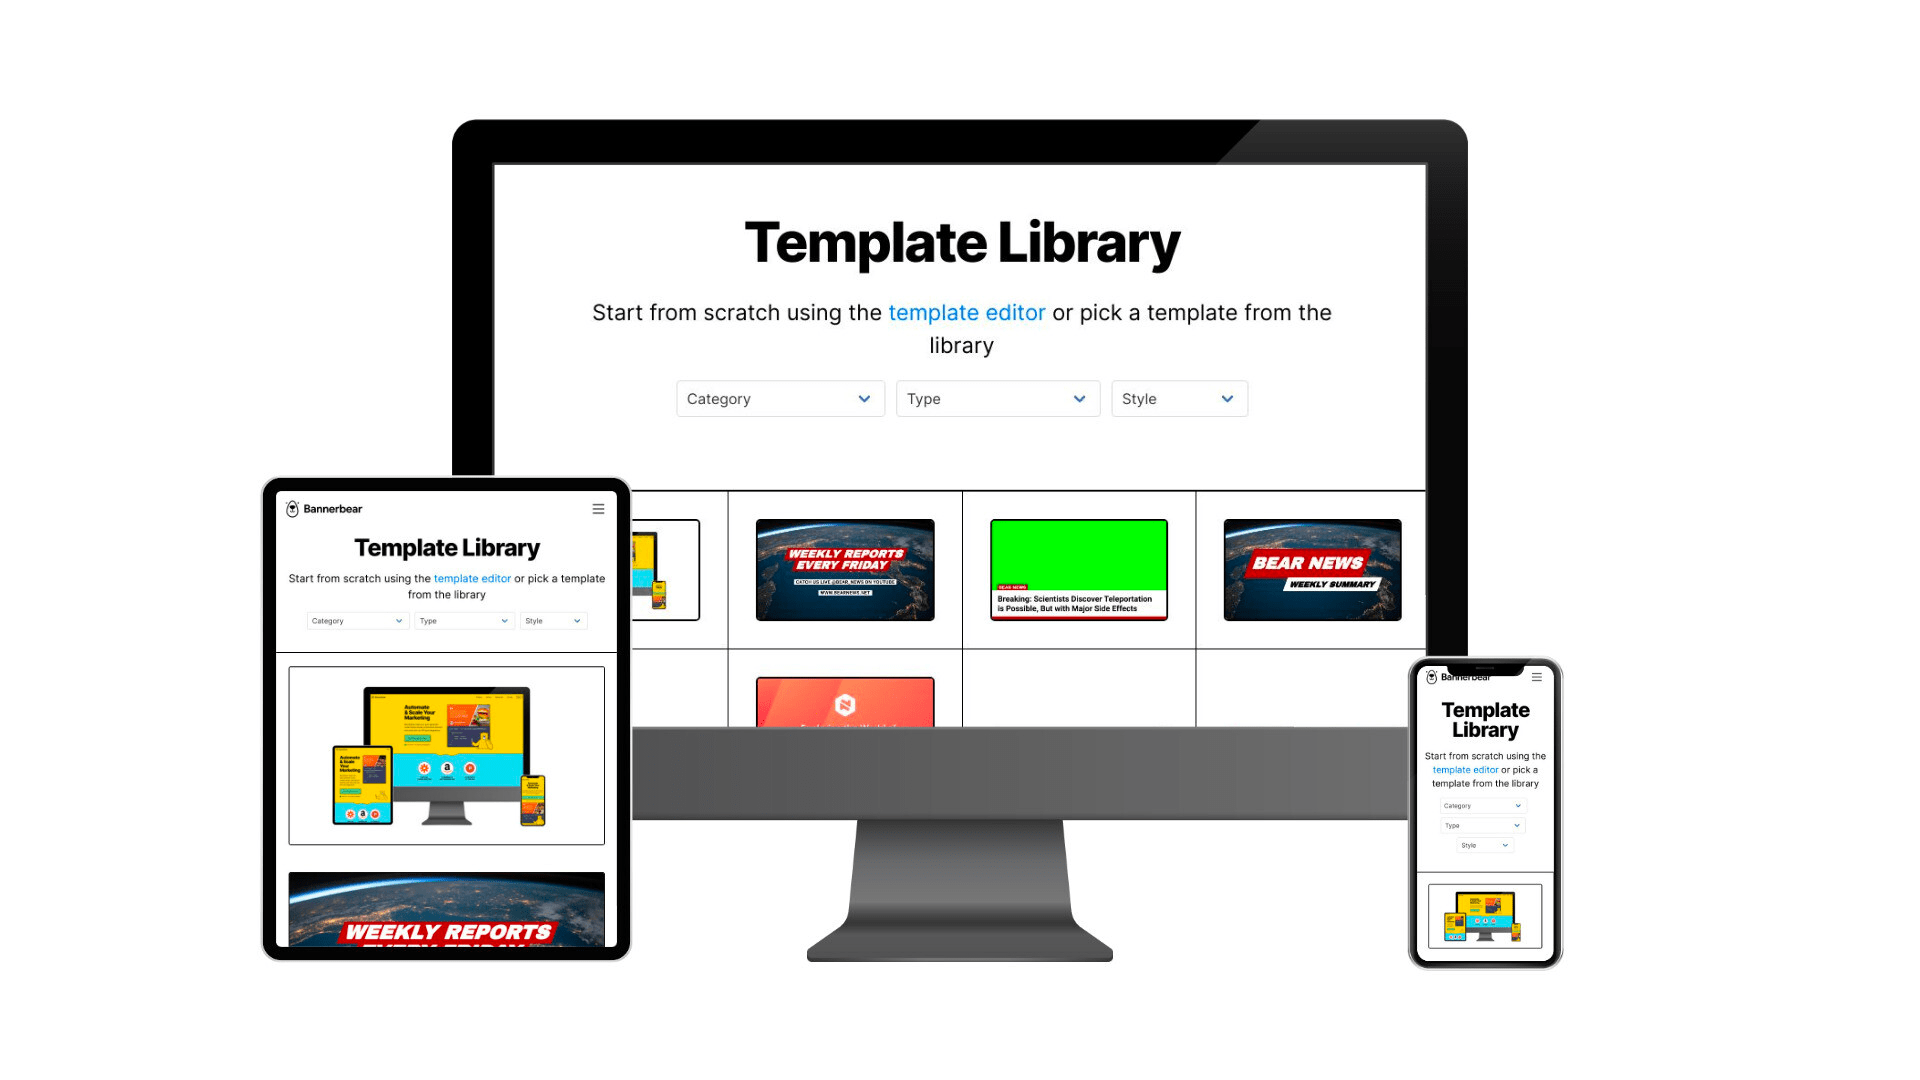
Example 2: https://www.bannerbear.com/templates/
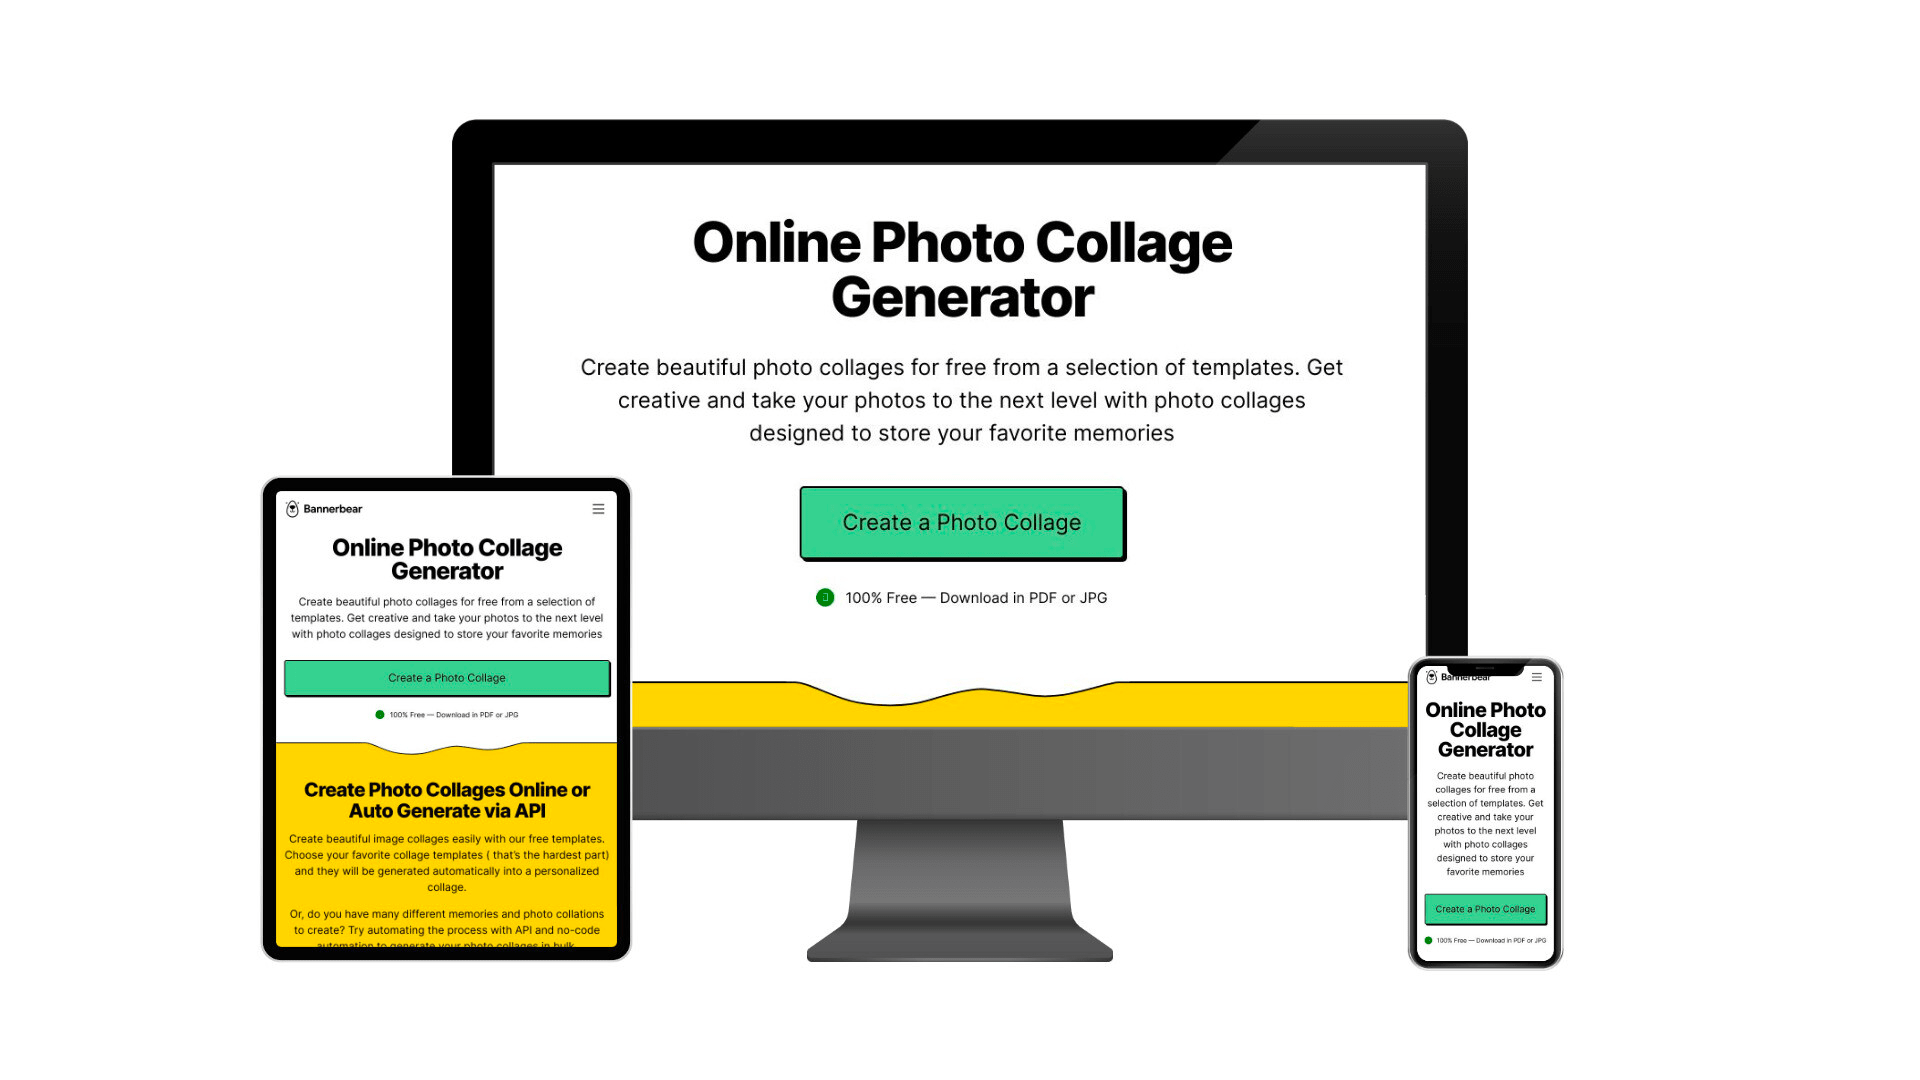
Example 3: https://www.bannerbear.com/generators/free-online-photo-collage-generator/
What is Bannerbear
Bannerbear is a tool that helps you generate custom images, videos, and more using API. It has libraries in various popular programming languages like Ruby, PHP, and Node.js, making integrating image generation and other media manipulation functionalities into your application effortless.
The images and other media files are created based on a template where you can add static and dynamic objects such as images, text, and shapes. By passing different data to the API, the values of these dynamic objects can be altered to generate unique content.
All API requests on Bannerbear are scoped to a project and you can create multiple design templates in the same one. The design templates can be accessed using the project API key and their template IDs.
Now that you have a little bit of an idea of what Bannerbear does, let’s get started!
Creating a Bannerbear Project
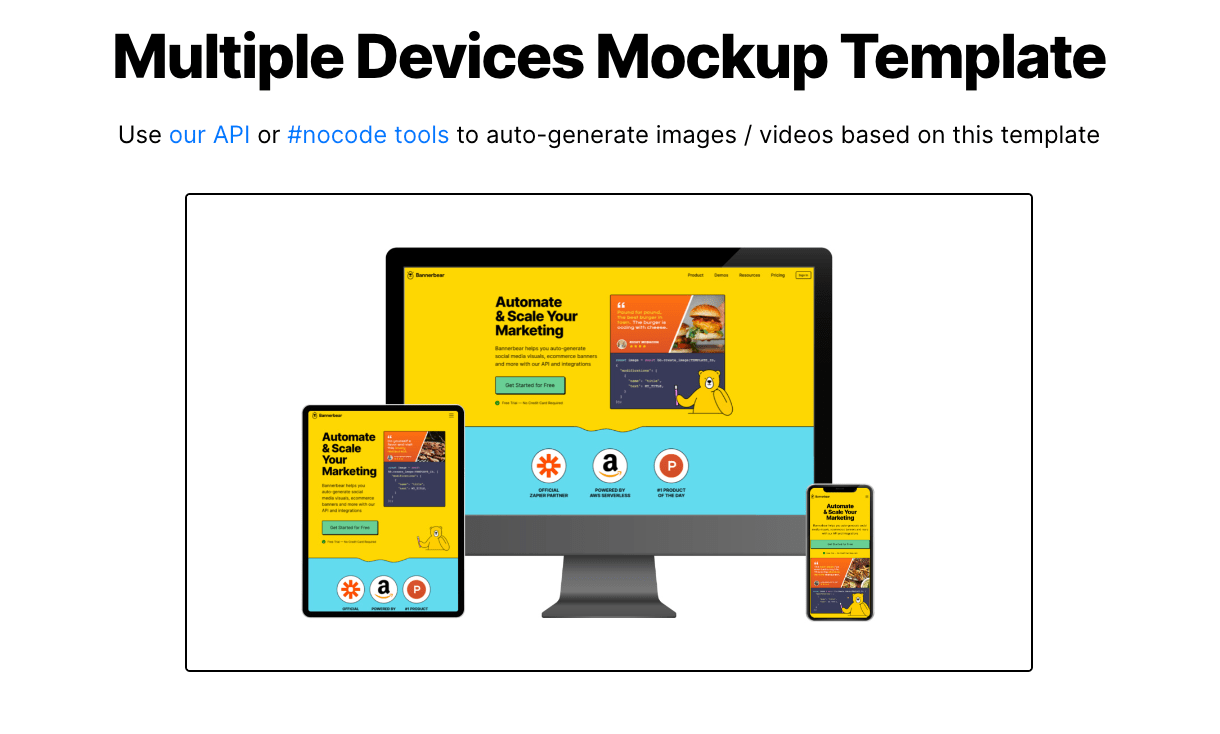
To make a template for generating images, you will need a Bannerbear account. Sign up for an account and create a new project in your account. Next, duplicate this device mockup template to your project.
You can edit the template if you want to change the design or make modifications to suit your needs. Different static and dynamic objects like text, images, shapes, etc. can be added and arranged using the template editor's drag-and-drop interface.

In the original template, we have a few dynamic image objects that can be changed via API requests, which are desktopimagecontainter, tabletimagecontainer, and phoneimagecontainer.
To change these images, we can specify the image URLs in an array and pass it to the create_image method when we use the Bannerbear Node.js library in our code.
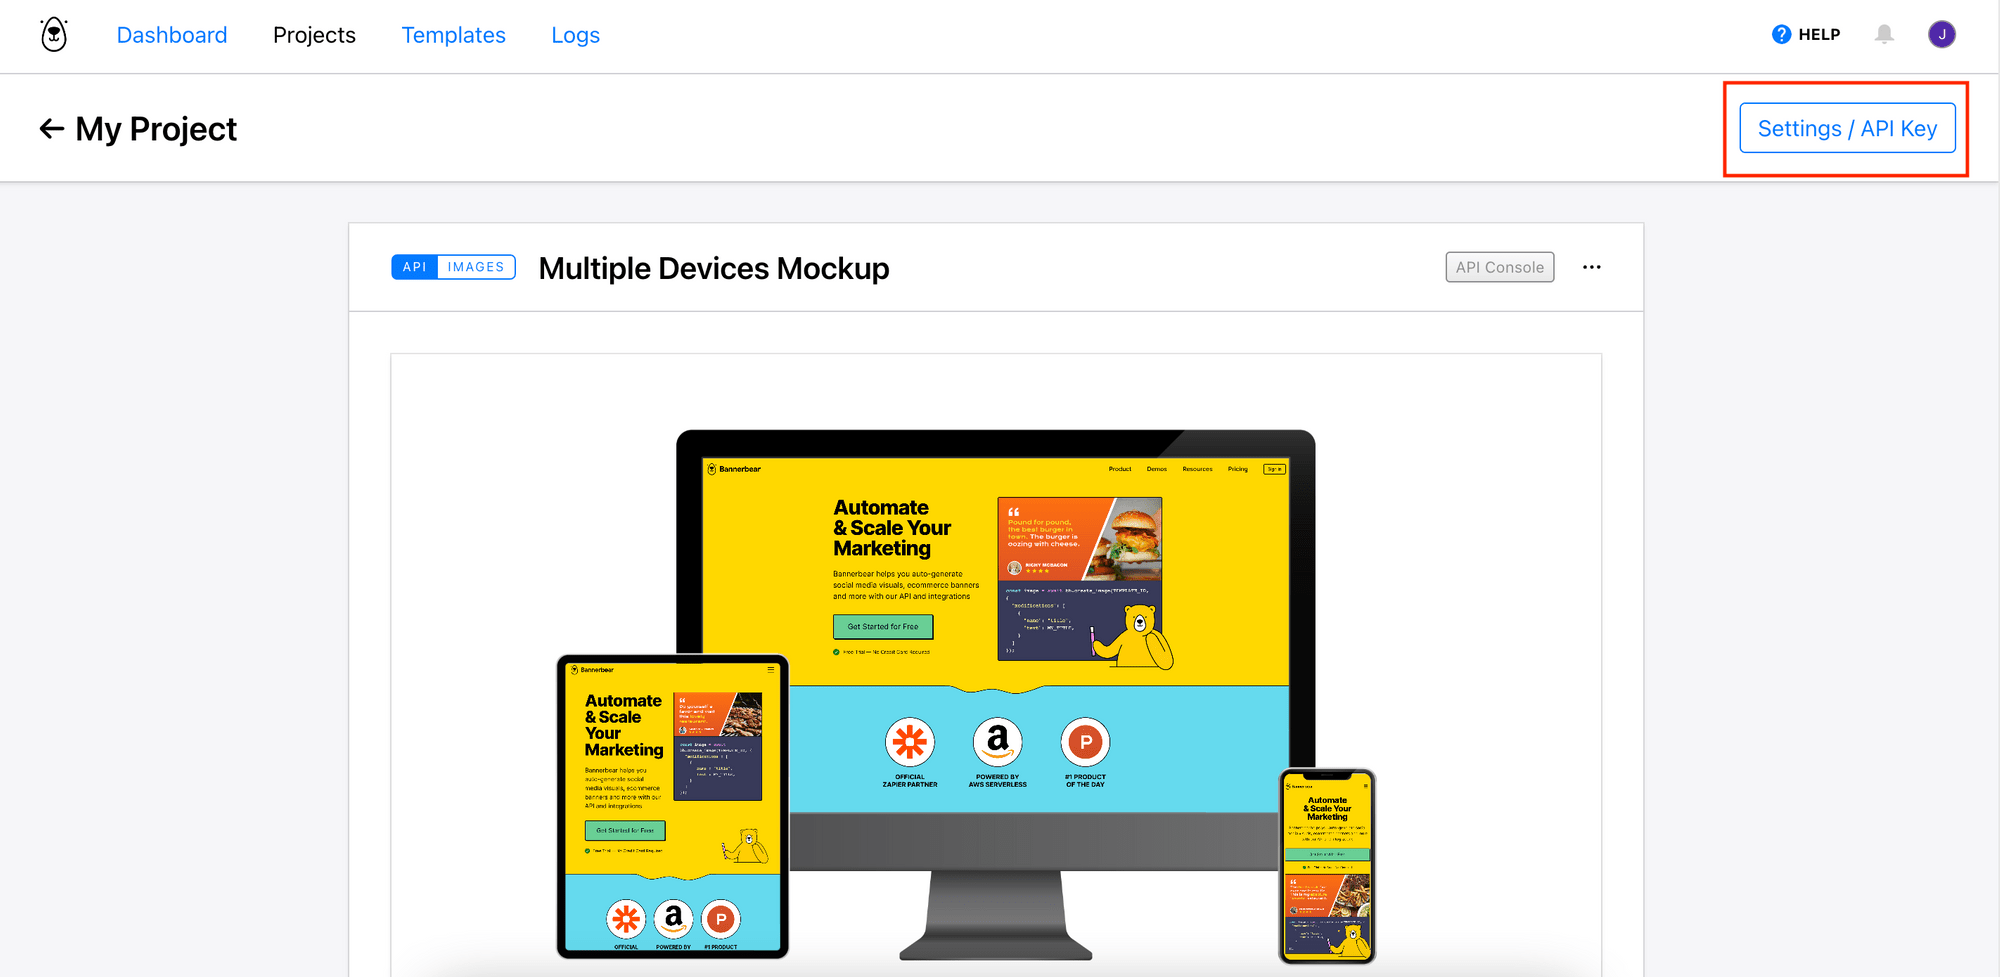
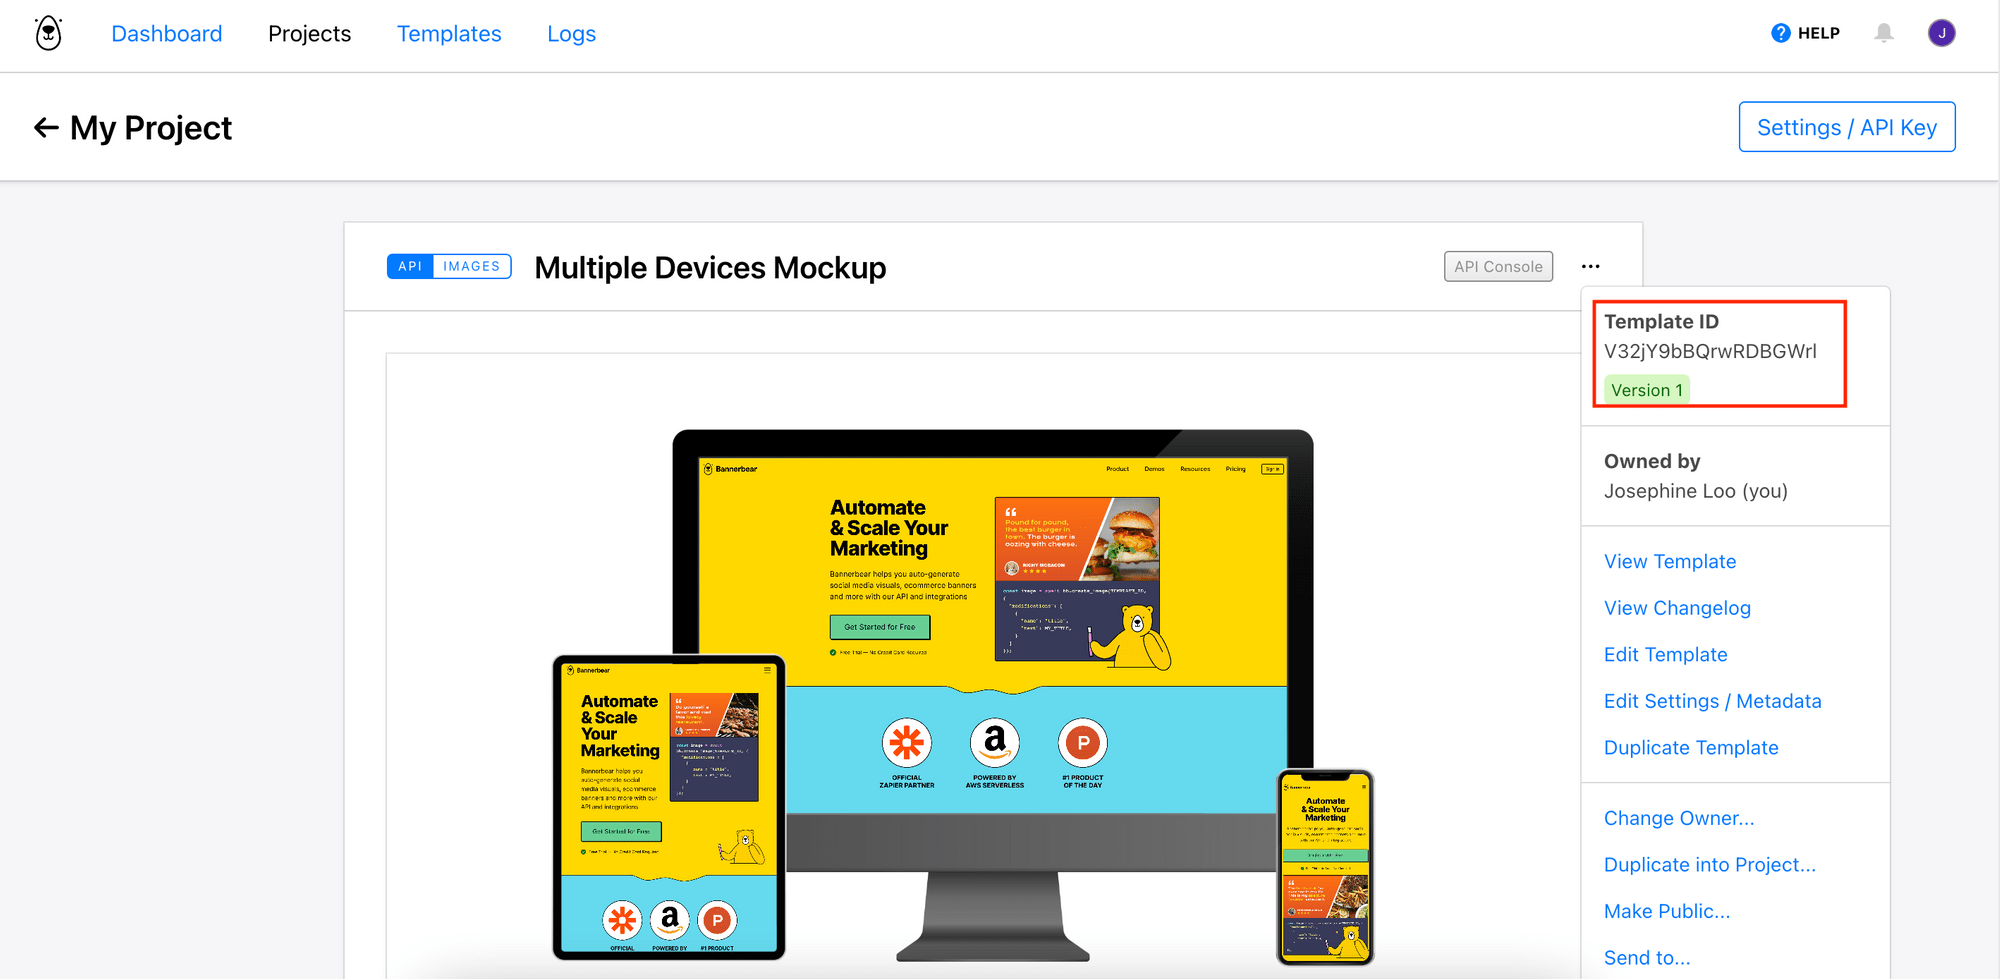
Next, get the project API key and template ID. We will need them to access the project and design template.
Click on “Settings/API Key” on the template page to reveal the API key.
For the template ID, you can find it in the template option as shown in the screenshot below:
🐻 Bear Tips: You can get more free templates from the Template Library.
Writing the Code
We will create a /mockup endpoint where you can send a GET request to generate device mockups for a website, using the URL passed to a parameter named url. Bannerbear will take screenshots of the website in various dimensions and then populate your template with these screenshots. As a result, you will get a response containing the mockup image’s URL.
Step 1. Set up a Node.js Project
We will need Express for hosting the /mockup endpoint and Bannerbear for generating the image. After initializing a new Node.js project by running npm init in your working directory, run npm i <package_name> to install the packages below:
- express
- bannerbear
Then, create a a file named index.js and paste the code below to configure your Express server:
const express = require('express')
const app = express()
const port = 3000

app.get('/', (req, res) => {
  res.send('Hello World!')
})

app.listen(port, () => {
  console.log(`Example app listening on port ${port}`)
})
When you run node index.js in the terminal, the server should be running at http://localhost:3000/.
Step 2. Take Screenshots
In the same project, create a new file named bannerbear.js. This is where we will create functions to take screenshots and generate images using Bannerbear.
Import the Bannerbear library and declare your Bannerbear project API Key and template ID as constants.
const { Bannerbear } = require('bannerbear');

const API_KEY = 'your_api_key';
const TEMPLATE_UID = 'template_id';

const bb = new Bannerbear(API_KEY);
Then, create a function named screenshot to take website screenshots in these dimensions:
- desktop - 1024x768 pixels
- tablet - 768x1024 pixels
-
mobile - 360x800 pixels
module.exports.screenshot = async (websiteUrl) => { const screenshot = async (width, height) => await bb.create_screenshot(websiteUrl, { width: width, height: height }, true);
const screenshots = await Promise.all([screenshot(1024, 768), screenshot(768, 1024), screenshot(360, 800)]);

return screenshots.map((view) => view.screenshot_image_url);   };
The function will return an array containing the URLs of the screenshots. These are some examples of the screenshot:
Desktop (1024x768 pixels)
Tablet (768x1024 pixels)
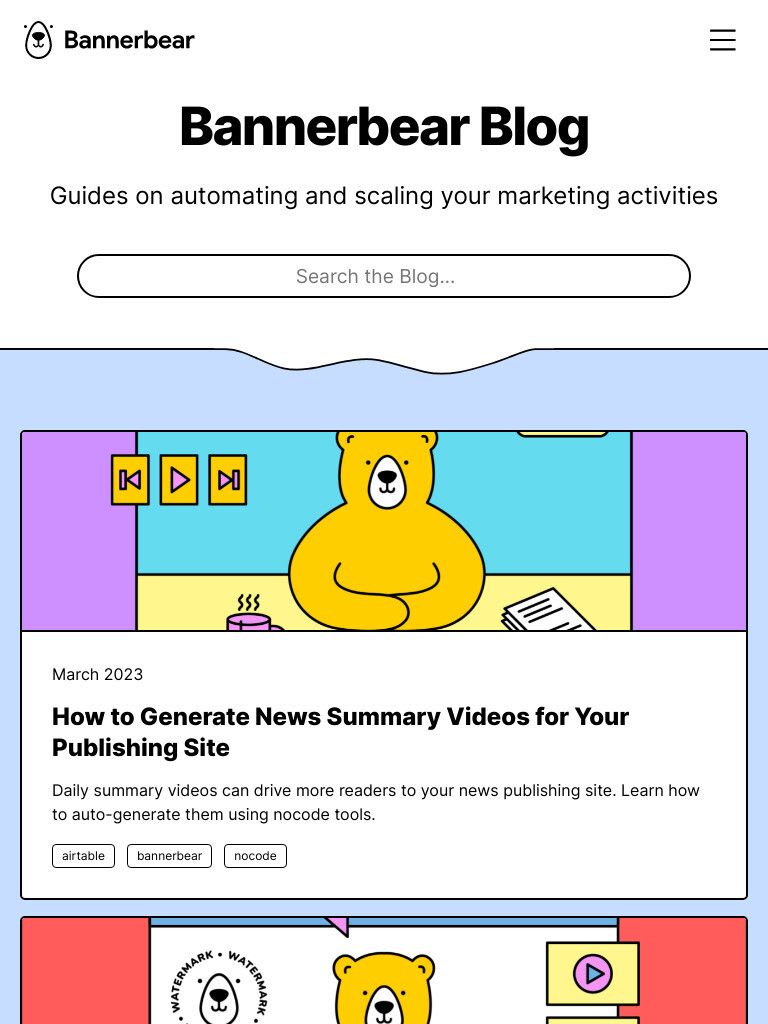
Mobile (360x800 pixels)
🐻 Bear Tips: Refer to the API Reference for all screenshot options.
Step 3. Generate Device Mockup
In the same file, add another function named generateImage to populate the Bannerbear template with the screenshots. The resulting image URL will be returned.
module.exports.generateImage = async (screenshotUrls) => {
  const images = await bb.create_image(
    TEMPLATE_UID,
    {
      modifications: [
        {
          name: 'desktopimagecontainer',
          image_url: screenshotUrls[0],
        },
        {
          name: 'tabletimagecontainer',
          image_url: screenshotUrls[1],
        },
        {
          name: 'phoneimagecontainer',
          image_url: screenshotUrls[2],
        },
      ],
    },
    true
  );

  return images?.image_url_jpg;
};
Step 4. Create a GET Endpoint
In index.js, create a function for GET /mockup. It will read the website's URL from the parameter url and call the functions written above to take screenshots and generate device mockup image for the website.
const bannerbear = require('./bannerbear');

...

app.get('/mockup', async (req, res) => {
  let url = req.query.url;

  const screenshotUrl = await bannerbear.screenshot(url);

  const mockup = await bannerbear.generateImage(screenshotUrl);

  res.send(mockup);
});
Here’s the result when you make a GET request to …/mockup?url=https://www.bannerbear.com/blog:

🐻 View the full code on GitHub.
Conclusion
Creating a device mockup generator using Bannerbear is a great way to showcase your website designs with a realistic preview and create promotional materials for them fast. With Bannerbear's easy-to-use API and customizable template, you can quickly generate different images automatically based on a template.
Besides making device mockups, you can also learn:
- How to Build a Video Thumbnail Generator Tool Using React and Bannerbear
- How to Create a Dynamic Twitter Banner with an Event Countdown in Node.js (Updated Automatically)
- How to Add a Dynamic Watermark to Puppeteer Screenshots Using Bannerbear
- How to Use the Bannerbear WordPress Plugin to Generate Dynamic Open Graph Images
If you haven't already, sign up for a Bannerbear account and start generating images automatically today.
