
How to Create a Dynamic Twitter Banner with an Event Countdown in Node.js (Updated Automatically)
Contents
The Twitter profile banner is a good space to highlight and showcase a brand’s image by using a banner image that reflects the brand's characteristics. Besides that, it can also be used to highlight important upcoming events like a new product launch, sales, special campaigns, etc.
Instead of showing only the event date, displaying the number of days to the event on the banner can help to build your audience’s anticipation towards the event and create momentum for it. That said, you can actually generate and update the Twitter banner automatically without having to create a new banner manually every day.
In this tutorial, we’ll learn how to create a dynamic Twitter banner that will count down to your event daily in Node.js using Bannerbear and Twitter APIs.

What is Bannerbear
Bannerbear is an automated media generation service that helps you create custom images, videos, and more using API. To generate a dynamic Twitter banner that will count down to an event, we will use Bannerbear’s Image Generation API.
The Image Generation API generates custom images automatically based on a design template which you can add static and dynamic images, texts, shapes, etc. The values of the dynamic objects can be set by passing different data to the API.
Bannerbear offers different ways to use the API. You can use HTTP requests, SDKs (Node.js, Ruby, and PHP), third-party no-code integration, etc. For this project, we will use the Node.js library to generate dynamic Twitter banners like the examples below:
Example 1

Example 2

Setting up The Project
Create a New Bannerbear Design Template
Create a new Bannerbear project and create a design template for your Twitter Banner. You can design your template from scratch or duplicate this tutorial's Twitter Event Banner Template.
To display the date and the number of days to an event dynamically, we will need these dynamic objects in the template:
- Text - date, countdown
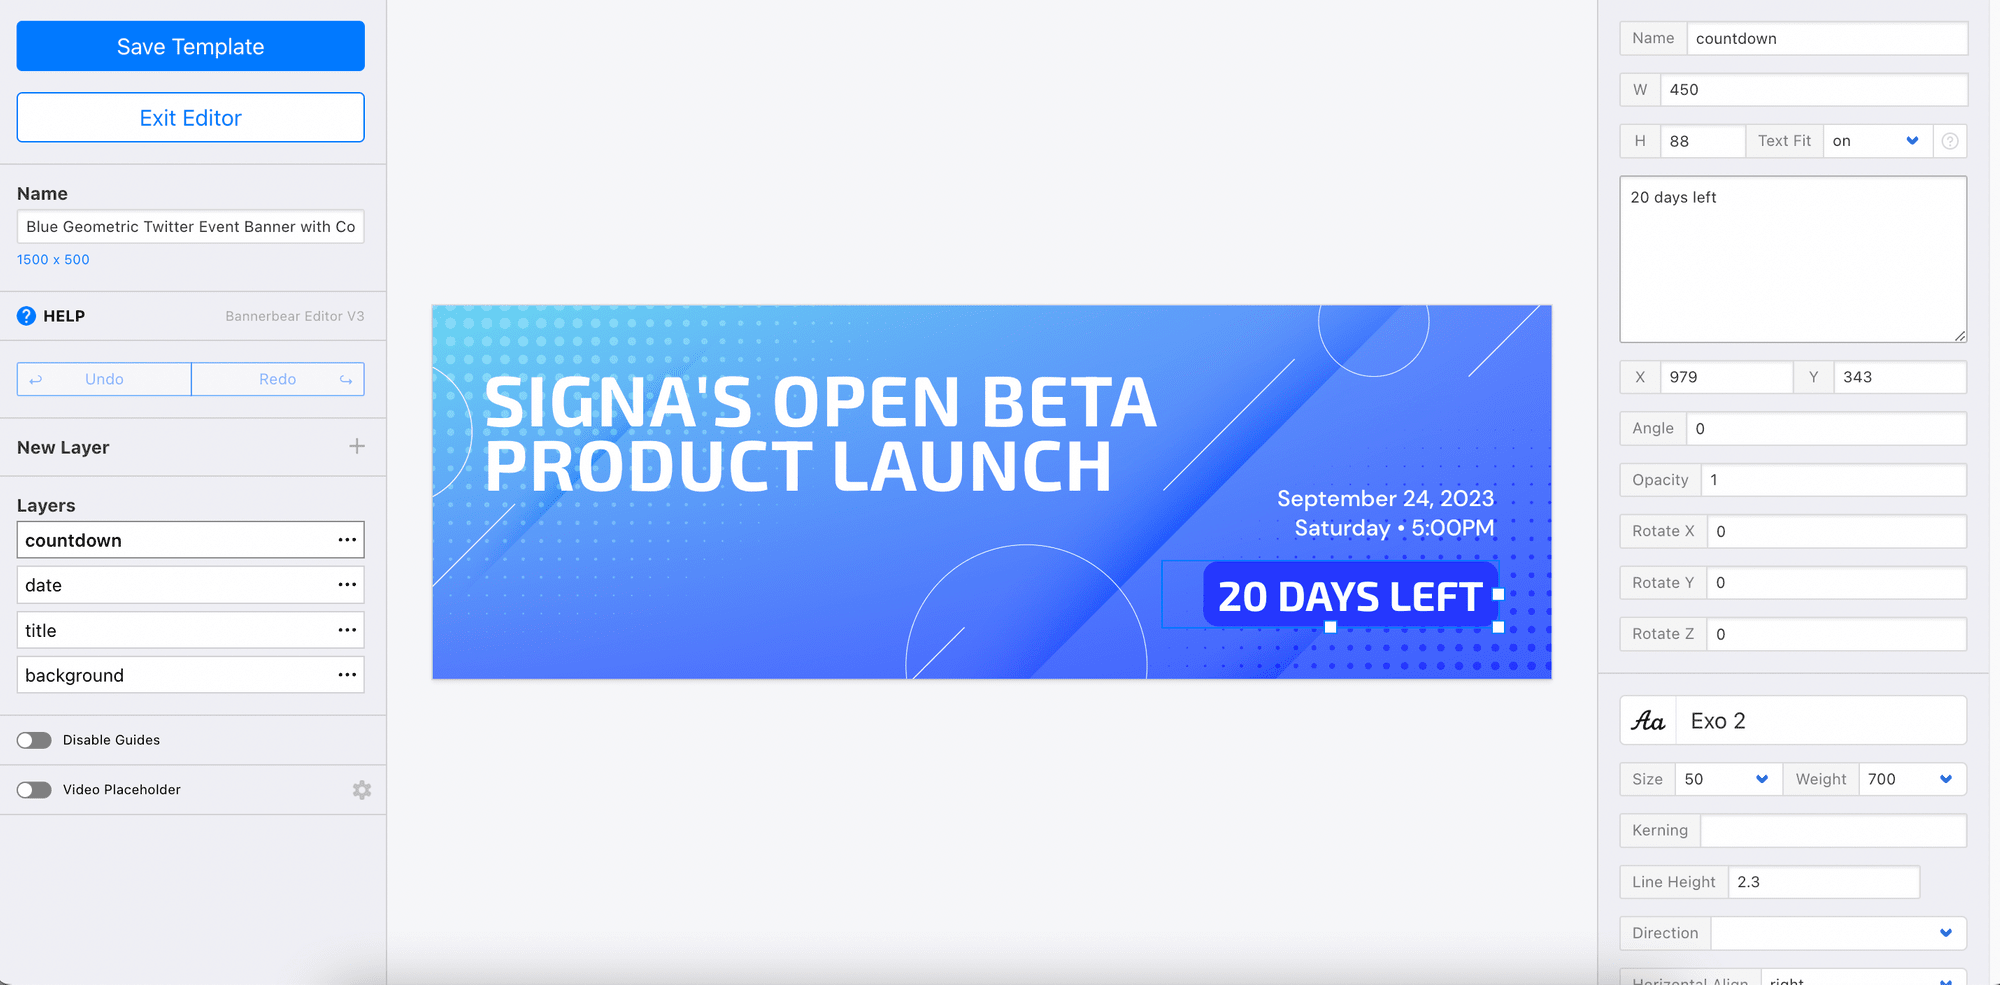
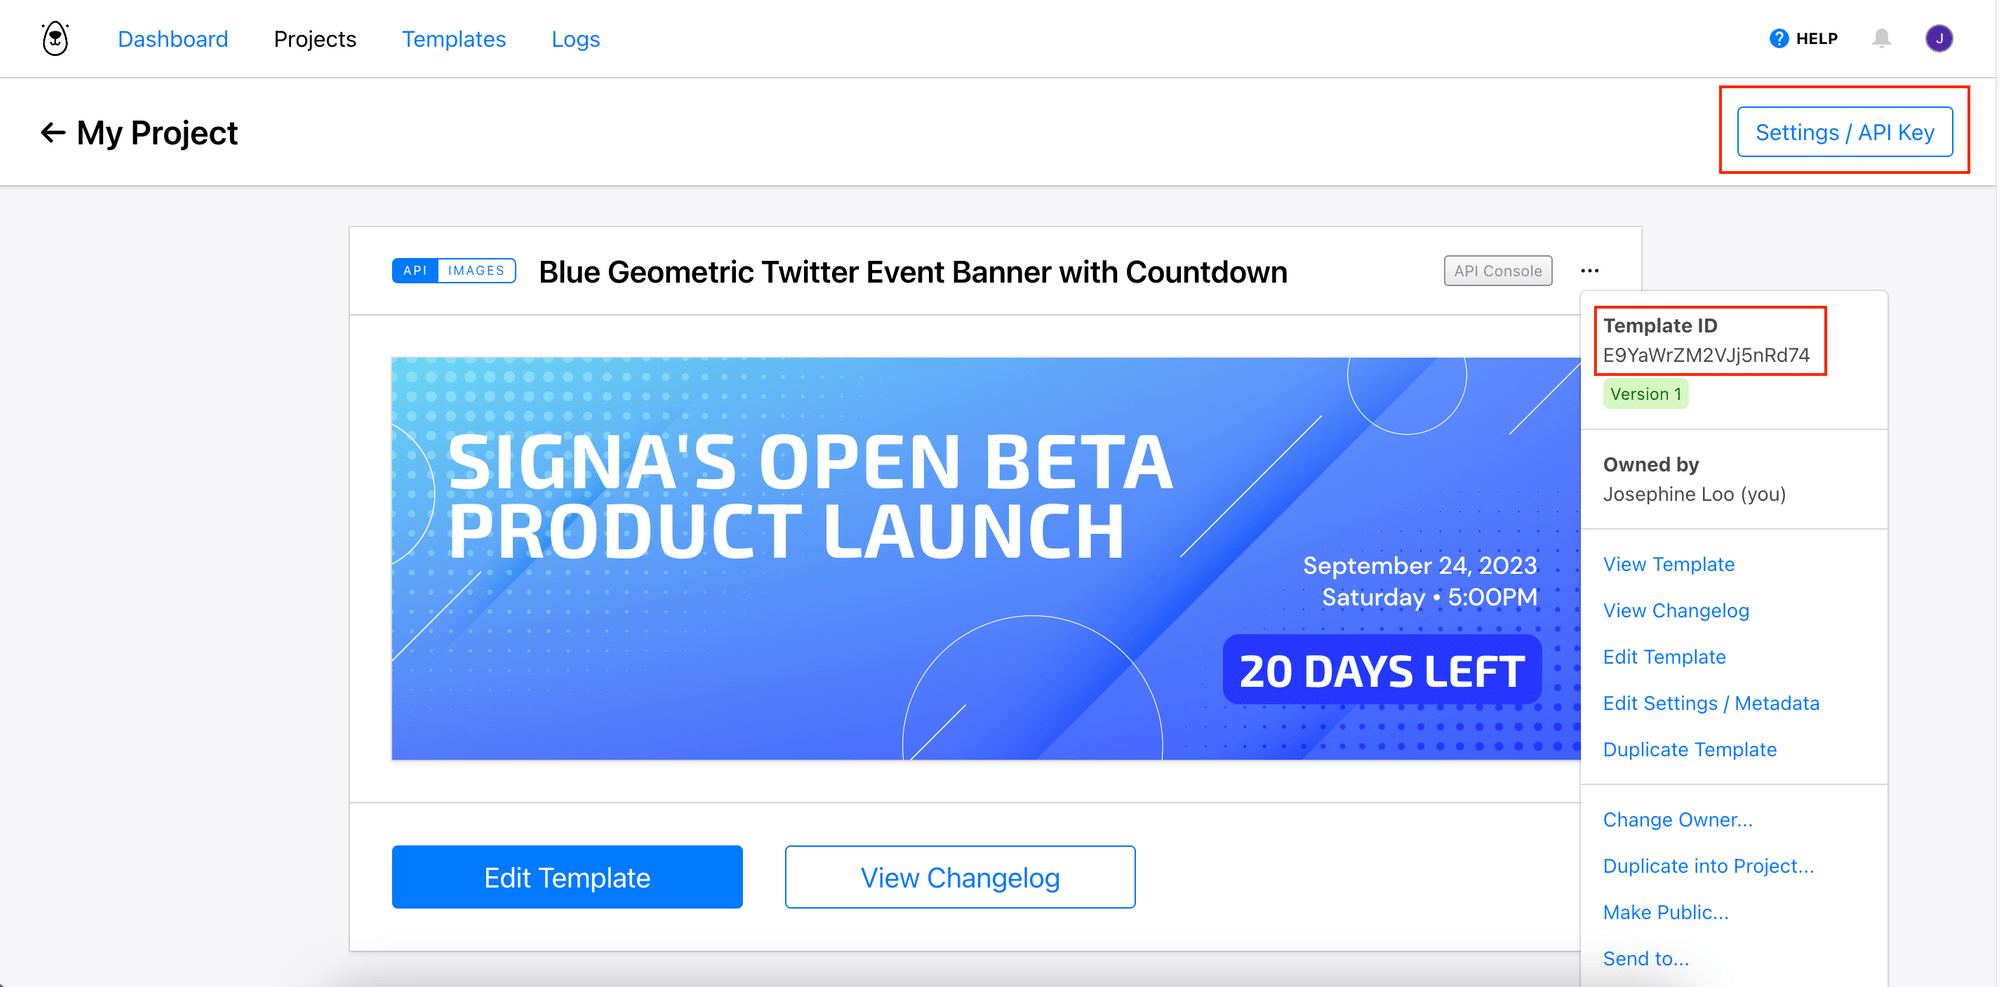
After saving the template, you will be able to get your template ID and Bannerbear project API key from the template menu page. Save them to use in the project later.
Create a New Twitter Project
You will need a Twitter Developer account to use the Twitter API. Follow the steps from Twitter’s Guide to sign up for a developer account to get access to the APIs.
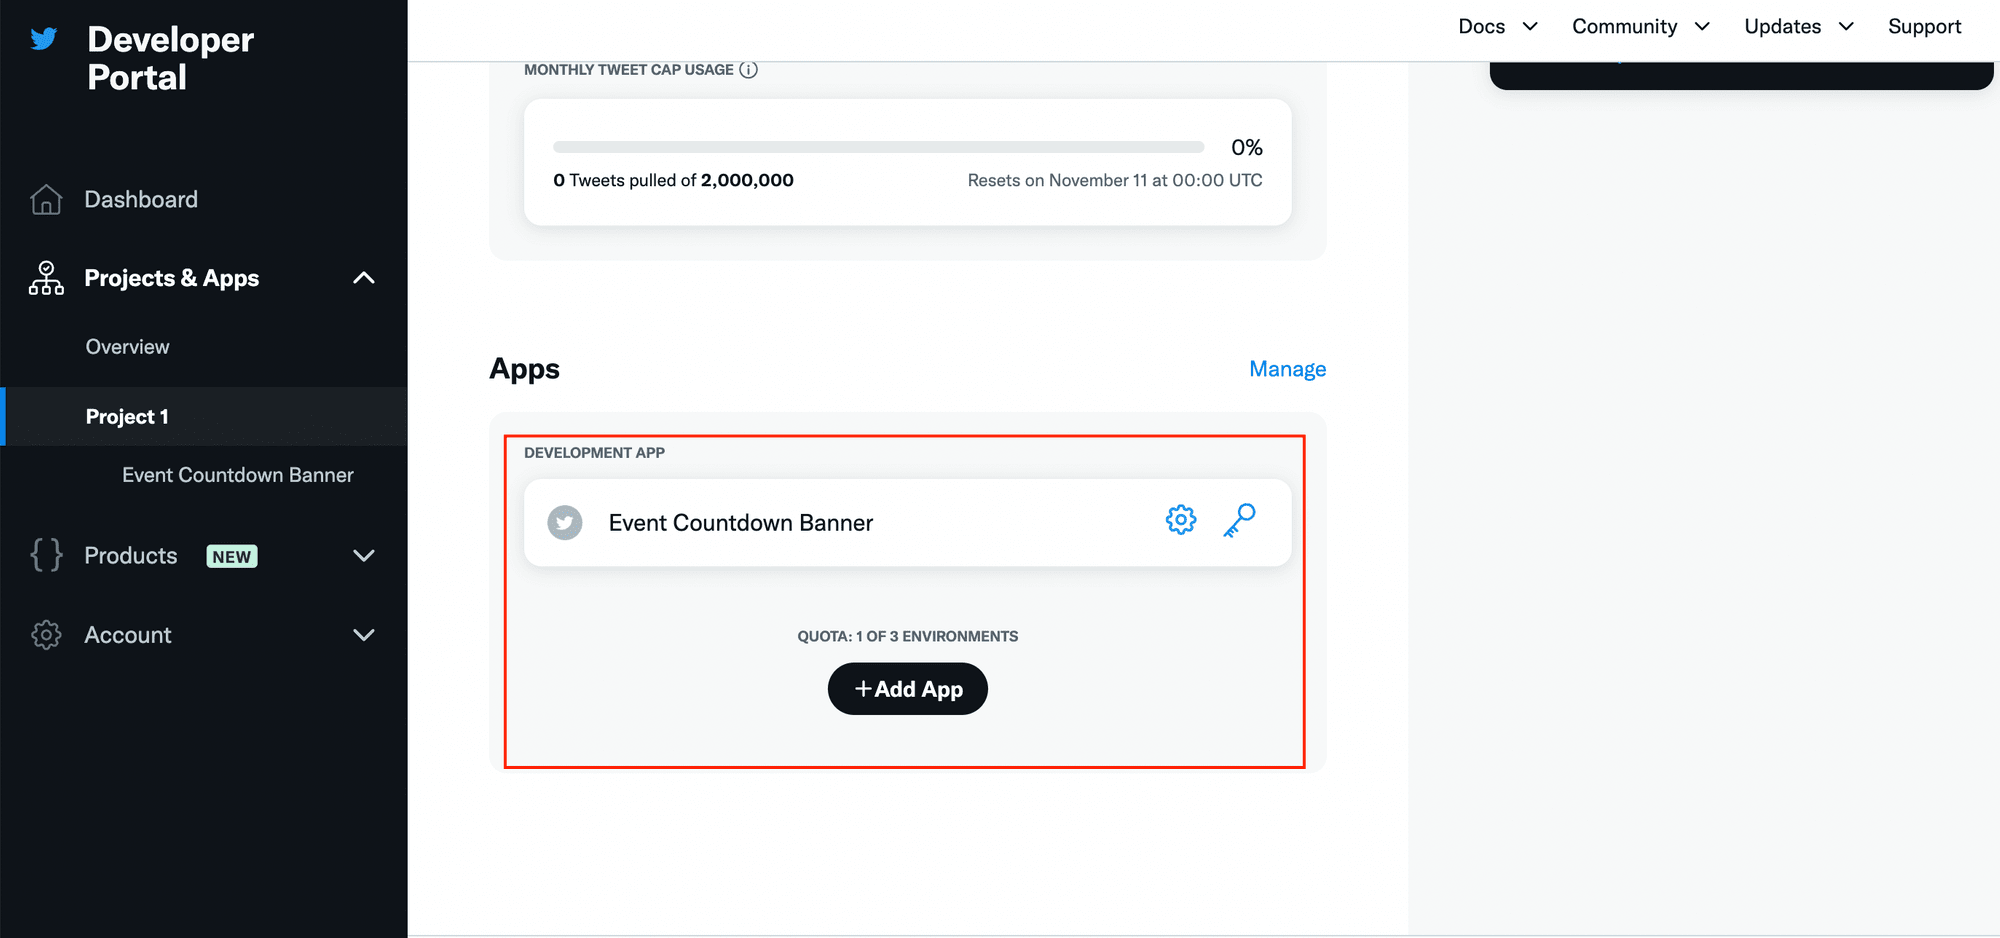
After your application is approved, create a new app in your project.
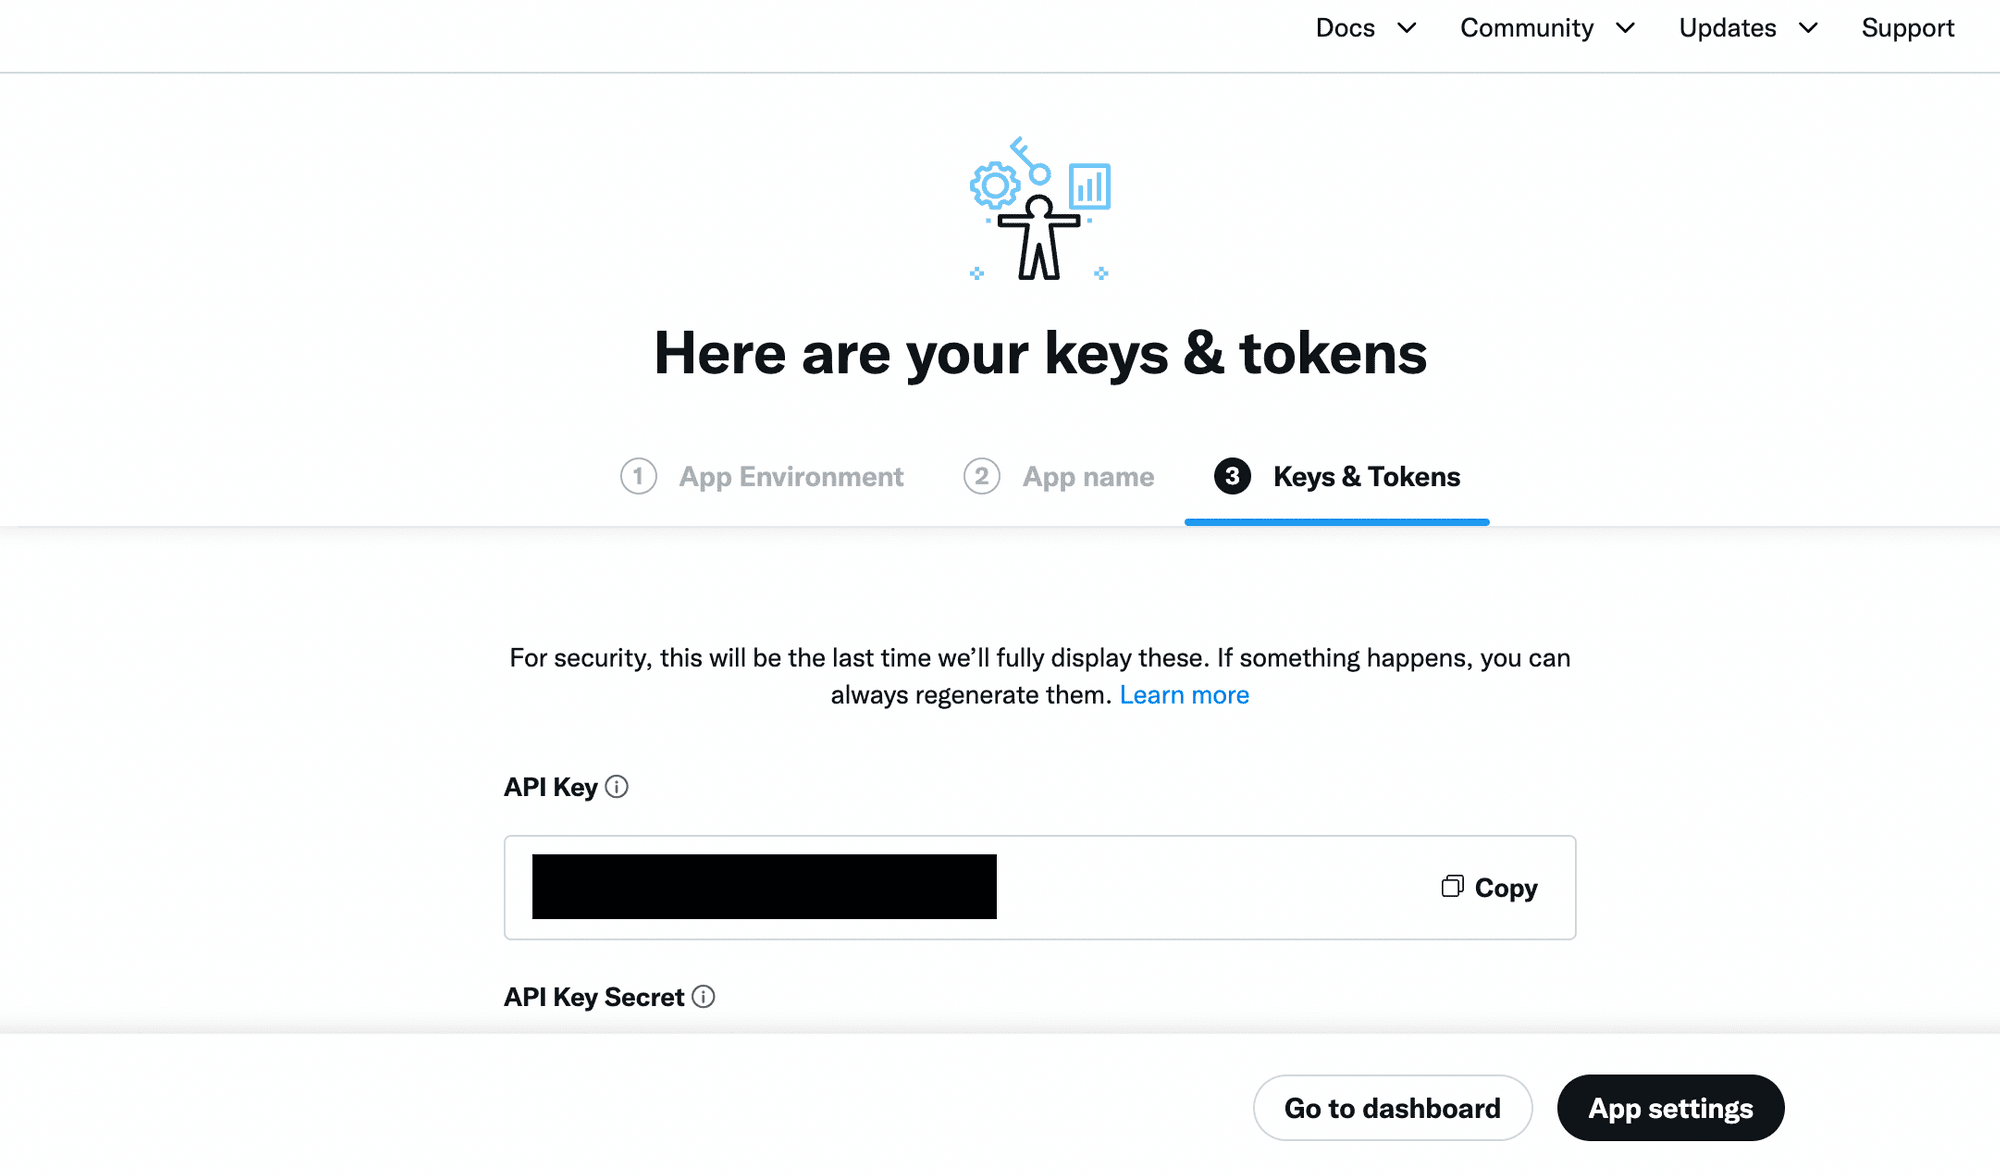
In the last step of creating a new app, you will be shown the API Key, API Key Secret, and Bearer Token of the app. We will not be using the Bearer Token but we will need the API Key and API Key Secret (Consumer Key and Secret) for our project. Copy them and keep them for later.
We will need to generate an Access Token and Secret too to use Twitter API.
Before that, we need to set up the user authentication settings in the “Settings” page so that the token will be generated with read and write access.
❗️You will not be able to change your Twitter banner using the API if you do not have the write access.
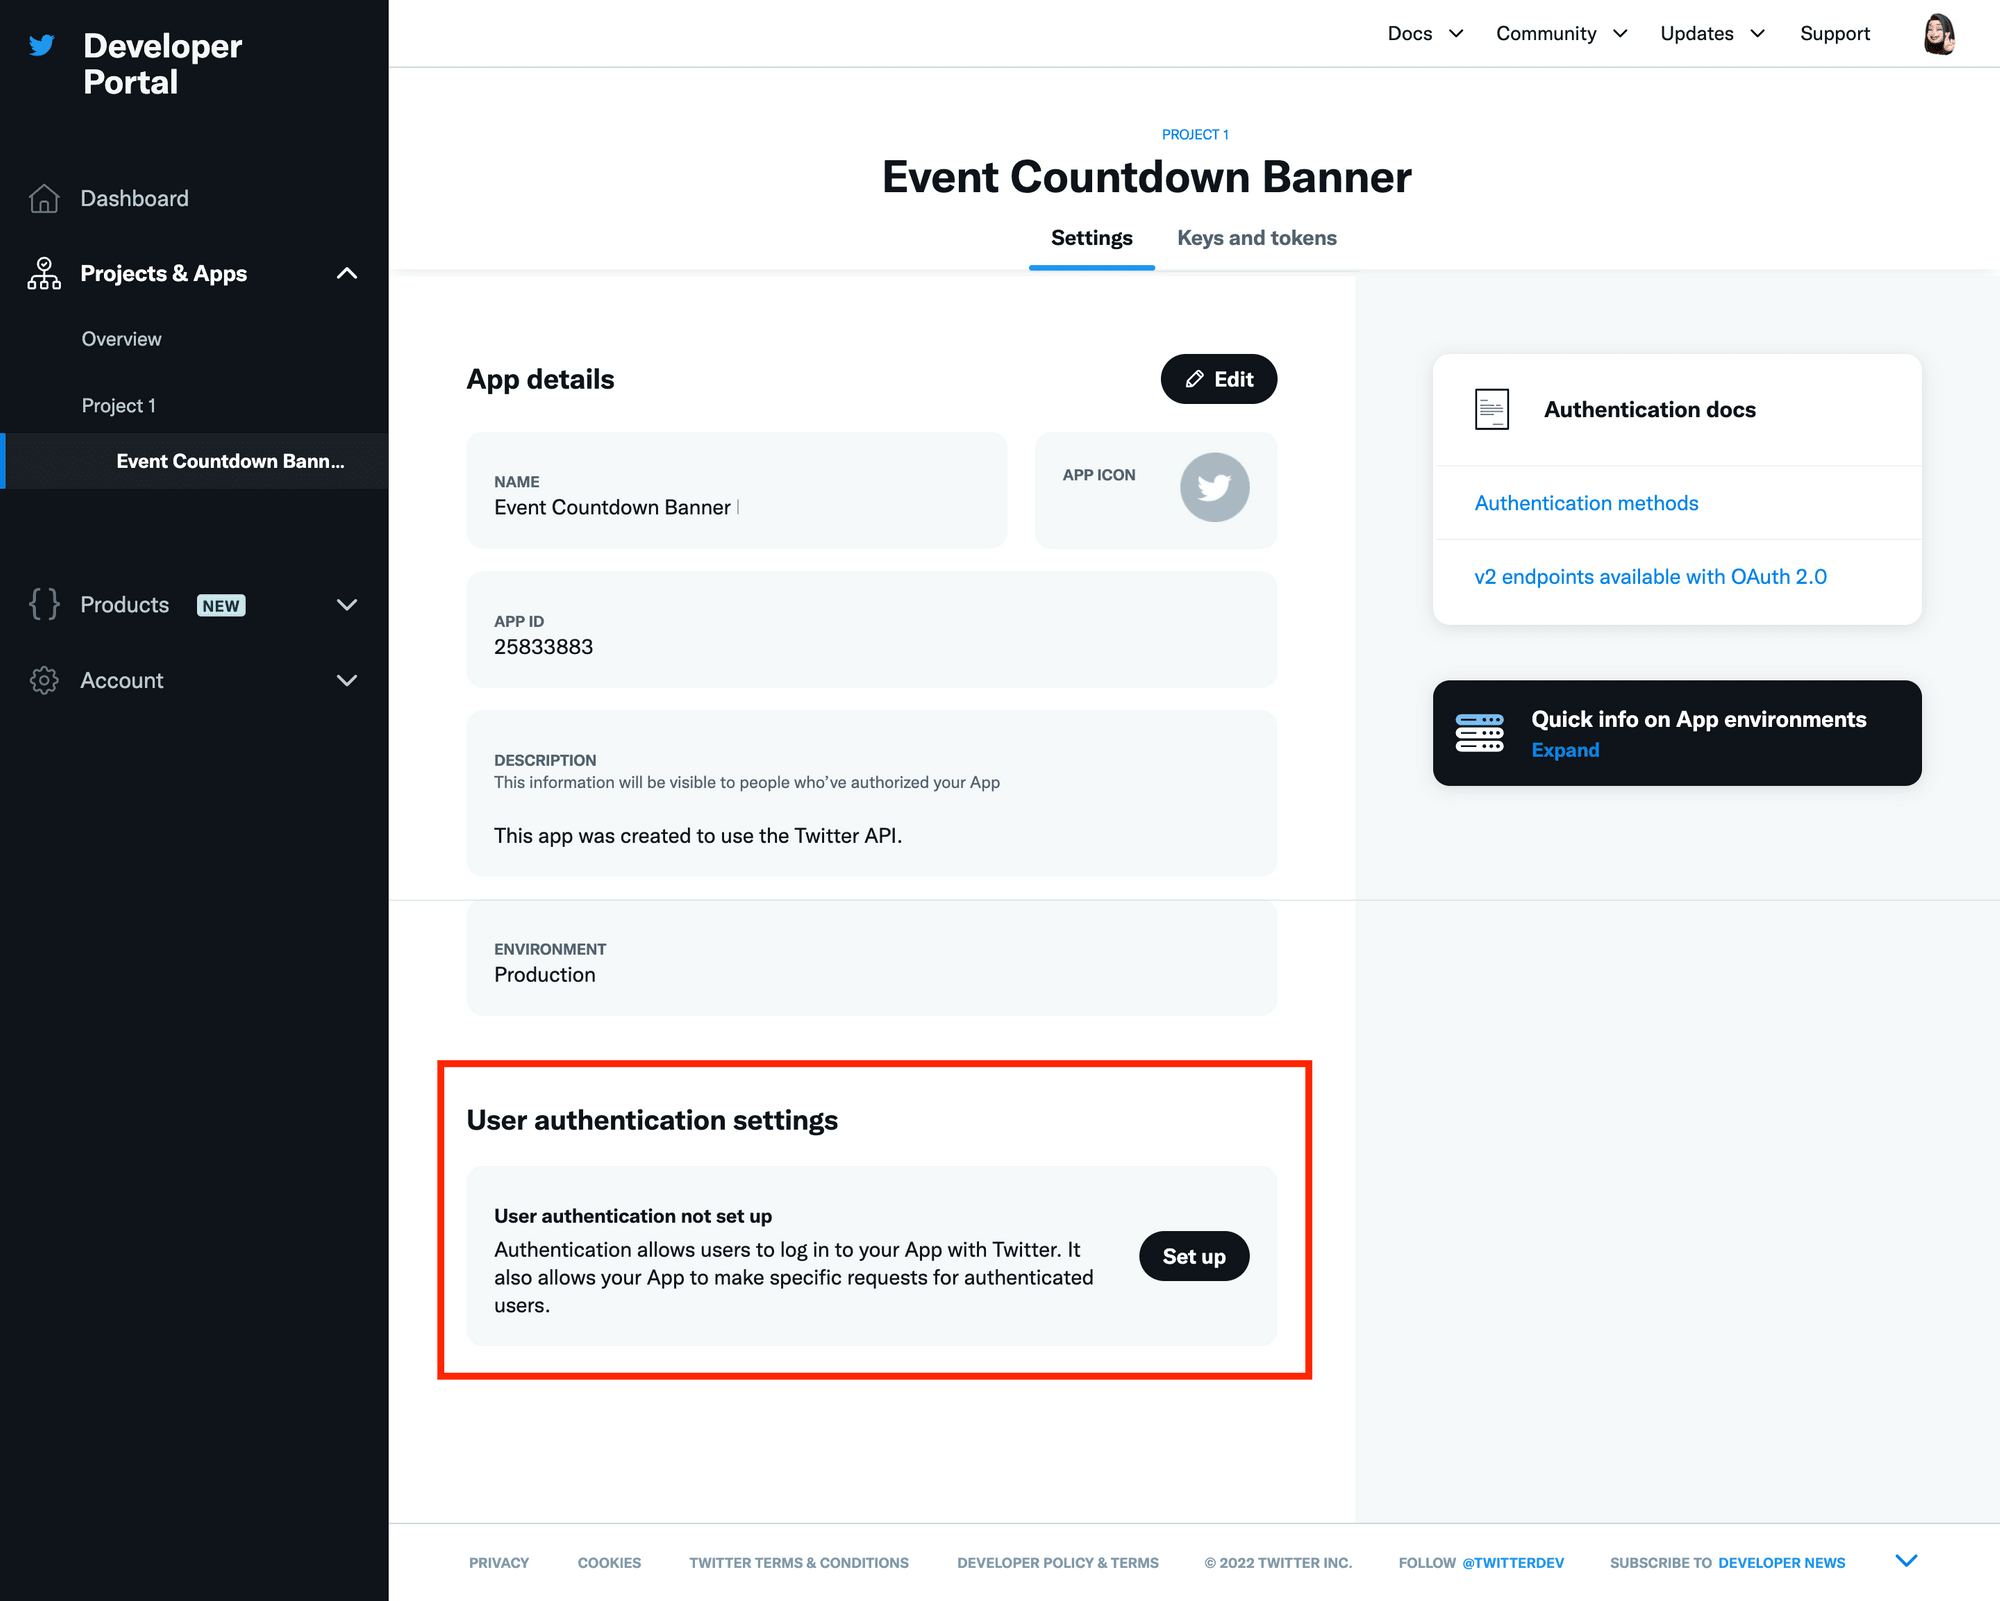
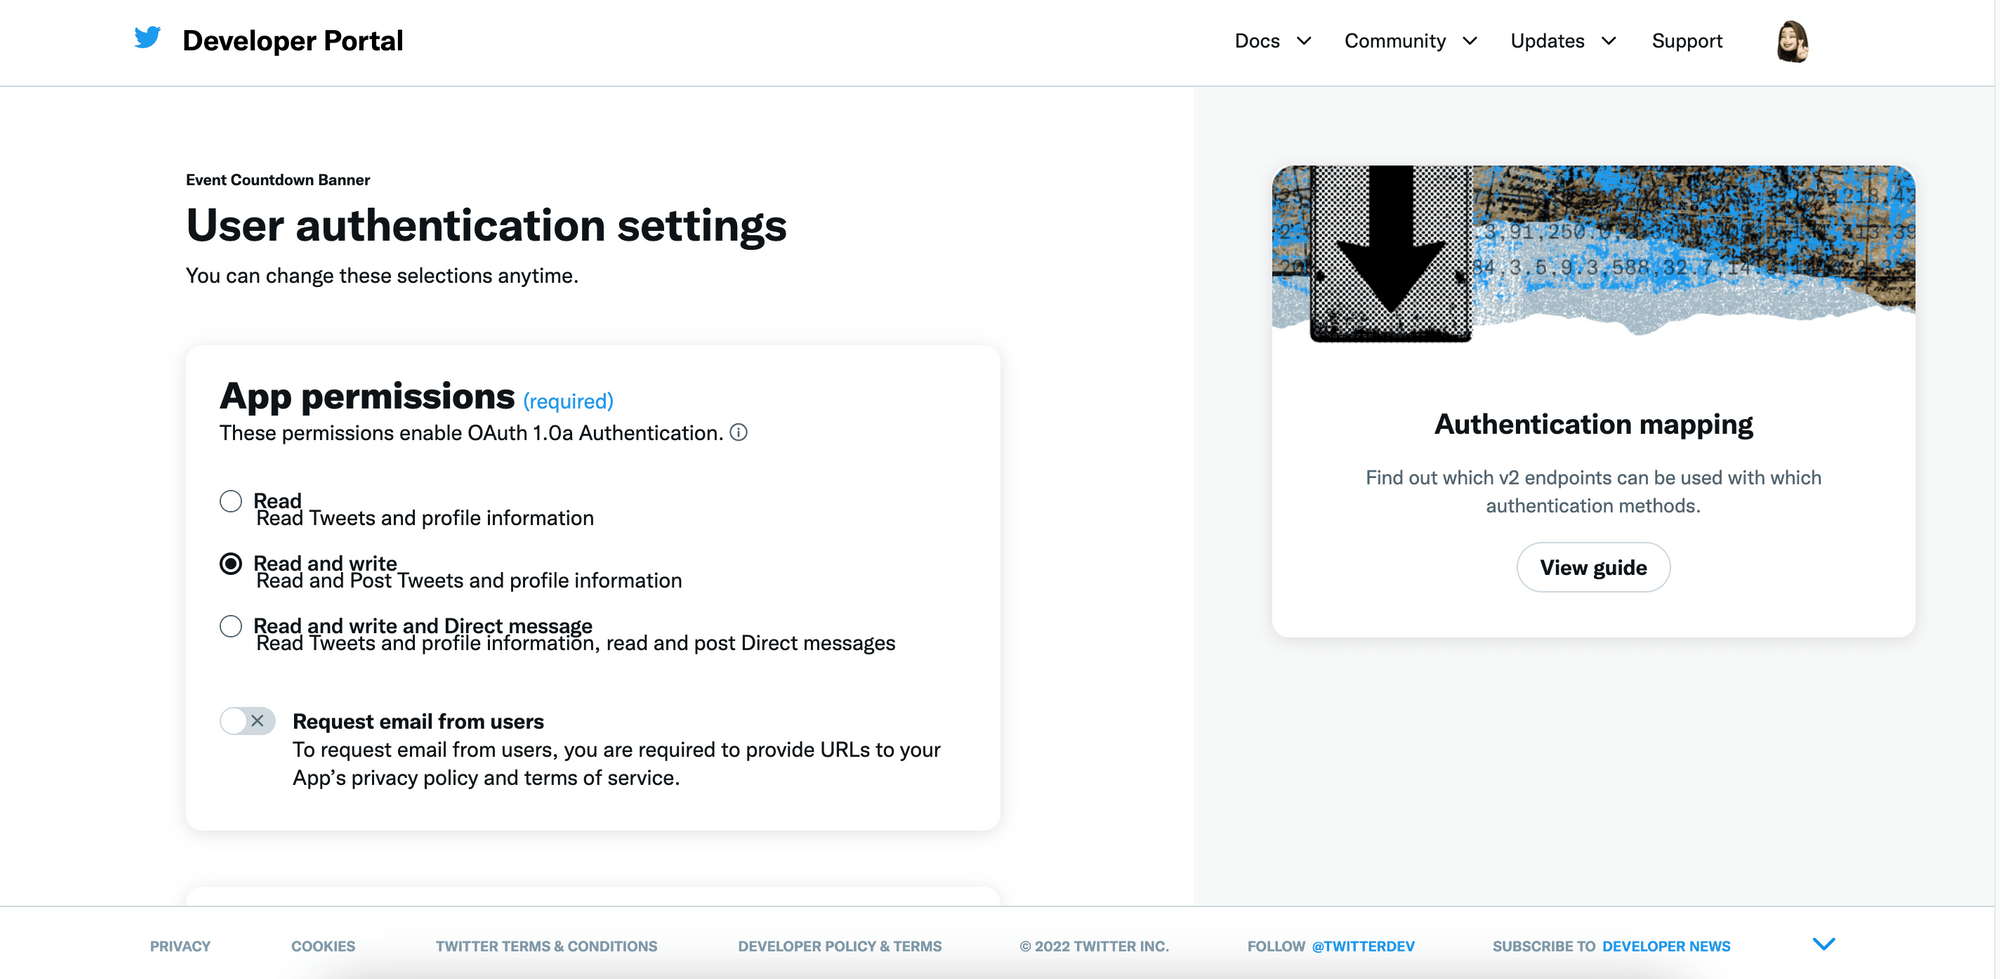
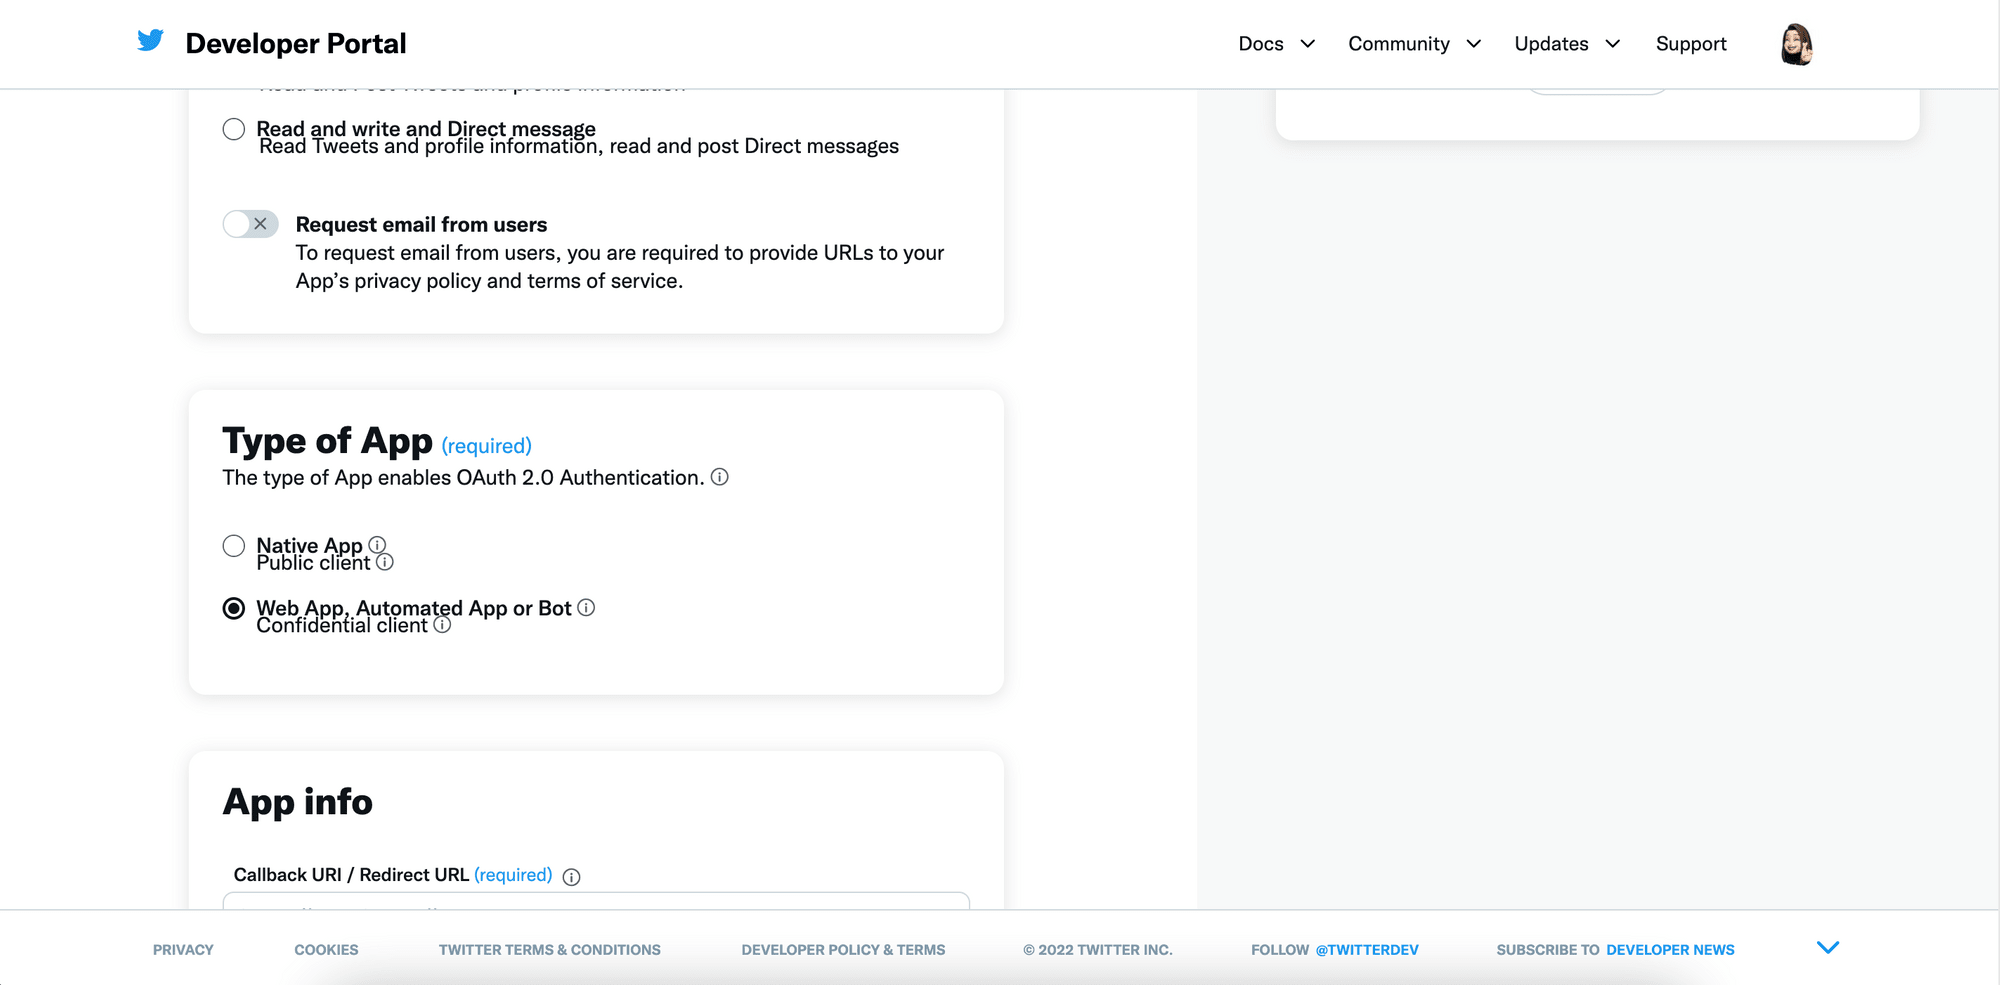
Set the “App permissions” to “Read and write” and choose “Web App, Automated App or Bot” as the type of app. Fill in other required information and save the changes.
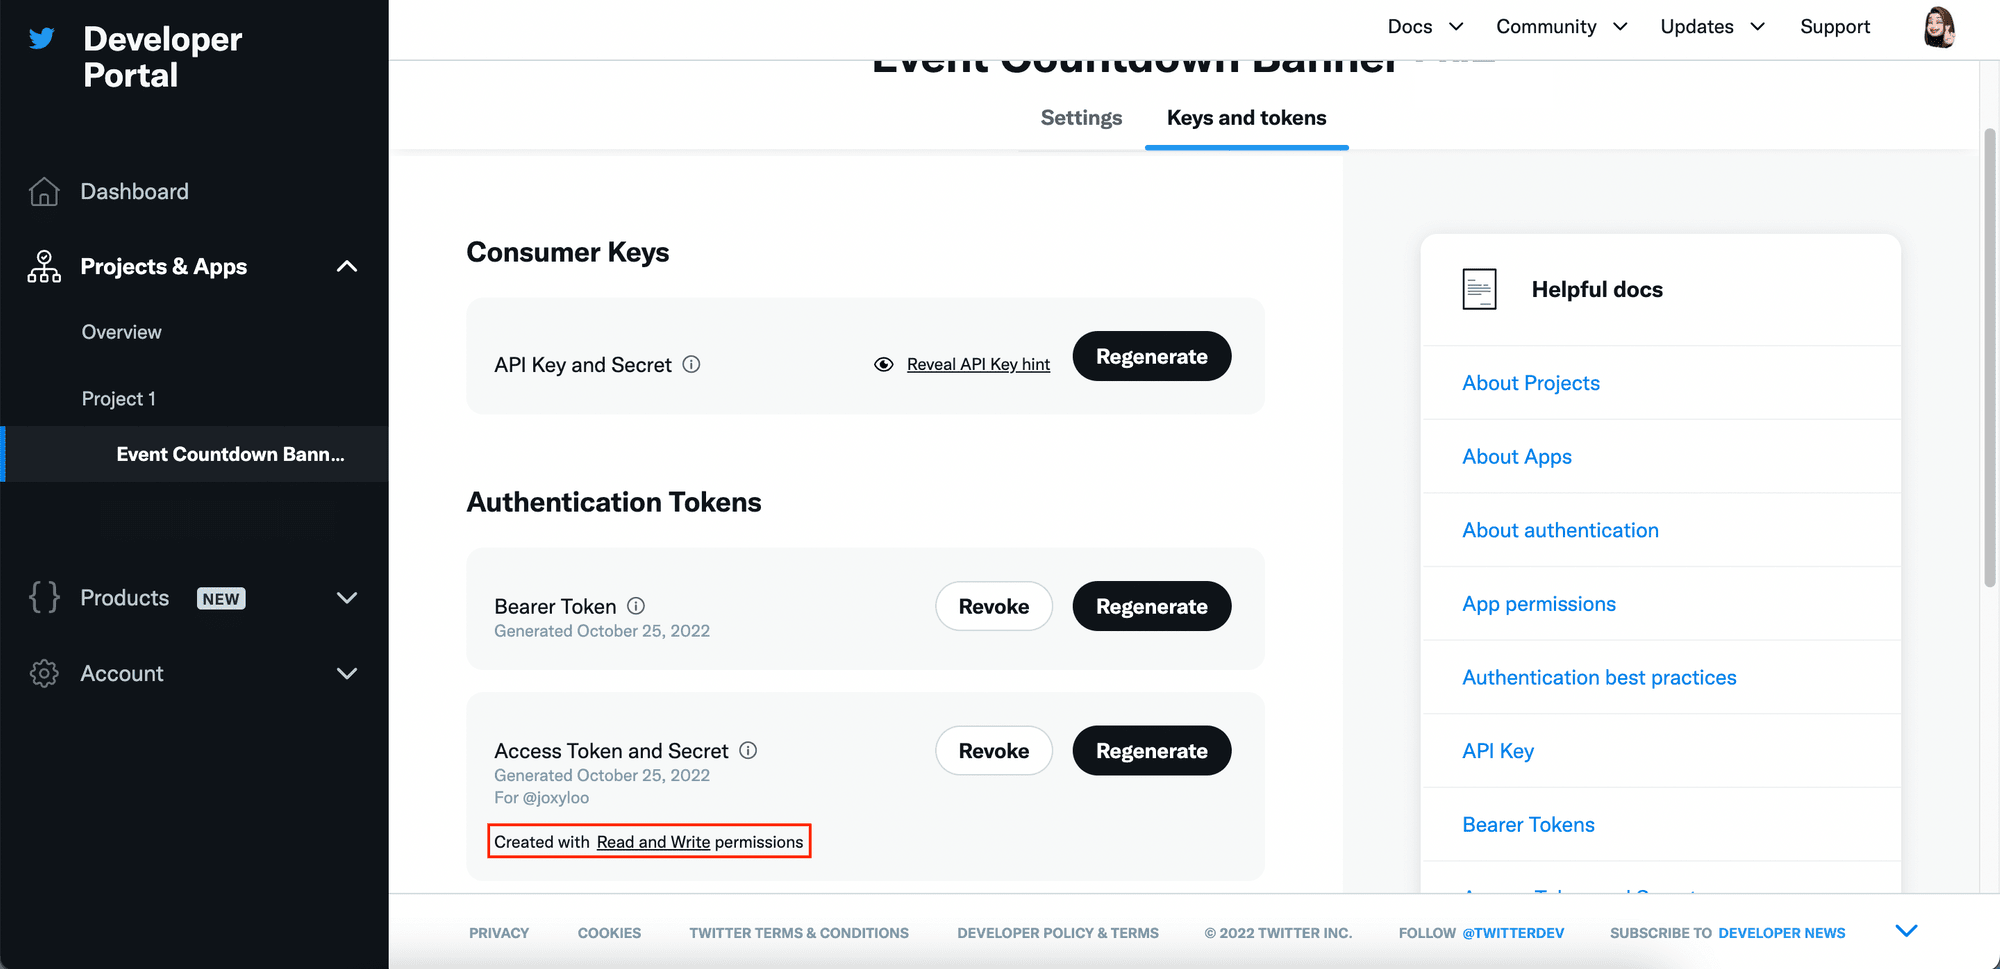
Then, click “Generate” to generate the token and secret and keep them somewhere safe.
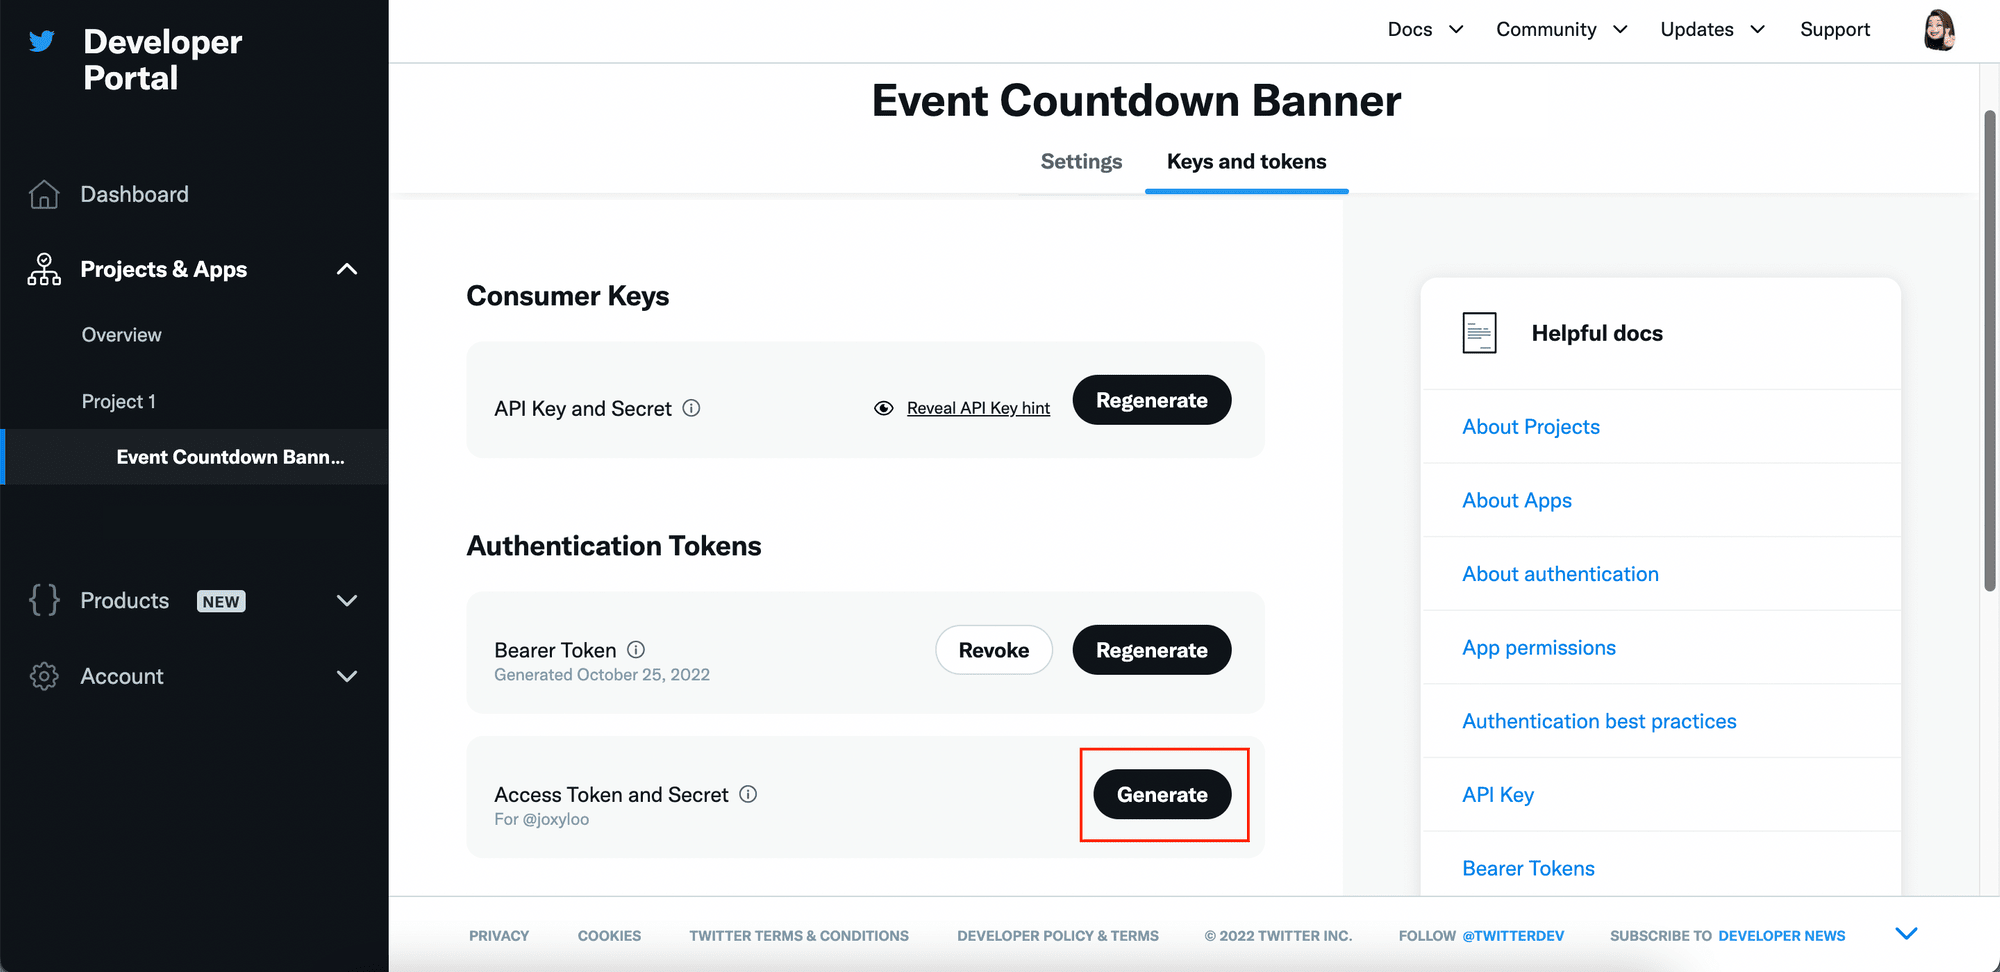
You should see that the Access Token and Secret will be generated with read and write permissions.
Starting a New Node.js Project
Create a new folder for your project by running the following command in the terminal.
mkdir bannerbear-twitter-banner
cd bannerbear-twitter-banner
Then, initialize a new Node.js project by running npm init in the working directory and install the packages below by running npm i <package_name> after the initialization is completed:
- dotenv
- node-fetch
- bannerbear
- cron (optional)
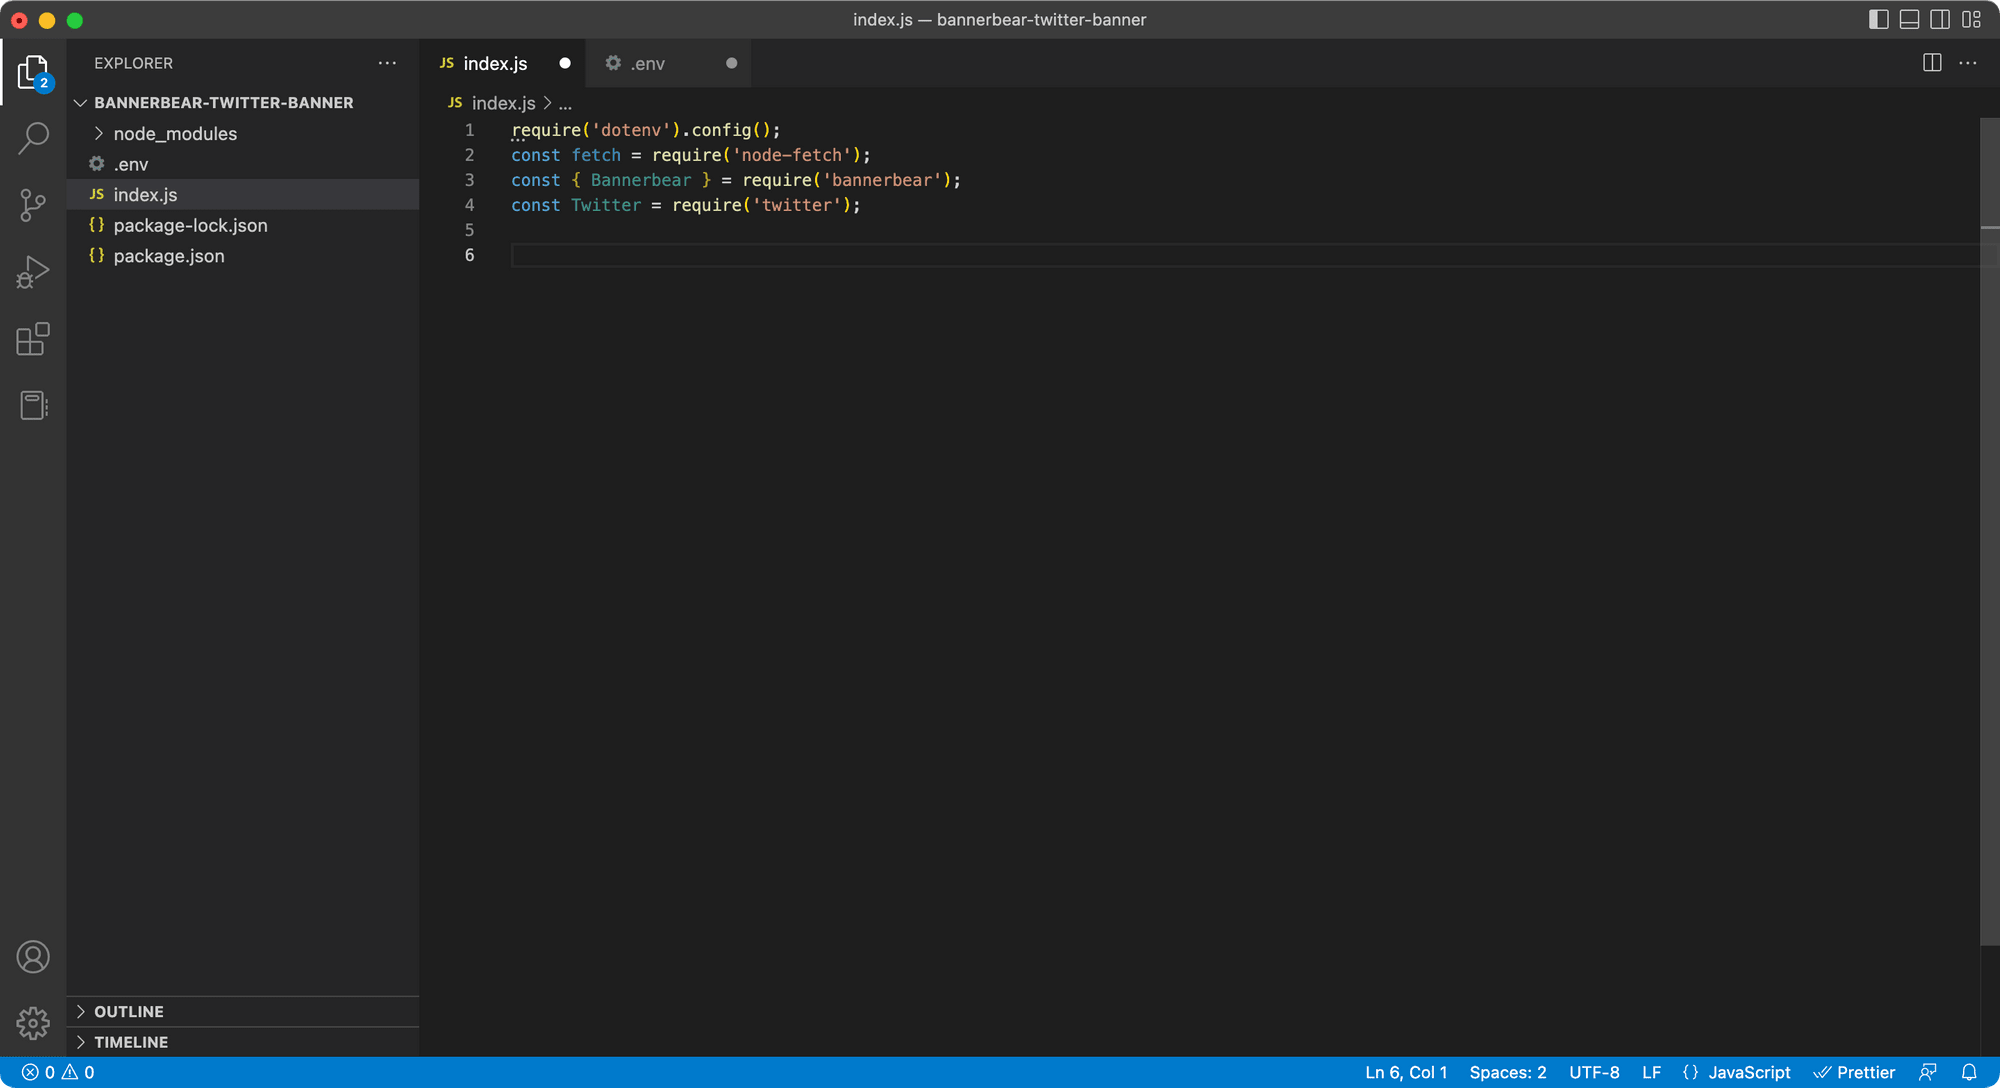
Create a new index.js file and import the installed packages.
require('dotenv').config();
const fetch = require('node-fetch');
const { Bannerbear } = require('bannerbear');
const Twitter = require('twitter');
We will store the Bannerbear and Twitter API keys in a .env file and access them using process.env.<name> to keep them safe.
Create a .env file and add the API keys into the file (I am using some dummy keys for this example):
BB_API=bb_pr_8b4bd53cff55342340d3e61b548af
TWITTER_CONSUMER_KEY=B92UzHsnr6GBMq2ZjZCtB5q
TWITTER_CONSUMER_SECRET=PRaWPeAIkTBskz16eBcUCThyGIsbweGBohzyXihgtMJ3t
TWITTER_ACCESS_TOKEN_KEY=1502479851462471681-AsvIXfgl085ELtLUW7Pvc1Agq3hJ
TWITTER_ACCESS_TOKEN_SECRET=Rd4Ge9fs09uAXaNEfJudujZ3qL1q8K6NpLVDZ6tlavSOnzg
Your file structure should look like this:
Writing the Code
In index.js, create a function called start().
async function start() {

}
We will be writing our code inside the function above.
Step 1. Calculate the Number of Days to the Event
You can hardcode the event date or pull the date from a data source to calculate the number of days to the event. For simplicity, we’ll hardcode the date for this tutorial.
If the event is not due yet, we’ll show the number of days to the event. Else, we’ll show “Live Now!” on the Twitter banner.
const eventDate = new Date(2022, 11, 25); // hardcode or pull event date from a data source - note that month starts from 0
const days = calculateDays(new Date(), eventDate) || 0;
const countdownText = (days > 0) ? `${days} day left` : 'Live Now!' ;
calculateDays()
function calculateDays(today, eventDate){

   const difference = eventDate.getTime() - today.getTime();

   return Math.ceil(difference / (1000 * 3600 * 24)); // convert to days
}
Step 2. Generate a Twitter Banner Using Bannerbear
Once we have the number of days to the event, we will change the text in the Twitter banner using Bannerbear.
const BB_TEMPLATE_UID = 'p8YXW3b1xkaXDVgkw2';
const dateOptions = { year: 'numeric', month: 'long', day: 'numeric' };

const bannerUrl = await generateBanner(eventDate.toLocaleDateString("en-US", dateOptions), countdownText);
Reminder : You will need to replace the value of BB_TEMPLATE_UID with your own template ID.
generateBanner()
function generateBanner(eventDateText, countdownText) {

  return new Promise(async (resolve, reject) => {

    const bb = new Bannerbear(process.env.BB_API);

    const images = await bb.create_image(
      BB_TEMPLATE_UID,
      {
        modifications: [
          {
            name: 'countdown',
            text: countdownText,
          },
          {
            name: 'date',
            text: eventDateText,
          },
        ],
      },
      true
    );

    resolve(images?.image_url_jpg);
  });
}
The function generateBanner() will return a JPEG image URL created by populating the dynamic objects— countdown and date in the Bannerbear design template with values stated in the modifications array.
🐻 For other options that can be used with
bb.create_image(), please refer to the Bannerbear Node.js Library GitHub repo.
Step 3. Update the Twitter Banner
Using the image URL returned, we will update our Twitter banner using Twitter’s API, POST account/update_profile_banner.
if (bannerUrl) {
        await updateTwitterBanner(bannerUrl);
}
updateTwitterBanner()
async function updateTwitterBanner(bannerUrl) {

  const twitter = new Twitter({
    consumer_key: process.env.TWITTER_CONSUMER_KEY,
    consumer_secret: process.env.TWITTER_CONSUMER_SECRET,
    access_token_key: process.env.TWITTER_ACCESS_TOKEN_KEY,
    access_token_secret: process.env.TWITTER_ACCESS_TOKEN_SECRET,
  });

  const bannerImage = await fetch(bannerUrl);
  const buffer = await bannerImage.arrayBuffer();
  const bannerString = Buffer.from(buffer).toString('base64');

  twitter.post(
    'account/update_profile_banner', // endpoint
    { banner: bannerString }, // param
    function (error, tweet, response) { //callback

      if (error) throw error;
      console.log(tweet); // Tweet body.
      console.log(response); // Raw response object.
    }
  );
}
If you call the function start() inside the code and run node index.js to execute the file, your Twitter banner should be updated.

Step 4. Running the Job Automatically on a Schedule
Depending on how you will deploy your code, you can use different ways to set up a schedule to change the Twitter banner automatically.
If you’re integrating it into an existing application, you can install cron by running npm i cron and add the code below to trigger the job every day at midnight using the cron expression 0 0 * * *.
var CronJob = require('cron').CronJob;

var job = new CronJob(
	'0 0 * * *', // every day at midnight
	function() {
		start();
	},
	null,
	true,
	null,
  	null,
  	null,
  	new Date().getTimezoneOffset()/-60 //utcOffset
);
You can also modify the cron expression to update every minute (* * * *) to show a real-time countdown on the dynamic banner (don't forget to modify the countdown text too). Use a cron schedule expression editor to check the cron expression.
Alternatively, you can set it up as an API or webhook and create a cron job to trigger it. In that case, you can skip the code above.
🐻 View the complete code on GitHub.
Automating with Code
Creating automation with code will give you the flexibility on how you want to implement it. You can integrate it into an existing app and trigger it using a cron job in the code like this tutorial or use them in other ways:
- Deploy as an endpoint and trigger using cron-job.org
- Deploy as a serverless AWS Lambda function and trigger using Amazon EventBridge
- Create a scheduled job on your local machine to call the function (Refer to How to Set Your Notion To-do List as Desktop Wallpaper Automatically)
- Host it on Replit (non-production)
Changing the Twitter profile banner is one of many examples of using Bannerbear to automate media generation. Besides that, you can also…
- Generate custom Open Graph images for CMSs automatically
- Send a dynamic personalized welcome image to new users
- Add auto-generated subtitles to videos
- Generate social media content automatically by repurposing existing content
…and more! For more ideas, you can visit our blog. 🐻💡
