
How to Add Auto-Generated Custom Open Graph Images to Ghost Using Bannerbear
Contents
Ghost is a free and open-source blogging platform designed to simplify the process of online publishing regardless of the type of content. Similar to WordPress, users can choose between managed hosting and self-hosting depending on their publication needs.
Ghost(Pro) managed hosting enables users with less technical knowledge to build their websites within seconds without worrying about the technical aspects of a website. However, a self-hosted Ghost website offers more control and flexibility as users are able to modify the core code. This enables users to do some advanced customizations which can only be done by modifying the code, including adding dynamically generated custom Open Graph images to different articles automatically.
In this tutorial, we’ll learn how to add auto-generated custom Open Graph images to Ghost using Bannerbear to show an image like the example below for your articles on social media:
❗️ Note : This tutorial is only for self-hosted Ghost websites as Ghost(Pro) websites created using the managed hosting service do not offer the ability to modify the core code, as stated in Ghost(Pro) vs Self-hosting.
What Is an Open Graph Image
The Open Graph image (OG image) or social sharing image is an image that will be displayed when you share a website on social media.
It can be set by adding the og:image or twitter:image meta tag within your website’s <head> section:
<meta property='og:image' content="IMG_URL" />
When you’re using Ghost, you can upload an Open Graph image for your article from the article editor.
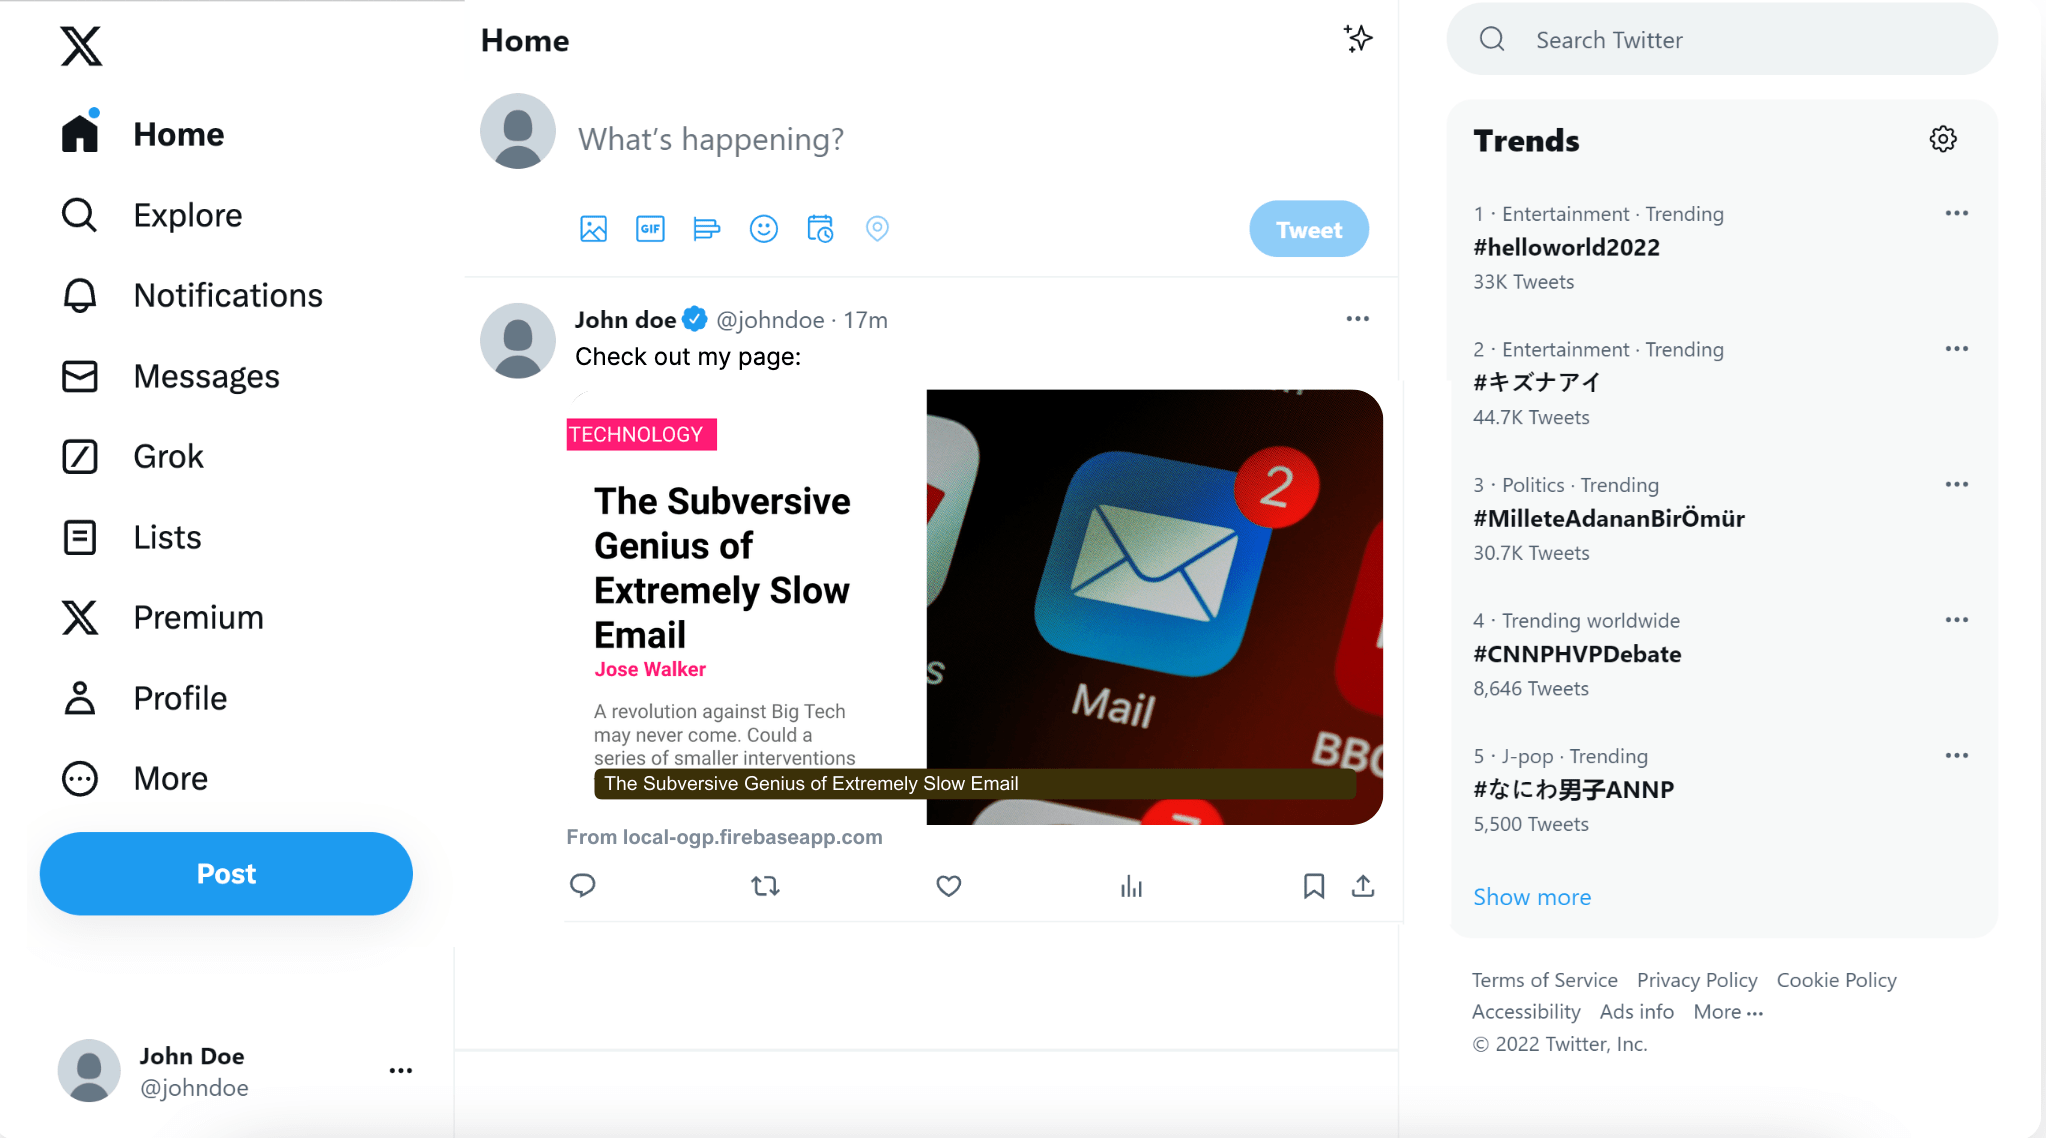
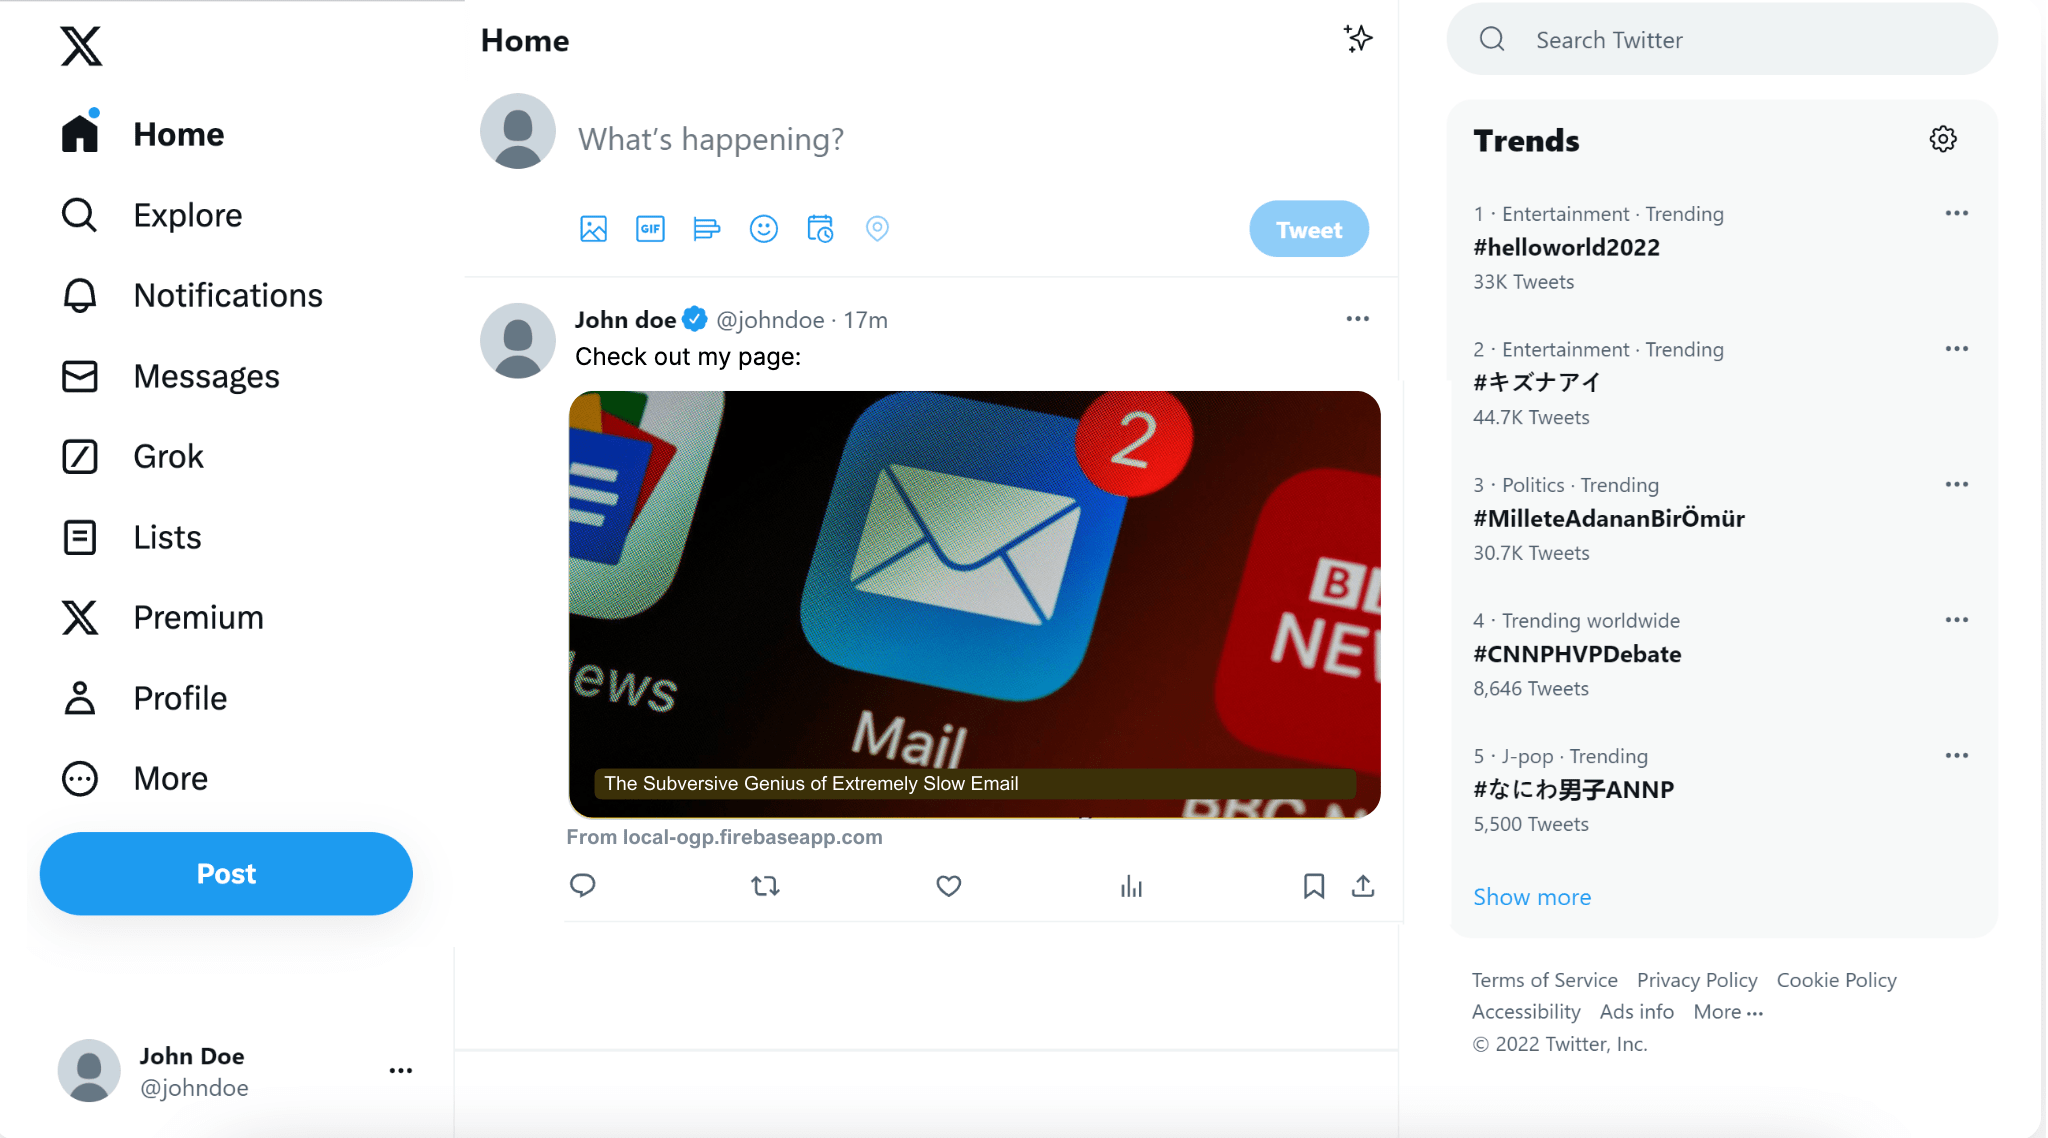
If an Open Graph image is not uploaded, Ghost will use the featured image of your article automatically and it will look like this when the article is shared on social media:
Using a Custom Open Graph Image
If you are publishing various types of content on your website, you can use a custom Open Graph image to highlight the category of the article to make your social media post more appealing to its target readers. Besides that, you can also add other information like the author’s name and the article description to the image.
Example 1

Example 2

Example 3

Each article will have a unique Open Graph image. That being said, you do not need to create and upload the image manually for every article as it can be fully automated using Bannerbear by modifying the core code.
How Does Bannerbear Work
Bannerbear is an automated media generation service that helps you create custom images, videos, and more using API. To generate a custom Open Graph image automatically, we will use Bannerbear’s Image Generation API.
The Image Generation API generates custom images automatically based on a design template which you can add static and dynamic images, texts, shapes, etc. The values of the dynamic objects can be set by passing different data to the API.
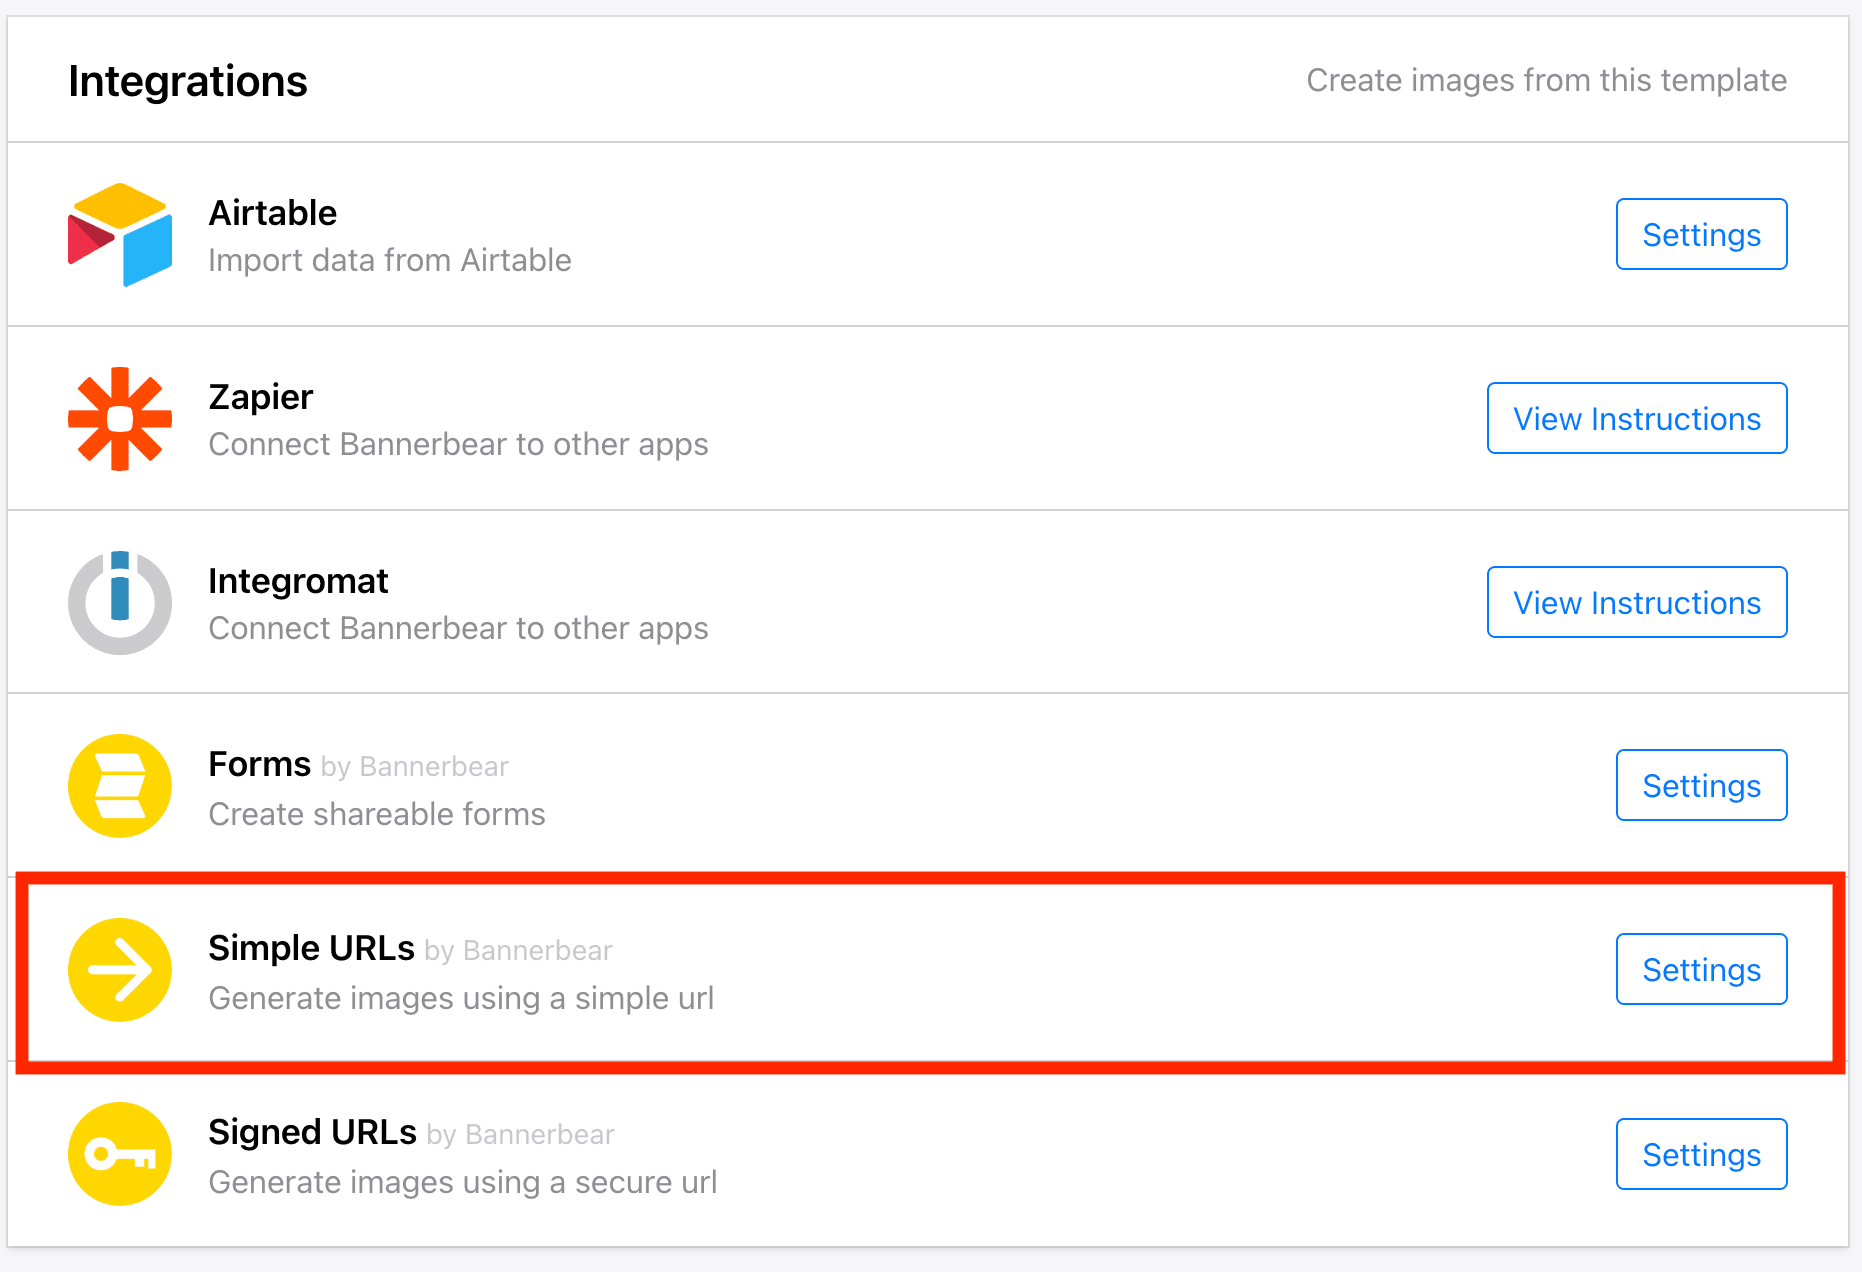
Bannerbear offers different ways to use the API. You can use HTTP requests, SDKs (Node.js, Ruby, and PHP), third-party no-code integration, etc. To create and add a custom Open Graph image automatically to Ghost using Bannerbear, we will use the easiest method, which is using a Simple URL.
By using a Simple URL in the meta tags, Open Graph images will be generated automatically when someone shares your website on social media.
Adding a Custom Open Graph Image Automatically Using Bannerbear
Step 1. Prepare a Bannerbear Design Template
Create a new Bannerbear project and create a design template for your Open Graph image. You can design your template from scratch or duplicate this tutorial's Open Graph Image Template that is created based on Ghost's default theme, Casper.
To display the title , description/excerpt, author’s name , category, and featured image of an article on the Open Graph image, we will need these dynamic objects in the template:
- Text - title, description, author, category
- Image - image_container

The Open Graph images will be generated automatically based on this template and the values of the dynamic objects above will be changed every time we access the Bannerbear Image Generation API using a unique URL.
Step 2. Go to “structure-data.js”
Meta tags will be generated and inserted into the <head> section of a Ghost website via the writeMetaTag() function in “current/core/frontend/helpers/ghost_head.js”.
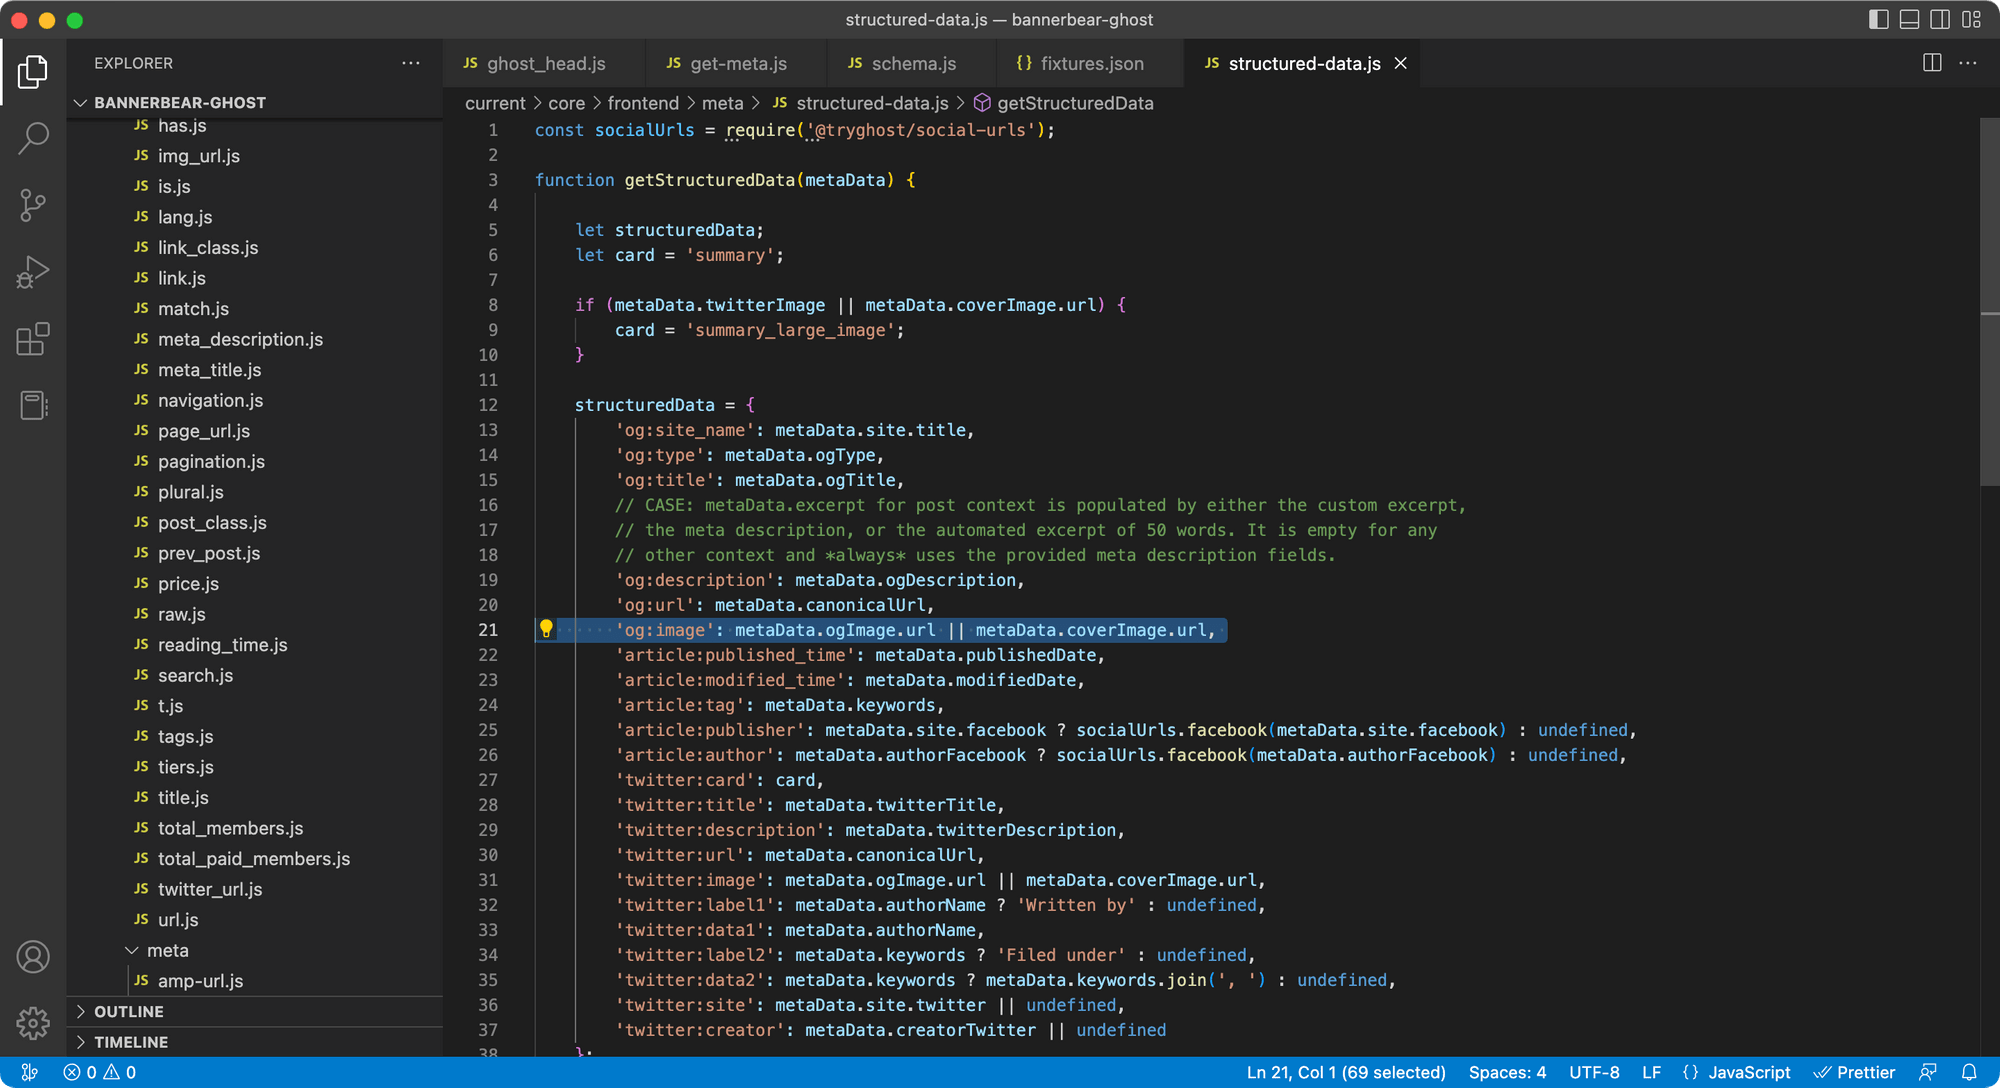
These meta tags including the og:image and twitter:image tags will be generated based on the data retrieved using getStructuredData() from “current/core/frontend/meta/structured-data.js”.
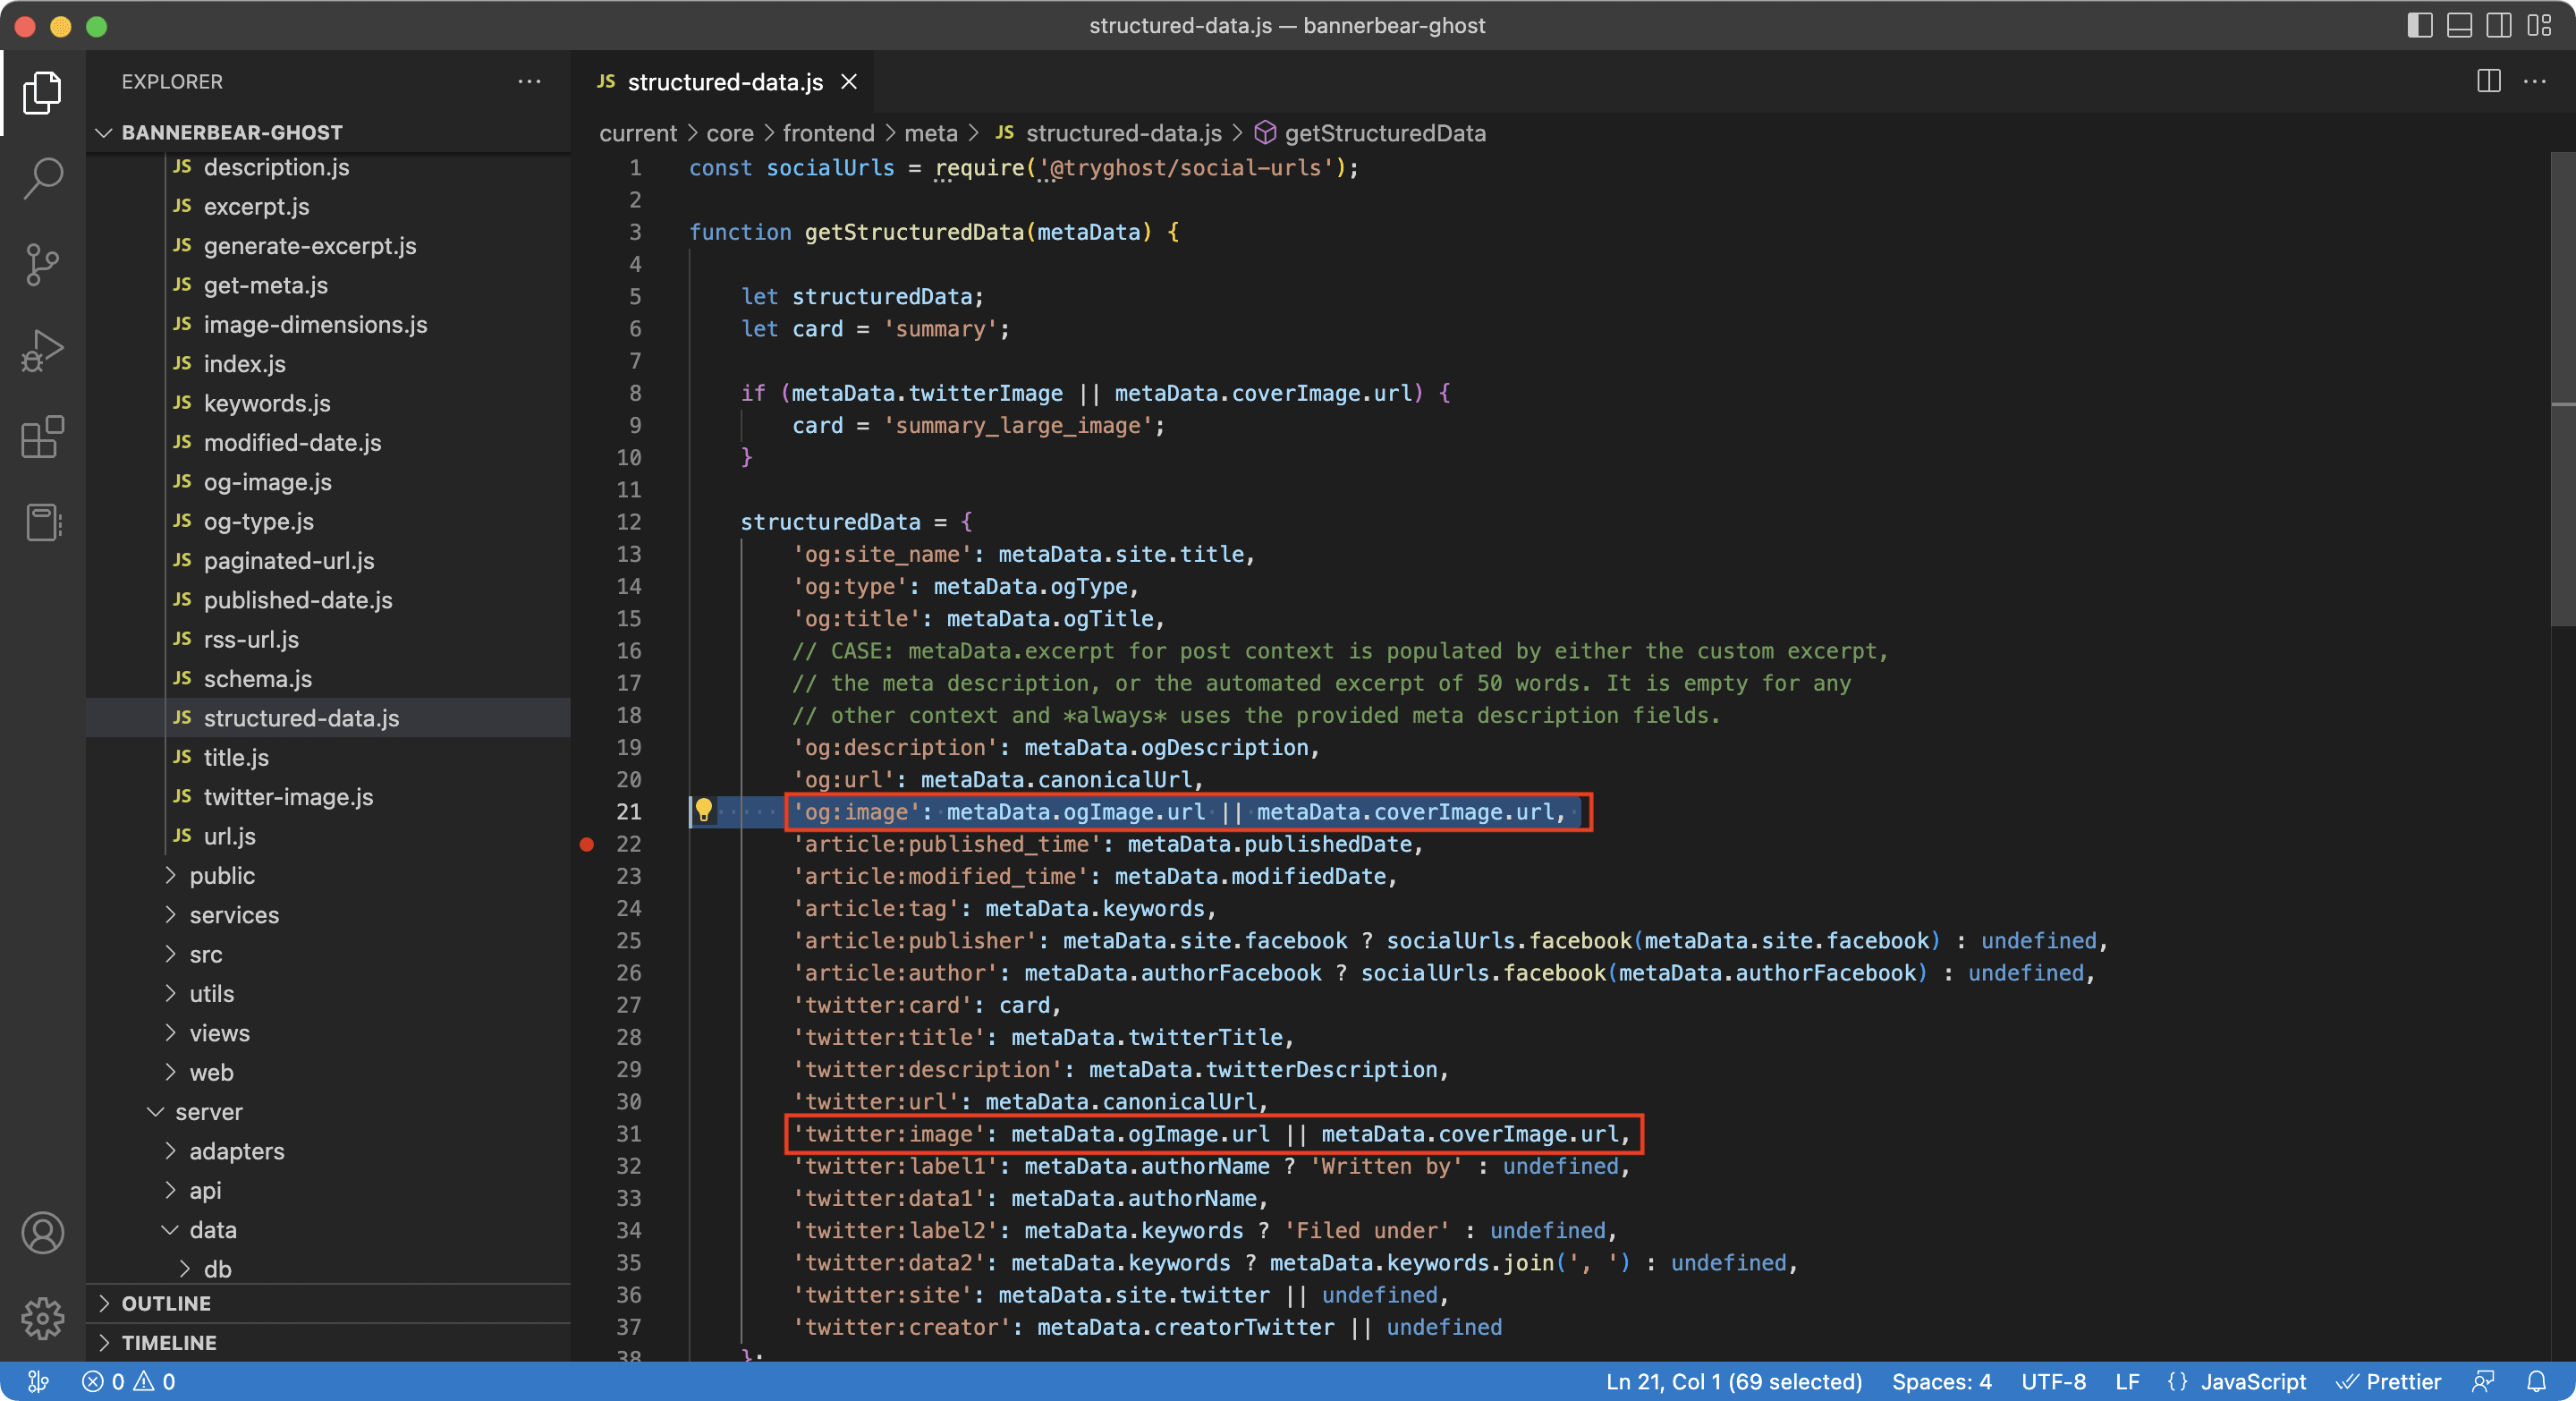
As seen from line 21 from the screenshot above, metaData.ogImage.url or metaData.coverImage.url will be assigned as the default Open Graph image. To use a custom Open Graph image that is generated dynamically using Bannerbear, we will need to replace these values with a Simple URL.
Step 3. Create a Simple URL for Image Generation
The Simple URL used to generate an Open Graph image automatically using Bannerbear consists of an API path and multiple sets of data in the format of “layer/attribute/data”.
To construct a Simple URL, we will need an API path that is structured like the example below:
https://ondemand.bannerbear.com/simpleurl/<URL Base>/image
The URL Base will be different for every design template and you can create one from your design template menu.
Next, we can add the article title, description, author’s name, category, and featured image URL following the layer/attribute/data format. The values of these attributes can be retrieved from the metaData object passed to the getStructuredData() function.
title: title/text/${encodeURIComponent(metaData.ogTitle)}
description: description/text/${encodeURIComponent(metaData.ogDescription)}
author: author/text/${metaData.authorName}
category: category/text/${metaData.keywords}
image: image_container/image_url/${metaData.coverImage.url}
Combine the API path and layer/attribute/data strings to construct the complete Simple URL:
https://ondemand.bannerbear.com/simpleurl/ley9O0B2Zv2B4GjRDY/image/title/text/${encodeURIComponent(metaData.ogTitle)}/description/text/${encodeURIComponent(metaData.ogDescription)}/author/text/${metaData.authorName}/category/text/${metaData.keywords}/image_container/image_url/${metaData.coverImage.url}
As the data will be retrieved from individual articles, a unique Simple URL will be created dynamically for every article, generating different custom Open Graph images automatically.
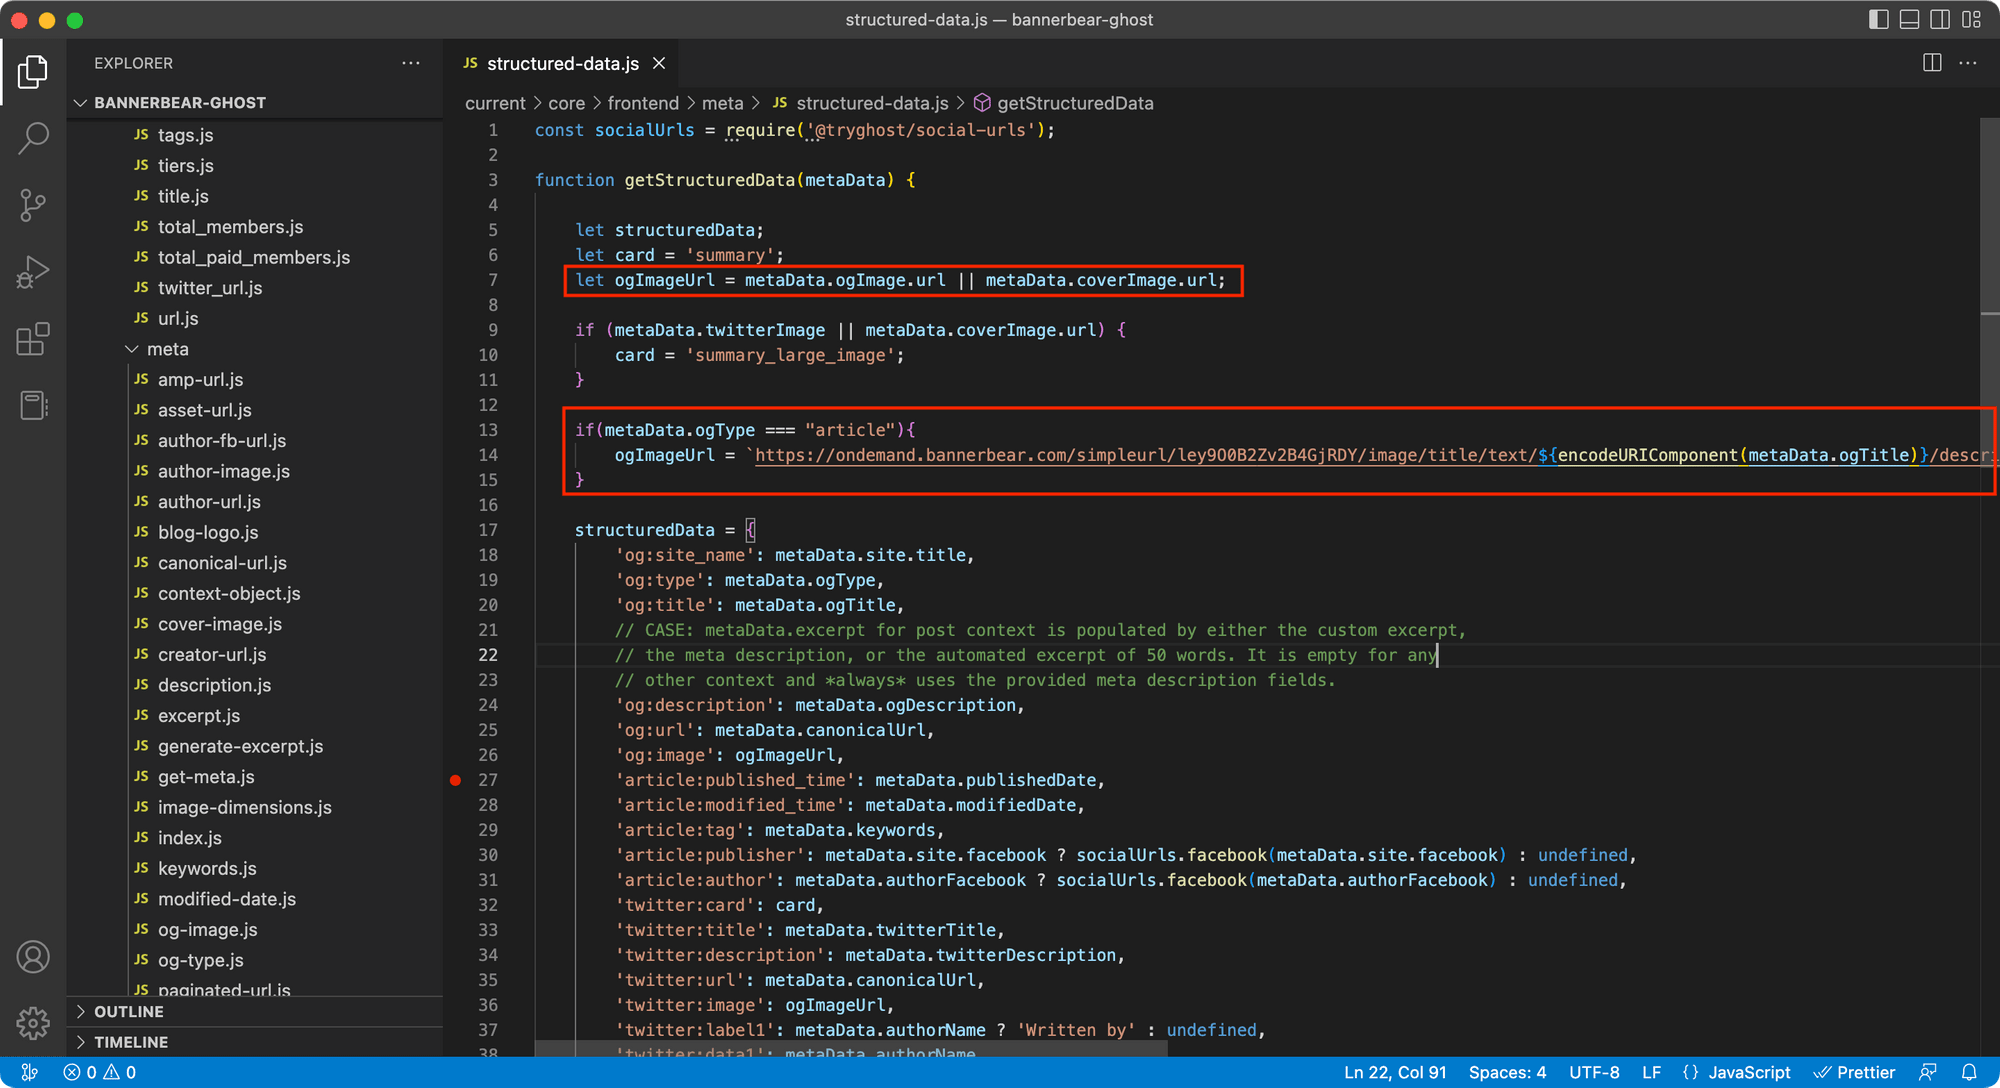
Step 4. Assign the Simple URL as the Open Graph Image
Create a variable ogImageUrl to hold the value of the Open Graph image URL. As we will be generating and adding custom Open Graph images to articles only, we will assign the Simple URL as the value for ogImageUrl only when metaData.ogType is article.
let ogImageUrl = metaData.ogImage.url || metaData.coverImage.url;

if(metaData.ogType === "article"){
	ogImageUrl = `https://ondemand.bannerbear.com/simpleurl/ley9O0B2Zv2B4GjRDY/image/title/text/${encodeURIComponent(metaData.ogTitle)}/description/text/${encodeURIComponent(metaData.ogDescription)}/author/text/${metaData.authorName}/category/text/${metaData.keywords}/image_container/image_url/${metaData.coverImage.url}`;
}
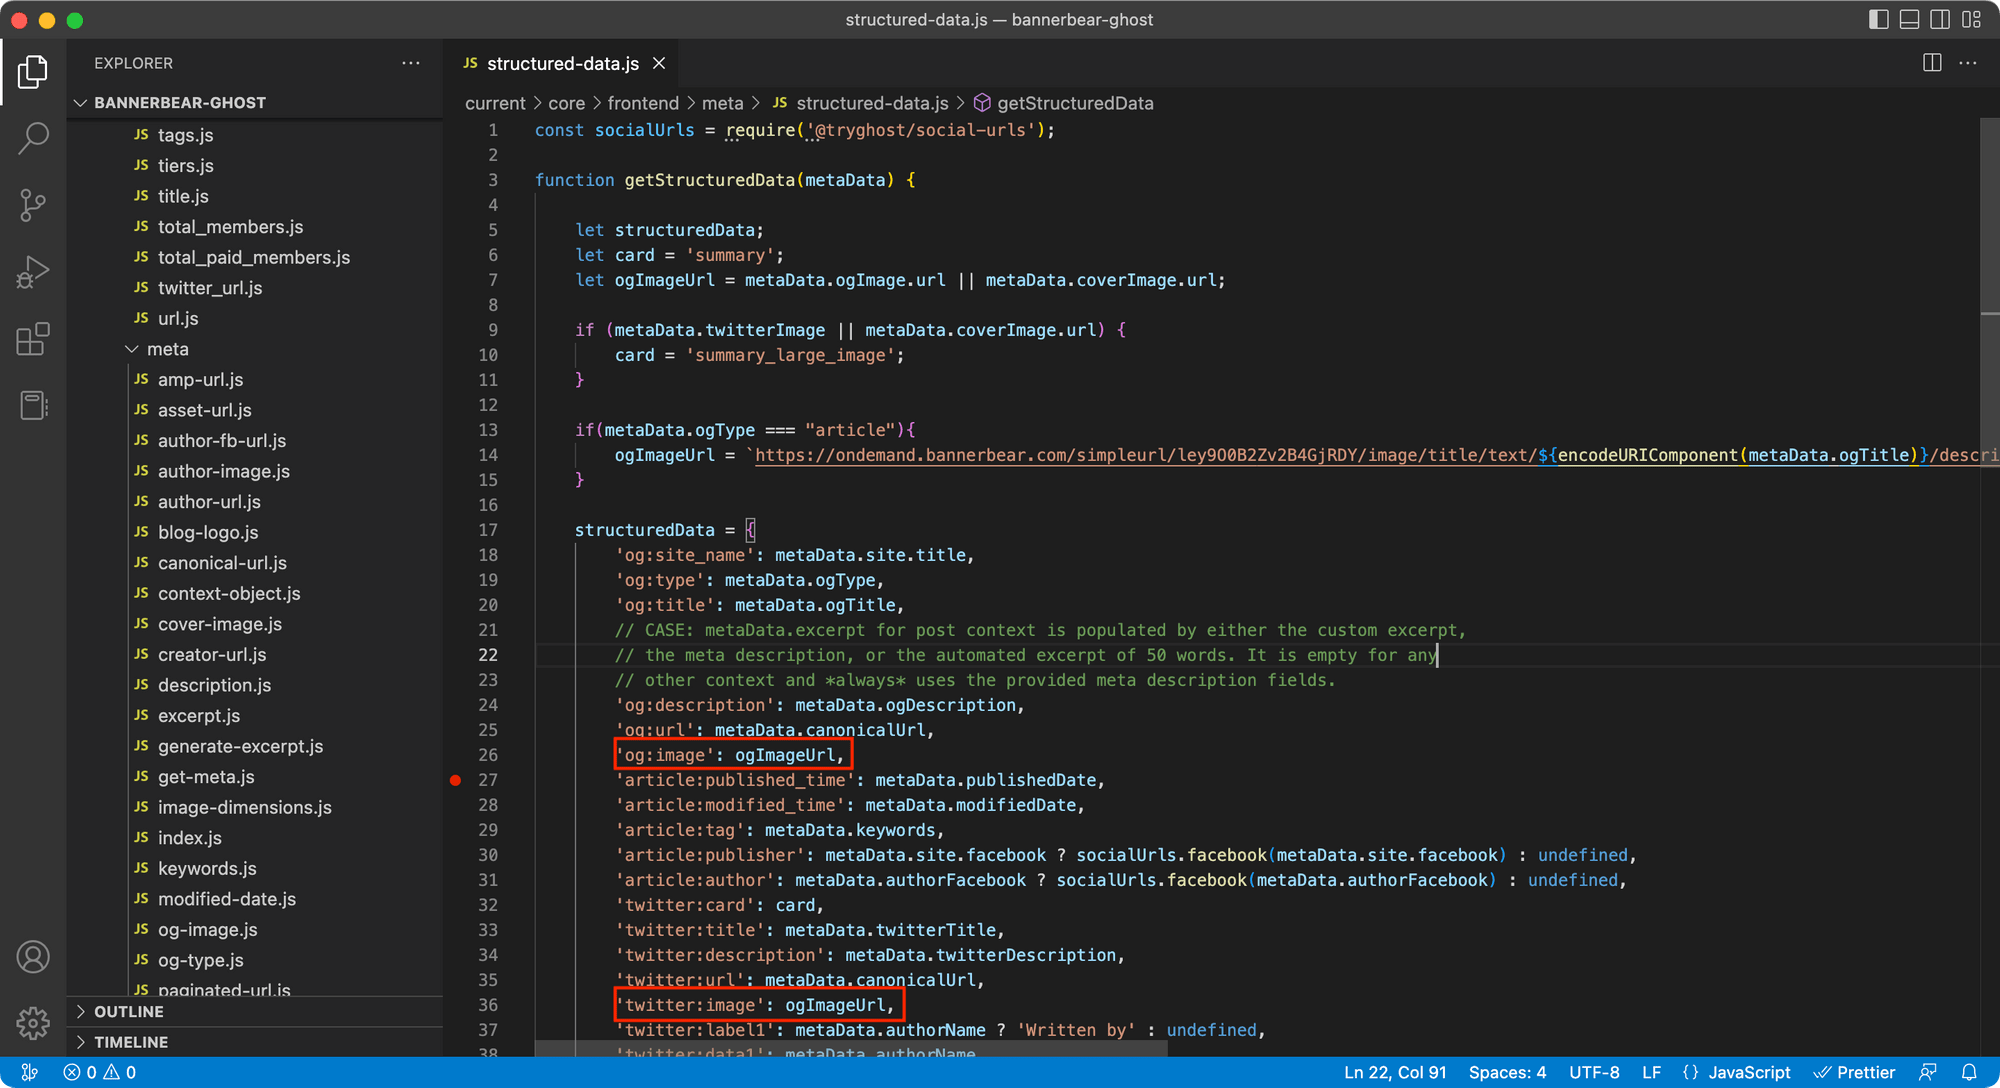
Lastly, change the values of structuredData[”og:image”] and structuredData[”twitter:image”] to ogImageUrl.
Testing the Result
Deploy the code and the meta tags should be injected into the <head> section of your website. You can test the Simple URL by retrieving the complete URL from the meta tag using your browser inspector.
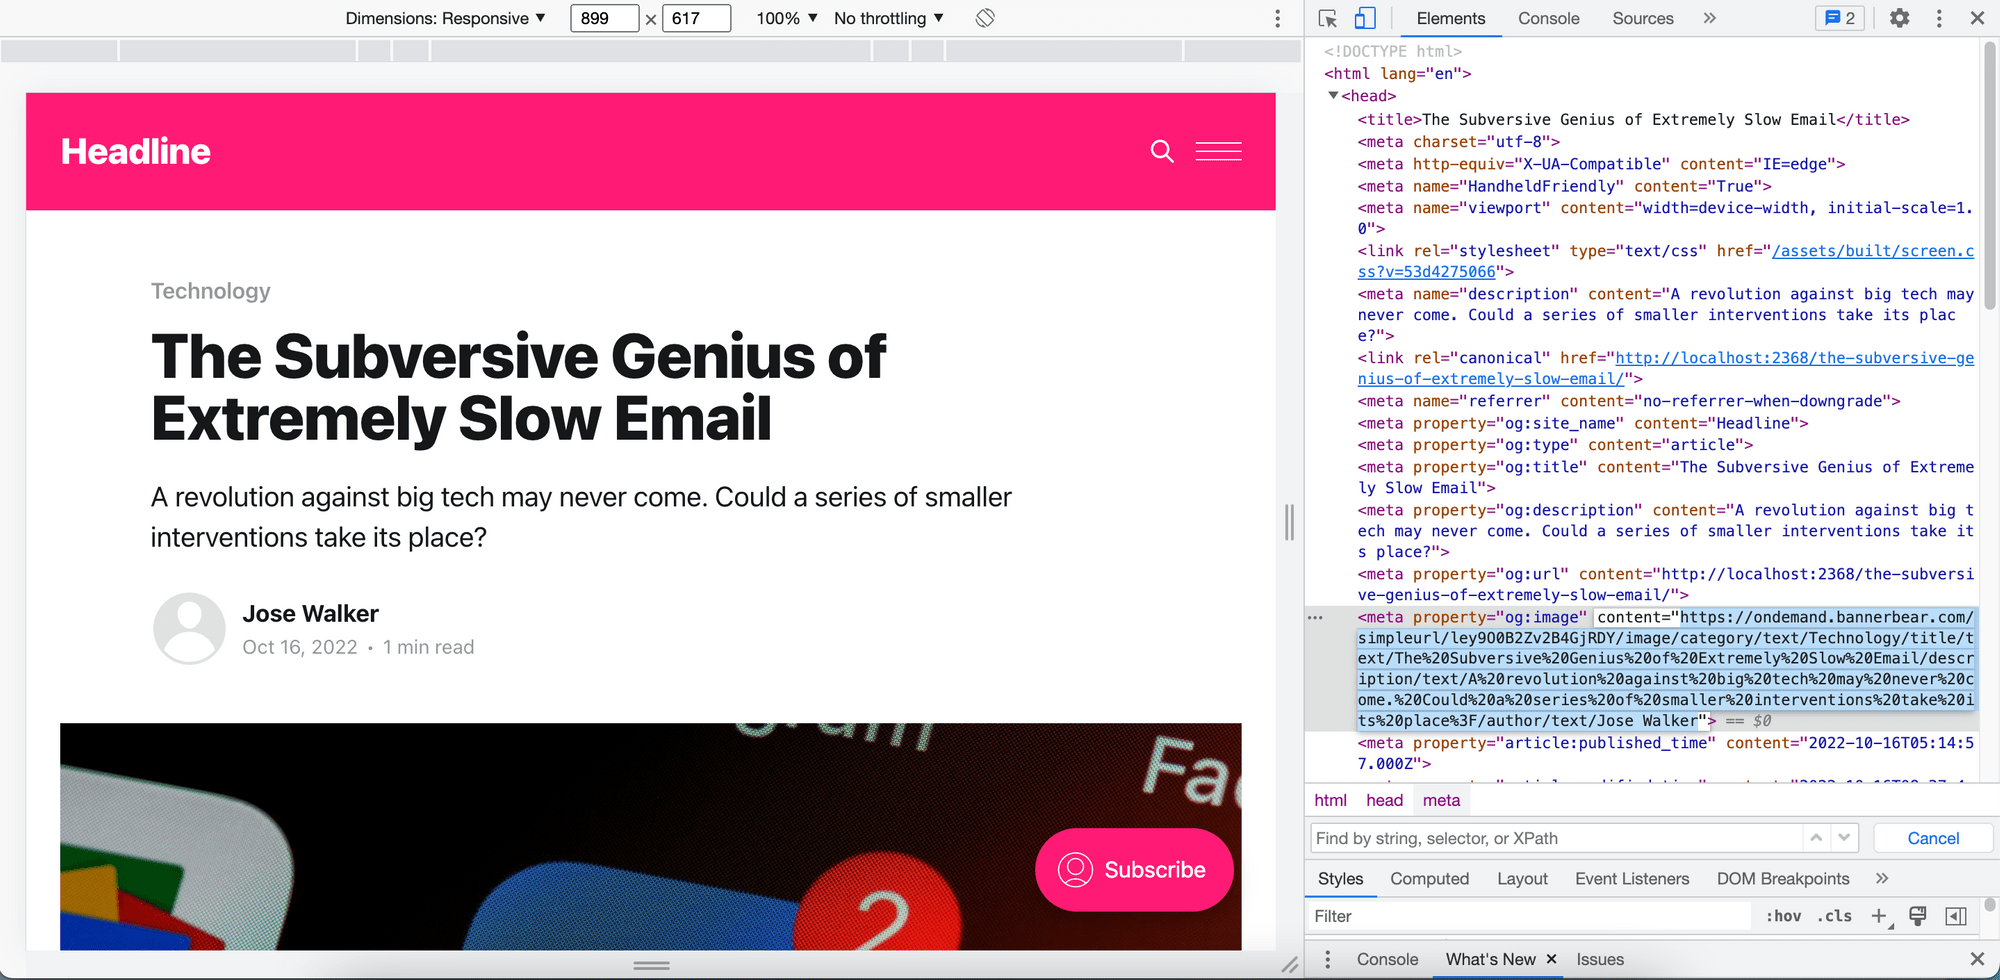
When you visit the URL, you should get a custom Open Graph image generated automatically by Bannerbear based on the design template using the article data.

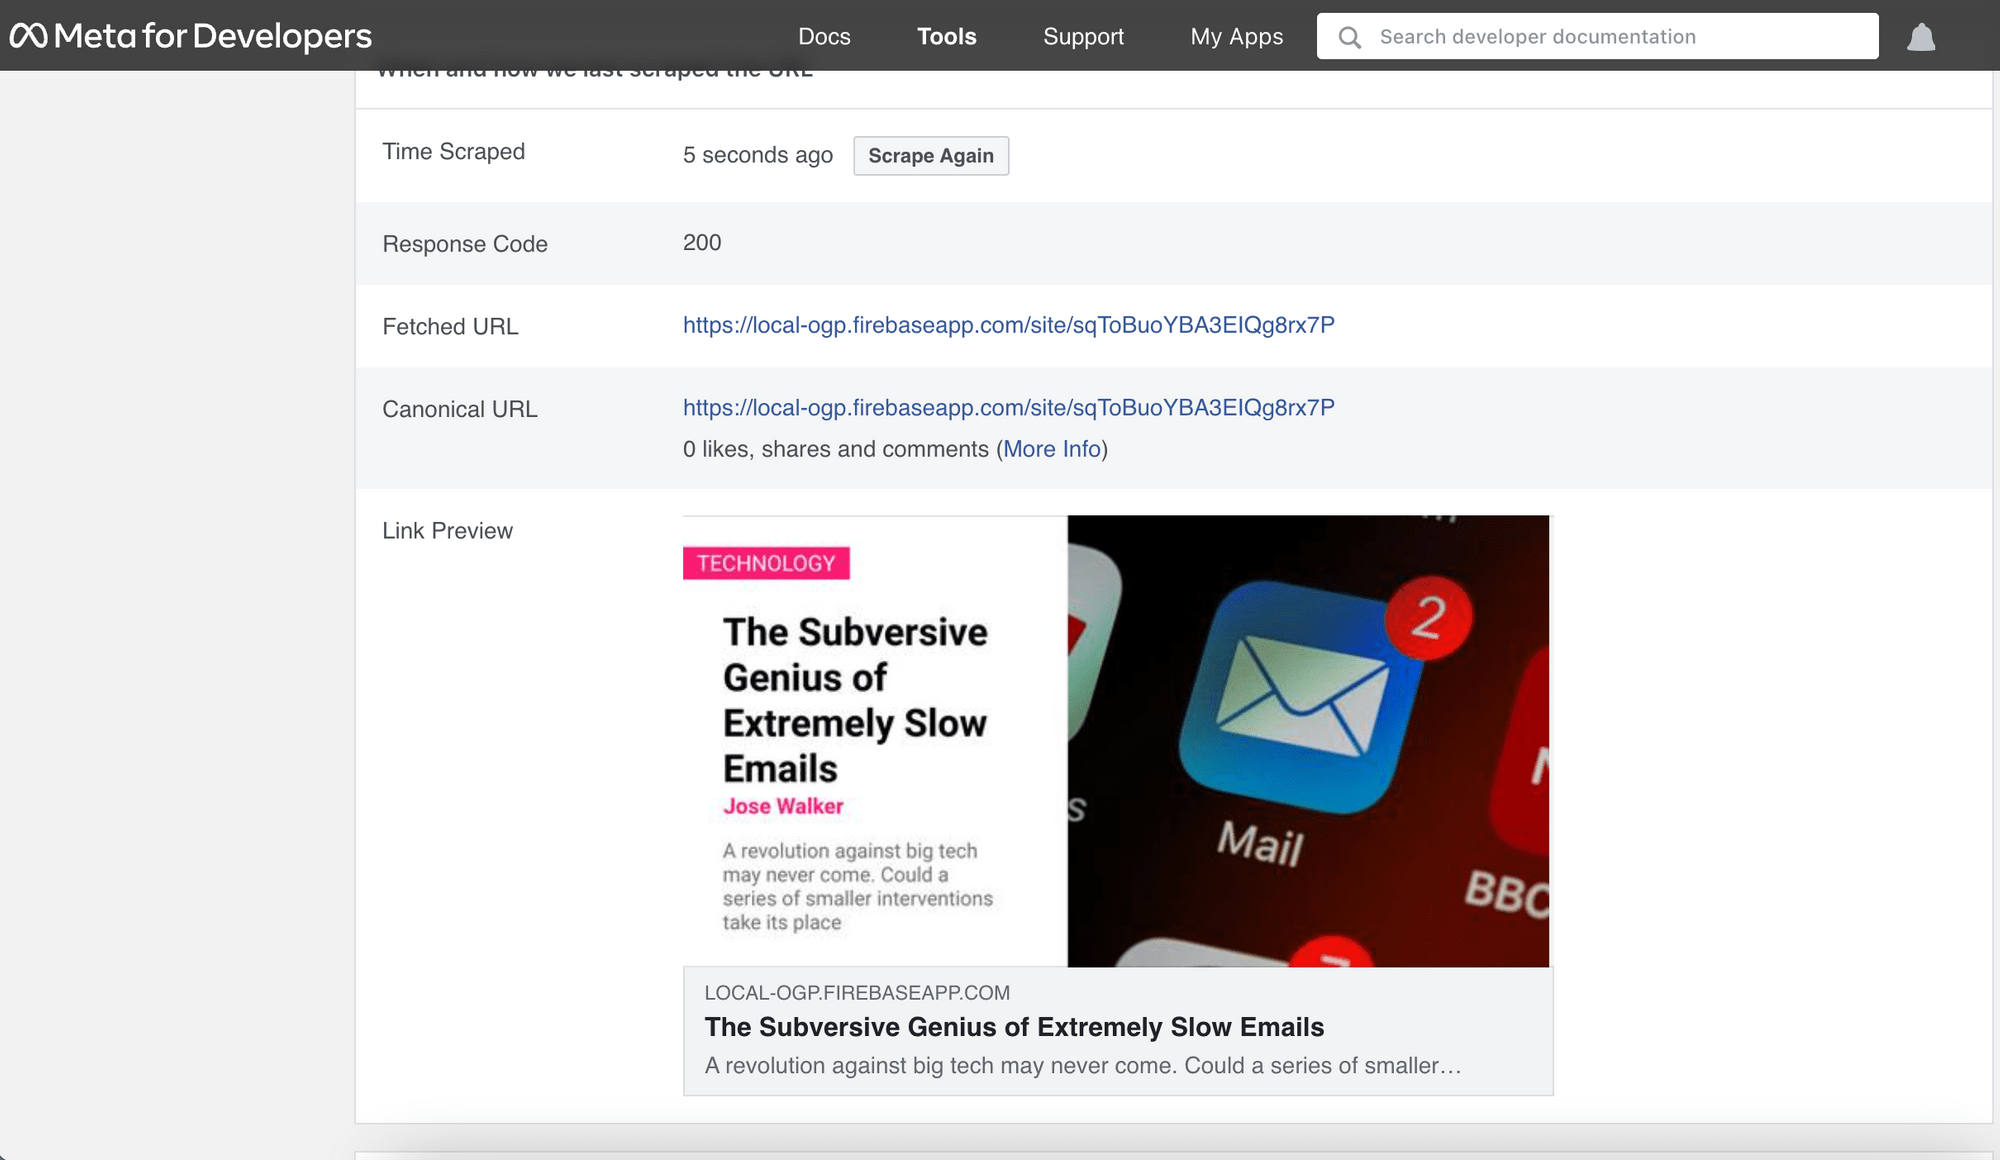
If you want to make sure that the custom Open Graph image auto-generation has been set up correctly, you can use an Open Graph image tester to preview the image.
Here are some of them that are free:
- Official Facebook Sharing Debugger
- Twitter Card Preview Tool
- Facebook Open Graph Preview Tool
- OpenGraph.xyz
You should be able to see a preview of the Open Graph image:
🐻 Bear Tips: If you are developing your Ghost website locally, you can install the Localhost Open Graph Checker extension on Chrome to give the Open Graph image a quick test. However, do note that the featured image will be inaccessible due to the localhost URL.
What’s Next
Other than Ghost, you can use Bannerbear to generate custom Open Graph images automatically for other CMSs like WordPress, Wix, Squarespace, etc. as well. If you are also exploring them to find the best option to suit your publication needs or currently using them, you can read how to add auto-generated Open Graph images to these platforms from the tutorials below:
