
How to Auto-Generate Subtitles/Closed Captions for Tiktok & Instagram
Contents
Adding closed captions to videos is important, particularly on platforms like TikTok and Instagram where viewers’ attention spans are typically shorter. They not only help to engage viewers but also make the content more accessible to non-native speakers and those with hearing impairments.
If you’re a developer working on a video editing application, incorporating an auto-captioning feature can greatly elevate the user experience and the overall value of the app. Rather than building this feature from the ground up, you can save on development time and costs by integrating a third-party service via their API.
In this tutorial, we’ll guide you through the process of using Bannerbear’s API to automatically generate and add closed captions to videos. By the end of this tutorial, you’ll be able to produce results similar to the one shown below:
Video source: YouTube
What is Bannerbear
Bannerbear is a tool that helps you automatically generate custom images, videos, and more from templates. It offers APIs and libraries in various popular programming languages, such as Nodes.js, Ruby, and PHP, allowing developers to easily integrate its image/video generation and manipulation capabilities into their applications. That includes auto-transcribing and adding the transcription as closed captions or subtitles to videos, which is what we are going to do in this tutorial!
To generate images or videos automatically, you need to create a design template in Bannerbear. Bannerbear offers various static and dynamic objects like images, text, QR codes, and shapes that can be added to the design template. The dynamic objects can be changed via API to automatically create unique images or videos, without the need for manual human intervention.
Here’s an example of a Bannerbear design template:
Creating a Bannerbear Design Template
In this section, we will learn step-by-step how to create a template for generating videos with closed captions added automatically.
If you haven’t already done so, sign up for a Bannerbear account and create a new project in your account. Then, duplicate the template below to your project by clicking on it:

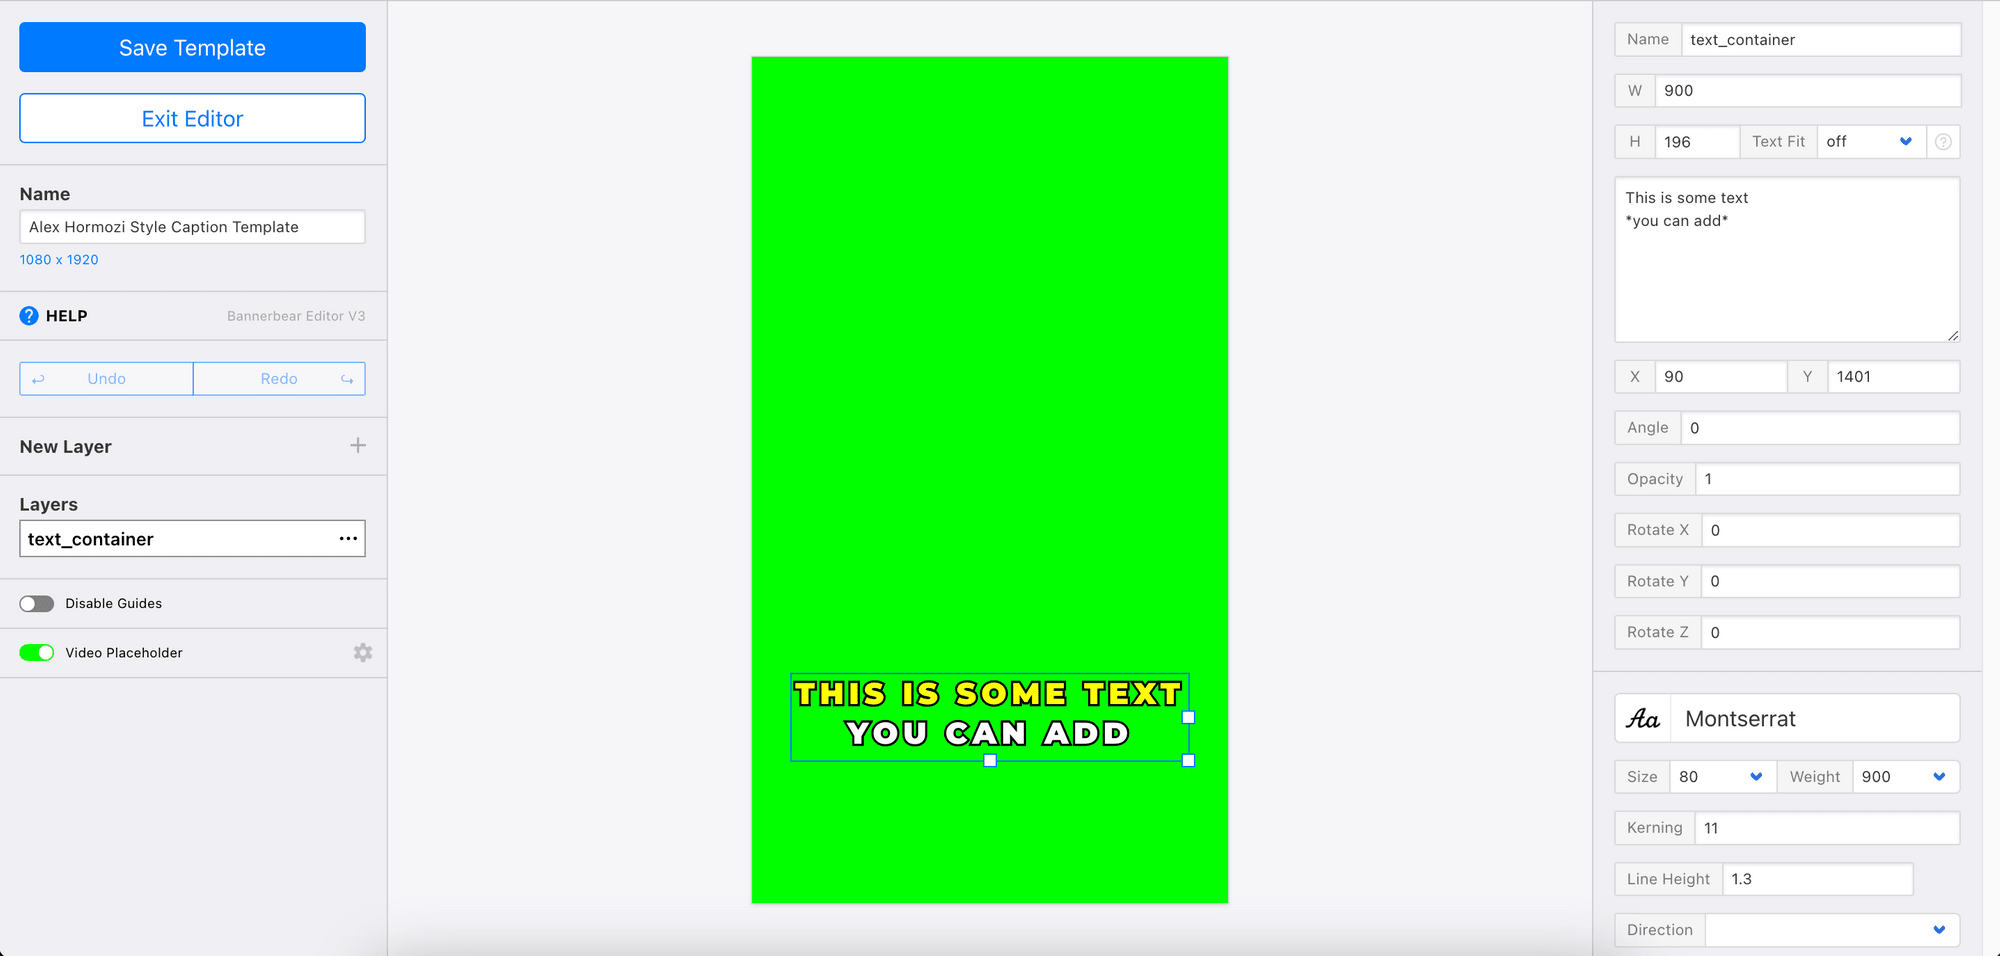
The template contains a dynamic text object named “text_container” to which the automatically generated closed captions will be added. You can modify the template or change the design using the template editor's drag-and-drop interface. Click “Save Template” and exit the editor when you’re done.
🐻 Bear Tips: When a secondary style (eg. the yellow text in the template above) is used, it will be applied to the portion of the text that is being spoken at the moment.
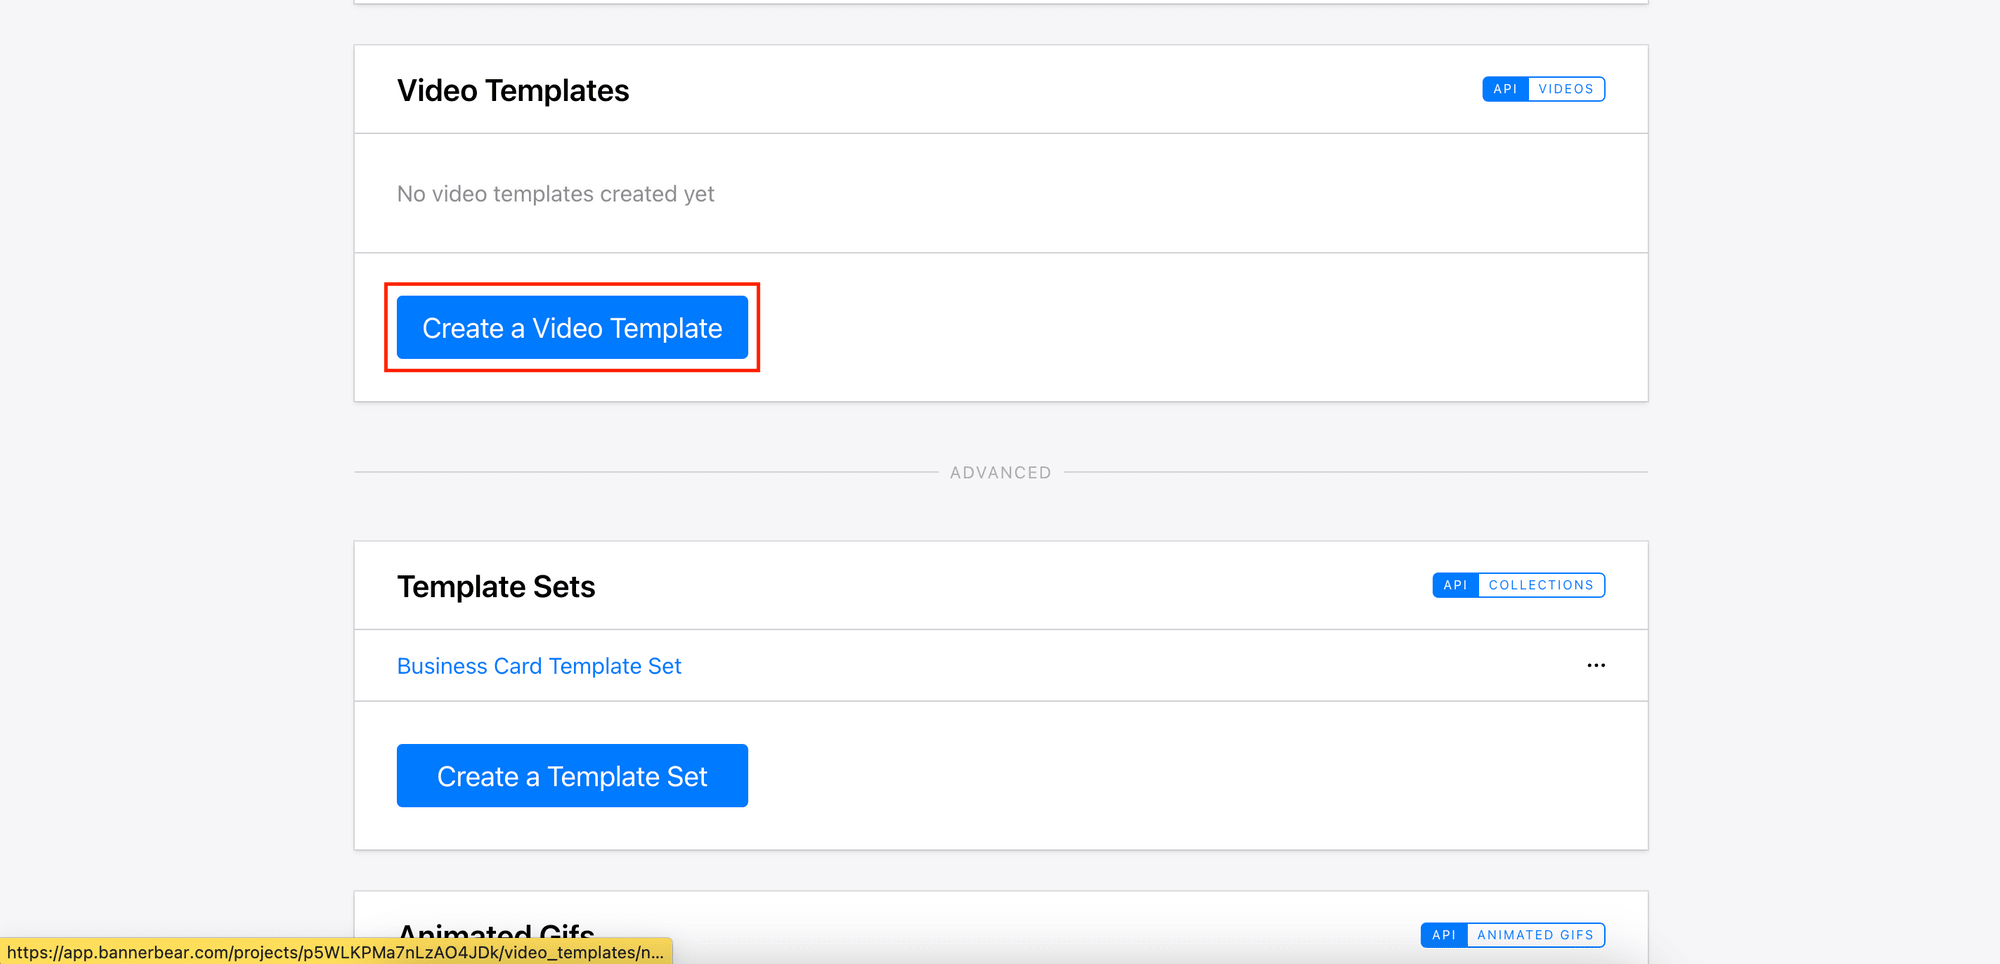
On your project home screen, scroll down to the Video Templates section and click on “Create a Video Template”.
Then, select the template above and choose “Transcribe” as the build pack. Click on “Save Video Template” to continue.
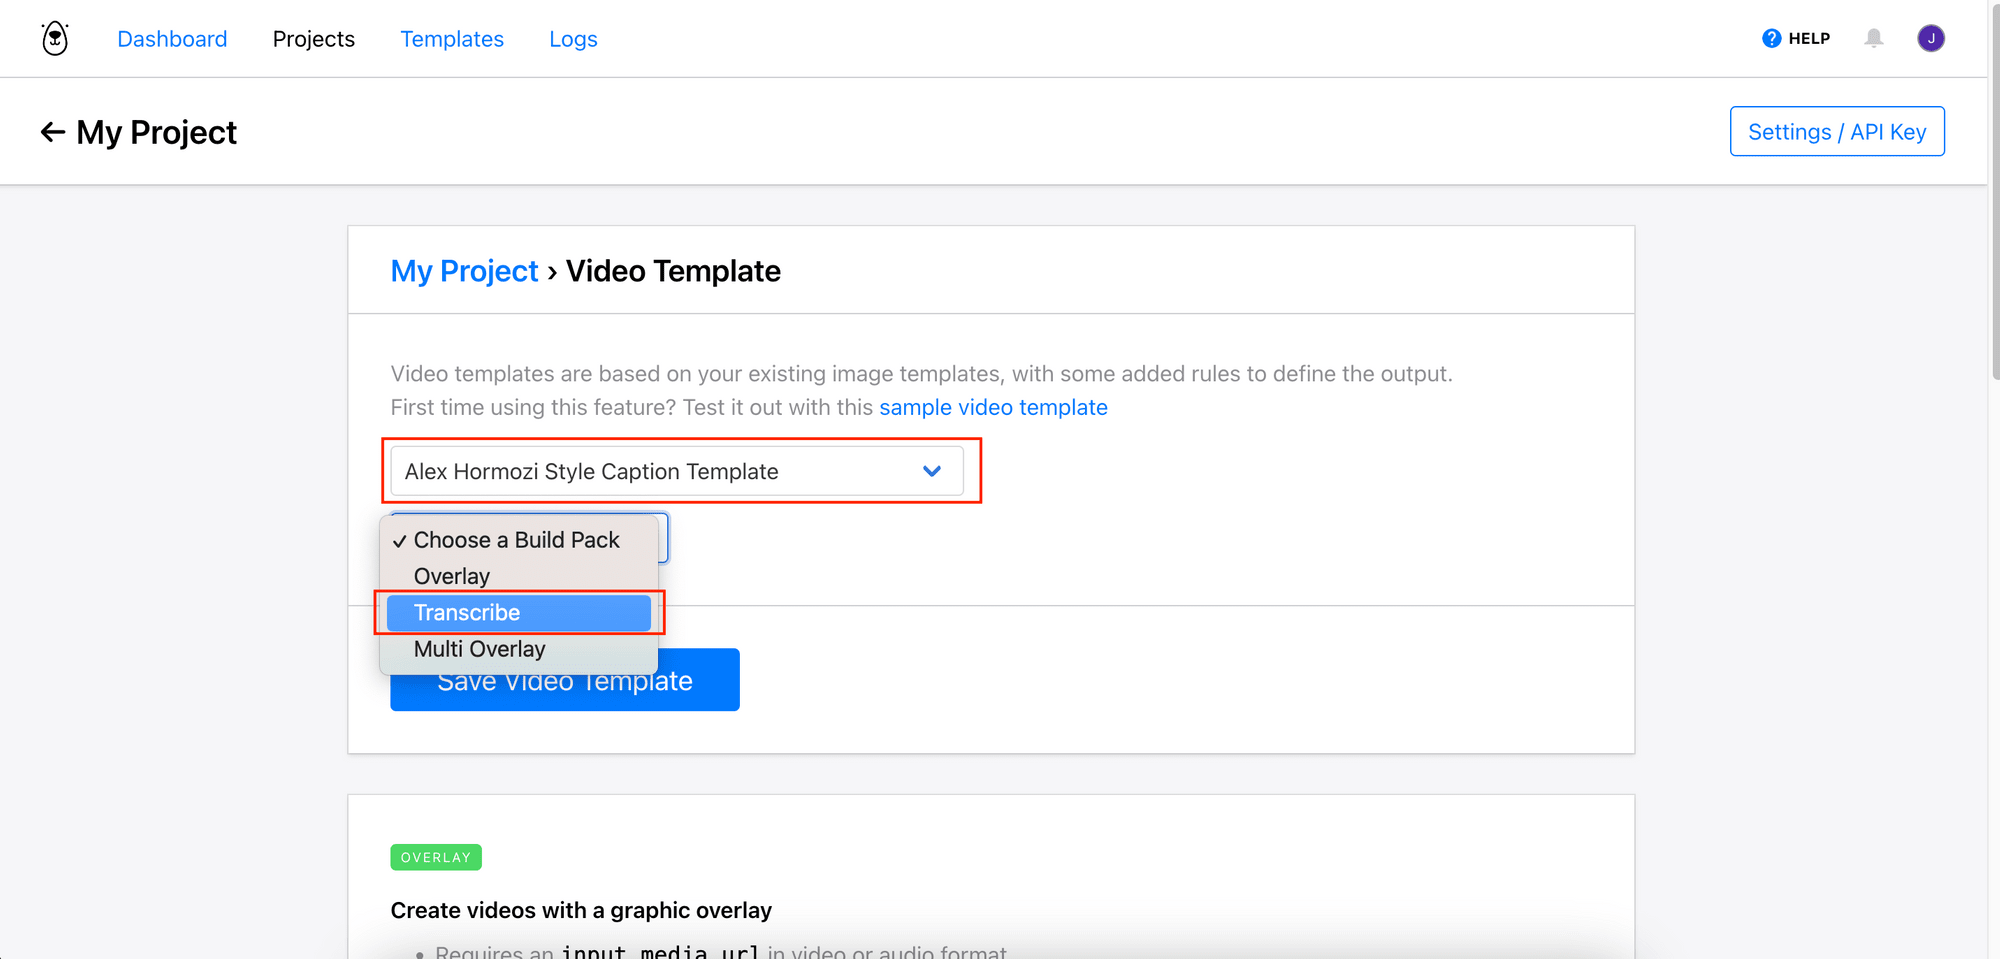
Depending on the chosen build pack, the video template can be used to:
- Transcribe and add closed captions automatically (transcribe), or
- Overlay text and images on top of the video (overlay/multi overlay)
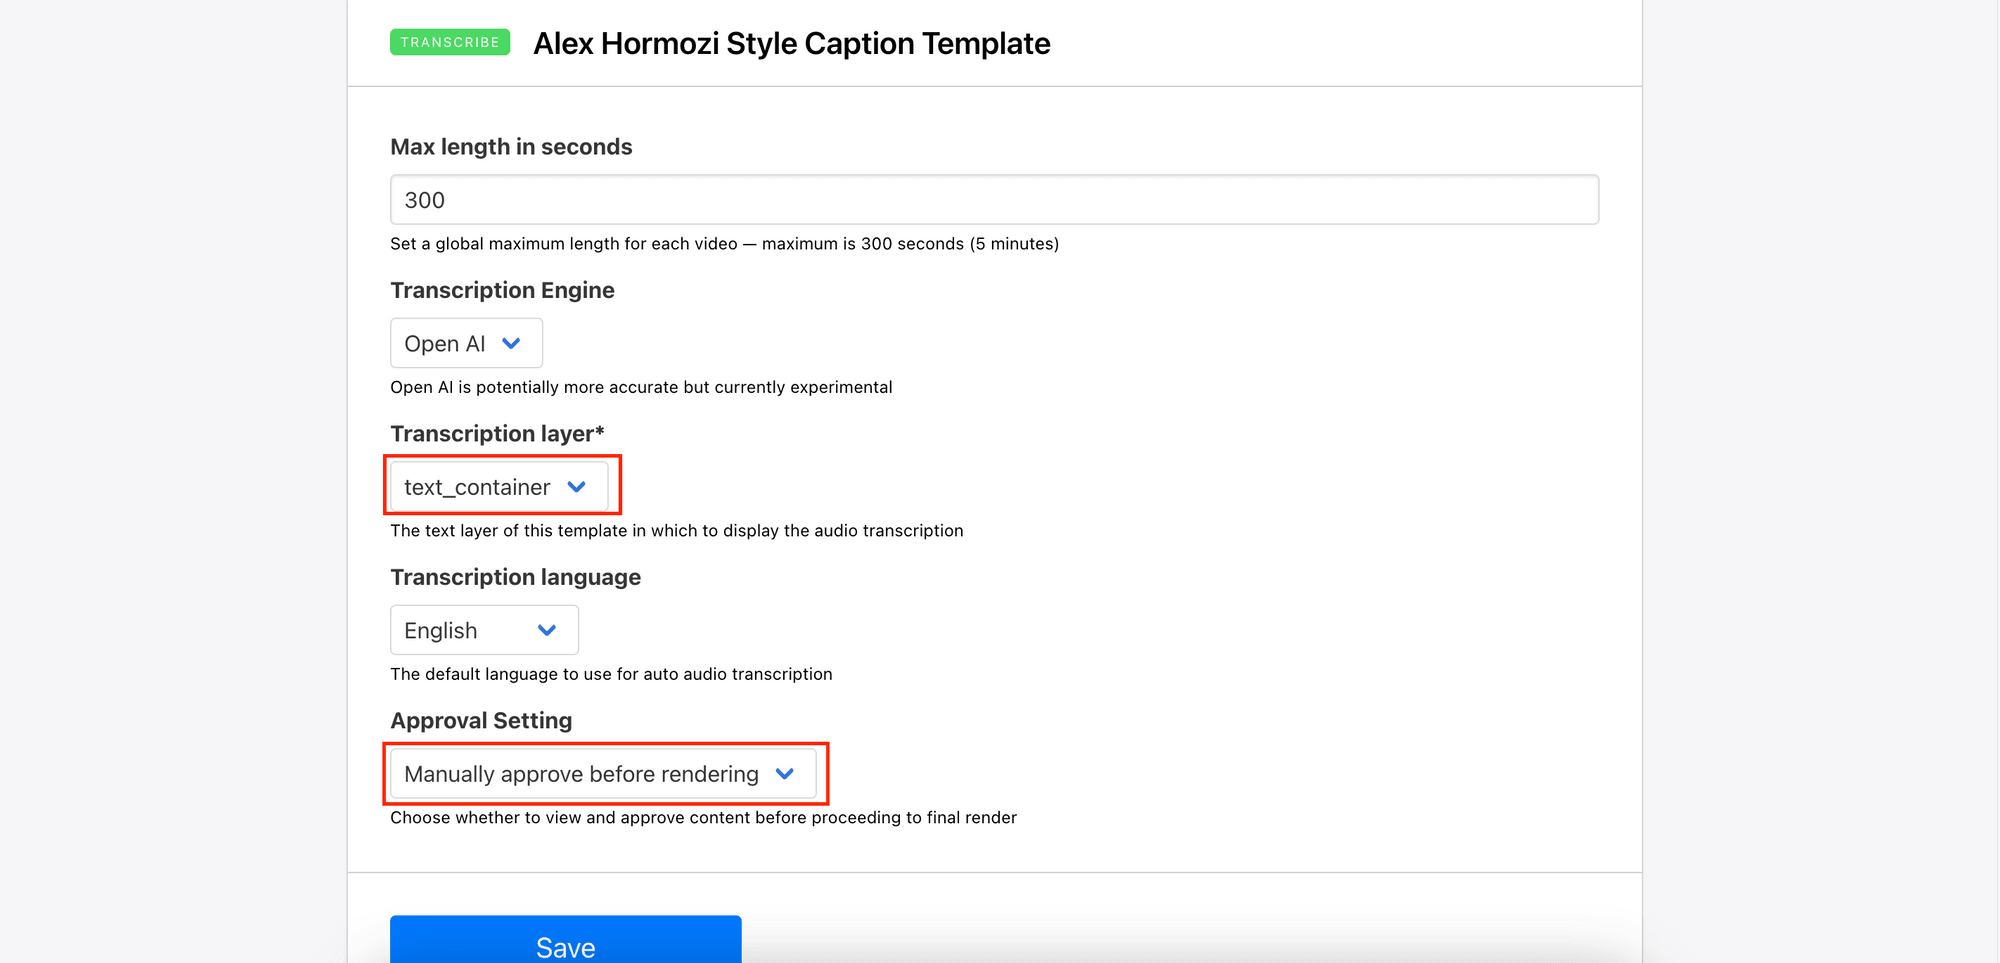
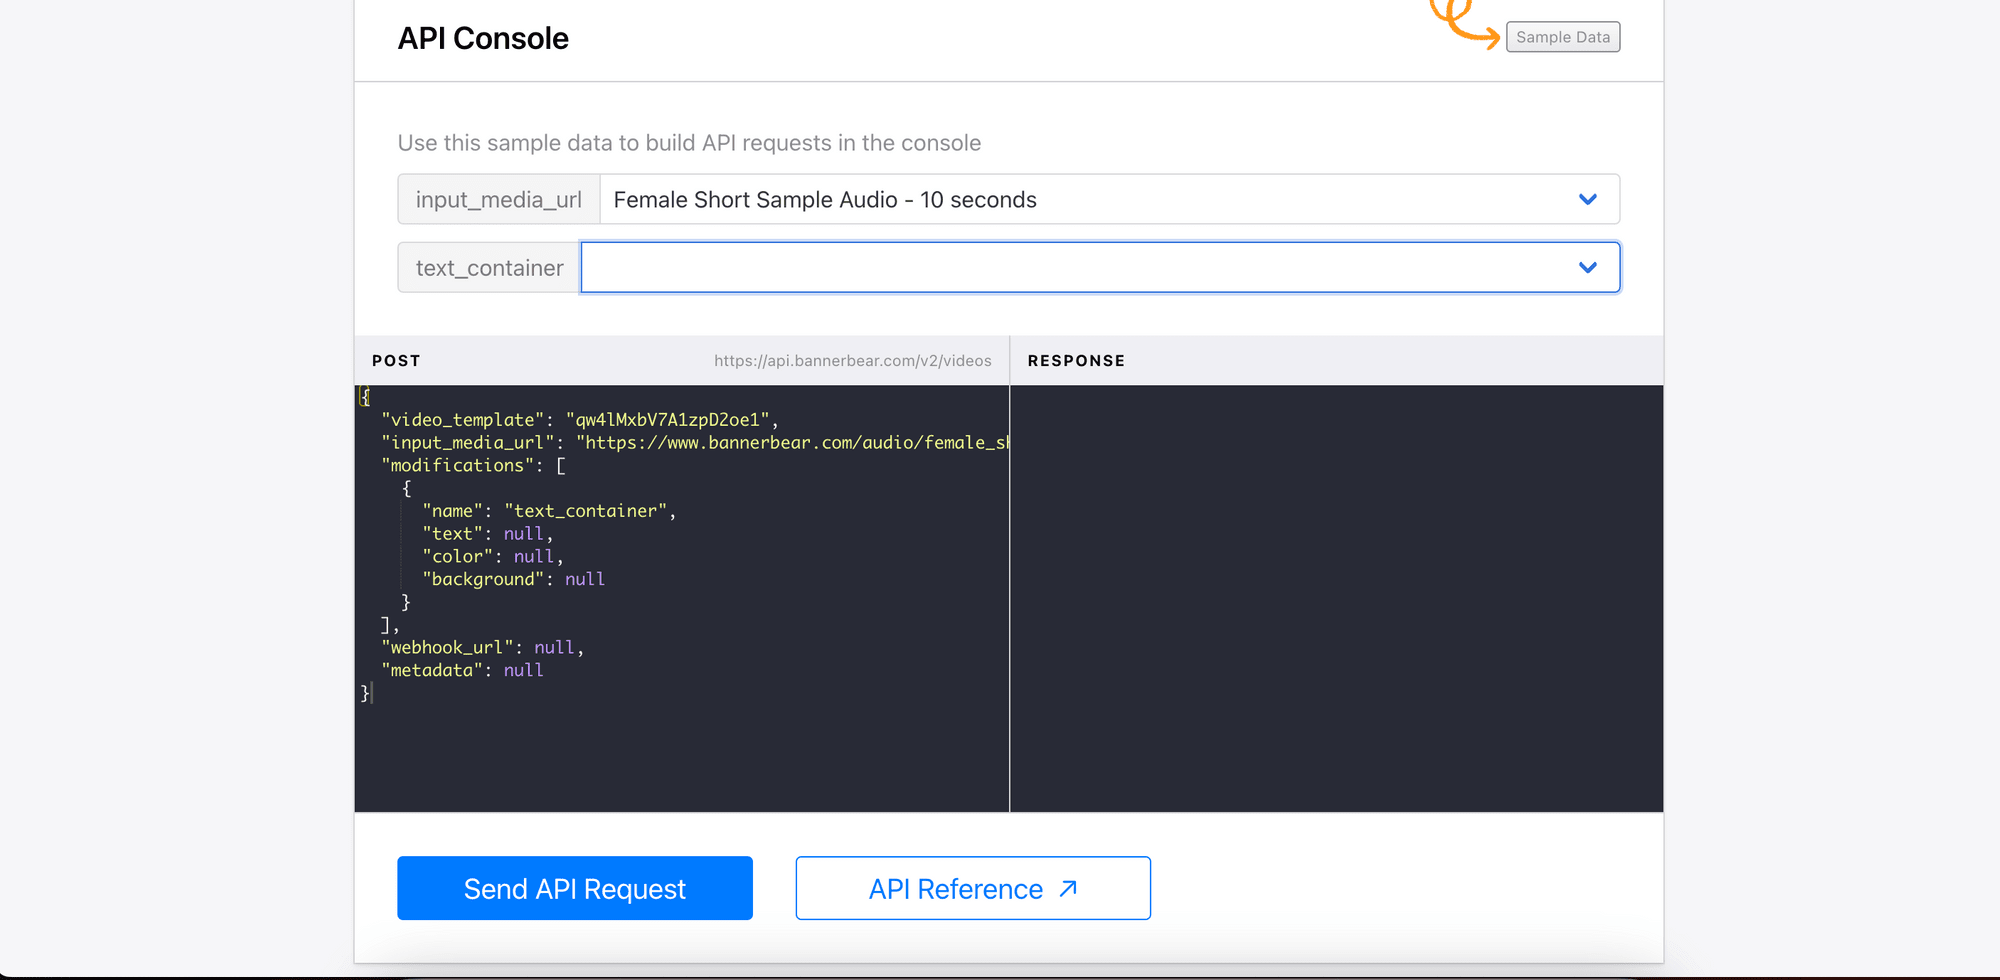
Then, choose “text_container” as the transcription layer and set the approval setting to “manually approve before rendering”. This allows you to double-check and approve the automatically generated closed captions before being added to the video. You can also change the max length, transcription engine (Google/OpenAI), language, etc.
After saving the template, you can test generating a video from the API console using the sample data:
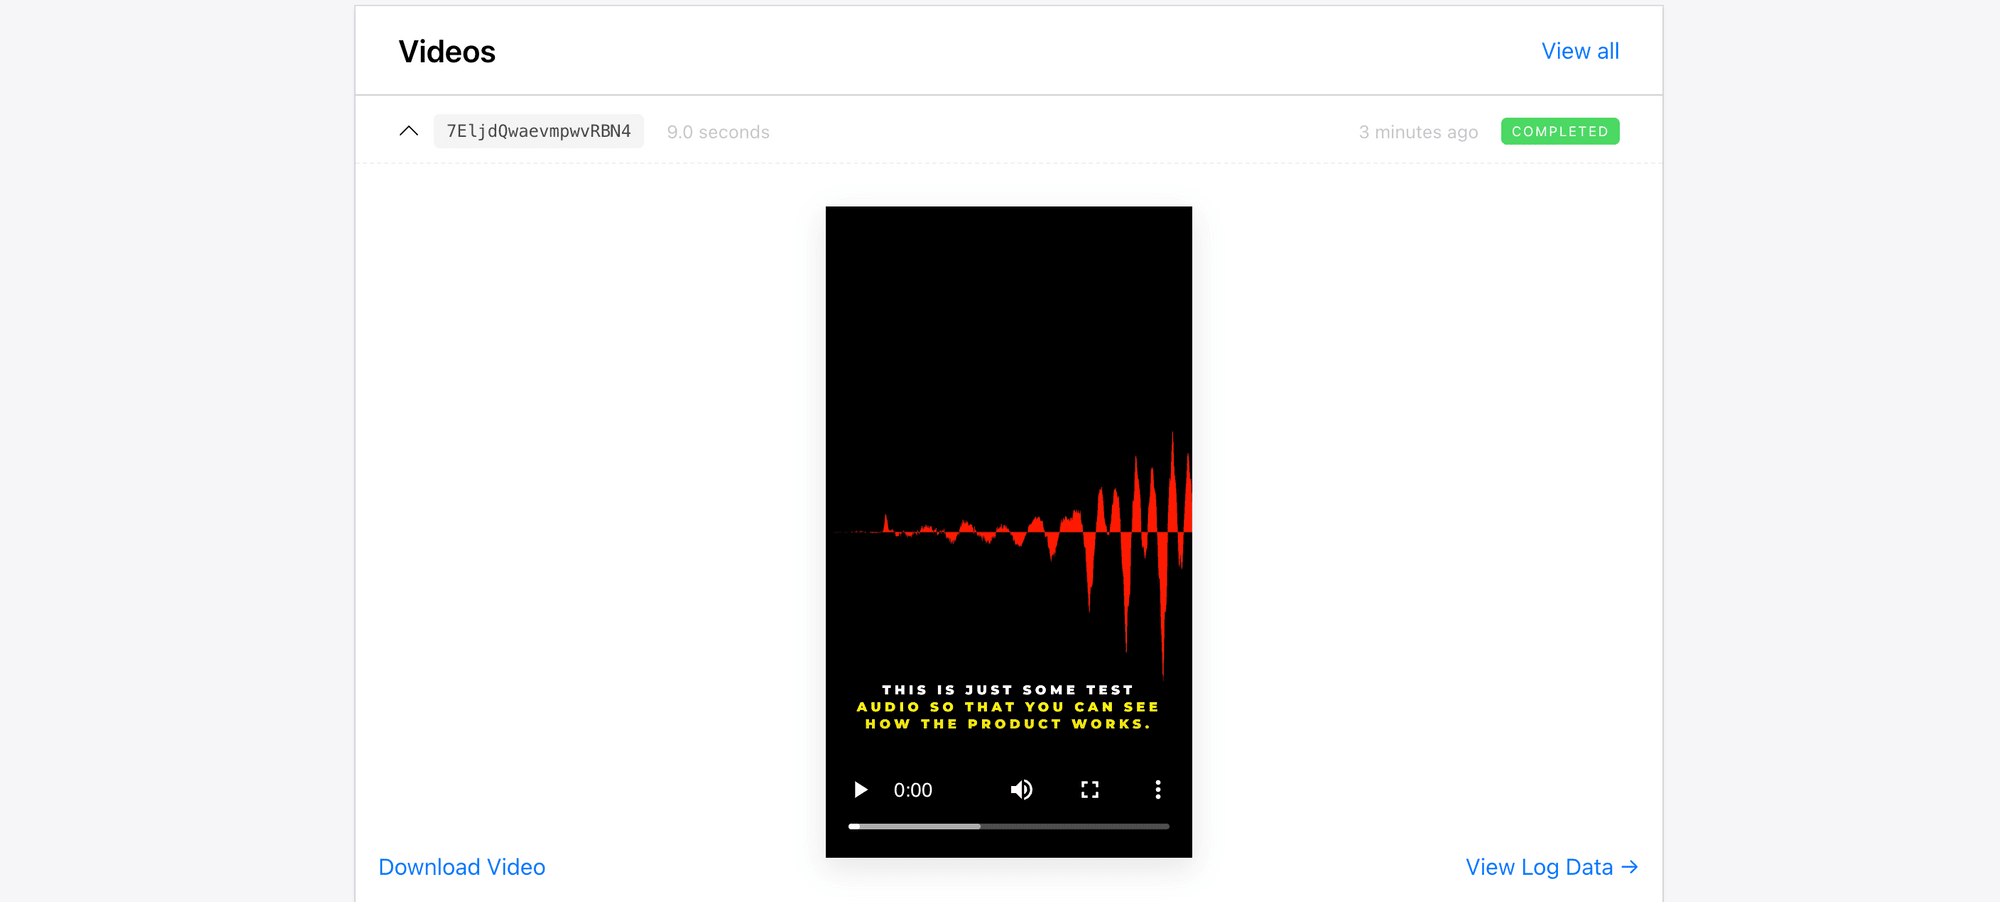
Once you send the API request and approve the transcription, the video will start rendering. The status will be shown as “Completed” when it’s done:
Adding Closed Captions to Videos (Node.js Code)
Now that the video template works successfully, you can access it using API and integrate the auto-transcription functionality into your application easily. To demonstrate how it works, let’s create an Express.js backend with a few endpoints for auto-transcribing and adding closed captions to videos using the template above.
Create a new folder for your project. In the terminal/command line, navigate to the project directory and run npm init to create a new Node.js project. Then, create a file named index.js for writing the code.
Step 1. Set up an Express Server
In the terminal/command prompt, run the command below to install Express:
npm i express
In index.js, paste the code below to create a simple Express app:
const express = require('express')
const app = express()
const port = 3000

app.use(express.json());

app.get('/', (req, res) => {
  res.send('Hello World!')
})

app.listen(port, () => {
  console.log(`Example app listening on port ${port}`)
})
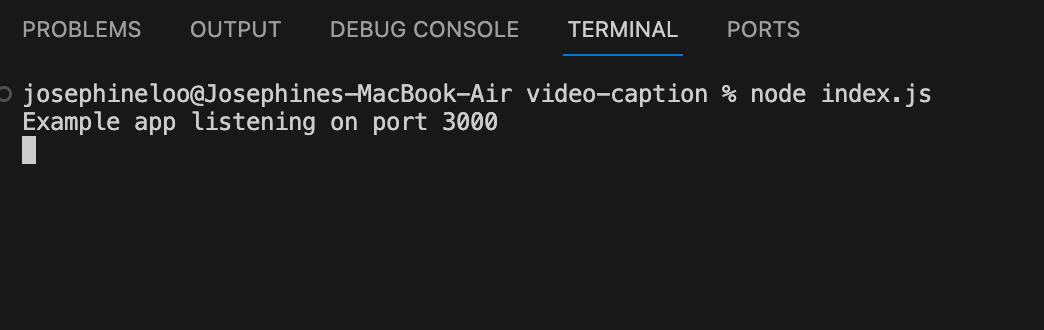
When you run node index.js in your terminal/command prompt, the app should be running at port 3000:
Step 2. Create Endpoints
In index.js, create two POST endpoints for generating transcription and adding closed captions to videos:
app.post('/generate-transcription', async (req, res) => {

});

app.post('/add-closed-captions', async (req, res) => {

})
Step 3. Install and Import Bannerbear
In the terminal/command line, install the Bannerbear Node.js library by running the command below:
npm i bannerbear
Then, create a new file named videoService.js and import the Bannerbear library at the beginning of the file :
const { Bannerbear } = require('bannerbear');
Next, create a new instance of Bannerbear using your API key:
const bb = new Bannerbear("your_api_key");
🐻 Bear Tips: You can get your Bannerbear API key and video template ID from your Bannerbear dashboard. For detailed instructions, refer to this tutorial.
Step 4. Generate the Transcription
In the videoService.js file, create two functions for starting the transcription process and retrieving the result:
exports.generateTranscription = async function (videoTemplateUid, videoUrl) {
  const res = await bb.create_video(videoTemplateUid, {
    input_media_url: videoUrl,
  });

  return res.uid;
};

exports.getTranscription = async function (videoUid) {
  let status = '';
  let res;
  while (status !== 'pending_approval') {
    res = await bb.get_video(videoUid);
    status = res.status;
  }

  return res.transcription;
};
🐻 Bear Tips: You can refer to the Bannerbear Node.js Guide and API reference for more details on how to use the API.
In index.js, add the code below to the /generate-transcription endpoint to pass the video template ID and video URL from the request body to the generateTranscription function for starting the transcription process. Then, pass the video ID returned to the getTranscription function to get the transcription result:
const videoService = require('./videoService');
...

app.post('/generate-transcription', async (req, res) => {
  const videoUid = await videoService.generateTranscription(req.body.videoTemplateUid, req.body.videoUrl);
  const transcription = await videoService.getTranscription(videoUid);

  res.json({
    videoUid: videoUid,
    transcription: transcription,
  });
});
The POST /generate-transcription endpoint returns a JSON containing the video ID and the transcription. Here’s a screenshot of a sample request on Postman:
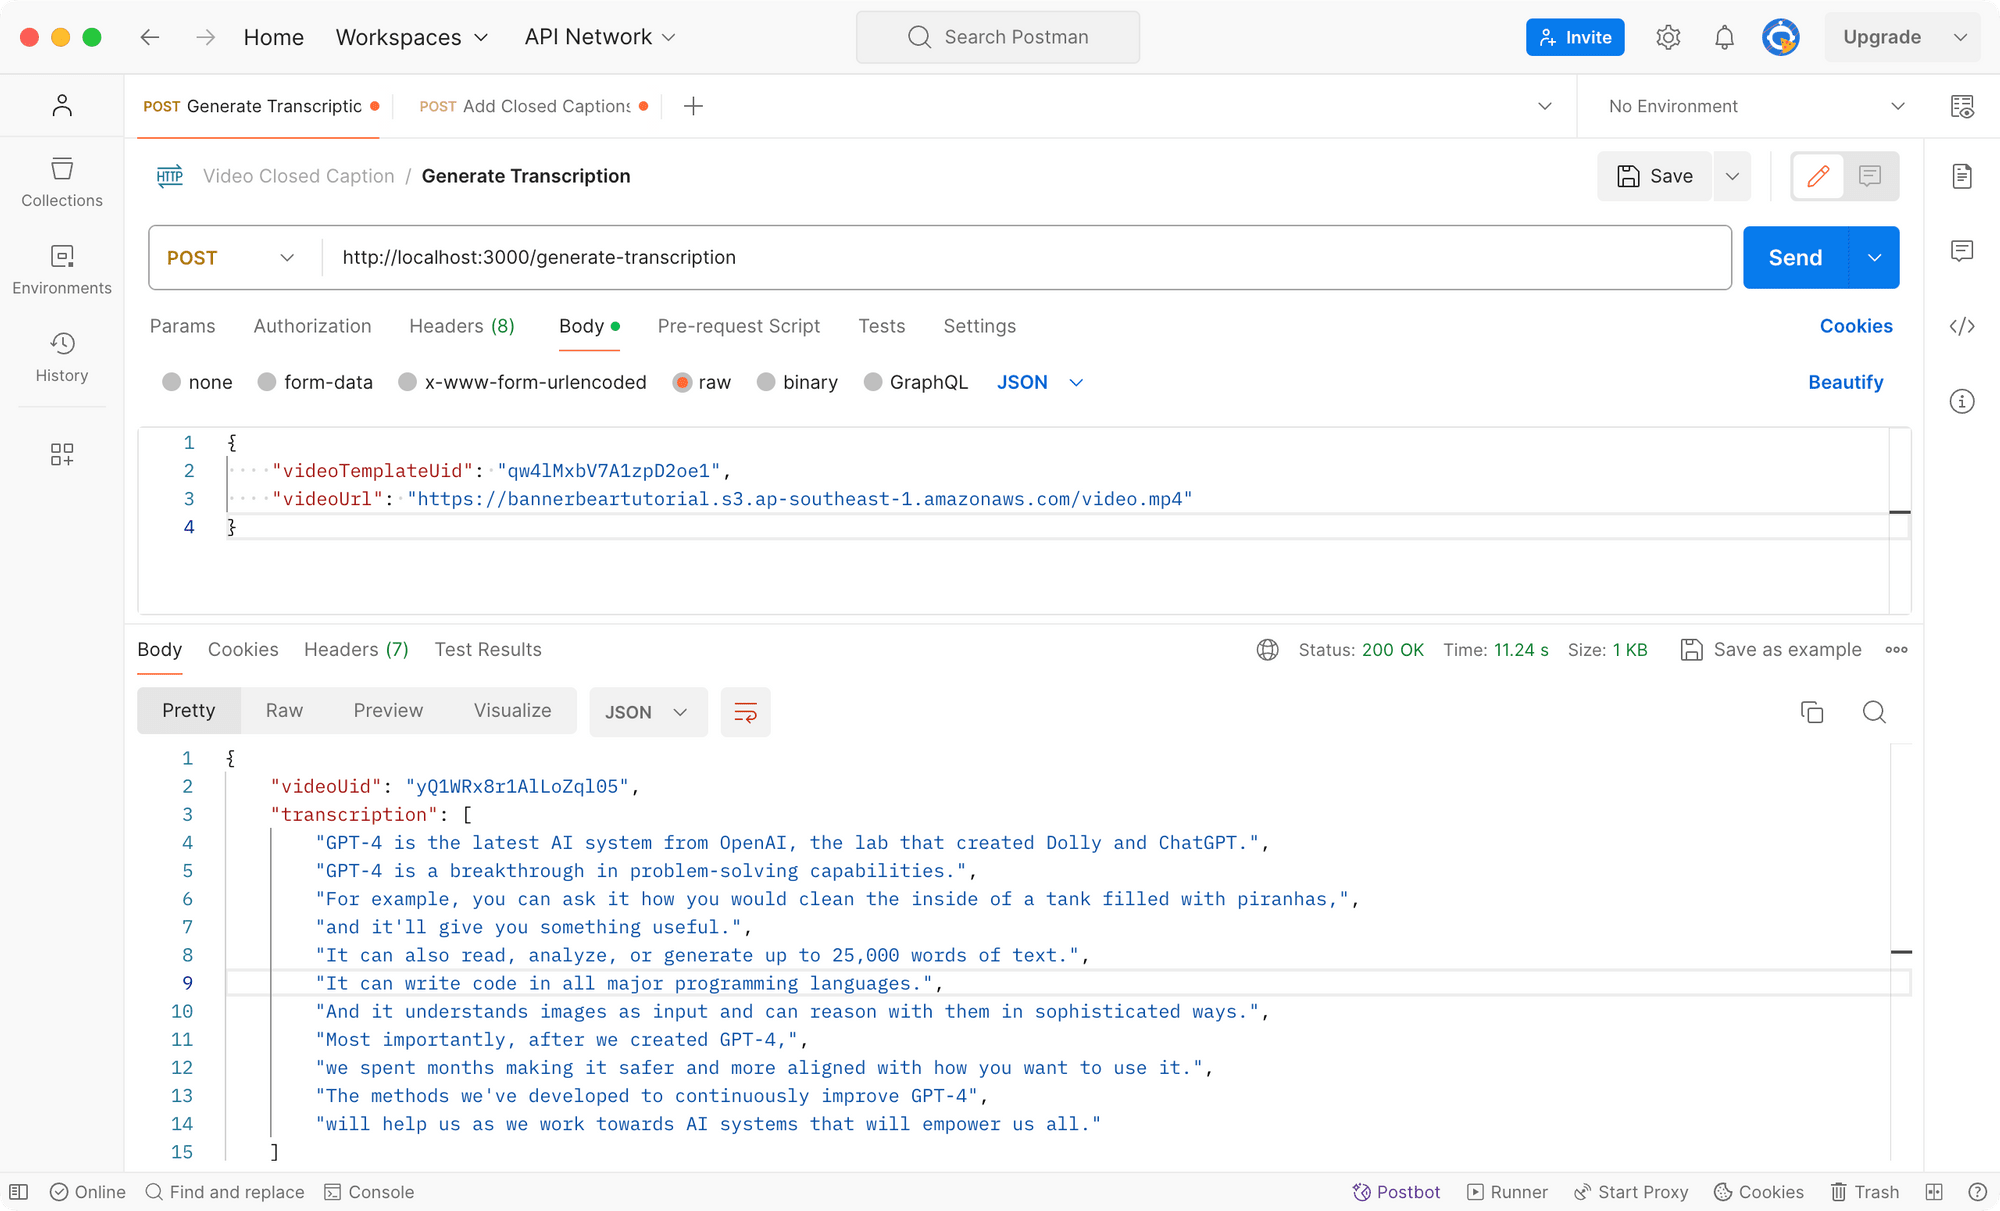
In your application’s frontend, you can display the transcription to users and let them modify or approve it. In the example above, the word “DALL·E” is misrecognized as “Dolly”. By letting users approve the transcription before adding it to the video, such mistakes can be corrected.
Step 5. Add Closed Captions to the Video
In videoService.js, create a function named addClosedCaptions for adding the approved transcription as closed captions to the video and return the final video URL:
exports.addClosedCaptions = async function (videoUid, transcription) {
  await bb.update_video(videoUid, {
    approved: true,
    transcription: transcription,
  });

  let status = '';
  let res;
  while (status !== 'completed') {
    res = await bb.get_video(videoUid);
    status = res.status;
    console.log(res);
  }
  return res.video_url;
};
In index.js, add the code below to the /add-closed-captions endpoint to pass the video ID and approved transcription to the addClosedCaptions function:
app.post('/add-closed-captions', async (req, res) => {
    const videoUrl = await videoService.addClosedCaptions(req.body.videoUid, req.body.transcription);
    res.json({
        videoUrl: videoUrl
    })
})
You can call the endpoint after the transcription is modified and approved by the user. As a result, the URL of the video with the closed captions added will be returned:
The POST /add-closed-captions endpoint returns the URL of the video with the closed captions added:
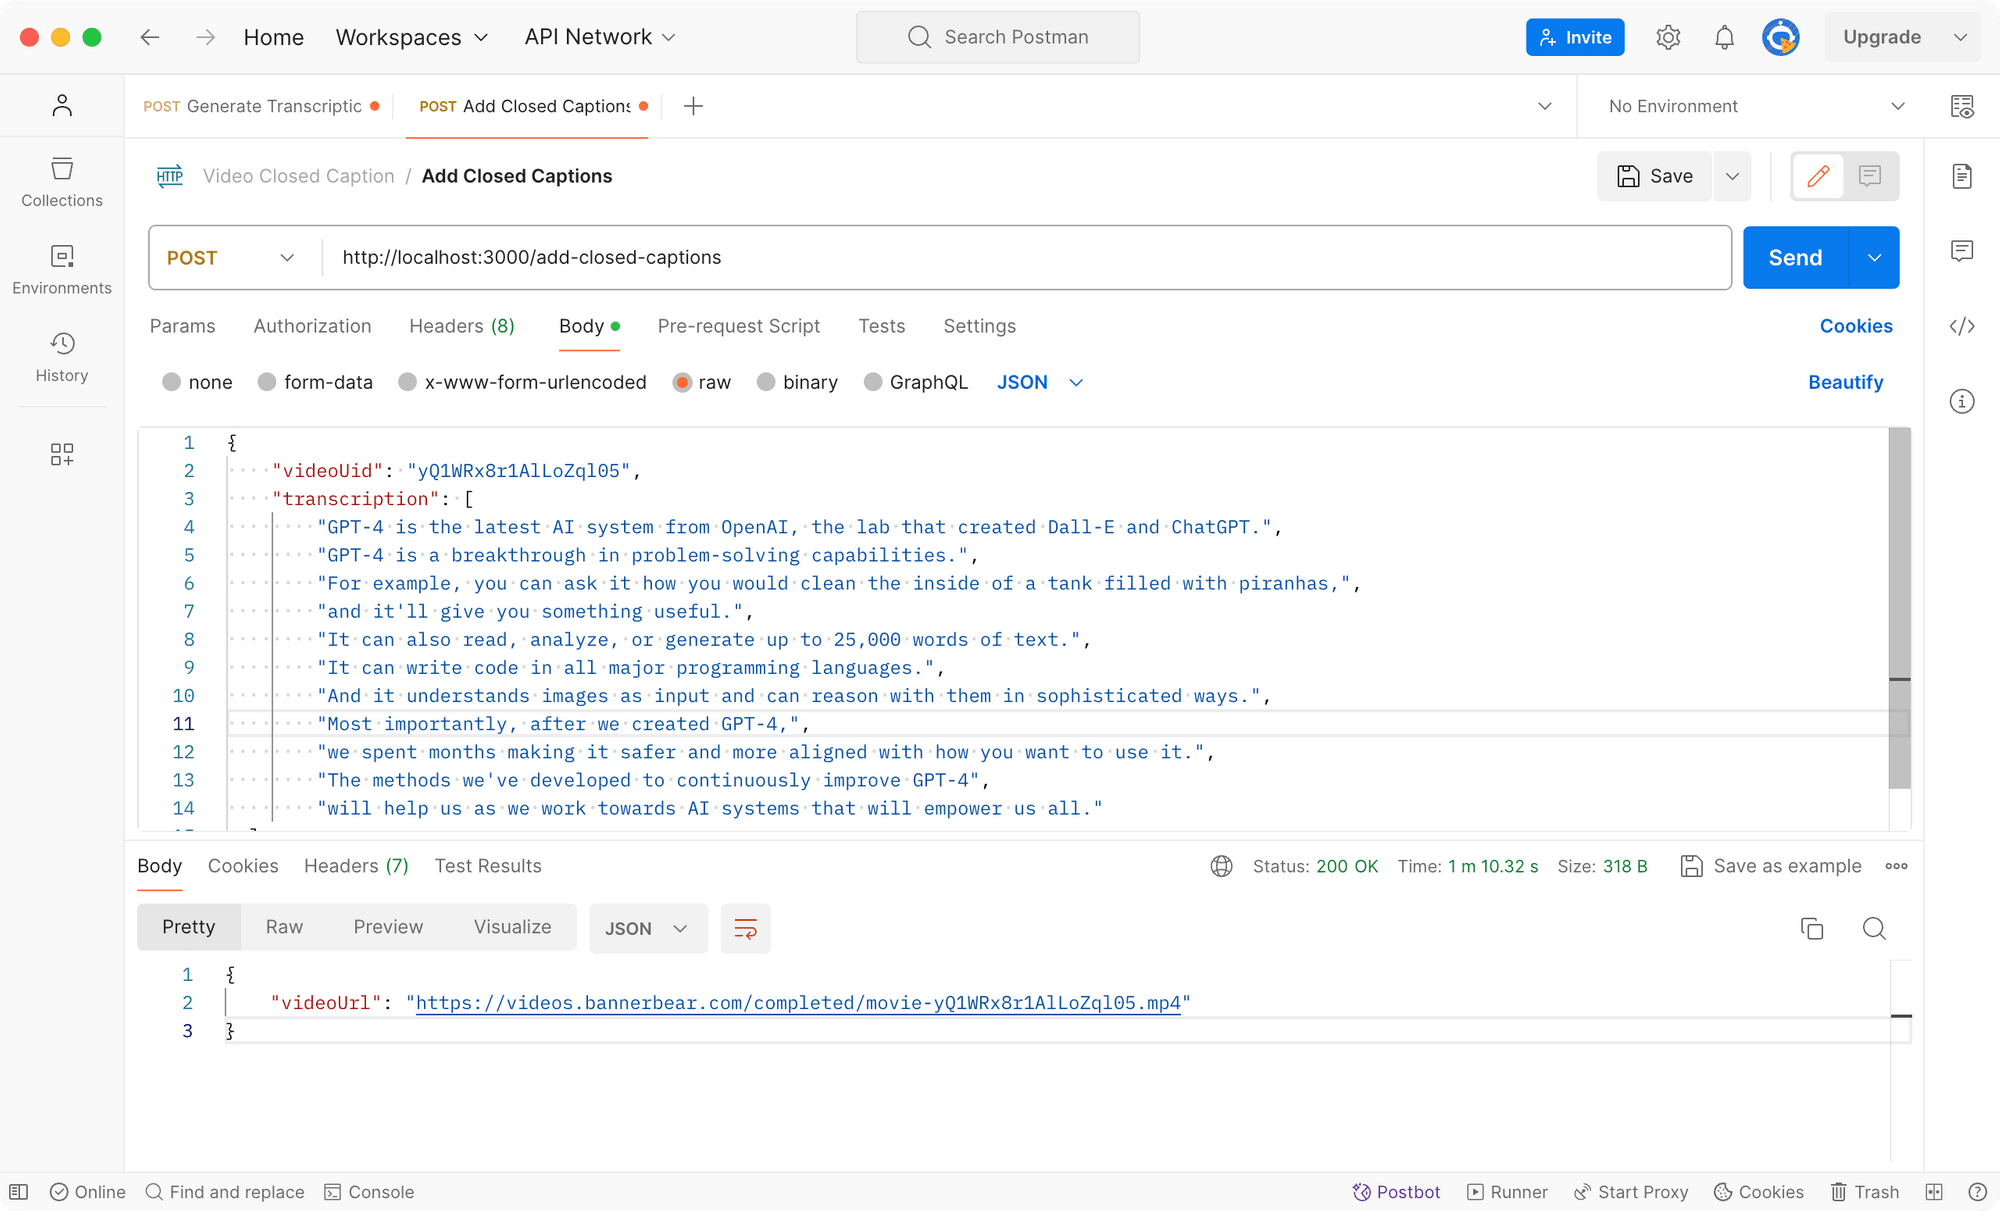
In your application, you can call this endpoint after the transcription is modified and approved by the user.
Here’s the result:
💻 View the full code on GitHub.
Conclusion
There you have it! You’ve now learned how to use Bannerbear’s API to integrate an auto-captioning feature for videos into your application. Using a third-party API like Bannerbear that has the feature that you’re looking to build can significantly reduce the time and effort needed. If you haven’t already, you can sign up for a Bannerbear account for free and start exploring its features!
