
How to Generate Event Marketing Graphics in Any Size from a Single Template Using Bannerbear (Node.js Tutorial)
Contents
Promoting an event requires creating visuals in different sizes—an Instagram story, a Facebook post, an X banner, a website hero, and maybe a printed flyer on top of that. Each platform has its own required dimensions and resizing them manually eats up time that could be spent on more important things.
If you're building an event management app or anything where users design promotional materials, here's something you can offer them: instead of asking users to resize their designs for every format themselves, you can use Bannerbear's API on the backend to handle it automatically, generating the right dimensions for Instagram, Facebook, Twitter/X, and more in one go.
Bannerbear's Adaptive Templates feature lets you design once and generate images at any size automatically. In this tutorial, we'll walk through how to set up an adaptive template in Bannerbear, configure the adaptive settings for each layer, and then use its API to generate event assets at multiple sizes programmatically:

We'll be writing a Node.js script to demonstrate this, but the same logic applies regardless of language. Just adapt the script we use in this tutorial to fit your own project.
Note: The adaptive sizing feature is only available in Bannerbear v5, which is currently not open to the public yet. Stay tuned for updates on when it becomes available!
What Are Adaptive Templates?
Adaptive Templates are a feature in Bannerbear V5 that let you define rules for how each layer in your design repositions and resizes automatically when you request a different canvas size via the API.
Instead of creating and maintaining separate templates for every dimension, you design one template and configure rules that tell Bannerbear how each object should behave when the canvas grows or shrinks.
Pre-requisites
To follow along with this tutorial, you'll need:
- A Bannerbear account
- Node.js installed
🐻 Bear Tip: For reference, this tutorial uses Node.js v25+.
How to Generate Event Marketing Graphics in Any Size from a Single Template Using Bannerbear
Step 1. Design Your Template in the Bannerbear Editor
Open the Bannerbear template editor and build your event poster at its base size. In our example, we're working with a social media post template at 800 × 800px:
Once your design looks good at the base size, it's time to configure the adaptive settings for each layer.
Step 2. Configure Adaptive Settings for Each Layer
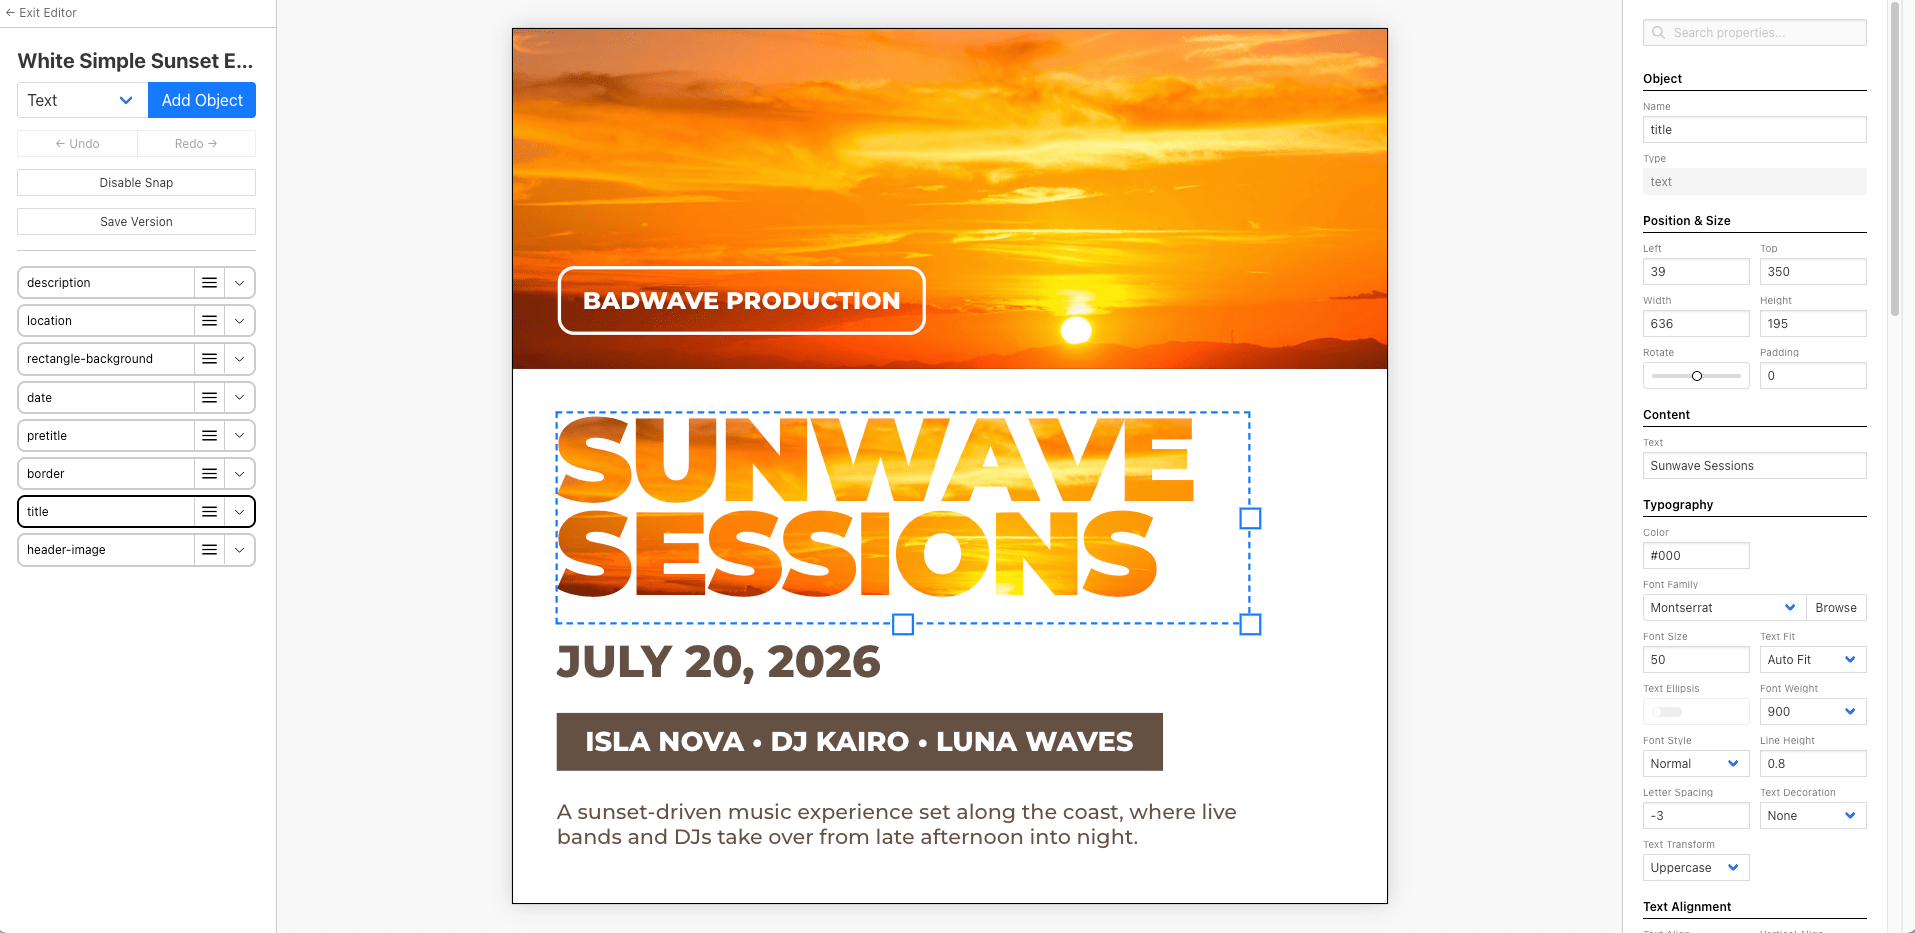
Select each layer in the editor and look at the Adaptive Settings panel in the right sidebar:
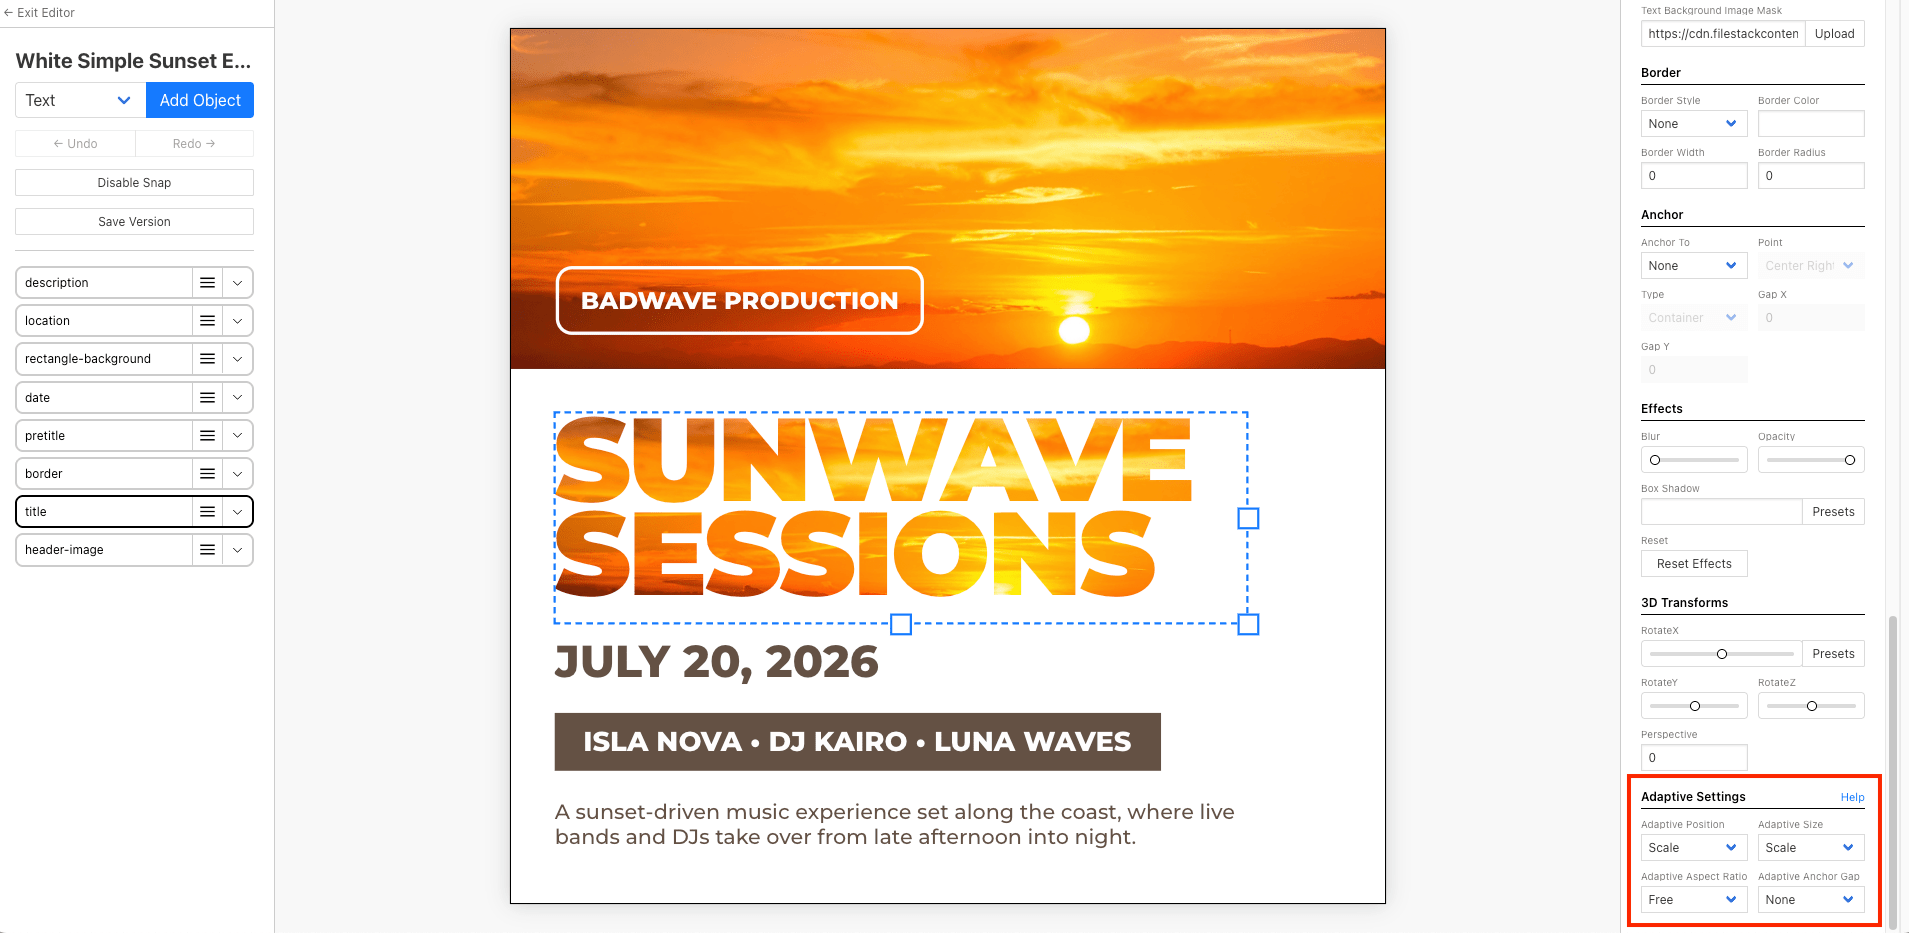
Here's how we configured the layers for every layer in the template above:
- Adaptive Position:
Scale - Adaptive Size:
Scale - Aspect Ratio:
Free - Adaptive Anchor Gap:
None
This makes the objects in the template grow to fill the full width and adjust its position proportionally as the canvas changes, keeping the visual hierarchy intact across sizes.
You can click “Help” to see the more information about the settings:

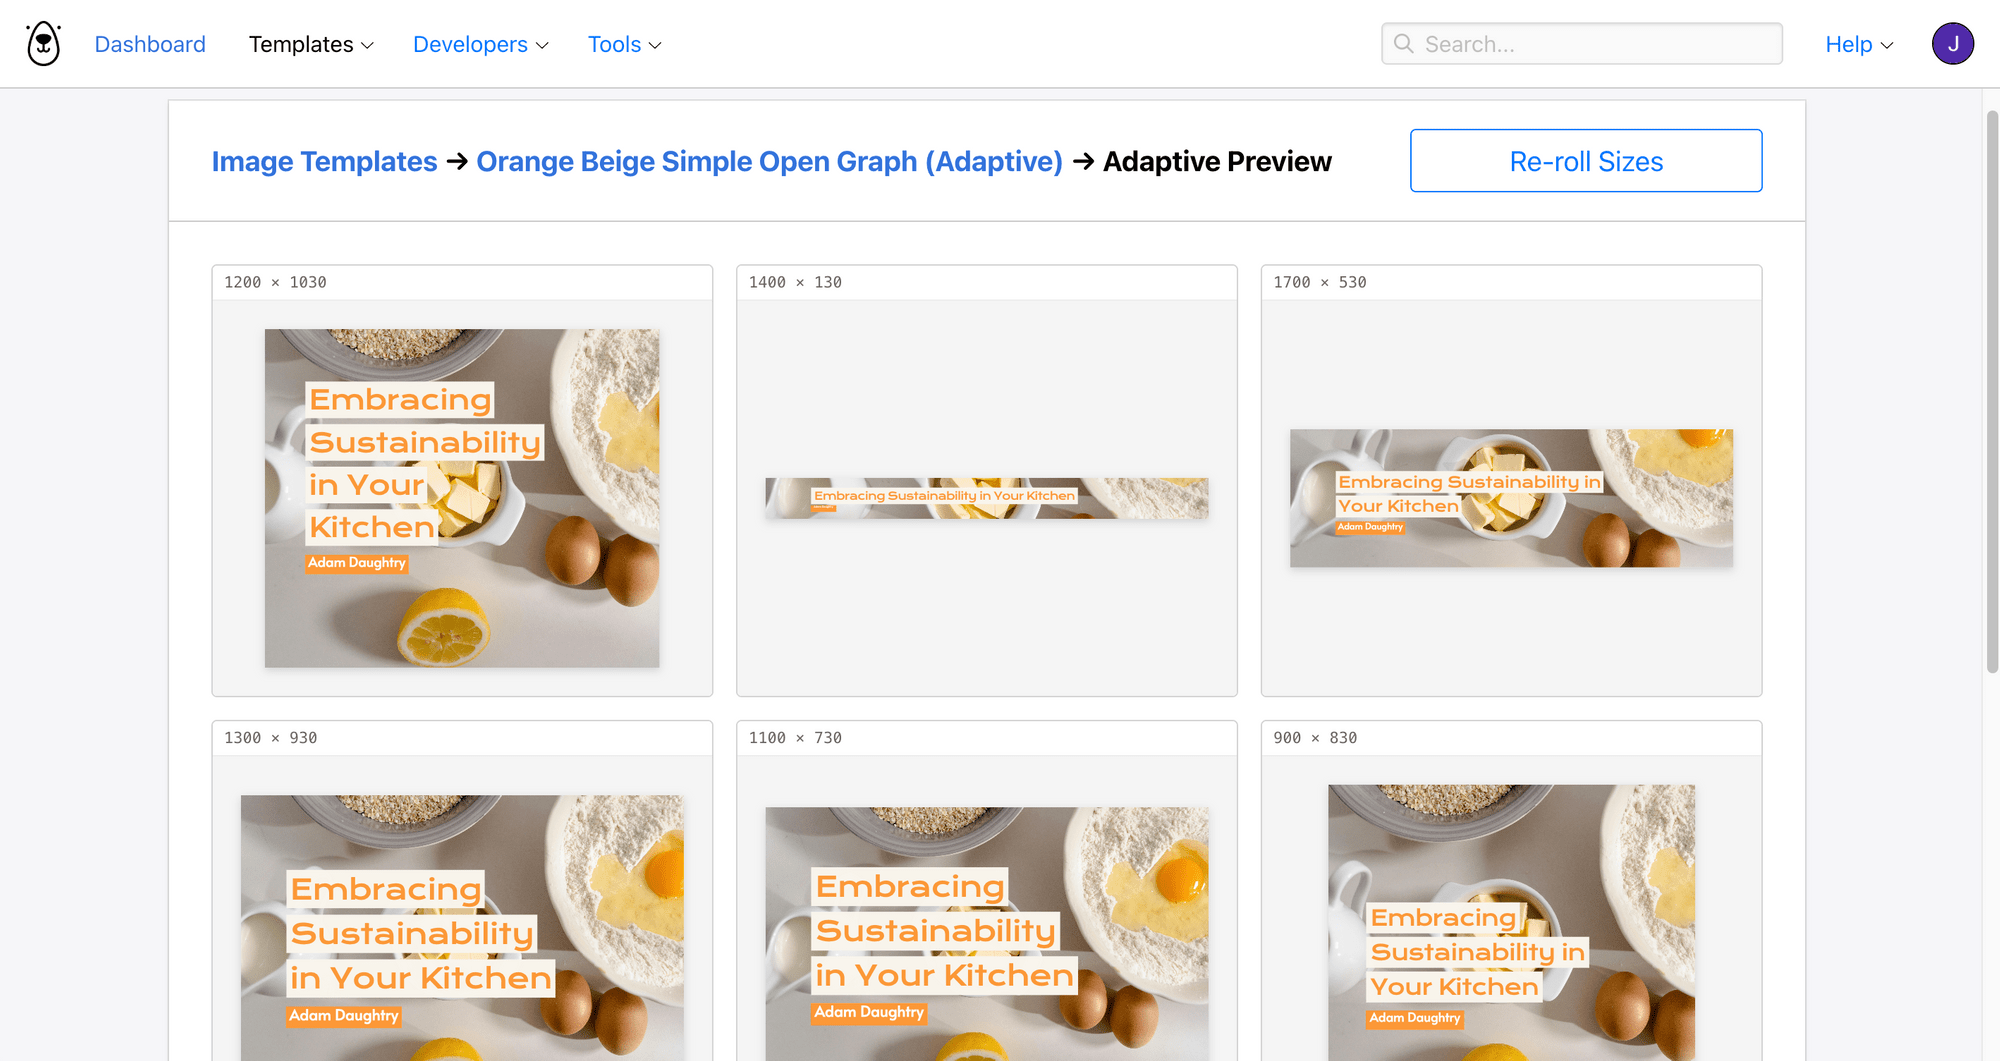
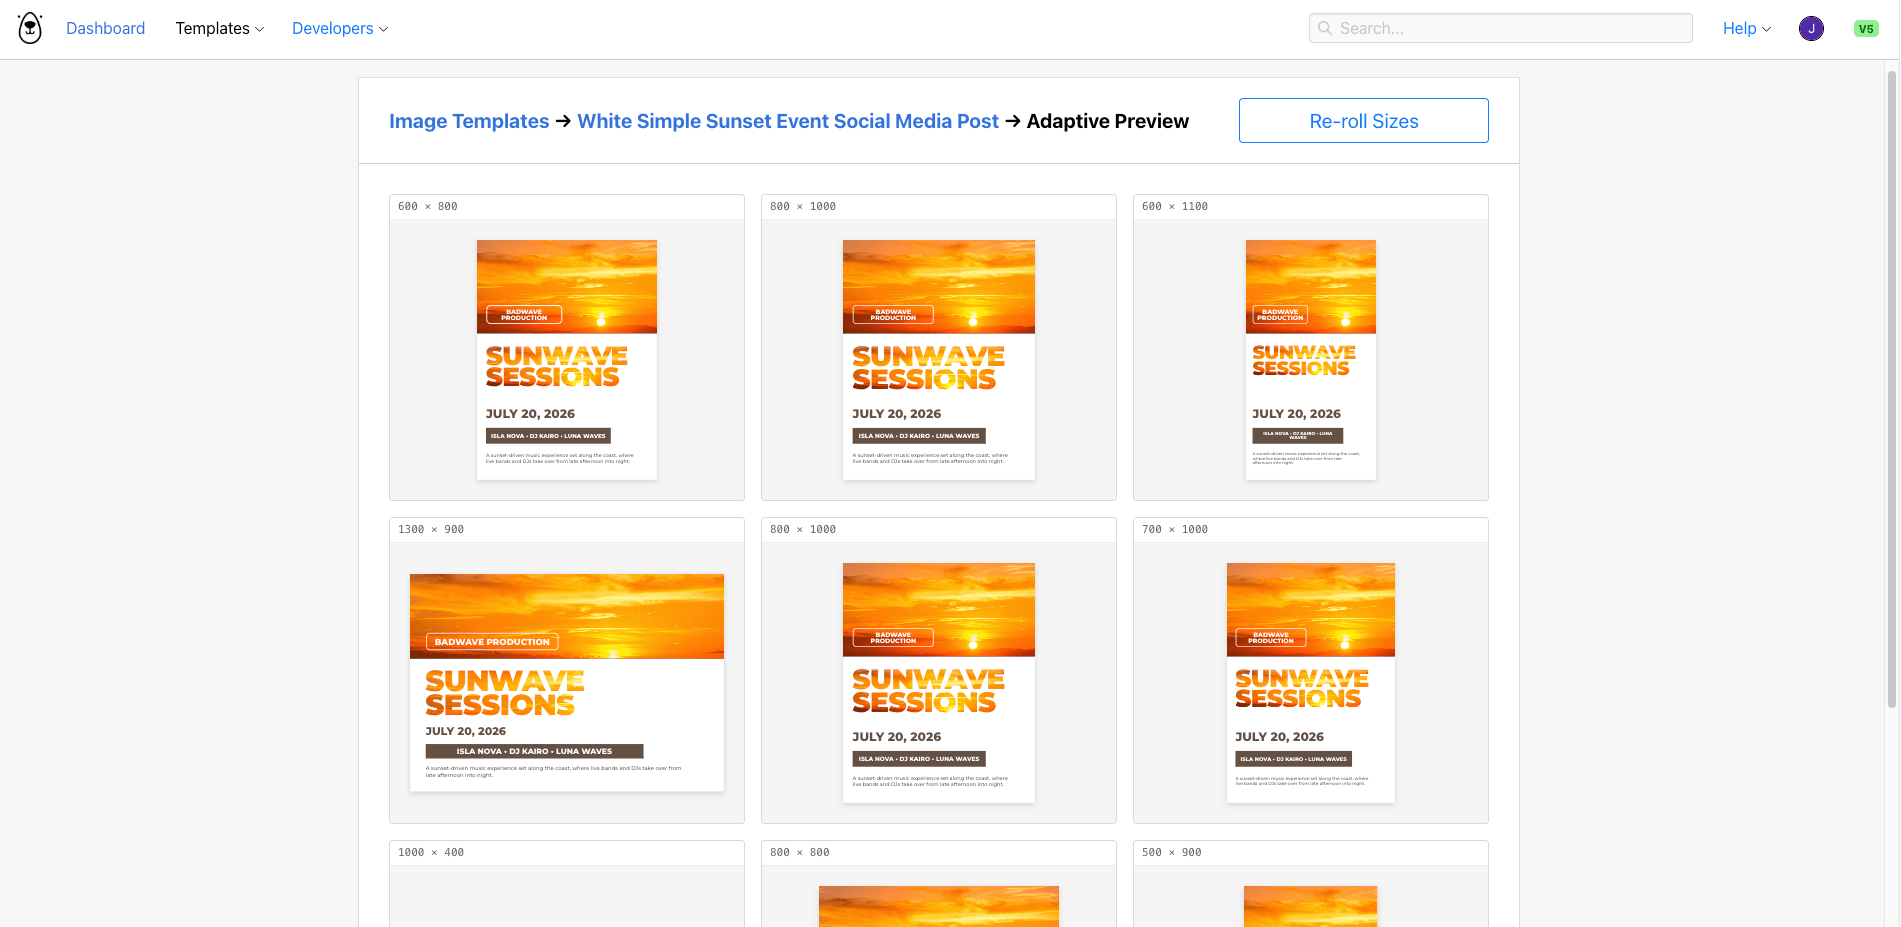
And click “Open Adaptive Preview” to see how your template renders at various dimensions:
Once you’re happy with how they look, save and exit the template editor.
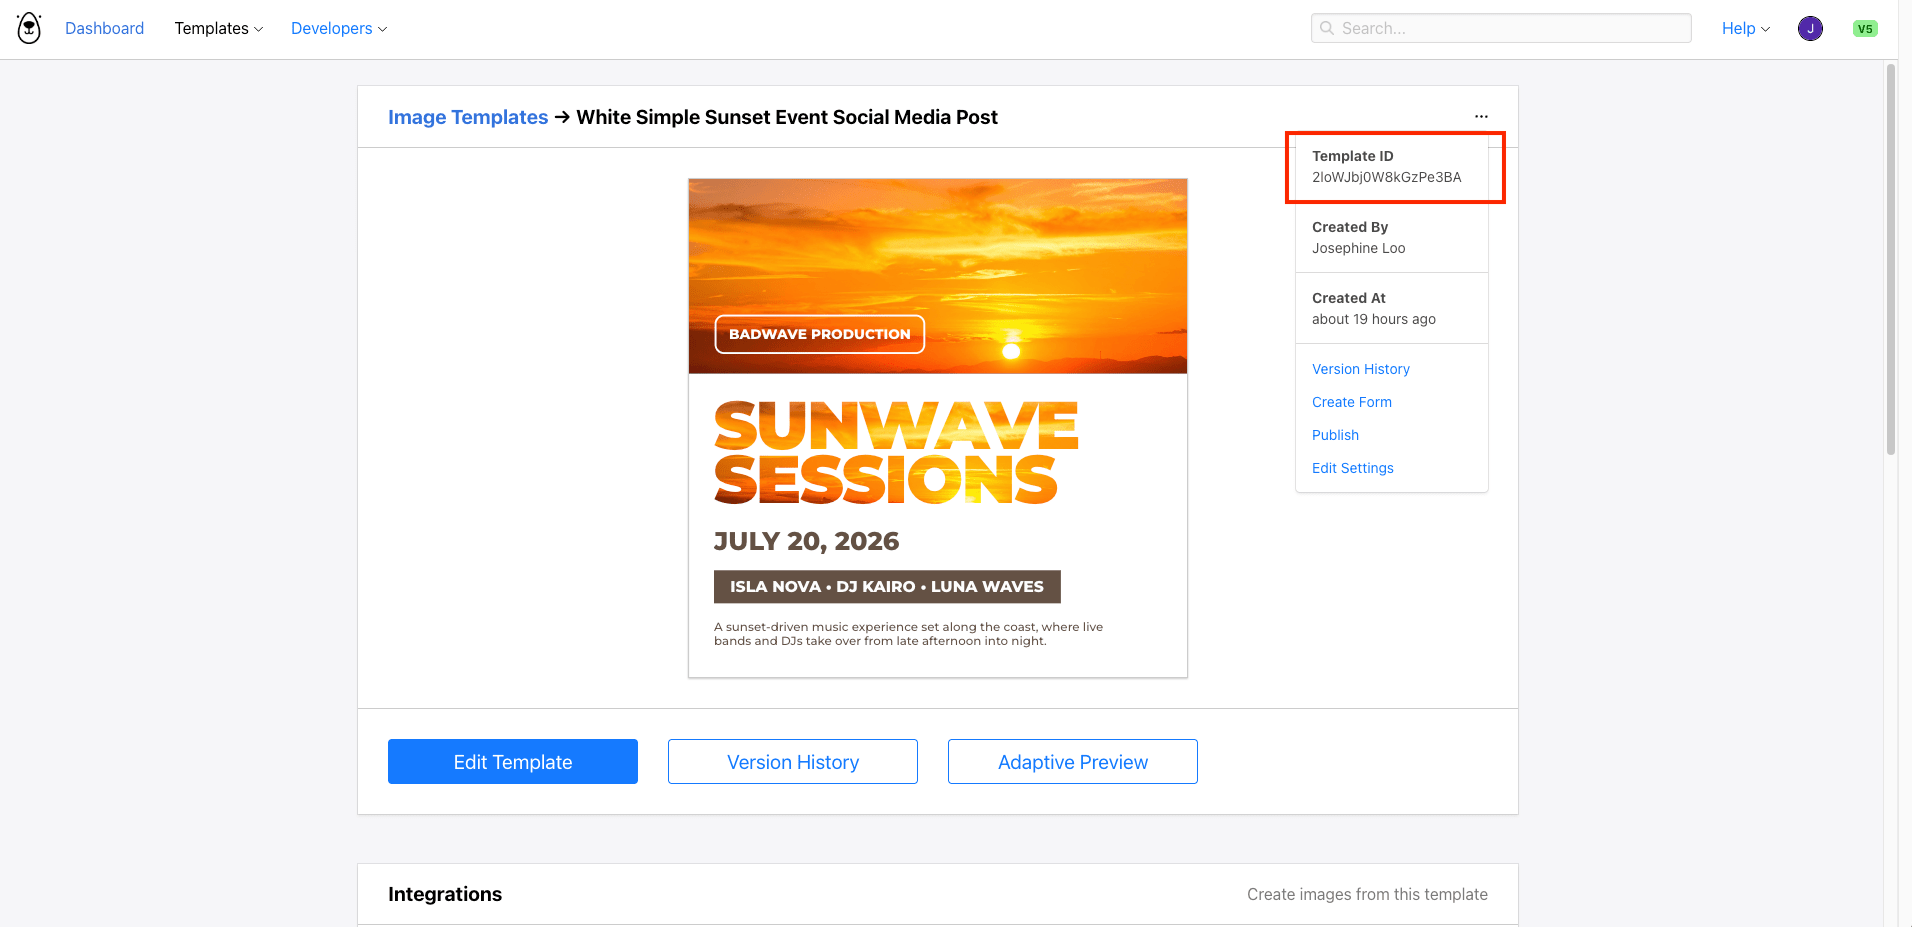
Step 3. Get Your Template ID and API Key
To call the Bannerbear API, you'll need two things—your template ID and an API key.
You can find the template ID in the top right corner of your template page:
For the API key, head to Developers → API Keys and create a new one there:
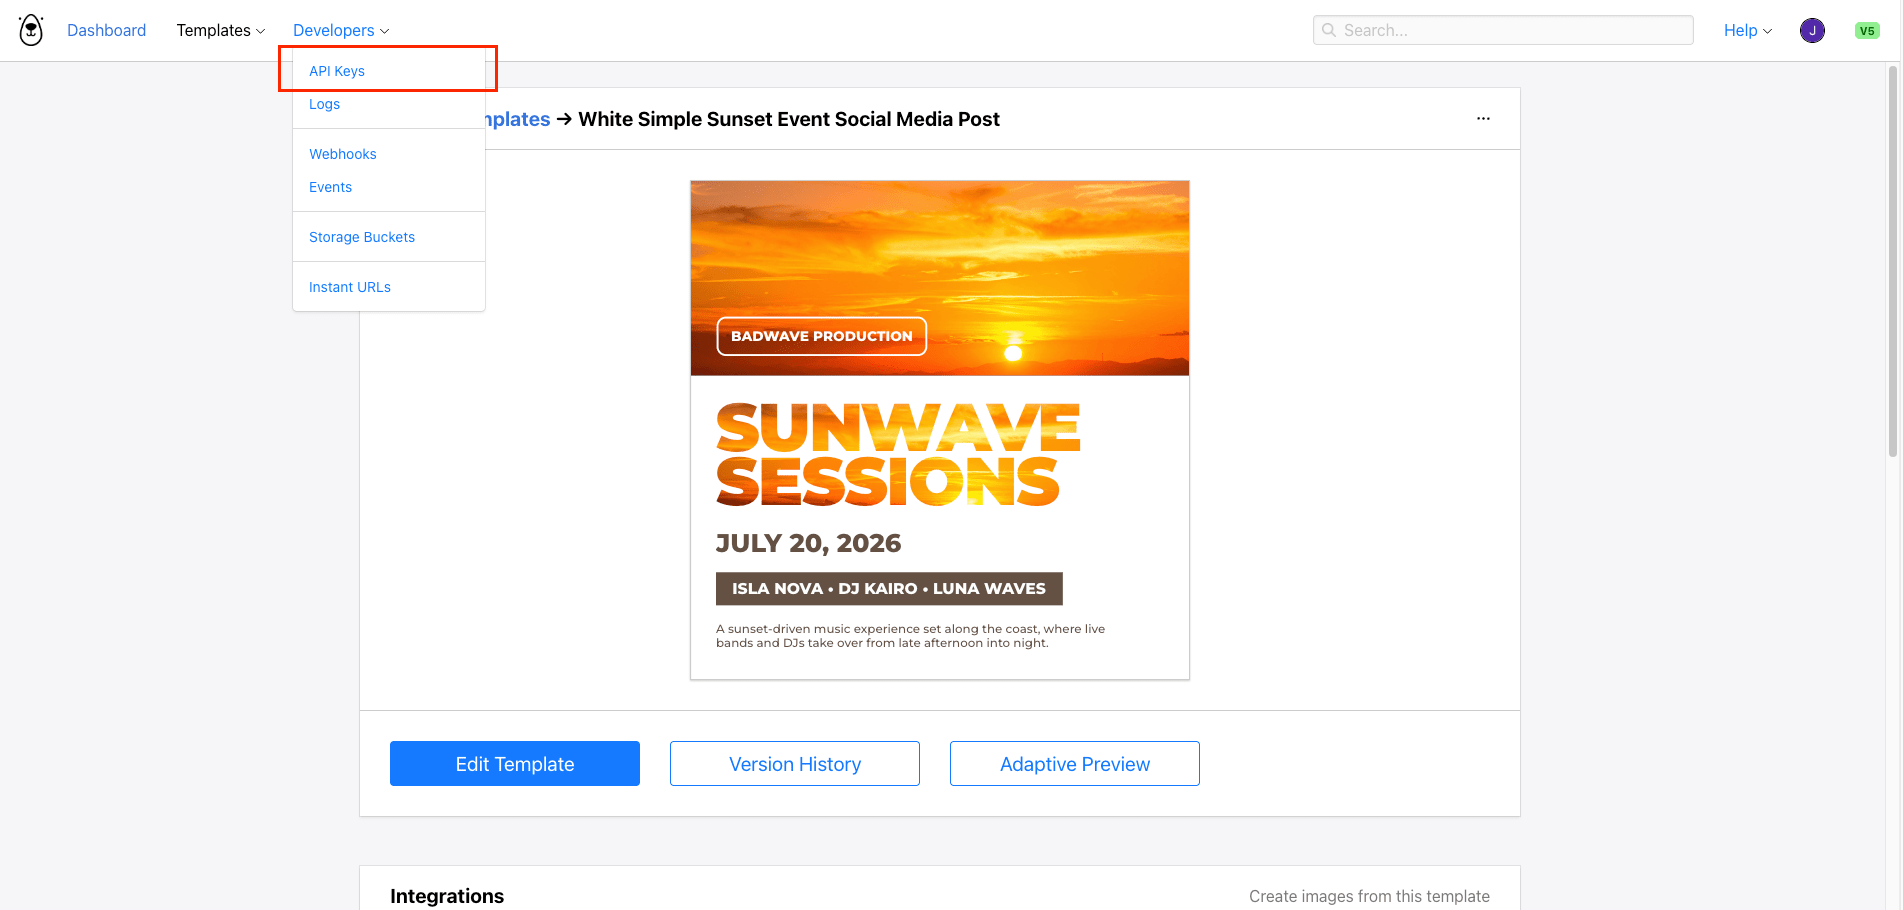
Copy both values. We’ll add both to our project's .env file later.
Step 4. Set Up Your Node.js Project
Create a new folder for your project and open a terminal in that directory.
mkdir event-assets-generator
cd event-assets-generator
npm init -y
Next, install dotenv so we can load environment variables from a .env file:
npm install dotenv
Create a .env file in the root of your project and add your API key and template UID:
BANNERBEAR_API_KEY=your_bannerbear_api_key_here
BANNERBEAR_TEMPLATE_UID=your_template_uid_here
Then, create your index.js file and load the variables at the top:
require('dotenv').config();
const express = require('express');

const API_KEY = process.env.BANNERBEAR_API_KEY;
const TEMPLATE_UID = process.env.BANNERBEAR_TEMPLATE_UID;
const BASE_URL = 'https://sync.api.bannerbear.com';
Step 5. Write a Function to Generate an Image at a Custom Size
The Bannerbear V5 API lets you override the template's width and height per request using modifications.template. This is how you tell the API to render your adaptive template at a different canvas size:
async function generateEventImage(width, height) {
  const response = await fetch(`${BASE_URL}/v5/images`, {
    method: 'POST',
    headers: {
      'Authorization': `Bearer ${API_KEY}`,
      'Content-Type': 'application/json',
    },
    body: JSON.stringify({
      template: TEMPLATE_UID,
      modifications: {
        template: {
          width: width,
          height: height,
        }
      },
    }),
  });

  const data = await response.json();
  return data;
}
The API will respond immediately with a 202 Accepted status and a pending image object. The status field will be pending until rendering is complete, at which point it changes to completed and the files object contains the URLs to your generated image.
Step 6. Generate Images for Multiple Sizes
Define the list of sizes you want to generate. As a starting point, these sizes cover the most common social media formats:
const sizes = [
  { label: 'Instagram Post (Square)', width: 1080, height: 1080 },
  { label: 'Instagram Story / Reel', width: 1080, height: 1920 },
  { label: 'Facebook Post', width: 1200, height: 630 },
  { label: 'X Post', width: 1600, height: 900 },
  { label: 'Event Flyer (Portrait)', width: 800, height: 1100 },
];
Lastly, add a self-invoking function to call the function we created earlier to generate images for each size in the array:
(async () => {
  console.log('Generating event assets...\n');

  sizes.forEach(async size => {
      const image = await generateEventImage(size.width, size.height);
      console.log(`✓ ${size.label} (${size.width}×${size.height})`);
      console.log(` JPG: ${image.files.jpg}`);

  });

})();
Step 7. Run the Script
To test it, run the command below in your terminal:
node index.js
You should see output like this:

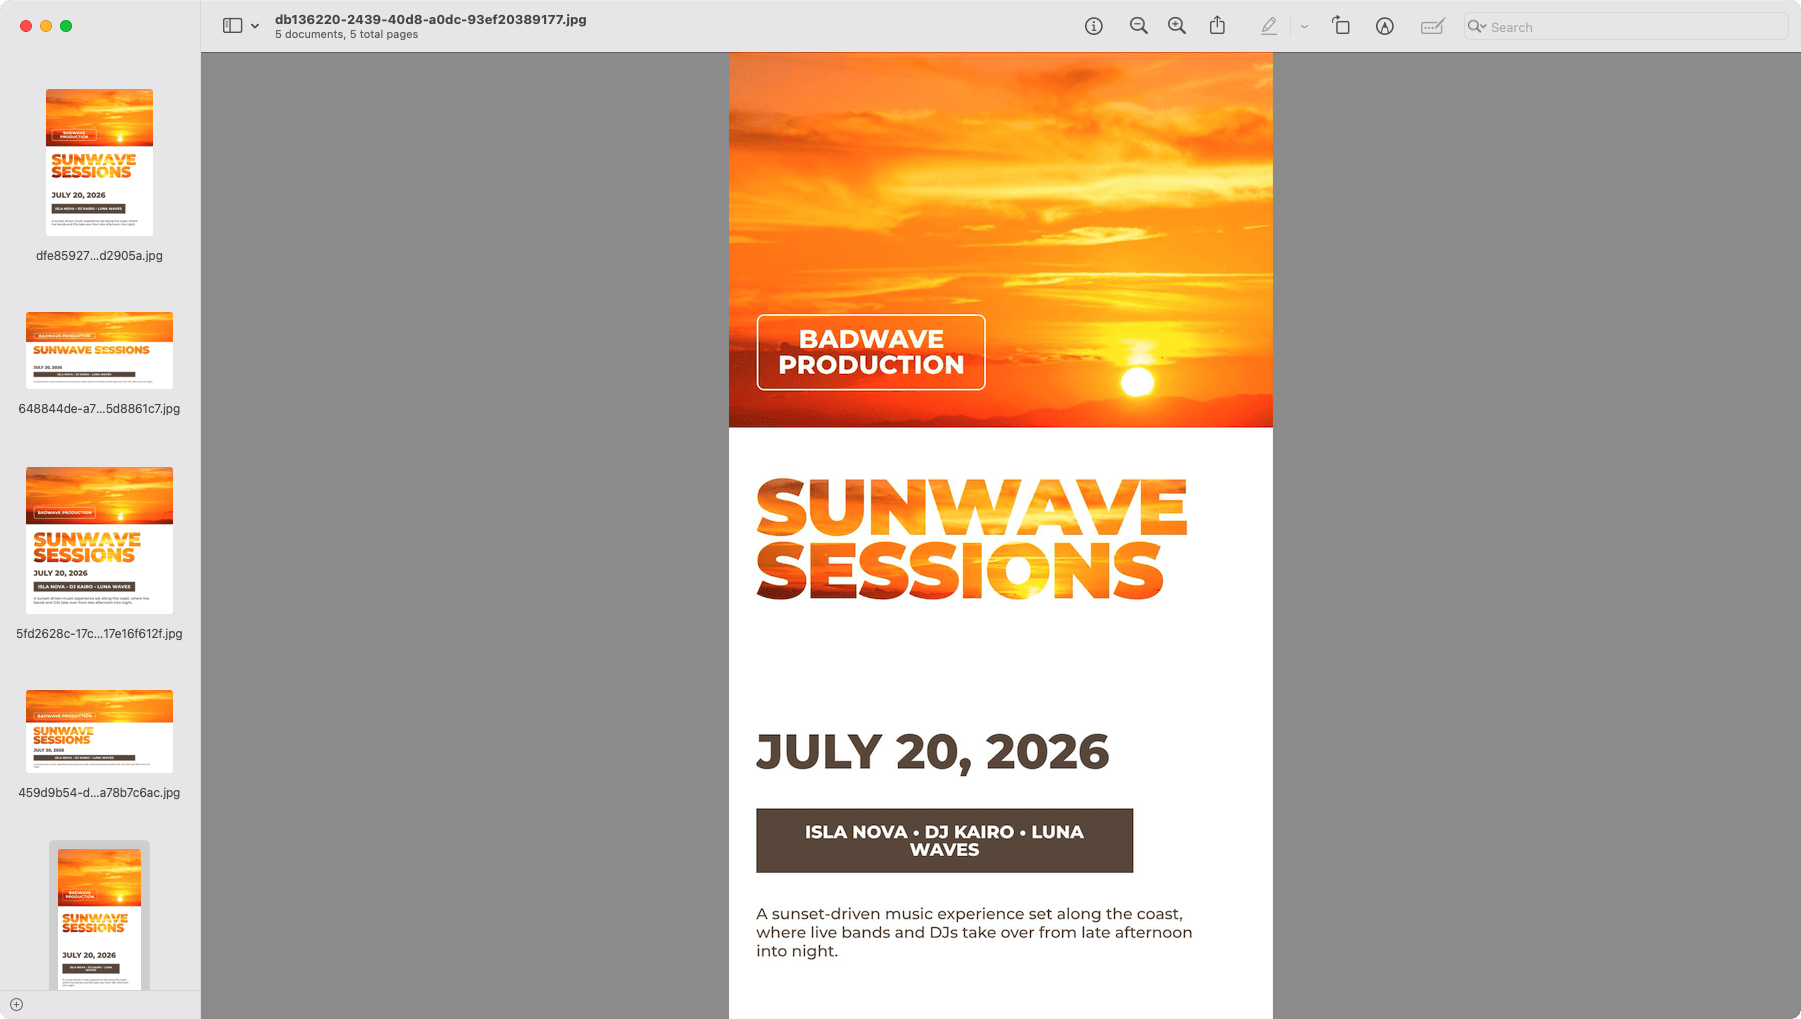
Each URL points to a fully rendered image of your event template at the corresponding size. Open any of them in your browser to verify the layout looks right:
If a layer is out of position or the text is too small at a particular size, head back to the template editor and tweak the adaptive settings for that layer.
Conclusion
That’s it! With a single Bannerbear adaptive template and a few lines of JavaScript, you can generate a complete set of event marketing visuals in every format you need all from one API call. There's no manually duplicating templates or repositioning elements.
If you'd like to be notified as soon as Bannerbear V5 launches, sign up for your free account. In the meantime, the current version of Bannerbear is fully capable and a great place to start!
Here are a few tutorials to get you going:
- Bannerbear Beginner Guide: How to Start Generating Images Dynamically in JavaScript
👉🏻 a great starting point if you're new to the API - Template Set: Batch-Generate Images in Different Dimensions Using Bannerbear (Node.js)
👉🏻 the current-version approach to generating multiple image sizes - How to Build a "Share" Feature That Auto-Generates Quote Cards Using Bannerbear
👉🏻 a practical example of API-driven image generation in a real app - How to Build an AI-Powered Quote Generator with ChatGPT and Bannerbear
👉🏻 for combining AI with automated image generation
