
How to Crop and Resize Videos Using FFmpeg
Contents
With the popularity of video content, it is estimated that video streaming and video downloads will contribute to 82% of global internet traffic in 2022. This makes cropping videos into different aspect ratios to meet the video specifications of different platforms like Youtube, Instagram, TikTok, Facebook, etc. a day-to-day task for video editors, content creators, and small business owners.
Besides that, video clips used for long-form videos don’t always have the same dimension. Therefore, cropping and resizing is often required to merge videos of different dimensions in video production. If you’re looking for a free tool to crop videos programmatically, here’s a great option—FFmpeg.
In this tutorial, we’ll learn how to use FFmpeg to crop and resize videos to fit different aspect ratios or remove unwanted black borders.
What is FFmpeg
FFmpeg is a complete, cross-platform solution to record, convert and stream audio and video. It can decode, encode, transcode, mux, demux, stream, filter and play pretty much any media file in any format. It is also highly portable as it compiles and runs in a wide variety of build environments, machine architectures, and configurations like Linux, Mac OS X, Microsoft Windows, etc.
It contains multiple tools for end-users to convert, play and analyze media files and libraries for developers to use in different applications.
Pre-requisite
You will need to download FFmpeg to crop and resize videos following this tutorial. For reference, the version of FFmpeg used in this tutorial is v5.0.1.
Basic Command
FFmpeg has many filters that can help you to manipulate video files easily (you can find related tutorials in the end of this tutorial). To crop videos into any dimension, we are going to use the "crop" filter.
The filter works with this simple command:
ffmpeg -i input.mp4 -vf "crop=w:h:x:y" output.mp4
vf indicates the usage of a video filter.
crop is the name of the filter.
w:h is the width and height of the output video.
x:y is the coordinate where the video will be cropped.
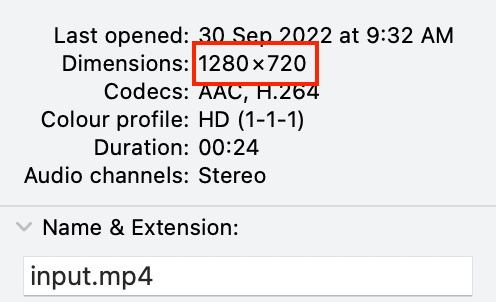
Checking the Dimension of a Video
Before using the command above to crop an input video into a new dimension, let’s check the original dimension of the video.
The size of the sample video that I’m using for this tutorial is 1280x720 pixels, which is a 16:9 video.
You can run the ffprobe command below in your terminal to find out your video's dimension:
ffprobe -v error -select_streams v:0 -show_entries stream=width,height -of csv=s=x:p=0 input.mp4
The output should show the video dimension in width x height.

Alternatively, you can read the dimension from your system’s file info.
This is to make sure that the size that you specify when cropping the video is smaller than the original input video. For example, if you try to crop a 640x360 pixels (16:9) video into a 4:3 video with the same width, the command will fail as the height of the video will be 480 pixels according to the aspect ratio.

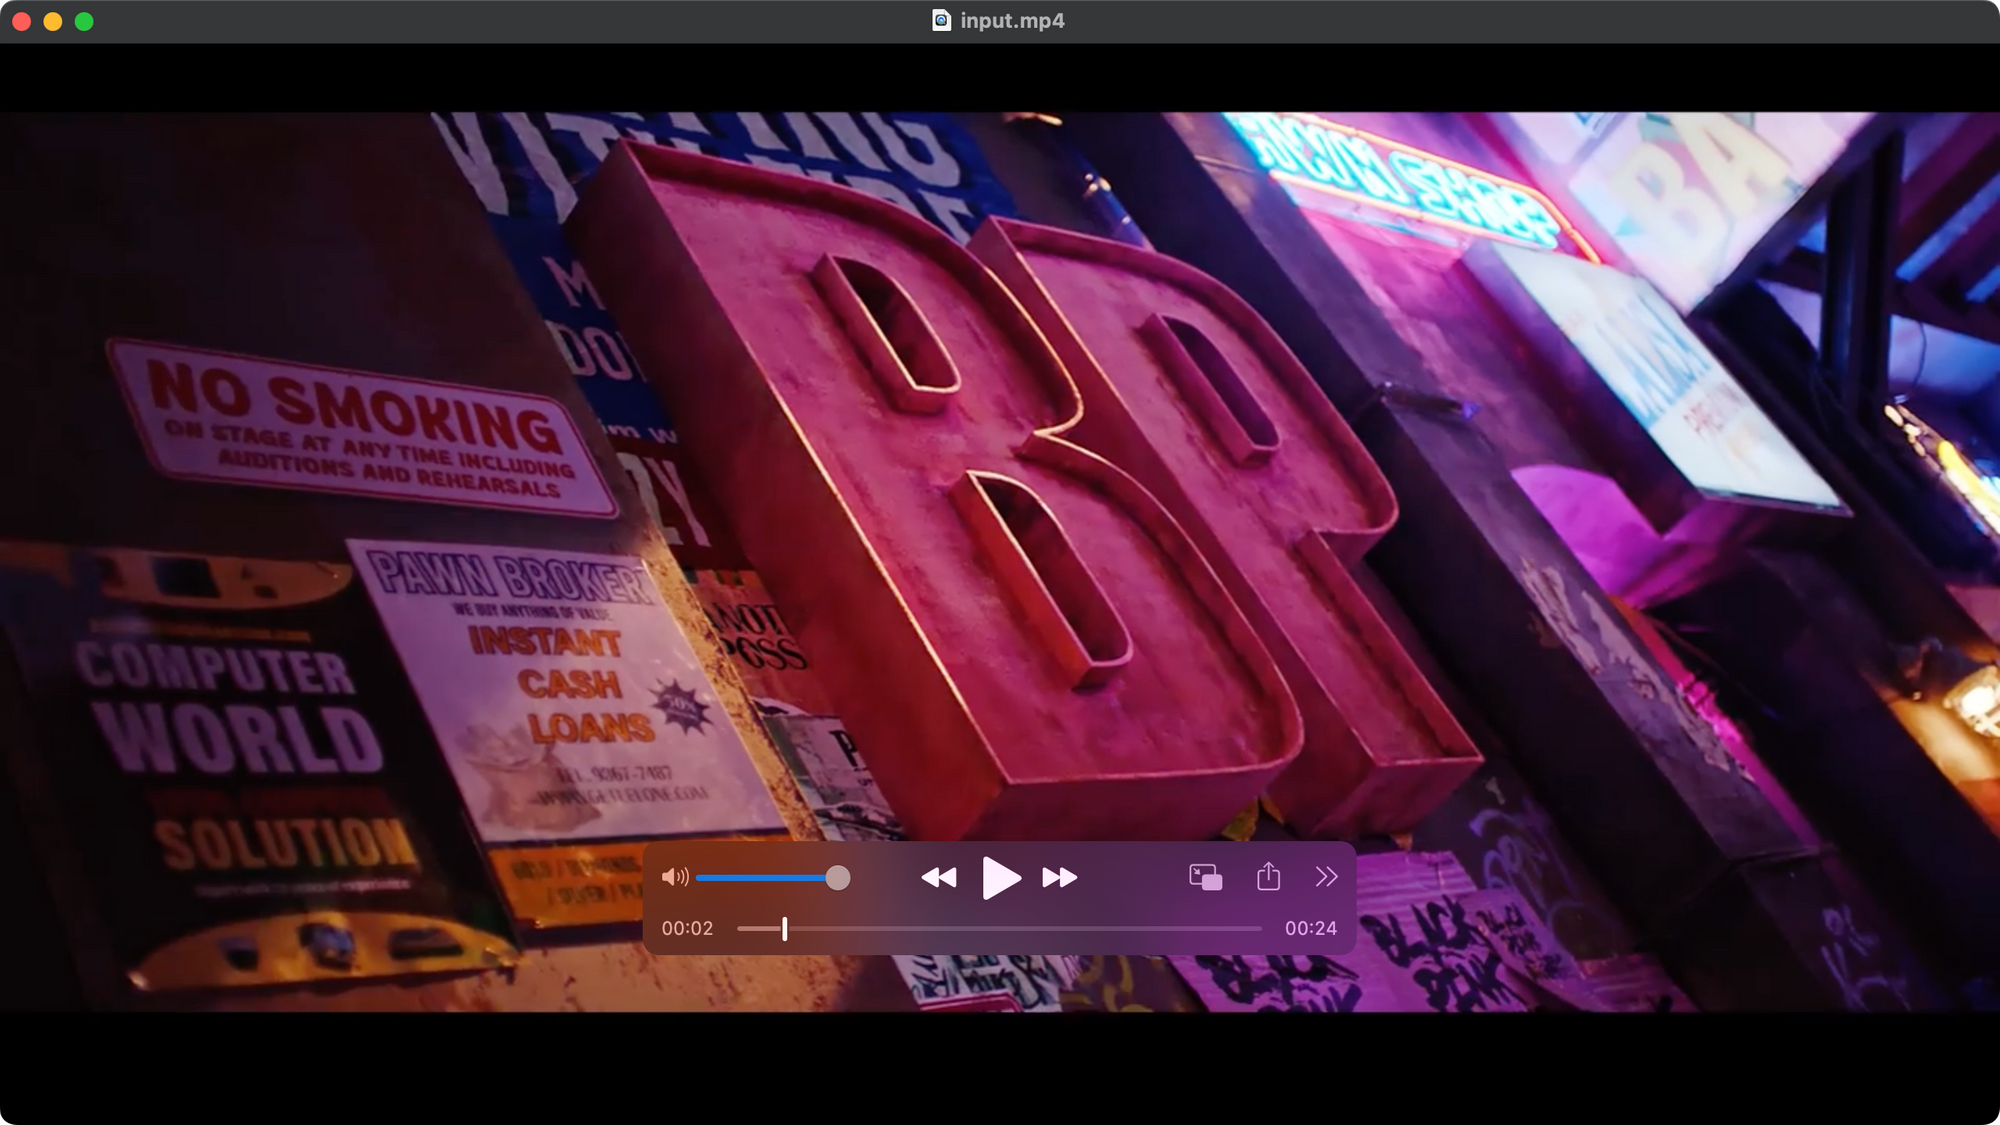
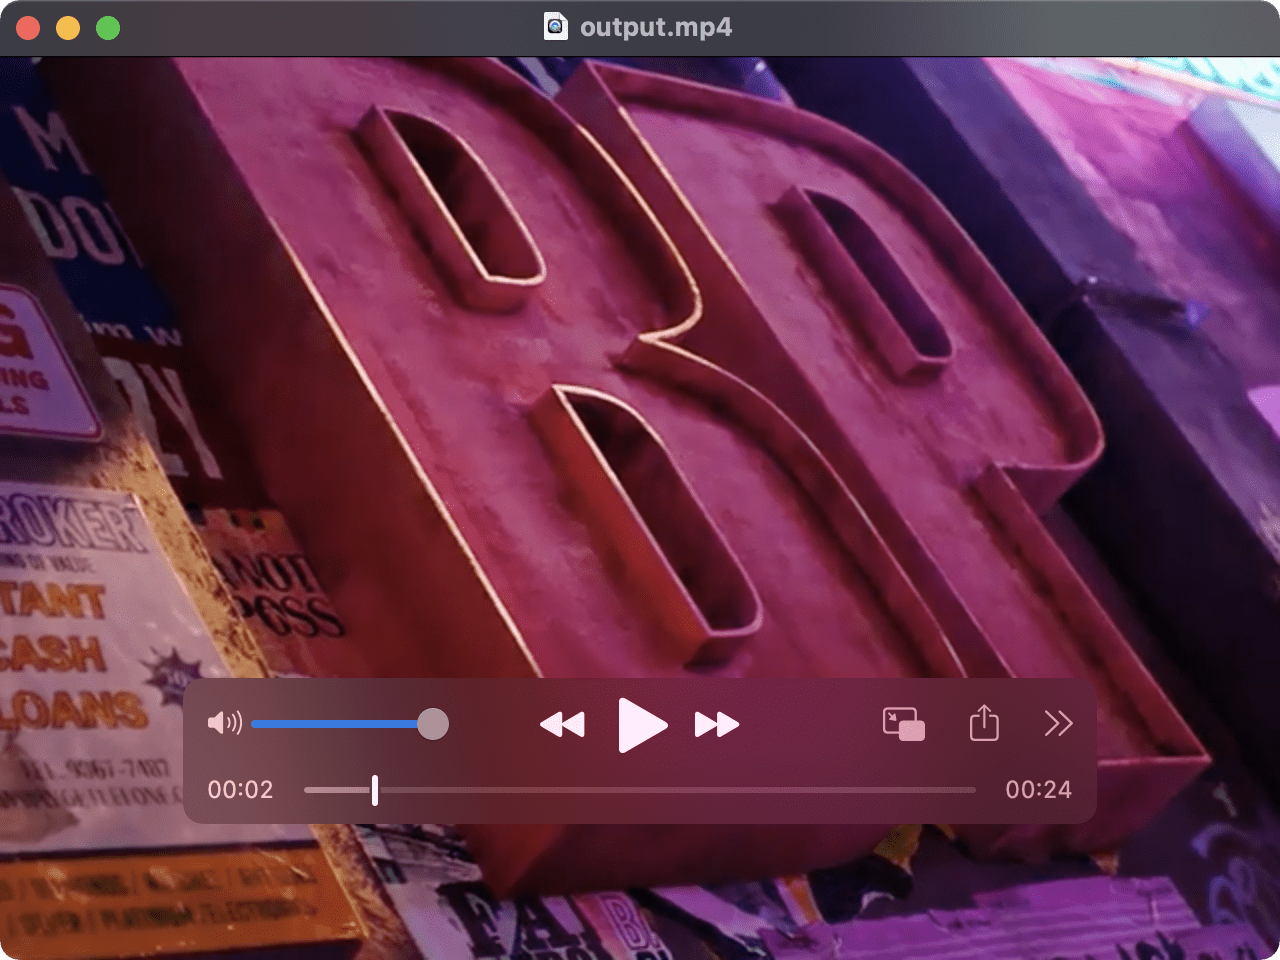
Example - Aspect Ratio with No Position Specified
To crop your video into a new dimension without an error using FFmpeg, you can use an aspect ratio calculator to find the correct width and height.
We are going to crop the sample video which is 1280x720 pixels (6:9) into a 4:3 video. According to the aspect ratio calculator, the output dimension can be set to 640x480 pixels.
The command below will crop the input video into 640x480 pixels:
ffmpeg -i input.mp4 -vf "crop=640:480" output.mp4
When the position x:y is not specified, FFmpeg will automatically crop the input video from the center.
Original Video
Result
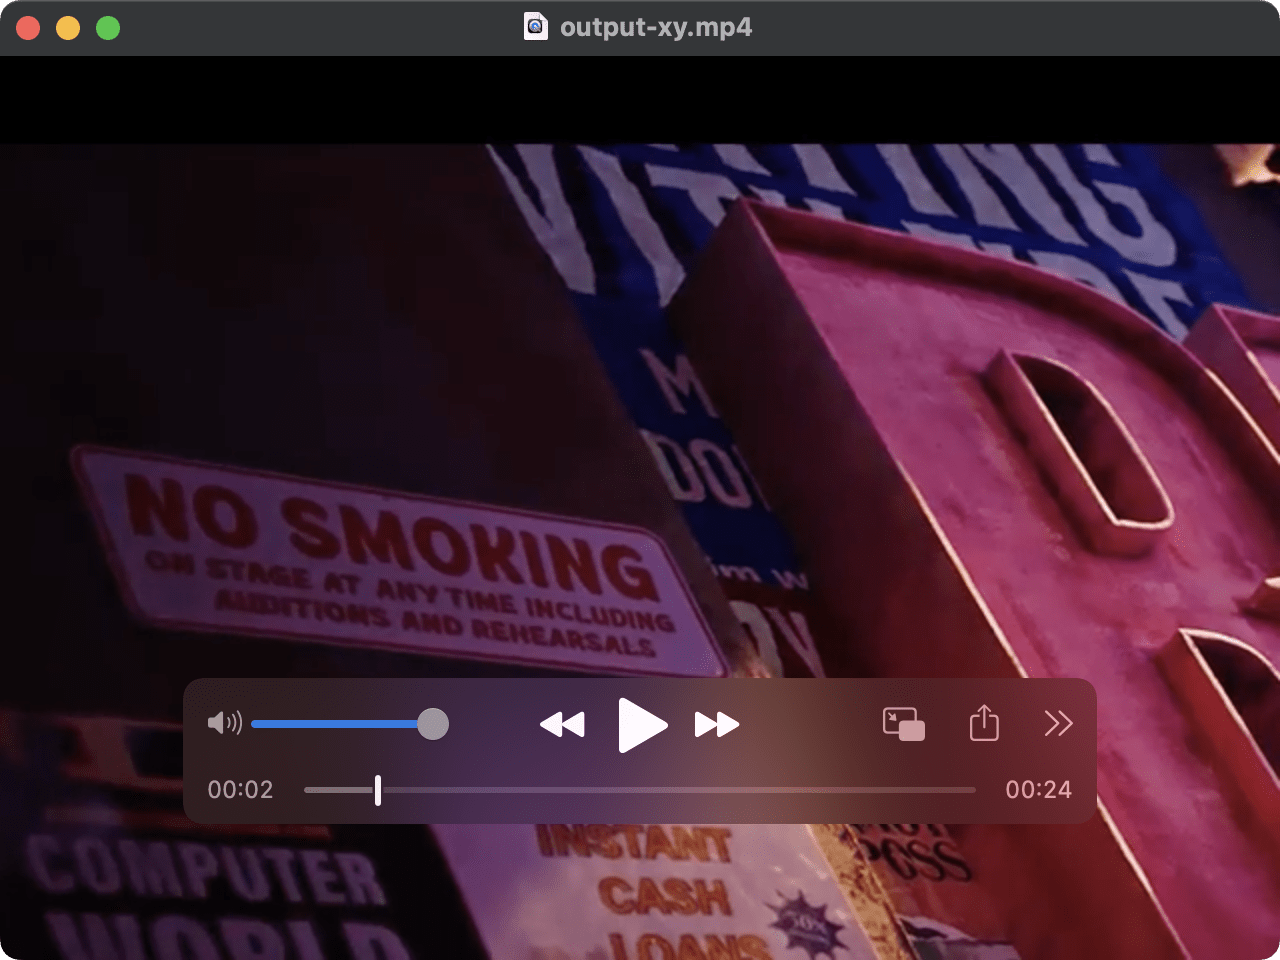
Example - Aspect Ratio with Position (x:y) Specified
When the position x:y is specified, the video will be cropped from x:y towards the right and the bottom of the video.
For example, the command below will crop the video from the top left corner (0,0) of the video:
ffmpeg -i input.mp4 -vf "crop=640:480:0:0" output-xy.mp4
Result (Top Left)
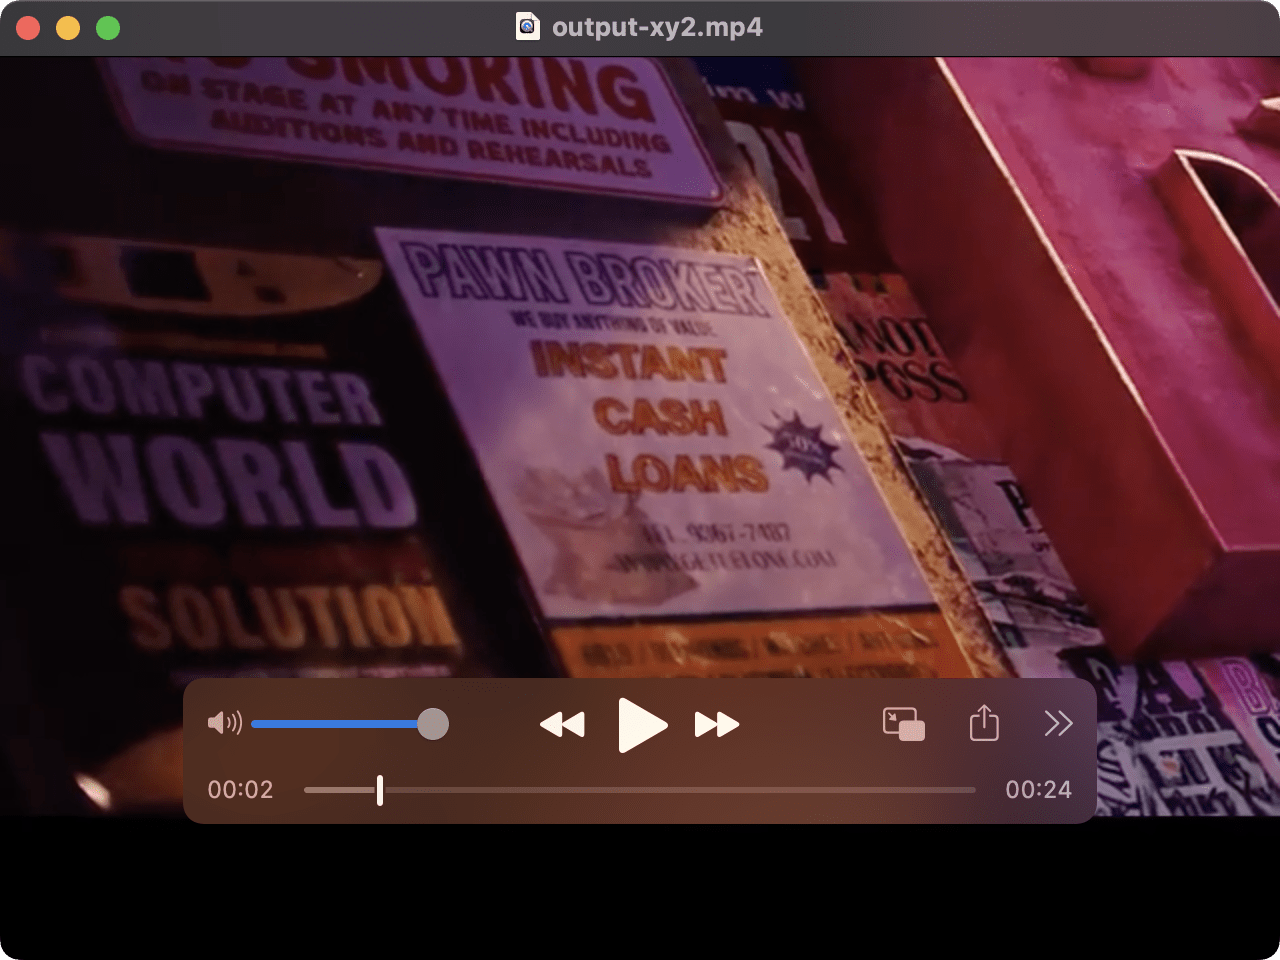
With position 0:720, it will be cropped from the bottom left corner.
ffmpeg -i input.mp4 -vf "crop=640:480:0:720" output-xy2.mp4
You can also use the variable in_h which represents the input video’s height.
ffmpeg -i input.mp4 -vf "crop=640:480:0:in_h" output-xy2.mp4
Result (Bottom Left)
To crop the video from the right, change the position to 1280:y or in_w:y, with y being the y-coordinate with a value within the range of the video's height, [0, 720].
Example:
ffmpeg -i input.mp4 -vf "crop=640:480:1280:0" output-xy.mp4
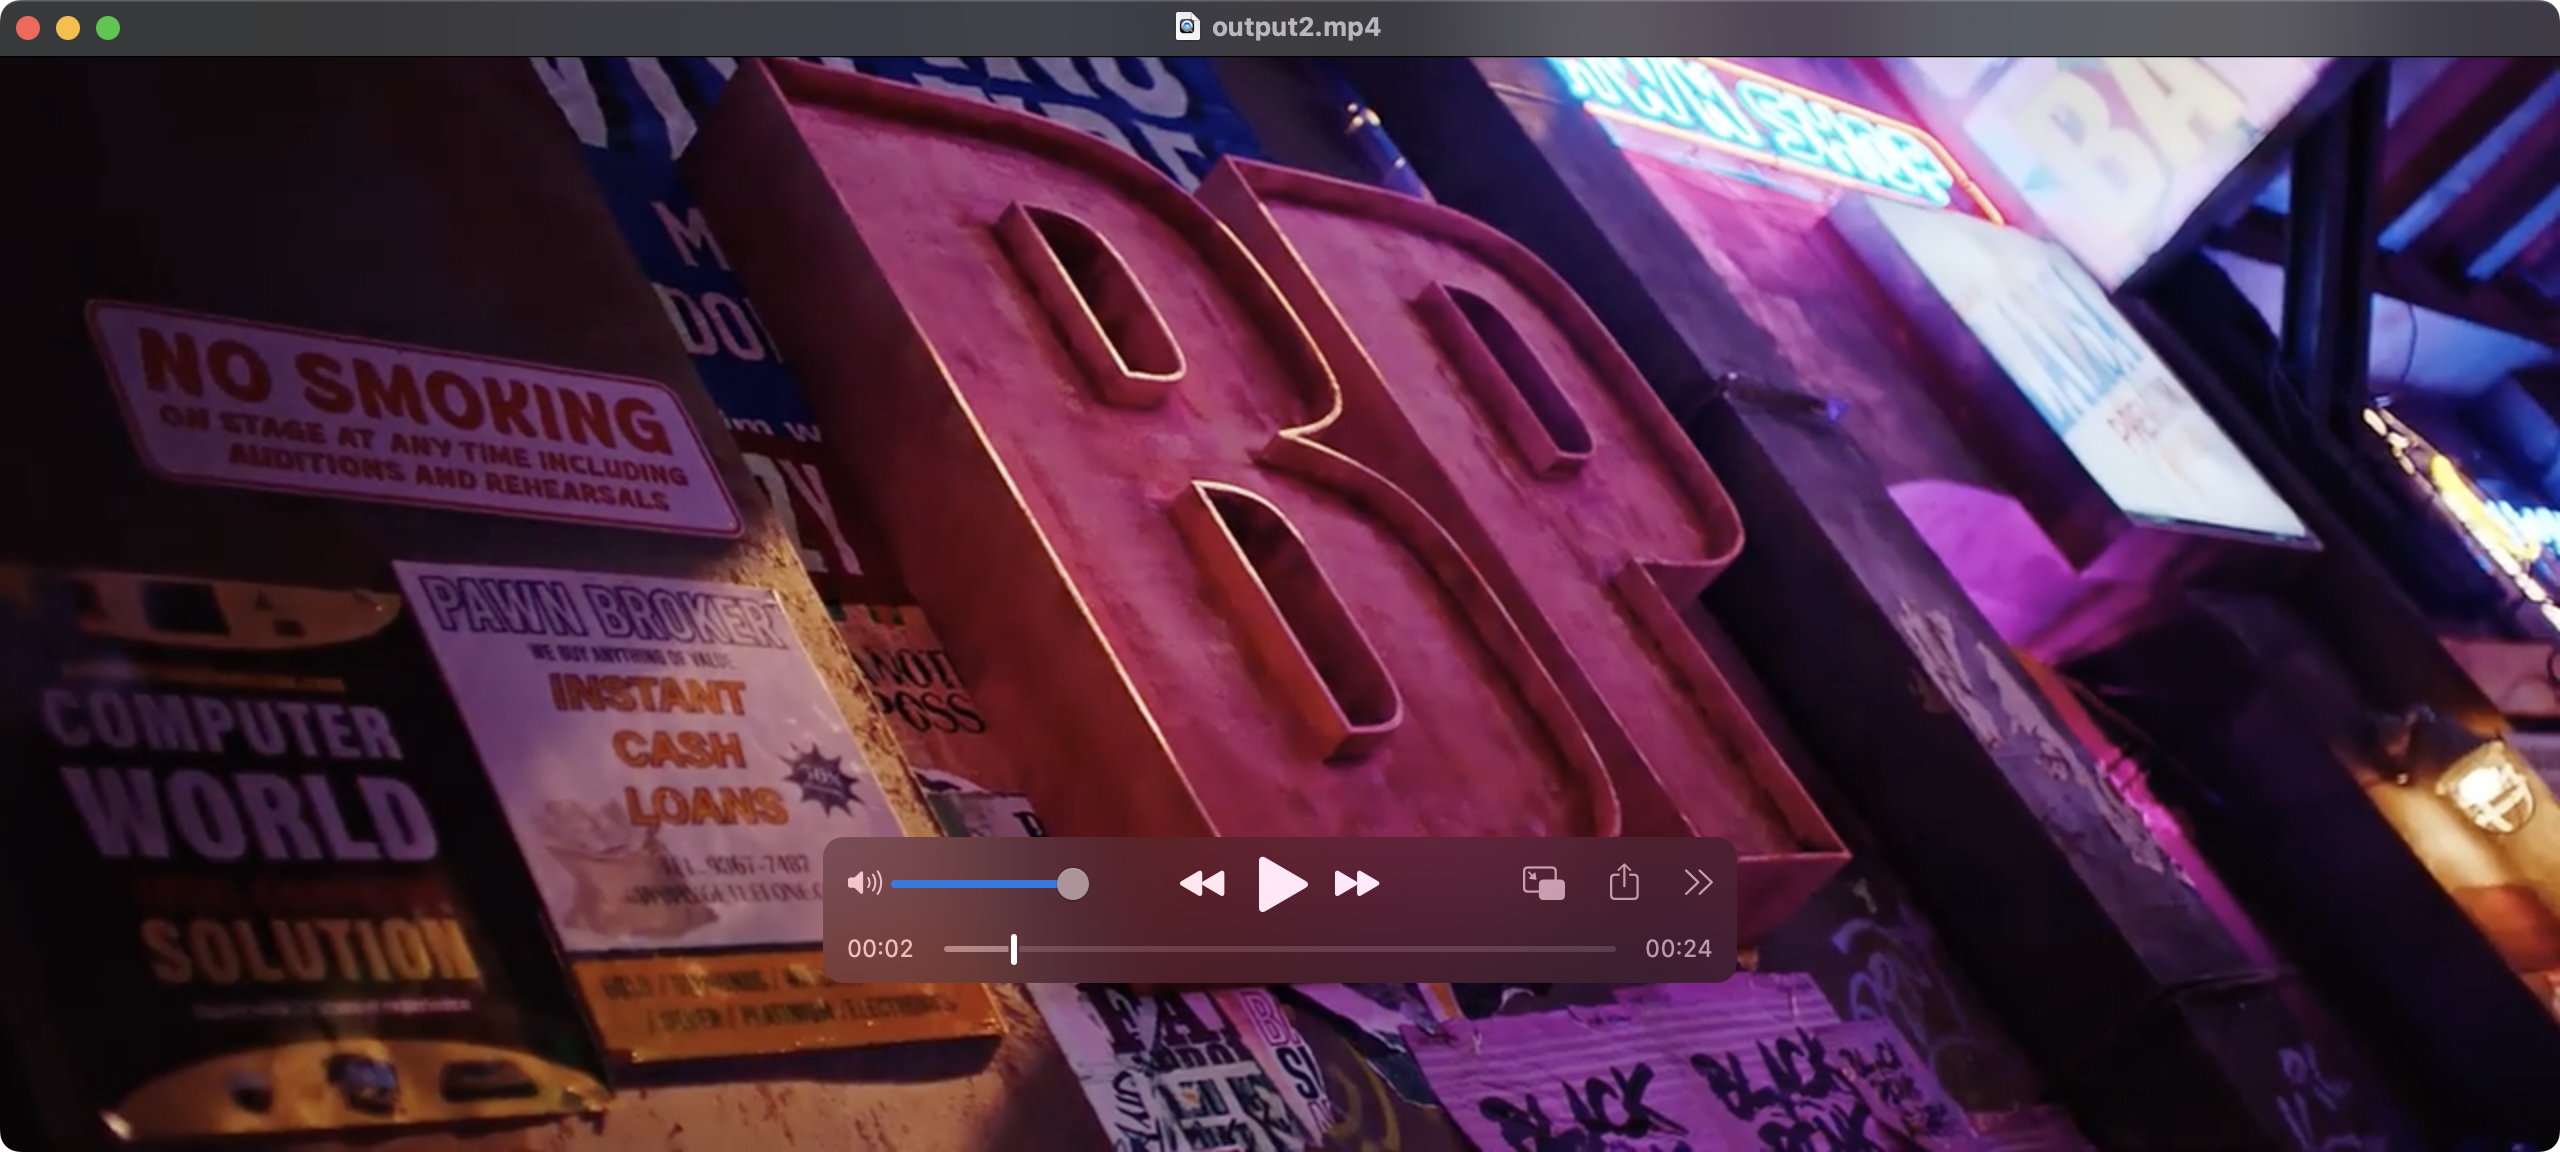
Trimming Black Borders
Sometimes, there will be black borders around a video to fit an aspect ratio. In this case, you can use the "cropdetect" filter to auto-detect the crop size and position. The filter will detect the non-black area of the input video, then calculate and print the recommended crop size and position.
Run the command below to get the crop size and position:
ffmpeg -i input.mp4 -vf cropdetect -f null - 2>&1 | awk '/crop/ { print $NF }' | tail -1
Output

Then, use the output result in the crop command to remove black borders:
ffmpeg -i input.mp4 -vf "crop=1280:576:0:72" output2.mp4
Result
🐻 Bear Tips : You can use ffplay to preview the result without saving the file, eg.
ffplay -i input.mp4 -vf "crop=1280:576:0:72".
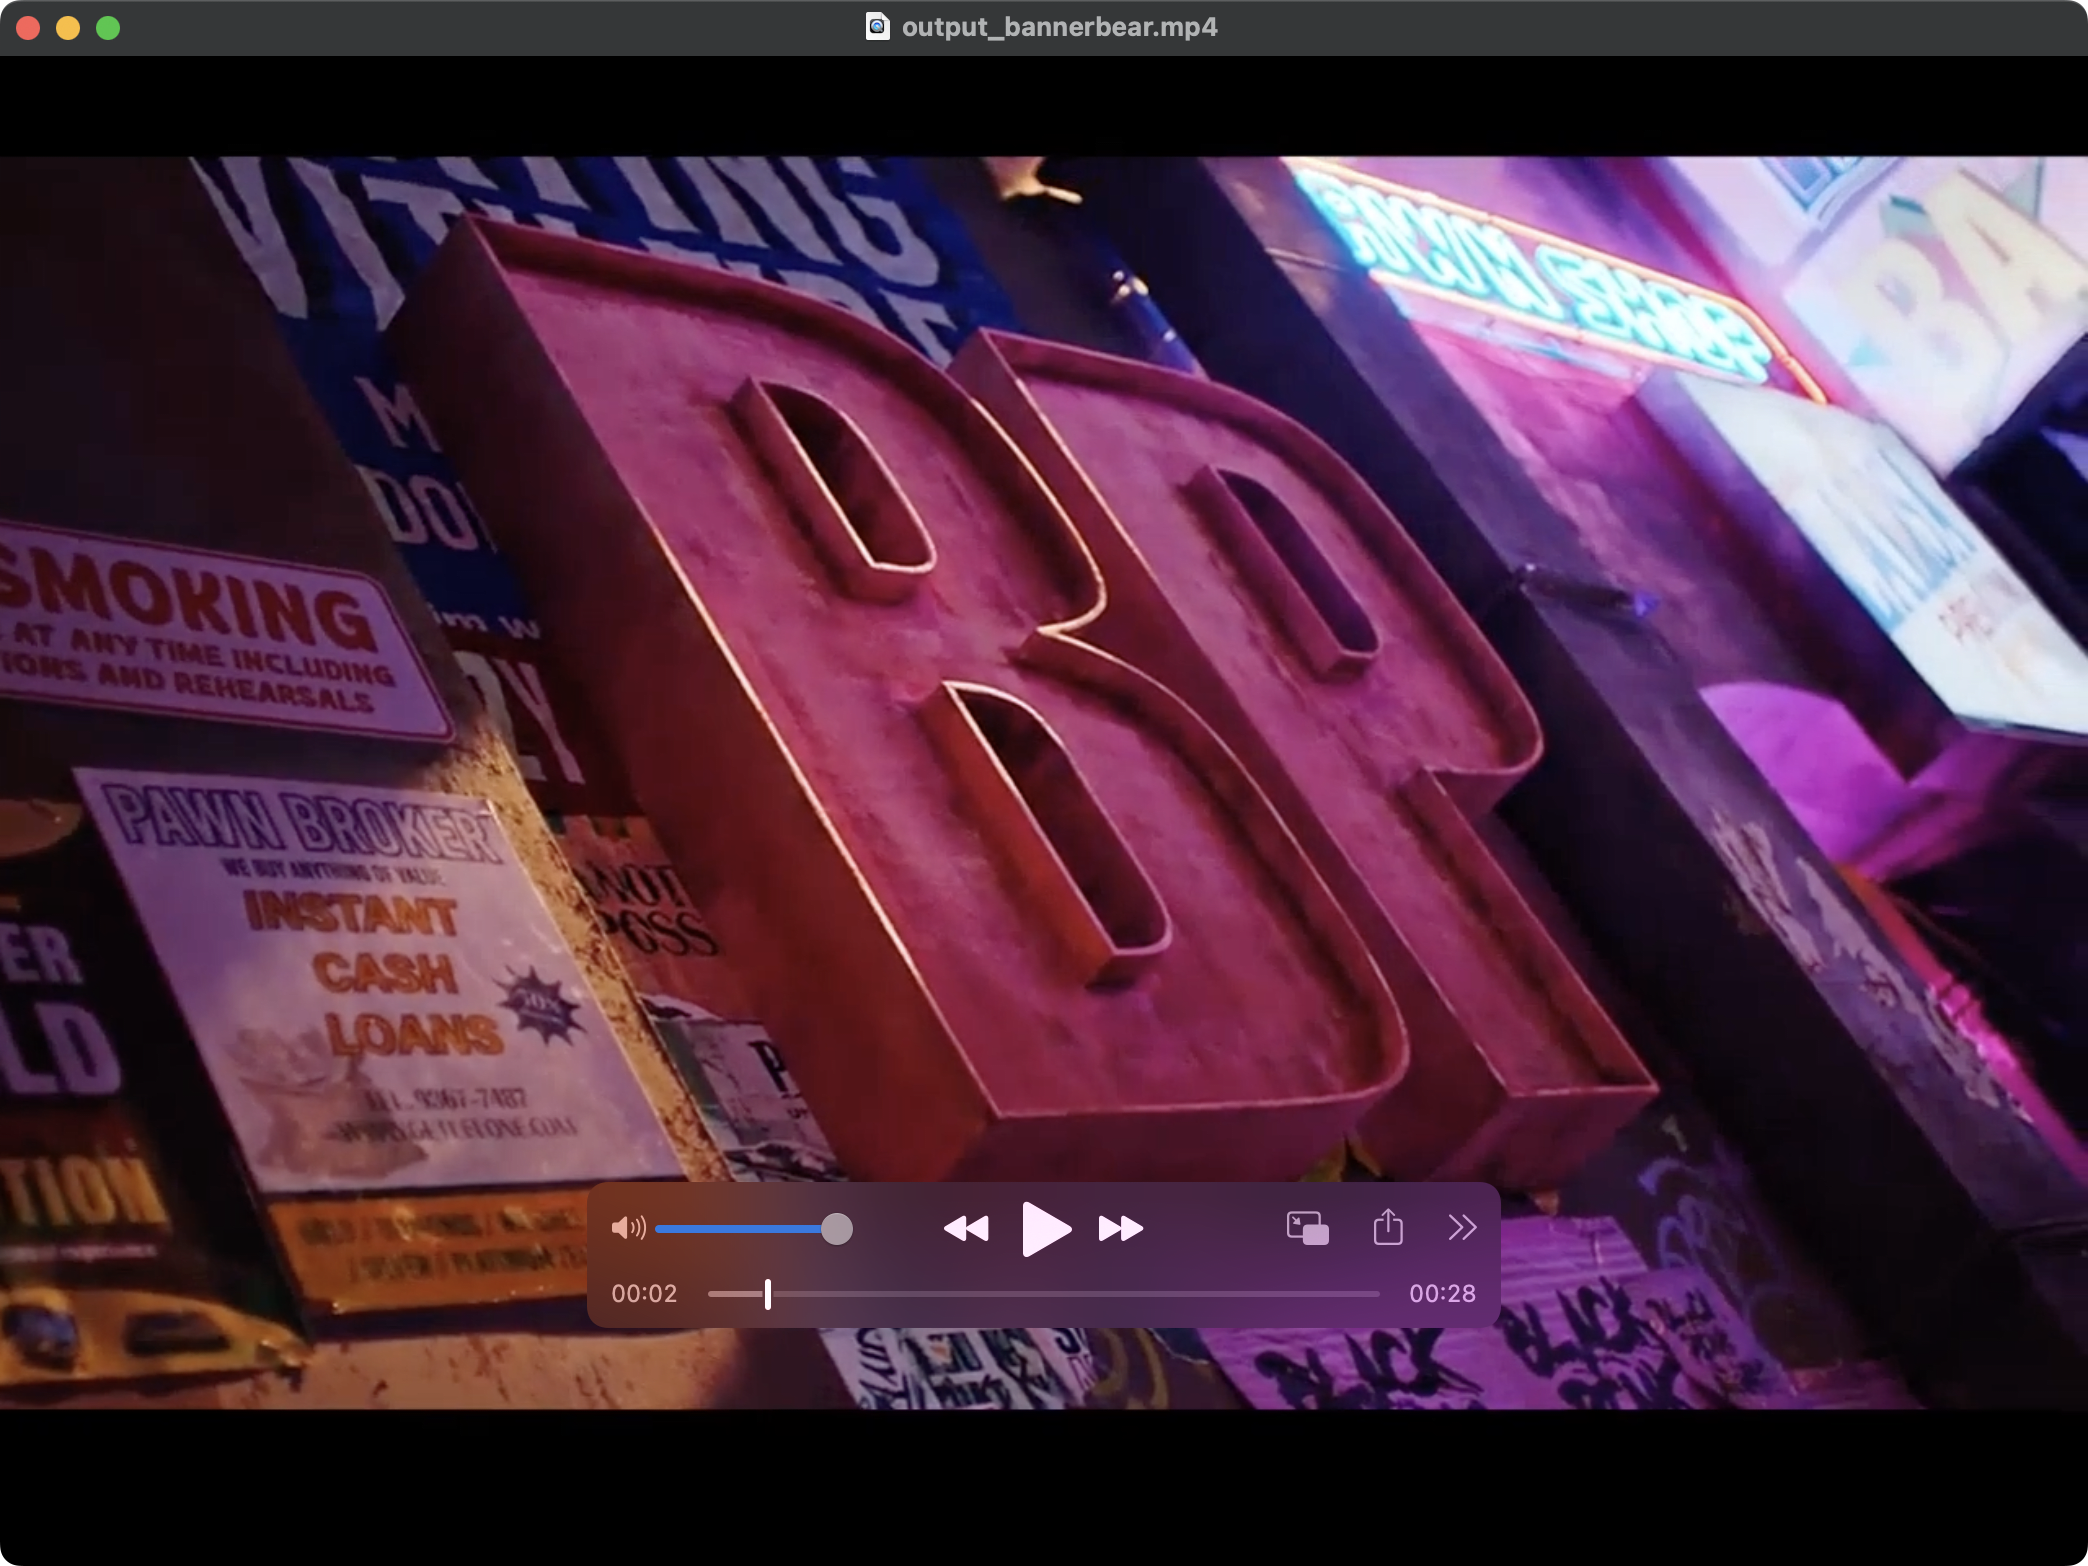
Using Bannerbear API
The FFmpeg "crop" filter is an excellent tool to crop and resize videos programmatically. However, if you have multiple videos with different sizes and you want to merge them into a video file, you will have to crop each video separately before merging them.
In that case, you can try using Bannerbear’s Movies API as cropping will be done automatically when you use the API to merge videos.
It is especially useful when you have some reusable video clips that are always the same (like an intro or outro) and want to merge them with new clips regularly. By using the API, you can save the time of cropping videos clips.
It can also be easily integrated into any existing app or platform. The only thing you have to do is create a video template and send a request to the API like the example below:
var data = {
  "width" : 1280,
  "height" : 960,
  "transition" : "fade",
  "inputs" : [
    {
      "asset_url": "https://ffmpeg-bb.s3.ap-southeast-1.amazonaws.com/ffmpeg-crop/input.mp4"
    },
    {
      "asset_url": "https://ffmpeg-bb.s3.ap-southeast-1.amazonaws.com/input2.wmv",
      "trim_to_length_in_seconds": 3
    },
  ]
}

fetch('https://api.bannerbear.com/v2/movies', {
  method: 'POST',
  body: JSON.stringify(data),
  headers: {
    'Content-Type' : 'application/json',
    'Authorization' : `Bearer ${API_KEY}`
  }
})
The videos will be merged and scaled automatically according to the dimension specified regardless of their original dimension. For example, the same 1280x720 pixels (16:9) video used for previous examples can be resized to 1280x960 pixels (4:3) perfectly fine even though the height of the output video is greater.
What’s Next
As mentioned previously, FFmpeg has many filters that can help you to manipulate video files easily. If you’re interested to explore them, here are some tutorials in which they are used:
- concat - How to Merge Video Files Using FFmpeg
- subtitles - How to Add Subtitles to a Video File Using FFmpeg
- thumbnail - How to Set a Custom Thumbnail for a Video File Using FFmpeg
- fps - How to Extract Images from a Video Using FFmpeg
- palettegen and paletteuse - How to Make a GIF from a Video Using FFmpeg
If you wish to use a simpler method to create videos, you can also try these Bannerbear tutorials:
🐻 How to Create Videos with Auto Subtitles in One API Request
