
How to Automatically Turn Instagram Photos into Videos with Make
Contents
Videos are the most engaging form of visual content, generating 1200% more shares than text and photo content combined. And with so many people on video-centric social media platforms like Instagram, TikTok, and Youtube, this form of content should be a mainstay of your brand’s marketing strategy.
As effective as this marketing type might be, producing videos is expensive and time-consuming. Even short-form content—which is incredible for amplifying your reach—takes time to plan, create, and publish. This makes video a difficult marketing strategy for small businesses and individuals with limited resources.
Rather than miss out on the opportunities of video marketing, consider repurposing other forms of content to create something more dynamic. Your brand’s Instagram feed is the perfect source of material. That’s why in this tutorial, you’ll learn how to use Make and other nocode tools to turn static photos into branded videos, complete with transitions and sound.
What You Will Create
Nocode tools can help you automatically turn static images into eye-catching videos at little-to-no additional cost. Using photos already published on your brand’s Instagram feed makes it even easier, as all content has already been pre-approved.
There are several ways to automate video generation, but in this tutorial, we will be using:
- Bannerbear : To design templates and generate branded videos
- Google Sheets : To store published Instagram media
- Make : To trigger actions in different programs according to a pre-designed scenario
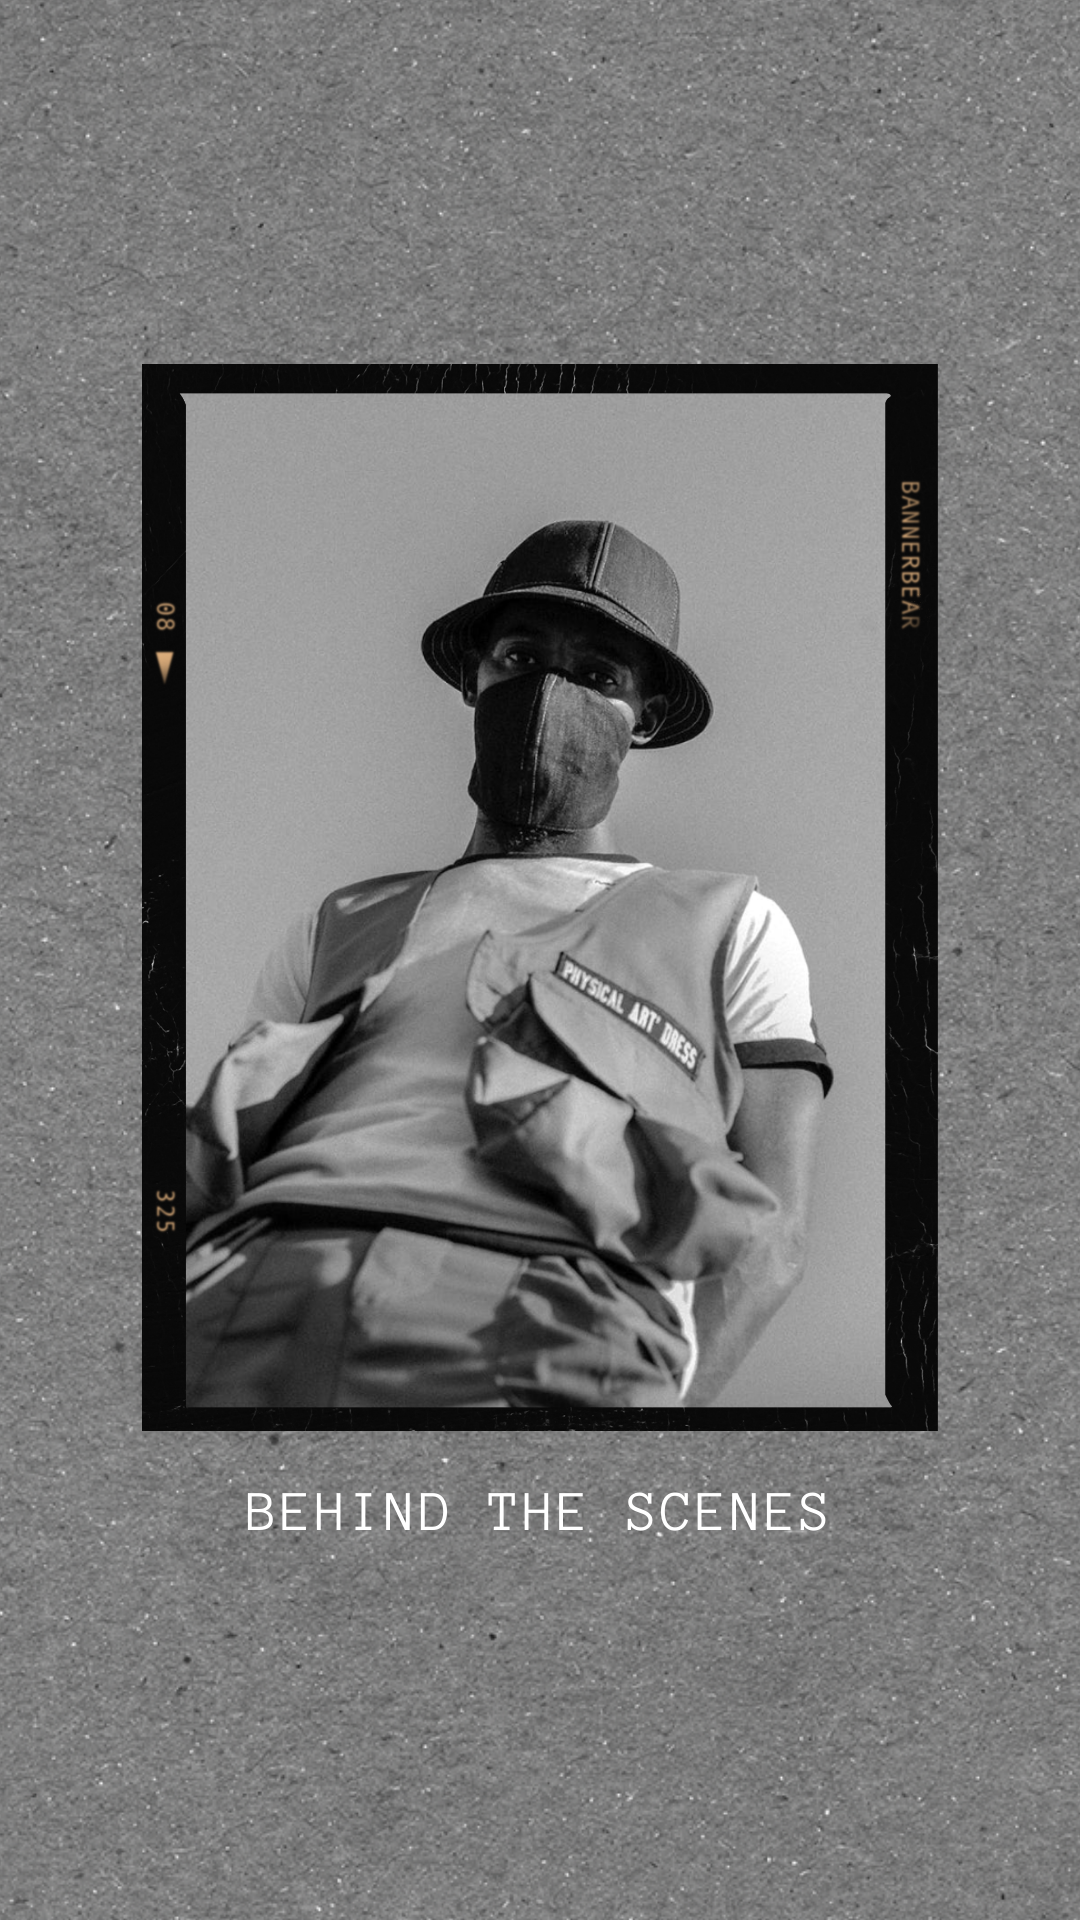
By the end of the tutorial, you should be able to produce a video like this:
Let’s get started!
Customize Your Bannerbear Template
Bannerbear’s video generation API places input material (text, images, videos) into a reusable template that you can design to match your brand.
To create a template, log into your Bannerbear account and click the Projects tab. Click “Create another Project”, then either start with a blank template or use one of ours:
Make changes to the template to suit your intended use case. Most platforms recommend an aspect ratio of 9:16 for mobile video, although some (Youtube, Facebook) will accept 1:1 as well.
Your template will need to include a video placeholder. To add one to your project, toggle the “Video Placeholder” button on the left sidebar. Resize as needed.
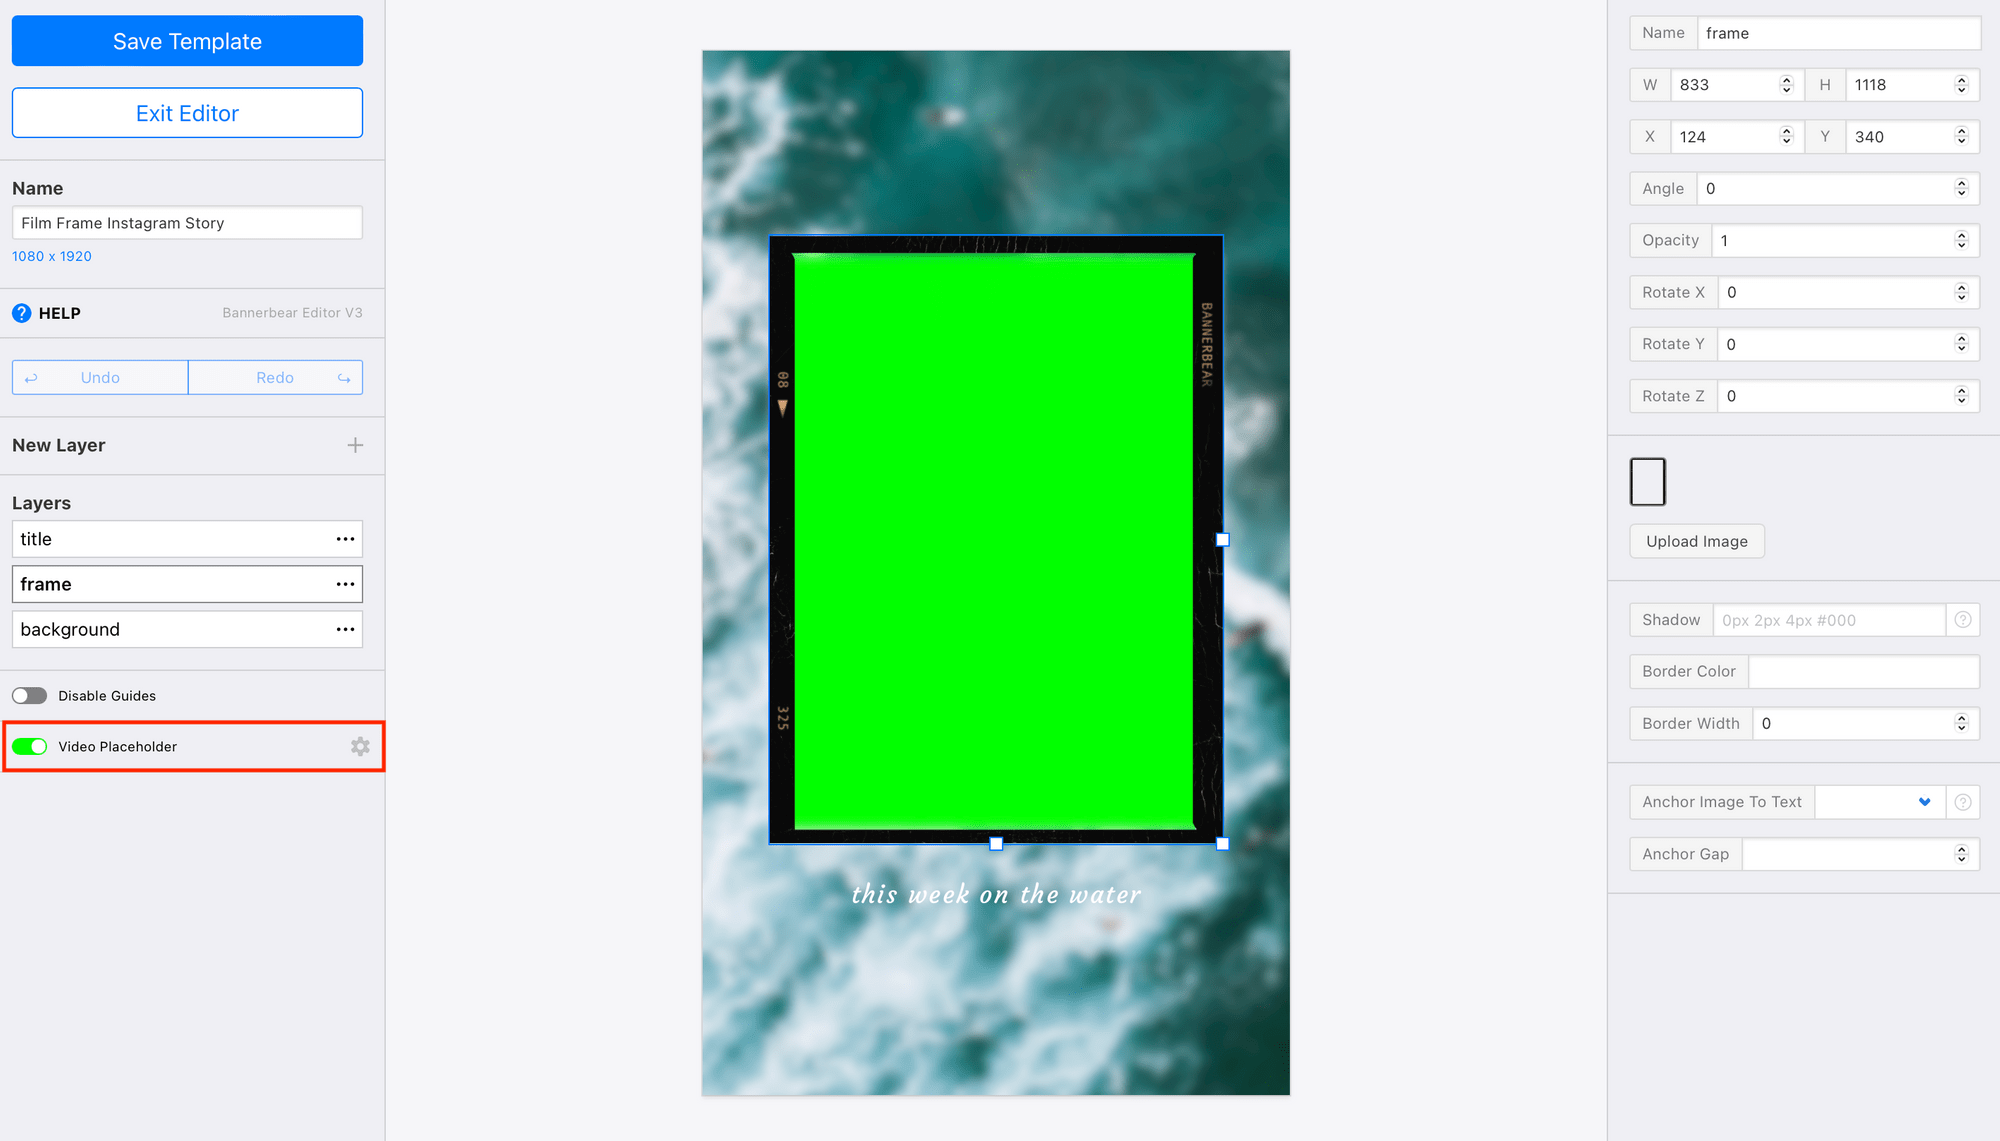
Keep in mind that because the video placeholder cannot be layered on top of other elements, any background images will have to be cropped around the placeholder.
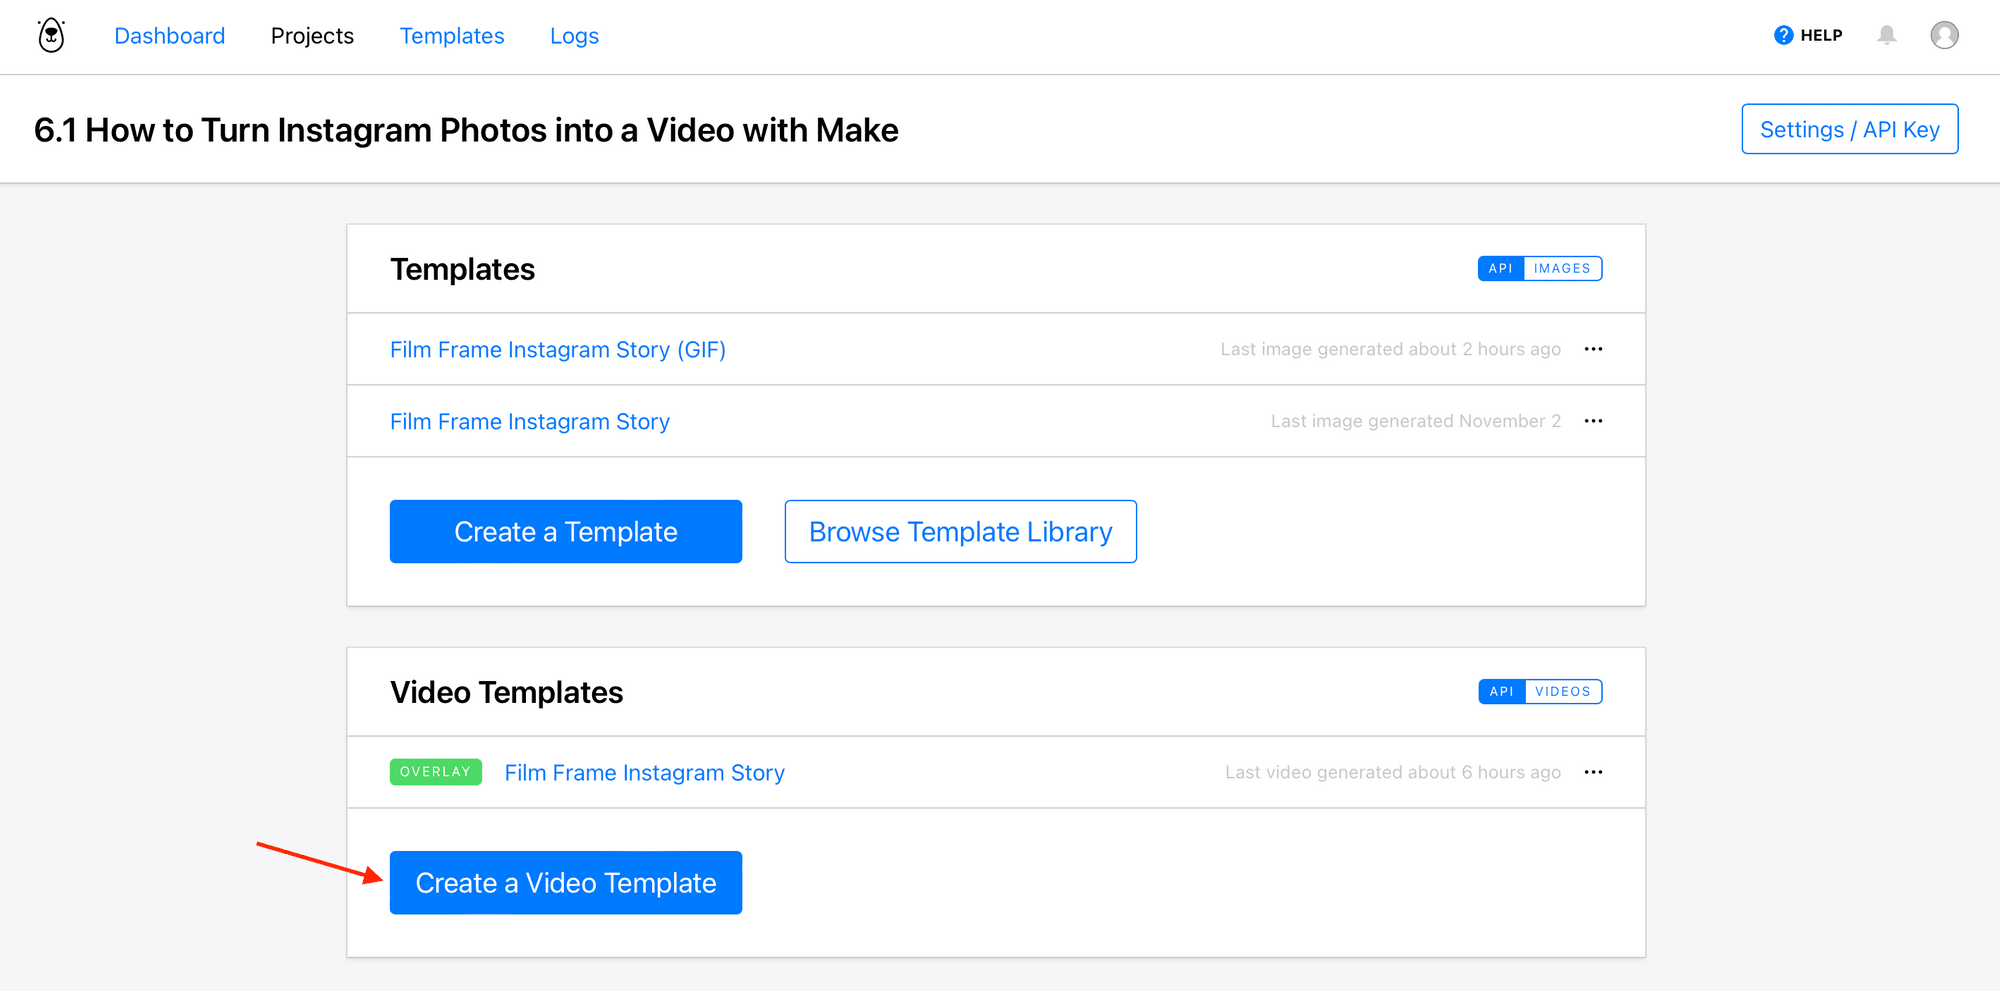
When you’re happy with your design, click “Save Template” and go back to the associated project page in the Bannerbear app. Click “Create a Video Template”.
Select the template you designed and choose “Overlay” as the Build Pack.
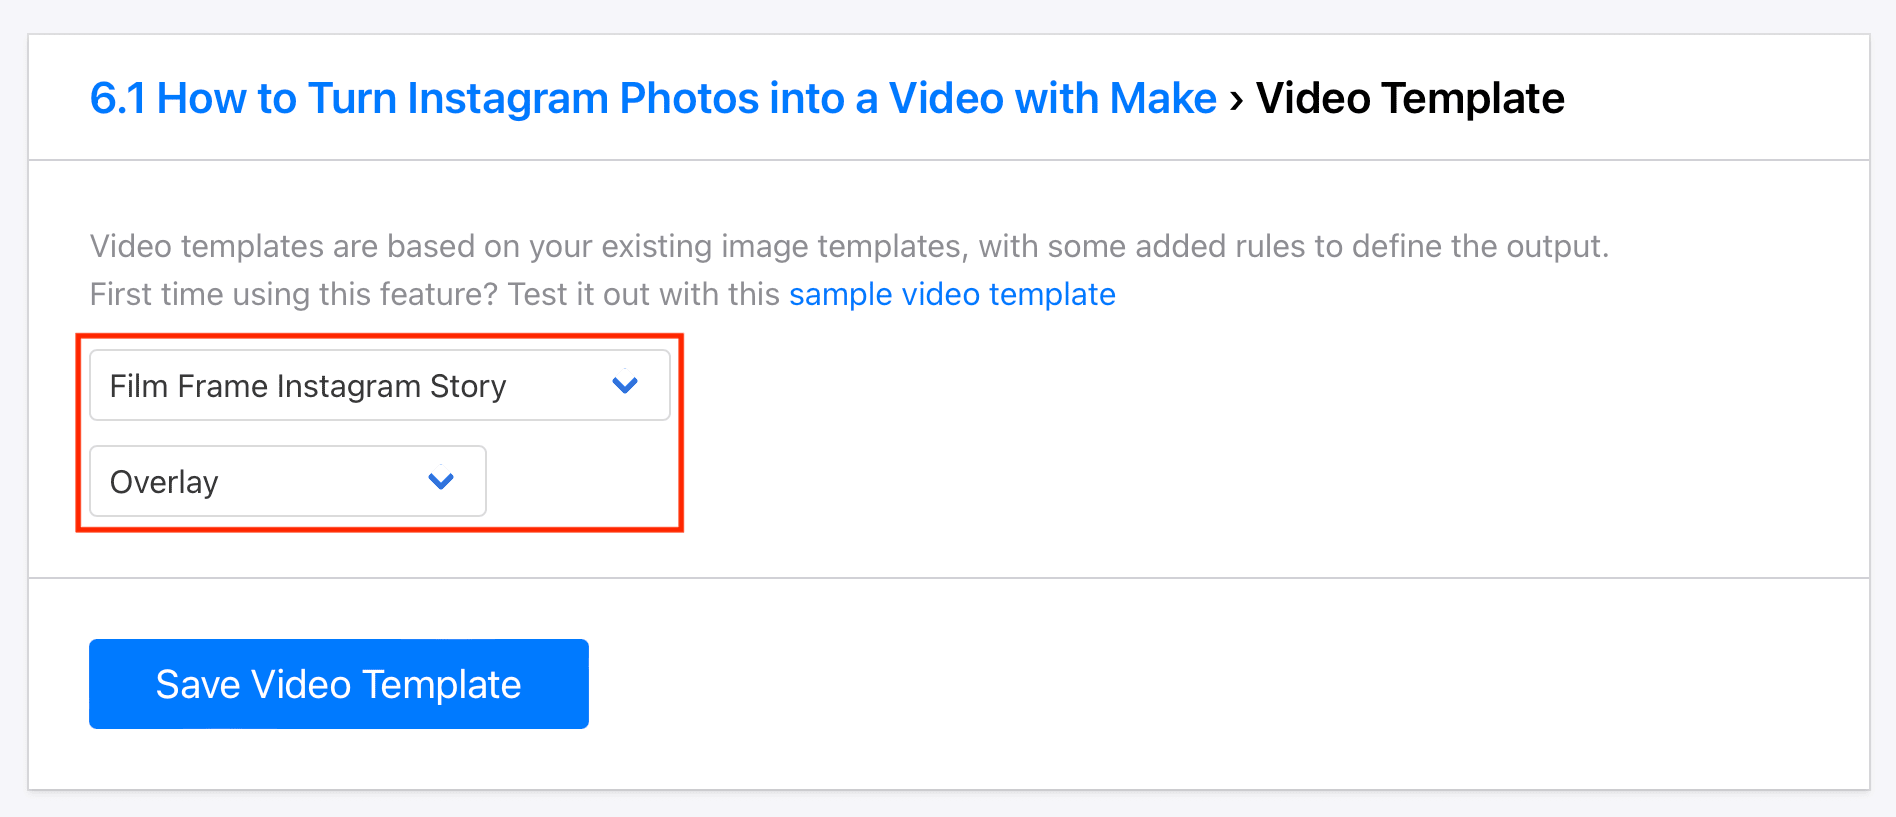
Click “Save Video Template”.
Bear Tip 🐻: Here’s a modified version of the Film Frame Instagram template, complete with a video container.
Create a Google Sheets File to Store and Sort Instagram Media
A single Google Sheets file will save your Instagram media as it is published, then sort for the most recent to push through to your video template.
Step 1. Create a Worksheet for All Media
The All Media worksheet will receive all media URLs as they are published to your Instagram feed. Create a new spreadsheet and name it. Then, name the first spreadsheet “All Media” and add two primary headers: Image URL in A1 and Timestamp in B1.
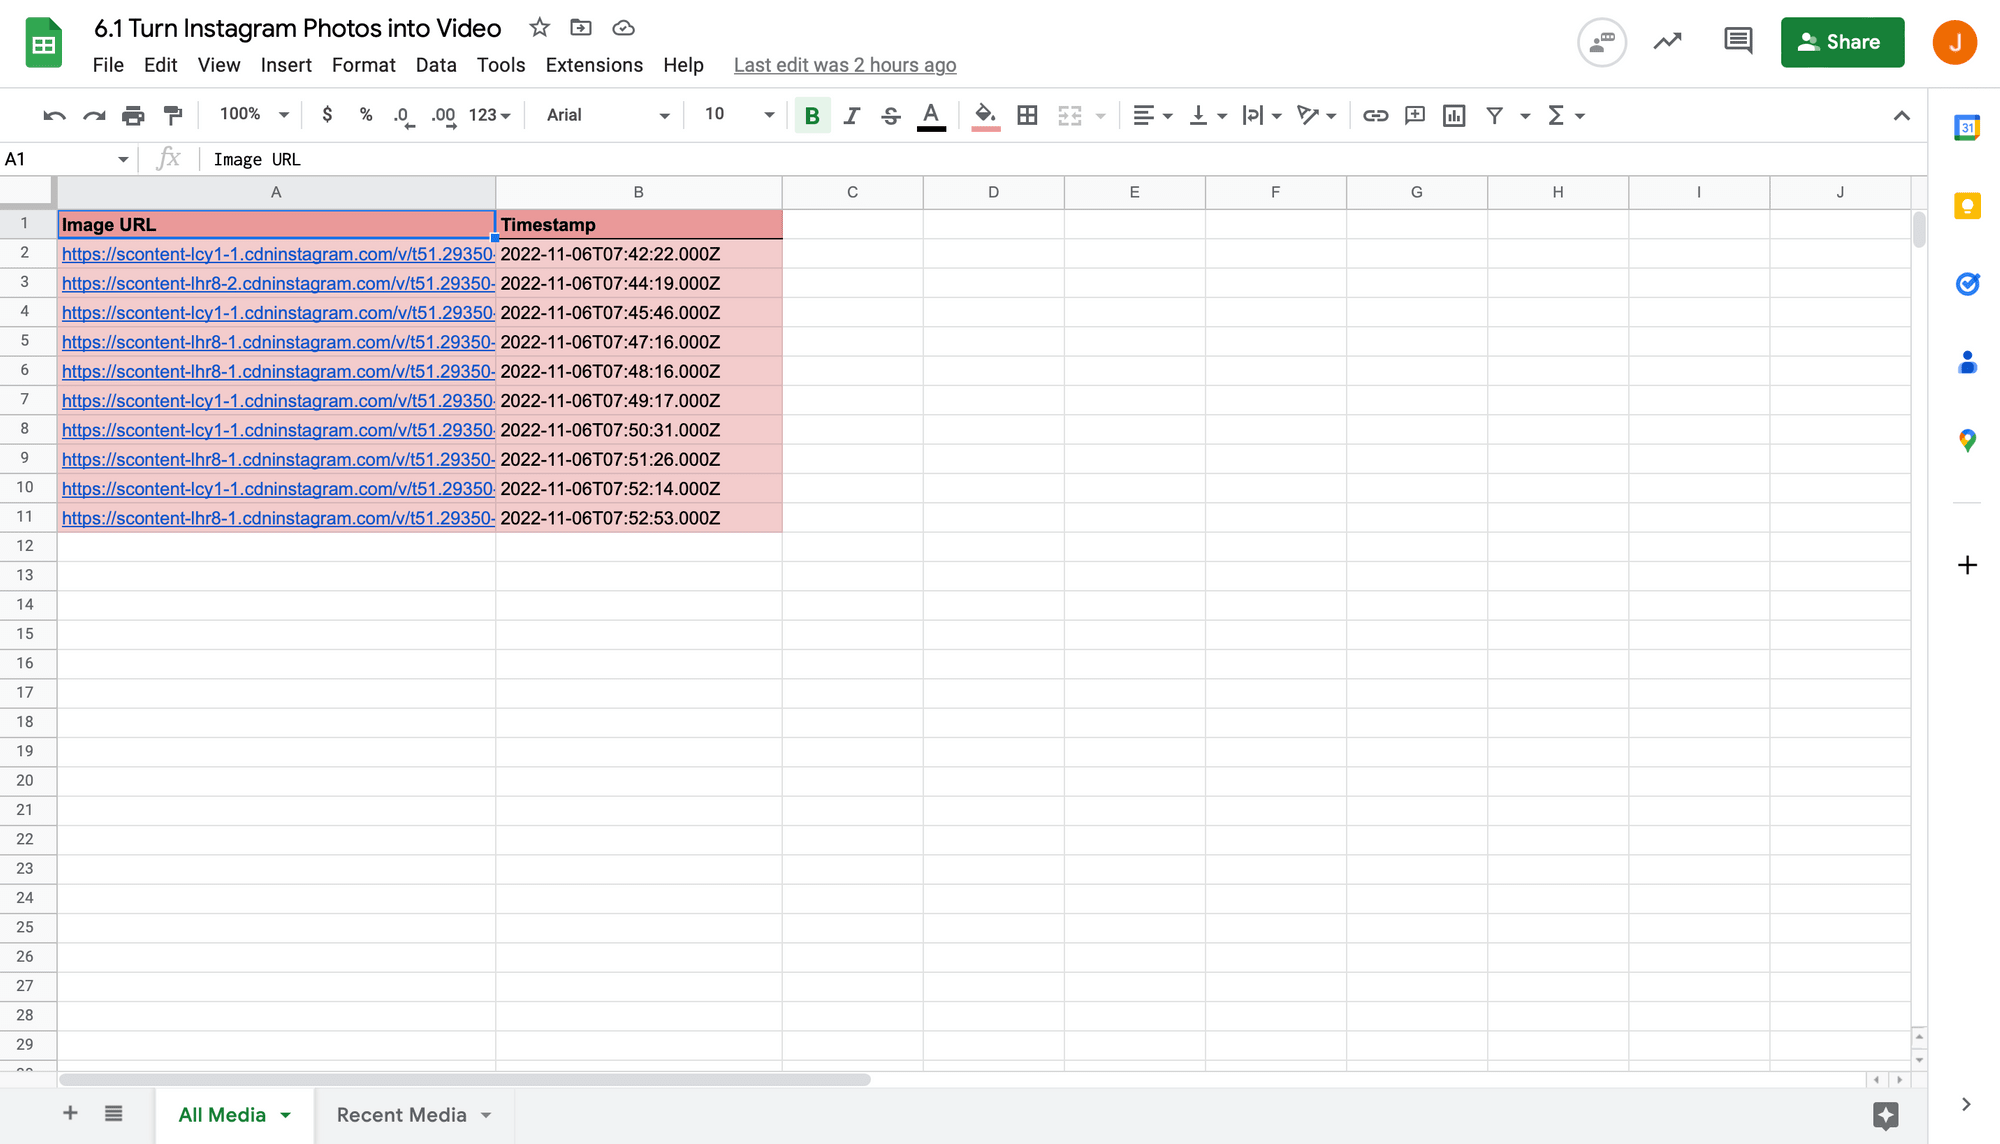
Make any formatting changes you’d like.
Bear Tip 🐻: Highlight the cells of your worksheets different colors to make the All Media and Recent Media entries easy to differentiate.
Step 2. Create a Worksheet for Recent Media
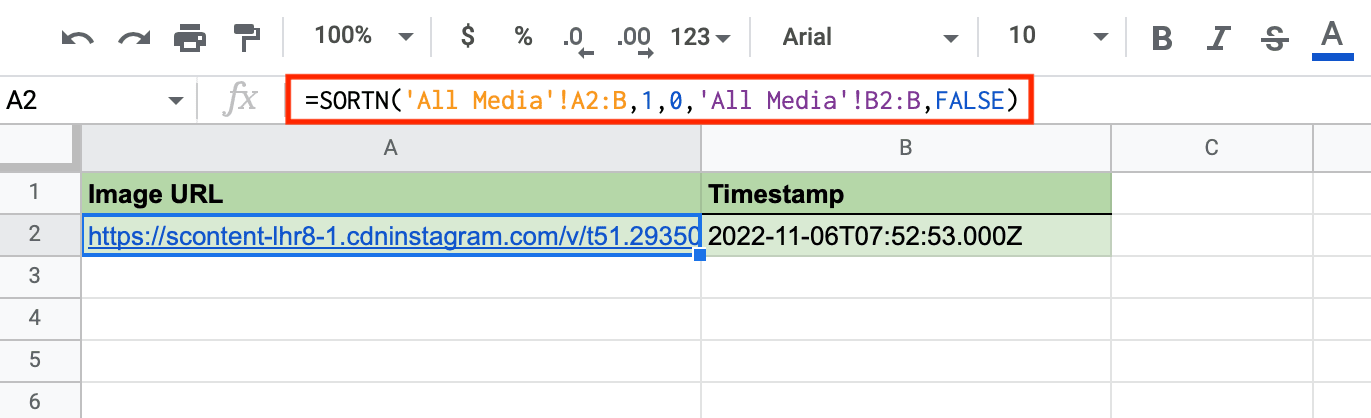
The Recent Media workshop will sort for the newest published post. Duplicate your All Media spreadsheet and name the new one.
Make any visual modifications you’d like to differentiate between the two spreadsheets easily.
Insert the following formula into cell A2: =SORTN('All Media'!A2:B,1,0,'All Media'!B2:B,FALSE).
This follows the syntax: SORTN(range, [n], [display_ties_mode], [sort_column1], [is_ascending1],…).
Save your changes, then move on to the next step.
Create a Scenario that Sends New Instagram Media to Sheets
We will set up two separate scenarios: one to send new Instagram media to your Google Sheets file and another to generate videos on a schedule.
Log into your Make account and click “+ Create a new scenario” on the top right corner of the home page. From there, set up the following modules:
Instagram: Watch Media
Choose Instagram as the app and “Watch Media” as the action. If you haven’t connected your Instagram account yet, you will be prompted to login.
The Limit (maximum number of results Make will pull during an execution cycle) will depend on your publishing frequency. Anywhere from 1 to 5 should work, depending on how often the scenario is scheduled to run.
In this example, we will set the limit at 3 and schedule the scenario to run every hour.
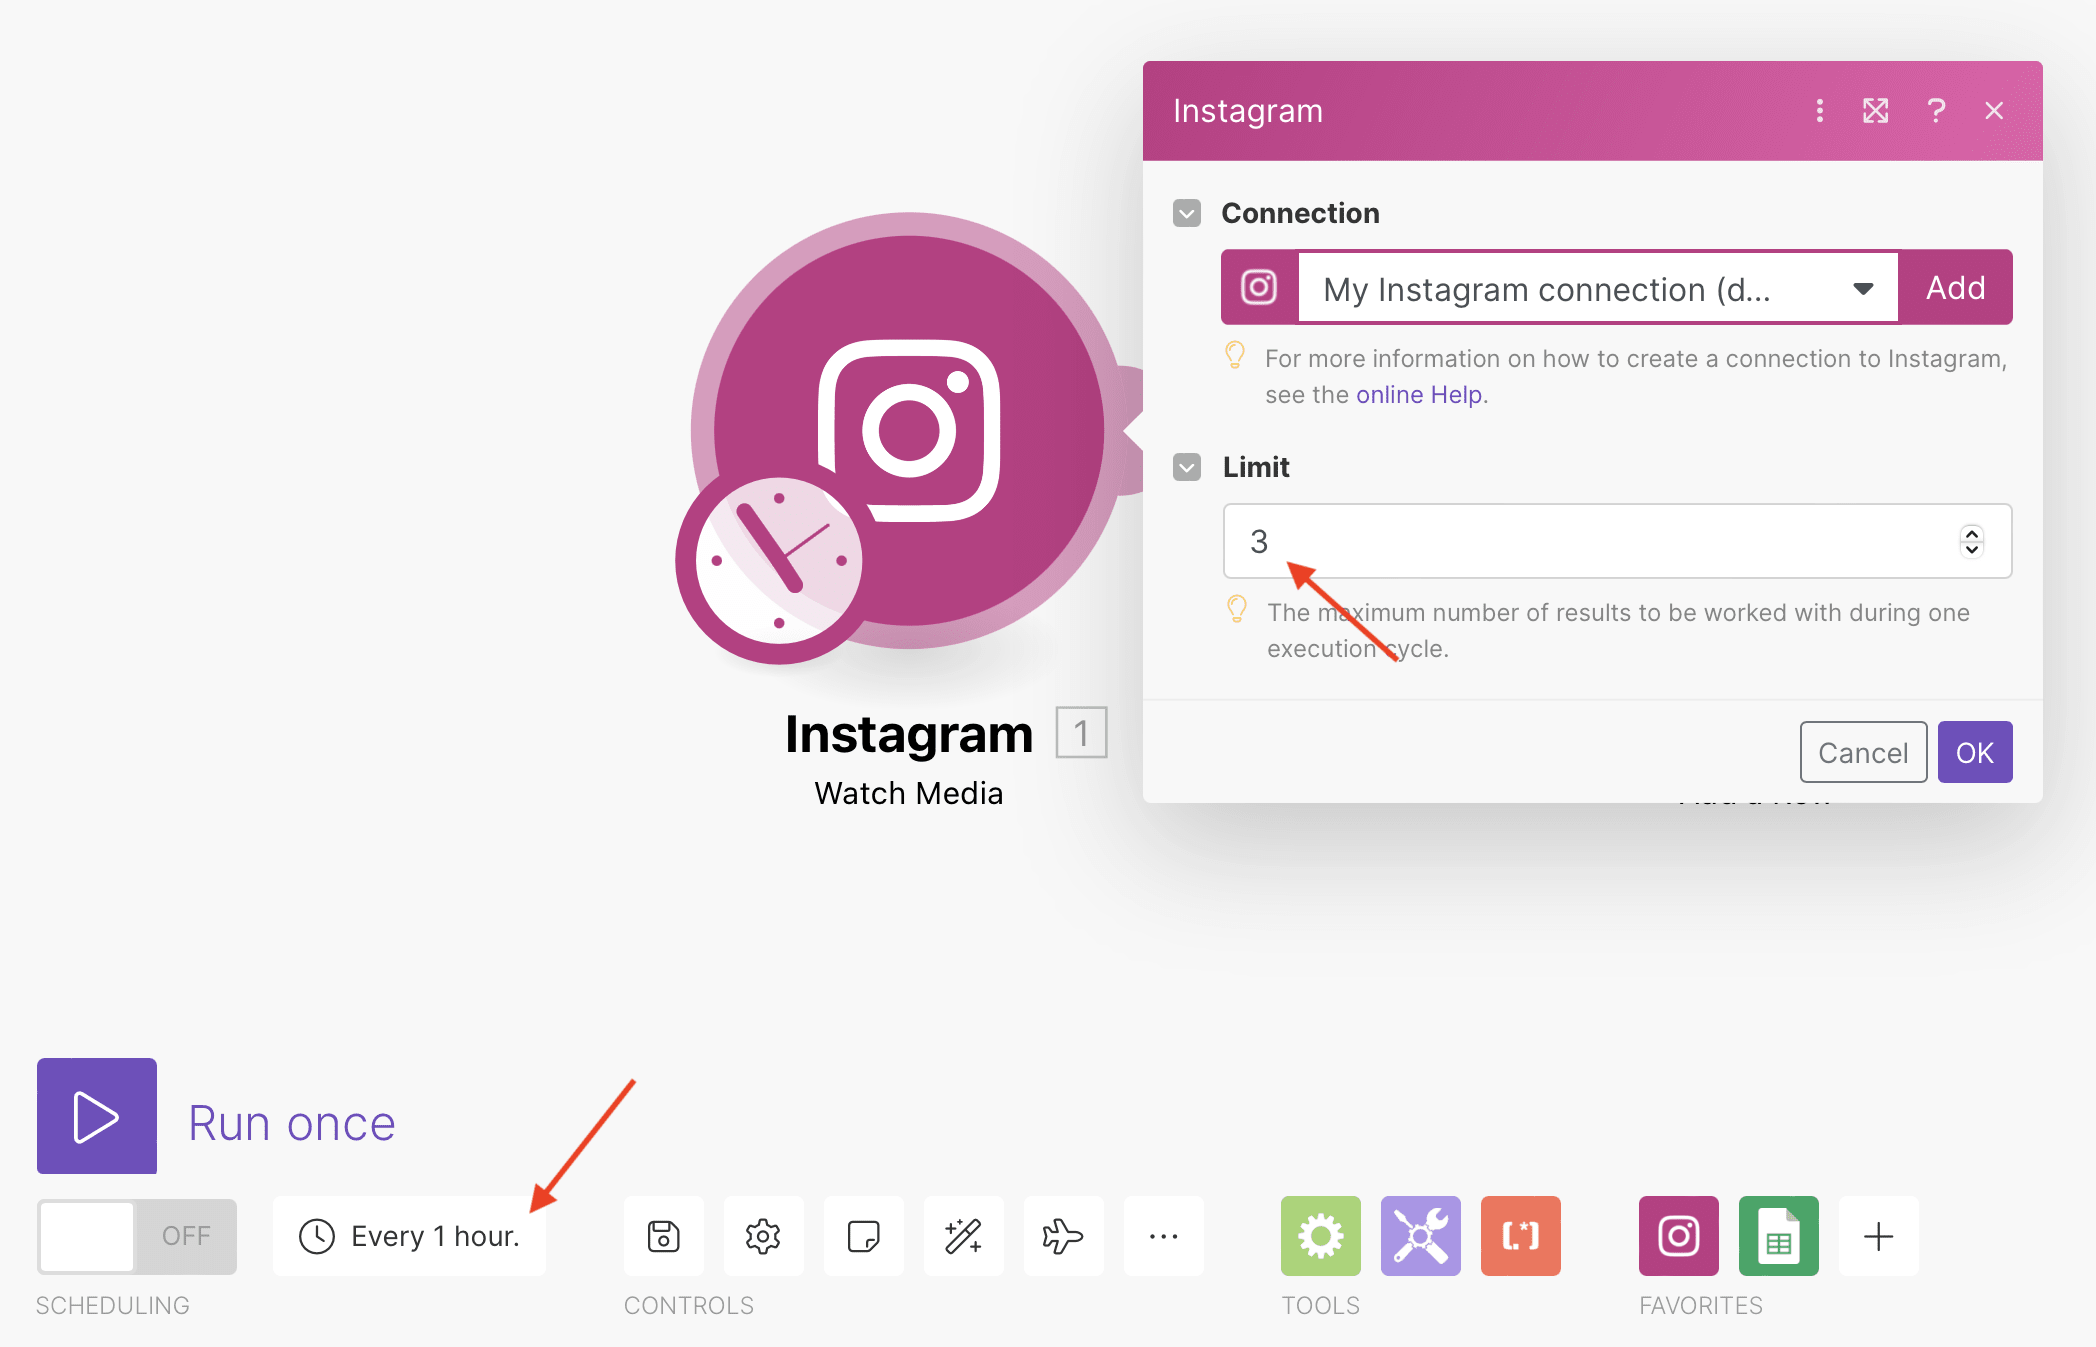
When your module is set up, click “OK”.
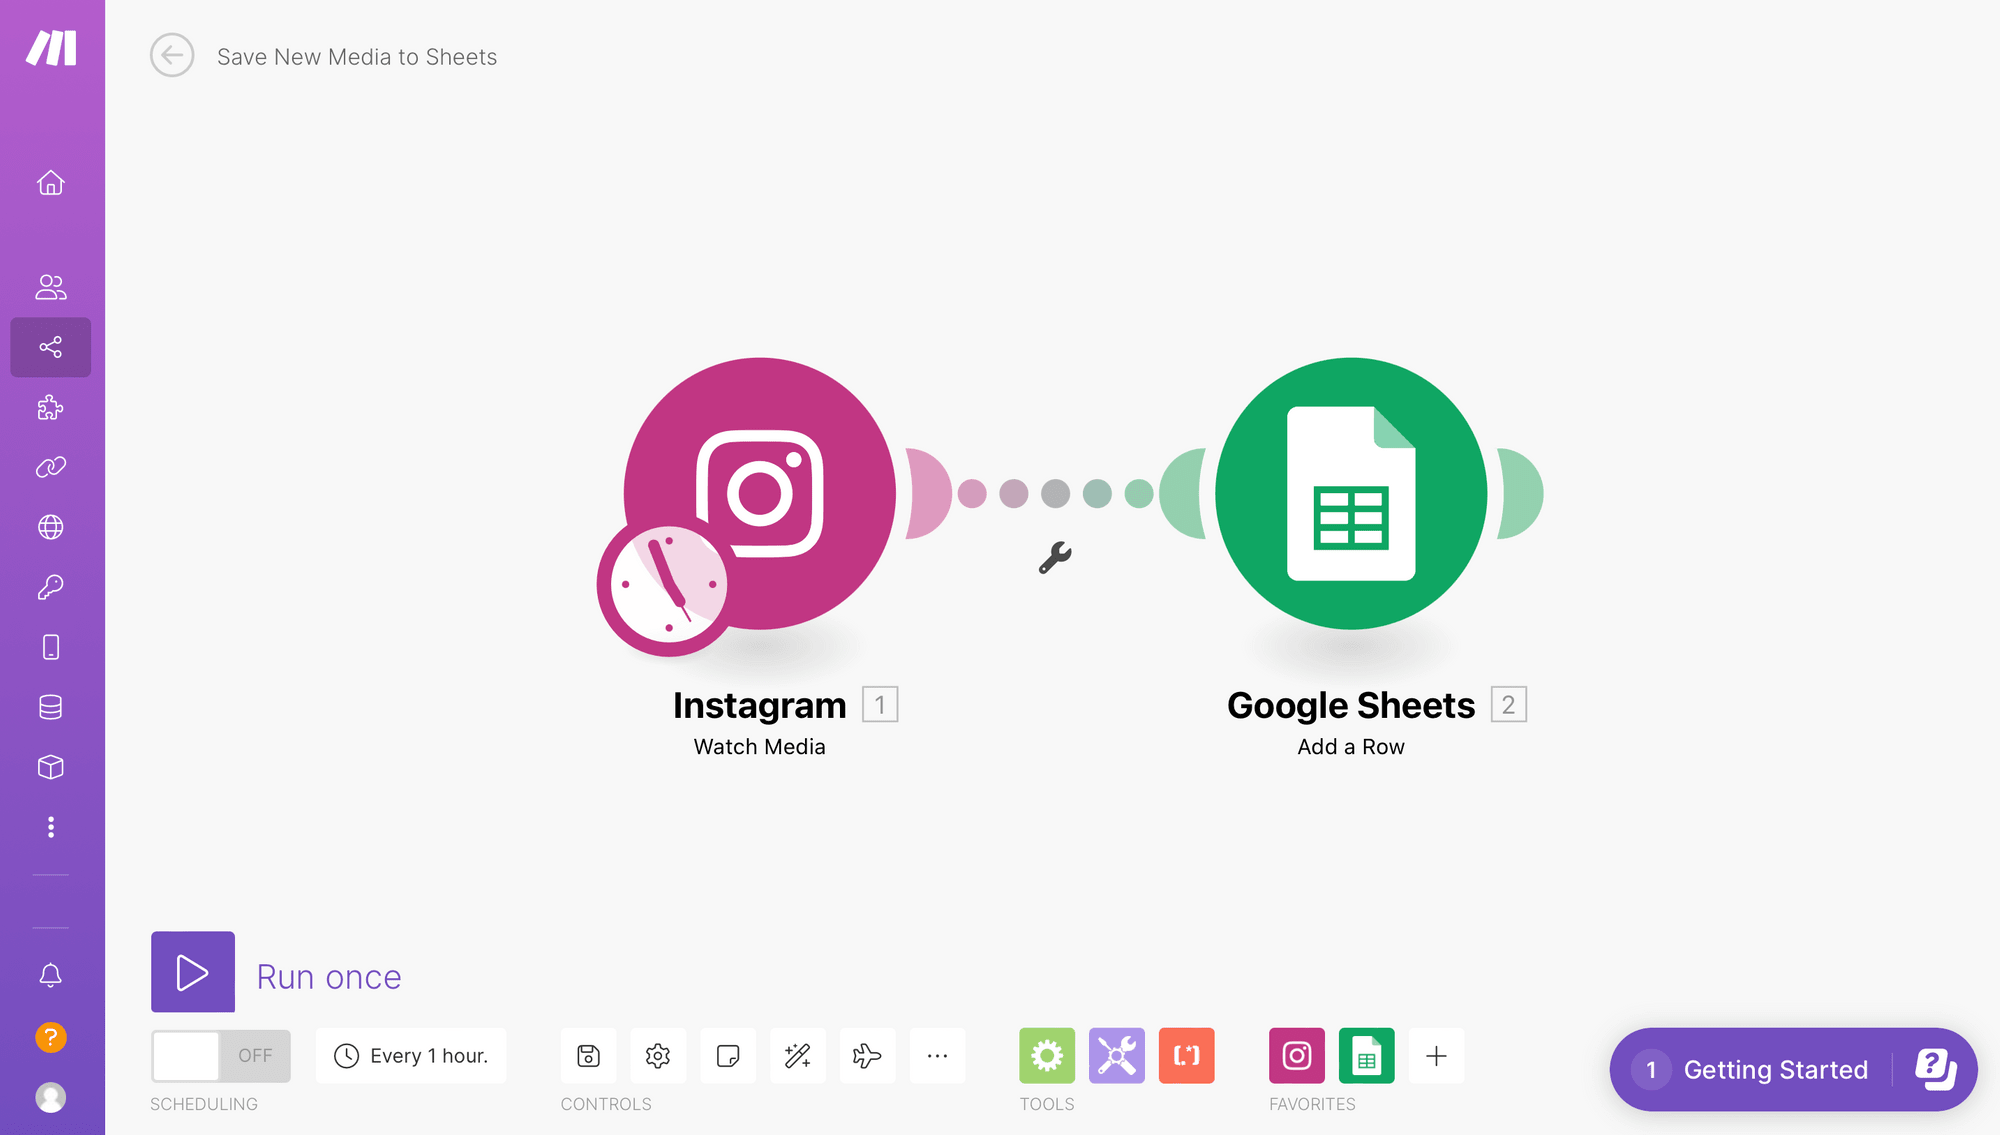
Google Sheets: Add a Row
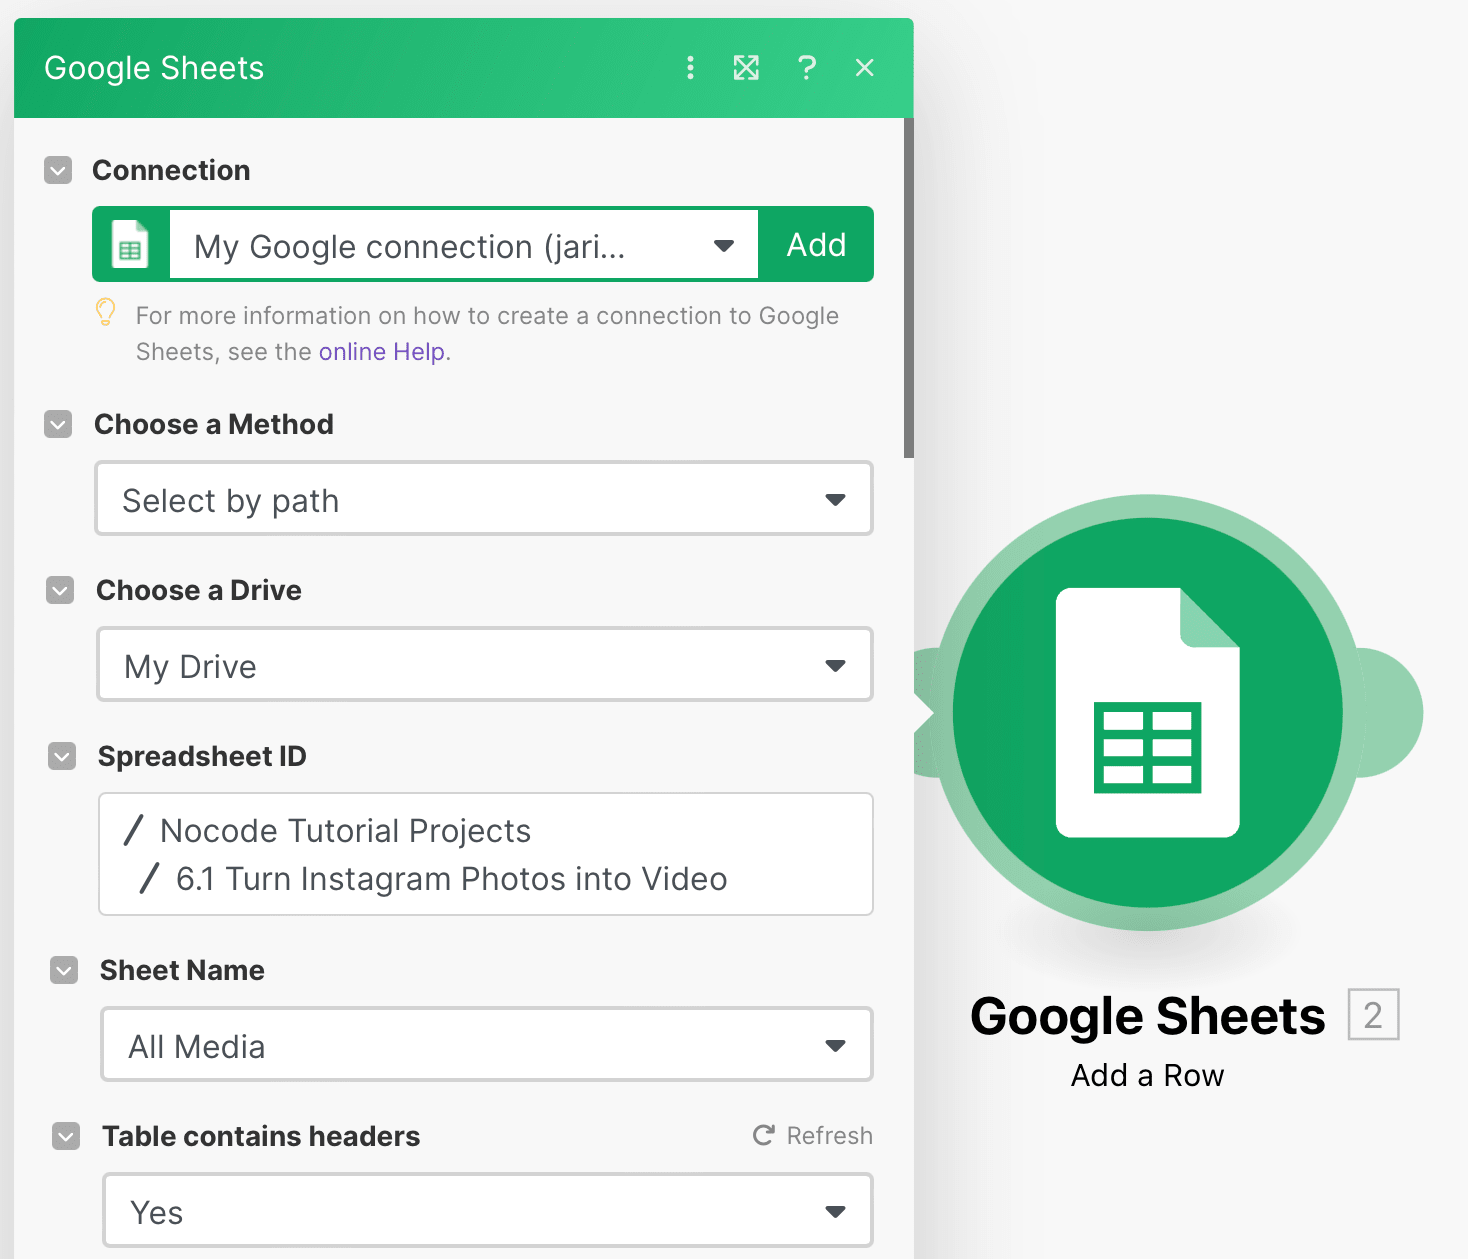
Choose Google Sheets as the app and “Add a Row” as the action. If you haven’t connected your Google Sheets account yet, you will be prompted to login.
To set up the module, choose the corresponding Drive, Spreadsheet, and Sheet Name.
You will also have to map Instagram media data to the headers. Insert 1. Media URL into the Image URL (A) column and 1. Timestamp into the Timestamp (B) column.

Click “OK”, then run your scenario to ensure new media URLs and timestamps are dropped into your Google Sheet.
Once you’ve confirmed everything is working correctly, save your scenario and toggle the Scheduling button on the bottom left of the editor to “ON”.
The full scenario should look like this:
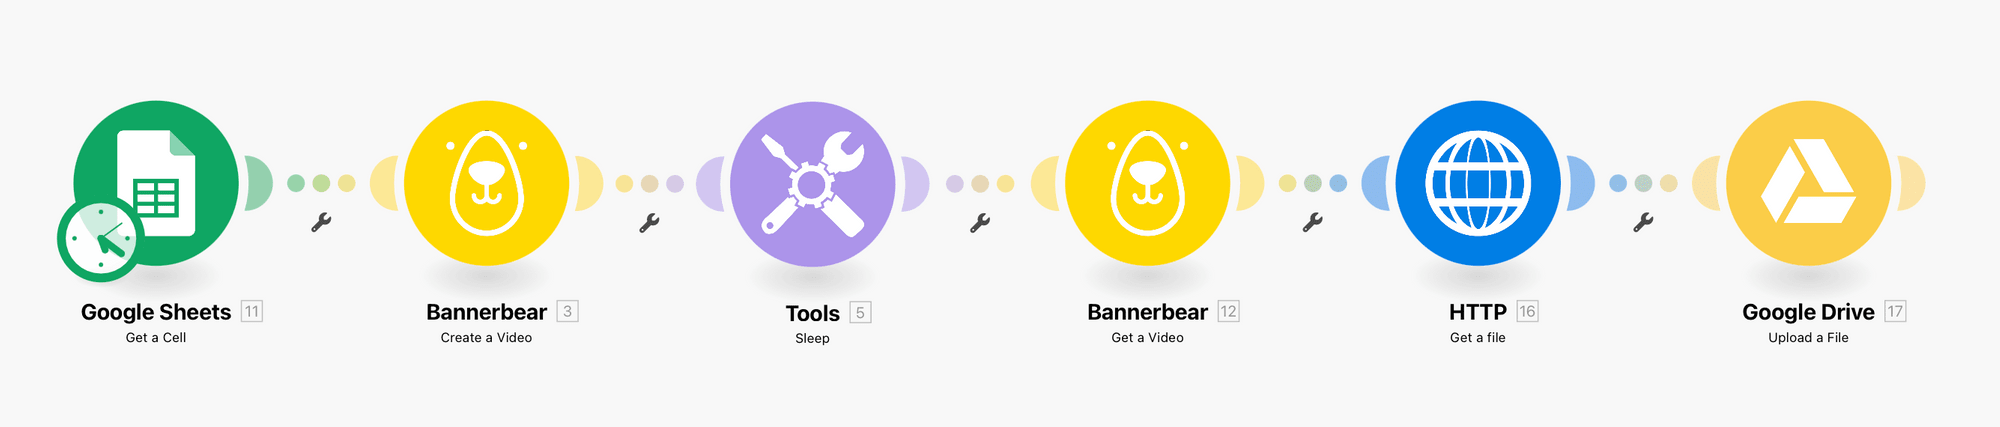
Create a Scenario that Generates a Video on a Schedule
From your Make home page, click “+ Create a new scenario” on the top right corner. Set up the following modules:
Google Sheets: Get a Cell
Choose Google Sheets as the app and “Get a Cell” as the action. Your account should already be connected from the previous step, so simply select it and choose the corresponding Drive, Spreadsheet, and Sheet Name.
Select the cell that will hold the most recent URL: A2
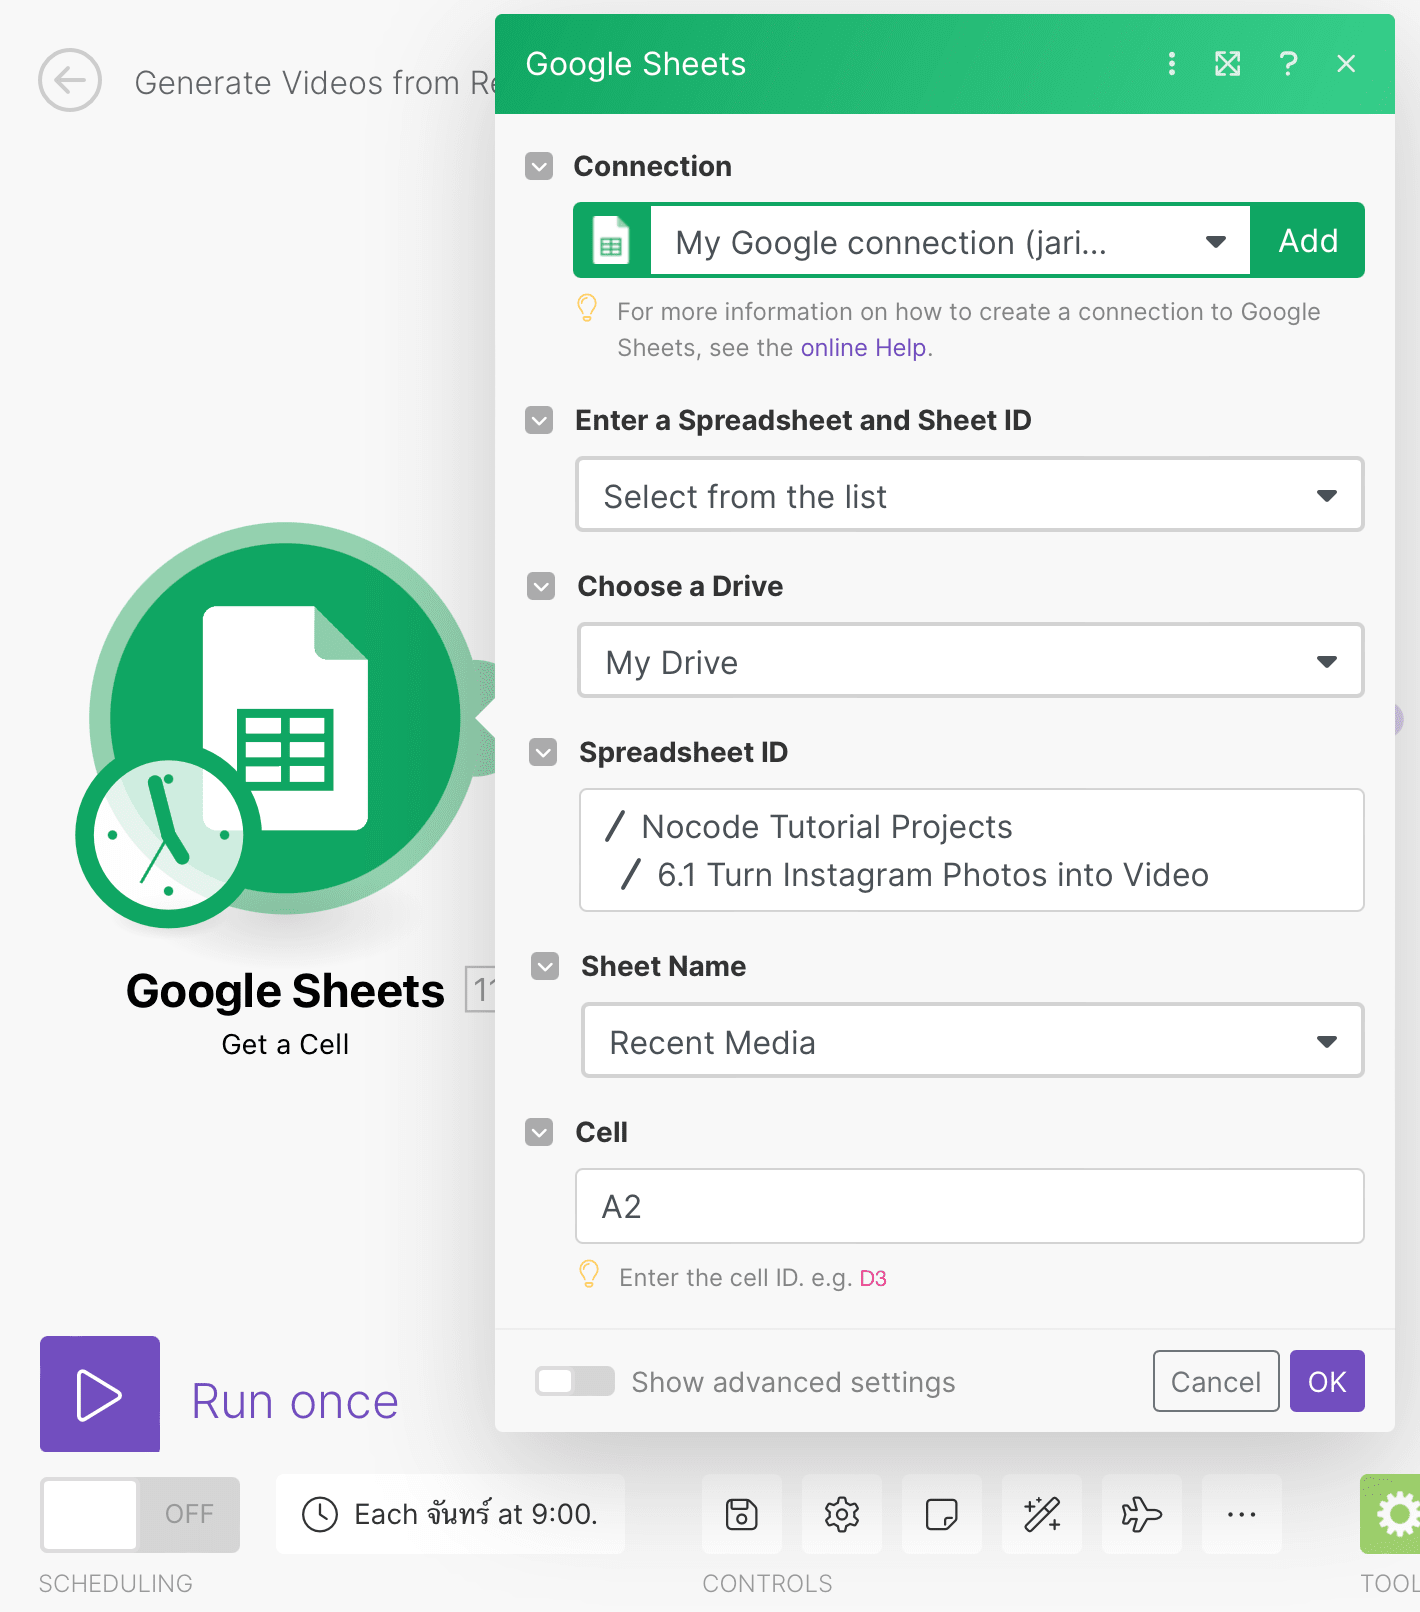
Click “OK”.
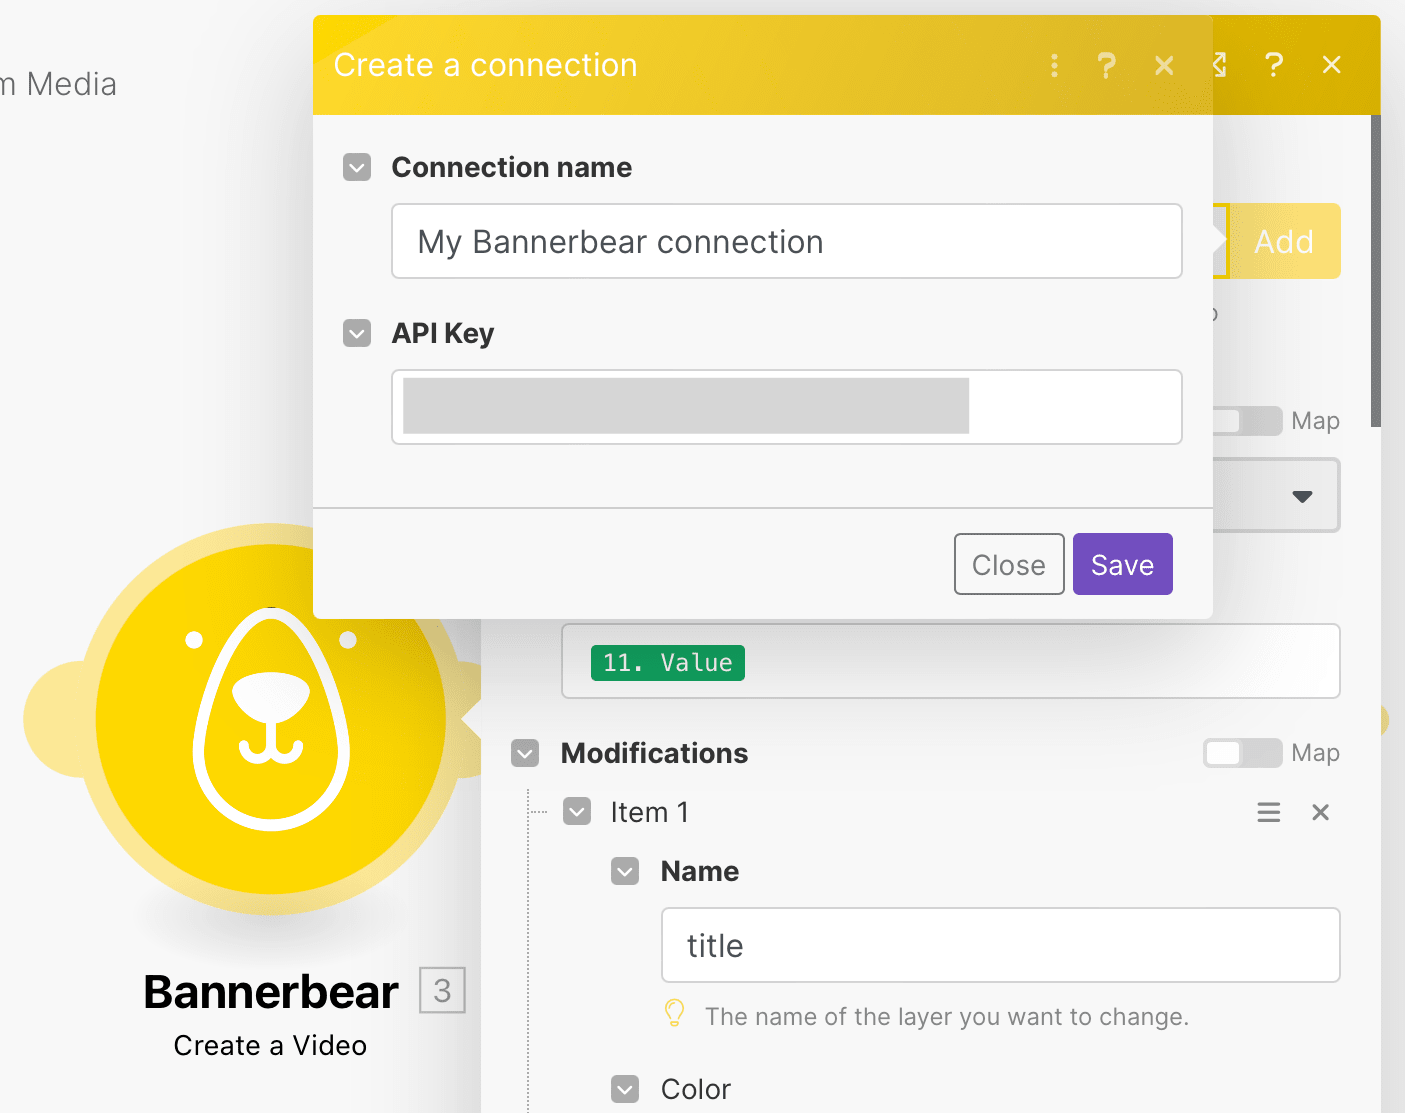
Bannerbear: Create a Video
Choose Bannerbear as the app and “Create a Video” as the action. You will need to connect your Project by clicking “Add” and inserting the API Key, which you can find in the Settings / API Key section of the Bannerbear app.
Once your project is successfully connected, select the correct Video Template UID and add the Input Media URL from the previous module.
You will need to add modifications for video generation to run, so add the names of the layers you want to change and specify any adjustments.

When you’re happy with the modifications, click “OK”.
Tools: Sleep
Videos take some time to render, so a sleep step will ensure it is successfully generated prior to the next module.
Add a Sleep tool module from the bottom taskbar. Set the delay at anywhere between 60 and 120 seconds.
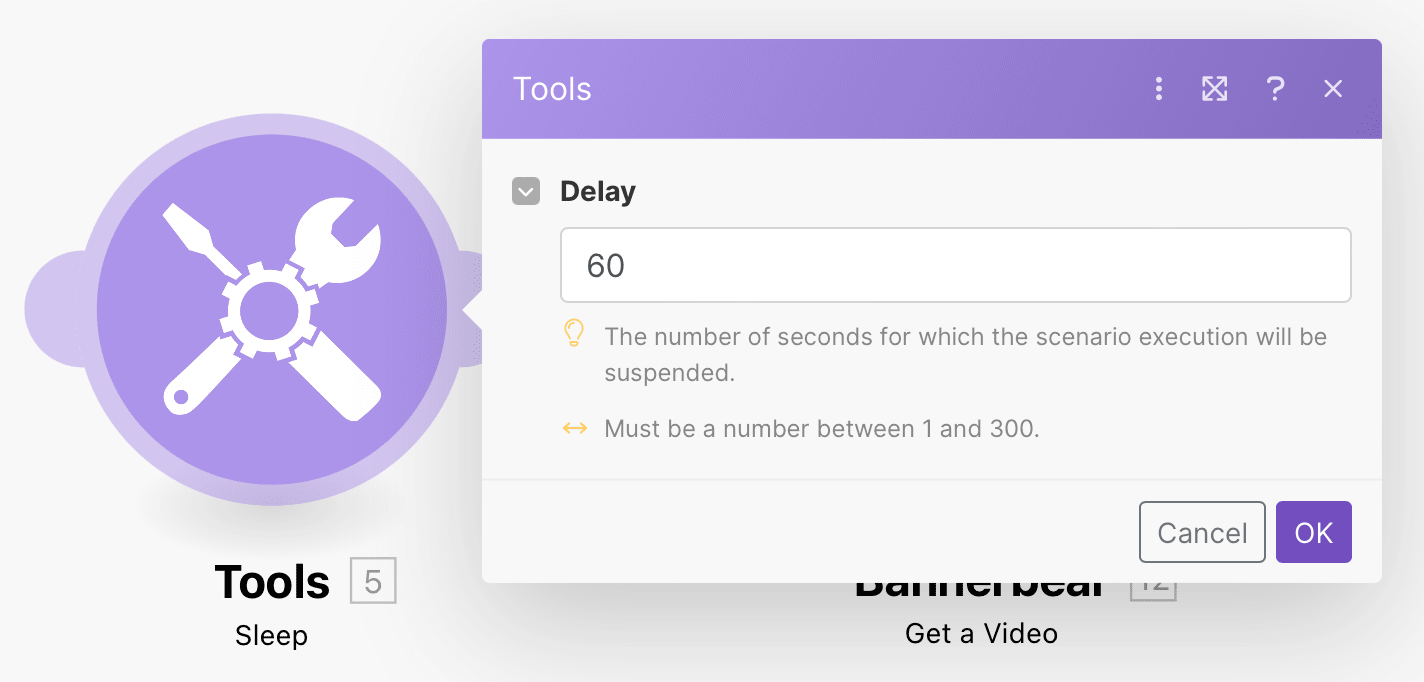
Click “OK” and move on to the next module.
❗ Note : The Sleep tool will work for most simple automations, but it leaves a greater margin for error if videos don't render in time. A more bulletproof way to fetch videos is to set it up as a separate scenario using a webhook as the trigger.
Bannerbear: Get a Video
Choose Bannerbear as the app and “Get a Video” as the action. Insert the UID from the previous video creation step.
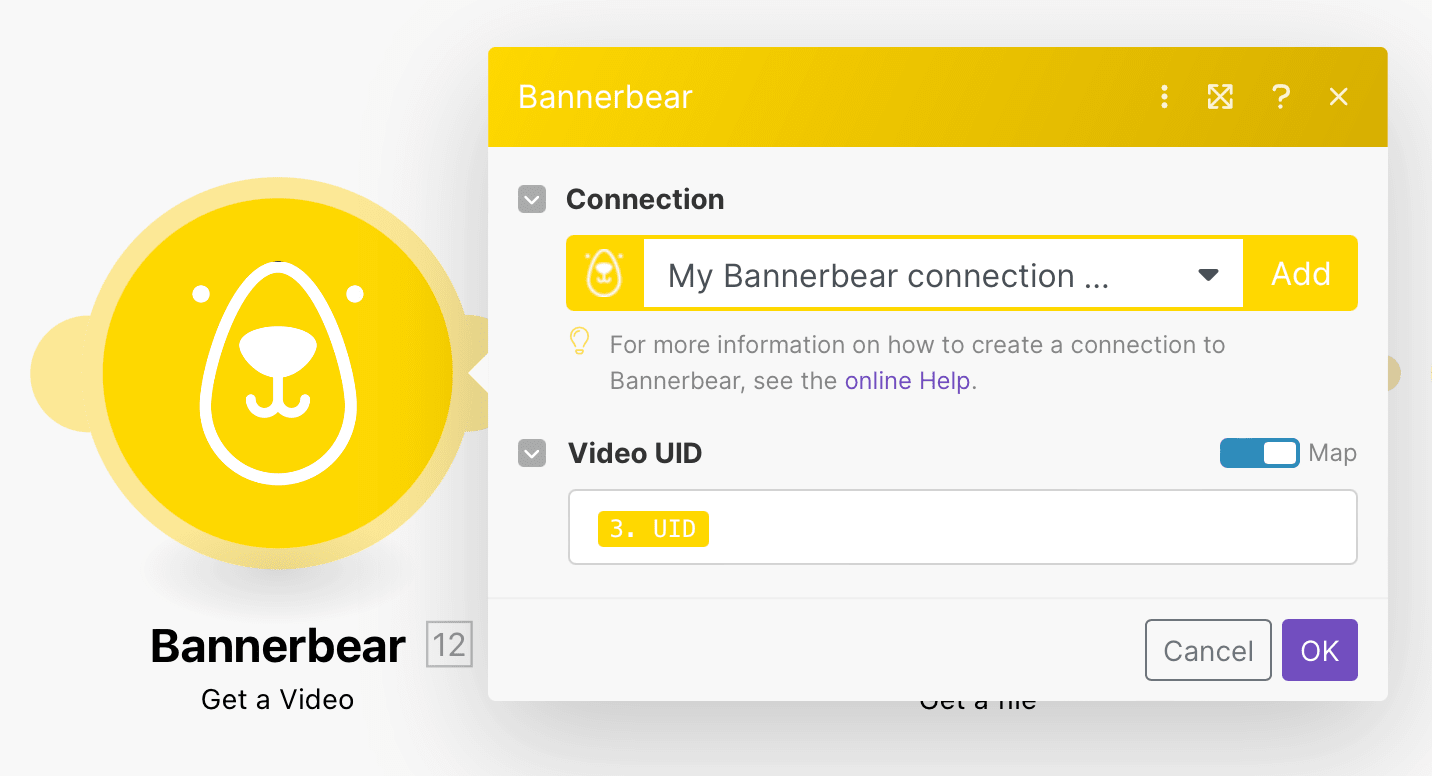
Click “OK”.
HTTP: Get a File
Since the previous module only retrieved the URL, this step is necessary for obtaining the actual video file.
Choose HTTP as the app and “Get a File” as the action. Insert the Video URL from the previous module.
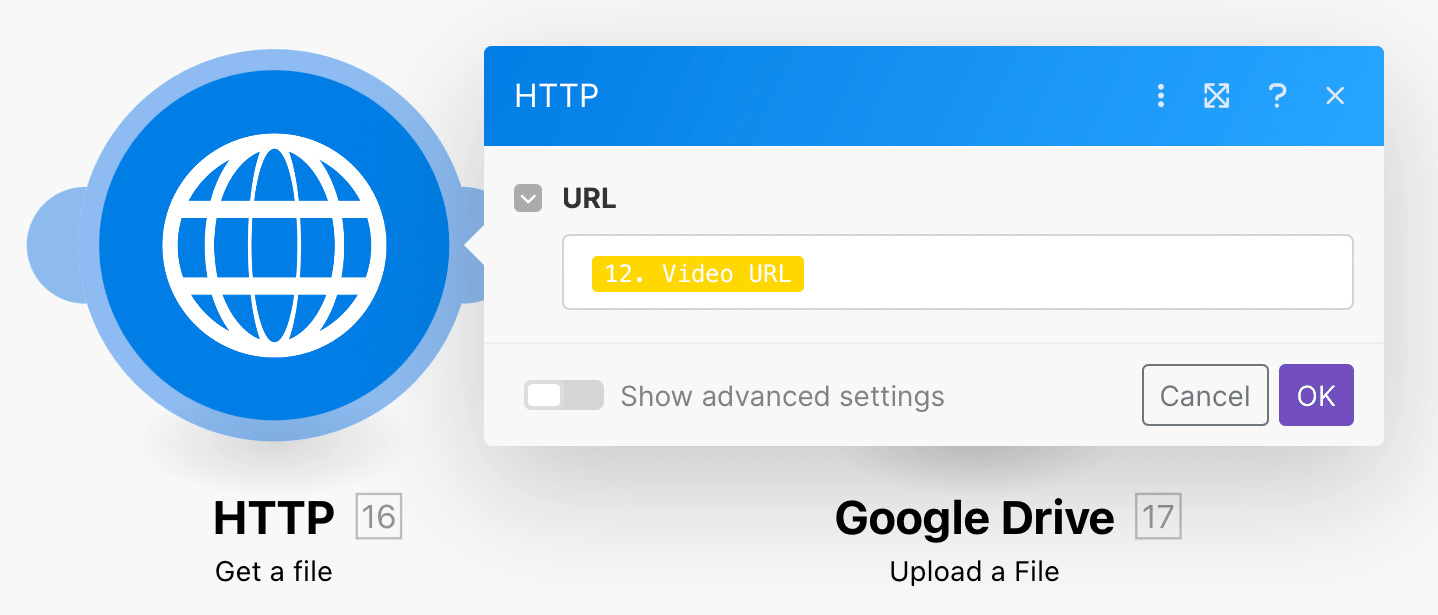
Click “OK”.
Google Drive: Upload a File
Choose Google Drive as the app and “Upload a File” as the action. Set up the module by specifying the location you want the video to be uploaded, then choose “HTTP - Get a file” as the file source.
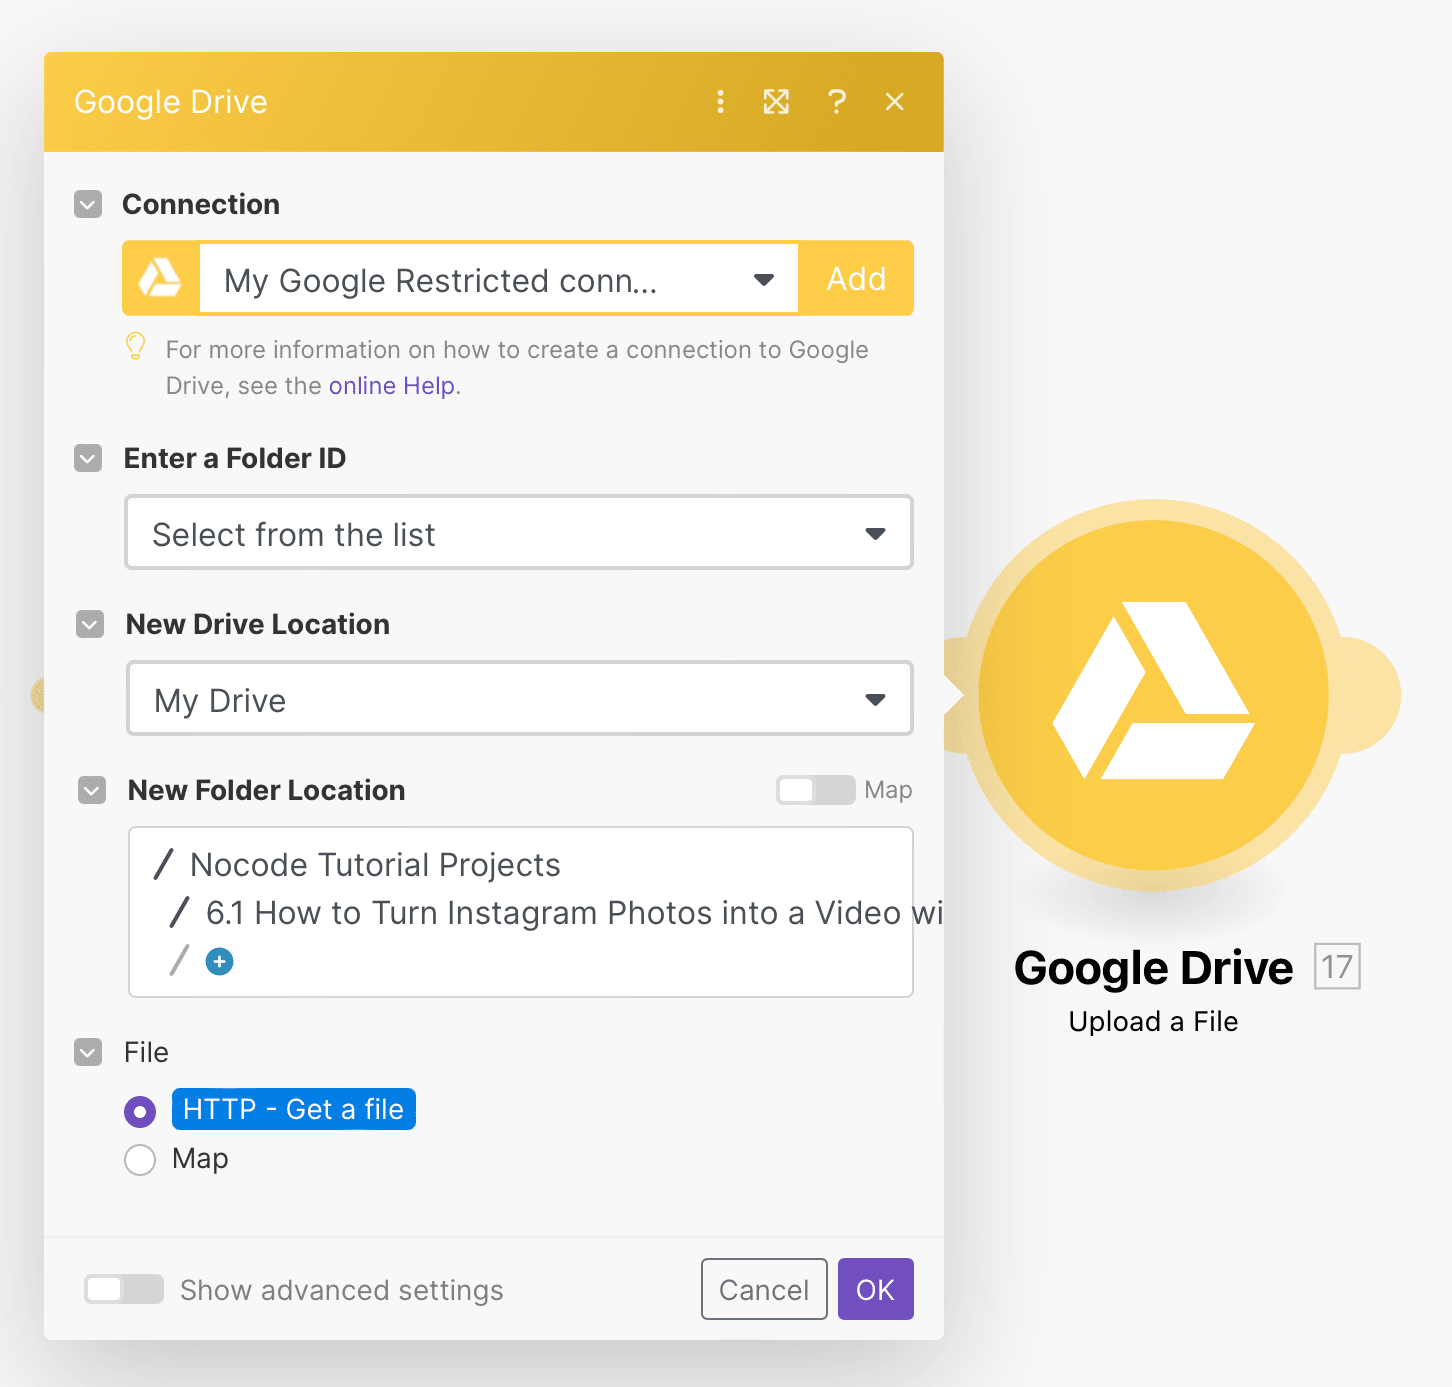
Click “OK”, then run the entire scenario to ensure a video is successfully generated, fetched, and uploaded to the correct Drive folder.
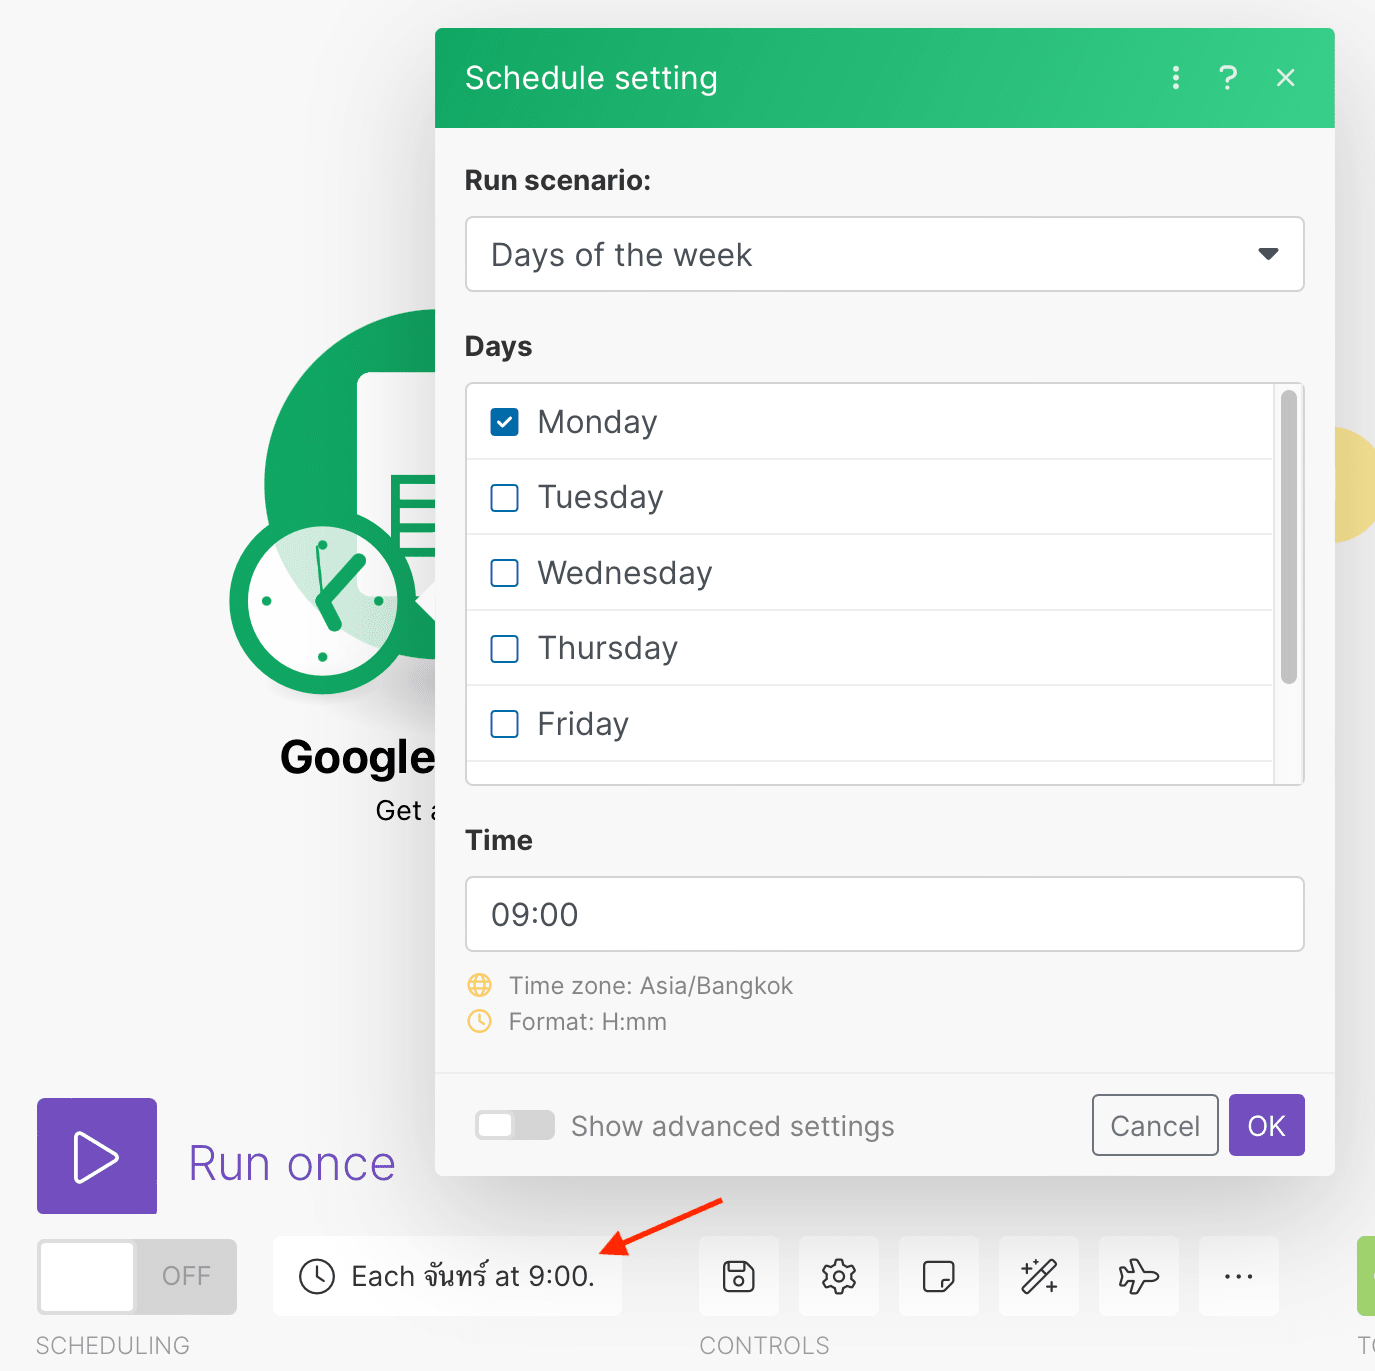
❗ Note : You will need to add a schedule setting for your scenario to run on a regular basis. In this example, we will instruct it to run every Monday at 9:00 am.
The full scenario should look like this:
Save your scenario, and once you’ve confirmed everything is correct, toggle the Scheduling button on the bottom left of the editor to “ON”.
Bear Tip 🐻: If you’d like to automatically publish your newly generated video to Instagram instead of having to manually grab it from Google Drive, add and set up an additional module: Instagram: Create a Video Post. That said, keep in mind that this is only possible for Business accounts and this template is more suitable for Stories!
The final result you should be looking for is a video like this in your Google Drive folder:
And that’s all to it!
Reusing Instagram Photos for More Brand Assets
There’s no reason a good photo should only be posted once. By regularly turning them into videos, you create something more eye-catching that can be used as an Instagram Story or something similar. Best of all, you can schedule video generation using Make so there’s always something new to post.
The sky is the limit when it comes to repurposing brand assets. You don’t have to stop at videos for Stories—consider adding the same photos to newsletters, Tweets, and more.
For more Instagram photo repurposing ideas, check out these nocode tutorials:
👉 How to Turn Your Recent Instagram Photos into a Video or GIF
👉 How to Create an Auto-Updating Instagram Grid Mockup for Your Newsletter or Website
