
Automate Graphics Across Channels with Adaptive Resizing (Bannerbear V5 Tutorial)
Contents
Let’s say you’re running an event—a webinar, product launch, or even community meetup. You need to promote it across multiple channels: Facebook, Instagram, LinkedIn, email, and perhaps even physical signage. The challenge is that each placement requires different dimensions.
The traditional design workflow isn’t wrong, but it’s inefficient. You design a graphic, duplicate and resize it, then rearrange elements to maintain visual integrity. And then, you repeat this process for each additional platform. Each update means redesigning every version from scratch.
Bannerbear V5’s adaptive resizing feature solves this problem. Instead of manually resizing for each platform, you design your template once and define how elements should reposition when the canvas dimensions change. One Airtable record triggers one workflow, which generates all required sizes simultaneously.
In this tutorial, we’ll build a system that transforms a single event record into perfectly sized graphics optimized for every channel you need.
Why Adaptive Resizing?
A workflow created for adaptive resizing offers plenty of flexibility and reusability. You’re not locked into fixed dimensions. Instead, you can generate different sizes based on specific conditions, making your automation both versatile and hands-free.
There are plenty of great uses for adaptive templates, such as:
- Social posts that need to be optimized for platform technical specifications
- Website image variations used for A/B testing
- Retail signage that needs to consistently deliver on tags and posters alike
- Time-sensitive content that needs to be distributed quickly
There are situations when other methods of image resizing are more appropriate, such as when you only have a couple of other dimensions needed (and they are unlikely to change), and there are too many complicated elements that make resizing less predictable. Creating an Image Collection can be more suitable and still yield great results, but it will still require you to set up multiple templates.
What You Will Create
We’re using event planning as the use case for this tutorial, but there are plenty of situations where you might need to generate graphics in dynamic sizes—and you can certainly adapt this method to your needs.
Here are the tools we’ll be using:
- Airtable : To store data and generated graphics
- Bannerbear : To design adaptive templates and generate graphics in many sizes
- Zapier : To trigger actions in different programs based on predesigned instructions
By the end, one Airtable record will trigger graphics across all your channels simultaneously.
Ready to build? Let’s go.
Building the Workflow
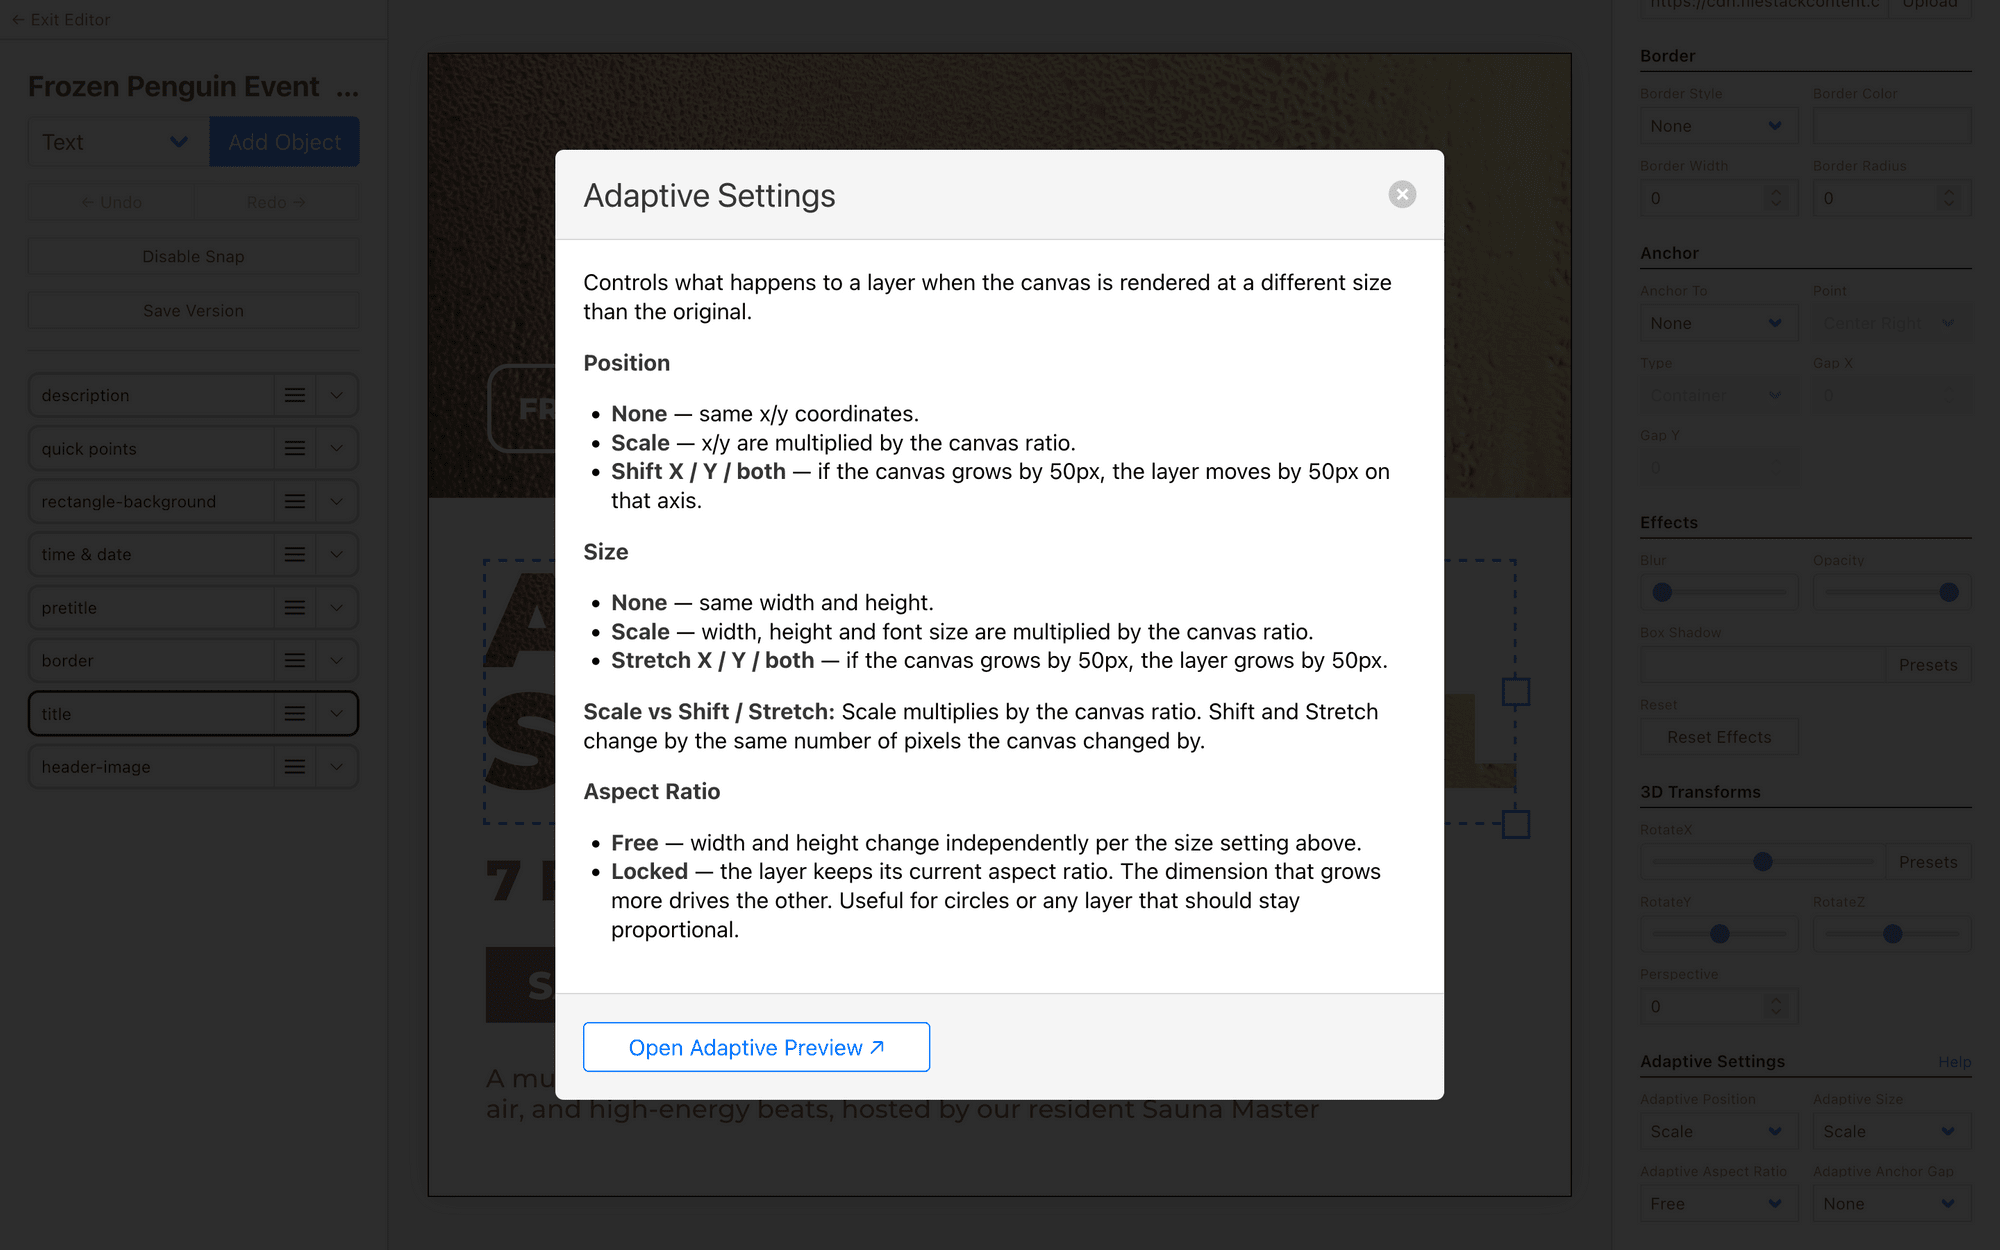
An adaptive Bannerbear template is the same as a regular template, with one key difference: you tell each layer how to behave when the canvas gets bigger or smaller.
Here’s how to bring a Bannerbear template, Airtable database, and Zap all together:
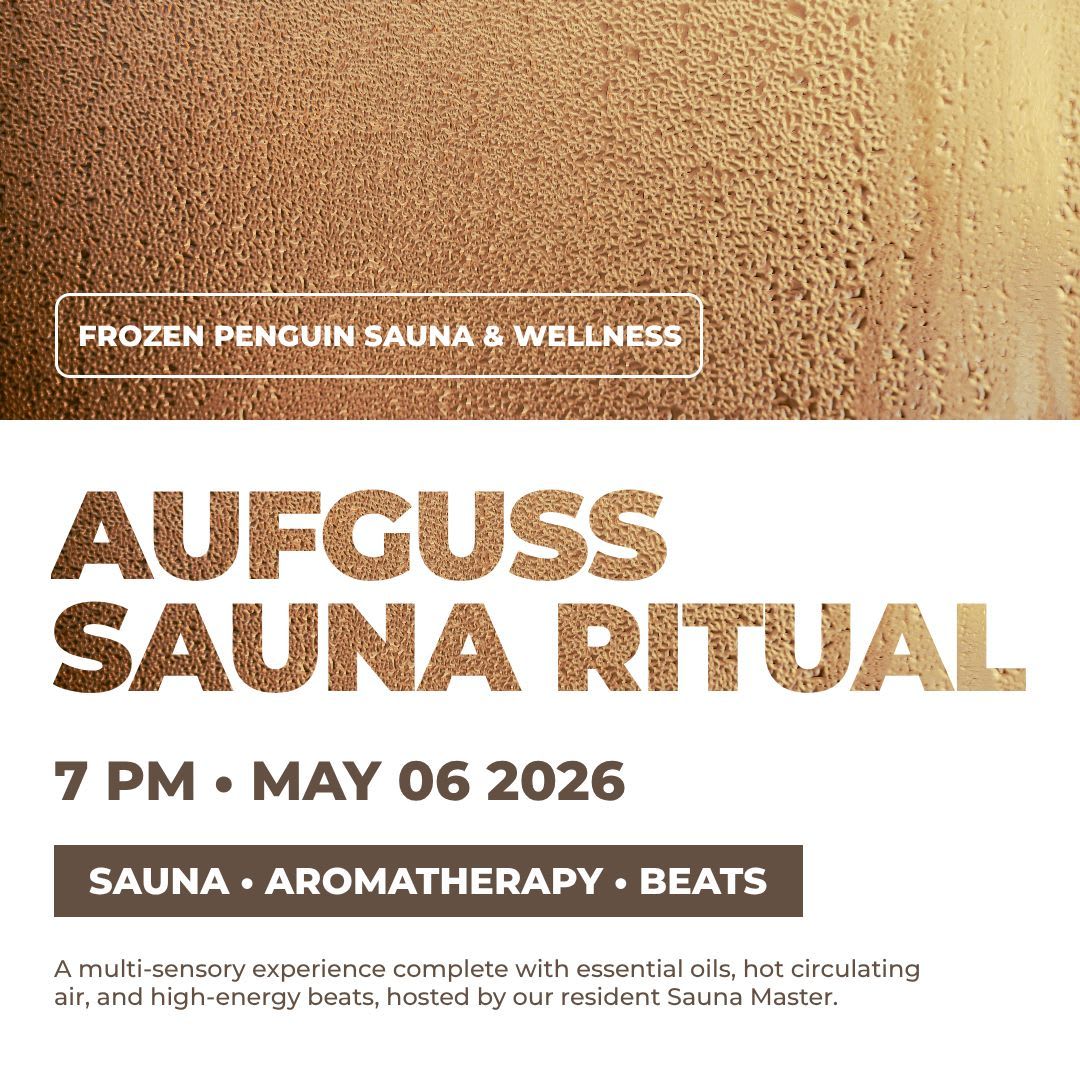
Step 1 - Create An Adaptive Bannerbear Template
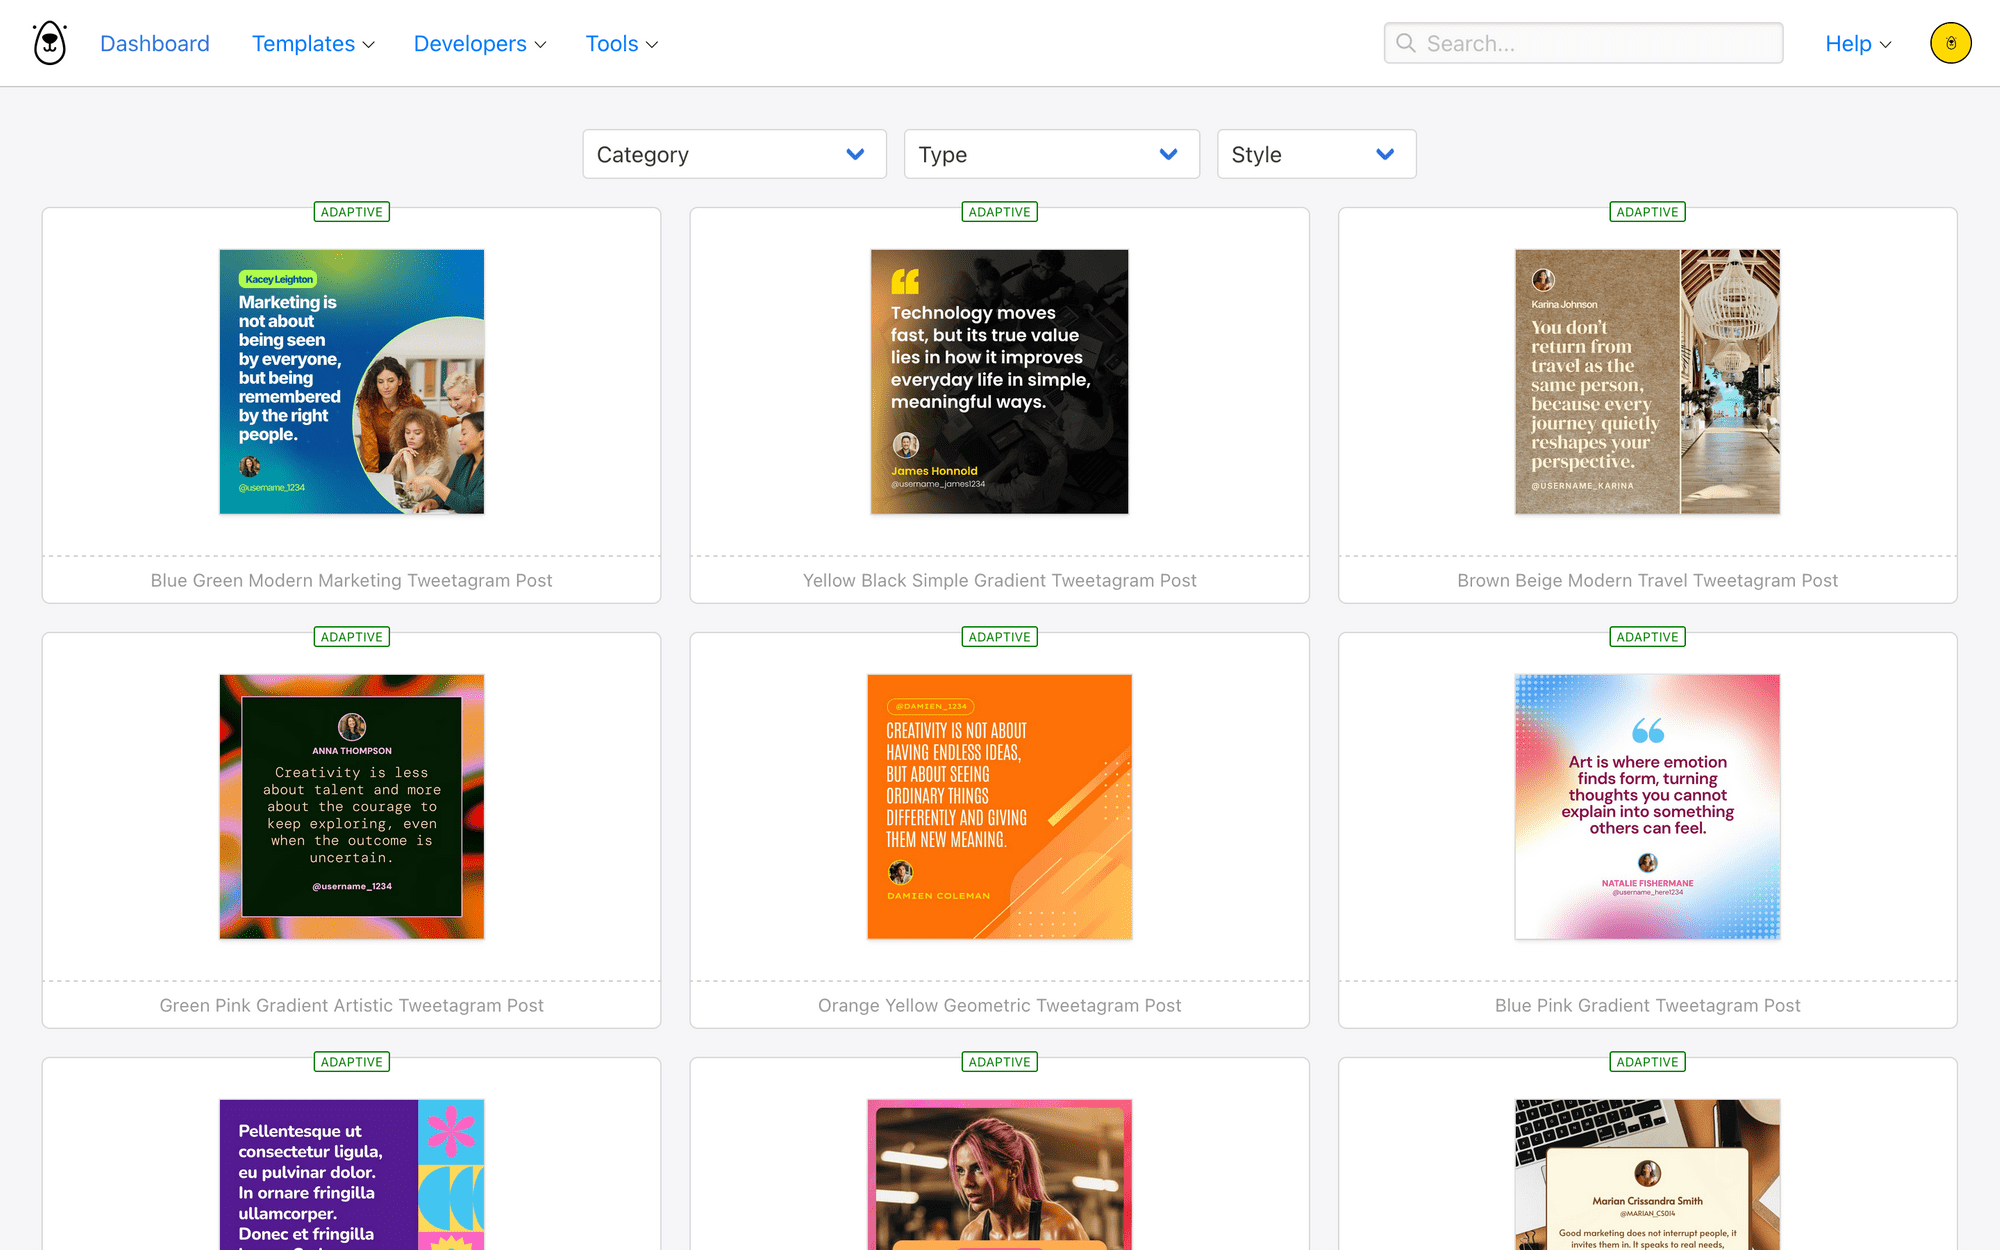
Log into your Bannerbear account (or create a free account if you don’t have one yet—no credit card required! 🥳), and create a new project.
You can start from scratch or use one of our predesigned adaptive templates:
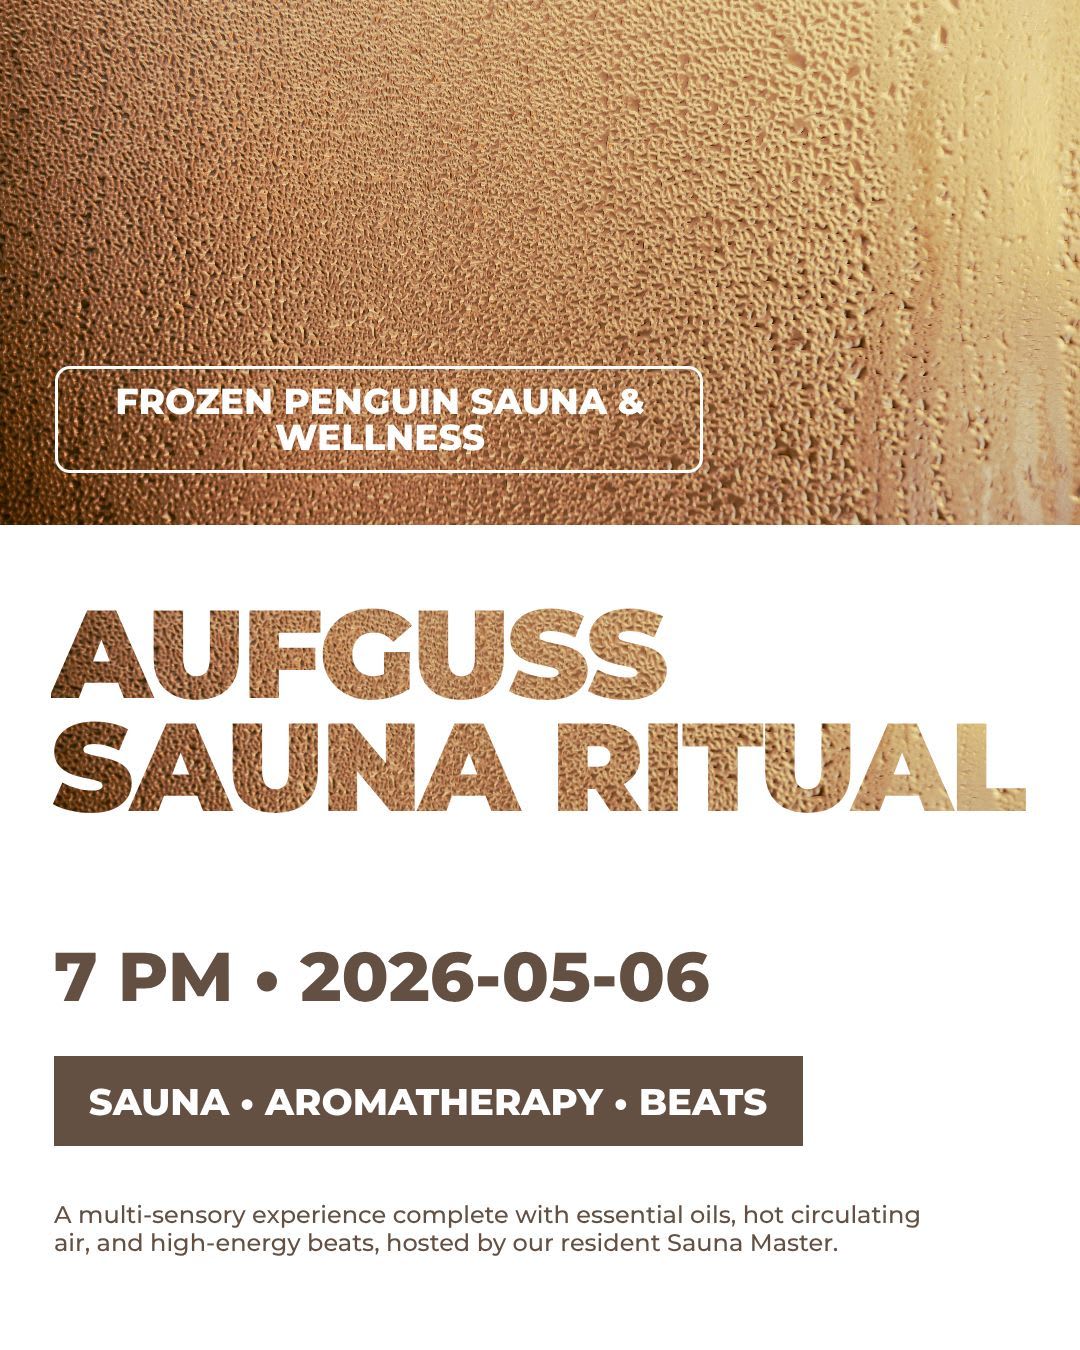
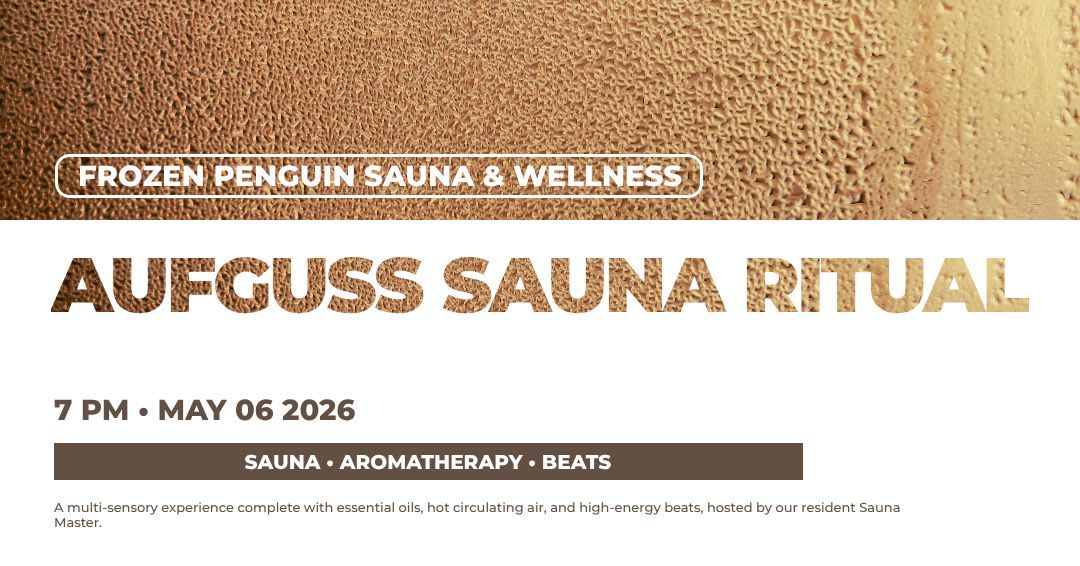
As you build out your layers, you'll see adaptive settings at the bottom of the right sidebar. There you control position, size, aspect ratio, and anchor gap for each element.

You decide how each element scales and whether to lock it to other elements or coordinates.
Click Adaptive Preview from your template page to see your design across many dimensions at once.

Re-roll as many times as needed, and make the necessary adjustments.
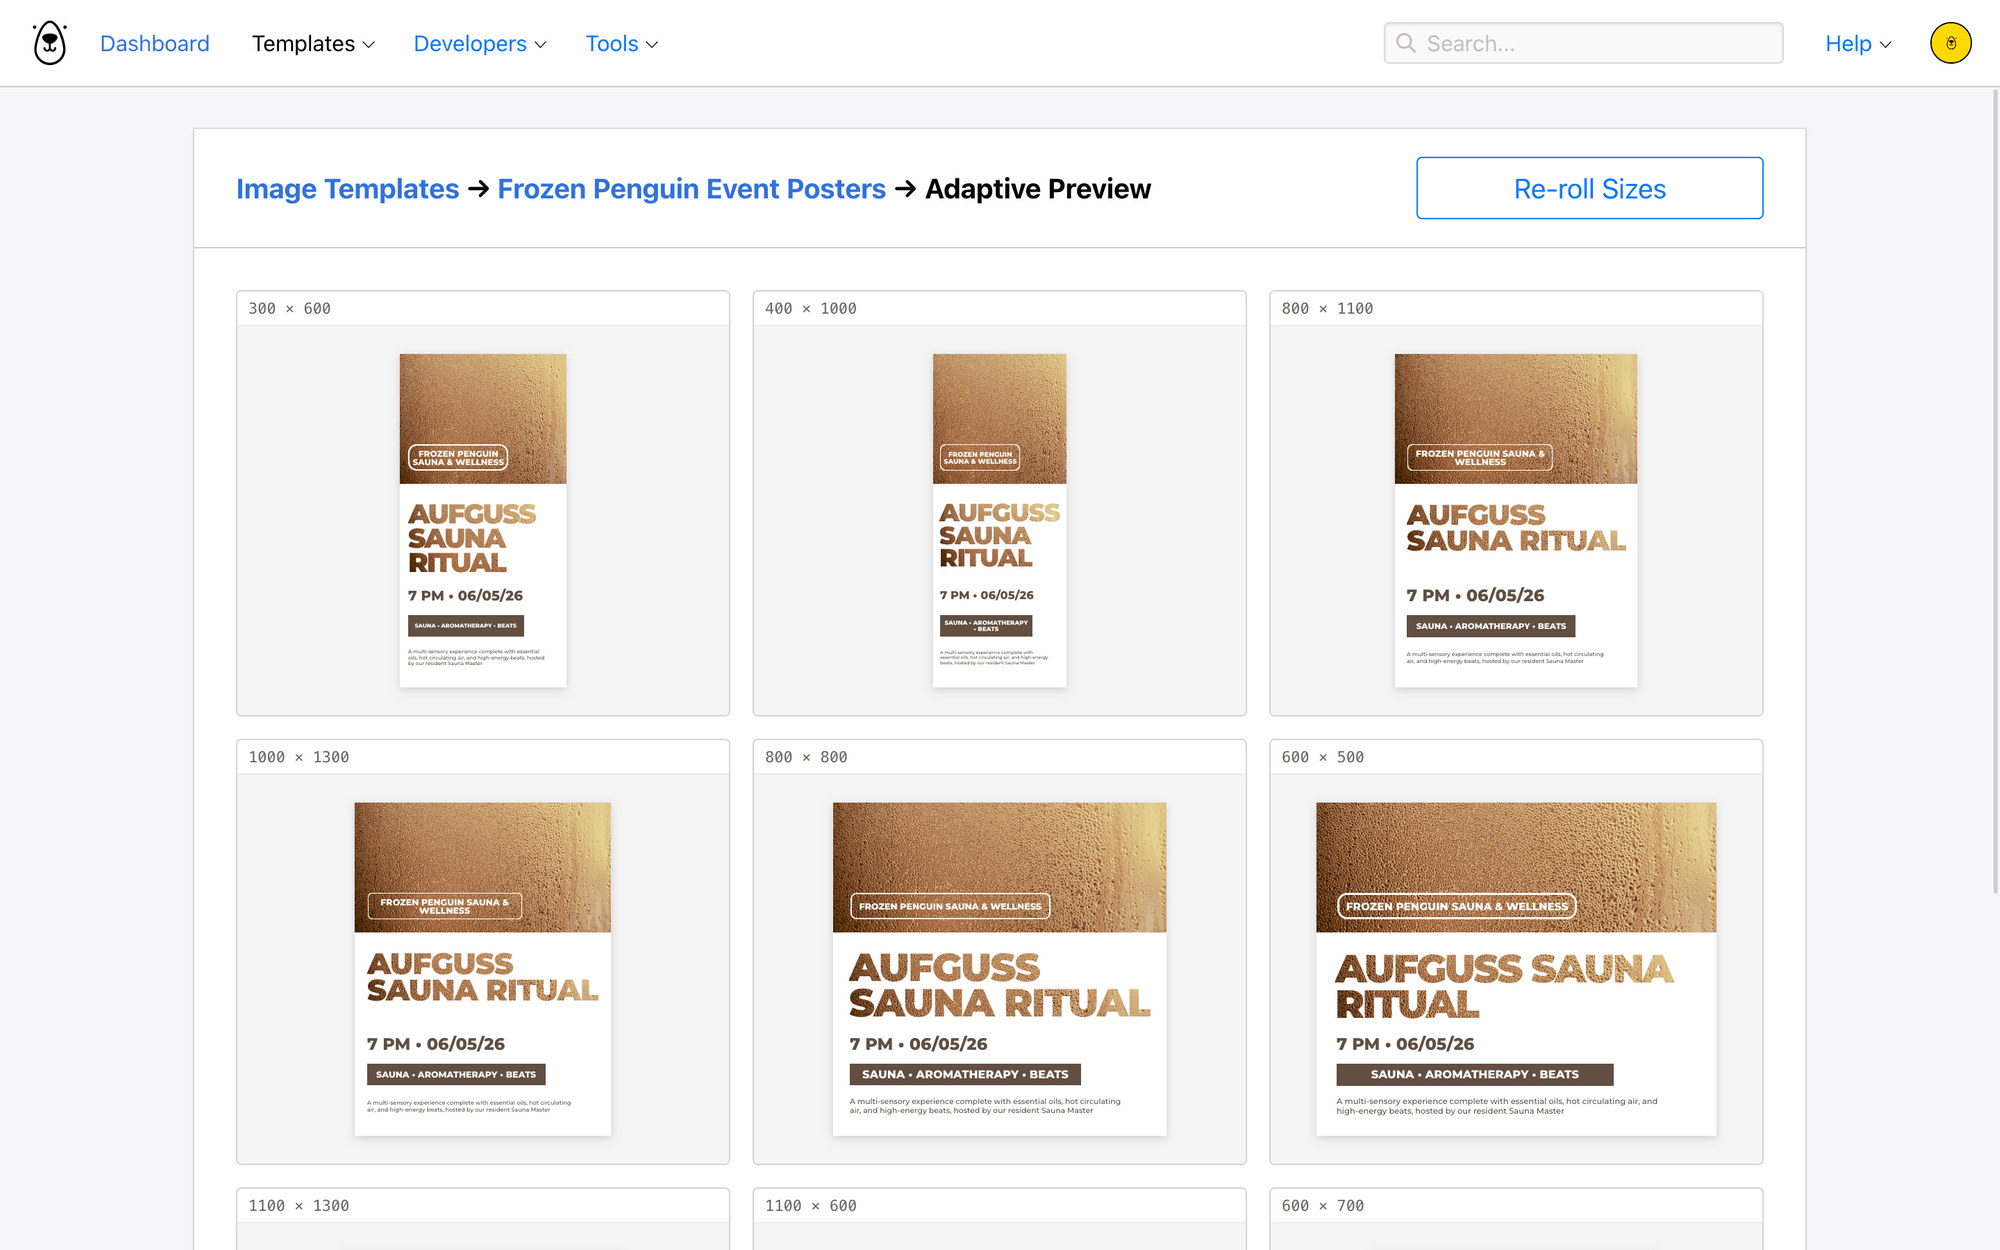
Once everything looks right, your template is ready to go.
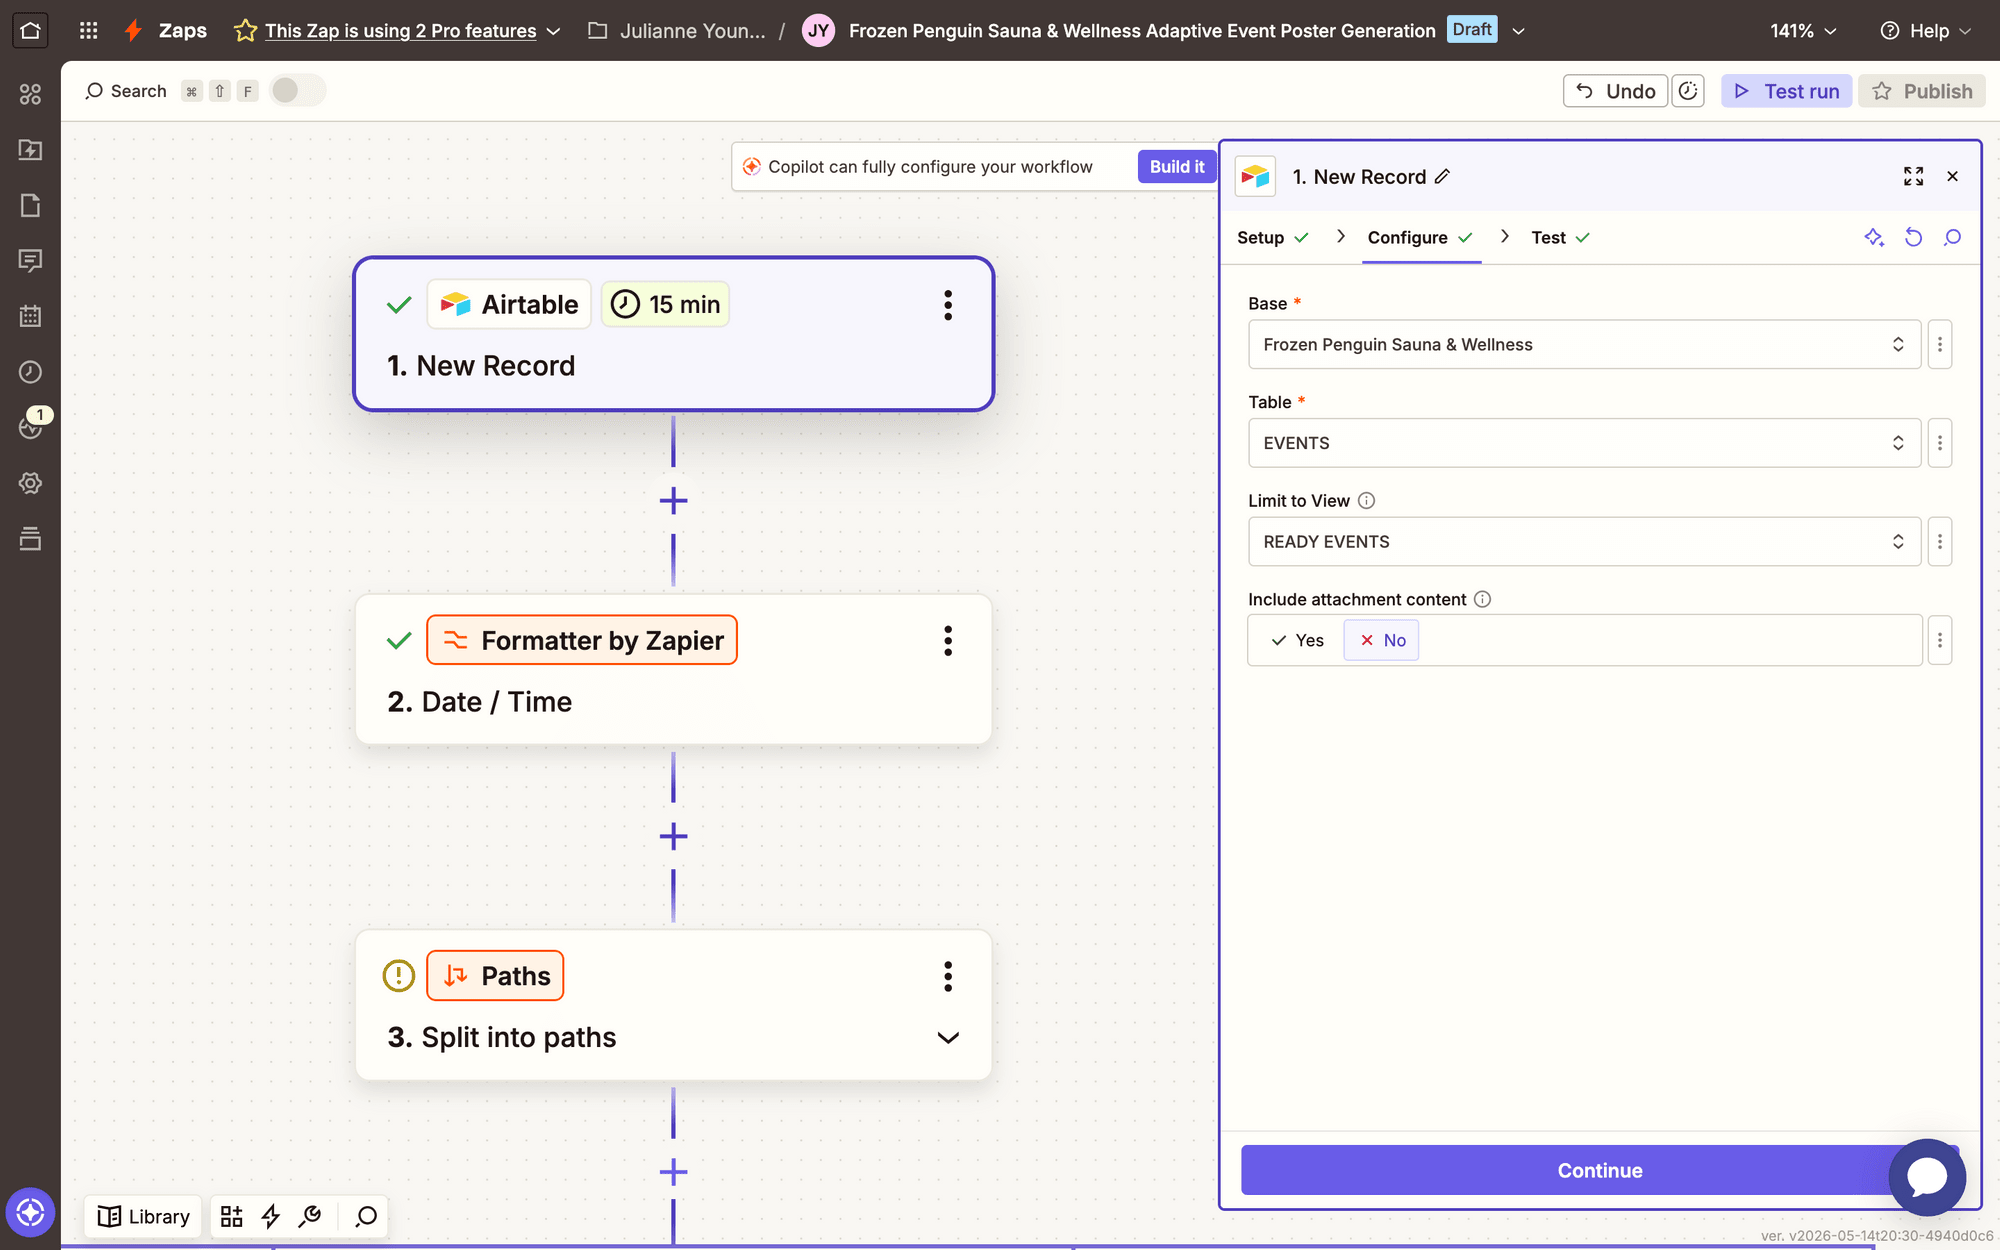
Step 2 - Prepare Your Airtable Base
Airtable is a spreadsheet-database hybrid that integrates well with nocode tools like the ones we’re using today. You can substitute another app if you prefer.
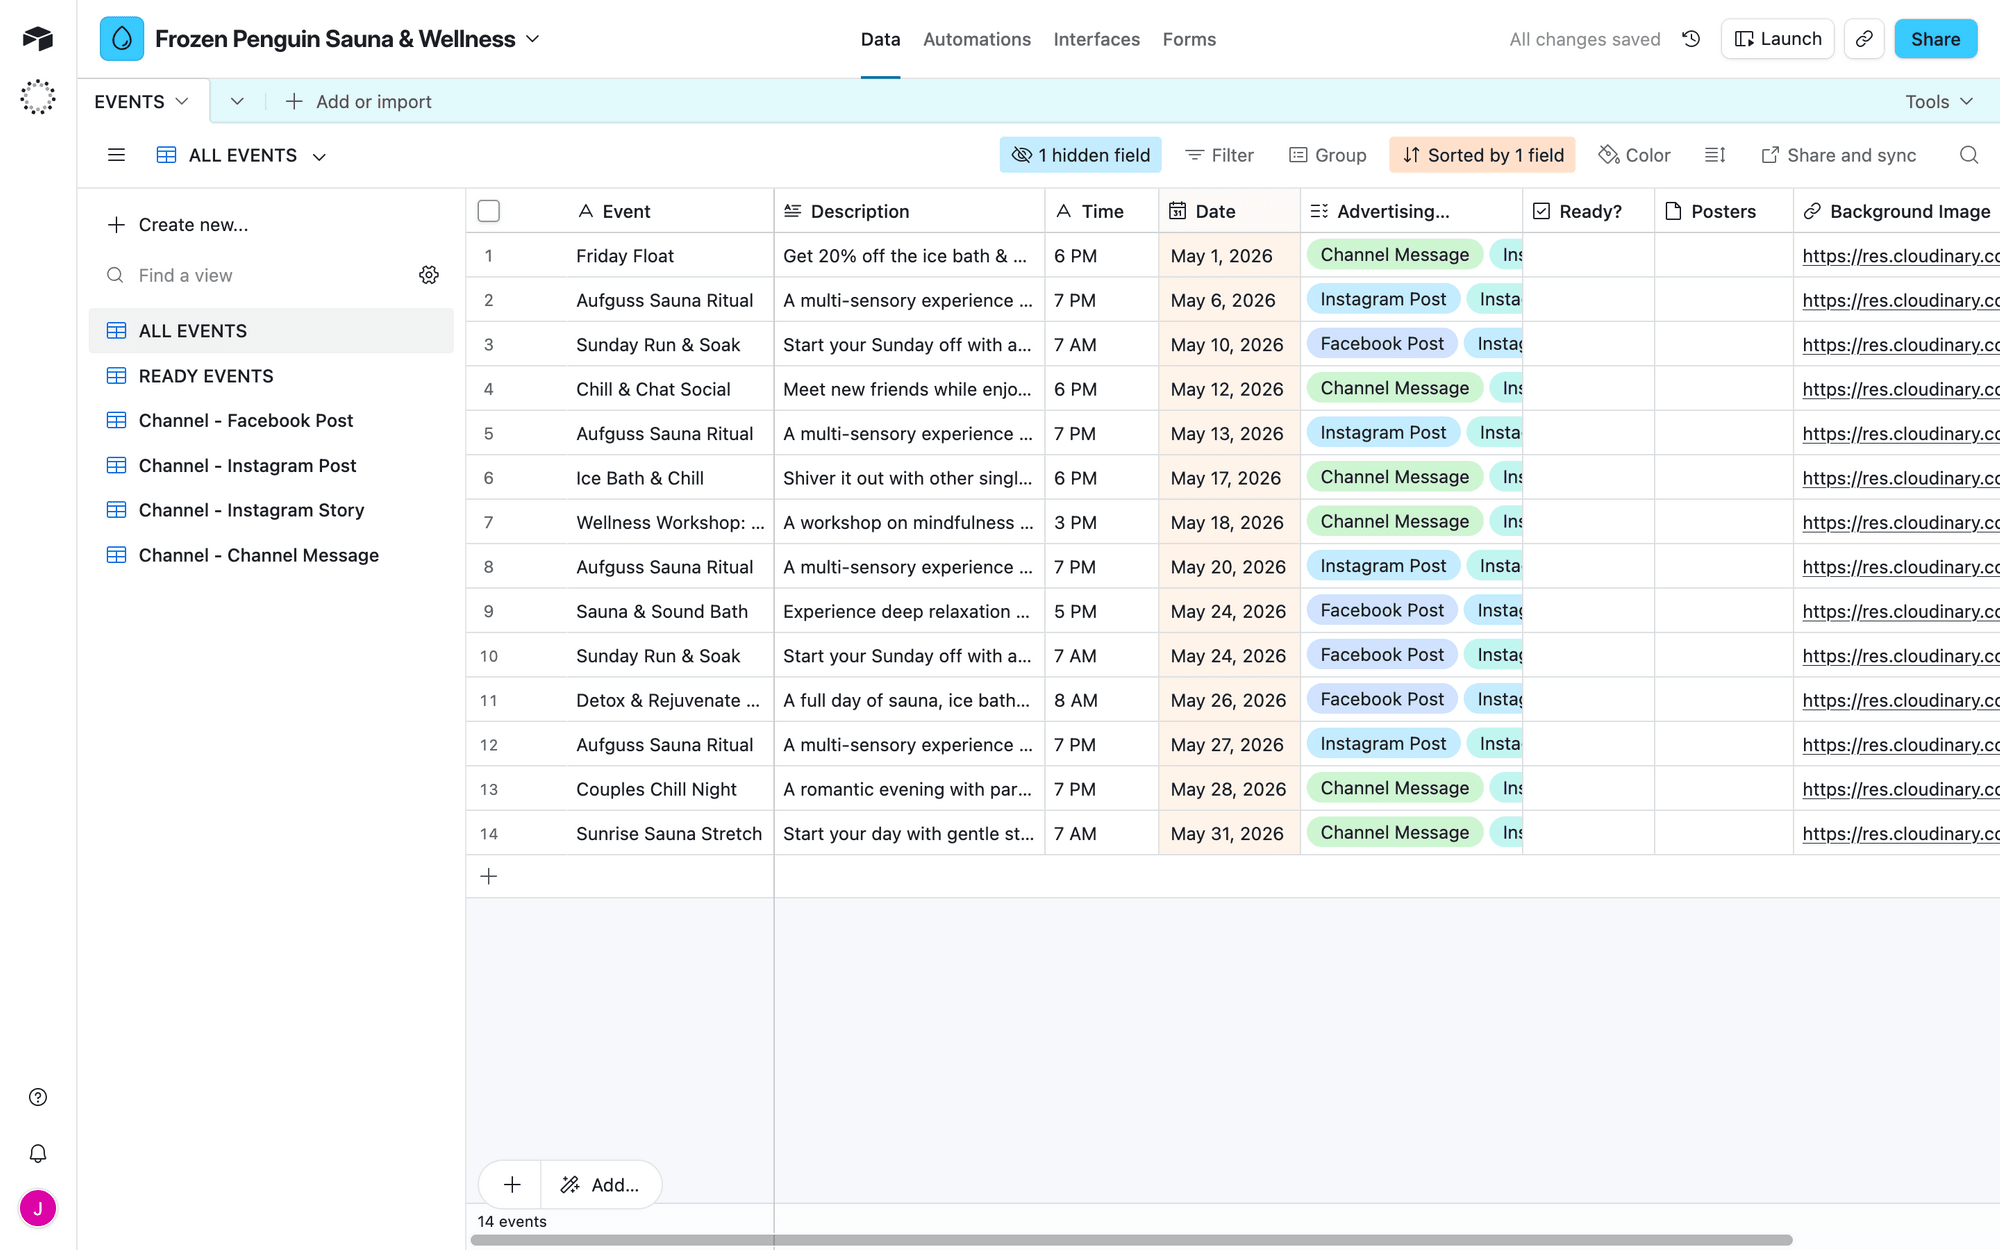
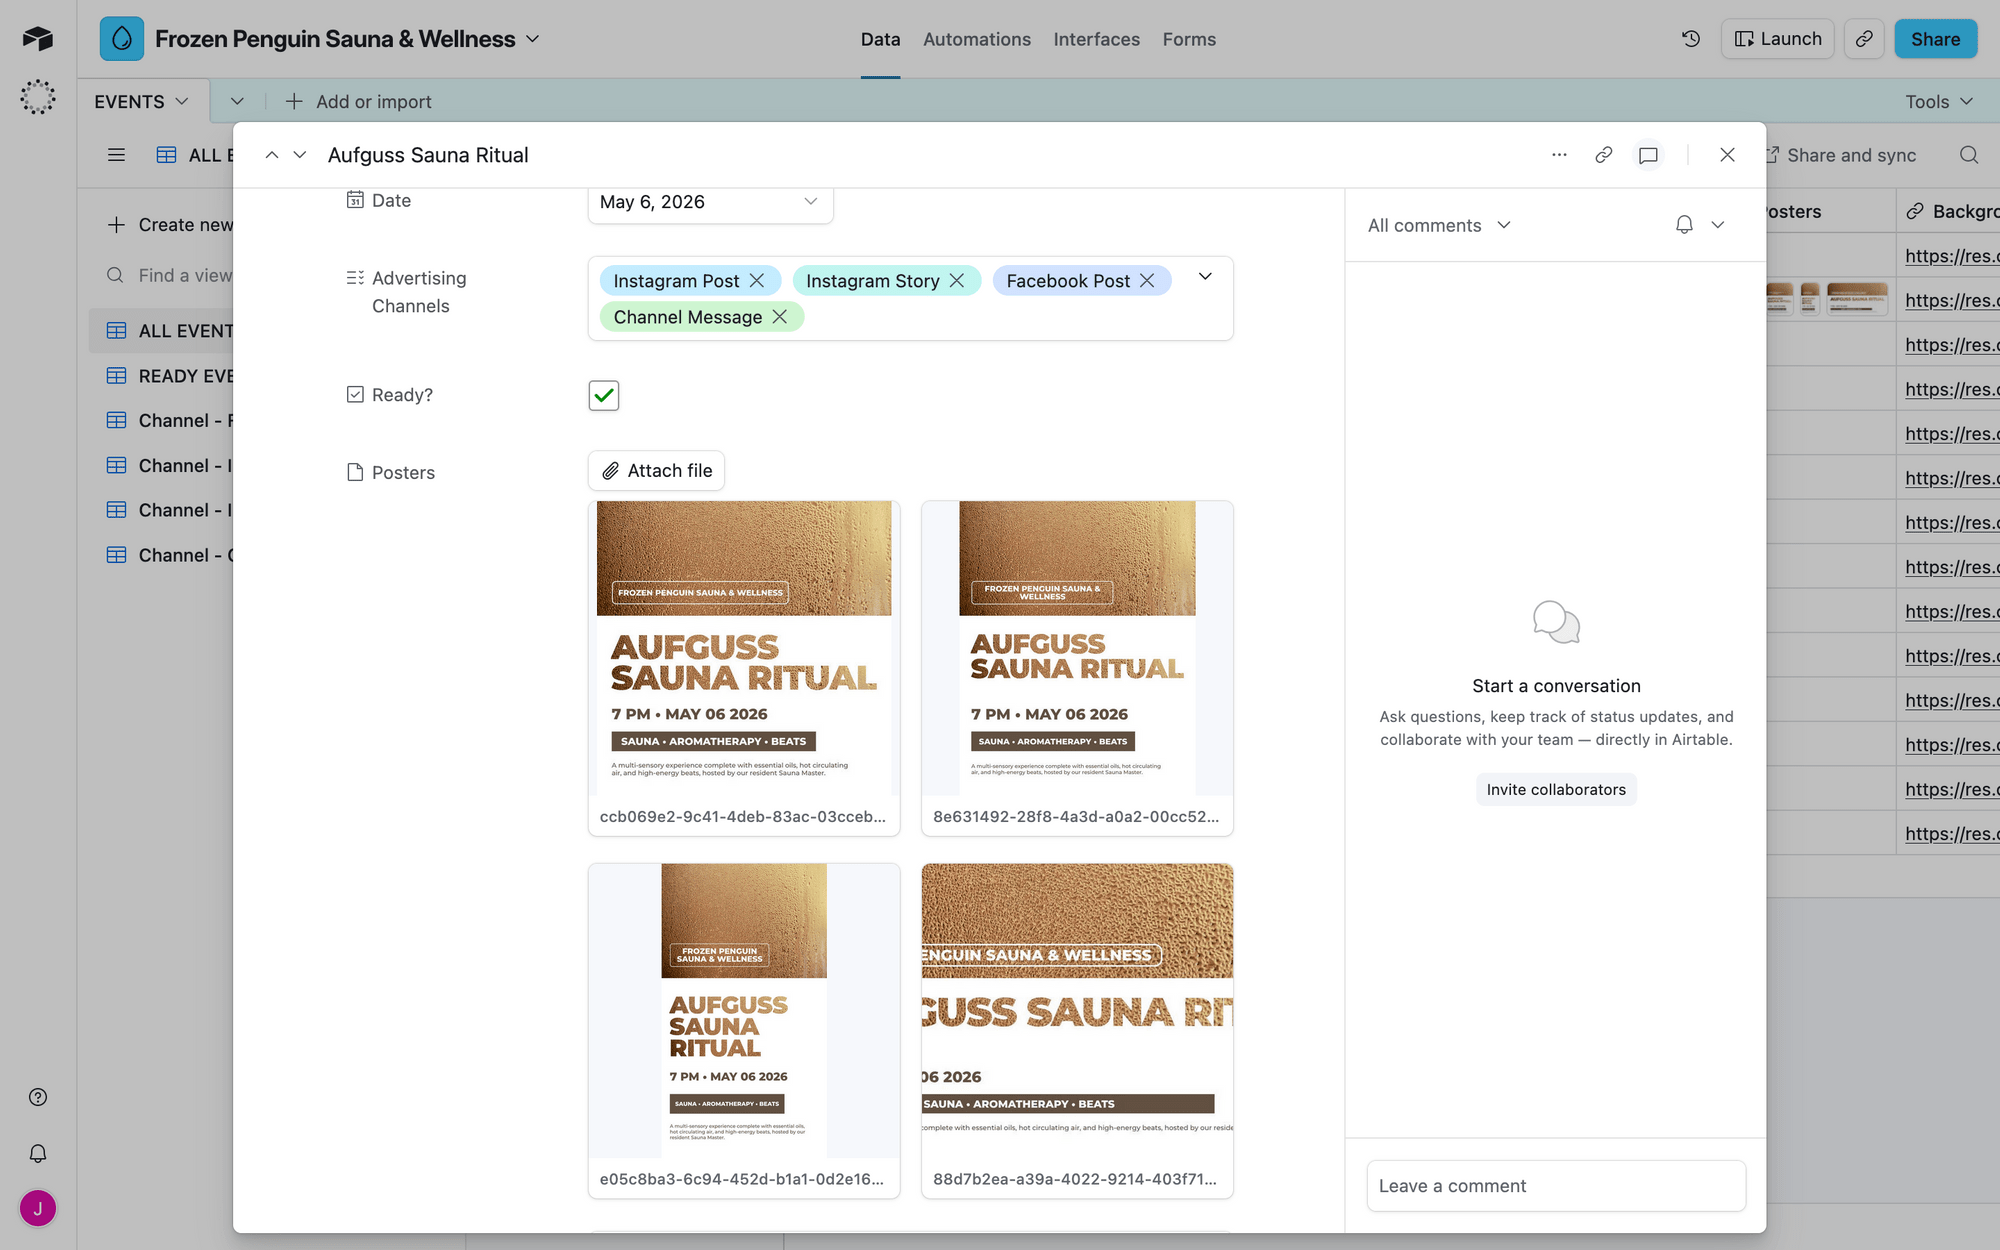
Log in and load your base. You’ll need an events table with the essentials: event names, descriptions, times, and dates. Then add:
- A multi-select field for channels (eg. "Facebook Post," "Instagram Post," "LinkedIn”)
- An attachment field for generated posters
- A checkbox field for approval
Your table should look something like this:
Create a filtered view showing only approved records—this is what Zapier will watch.
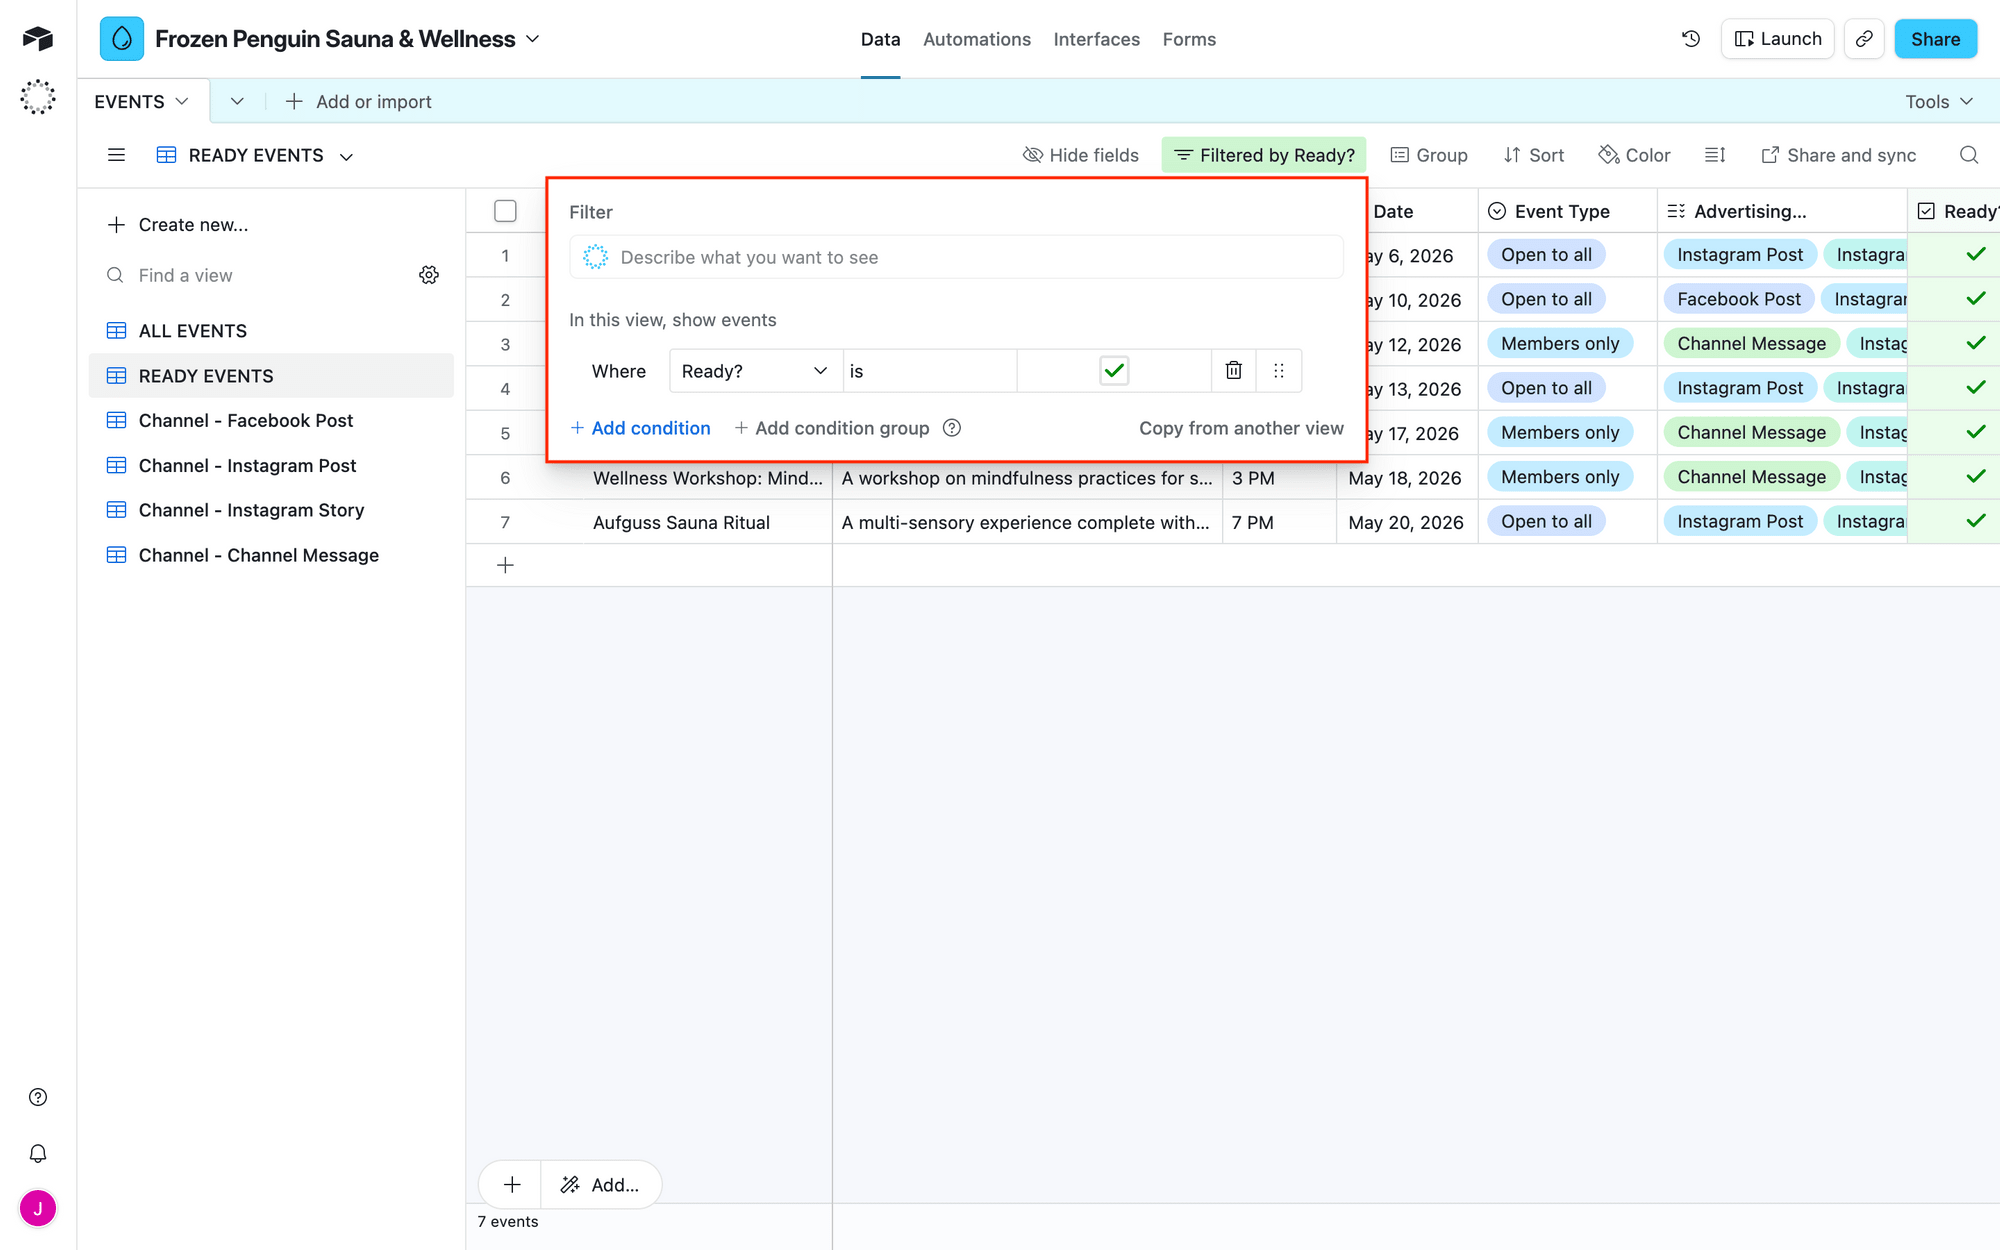
Have at least one test record ready before moving on.
Step 3 - Set Up a Zap that Generates & Stores Graphics
Log into your Zapier account, and create a new Zap. Here’s what you’ll configure:
Trigger: New Record in Airtable
Select Airtable → New Record. Choose your base and table, limiting to approved records only.
Test it to make sure it picks up your test data.
(Optional) Action: Date / Time in Formatter by Zapier
This step is optional but ensures readable dates when pulling from Airtable.
Select Formatter by Zapier → Date / Time. Set Transform type to Format and choose MMM DD YYYY.
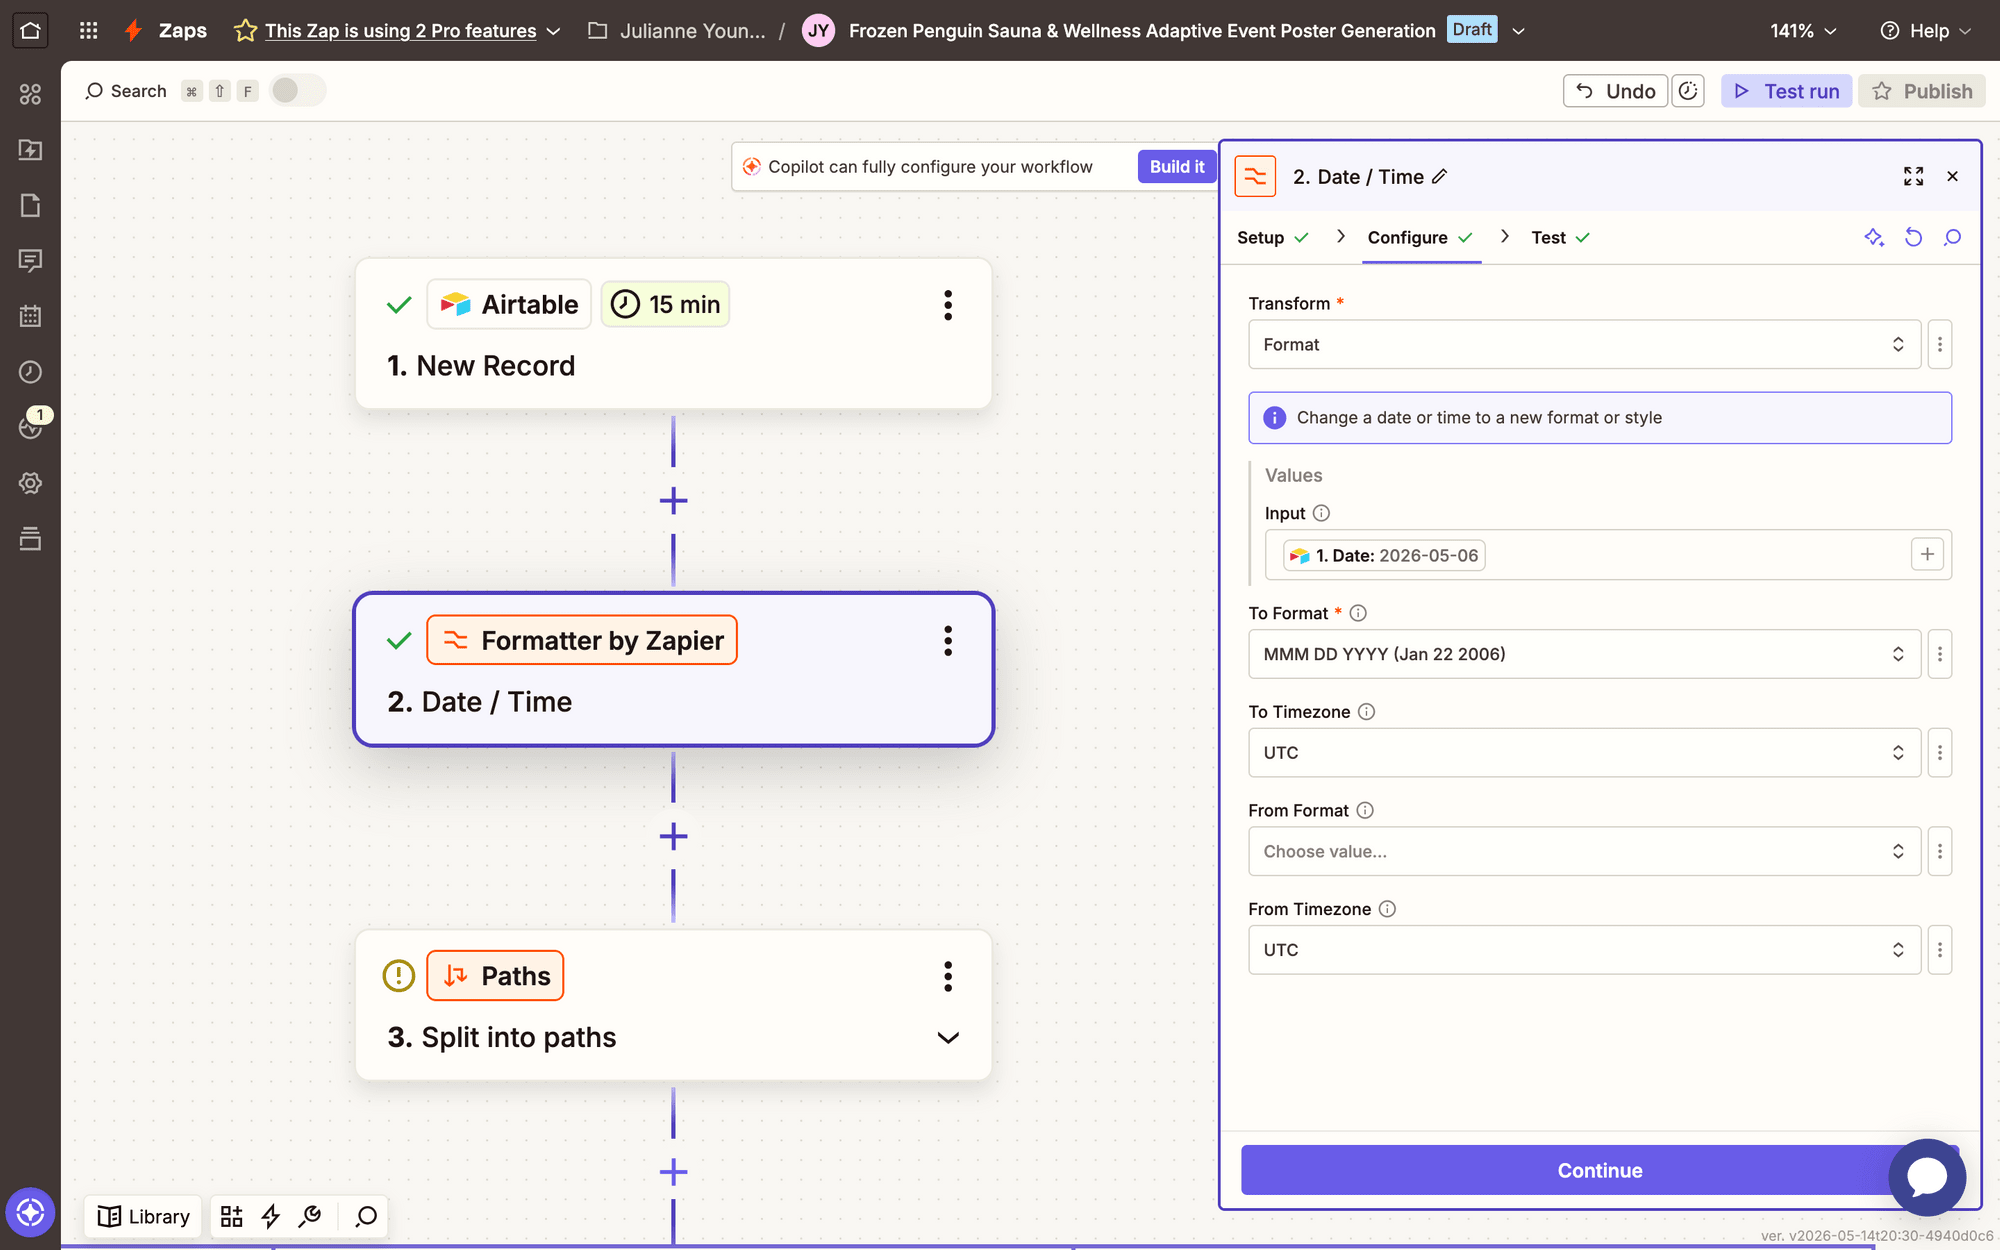
Test, then continue.
Action: Split Into Paths in Paths by Zapier
This is where adaptive resizing pays off. Paths routes each event down multiple branches, generating a different size in each one.

Set up Path A with the condition: does the advertising channels field contain "Channel Message"? If yes, continue.
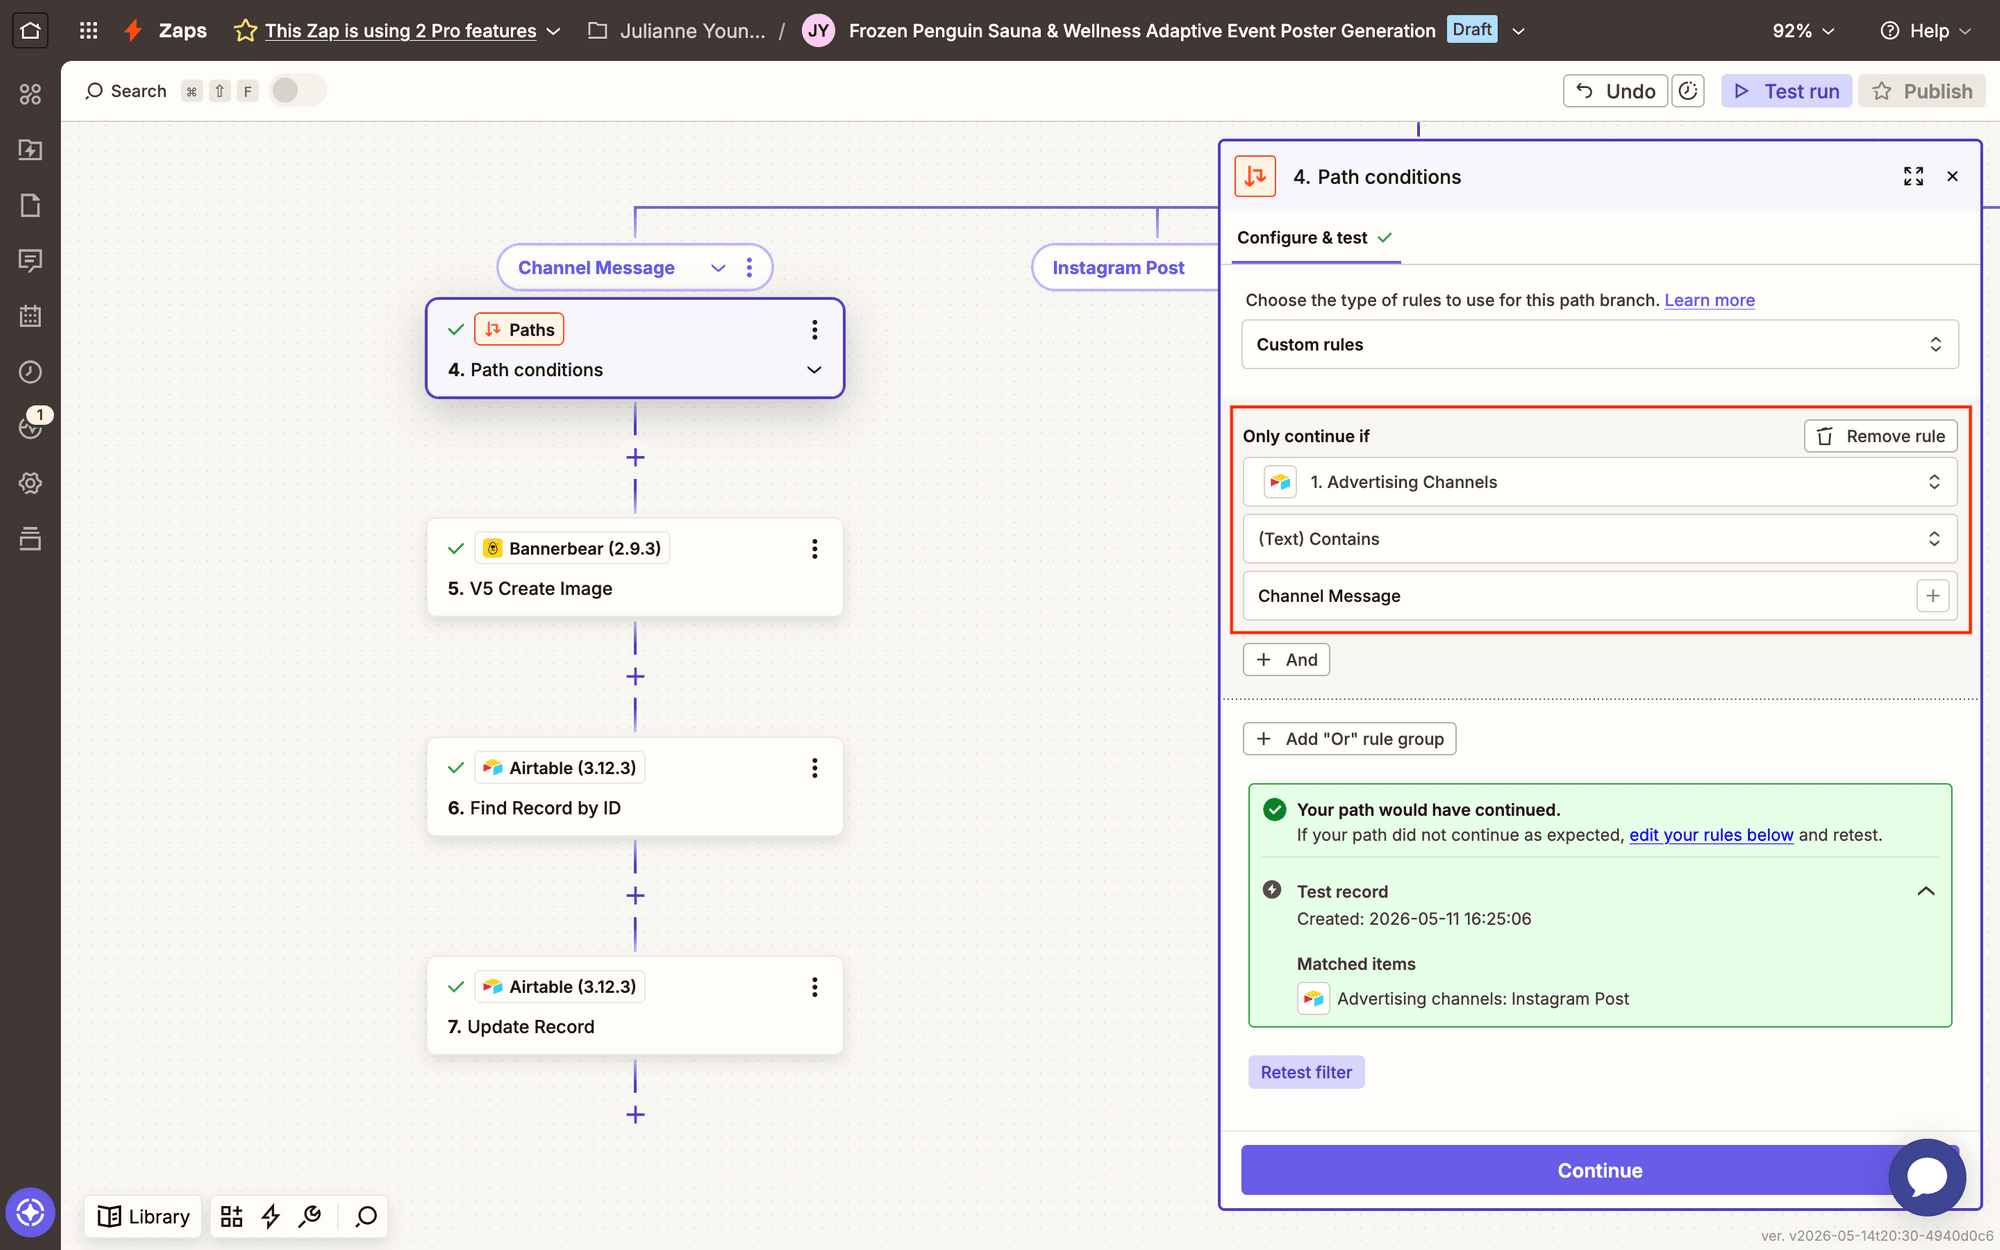
Bear Tip 🐻: Rename each path to describe the dimensions or channel for easier navigation.
Test to confirm whether the test record would continue under those conditions.
Action: V5 Create Image in Bannerbear
Select Bannerbear → V5 Create Image. Connect your account using your API key.
❗️ Note : This action is currently only available to V5 users.
Select the template you designed, and specify your Channel Message dimensions.
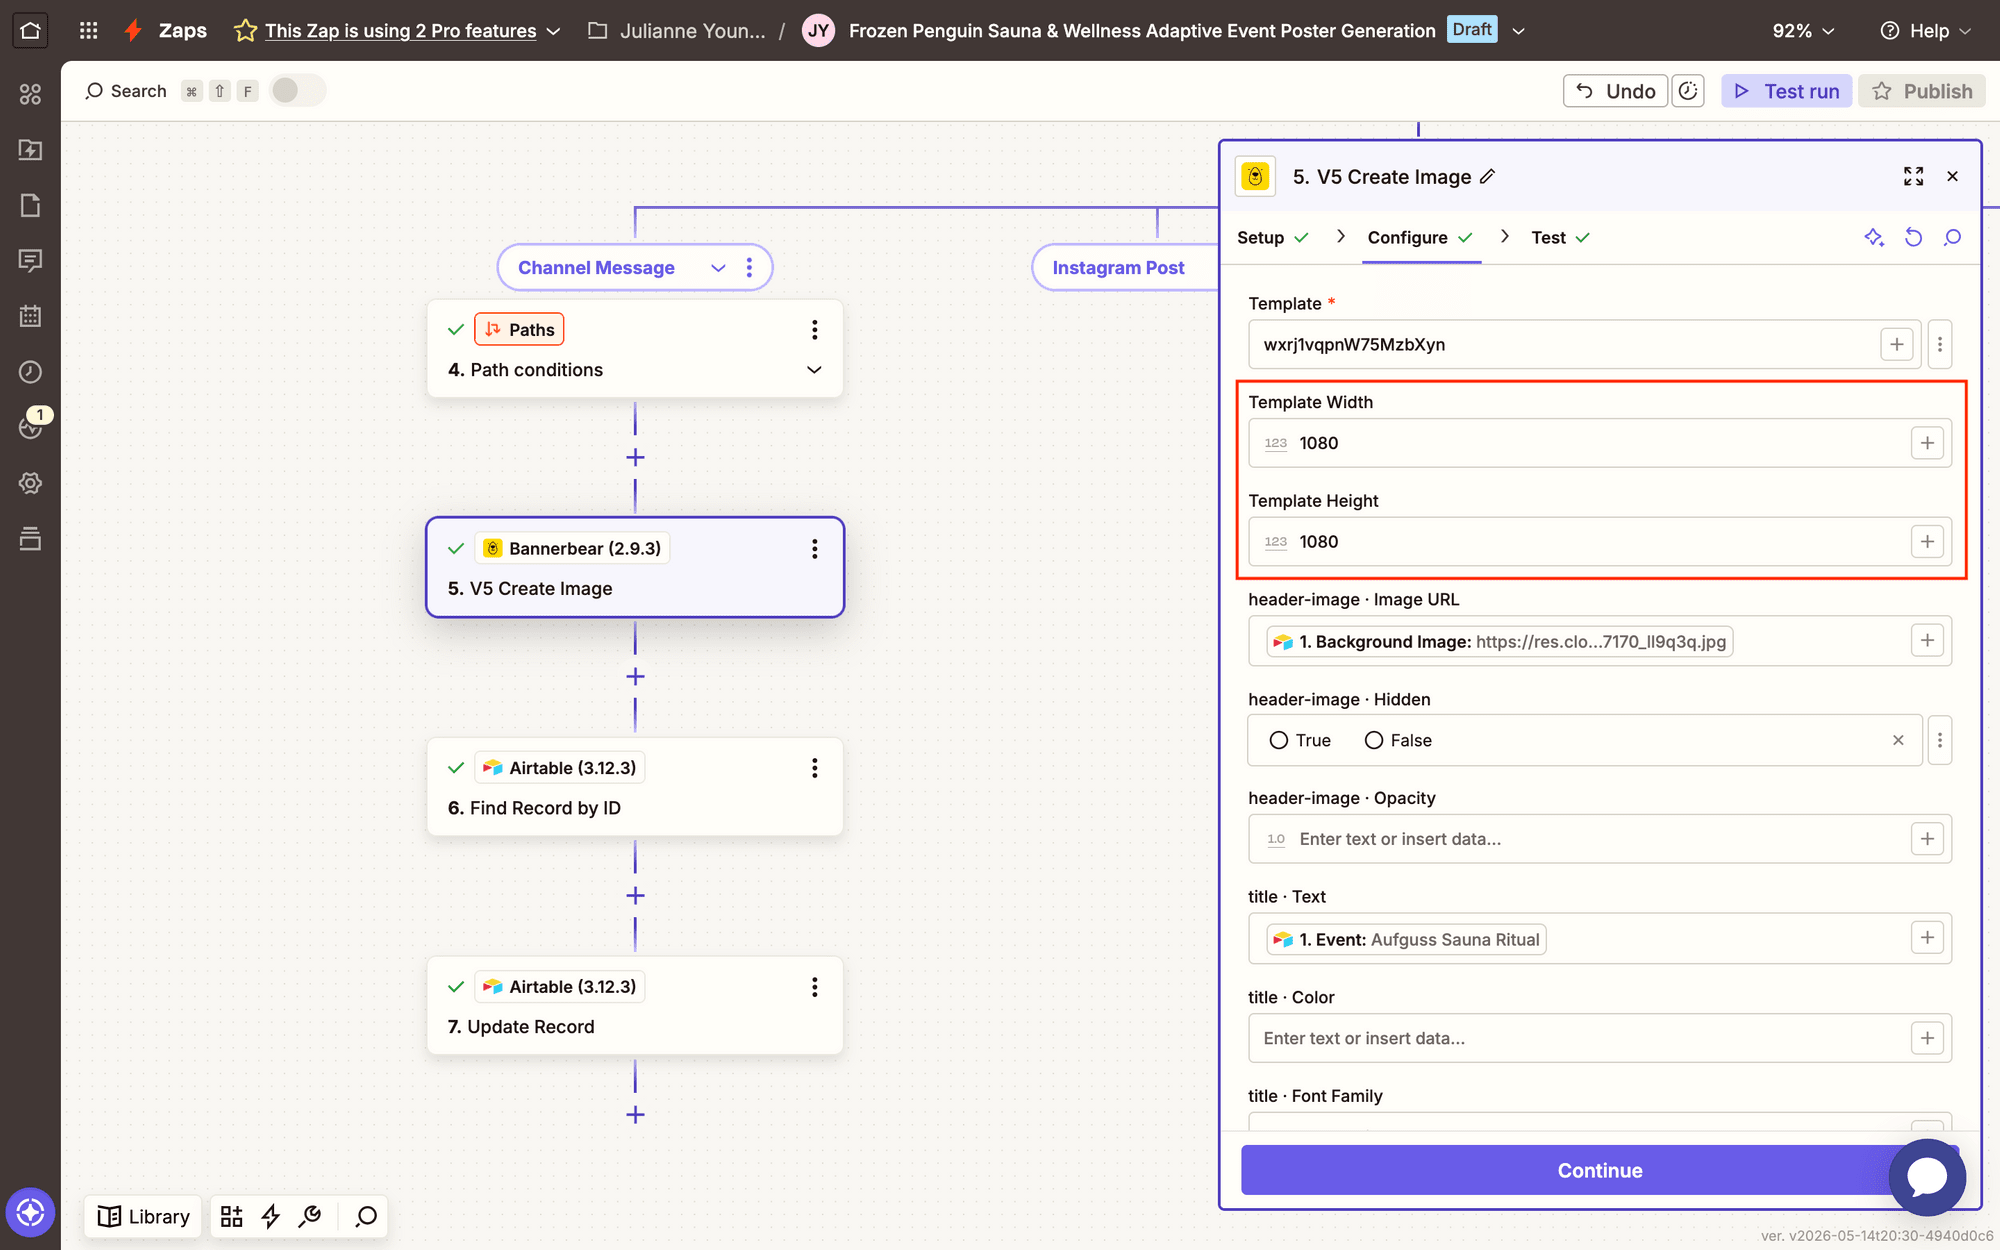
Map dynamic fields to template layers. Use Airtable record ID as metadata to match the image back to its source.
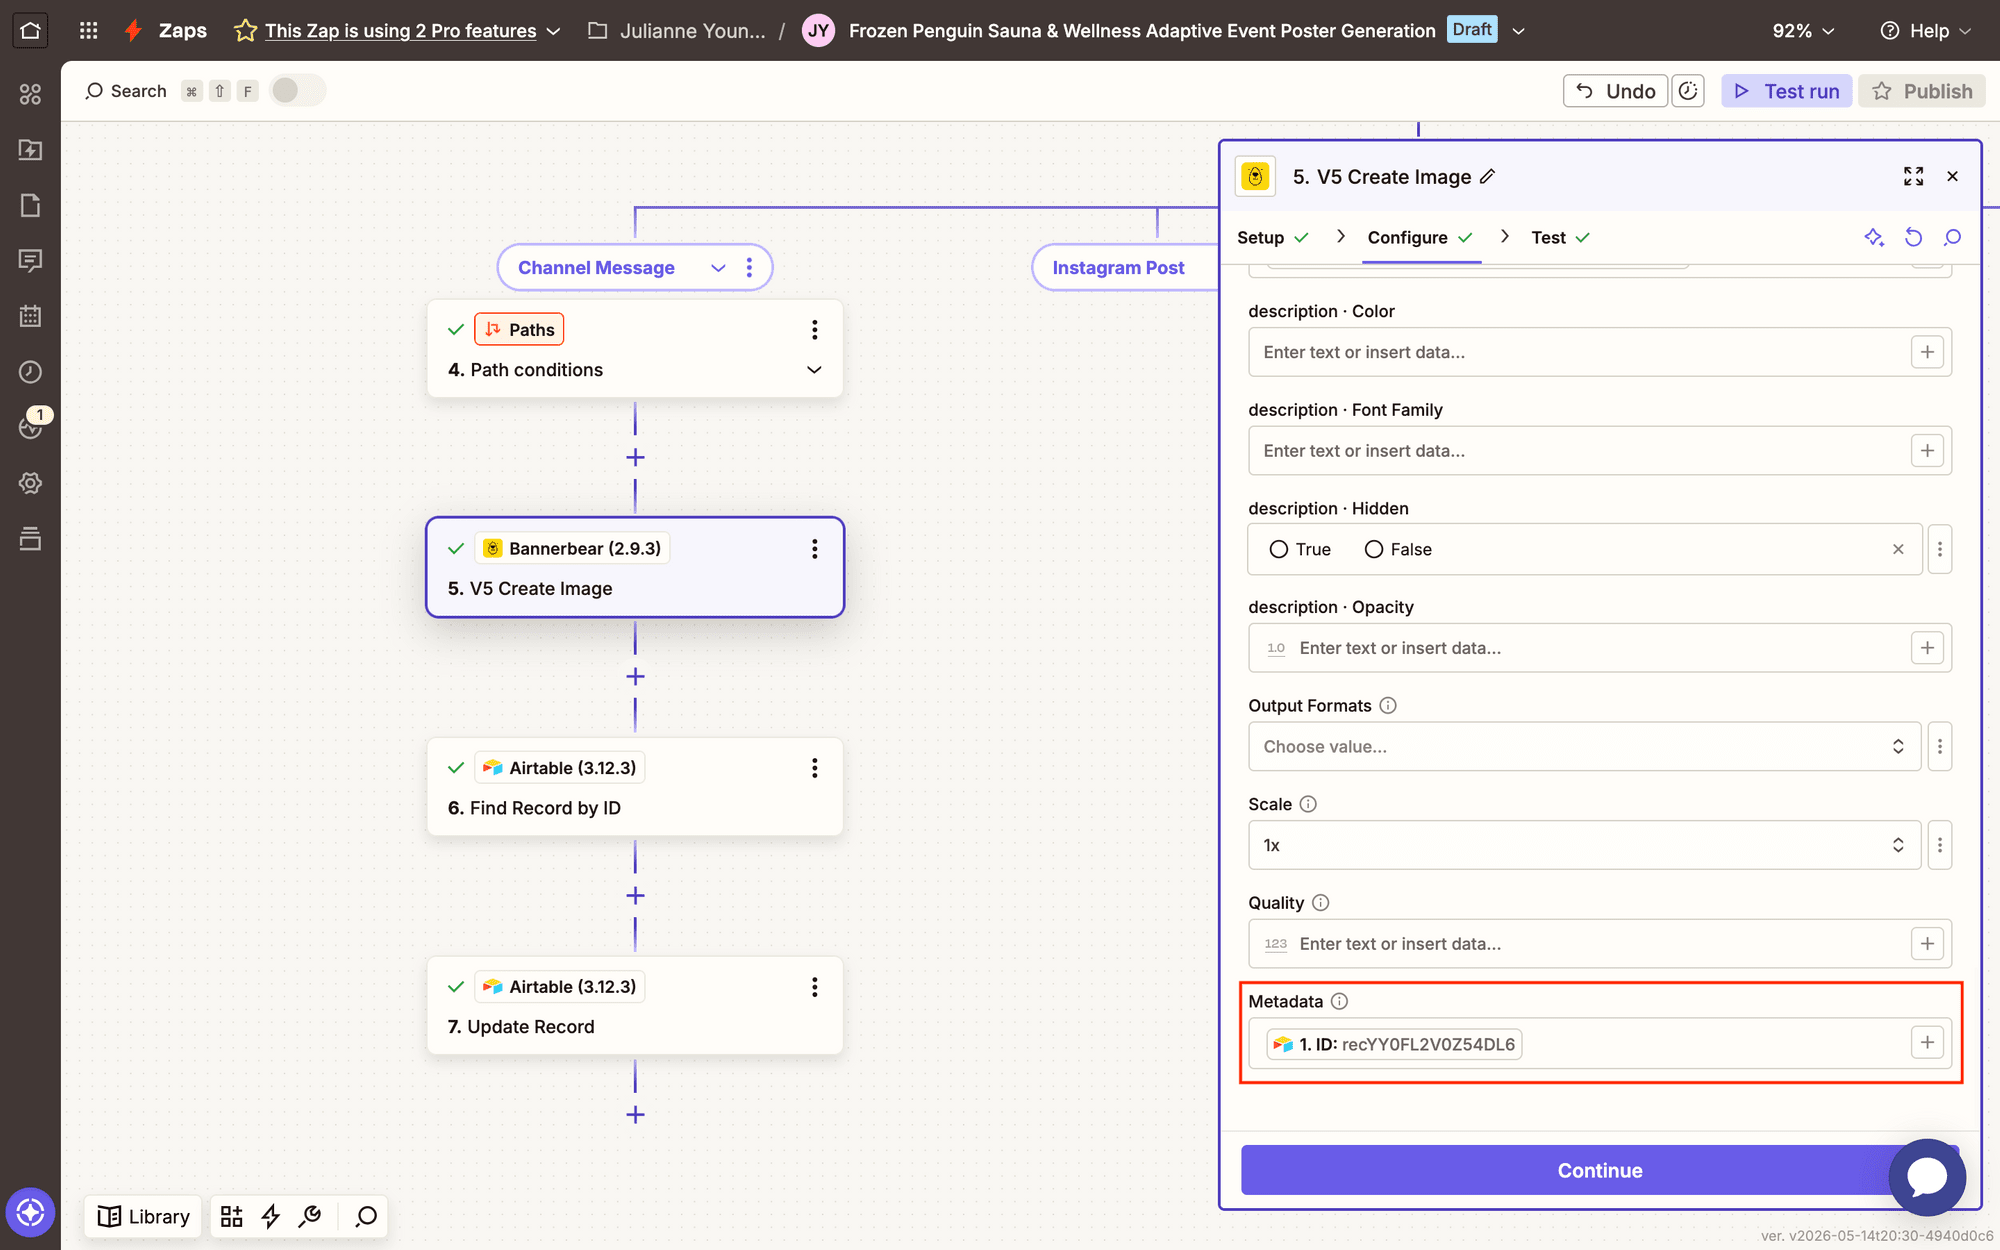
Test your workflow. You should see a generated image link in the output section.
Now, there are two ways you can continue. If you’ll be saving each poster to its own Airtable attachment field, all you have to do is add an Update Record event to each path. That’s where your workflow can end.
But if you want to store all of your generated images in one field, you’ll need to set up the workflow a little differently. First, you’ll look for existing attachments, and then upload the image as an additional file rather than replacing everything entirely.
Let’s set this workflow up to add to a single attachment field.
Action: Find Record by ID in Airtable
Select Airtable → Find Record by ID. Use the image's metadata as the Record ID search value.
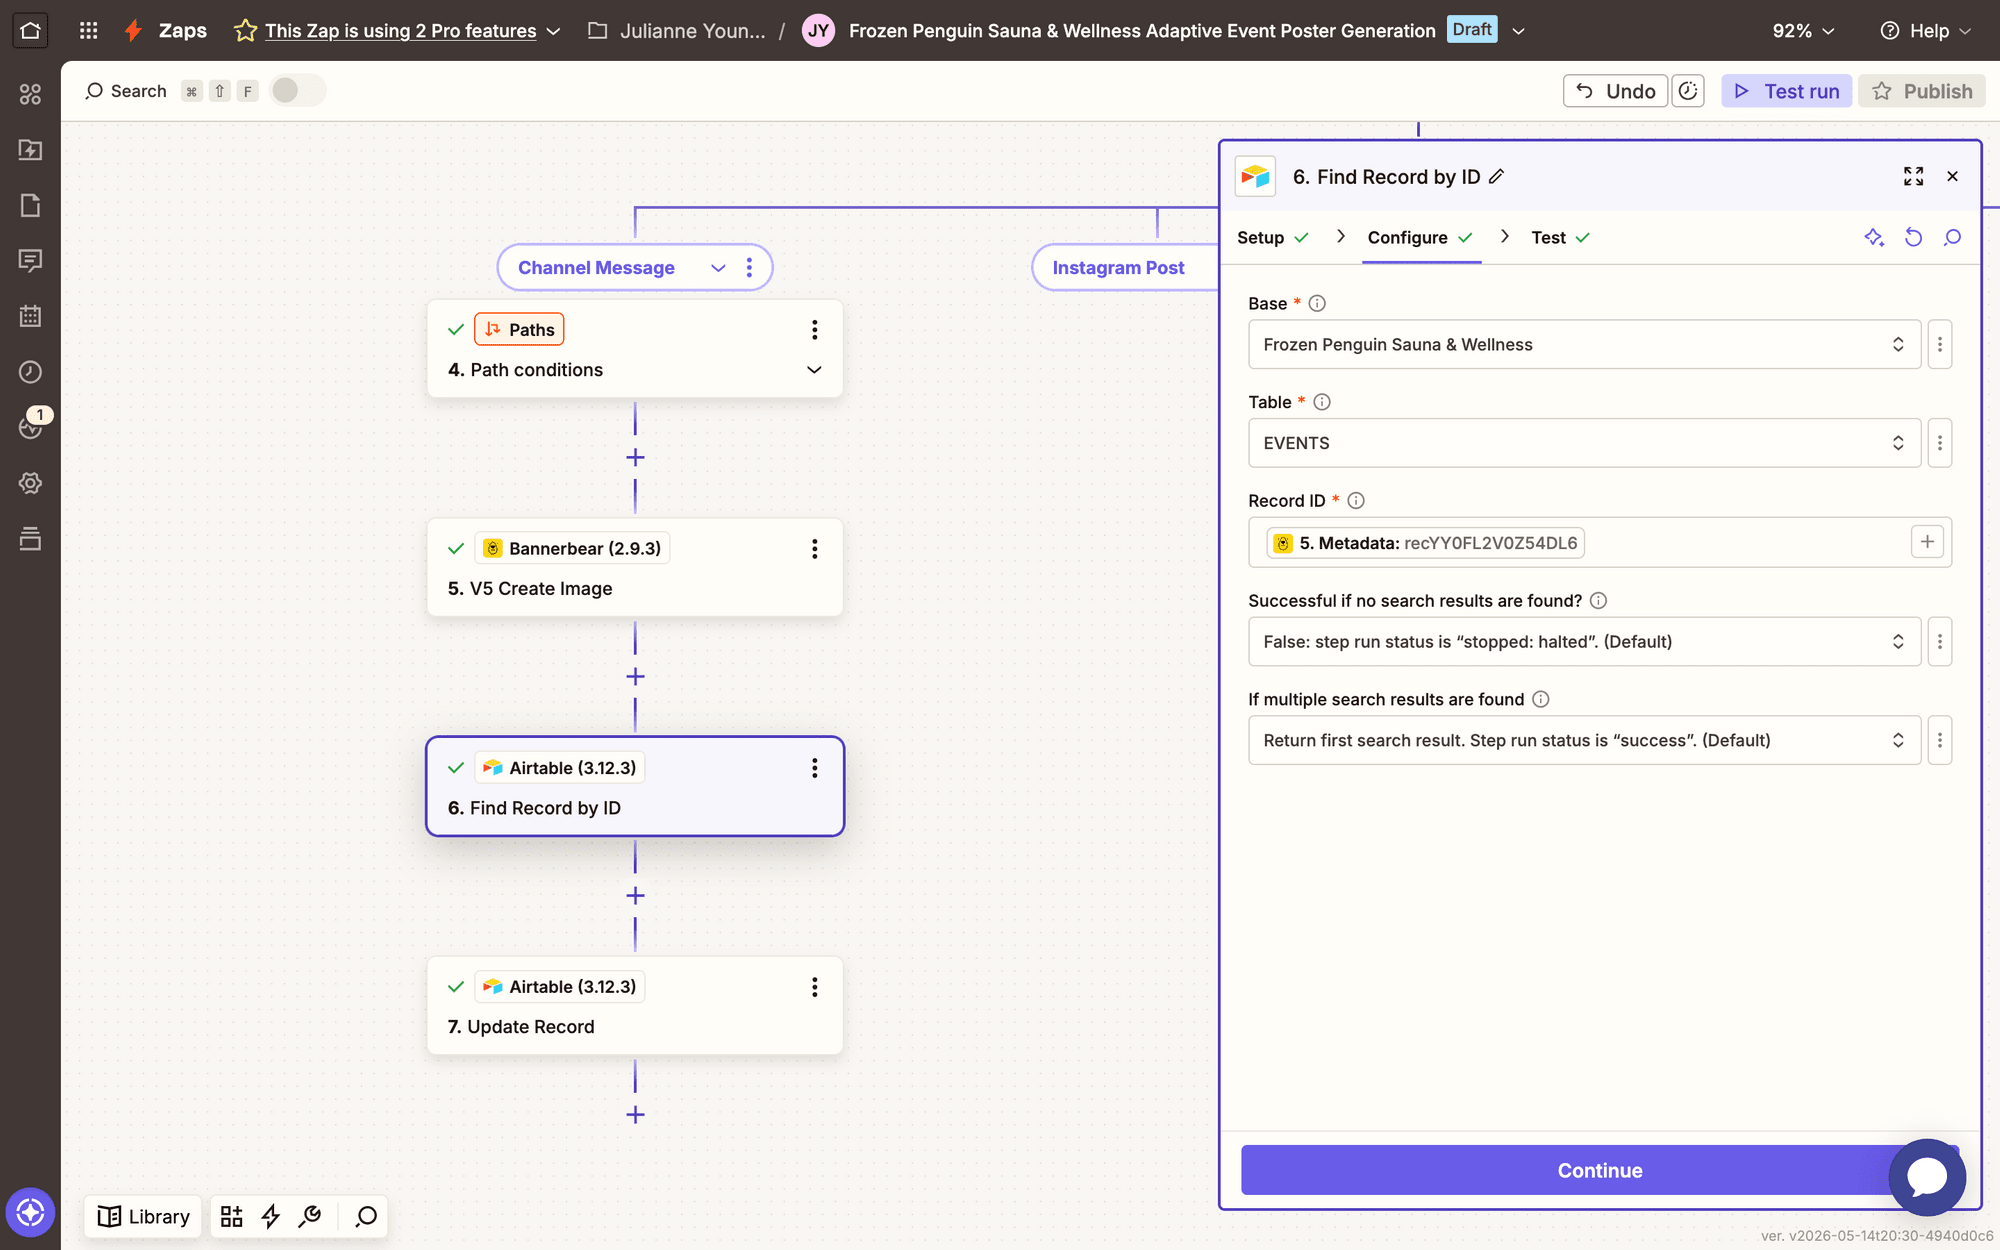
Test the step to pull up the latest record data.
Action: Update Record in Airtable
Select Airtable → Update Record for the same base and table. Use image metadata as the record ID search value.
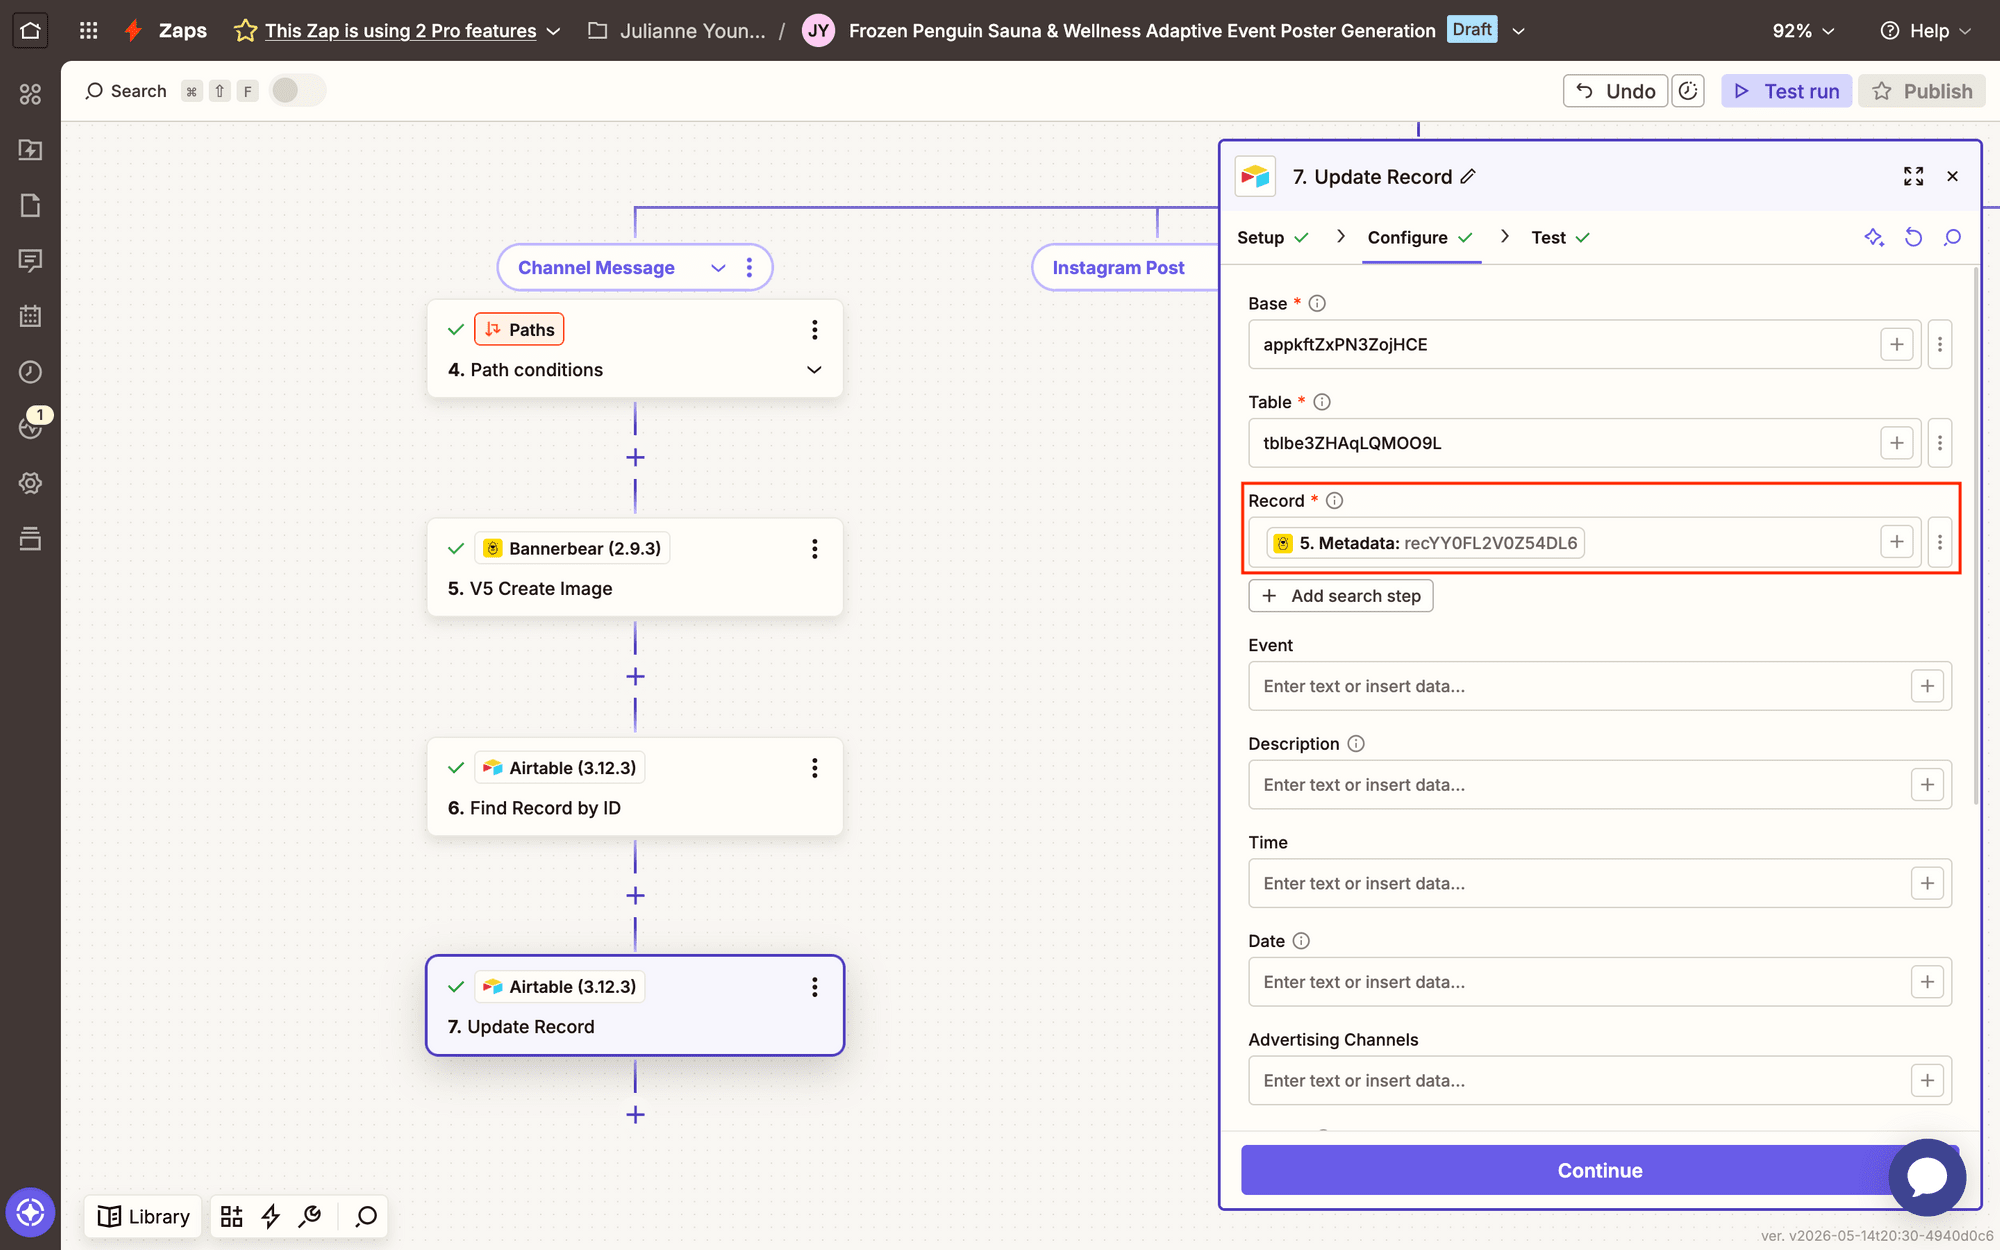
Now, we configure the attachments.
Map the new image file to the attachment field along with the Fields Posters ID from your search step:
Files Jpg: [URL HERE], Fields Posters ID: [ID STRING HERE]

Test the action. You should see the image appear as an attachment in Airtable.
Bear Tip 🐻: Keep in mind that you will need to start with a test attachment in the field for this to work.
Now, duplicate the entire path. Change the condition to “Instagram Post” and its corresponding dimensions, and make sure all your values are correctly mapped.
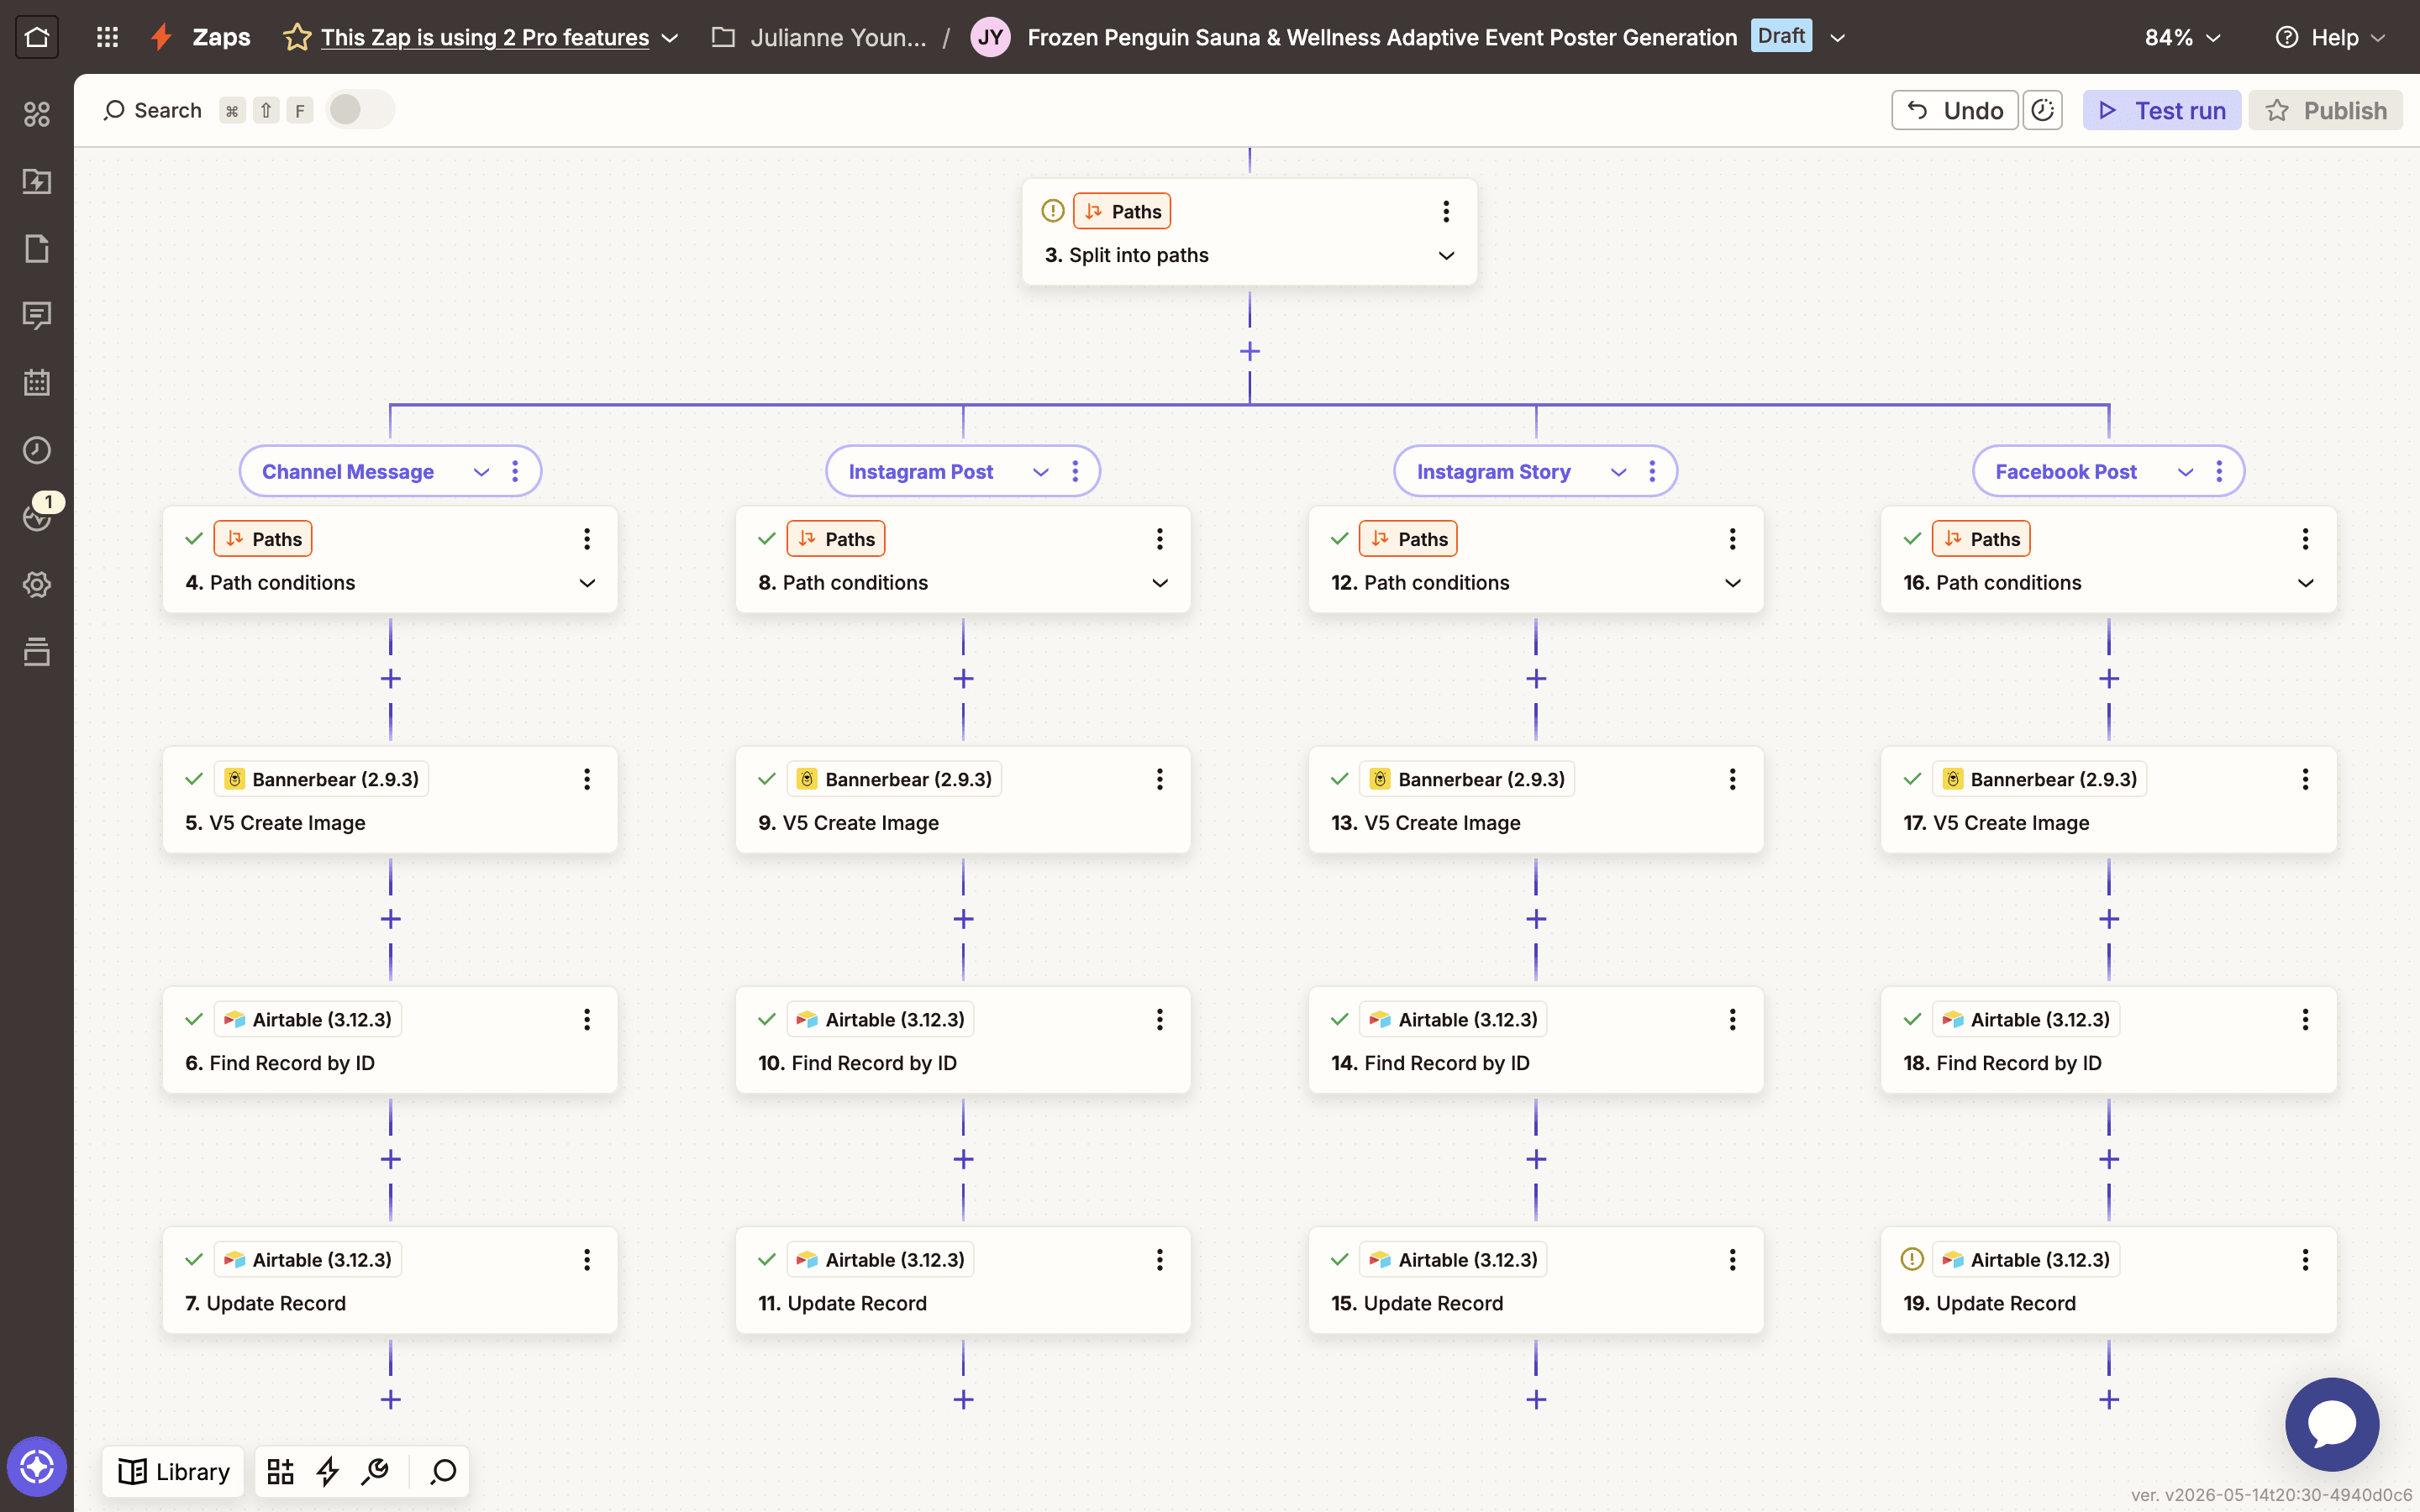
Test again. Each graphic should add to the field without replacing prior ones.
Repeat for every platform you're targeting.
Once everything's set up and tested, you're done. Approve a record in Airtable, and watch all your sizes generate automatically!
Conclusion
You've just built a system that does the work for you. One template, one Airtable record, and your graphics are generated across every platform you need.
Adaptive resizing scales with you. Need to add LinkedIn? Duplicate a path. Need to adjust sizing? Update once, and everything regenerates. It's automation that actually automates rather than moves the busy work around.
Want to learn about other ways to generate multiple images at once? Here are a few other techniques we’ve covered:
👉 How to Instantly Generate Customized Event ID Cards with QR Codes
👉 How to Generate a Collection of Product Ads for Facebook Carousel
👉 How to Instantly Generate Certificates Online with Bannerbear and Airtable
👉 How to Generate Bannerbear Images with Airtable (Integration Guide)
👉 Ecommerce Localization: How to Generate Images with Local Currencies and Languages
