In Bannerbear V5, you have everything you need to auto-generate media under one API. With the Images, Animations, Tools, and Workflows endpoints, you can use Bannerbear API to perform a variety of media manipulation tasks—from simple ones like generating images and cropping videos, to full video editing automations that involve multiple steps.
In this article, we'll cover two major features in Bannerbear V5:
- Generating an image - from a template, in multiple formats and any size
- Running a workflow - we'll build one that resizes a video and overlays a title card animation on top of it
Let's get started!
🐻 Bear Tip: This tutorial uses Node's built-in
fetchto make HTTP requests. If you’re using other programming languages, just follow along and adapt the same requests to whatever language you're using.
Getting Started
To follow along with this tutorial, you will need:
- A Bannerbear account (sign up for free here)
- Node.js and npm installed
Note: This tutorial uses the v5 API, which is not compatible with v3 API keys (and vice versa). Make sure you switch to v5 in your dashboard.
Getting Your Bannerbear API Key
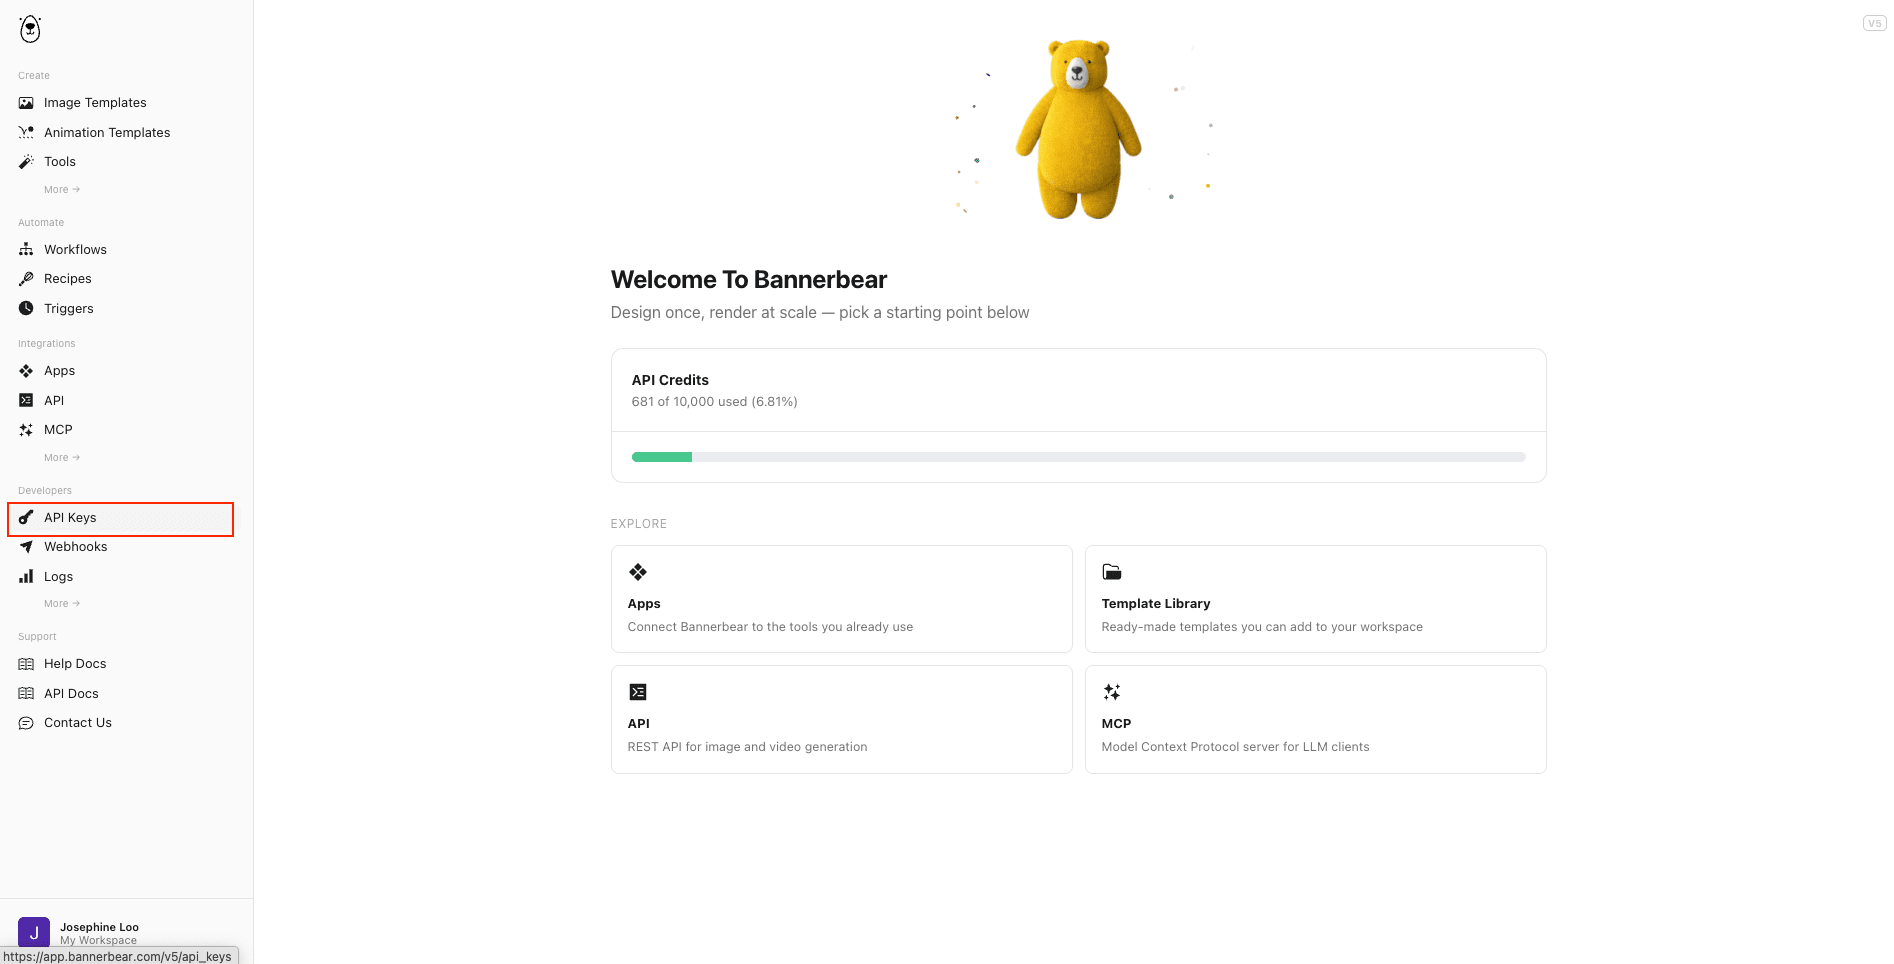
To get your API key, log in to Bannerbear and head to Developers → API Keys :
From there, you can create a new key, and optionally scope it to specific resources:
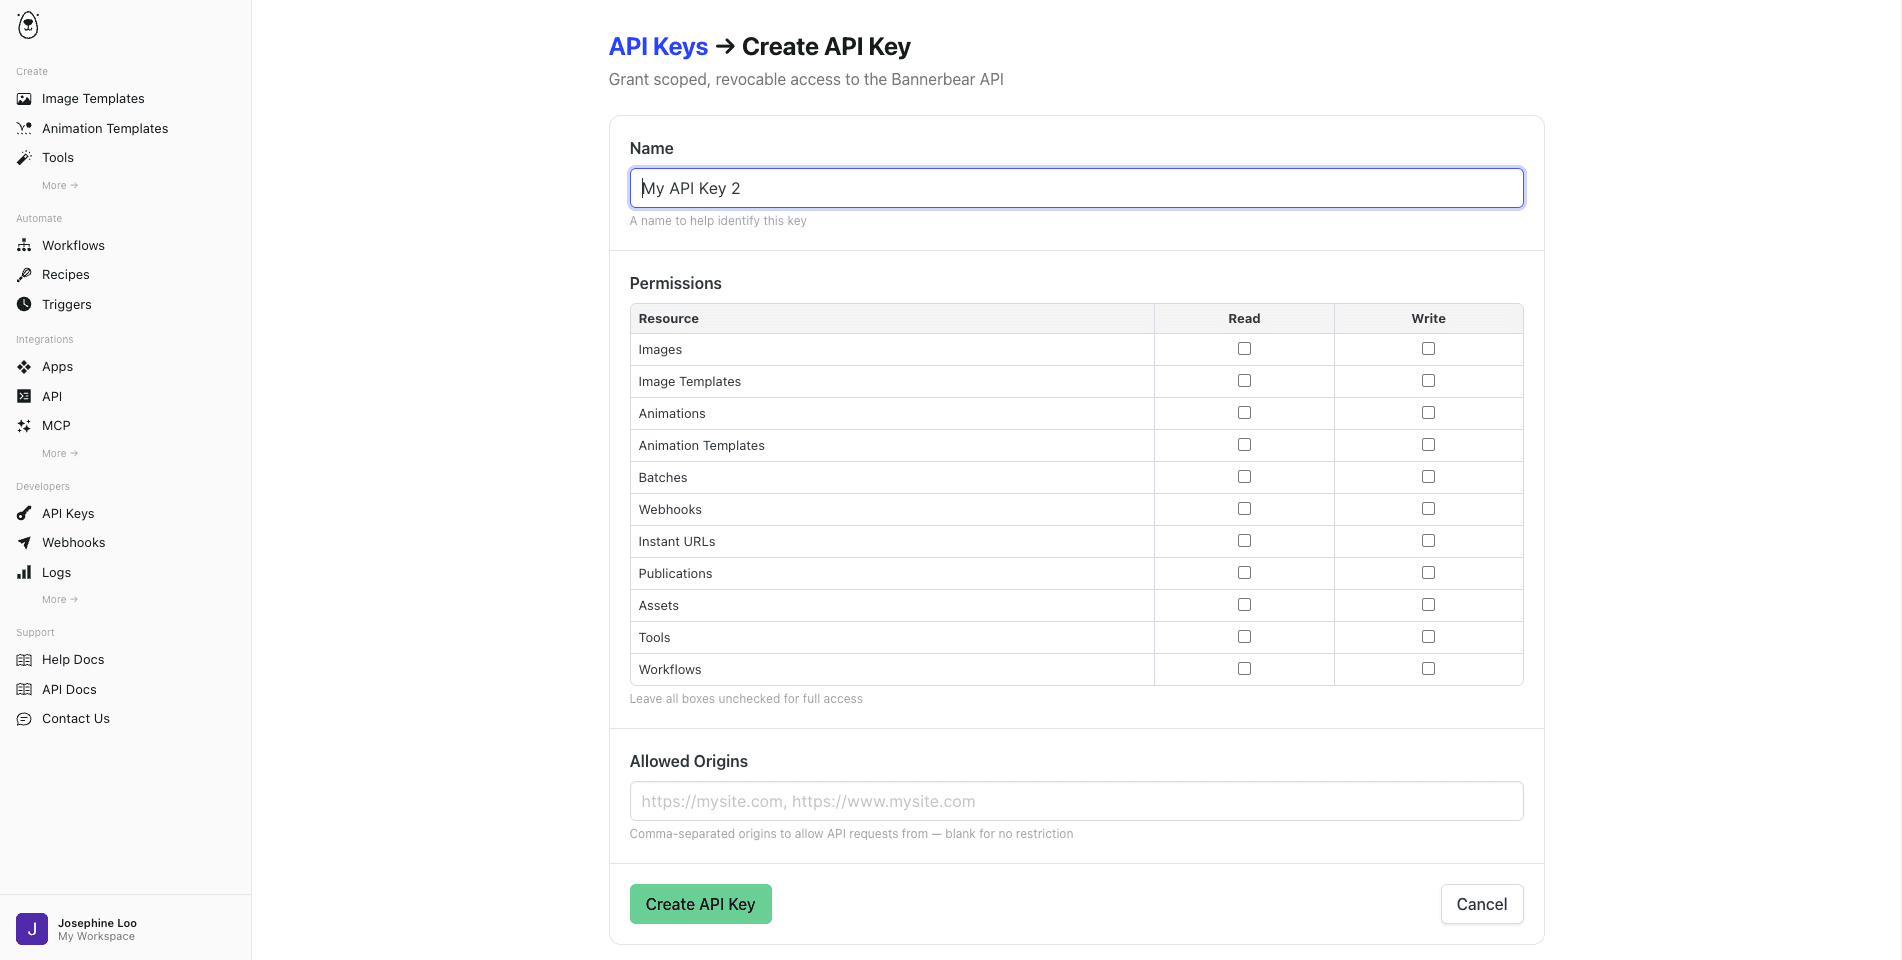
Copy your API key and store it in your project’s .env file:
BANNERBEAR_API_KEY=your_api_key_here
Generating an Image in Bannerbear v5
Step 1. Create a Template
Everything in Bannerbear starts with a template. You can create a template from scratch:
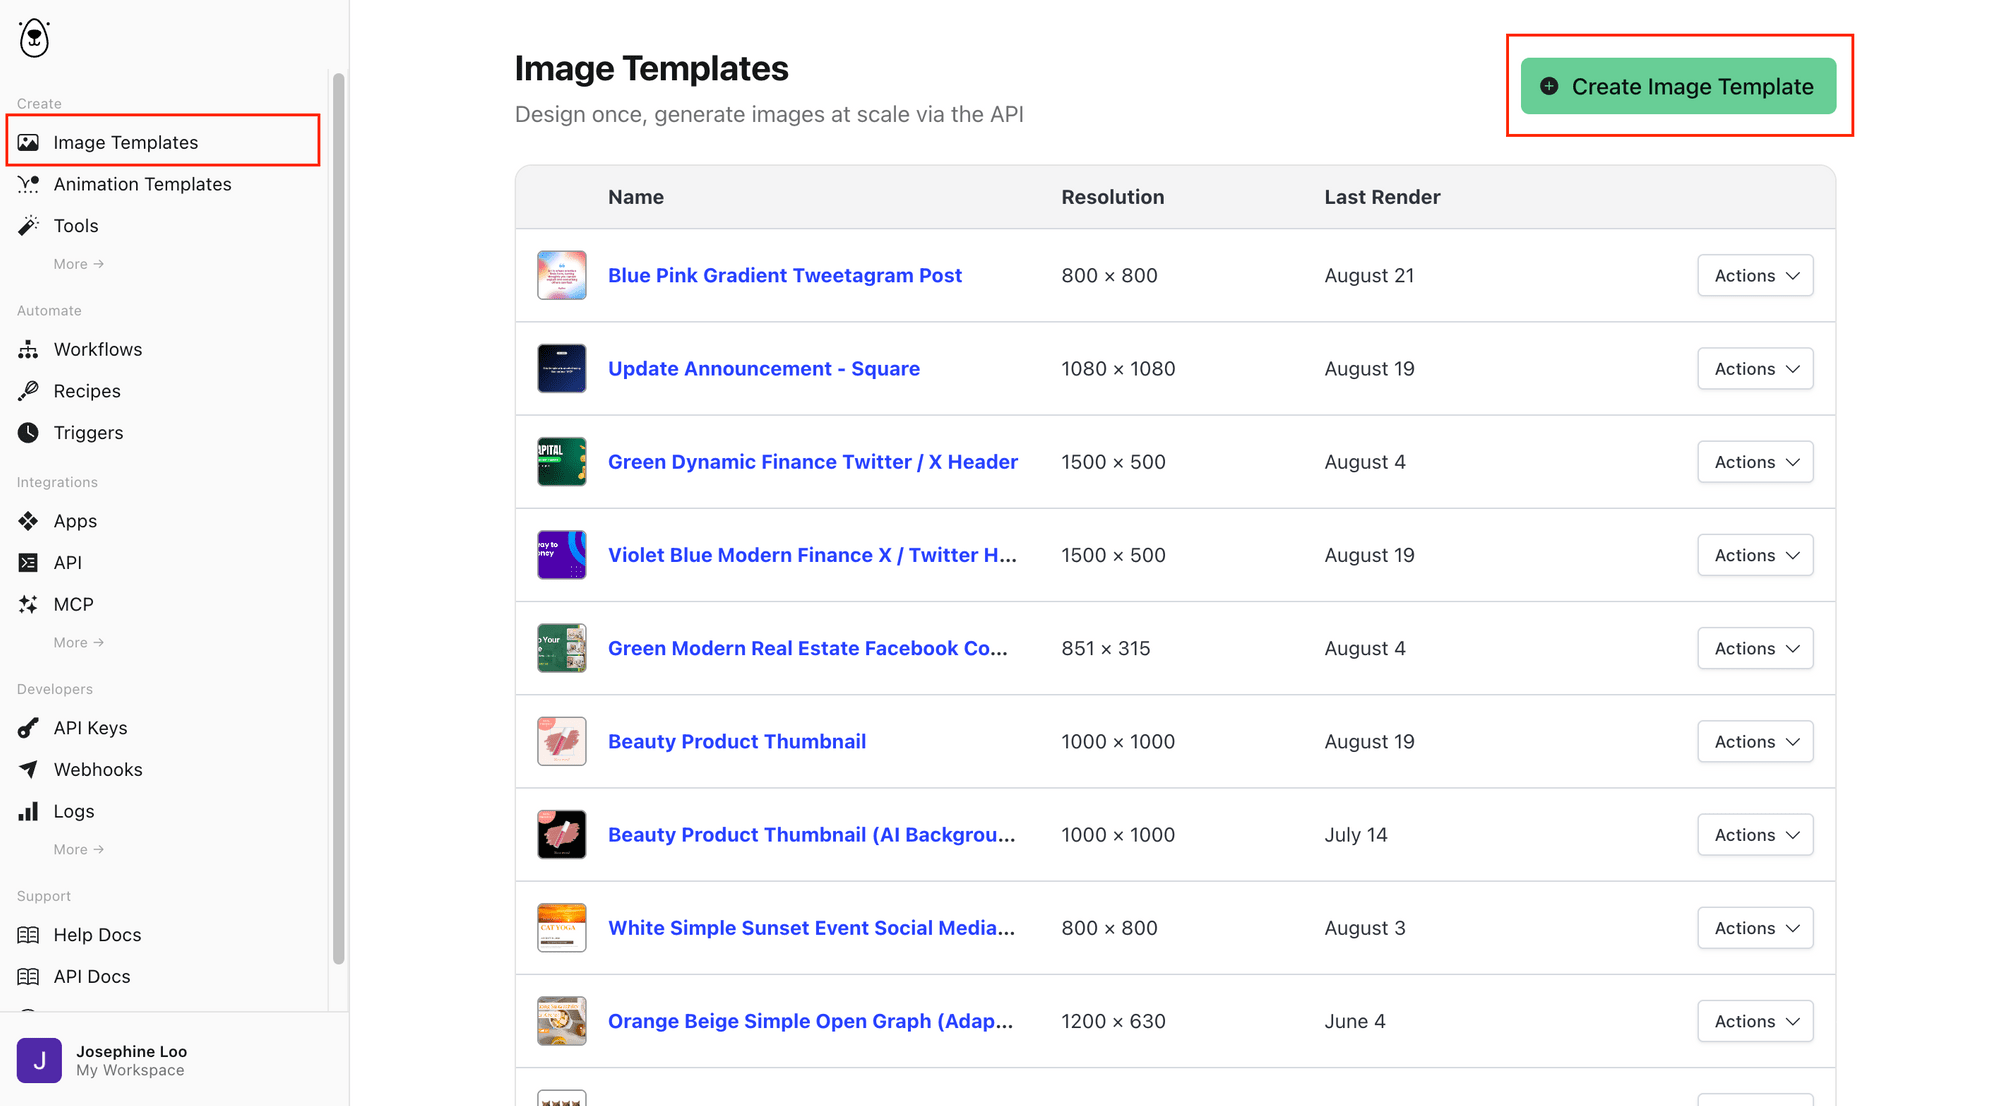
…or duplicate one from the Template Library:
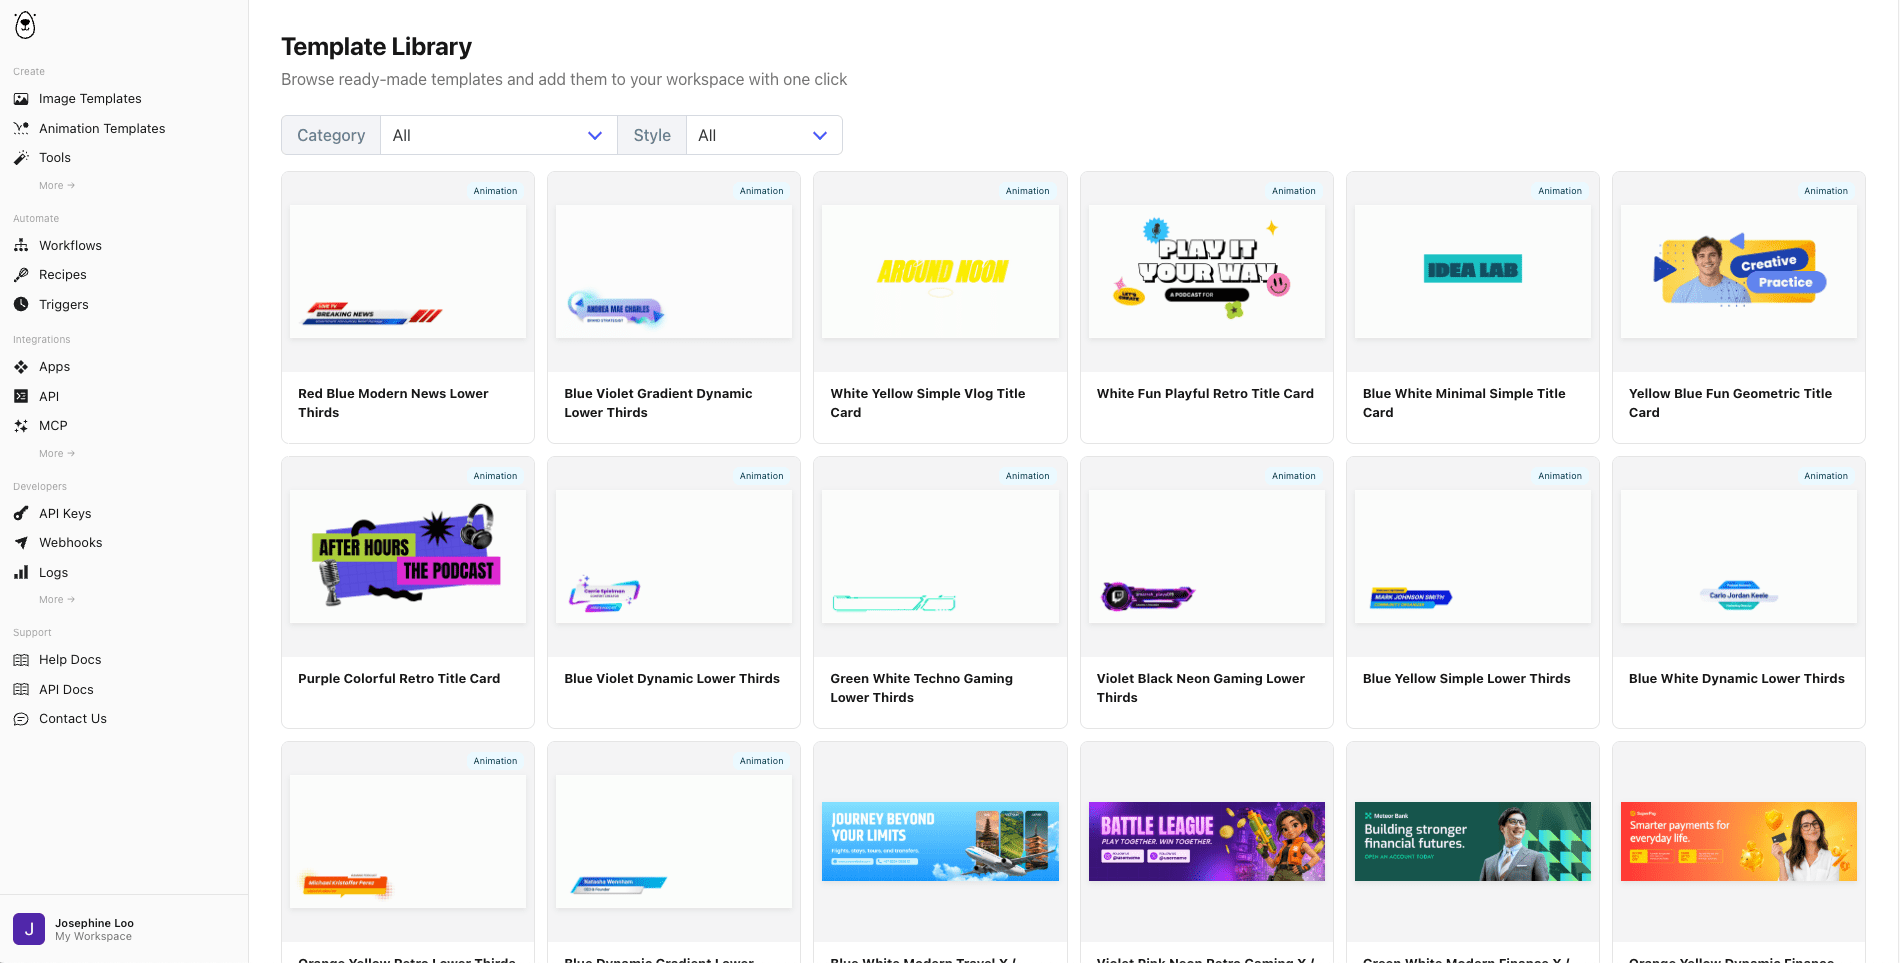
To make things simple, let’s duplicate this template from the Template Library:
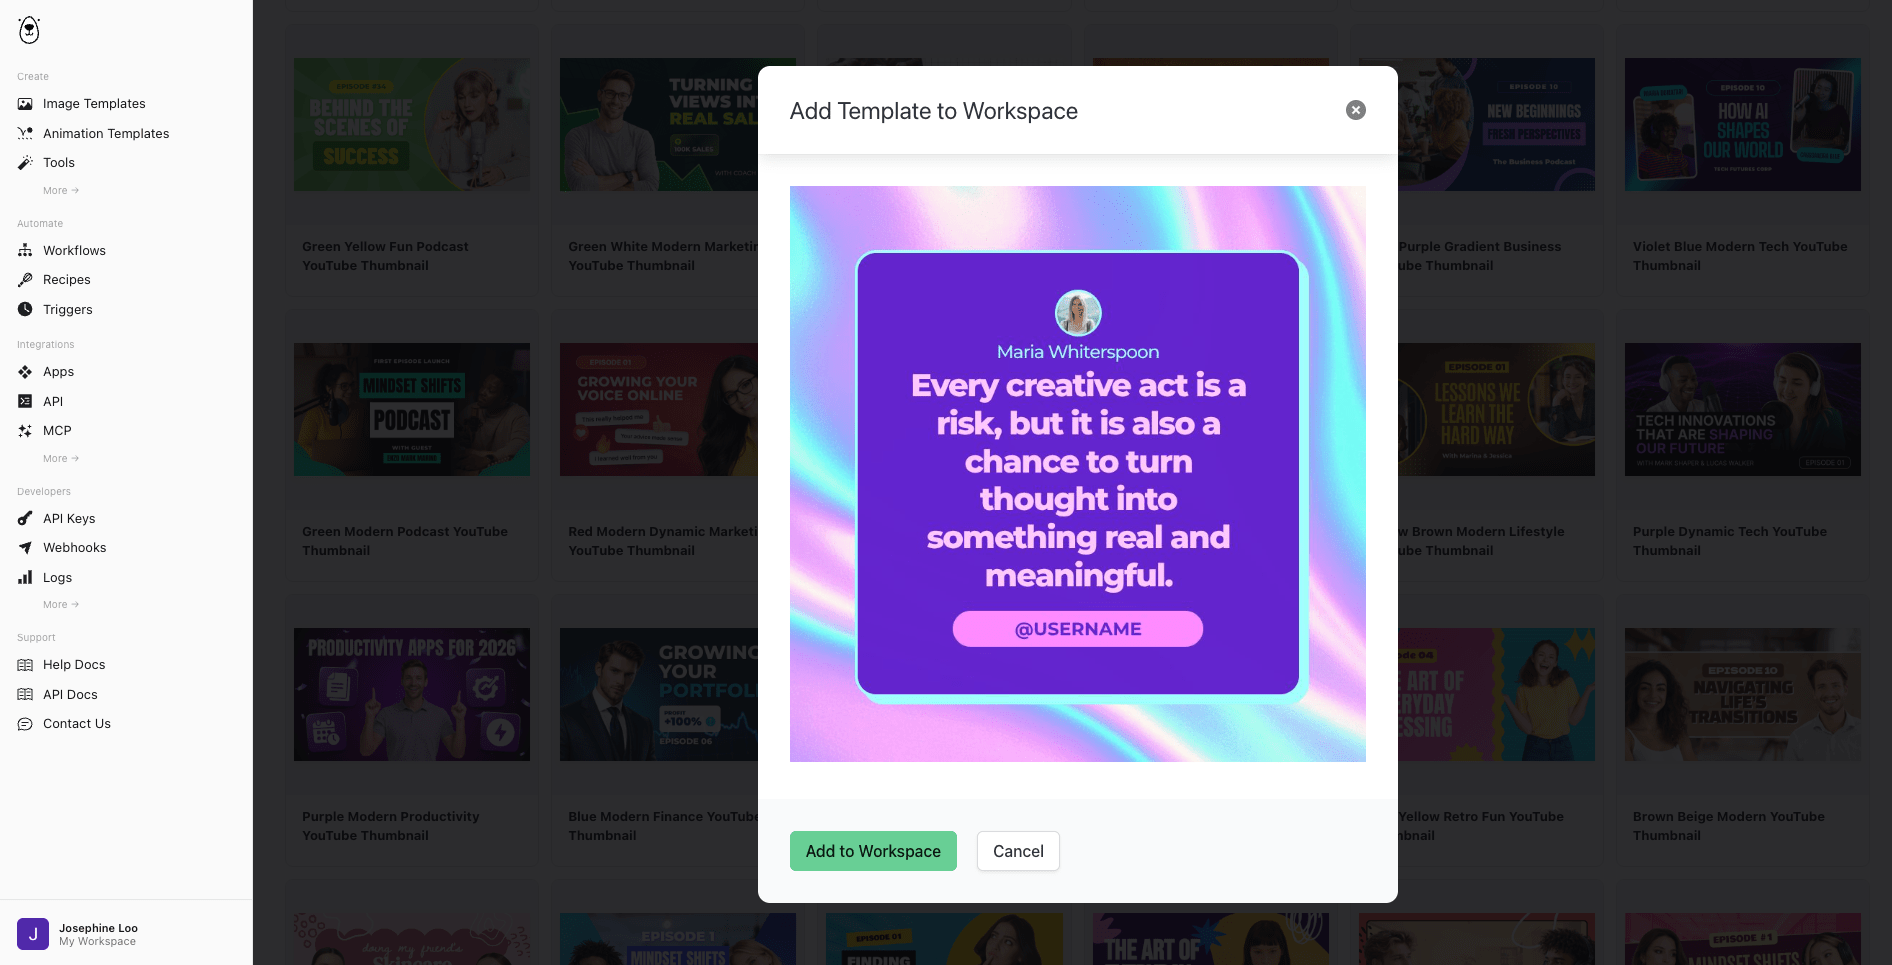
Once you're in the editor, you can click “+ Add Object” to add layers. You'll see options like Text, Static Image, Rectangle, Circle, QR Code, and more:
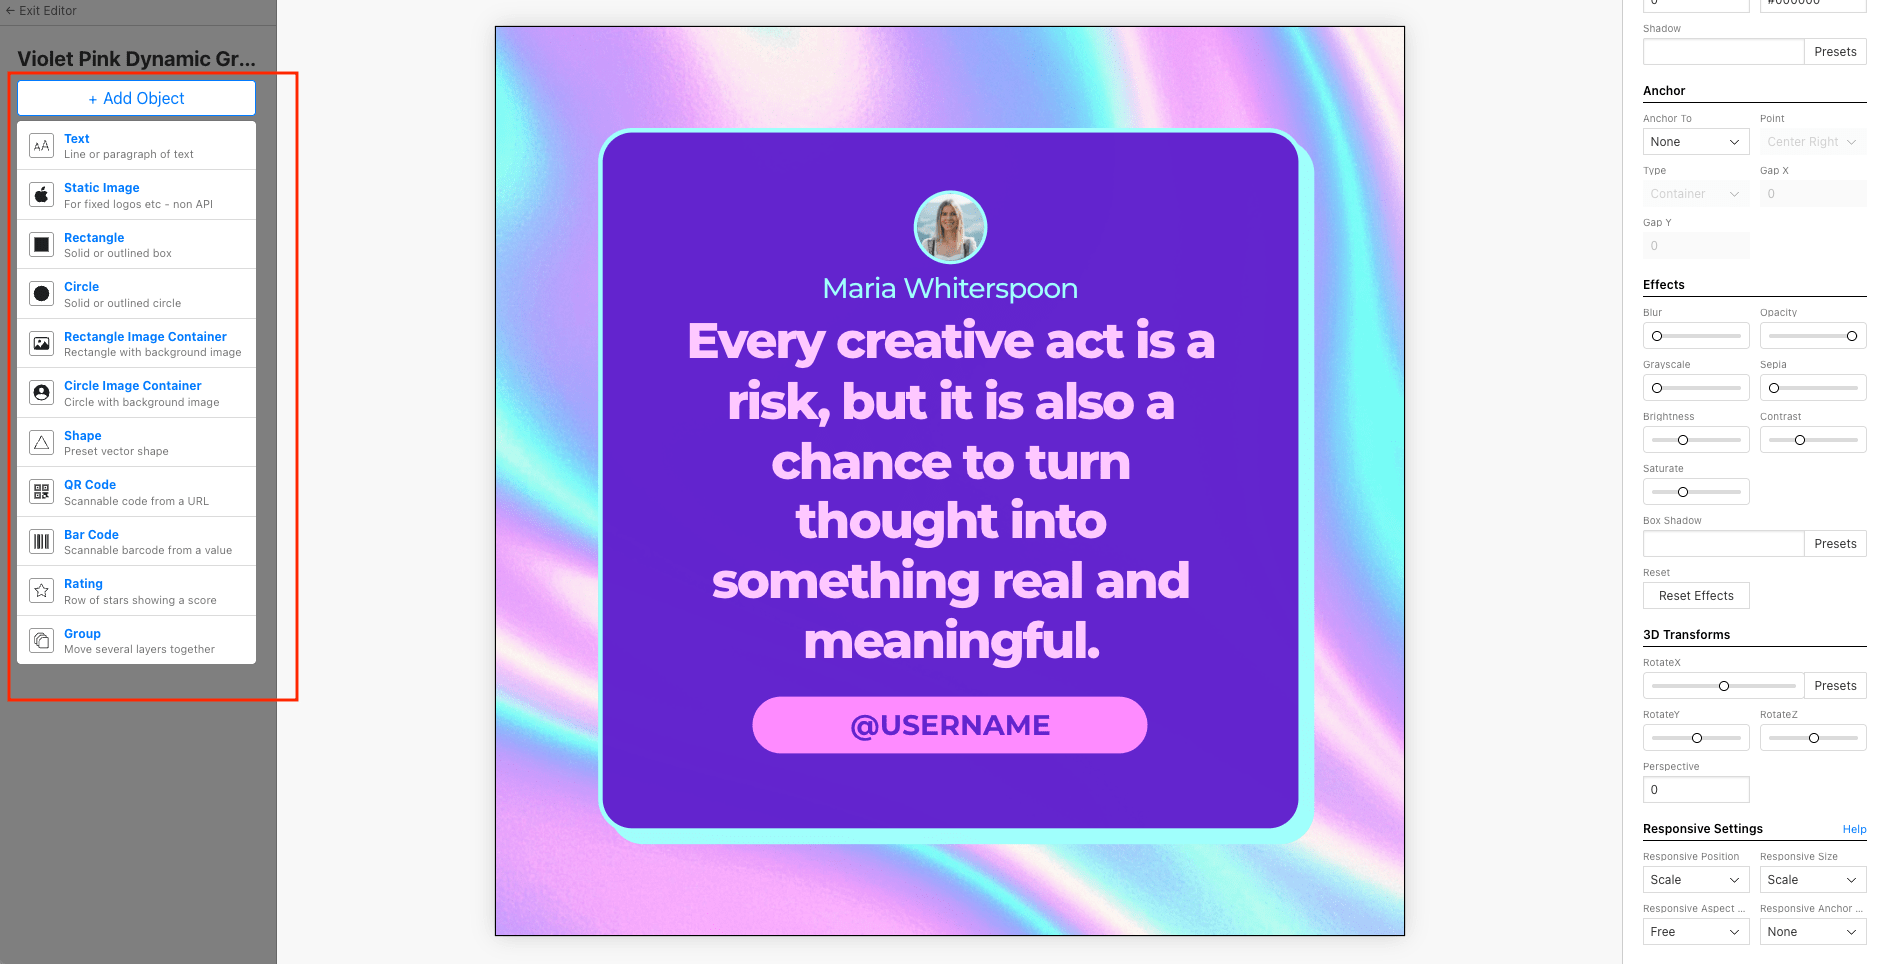
You can play around the editor and add some objects, or leave the template as it is.
🐻 Bear Tip: You'll reference the layers’ names when you send modifications via the API, so give them meaningful names (like
title,logo,background) so that it’s easier to refer to.
Step 2. Making It Responsive
In Bannerbear v5, every layer has a Responsive Settings panel that controls what happens to it when the canvas is rendered at a different size than the original:
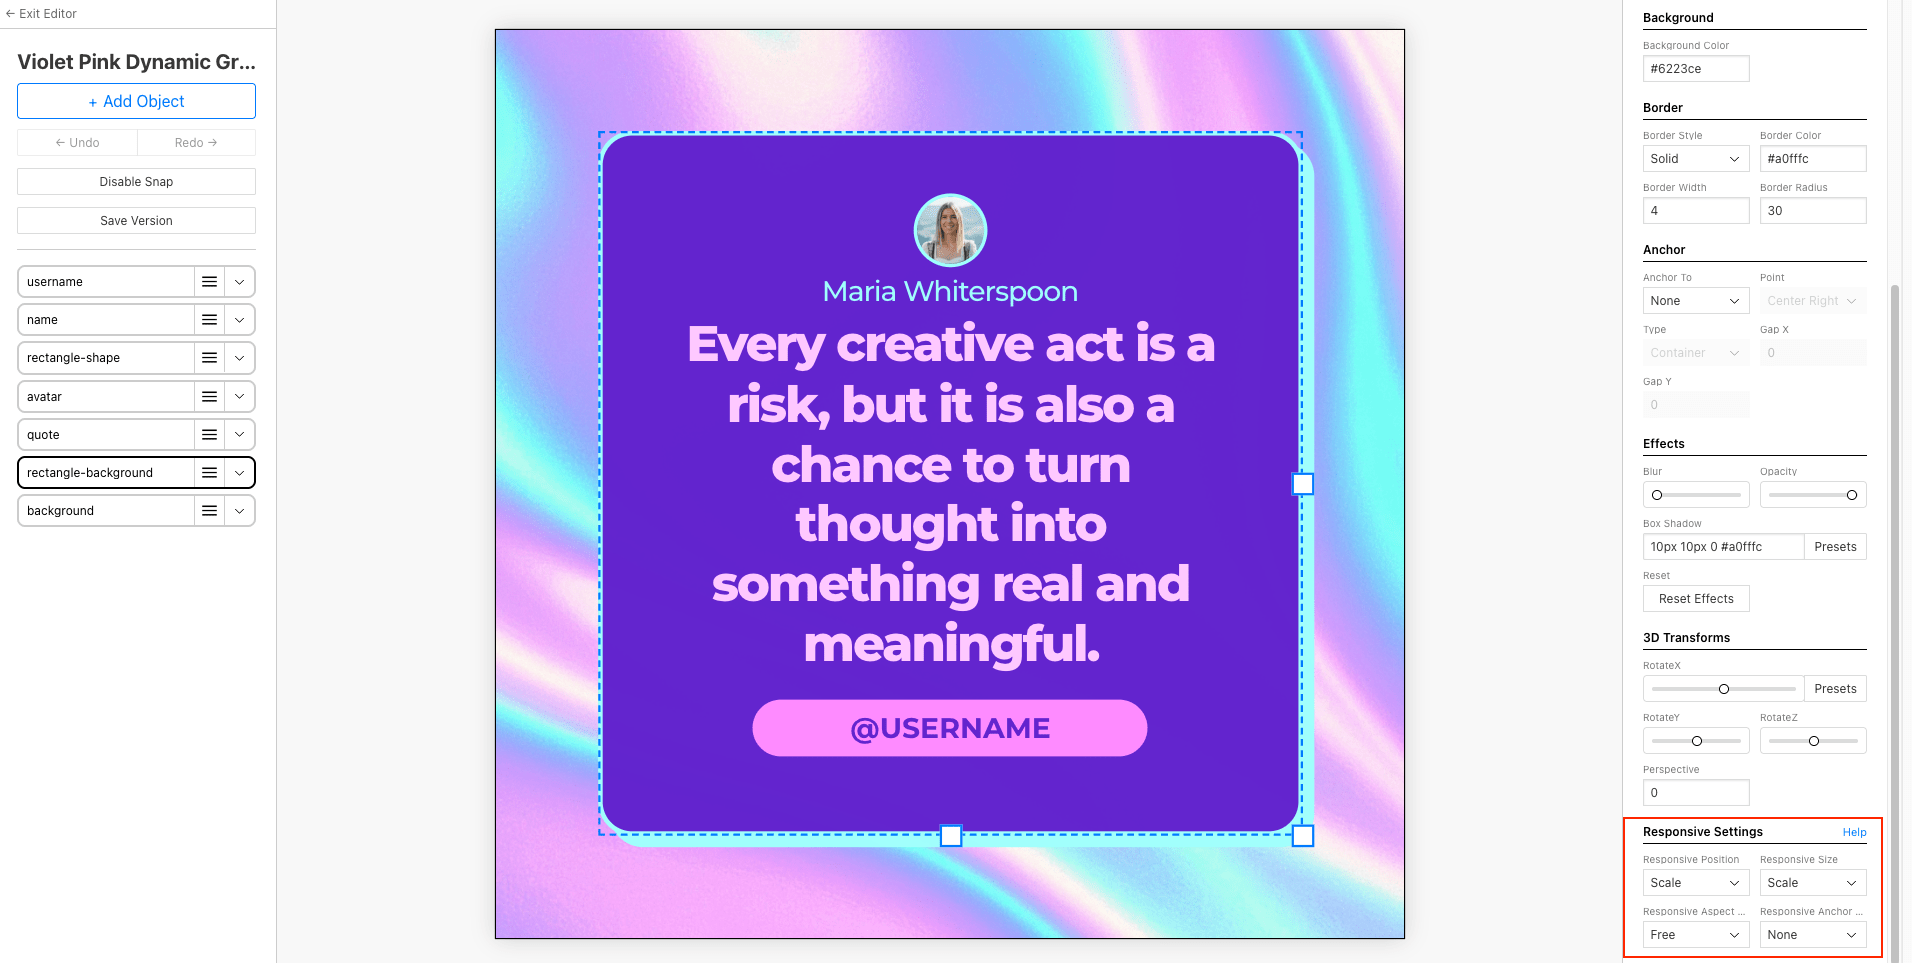
You can click on “Help” to see how each configuration affects how the layer behaves when the canvas is rendered at different size:
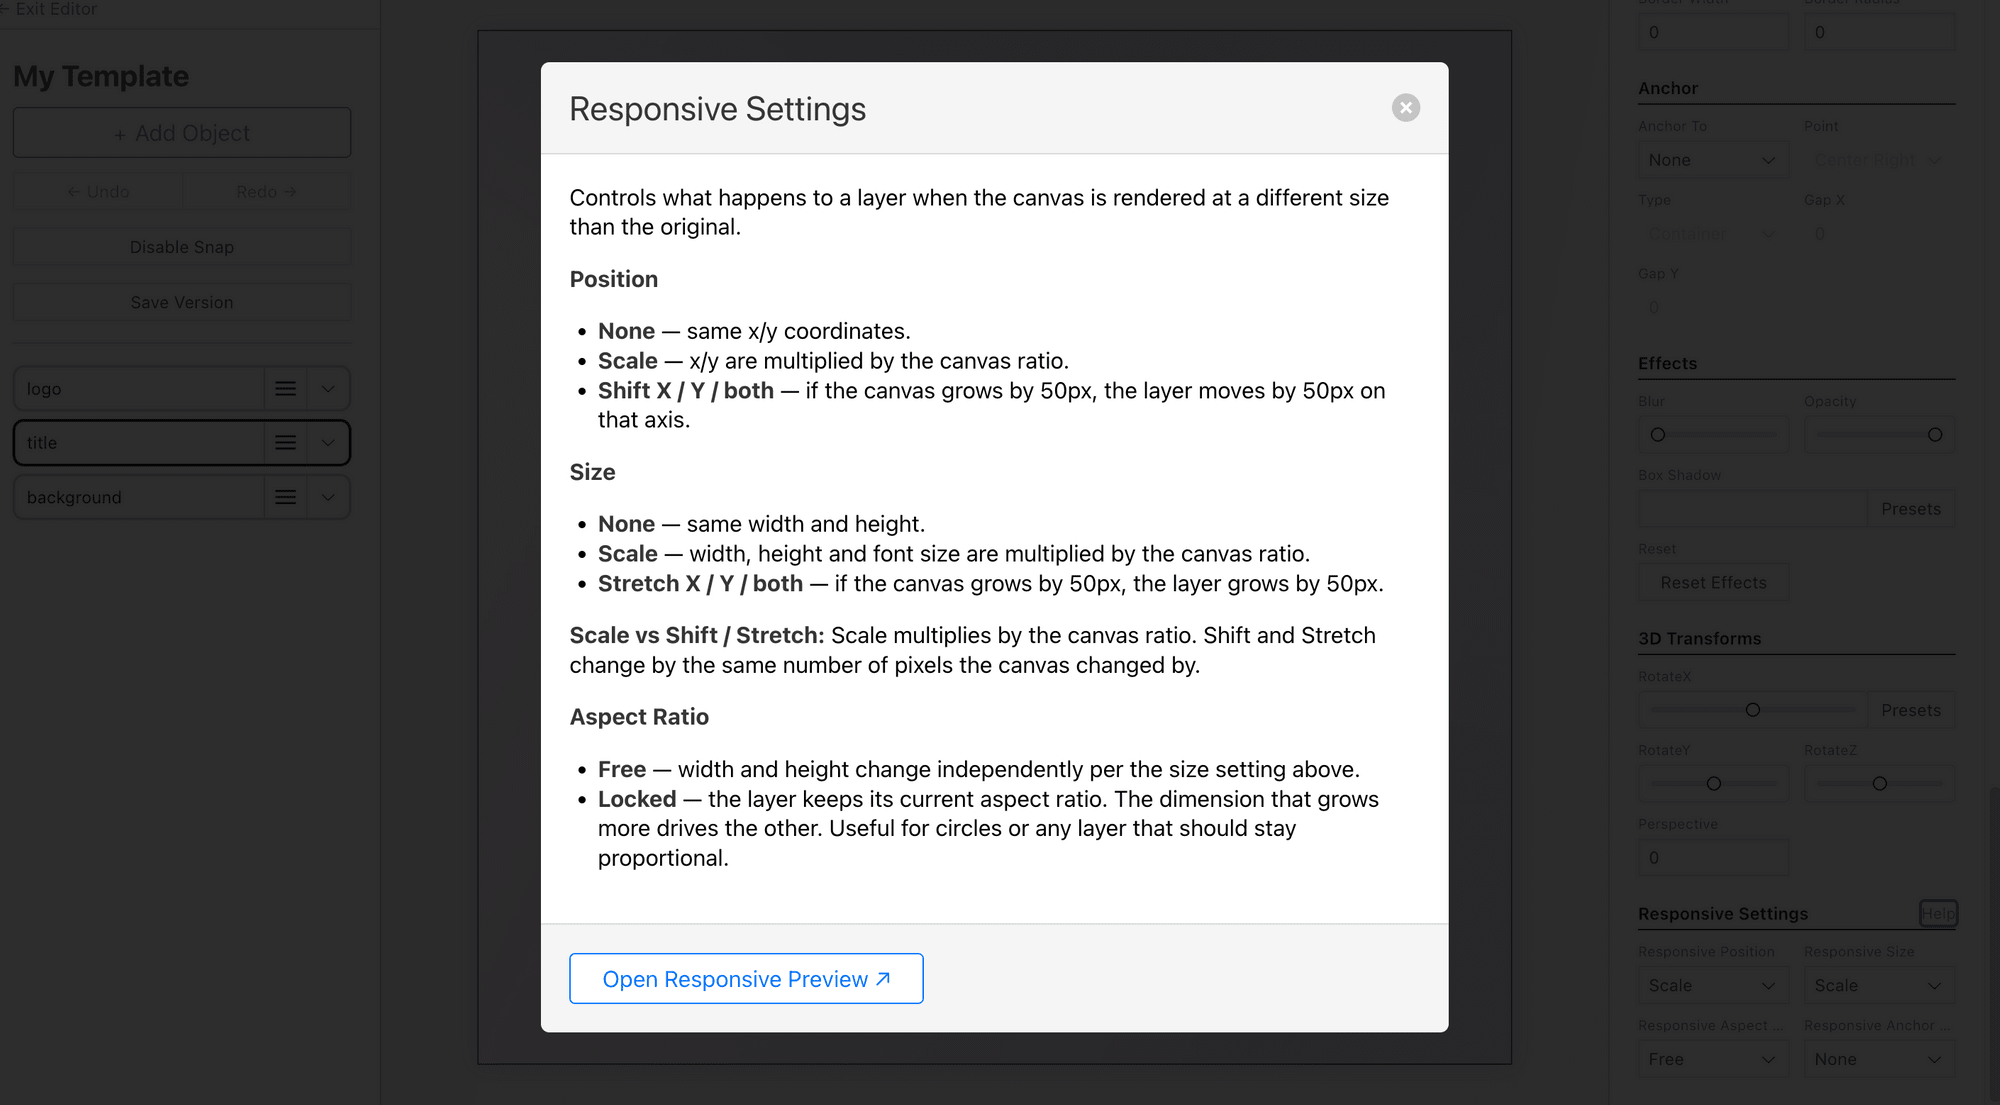
The main configurations are:
- Position - what happens to the layer's x/y coordinates
- Size - what happens to the layer's width, height, and font size
- Aspect Ratio - whether a layer stays proportional as it resizes
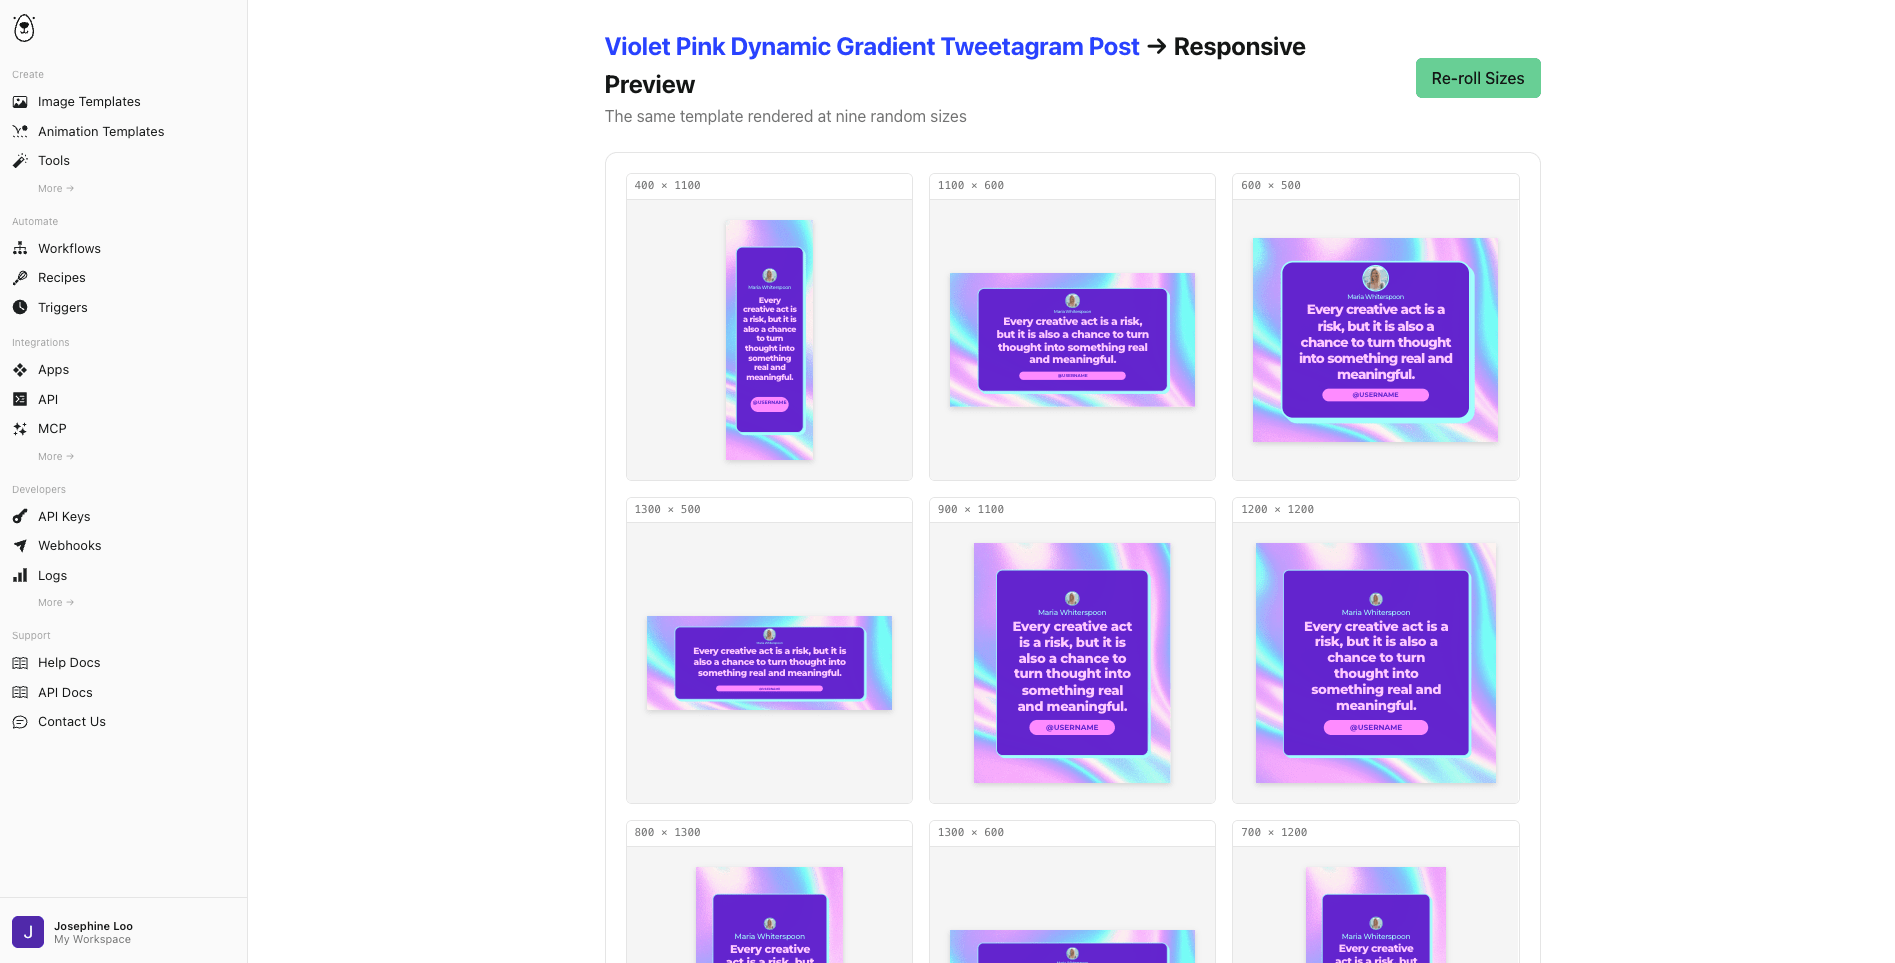
For this template, every layer has its Responsive Position and Responsive Size set to "Scale," and Responsive Aspect set to "Free" except for the avatar layer, which has the first two settings set to "None" and the last set to "Locked." This means the avatar layer's size and position stay fixed, while the other layers scale to match whatever size is requested.
Once you've set the responsive rules on your layers, you can click “ Open Responsive Preview” to see the same template rendered at different random sizes:
Step 3. Generating an Image via the API
With your template ready, you can now generate an image using the API.
Grab its ID from the URL:
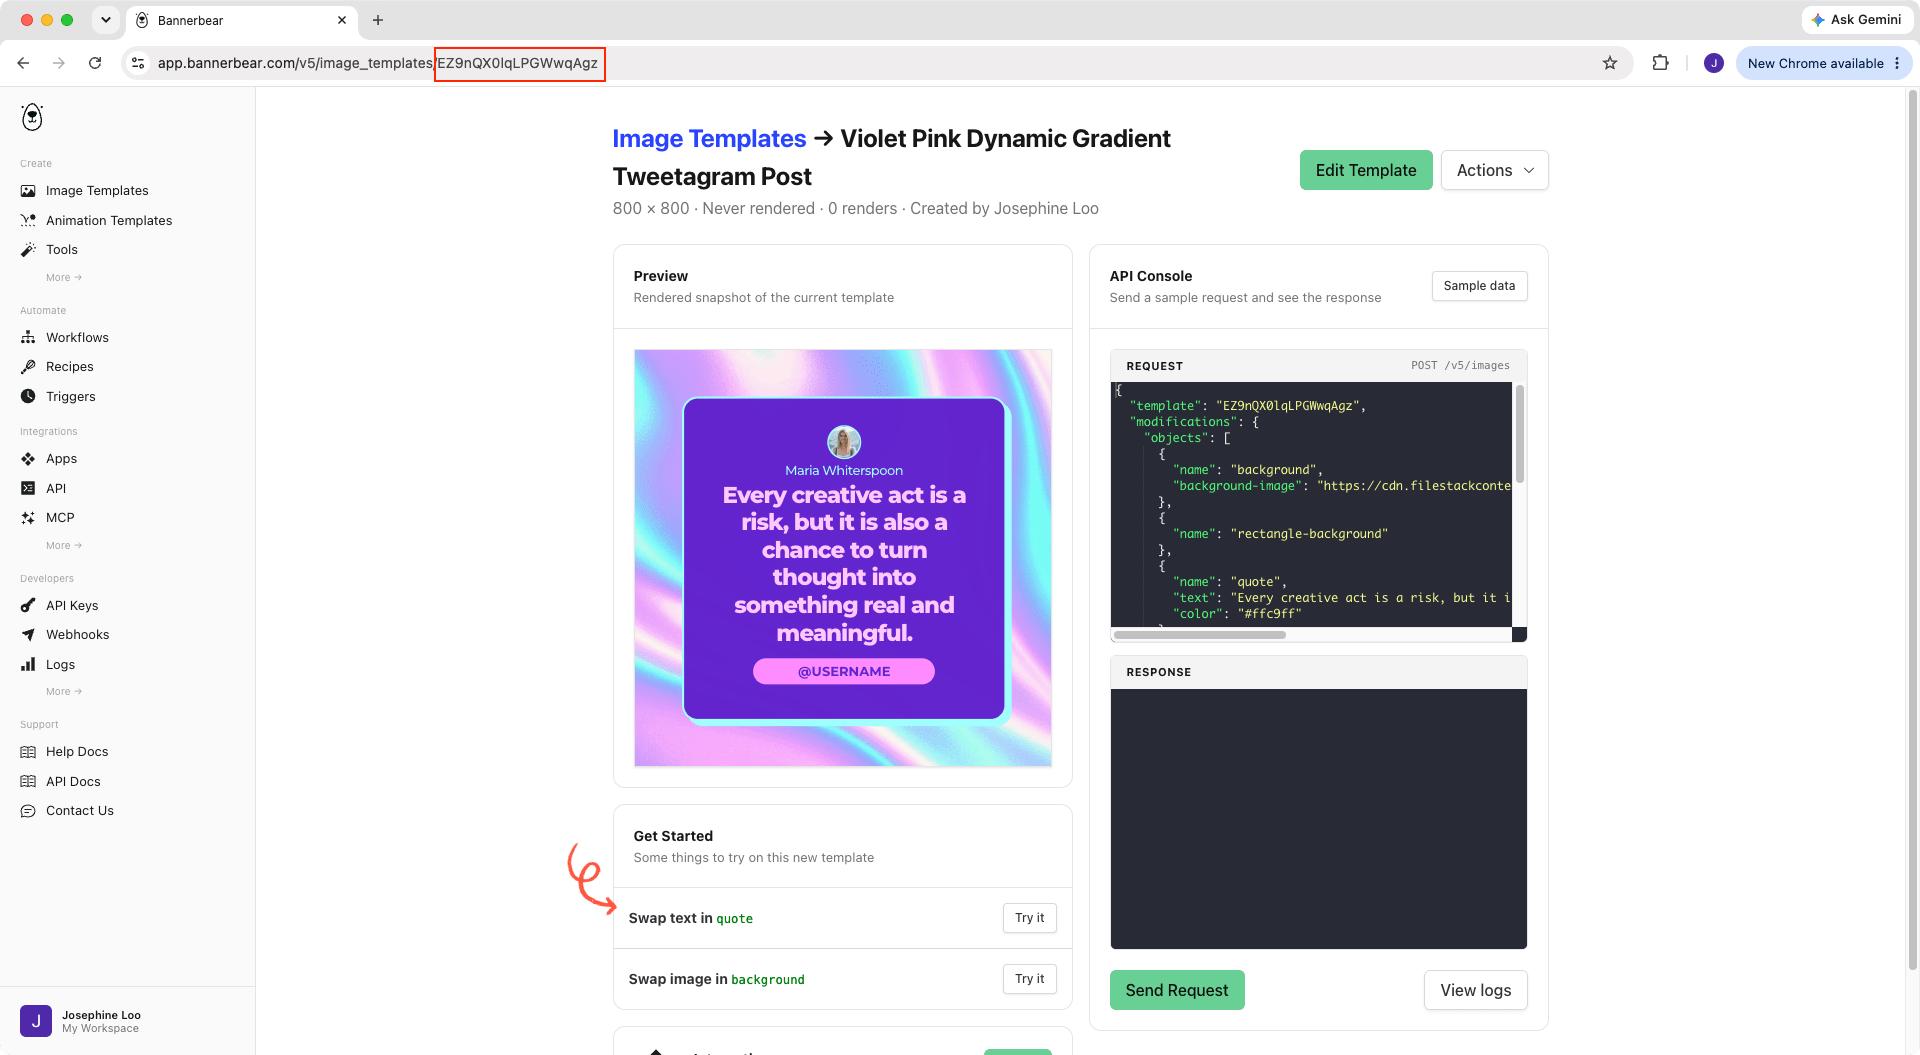
Then, create a new file (e.g., generate-image.js) in your Node.js project, and paste the code below (using your template ID):
require('dotenv').config();

const API_KEY = process.env.BANNERBEAR_API_KEY;

(async () => {
  const response = await fetch('https://sync.api.bannerbear.com/v5/images', {
    method: 'POST',
    headers: {
      'Content-Type': 'application/json',
      Authorization: `Bearer ${API_KEY}`,
    },
    body: JSON.stringify({
      template: 'your_template_id',
      formats: ['png'],
      modifications: {
        template: {
          width: 1080,
          height: 1920,
        },
        objects: [
          {
            name: 'quote',
            text: 'Welcome to V5!',
          },
        ],
      },
    }),
  });

  const image = await response.json();
  console.log(image);
})();
modifications.objects is where you target layers by the name you gave them in the editor and change their text, colors, or images. Just add any layer that you want to change with the new value to the array.
In the code above, we’re setting the quote text to “Welcome to V5!”, and requesting a 1080x1920px image rather than the template’s original dimension.
When you execute the script by running node generate-image.js in the terminal, it should print a response object like this:
{
  uid: '7ZlmWJVNv78Va3eKOv',
  status: 'completed',
  template: 'EZ9nQX0lqLPGWwqAgz',
  files: {
    png: 'https://images.bannerbear.com/V5/e9mN50JPL8PYk1A6pl/7ZlmWJVNv78Va3eKOv/56699ccd-9a68-4b24-a38f-72304c449c09.png'
  },
  metadata: null,
  self: 'https://api.bannerbear.com/v5/images/7ZlmWJVNv78Va3eKOv',
  created_at: '2026-08-24T10:06:22.374Z',
  completed_at: '2026-08-24T10:06:23.702Z'
}
And this is how the image returned above looks like:
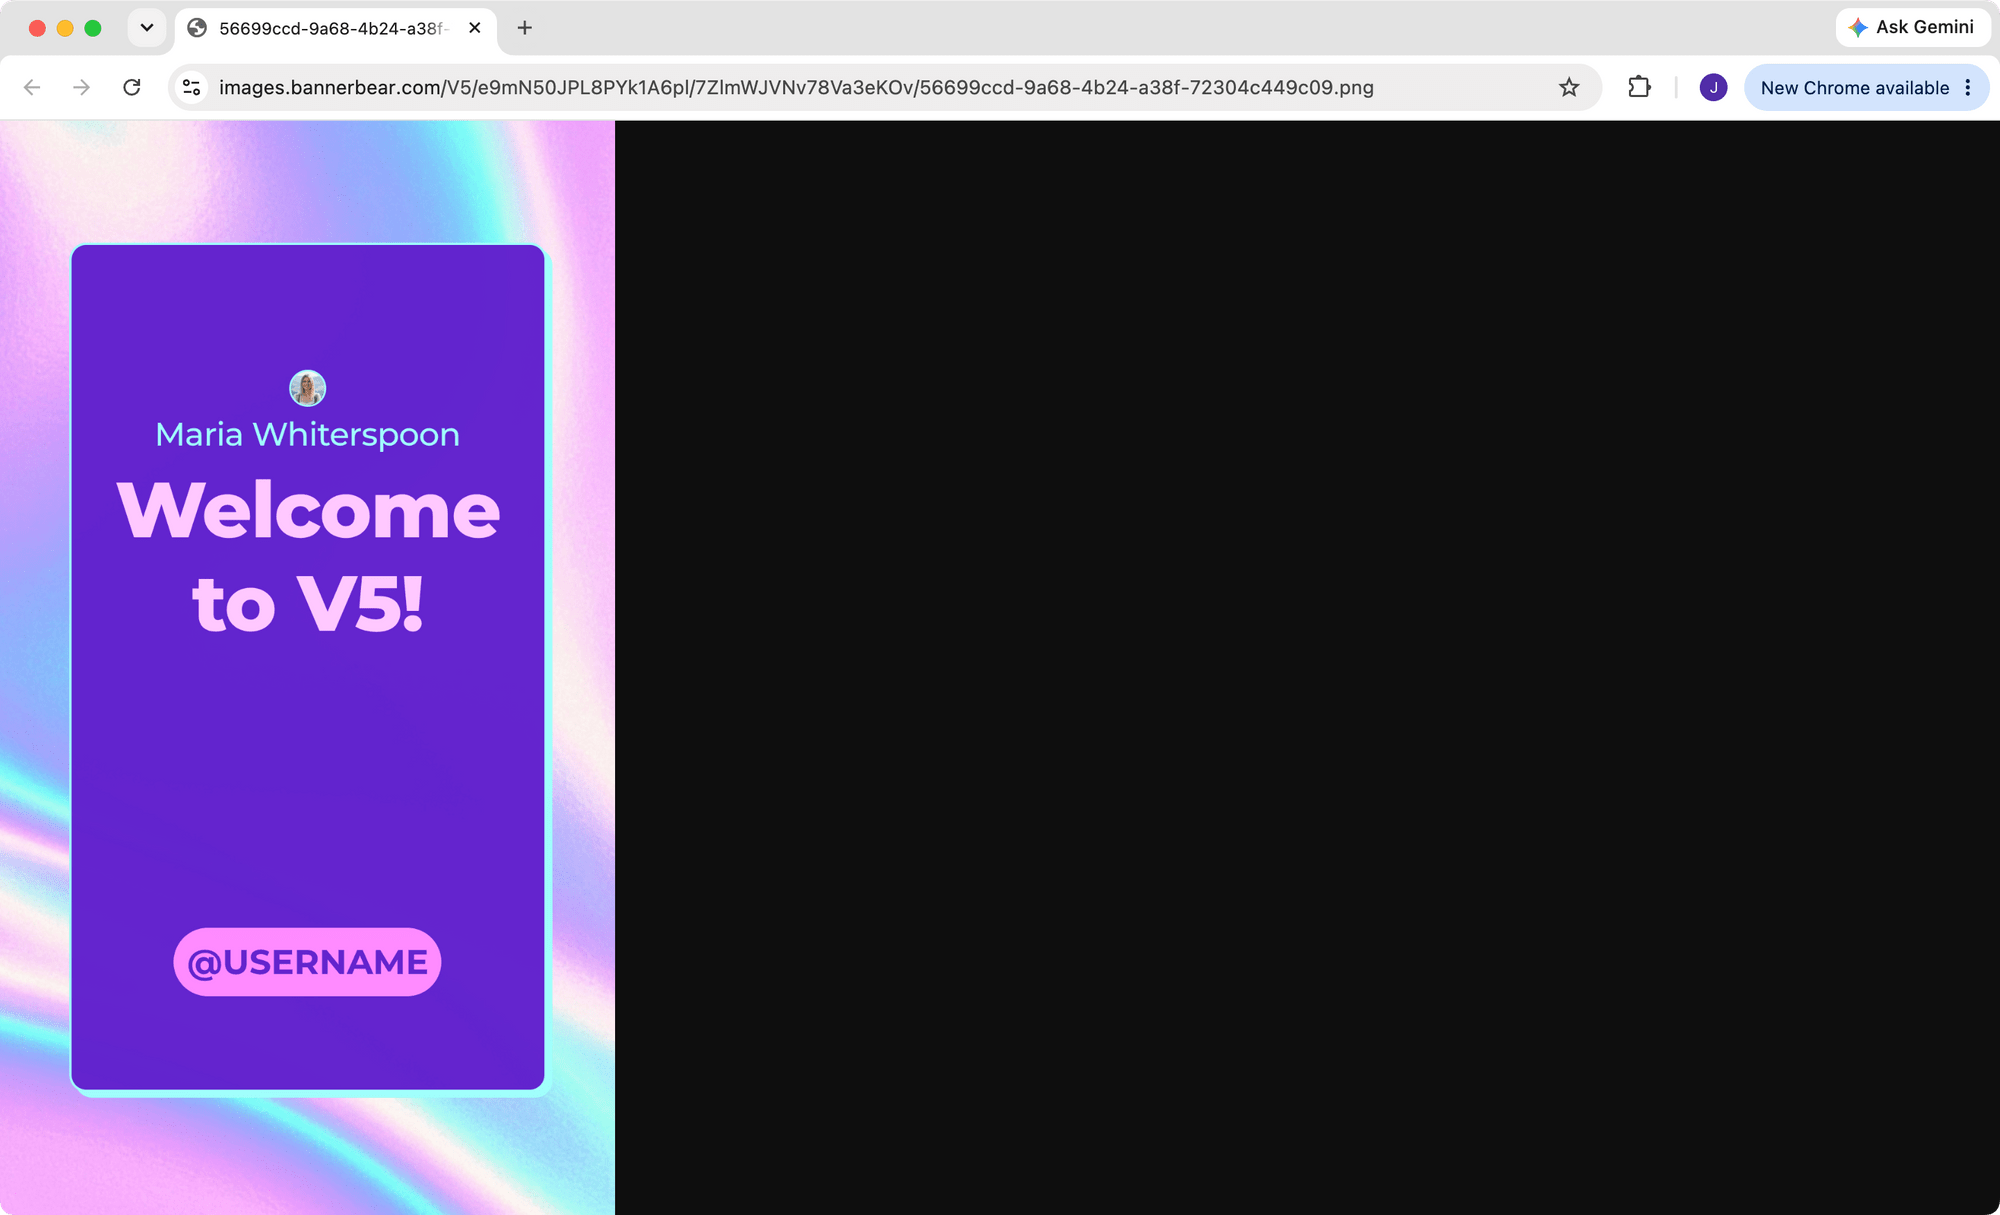
🐻 Bear Tip: 1080x1920px is the dimension for Instagram Stories.
Generating an Image in PDF Format
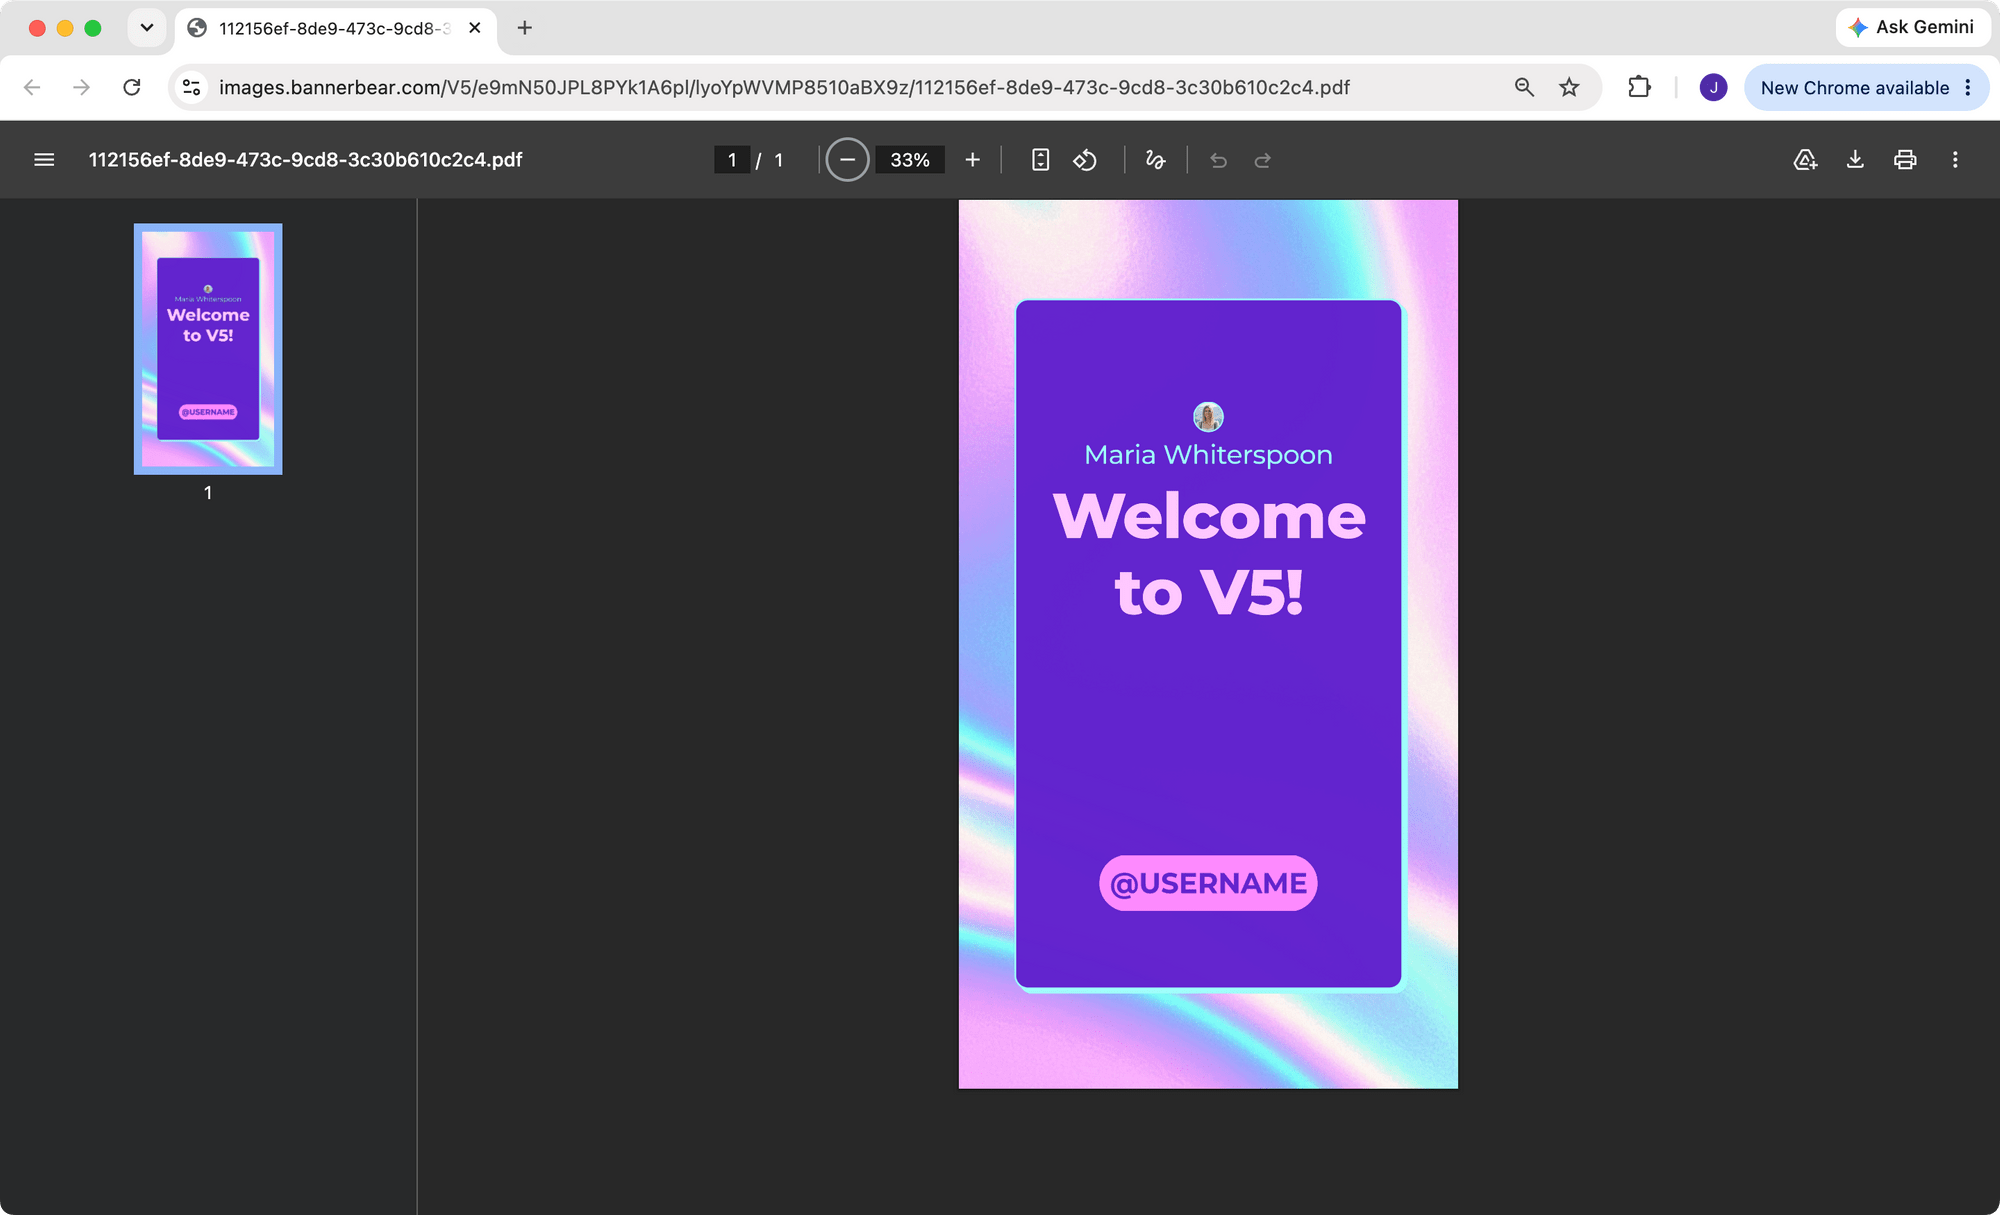
formats lets you request jpg, png, pdf, webp, or avif in the same request. If you want a print-ready PDF alongside your PNG, just add pdf to the array:
formats: ['png', 'pdf']
The image will be returned in both PNG and PDF formats:
Running a Workflow in Bannerbear v5
A Workflow is a series of steps that chain image, animation, and video tools usage together into a single automation. For each workflow, you can define what input it accepts and what each step does. Once you’ve designed a workflow in your Bannerbear dashboard, you can trigger it using the API or straight from the dashboard.
To show how it works, we'll build a simple workflow that takes a video and a text string as inputs, and then resizes the video and add a title card animation to it (duplicate this animation template to your account).
🐻 Bear Tip: An animation template works just like an image template. Instead of rendering as a single static frame, it renders short motion graphics that can be used as video elements, like lower thirds, intros, and social media stingers.
Step 1. Create a Workflow
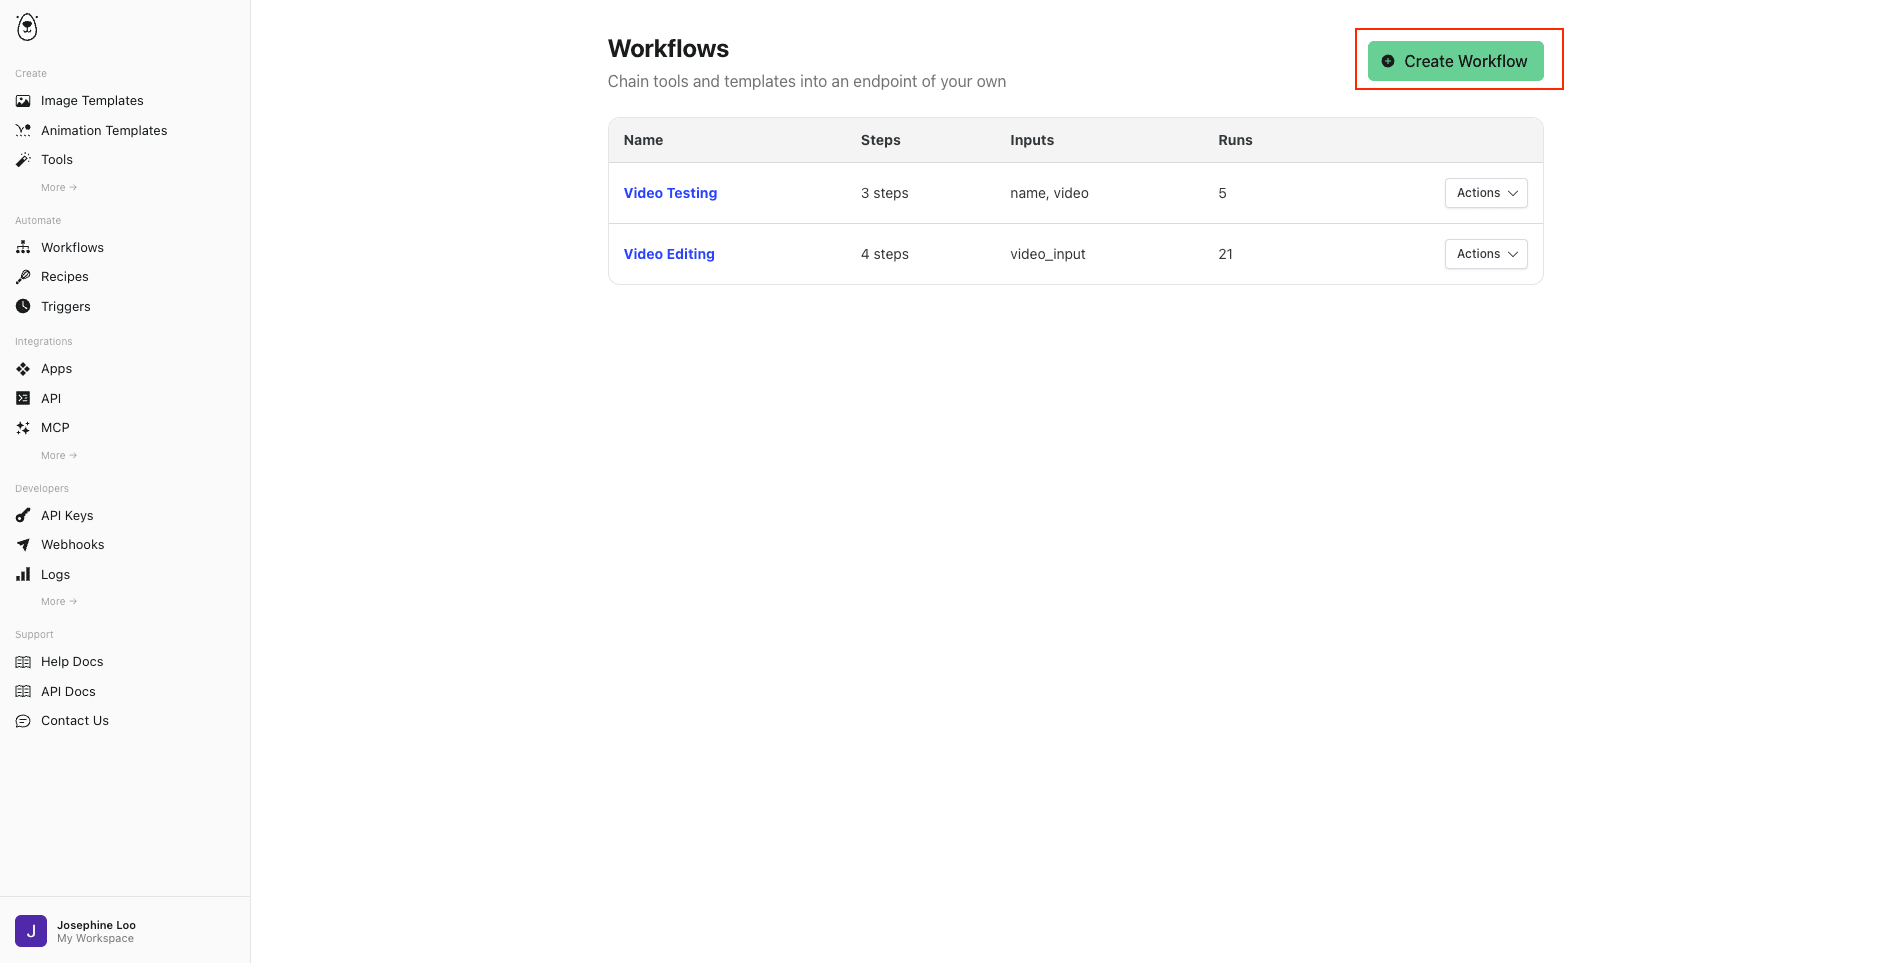
Head to Automate → Workflows and create a new workflow:
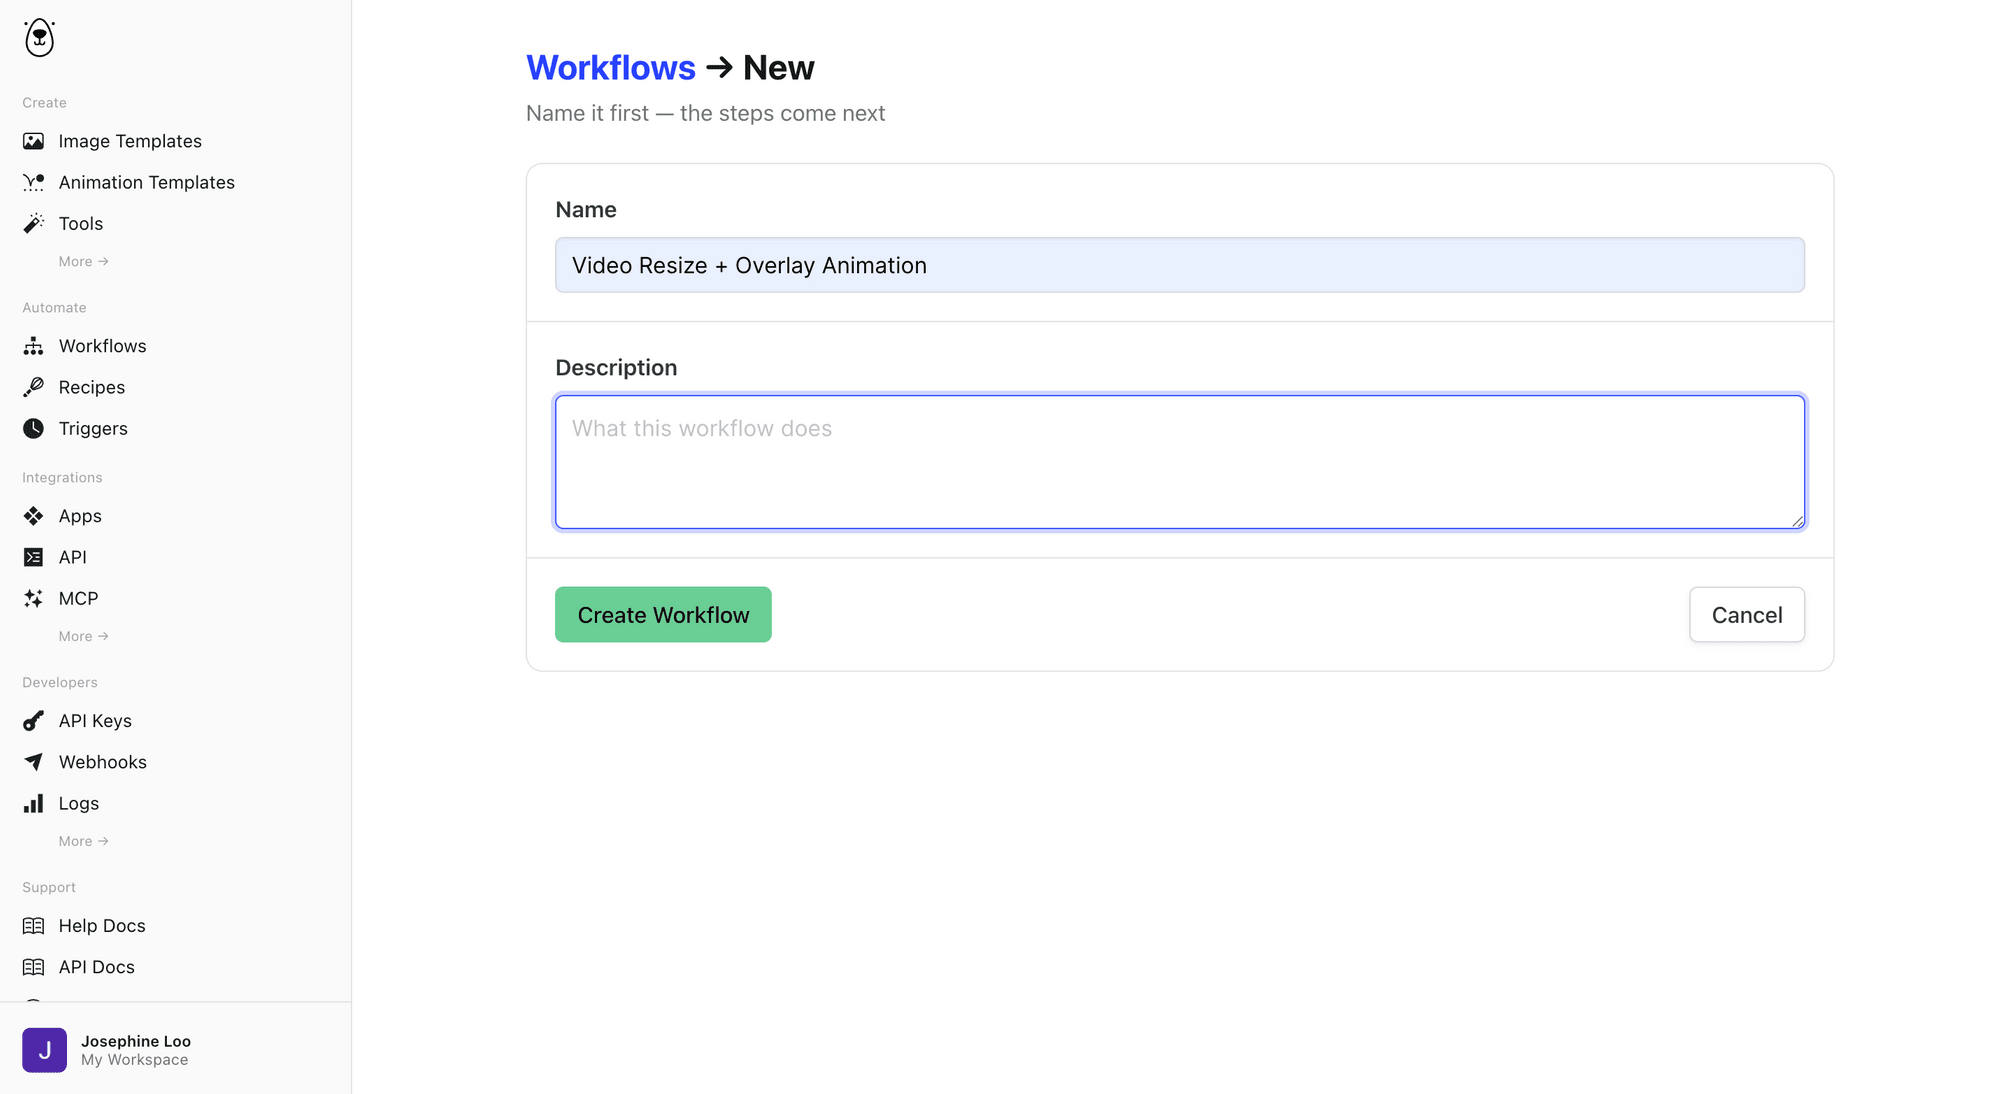
Give it a name (and maybe a description):
Step 2. Define Your Inputs
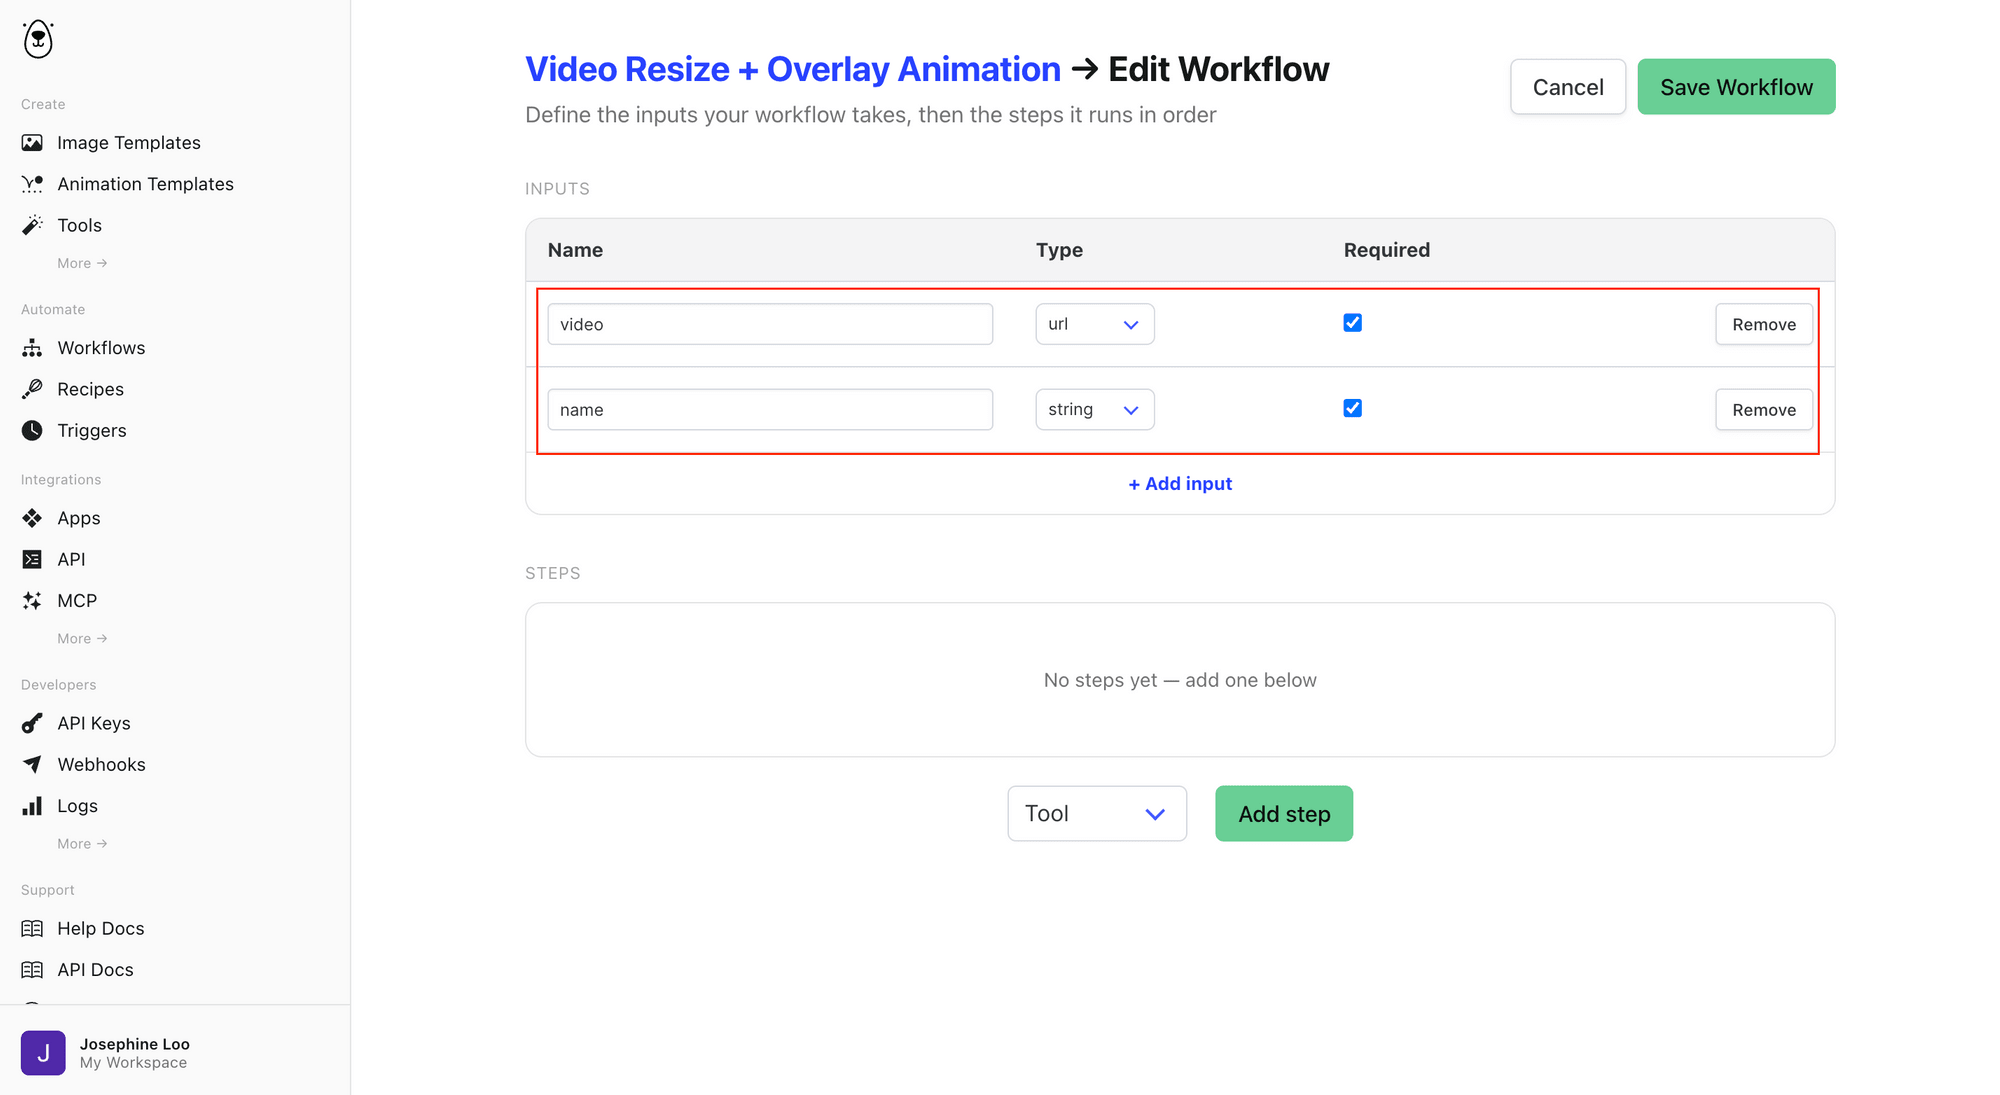
Then, define the inputs your workflow will accept. These are the values you'll pass in every time you run the workflow.
We'll need a video (url) and a name (string, for the title card):
🐻 Bear Tip: The input type supports
string,url,number, andboolean.
Step 3. Add Your Steps
Next, we’ll add steps to the workflow. Each step can carry out tasks that are available from the Image, Animation, and Tool APIs:
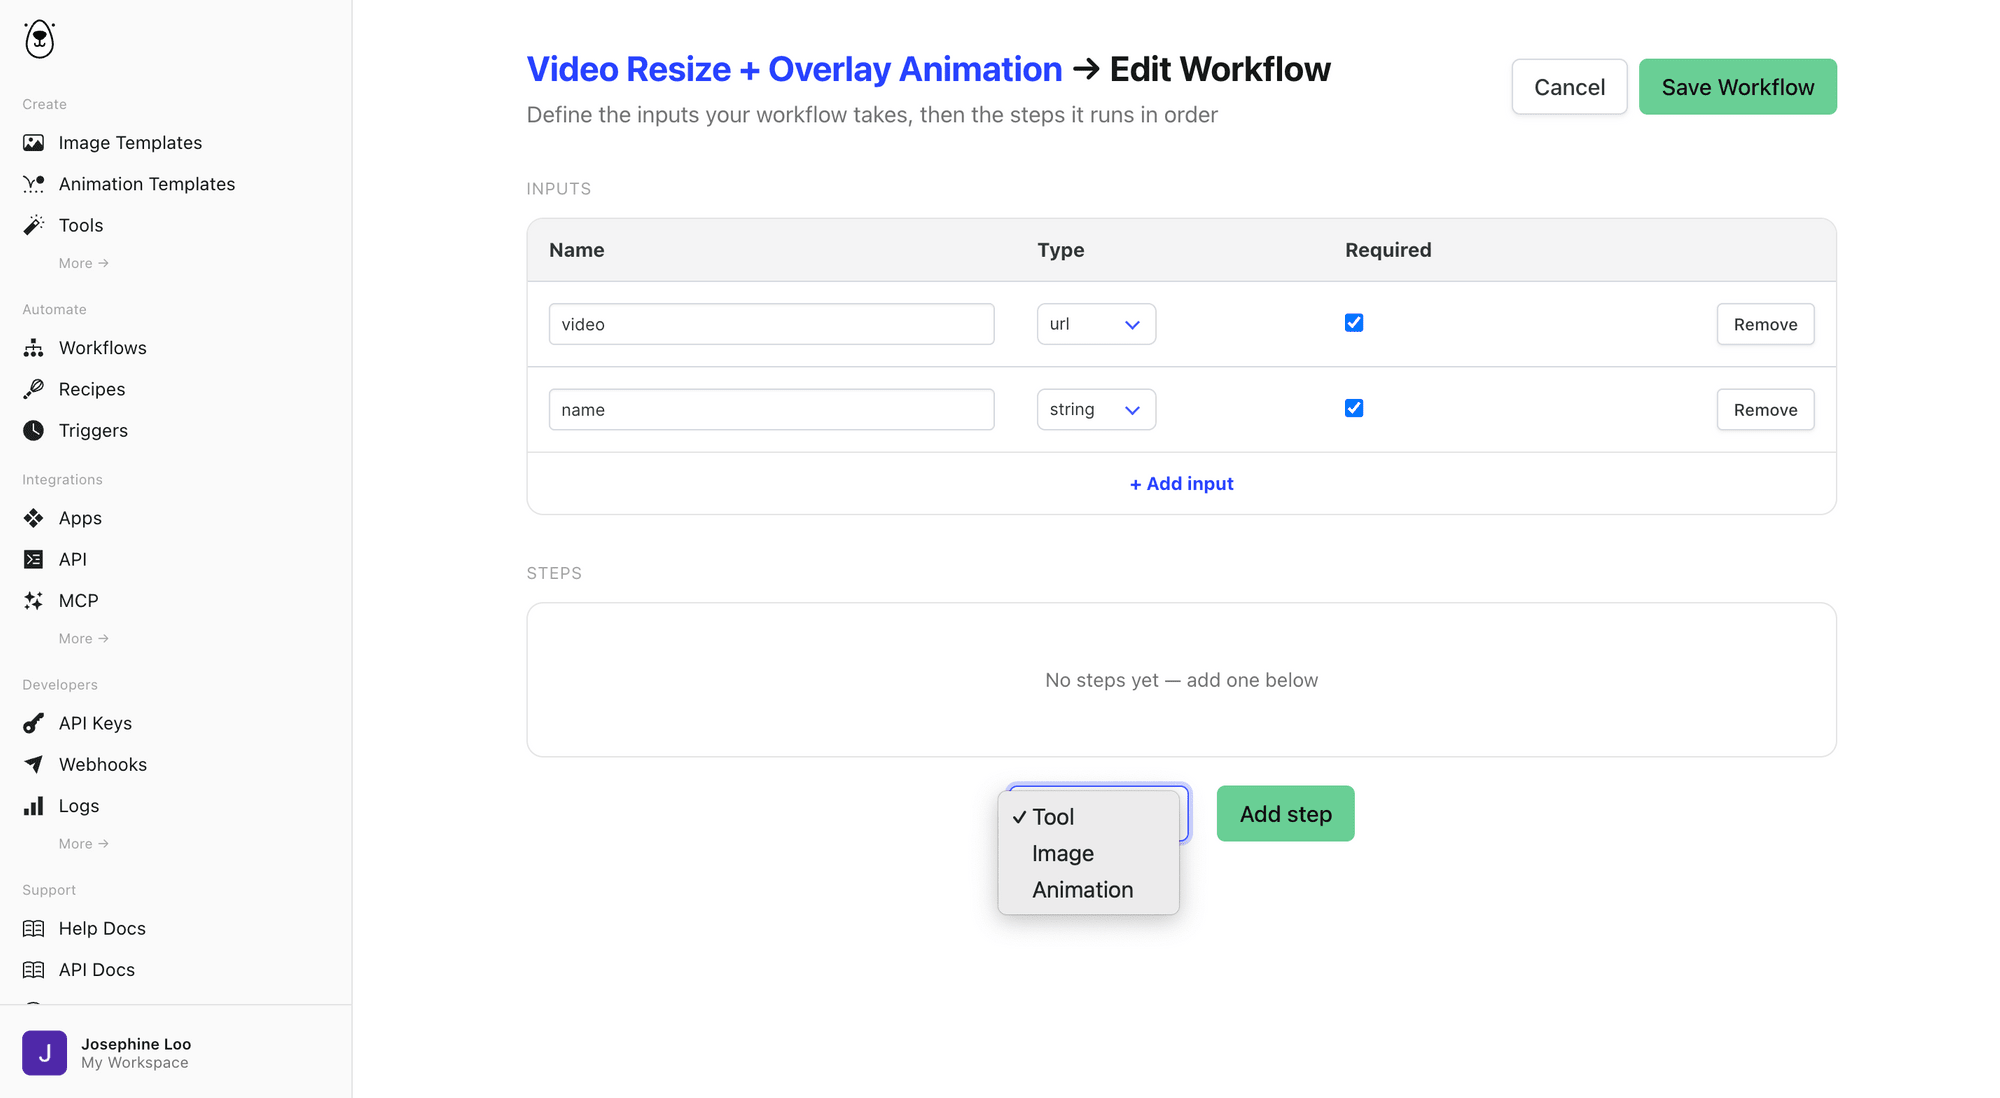
Workflow Step 1: Resize videos
Select Tool from the dropdown, and click “Add step” :
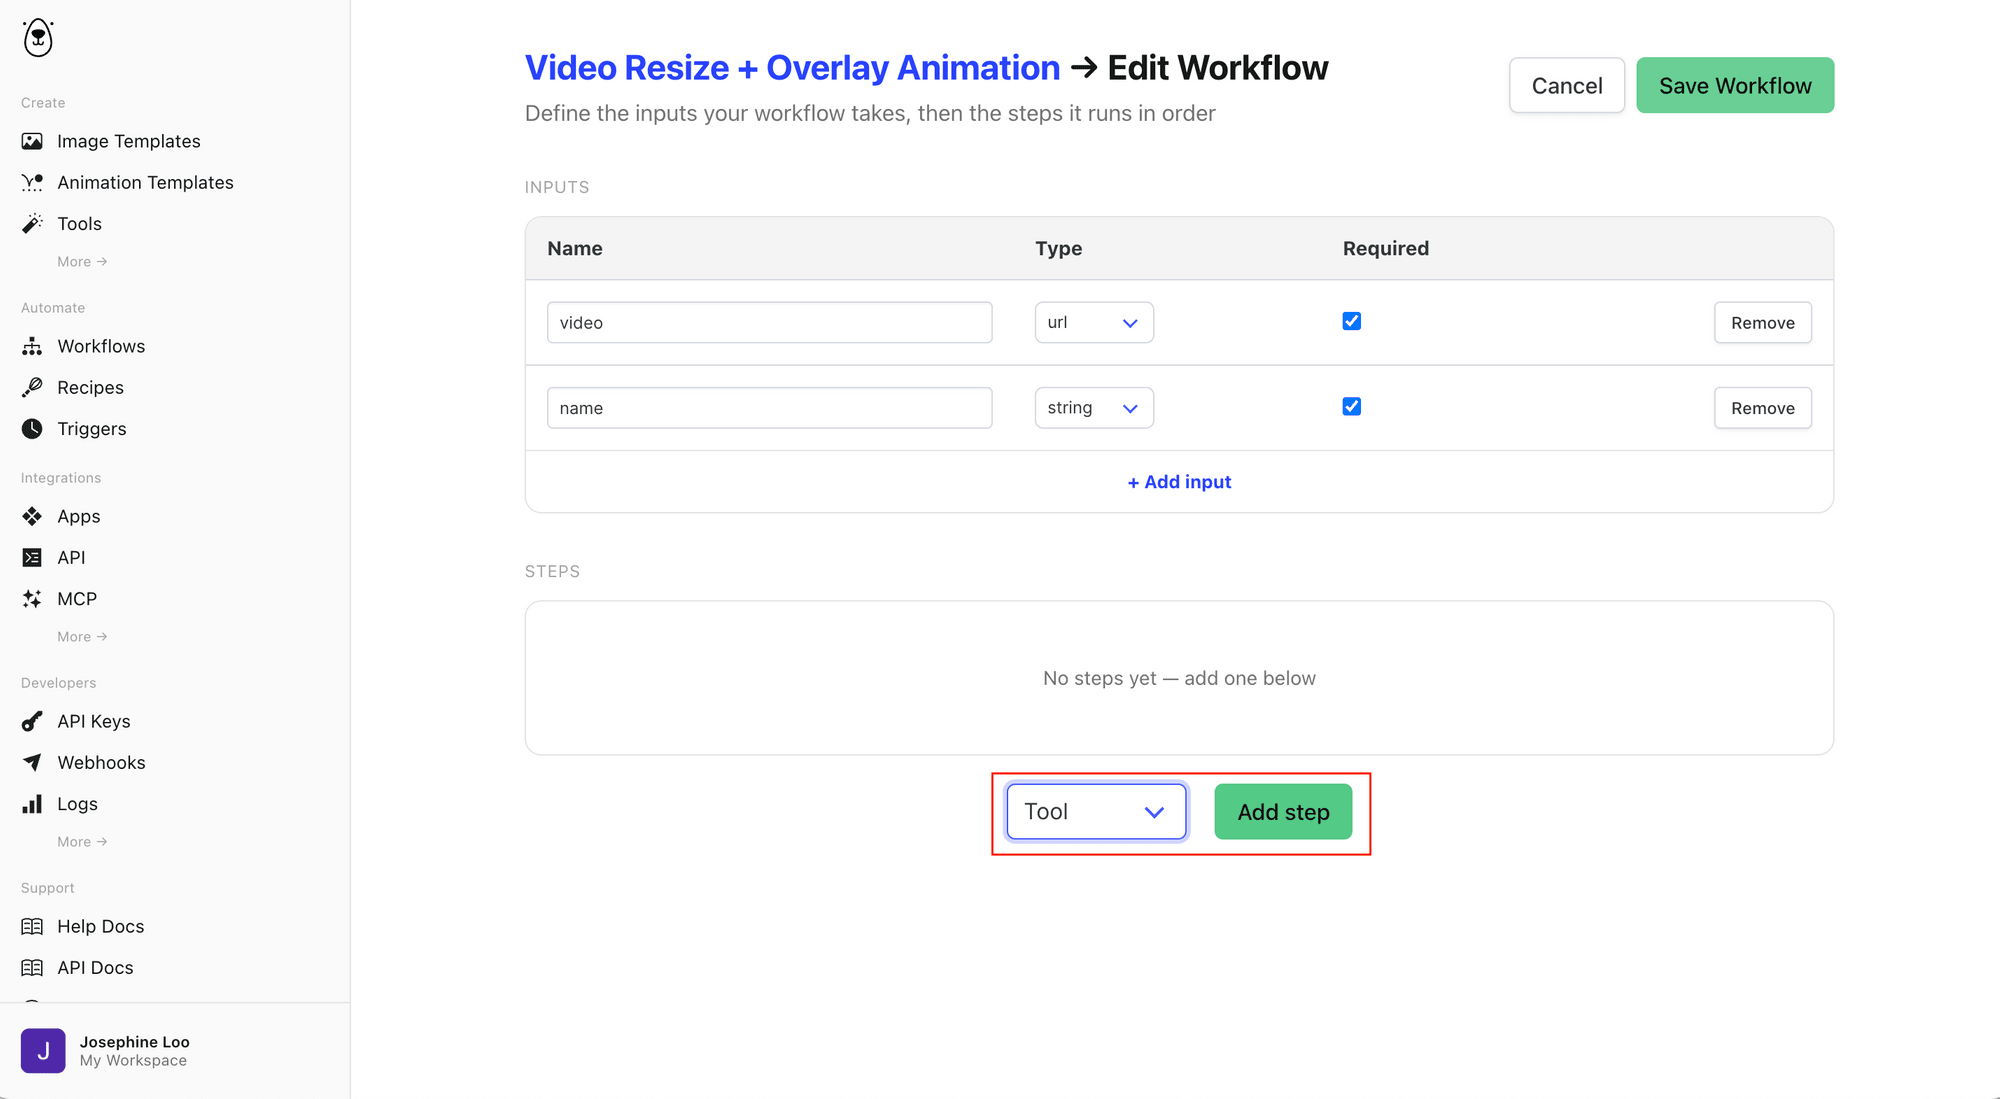
Choose Resize video from the tool. Reference the workflow's video input as the Video URL using the {{inputs.video}} syntax (you can select it from the “+ ref” dropdown), and set your target width and height:
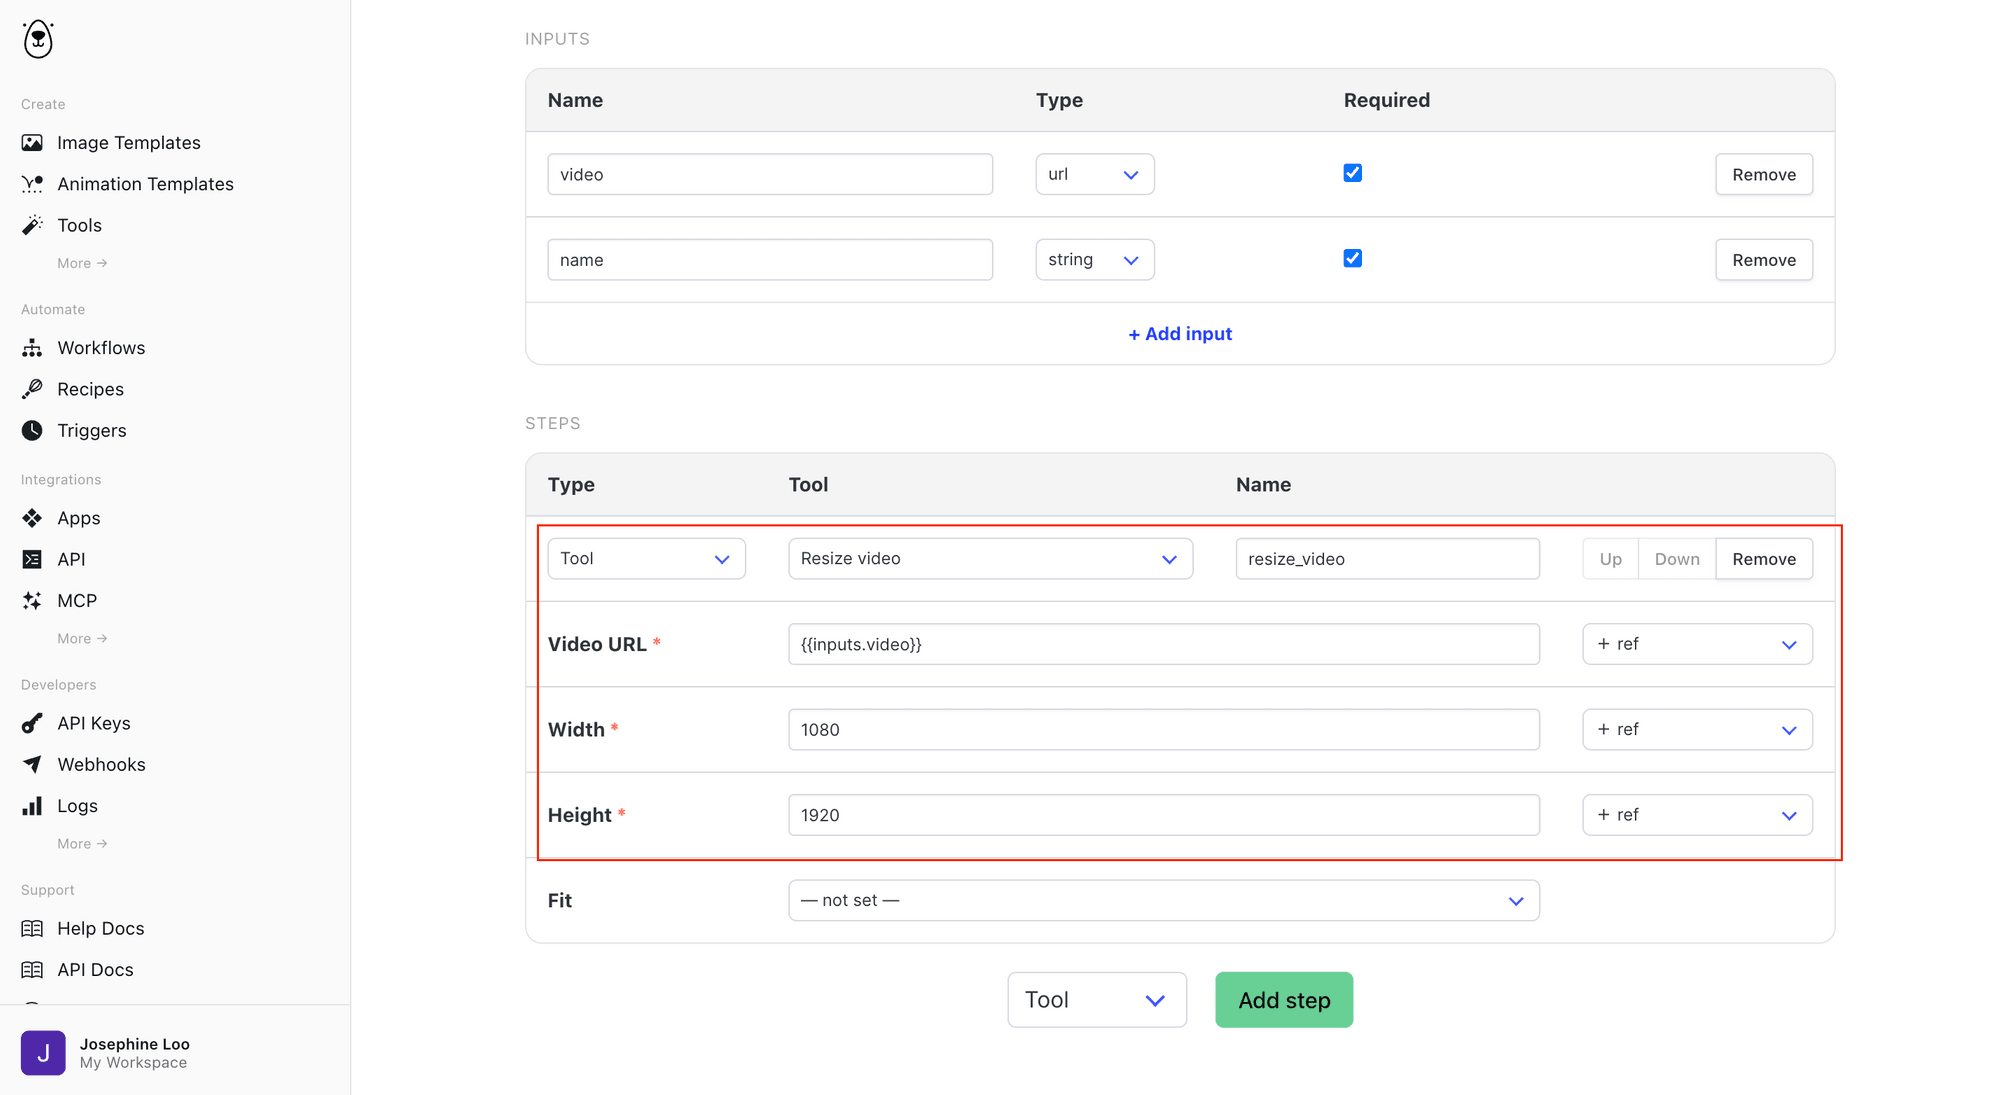
Workflow Step 2: Render the title card animation
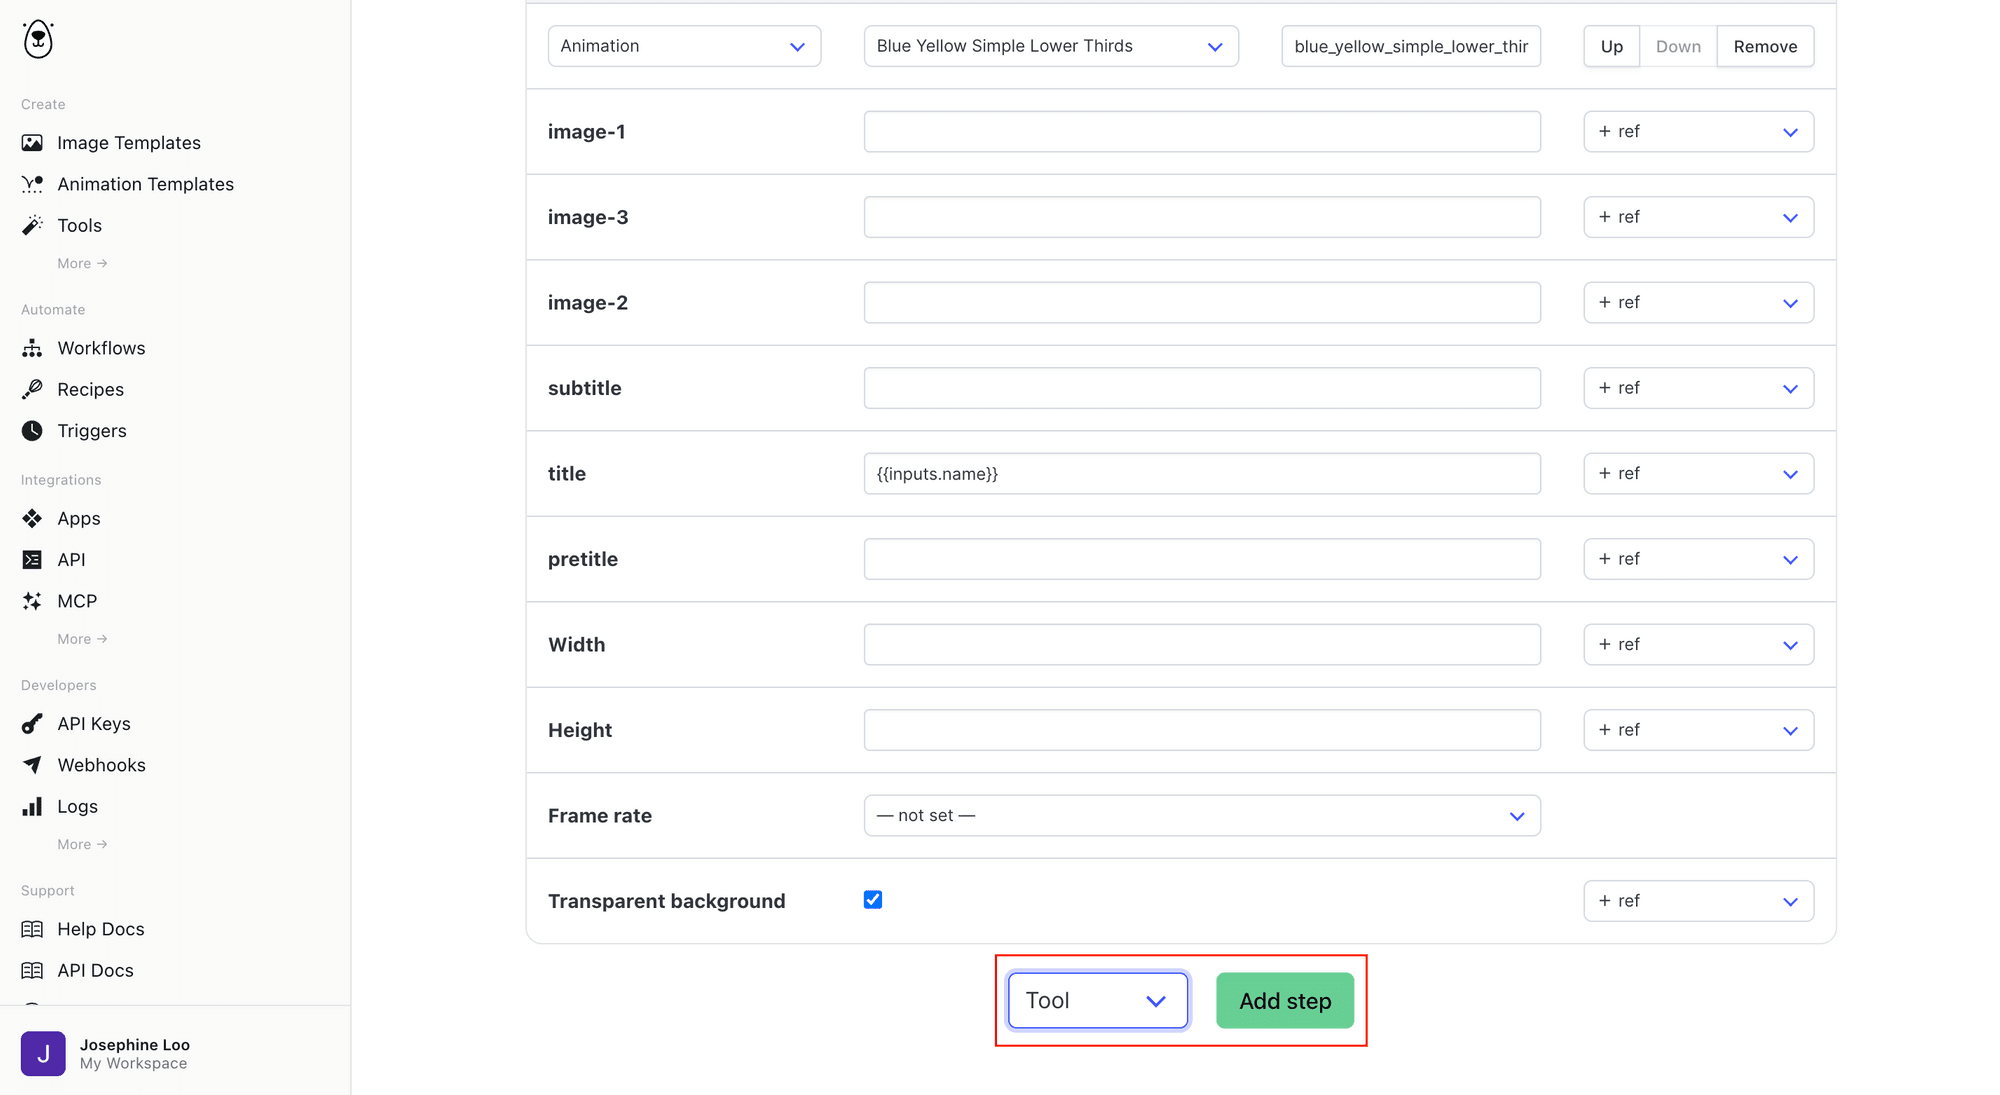
Select Animation from the dropdown, and click “Add step” :
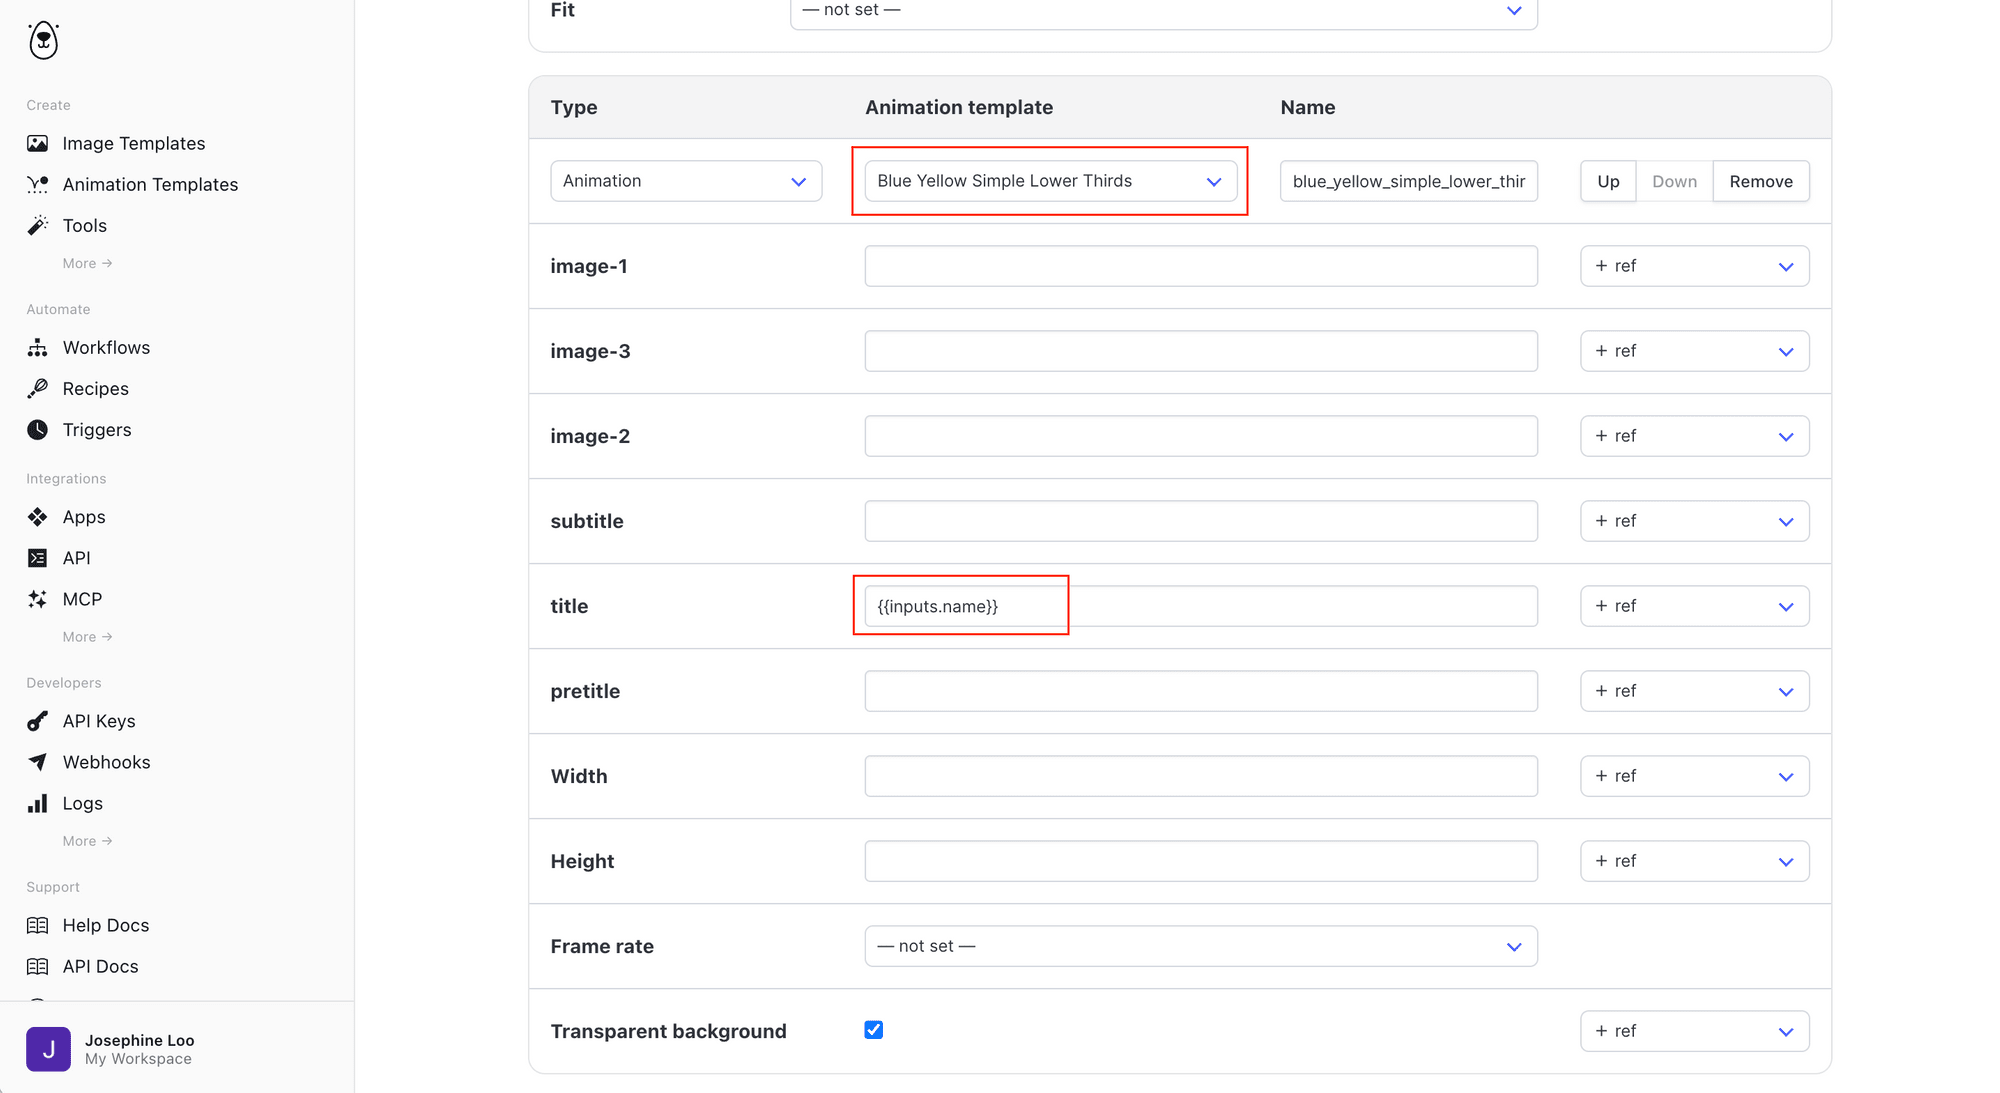
Pick the template you added earlier, and map the workflow's name input onto the animation's title layer:
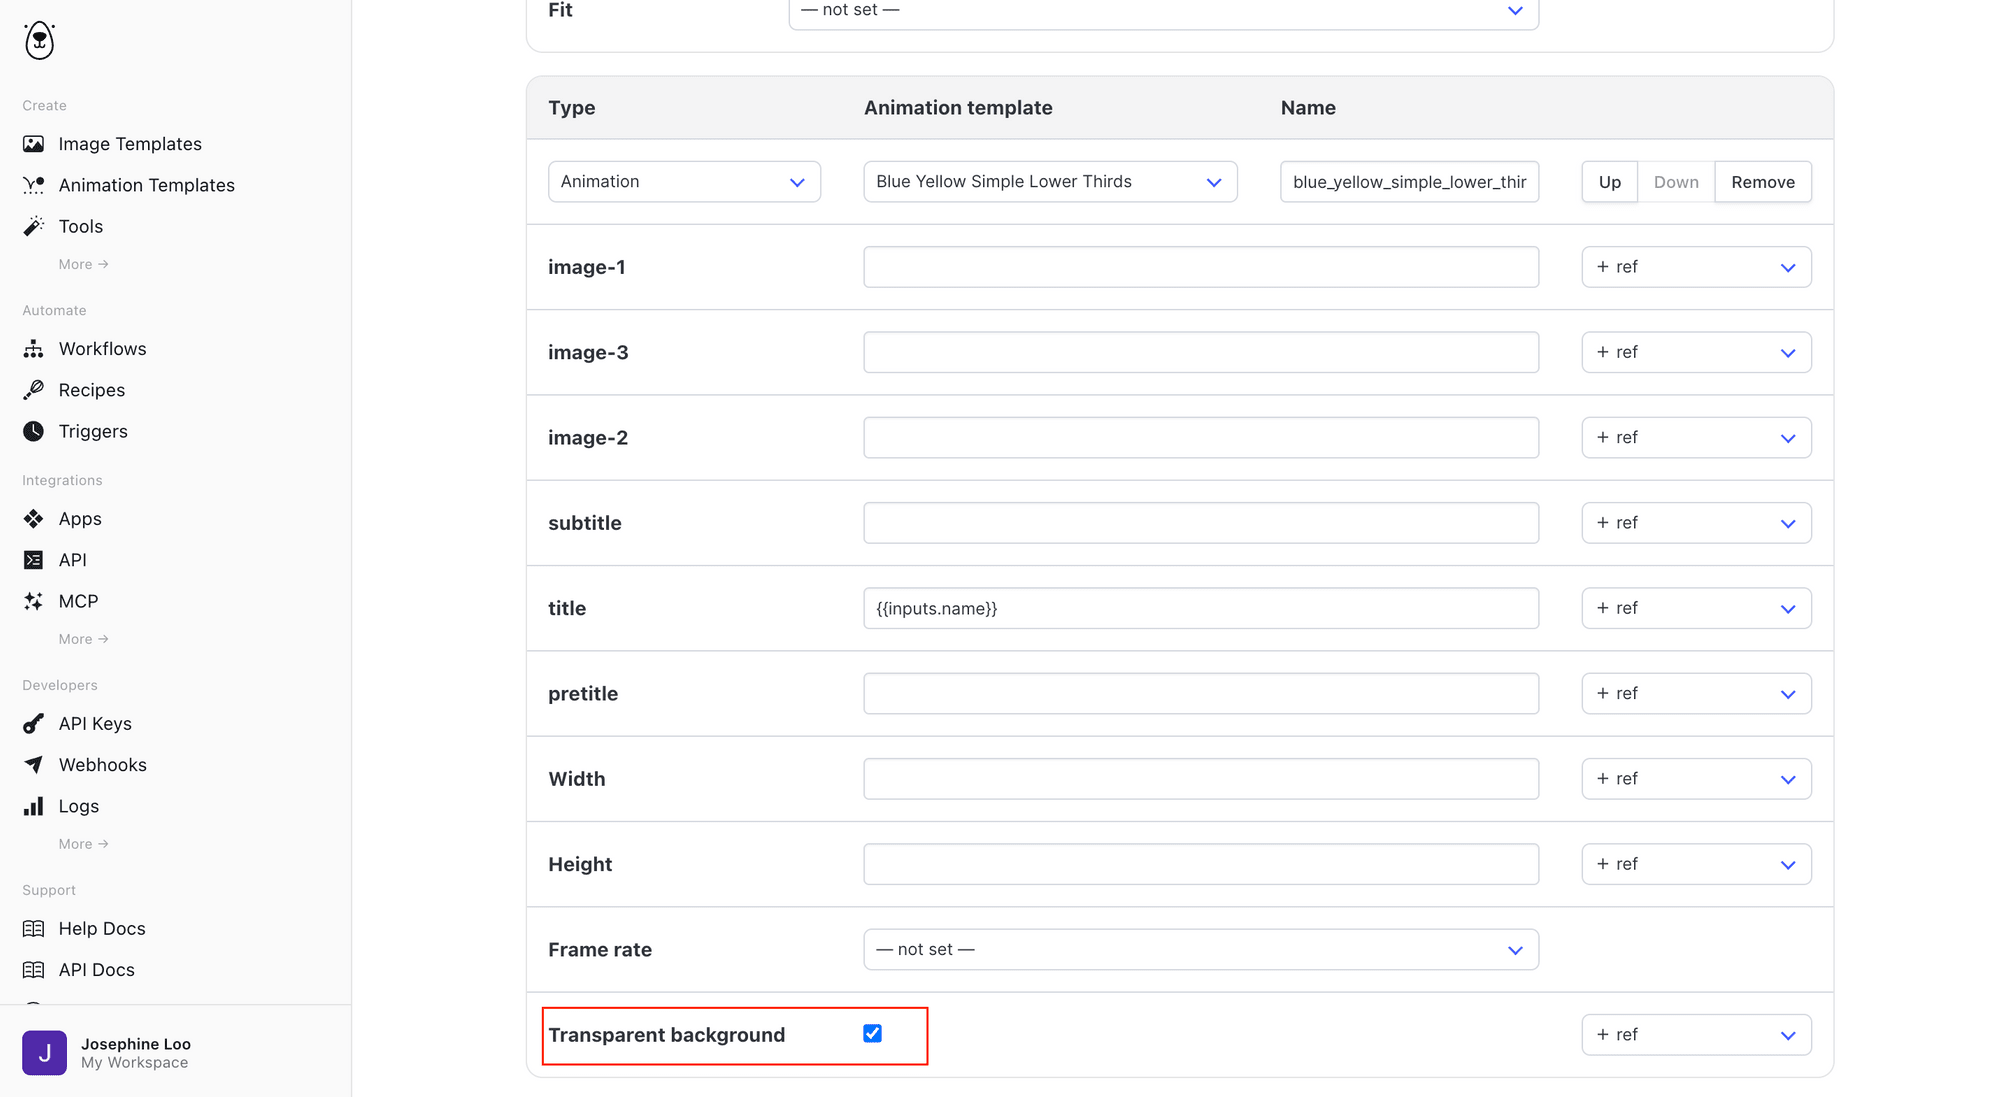
As we’ll be overlaying this animation on top of our input video, check the “Transparent background” box:
Workflow Step 3: Overlay the title card animation onto the video
For the final step of the workflow, add another Tool step:
Select Overlay video , and reference the resized video's output and animation's rendered output as the base and overlay videos respectively:
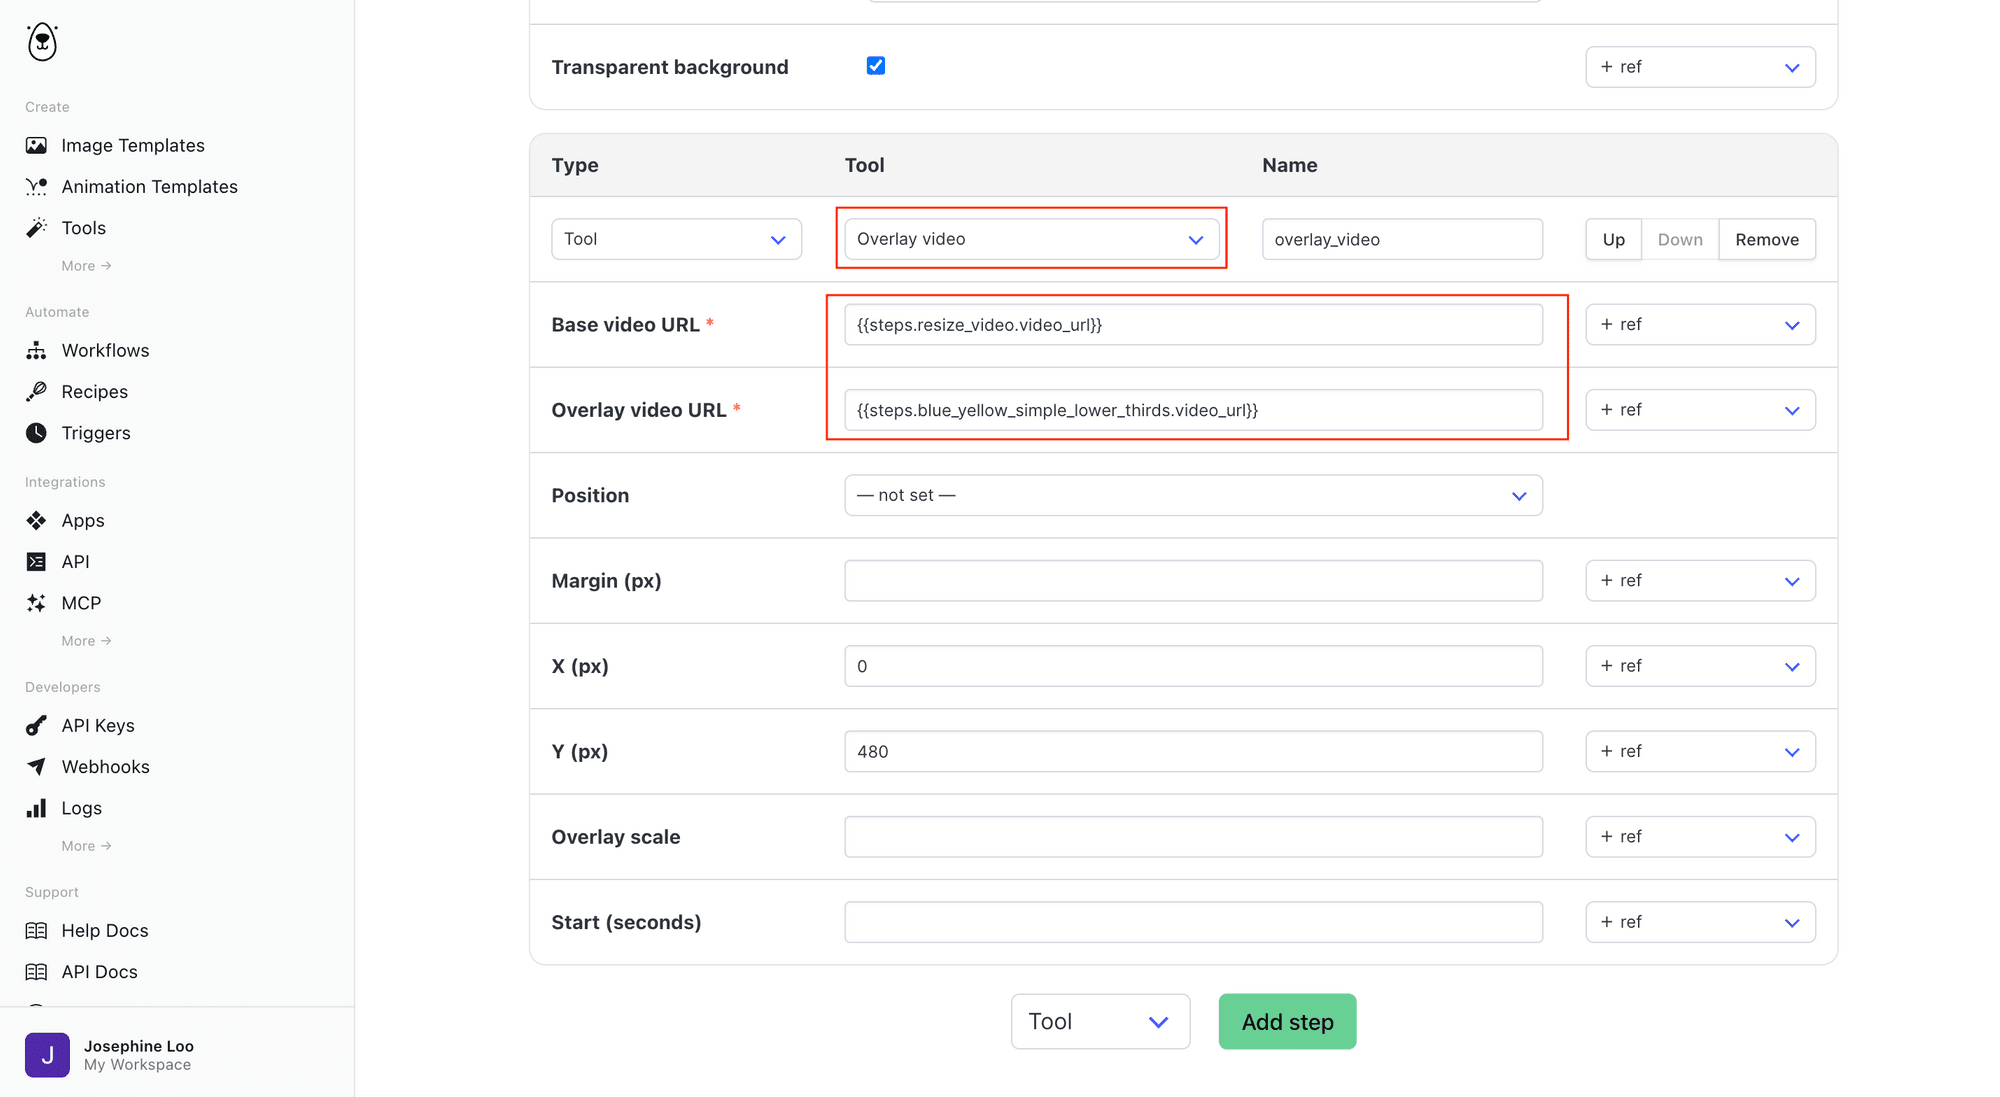
We also need to set the position of the overlay in the video:
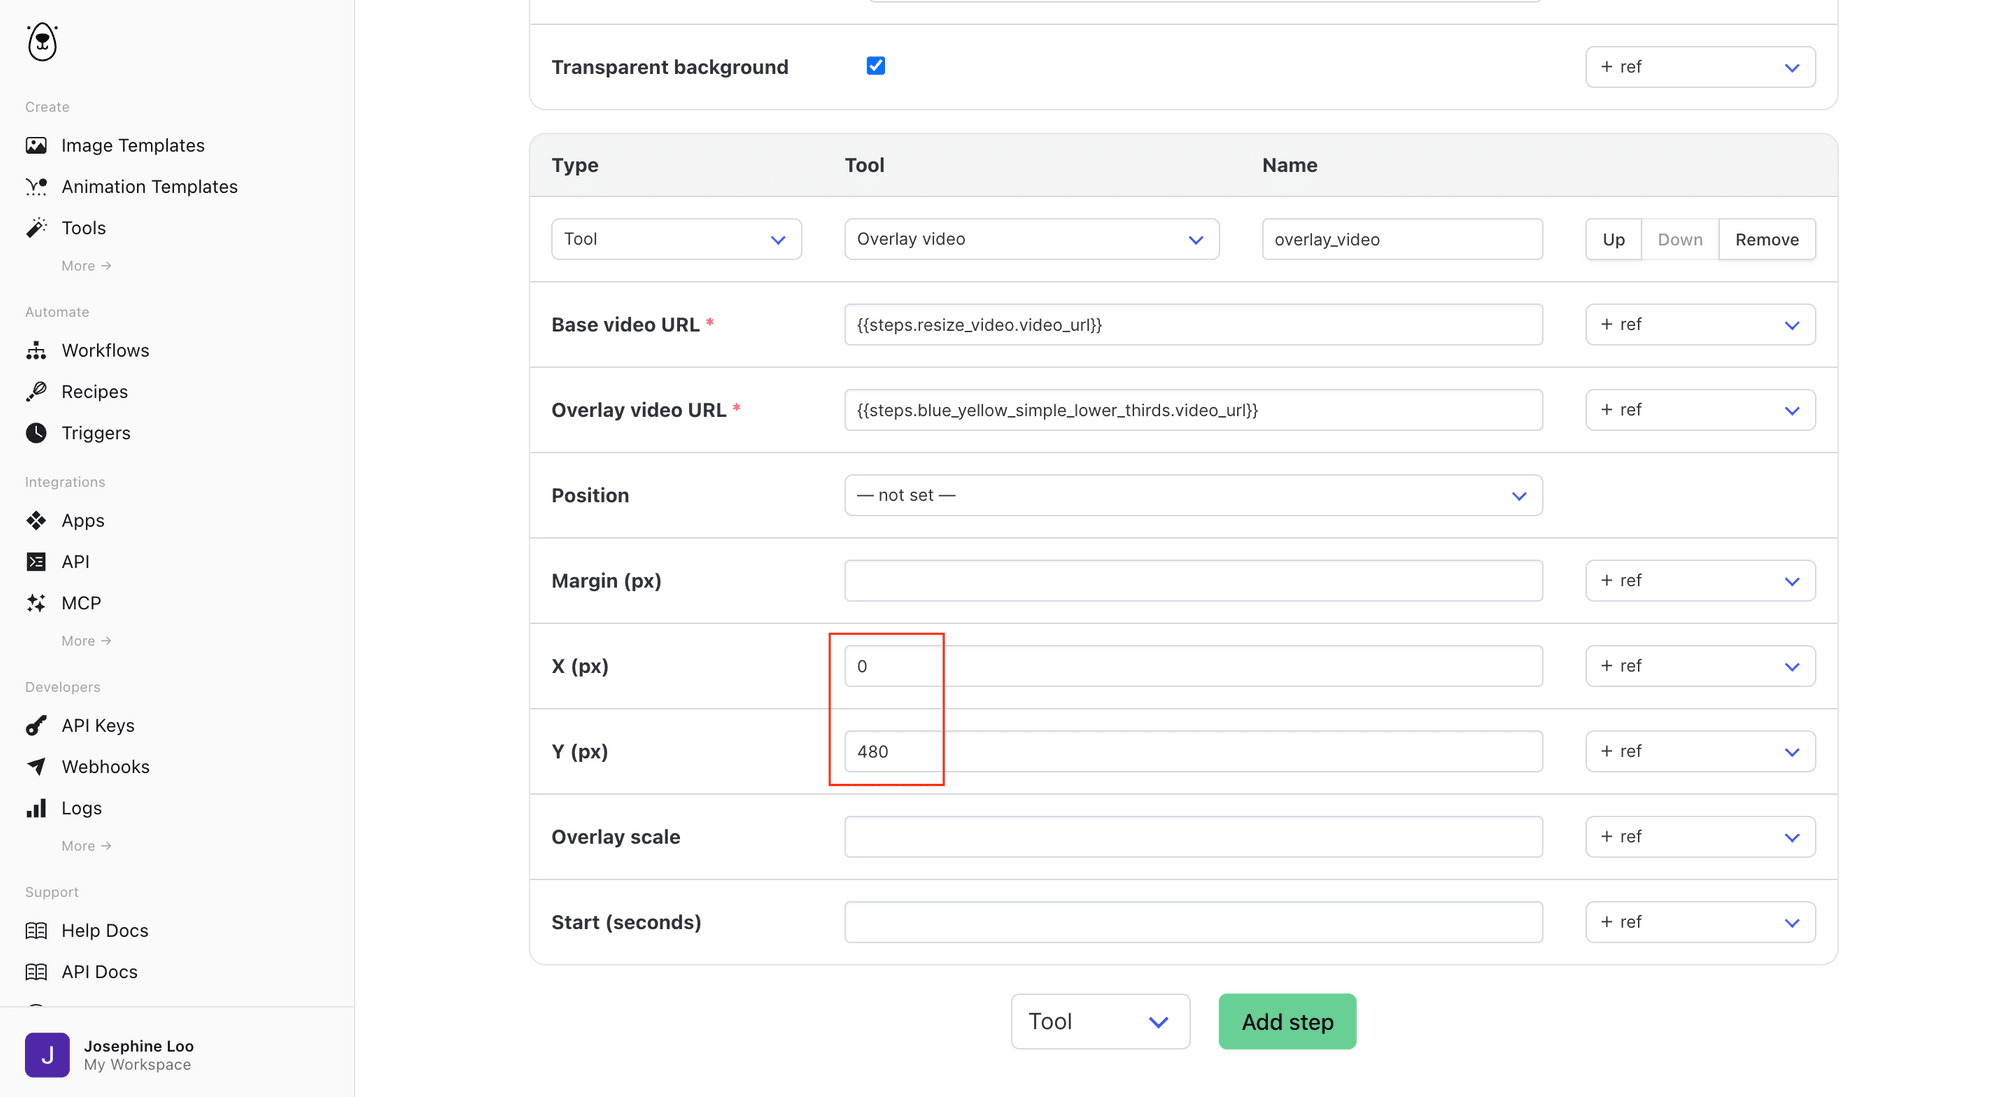
Finally, click “Save Workflow”. You'll be redirected back to the workflow's overview page, with all your steps listed in order and a form to test a run right from the dashboard:
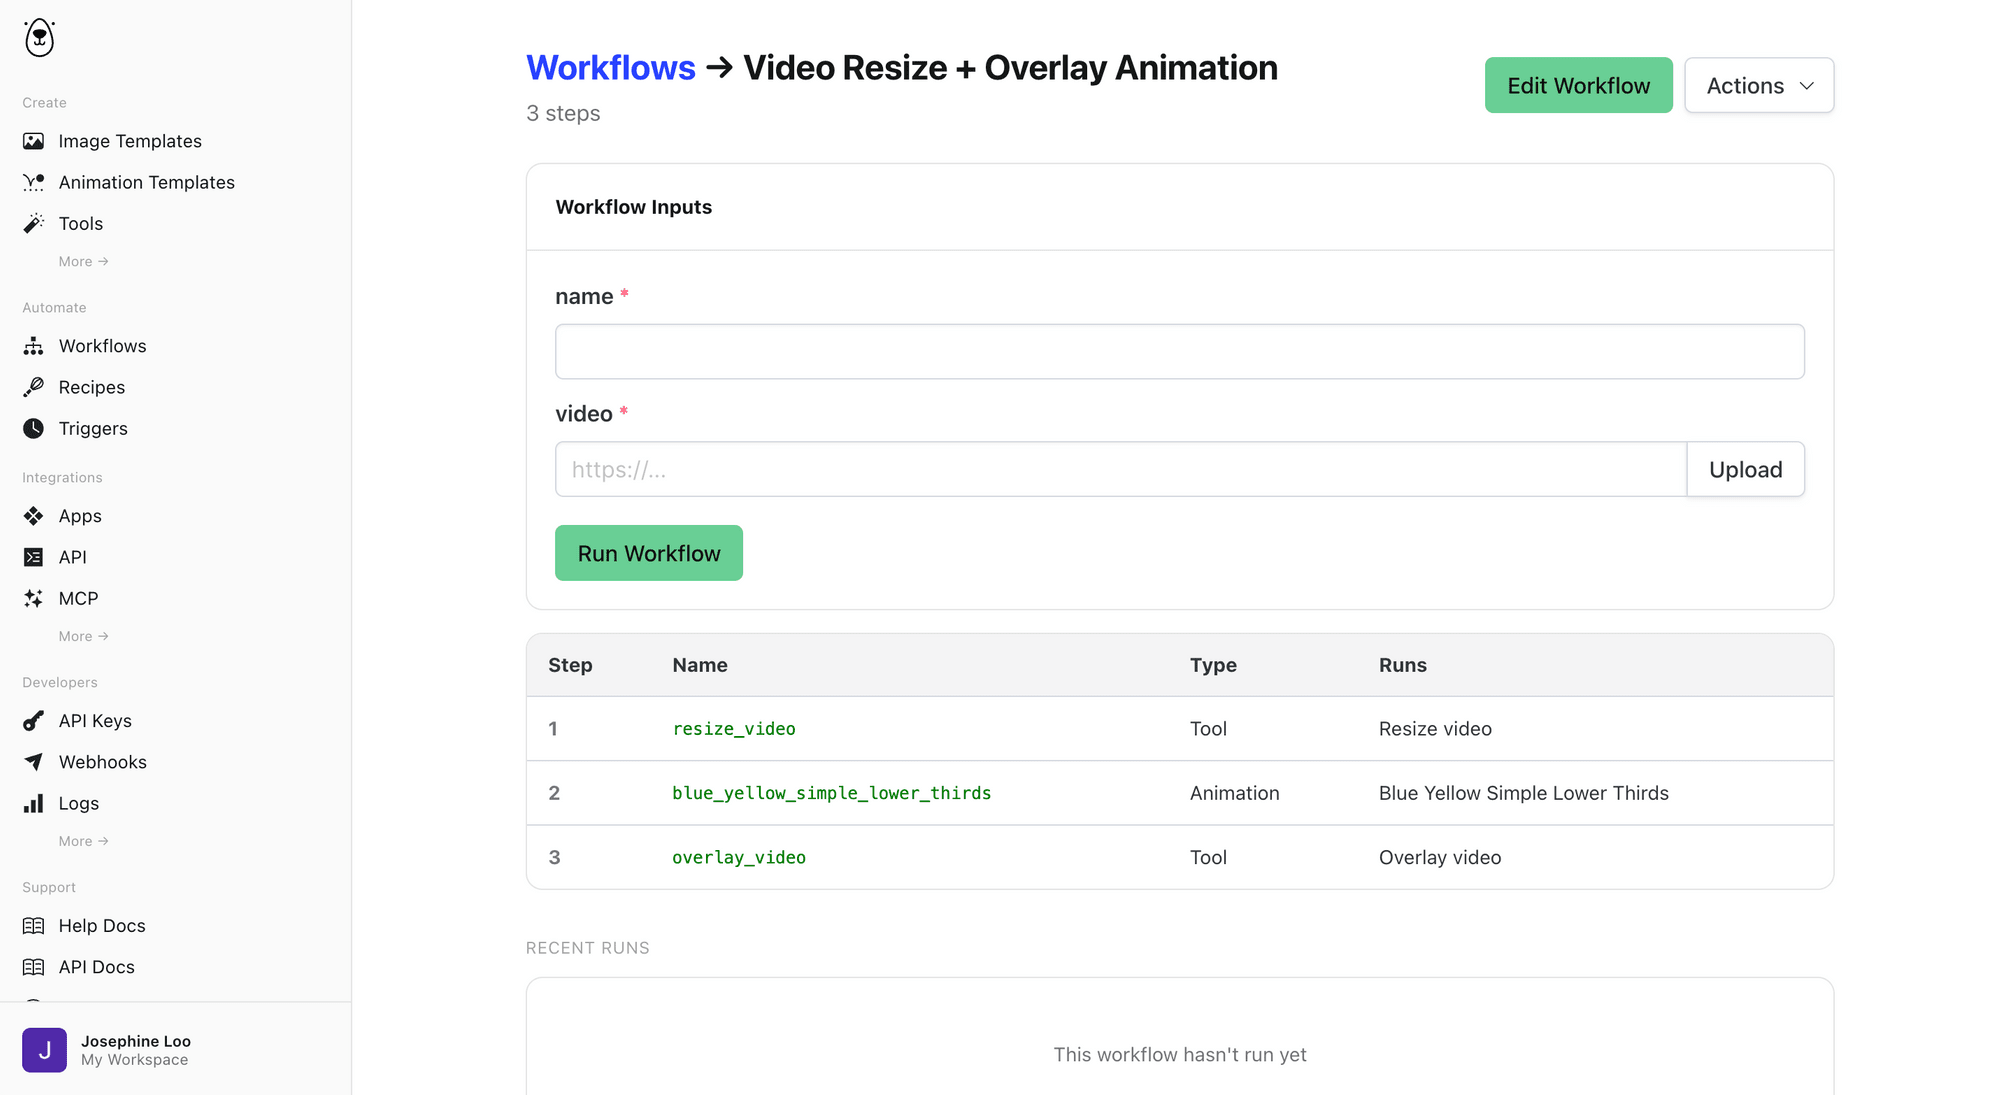
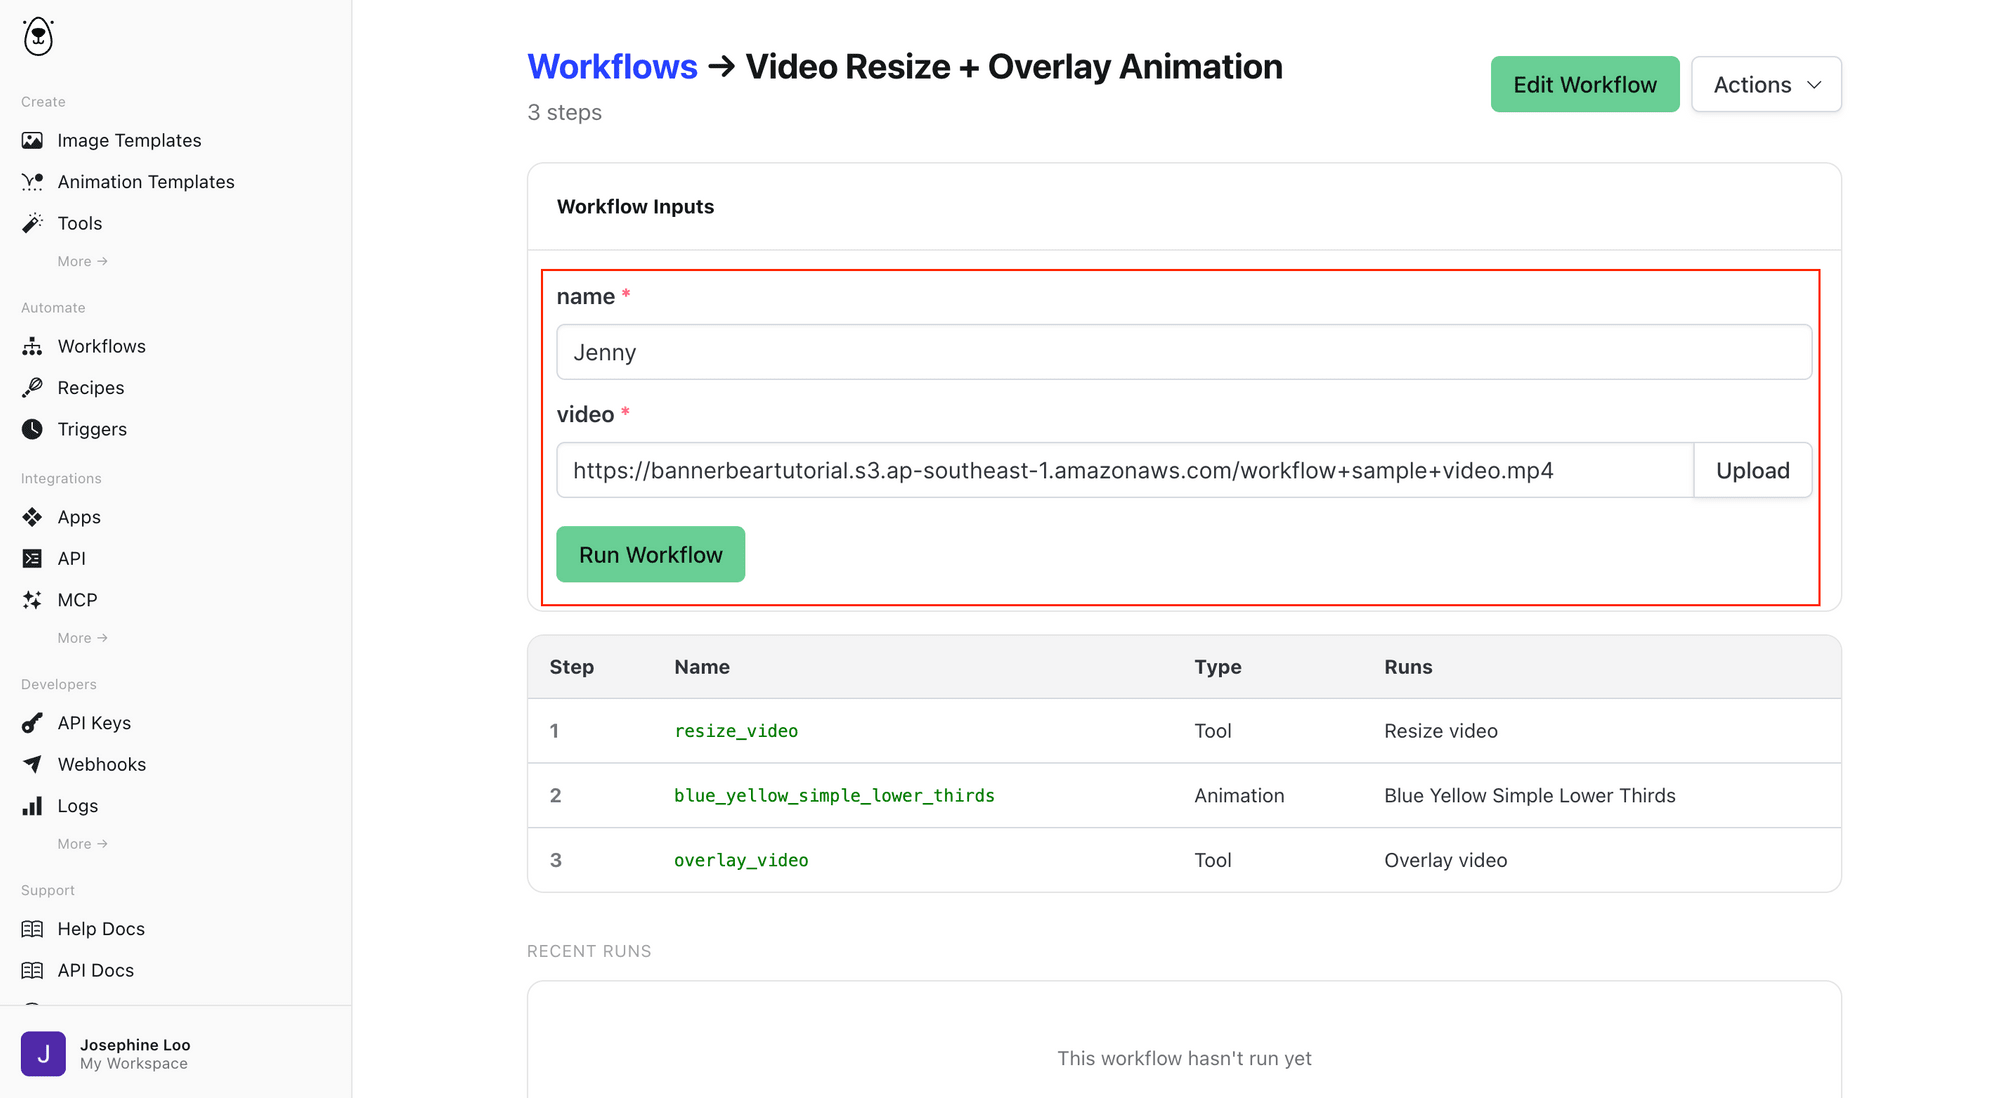
Step 4. Testing the Workflow in the Dashboard
Let’s test the workflow by entering information for the input fields and then clicking “ Run Workflow” :
You’ll see the live progress in your dashboard:
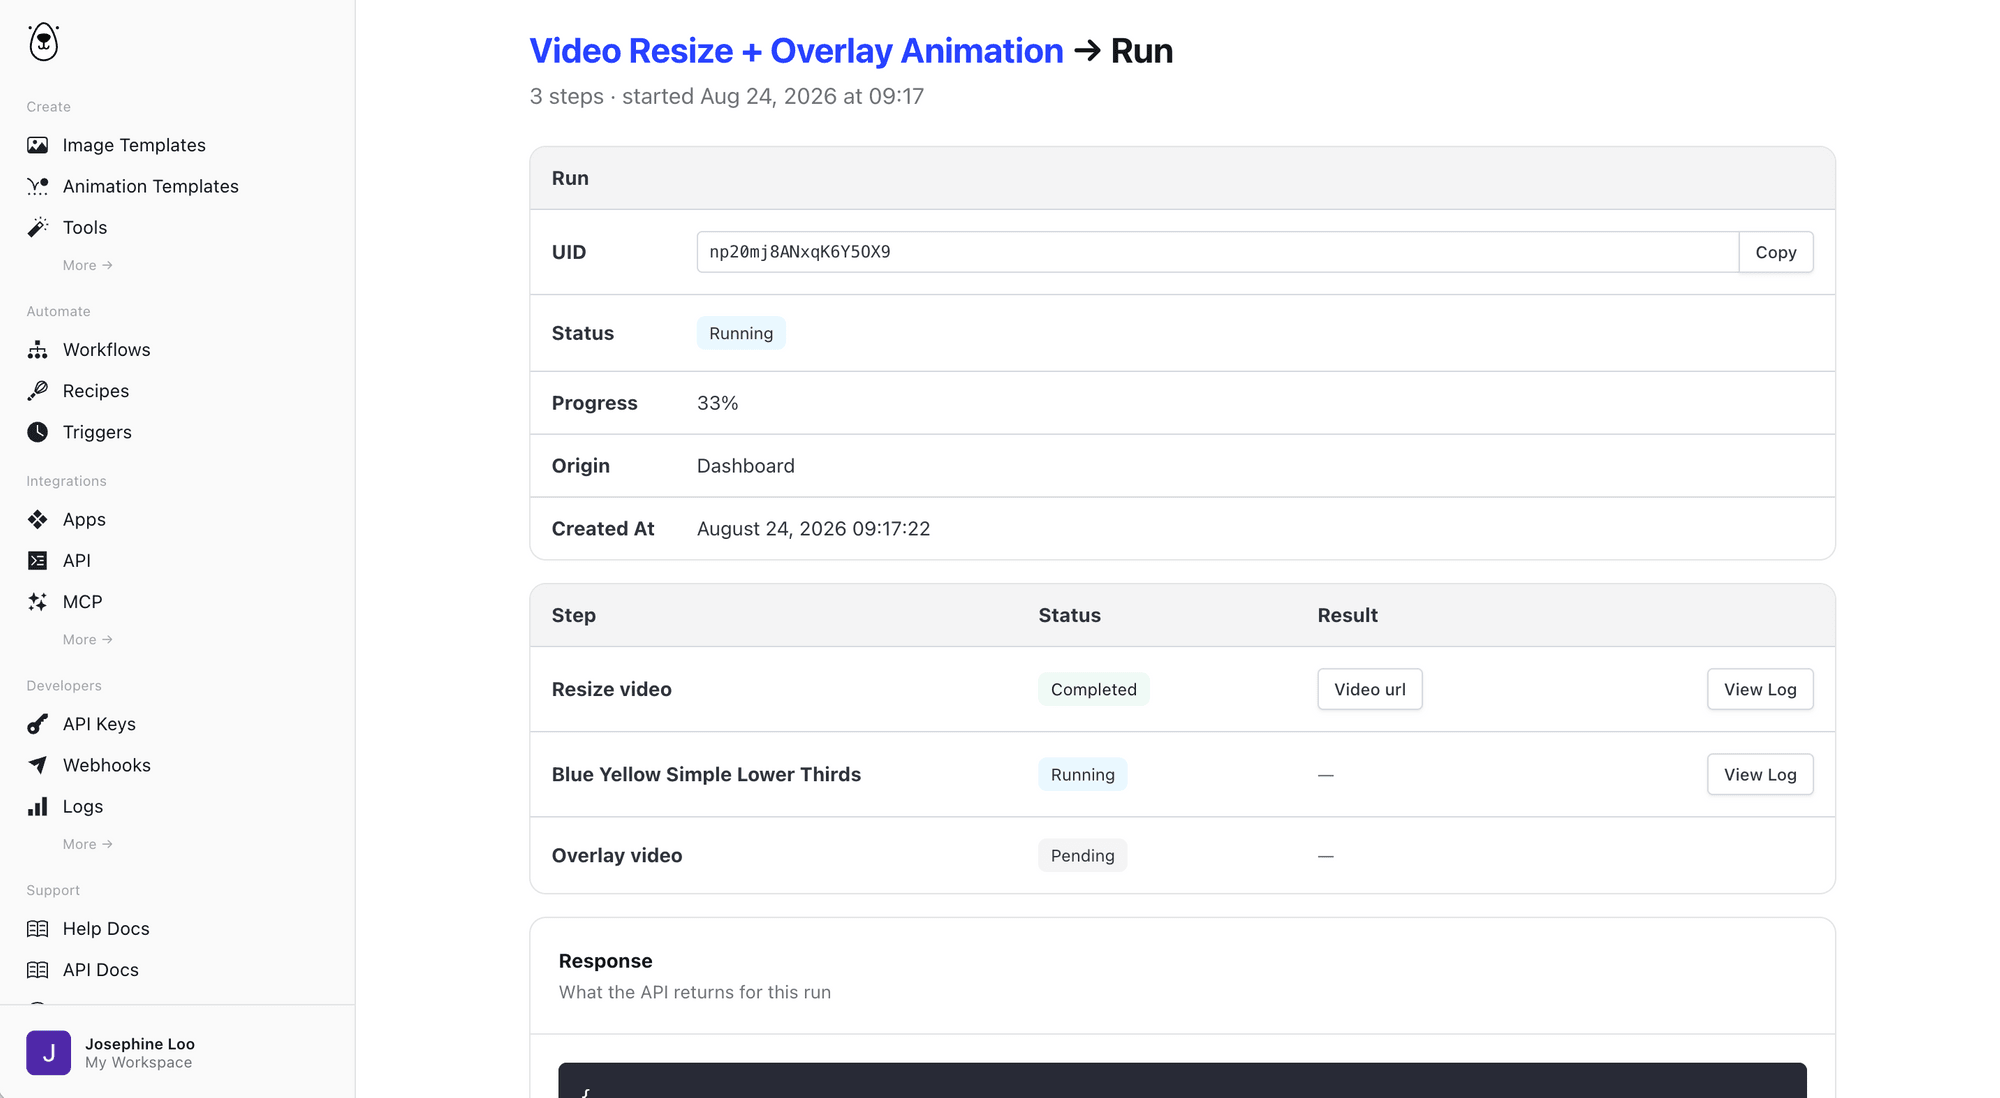
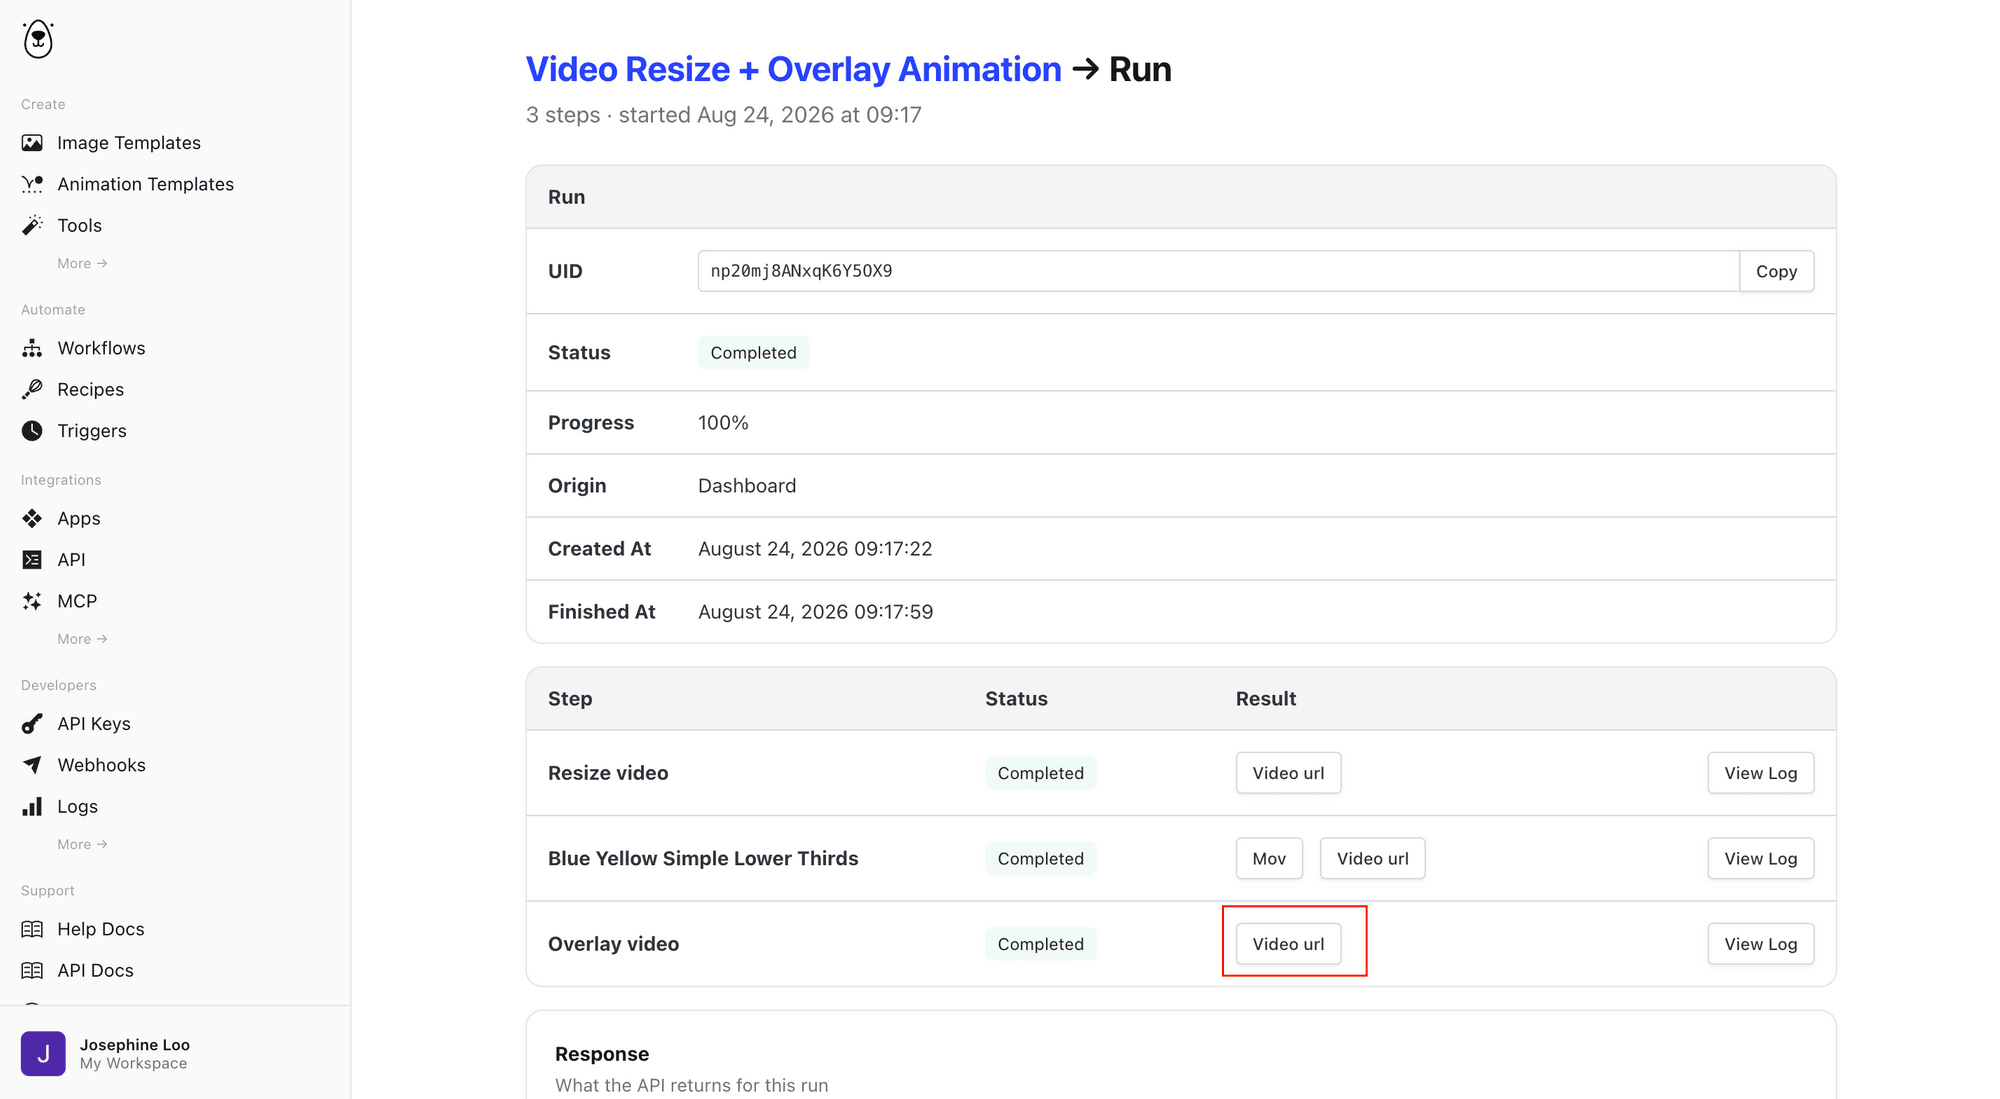
When the workflow has completed running, you can click the last step’s “Video url” button to check the result:
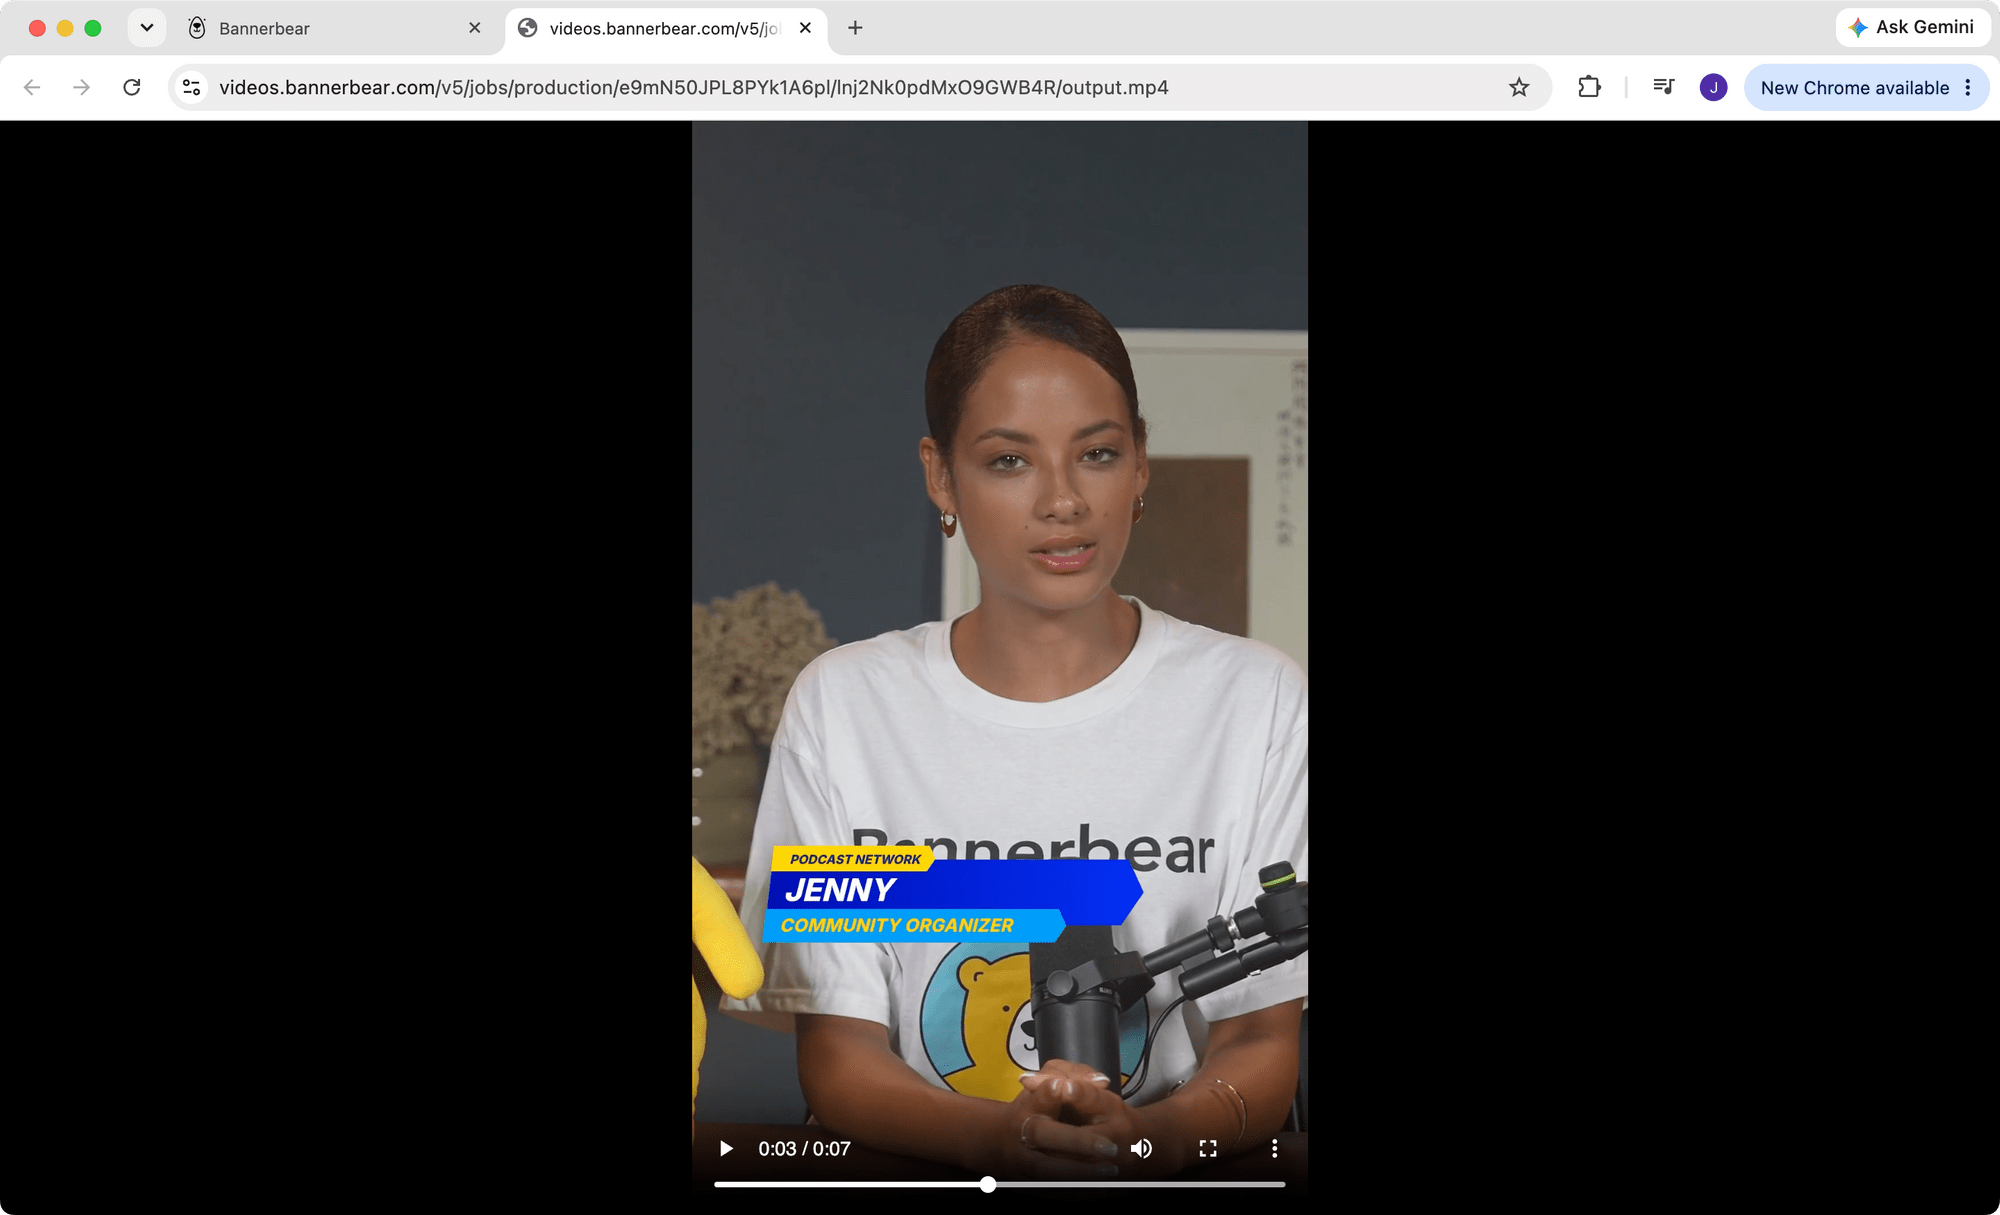
A new window will be opened up with the result video:
Step 5. Running the Workflow via the API
The workflow can also be triggered via API—by sending a request to /v5/workflow_runs. In your code, pass the workflow's ID (also retrievable from the URL) and values for each declared input:
require('dotenv').config();

const API_KEY = process.env.BANNERBEAR_API_KEY;
const sleep = (ms) => new Promise((resolve) => setTimeout(resolve, ms));

(async () => {
  const response = await fetch('https://api.bannerbear.com/v5/workflow_runs', {
    method: 'POST',
    headers: {
      'Content-Type': 'application/json',
      'Authorization': `Bearer ${API_KEY}`
    },
    body: JSON.stringify({
      workflow: 'your_workflow_id',
      inputs: {
        video: 'https://bannerbeartutorial.s3.ap-southeast-1.amazonaws.com/workflow+sample+video.mp4',
        name: 'Jenny'
      }
    })
  });

  const run = await response.json();
})();
This responds with 202 Accepted right away and the run happens asynchronously behind the scenes. To get the result, poll the GET /v5/workflow_runs/:uid endpoint to check progress and grab the final video once it's done:
let result = run;
  while (result.status !== 'completed') {
    await sleep(3000);

    result = await fetch(`https://api.bannerbear.com/v5/workflow_runs/${result.uid}`, {
      headers: { 'Authorization': `Bearer ${API_KEY}` }
    }).then((res) => res.json());

    console.log(`Status: ${result.status} (${result.progress}%)`);
  }

  // Log the final result
  if (result.status === 'completed') {
    console.log(result.outputs); // every completed step's output, keyed by step name
  } else {
    console.log('Workflow run failed:', result.error);
  }
Once status changes to completed, outputs will contain the result of every step:
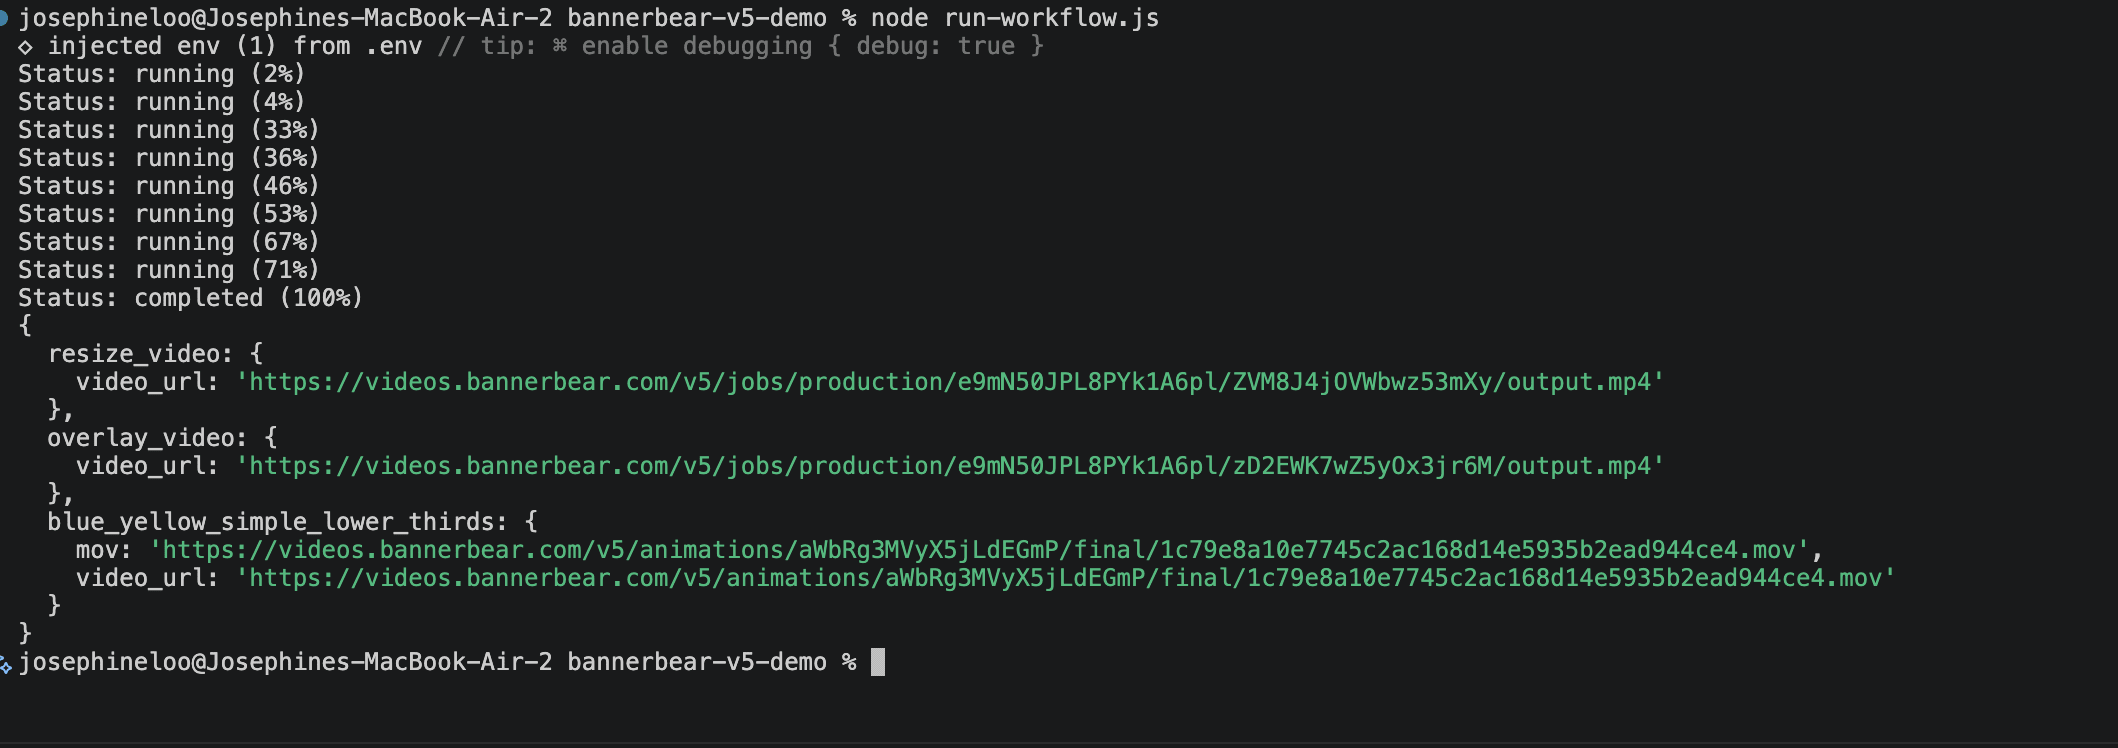
You can grab the resized video, the title card animation, and the final joined video all from the same response.
Using Bannerbear MCP in AI Agents
The API isn't the only way to work with Bannerbear. Bannerbear also has an MCP server, which you can connect to AI agents and assistants like Claude, Codex, OpenClaw, and more.
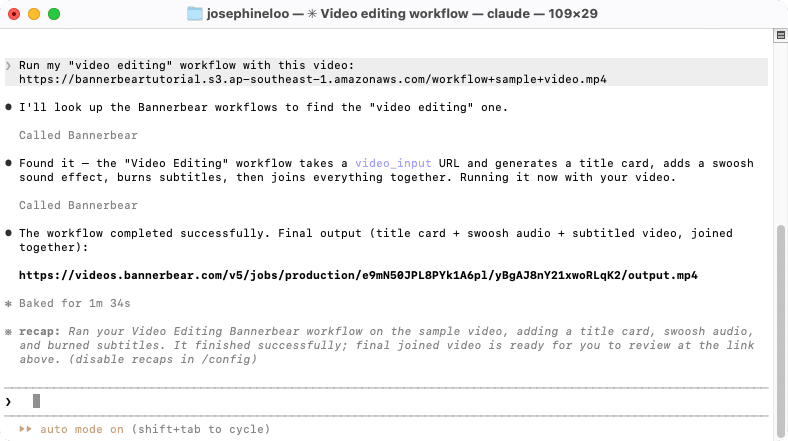
Once it’s connected, you can just ask in plain language what you want to do with Bannerbear, and the AI client will call the right tool, pass the inputs, and return the result. For example, something like "Run my "video editing" workflow…":
…or what we've walked through in this article: generating images from a template.
If you'd like to connect the Bannerbear MCP, follow these guides:
- How to Set Up Bannerbear MCP in Claude Code
- How to Set Up Bannerbear MCP in Codex
- How to Set Up Bannerbear MCP in OpenClaw
- How to Set Up the Bannerbear MCP in ChatGPT (Nocode-friendly)
That's It!
These two examples are just the tip of the iceberg. Other than what we did in this tutorial, you can also use Tools for standalone media operations like background removal, PDF creation, and a whole set of video transforms (trimming, cropping, overlaying, subtitling, and more) that run independently of any template.
Feel free to play around the dashboard, API, and MCP yourself, and see what Bannerbear can do for you!
👉🏻 Don't have an account? Start a free trial with 30 API credits.