
How to Use a Webhook to Retrieve Generated Videos on Make
Contents
Automated video generation simplifies workflows in a number of ways. You can set up production of social media, e-commerce, and more material using an API and the help of a workflow automations tool like Make. But as eye-catching as videos can be, they’re slightly harder to create and distribute compared to static photos or mere text. After all, they are significantly larger files that often involve multiple clips, transitions, and even audio.
Because of the time it takes to render a video, it’s crucial to set up Make automations in a way that allows process completion before the file is fetched. In some sequences, you might have seen the Sleep tool used to delay the next step of the process for up to 300 seconds. This can be useful for testing if scenarios work, but it’s more error-prone because:
- It does not account for server delays or malfunctions
- It assumes a fixed delay when video generation time varies
- It simply fails if a video isn’t successfully rendered in time
A better, more bulletproof alternative is a webhook, which only initiates when a video is successfully rendered.
In this article, we’ll be picking up a past tutorial—How to Automatically Turn Instagram Photos into Videos with Make—to show how we can improve the chances of a successful run by using a webhook to retrieve generated videos.
Let’s start with a little review.
What is a Webhook?
Webhooks are automated messages triggered by a specific event. When they are activated, a payload (message containing data) is sent to a unique URL. Another program can then call the webhook, storing it or using it for the next step of execution.
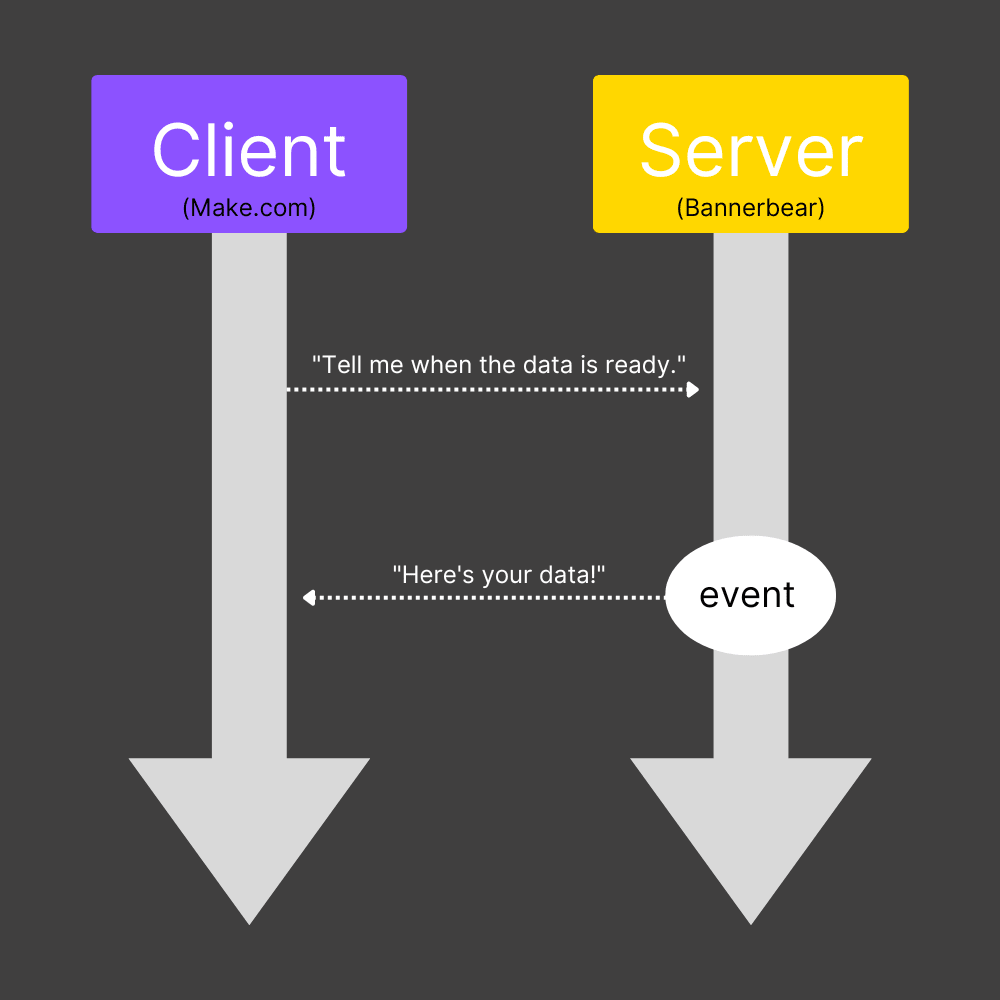
Unlike APIs, webhooks are unable to add, edit, or manipulate the data in any way. They simply complete the single, specific task they are assigned without any intervention.
Knowing when to use webhooks in your nocode automations can make them shorter and improve their accuracy. They aren’t as intimidating as they might seem, and they can easily be set up by non-technical users.
Now, let’s take a look at how we can set up Make scenarios that generate a video in Bannerbear, send it to a webhook URL, then fetch it to be stored in Google Drive.
Picking up Where We Left Off
Previously, we used Make to auto-generate videos from newly published Instagram media. The steps we used were:
- Customize Your Bannerbear Template
- Create a Google Sheets File to Store and Sort Instagram Media
- Step 1. Create a Worksheet for All Media
- Step 2. Create a Worksheet for Recent Media
- Create a Scenario that Sends New Instagram Media to Sheets
- Create a Scenario that Generates a Video on a Schedule
But in this tutorial, instead of using a single scenario to generate and fetch a video, we will be splitting the events into two separate steps.
Let’s pick up after the step: Create a Scenario that Sends New Instagram Media to Sheets and assume you now have a Bannerbear template, a Google Sheets file with worksheets for all and recent media, and a Make scenario that sends new Instagram media to Sheets.
Generate a Custom Webhook URL
A webhook requires a unique URL that receives a payload whenever a certain event occurs. In this situation, Make generates the URL that starts listening for requests and acts as the trigger for video retrieval and storage.
Because the URL is generated using Make’s Webhooks module, we need to start by creating the scenario that monitors it. After that, we can set up the scenario that calls the webhook every time a video is generated with Bannerbear.
Log into your Make account and click the “+ Create a new scenario” button on the top right corner of the home page. Set up the following modules:
Webhooks: Custom Webhook
Choose Webhooks as the app and “Custom Webhook” as the event. A configuration box will pop up next to the module. Click “Add,” then name your webhook. Click “Save.”
Make will generate a custom webhook URL that you can associate with generated videos in your next scenario.
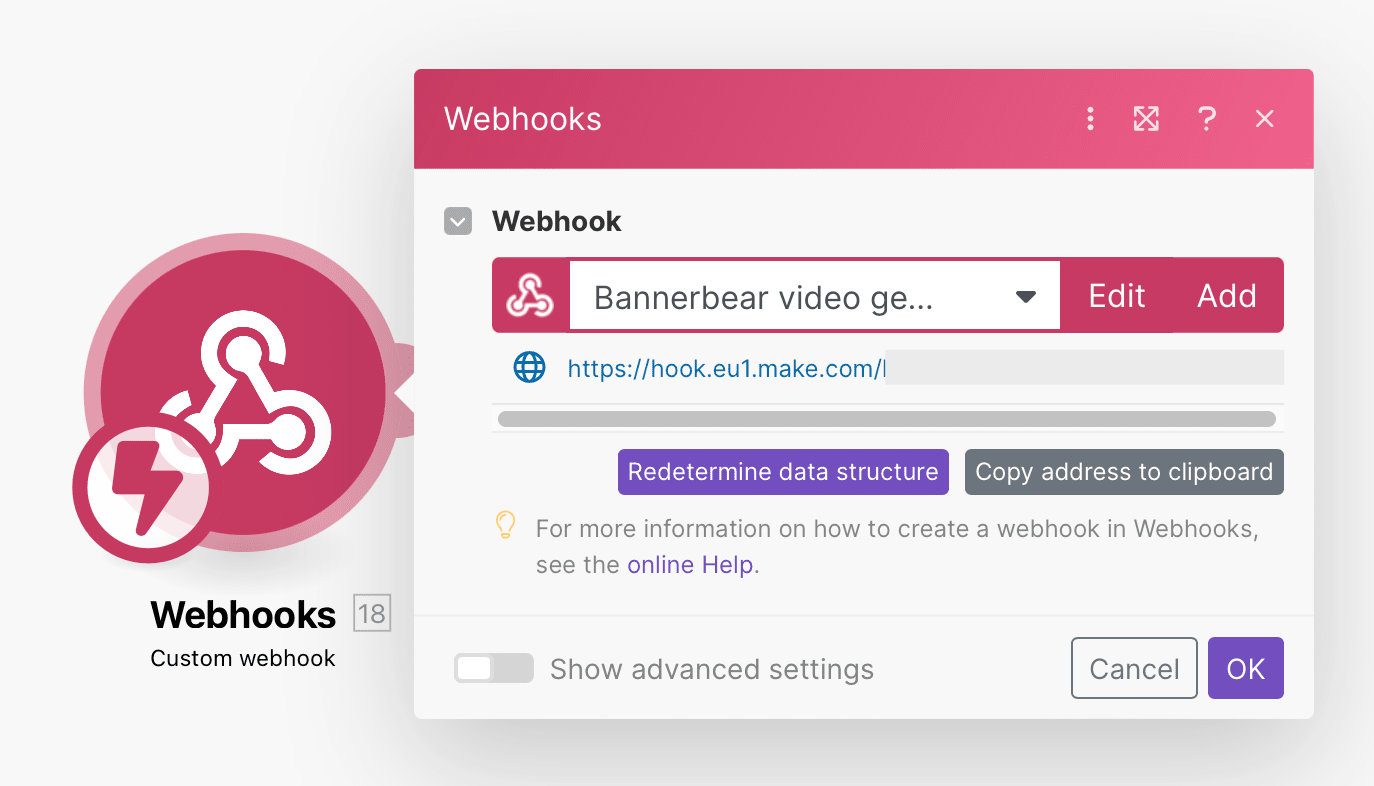
Copy the URL and save it somewhere easily accessible for the next step.
We will come back to complete this scenario later.
Create a Scenario that Generates a Video on a Schedule
Create another scenario from your Make home page and set up the following modules:
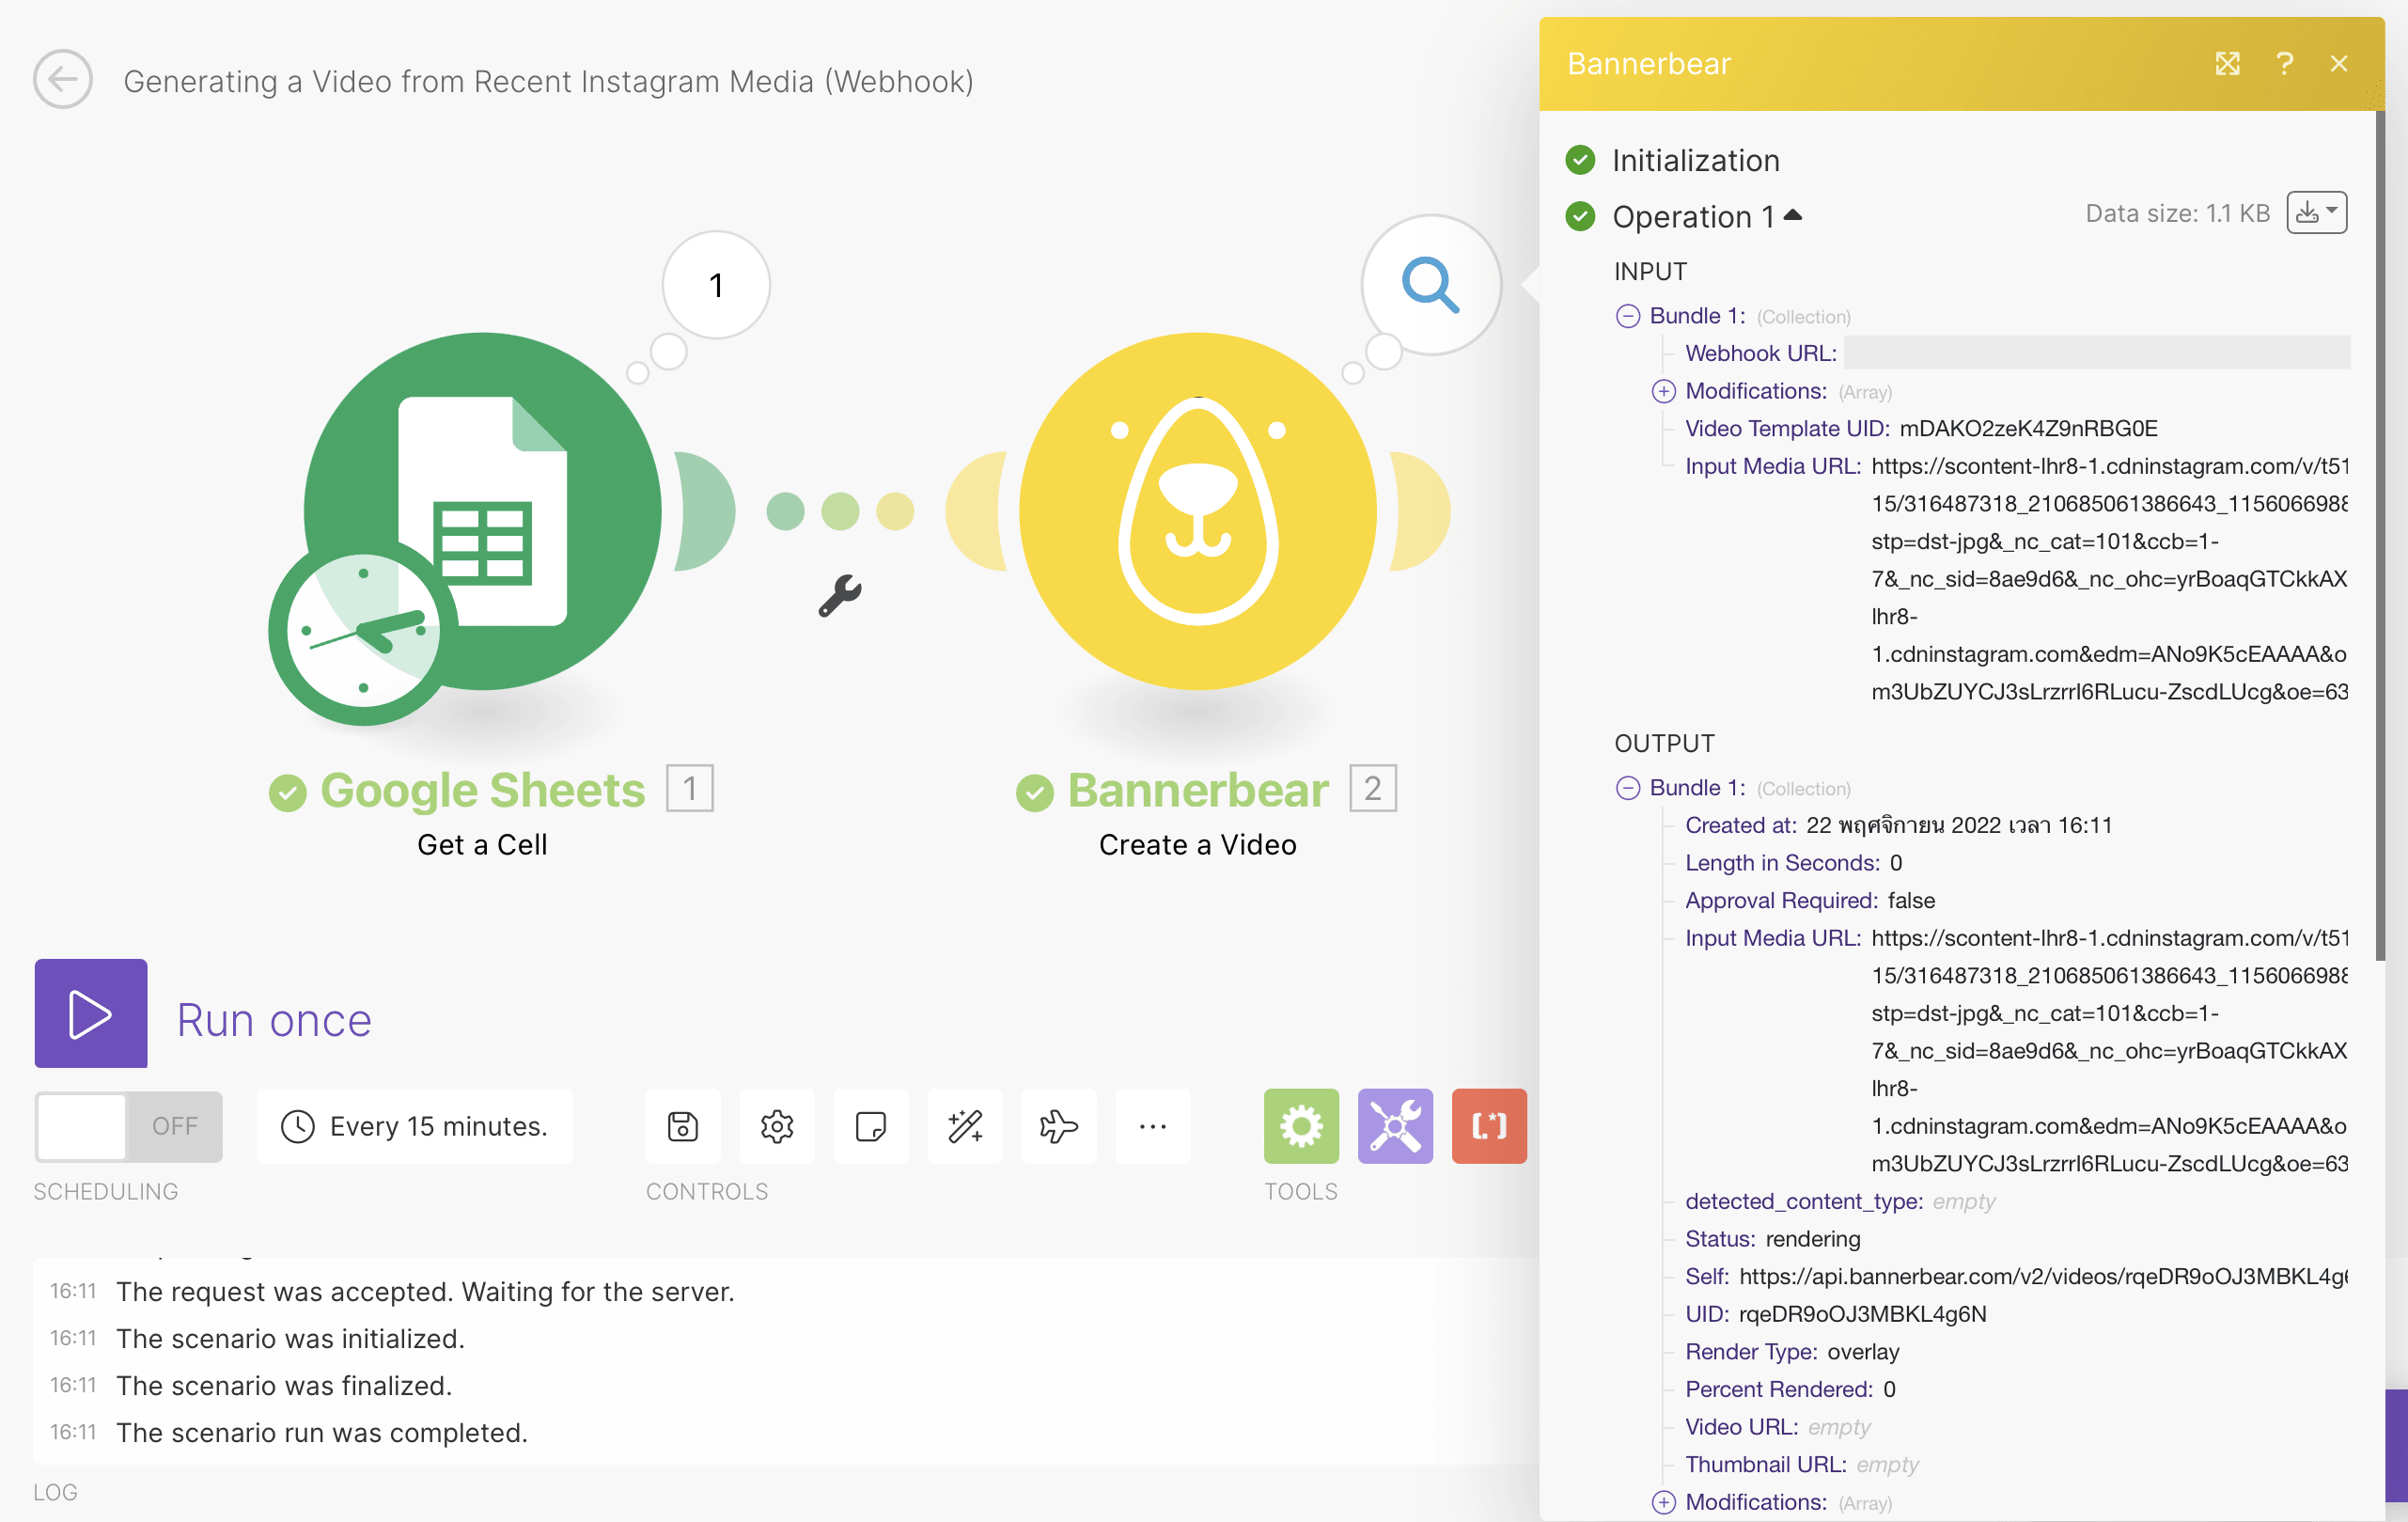
Google Sheets: Get a Cell
Choose Google Sheets as the app and “Get a Cell” as the event. If you haven’t connected your Sheets account yet, you will be prompted to log in.
Once you’ve selected the right account, enter the Drive and Spreadsheet ID that contains your Instagram media URLs. Select the Recent Media sheet and enter “A2” in the Cell field.
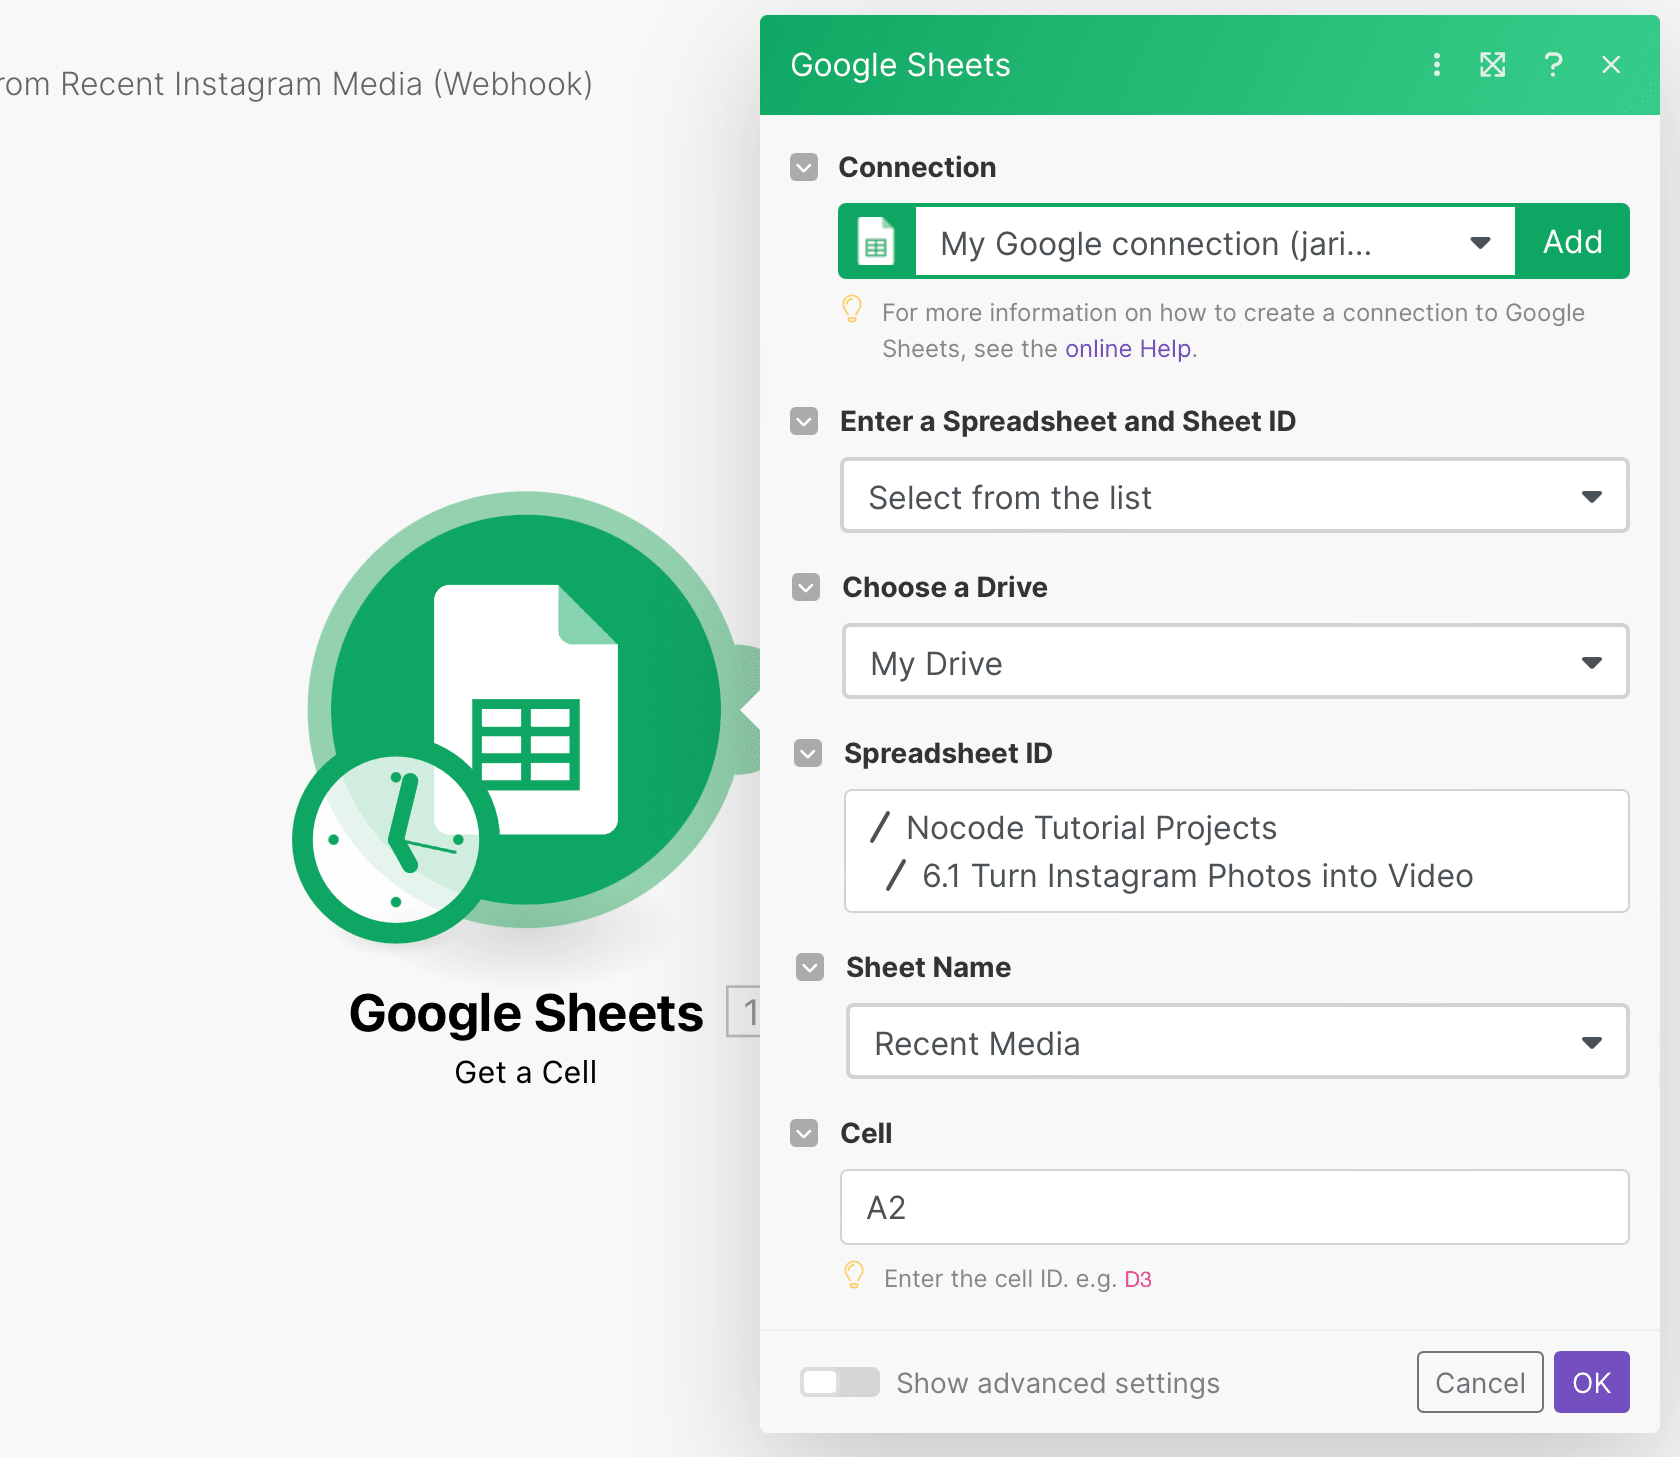
Click “OK.”
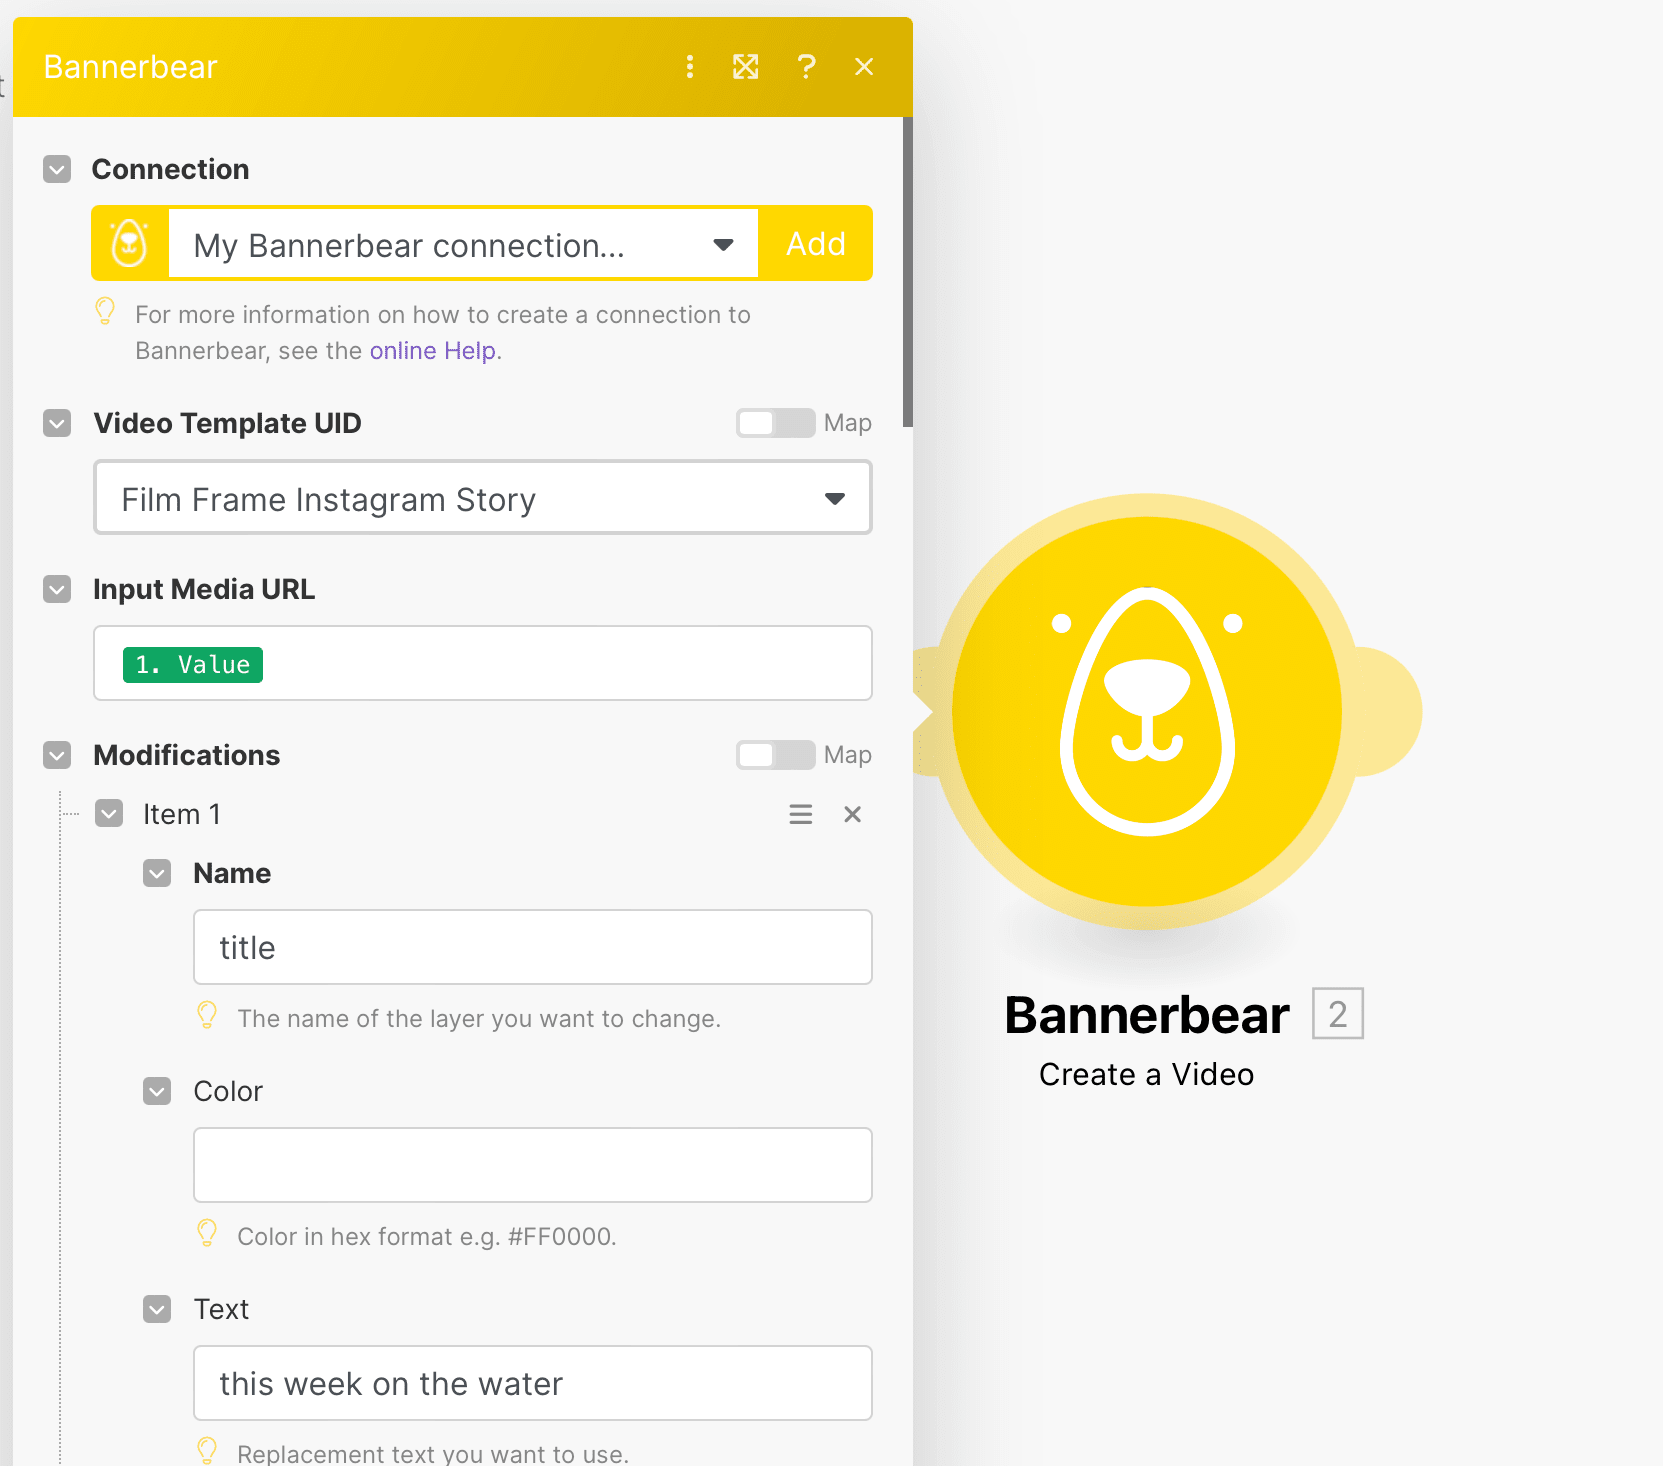
Bannerbear: Create a Video
Choose Bannerbear as the app and “Create a Video” as the event. Connect your project by inserting the API key in the configuration box, which you can find in the Settings / API Key section of the corresponding Bannerbear project page.
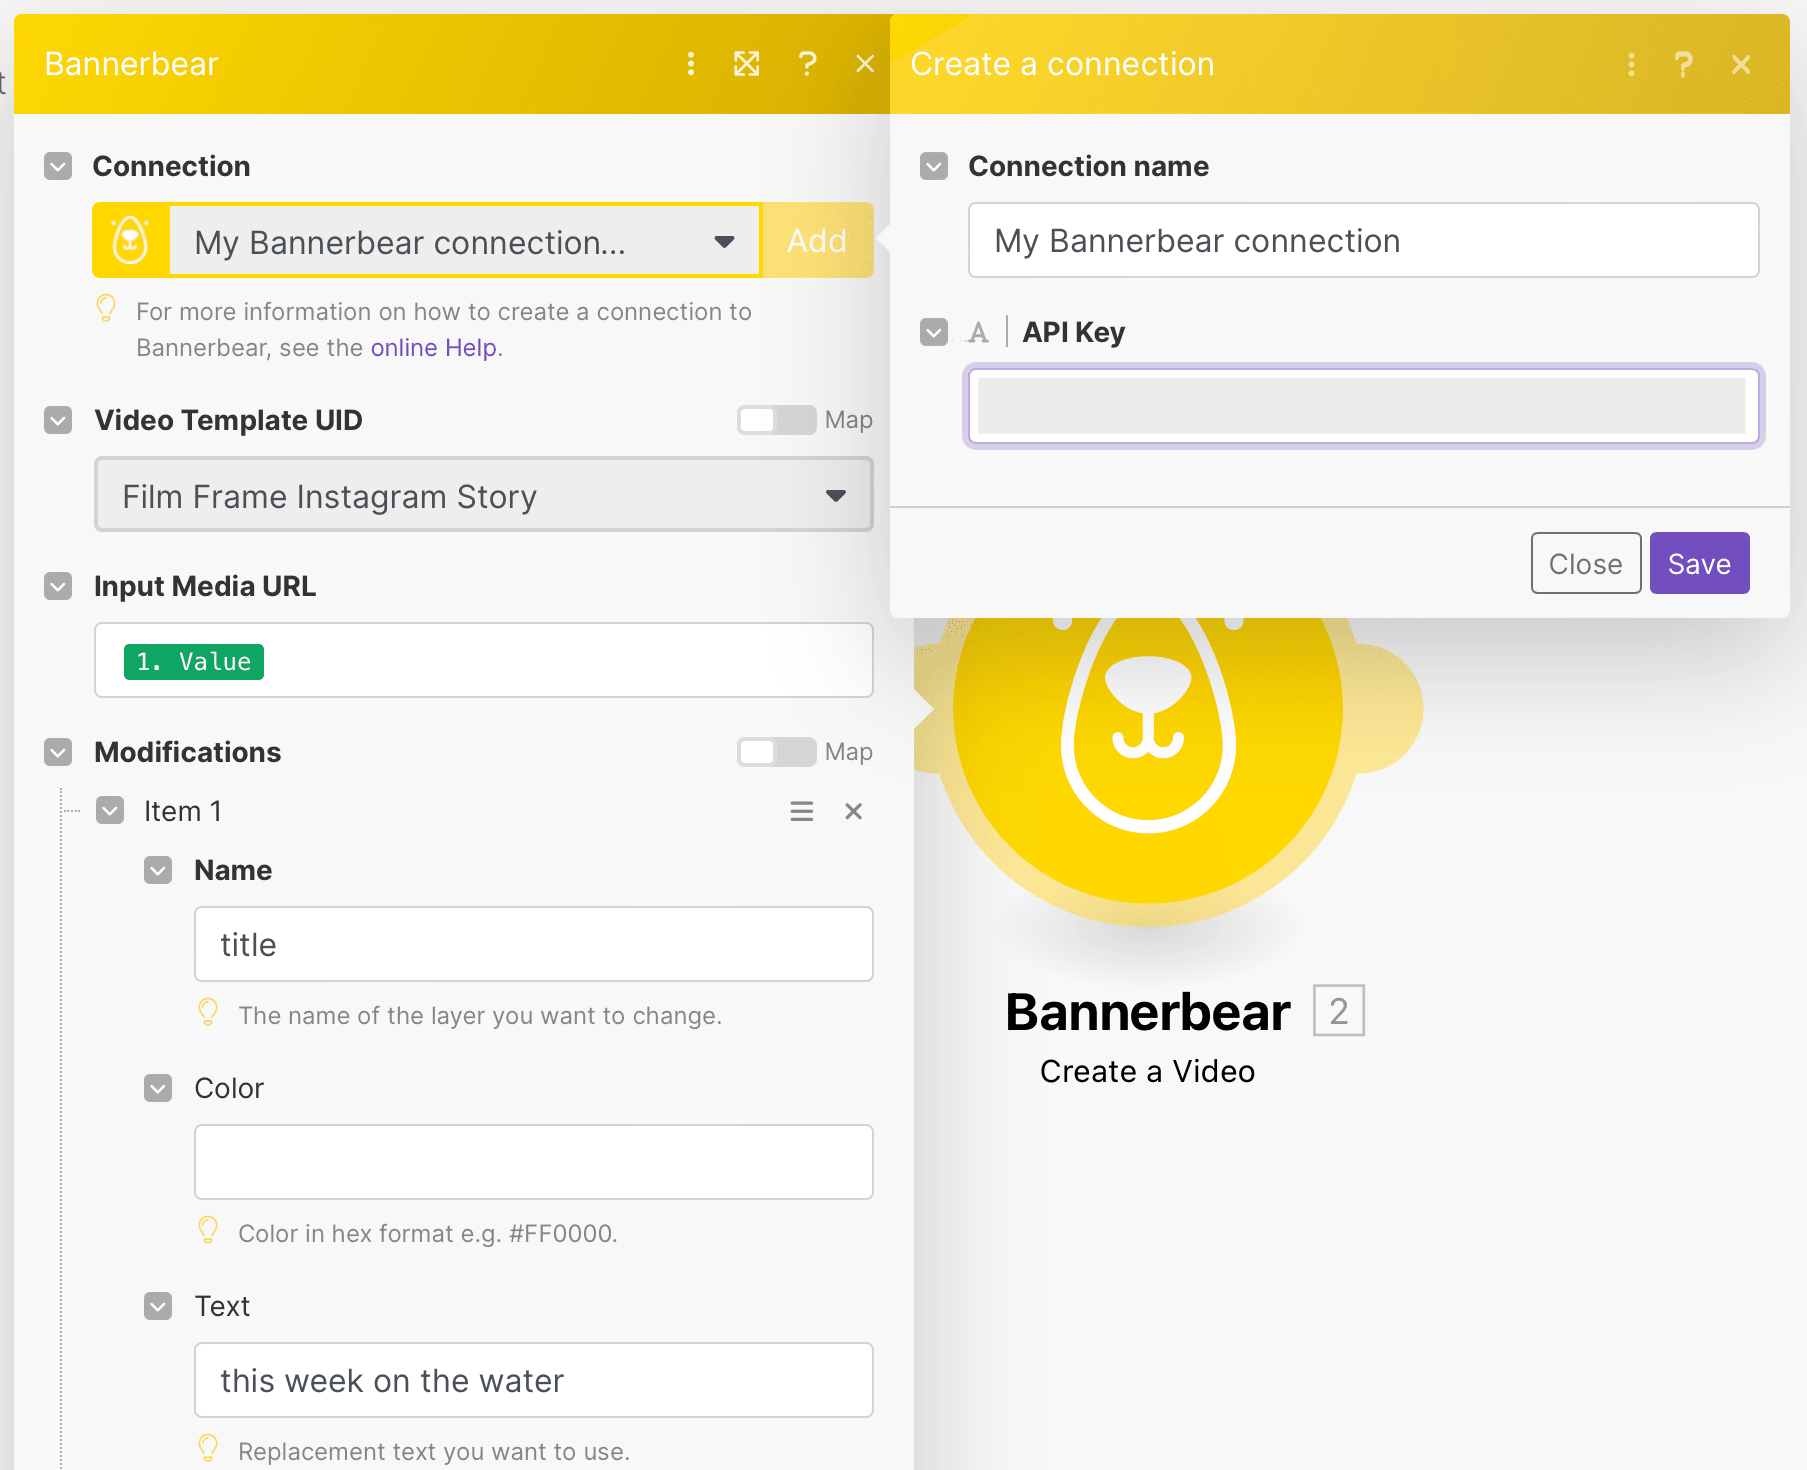
Once your project is connected, configure the module by selecting the correct video template and mapping Value from the previous module to the Input Media URL field.
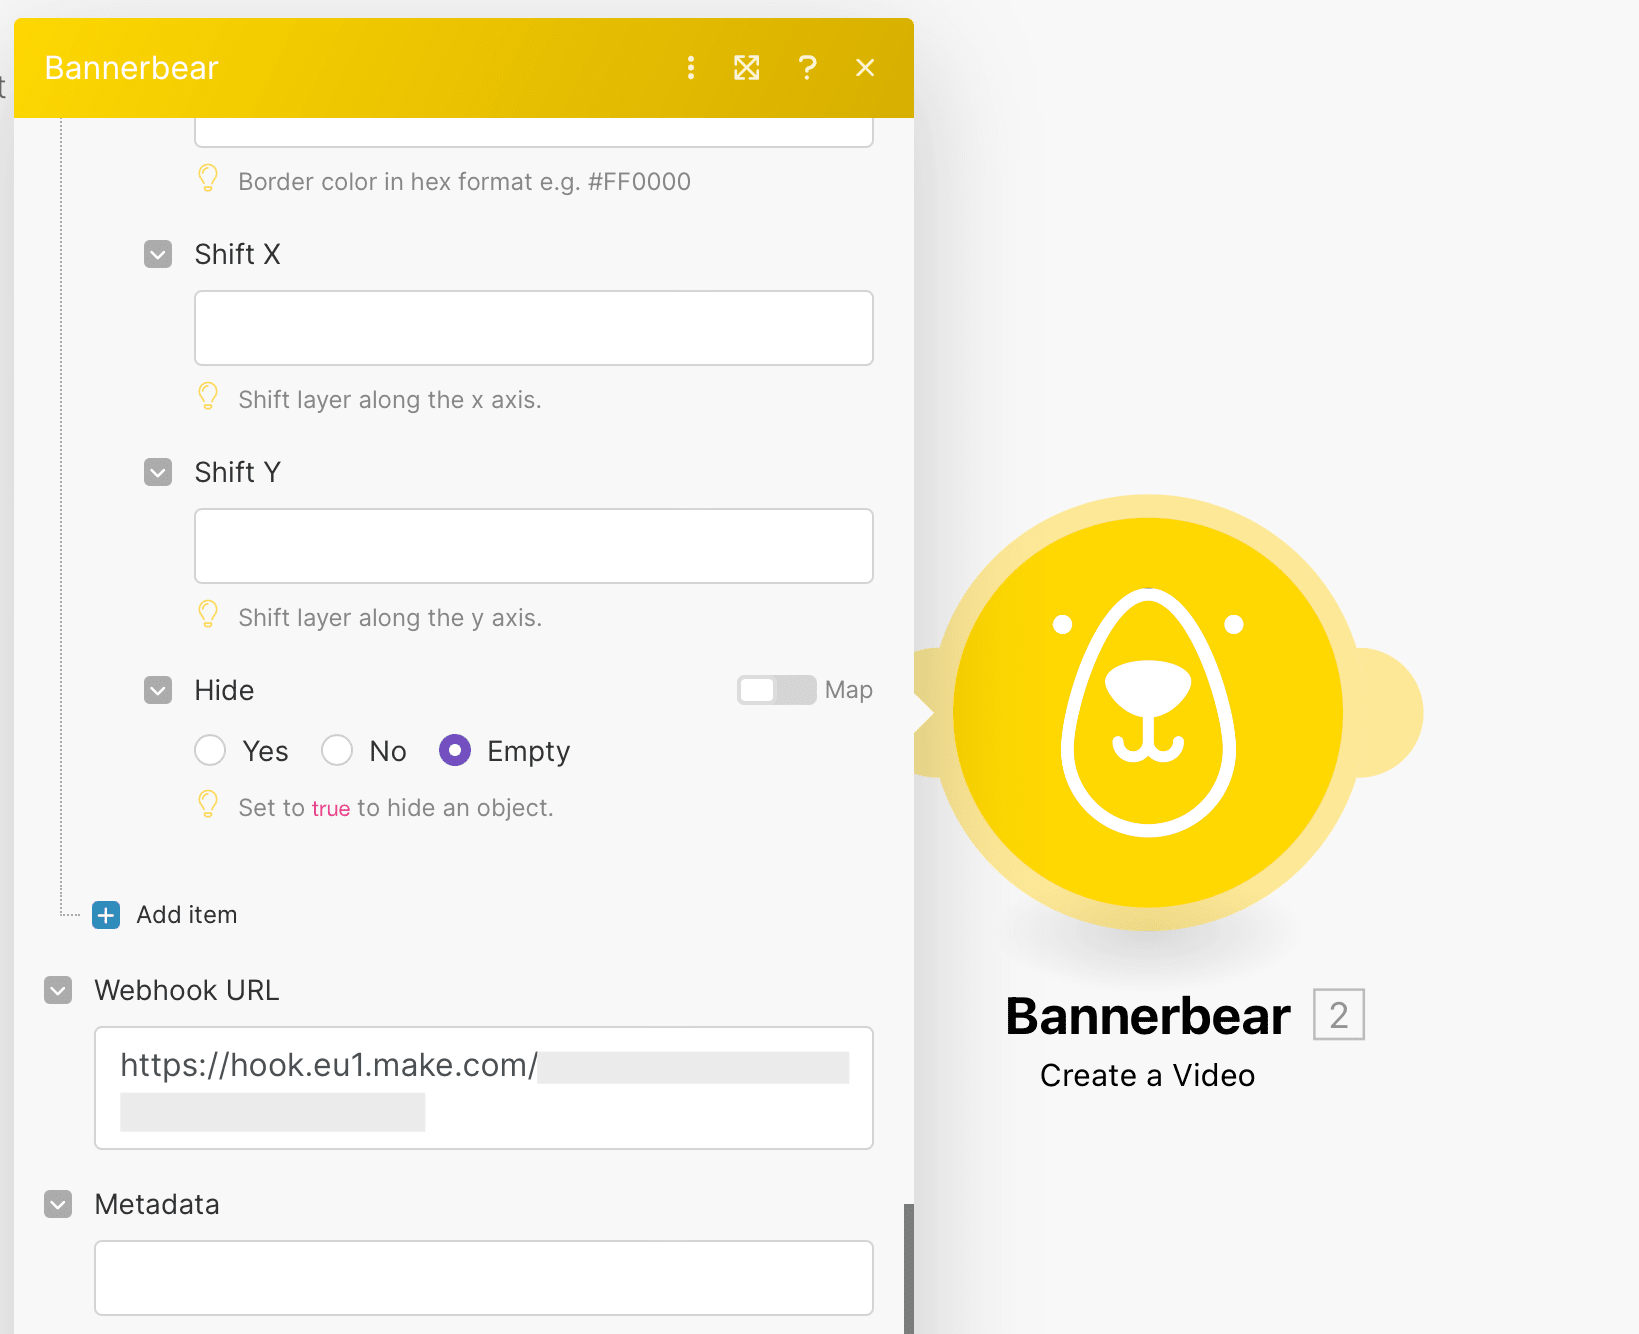
You will need to add modifications for video generation to run, so add the names of the layers you want to change and specify any adjustments.
Now, you will need to insert the URL you saved earlier into the Webhook URL field. This ensures that a payload is sent every time a video is generated.
Click “OK” and run the entire scenario once. You can ensure a video has been successfully generated by clicking the magnifying glass 🔍 on the Bannerbear module or by checking the Logs section of your Bannerbear app.
After confirming everything is working correctly, save your scenario.
Complete the Scenario that Fetches Generated Videos
Let’s go back to the first scenario (where the unique webhook URL was generated) to complete it.
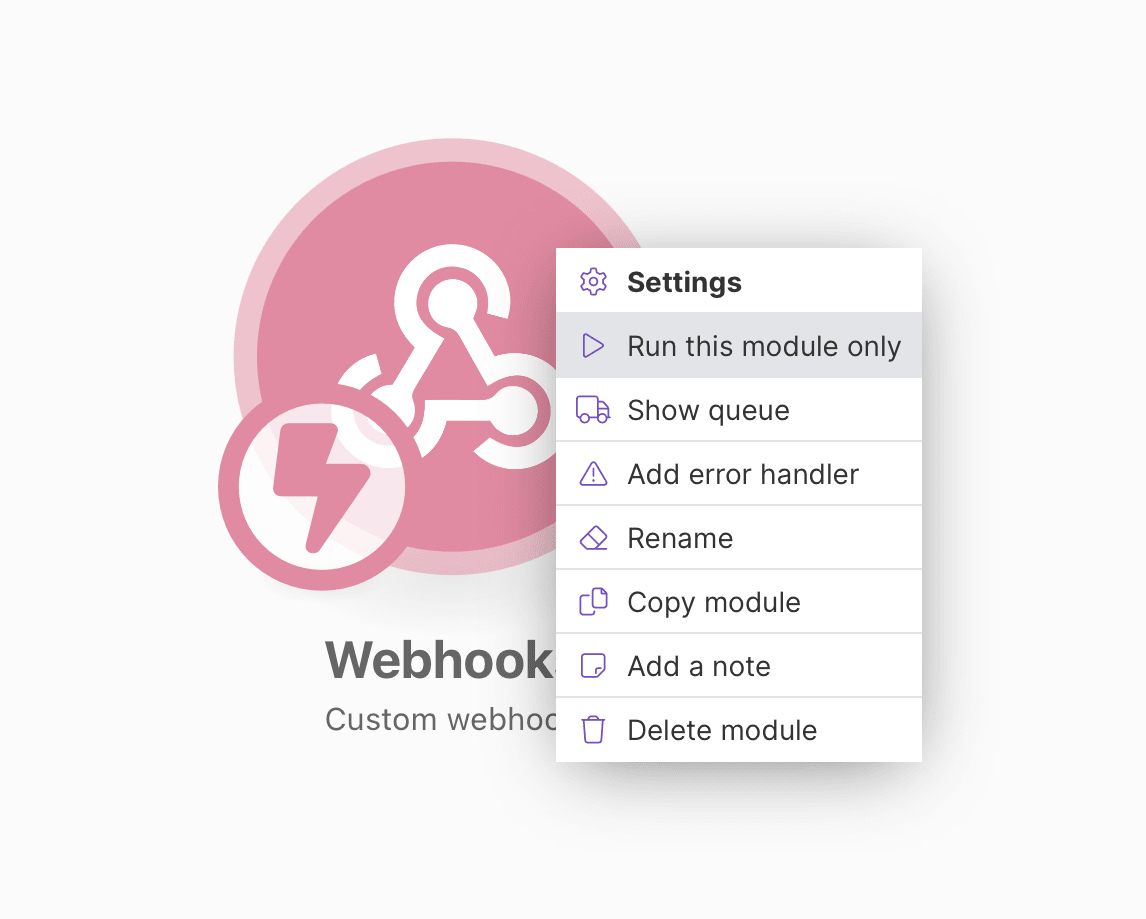
Right-click on your Webhooks module and click “Run this module only.” This will pull the video URL from the previous generation step so you can map it to the subsequent modules.
Now, set up the following modules:
HTTP: Get a File
Choose HTTP as the app and “Get a File” as the event. Map the video_url output from the previous module to the URL field.
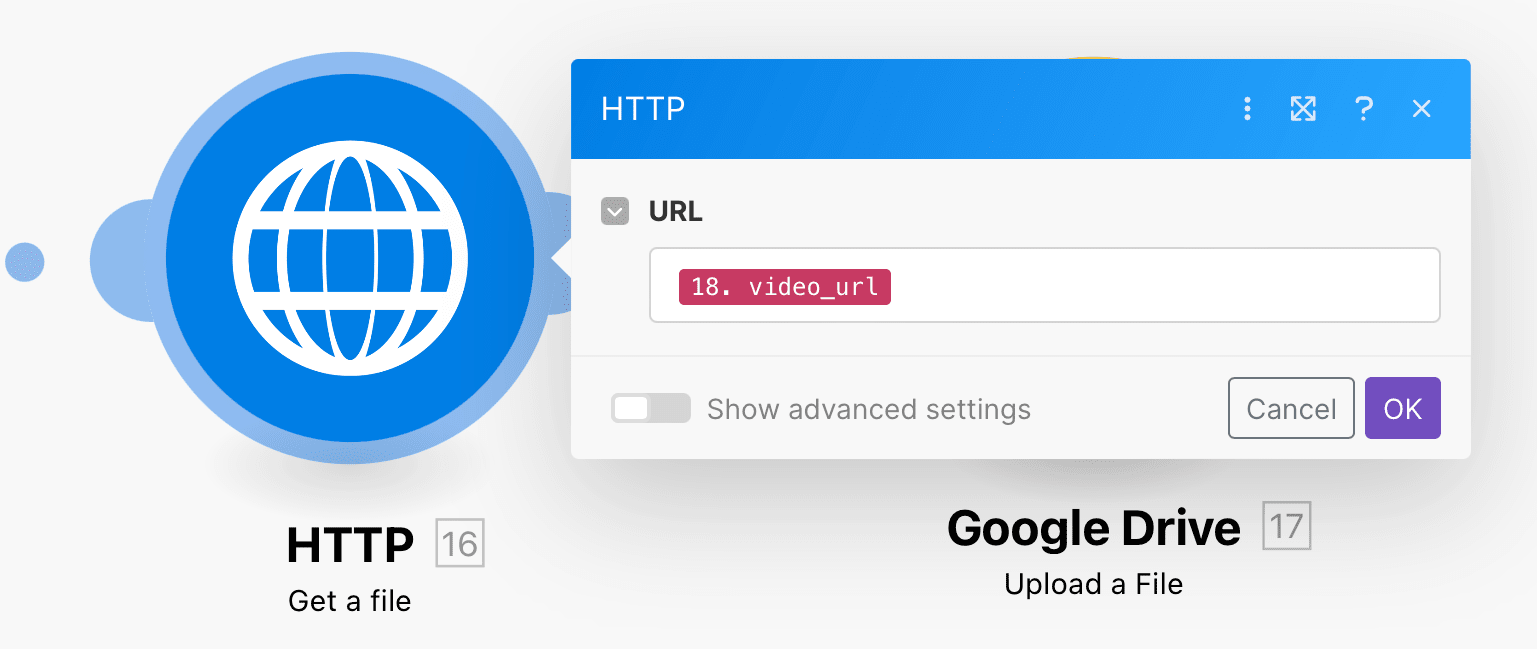
Click “OK.”
Google Drive: Upload a File
Choose Google Drive as the app and “Upload a File” as the event. If you haven’t connected your Drive account yet, you will be prompted to login.
Set up the module by selecting the right Drive and folder location. Specify “HTTP - Get a file” as the File.
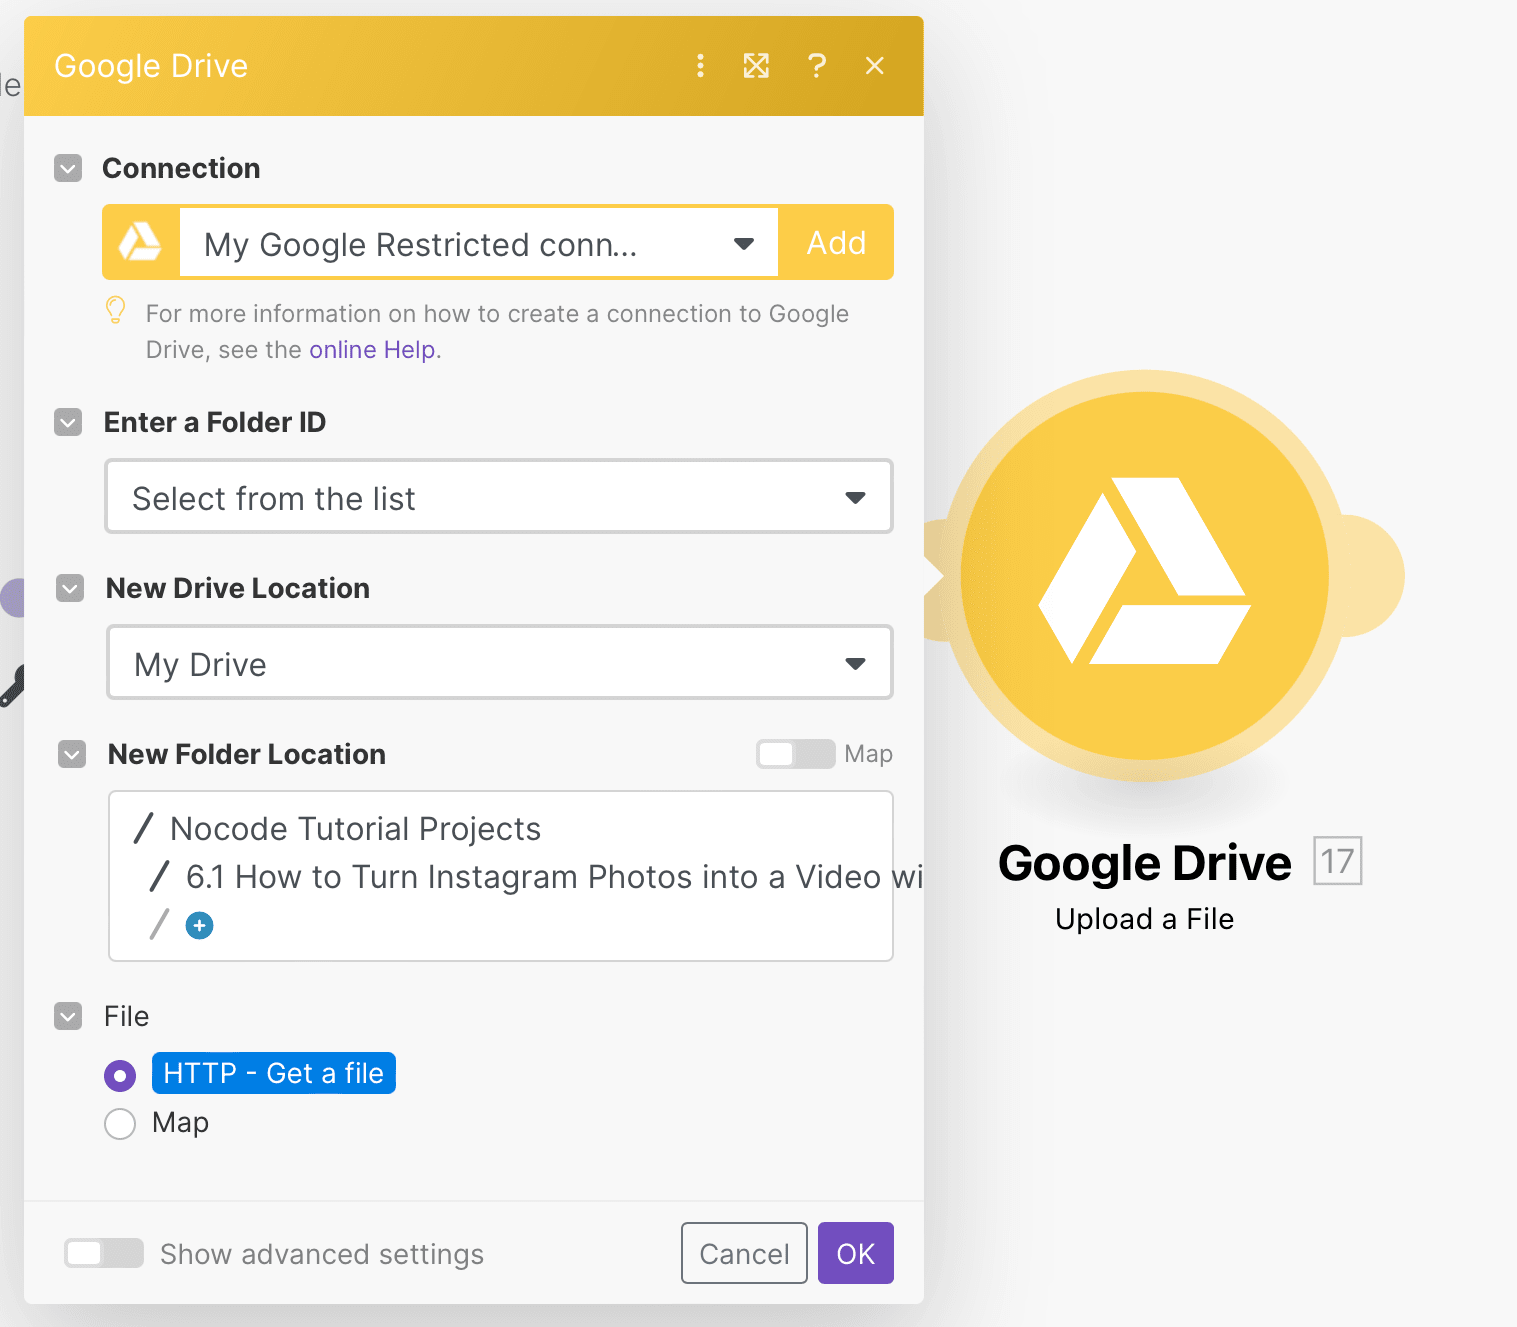
Click “OK” and save your scenario, then run it once. The generated video should show up in your specified Drive folder.
Bear Tip 🐻: When you’ve completed this scenario, make sure to toggle Scheduling to “on” so that it picks up any data sent to the webhook URL. If it is not switched on, you will be unable to test the entire sequence in one go.
Your final video should look something like this:
And there you have it: a nocode video generation automation that leaves less room for error!
Using Webhooks to Build Better Nocode Automations
Make's Delay tool can be helpful in many situations, but it's more error-prone when it comes to retrieving generated videos. You can build a more bulletproof nocode automation by using a webhook to trigger retrieval after a video is successfully rendered.
For more ways to generate images and videos from Instagram media, check out the following tutorials:
👉 How to Automatically Turn Instagram Photos into Videos with Make
👉 How to Turn Your Recent Instagram Photos into a Video or GIF
👉 How to Create an Auto-Updating Instagram Grid Mockup for Your Newsletter or Website
