Every blog post you publish can be repurposed into other formats, and short-form video is one of the most rewarding. TikTok, Instagram Reels and YouTube Shorts recommend videos based on what viewers watch and engage with, not only to who already follows you. This means they can put your content in front of an audience who would never have found it through search.
With AI and MCP, repurposing content is easier than ever. However, AI output can be unpredictable. For the same task, you might get two completely different layouts, fonts and caption styles. That's why in this tutorial, we're going to pair AI with Bannerbear. AI reads an article, pick the highlights and write a video script, while Bannerbear templates and workflows handle everything visual. This ensures every video comes out with predictable design.
For demo, we'll turn 15 Best Places to Visit in Vietnam by Kat Smith into a narrated short-form video (all credit for the original article and its photos goes to Kat and A Way Abroad!). We'll cut the list down to five places for a short video, and here's the result you'll get:
It's an 18-second 9:16 video covering five places from the article, complete with voiceover and captions. And since the design comes from the templates we picked, we knew exactly how it would look before it was even rendered!
What Is a Bannerbear Workflow
Bannerbear is a tool that lets you automatically generate images, animations and videos from templates. Besides rendering templates, it has a set of media tools (e.g., trim, resize, overlay and subtitles) that you can chain together into a multi-step workflow. In a workflow, you declare the inputs and link the steps together, so each step can use the output of an earlier one.
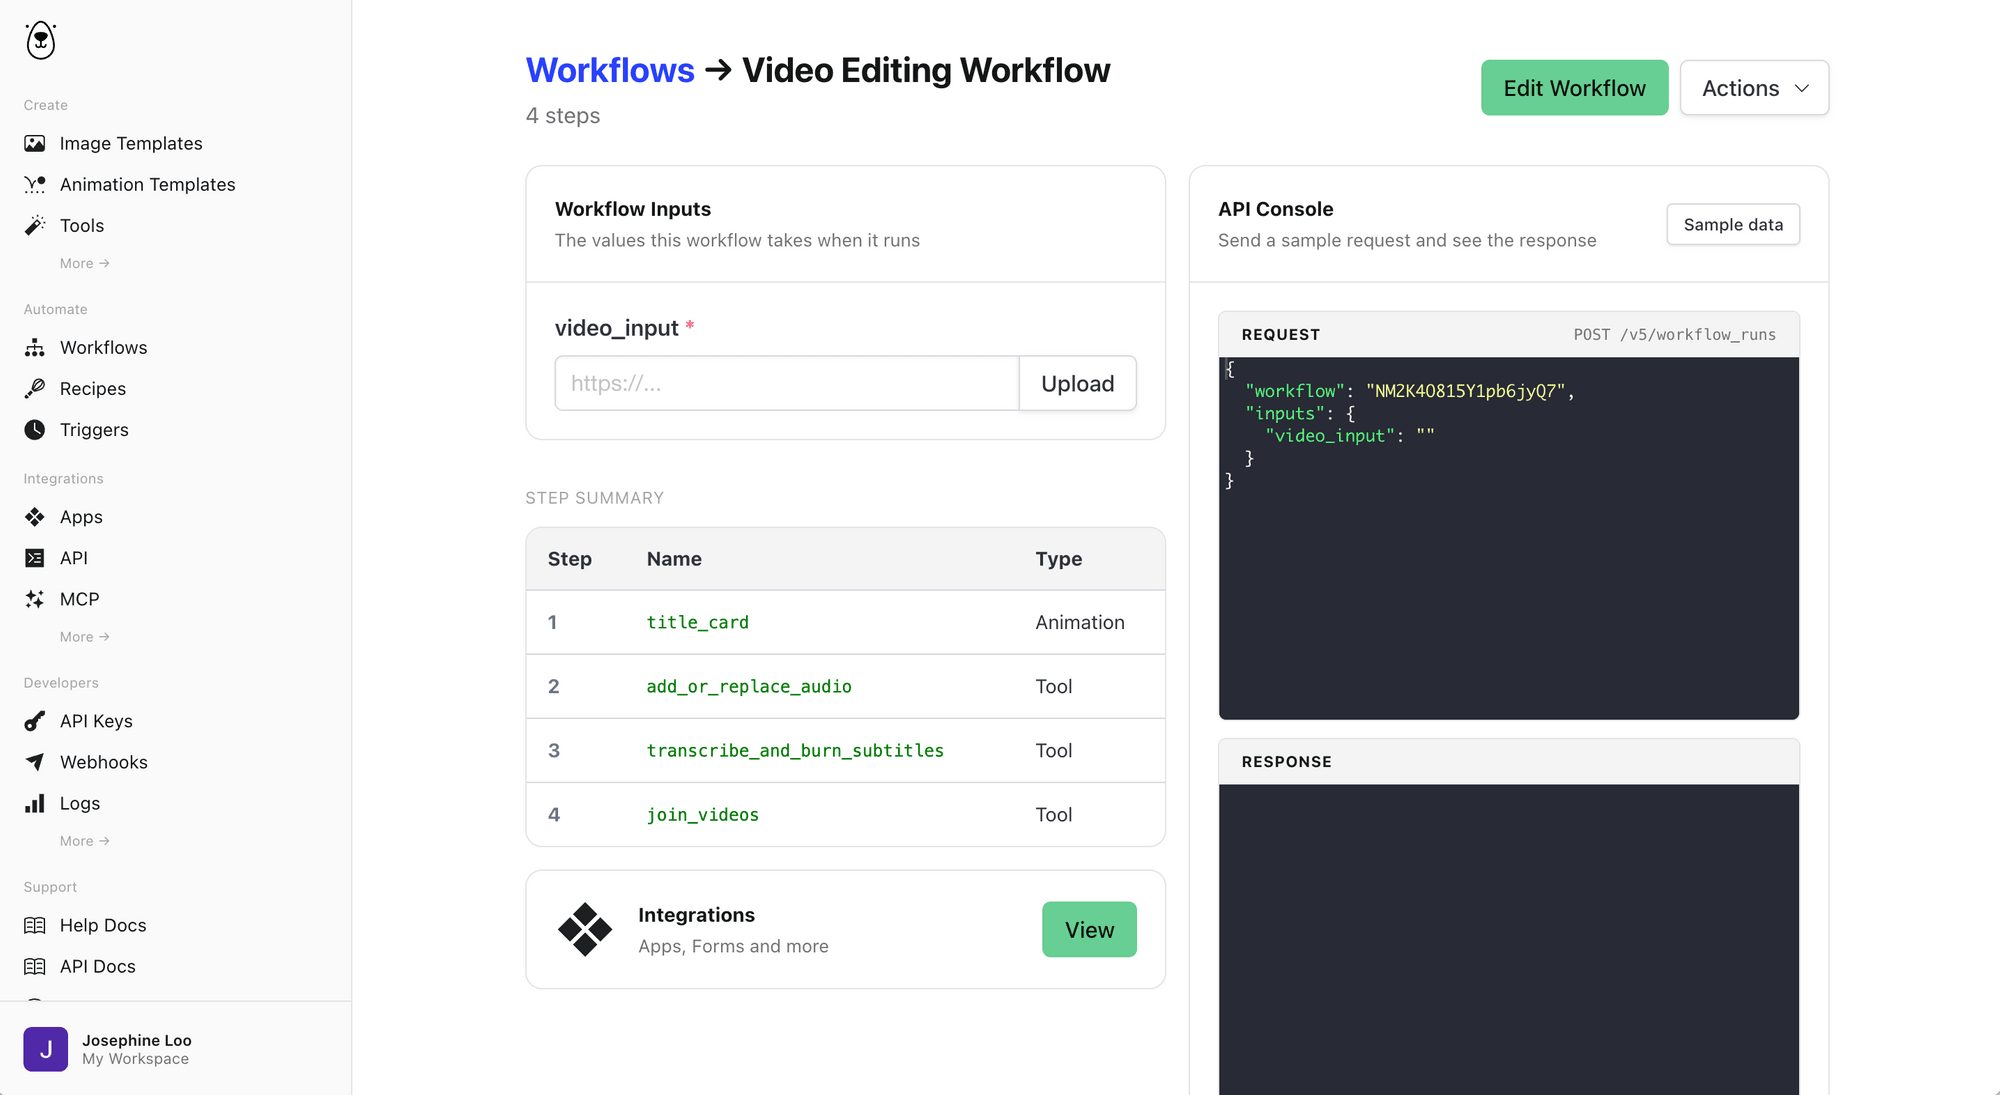
Bannerbear offers an MCP server, an API and libraries for popular programming languages such as Node.js, Ruby and PHP, so you can easily add image and video generation features to your application or project.
🐻 Bear Tip: If you're new to workflows, Auto-Generate Multilingual Subtitles for Podcast Clips with AI and Bannerbear is a shorter example that uses some of the same tools.
What We're Building
The workflow produces an 18-second vertical video made of six scenes: an intro card with a headline, followed by one card for each of five places. Each scene gets its own AI voiceover line and subtitles, and then joined into one video.
Our setup has three parts:
- Bannerbear animation templates (for the scenes): we’ll use two templates from the Orange Black Simple Title Card Story design as they are. Scene 1 shows the headline over the article’s thumbnail, and Scene 3 shows each place name over that place's photo.
- AI agent: reads the article, picks the places and photos, writes the headline and video script, and runs the workflow through the Bannerbear MCP server.
- Bannerbear workflow: renders a scene for the intro and each of the five places, generates a voiceover line for each scene and adds it to that scene, burns subtitles into each scene, and joins the six clips into one video.
Each workflow run produces one narrated video from one article.
Pre-requisites
To follow this tutorial, you will need:
- A Bannerbear account (the free trial comes with 30 API credits)
- An AI agent that runs on your machine and supports MCP, such as Claude Code, Codex or OpenClaw
- A listicle with one image per item
🐻 Bear Tip: Use articles and photos you own or have permission to use. If you're using someone else's article, credit the original author in your video caption or post.
Adding the Animation Templates
Duplicate the templates below to your account:
Orange Black Simple Title Card Story - Scene 1 for the intro
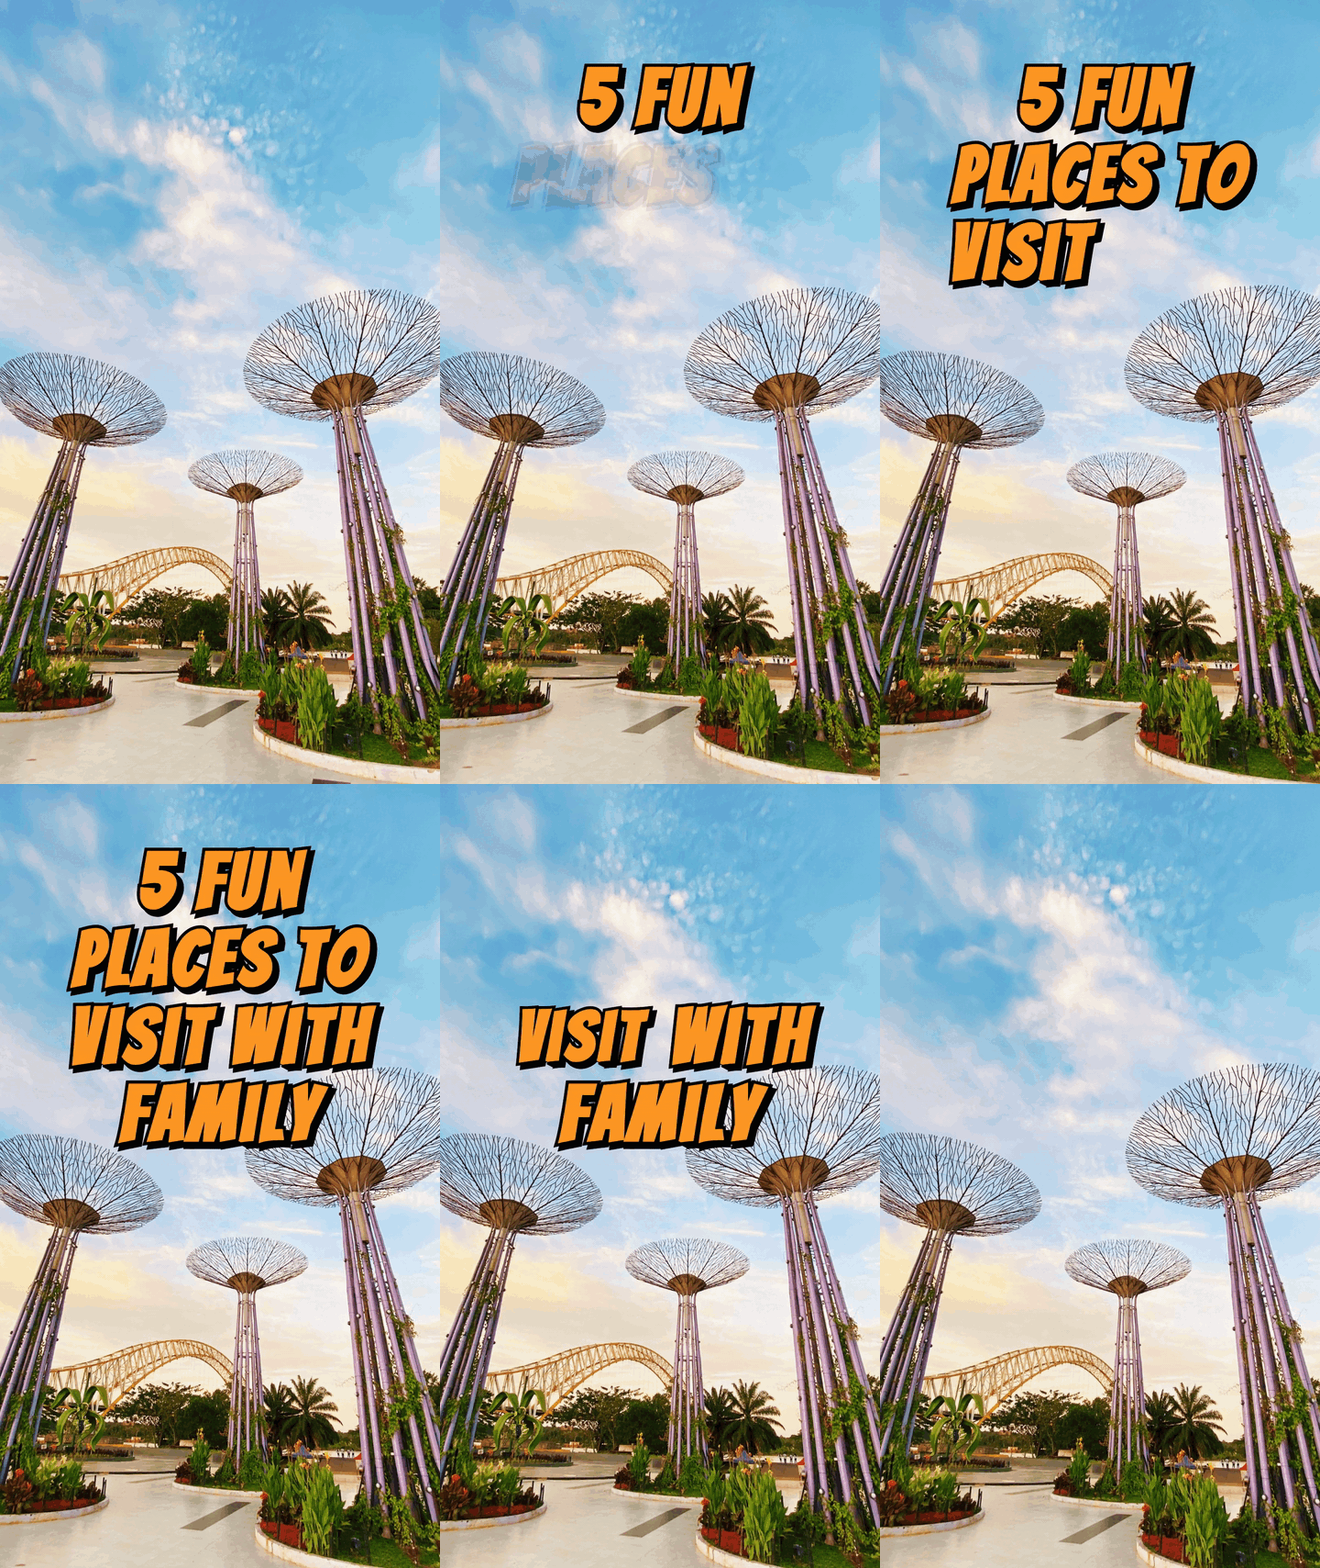
Orange Black Simple Title Card Story - Scene 3 for each place
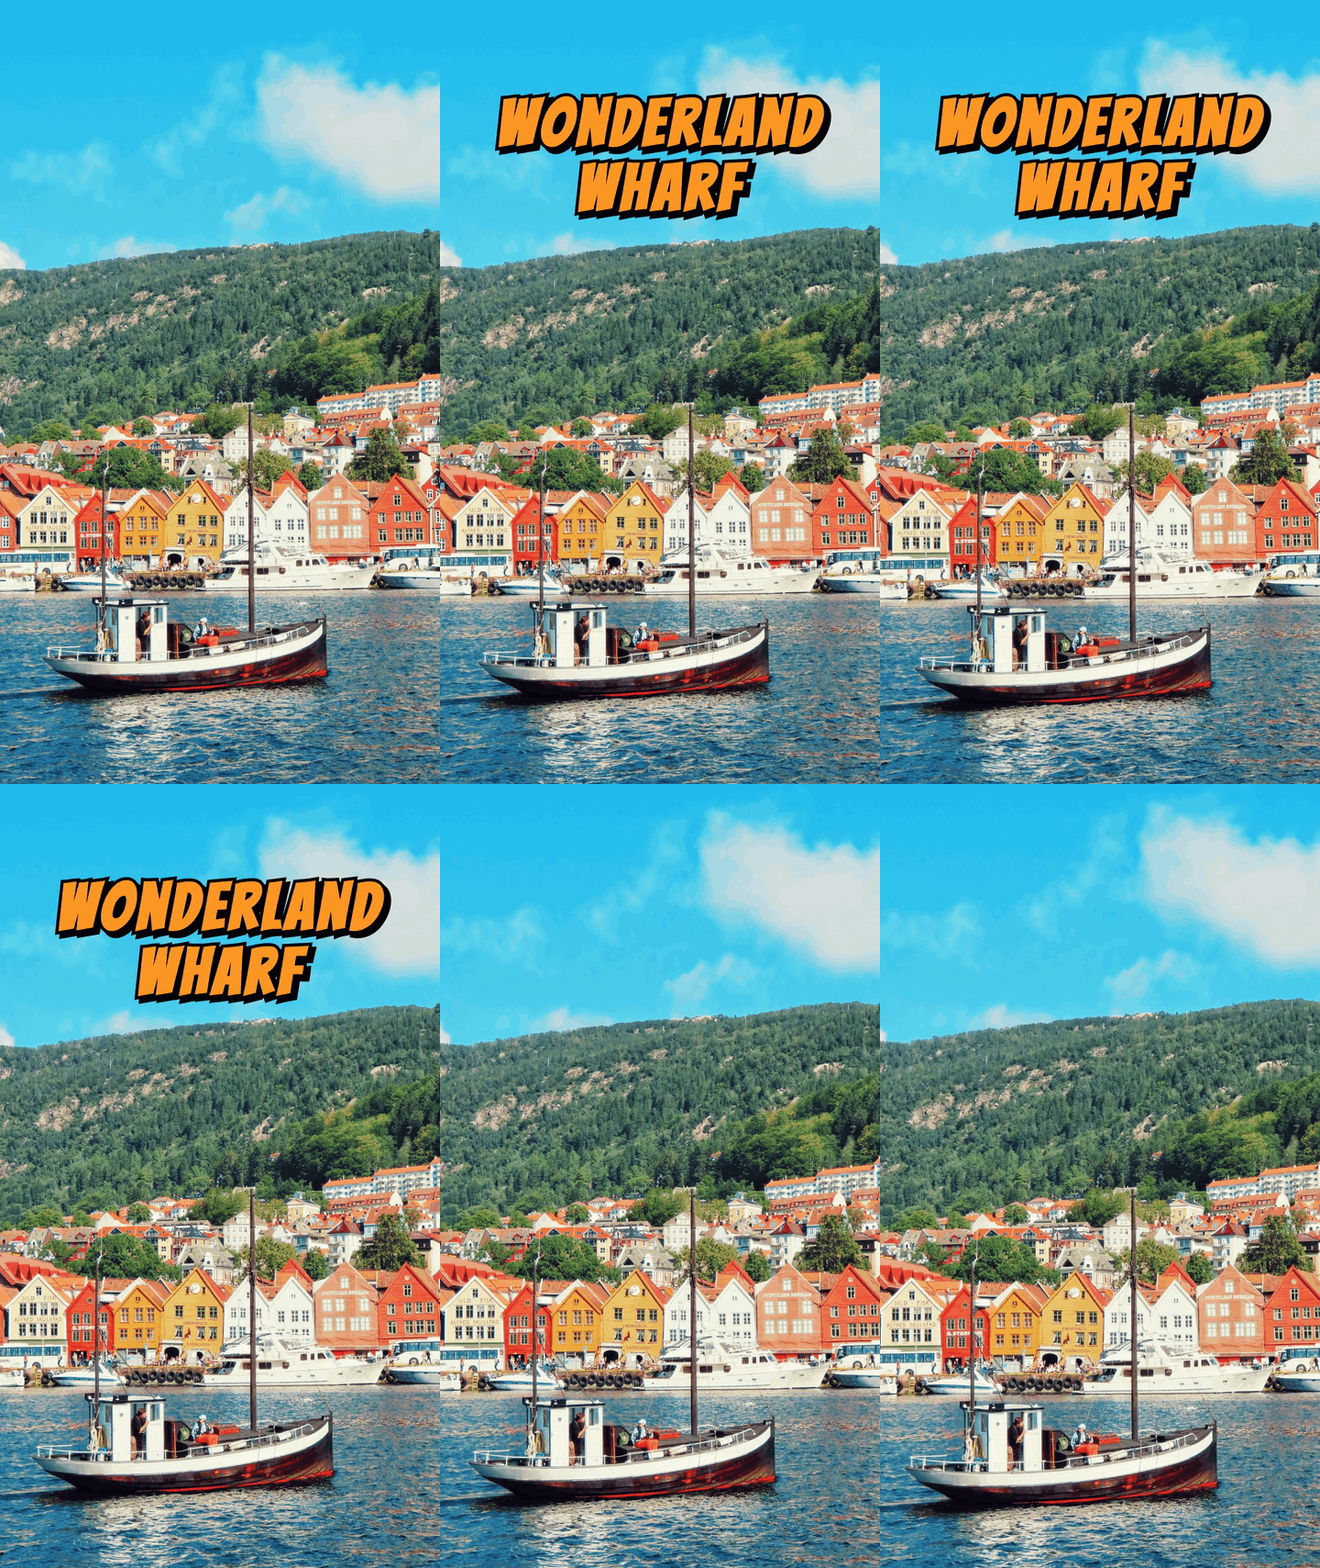
Both templates have the same two layers, and the workflow replaces their content on each run:
backgroundtitle
🐻 Bear Tip: The scene length is also the limit for each narration line. If you'd like longer lines, extend the keyframes in the templates.
Building the Workflow
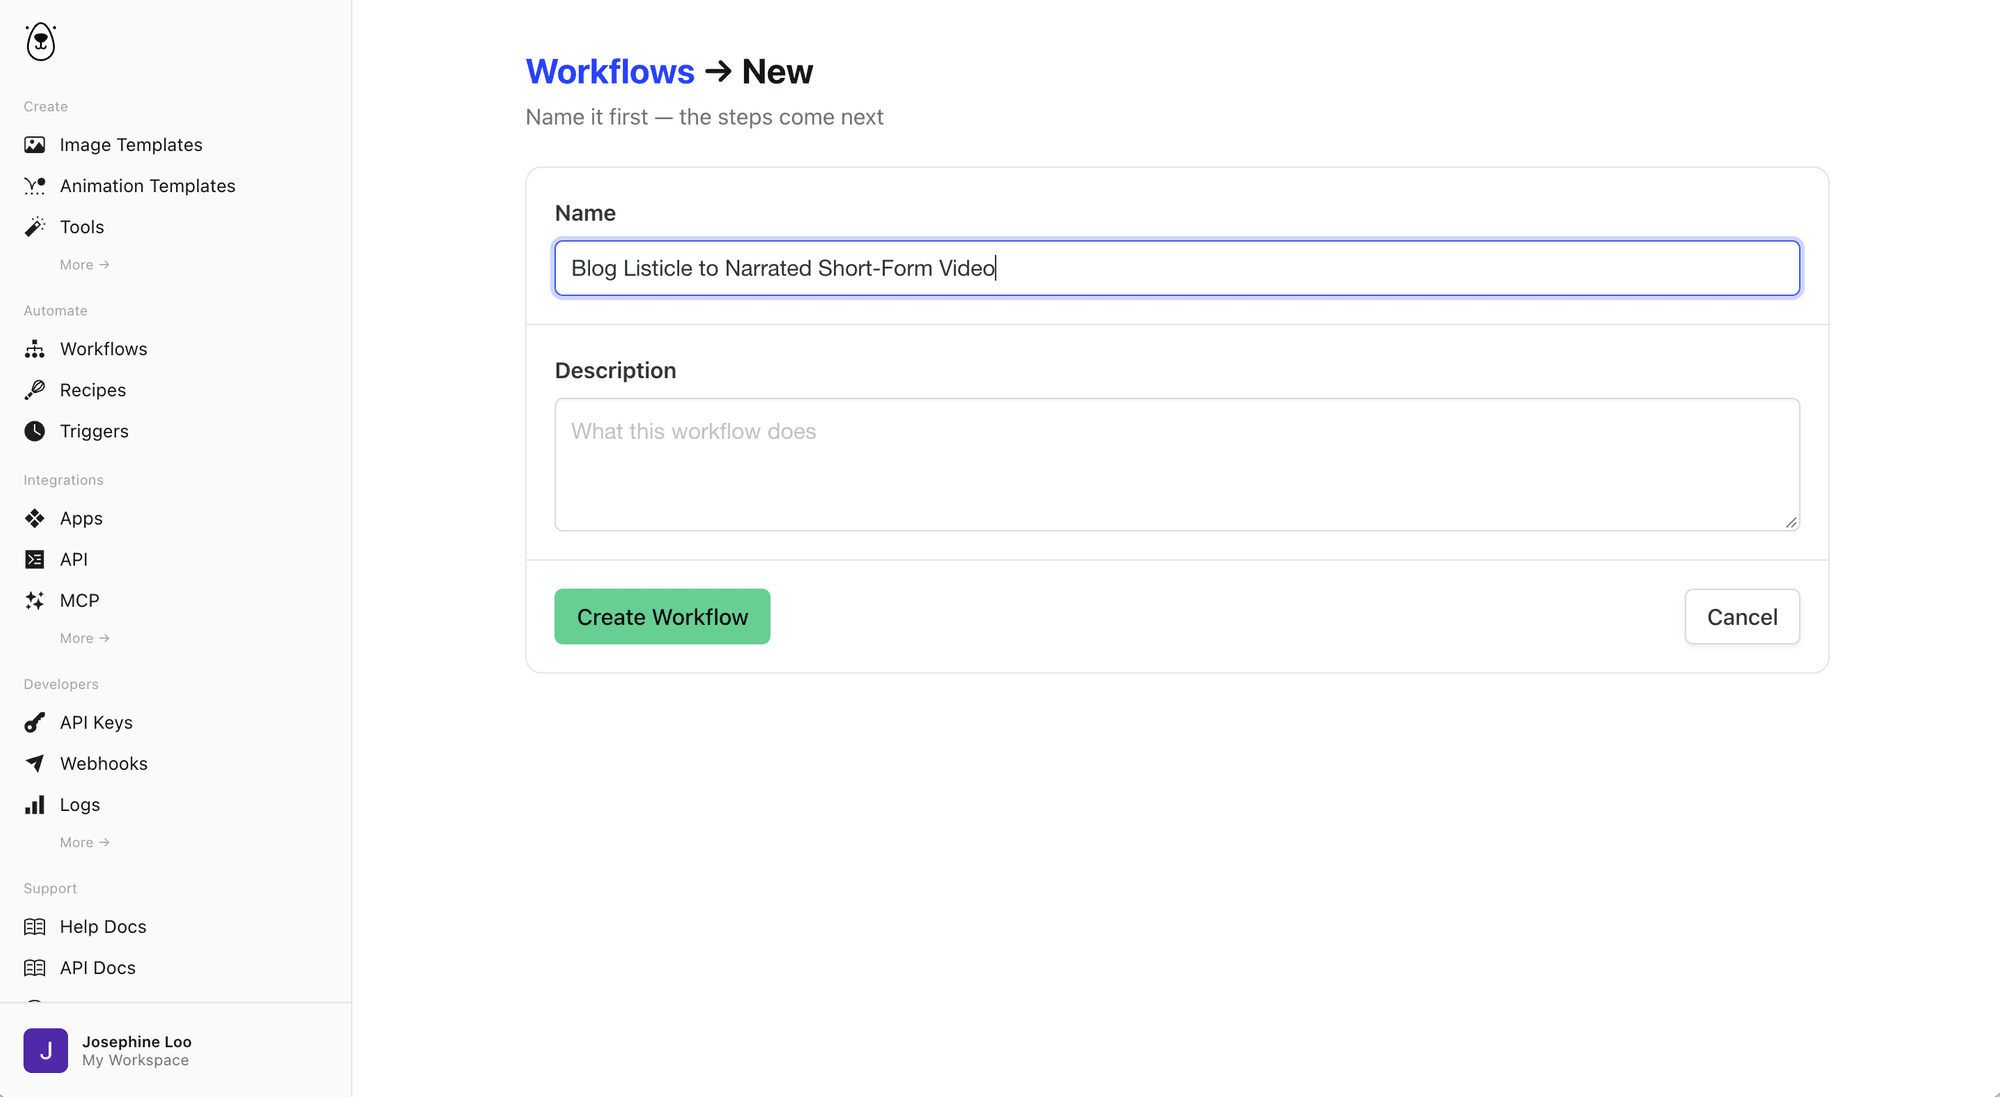
With both templates ready, go to Workflows in the dashboard and click Create Workflow. Name it "Blog Listicle to Short-Form Video":
Step 1. Declare the Inputs
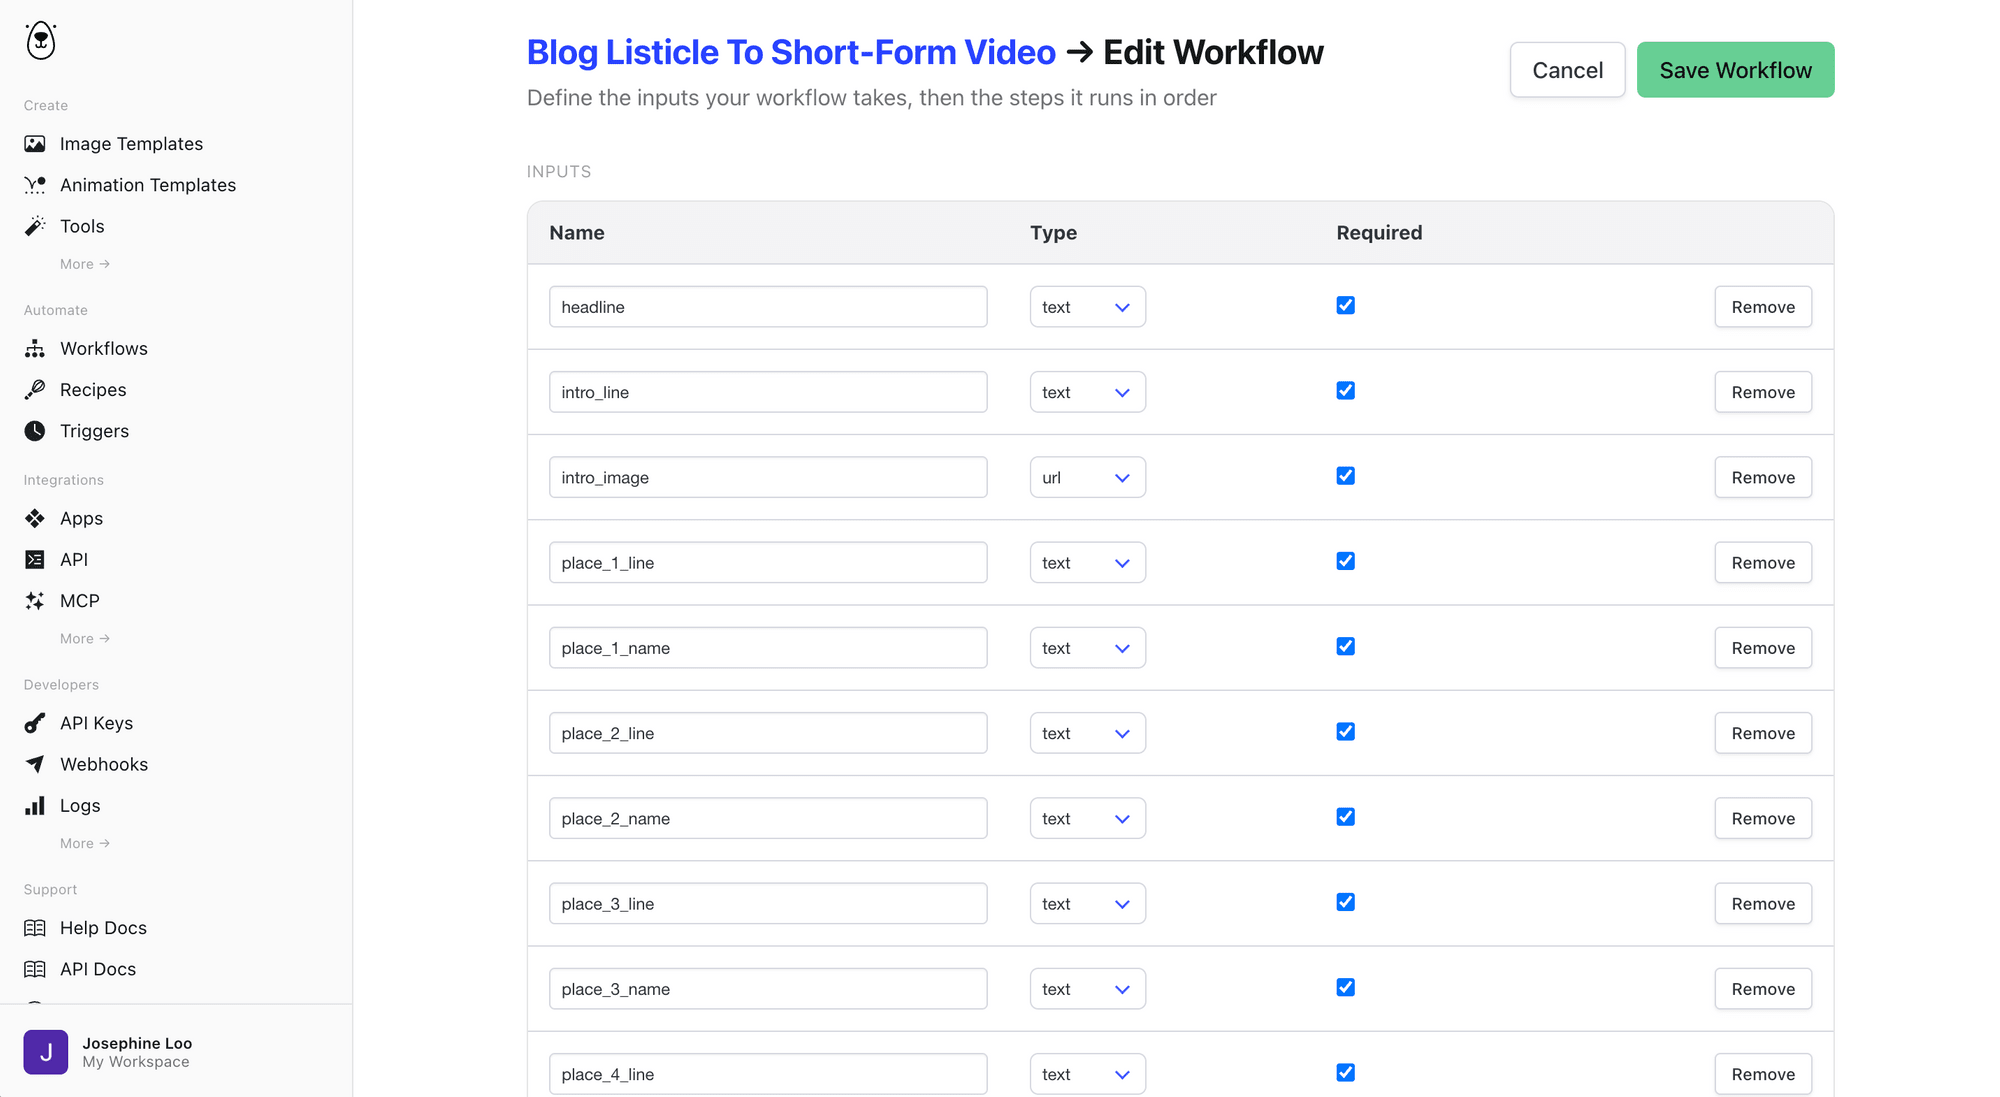
Use + Add Input to add 18 inputs, all required:
headline, textintro_image, urlintro_line, textplace_1_nametoplace_5_name, textplace_1_imagetoplace_5_image, urlplace_1_linetoplace_5_line, text
Step 2. Add the Steps for Each Scene
Every scene uses the same four steps, in this order:
- Animation: renders the scene from an animation template, with the scene's photo and title.
- Tool - Generate voiceover: turns the scene's narration line into speech.
- Tool - Add or replace audio: puts the voiceover onto the scene.
- Tool - Transcribe and burn subtitles: transcribes the voiceover and draws the captions onto the scene.
Set up the intro scene first, then repeat the same steps for the five places.
Intro scene settings
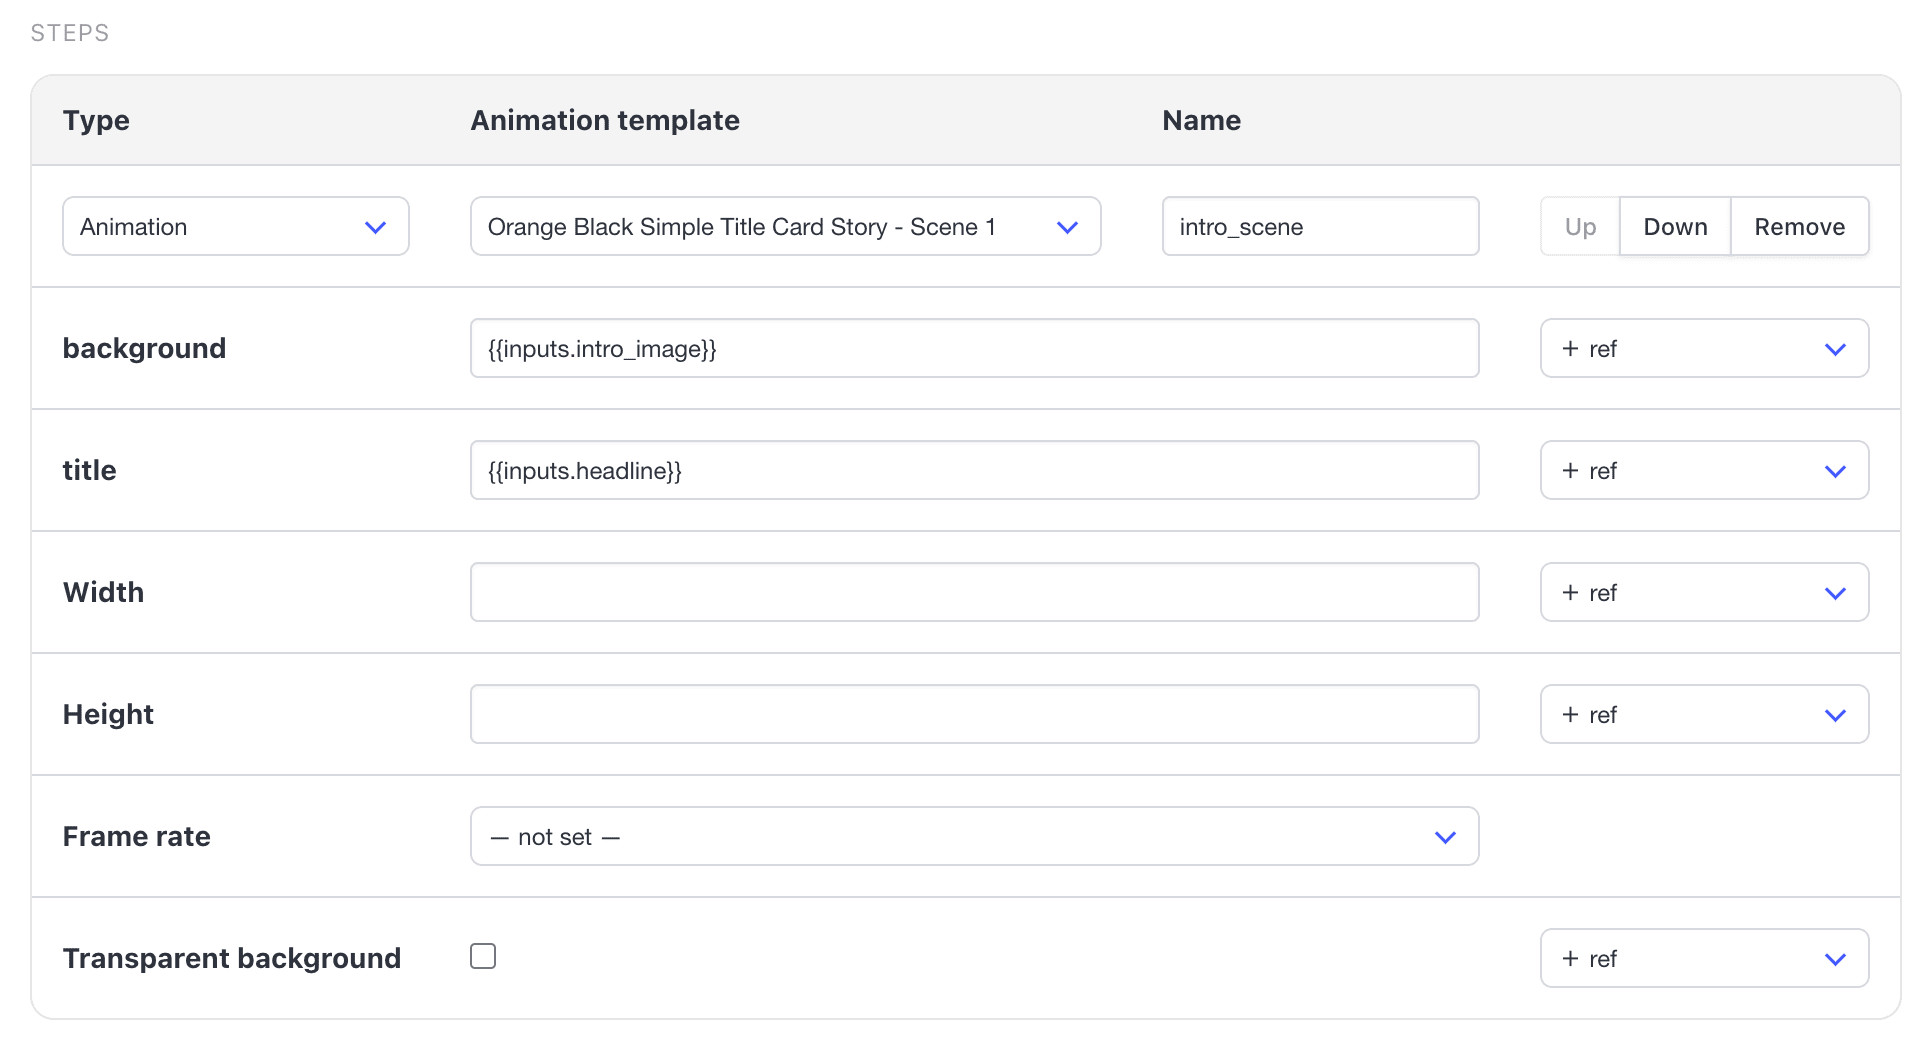
Animation (intro_scene)
Add an Animation step and select the Orange Black Simple Title Card Story - Scene 1 template. Set the background layer's image to {{inputs.intro_image}} and the title layer's text to {{inputs.headline}}:
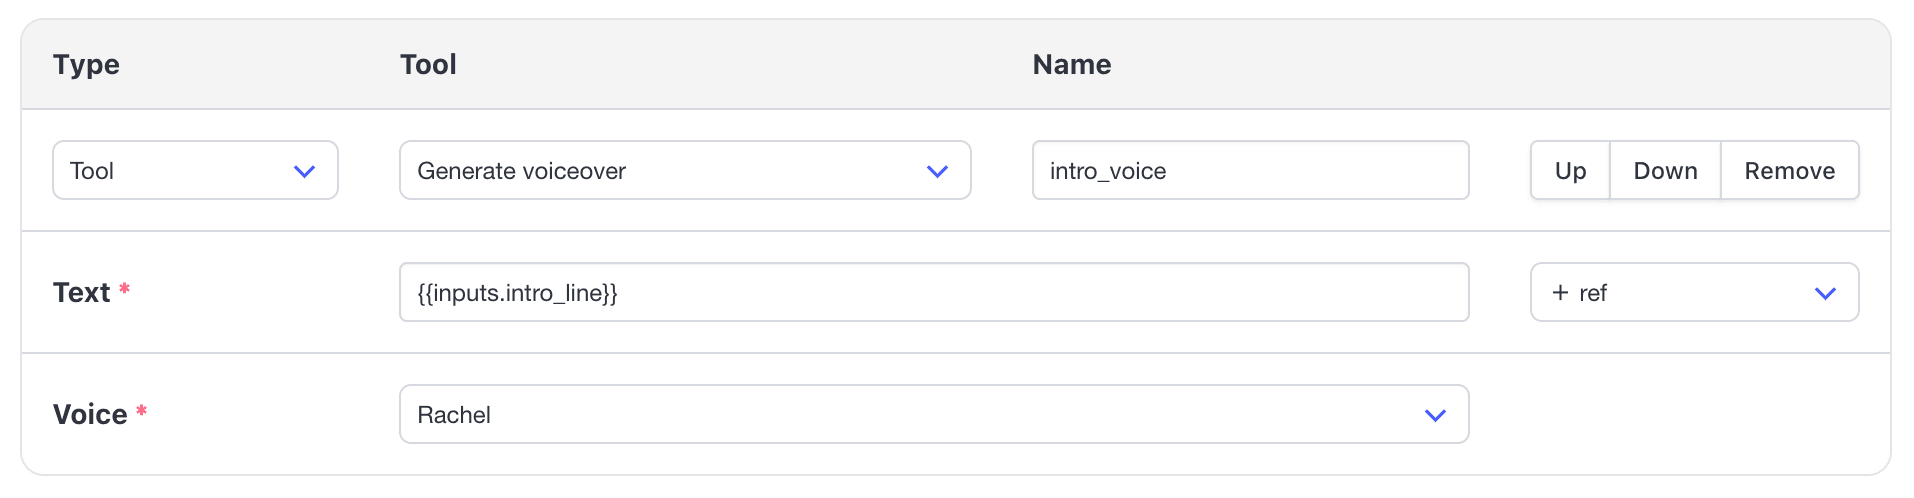
Tool - Generate voiceover (intro_voice)
Add a Tool step and select Generate voiceover from the dropdown. Set the text to {{inputs.intro_line}} and pick a voice (e.g., Rachel):
Tool - Add or replace audio (intro_clip)
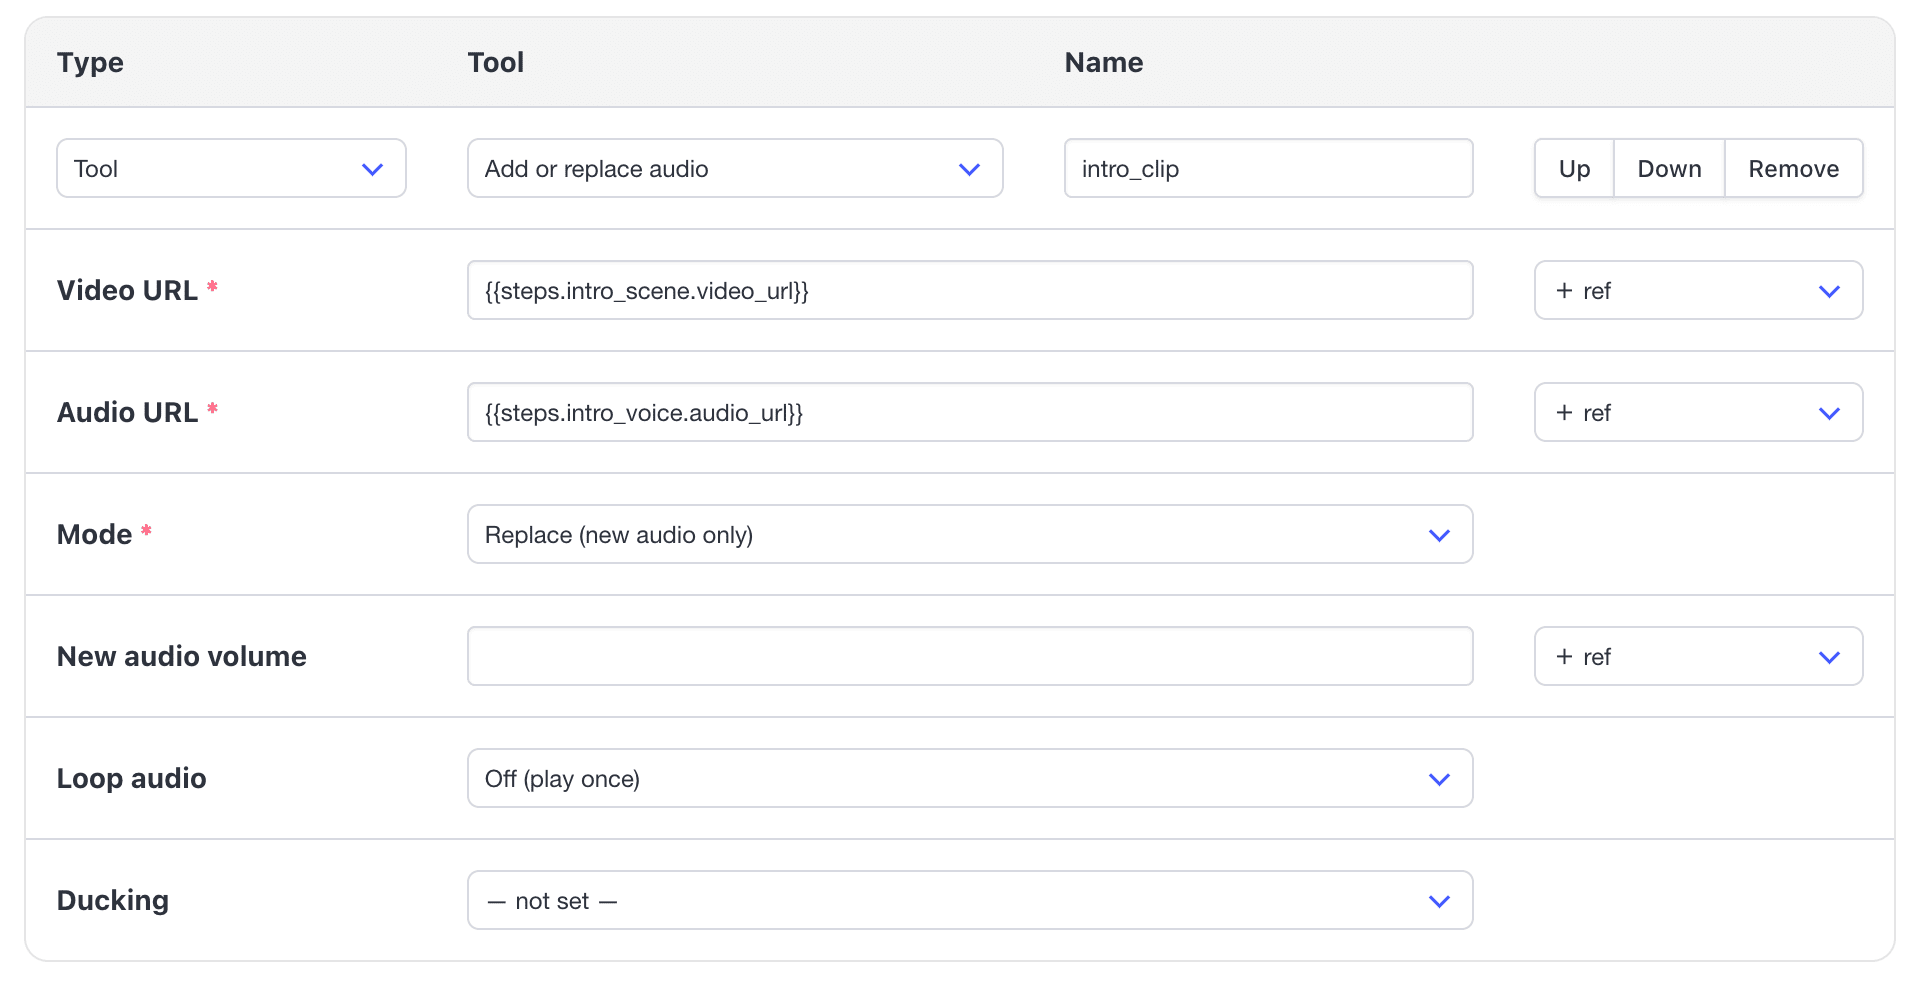
Add another Tool step and select Add or replace audio. Set the video URL to {{steps.intro_scene.video_url}}, the audio URL to {{steps.intro_voice.audio_url}}, mode to Replace , and loop to Off :
Tool - Transcribe and burn subtitles (intro_subtitles)
Add another Tool step and select Transcribe and burn subtitles. Set the video URL to {{steps.intro_clip.video_url}} and use the settings below for a clean subtitle style:
- Words per segment:
3 - Font:
Oswald - Font size:
16 - Alignment:
Middle Center - Outline:
1px - Outline color:
#000000
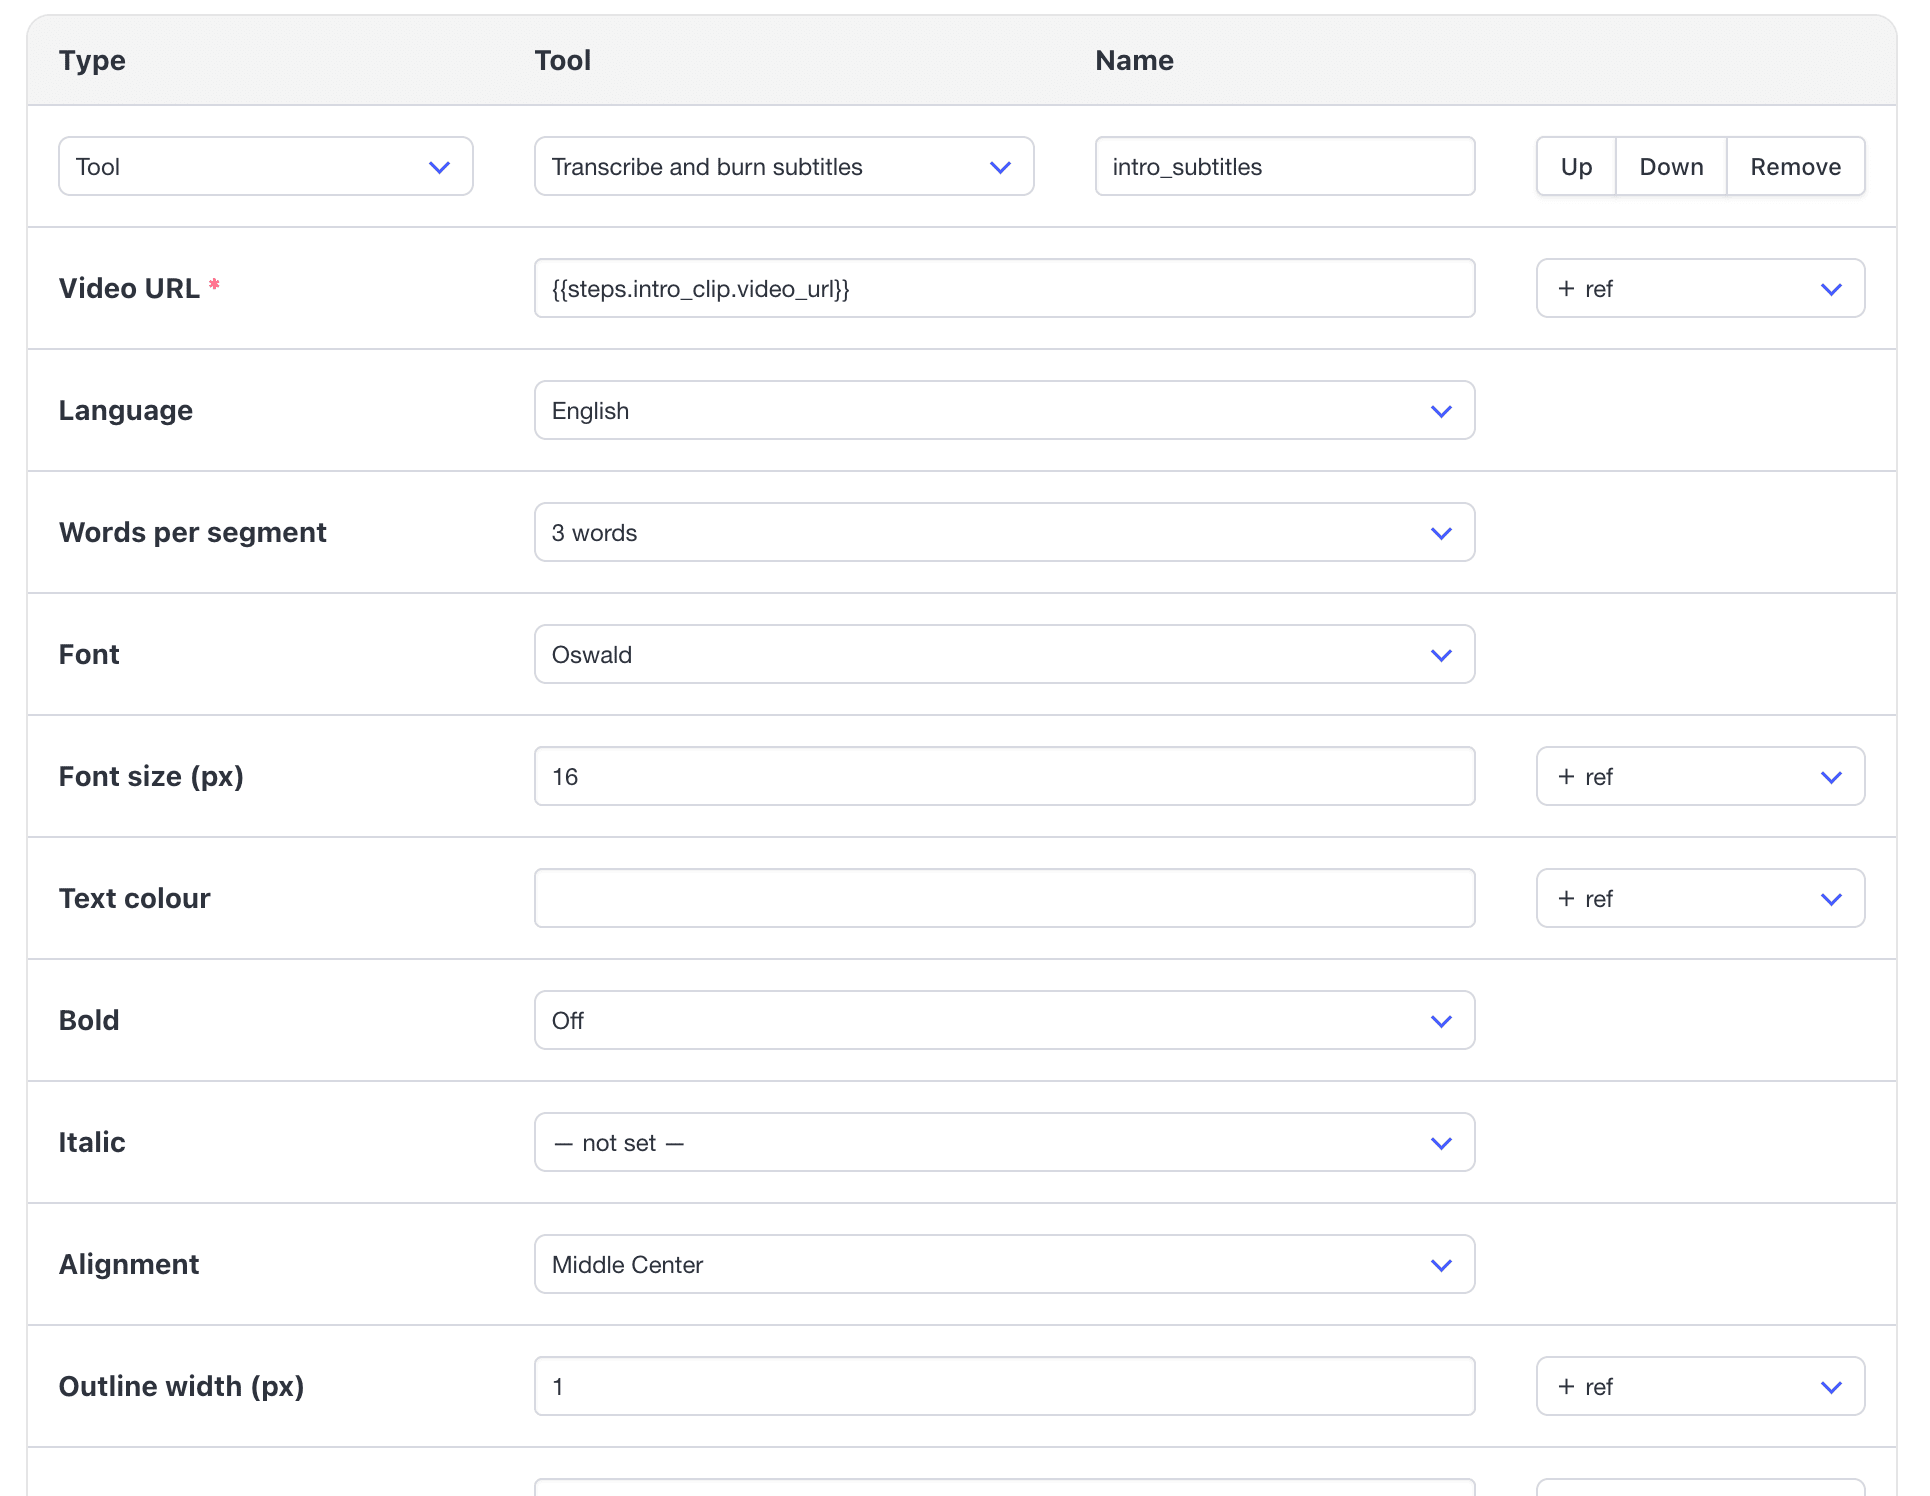
🐻 Bear Tip: Three words at a time gives the short, fast captions that are common on social video, and a thin black outline keeps them readable on any photo.
Place Scene Settings
Repeat the four steps for place_1 through place_5. The settings are the same as the intro, except that the animation step uses the Orange Black Simple Title Card Story - Scene 3 template, and the inputs point to that place's image, name and line.
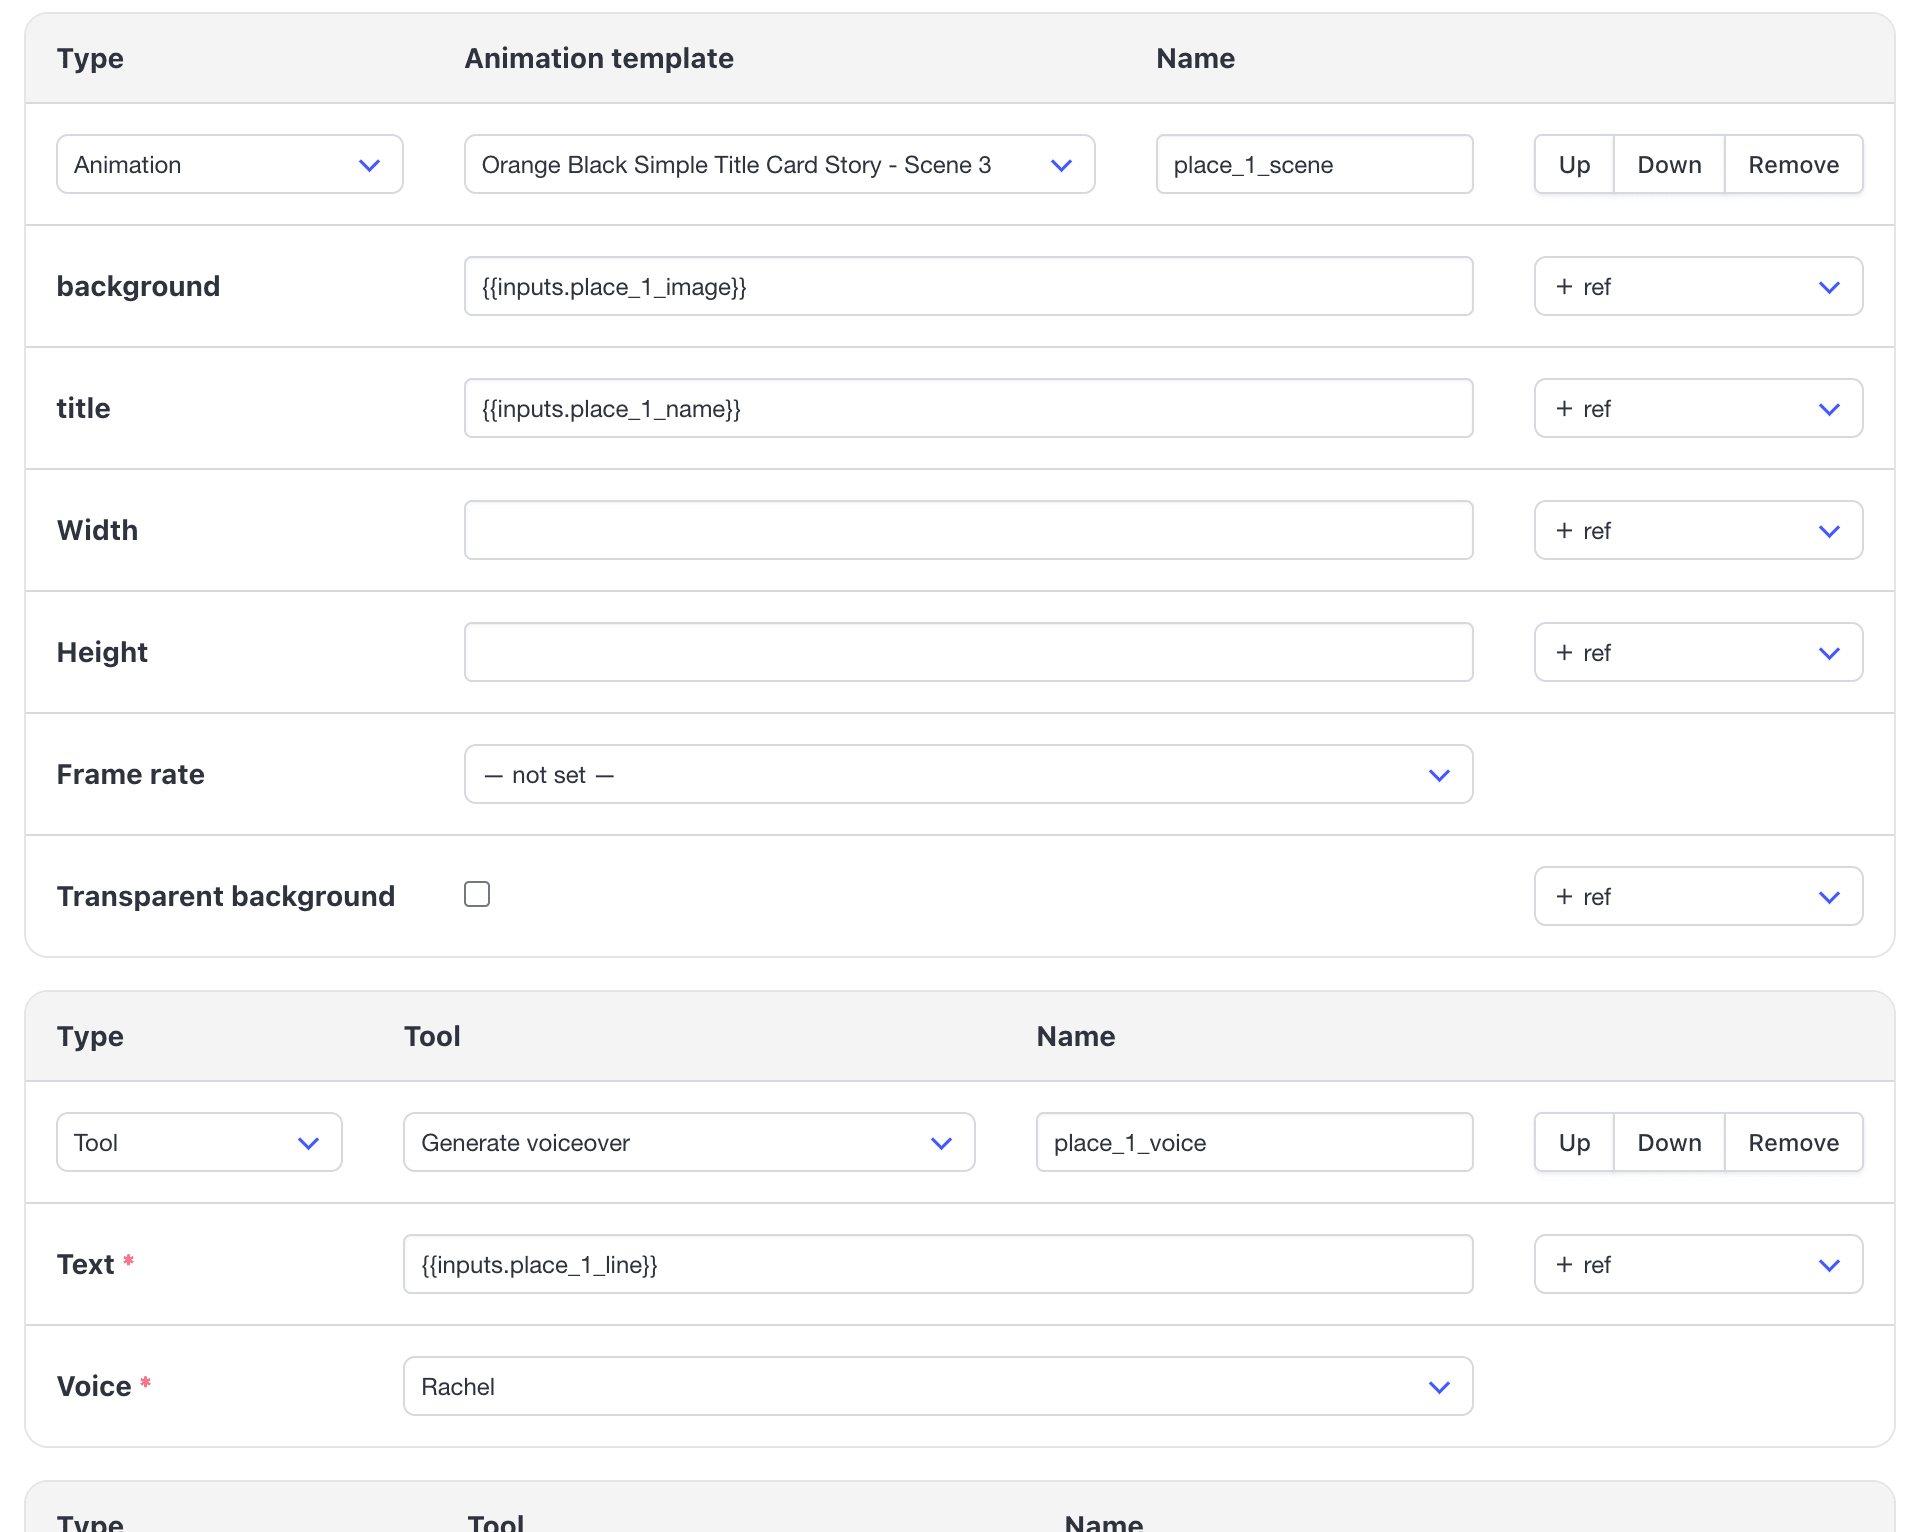
Note: Each scene gets its own voiceover and its own subtitles before the scenes are joined, so the narration and captions stay inside their own scene. If you generated one voiceover for the whole script, or transcribed the joined video in one pass, the first words of the next place could show up while the previous photo is still on screen.
Step 3. Join the Scenes
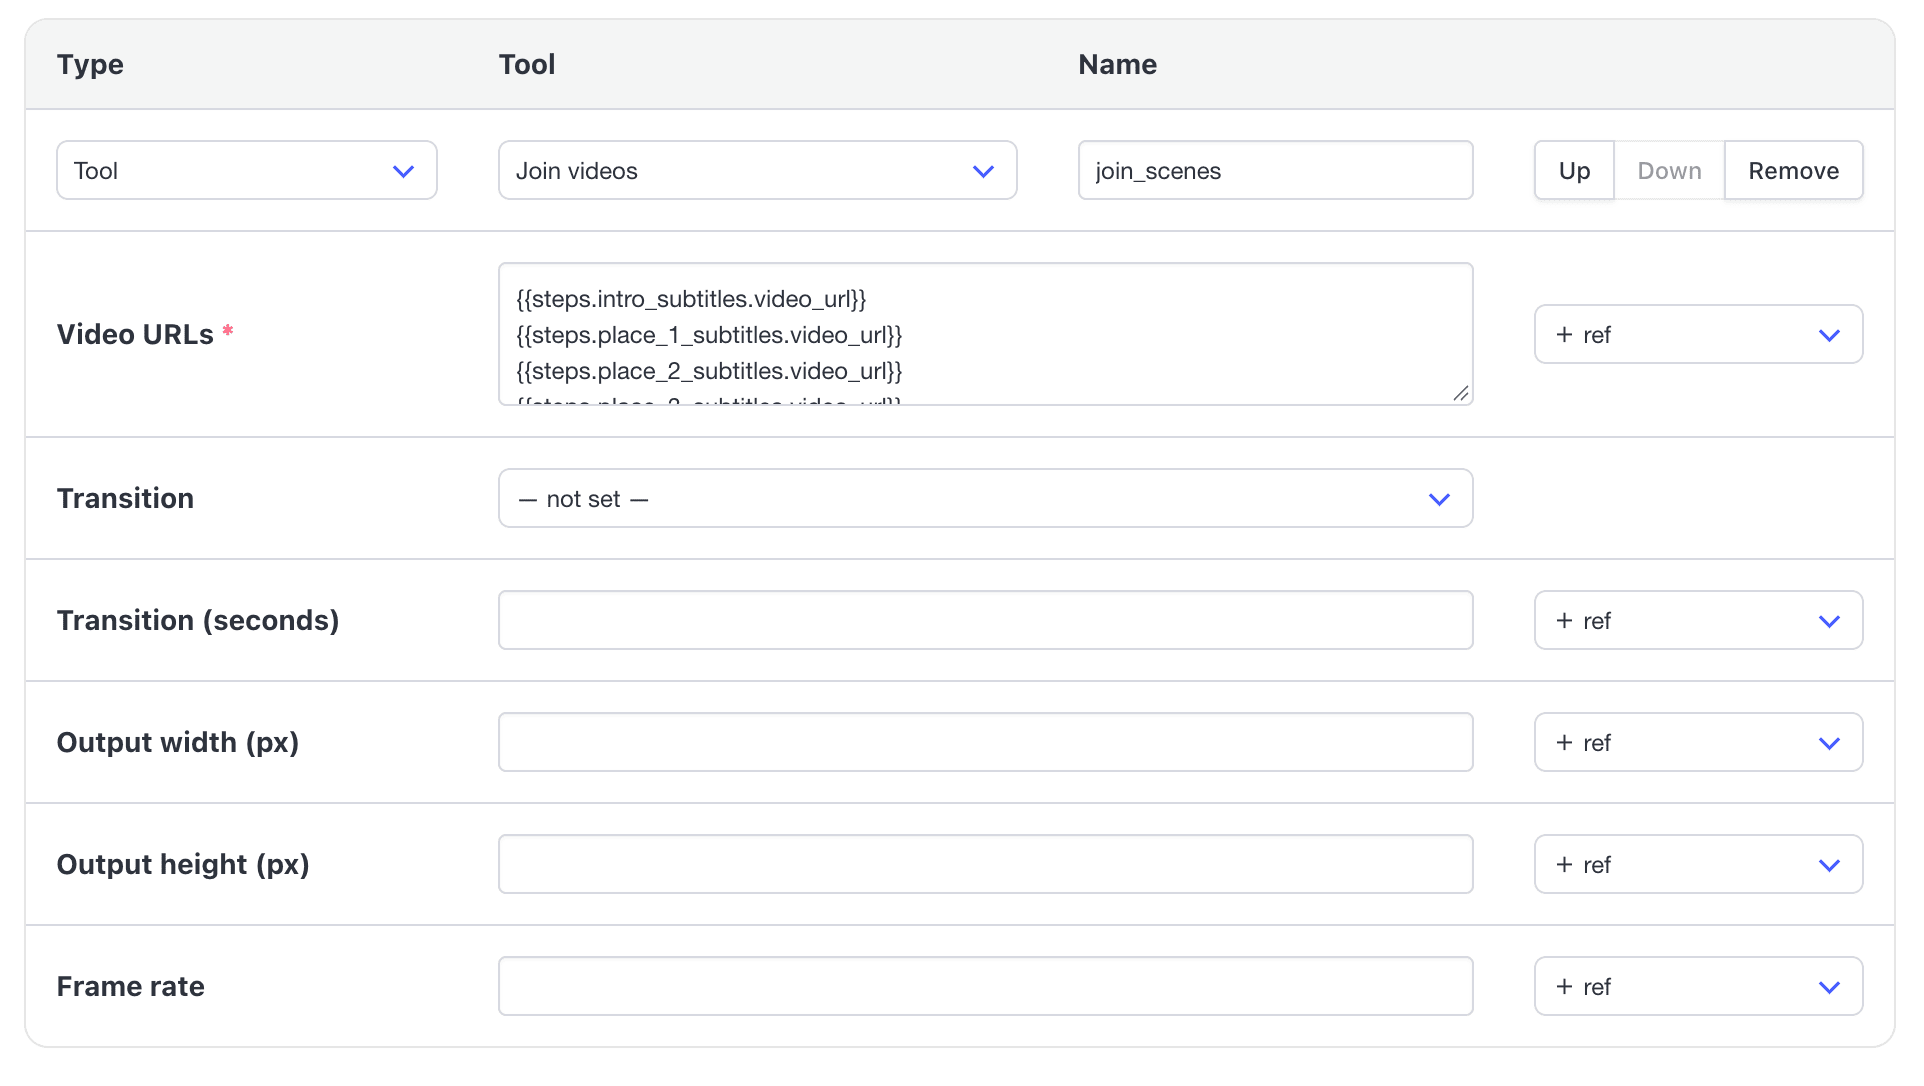
This is the last step. Add a Tool step and select Join videos (join_scenes). Add the six subtitled clips in order, from {{steps.intro_subtitles.video_url}} to {{steps.place_5_subtitles.video_url}}:
Save the workflow.
🐻 Bear Tip: If you'd rather skip the setup, you can add both templates and the finished workflow to your project using this link.
Running the Workflow with the Bannerbear MCP Server
Before you start, connect the Bannerbear MCP server to your AI agent by following one of these guides:
- How to Set Up Bannerbear MCP in Claude Code
- How to Set Up Bannerbear MCP in Codex
- How to Set Up Bannerbear MCP in OpenClaw
- API Reference - MCP Server (endpoints and authentication for any other MCP client)
Then, start a new session and give your agent the article URL along with a few instructions for the script:
Turn this article into a vertical video using my Bannerbear workflow
"Blog Listicle to Short-Form Video":
https://www.findawayabroad.com/post/best-places-to-visit-in-vietnam

- Pick 5 places from the list and use each place's photo from the article
- Use the article's hero image for the intro
- Write a short headline for the intro card
- Keep every narration line to 10 words or fewer
- Return the final video URL
The agent then works through the task and returns the final video URL. Here's the result we got:
Using the Bannerbear API Instead
MCP works well when you want to choose the article and review the script. If you'd like videos to be generated automatically or want to integrate it into your application, you can run the same workflow through the Bannerbear API. This suits developers who:
- want a video to render automatically when a post is published in WordPress, Ghost or another CMS
- need to batch-process an archive of existing listicles
- already store the item names, images and short summaries as structured fields, or generate the script with their own LLM call
Conclusion
That's it! You now have a Bannerbear workflow that turns a listicle into a narrated short-form video with voiceover and subtitles, and can be triggered using plain language in AI agents.
Each new run uses the same templates, so every video design stays consistent. You can try it on other articles, or modify the templates or workflow to suit your needs. For example:
- Change the length: add or remove scene steps for a top 3 or top 10 list (you can ask your AI agent to do it too!)
- Add your branding: put your logo on every frame with an Add image overlay step after
join_scenes. - Add background music: use Add or replace audio in Mix mode with ducking, so the music dips under the narration (we did it in this tutorial)
- Make it multilingual: ask your AI agent to write the lines in another language, and set the subtitle language to match.
To try it on your own articles, add the templates and workflow to your project, connect your AI agent, and pass in a listicle URL. If you don’t have an account yet, sign up for Bannerbear. The free trial comes with 30 API credits for you to test it out!