Bannerbear Workflows let you chain multiple video editing steps like trimming clips, joining them together, resizing for different platforms, and more into a single pipeline. This is useful for podcasters who need to turn every new episode into short, shareable clips for TikTok, Instagram Reels, and YouTube Shorts.
Instead of doing everything manually or writing your own FFmpeg pipeline, you build the workflow once in the Bannerbear dashboard, then trigger it either from there, via the API, or by chatting with your AI assistant, including Claude Code, Codex, OpenClaw, and more (via MCP).
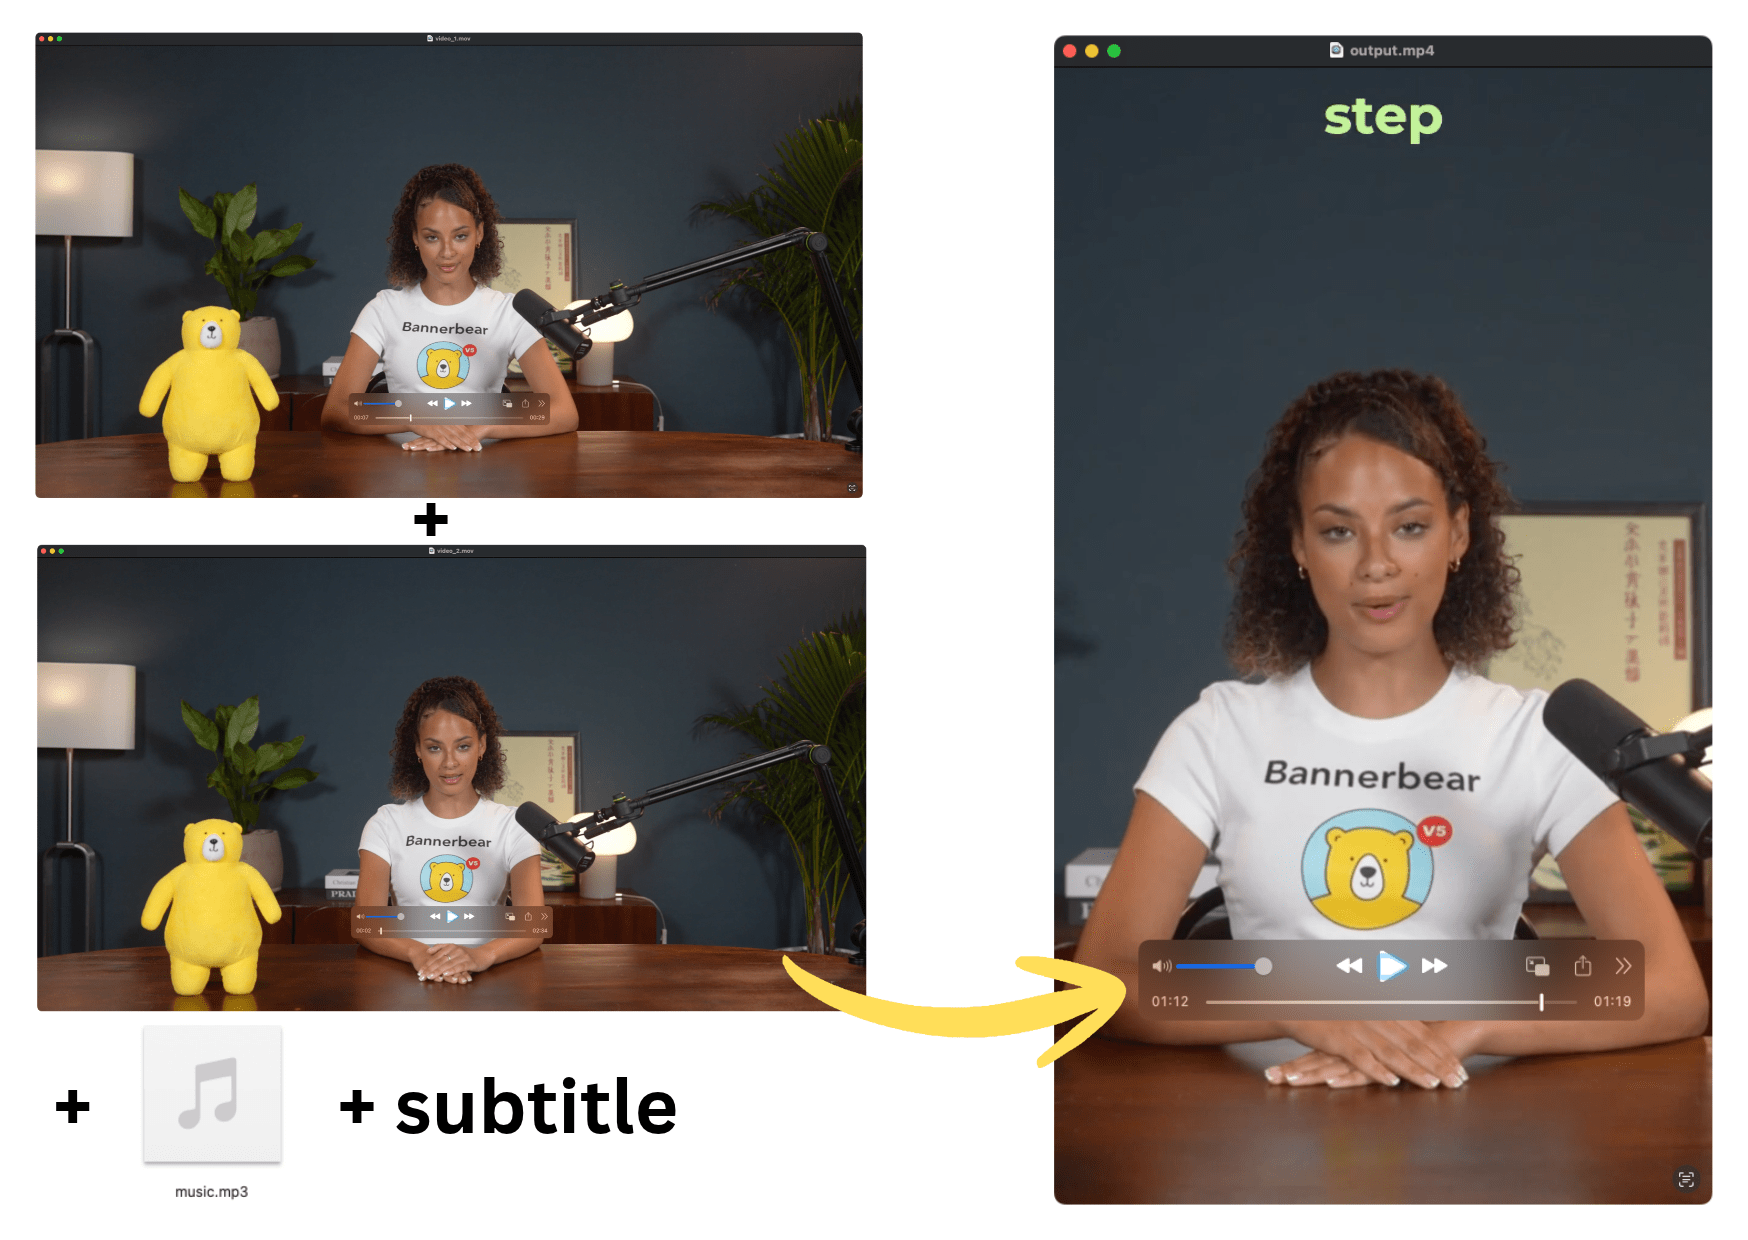
In this article, we'll build a multi-clip podcast video editing workflow that:
- joins two clips (e.g., your show's intro and a highlight from the episode)
- resizes it to a vertical video
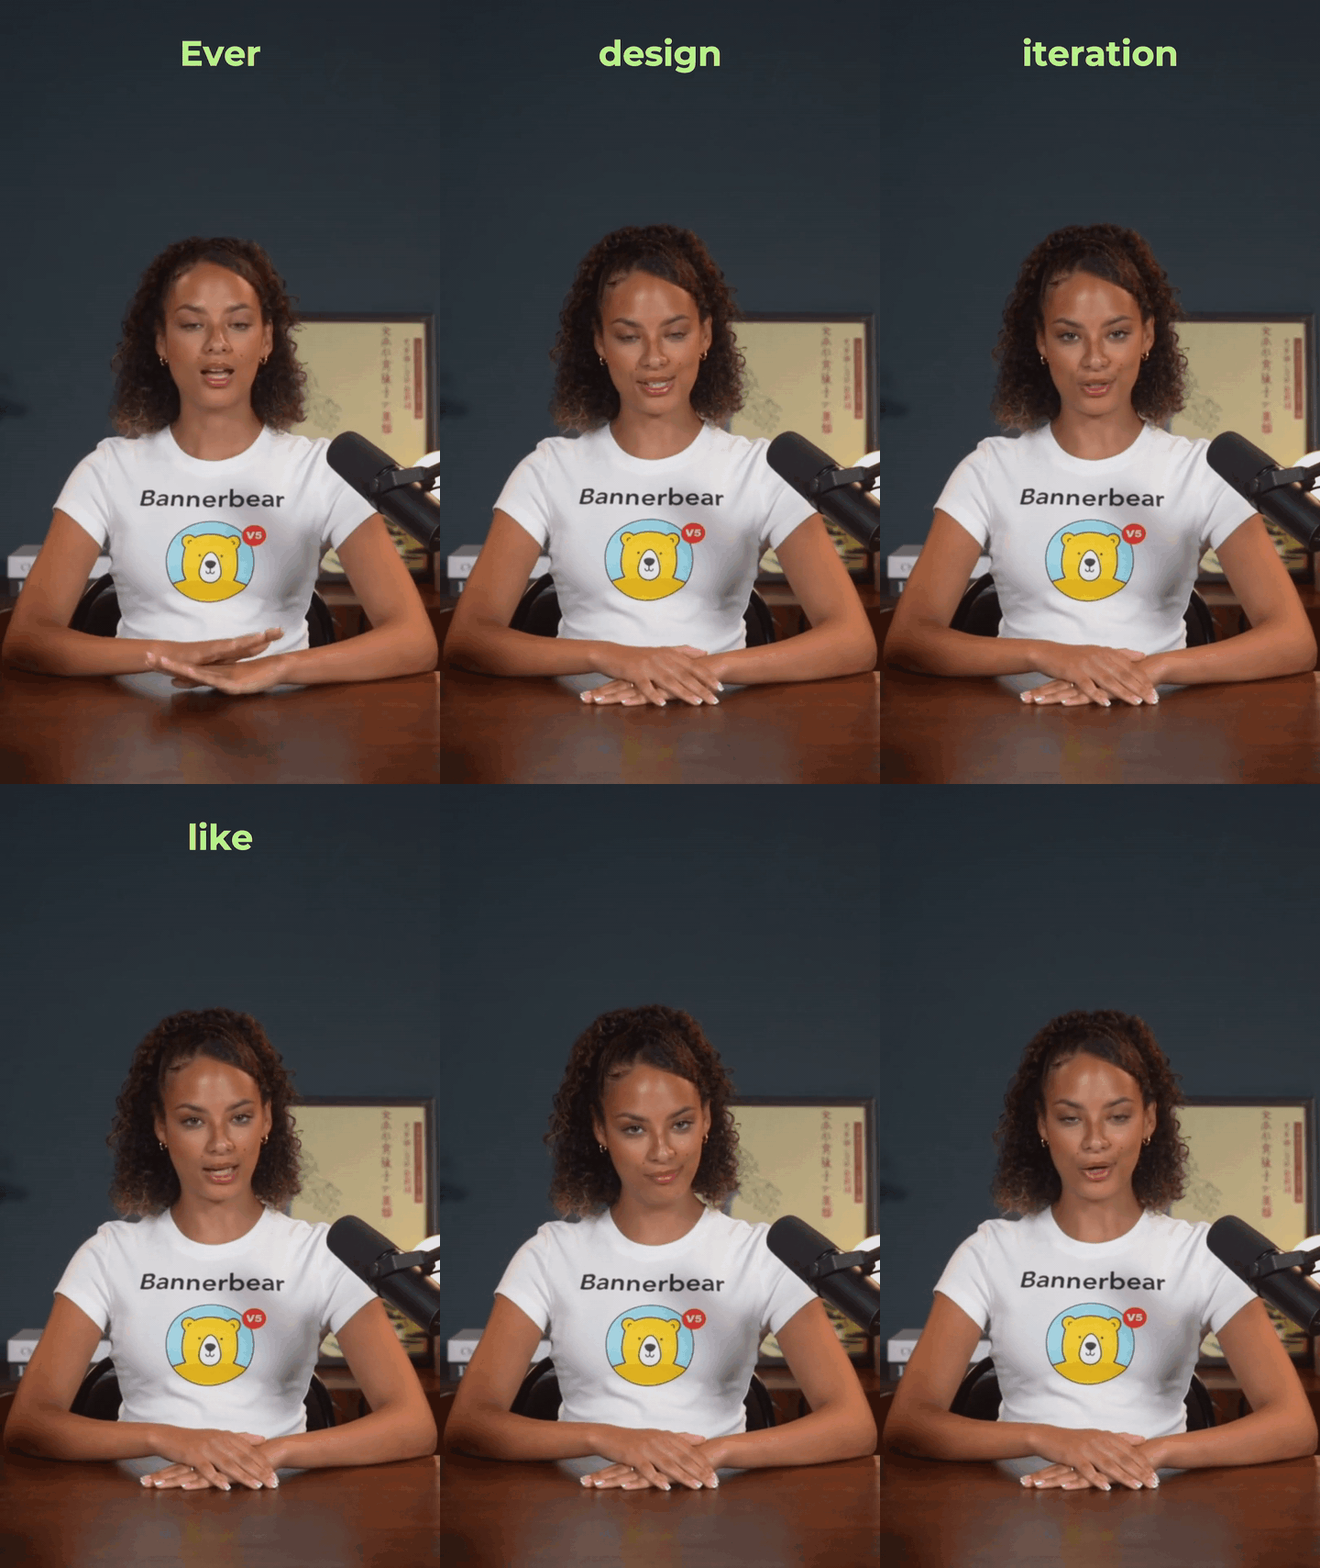
- burns in subtitles
- adds a background music track
GIF preview:
Let's get started!
What Is a Bannerbear Workflow
A Workflow in Bannerbear lets you chain multiple video tools, images, and animations into one template.
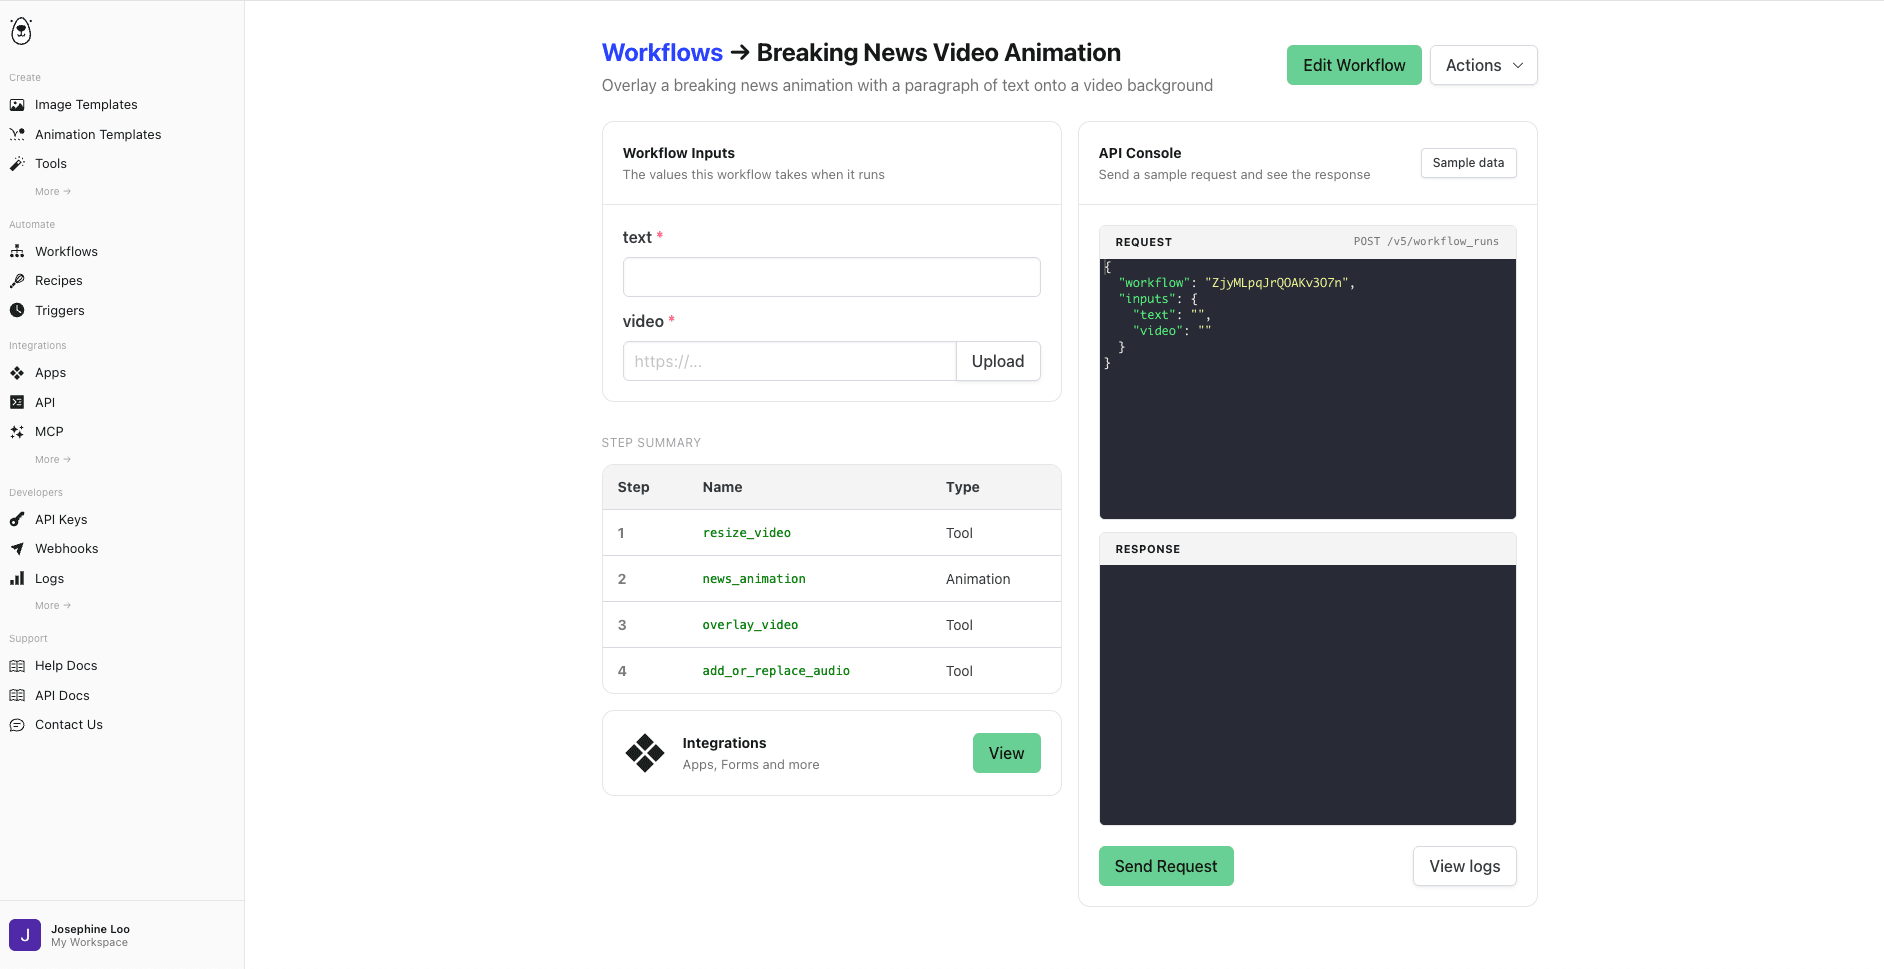
You can declare the inputs your workflow accepts (text/URL/number/boolean), and then reference them in steps where you can use various video editing tools, or render images and animations from your Bannerbear templates.
After building a workflow, you can trigger it however suits the job at hand:
- manually in the dashboard - for testing or a less-frequent job
- via the API - when you want it wired into an automation
- in your AI assistant - via Bannerbear MCP
Pre-requisites
To follow this tutorial, you will need:
- A Bannerbear account (start a free trial)
- Node.js and
npminstalled - Two sample video clips and an audio track
Building the Workflow in the Dashboard
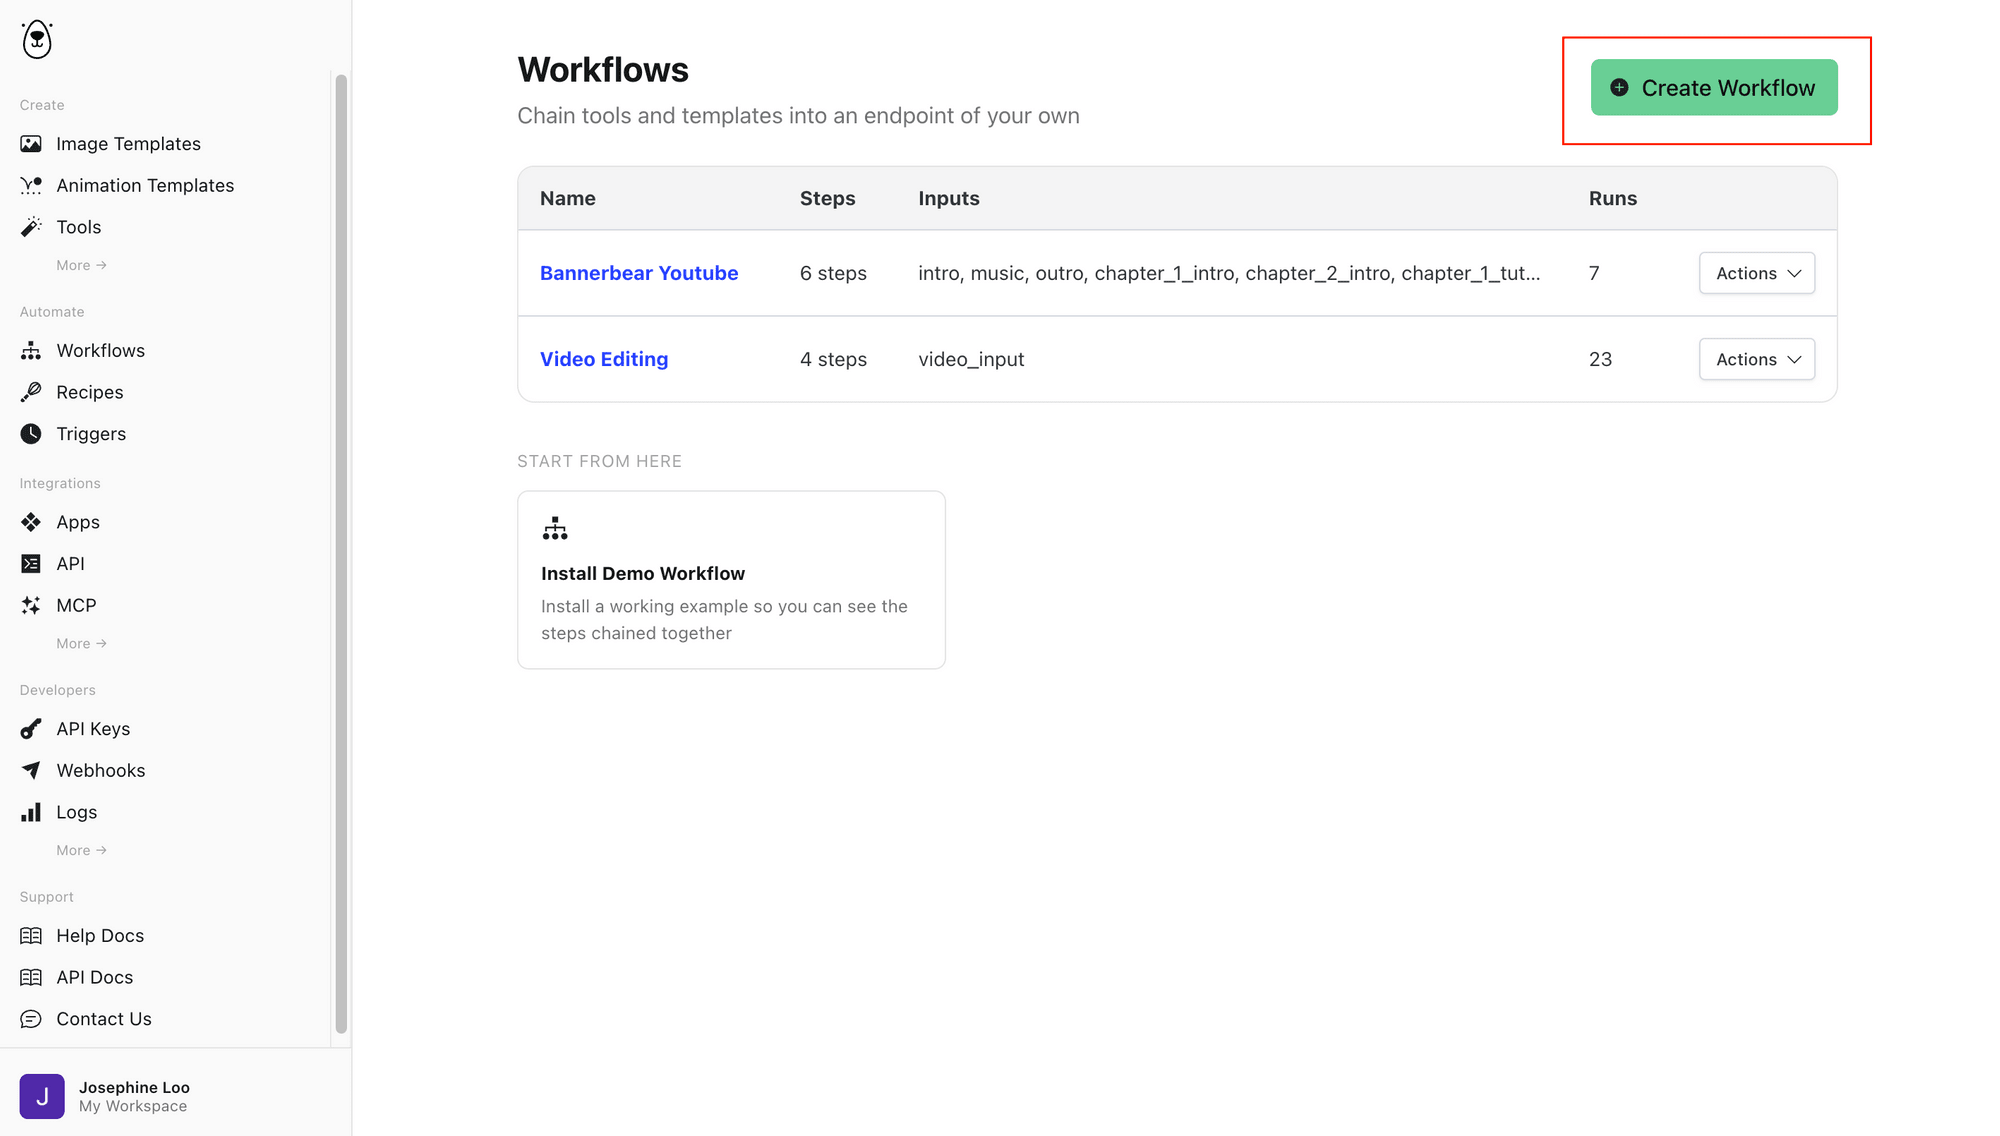
Log in to your Bannerbear account and head to the Workflows tab in the sidebar. From there, create a new workflow:
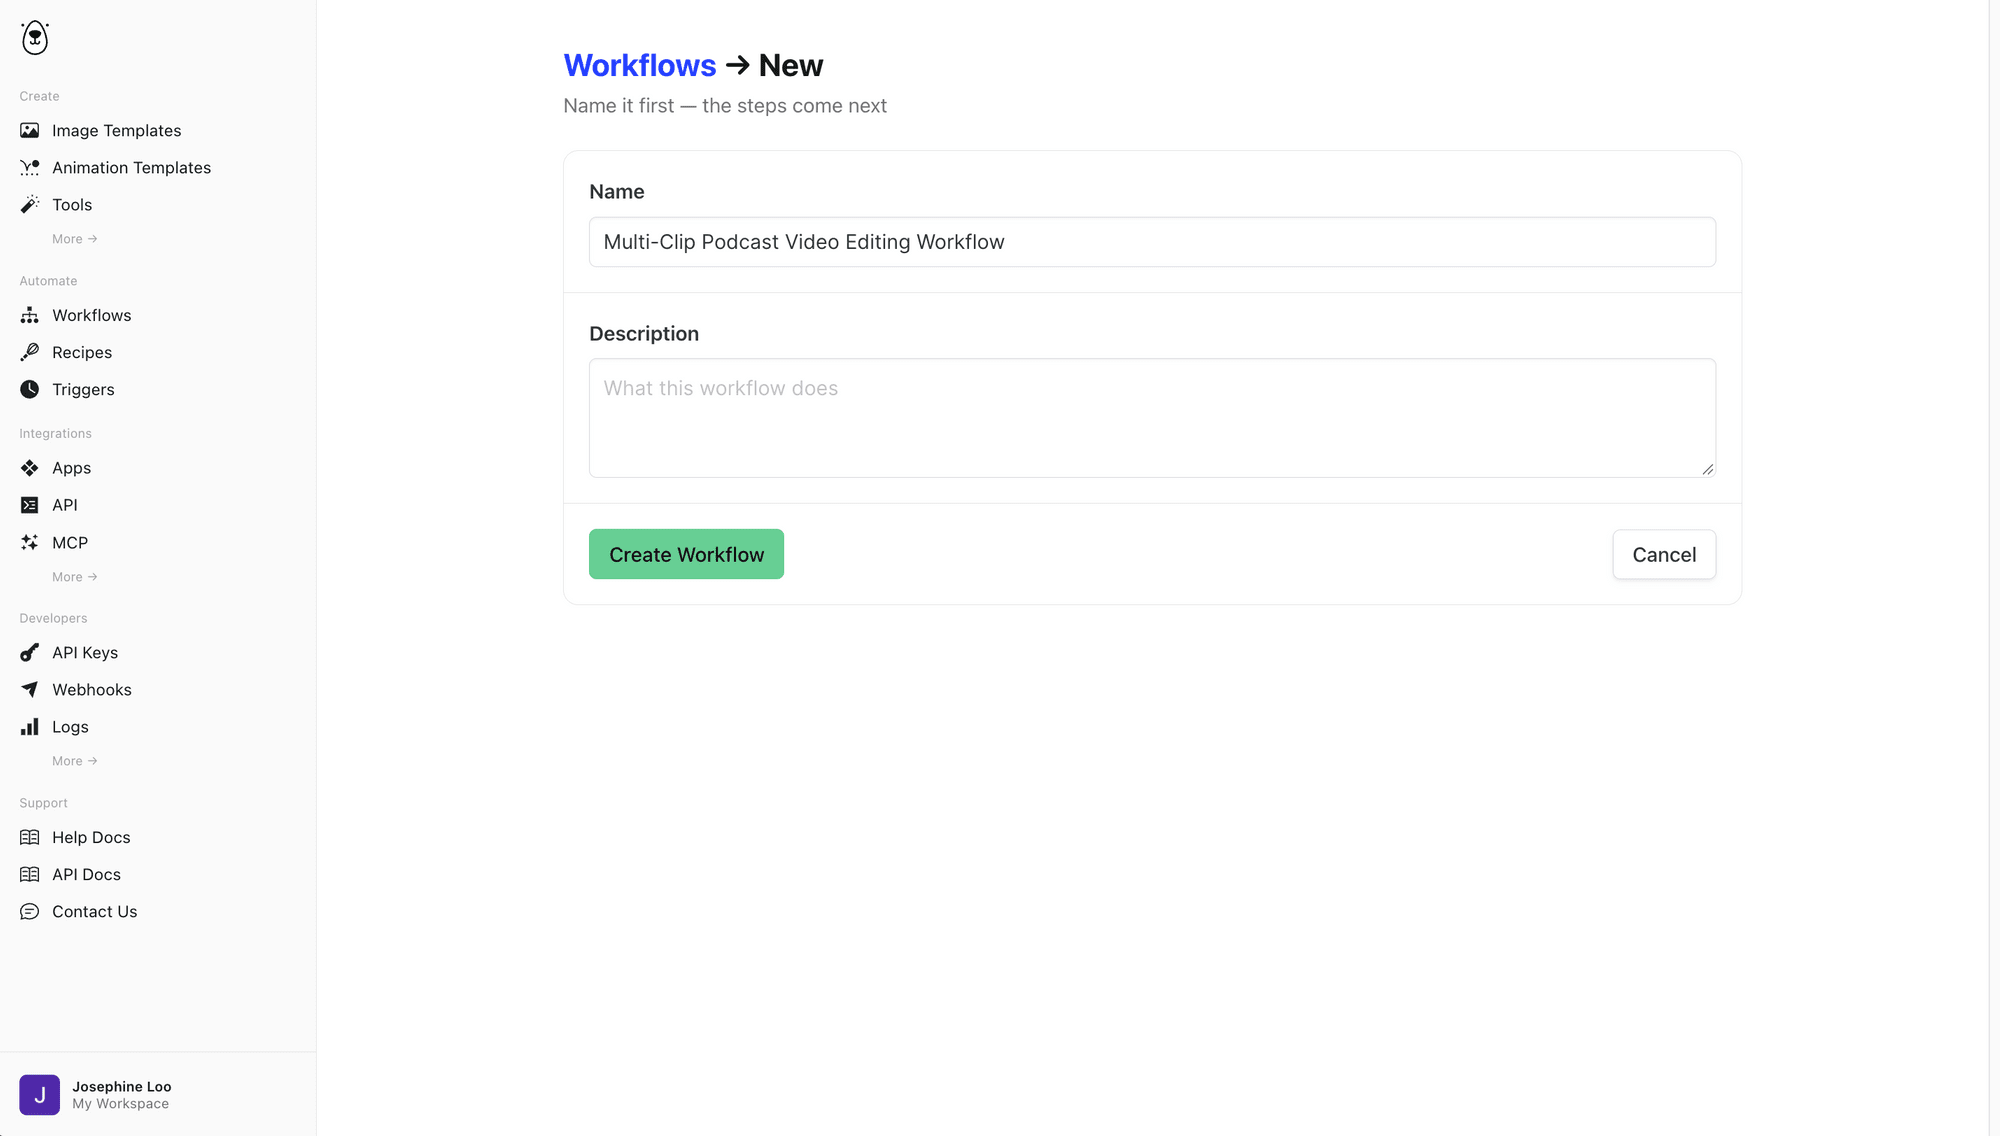
Give your workflow a name (and maybe a description):
Step 1. Define Your Inputs
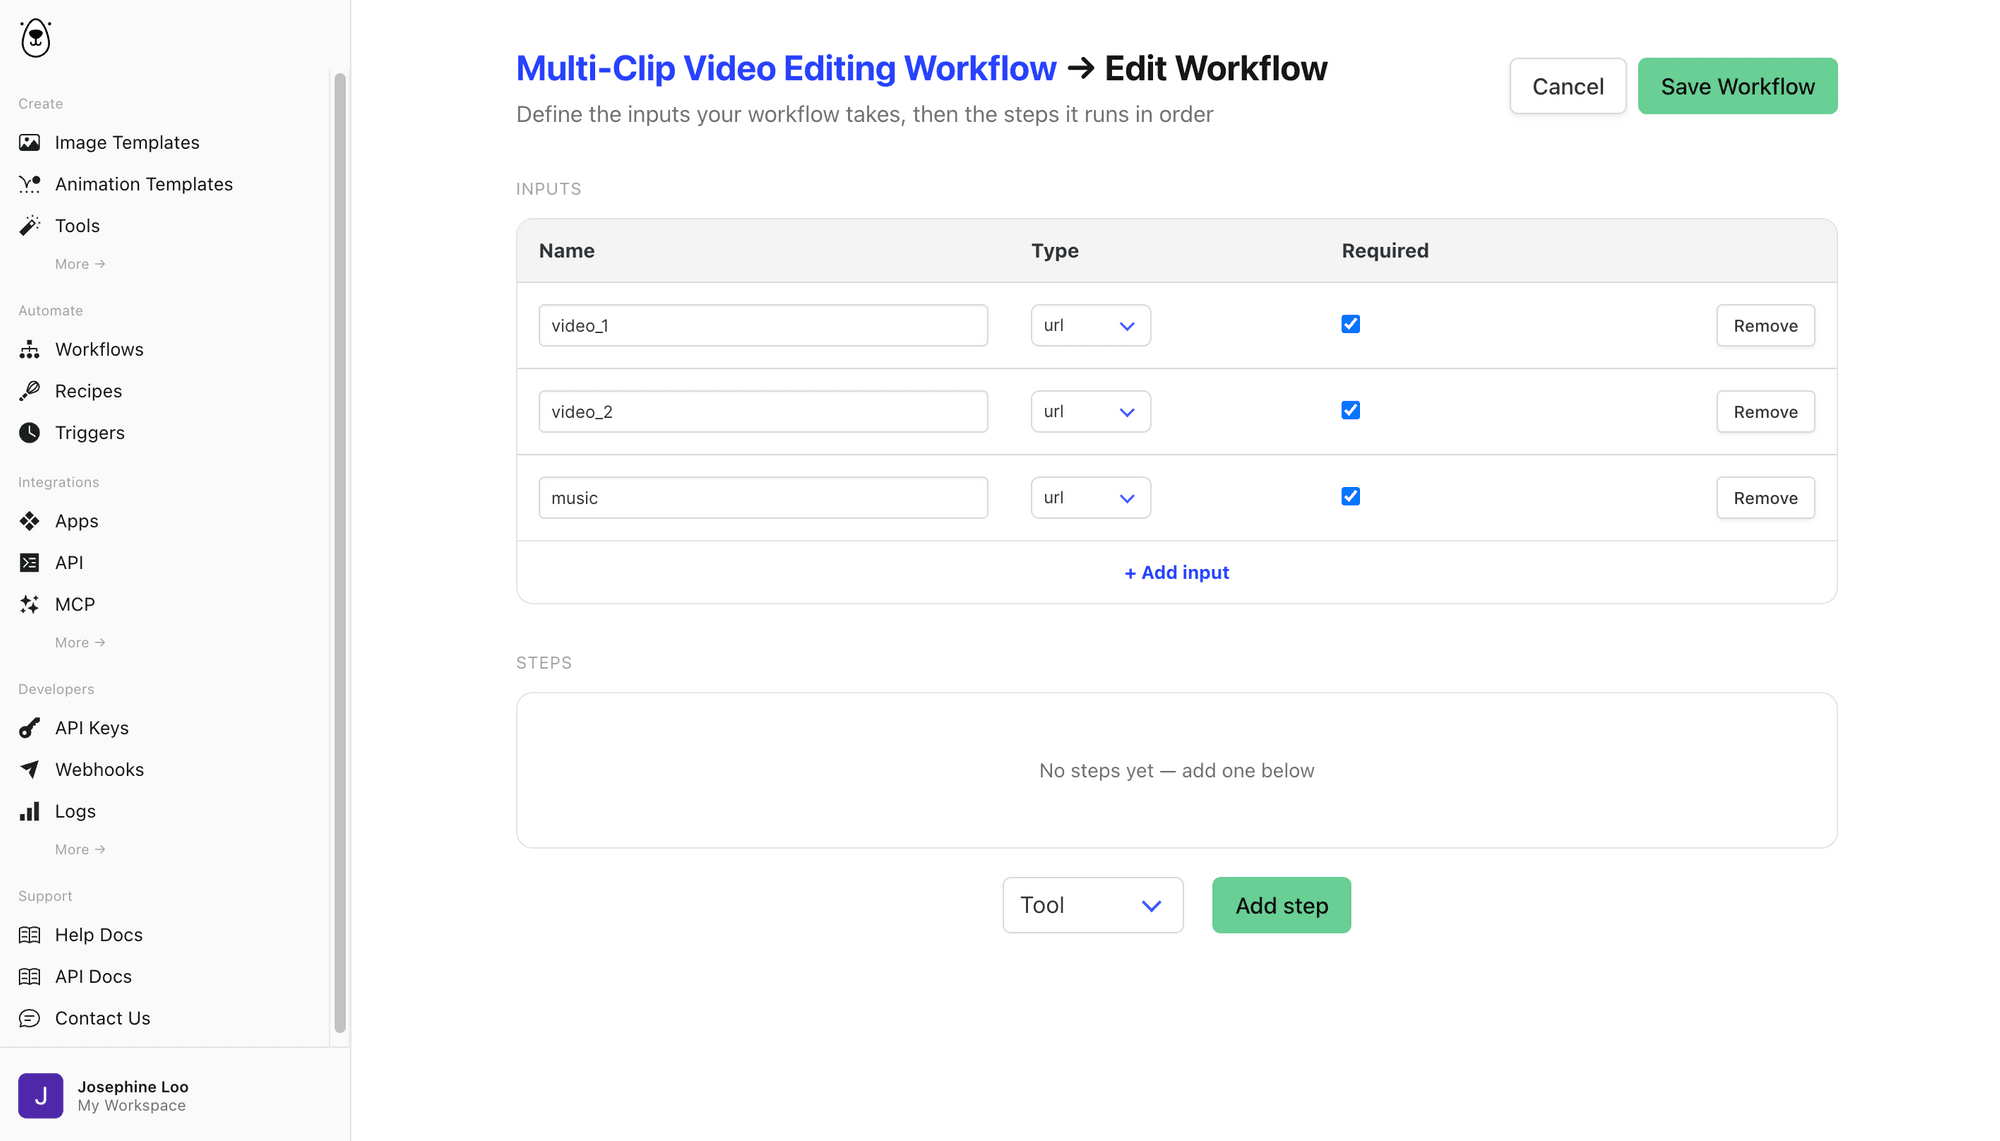
In the INPUTS section, declare the inputs that your workflow needs. For our multi-clip editor, we'll add three:
video_1- typeurl, required (e.g, your podcast intro)video_2- typeurl, required (e.g., the episode highlight)music- typeurl, required (e.g., your show's theme or background track)
Step 2. Add Your Steps
In the STEPS section, select Tool from the dropdown and click “Add step”. You'll see every available tool listed, including “Remove background”, “Generate AI image”, “Generate AI video”, etc.
Add the steps and tools we need, in this order:
- Join videos - joins
video_1andvideo_2 - Resize video - resizes the joined video to a vertical format
- Transcribe and burn subtitles - auto-captions the result
- Add or replace audio - mixes in
musicas your background track
For each step, you need to fill in fields to complete the workflow. You can point them to either an input declared above or an earlier step's output:
Step 1. Join videos
Reference video_1 and video_2 inputs from the “+ref” dropdown to be used for video URLs:
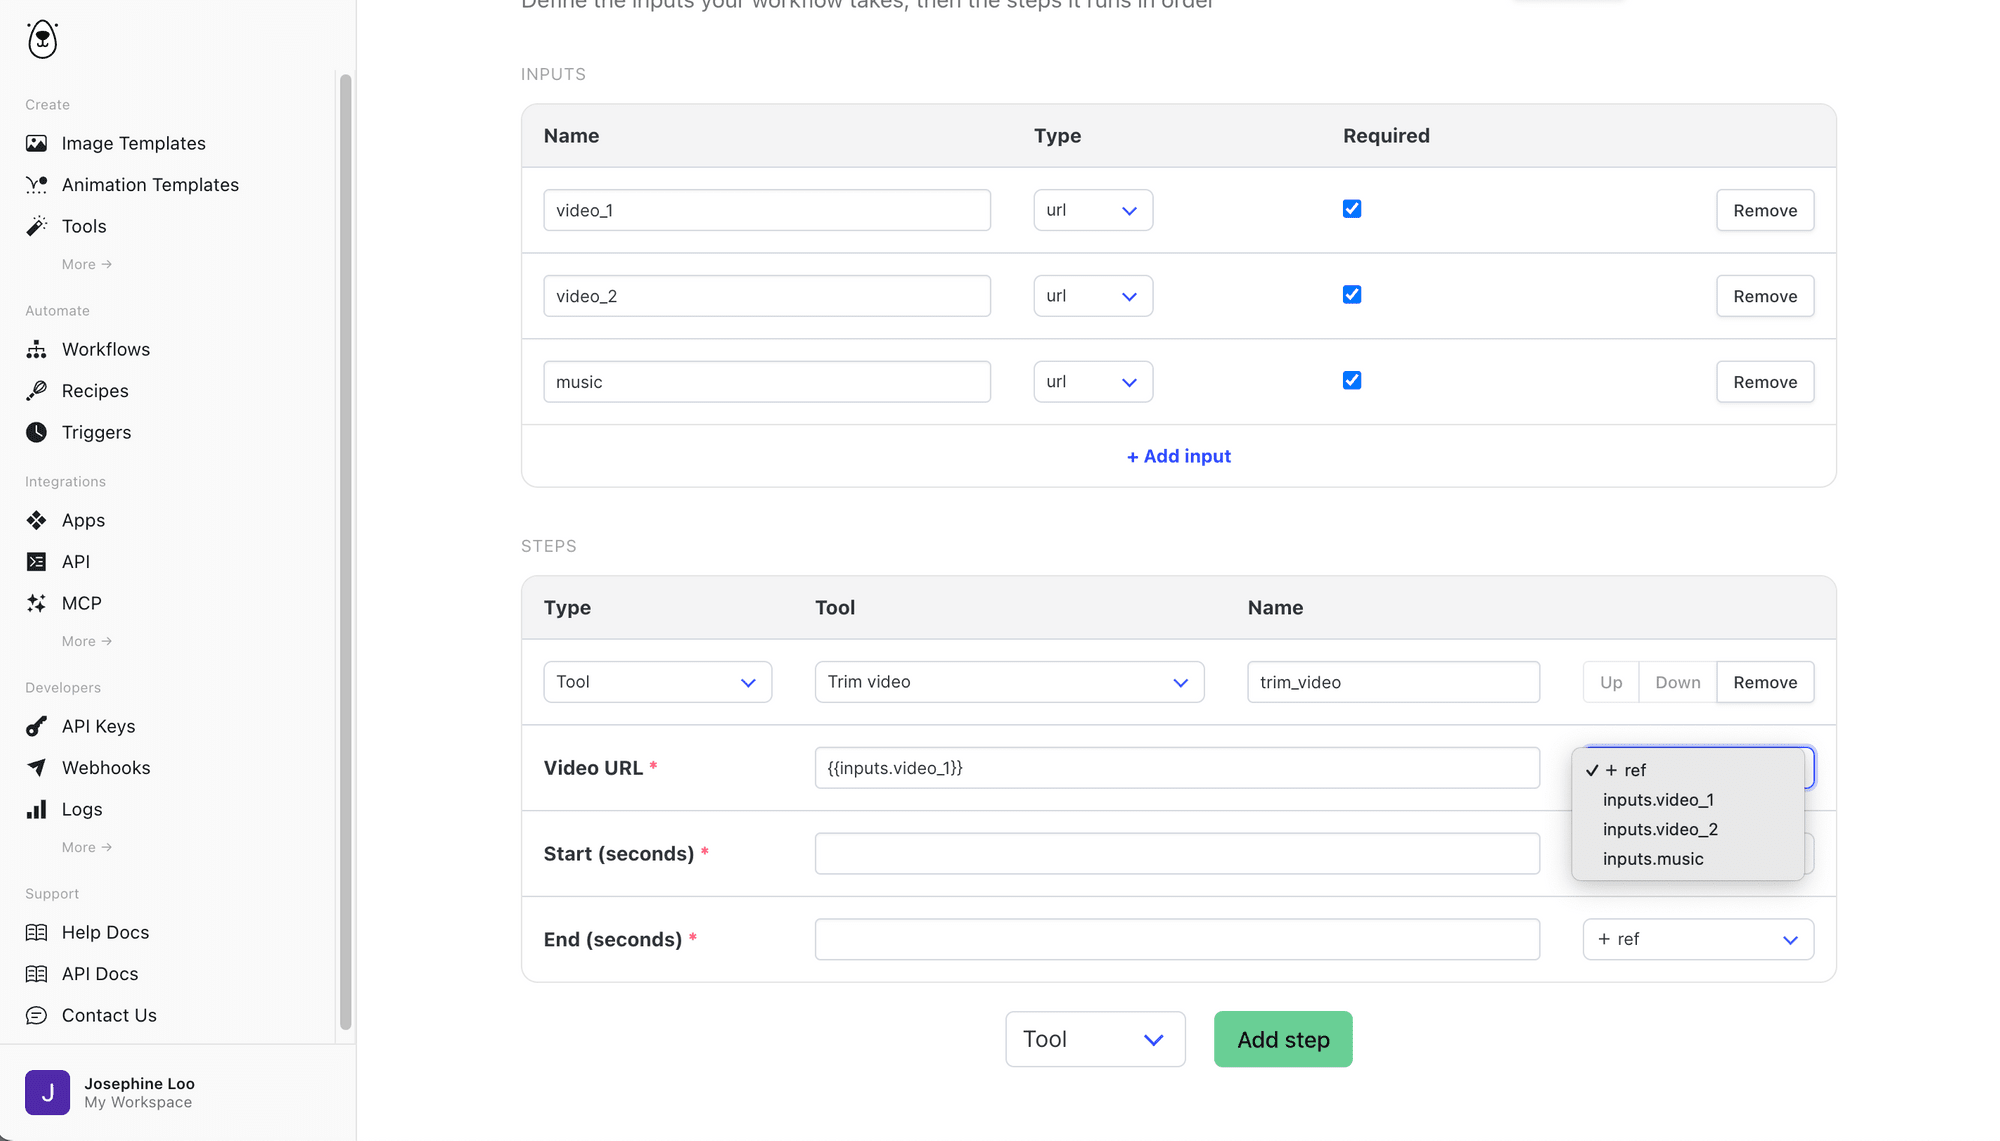
This step will join the two videos together into a single clip.
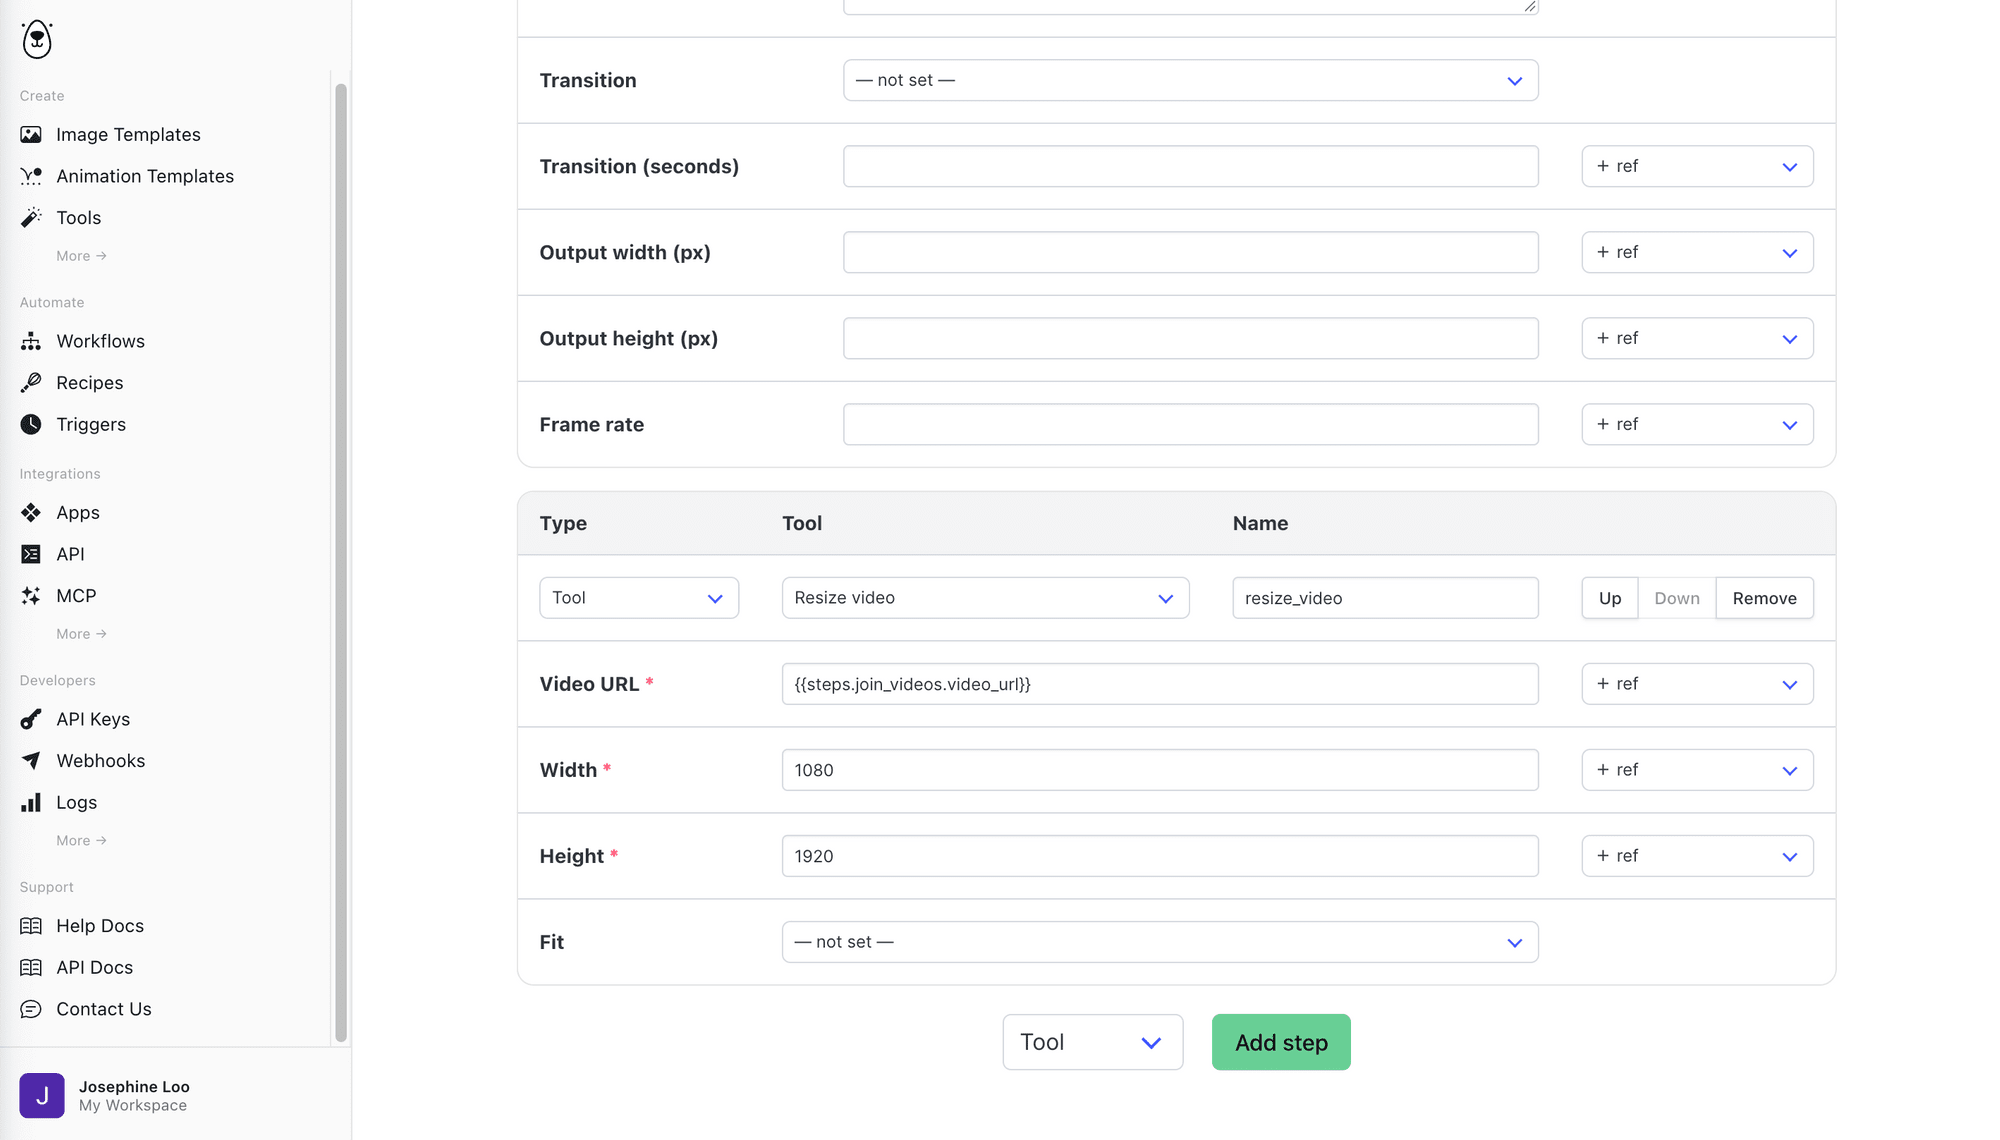
Step 2. Resize video
Reference the previous step’s output as the video URL and set the width and height to 1080x1920px:
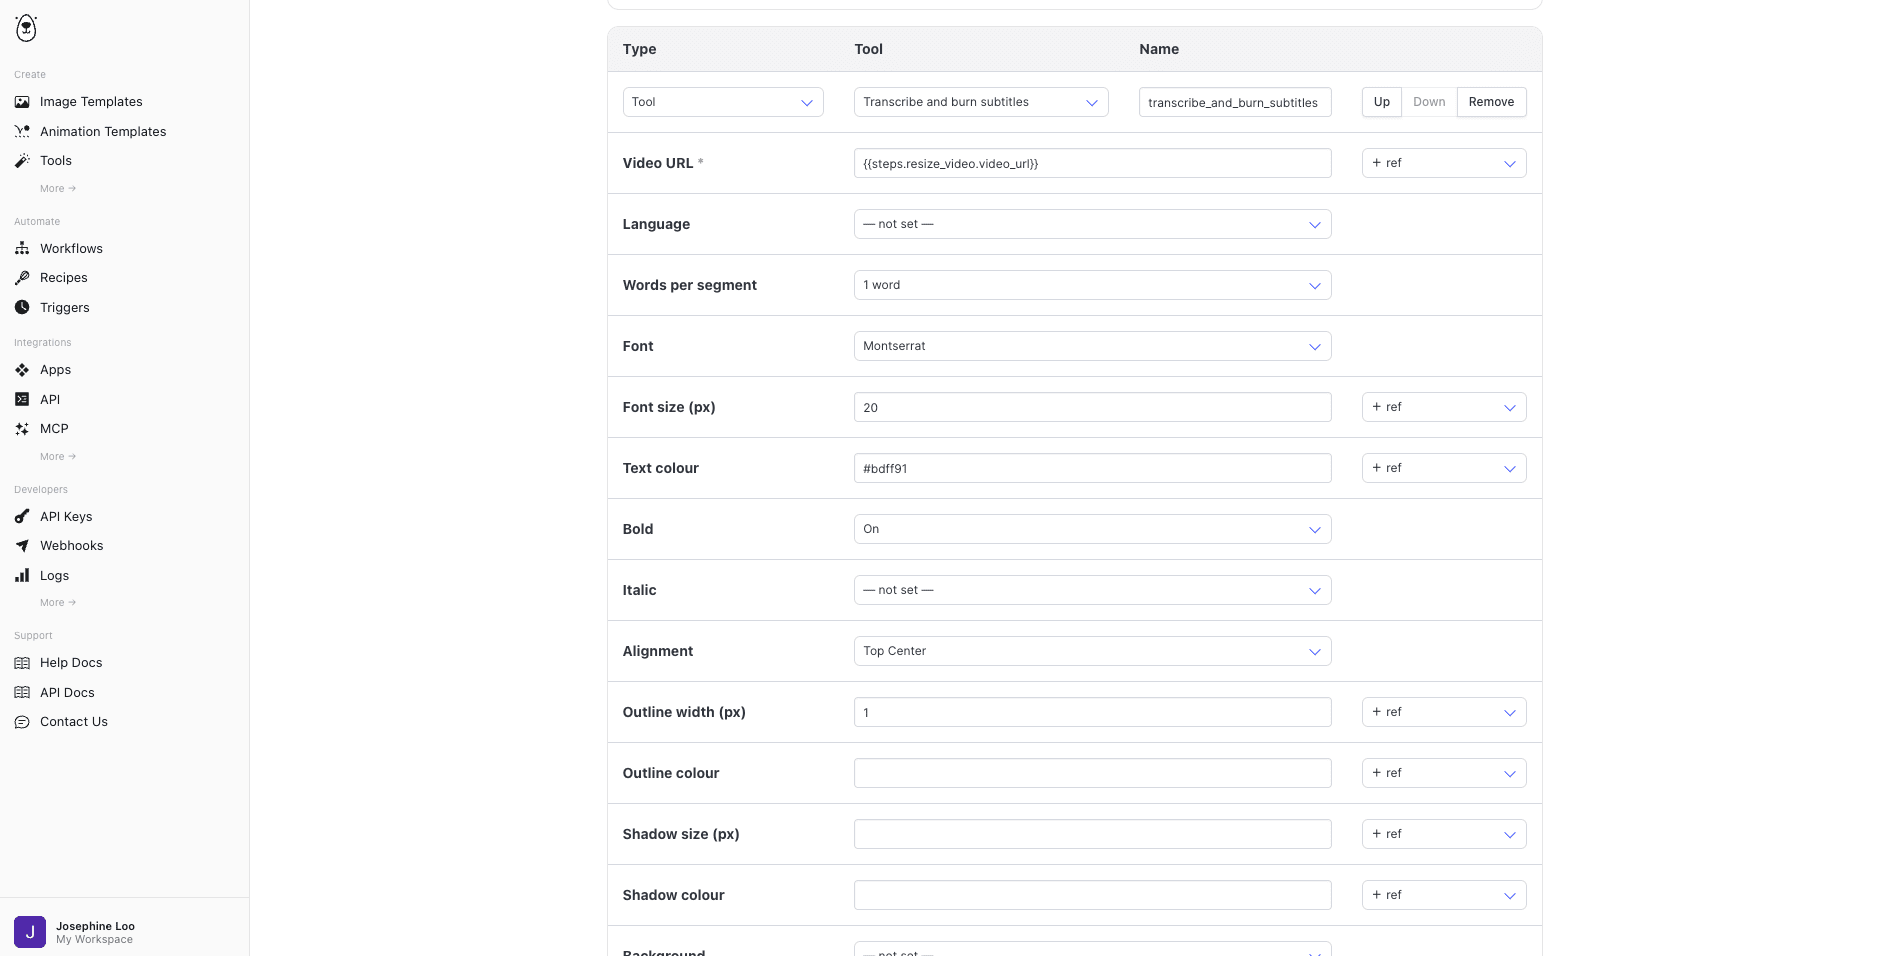
Step 3. Transcribe and burn subtitles
Since most people scroll social feeds with the sound off, captions help your podcast conversation grab attention even when viewers aren't listening.
Reference the previous step’s output as the video URL and set values for other fields like words per segment, font style and size, and more:
🐻 Bear Tip: Use “Up” and “Down” to reorder a step if you need to switch the sequence or add an extra step between existing ones.
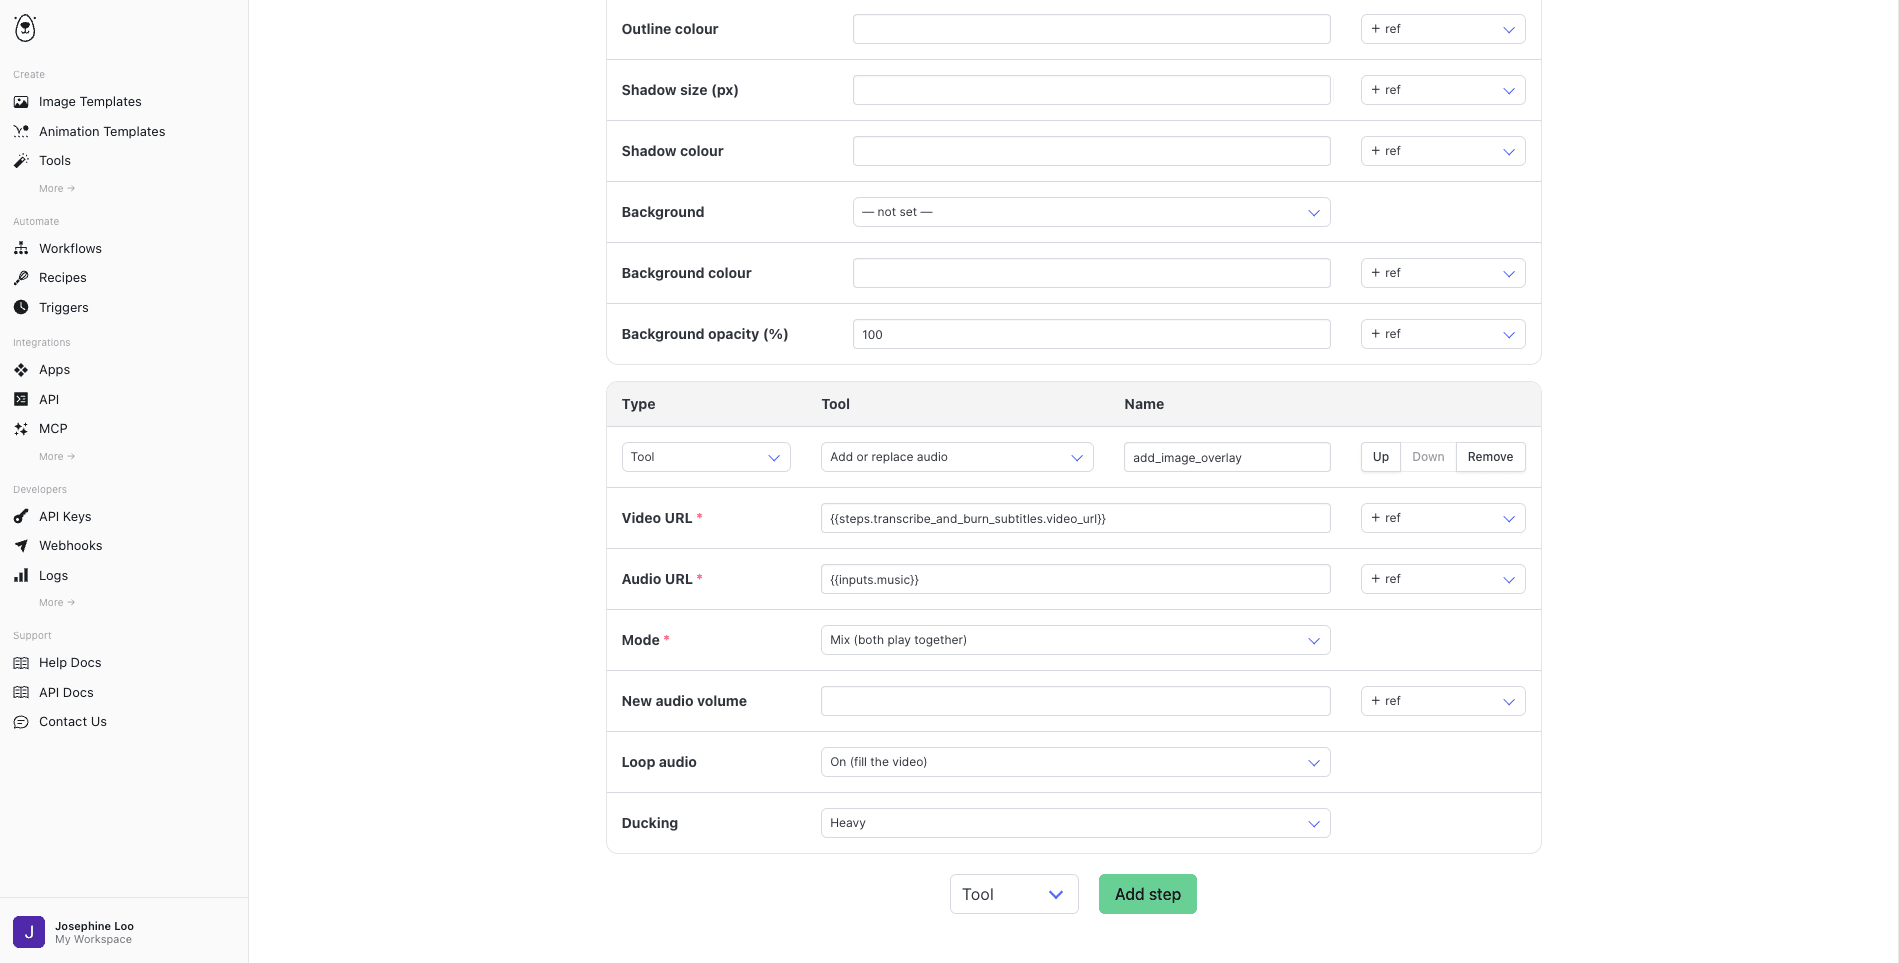
Step 4. Add or replace audio
Reference the previous step’s output as the video URL and the music input as the audio URL. Set the mode to “Mix” and ducking to “Heavy” so that the host's voice is still audible:
Once everything's configured, hit “Save Workflow”.
🐻 Bear Tip: You can click here to duplicate the workflow to your account.
Running Your Workflow
There are three ways to trigger the workflow:
Option 1: Trigger It Manually from the Dashboard
You can test the workflow by filling in the form on your workflow’s overview page and clicking the “Send Request” button to trigger it:
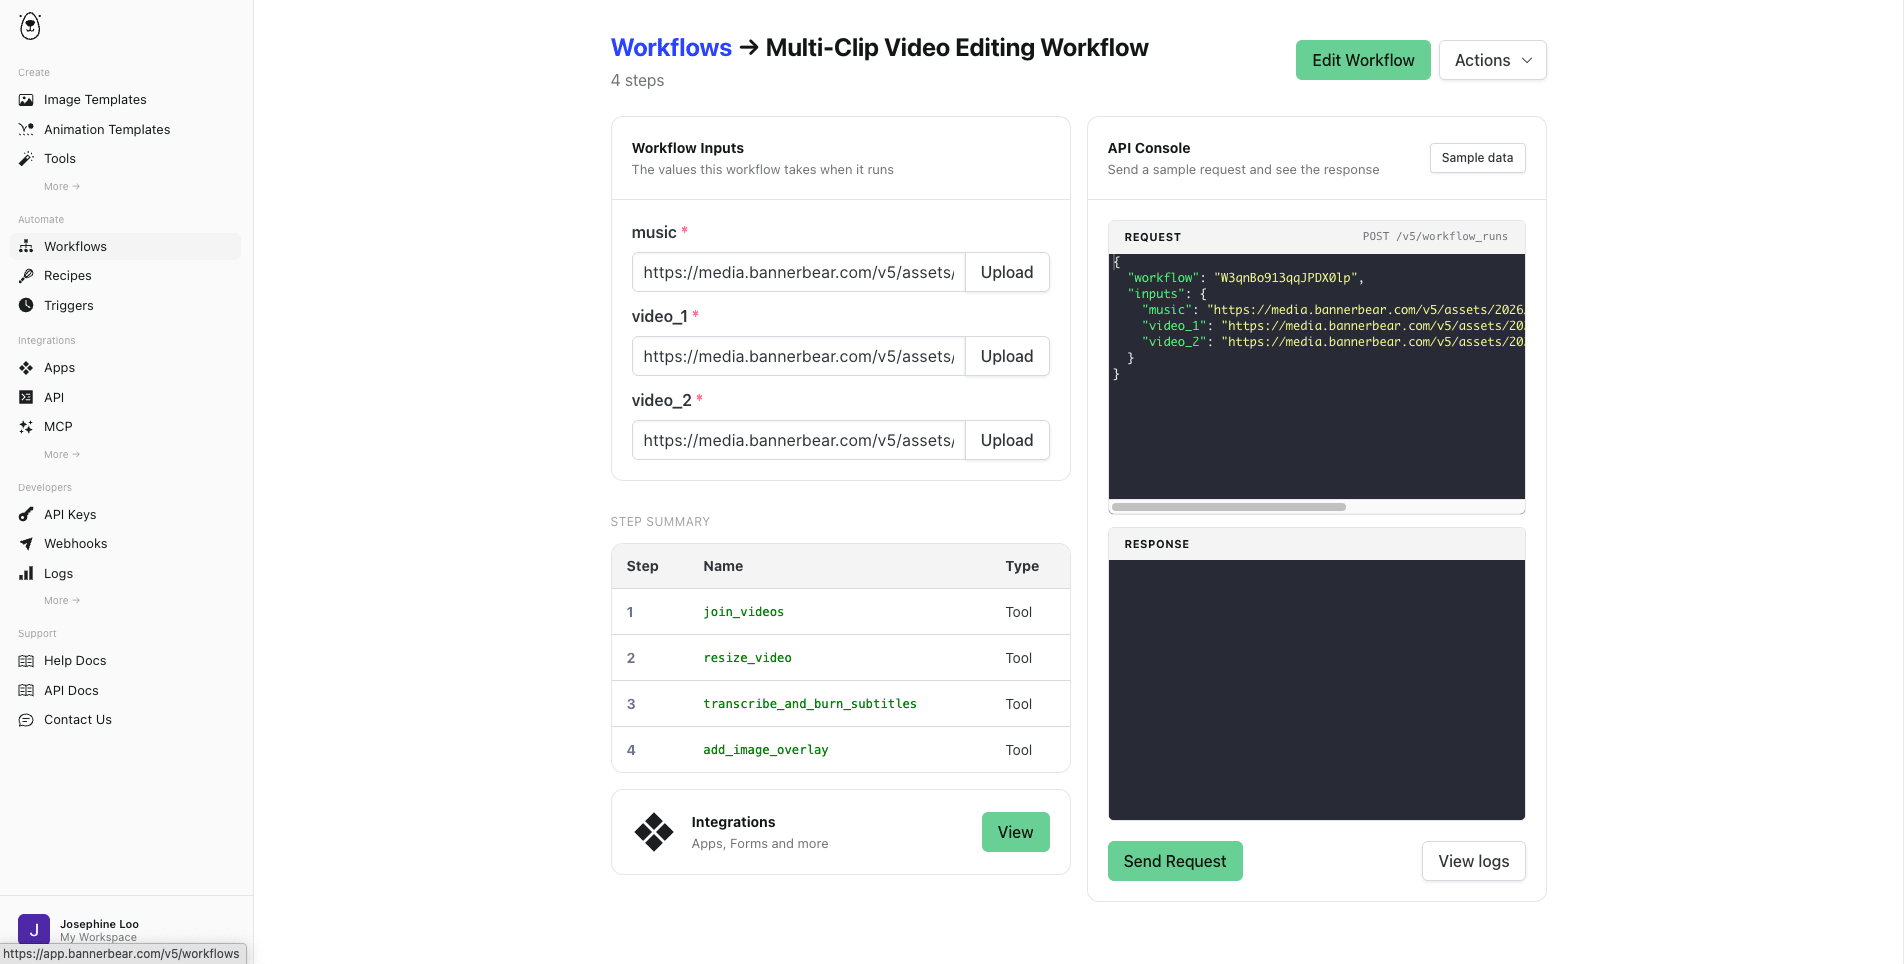
This is the fastest way to trigger a workflow, since no additional setup is required. It is also good for any repetitive task where the inputs change every time, but the job doesn't happen often enough to justify building out a full automation. For example, creating clips for your weekly podcast episode.
Option 2: Trigger It via API
For anything recurring that’s worth automating (e.g., triggering the workflow every time new clips gets uploaded), you can integrate the workflow into your automation script via API.
For example, this is a request to the Workflow Runs endpoint that passes new input to the workflow:
require('dotenv').config();

const API_KEY = process.env.BANNERBEAR_API_KEY;
const WORKFLOW_UID = 'your_workflow_uid_here';

(async () => {
  const response = await fetch('https://api.bannerbear.com/v5/workflow_runs', {
    method: 'POST',
    body: JSON.stringify({
      workflow: WORKFLOW_UID,
      inputs: {
        clip_1: 'https://cdn.example.com/clips/scene_a.mp4',
        clip_2: 'https://cdn.example.com/clips/scene_b.mp4',
        music_url: 'https://cdn.example.com/audio/background_track.mp3'
      }
    }),
    headers: {
      'Content-Type': 'application/json',
      'Authorization': `Bearer ${API_KEY}`
    }
  });

  const run = await response.json();
  console.log('Run started:', run.uid, '- status:', run.status);
})();
The API runs asynchronously, and you can get your finished video by polling the run until it completes:
while (true) {
  await new Promise(resolve => setTimeout(resolve, POLL_INTERVAL_MS));

  const pollResponse = await fetch(`https://api.bannerbear.com/v5/workflow_runs/${run.uid}`, {
    method: 'GET',
    headers: {
      'Authorization': `Bearer ${API_KEY}`
    }
  });

  const polledRun = await pollResponse.json();
  console.log('Status:', polledRun.status, `(${polledRun.progress}%)`);

  if (polledRun.status === 'completed') {
    console.log('Final video:', polledRun.outputs.music.video_url);
    break;
  }

  if (polledRun.status === 'failed') {
    console.error('Run failed:', polledRun.error);
    break;
  }
}
🐻 Bear Tip: You can get your Bannerbear API key from your Bannerbear dashboard: Developers → API Keys.
Option 3: Trigger It by Chatting with an AI Assistant
Bannerbear also has an MCP server, which you can connect to your AI assistant. Once it’s connected, you can trigger a run just by asking for it in plain language.
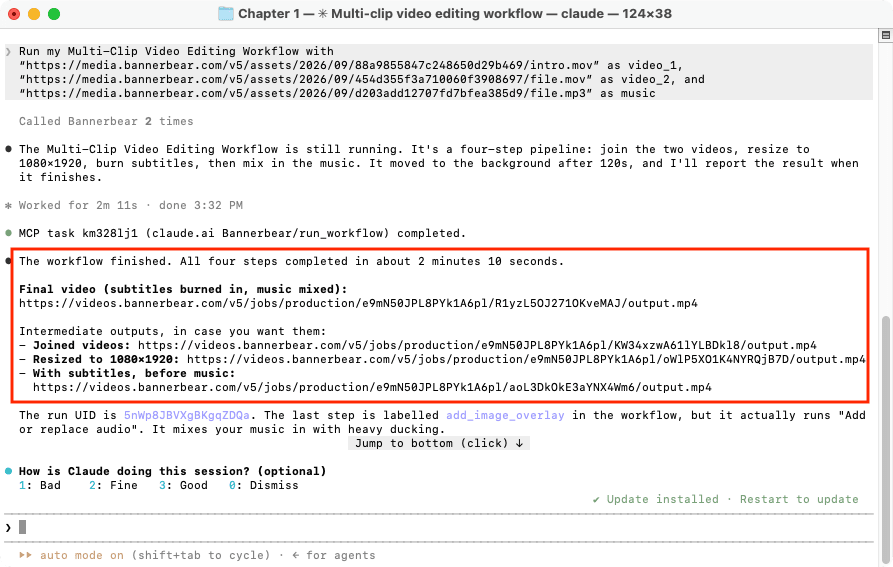
"Run my Multi-Clip Podcast Video Editing Workflow with [URL] as video_1, [URL] as video_2, and [URL] as music"
The assistant calls the workflow run tool on your behalf, and can poll for status and hand you back the finished video URL in the same conversation:
If you’d like to set up the Bannerbear MCP server in your AI assistant, we've got dedicated guides for that:
- How to Set Up Bannerbear MCP in Claude Code
- How to Set Up Bannerbear MCP in Codex
- How to Set Up Bannerbear MCP in OpenClaw
What’s Next
This four-step workflow is just a simple demonstration of how Workflow chains multiple steps together. Bannerbear's tool library covers a lot more; feel free to try others in the same workflow:
- Trim video - cut a clip down to just the best moment of the conversation before joining it with the rest
- Apply a colour filter - run your joined footage through a preset grade like “warm” or “cool”
- Add image overlay - add your podcast logo into the corner of the video
- Create GIF preview - generate a short animated preview from your finished video, ready to drop into a newsletter announcing the new episode
For more guides and tutorials, refer to our API reference and blog.