
How to Convert Audio to Video for Youtube Upload Using FFmpeg
Contents
Youtube is one of the most popular media streaming platforms that have ever existed, with 2.1 billion monthly active users worldwide. Despite being a video streaming platform, music and audio are extremely popular on Youtube.
To date, the most-viewed music on Youtube, “Baby Shark Dance” has 11.34 billion) lifetime views on the platform. That is more than the world population! Besides music, people also like listening to other types of audio content like podcasts and audiobooks on Youtube.
However, audio files like MP3, WAV, or PCM cannot be uploaded to a YouTube channel as these formats are not supported. To upload these types of audio files to Youtube, they have to be converted to one of the supported formats.
In this tutorial, we’ll learn how to convert an audio file to a video file (without a watermark) that can be uploaded to Youtube using FFmpeg.

What is FFmpeg
FFmpeg is a complete, cross-platform solution to record, convert and stream audio and video. It can decode, encode, transcode, mux, demux, stream, filter and play pretty much any media file in any format. It is also highly portable as it compiles and runs in a wide variety of build environments, machine architectures, and configurations like Linux, Mac OS X, Microsoft Windows, etc.
It contains multiple tools for end-users to convert, play and analyze media files and libraries for developers to use in different applications. In this tutorial, we will be using the FFmpeg command-line tool to convert some audio files using several different commands.
Pre-requisite
You will need to download FFmpeg to do the media conversion following this tutorial. For reference, the version of FFmpeg used in this tutorial is v5.0.1.
FFmpeg Commands
Convert MP3 to MP4
FFmpeg can be used to convert any type of media file to other formats in a single command and the command to convert an MP3 file to an MP4 file is as below:
ffmpeg -i input.mp3 output_simple.mp4
The file generated is an audio-only MP4 file and it can be played on a media player perfectly. However, using this command, the file cannot be uploaded onto a Youtube Channel despite MP4 being one of the supported Youtube file formats.
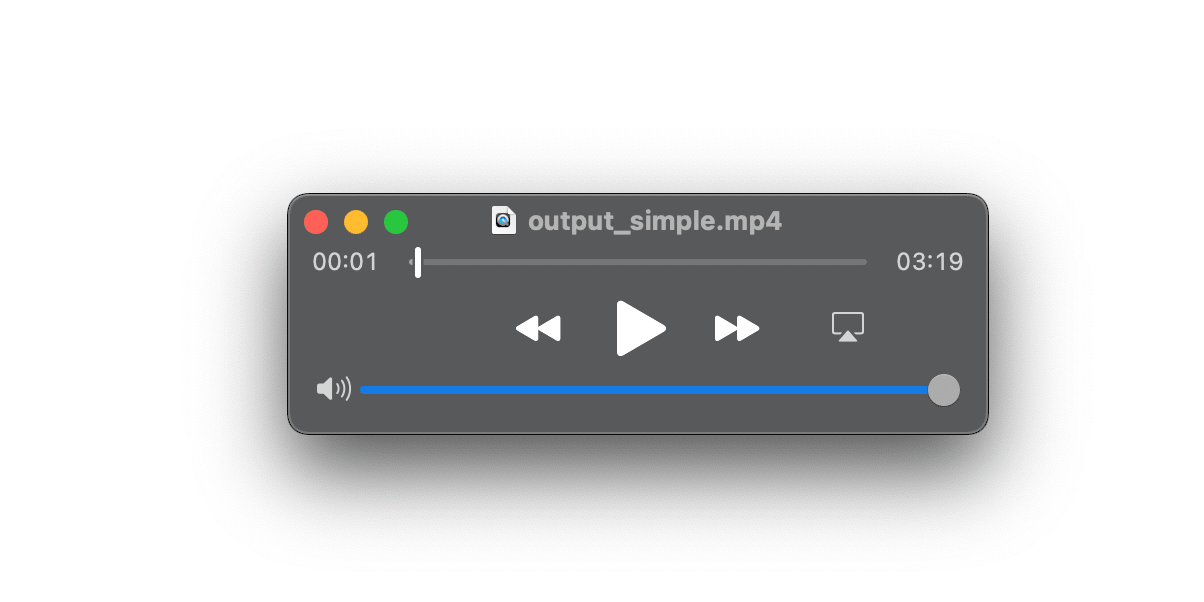
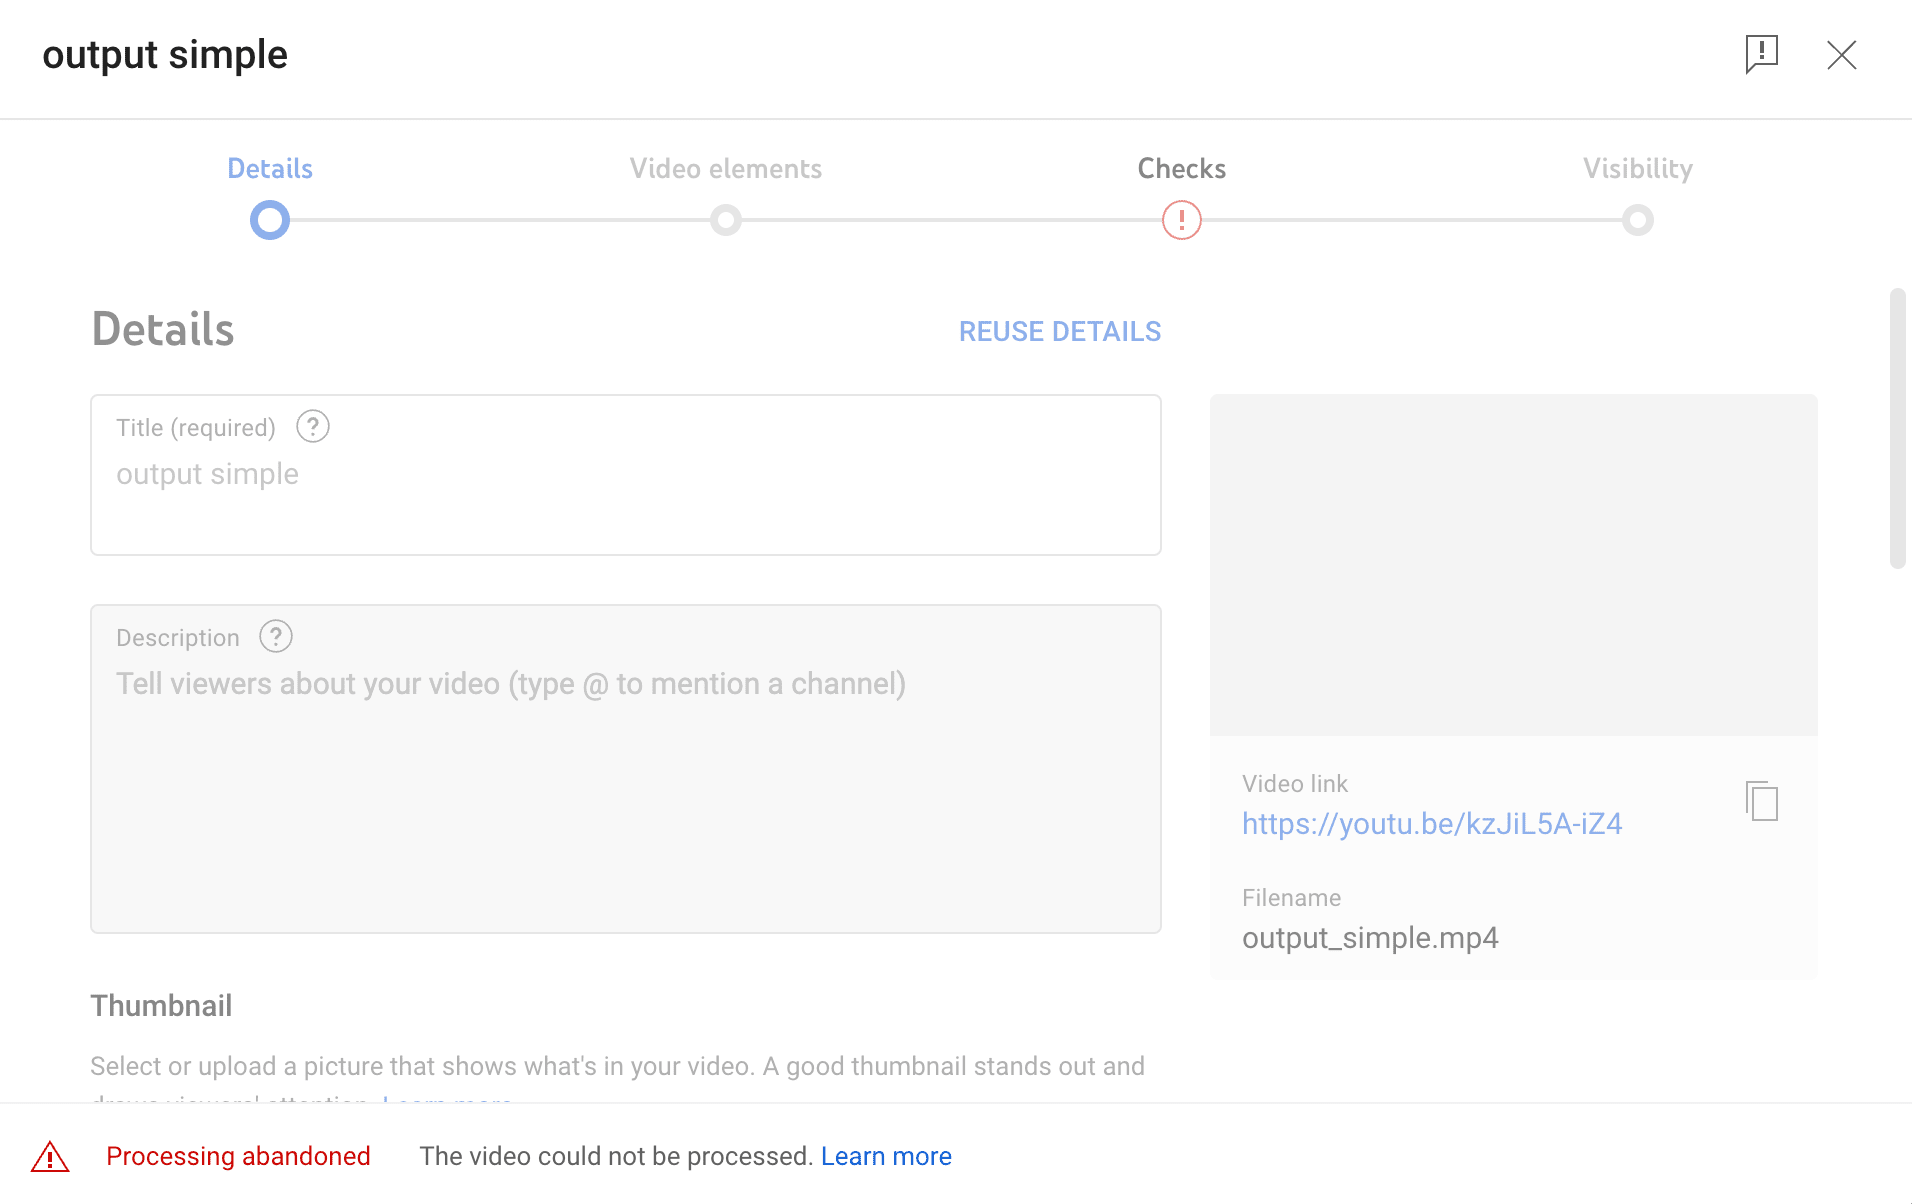
If you try to upload the MP4 file to a Youtube channel, you will get an error stating that the file could not be processed. This is because technically, the MP4 file uploaded is not a video file but an audio file in the MP4 format. Only videos can be uploaded.
To solve this problem, the solution is actually very easy—which is to add an image to the file conversion to get an MP4 video with a still image in the background.
Convert MP3 to MP4 (With an Image)
Let’s add an image along with the MP3 file for the conversion:
image.png

Run the command below to convert the input files:
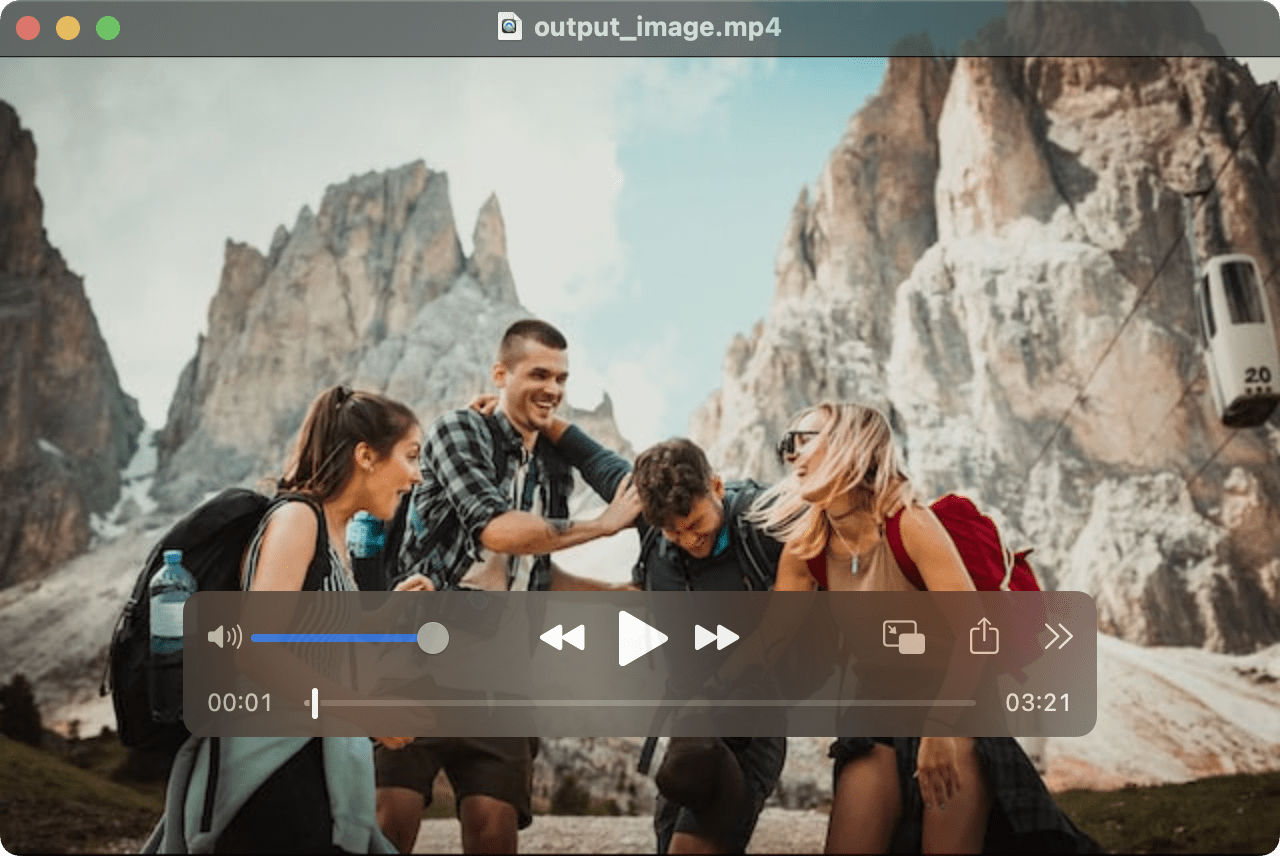
ffmpeg -loop 1 -i image.jpg -i input.mp3 -c:v libx264 -vf "pad=ceil(iw/2)*2:ceil(ih/2)*2" -shortest output_image.mp4
-loop 1 loops the input image infinitely.
-c:v libx264 encodes all video streams with libx264.
-vf "pad=ceil(iw/2)*2:ceil(ih/2)*2" is a pad filter that resizes the image.
-shortest specifies that the encoding will finish when the shortest output stream ends.
As the size of the image is 640 × 427 pixels, with the height being an odd number, you might encounter an error during the conversion as the width and height of an input file must be an even number.

Therefore, we need to transform the input image into a height with an even number using the pad filter (-vf "pad=ceil(iw/2)*2:ceil(ih/2)*2"). The pad filter will add black paddings to the image to make the width and height even. You can also change the padding color by adding the filter parameter :color=white to the command.
Another thing to take note of is the size of the image. The larger the size of the input image, the greater the computing resources needed to convert the image, and thus the longer the time needed. So, it might be a good idea to compress the image before the conversion to reduce the time, especially when your audio file is large (eg. podcast episodes, audiobooks, etc).
Result
By adding an image to the file conversion, the MP4 file is now a video with the image displayed in the background when it’s playing.
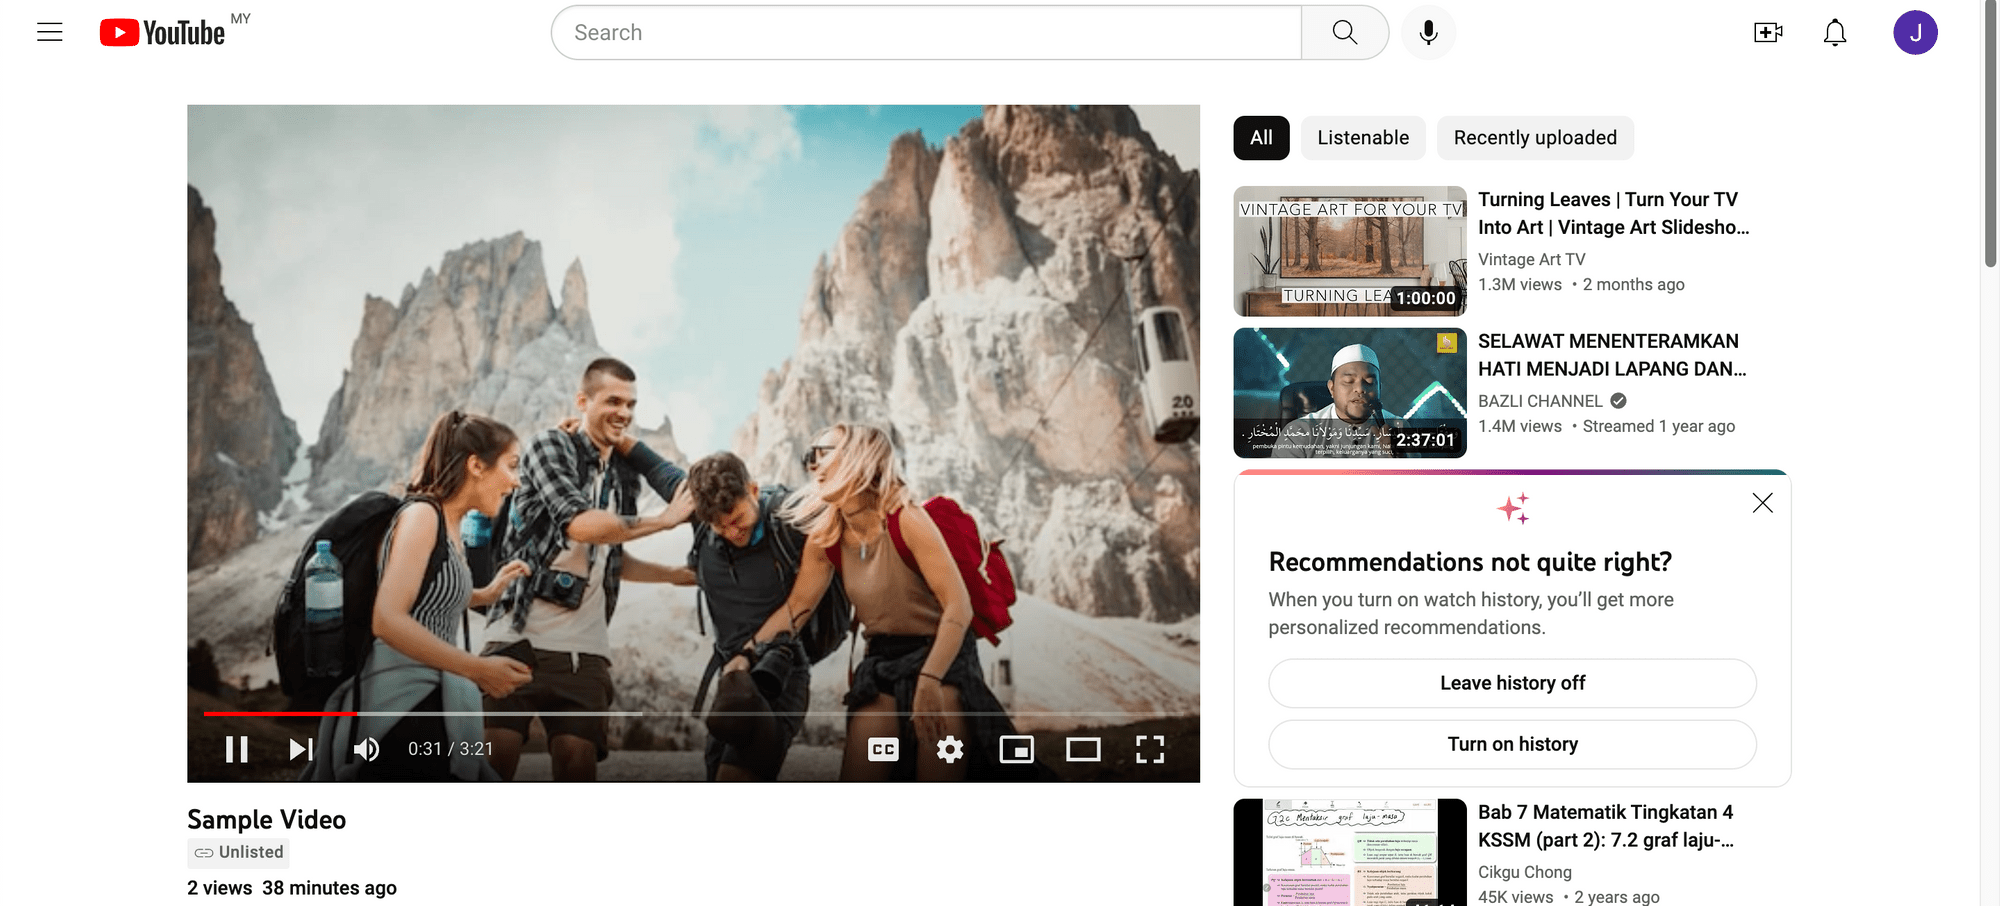
Uploading the video to Youtube shouldn’t have any problem now.
Save the command in a script file and you can convert any audio file into a video file with the snap of a finger by executing the script.
To convert multiple audio files in one go using a script, you can refer to the “Adding a Cover Art to Multiple Audio Files” section of How to Add a Cover Art to Audio Files Using FFmpeg and modify the bash script used in the tutorial.
Using Bannerbear API
No doubt converting an audio file into a video file to be upload on Youtube programmatically using FFmpeg command is an easy and fast method. However, if you need to display text on your image, you will need to add the text to the image manually using a photo editor and use the image in your audio-to-video conversion.
Imagine if you’re managing multiple podcast series that has more than two episodes per week for each one of them, it could be a tedious work despite the simplicity. If you’re looking to reduce friction to get the work done, you can try using Bannerbear to combine both processes.
Here’s an example of the result generated using Bannerbear:
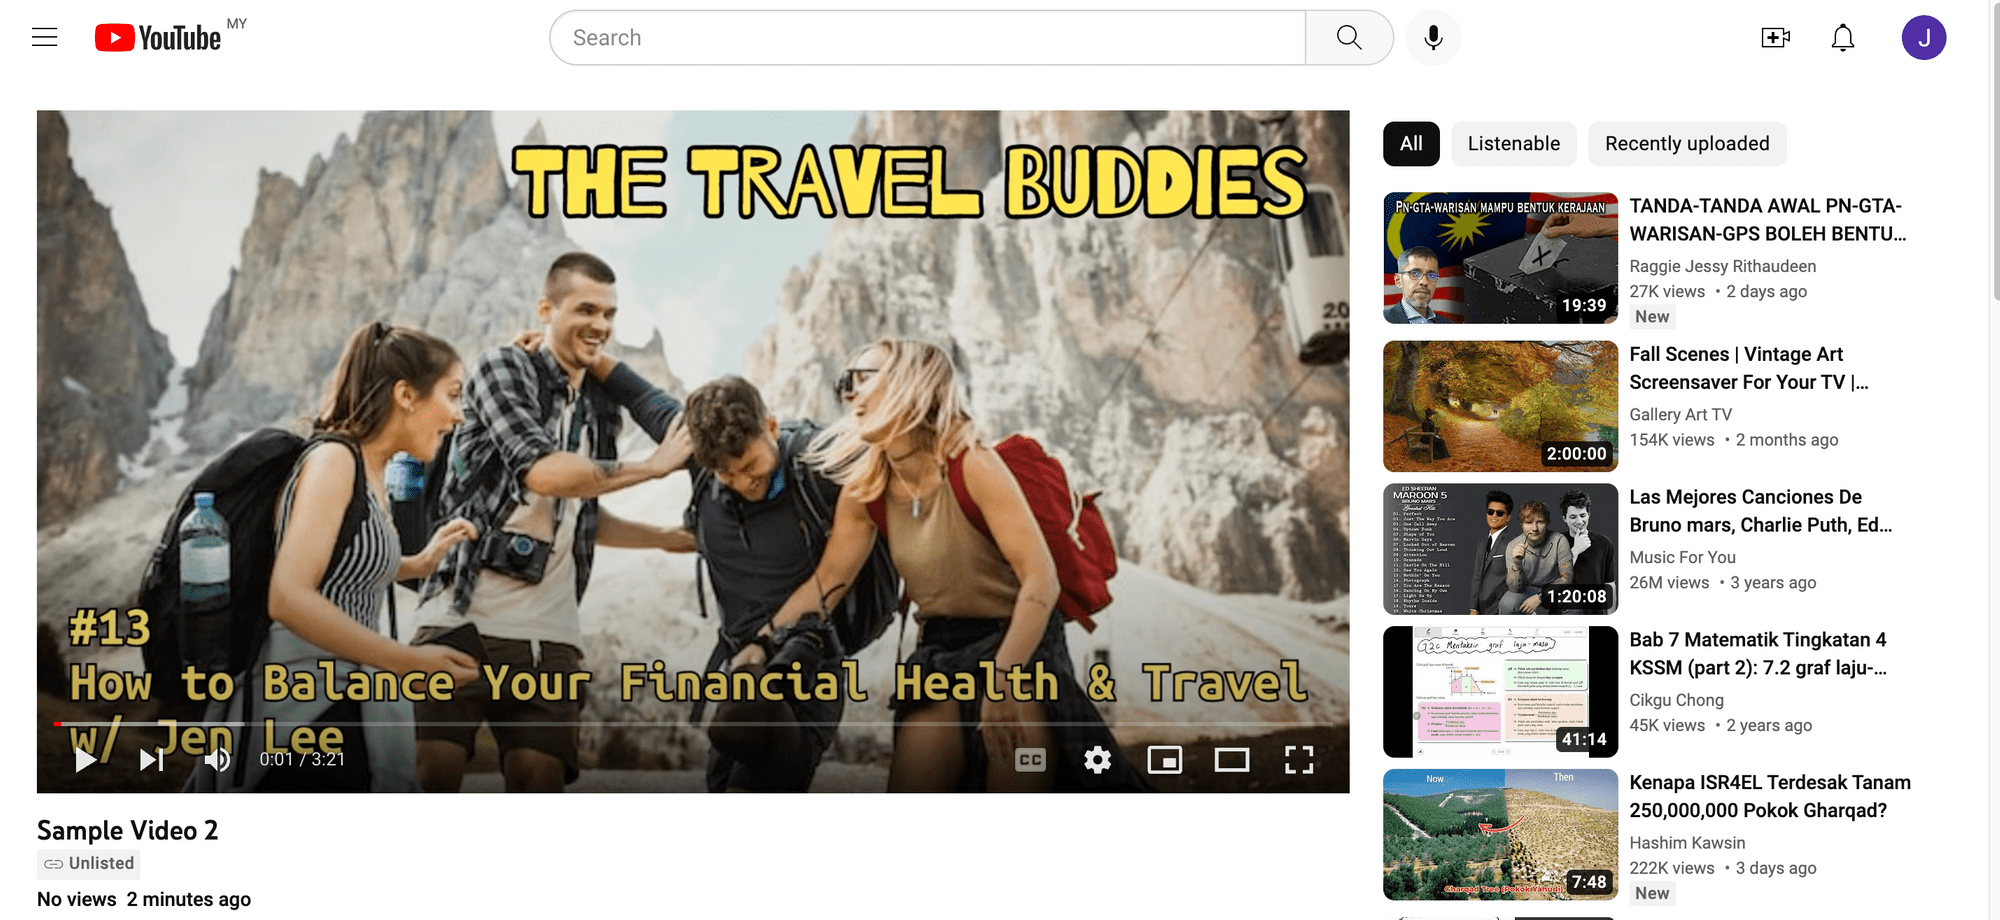
Bannerbear is an automated media generation service that helps you create custom images, videos, and more using API. The images and videos will be generated automatically based on a design template that you create.
In this case, you can make an HTTP request to add text to the image, and then pass the image generated and your audio file to the Movies API to turn them into a video.
Here’s a short code snippet that shows how it works:
const { Bannerbear } = require('bannerbear')

async function convertAudioToVideo(text, audioUrl){

    const bb = new Bannerbear(API_KEY);

    const imageUrl = await create_image(text);

    await bb.create_movie({
      width: 1200,
      height: 630,
      soundtrack_url : audioUrl,
      webhook_url: URL_TO_RECIEVE_THE_VIDEO,
      inputs: [
        {
          asset_url:imageUrl,
        },
        {
          asset_url:imageUrl,
        },
      ],
    });
}

async function create_image(text){
  const images = await bb.create_image(
    TEMPLATE_ID,
    {
      modifications: [
        {
          name: "text_episode", // the name of the text object in the template
          text: text,
        },
      ],
    },
    true
  );

  return images.image_url_jpg;
}

convertAudioToVideo("#13\n How to Balance Your Financial Health & Travel w/ Jen Lee", AUDIO_URL);
❗️Note : This is one of the ways to utilize the Movies API. As the API is meant for combining multiple video clips into a single one, you will need to insert the same image twice in the inputs array.
Every time you want to convert an audio file for Youtube and add an image as its background, all you have to do is call the function convertAudioToVideo() with the audio URL and text that you want to add to the image, and voila! The video is done!
What’s Next
Manipulating media files programmatically using FFmpeg or Bannerbear API gives us the flexibility to integrate the job into any existing application or workflow easily. If you are exploring these tools to generate and edit images/videos, here are some FFmpeg and Bannerbear tutorials that you might find interesting:
👉🏻 How to Add a Cover Art to Audio Files Using FFmpeg
👉🏻 How to Add Subtitles to a Video with FFmpeg (5 Different Styles)
👉🏻 How to Crop/Resize Videos Using FFmpeg
🐻 How to Add Auto-Generated Custom Open Graph Images to WordPress Using Bannerbear
🐻 How to Create a Dynamic Twitter Banner with an Event Countdown in Node.js (Updated Automatically)
