Track Cryptocurrency Updates with Zapier and Nomics Crypto
Contents
If you're creating image assets over and over again based on a particular template, you can use Bannerbear to automate this process.
What is Nomics Crypto?
Nomics Crypto is a cryptocurrency market data provider that provides real-time crypto market cap rankings, historical prices, charts, all-time highs, supply data & more for top cryptocurrencies like Bitcoin (BTC) & Ethereum.
What is Bannerbear?
Bannerbear is an API for generating images. You can design a template or use one from the library, and then feed in data using the API to generate images based off that template e.g. with different texts, colors and background images.
As a featured app in Zapier, Bannerbear can connect and share data with 3000+ apps like Notion, GitHub, MailChimp, and others.
What can I do with Nomics Crypto + Bannerbear?
You can incorporate chart objects from Nomics Crypto to your Bannerbear template and then push either an array or comma-delimited list to the API to render chart images. This feature provides support for all the normal transformations that other objects do like rounded corners, gradient fills, and drop shadow.
This way you can auto-generate Charts via API entirely with Bannerbear, then when you're ready to produce the assets for posting, you just watch all your images get generated. This makes it a particularly useful feature for financial, lifestyle, and sports apps.
And all of this using #nocode!
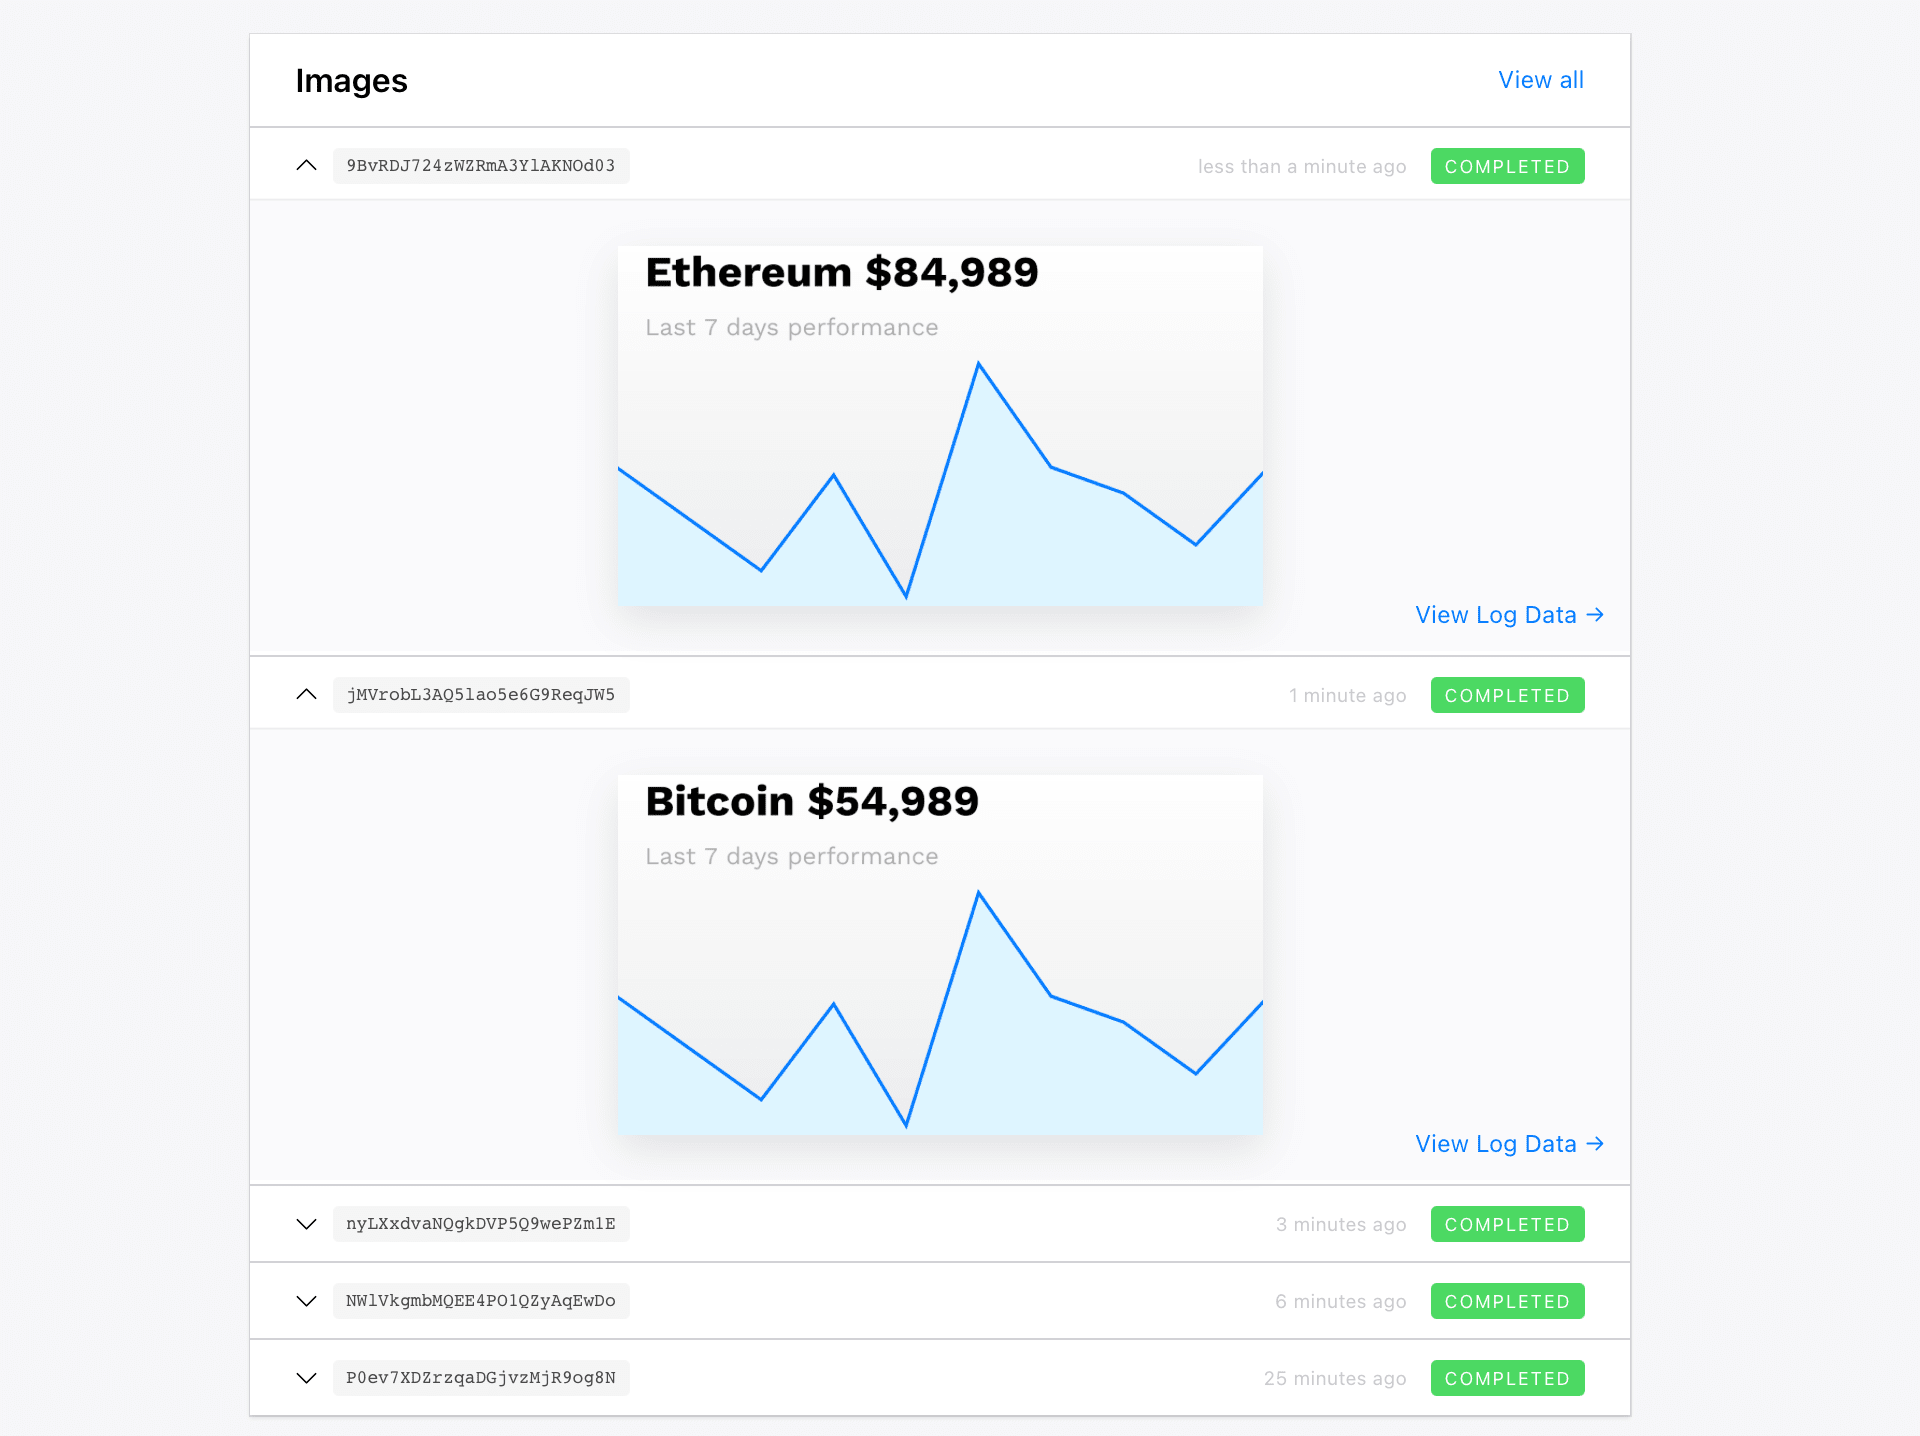
Sample images
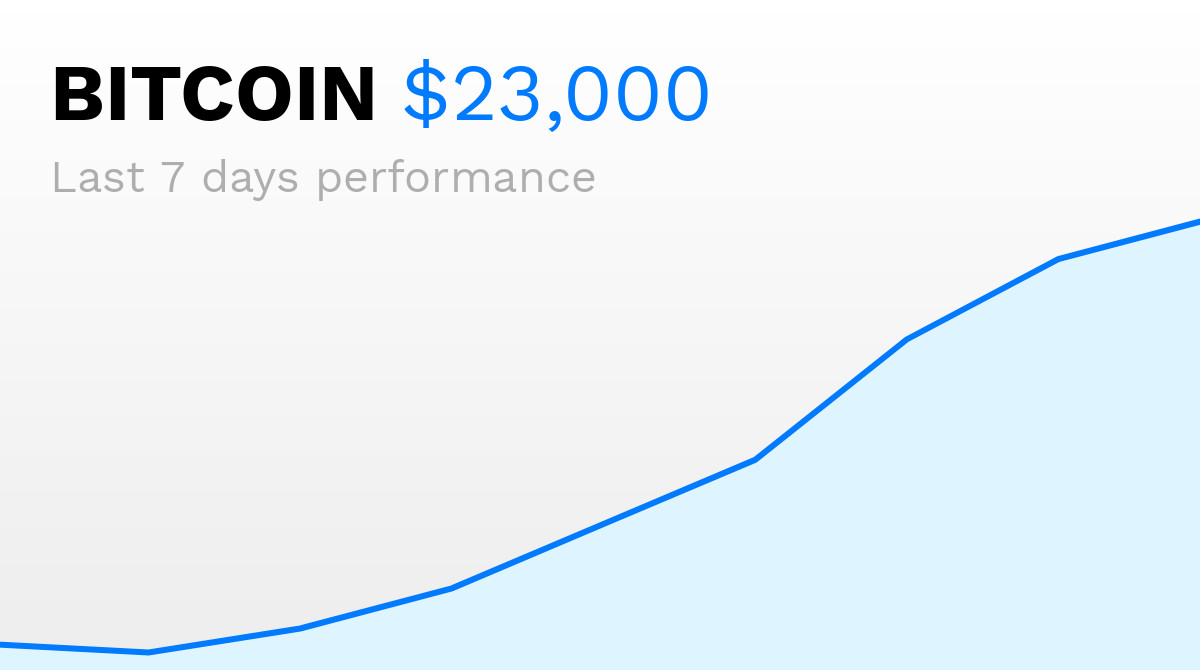
By the end of this tutorial you'll have automatically generated images like this:

Create a chart with Bannerbear
Before you can create a chart, you'll need a Bannerbear account. If you don't have one, you can create one here for free and use Bannerbear to generate up to 30 images via the API or any of the integrations (no 💳 required).
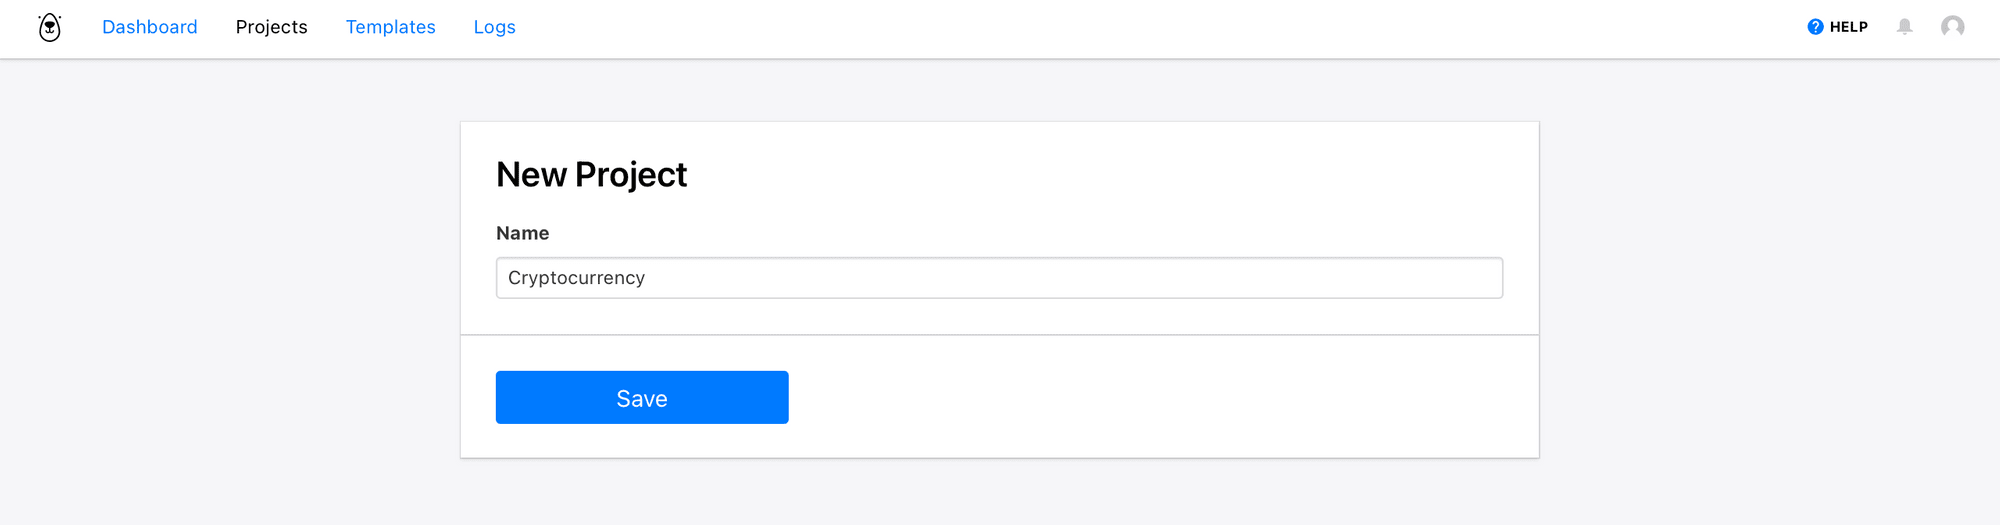
Once you have a Bannerbear account, you can create a project:
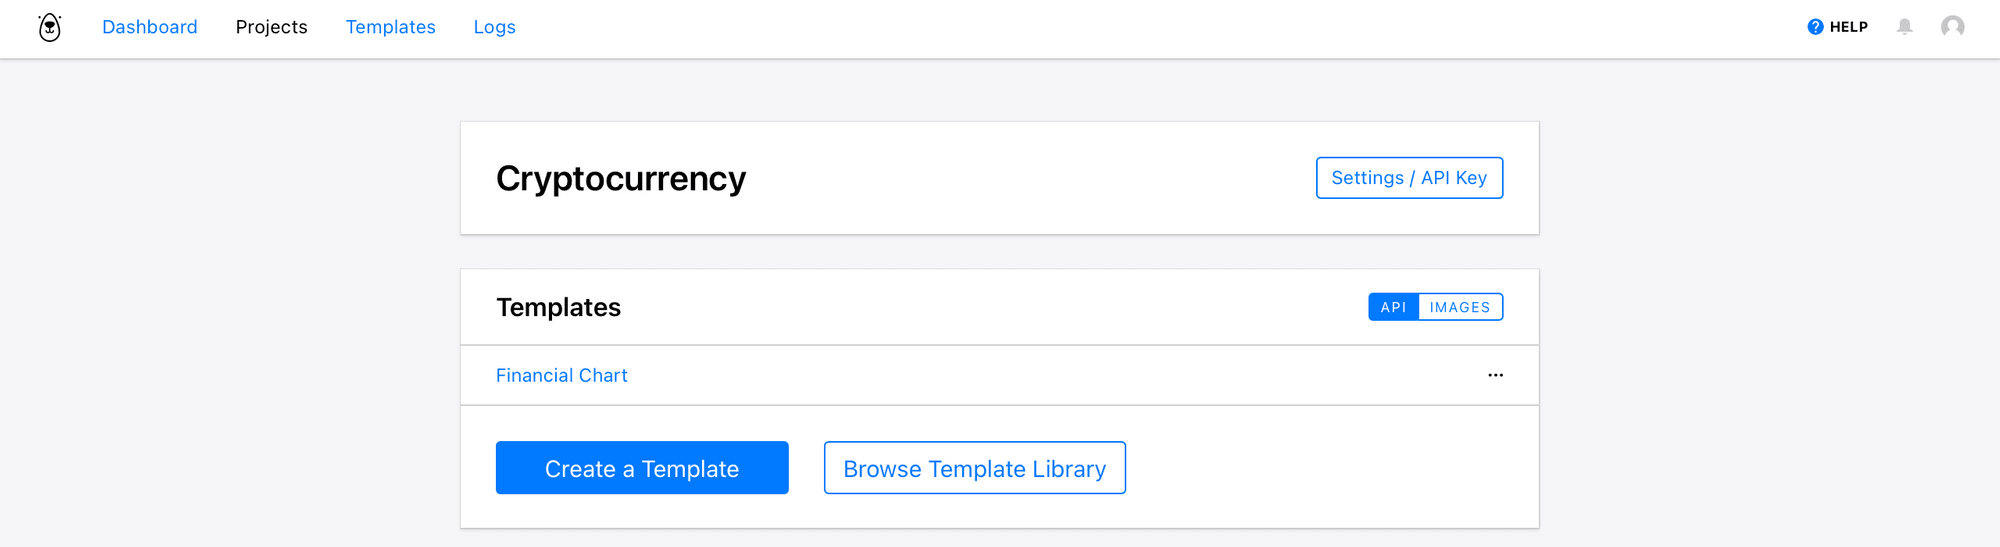
Add a Template to your Project
To get started, browse through our Templates Directory. We have 50+ designer made templates ready for you to tailor to your needs.
For this tutorial, we have a standard template "Financial Template" from the library that fits this use case. You can duplicate this template here.
Or, simply click on the image below to add it to your project automatically:
Get API Project Key
To connect your Bannerbear account to Zapier, you need to allow Zapier to access your Bannerbear Account with your Project API Key. The Project API key is found on the "Settings / API Key" page of your Project.
Ok, now you have your template, how can you connect Nomics Crypto?
You can connect your Bannerbear templates to Nomics Crypto with Zapier.
Get Nomics Crypto Free API Key
To allow Zapier to access your Nomics Crypto Account, go to the API Details to create an API key.
Click Send me my free API key :

Bear tip 🐻 Note that if you use the free API key, you need to provide attribution for the free account. The API key is restricted to personal use only.
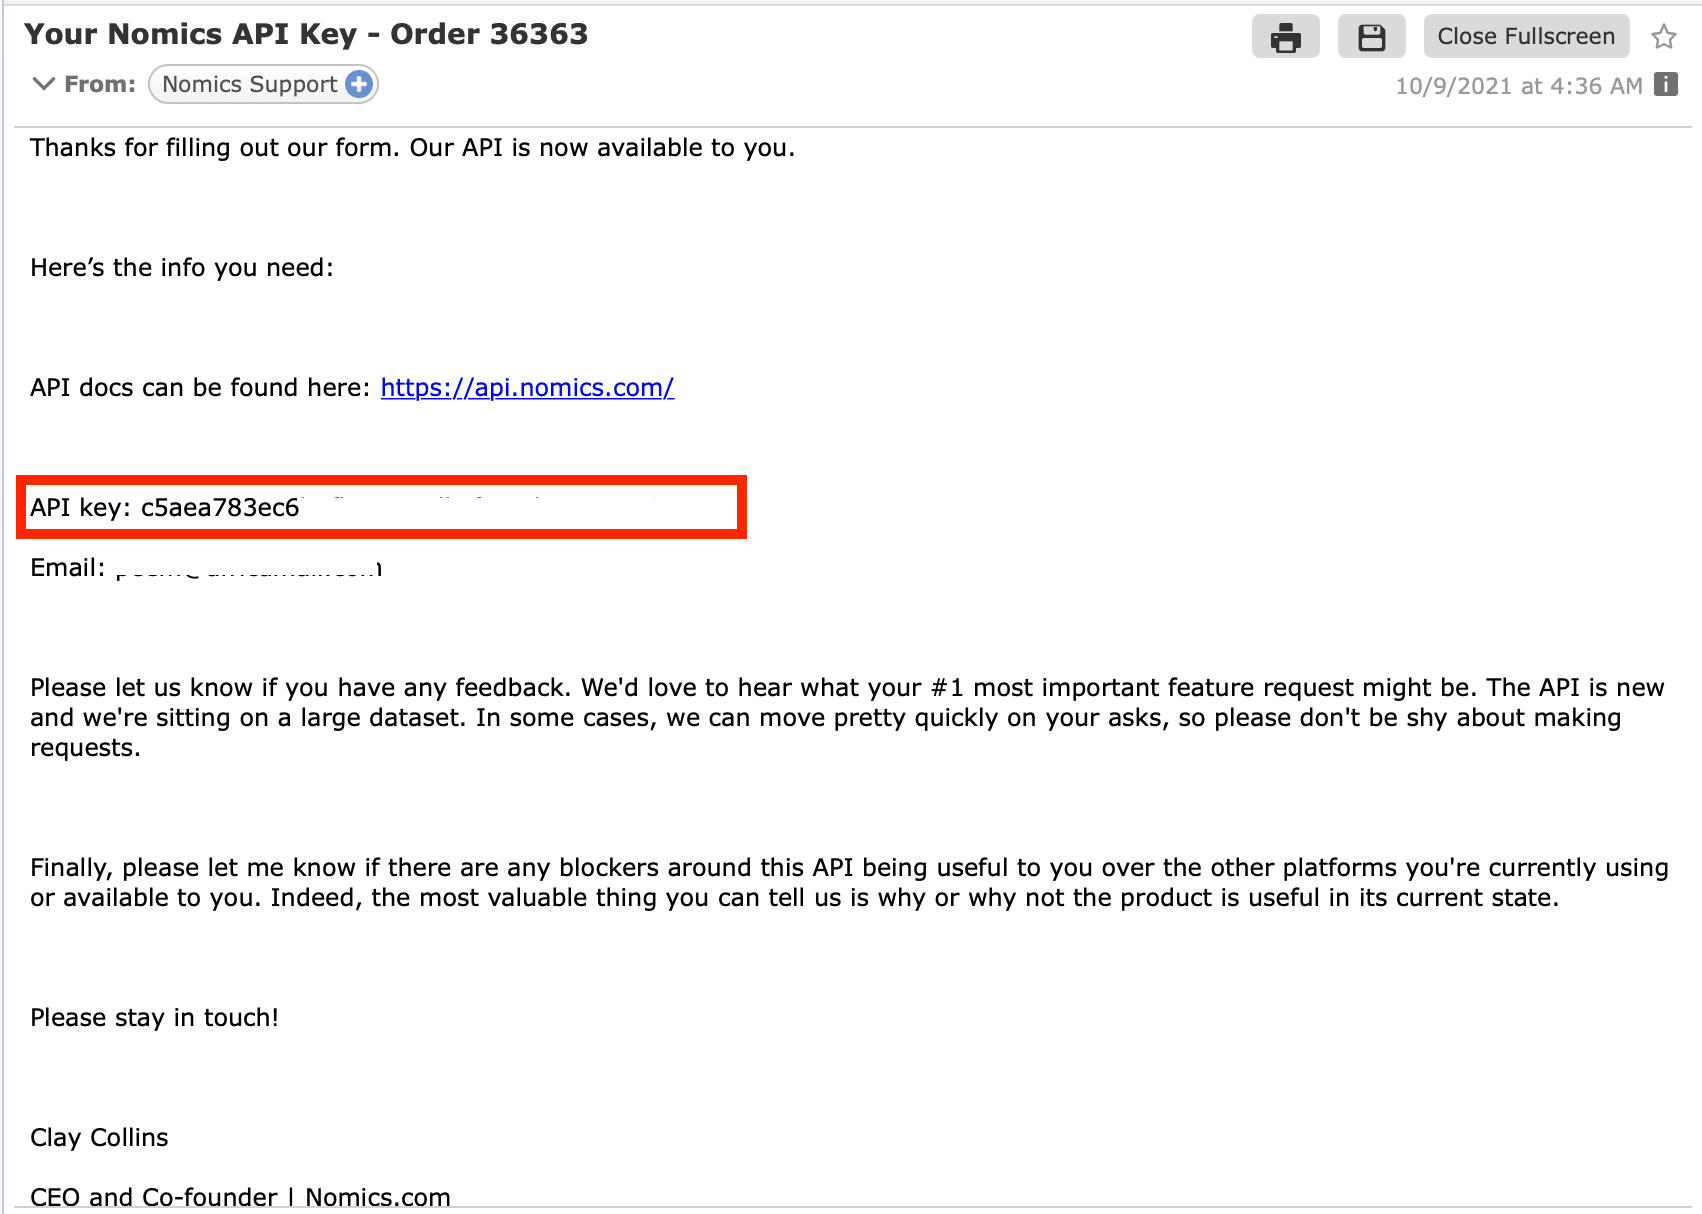
To begin your Nomics Crypto account setup, enter your email address and complete the details. You will receive the 40 character API key via email:
Next we need to generate some dynamic images to show stats with charts.
Connect Accounts on Zapier
Zapier allows you to connect apps by setting up triggers in Nomics Crypto and resulting actions in Bannerbear. With this you can automate some of your most tedious tasks, saving you time and freeing you up to focus on other projects.
When a chart is created in Nomics Crypto, you can automatically create a line chart image in Bannerbear and much more.

Zap #1: Connect Nomics Crypto on Zapier
First, set up a trigger that contains the data that you want to add. Here are the list of possible Zapier triggers with Nomics Crypto:
- Trigger when the specified currency hits a new all time high
- Trigger when a new aggregated kline candle is opened
- Trigger when new data is pulled for a specified currency
- Trigger when an assets rank changes or has been unchanged for 24 hours
- Trigger when the specified currency has a price movement greater than or equal to the percentage parameter (in both directions)
For this tutorial, we will create a Zap trigger for New Currency Ticker in Nomics Crypto when new data is pulled for a specified currency. Try this Zap HERE.
This trigger updates once daily at 0:00 UTC:
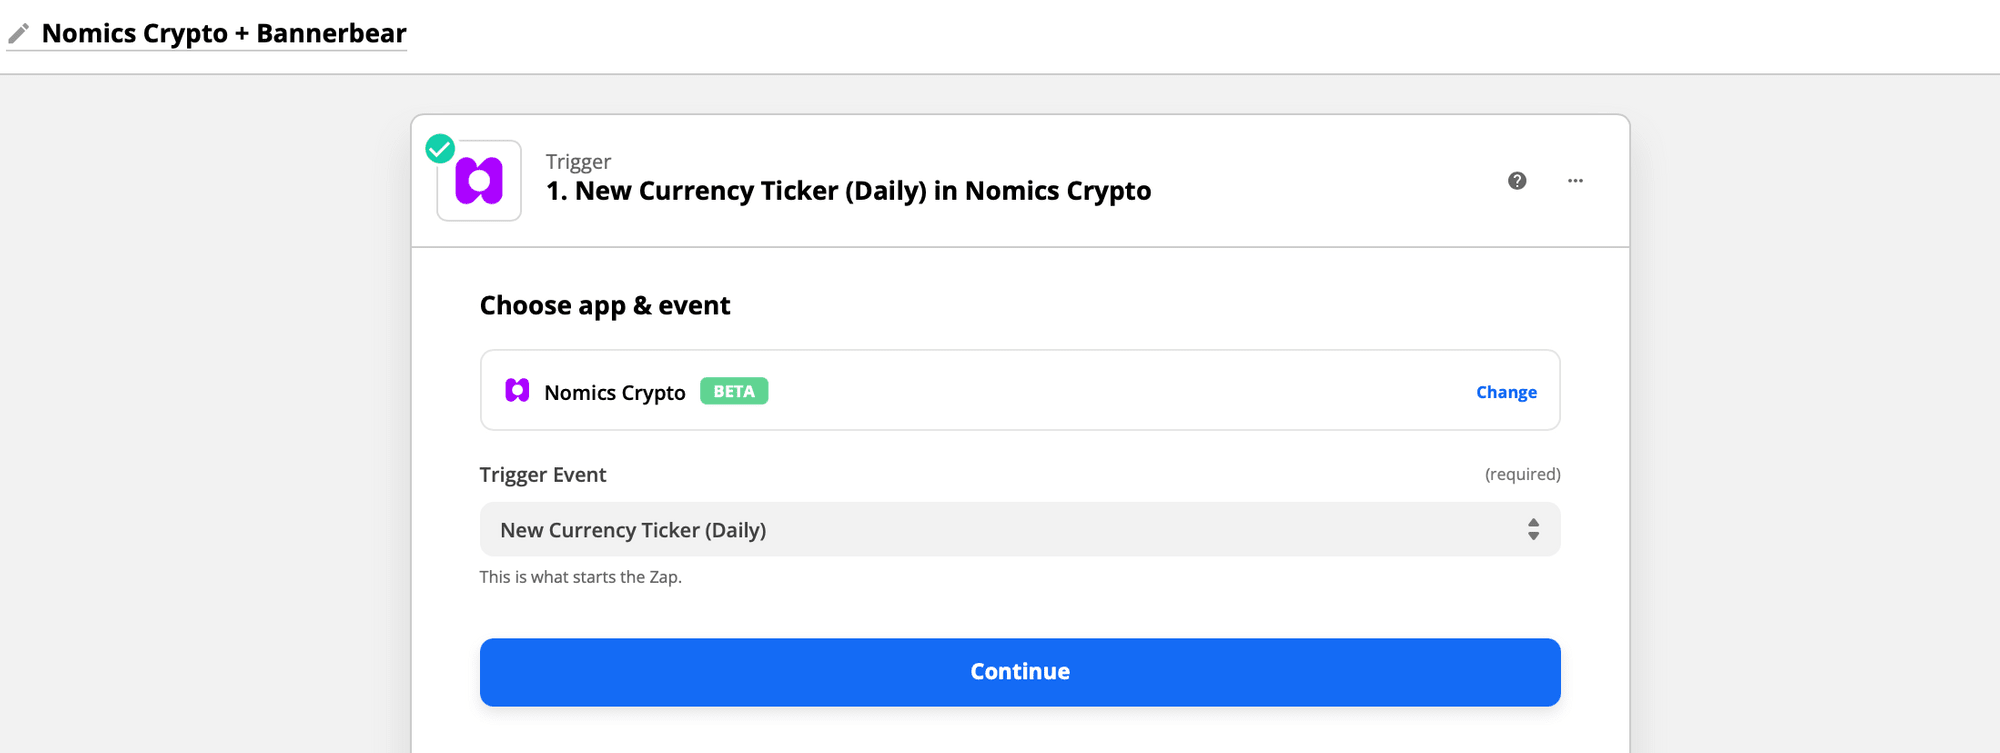
Click continue and sign into your Nomics Crypto account with the API key.
Next, we'll proceed to set up trigger by selecting the cryptocurrency symbol associated with the asset to poll. We'll choose BTC / Bitcoin for this tutorial:

Proceed to test trigger:
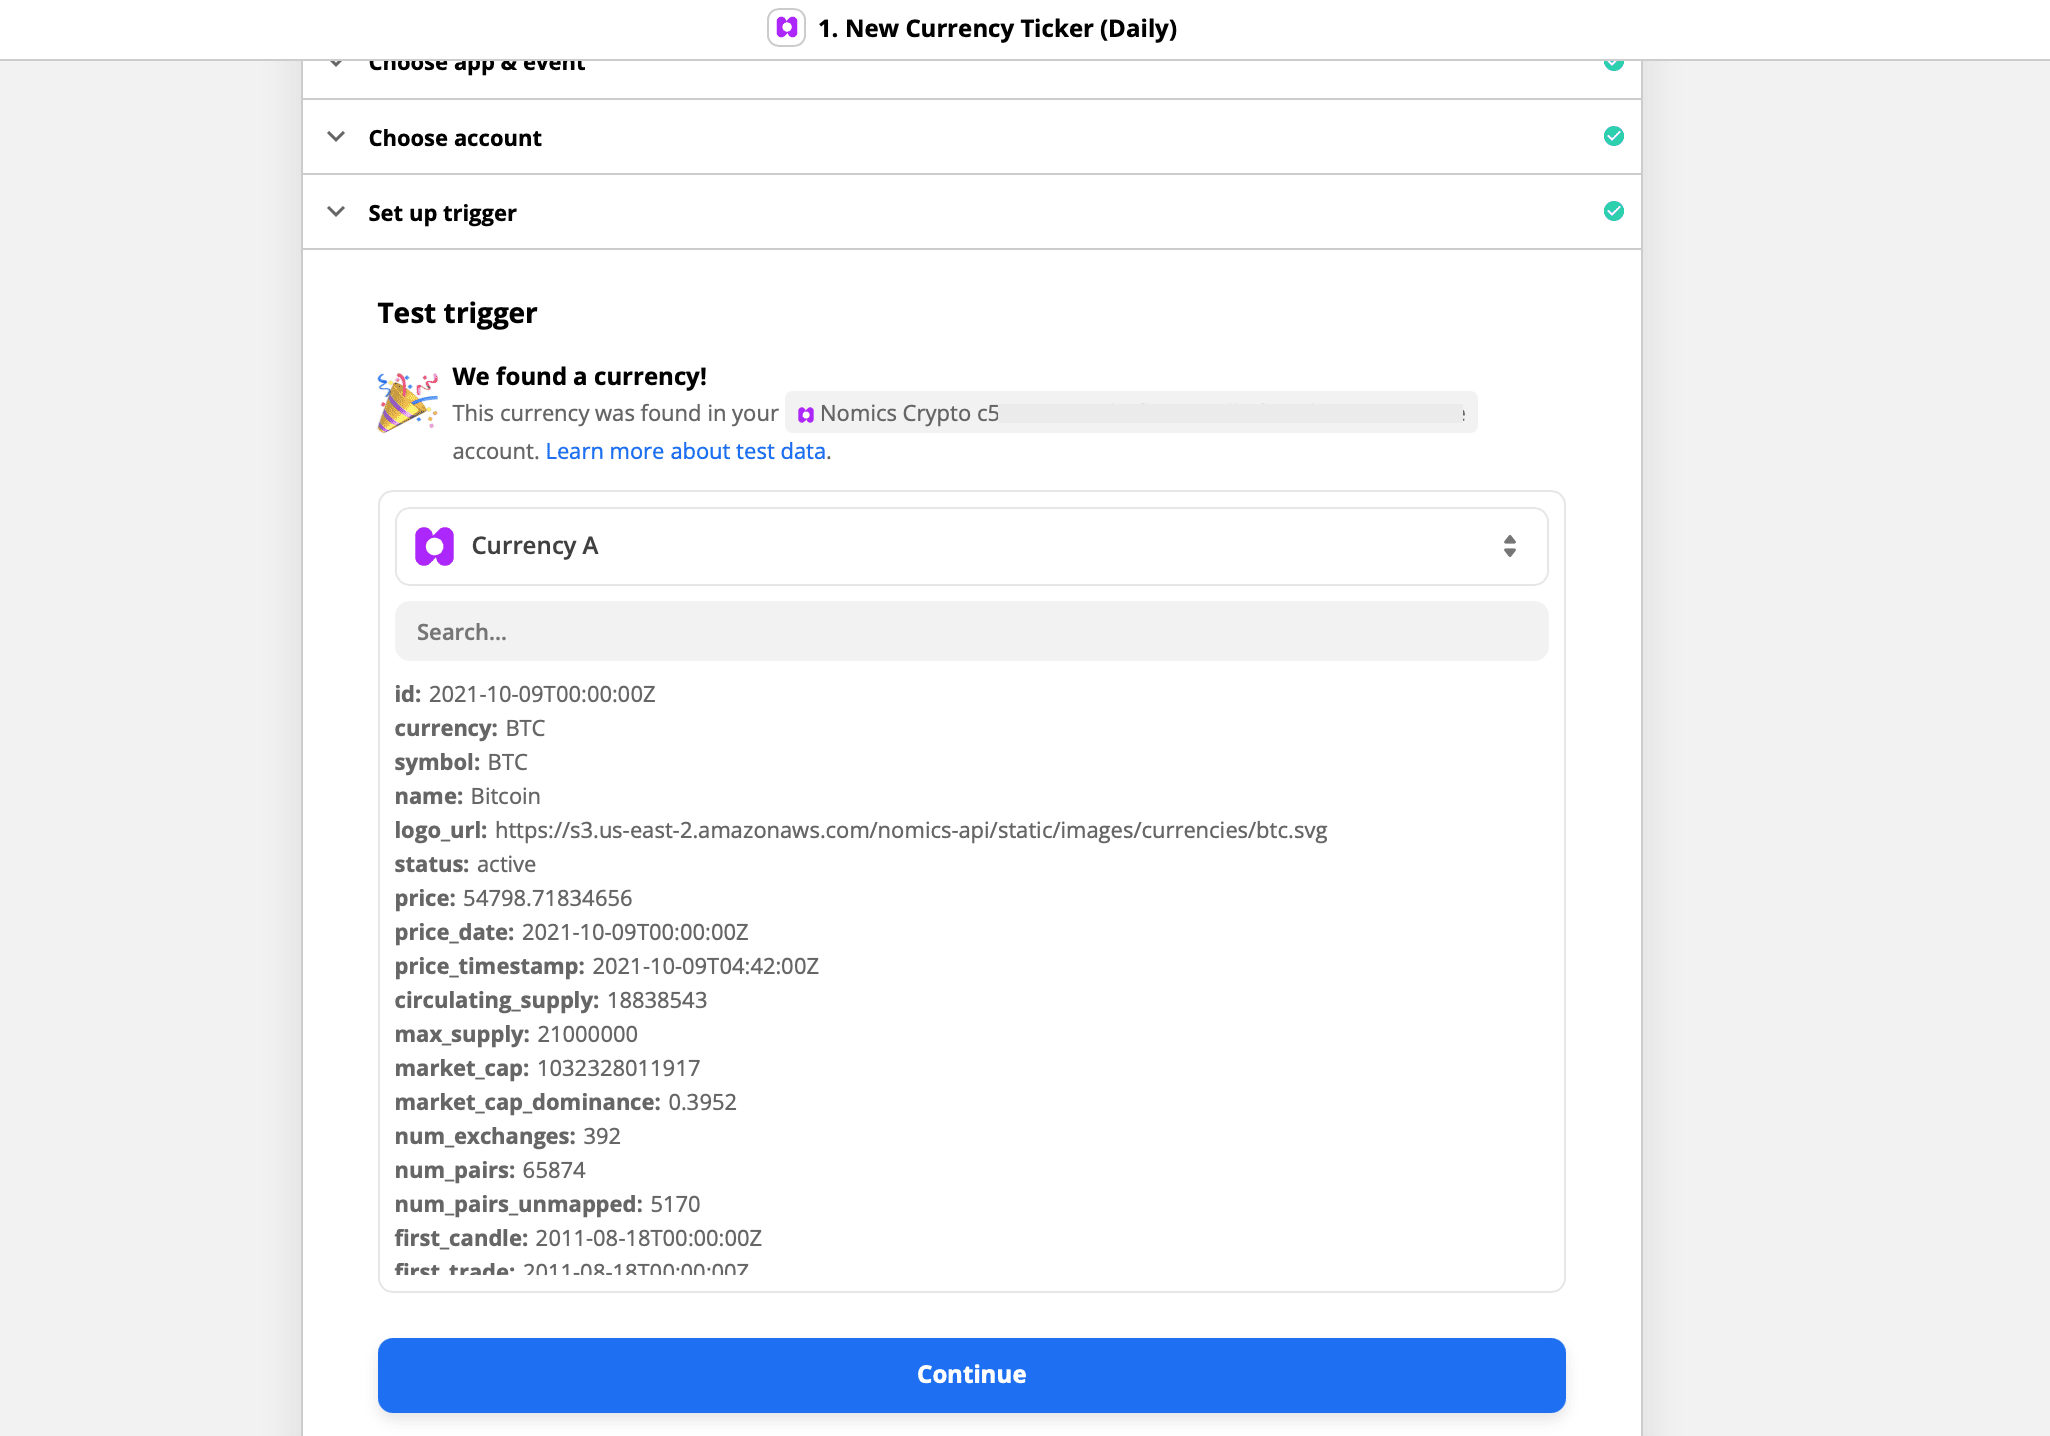
Now, click the next Action step, or click the _ plus + icon _ to add a step to your Zap.
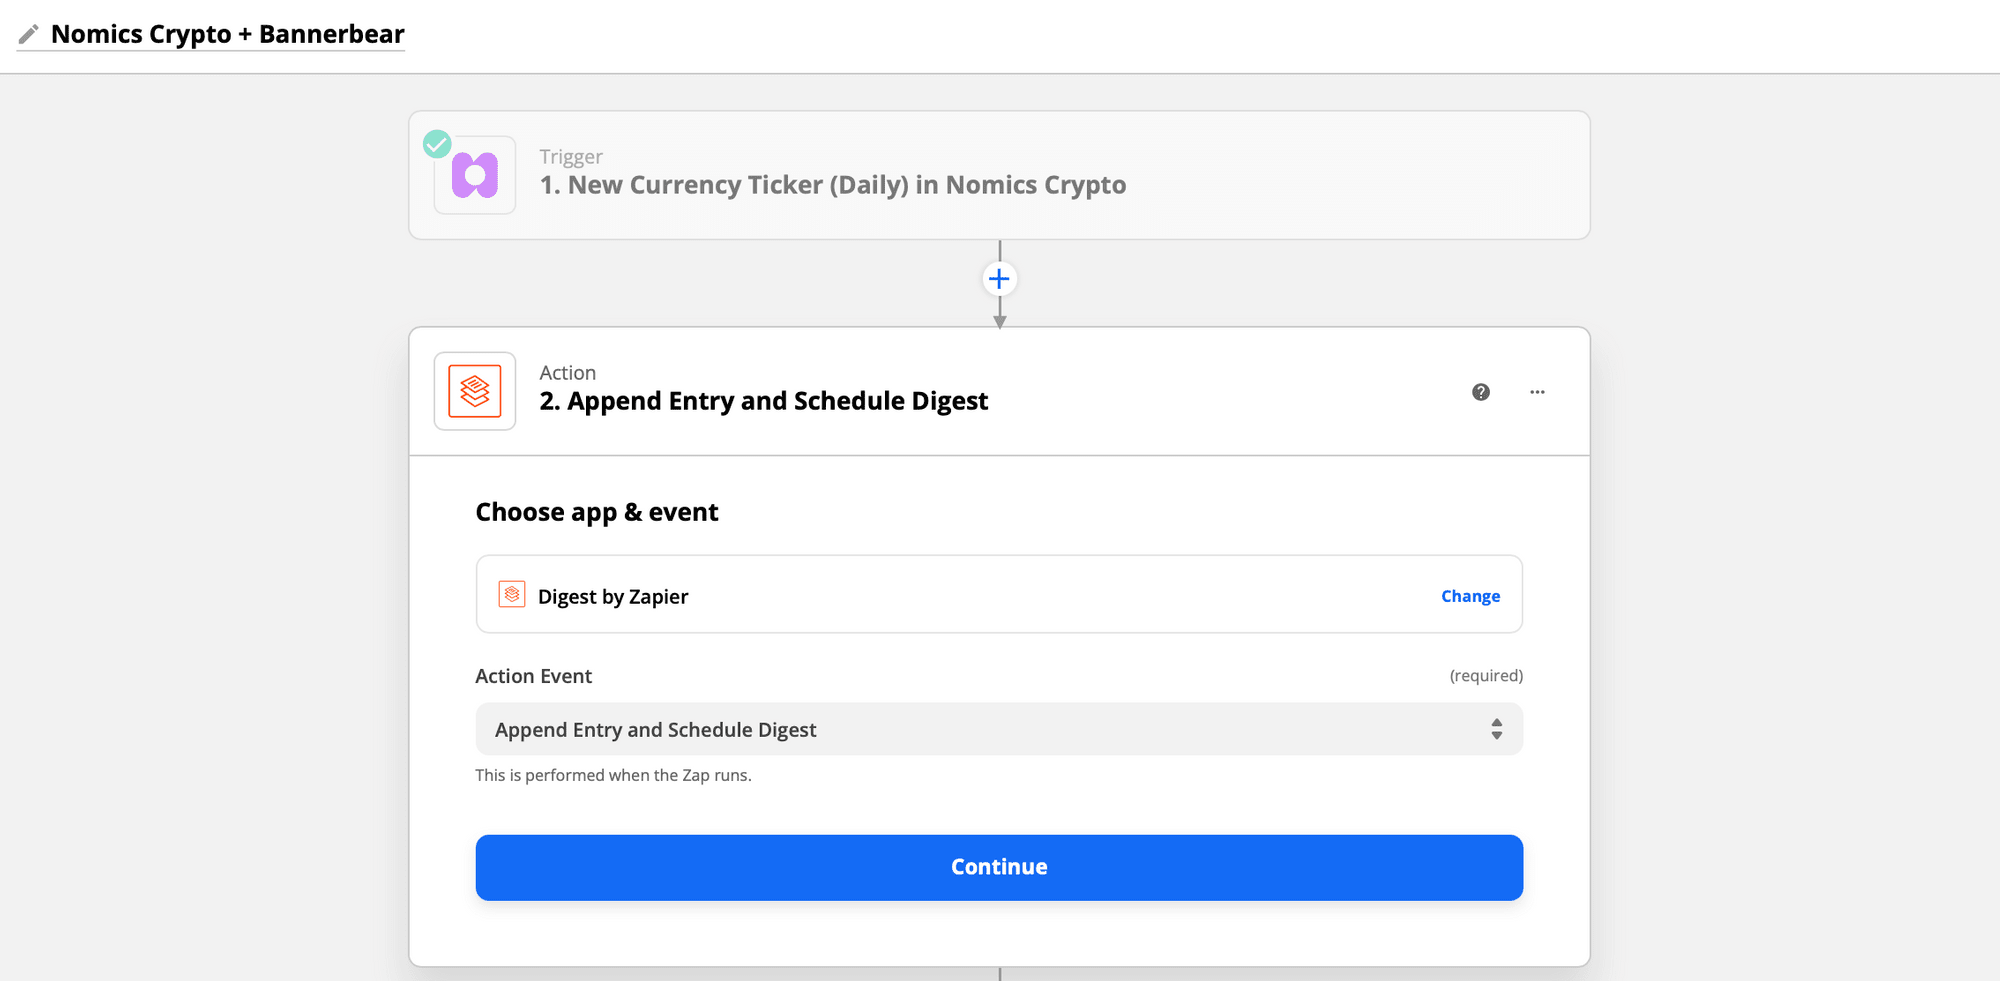
Zap #2: Append Entry and Schedule Digest
With Digest by Zapier, you can compile data from Nomics Crypto Zap triggers in a single batch that can be sent at a regular interval to the Bannerbear Zap action.
Instead of the 'New Image' actions in the Bannerbear Zap running every time the 'New Currency Ticker' trigger event occurs, the Digest Zap will receive the data and run in bulk at a given interval. For this tutorial, we want the Zap to run in bulk weekly.
To begin, add a digest step to your Zap. Search for and select Digest by Zapier.
Click the Action Event dropdown menu and select Append Entry and Schedule Digest. Click Continue:
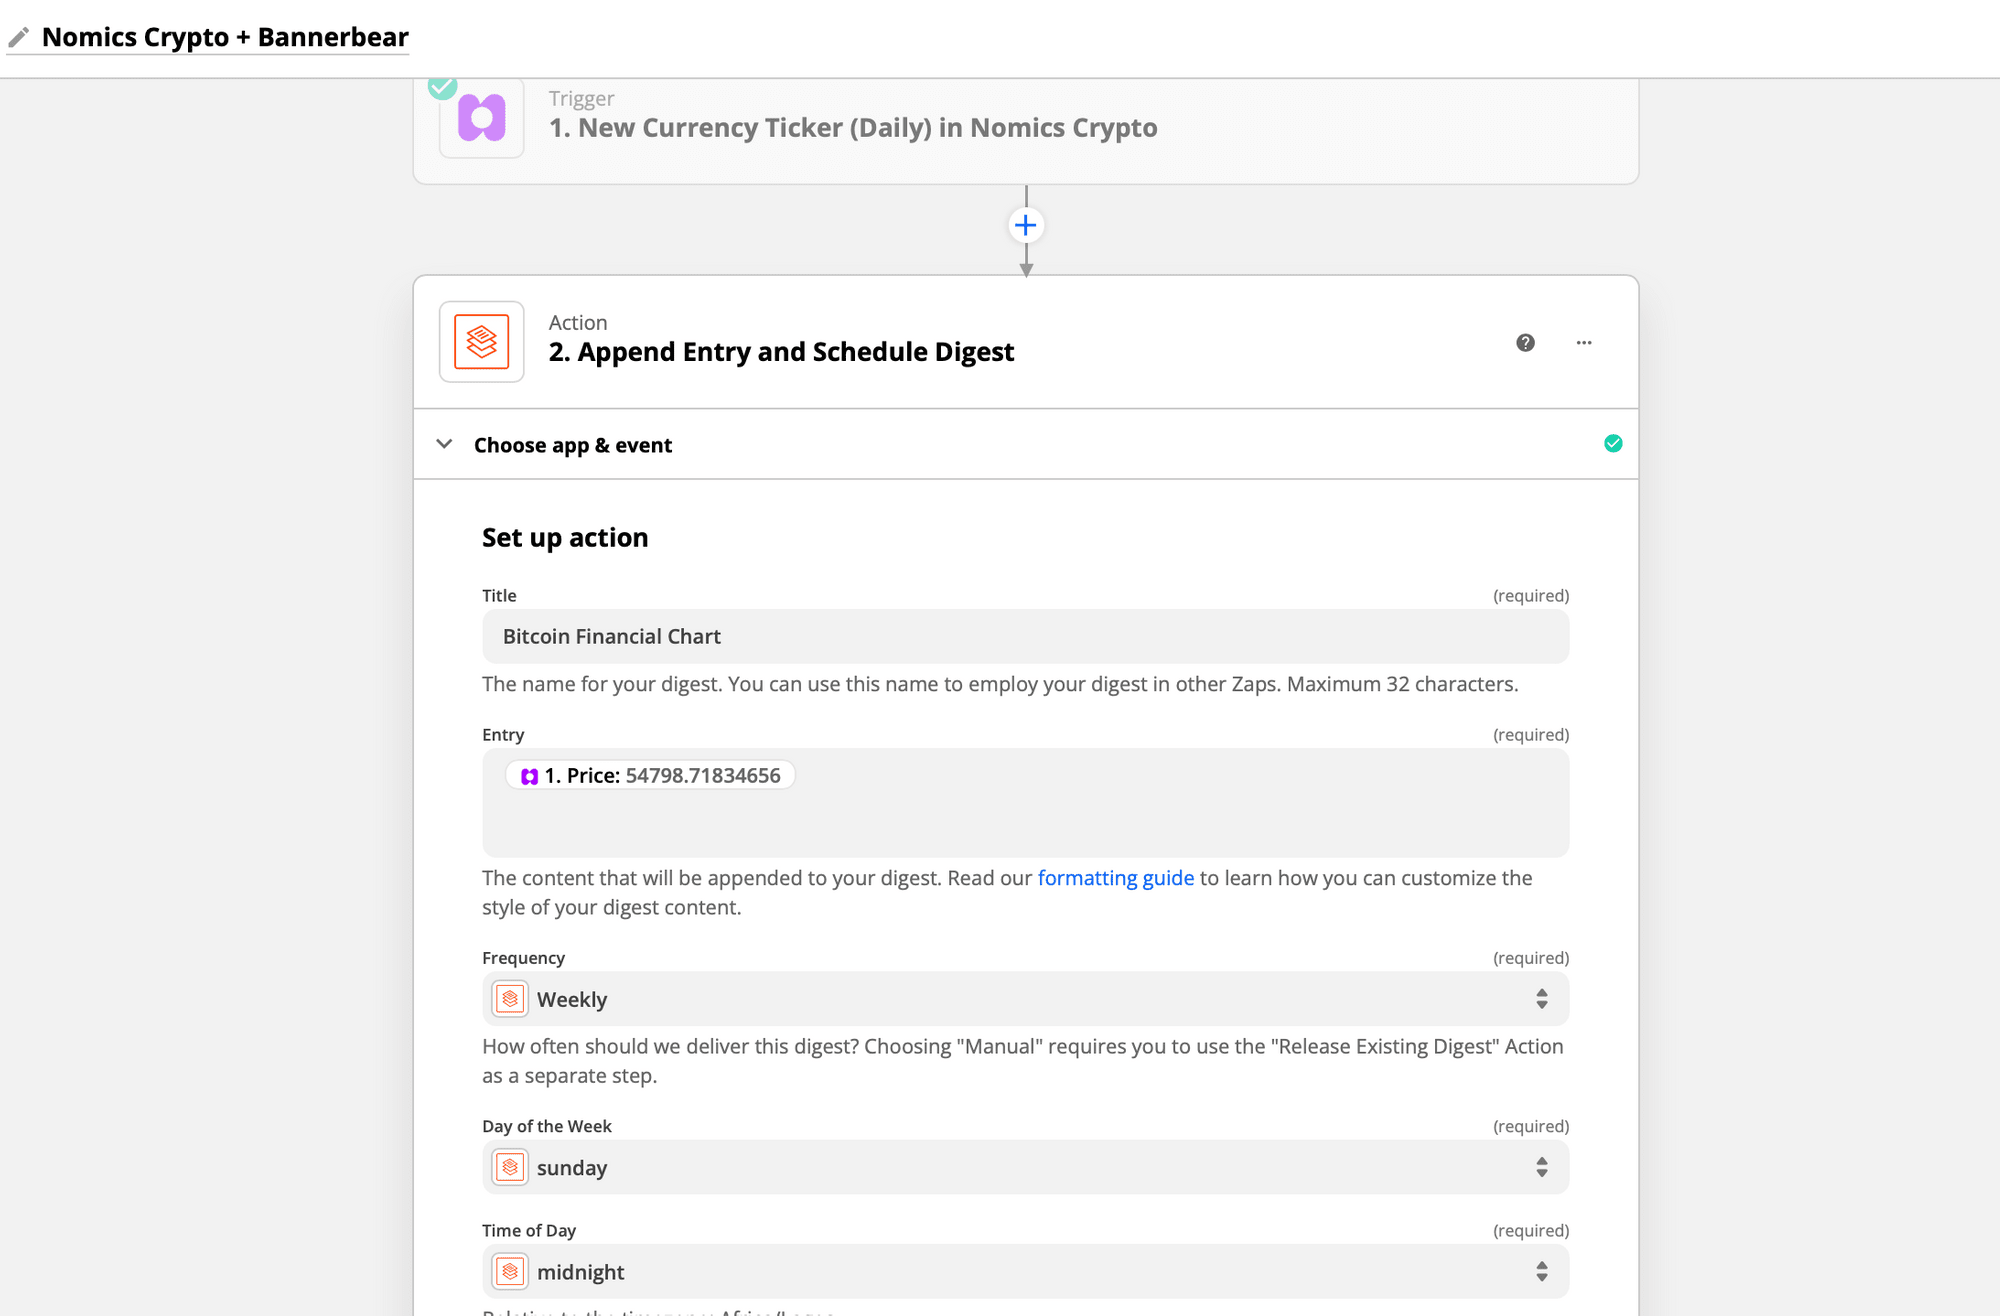
To set up your digest step,
- In the Title field, enter a name for your digest, maximum of 32 characters. This will be used to identify your digest in later steps in your Zap.
- In the Entry field, select the data from a previous step to add to the digest.
- Click Weekly in the dropdown menu as the Frequency to receive this digest information on Bannerbear
- Select the specific time of day or day of the week or month to release the digest:
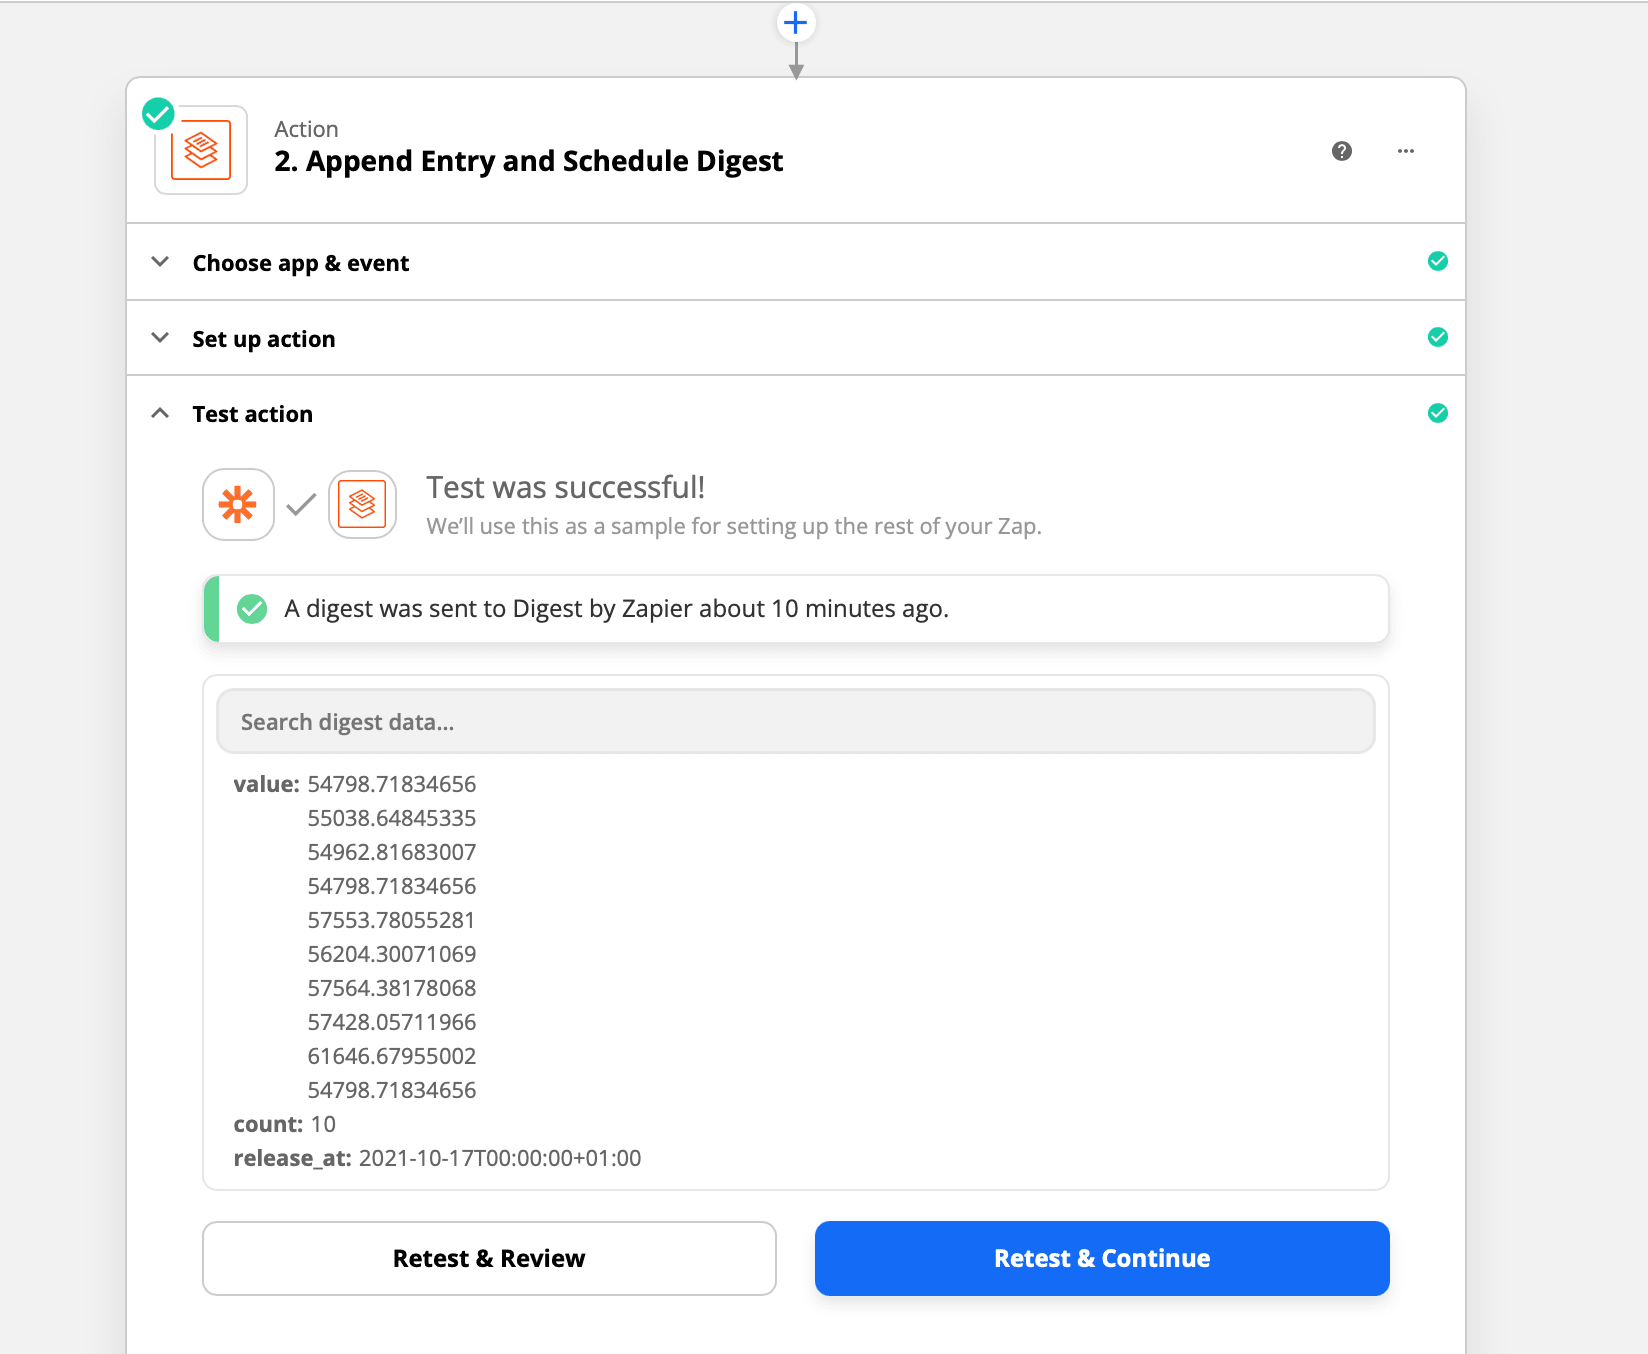
Click Continue. Click Test & Review. The Zap will create a new item in your digest and display the result.
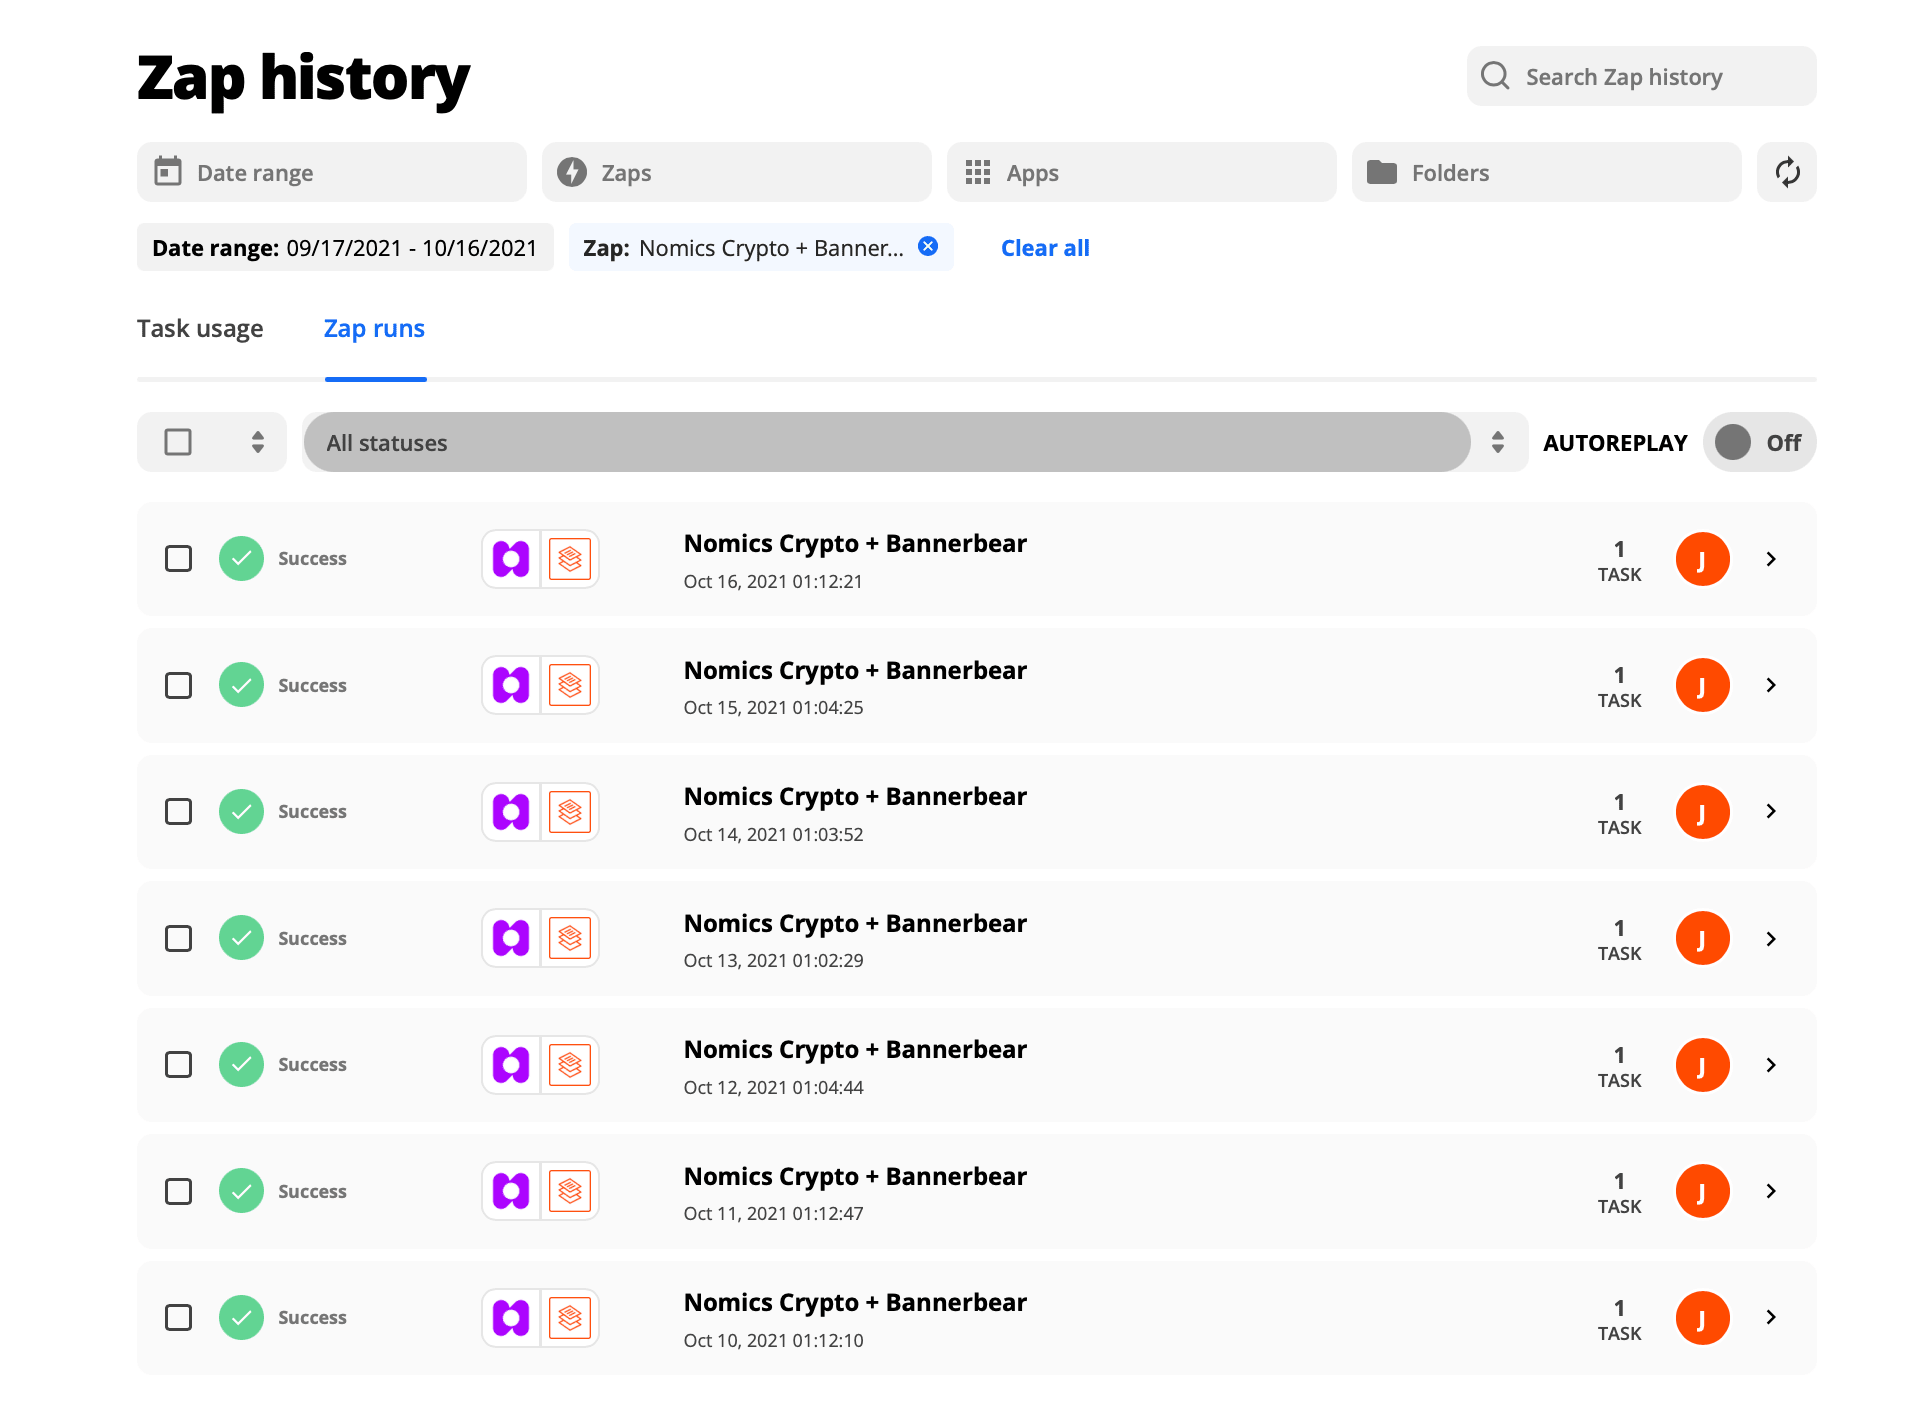
Individual Zap runs for each time the Zap is triggered will have a status of Delayed in the Zap history, until the digest releases weekly. When the digest is released, the status of the Zap run will change to Success.
The result will be ranked according to the dates:
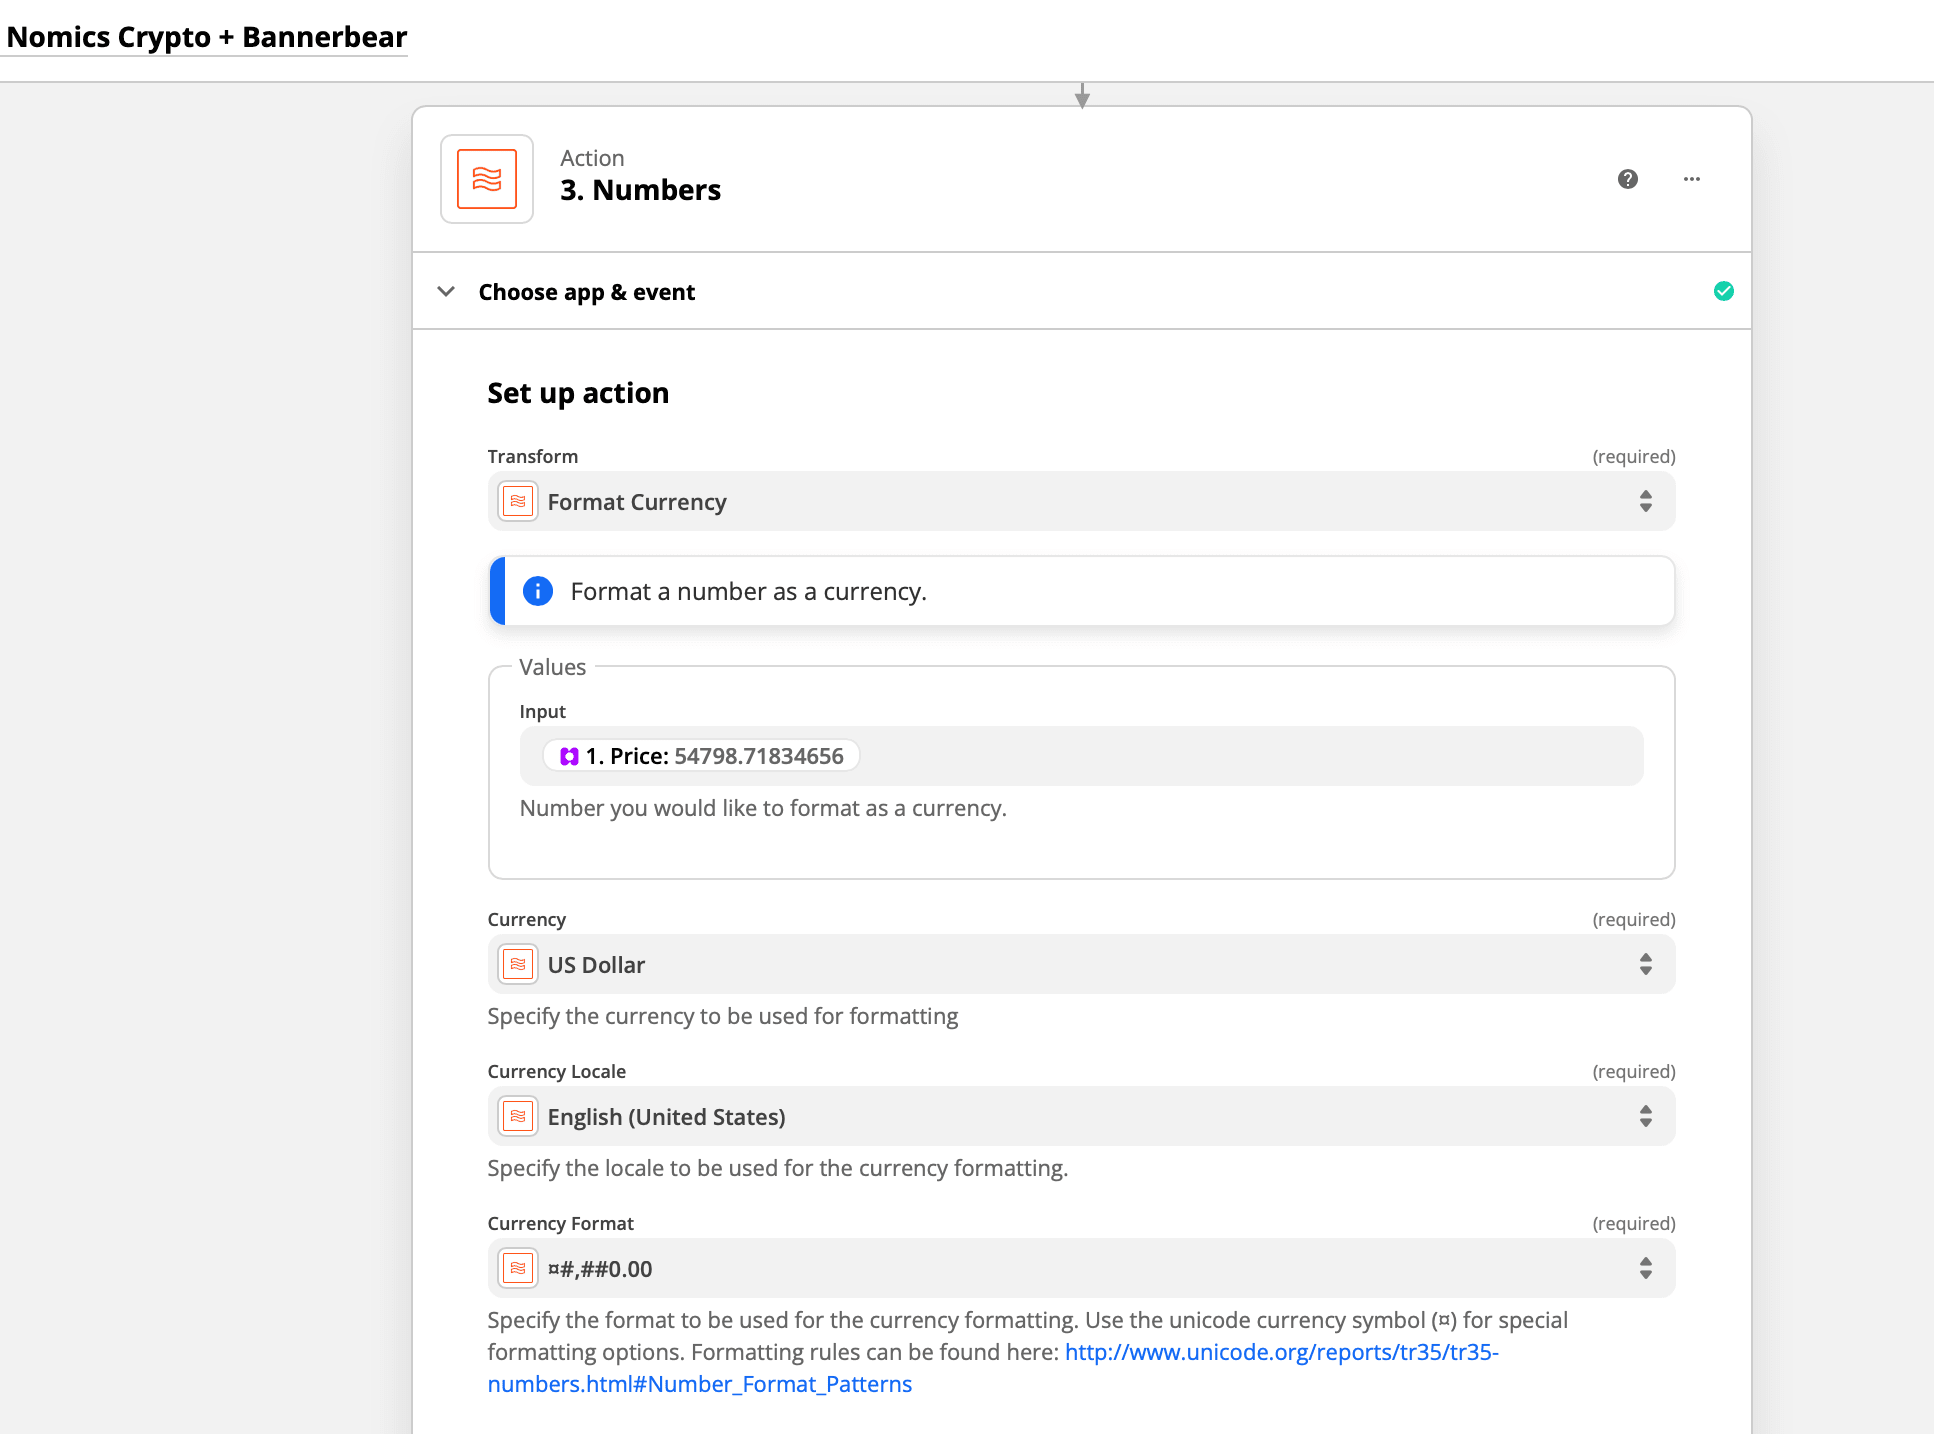
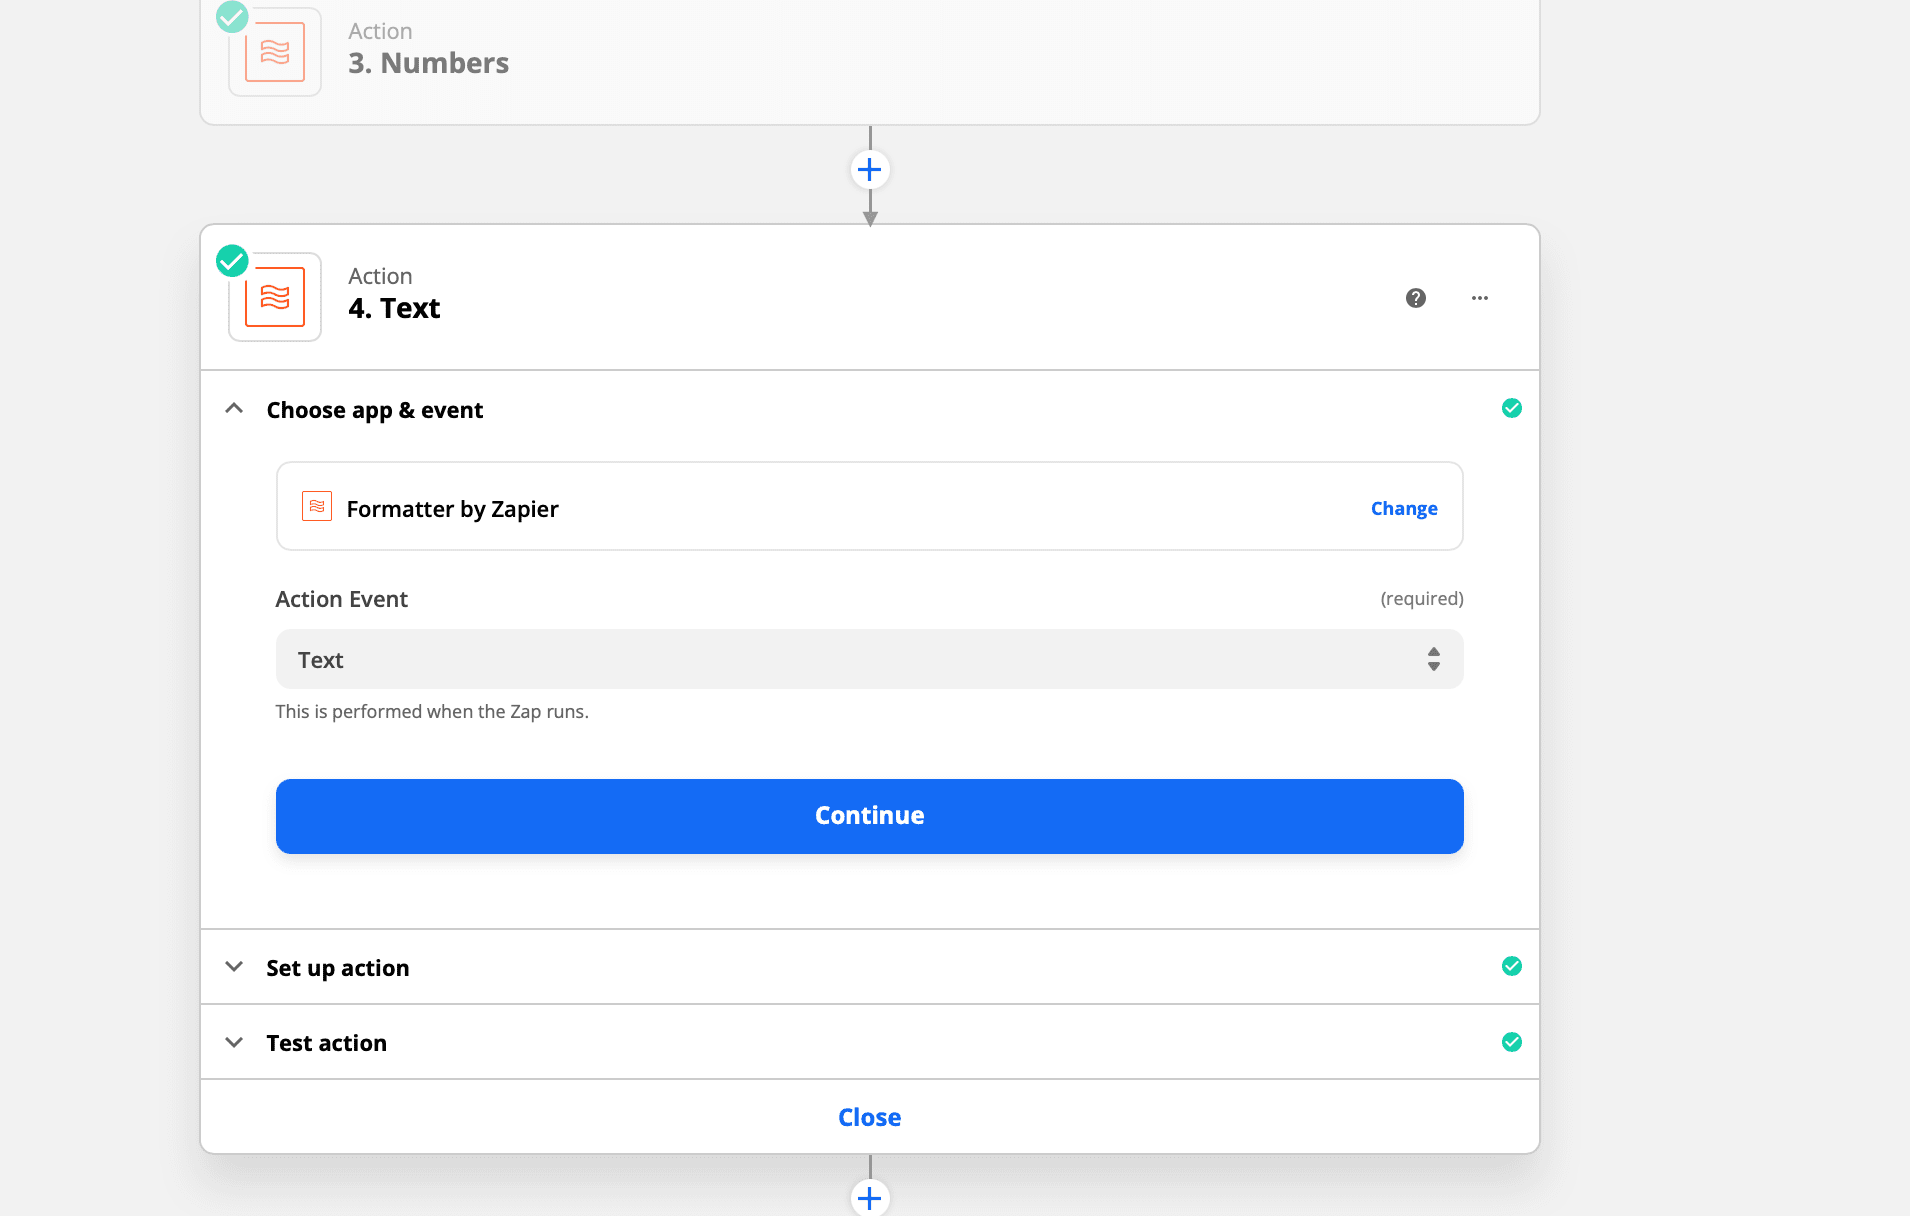
Zap #3: Format Currency with Formatter by Zapier
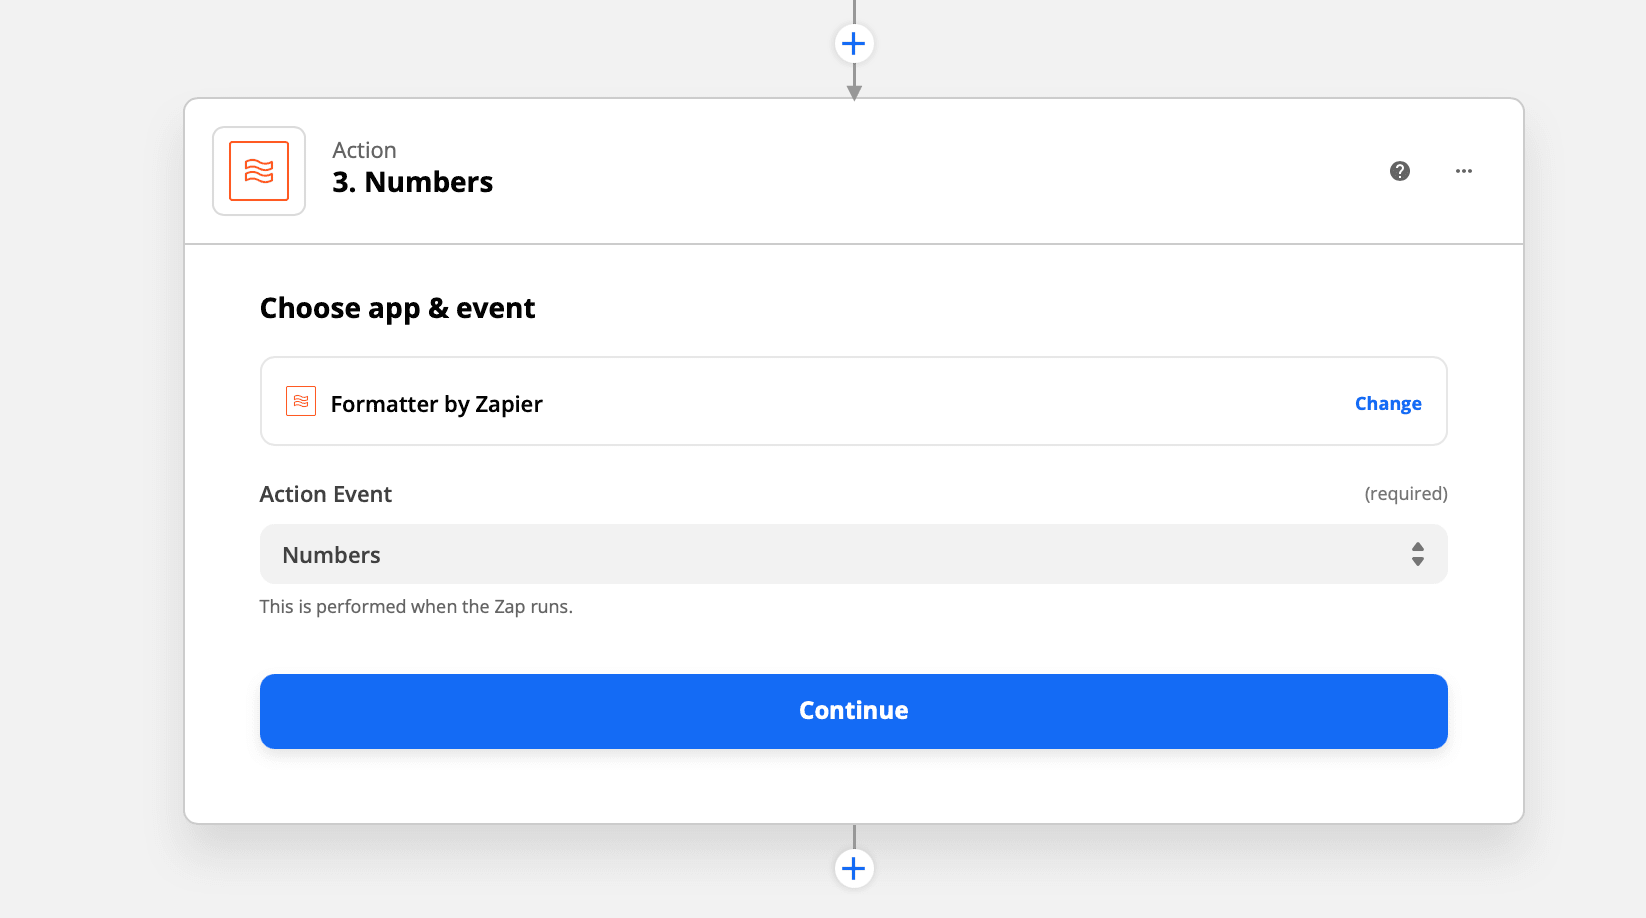
Next we will format the preview price as currency. Click the Action step, or click the plus + icon to add a step to your Zap.
Search for and select _ Formatter by Zapier _ as the app you want to send the digest to. Click the Action Event dropdown menu and select _ Numbers _ as the event :
Set up action:
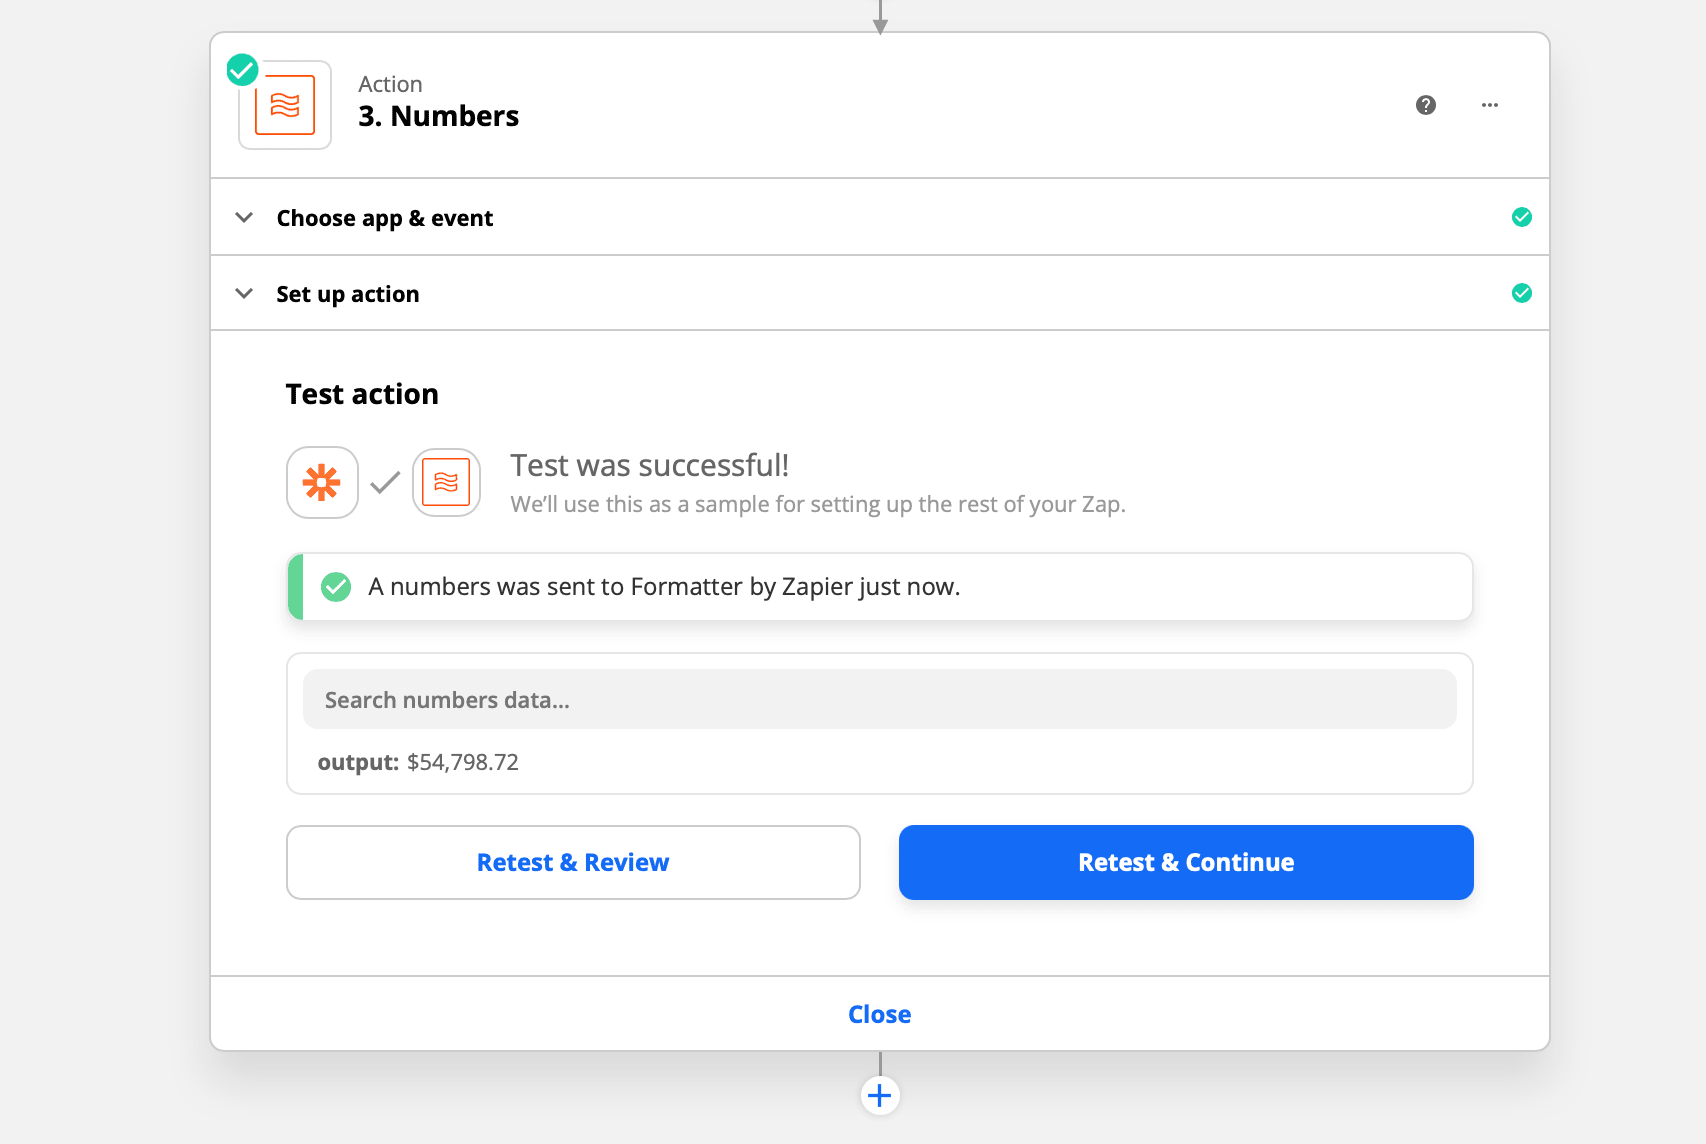
Test zap:
Zap #4: Format Line Items with Formatter by Zapier
Bannerbear processes your chart data as comma-separated values in this format: "26,41,19,21,40,30,30,41,45,29". So we need to format the data output from the Digest:
In the Set up action section, click the Transform dropdown menu and select Split Text.
In the Values section, click the Input field and select the Current digest field from a previous step.
In the Segment Index field, select All (as Separate Fields).
Click Continue:
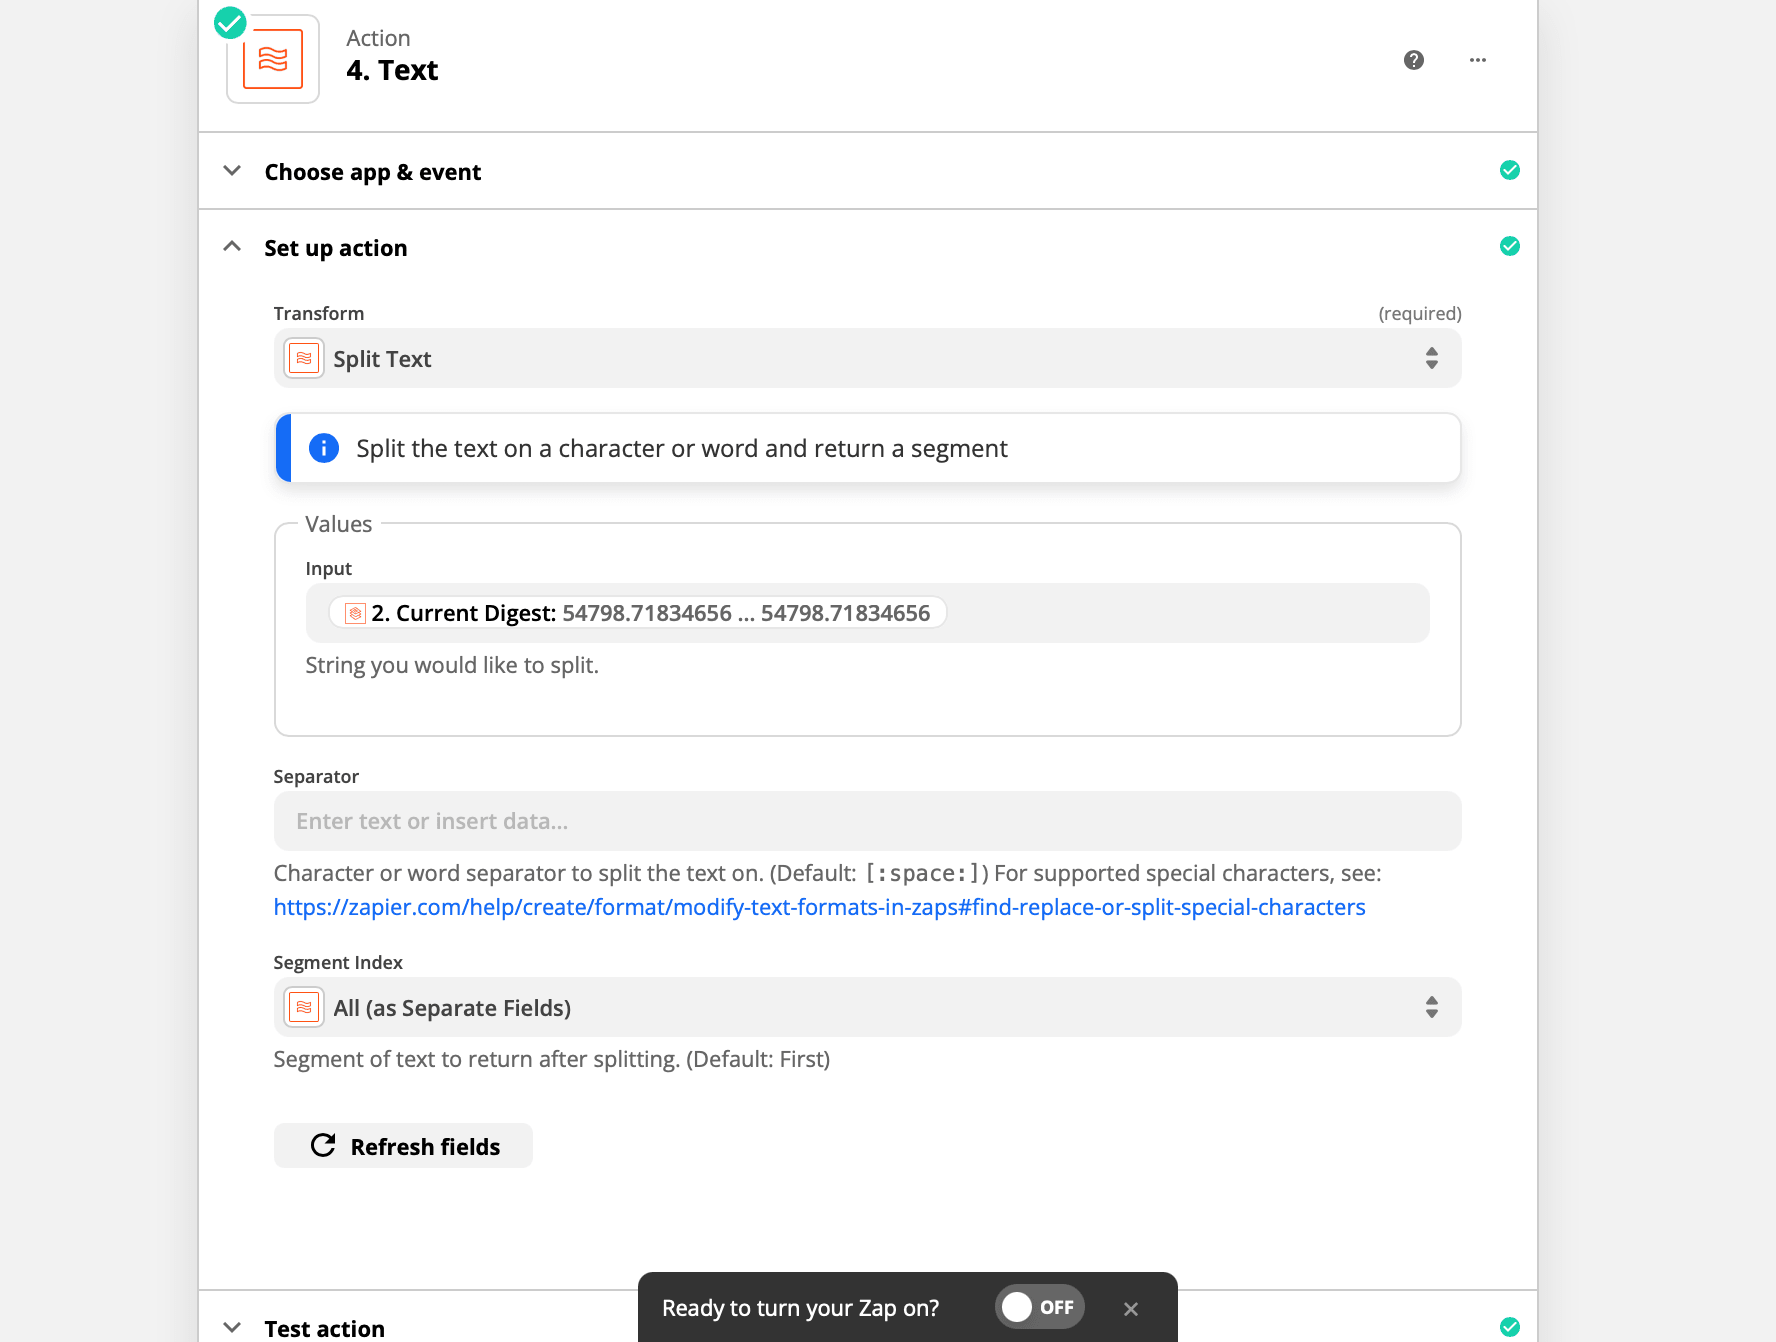
Click Test & Review. If the transformation is successful, the line items will be converted into a separate field for each item as well as a text string of all line items, separated by commas:

Zap #5: Release the content of the digest to Bannerbear
Next, add another action to the Zap to release the content of the digest to Bannerbear.
Click the Action step, or click the plus + icon to add a step to your Zap.
Search for and select Bannerbear as the app you want to send the digest to. Click the Action Event dropdown menu and select Create image as the event:
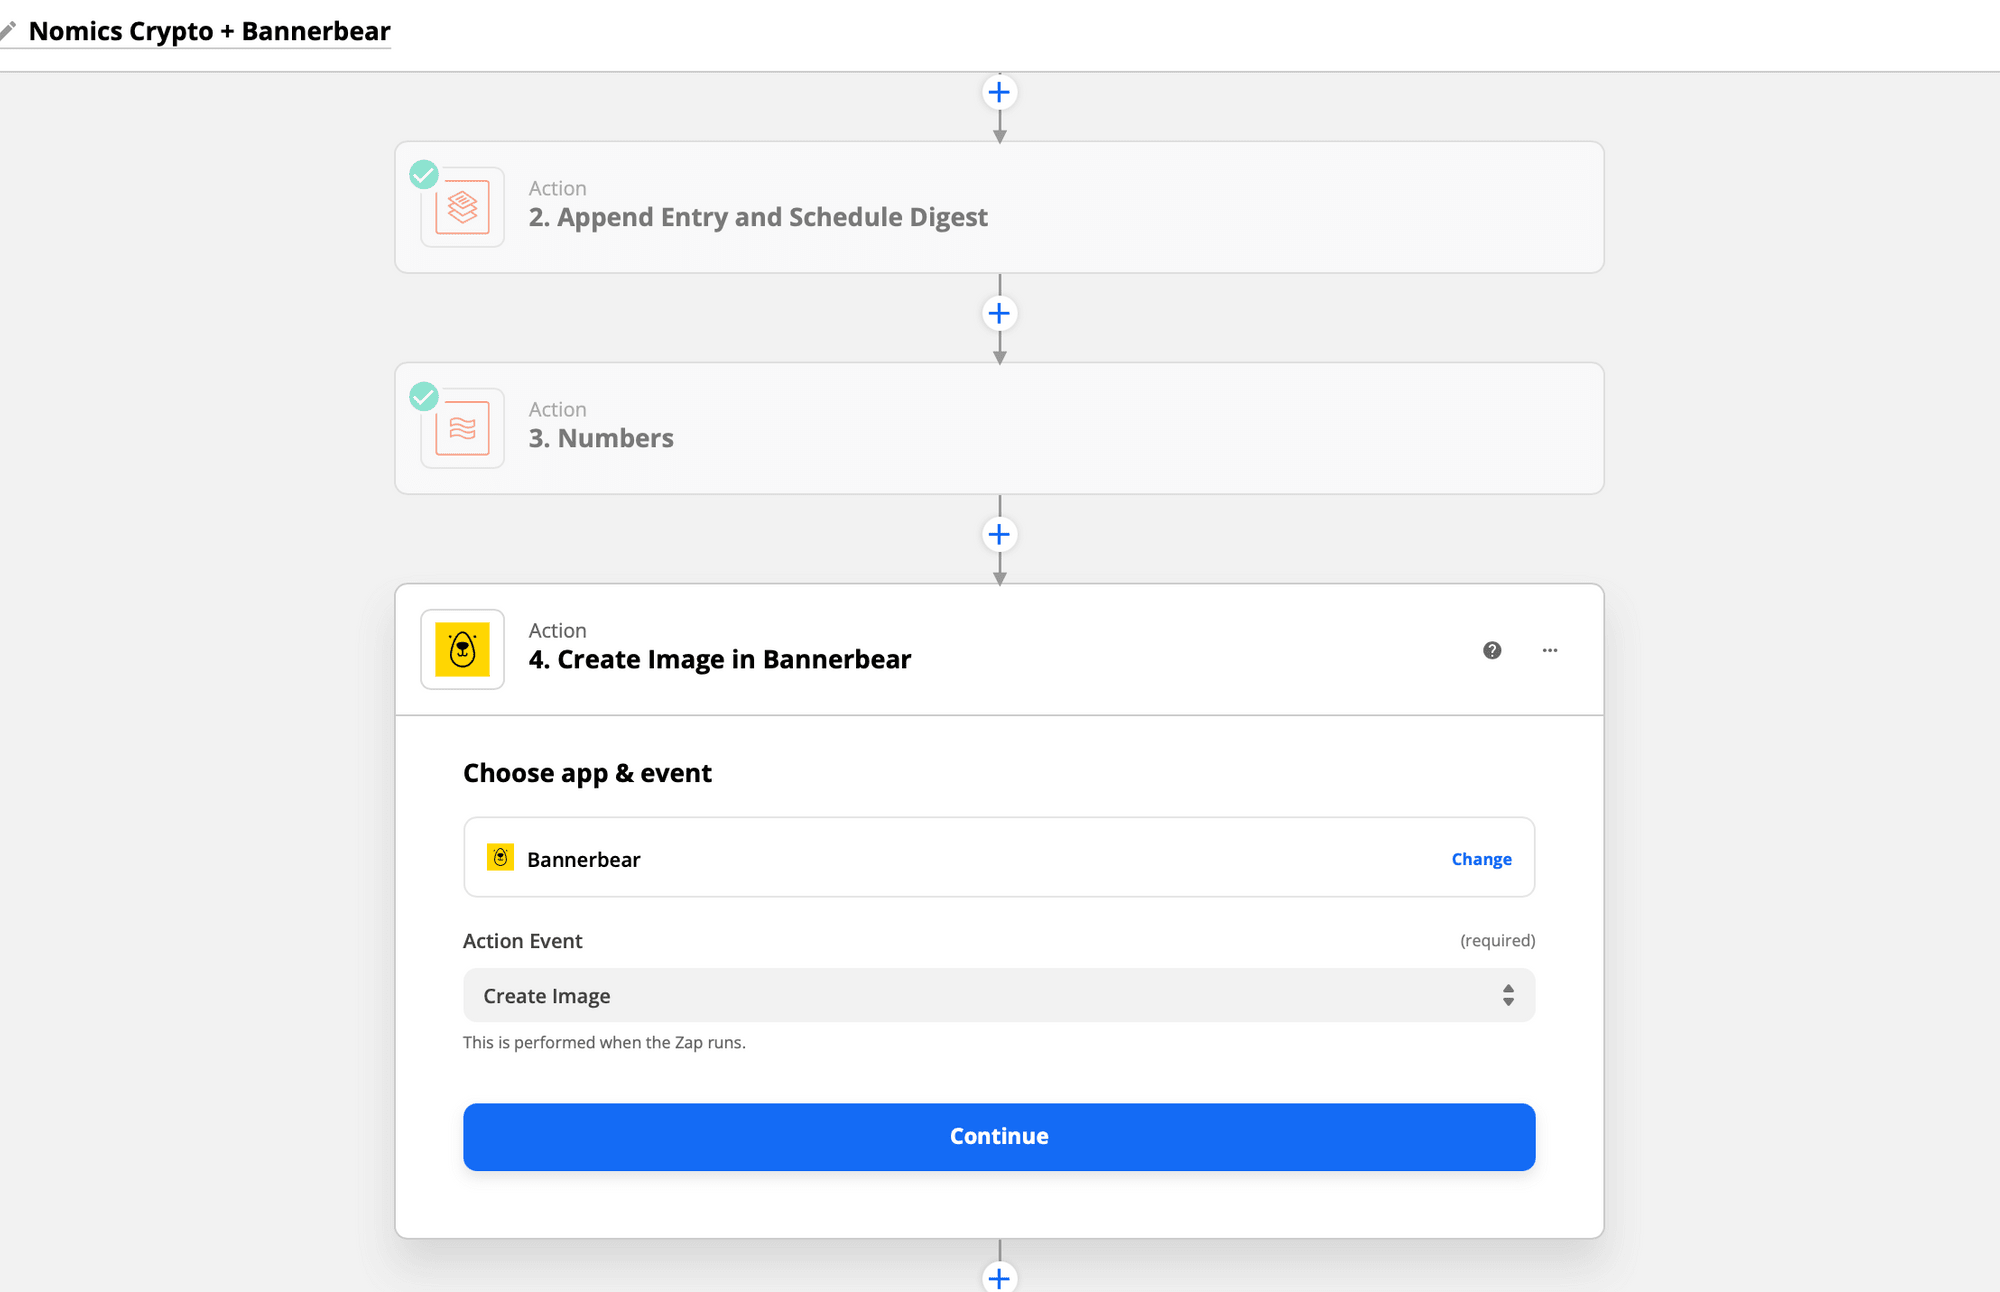
Click Continue.
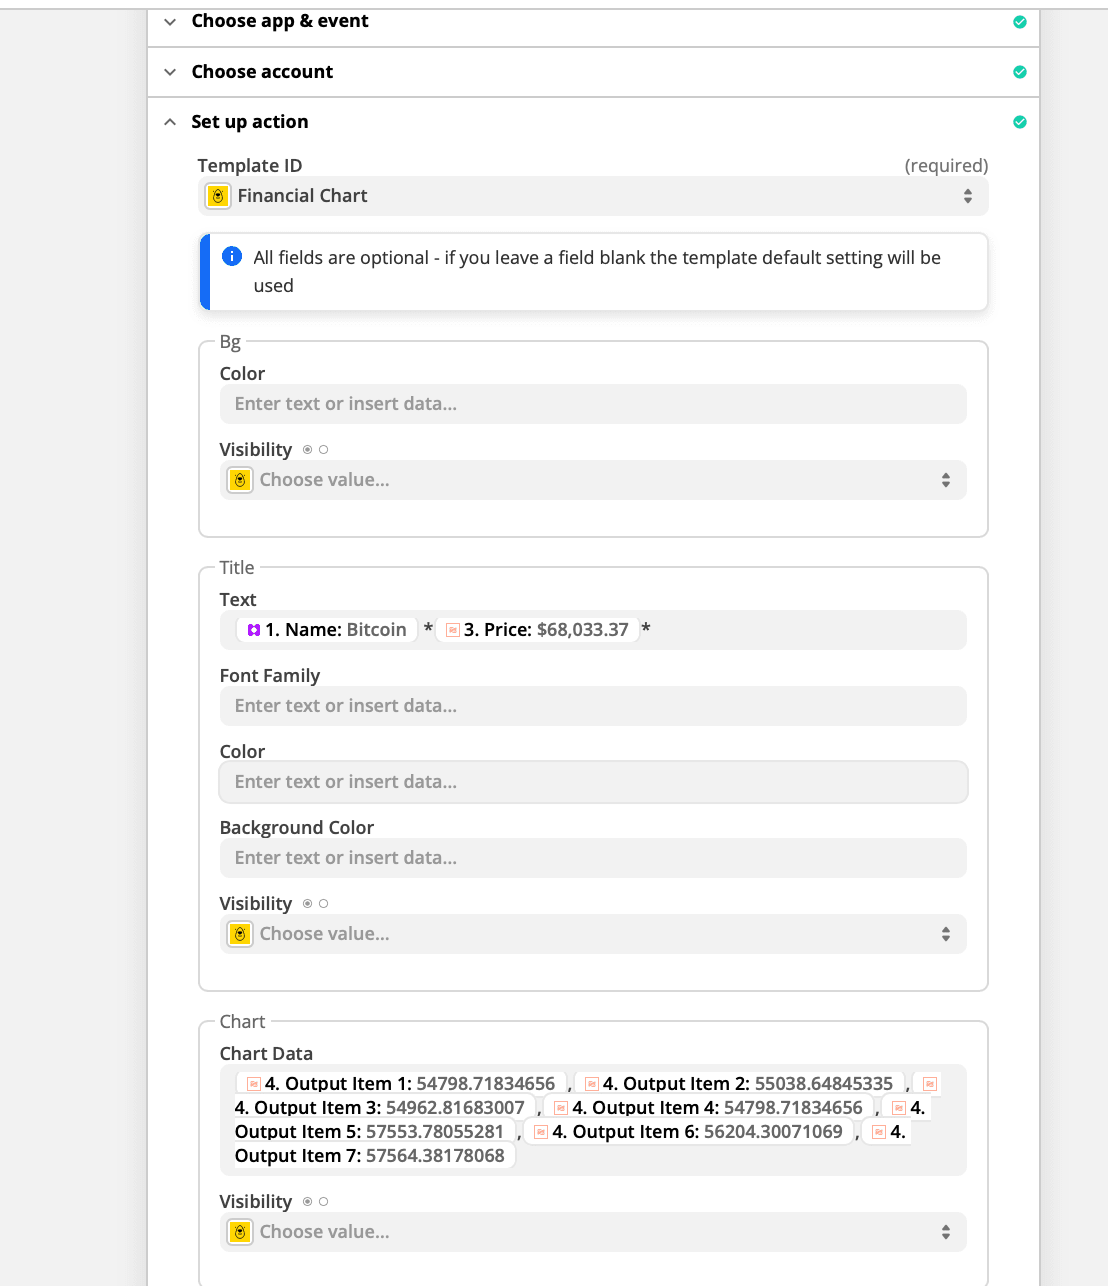
Next, set up your action to include the digest content. Input your Project API key to connect the Bannerbear template:

Select the Template ID from the dropdown menu and map the fields. Match the Name from the Nomics Crypto trigger and the Price from the Formatter by Zapier action.
For the Chart Data, input each output item for the week from Output Items 1 - 7 separated by a comma:
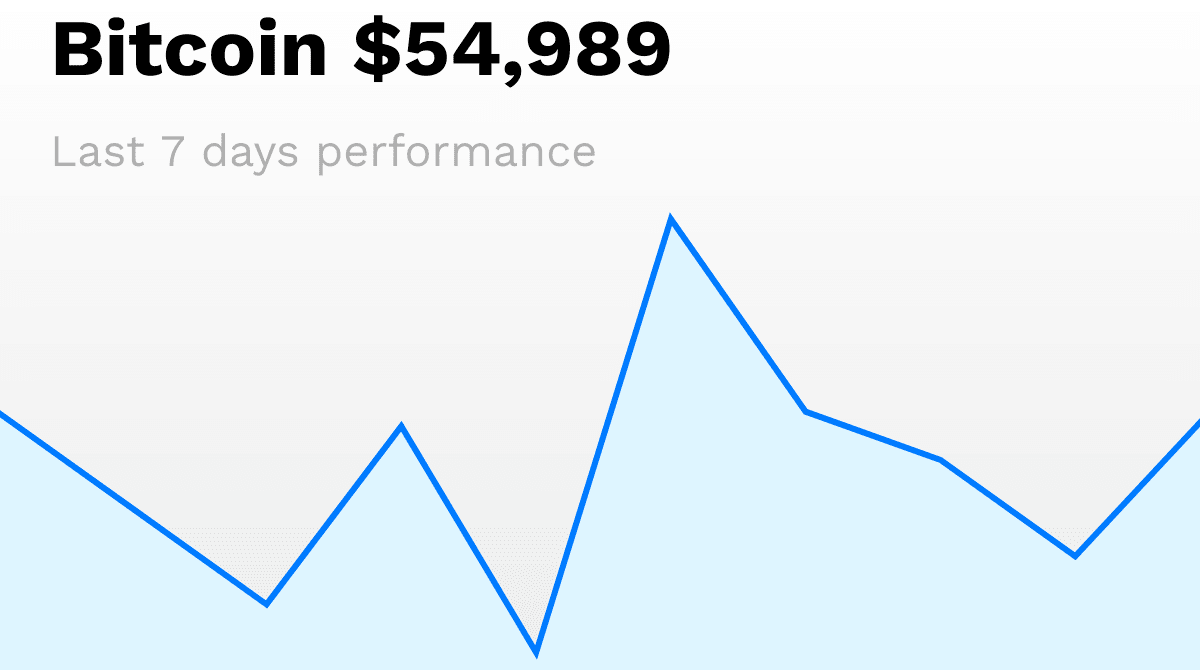
Test & Review. To test the Zap, Zapier will create a URL of a PNG image displaying a Line Chart:

You can also view the image created on Bannerbear:
The generated image will look like the template below.
Conclusion
We automated the process so that every time a new data is pulled for Bitcoin in Nomics Crypto at 0:00 UTC daily, the data is compiled in a single batch and sent weekly to Bannerbear template.
In your Zap History, you’ll see individual Zap runs for each time the Zap was triggered, not only for when the digest is released weekly_:_
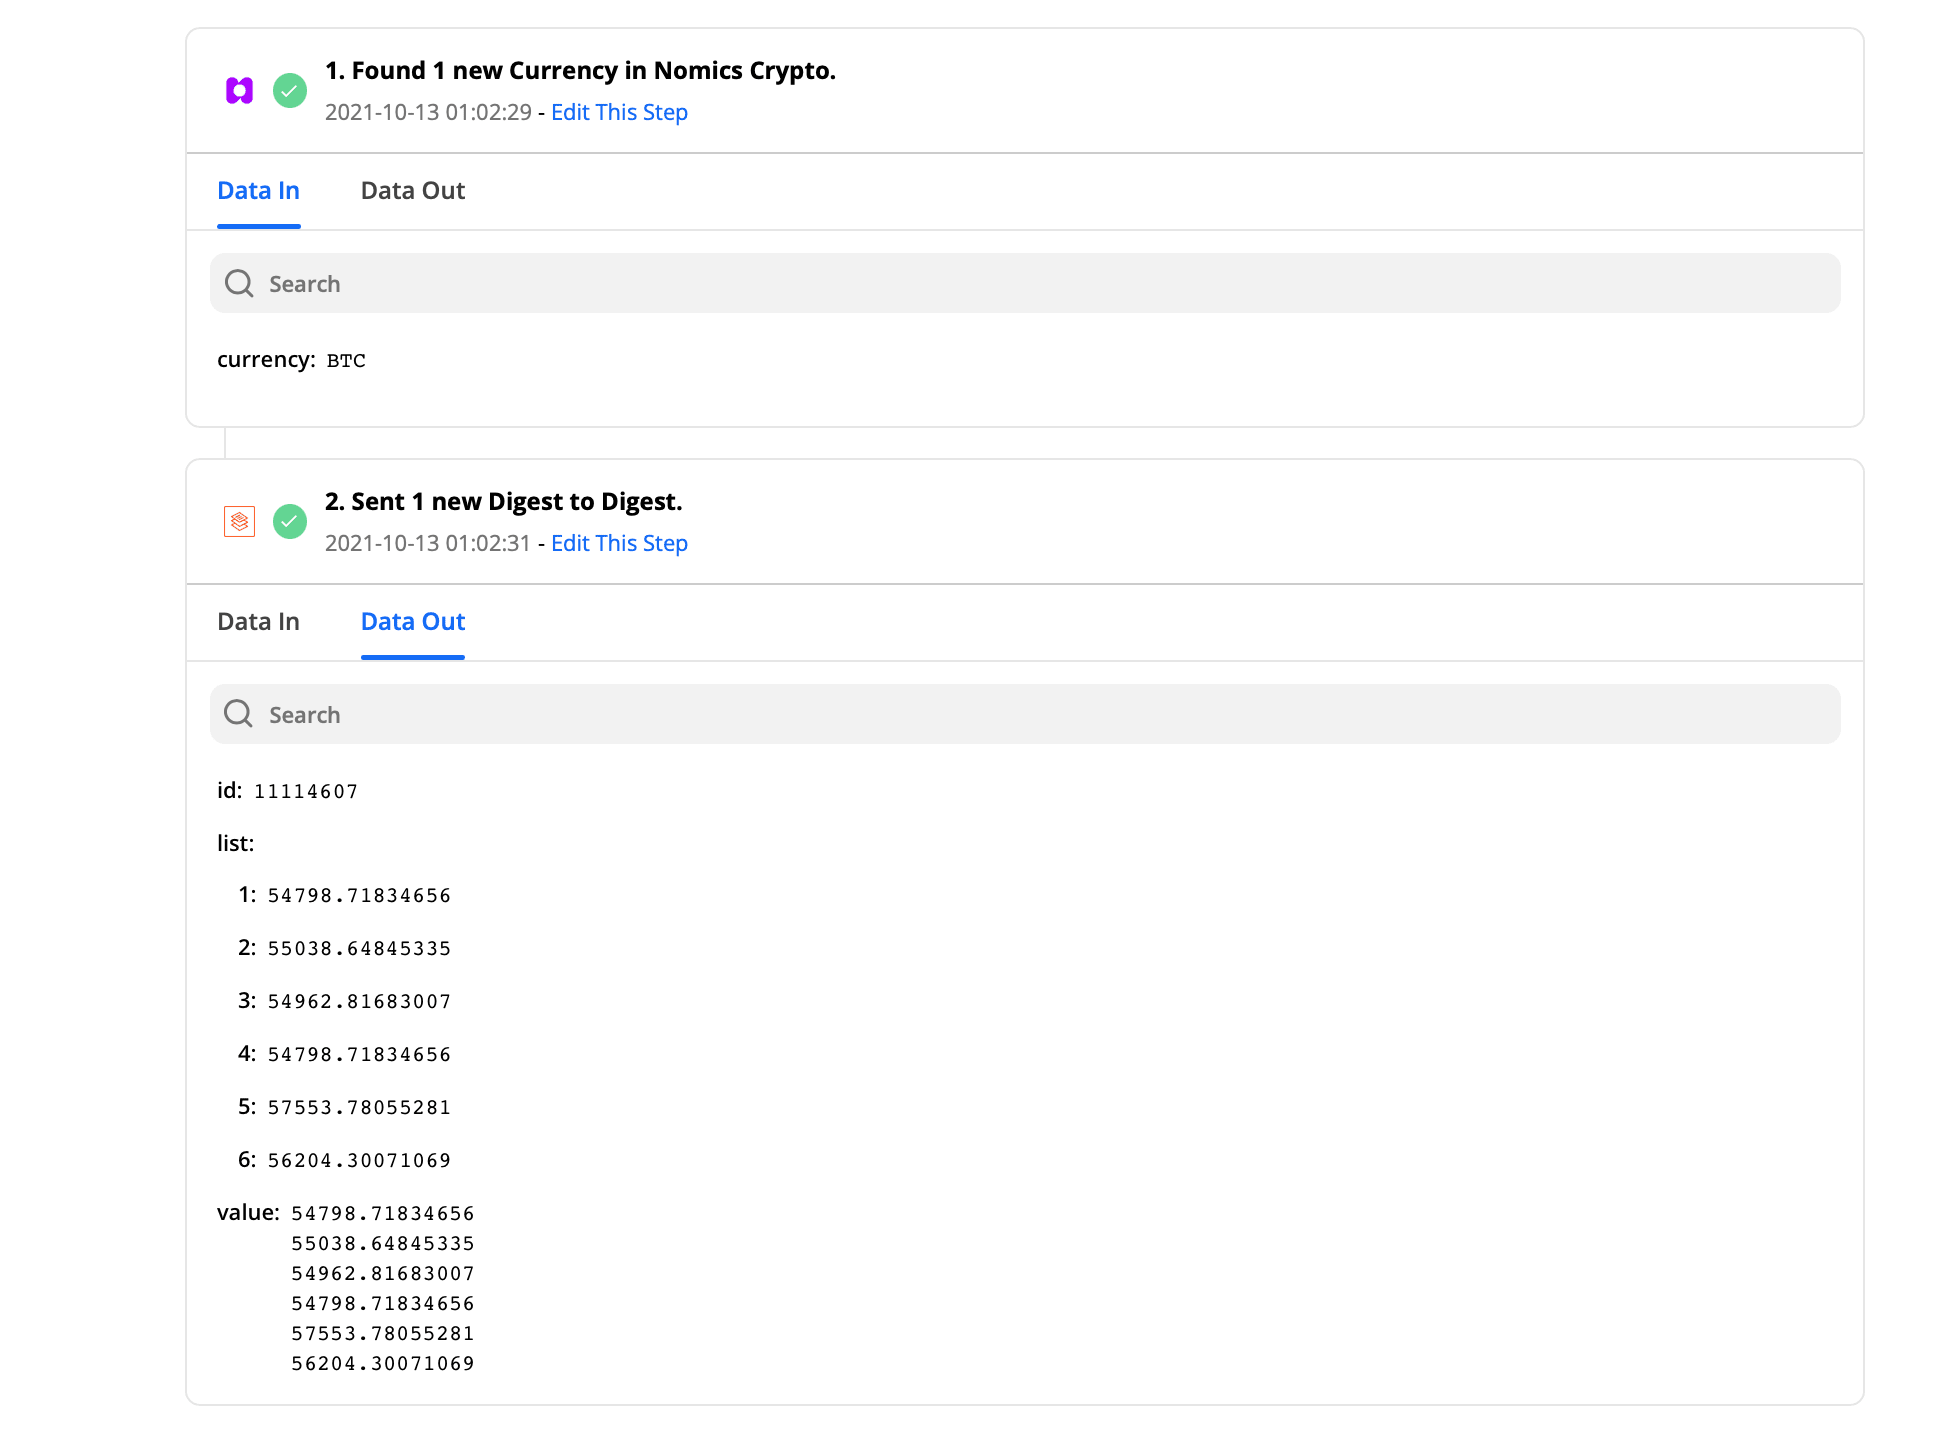
The Data Out shows the digest list:
Next steps
Now that we have successfully automated this process, why not give a try and create Gifs in place of the images. We have a tutorial for that here to give you a head start.