
How to Automatically Create and Print Shipping Labels for Your Online Shop
Contents
E-commerce has grown considerably over the past decade, with over 75% of consumers placing orders online at least once a month. Factors such as widespread use of mobile devices, an increase in omnichannel strategies, and of course, the shift in behavior resulting from the COVID-19 pandemic have led the change.
Experts predict that the e-commerce industry will continue growing alongside customer demand, and that means opportunities for new brands to enter the market. But while the possibilities are abundant, the competition is tough. Businesses need to meet modern consumer expectations to survive in the same landscape as Amazon, eBay, and other e-commerce giants.
When competing with larger brands, technology is indispensable. E-commerce businesses, in particular, rely on it to deliver goods to their customers quickly and accurately.
One area you should absolutely utilize technology in is your shipping labels. With a nocode automation like we’ll be building in this article, you can save time while building brand awareness.
Why Automate the Production of Custom Shipping Labels?
Automation is a game-changer when it comes to manual, repetitive tasks that don’t require complex decision-making. That makes it perfect for tasks like shipping label production.
Using tools to design, generate, and print shipping labels for your e-commerce business automatically pays off by:
- Reducing human error
- Building customer trust with package traceability
- Reinforcing branding
While it’s unlikely for e-commerce businesses and fulfillment centers to fully automate the shipping process (and it’s smart to add a manual inspection element to reduce costly mistakes), technology can significantly reduce the time it takes to box up and send out a package. As a result, you can serve many more customers at the same resource levels.
In this tutorial, you’ll learn how to design a template, auto-populate fields, and print labels that you can then add to e-commerce packages to make shipping easy.
What You Will Create
Complete, accurate labels increase the odds of every package arriving at customers’ houses, safe and sound.
Here are the tools you’ll need to generate branded shipping labels for every package your customers order:
- Airtable : To store order information and trigger shipping label production
- Bannerbear : To design templates and generate new labels for every order
- Zapier : To trigger actions in different programs based on pre-specified commands
To print shipping labels automatically, you’ll also need a printer capable of producing the type you need and an ezeep ↗account (free for up to 10 users!).
(Optional) If you are receiving orders through an e-commerce platform, consider adding a step that receives confirmed orders and sends them to your Airtable base.
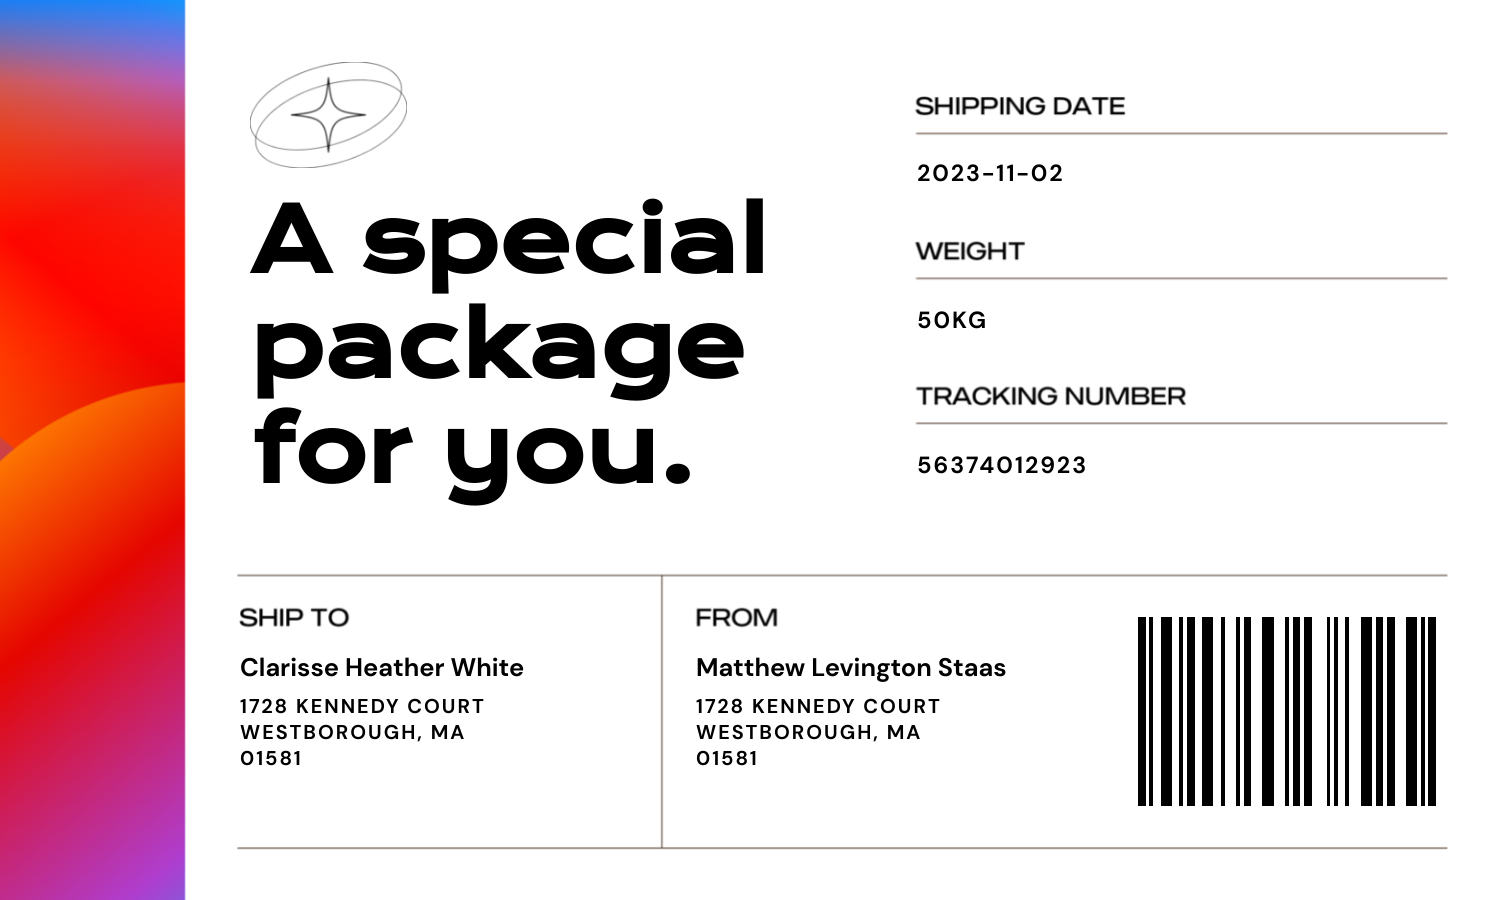
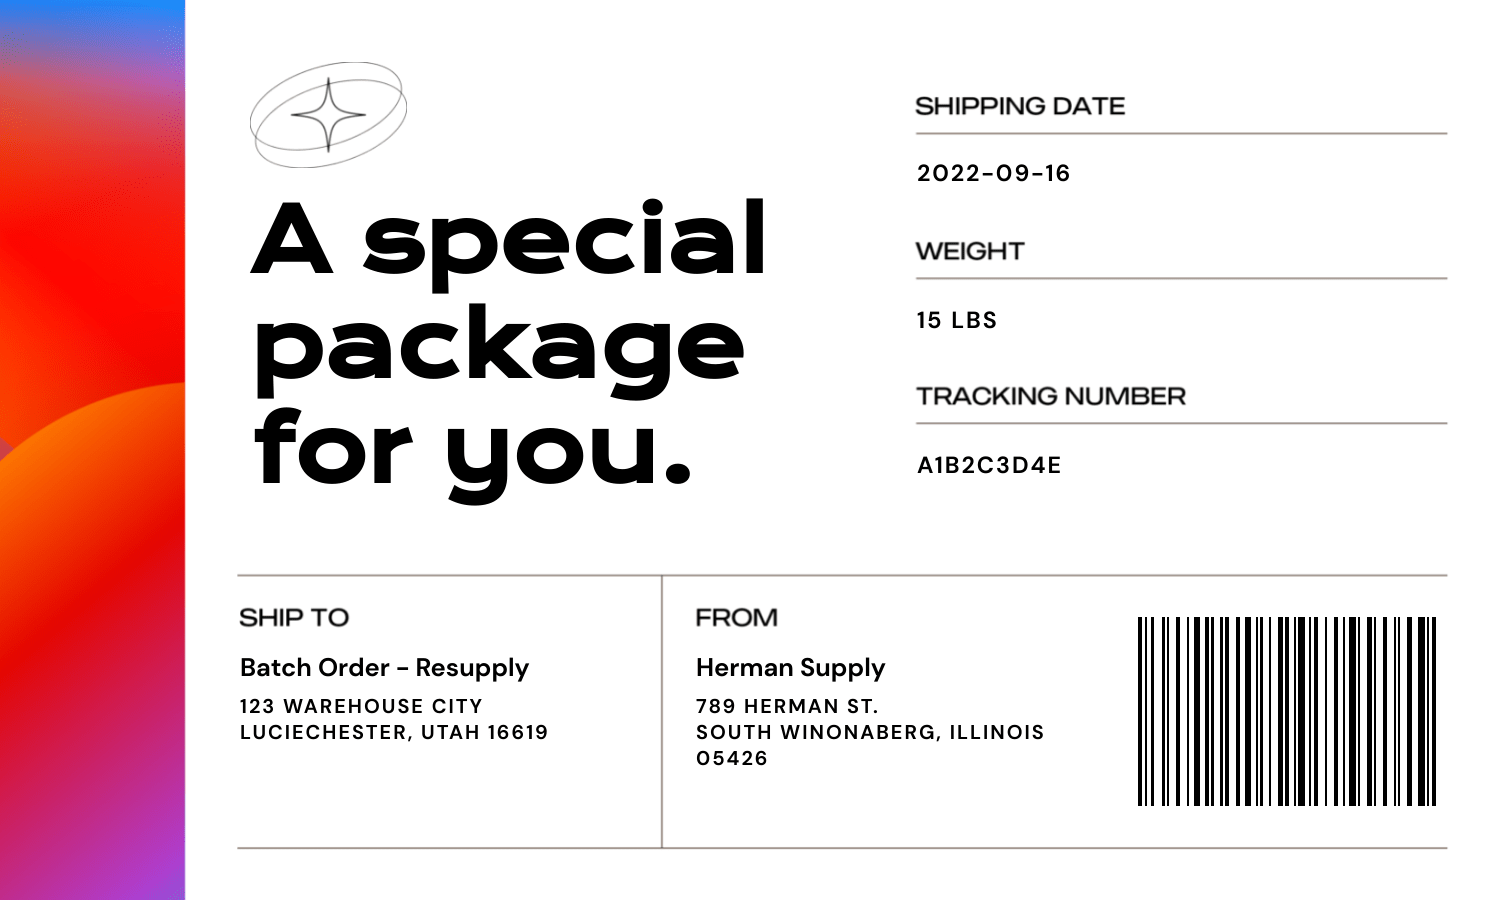
By the end of the tutorial, you should be able to produce a shipping label that looks something like this:

We will use a few samples from Herman Supply ↗’s product catalog and some hypothetical clients and orders to produce these assets.
Let’s get started!
Customize Your Bannerbear Template
A customized shipping label will serve its function while reinforcing your brand’s identity. Create a template by logging into your Bannerbear account, then going to the “Projects” tab. Create a new project, and start with a blank file.
You can also choose from our selection of shipping label templates:
A few things to keep in mind when designing your shipping label:
1 - Choose dimensions that are appropriate for your packaging. It’s easiest to design something that will work for a variety of packaging options, but you can also use conditional rules to generate differently sized labels if a package exceeds a certain weight.
2 - Match design to your branding. This will create cohesiveness and help customers associate brand elements with your business.
3 - Consider shipping service requirements. Every shipping service has their own tracking process and label requirements, so avoid any errors by following their recommendations.
Edit your template according to your needs, then click “Save Template.”
Bear Tip 🐻: Bannerbear currently supports four barcode formats: CODE128, EAN13, UPC, and EAN8. When designing your template, choose the type of shipping barcode that your logistics partner recommends.
Create an Airtable Base for Products, Clients, and Orders
We will be using Airtable for the purposes of this tutorial, but most database software and e-commerce platforms can be used to produce the same end result, save for a few modifications. You essentially need a way to track products, clients, orders, and other important details.
Log onto your Airtable account, and create a new base. If you already have a database, simply make any adjustments needed to include shipping label information.
Step 1. Create a Table for Product Information
The Products table should include any details you want to track, such as name, image, unit cost, total units sold, and gross sales. For shipping purposes, you should also include weight per unit.
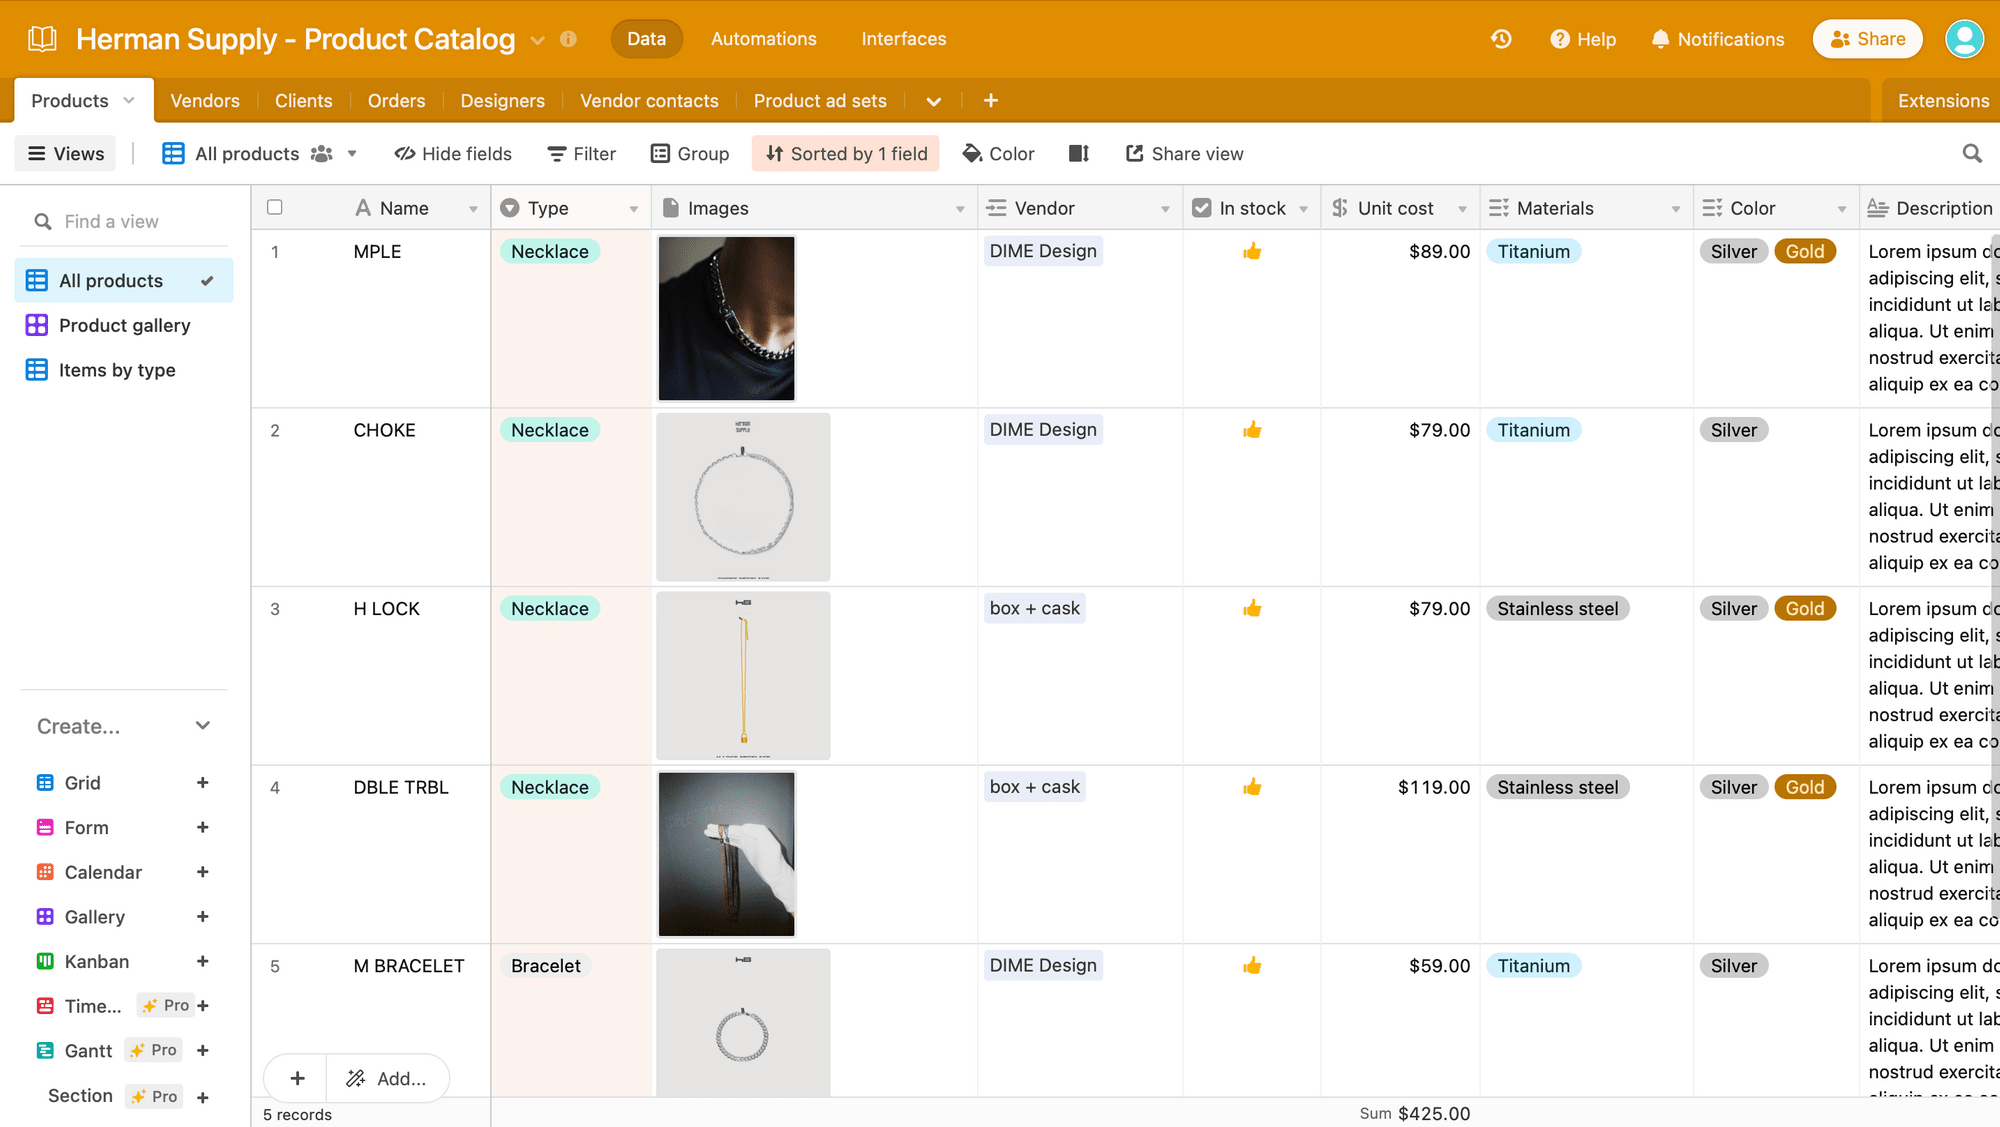
Make any modifications to suit your needs, and consider adding views that make it easier to look up items by image or category.
Step 2. Create a Table for Client Information
The Clients table puts contact and delivery information in one place. For shipment purposes, you will need fields for shipping and billing addresses, as well as contact information.
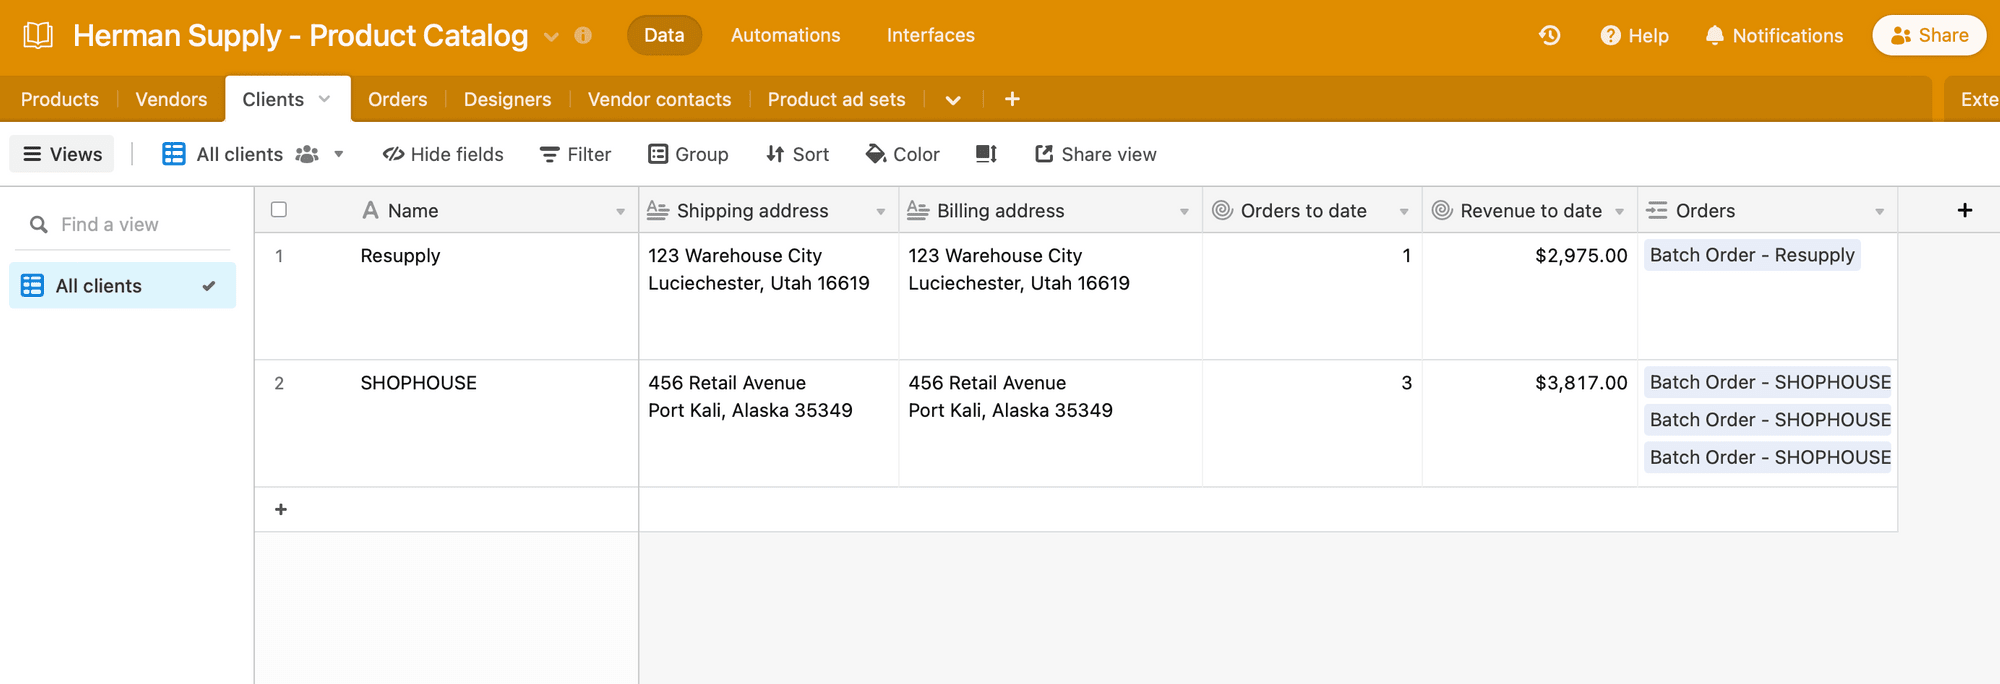
You might also want to include rollup fields that help you summarize client value with total orders and revenue earned. A lookup field also helps you find specific order data information with ease.
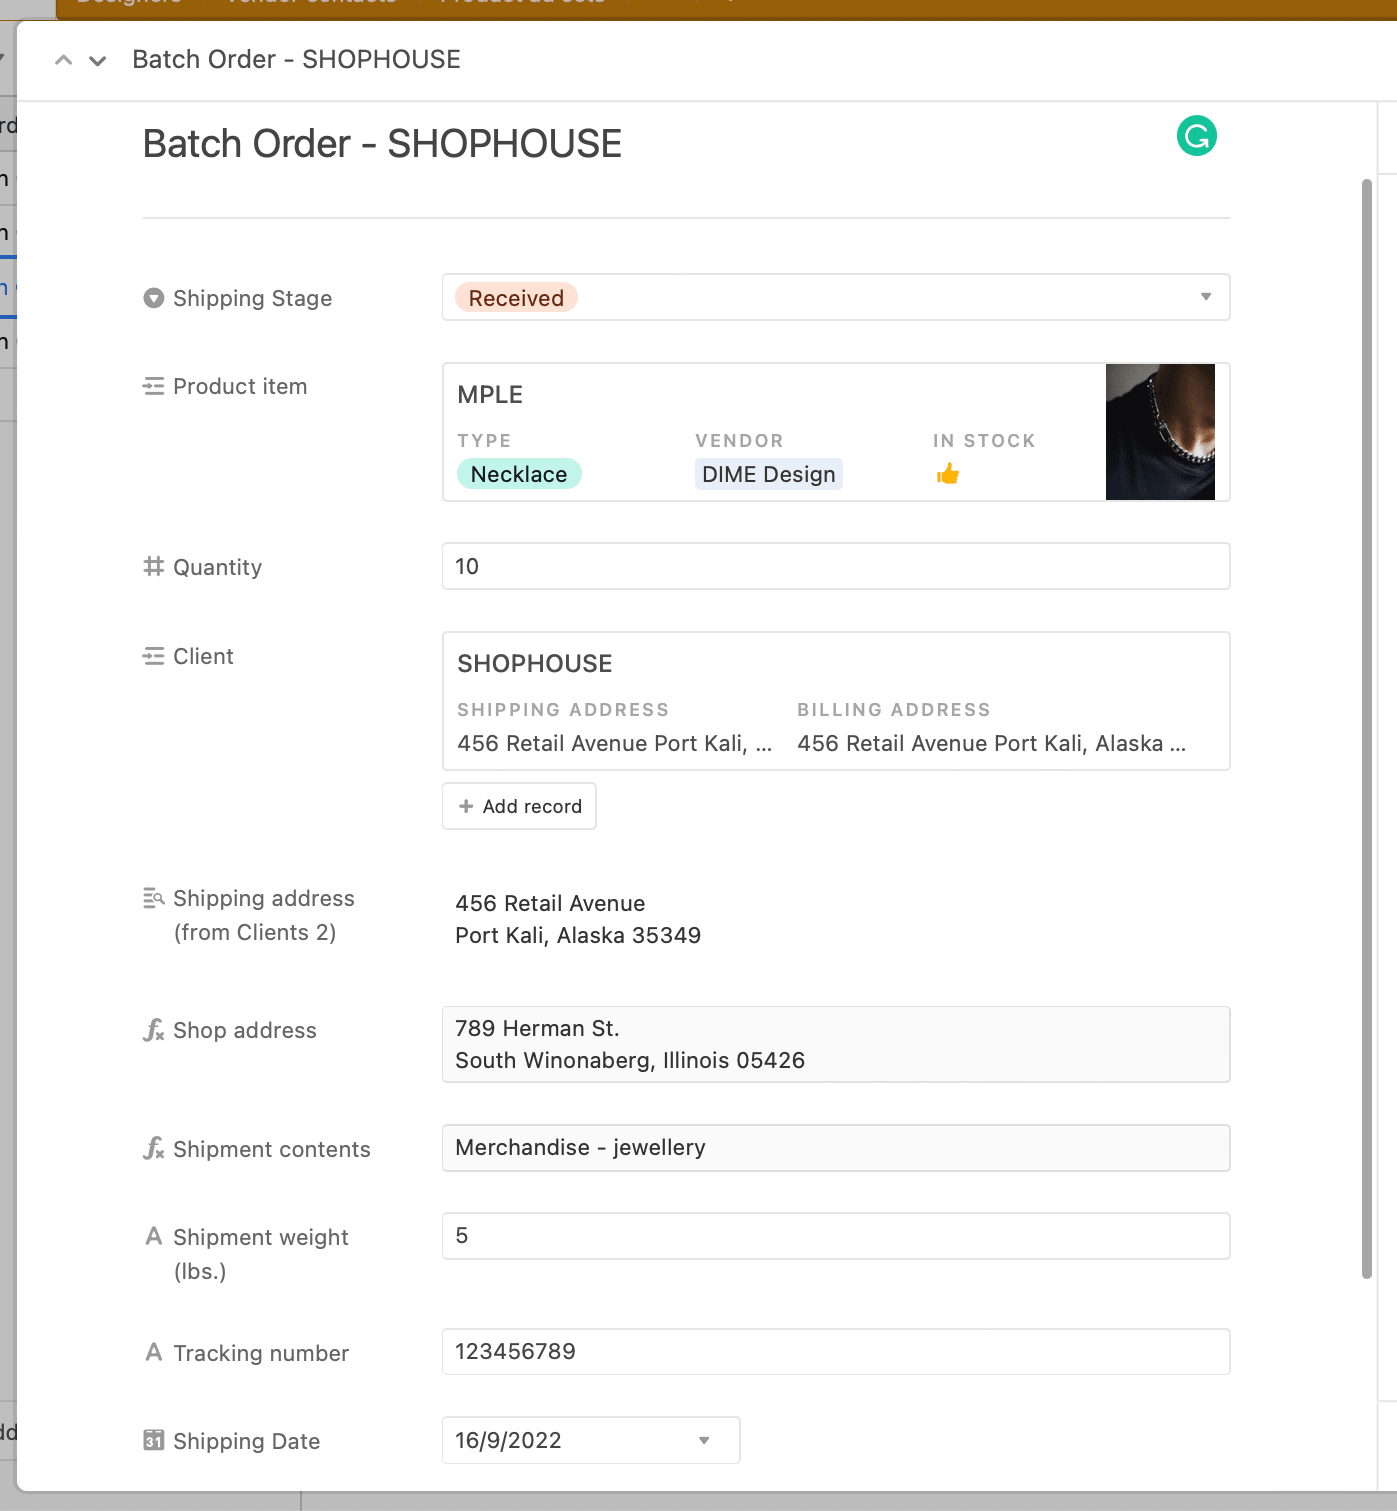
Step 3. Create a Table for Order Information
The Orders table is the most important for shipping label generation. You will create two views: one for all orders and another for orders that need to be shipped. Other views can also help you filter to view certain stages in the shipping process, such as orders waiting to be shipped.
Suggested fields for the All Orders view include:
- Order Type - Client
- Shipping Stage
- Product Item
- Quantity
- Total Cost
- Client
- Shipping Address
- Shop Address
- Shipment Contents
- Shipment Weight
- Tracking Number (Note: make sure tracking number is recorded in a format that agrees with your template’s chosen barcode format)
- Shipping Date
You can also add details such as unit cost and product images.
The Shipment Orders view will need to be filtered to include only orders that need to be packed and sent through a carrier. We will use three filters: (1) Client is not empty, (2) Shipping address is not empty, and (3) Tracking number is not empty. These will ensure labels aren’t produced without complete information.
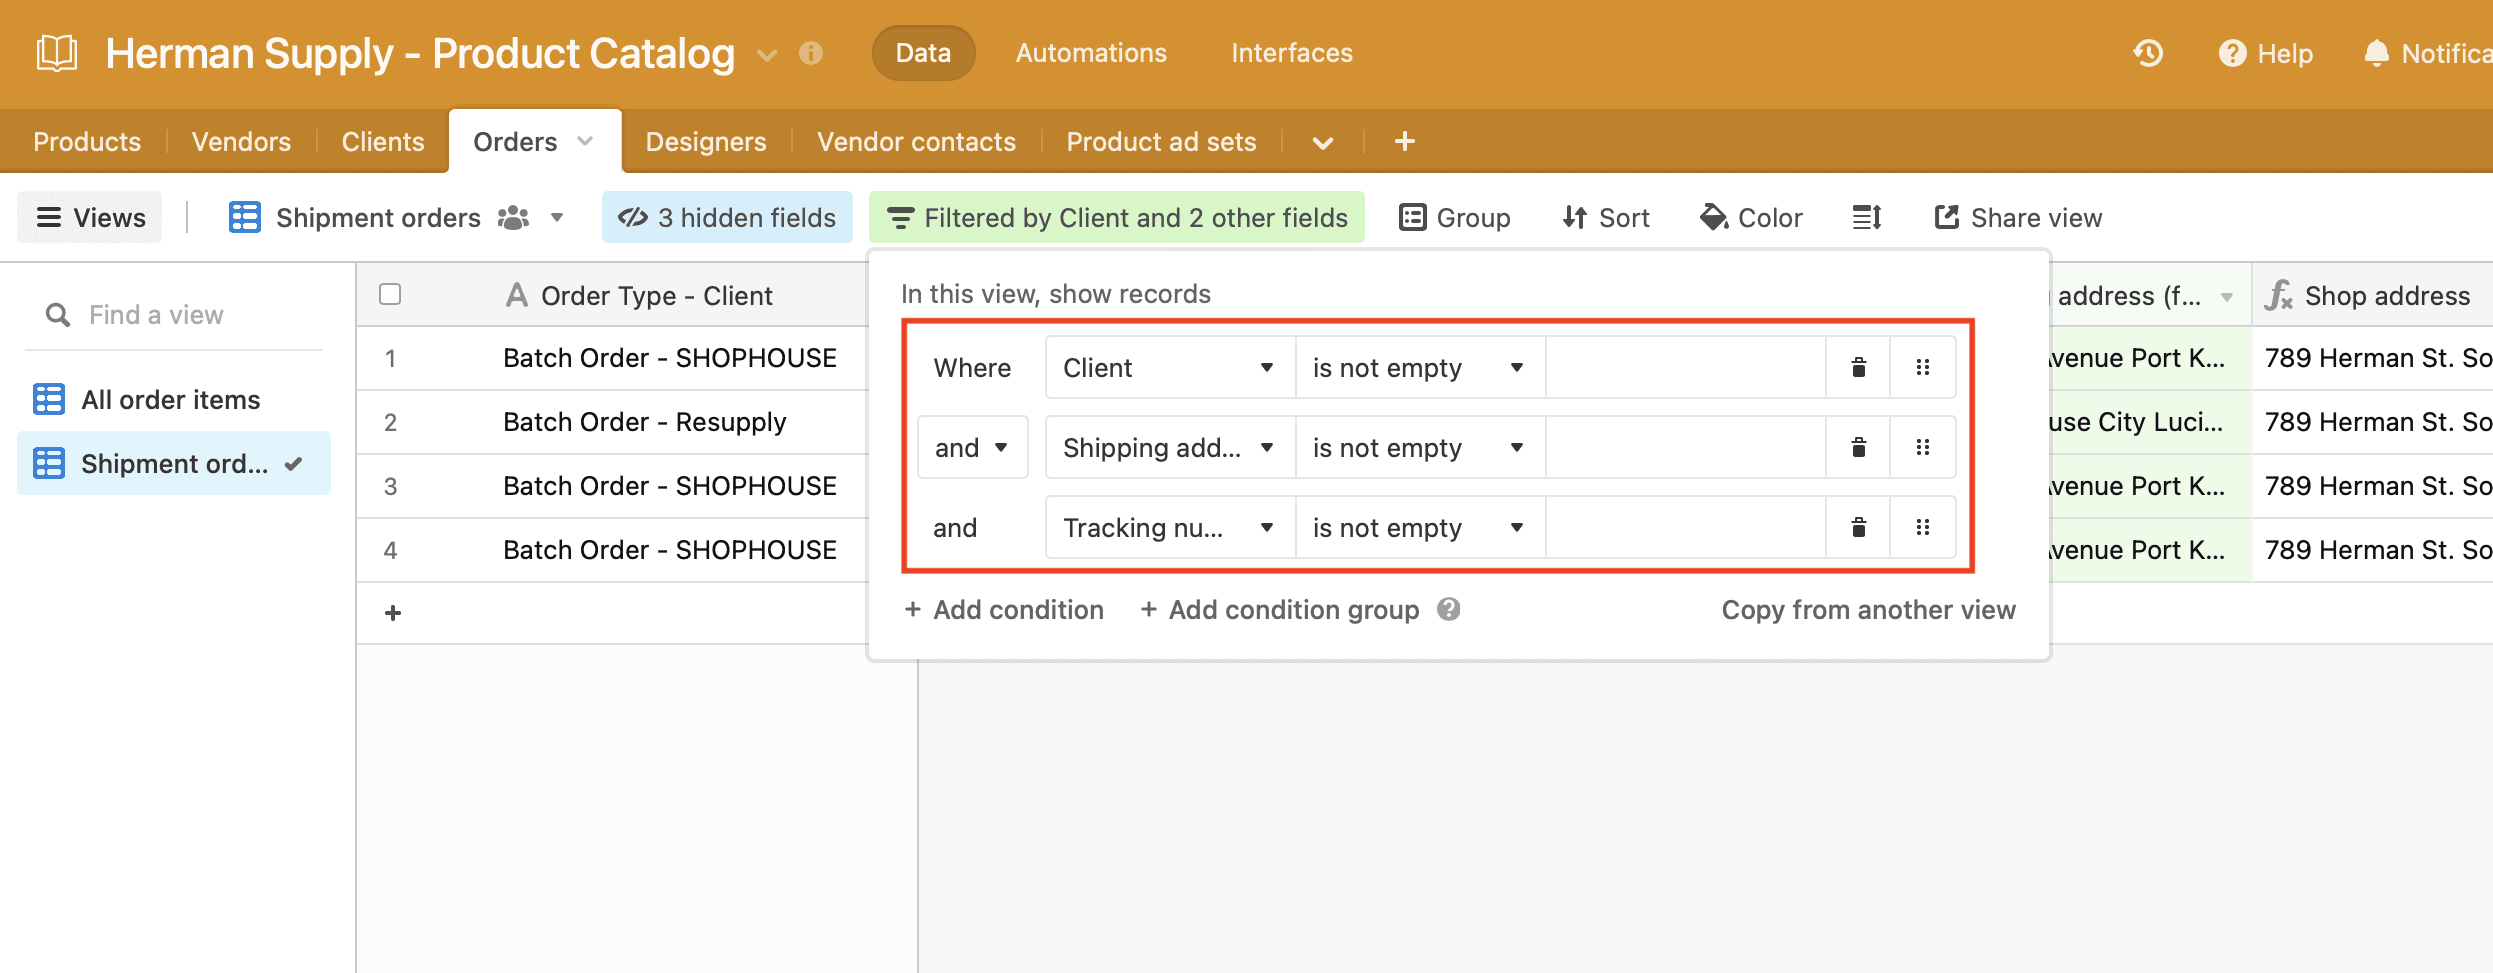
Hide any fields that aren’t important.
❗ Note : Save time and increase label accuracy by populating the Order table with information received by any e-commerce softwares you use. Most popular platforms such as Shopify and WooCommerce have integrations with Zapier so you can set up an automation that sends order information directly to Airtable.
Set up Zapier to Generate and Print Shipping Labels
Most fulfillment softwares still require some human intervention to increase accuracy, and it can be a great idea to add a final checking step prior to printing labels and sending packages off for delivery. However, task automation can relieve you from too much manual work while still producing beautiful results.
Log into your Zapier account, click “+ Create Zap,” and set up the following events to generate and print your bespoke shipping labels automatically:
Trigger: New Record in Airtable
Choose Airtable as the app and “New Record” as the event. If you haven’t connected your Airtable account to Zapier yet, you will be prompted to do so using the API key found on your Account page.
Once connected, select your account, then set up the trigger by choosing the right base, table, and view (Shipment Orders view).
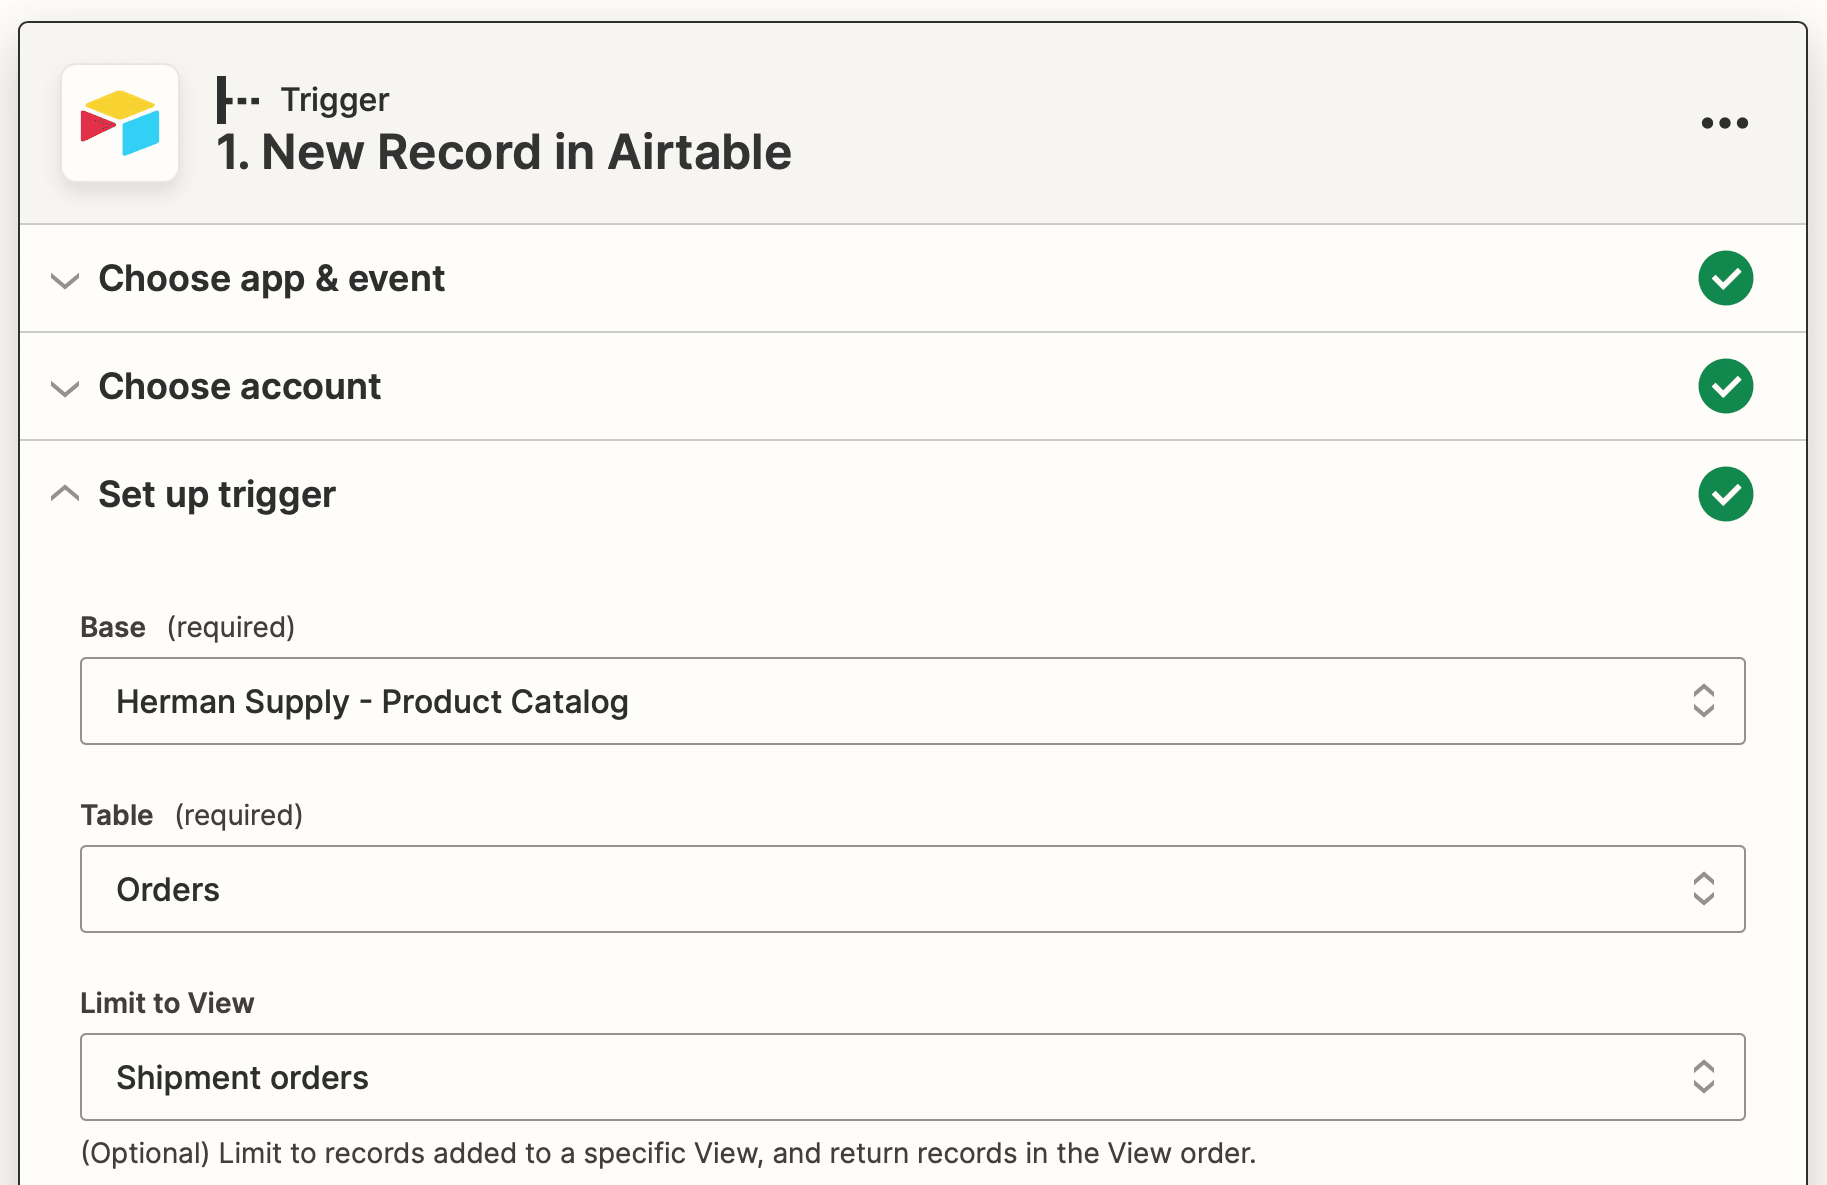
Test the trigger to ensure Zapier is able to find a record, then continue.
Action: Create Image in Bannerbear
Choose Bannerbear as the app and “Create Image” as the event. If you haven’t connected your Bannerbear project yet, you will be prompted to do so using the key found by clicking the “Settings / API Key” button on the associated project page in the Bannerbear app.
Once connected, proceed by selecting the correct template. Set up the action by mapping all of the Airtable shipping label details to their corresponding template fields.
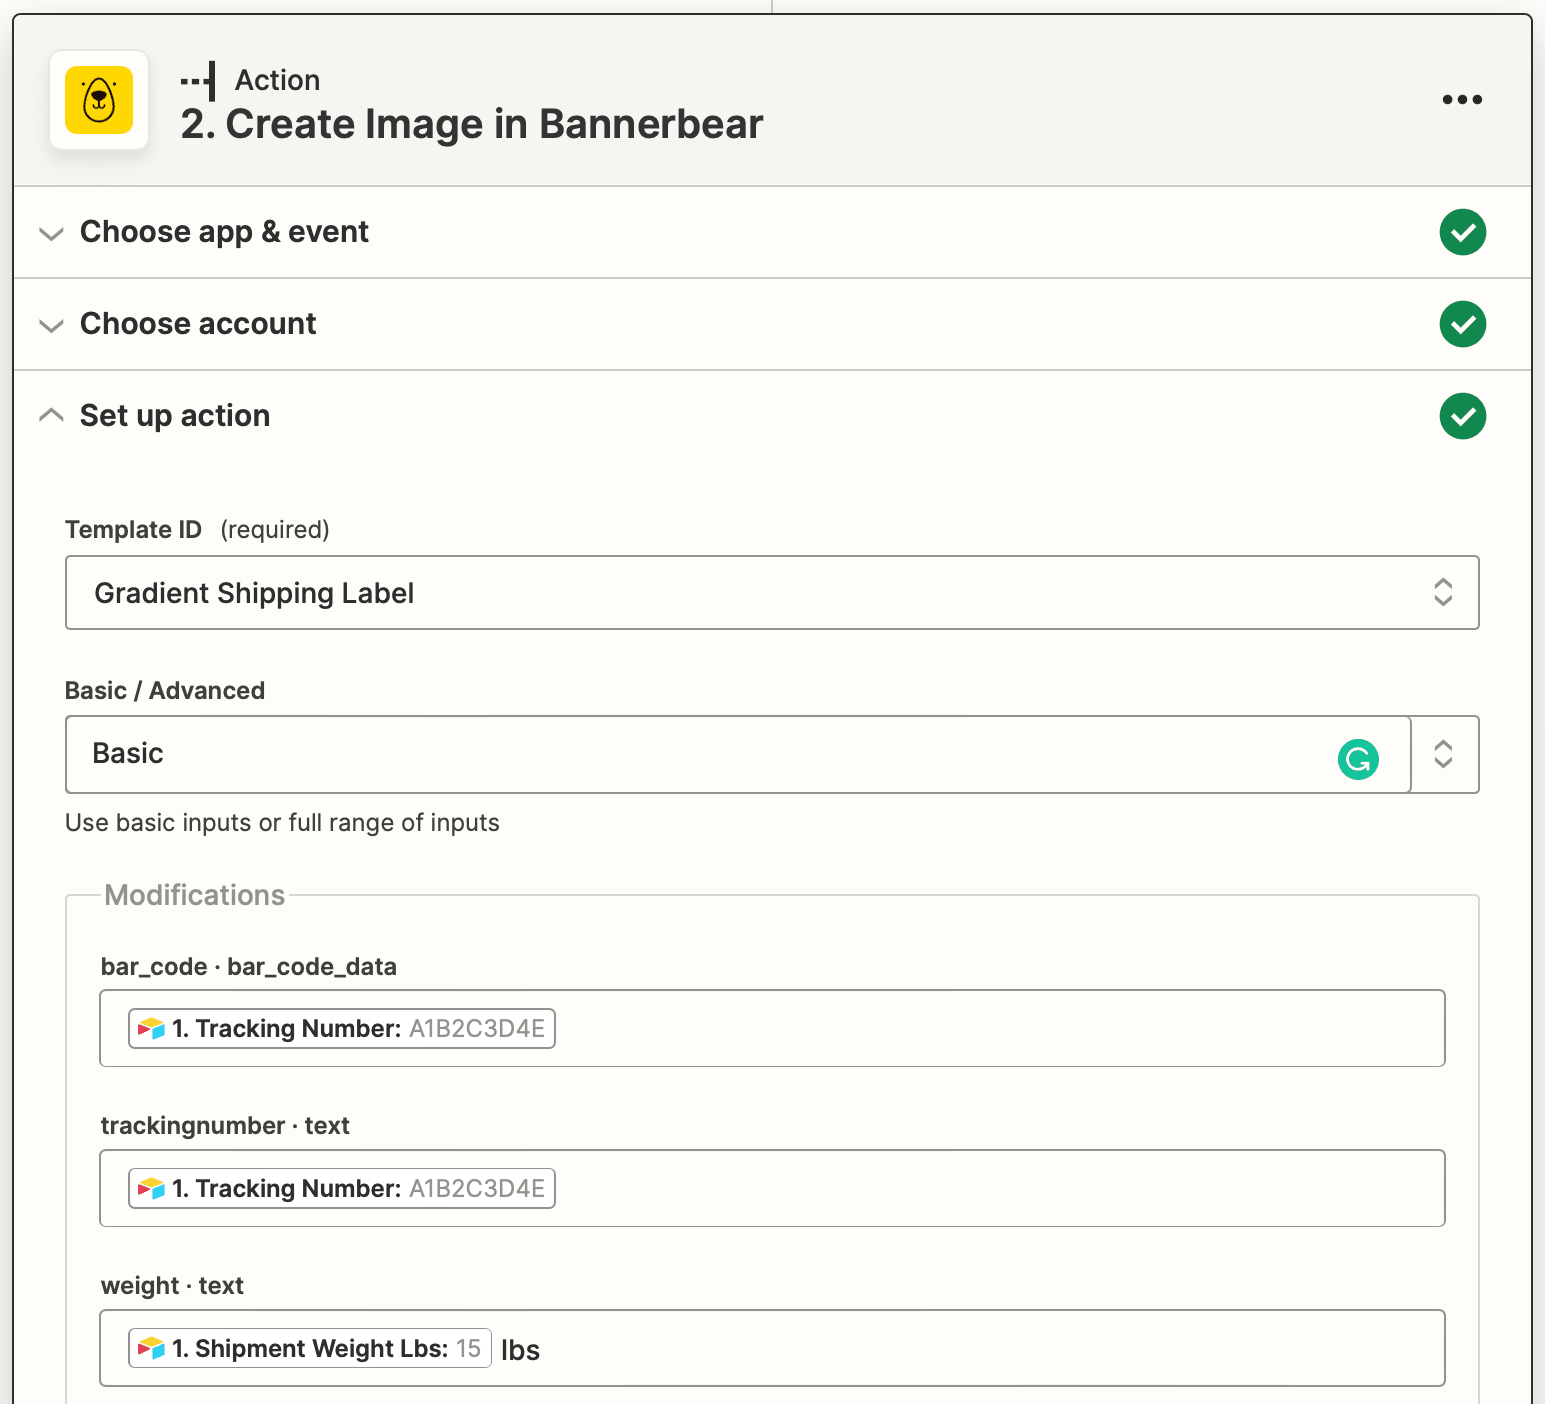
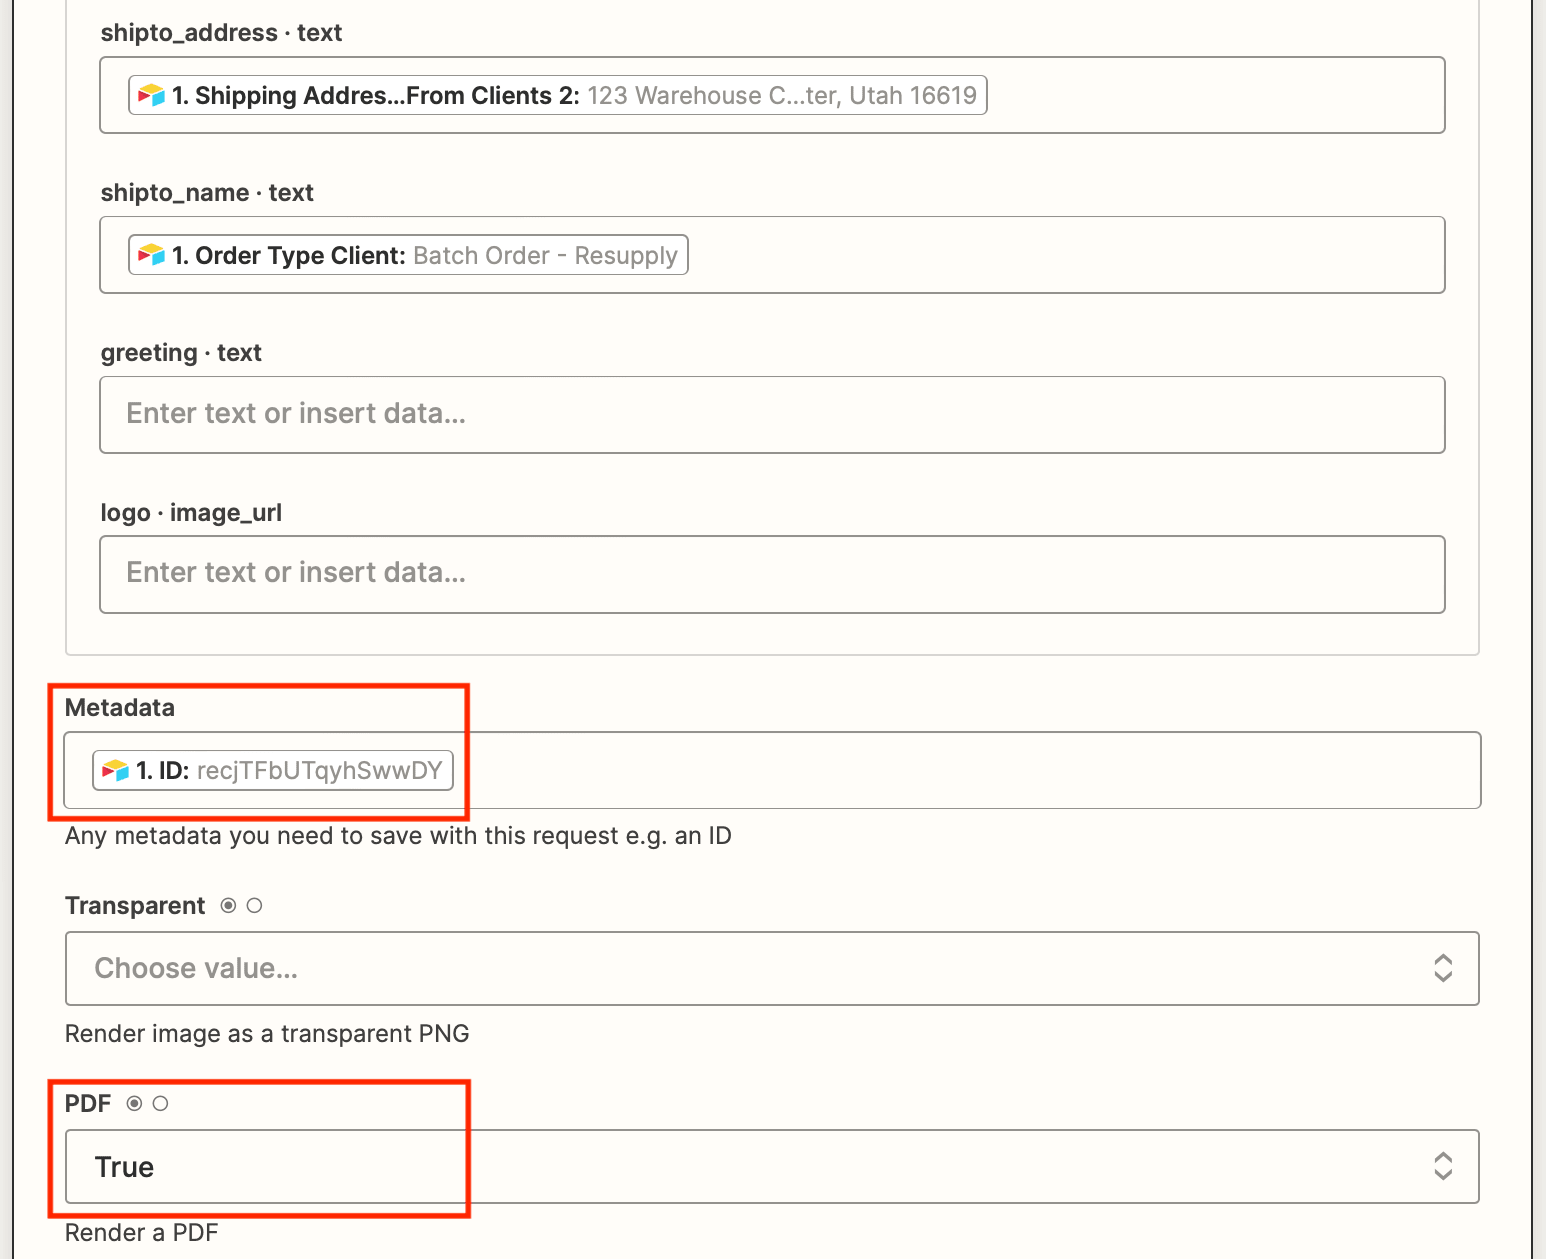
Set the PDF field value to “True" as the format is more suitable for printed materials.
When setup is complete, test the trigger to ensure the generated label is to your liking.
Bear Tip 🐻: If you would like to save a copy of the shipping label to your Airtable base, save the record ID as metadata and add another action to “Update Record in Airtable” to your zap.
Action: Print File in ezeep Blue printing
Choose ezeep Blue printing as the app and “Print File” as the event. If your ezeep account has not been connected yet, you will be prompted to log in.
Once connected, set up the action by selecting the correct printer and the generated label URL as a file reference.
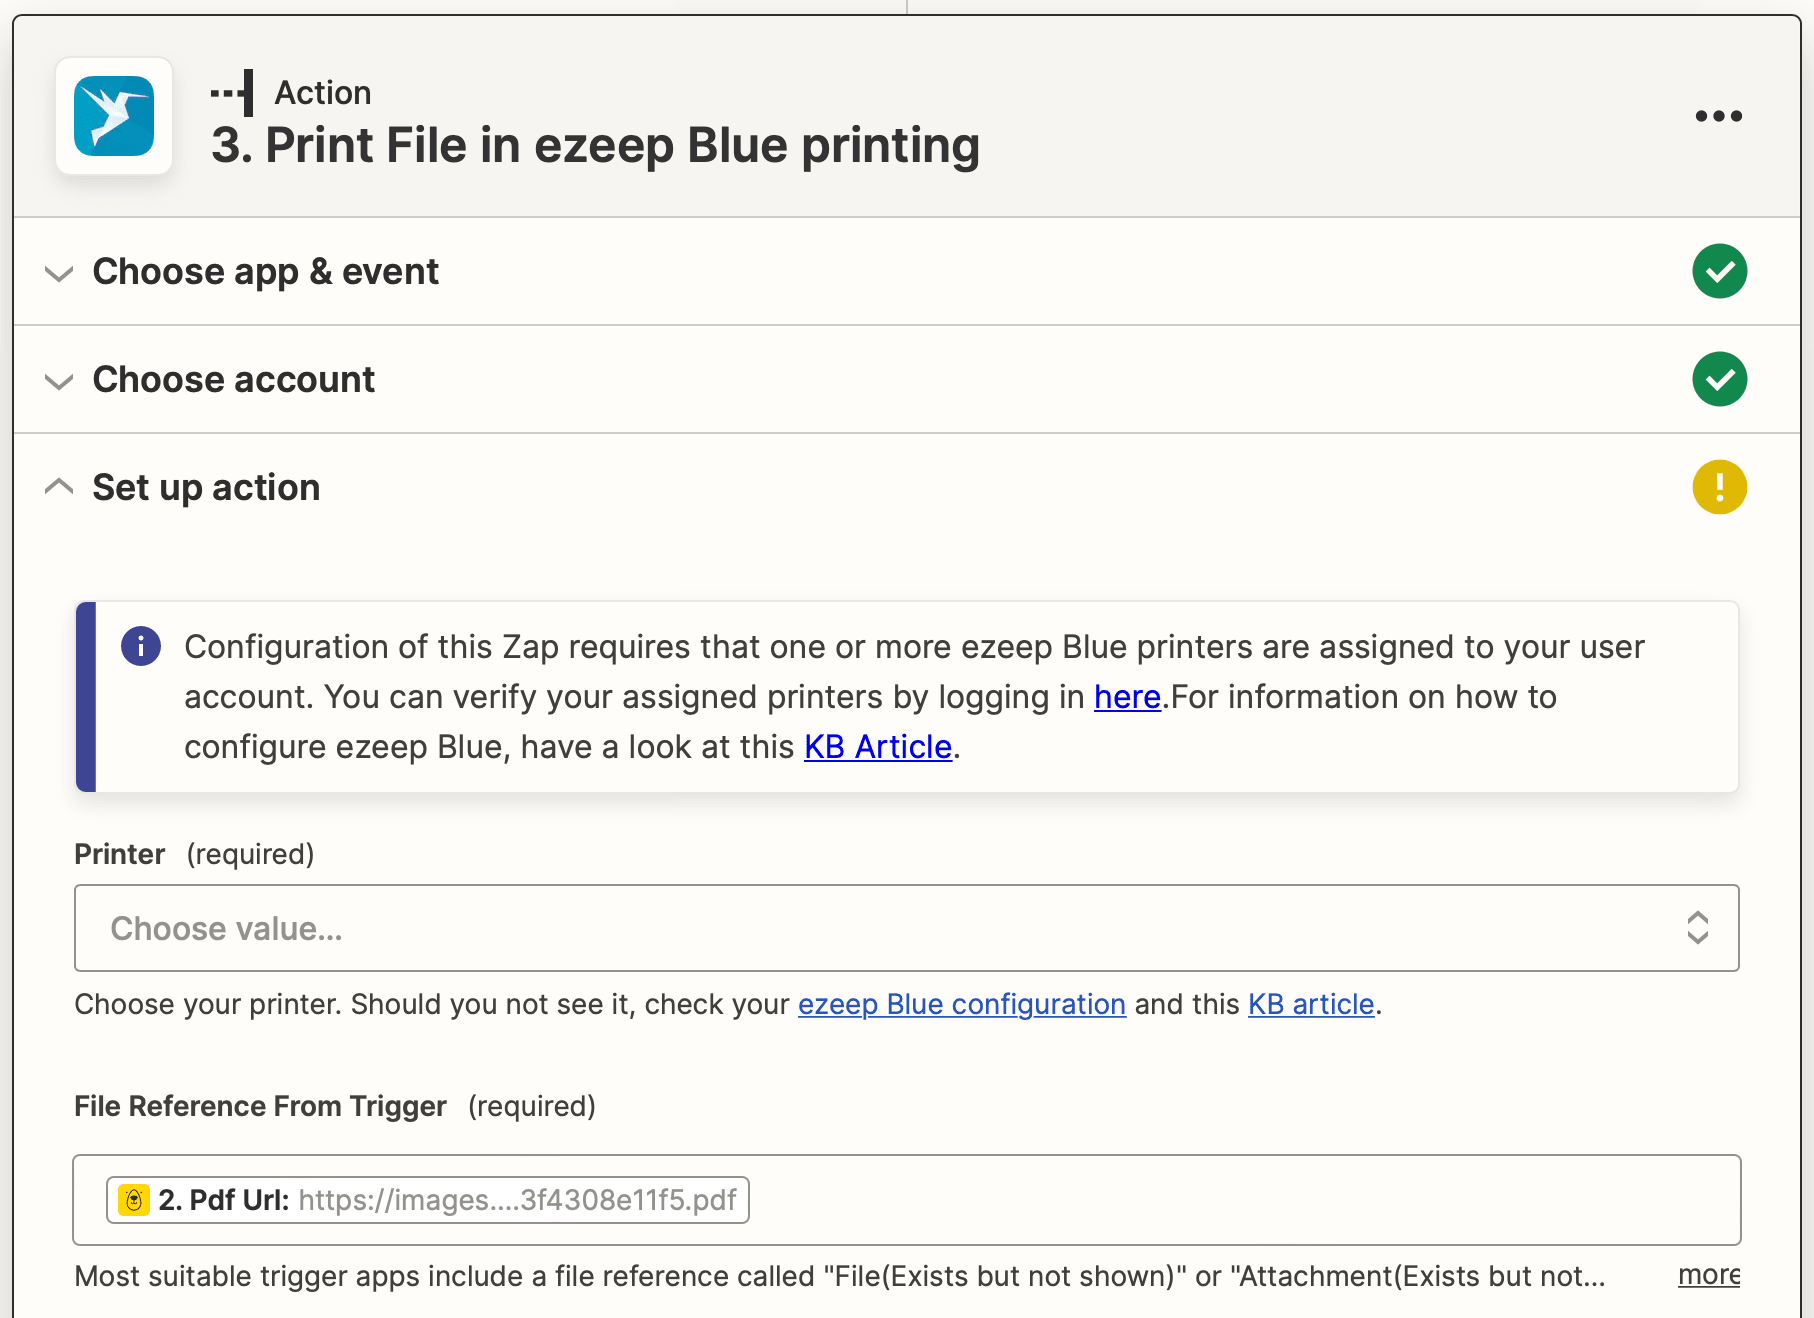
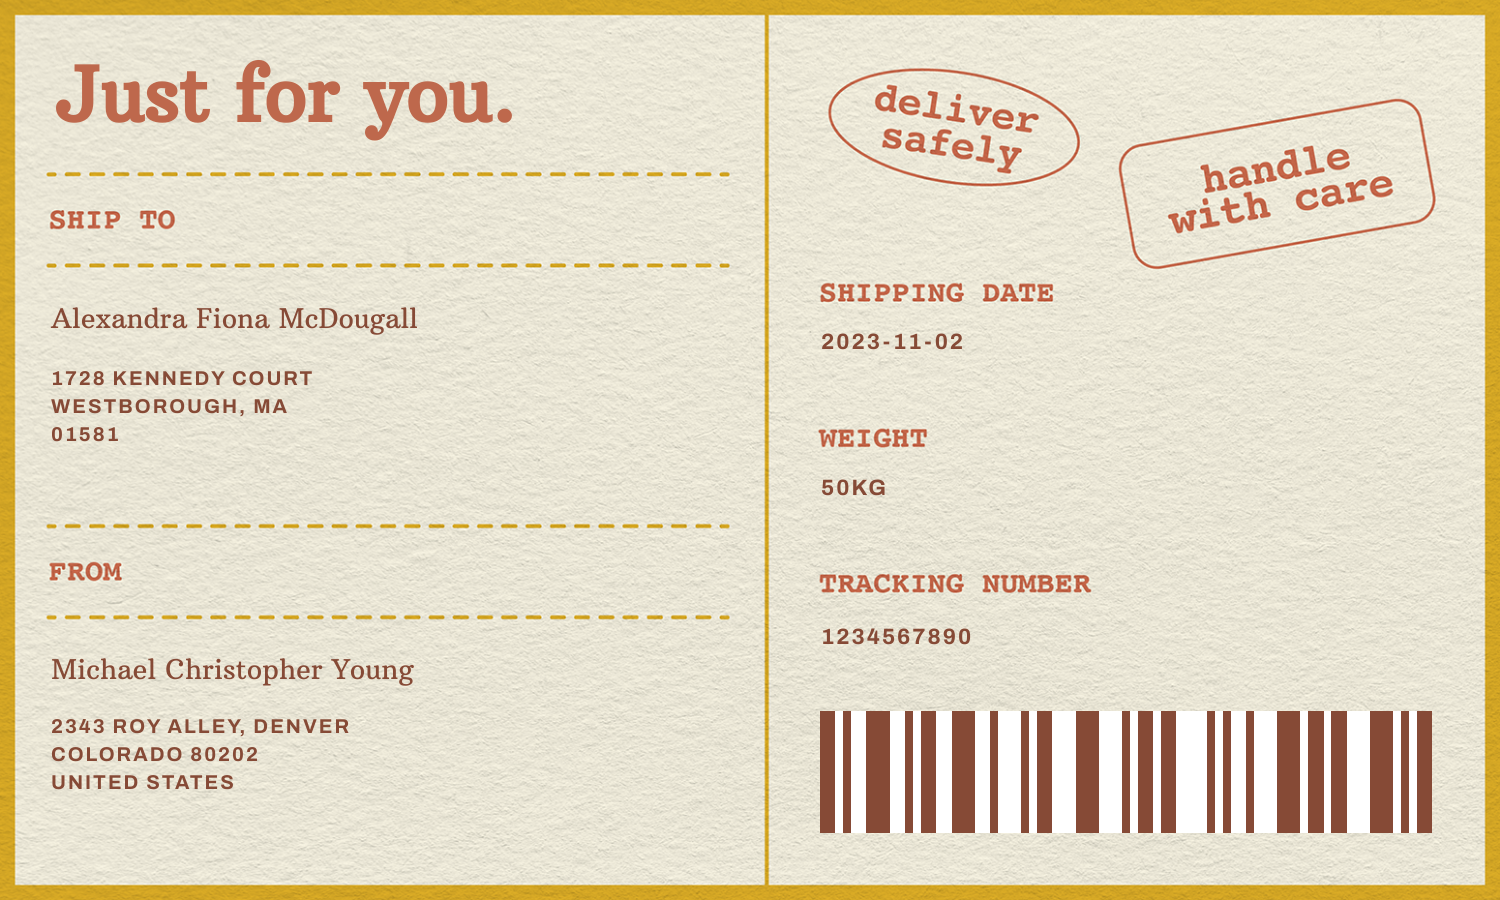
Customize the printing settings as needed, then test the action by sending 1 copy to your printer. You should be able to produce a shipping label that looks something like this:
And that’s it! Make any final adjustments to your zap, then click “Publish” to take it live.
You Don't Have to Sacrifice Speed or Style
To stay competitive in a market where buyers demand speed, it's important for e-commerce businesses to get packages out of the warehouse and onto customers' doorsteps as quickly as possible. At the same time, they can't compromise on style, because a strong brand identity contributes to long-term loyalty.
Nocode tools can help online stores of all sizes simplify their shipping label production process while still making room for a personal touch. With minimal human intervention beyond order confirmation, this automation is a great addition to your workflow.
