How to Automate your Client Onboarding with Airtable and Zapier
Contents
Whether you’re a freelancer taking on new clients, an employer taking on new employees or a sales team engaging with prospects, automating repetitive tasks increases efficiency.
Many individuals, however, perform tasks that reduce productivity, such as copying and pasting data from one site to another. Instead of spending your time and effort performing works that automation can do, why not use that time and effort to do those things that require human effort?
The workflows built-in Zapier— called Zaps — can automate many common tasks, such as automating your onboarding process. This automation software does not require you to be tech-savvy. You can use it even if you are a beginner and don't have programming knowledge.
This article will take you through the funnel of onboarding and pre-qualifying clients using personalized automation.
To make a Zap with Airtable, you'll need a Zapier account to use the workflows. If you don't have an account yet, it's free to get started.
Here is a few onboarding automation processes that can be done with Zapier.
Create a pre-qualification questionnaire
The start of the funnel is getting onboarding information from the client.
Engaging with prospective clients means taking the time to evaluate them to determine if they are a good fit. Prospect list qualification cuts down on lead generation time and helps to generate ready leads.
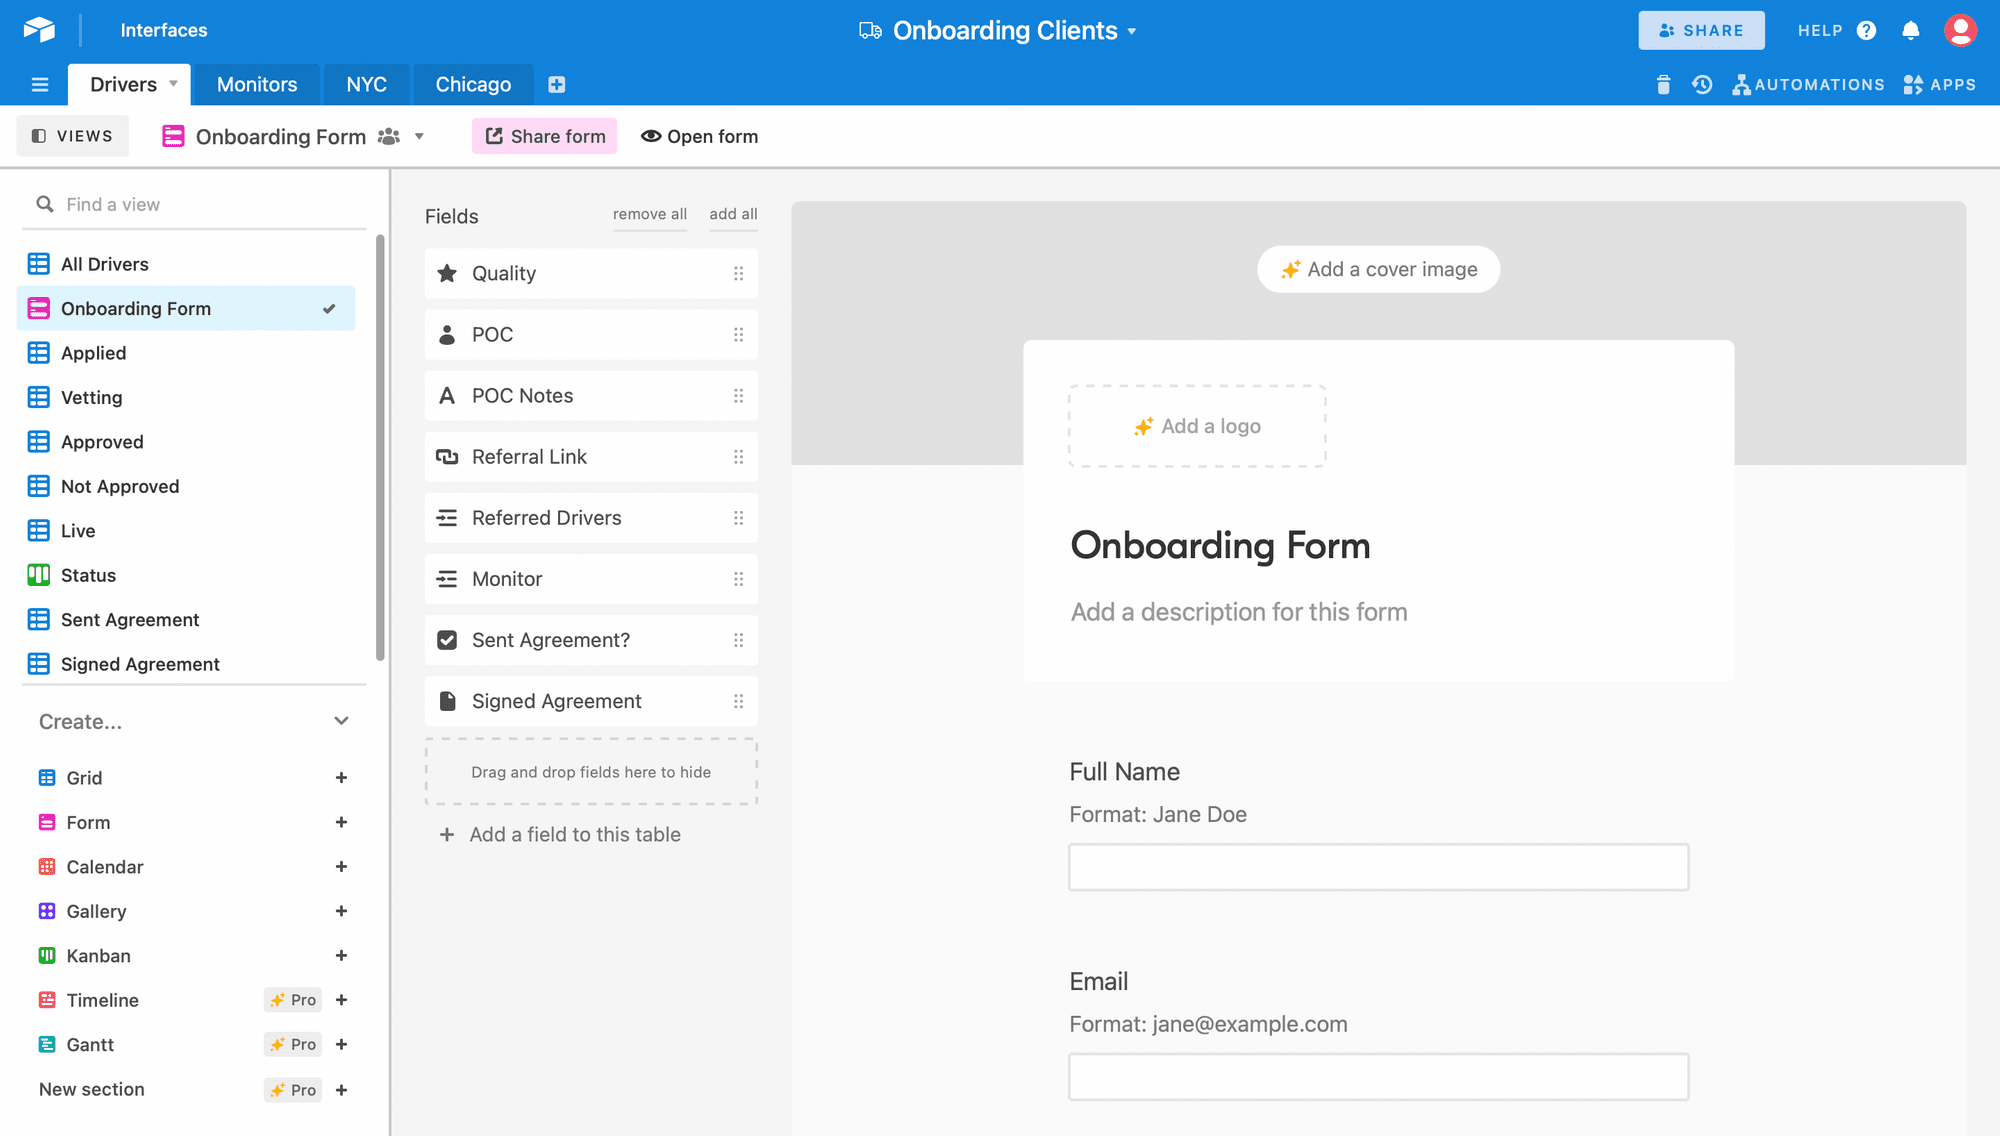
For this, we will use an Airtable form. If you already have an Airtable database for your leads, creating a form is easy with a simple drag-and-drop interface. Airtable forms let you collect information from anyone and save it automatically to any table in your base.
See an example of an onboarding form for new drivers:
Create a new record in Airtable
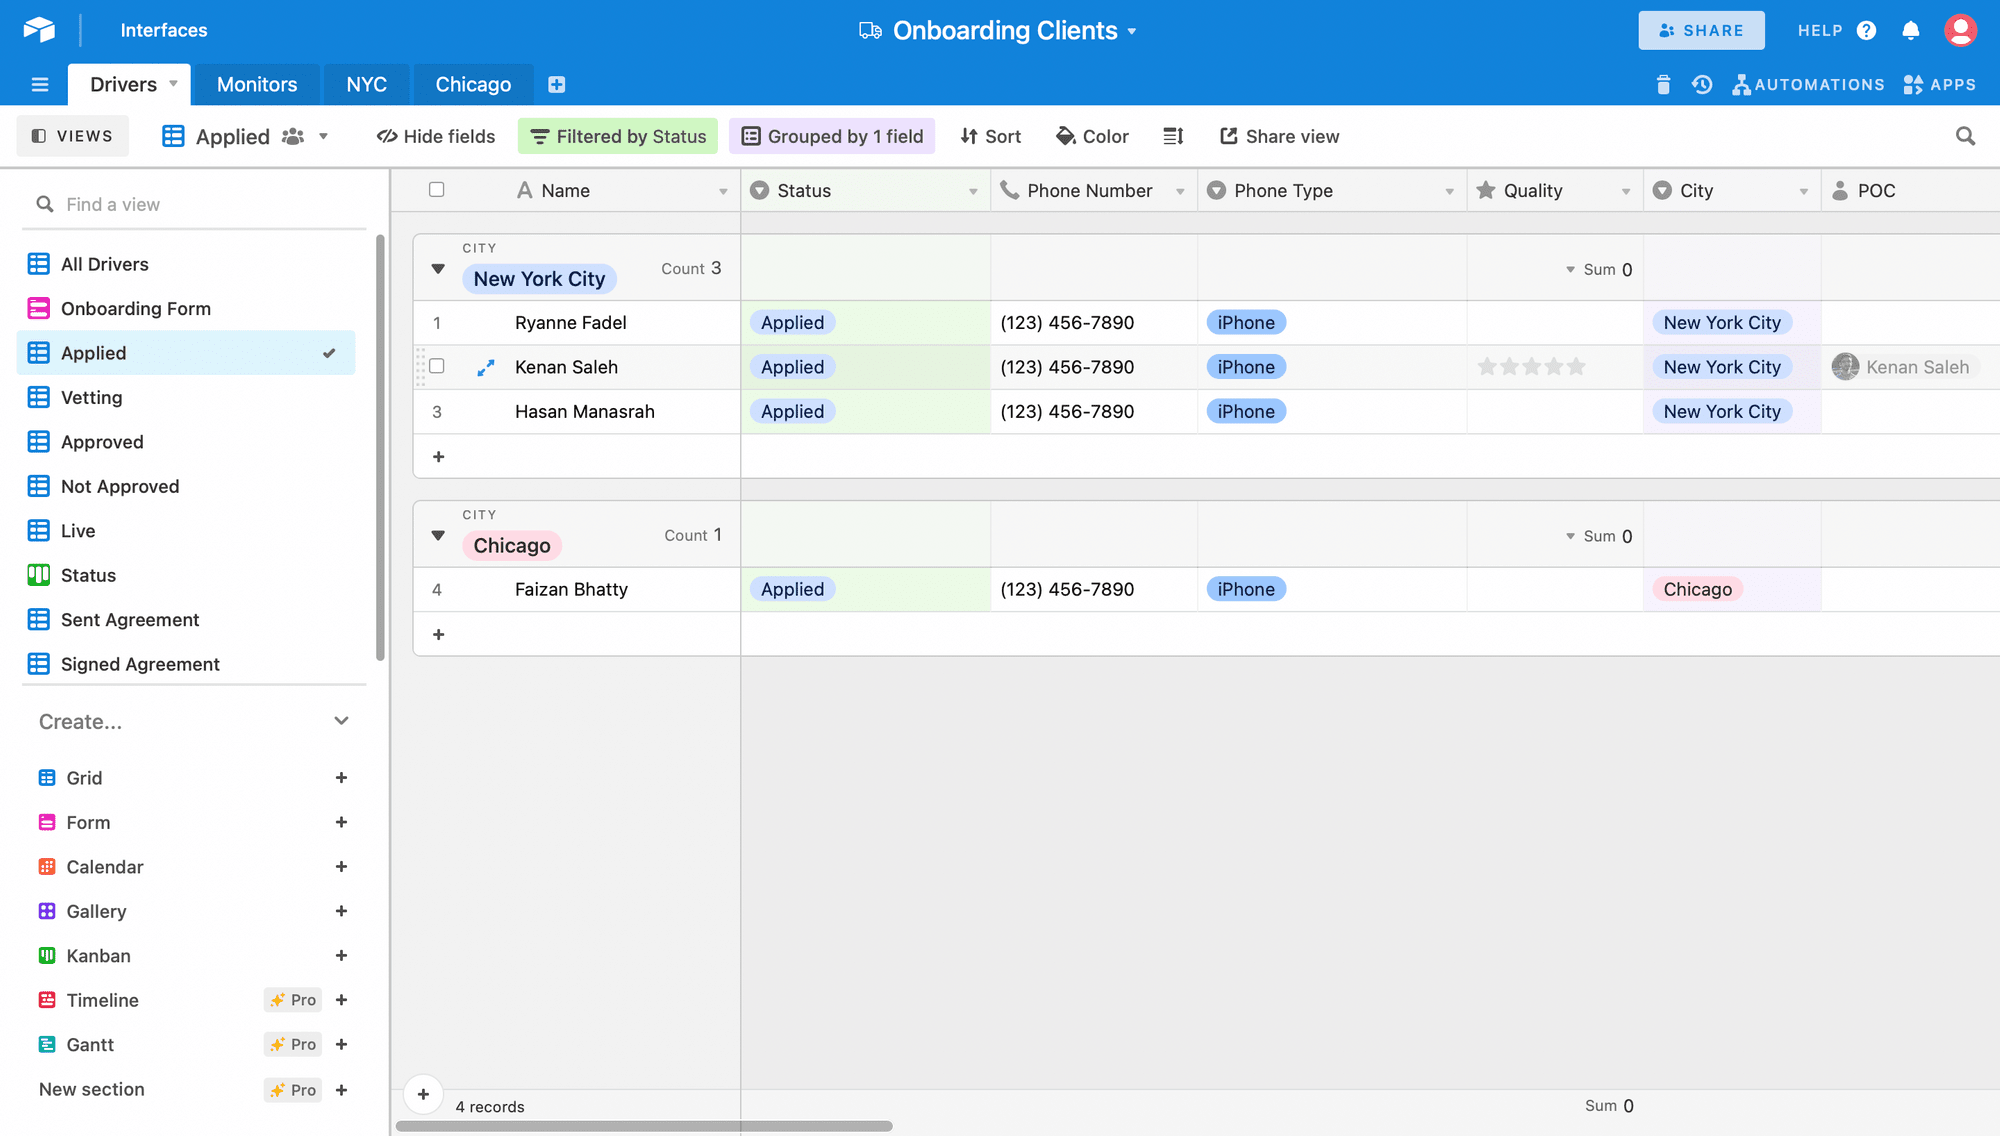
After the form submission, a new record will automatically be created in Airtable with the information provided.
This form lays the foundation for creating a profile page. When a client applies, they get moved to the ‘applied’ grid view:
Set up Zapier to update record within Airtable
Next, set a trigger to start a sequence for every new submission received on Airtable that gets moved to the ‘Applied’ view.
When you change the status from ‘Applied’ to ‘Vetting’, we want to trigger an action onboarding automation and email sequence to filter on updates to the ‘Vetting’ View in your Table.
You must have at least one "Last Modified Time" type column in your Table in order to use this Trigger. When this column changes to a new timestamp, your Zap will trigger on the corresponding record in the ‘Vetting’ View:
Create and Update Subscriber in MailerLite
Next, we need to set up a trigger so that after every potential client completes that form and is being vetted, Zapier send
This triggers a set of emails. This automatically adds them to a follow-up sequence in MailChimp, and they receive follow-up emails during the vetting period:
Trigger email on Approval or Rejection
For this stage, you can split people off to give them an email sequence over a week or two weeks depending on the interactions and whether they have been approved or rejected.
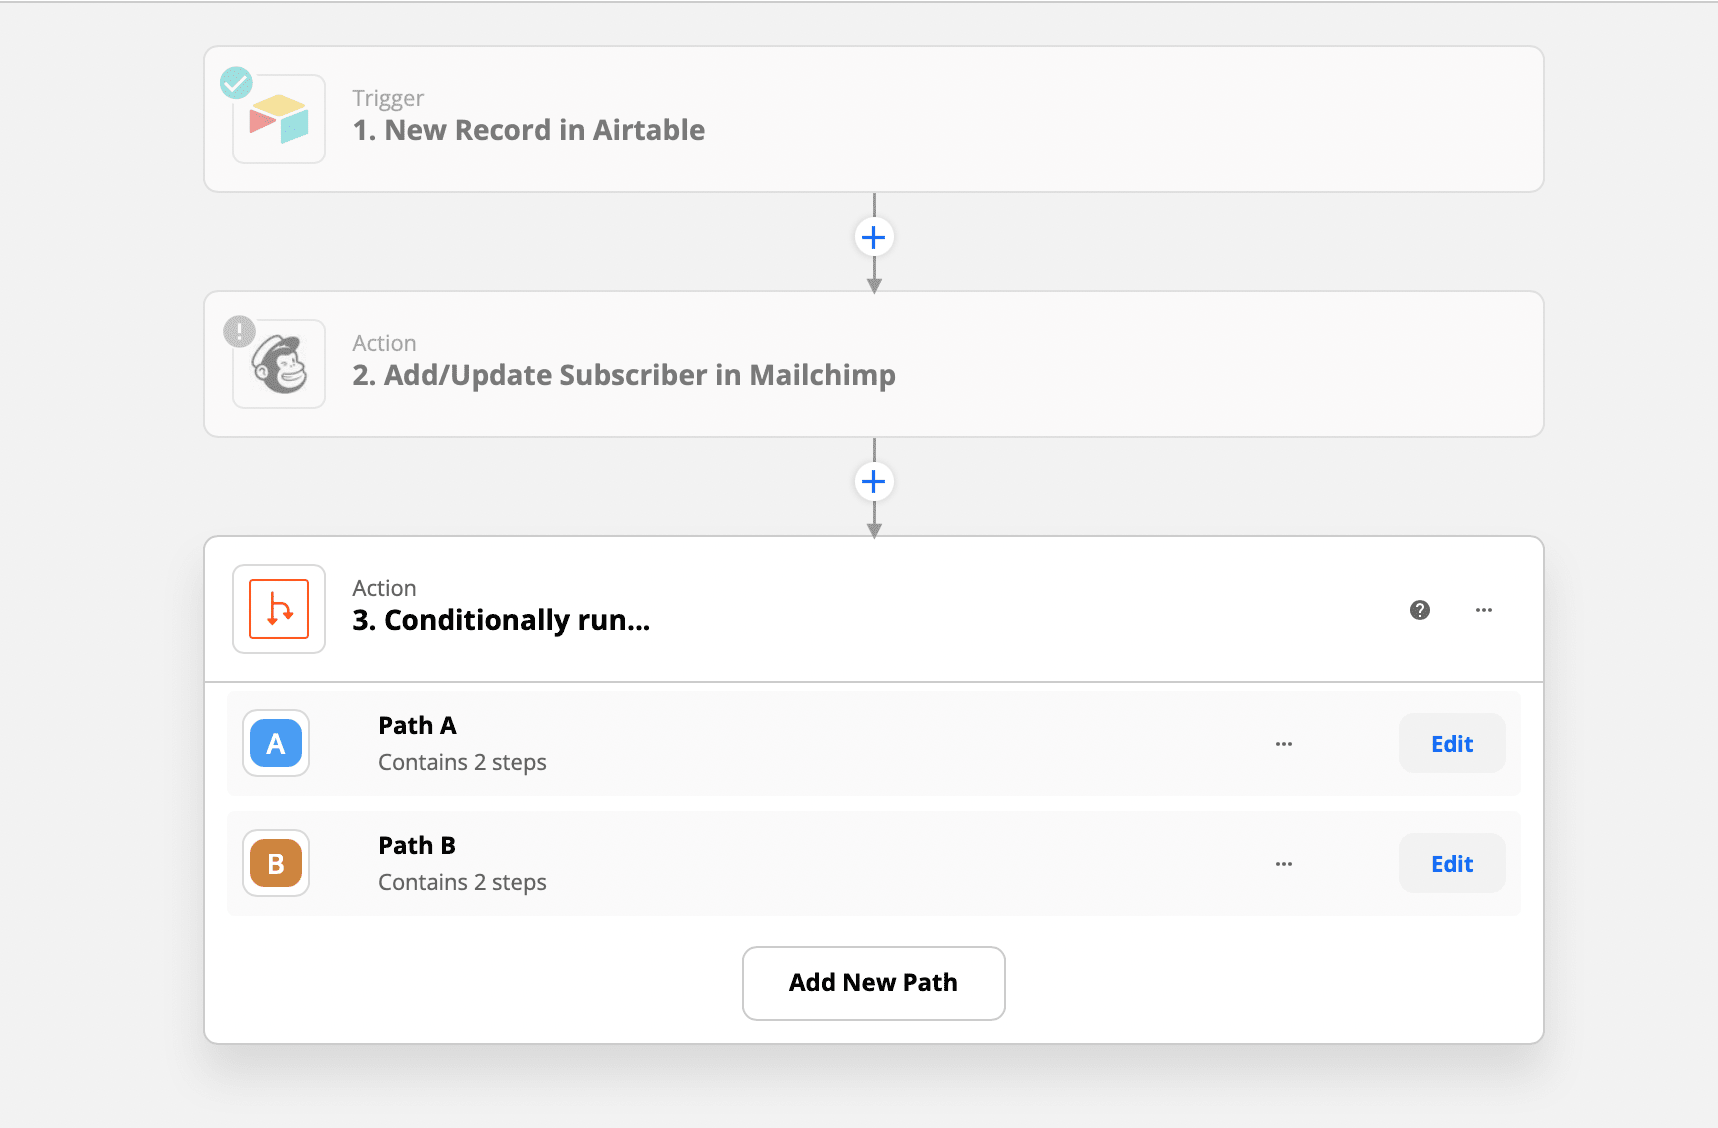
Paths by Zapier let your apps take different actions based on conditions you choose. Each path leads to a different outcome.
For each path, you can set the rules for what‘s allowed to pass through:
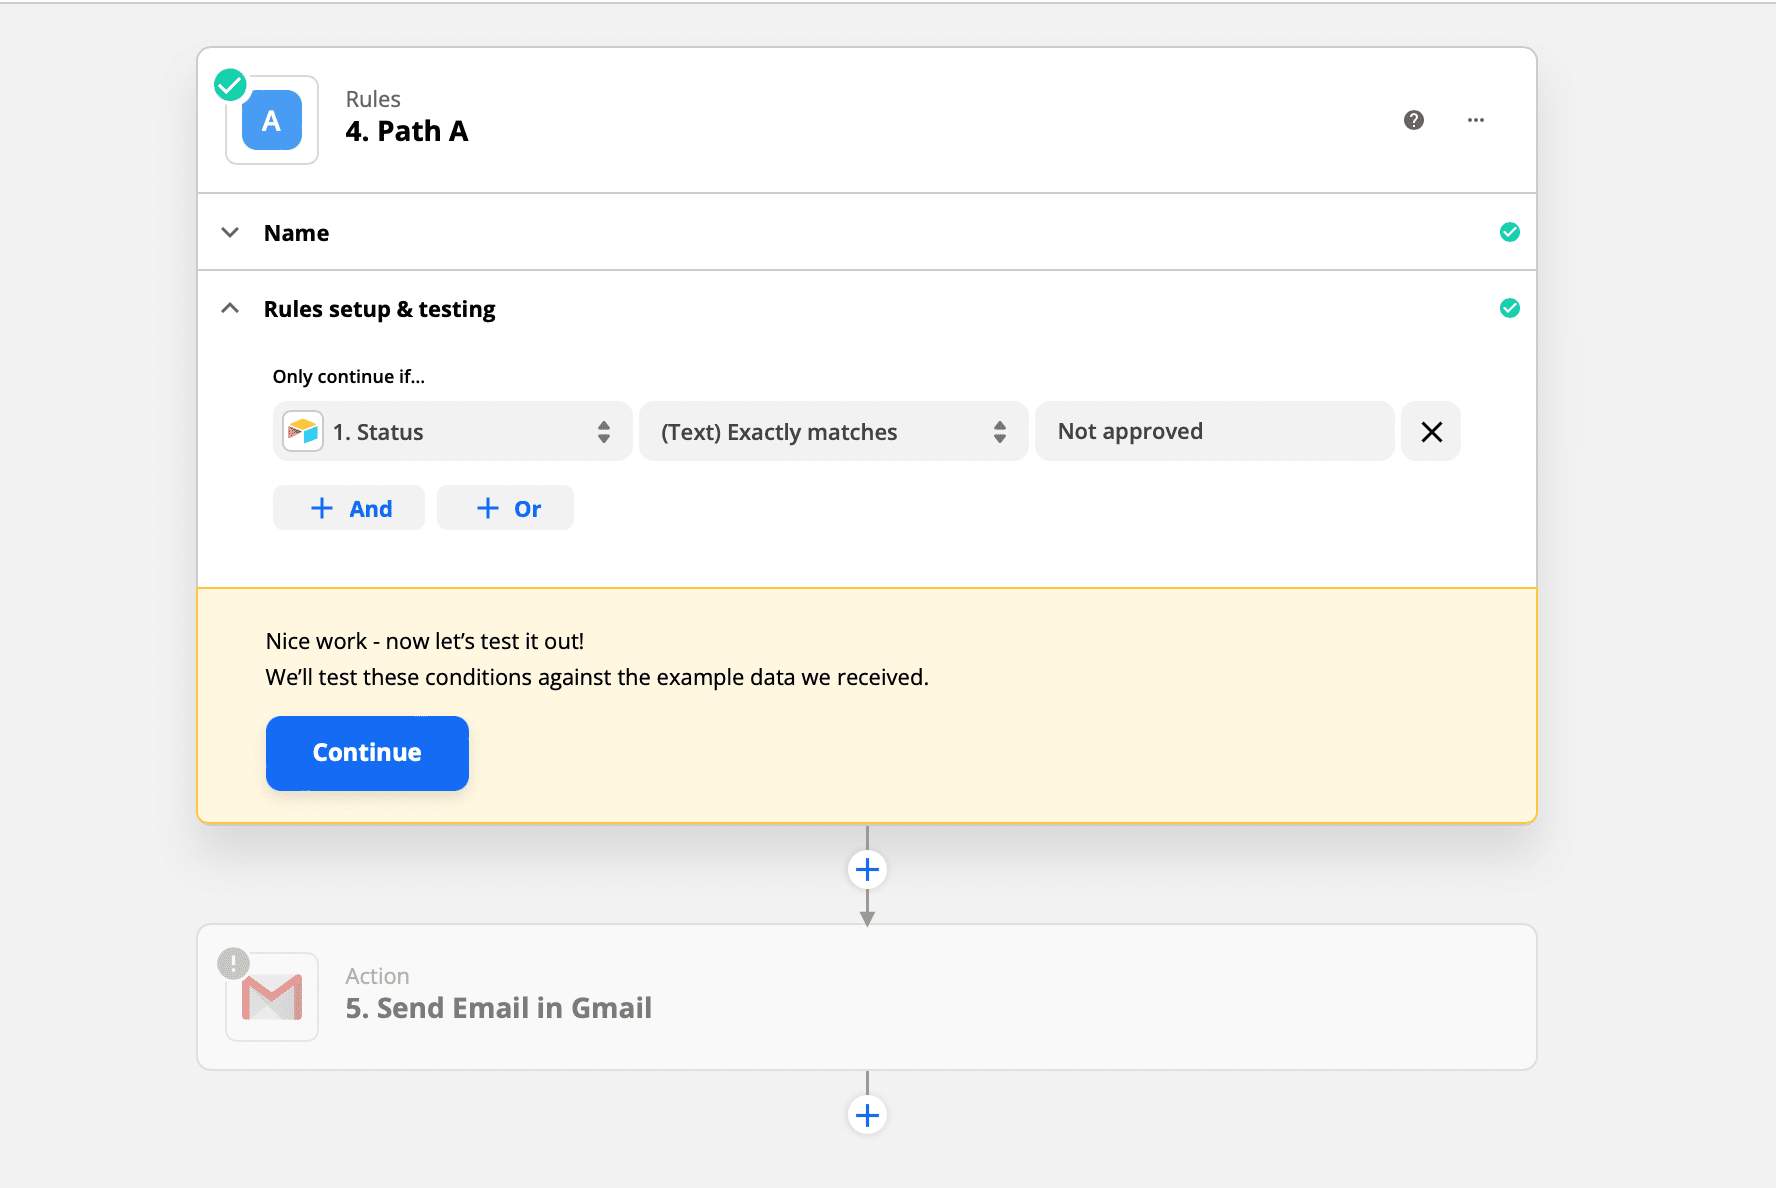
If a Client A is approved, then they receive a predefined acceptance and welcome onboarding email, but if Client B is rejected, they receive a different email:
Send a signature request from a template in HelloSign
For clients that are approved and ready to sign, use DocuSign or HelloSign to send them a contract or NDA.
Create a welcome banner with Bannerbear
To further personalise the onboarding experience, create a welcome banner with Bannerbear after the agreement is sent and signed. Having an excellent welcome banner is motivational and warm. Create the banner and send a private channel message in Slack:
Send appointment reminder emails at intervals before the call so you don’t waste time waiting for leads who've forgotten about the meeting.
Client Followup
In the research, prospecting, and pitch phase, you have already done most of the work. Now it's all about following up. Securing new clients is an ongoing process that's ready to be done. If you've already laid the groundwork for other opportunities, then take advantage of that!
Create client in Clockify
Next, we will set up a new client in Clockify. Clockify is a time tracking software you can use to check how much time you’ve spent on the client project. This is especially useful if you do hourly billing.
Request Testimonial
Gathering client testimonials is a very powerful way to let potential clients see that you have had success in the past meeting client needs and expectations. Testimonials let potential clients know that others have worked with you.
Key Takeaways
Client onboarding is one of the most common processes that can get hands-on especially when you scale up and get many clients on board. Automating these tasks certainly helps to eliminate repetitive activities, and ultimately helps to avoid burnout.
An effective client onboarding process automation can save you lots of time and help you establish a good client relationship from the start.
The goal is to make the automated tasks feel very personalised. With Zapier you can set timings as to when you want activities to occur - these can occur immediately after an event or at a set time with Schedule with Zapier or Delay with Zapier.
As a result, you don't have to waste time on multiple processes. You can concentrate on clients and focus on more productive activities.