How to Automate Your Social Media Content Creation Using Airtable
Contents
I just launched a new Airtable integration for Bannerbear - in this post I'm going to show you how to use it :)
What is Airtable?
Airtable is an awesome tool that acts like a spreadsheet but also makes it very easy to get data in and out of your spreadsheets through integrations with other apps.
What is Bannerbear?
Bannerbear is an API for generating images. You design a template (or grab one from the library) and then feed in data using the API to generate images based off that template e.g. with different texts, colors and background images.
What can I do with Airtable + Bannerbear?
If you're creating social media assets over and over again based on a particular template, you can use Bannerbear to automate this process. Organize your data on Airtable, click a button to import into Bannerbear, and watch all your images get magically generated!
This way you can do all your content planning for clients entirely in Airtable using just text, then when you're ready to produce the assets for posting, you just click one button.
And all of this using #nocode!
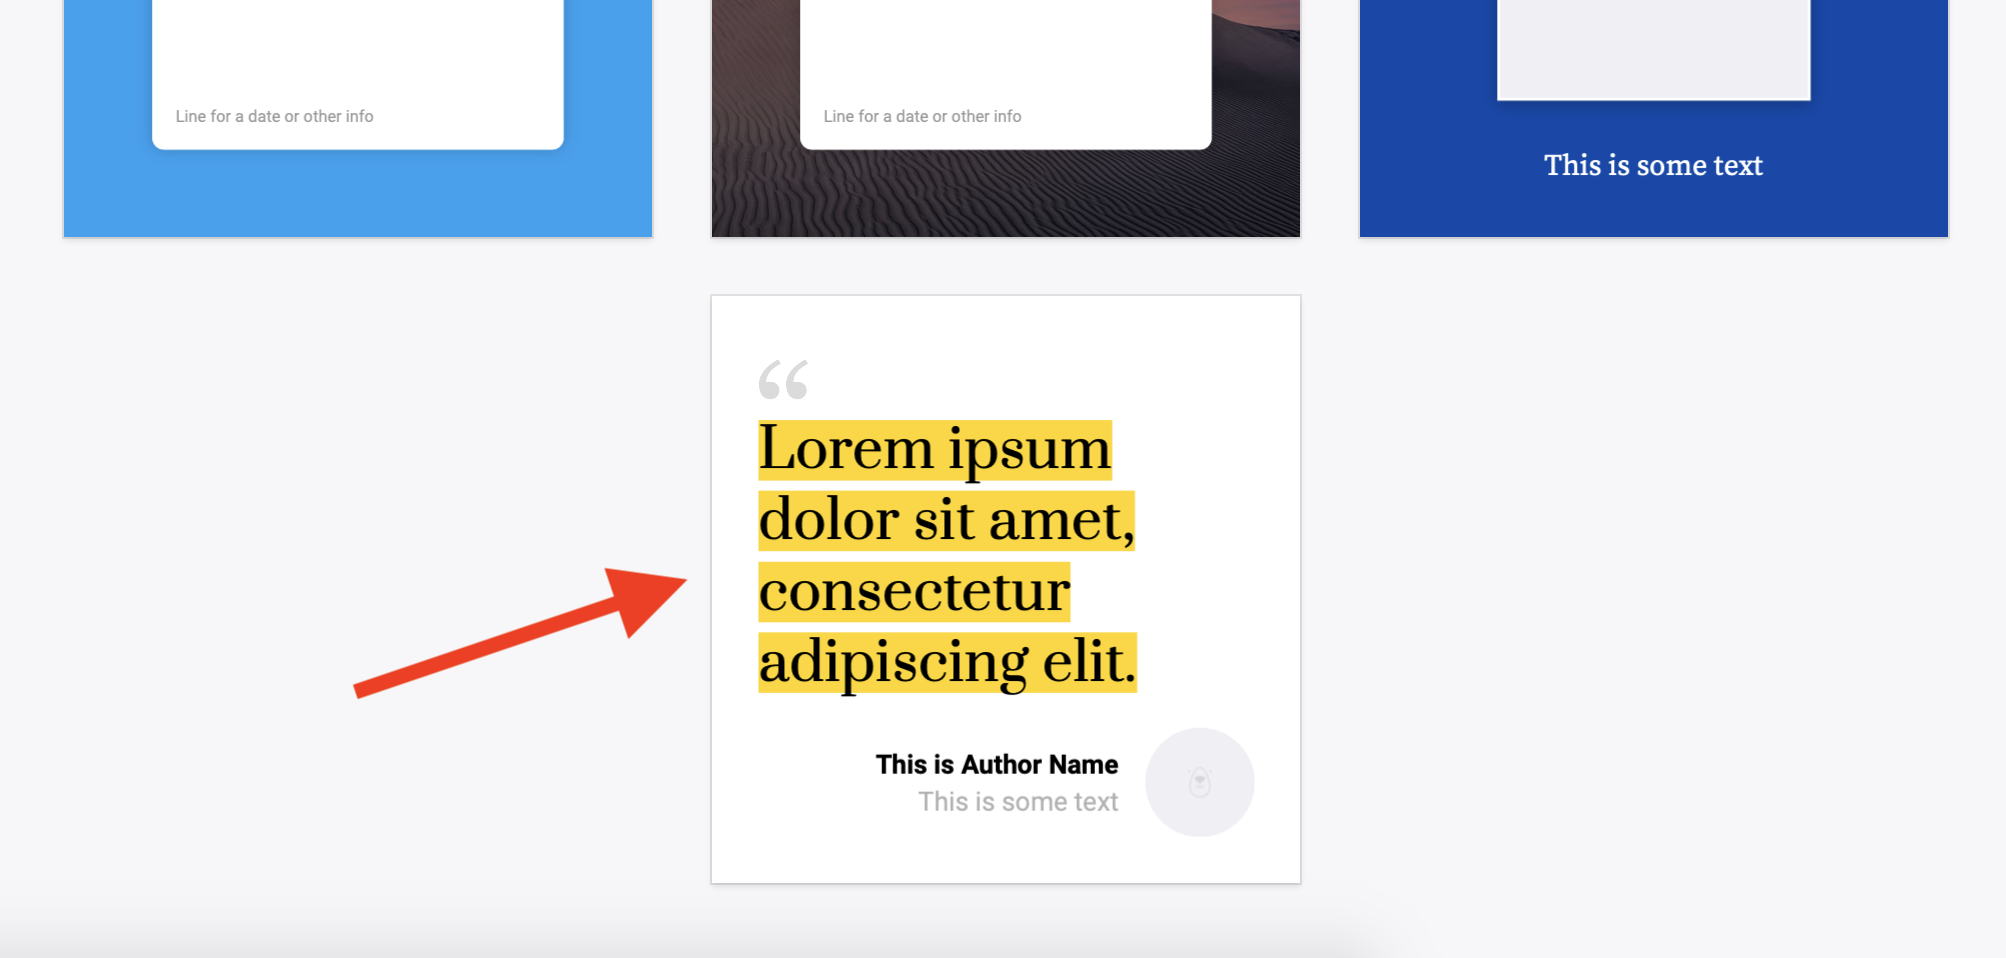
Sample images
By the end of this tutorial you'll have automatically generated images like this:


Adding your Airtable API Key
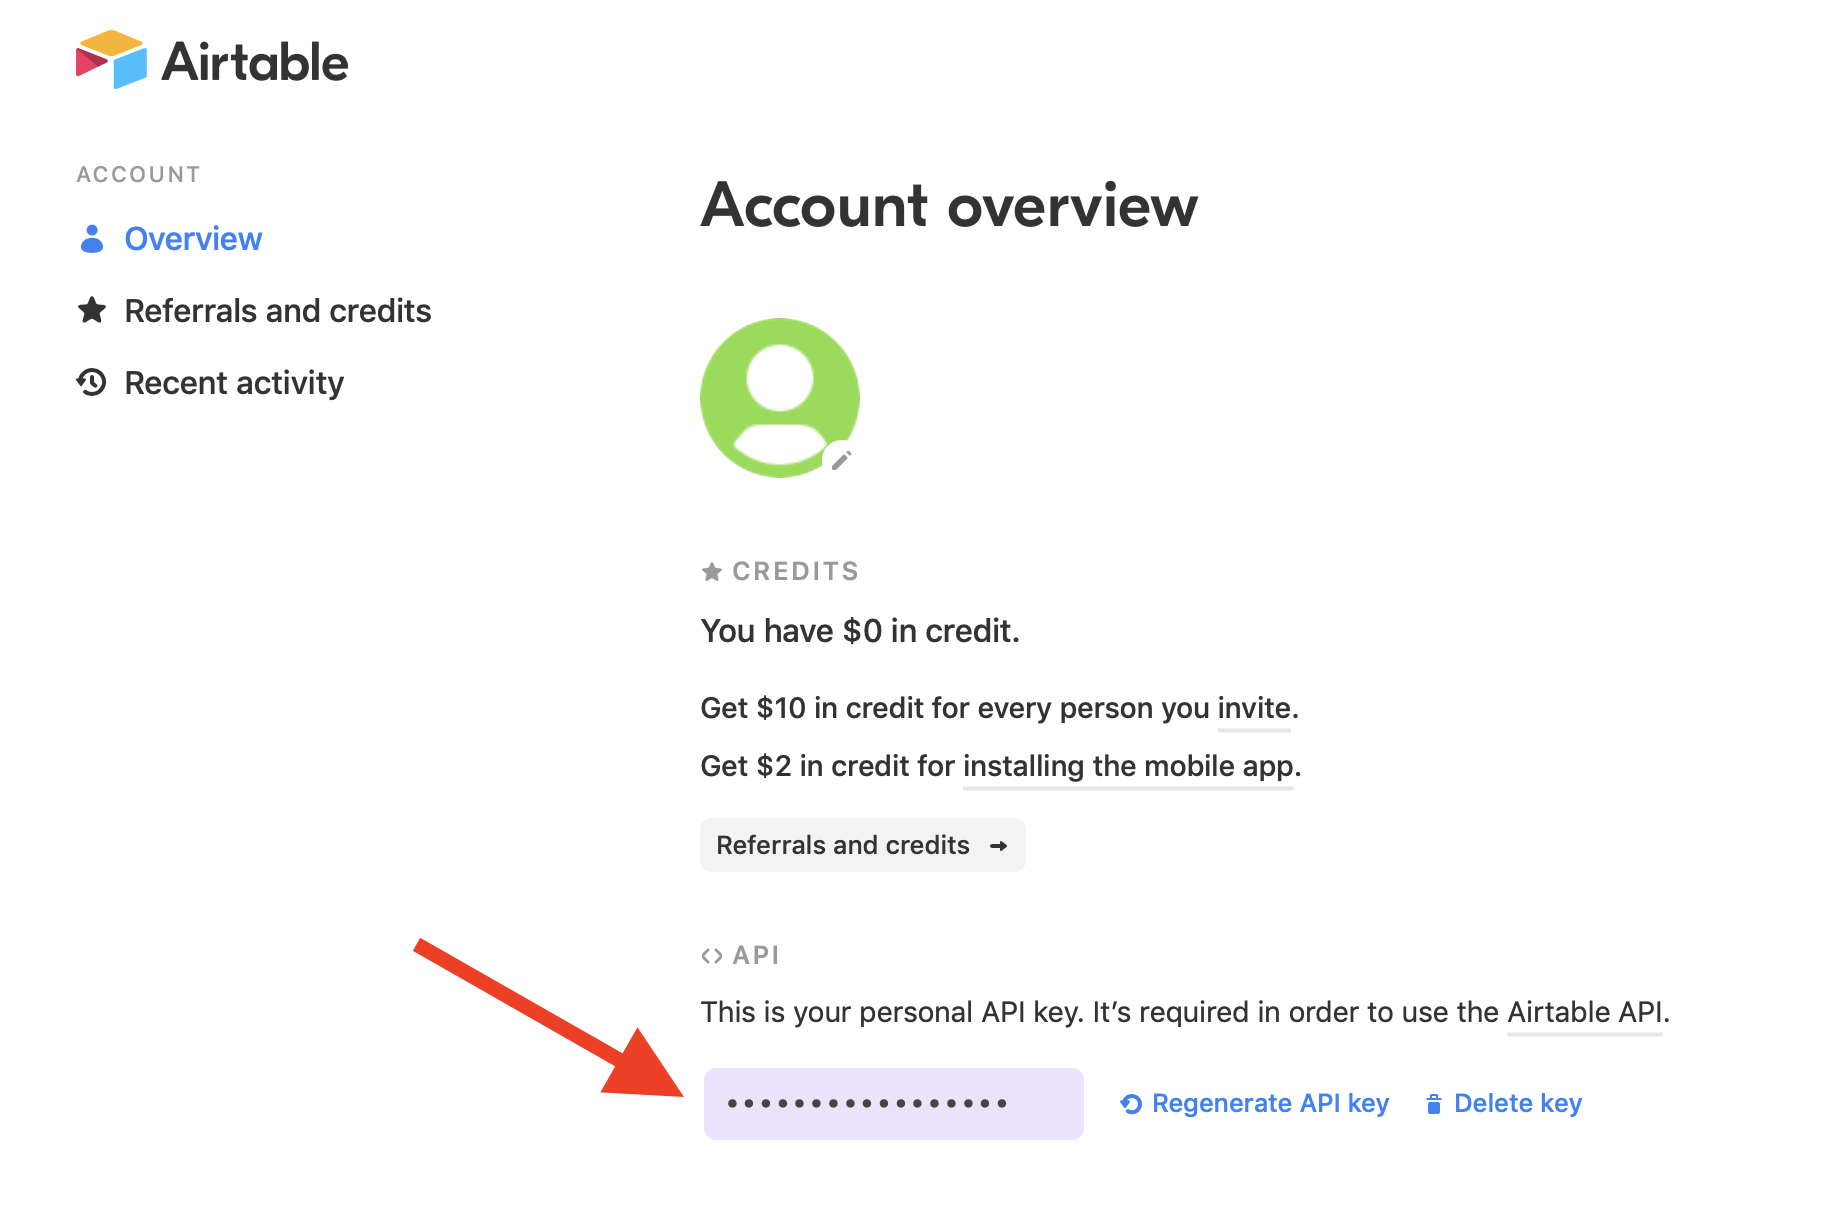
First you need to add your Airtable API Key to Bannerbear.
You can find your Airtable API Key in the Account section of Airtable.
Copy the key to your clipboard:
Next, add the Airtable API Key to Bannerbear in the Account Settings section. That's the first part done!
Adding a Bannerbear template
Bannerbear works on a Table-to-Template basis. Meaning, you connect your Airtable table to a template inside one of your Bannerbear projects.
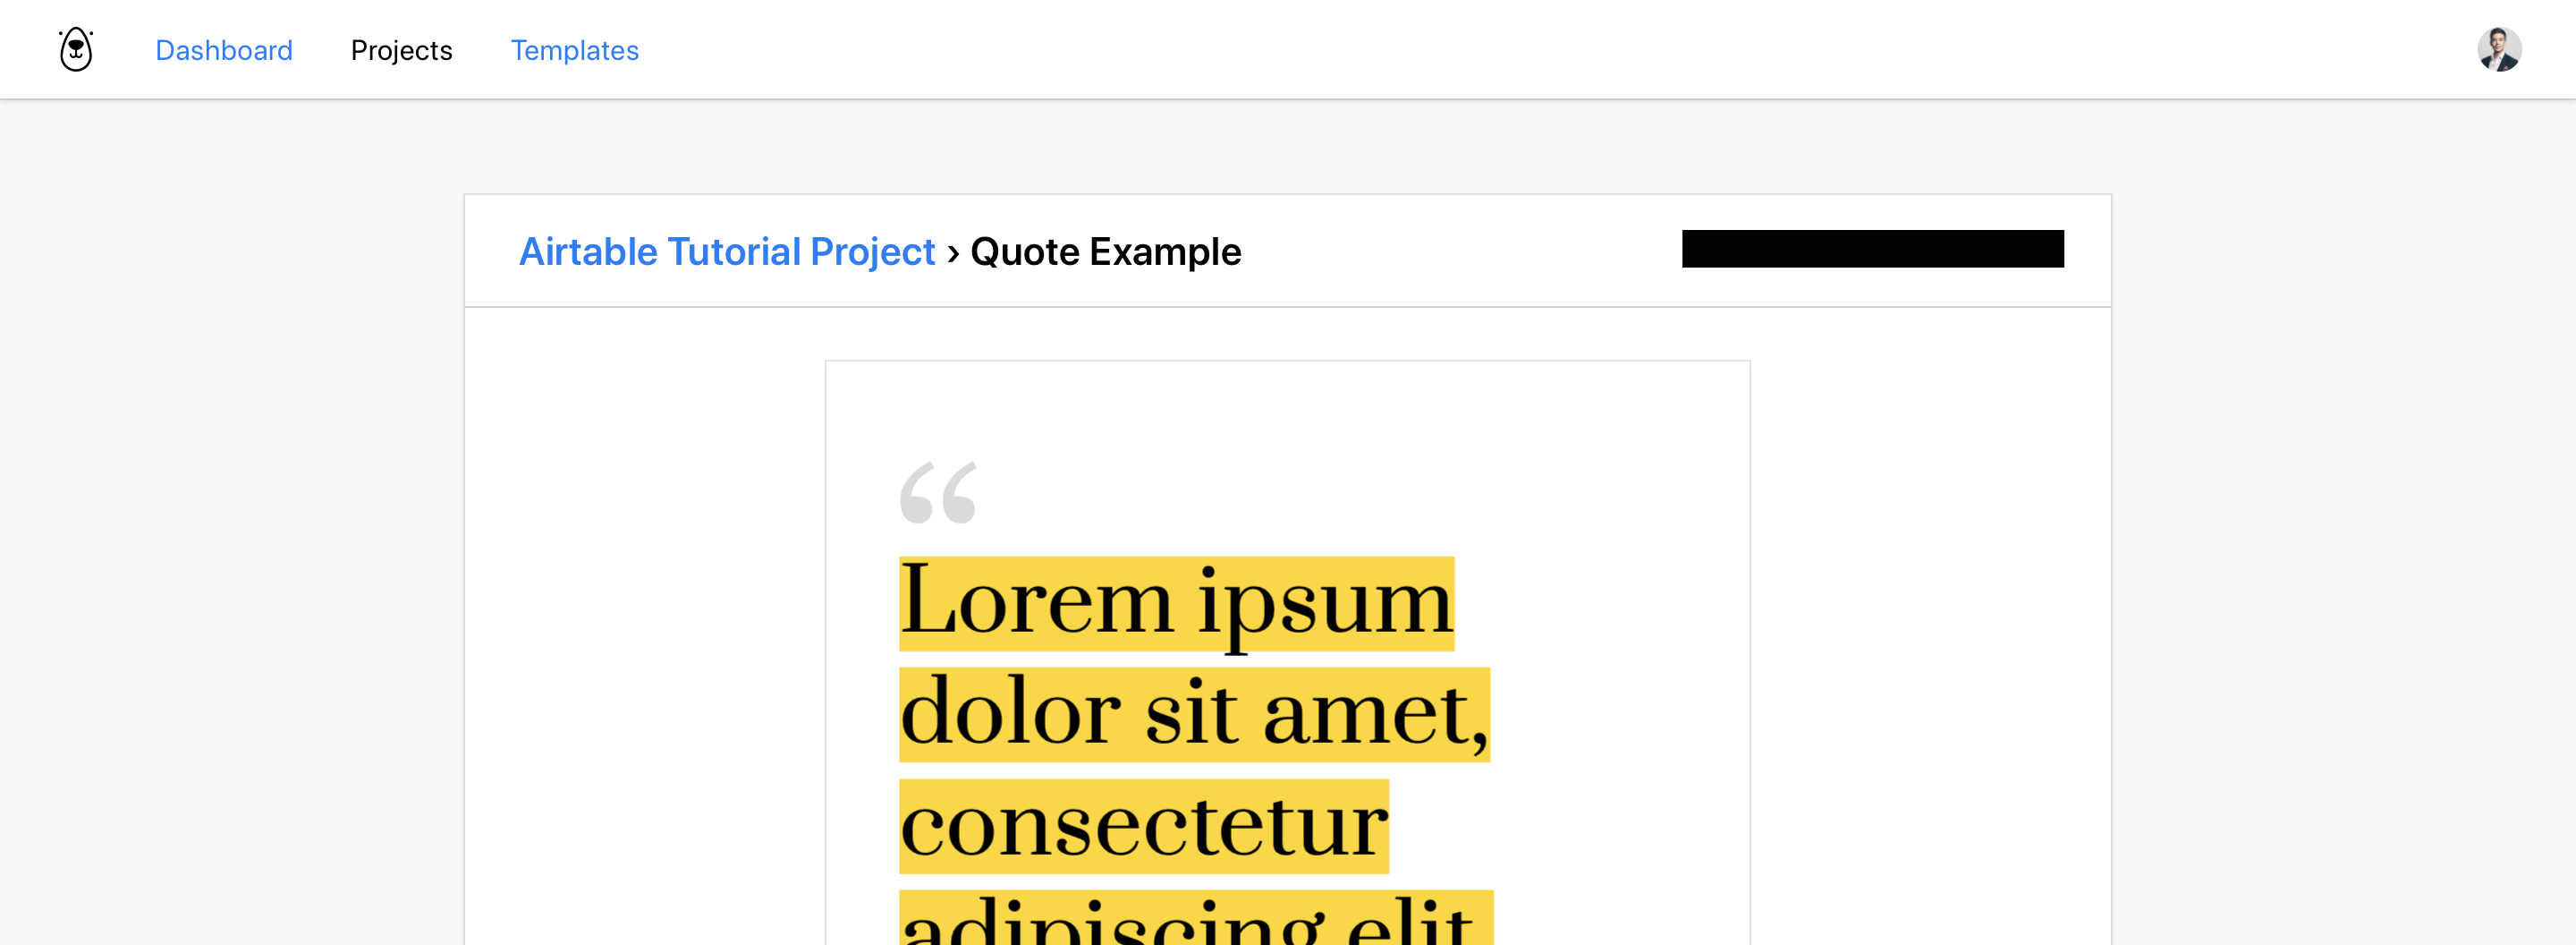
For this tutorial, create a project on Bannerbear and add the "Quote Example" template from the library to your project:
Adding it to a project will take you to the Project / Template page:
You can design any sort of template you need using the Bannerbear template editor (you can even invite a designer to create one for you!) but for now, lets try connecting this example template to an Airtable.
Connecting the template to Airtable
On the template page (the one we left off at above) find the Airtable icon - click it to go to the Airtable integration page:
![]()
From here, in terms of this tutorial you have two choices!
(Optional) Copy my Airtable Base
For the purposes of this tutorial I've set up an airtable base with the columns you need for the Quote Example template.
If you are using other templates or designing your own template, you will have to set up an Airtable base with the right columns - Bannerbear will show you how, more on this in the next section.
Copy this base:
https://airtable.com/shr8Xv57trKH08eWY
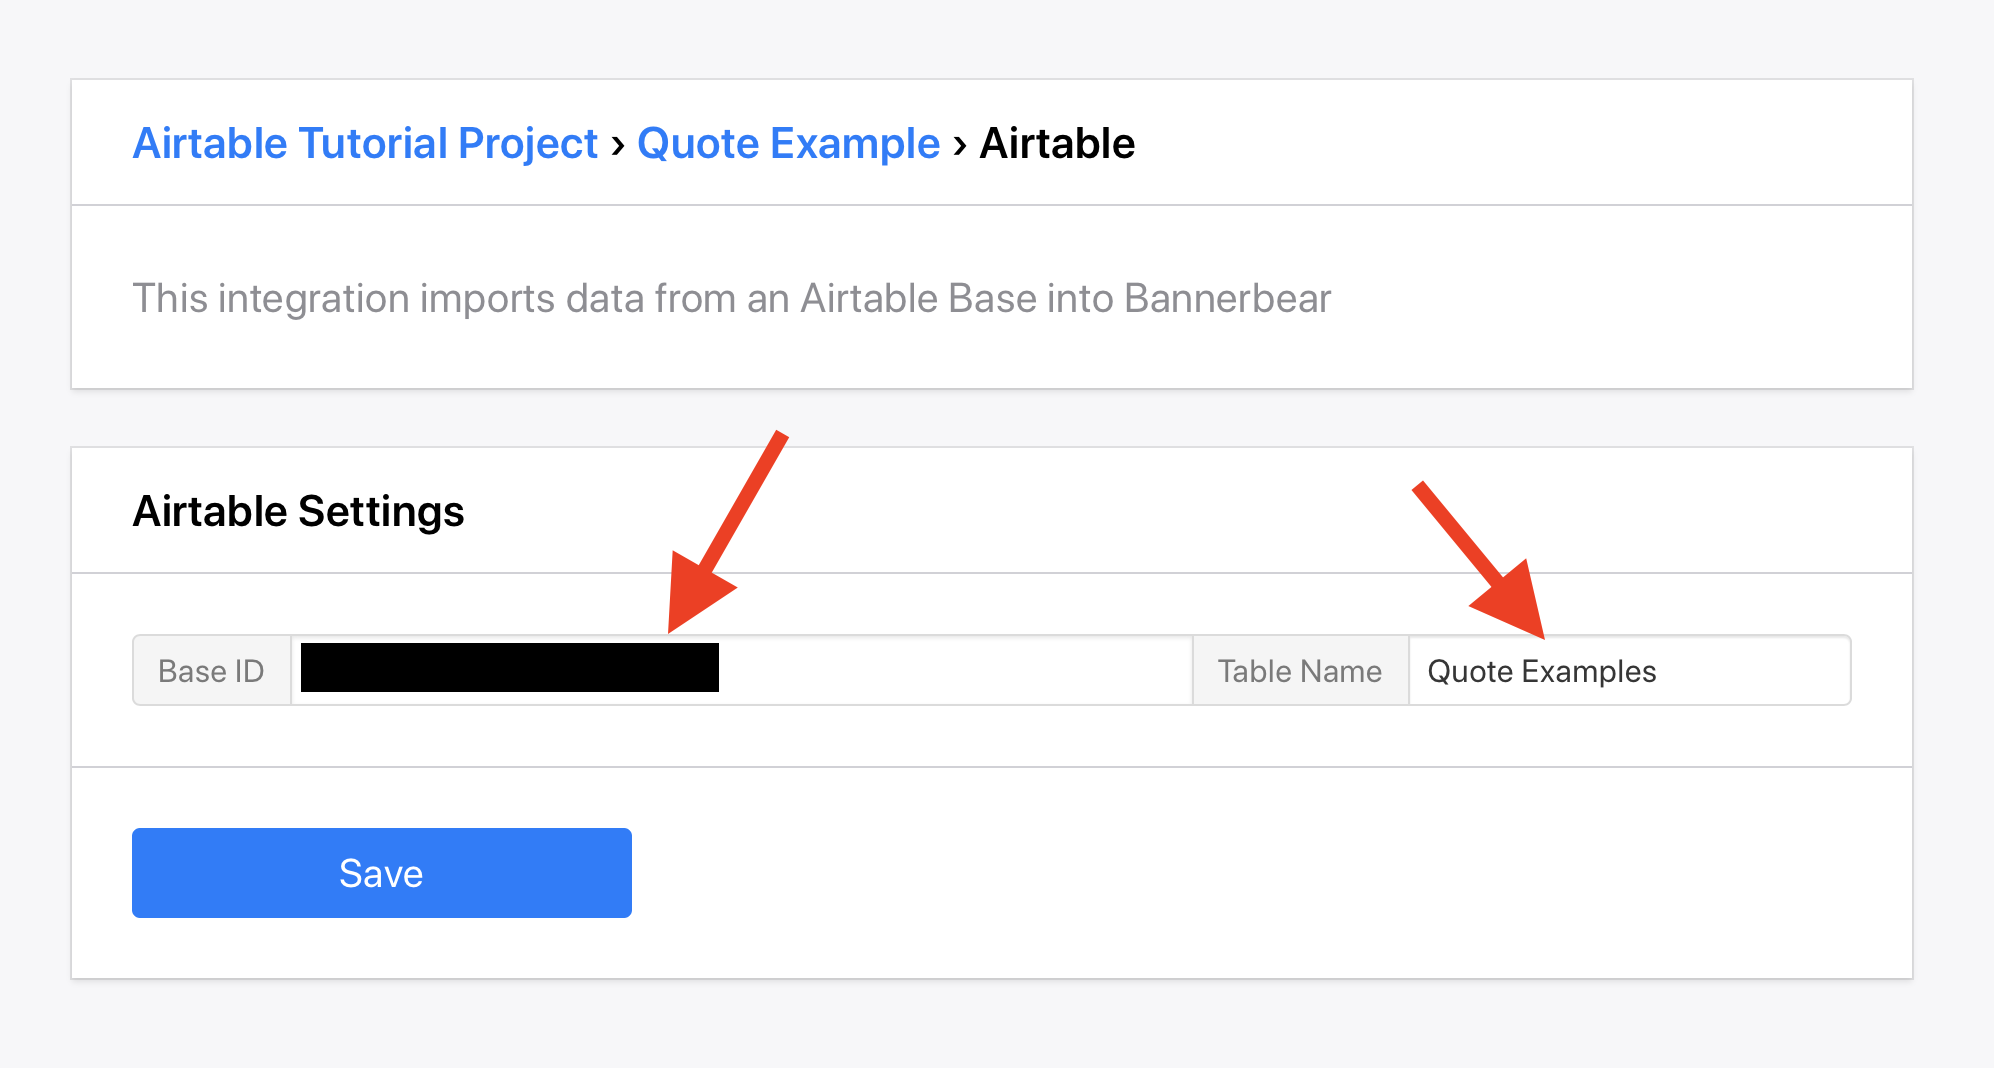
Set the Base ID and Table Name
Every Airtable Base has a special Base ID and Table Name that you need to use to connect with the Template.
Base ID
You can find the Base ID in the API Documentation on Airtable:
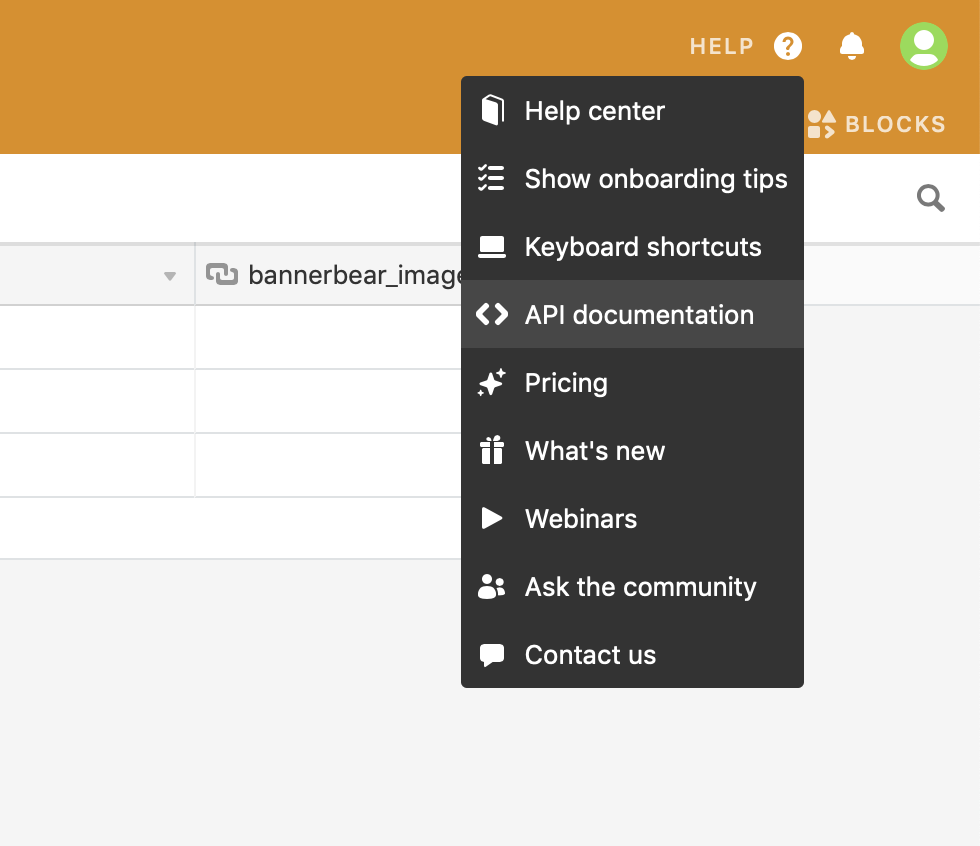
The Base ID generally looks something like this: app123456789ABC
It is an alphanumeric ID with the word app at the start and is shown at the top of the Airtable API Documentation page:
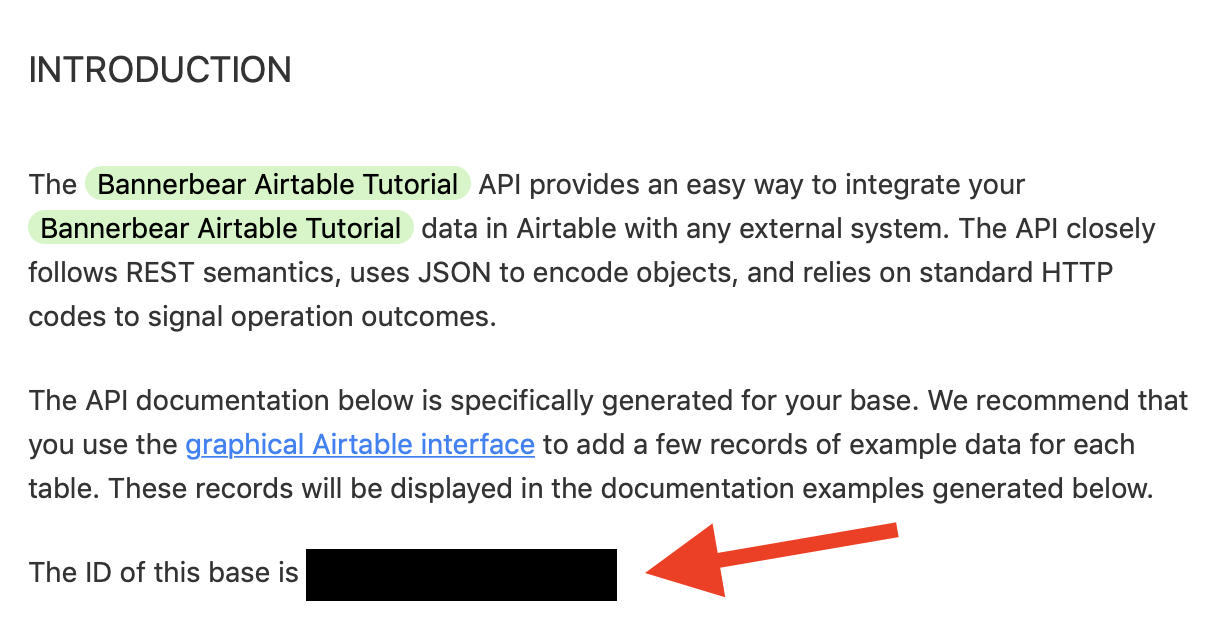
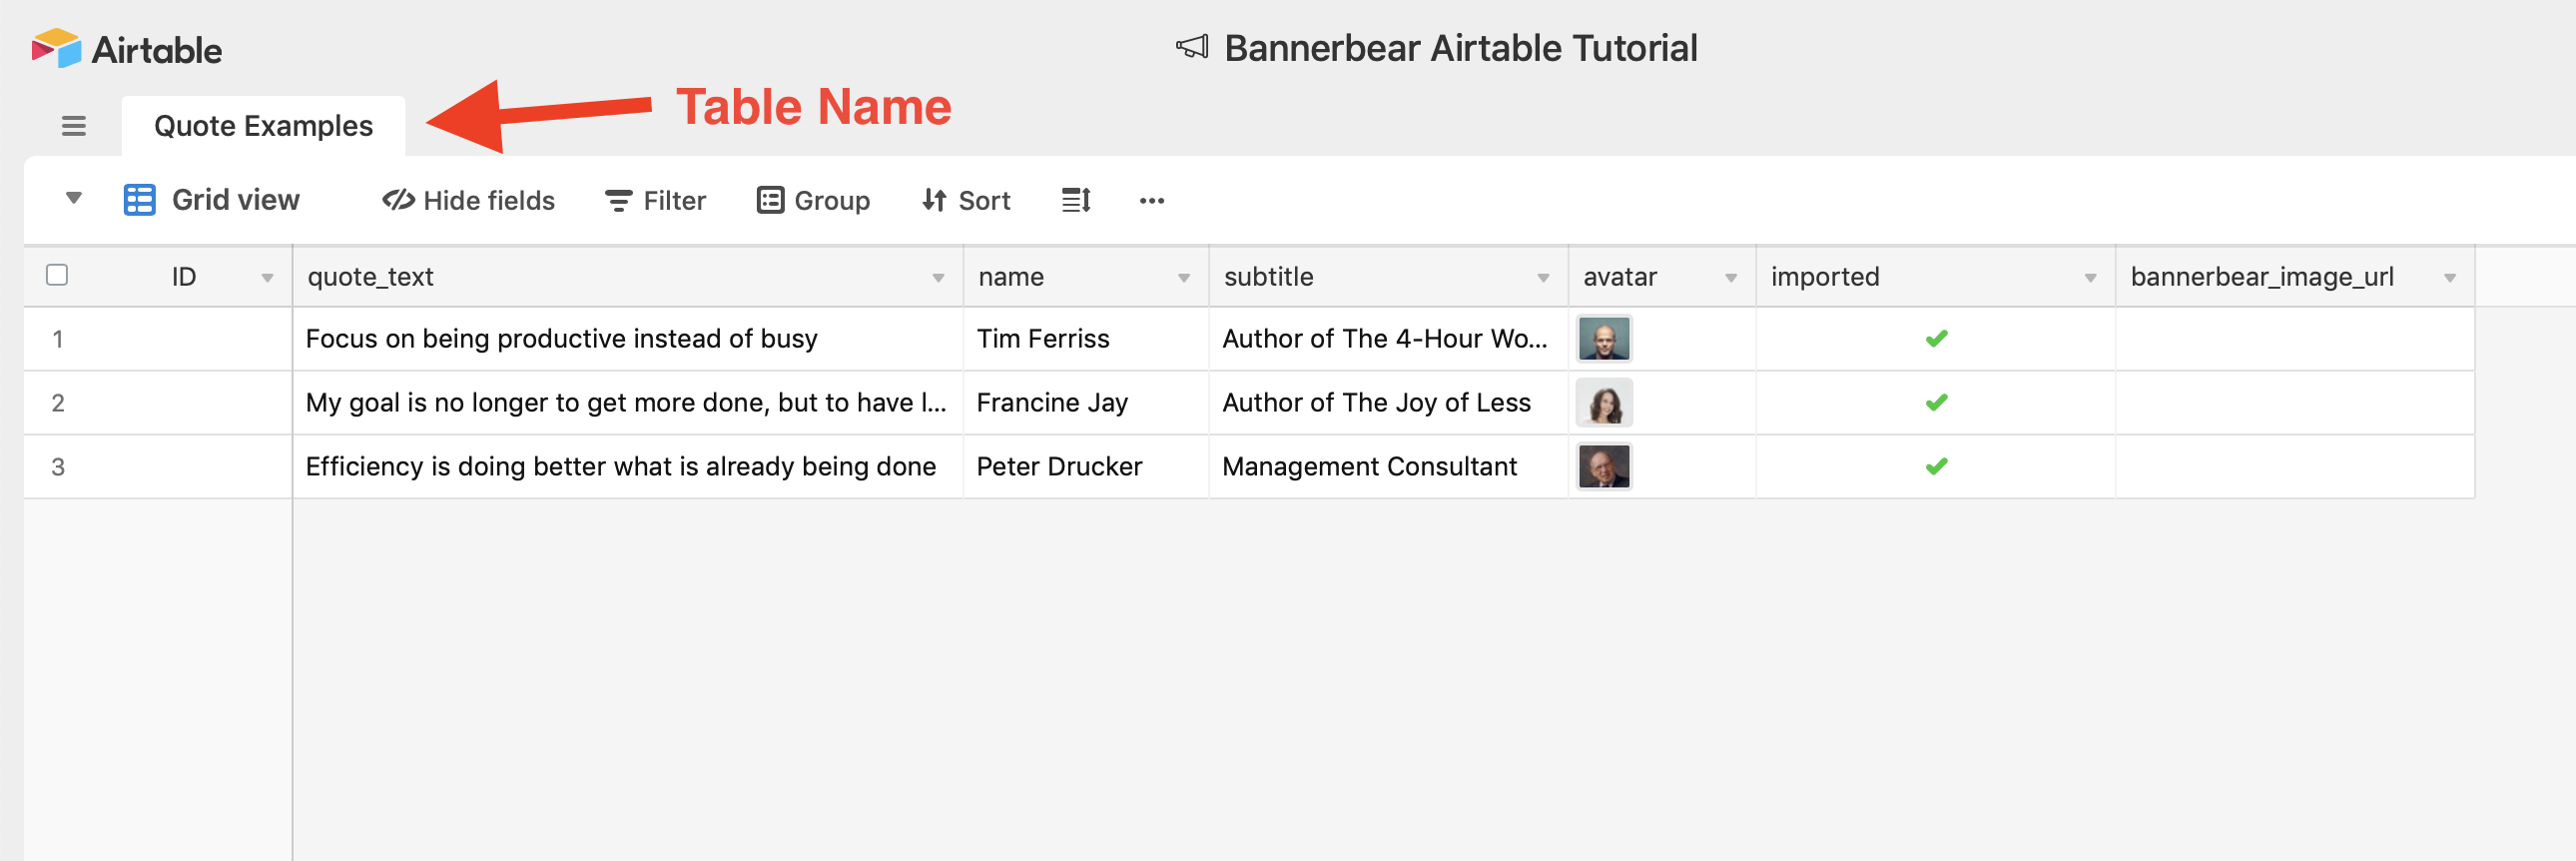
Table Name
The Table Name is the sheet / tab name inside the Airtable Base that you are using:
Plug those details into Bannerbear!
Setting up your Airtable table
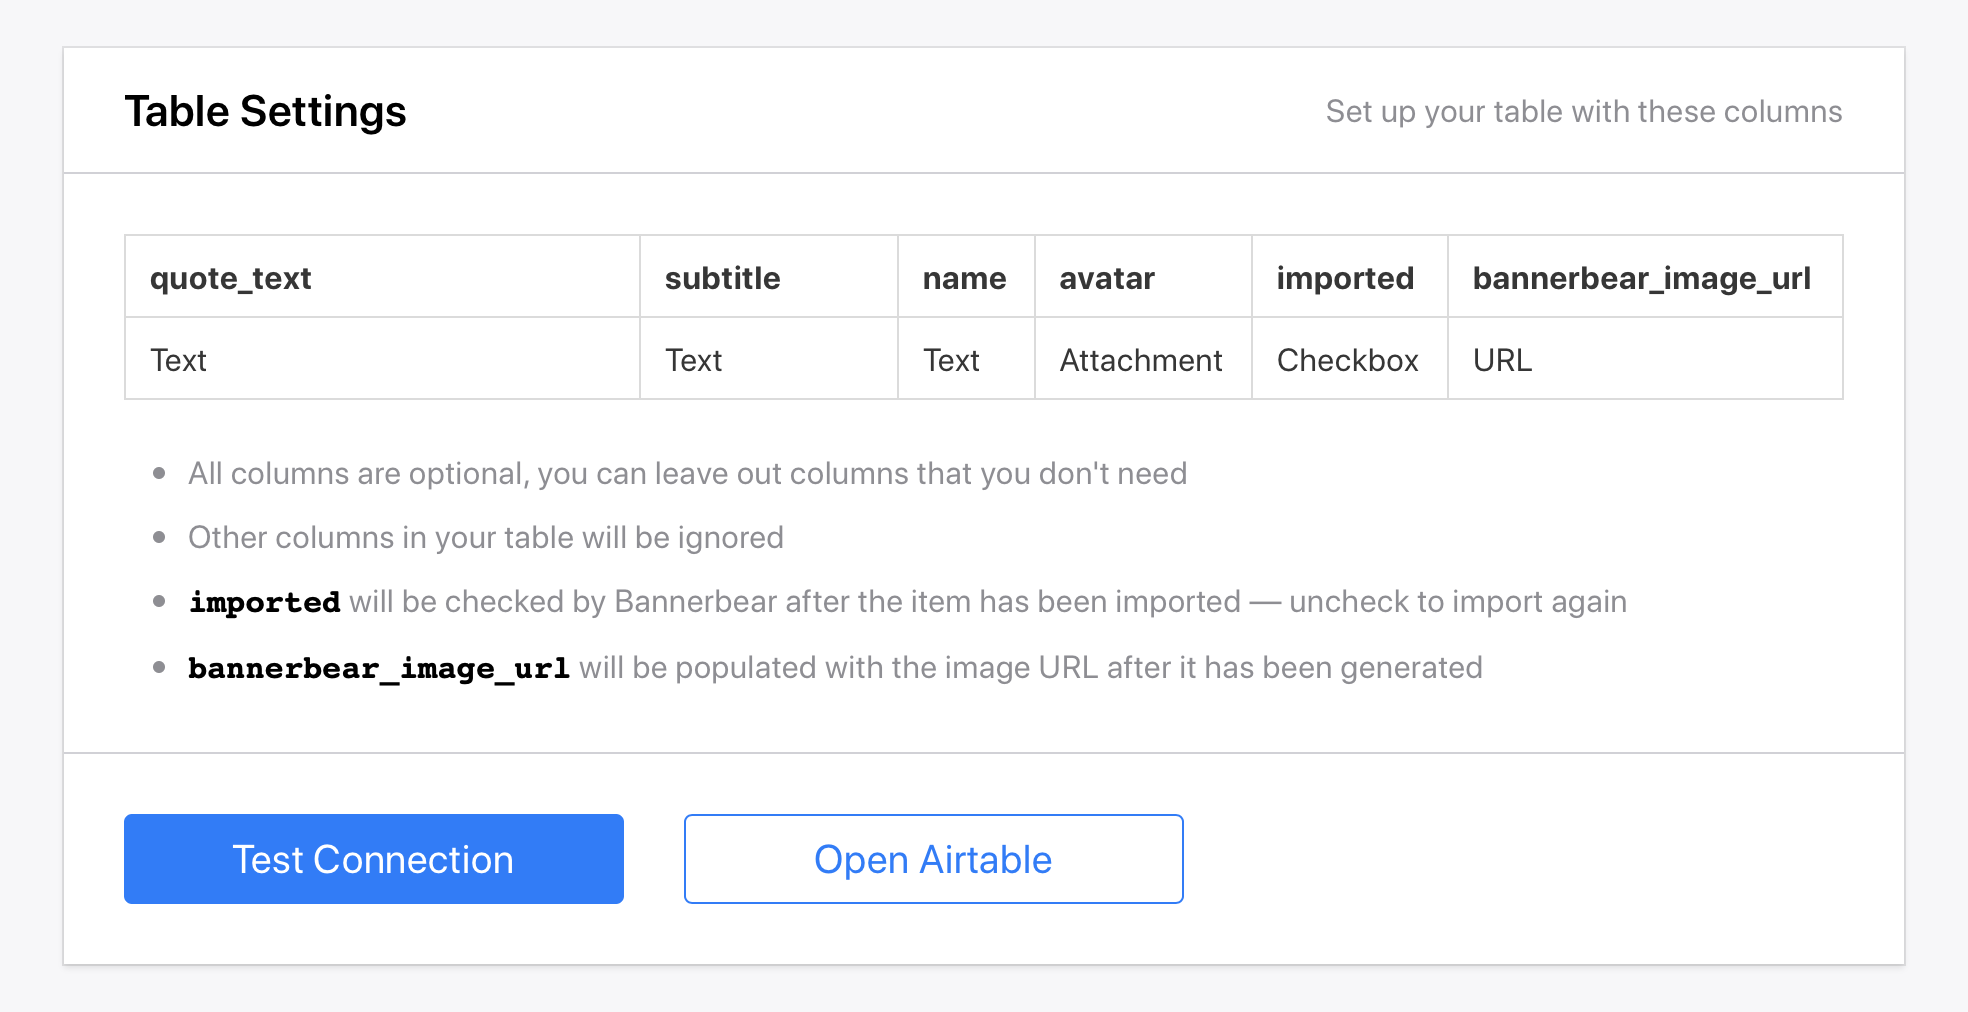
Once you have saved the above settings, Bannerbear will show you how it expects your Airtable to look:
(if you copied my Airtable Base above, your table will already look like this)
Note that all of these columns are optional. If there's a part of the template that you always want to keep the same in all of your variations, just leave it out of the table.
The last two columns are optional but pretty handy so I recommend including them:
- imported will show up as checked once Bannerbear has imported something. This is useful to prevent importing things multiple times, and also useful for re-importing (by unchecking) rows that you want to re-generate.
- bannerbear_image_url will be populated with the final image that Bannerbear generates. Again, not mandatory since all your images will be listed in the Bannerbear dashboard, but this is a convenient way to stay organized in Airtable.
Want to import data into multiple Bannerbear templates? Here's how to do that
Import Airtable data
You're all set now!
If you copied my Airtable Base above, feel free to add more rows of data or overwrite the existing data with your own.
If you started a Base from scratch, add some rows of data before trying to import.
For reference, my Airtable Base / Table has data like this:
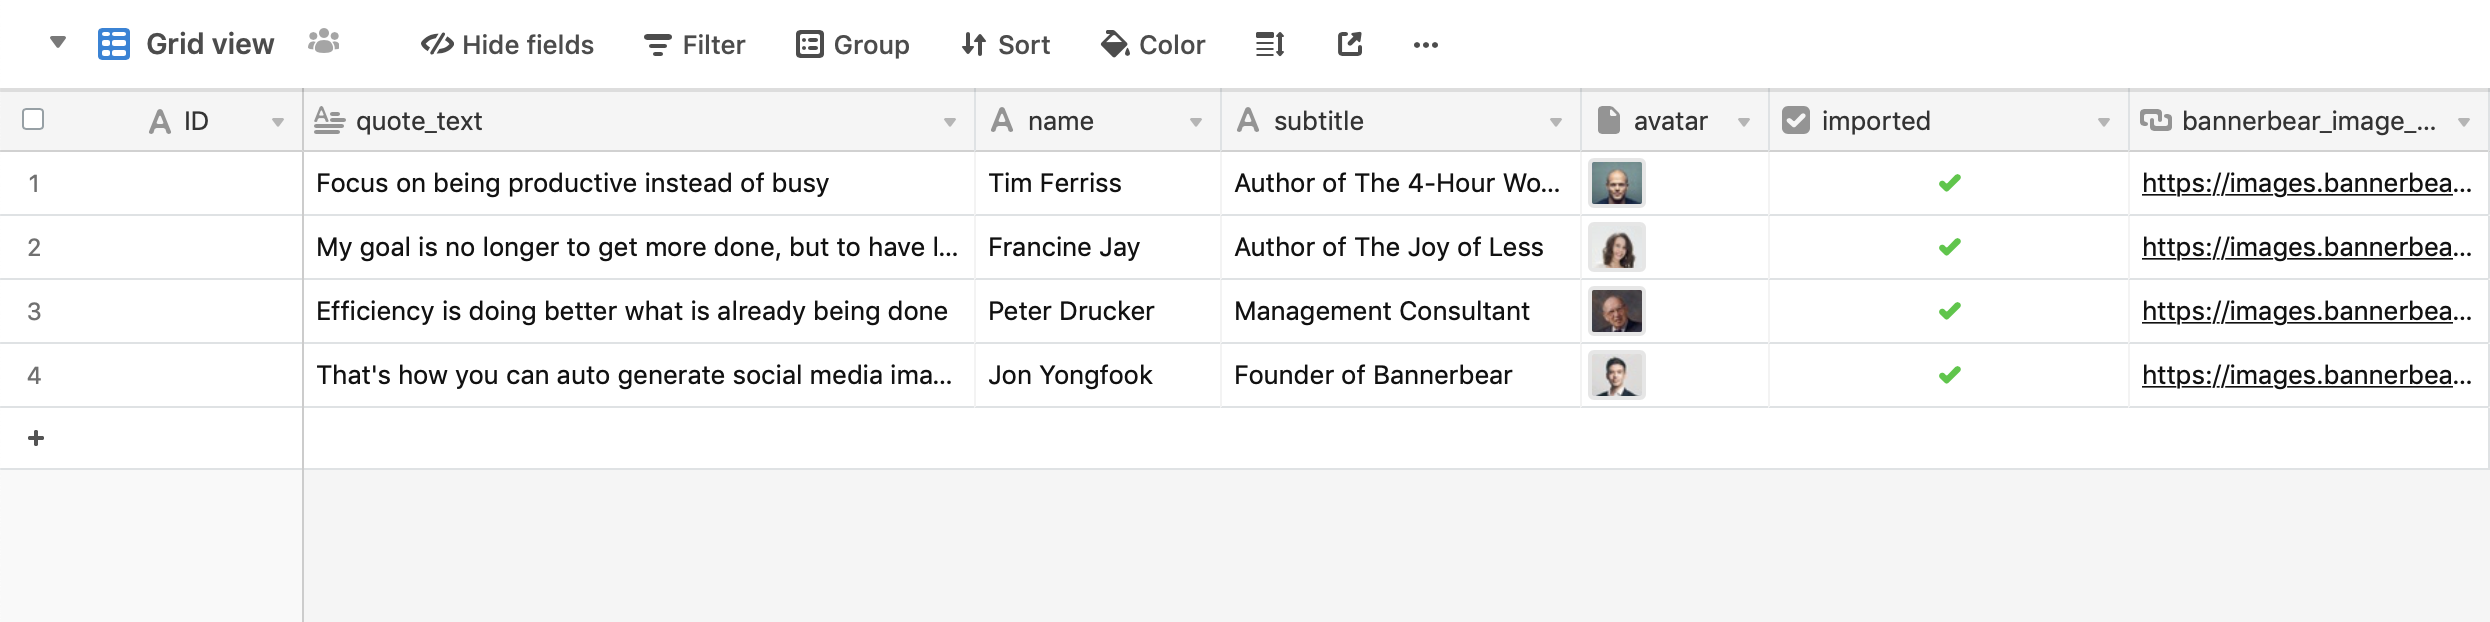
Note the last row that I added ;)
Hit the import button in Bannerbear:

After a couple of seconds, Bannerbear will have imported the data from your Airtable and start to generate the images. You can either view your Images list in Bannerbear to watch the new images pop up, or if you included the bannerbear_image_url column in your Airtable, you can watch the images get populated there!