
How to Auto-generate Watermarked Videos and Email Them to Clients
Contents
Watermarking is a relatively easy way for creatives to protect their work. A logo or some text won’t completely obscure photos, documents, or videos, but it will make it difficult for people to claim your work for their own use.
While watermarking is common practice in creative fields, it remains a tedious administrative task. Add in the work of submitting samples to clients, and you’ve got a lot of work on your hands.
Whether you’re an independent freelancer maximizing time spent on creative work or an agency scaling a client base, you can benefit from the convenience of automation. Nocode tools can help you watermark, store, and submit video samples to clients without spending hours on it each day—and in this article, you'll learn how to set up a workflow to do this on your own.
What You Will Create
Watermarking is the perfect candidate for automatic photo and video generation because it applies a standard logo or text to all incoming data. As you complete video project and upload samples, this automation will watermark, store, and send an email to clients without you having to lift a finger.
The tools you will be using are:
- Airtable : To store video generation and client information
- Bannerbear : To design templates and generate watermarked videos
- Gmail : To send emails to clients
- Google Drive : To store video clips
- Zapier : To trigger actions in different programs based on pre-specified commands
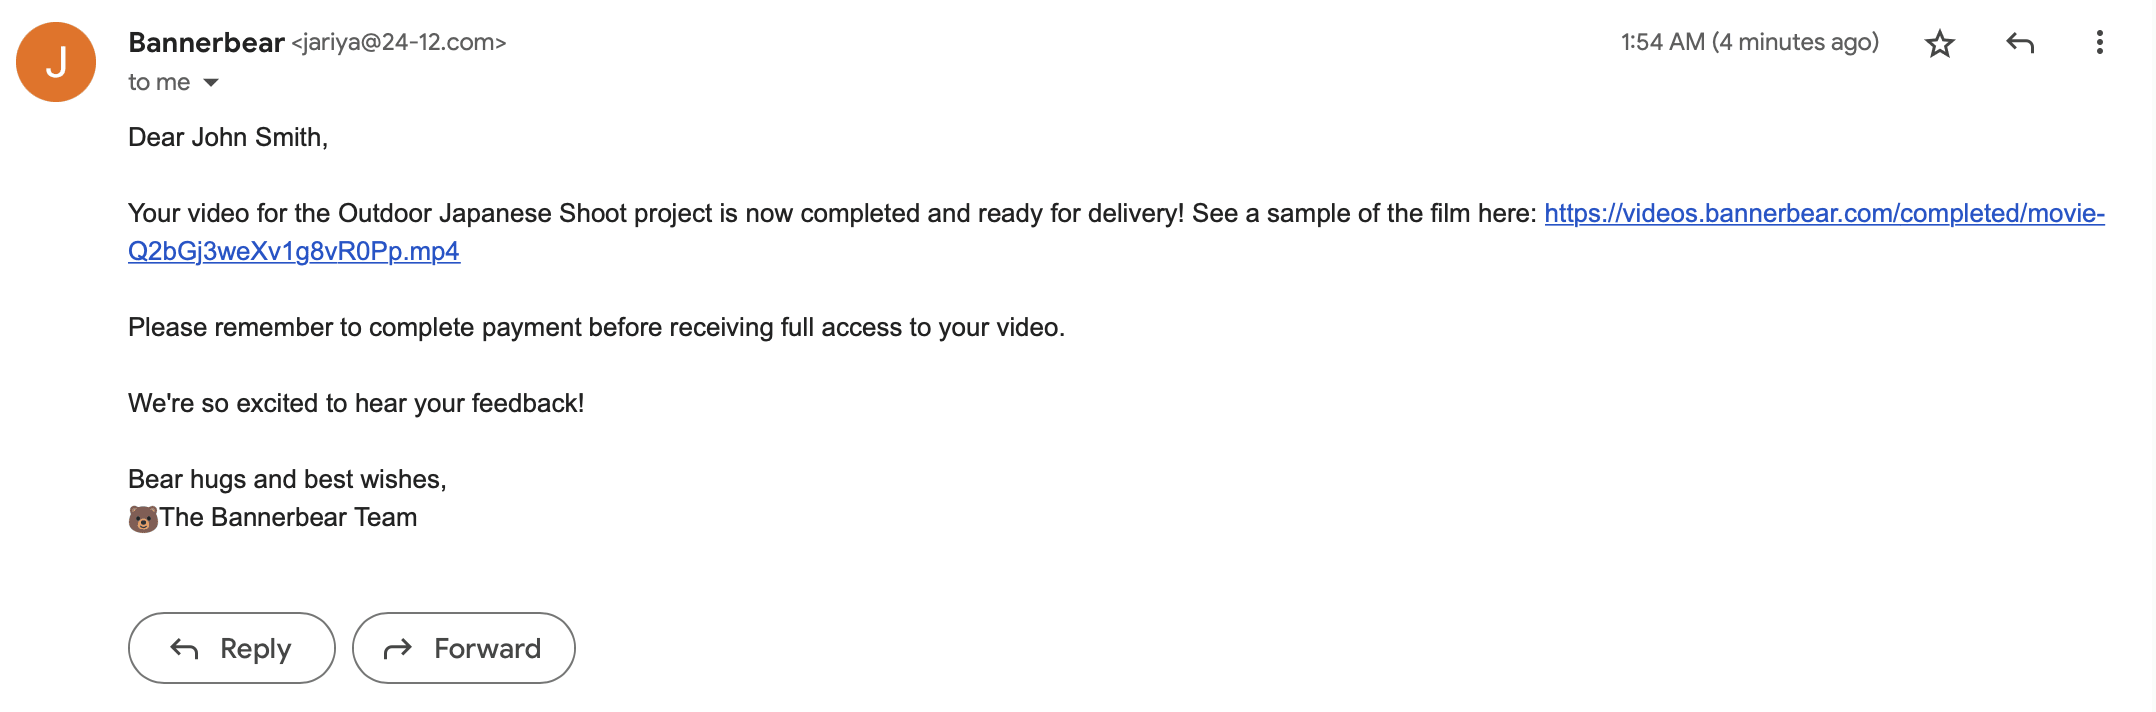
By the end of the tutorial, you should be able to generate a watermarked video that looks something like this:
Let’s get started with a template!
Customize Your Bannerbear Template
With Bannerbear, your sample clips can be passed through a dynamic template with your brand’s logo or text to produce a beautifully watermarked video.
Step 1. Design a Watermark Template
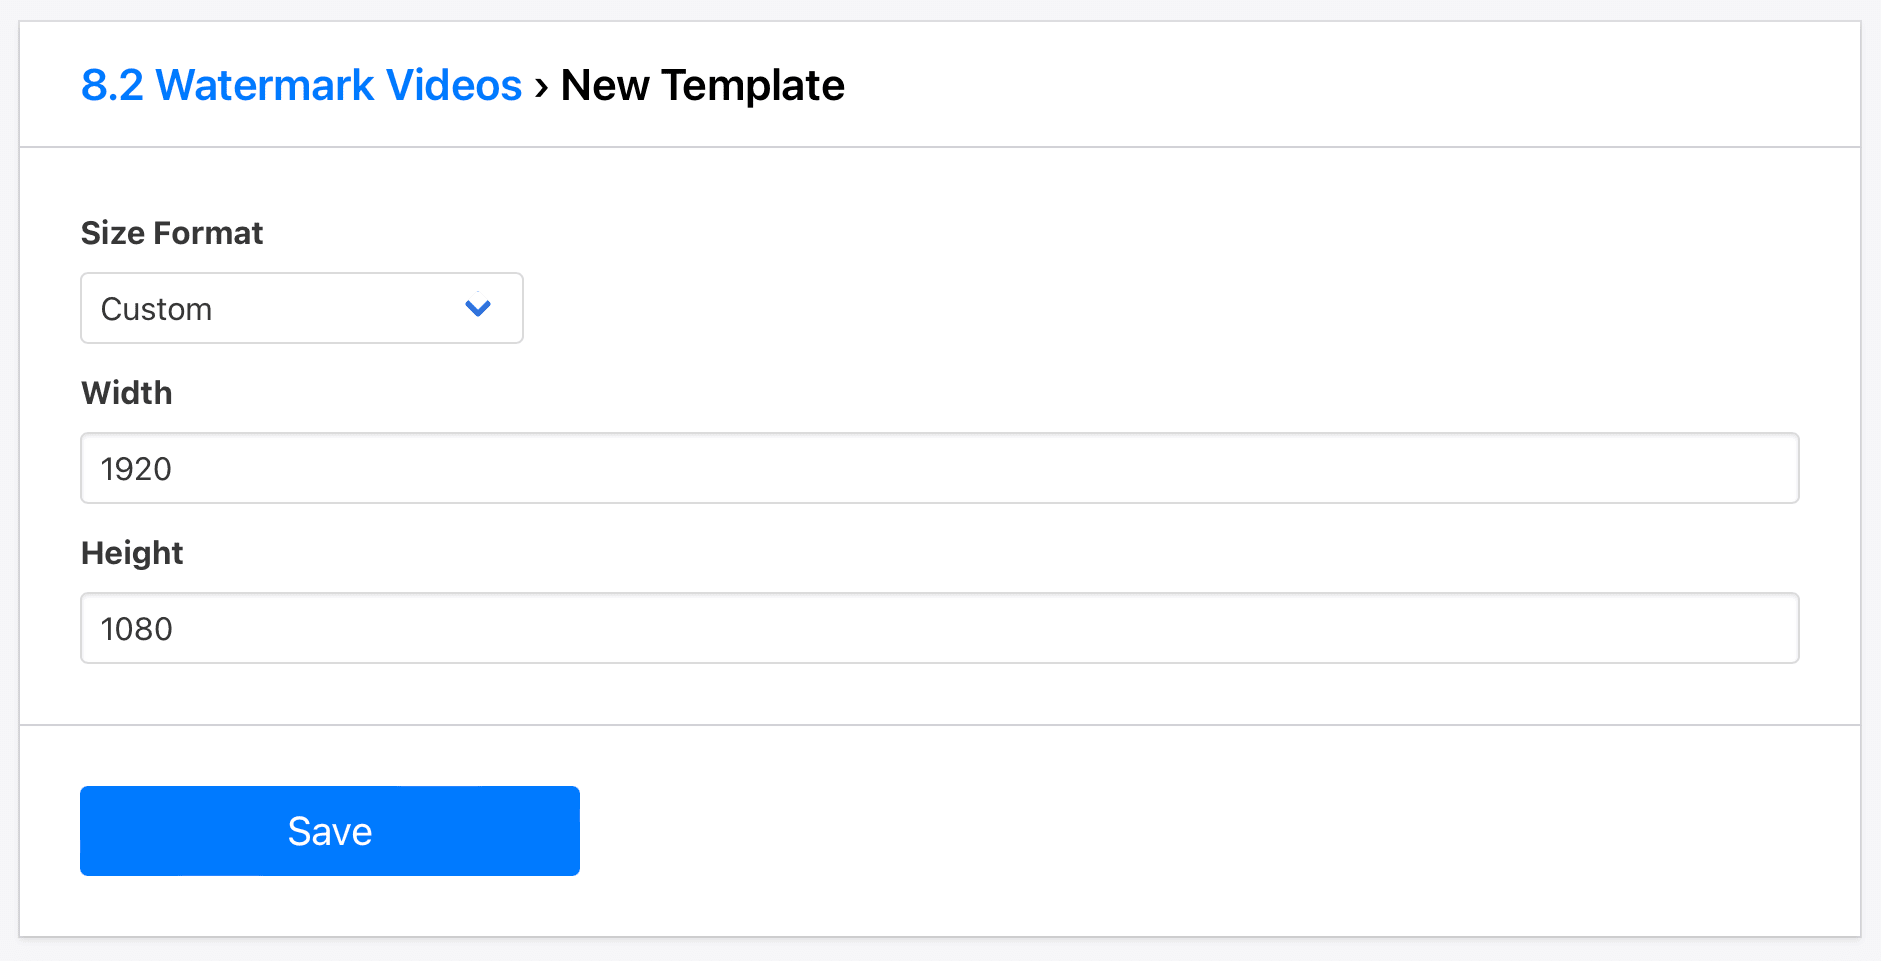
Log into the Bannerbear app (if you don’t have an account, sign up for 30 free API credits!), then create and name a new Project. From the project page, click Create a Template and set up the formatting to match the dimensions of your videos.
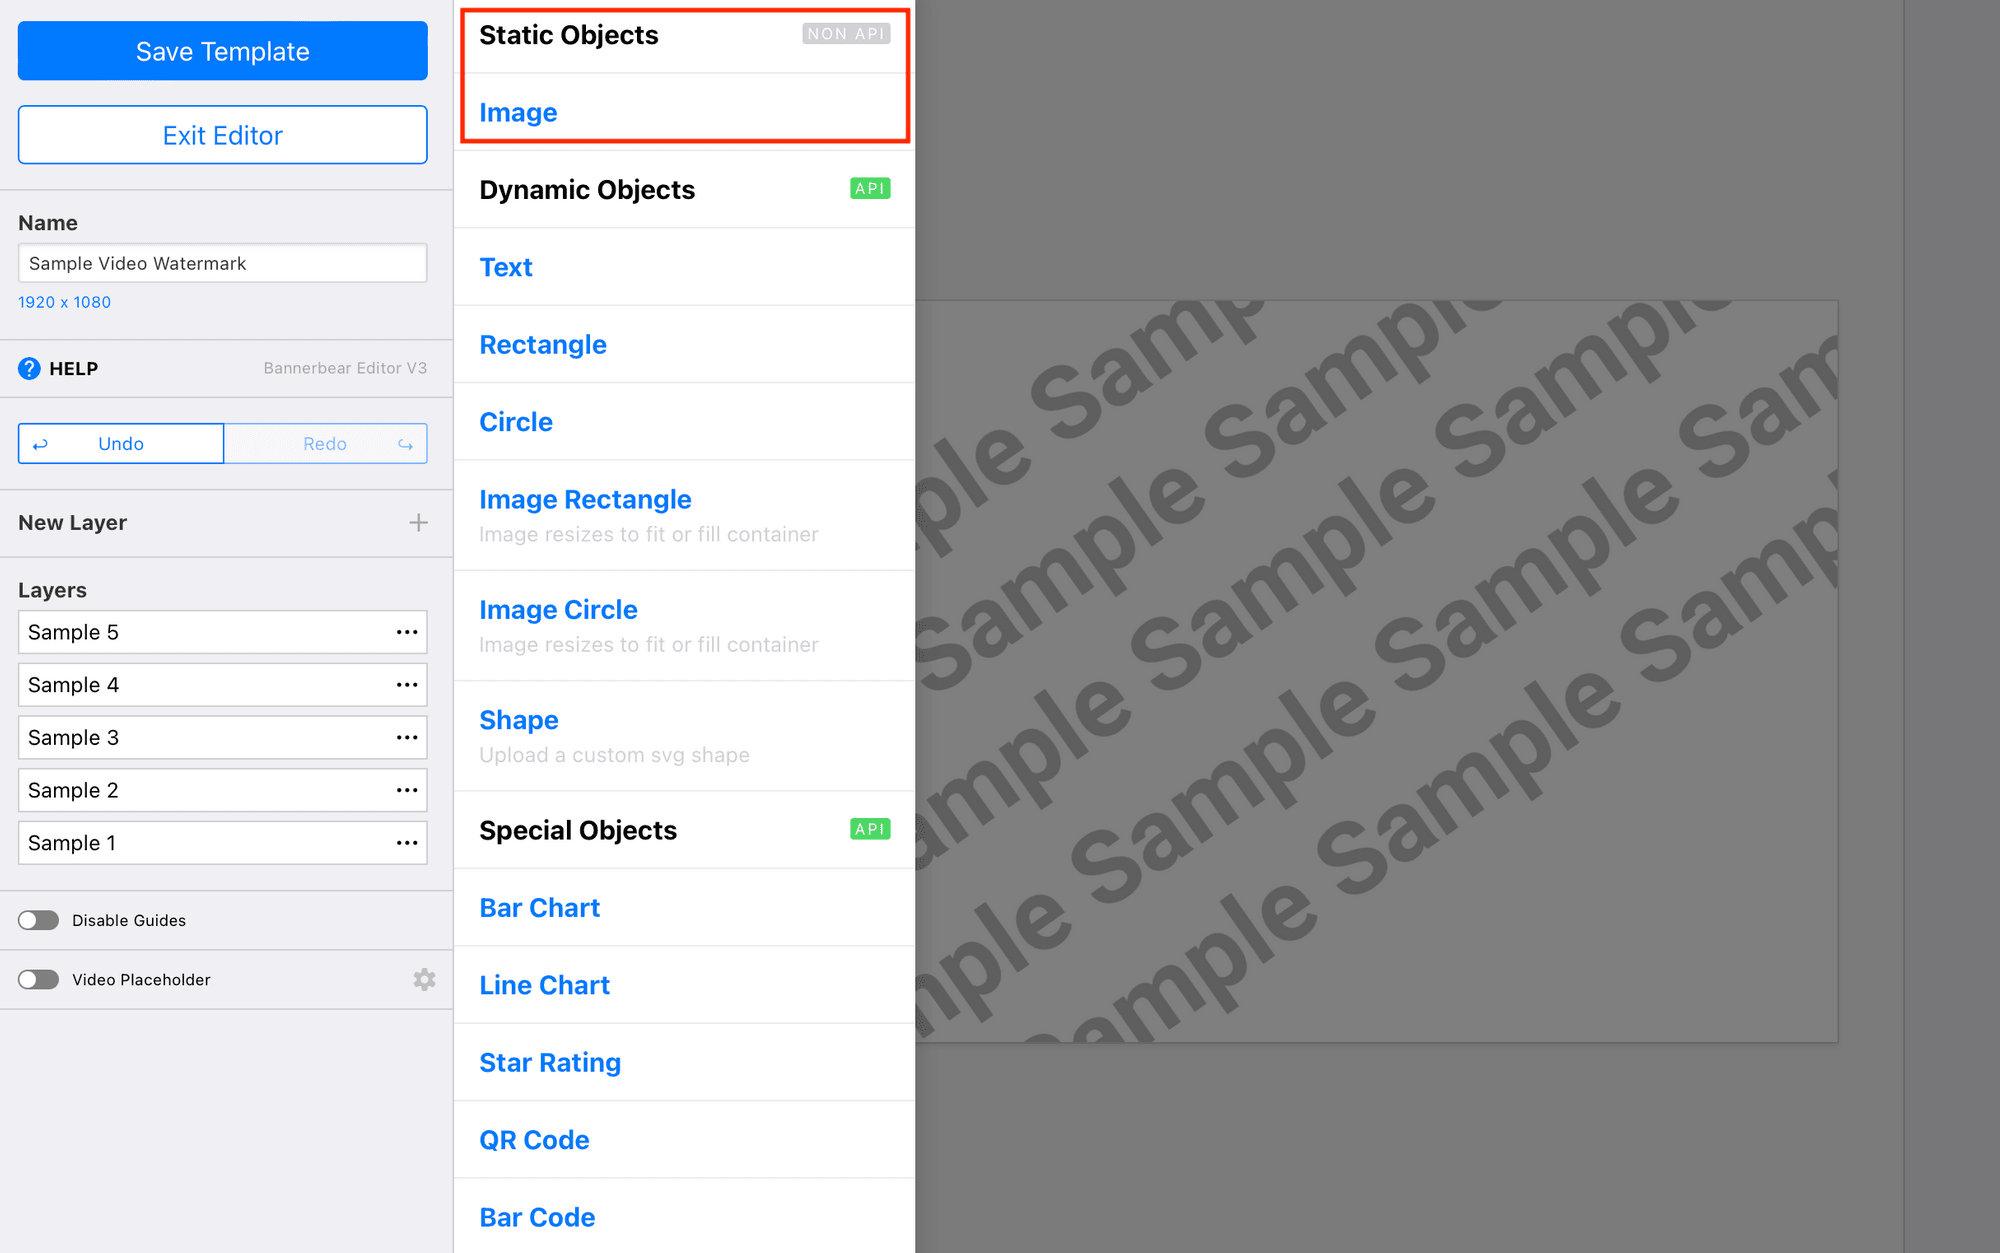
Click on the template to open the editor, then start designing your watermark. Use static fields for any images or text you don’t want to change from video to video.
Bear Tip 🐻: If you would like to designate the recipient of a video on the watermark, add a dynamic text placeholder and map it to the corresponding Airtable field in the video generation step.
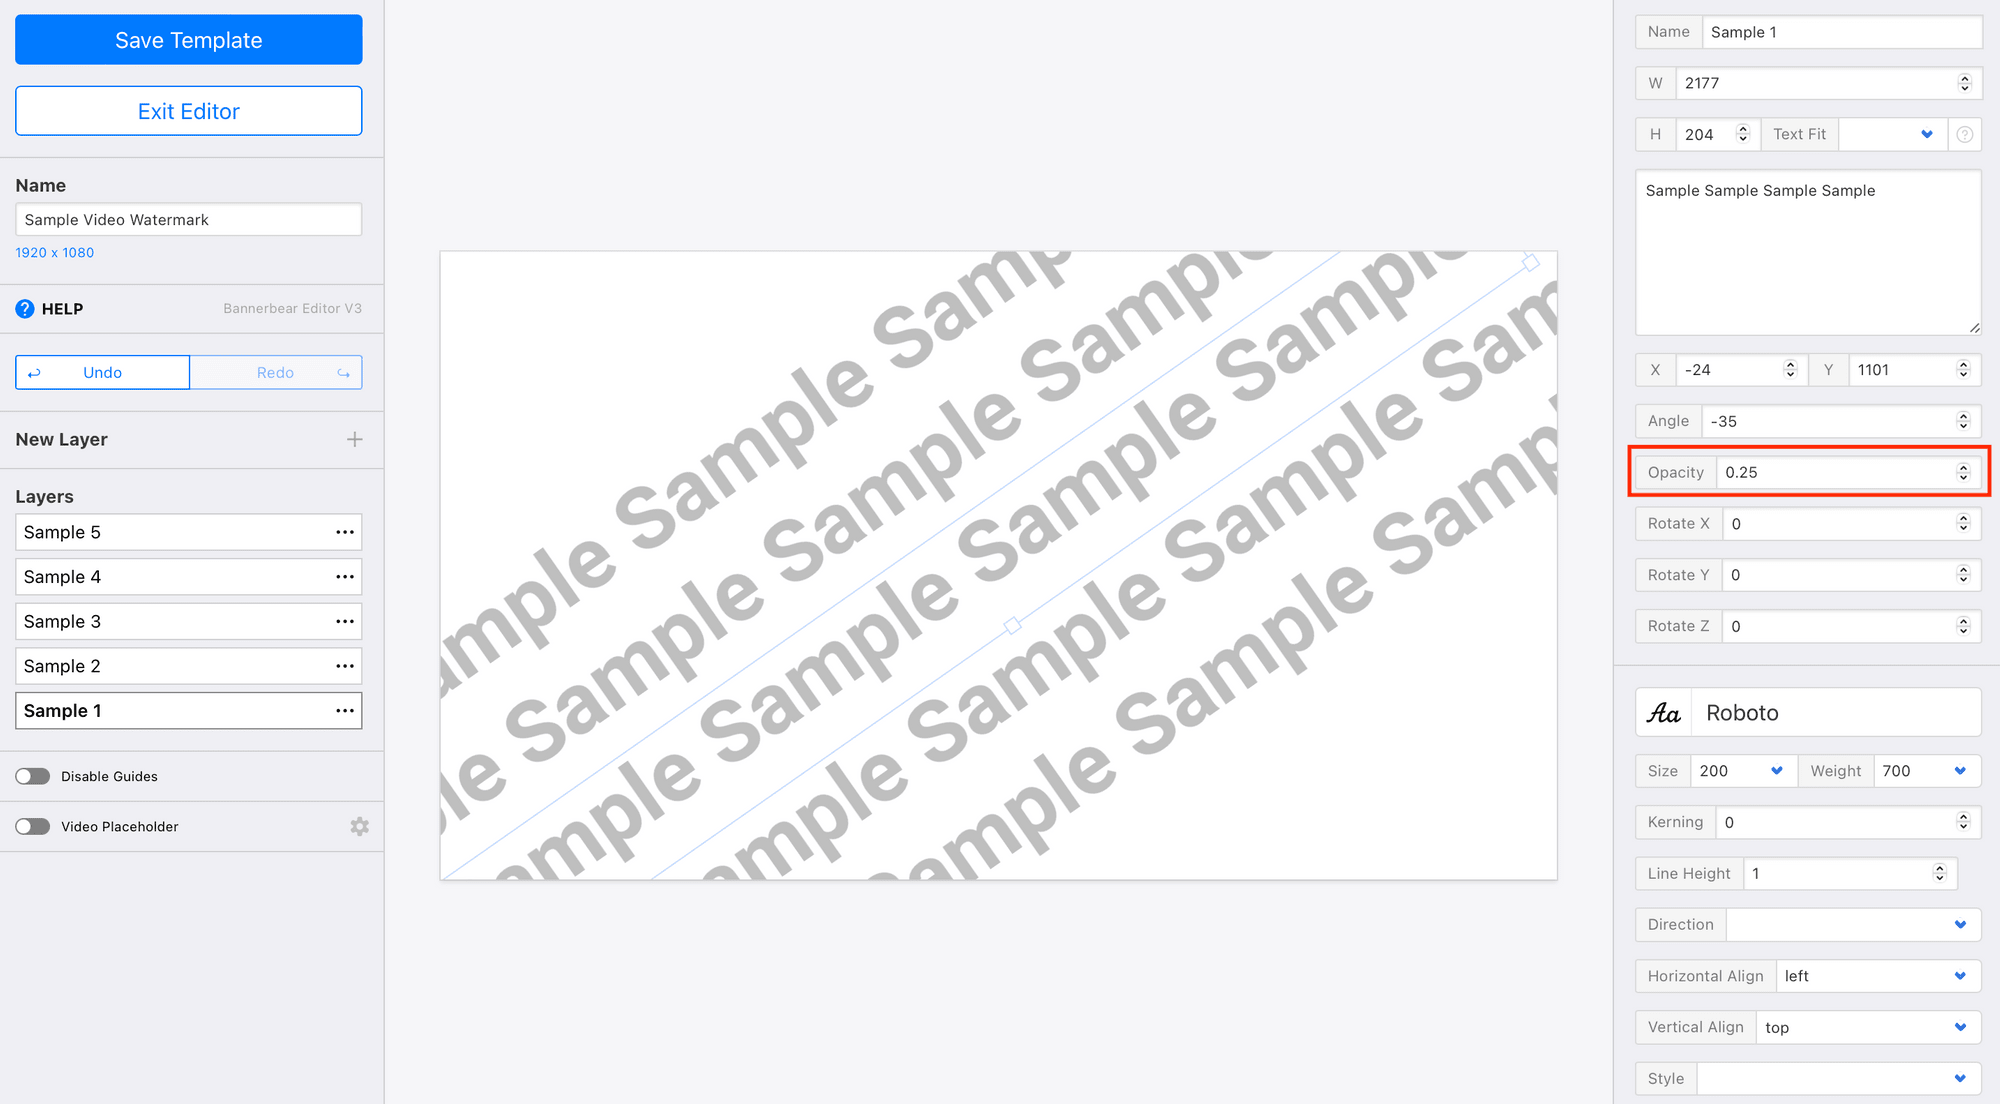
Adjust opacity to suit your preferences—we recommend 0.25-0.5.
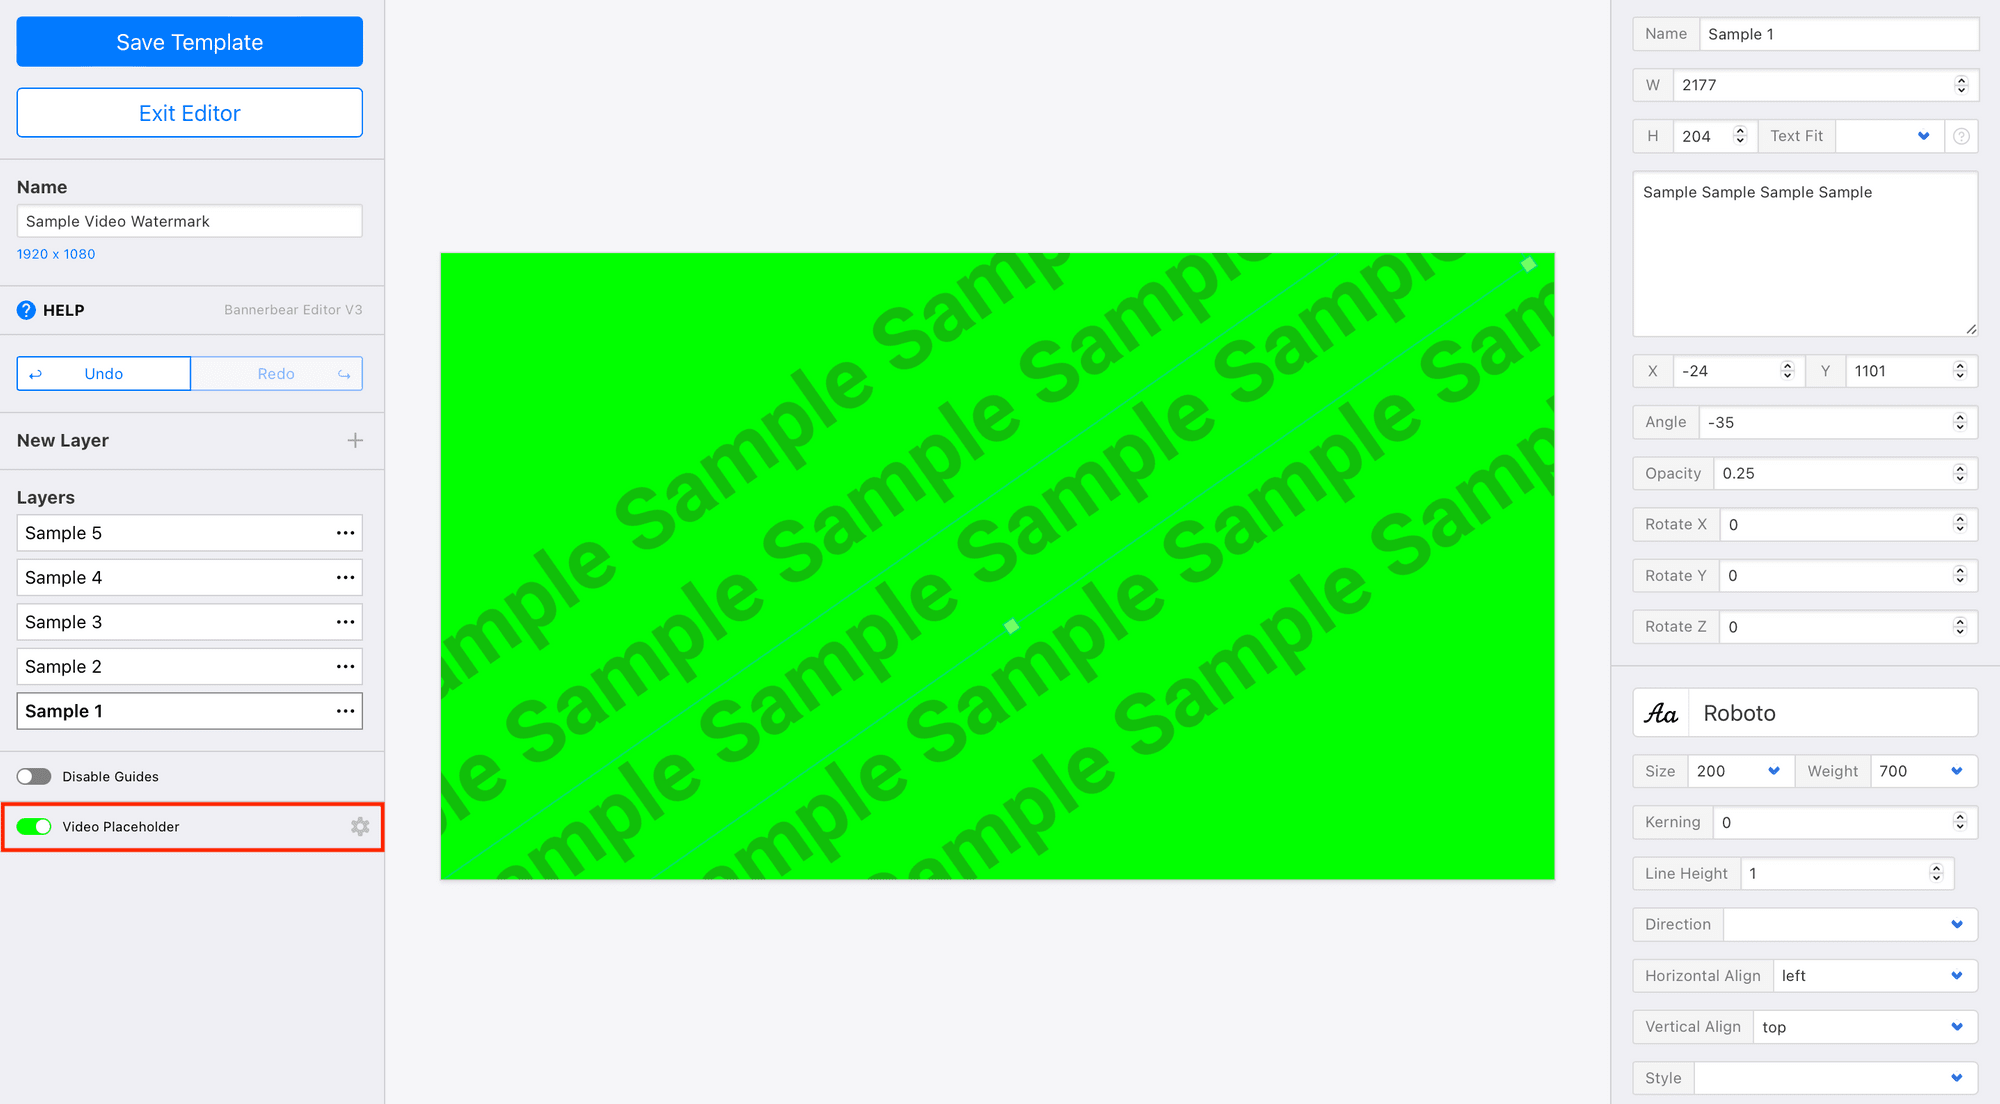
Finally, toggle the Video Placeholder option on the left sidebar to on. The green area is where your video will go.
Click Save Template , then exit the editor.
Step 2. Turn the Template into a Video Template
Return to the project page, then click Create a Video Template. This step will turn an image template into one compatible with video input.
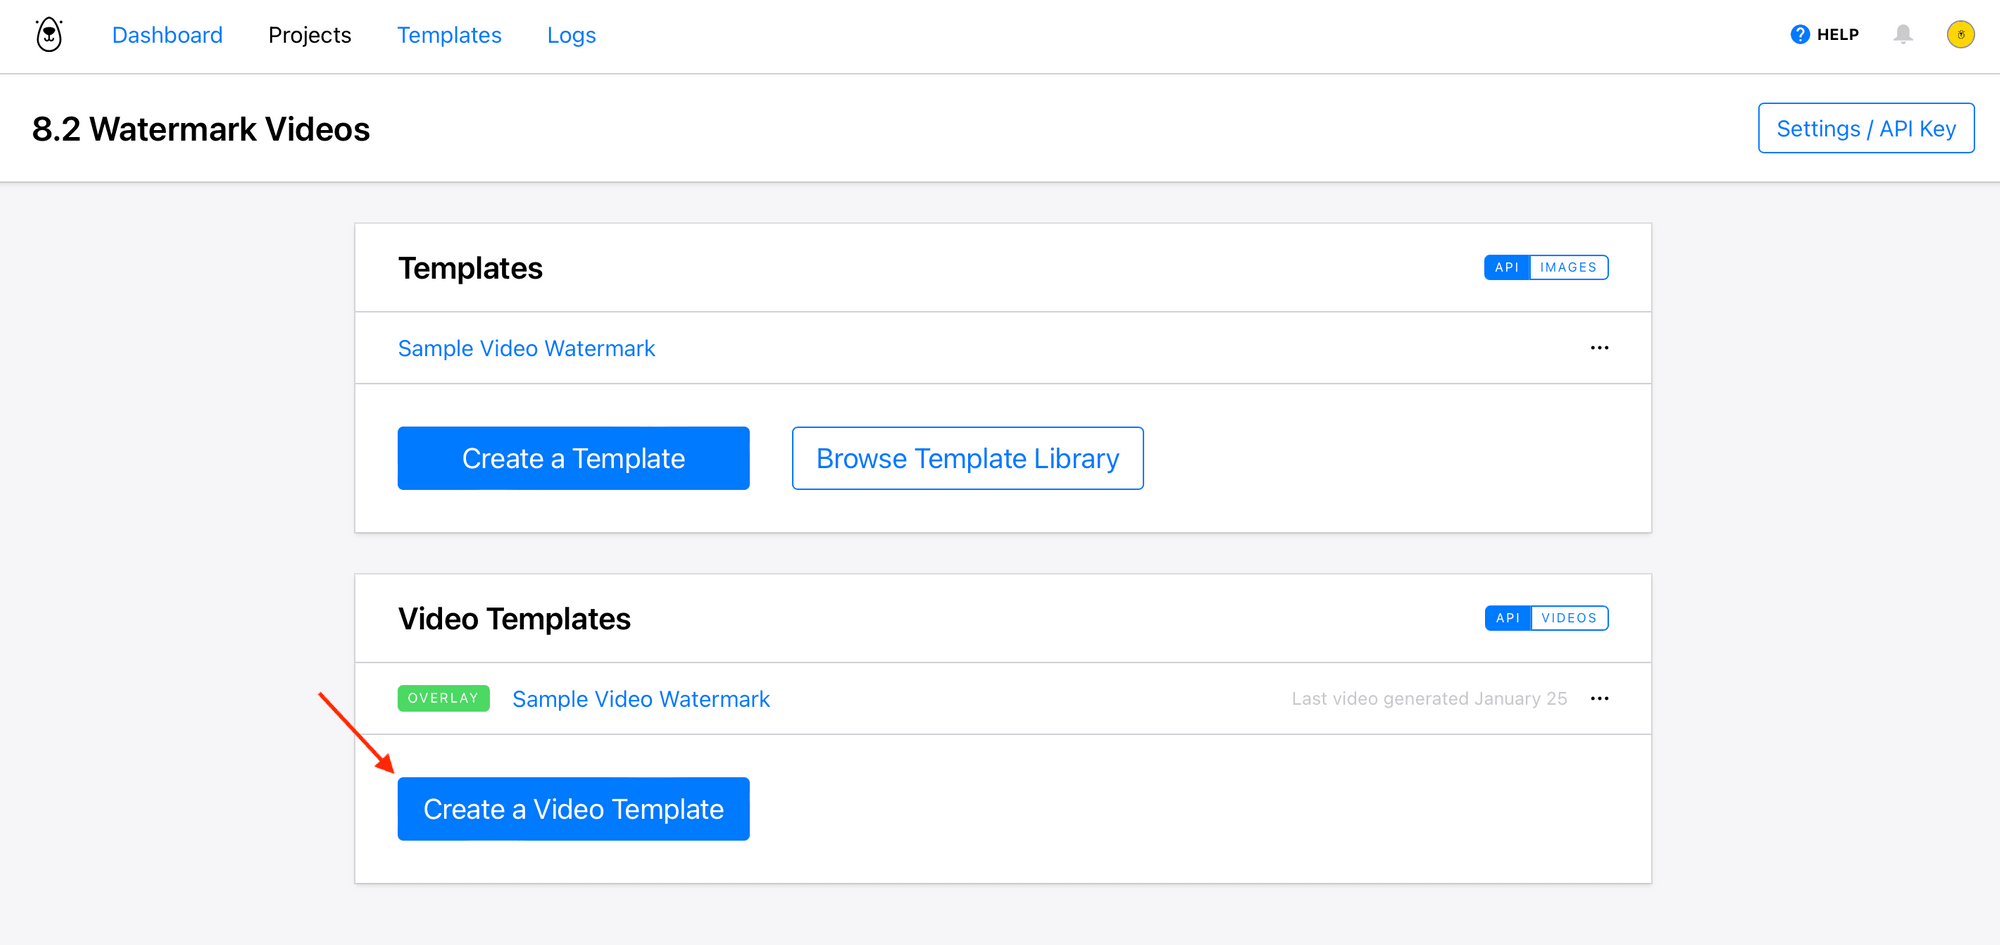
Select your watermark template and choose Overlay as the Build Pack.

Save the video template. You’ll now be able to generate videos with your watermark.
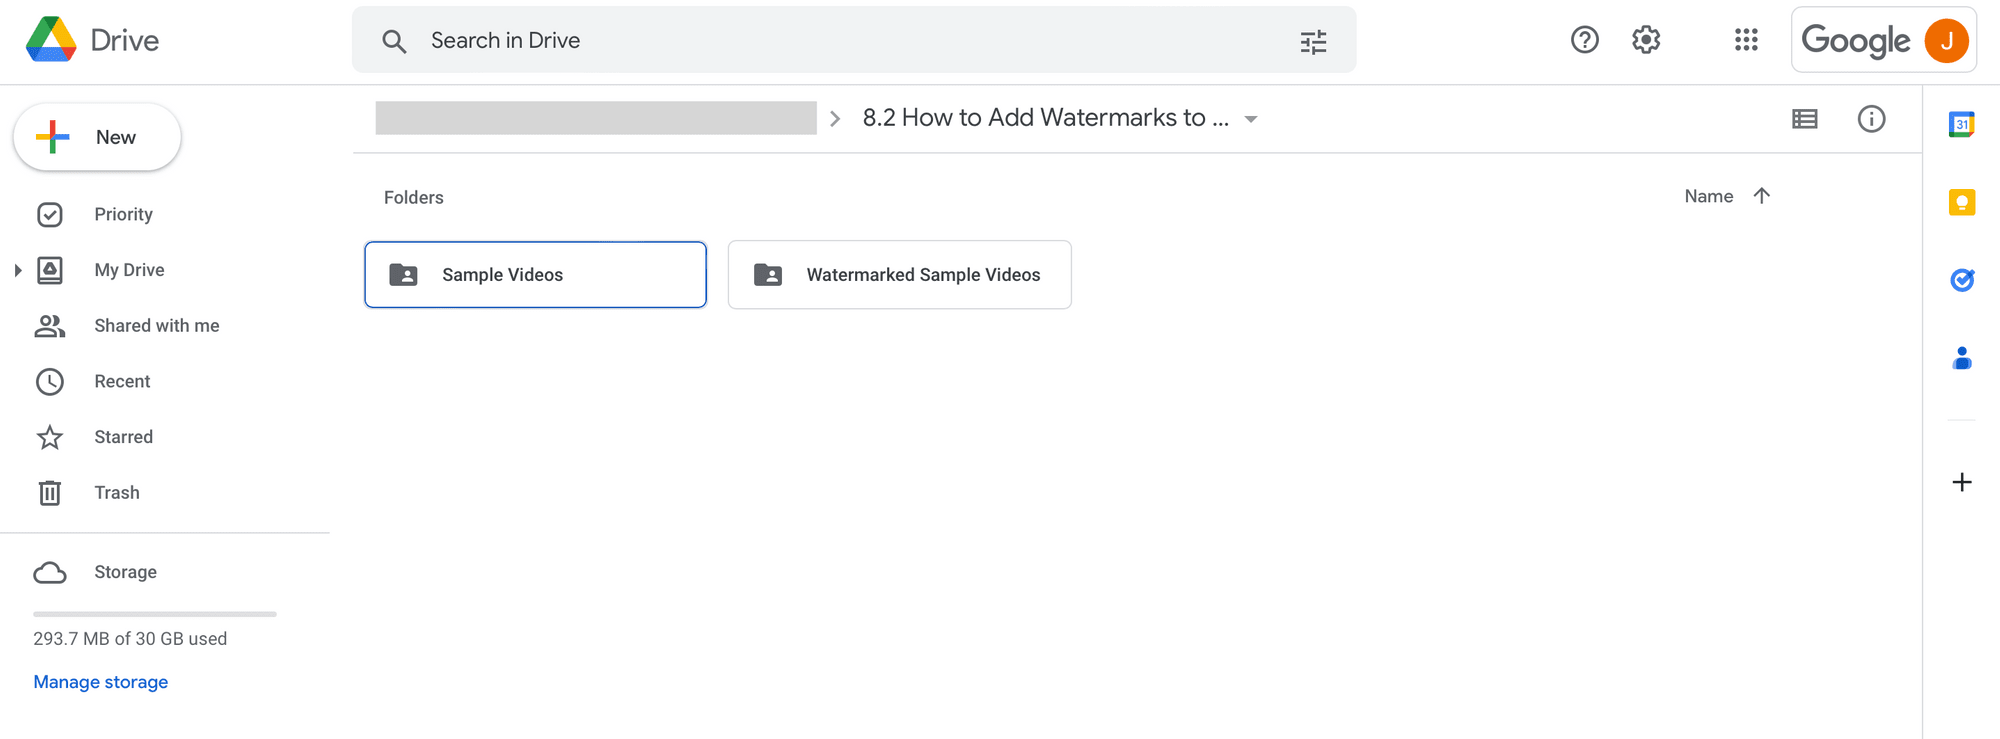
Create a Google Drive Folder for Video Storage
We will use Google Drive as a cloud storage solution for videos in this tutorial, but you can also use OneDrive, Dropbox, or a similar app.
Log into your Google Drive account and create three new folders: a main folder for your project, then two subfolders for input media and watermarked videos.
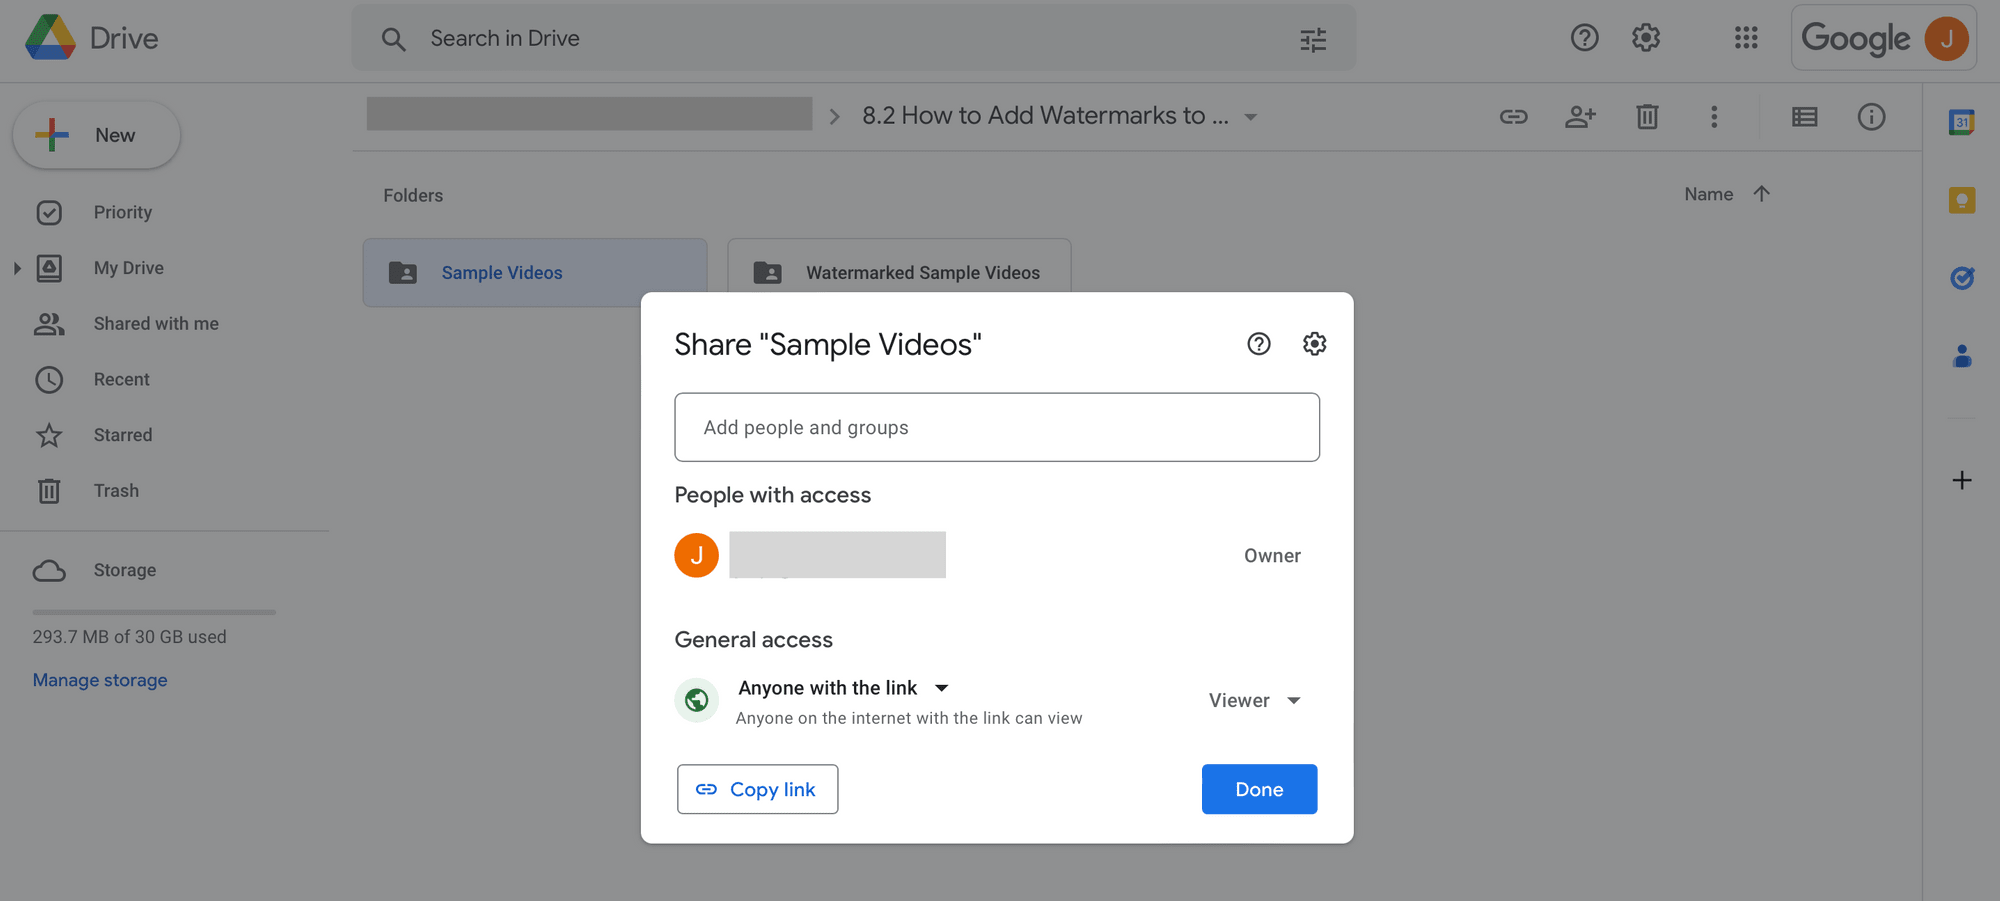
The folders will have to be publicly accessible for Bannerbear to fetch them as input media. Right-click on the folder that will hold the input files and select Share. Set access to Anyone with the link.
In this tutorial, we will use the video’s file name to send client name, project name, and client email to Airtable so the sample submission process can be fully automated. If you’ll be doing the same, include these items in each video’s name before uploading it to Drive.
We will format names as follows: Client - "Project" - Email.
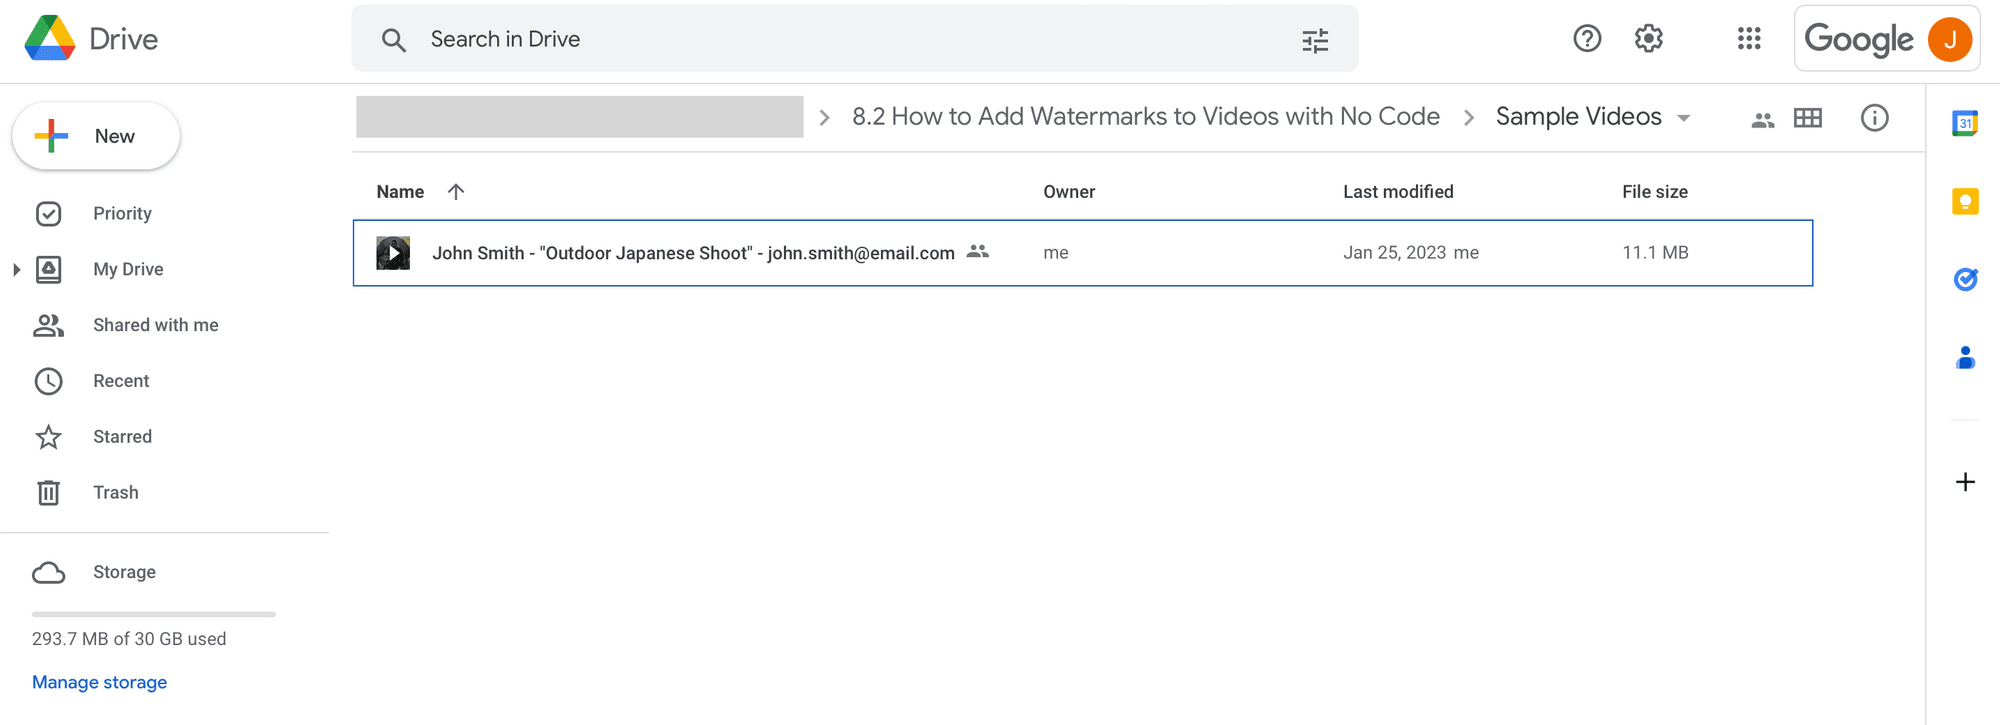
Decide on a file naming convention and upload one clip to test with when setting up your zap. Your Google Drive folders are now ready for use!
Prepare an Airtable Base for Video Generation and Submission
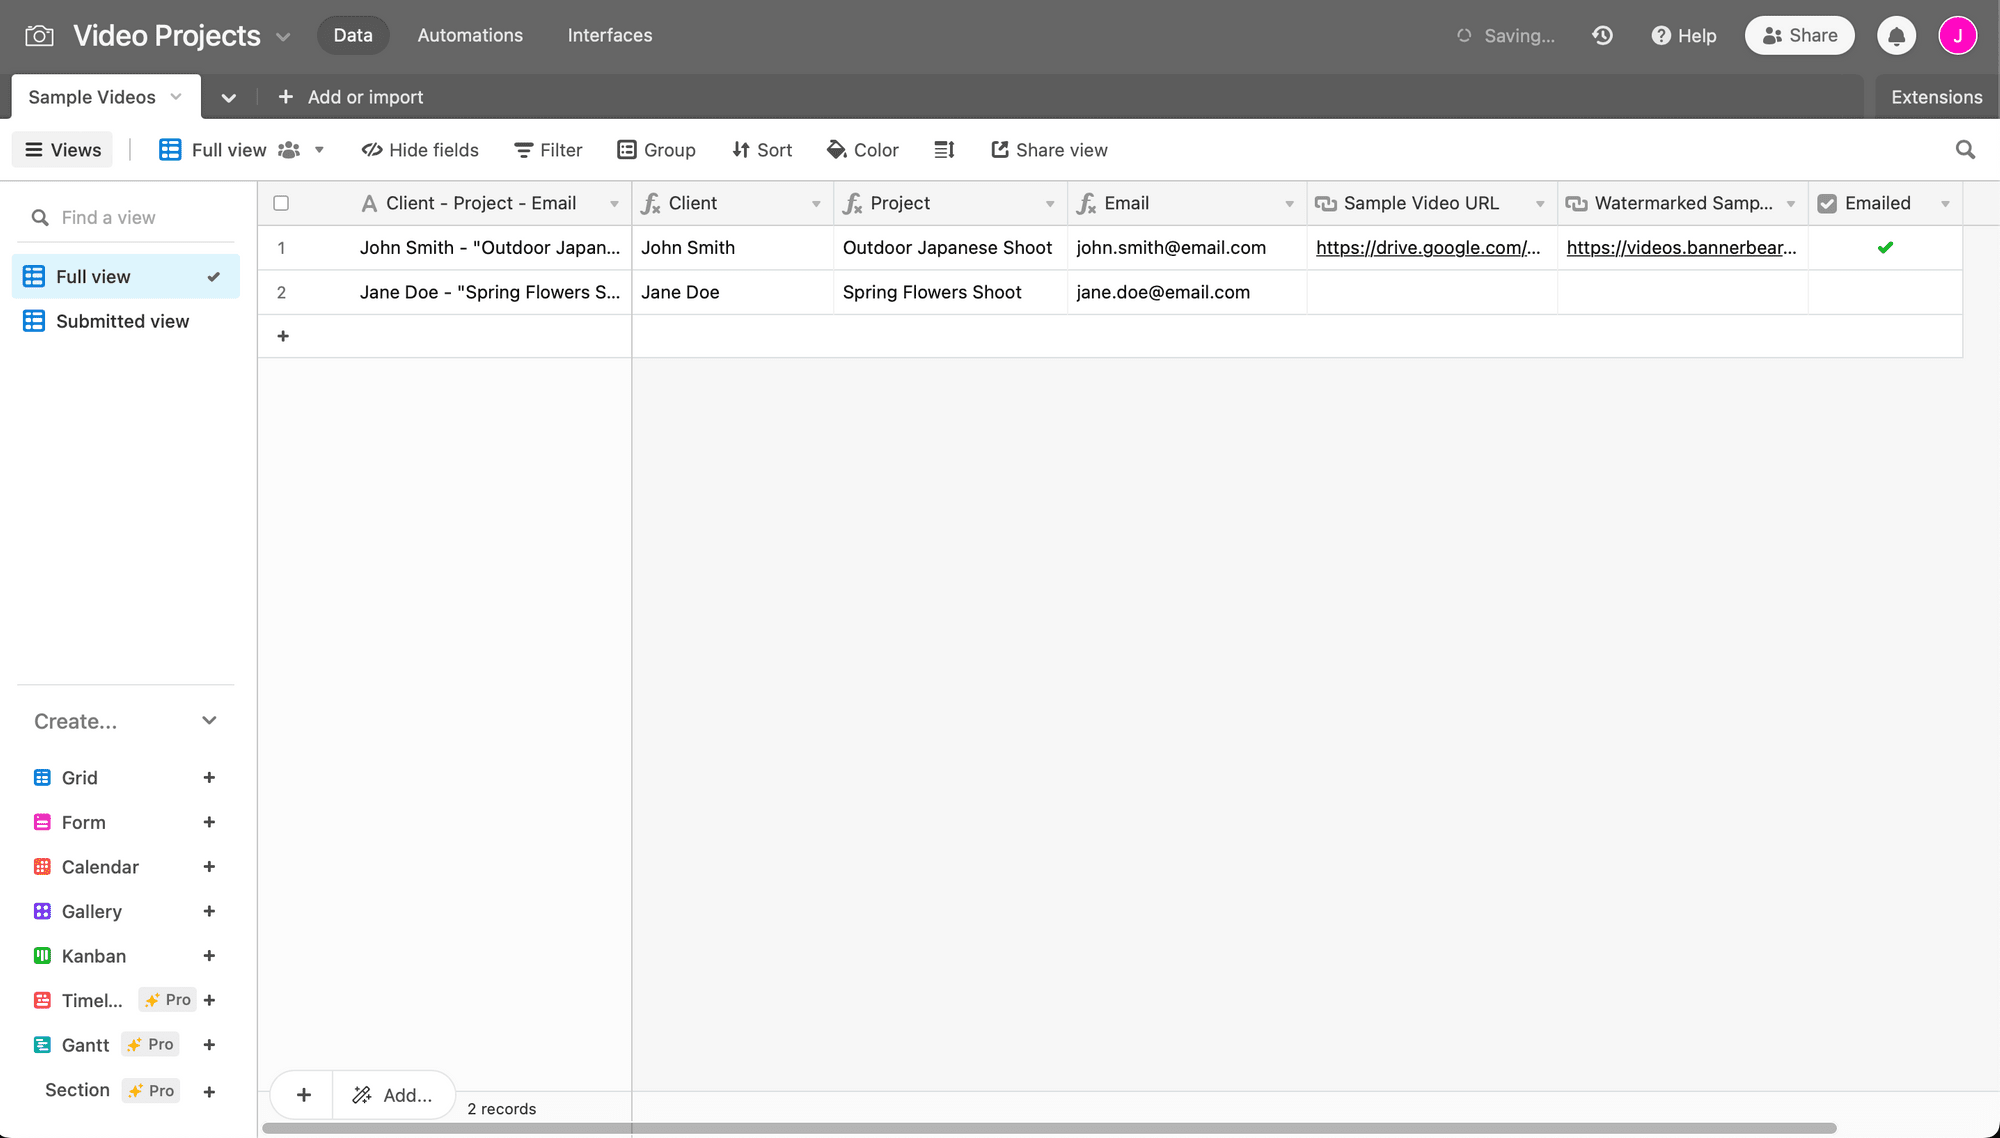
Airtable will be the source of data for video generation. It will store URLs, split file names into their respective parts, and indicate when a client has been sent their sample. We will only need one table for this tutorial.
To build a database for video generation and submission on Airtable, log into your account and create a new base. On the first table, set up the following fields:
- Client - Project - Email
- Client (as formula,
REGEX_REPLACE({Client - Project - Email}, " - .*", "")) - Project (as formula,
SUBSTITUTE(SUBSTITUTE(SUBSTITUTE(SUBSTITUTE({Client - Project - Email},Client,''),Email,'')," - ",""),'"', '')) - Email (as formula,
REGEX_EXTRACT({Client - Project - Email}, "[a-zA-Z0-9-*.]+@[a-zA-Z0-9-*.]+")) - Sample Video URL
- Watermarked Sample Video URL
- Emailed (as checkbox)
❗ Note : In order for the formula fields to work, your files have to follow the same naming convention as this tutorial.
Every time a video clip is uploaded to Google Drive, the first five fields will auto-fill themselves. The other two will populate themselves over the course of the automation, meaning you shouldn’t have to do any manual work on the sheet.
While adding another view for client sample submission status isn’t crucial to video generation, it can provide some useful information in a glance.
On the left sidebar of your Airtable base, click + next to Grid. Name it, then add one filter: Where Emailed is checked (✅).
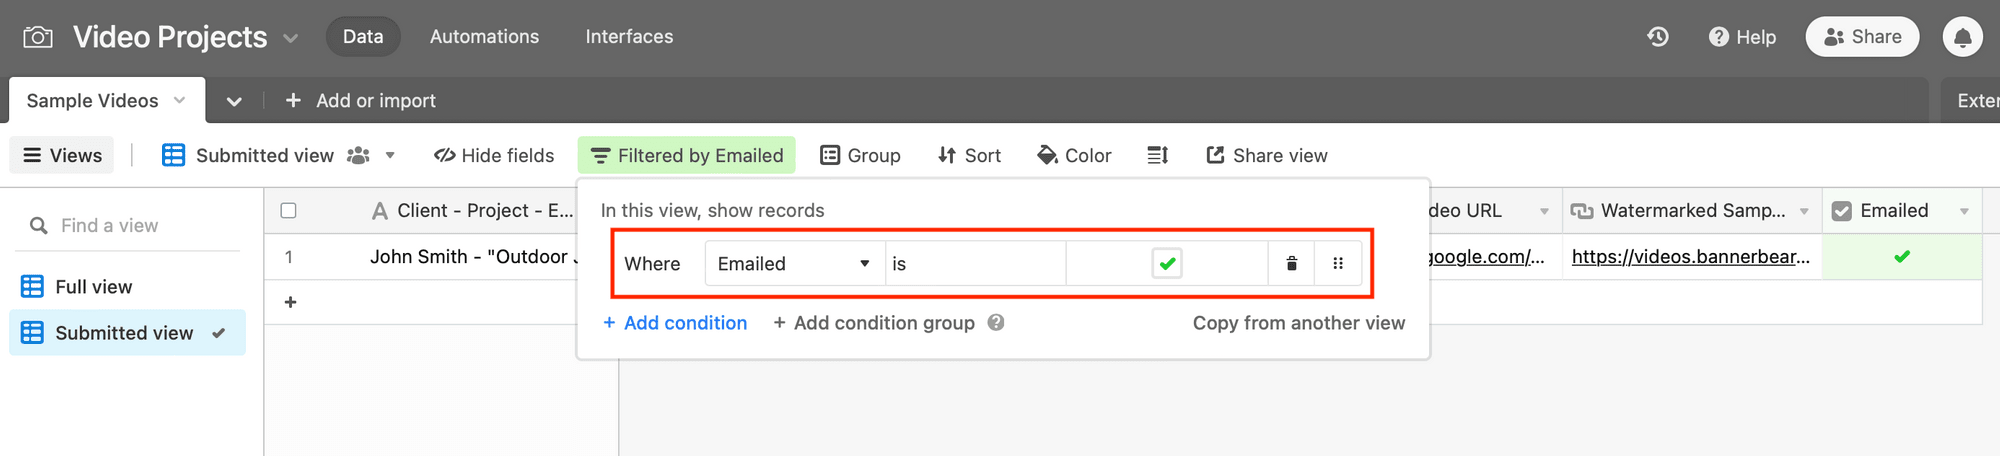
This view will help you see which clients have already been sent their sample videos.
Bear Tip 🐻: Make Airtable your one-stop-shop for video project management by adding tables for tracking status, storing client information, and calculating revenue. Or try one of these project management alternatives instead!
Set up a Zap to Generate Watermarked Videos
The first zap you set up will generate watermarked videos when you upload a sample to Google Drive.
Log into your Zapier account, click + Create Zap , and set up the following events:
Trigger: New File in Folder in Google Drive
Choose Google Drive as the app and New File in Folder as the event. If you haven’t connected your Google Drive account yet, you will be prompted to log in.
Set up your trigger by selecting the input media folder from your drive.
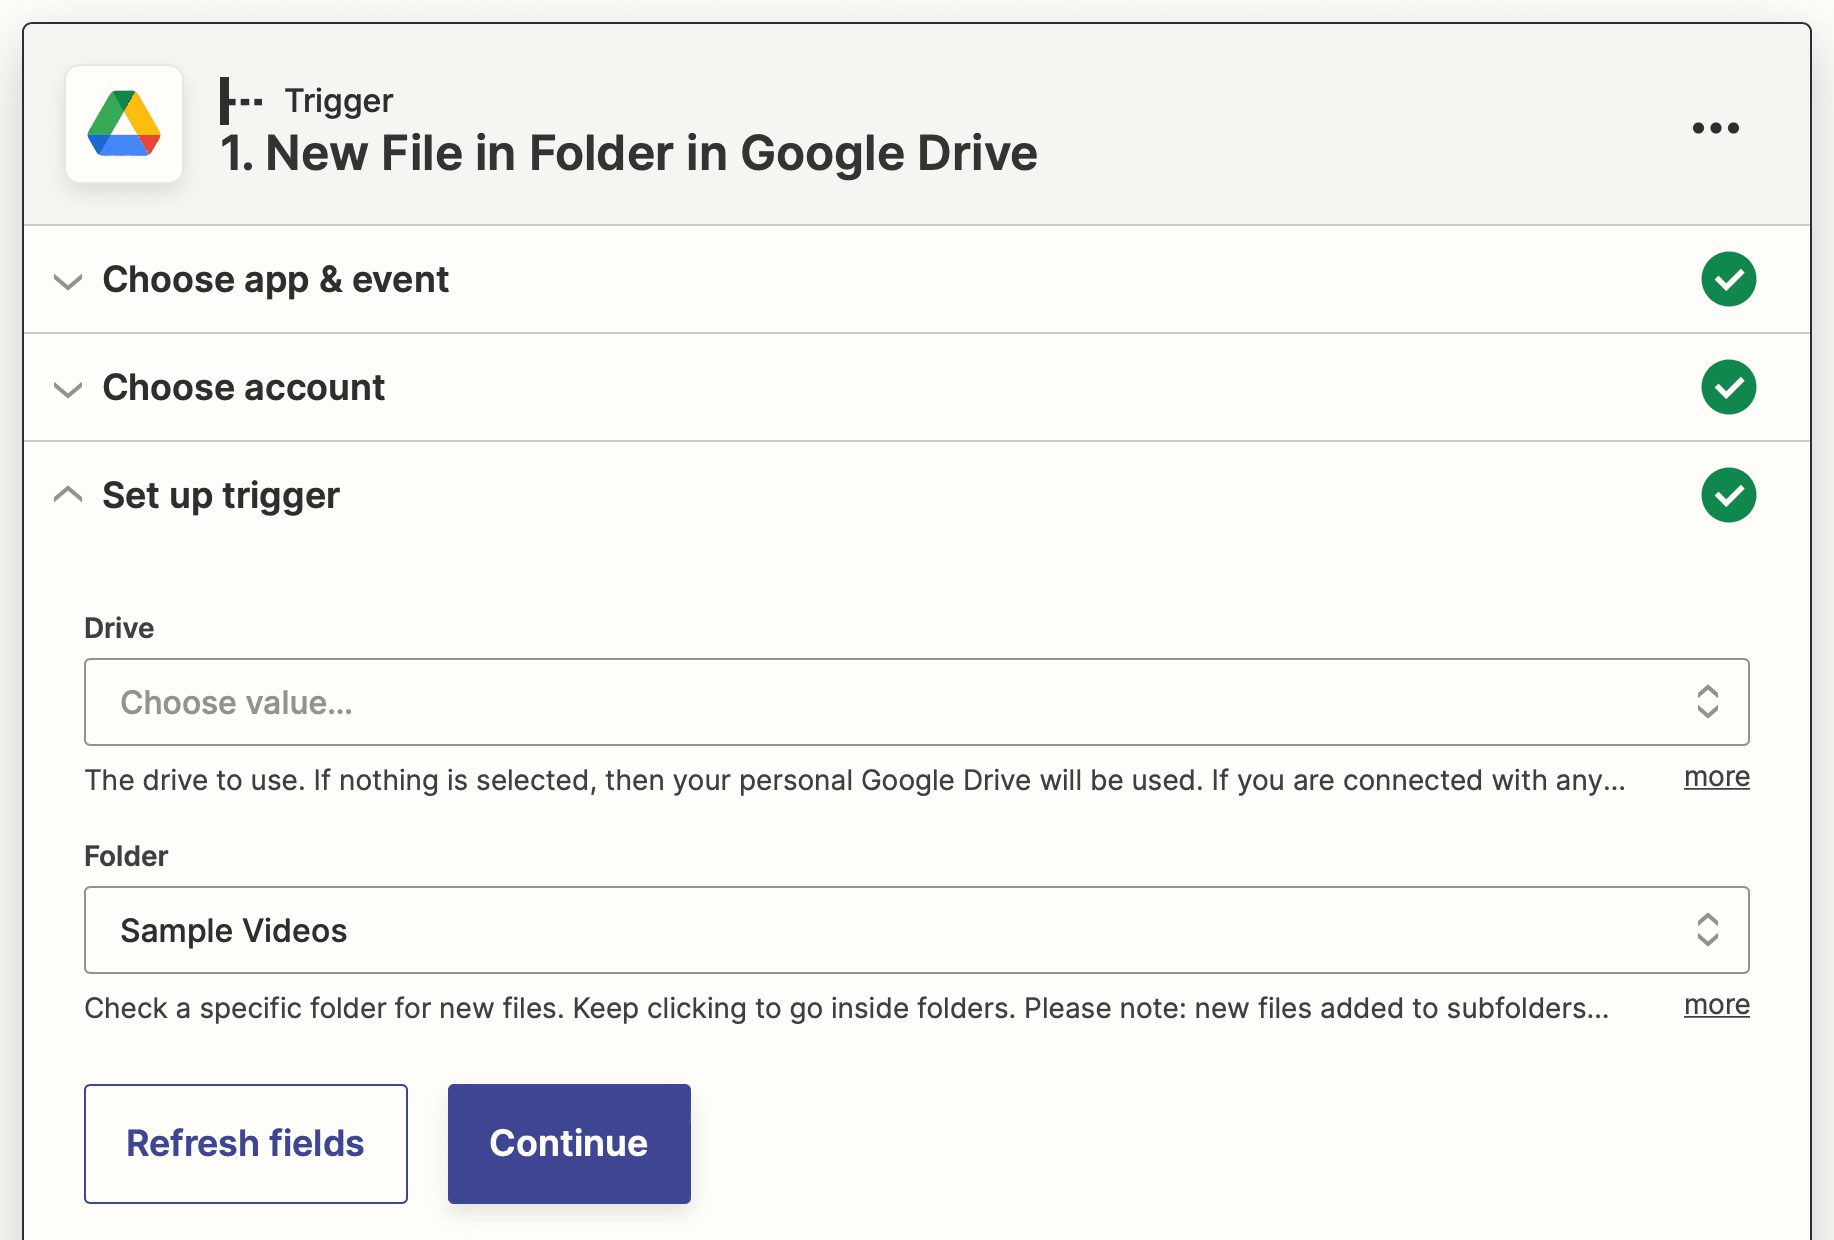
Test the trigger to make sure Zapier is able to find the sample clip you uploaded in the earlier step, then continue.
Action: Create Record in Airtable
Choose Airtable as the app and Create Record as the event. If you haven’t connected your Airtable account to Zapier yet, you will be prompted to do so using the API key found on your Account page.
Set up the action by choosing the right base and table, then mapping the file name and web content link to their corresponding Airtable fields.
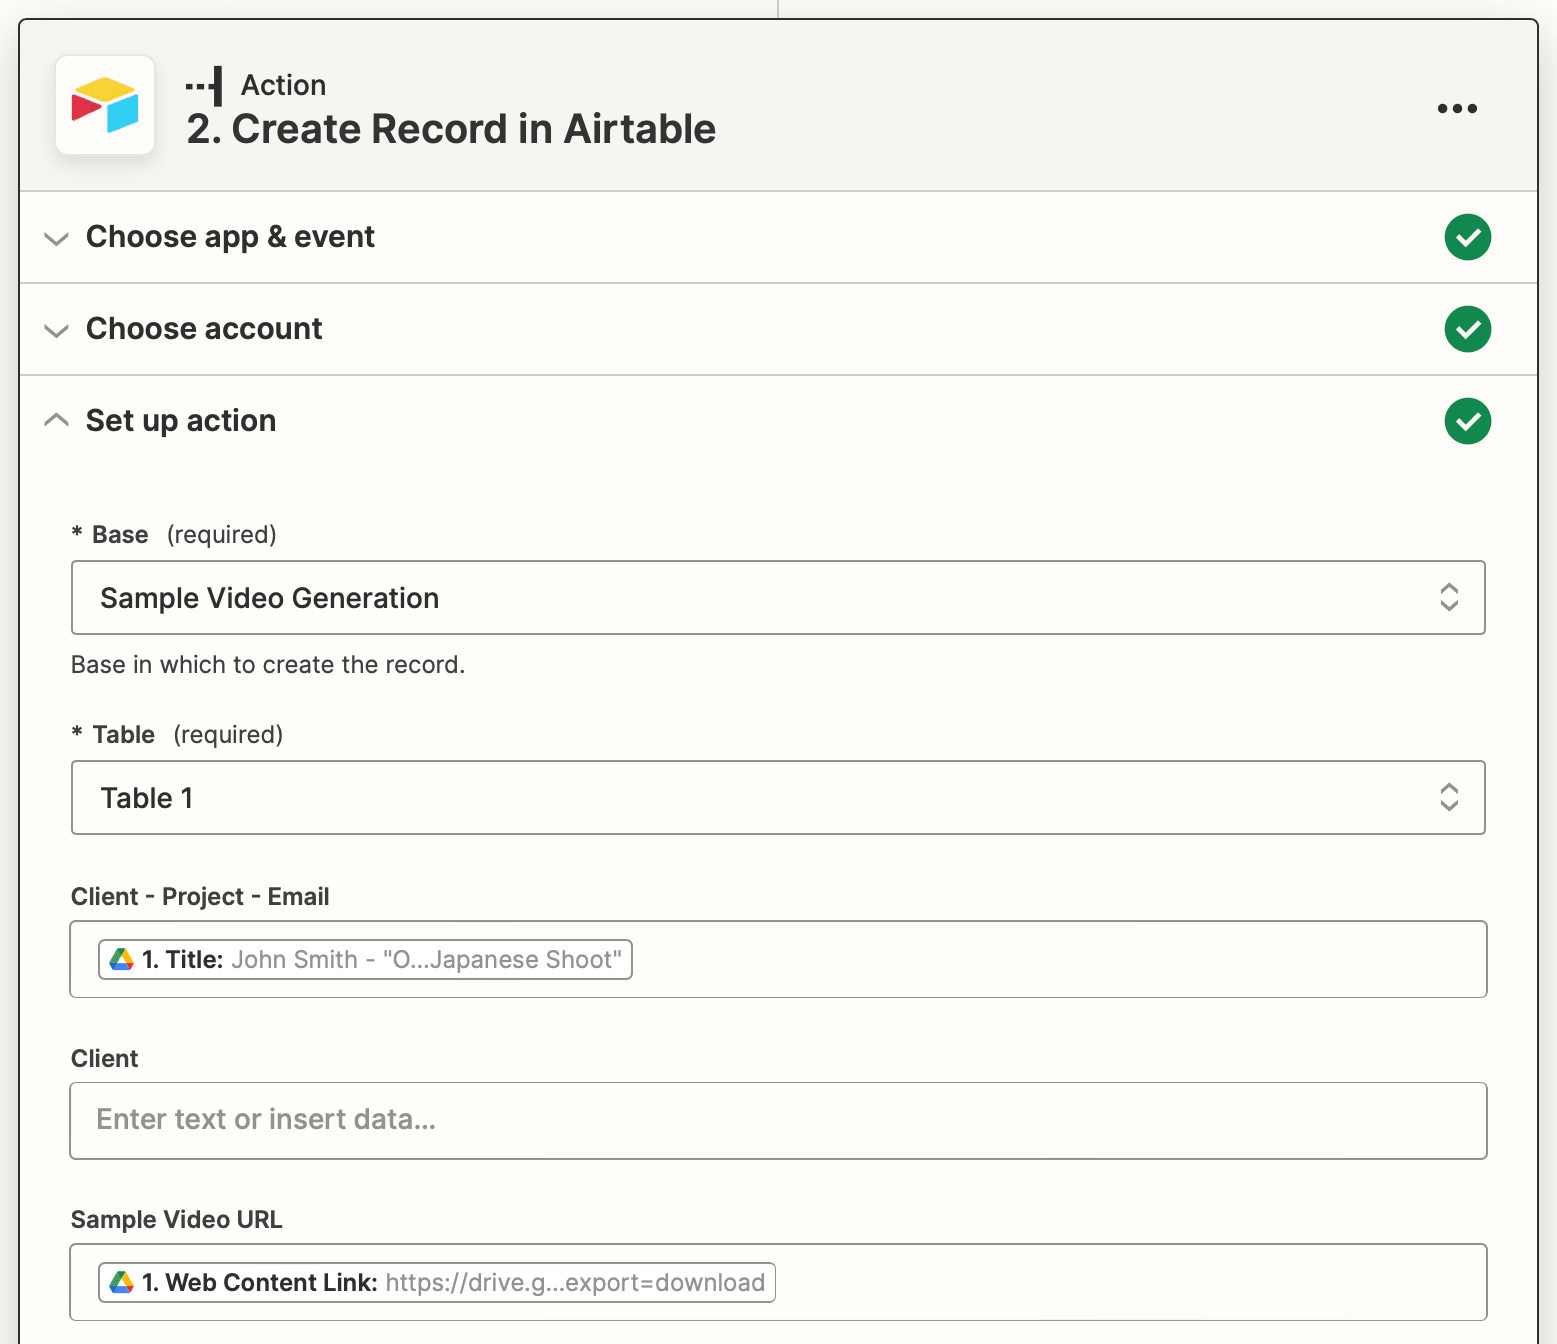
Test the trigger to make sure the information is deposited in the right fields. You should also notice the formula fields auto-populating themselves.
Action: Create Video in Bannerbear
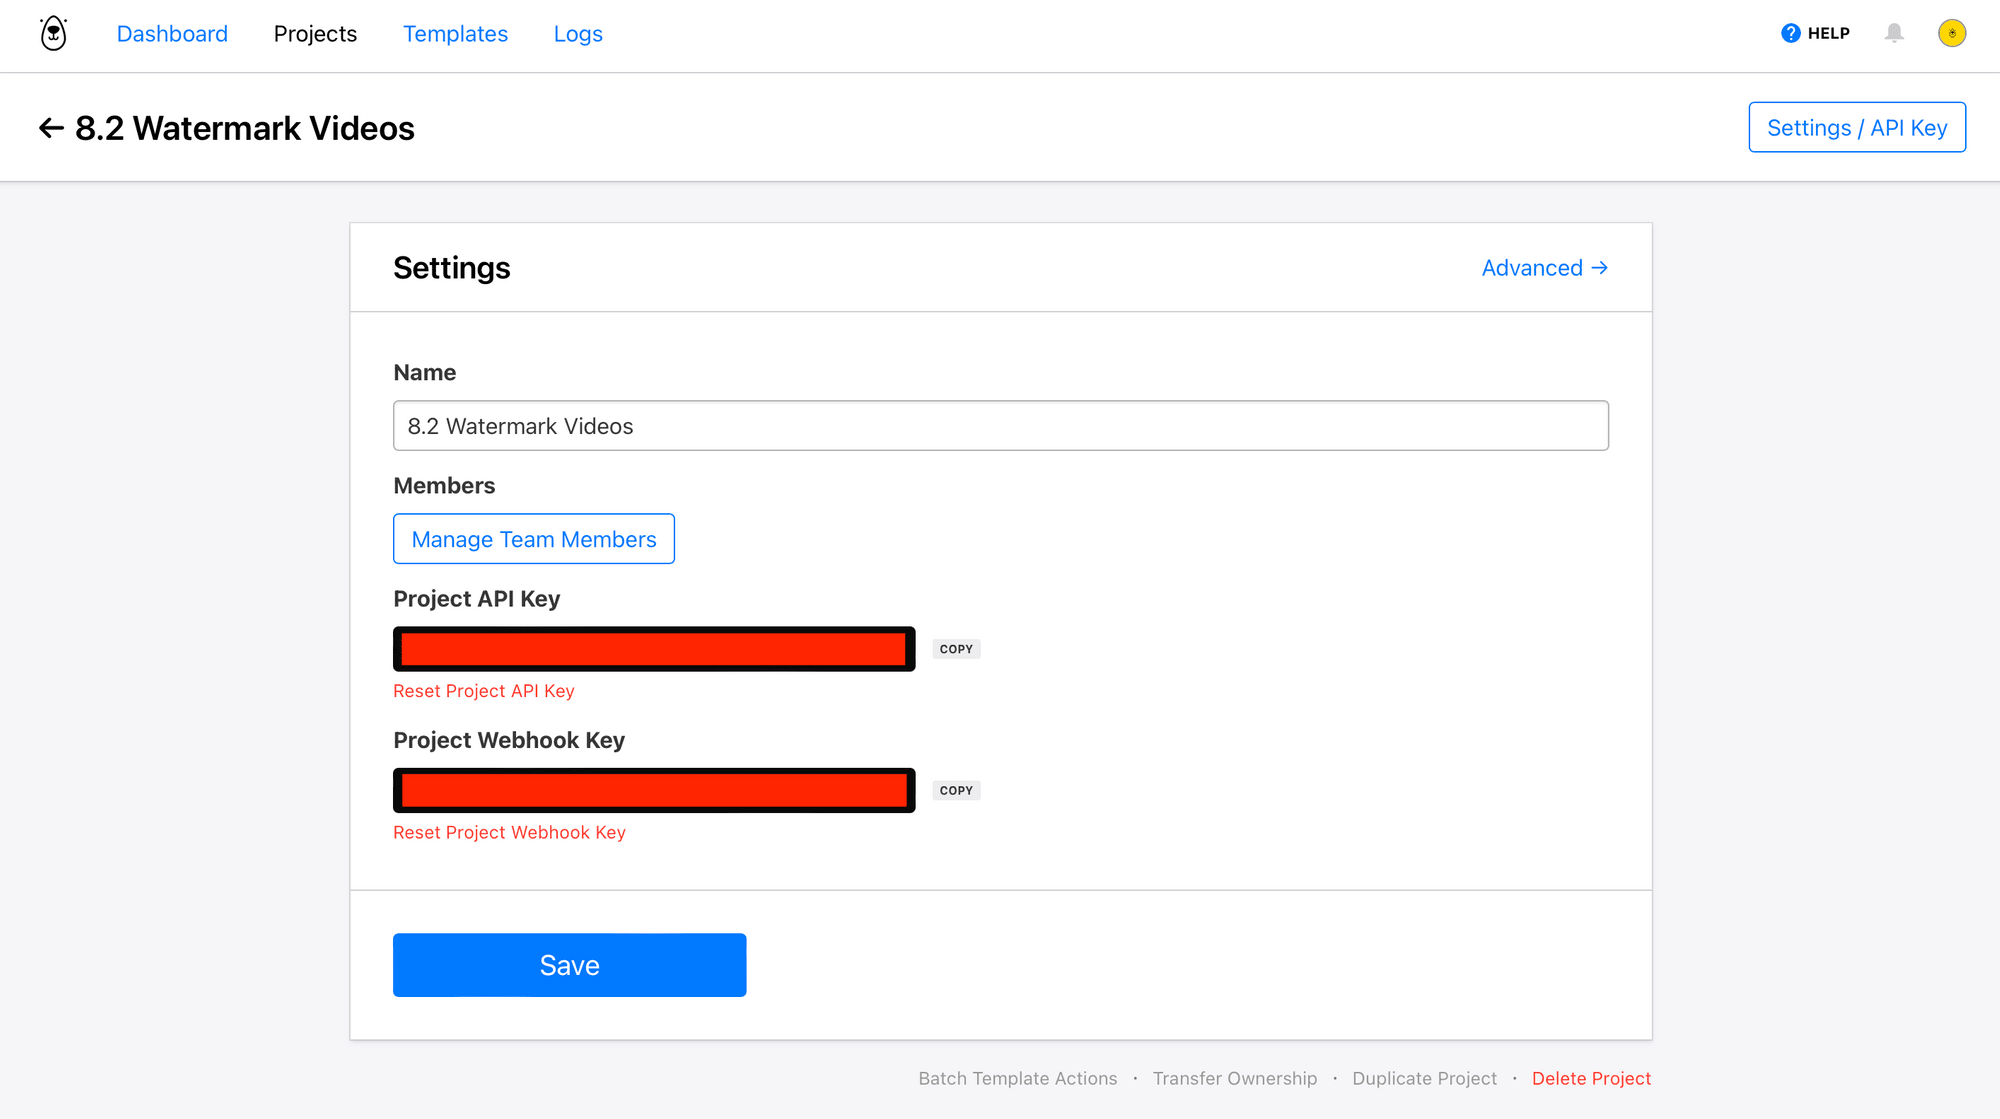
Choose Bannerbear as the app and Create Video as the event. You will need to connect your project using the key found by clicking the Settings / API Key button on the associated Bannerbear project page.
Once connected, set up the action by selecting your video template ID and inputting the media URL.
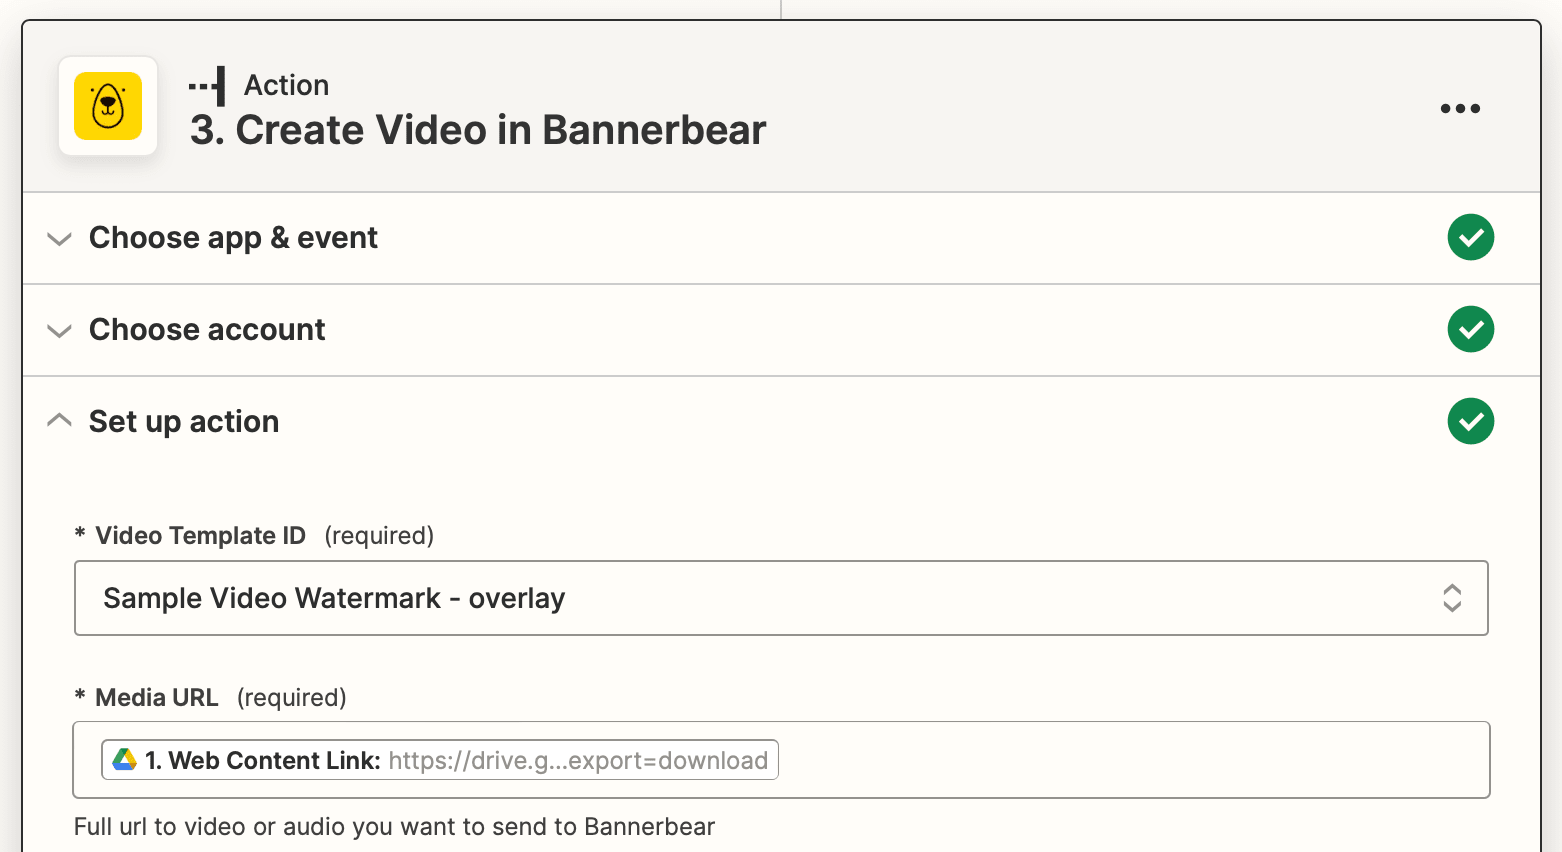
You will also need to save metadata with the video. This will ensure your generated video URL is saved to the correct Airtable record later on.
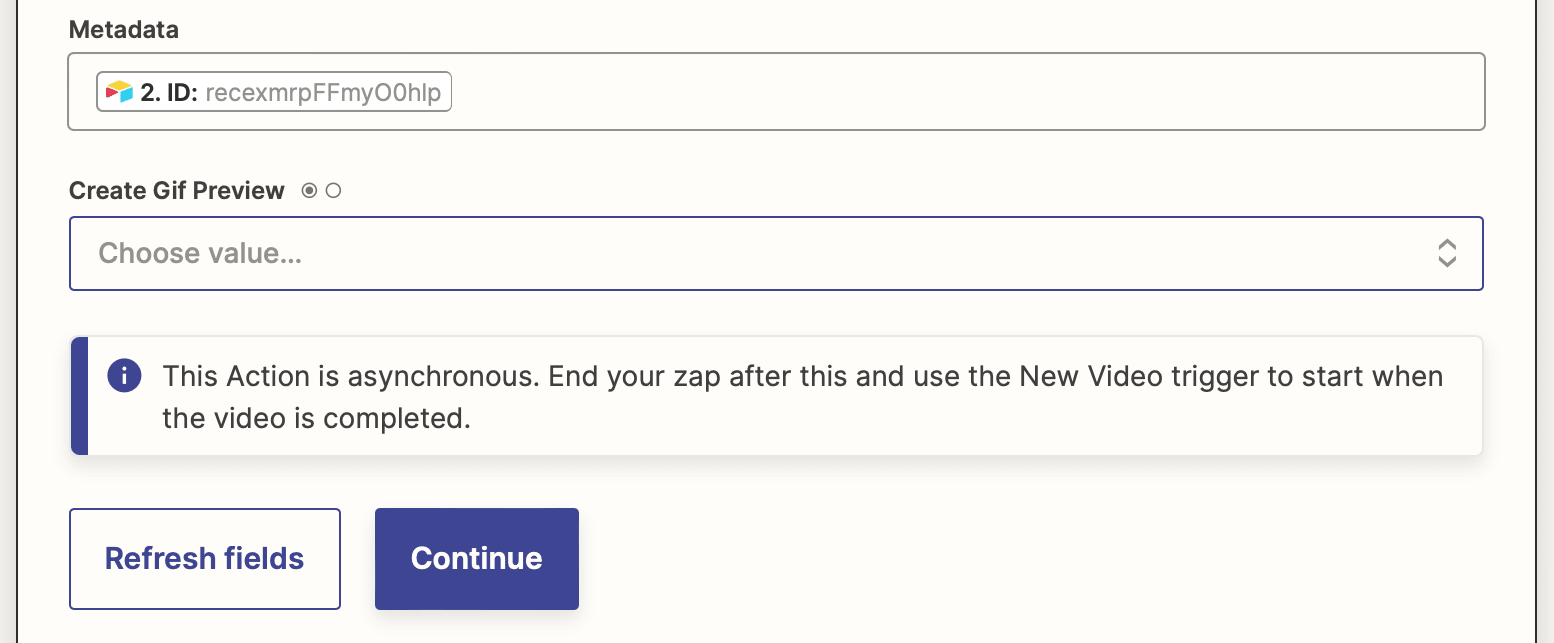
Test your action to make sure a video is generated correctly, then click “Publish” to take it live!
Set up a Zap to Retrieve Generated Videos and Send Emails
The second zap you set up will retrieve generated videos after they are rendered, save their URLs to Airtable, and send emails to clients.
Click + Create Zap , then set up the following events:
Trigger: New Video in Bannerbear
Choose Bannerbear as the app and New Video as the event. Your project should already be connected from the previous step, so proceed to test the trigger.

When you see that Zapier is able to successfully find the generated video, continue.
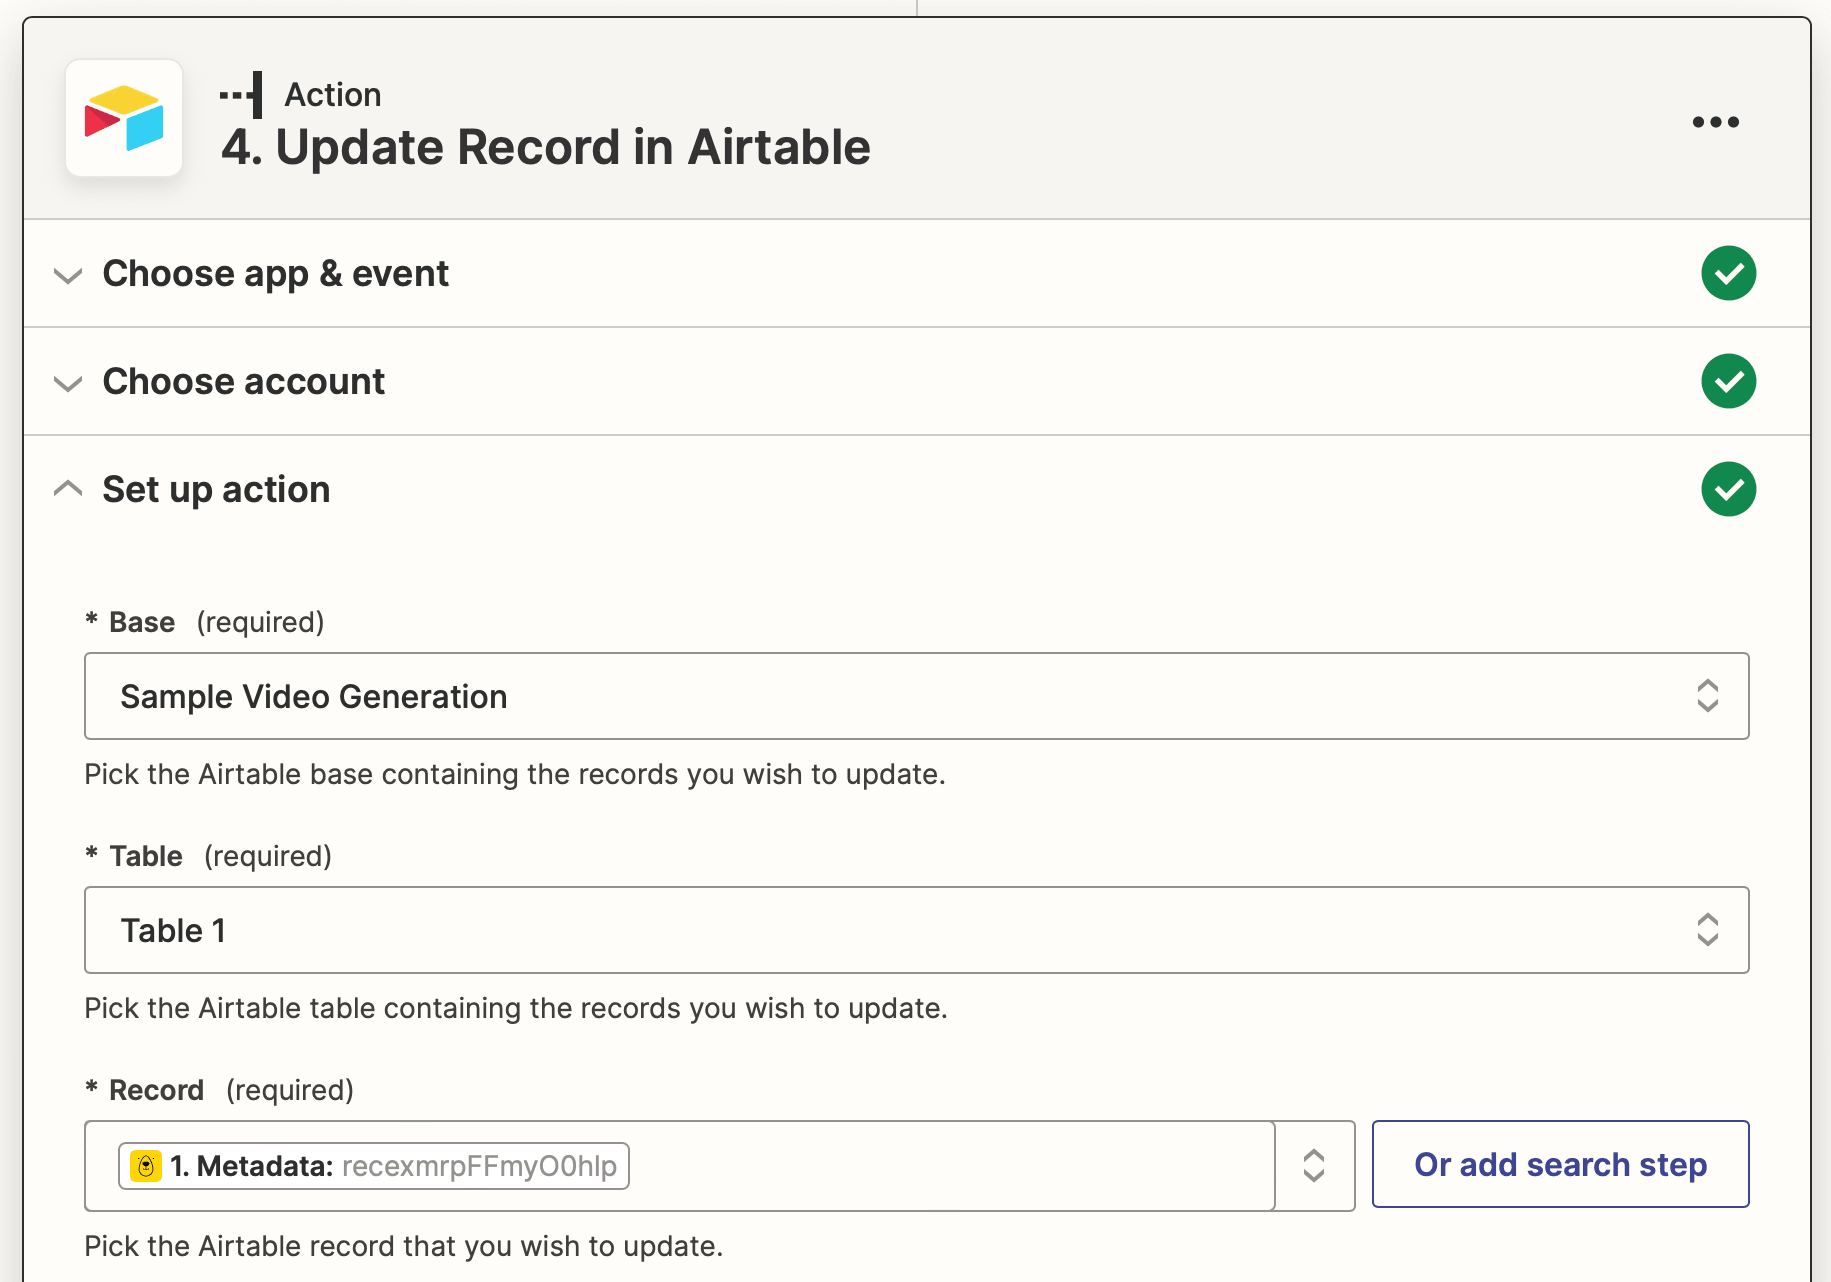
Action: Update Record in Airtable
Choose Airtable as the app and Update Record as the event. After selecting the correct account, set up the action by choosing the base and table.
Map the video’s metadata to the Record field, and put the video’s URL in its corresponding Airtable field.
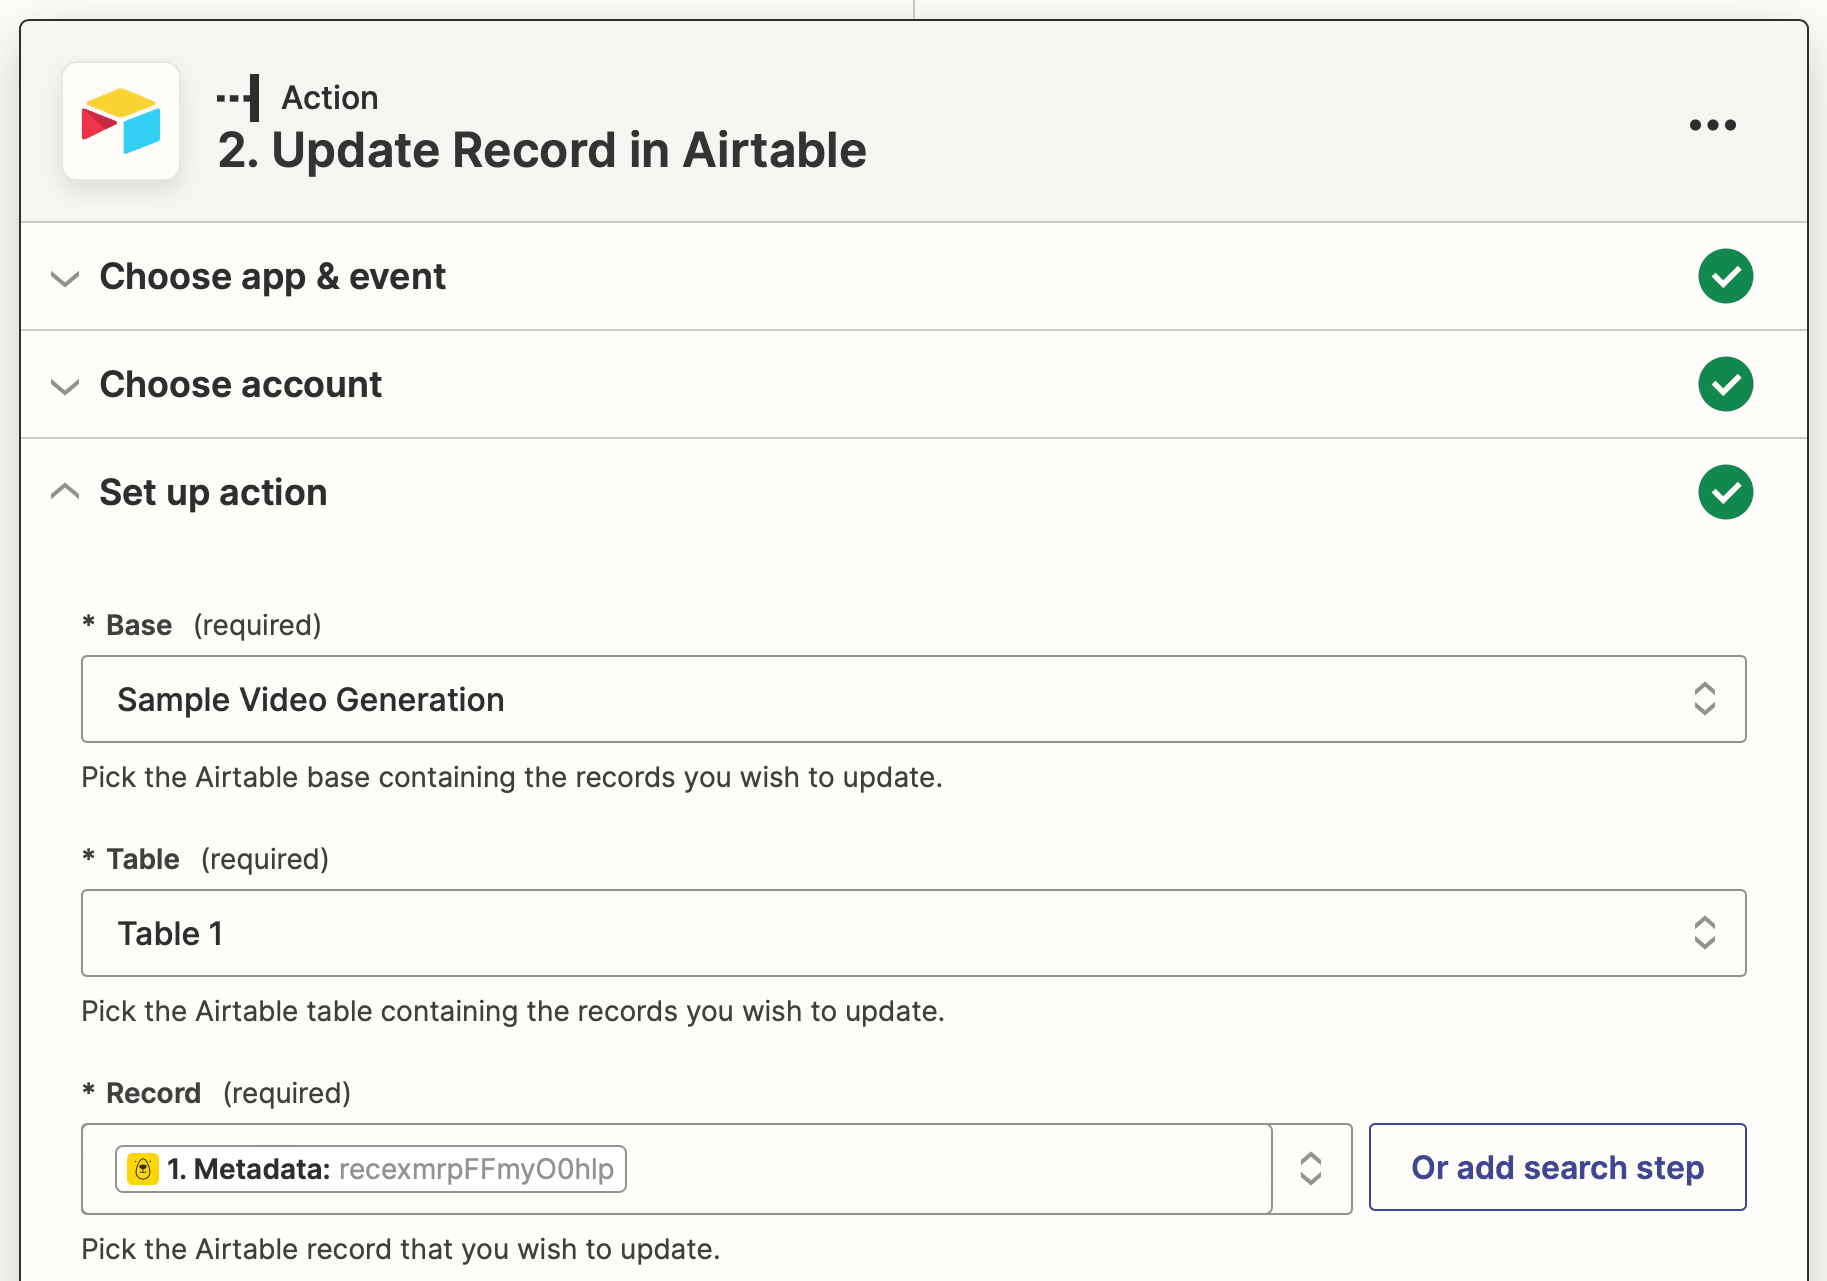
Test the action, then continue.
Action: Send Email in Gmail
Choose Gmail as the app and Send Email as the event. If you haven’t connected your account yet, you will be prompted to log in.
Set up the action by inserting the details you’d like to include in your email: recipients, subjects, email body, signature, and more.
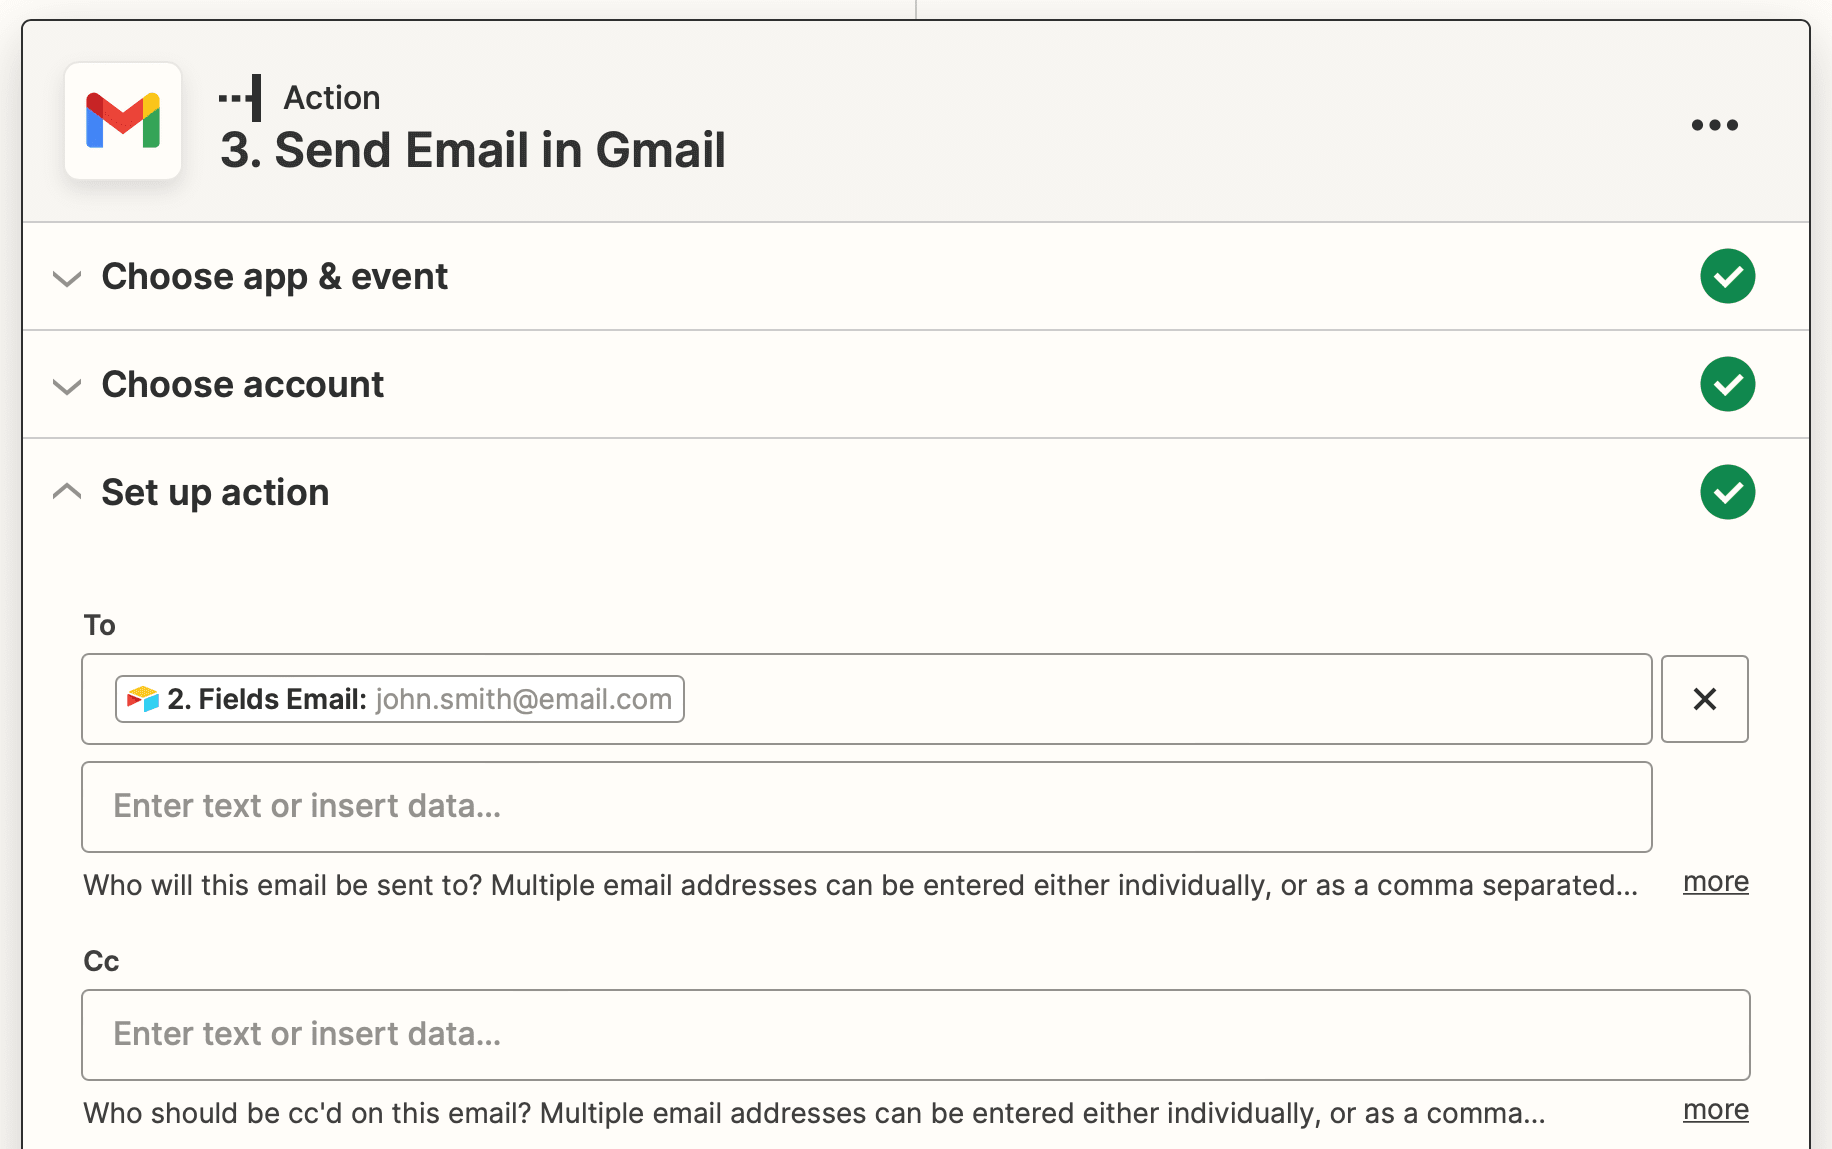
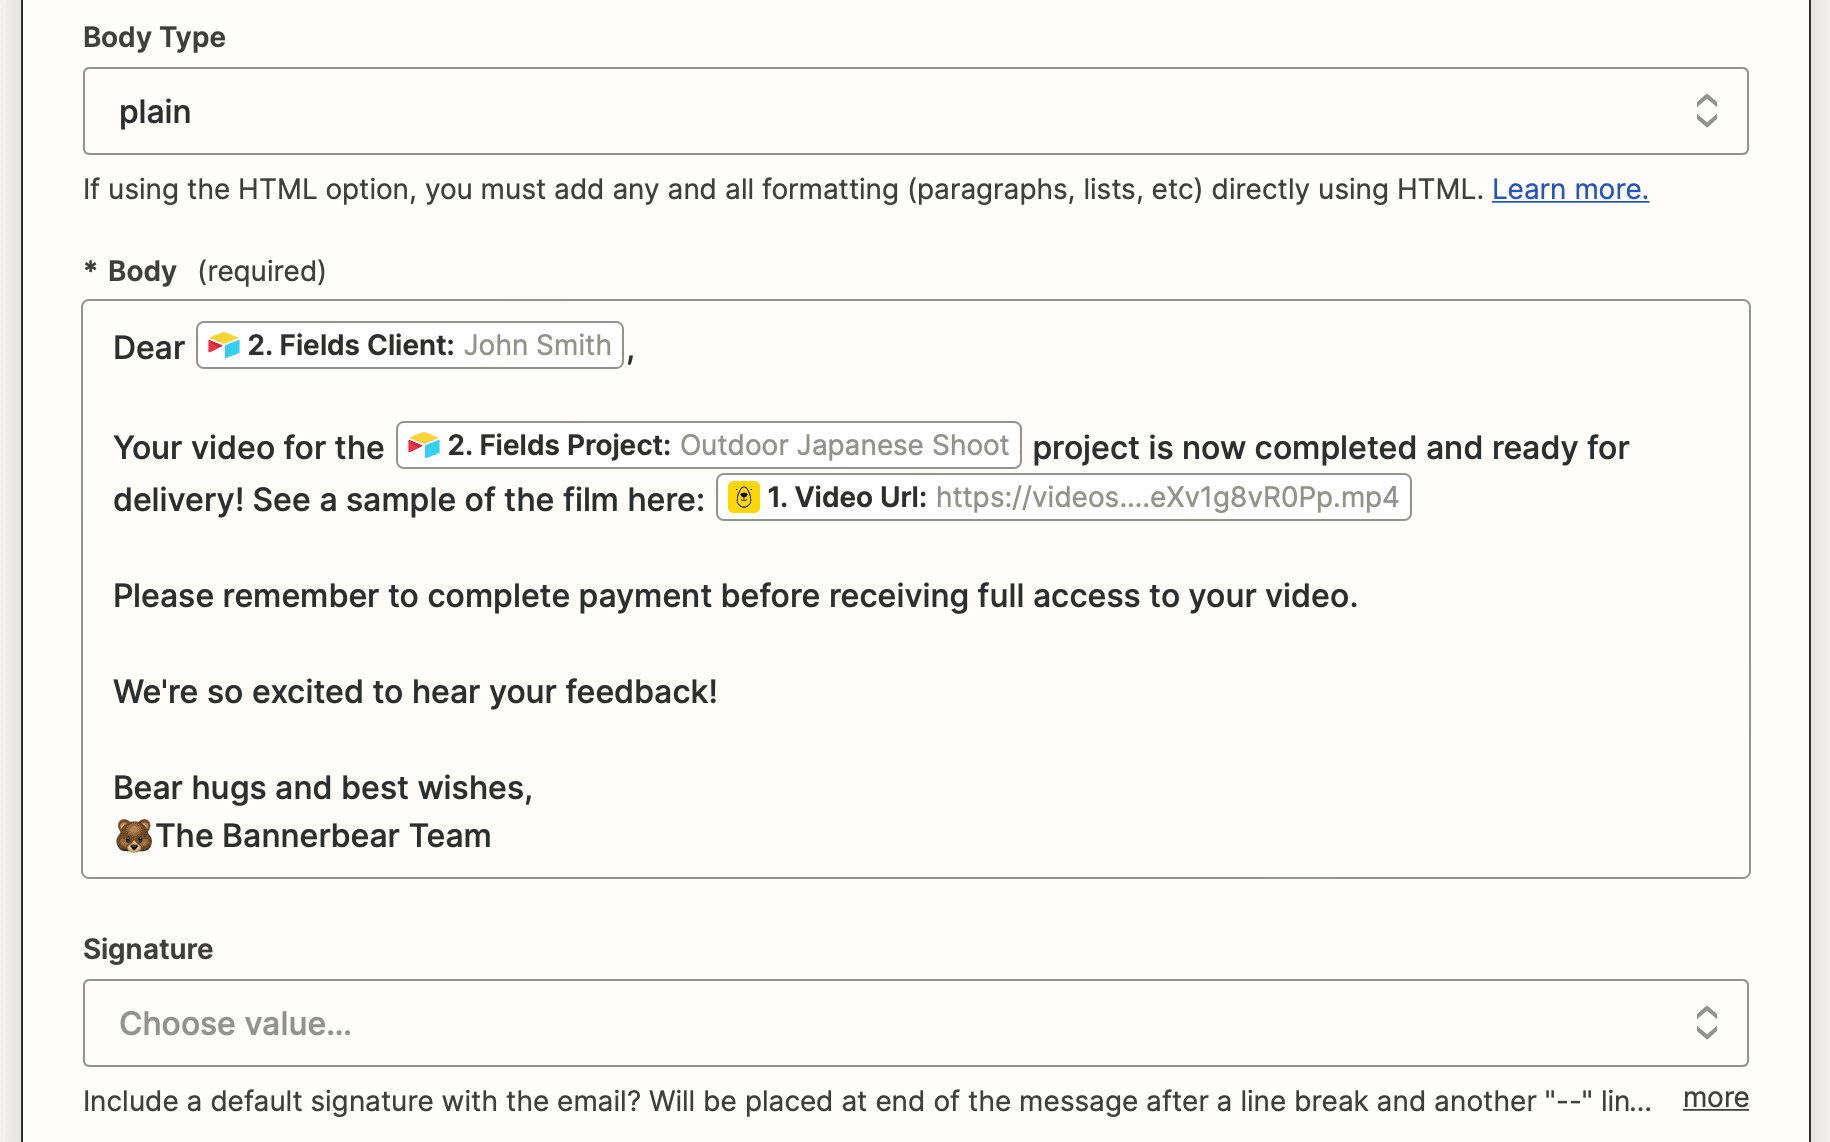
When you’re happy with your email setup, test the trigger.
Bear Tip 🐻: Before you map dynamic client emails to the recipient field, test the action by sending it to your own address.
Action: Update Record in Airtable
Choose Airtable as the app and Update Record as the event. Choose the right base and table, then map the video’s metadata to the Record field.
Fill the Emailed field with Y.
This will check the box after an email is sent so you can view it in your base’s Submitted view.
Test the trigger and make any final adjustments. When you’re done, click “Publish” and take the zap live!
Your final product should look something like this:
Automation Helps You Reserve Time for Creativity
Everyone should spend do less manual, repetitive tasks—but creatives, in particular, need to reserve their energy for the work that demands their personal time and attention. Automating watermarking can remove one thing from your plate. When you consider the time saved emailing clients to provide previews and prompt payment, it’s a considerable amount of time shaved off of your workday.
Nocode tools like Airtable, Bannerbear, and Zapier make it possible to simplify your workflow and spend more time doing what you love. And with zero human intervention beyond uploading the first video clip, this automation does just that.
