
How to Auto-generate Unique Video Banners with Pexels Stock Footage
Contents
⚠️ Warning: This is a low-code tutorial. A sample script is provided, but a fundamental understanding of JavaScript will help you modify it to suit your needs.
Videos created to engage viewers need to be made up of eye-catching elements. Movement is key, and while you can use text and animations to captivate watchers, stock footage is a cheaper and easier way to add variety and interest to the final product.
Stock footage is especially useful when it comes to videos that follow a certain format or template, such as in the case of automated generation. Rather than letting viewers grow bored or disengaged, a variety of clips keeps things fresh and new.
You can use nocode tools to retrieve randomized videos following specific keywords from Pexels. This makes it easy to integrate new footage into your automations while saving time and effort otherwise spent manually selecting and curating clips for each video.
The videos you automatically produce can look something like this:
In this article, you’ll learn how to access the Pexels API and incorporate its capabilities into your Bannerbear nocode workflows. Let’s get started!
How to Automatically Source Videos for Bannerbear Workflows Online
Pexels is known as a site that aggregates free stock photos and videos from creators all over the world. But it has more than manual search options—it also have a video API that can help you source relevant clips automatically.
The Pexels API can be used with nocode tools like Zapier to retrieve random relevant videos that can then be saved or used with Bannerbear in consecutive steps for things like:
- Generating news summary videos
- Creating videos for recurring events
- Marketing product collections
Overall, Pexels' API makes it easy and cost-effective way to source videos for various purposes—and you don’t need much technical ability to use it.
Here’s how you can start using the Pexels API with Bannerbear:
Get a Pexels API Key
To use the Pexels video API, you’ll need access to an API key. This means signing up for an account, generating a key, and saving it for your project.
Sign Up for an Account
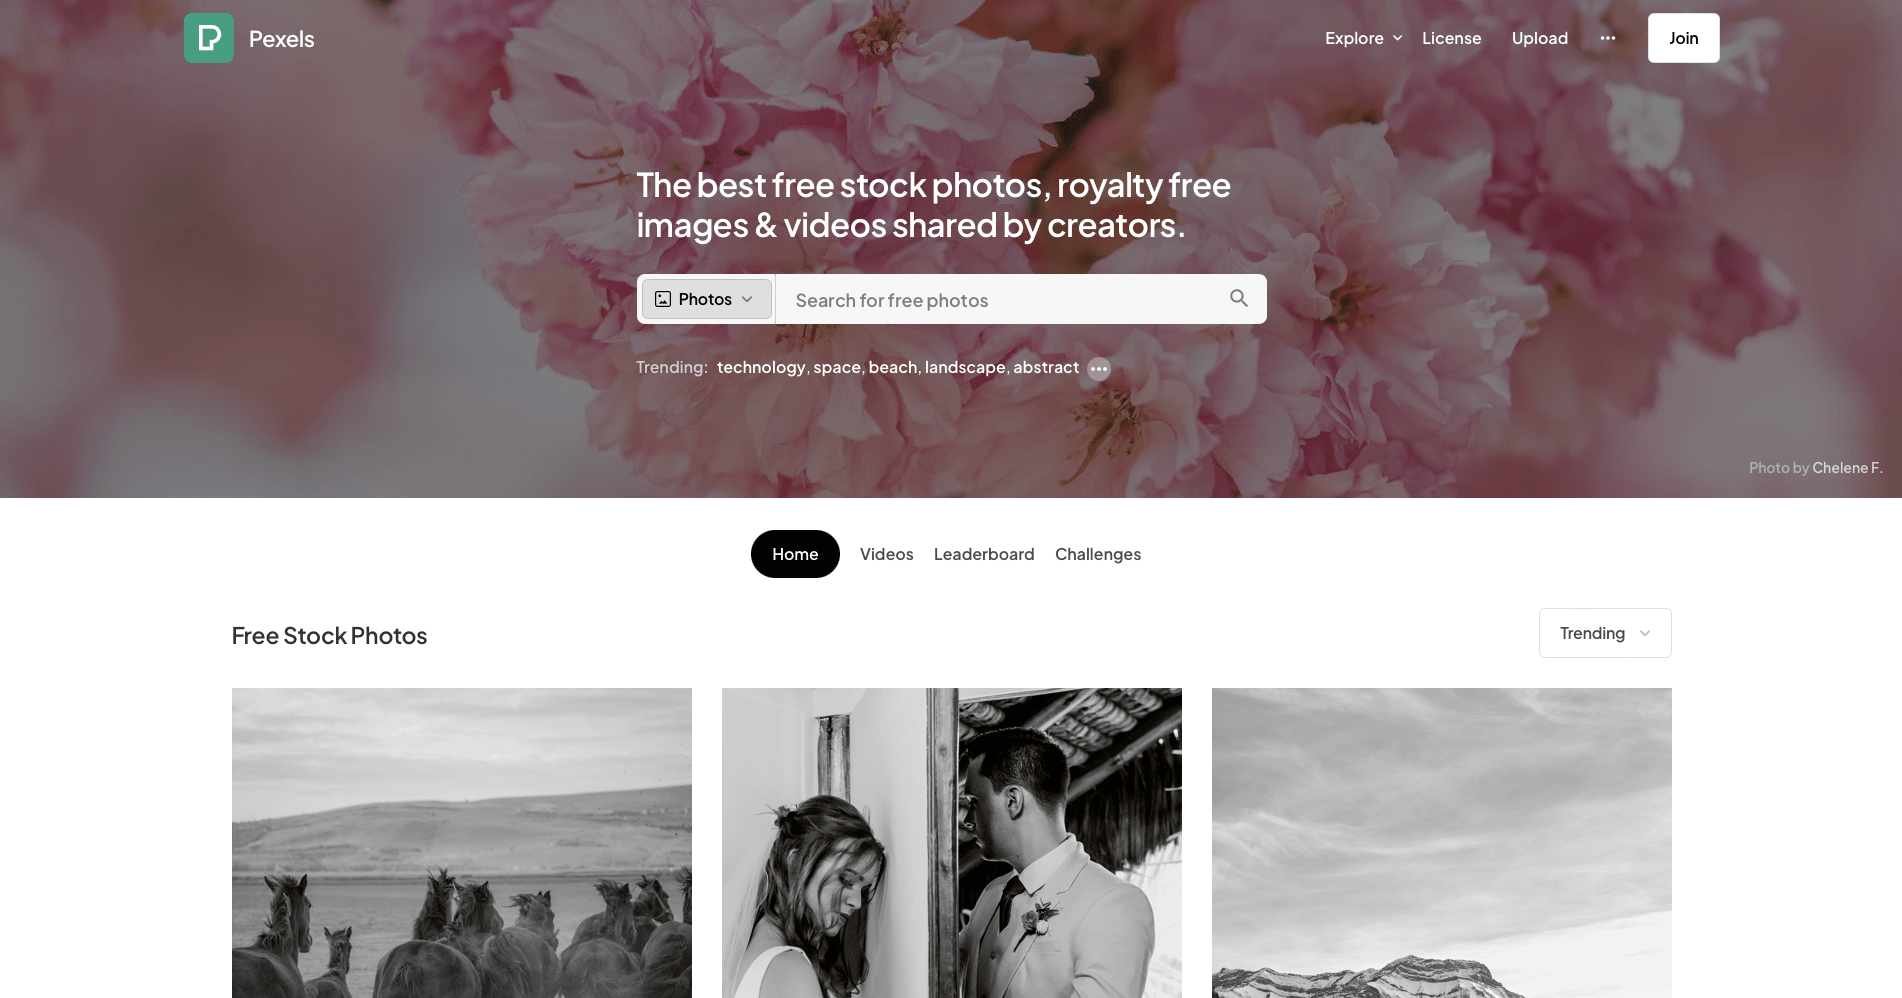
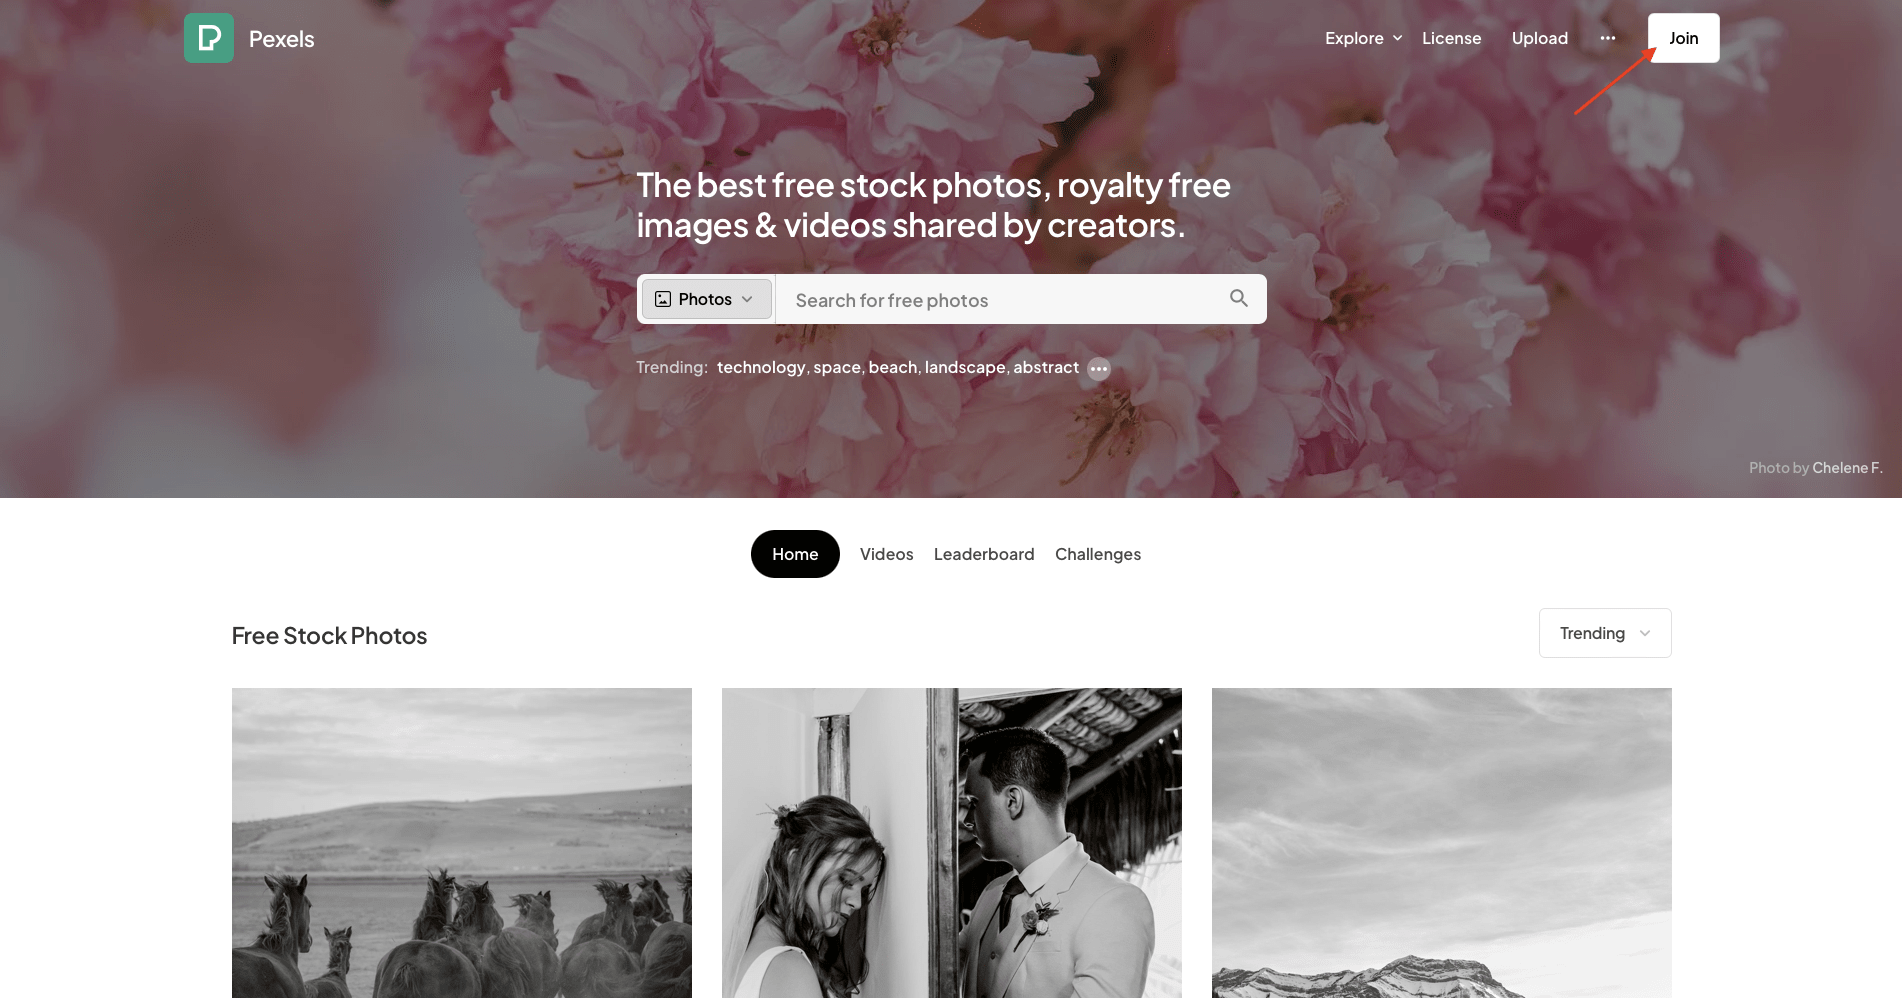
Go to the Pexels home page and log into your account. If you don’t have one yet, sign up by clicking Join.
Fill in the name, email, and password fields. You can also sign up using Facebook, Apple, or Google accounts.
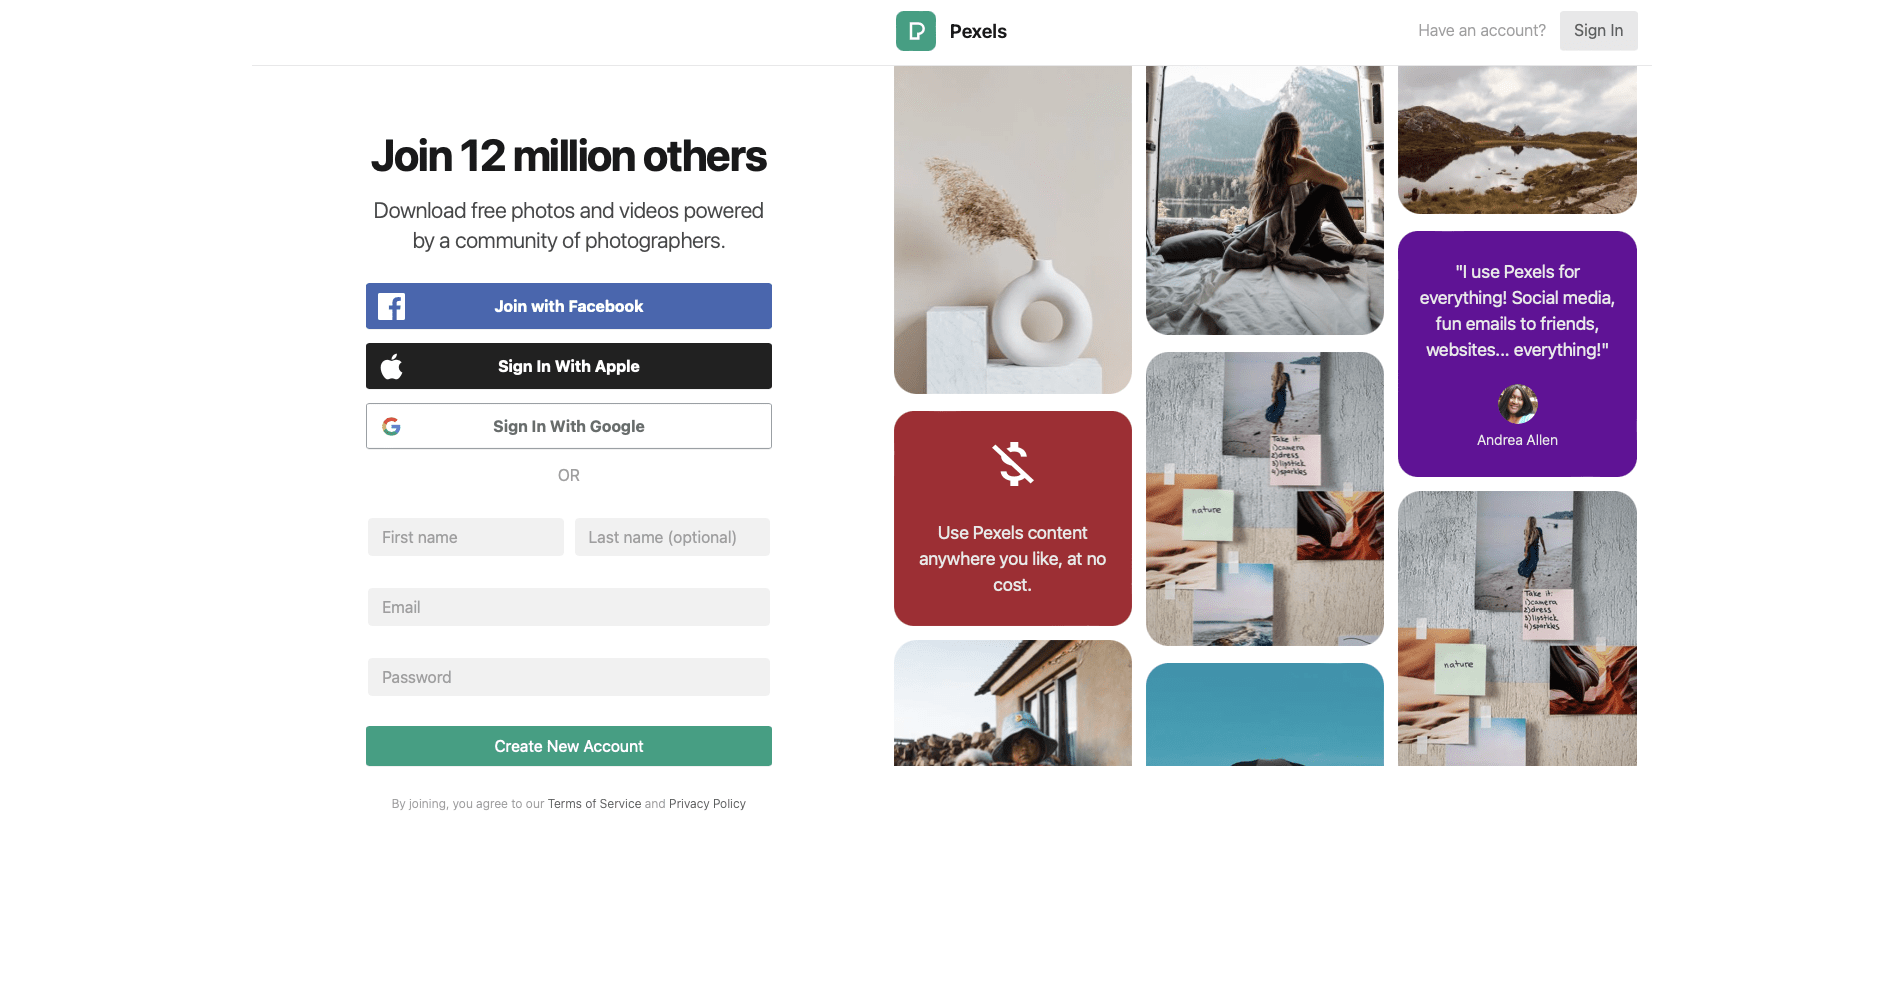
Click Create New Account when you’re done.
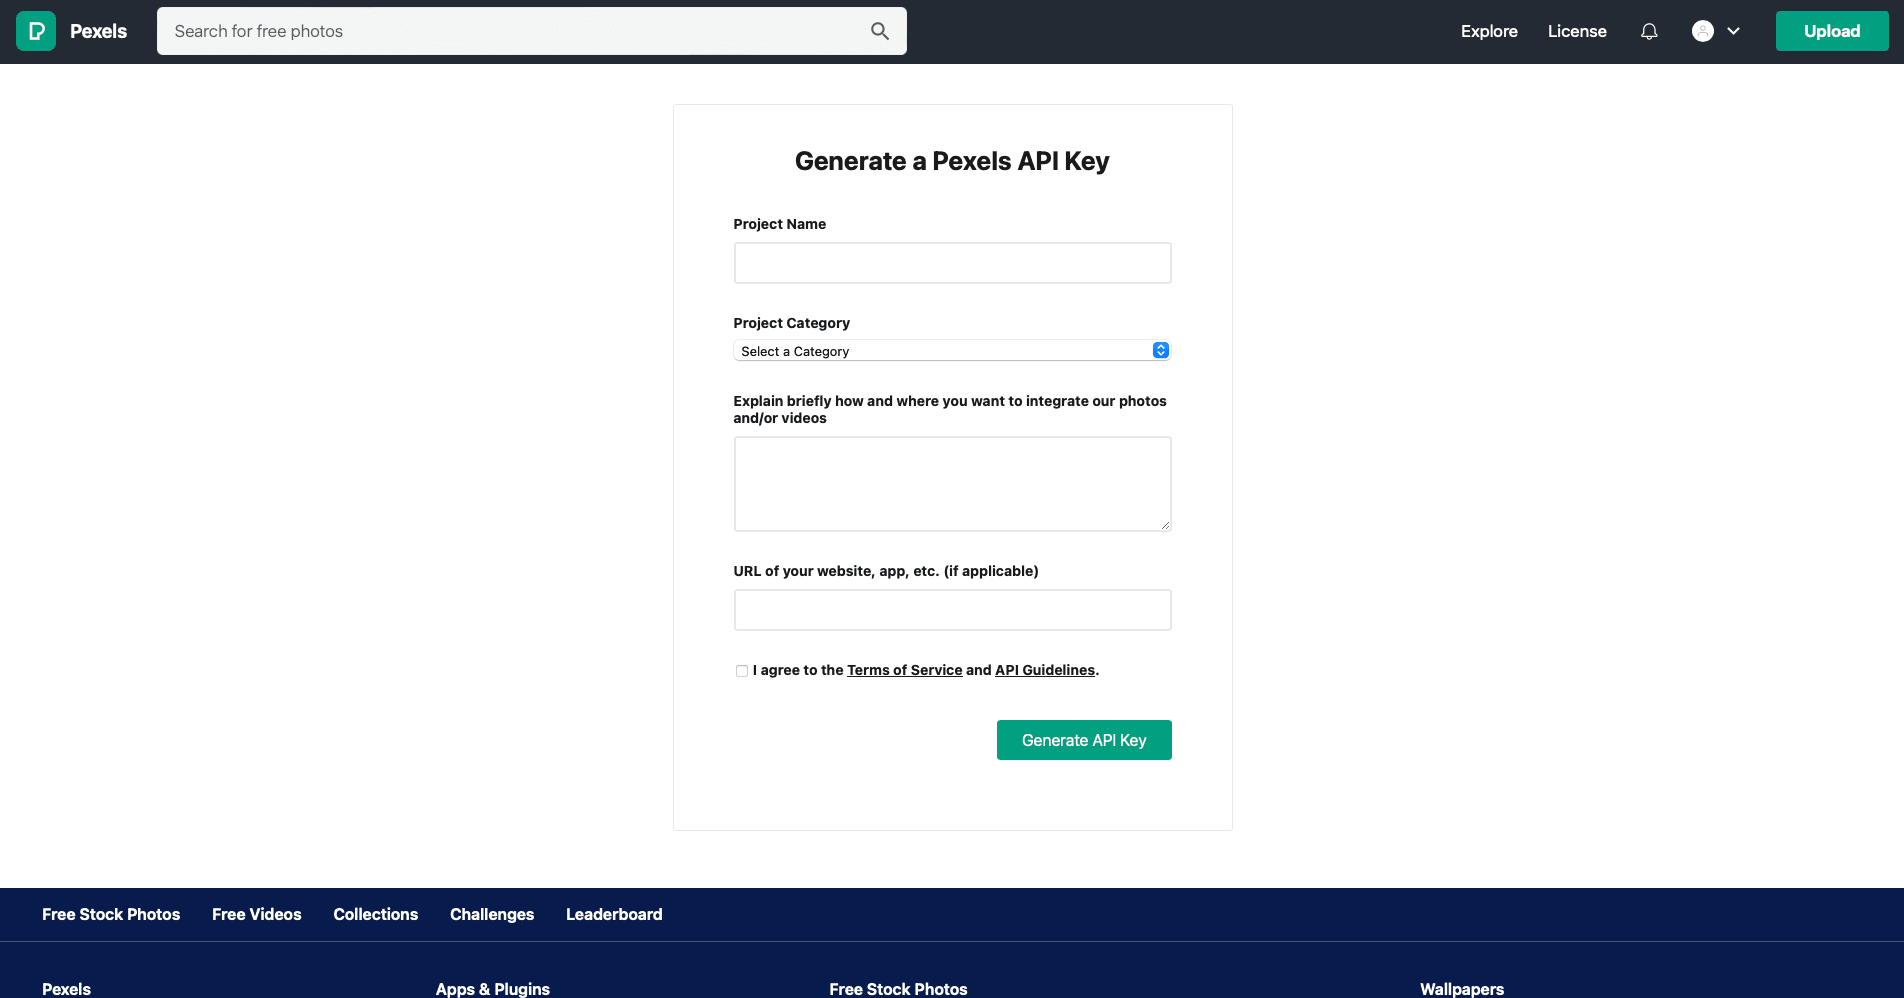
Generate an API Key
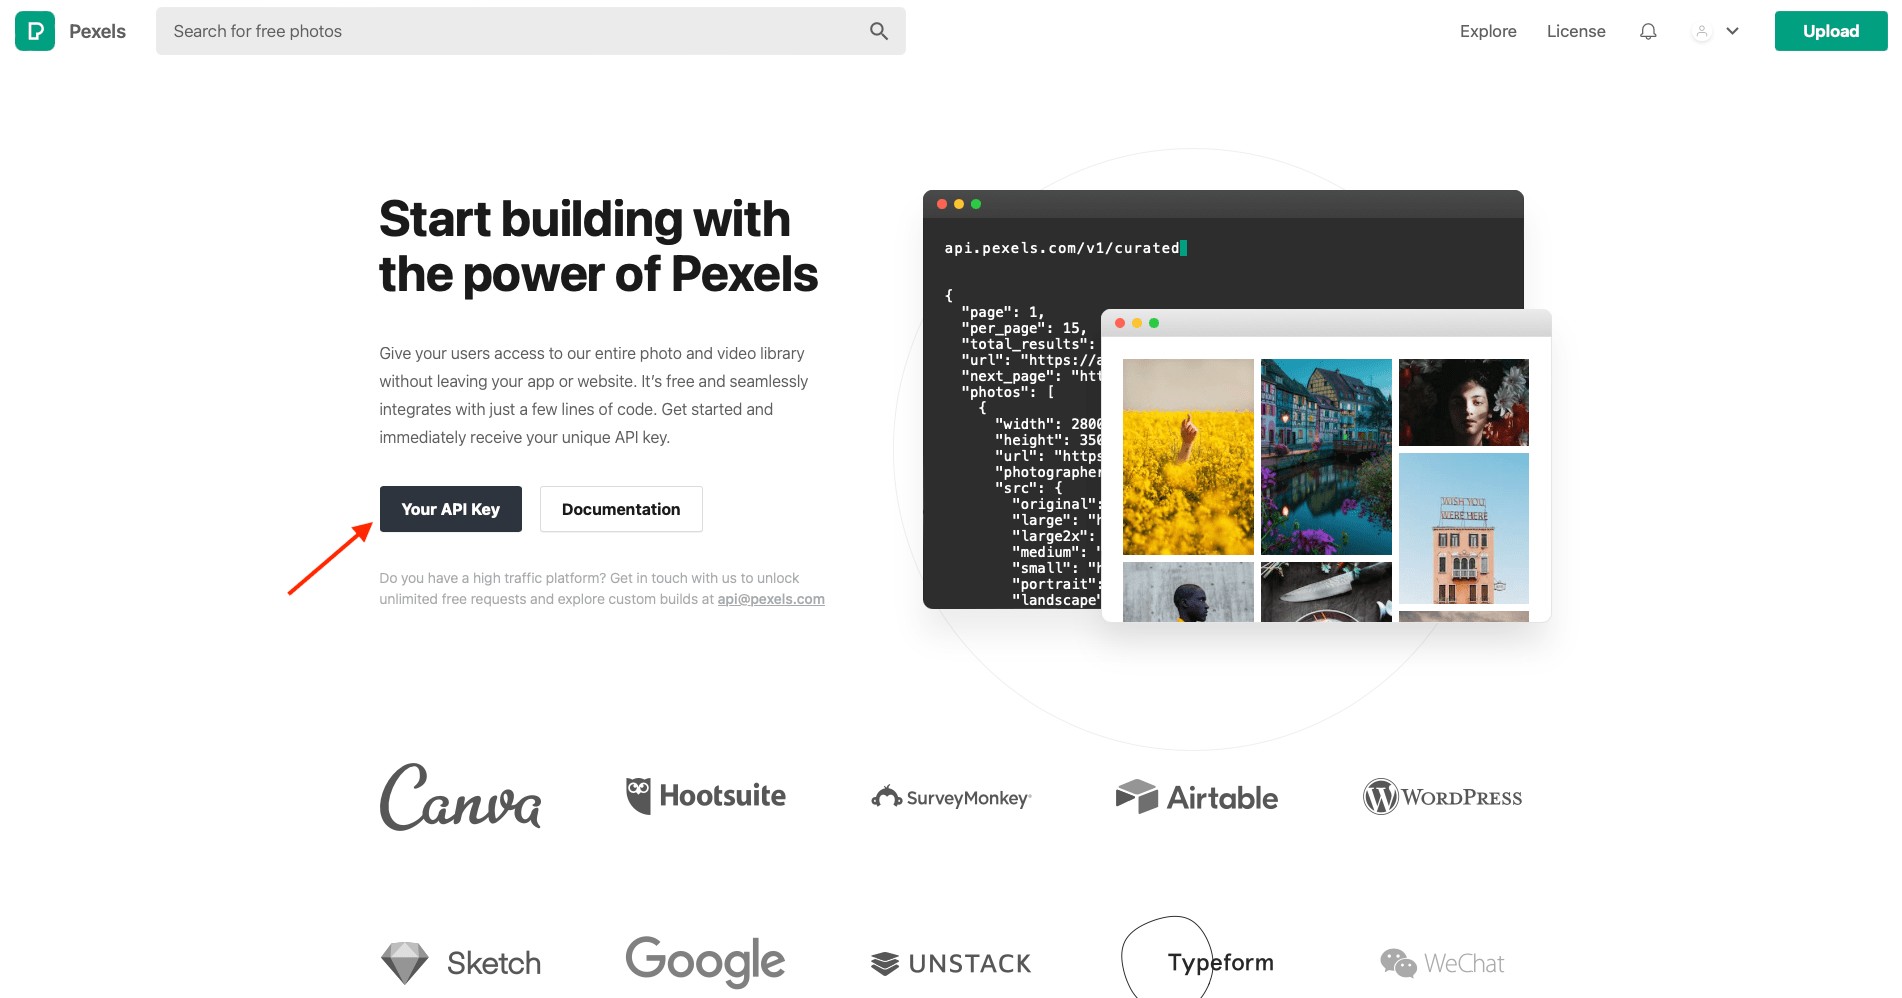
While logged into your account, hover over the profile icon in the top right corner. Click Image & Video API.

You should now be on the API page. Click Your API Key.
Pexels generates new API keys for every project, and you’ll have to fill in a form before getting a key.
Fill in your project details, including its name, category, description, and a website URL if applicable.
After agreeing to the terms and conditions, click Generate API Key.
You should now have access to an API key that you can save and use in your workflows.
Prepare the Script
Pexels doesn’t have a built-in Zapier integration, but we can use a short script to choose a random video that matches your set requirements.
Bear Tip 🐻: Pexels has official client libraries for Ruby, JavaScript, and .net. We will be using JavaScript for the sake of this tutorial.
Pexels’ video GET endpoint allows parameters for:
- Query (keyword string)
- Orientation (landscape, portrait, or square)
- Size (small, medium, or large)
- Locale (‘en-US’, ‘pt-BR’, ‘es-ES’, etc.)
- Page (page number requested)
- Per Page (number of results requested per page)\
Bear Tip 🐻: Read more about the Pexels API and parameters you can use for retrieving videos in their documentation.
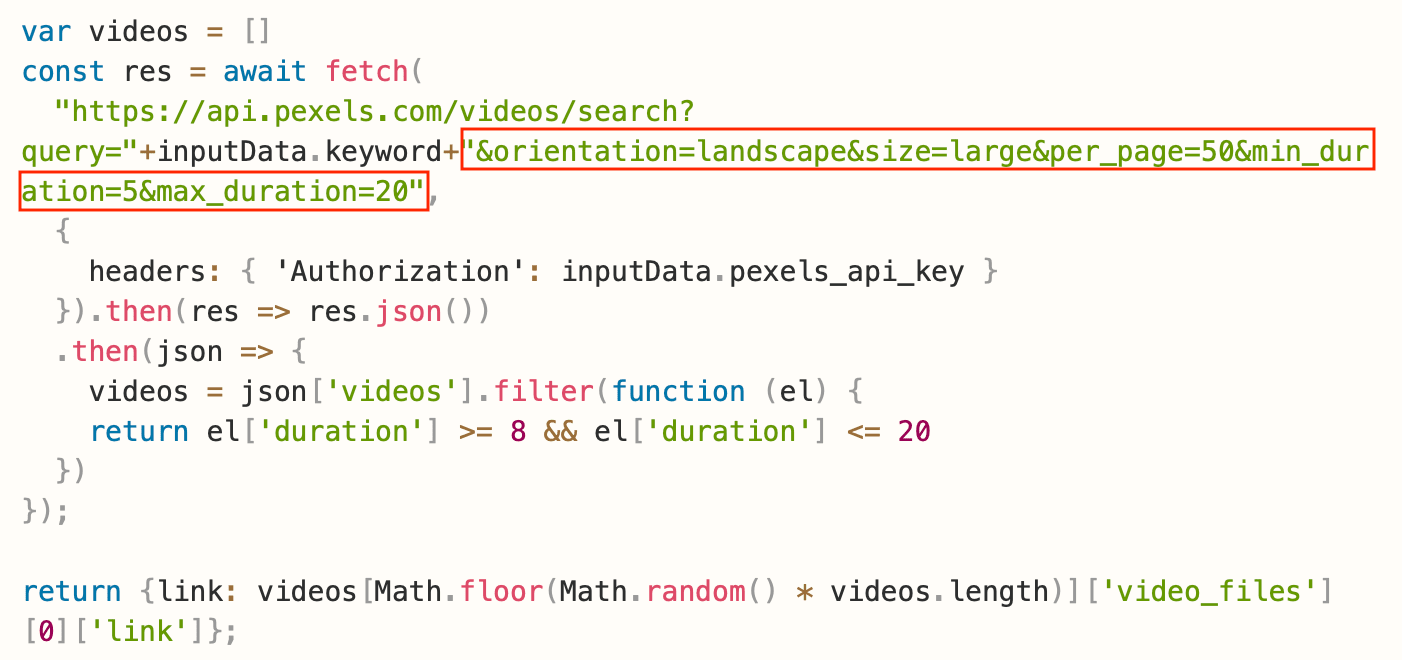
We have prepared a sample script you can use to set up variables, fetch random videos matching your parameters from Pexels, and return an object containing the link to the random video file:
var videos = []
const res = await fetch(
  "https://api.pexels.com/videos/search?query="+inputData.keyword+"&orientation=landscape&size=large&per_page=50&min_duration=5&max_duration=20",
  {
    headers: { 'Authorization': inputData.pexels_api_key }
  }).then(res => res.json())
  .then(json => {
    videos = json['videos'].filter(function (el) {
    return el['duration'] >= 8 && el['duration'] <= 20
  })
});

return {link: videos[Math.floor(Math.random() * videos.length)]['video_files'][0]['link']};
This script is created for basic use and can be tweaked to suit your needs. You can make adjustments to the parameters by modifying the request in line 2 (eg. changing size=medium to size=large), keeping the supported options described in the documentation in mind.
You can also adjust the preferred video length by changing the min_duration and max_duration values for both parameters and retrieval.
Make sure there is an ampersand (&) in betweeen every parameter, and remove any that are unneeded.
Now, you should have a script that retrieves random videos based on your requirements.
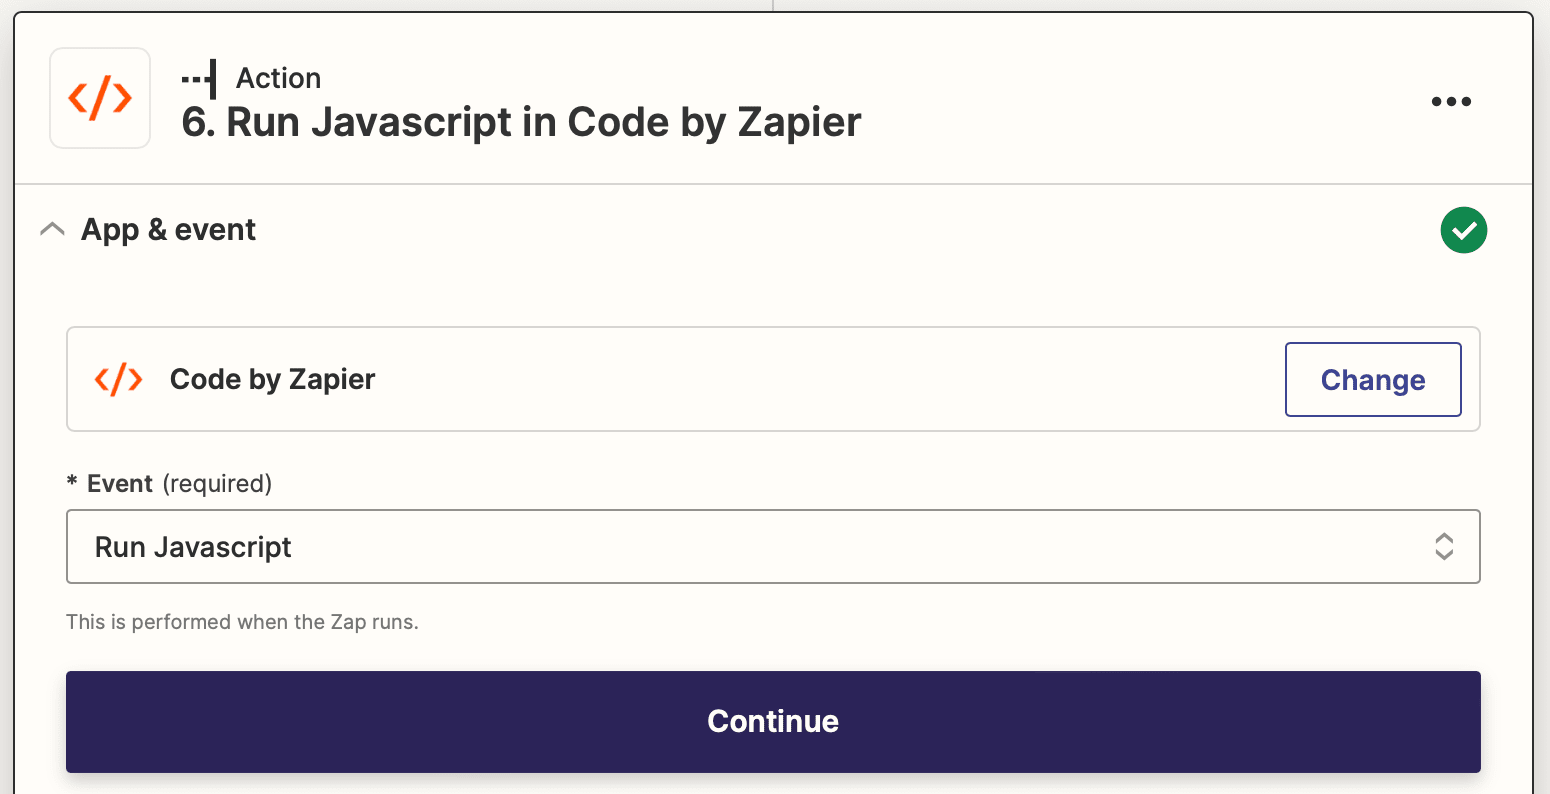
Add a Retrieve Images Action to Your Zap
Now that your script is ready, all that’s left to do is to add an action to your Zap that sets up video variables, fetches relevant clips, and returns them as objects you can use in the following actions.
Log into your Zapier account, and load into the Zap you’re adding a stock video retrieval step to.
Add a new action, choosing Code by Zapier as the app. Select Run JavaScript as the event.
The script includes some variables that need to be set up. Add two pieces of Input Data : keyword and pexels_api_key. The API key will be static, while your keyword can be inserted as text or as a dynamic item from a previous step of the Zap.
Paste your adjusted script into the Code section.
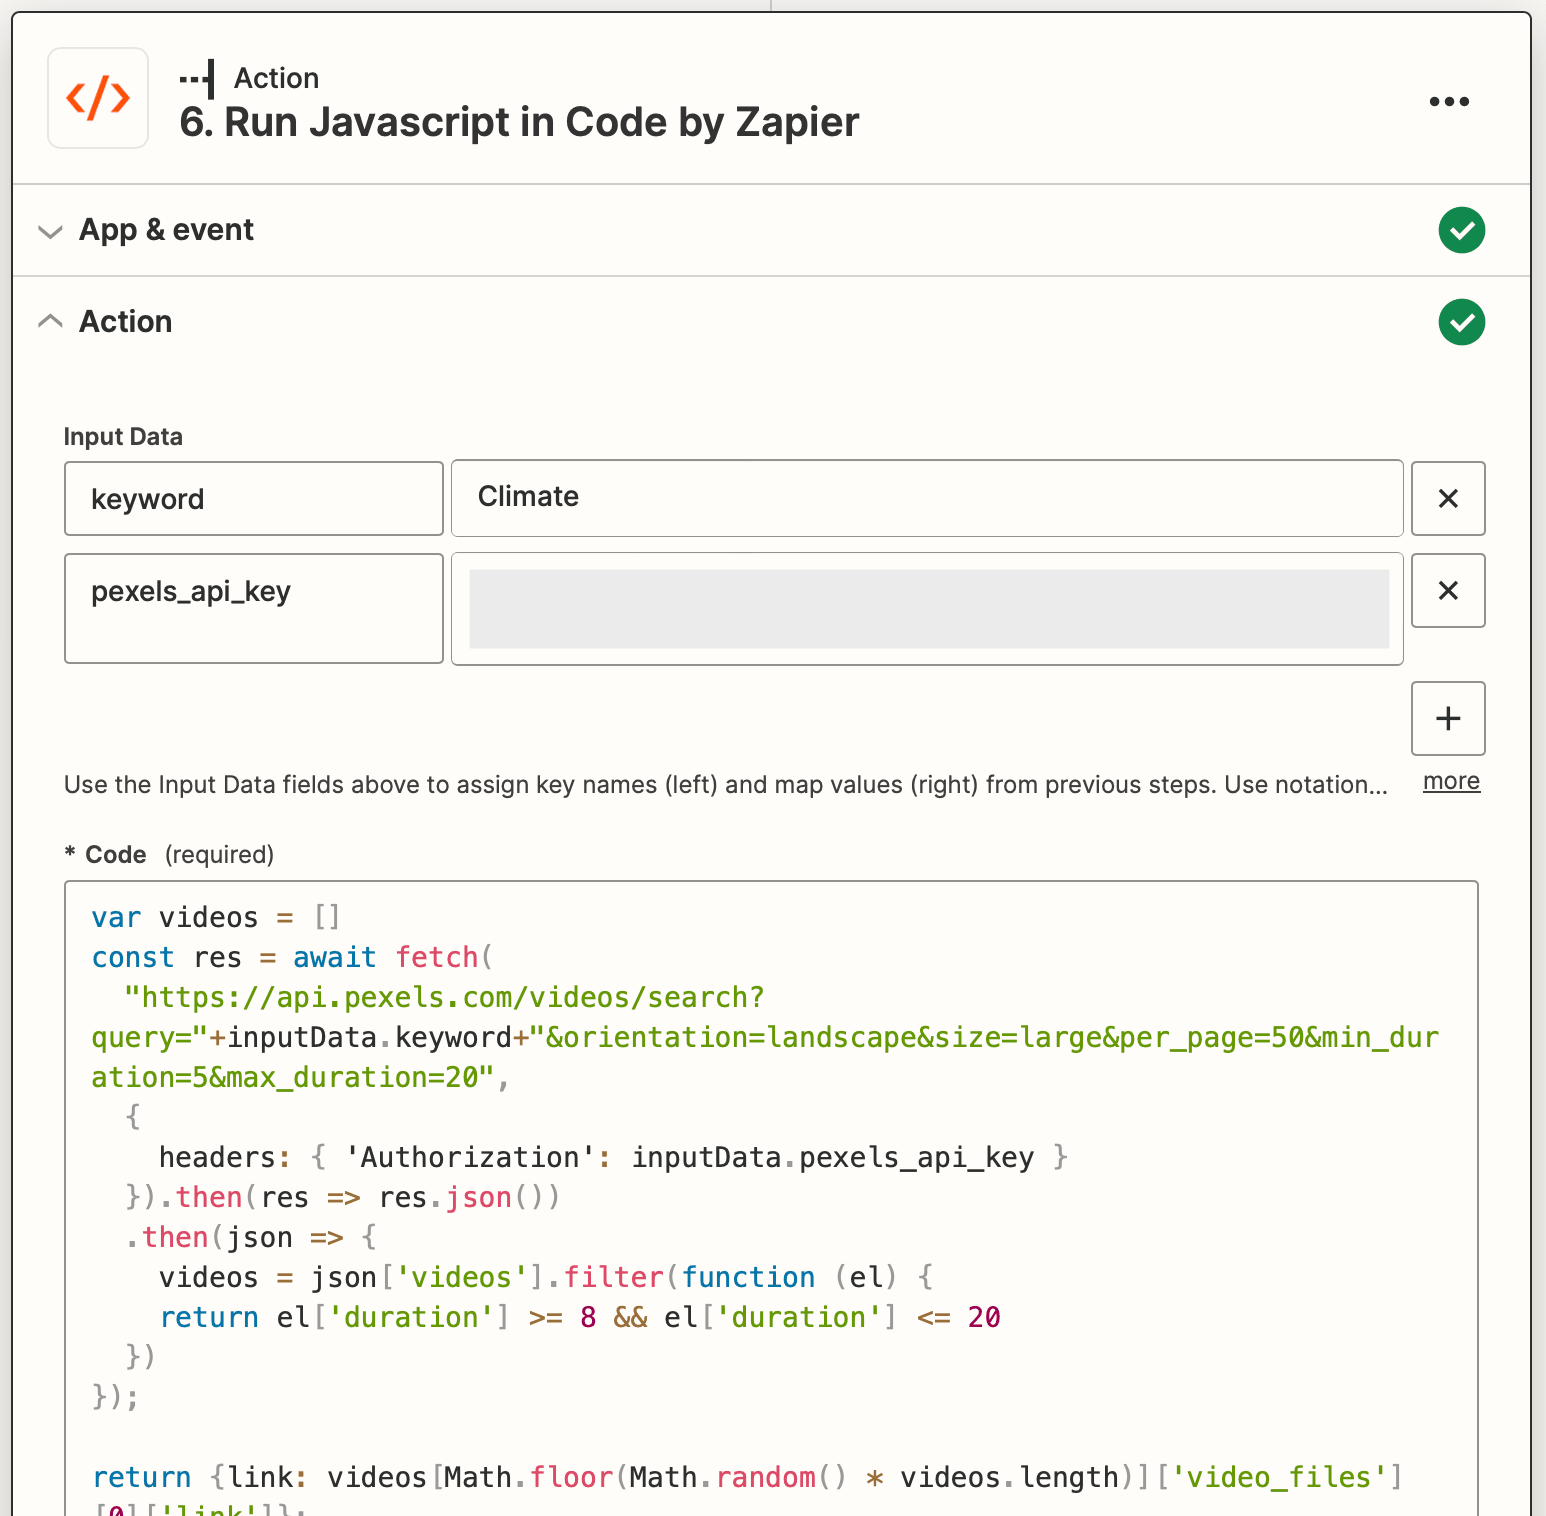
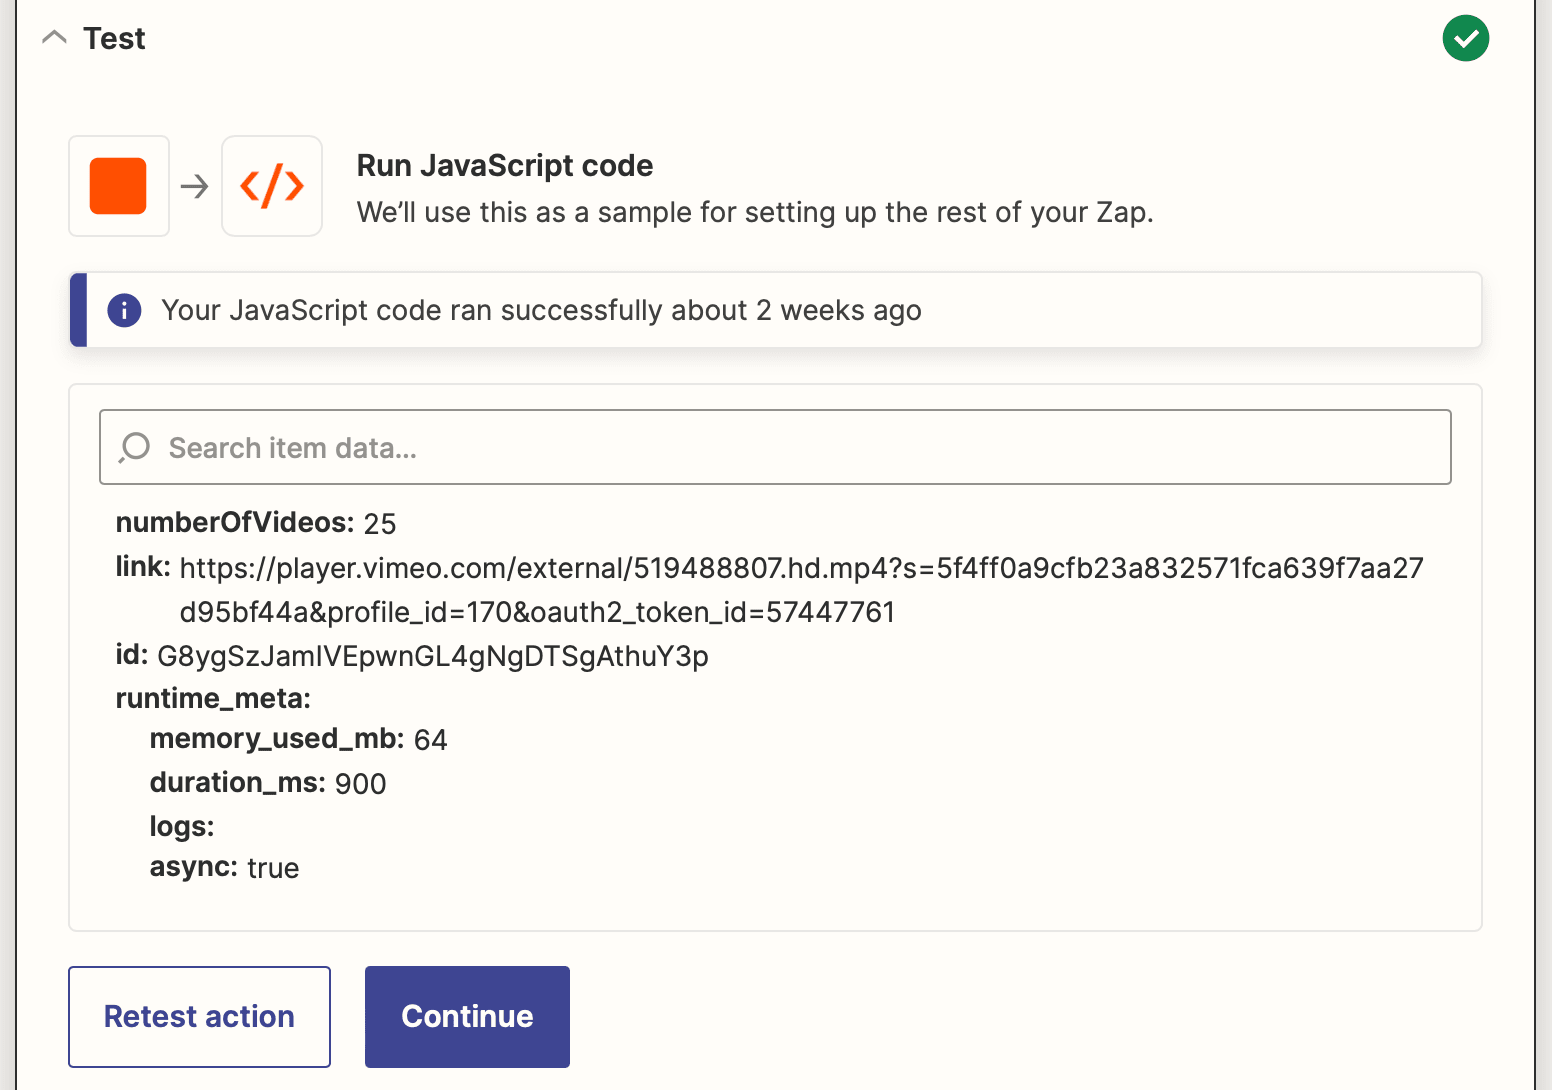
Test the action. In the output section, you should see a link to a video matching your set parameters.
Use Output in Consecutive Steps
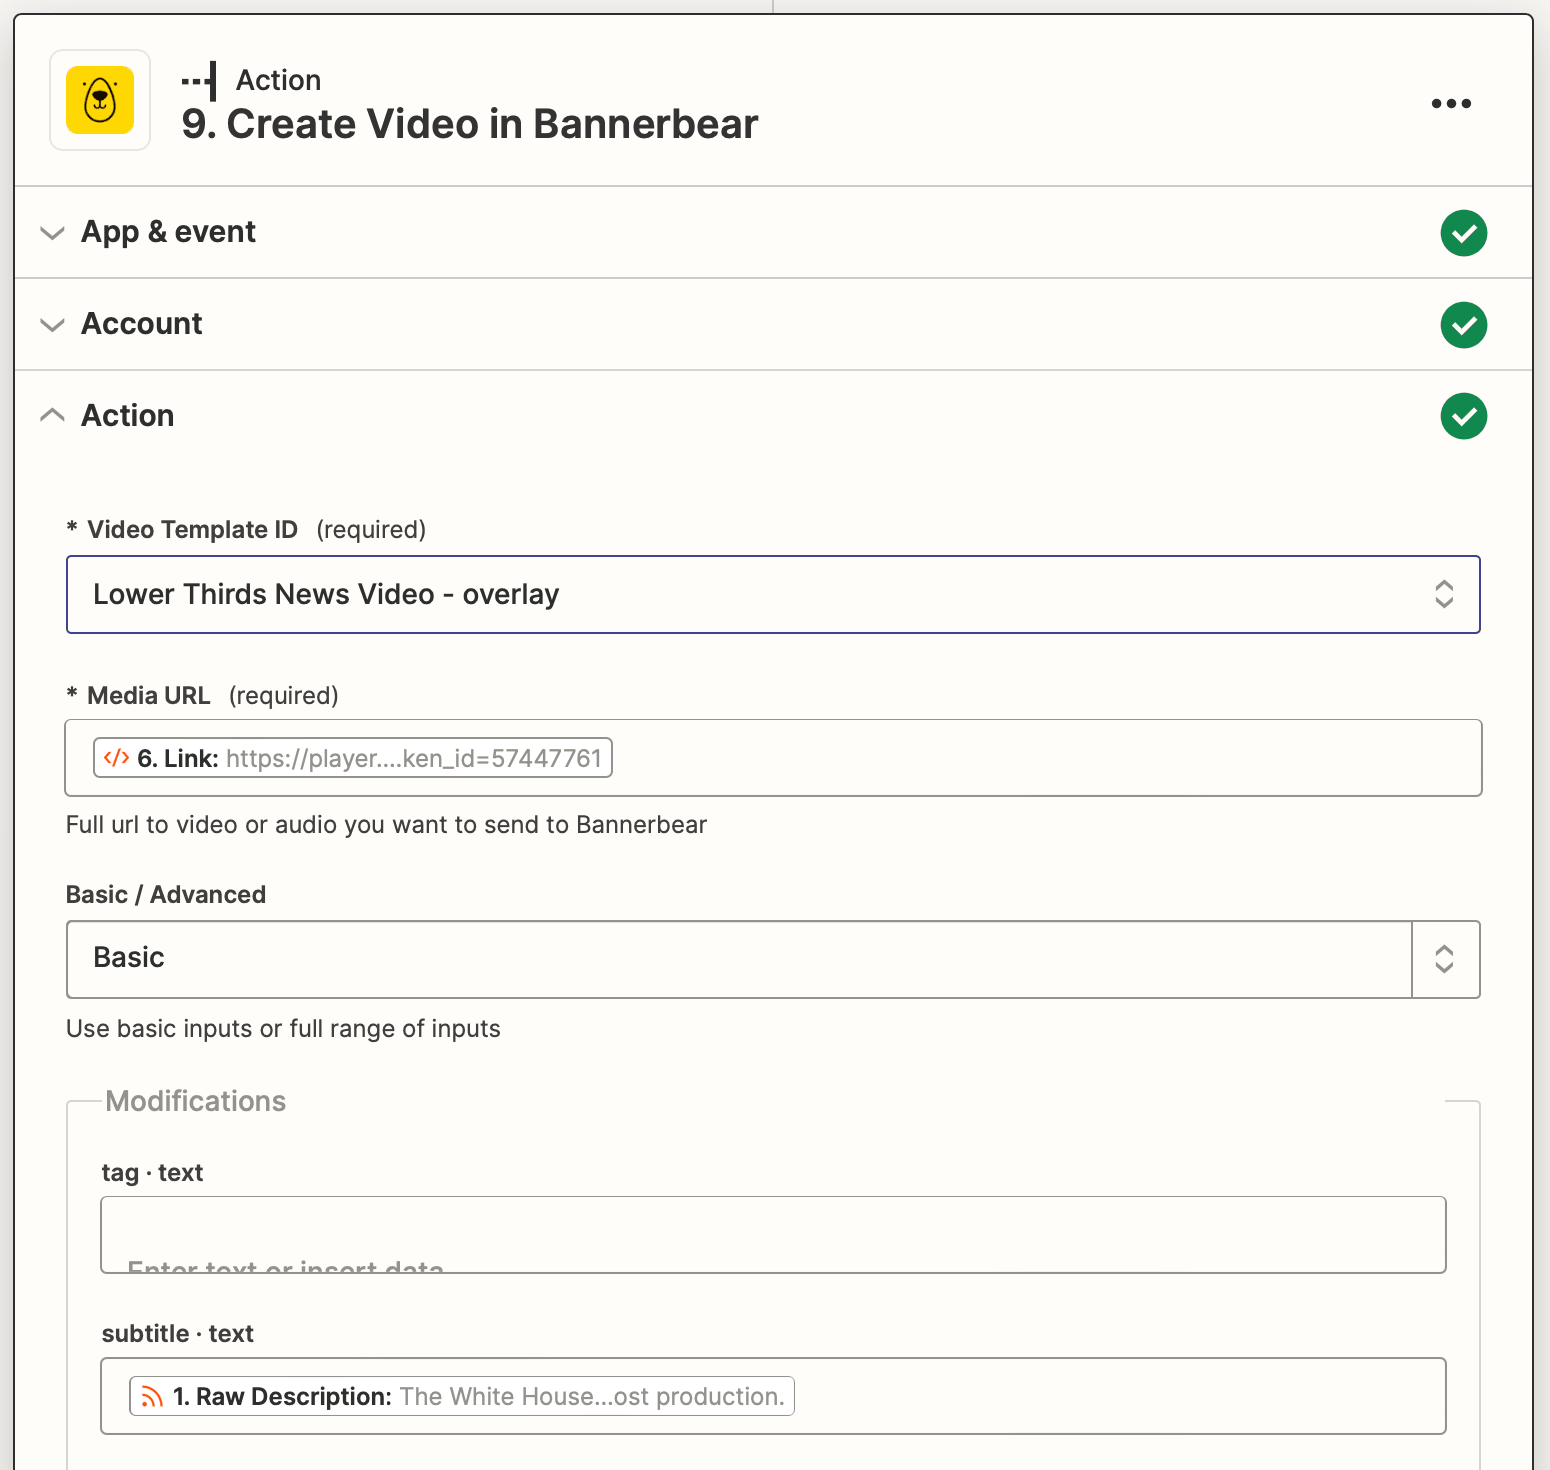
Now, all that’s left is to tie your randomized video in with whatever process you’re looking to automate. If you’re using it to produce video assets from a Bannerbear template, this means following up with a Create Video in Bannerbear action.
Set the action up as you normally would, then map the output link from your Pexels video retrieval step to the Media URL field.
This dynamic link will produce a randomized, yet relevant video when the automation is run, allowing you to generate unique graphics.
There are plenty of other ways to use this method to create unique video assets. It’s just about matching it to an appropriate use case and using your creativity to build a process that reliably produces quality videos.
Randomize Videos with the Pexels API
Using the Pexels API to randomize videos for automated video generation is fantastic for quickly and easily creating engaging videos. By accessing the vast library of videos available through the API, you can retrieve content that is both of high quality and visually appealing.
With just a few short steps, you can quickly incorporate Pexels into your Bannerbear workflows and generate amazing video assets that stand out from the rest.
