How to Automatically Generate an Event Invitation with RSVP Prompt on Airtable
Contents
Have you ever set up an event but your guests fail to appropriately RSVP or uphold their commitment to the RSVP? This creates a difficult situation for everyone involved in the planning.
Although there is no obligation to reply to an invite, RSVPs are critical to the planning of any successful event. An RSVP displays a strong intent to attend and assists the host or hostess in estimating how many guests will attend their event.
Sending a prompt to your guest to confirm their attendance gives the host or hostess a number to work with when making arrangements for food, beverages, seating. This saves you from unnecessary added stress, incurring additional expenses, or not having enough for everyone.
What better way to send out invitations and get confirmed attendance than with automation? With minimal manual effort, you can save a lot of precious time sending wedding invites to each of your guests.
What does this integration do?
In this tutorial, we will set up an automated workflow to send a personalized save-the-date card to your guests. The event invitation will contain a clickable RSVP CTA that pre-fills an RSVP form.
We will create automation between Bannerbear and Airtable that:
- Pulls in data from Airtable base,
- Connects your base with Bannerbear by sending an API request with just the click of a button,
- Generates PDF of the new wedding invite you have requested with a dynamic RSVP link,
- Stores that PDF in a specified Airtable field.
The table used in this tutorial looks like this:
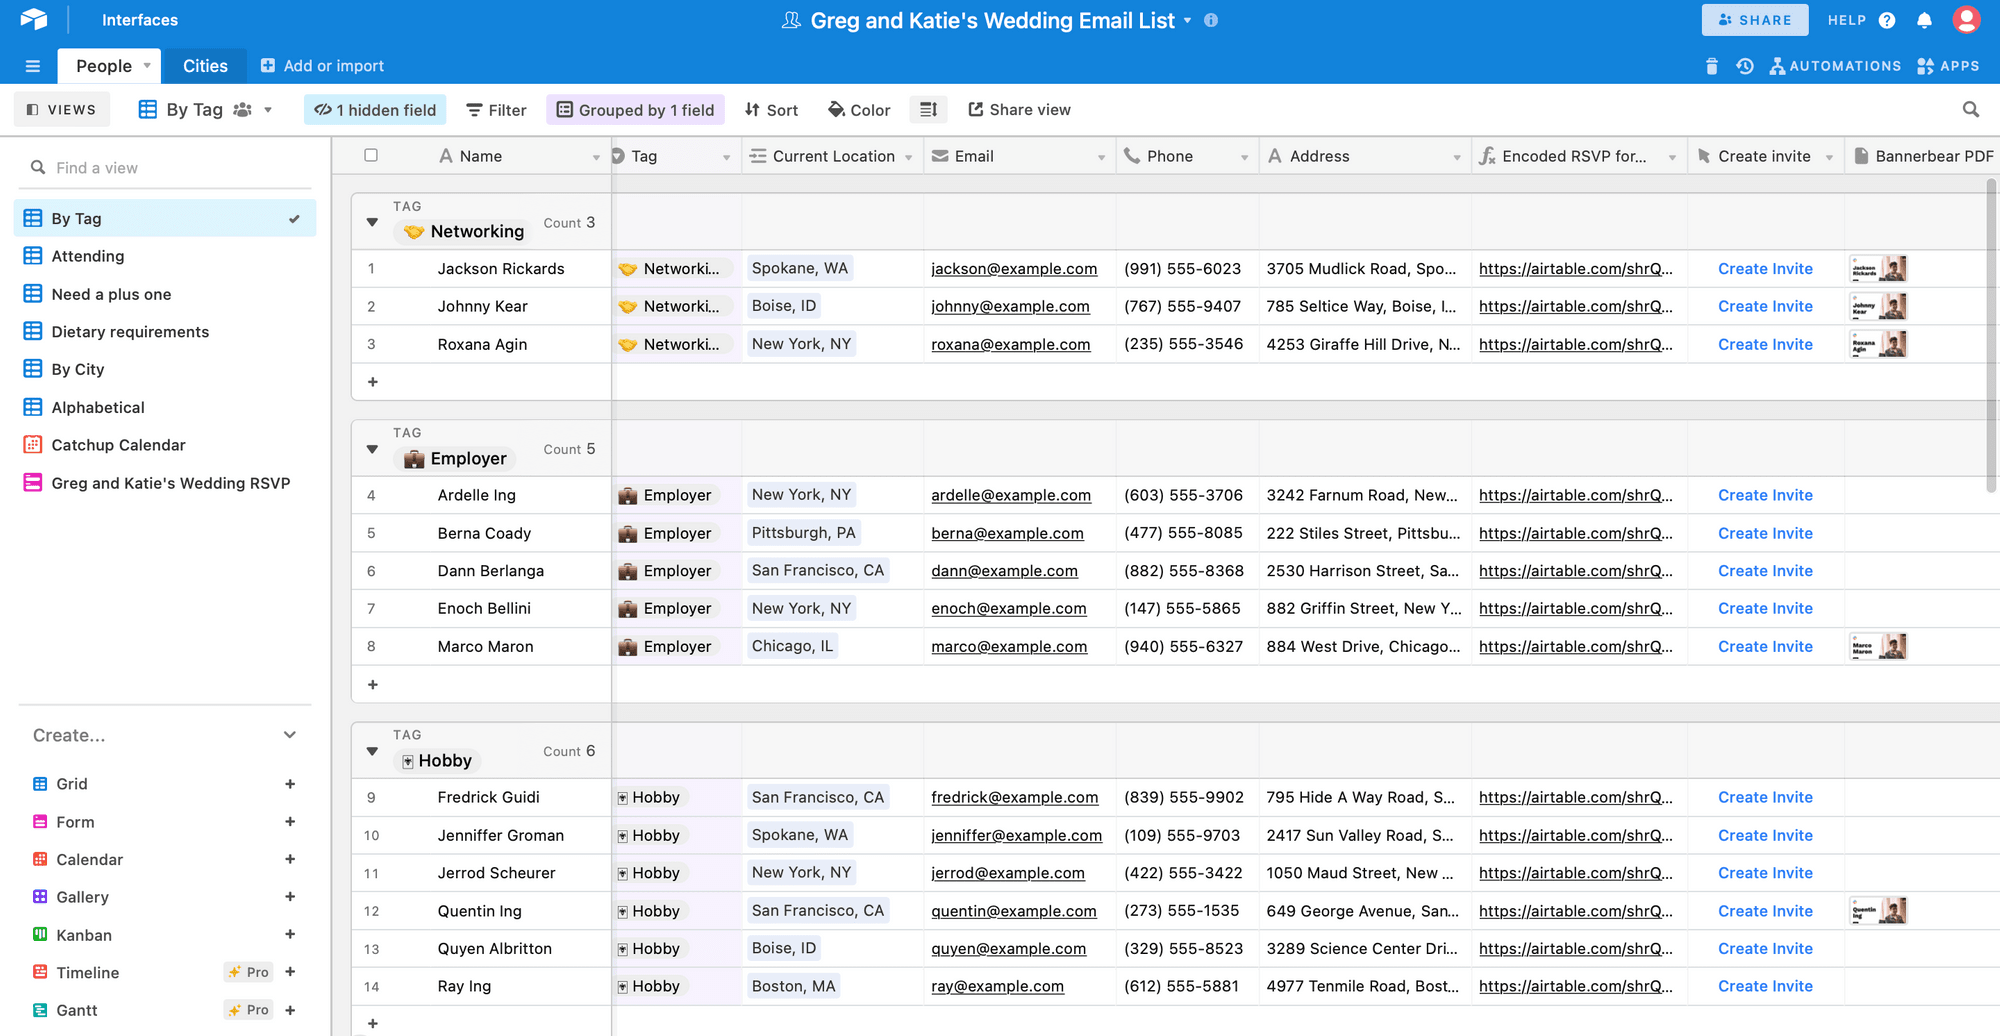
Example Image
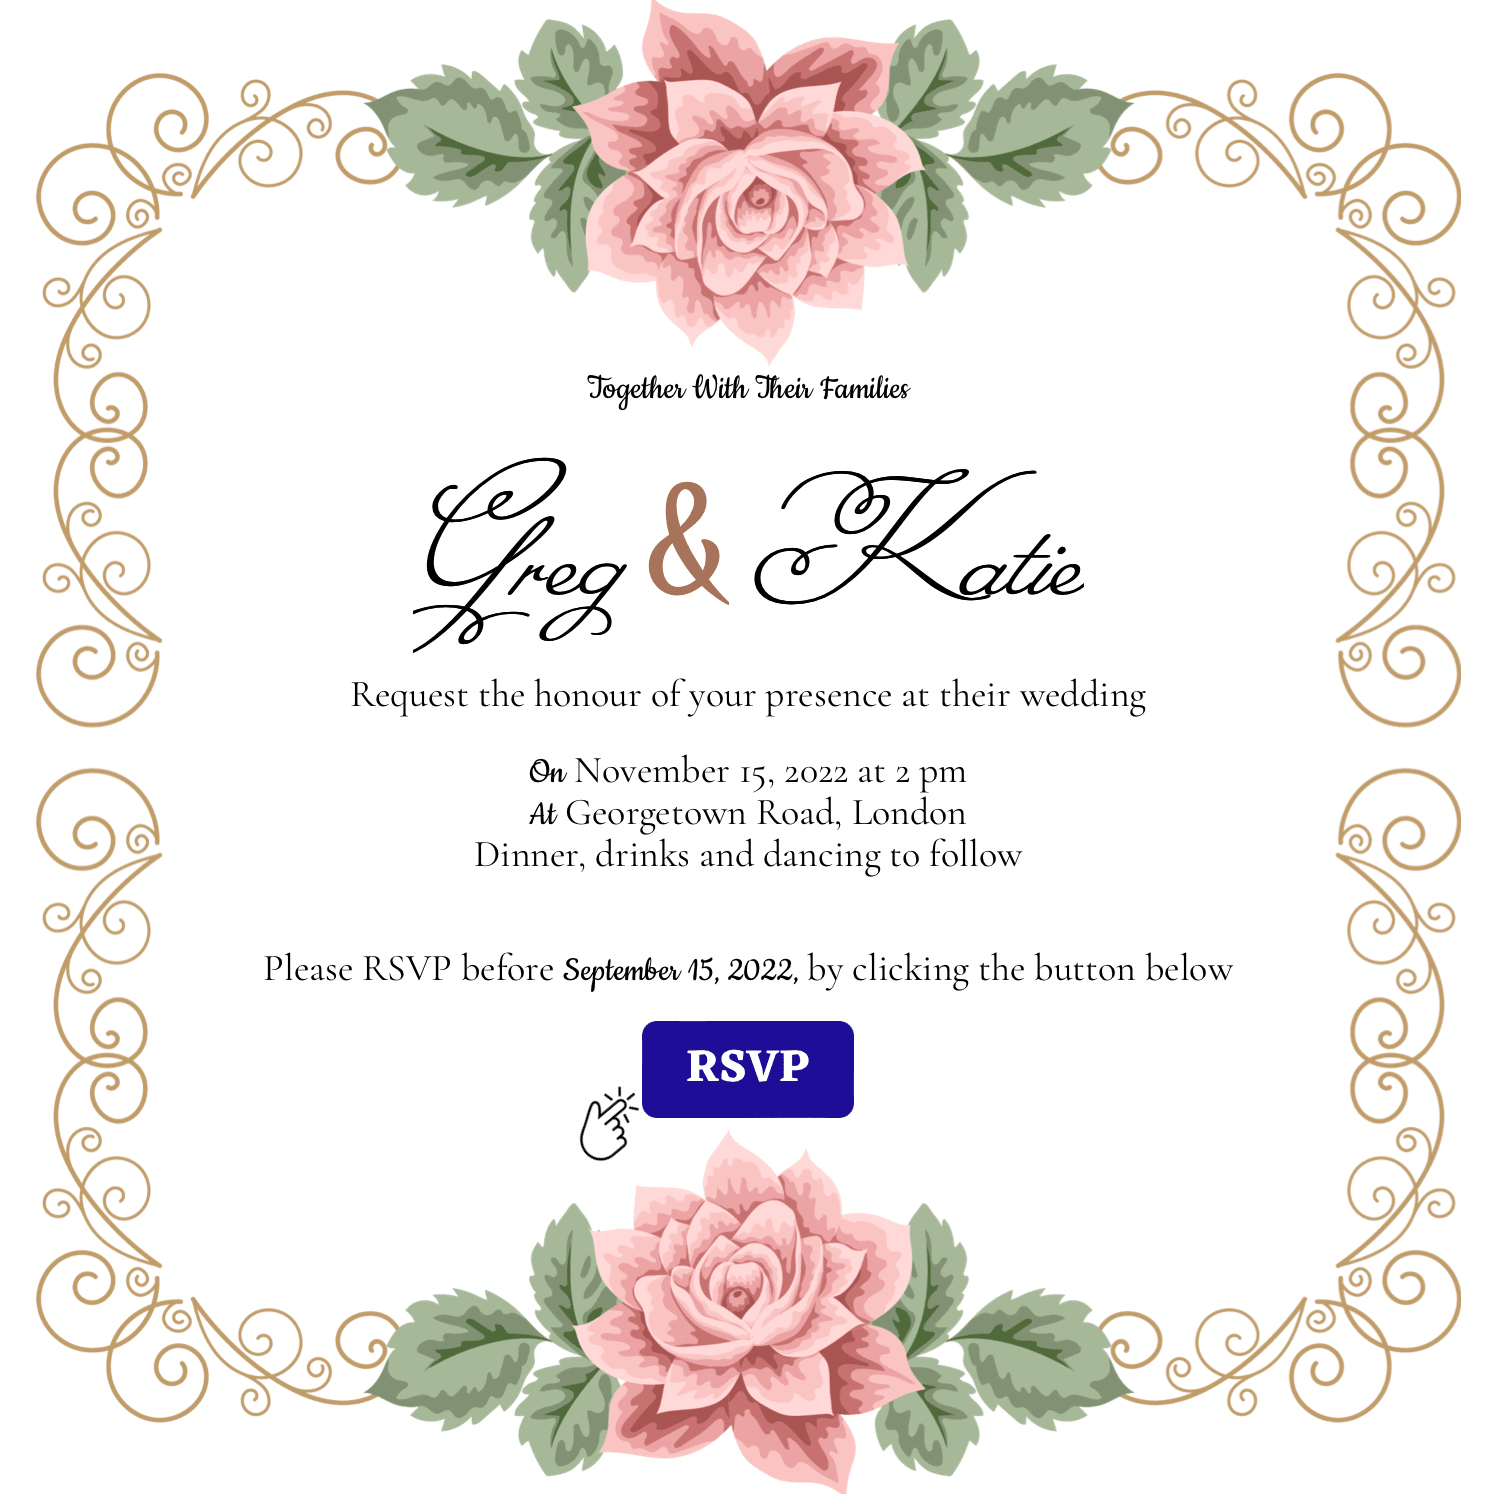
The end result will be a PDF document with clickable button:
Let's start with the basic elements.
Bannerbear Setup
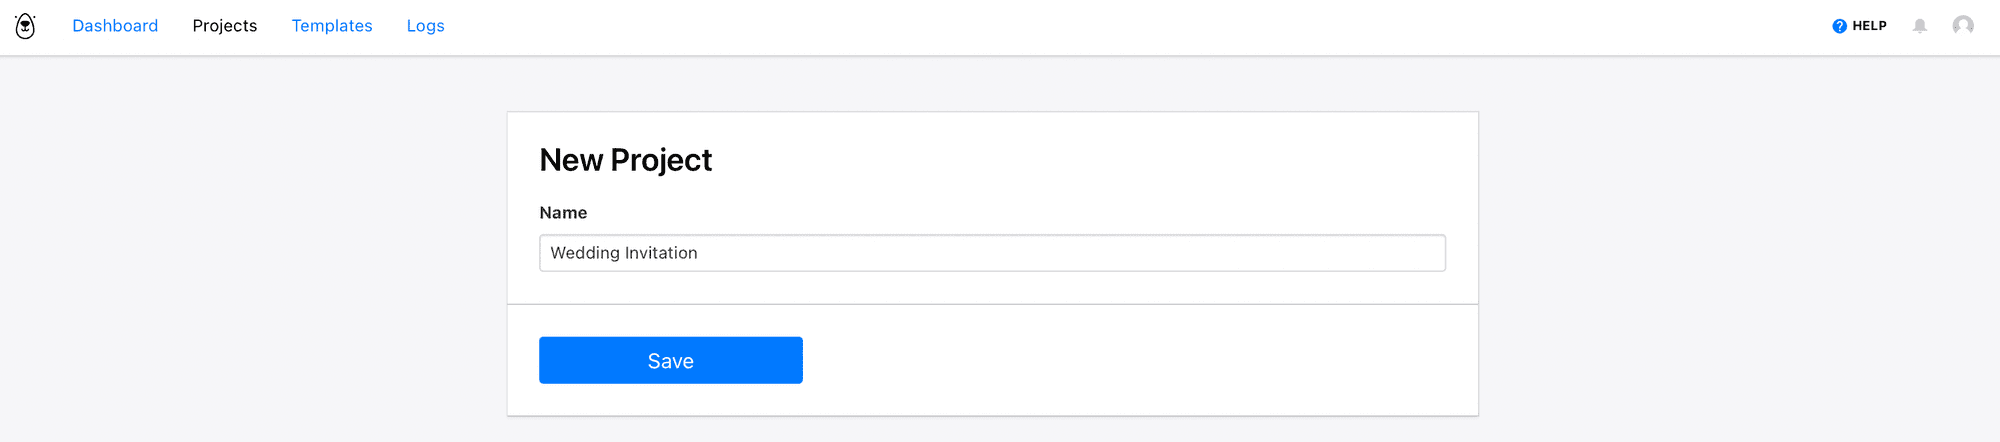
Create a project in Bannerbear
Go to https://app.bannerbear.com, sign in to your Bannerbear account and create a new project. Name your new project ’Wedding Invitation’:
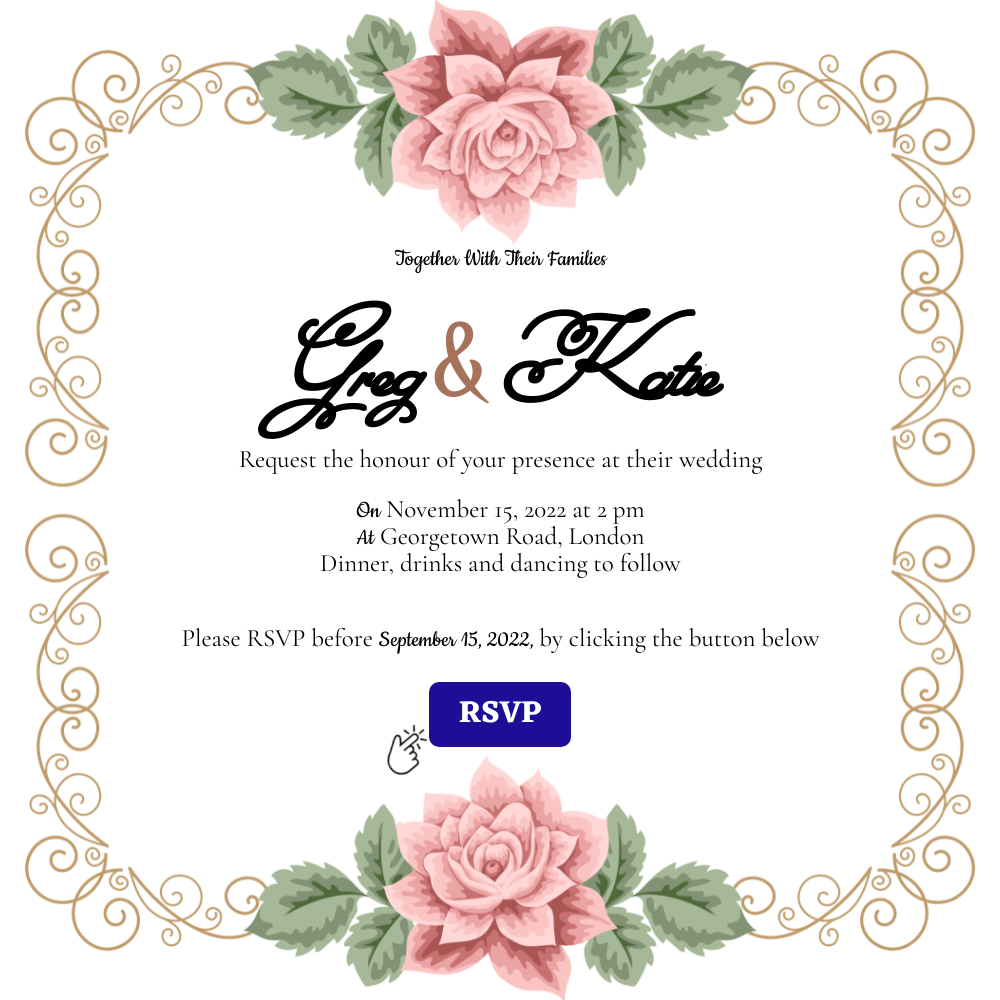
Create an Invitational PDF Template
To use a template you must add it to a project.
Browse the Template Library to add a sample template from a selection of ready-made templates to your Bannerbear project.
For this tutorial, we are going to use a shared template. Add the 'Wedding Invitation' template to your project, or click the image below to add it automatically.
Alternatively, Bannerbear allows you to create your own template with the flexibility of customising the layout, adding layers, objects, colours, fonts, etc.
There are core features the template should cover:
- Names of the Couple and/or Wedding logo
- Guest name for personalization
- Personalised RSVP button - With Bannerbear’s PDF feature, you can add pre-filled target URLs in PDFs
- Date and time
- Venue - This can simply be the city the wedding is located in. You can choose to send the event details to only guests that confirms attendance.
- Description and details
At this point, you will also want to copy your Project API Key as you will need this later to connect your Airtable base that contains the guest list to Bannerbear.
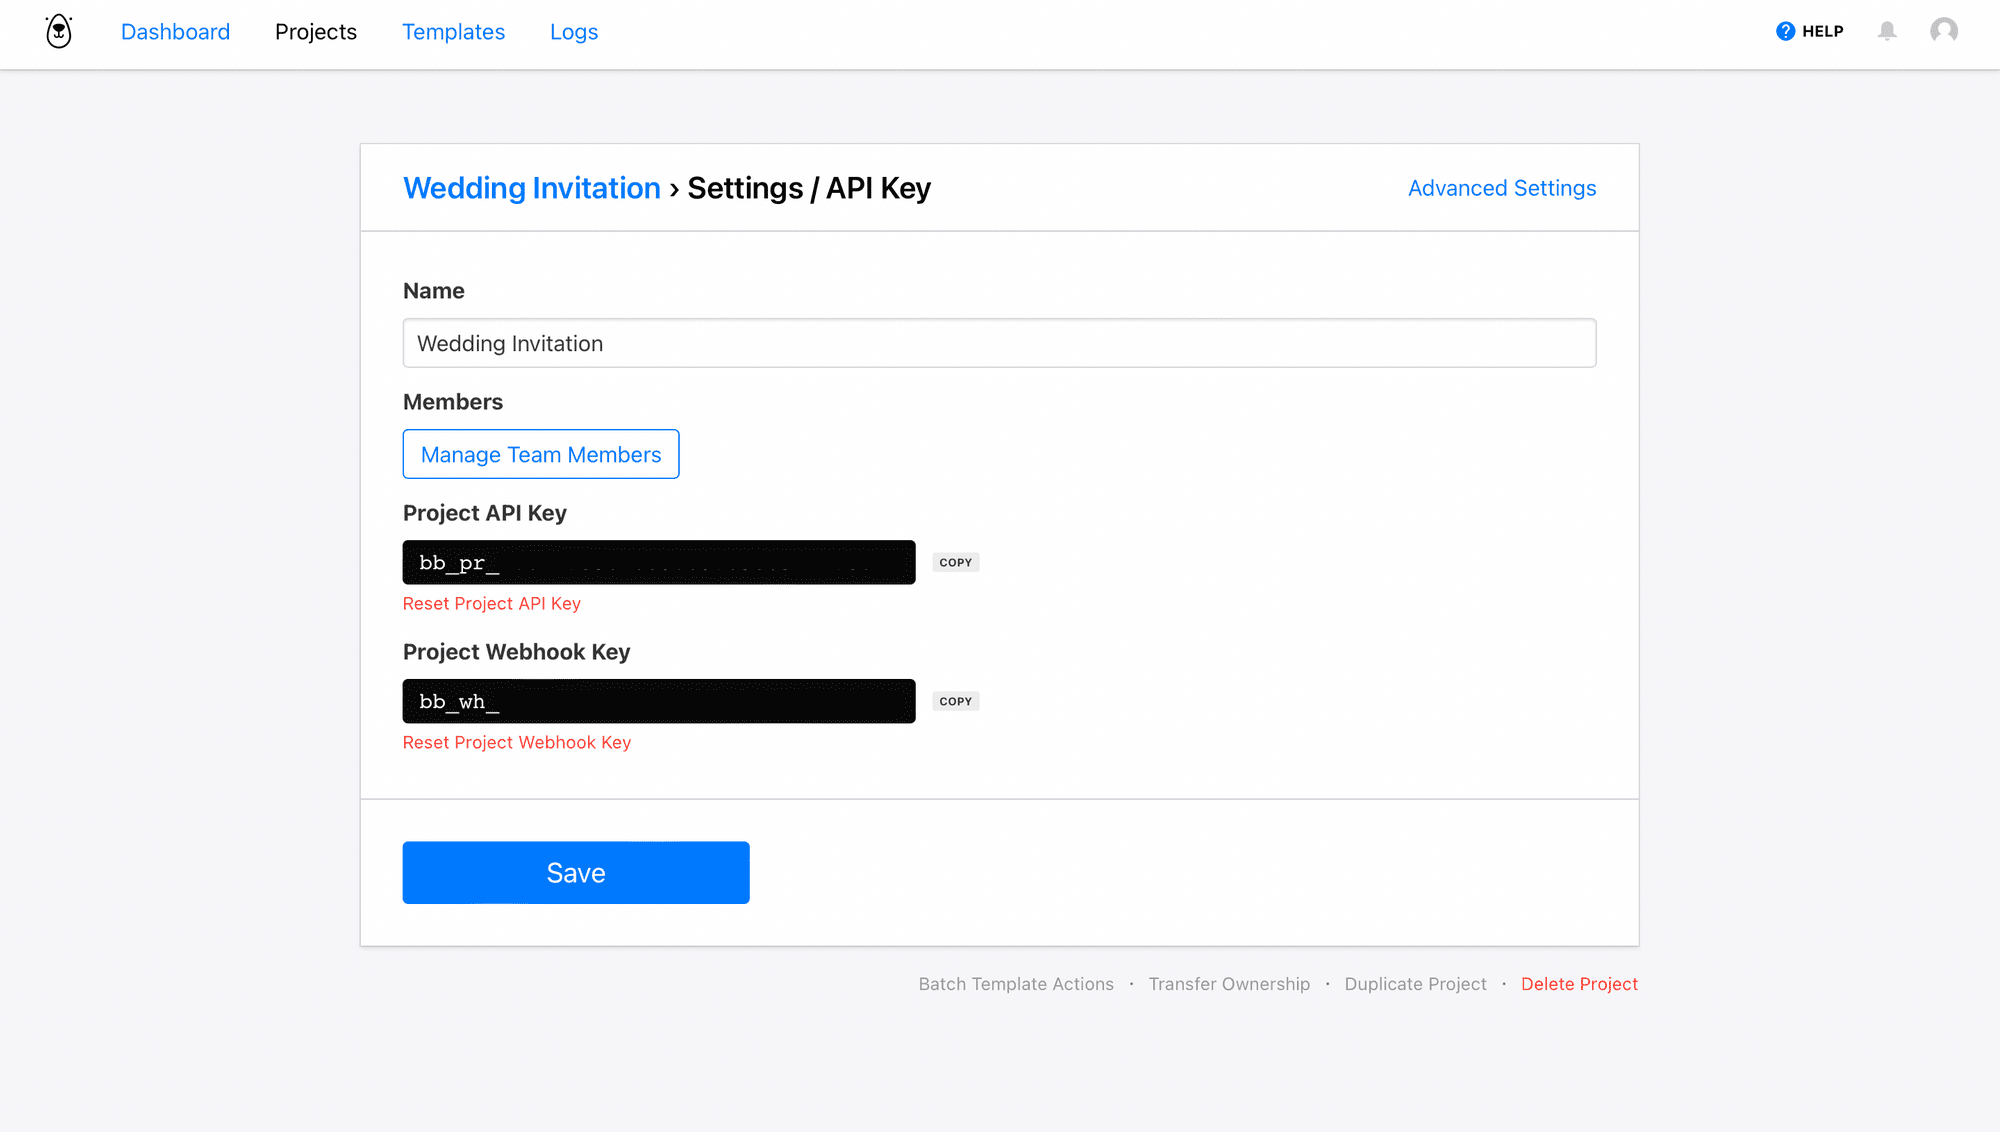
Get your Bannerbear Project API Key
Bannerbear uses API keys to allow access to the API. The API key is unique for each project. Always remember to keep your API key protected.
The Project API key is found on the Settings / API Key page of your Project:
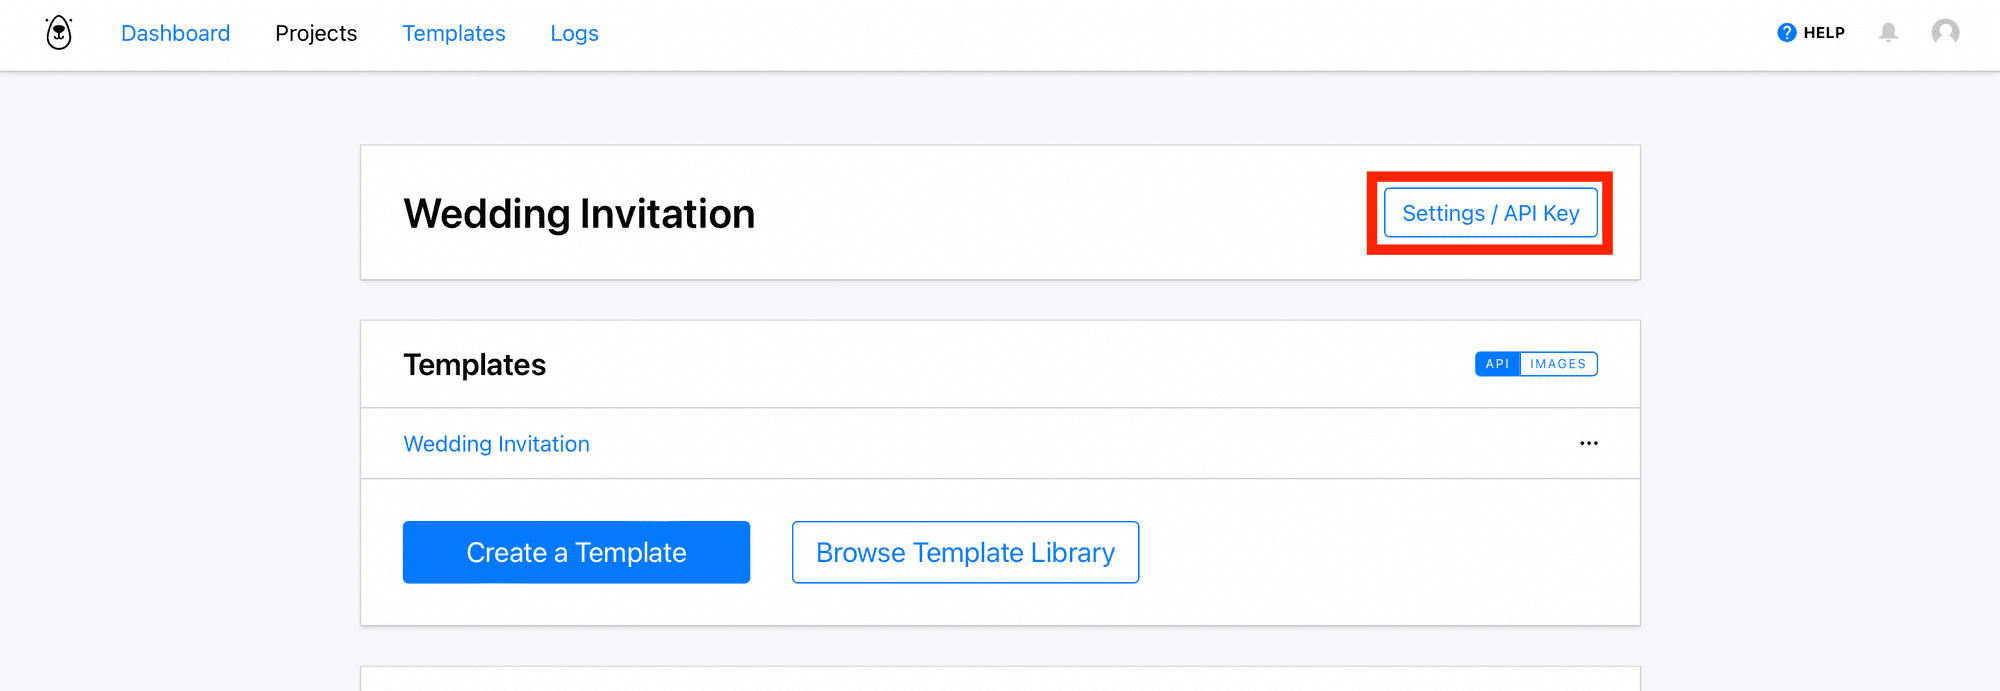
Copy the Project API Key to your clipboard. We will use your API Key ID later:
Connect Bannerbear to Airtable Grid
Airtable is a spreadsheet-database hybrid, with the features of a database but applied to a spreadsheet. It allows you to manage your social media content, create a CRM database, build collaborative apps and more!
Create an Airtable Contacts List
The first step to take is to gather a list of invitees. We will create a new table within your Airtable base with a list of guest names and emails.
We need a pre-populated Airtable base to get started. Give your base and table a name. See an example Airtable here:
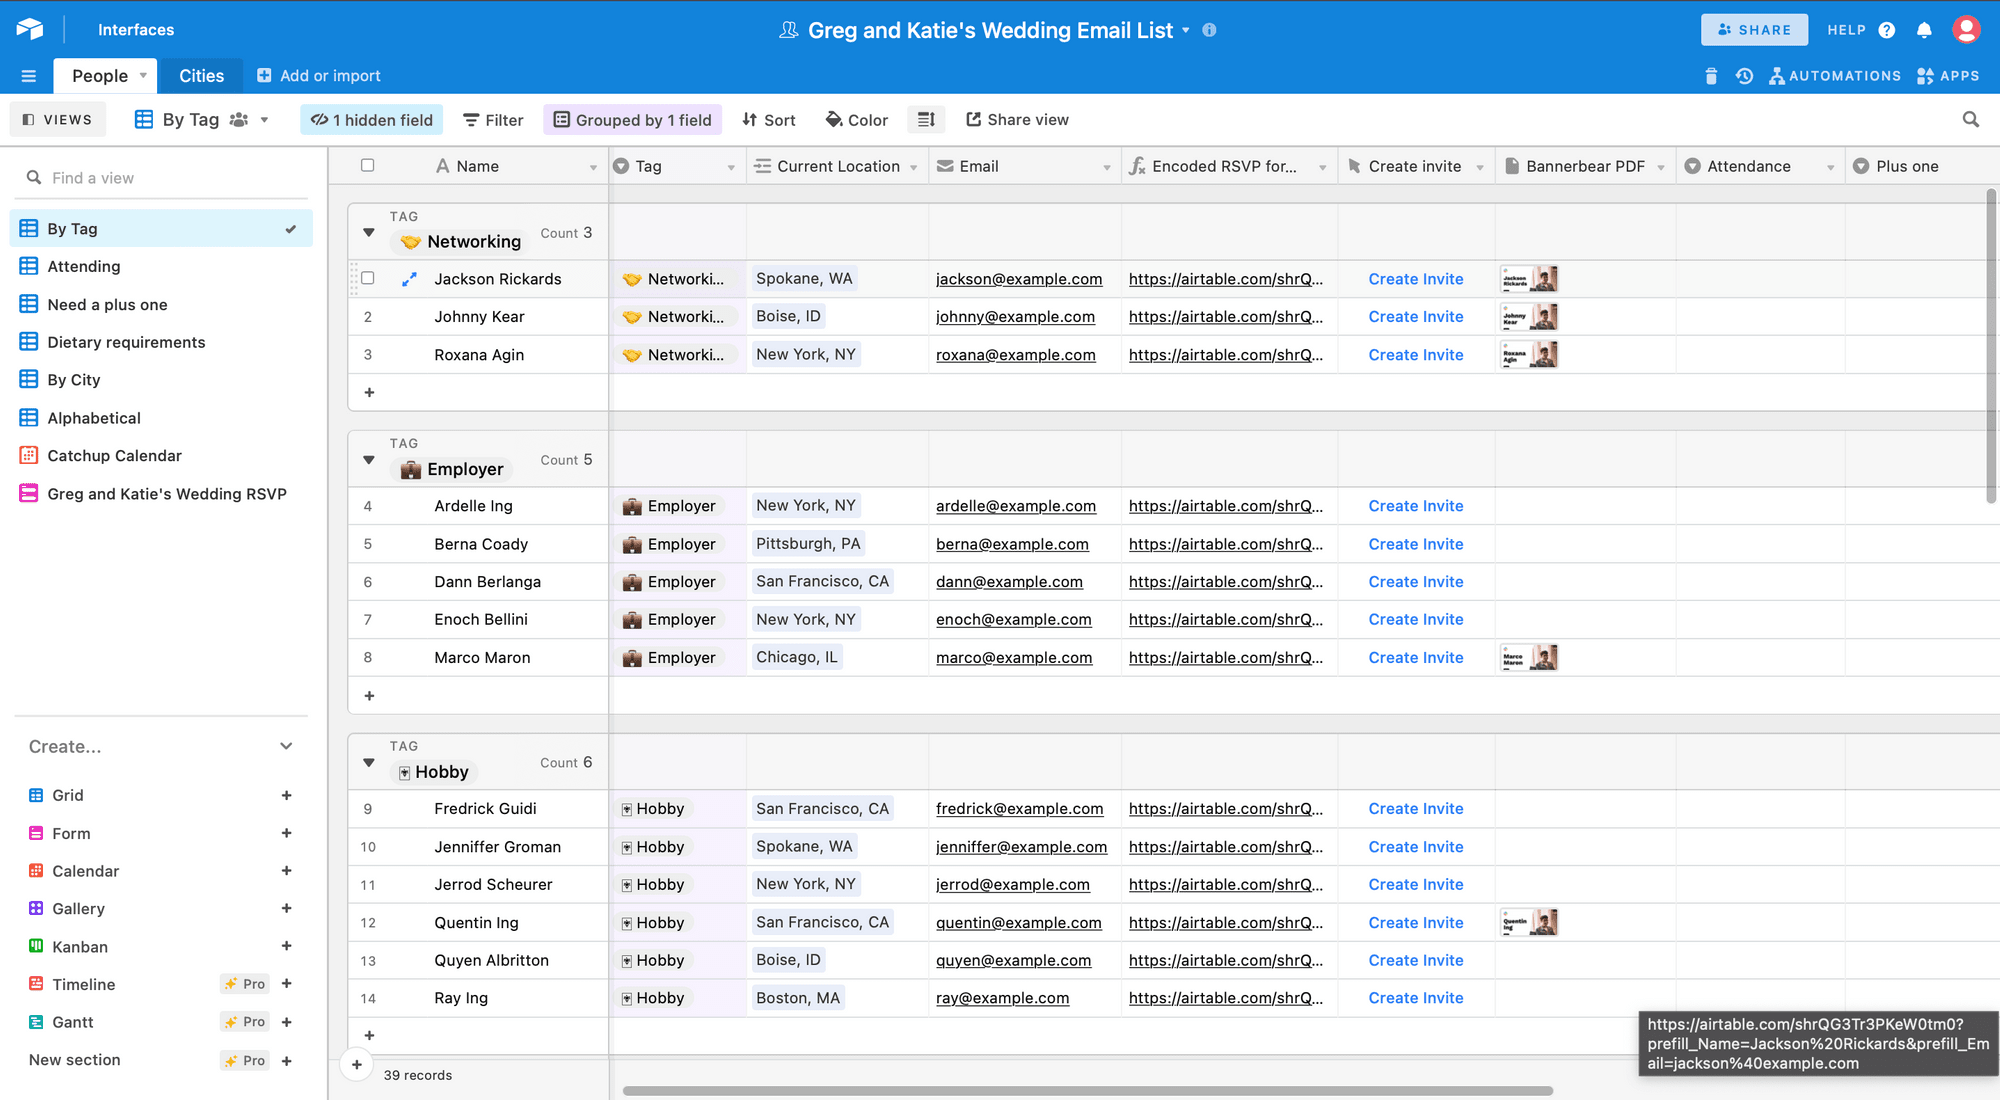
Starting with the grid, you'll want to create a few key fields to track information:
- Guest name
- Email address
- Button field
- Bannerbear PDF (attachment field) An empty field to receive the PDF generated
- Attendance (single select)
- Encoded form URL (formula field)
We will cover how to create the Button and Encoded form URL fields in later steps.
Other fields include:
- Dietary requirements (multiple select)
- Notes
- Plus one (single select)
- Address
- Phone
- Tag
This table will route RSVP forms and track who has RSVP'd.
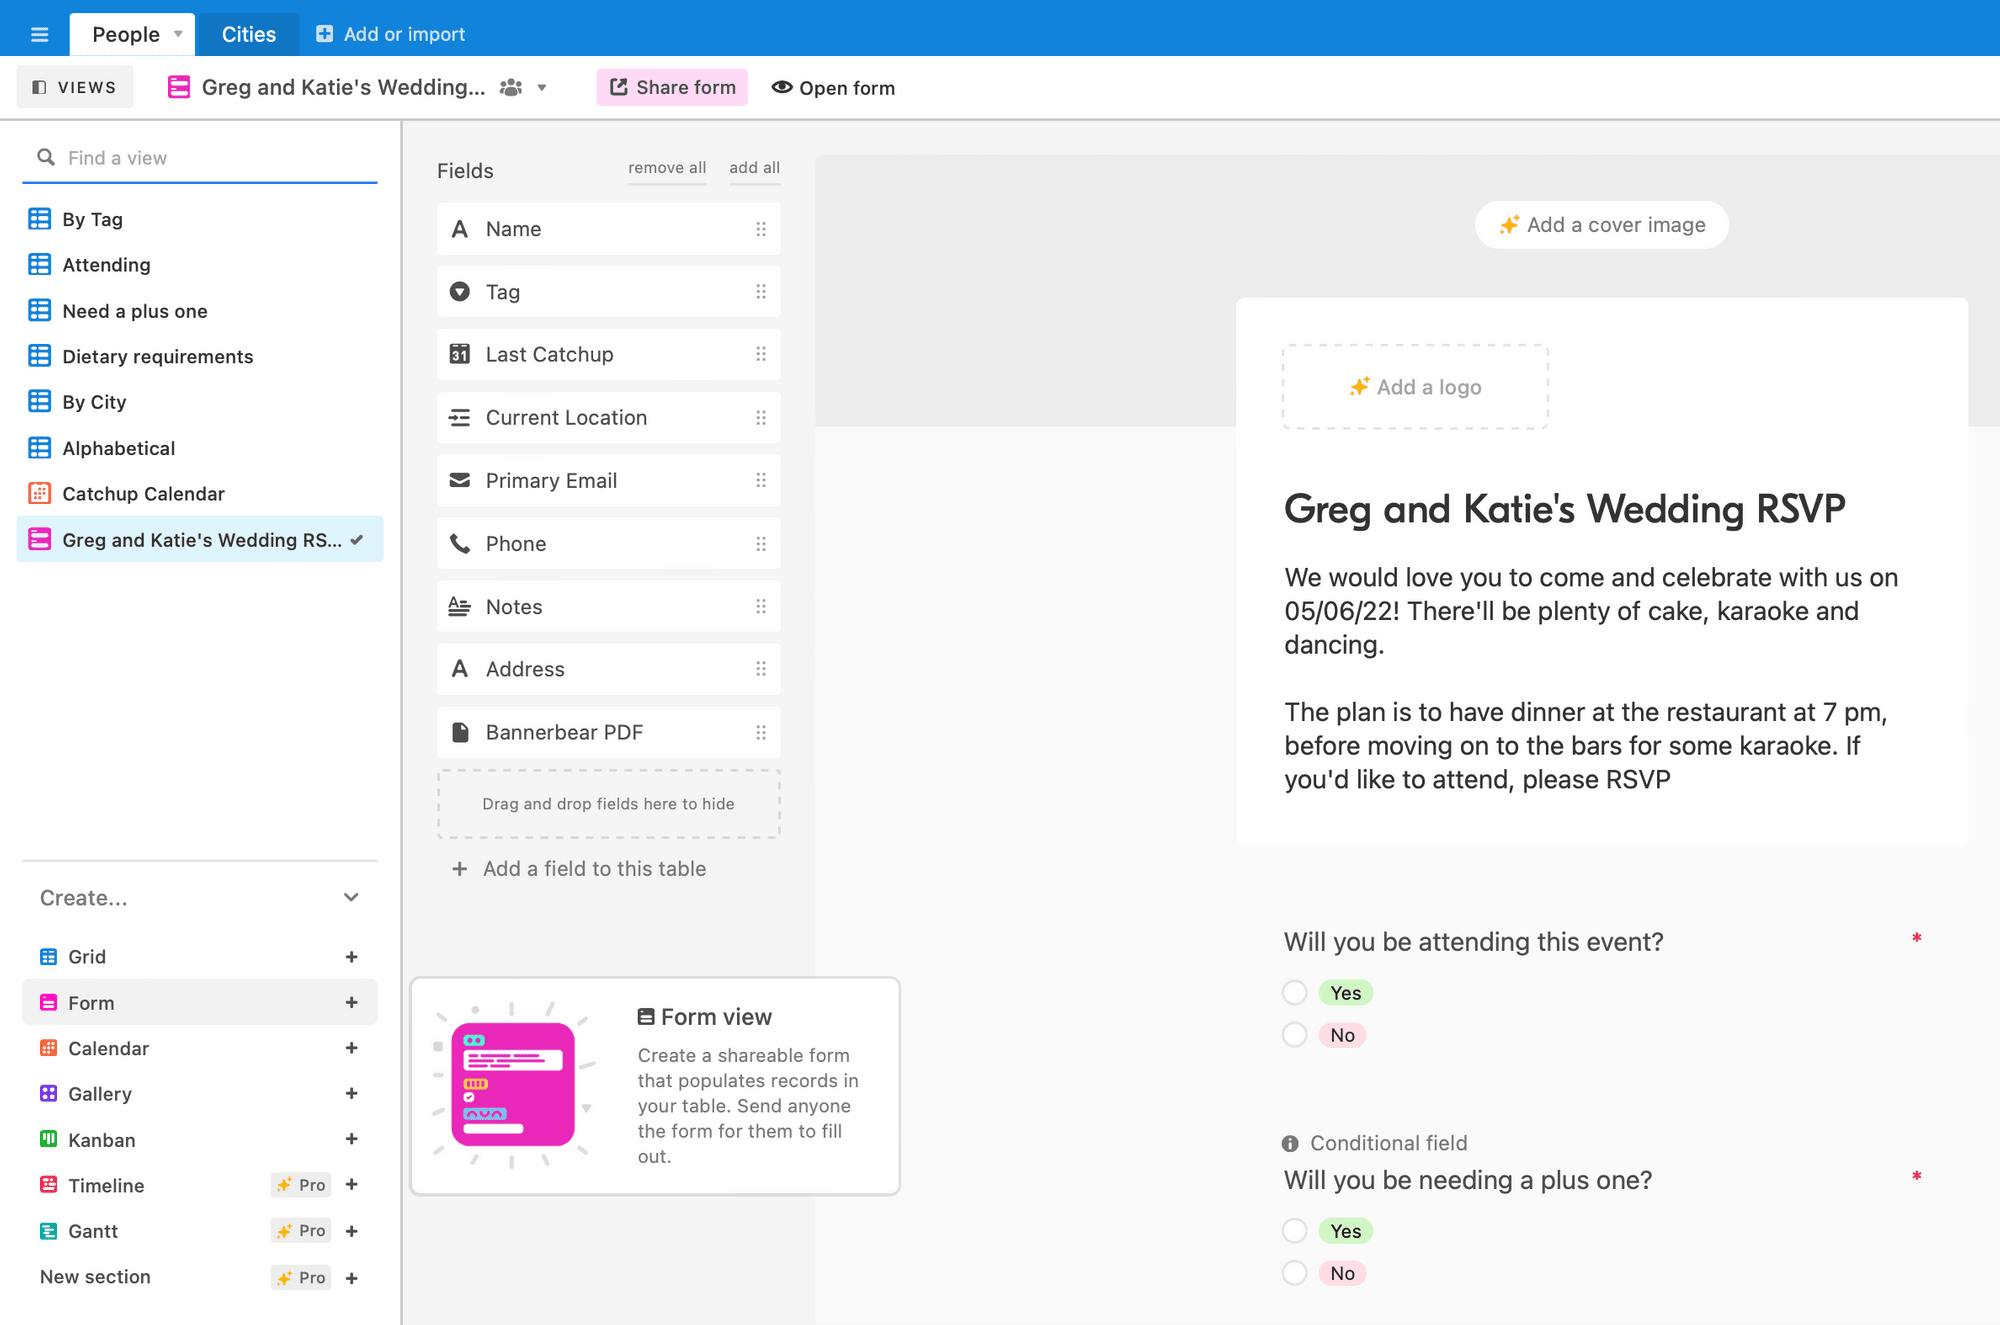
Create an RSVP form with custom response statuses
After the fields are created in grid view, add a form view to the table. The same fields created in the grid view will be available as form fields.
We’ll set up a form for people to request to RSVP to the event. This will be the only view your invitee can access within the base.
An RSVP form can reduce the friction between your guests and the submit RSVP button by making it easy for them to send in their responses.
Here are some things you can do to make your form personalised for your guests:
- Add your wedding branding to your RSVP response page
- Plus one(s) and their information
- Dietary preferences or restrictions
- Any data you want to provide the best guest experience
- RSVP button
- On-Page Confirmation indicating that the RSVP is successful after submitting a response
You can use conditional logic to control which custom questions show or hide based on the answers provided. Each field in a form can have conditions, or condition groups, determine when that field will be visible:
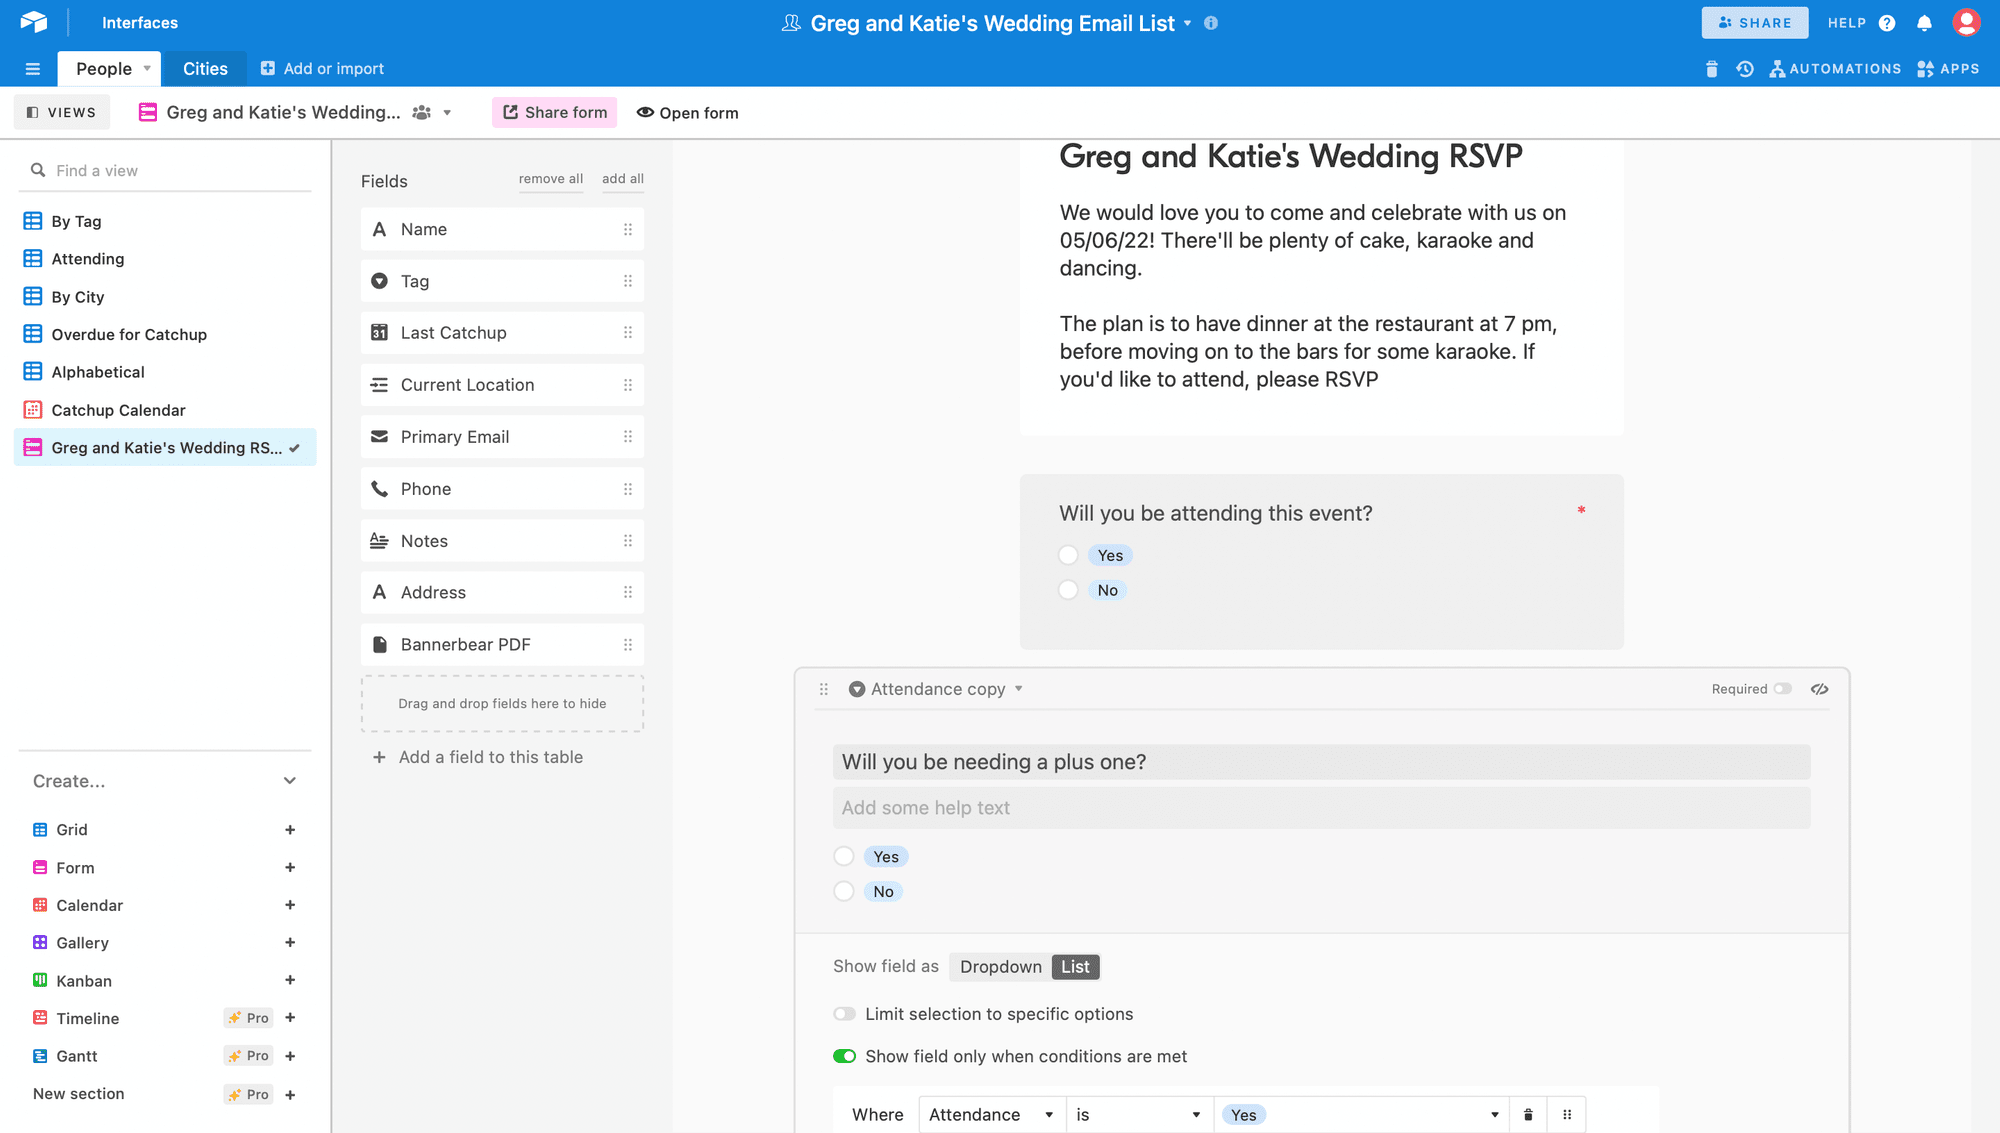
The optional form fields - dietary requirements, plus one, address - will only be visible if the guest indicates attendance:
Pre-fill form details with formula field
Next, we need to pre-fill the guest's name and email address for a better user experience. To do this, we'll need to write a formula using the ENCODE_URL_COMPONENT function by including some of the basic information needed.
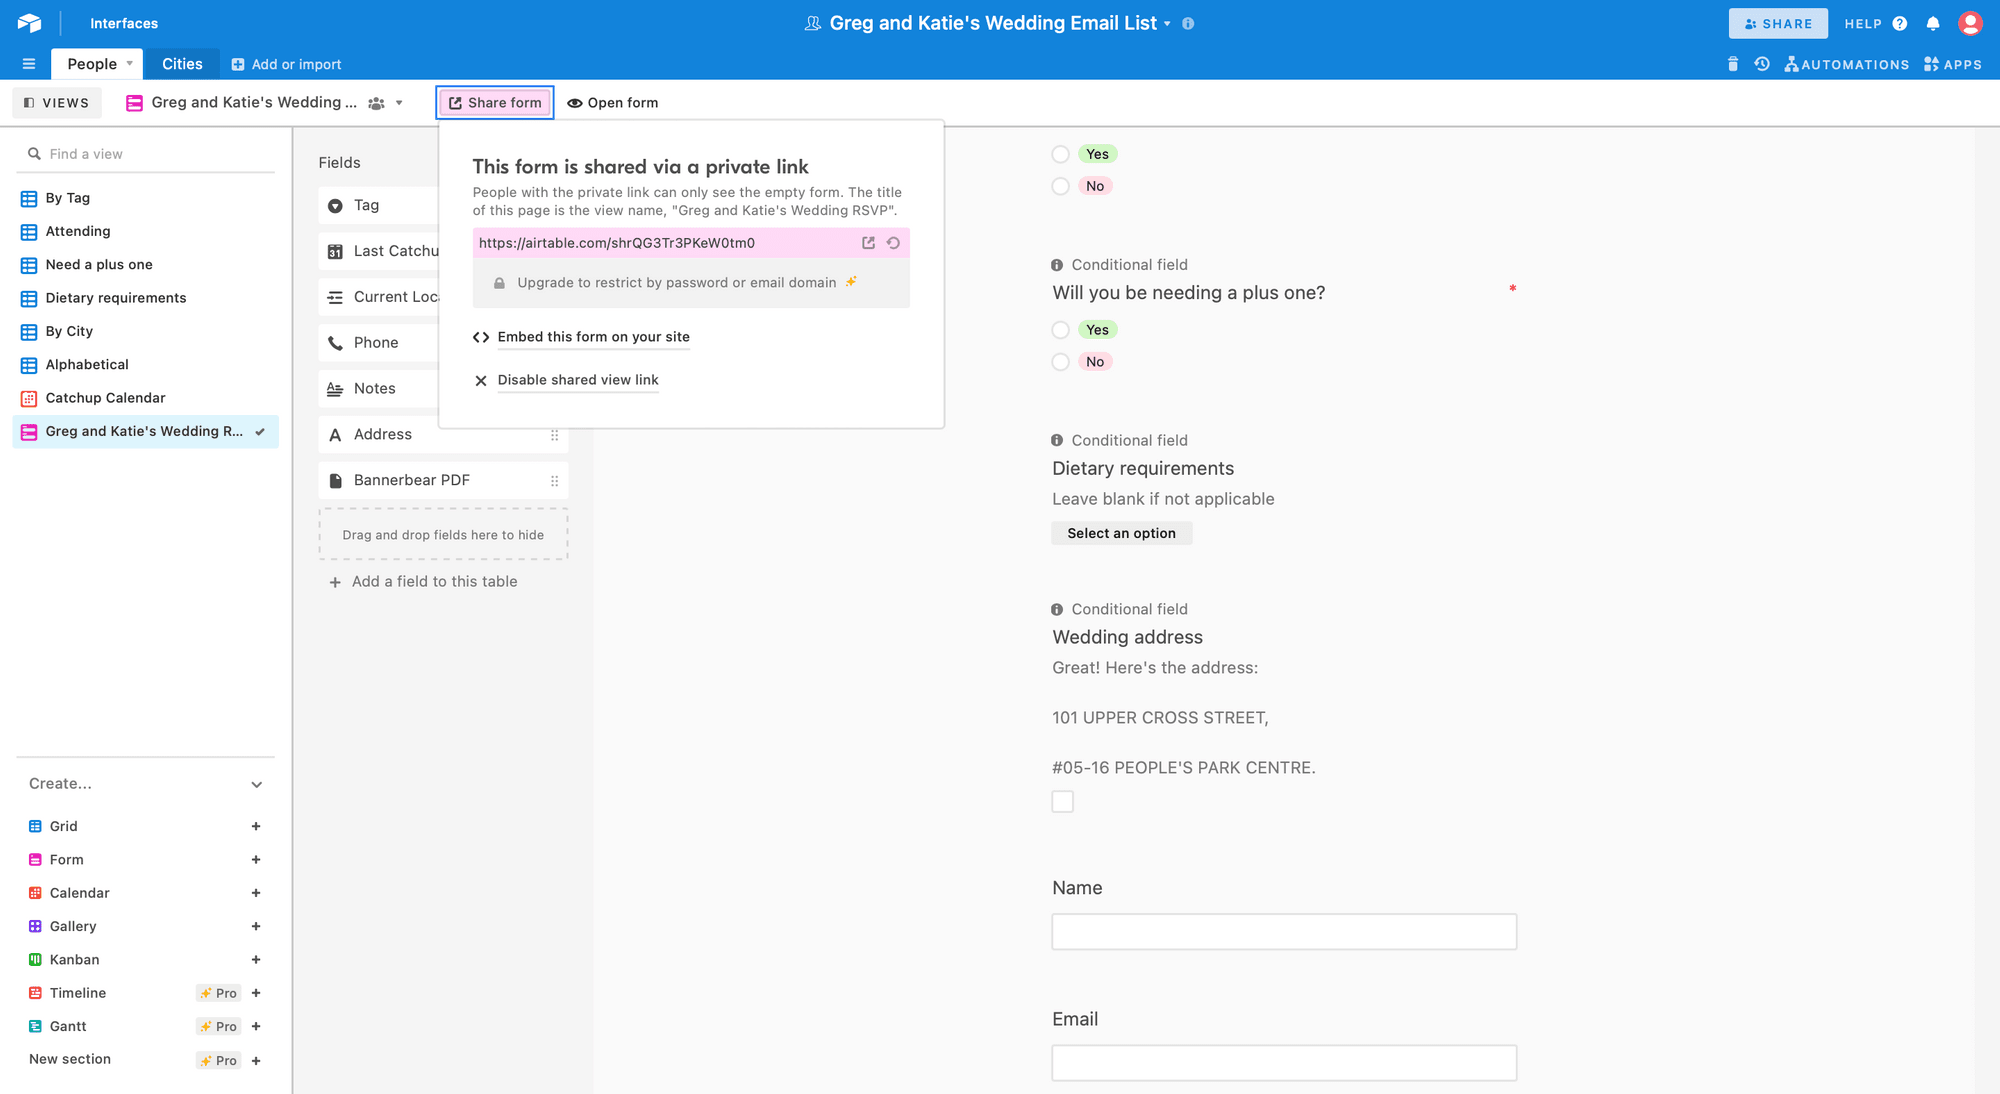
Start by finding the URL for the form you wish to prefill. Click on the "Share form" button to show the newly created form's URL and copy the URL to your clipboard:
Once you get the form URL, you can manually add parameters in the form URL to prefill fields.
Here's an example of what a URL would look like for prefilling name and email into a form:
'https://airtable.com/YOURFORMURLHERE?'
& 'prefill_' &
ENCODE_URL_COMPONENT('Name') & '=' & ENCODE_URL_COMPONENT({Name})
&
'&prefill_' & ENCODE_URL_COMPONENT('Email') & '=' & ENCODE_URL_COMPONENT({Email})
Click on the link below to get a preview of the final result:

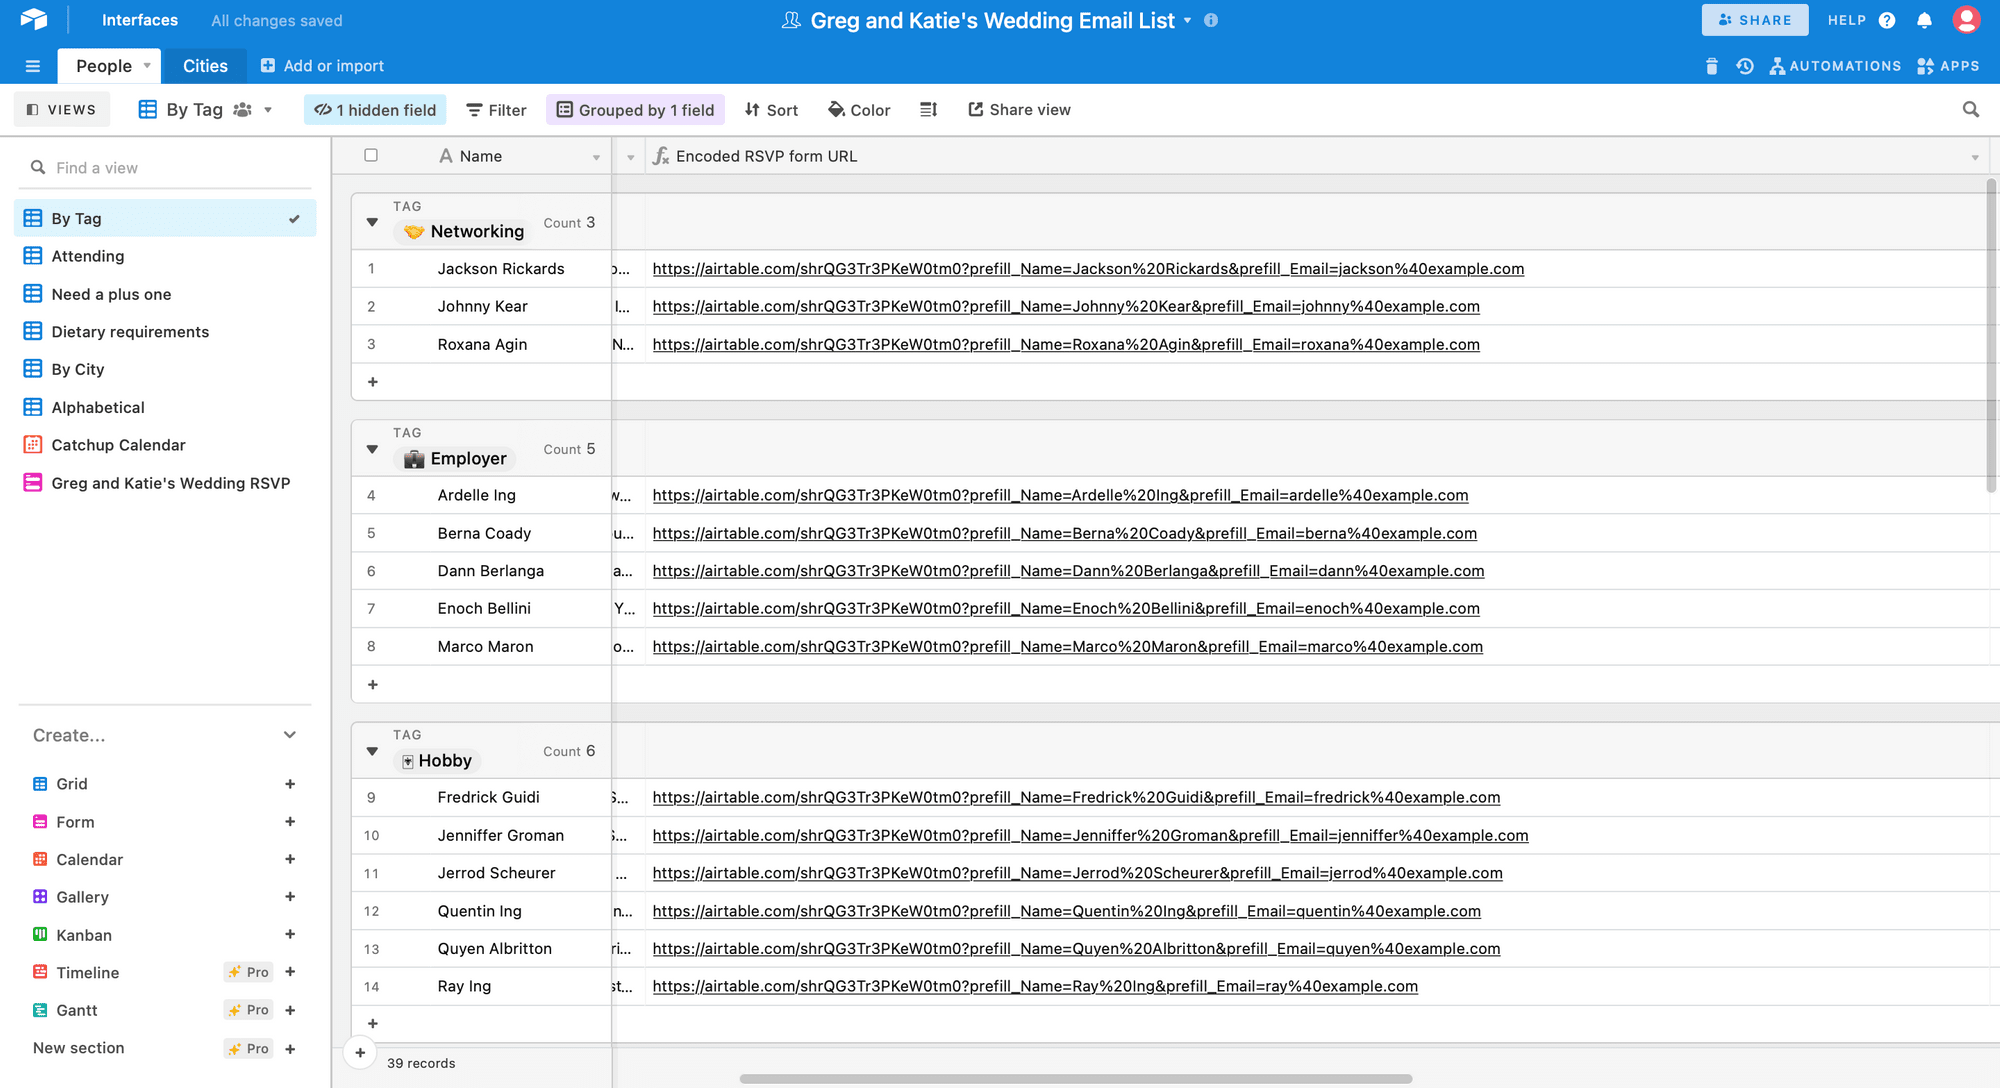
Copy the form URL, and paste into a new formula field in your grid view. The results in the full pre-filled URL for each unique record in your table:
Create button field on Airtable Grid
Airtable button field is an interactive type that lets you trigger customisable actions directly from your base.
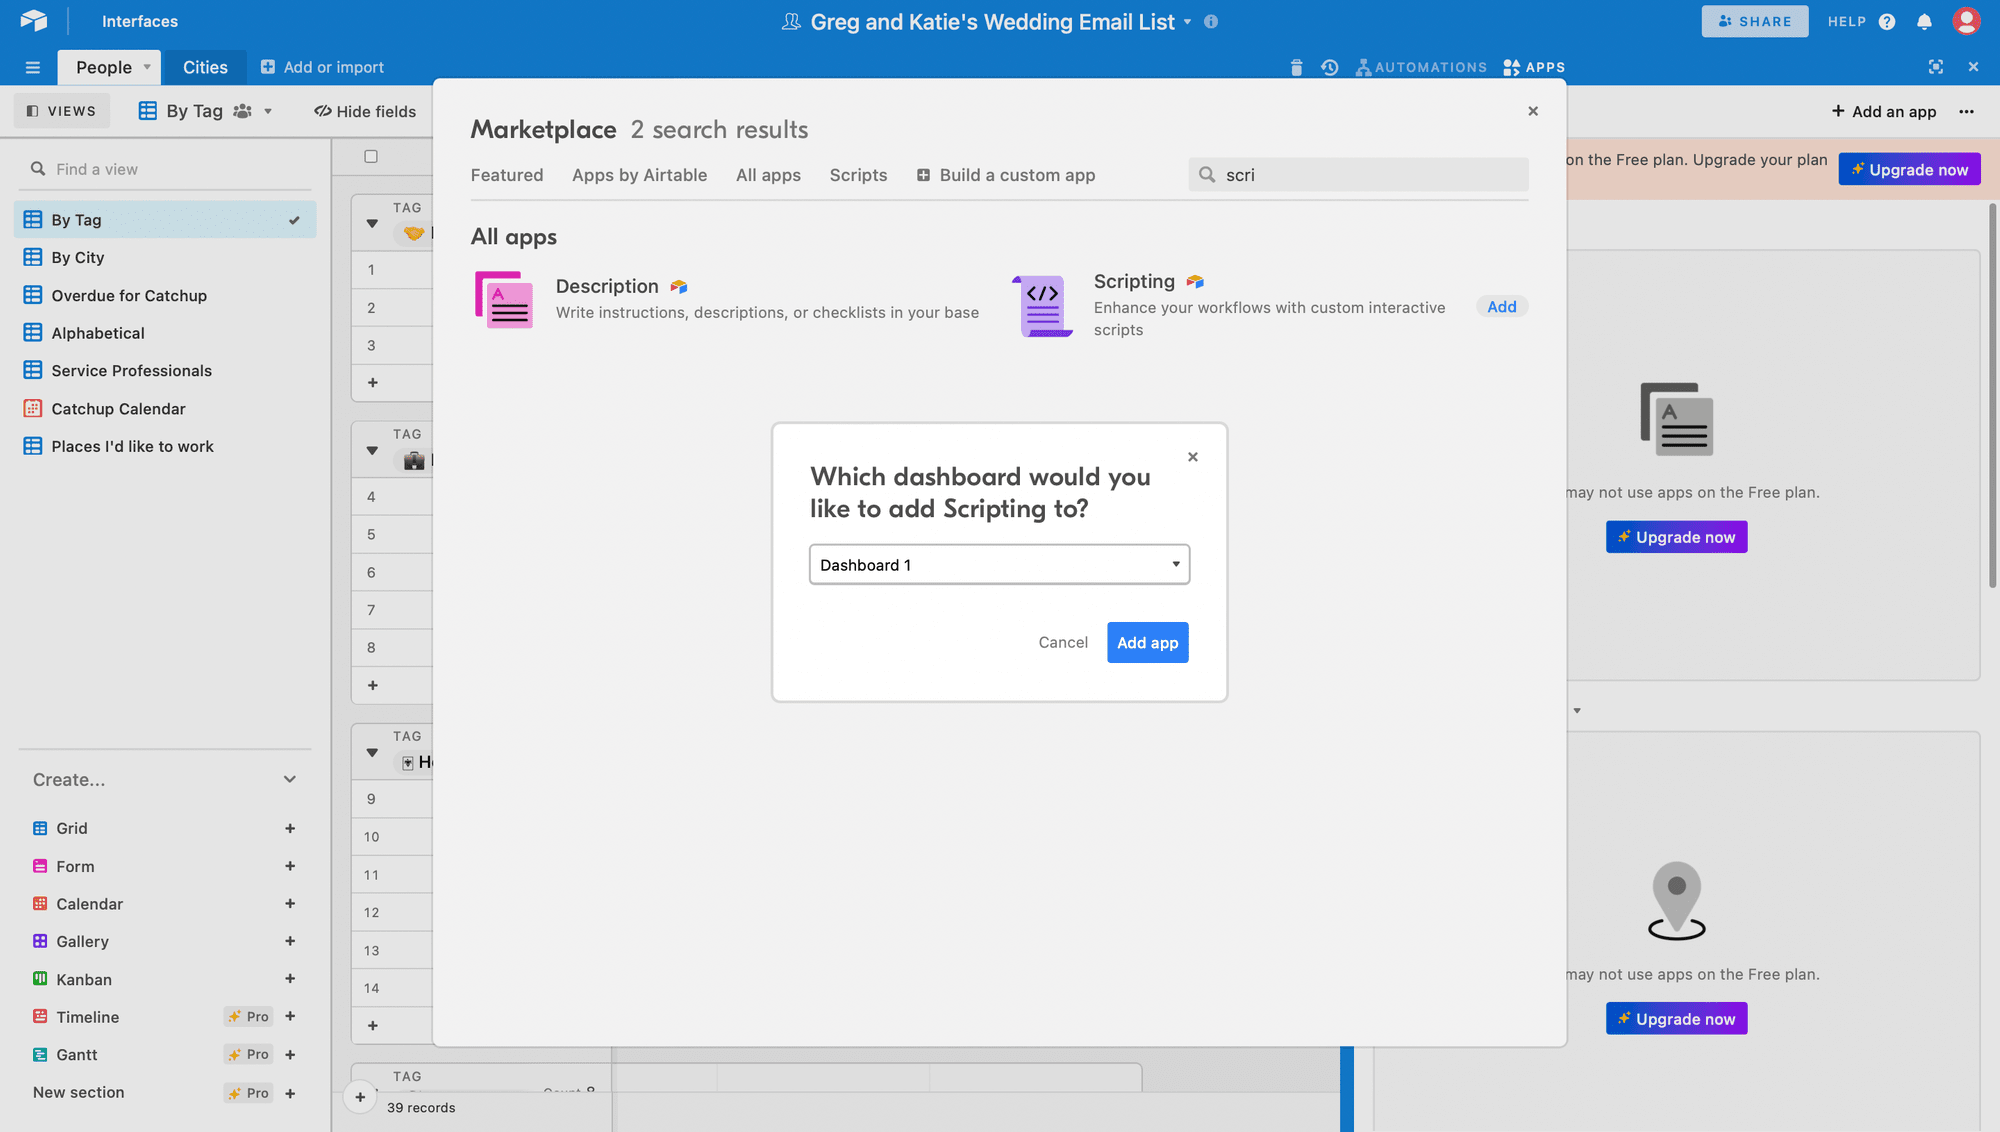
For this tutorial, we want to run the script selected. To get started, install a Scripting app to add the app to a dashboard in your base.
Click ‘+Add an app’ at the top of your screen:
Next, add a new field and select the _ Button _ field from the list of field options.
In the field configuration dialog, you can set a label and style for the button. Use the "Run script" action and select the Scripting app from the dropdown:
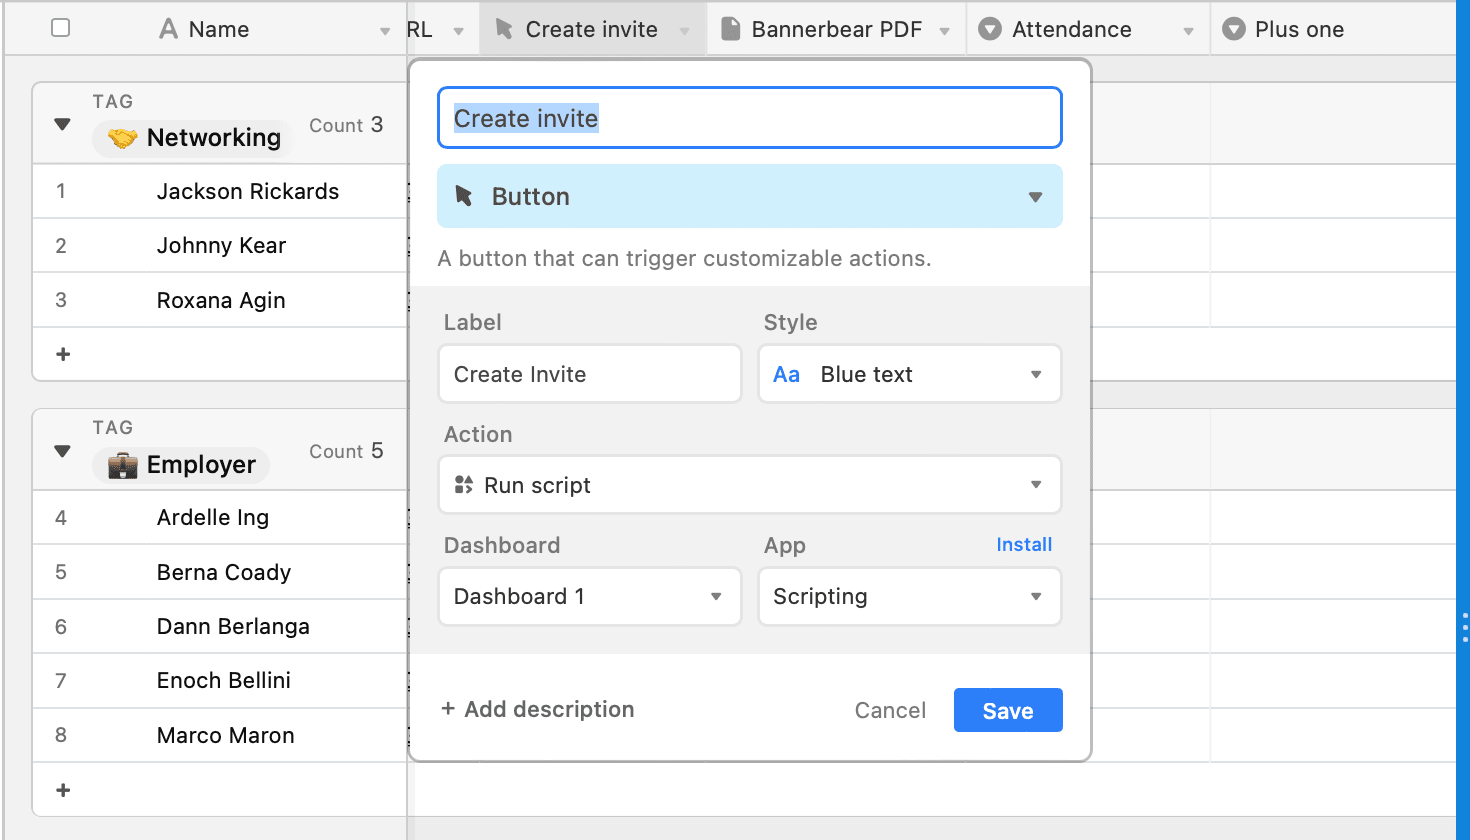
Next, set the field name as 'Create invite' then click _ create field. _
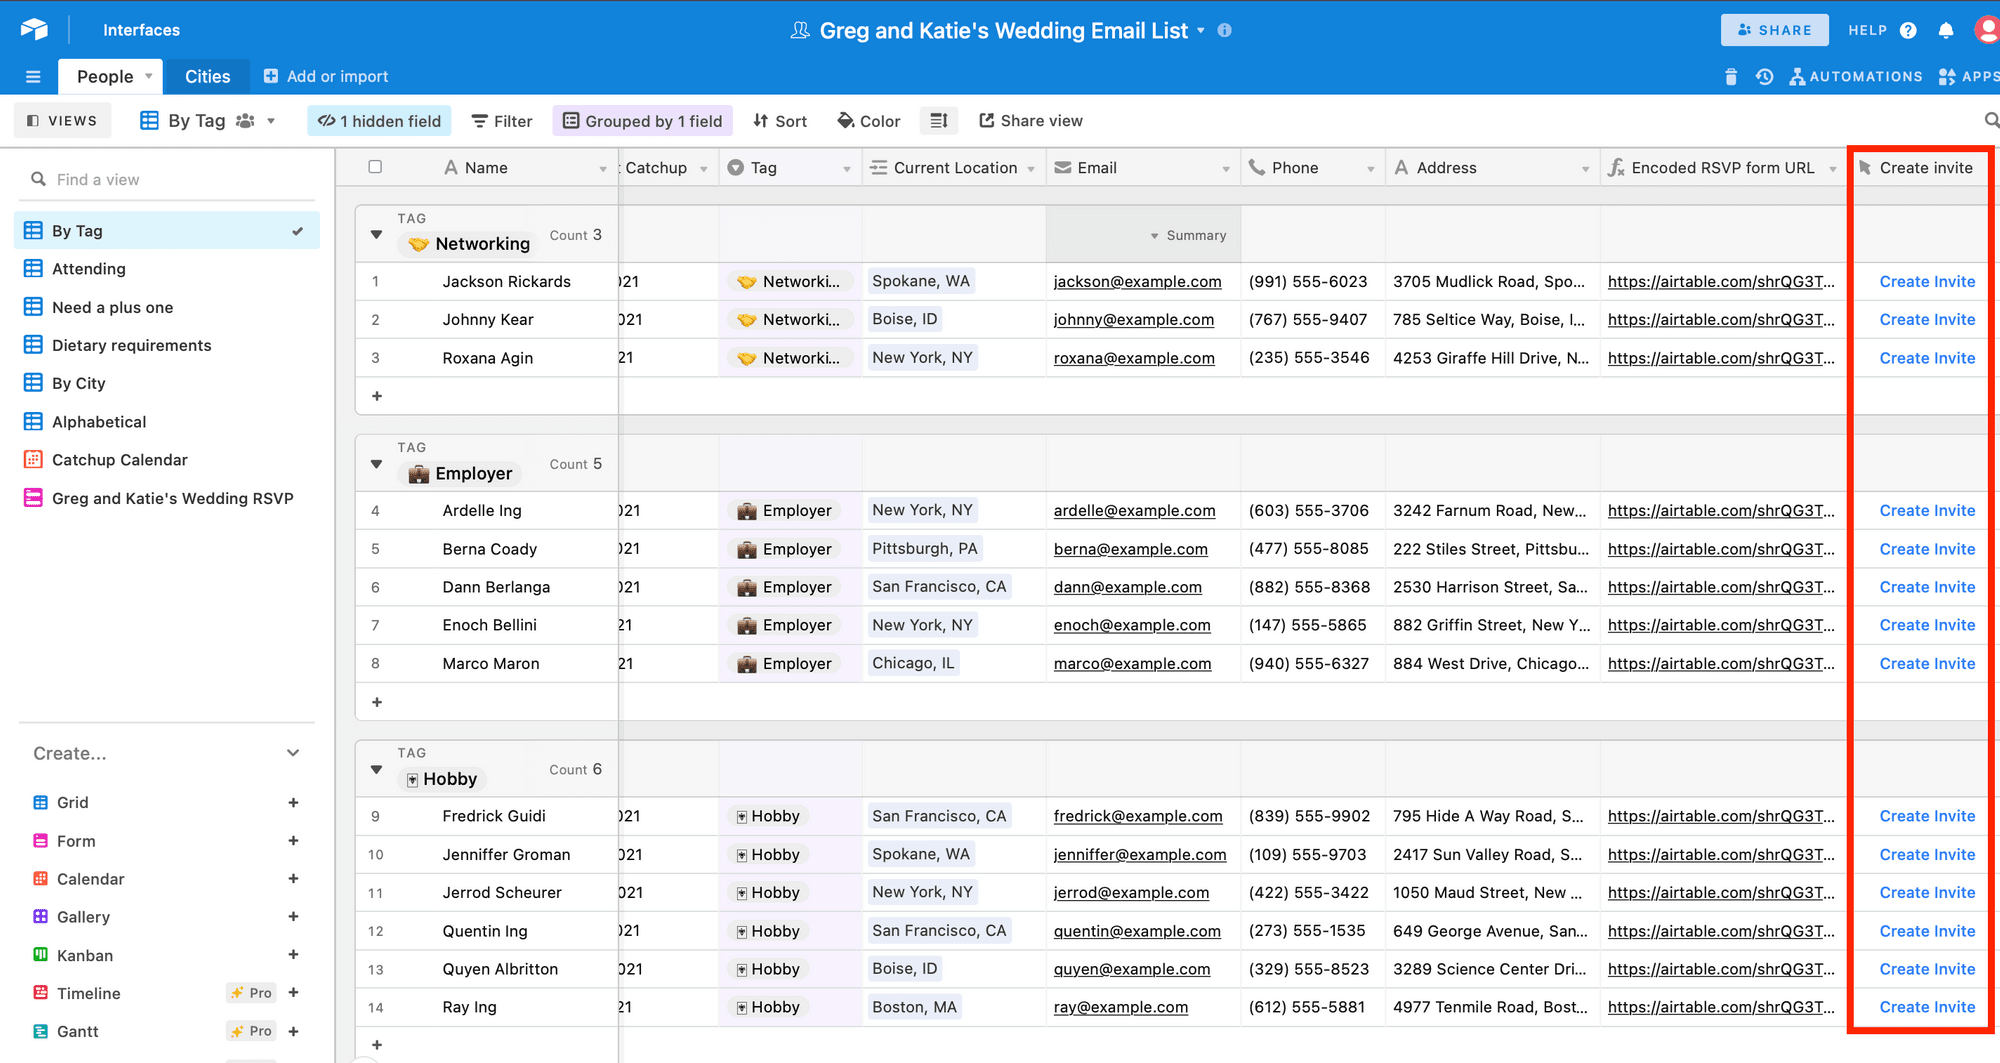
Once created, the button field will appear in your table as a clickable button. This action opens the app and runs the script:
Add Script to insert PDF to your Table
After finishing the table and form setup we can start with adding custom code to Airtable.
We want to automatically generate PDF in Bannerbear using the Scripting app on Airtable by:
- sending a POST request with a Bannerbear template UID and a list of template modifications you want to apply
- including the Bannerbear API key in all API requests to the server with the header:
Authorization: Bearer API_KEY - using webhooks or the synchronous endpoint to be notified when the resource has been generated with the header:
Authorization: Bearer WEBHOOK_KEY
To use the Scripting app to create a PDF on Bannerbear, you will need:
- your Airtable table and field names
- your Bannerbear API key
- Bannerbear template UID that you want to use
- list of modifications you want to make to the template layers, like changing the text, images, effect, fonts or the colours.
To use your script with the "Run script" action of a button field, use recordAsync with the same Table that contains the button field, or a View from that table.
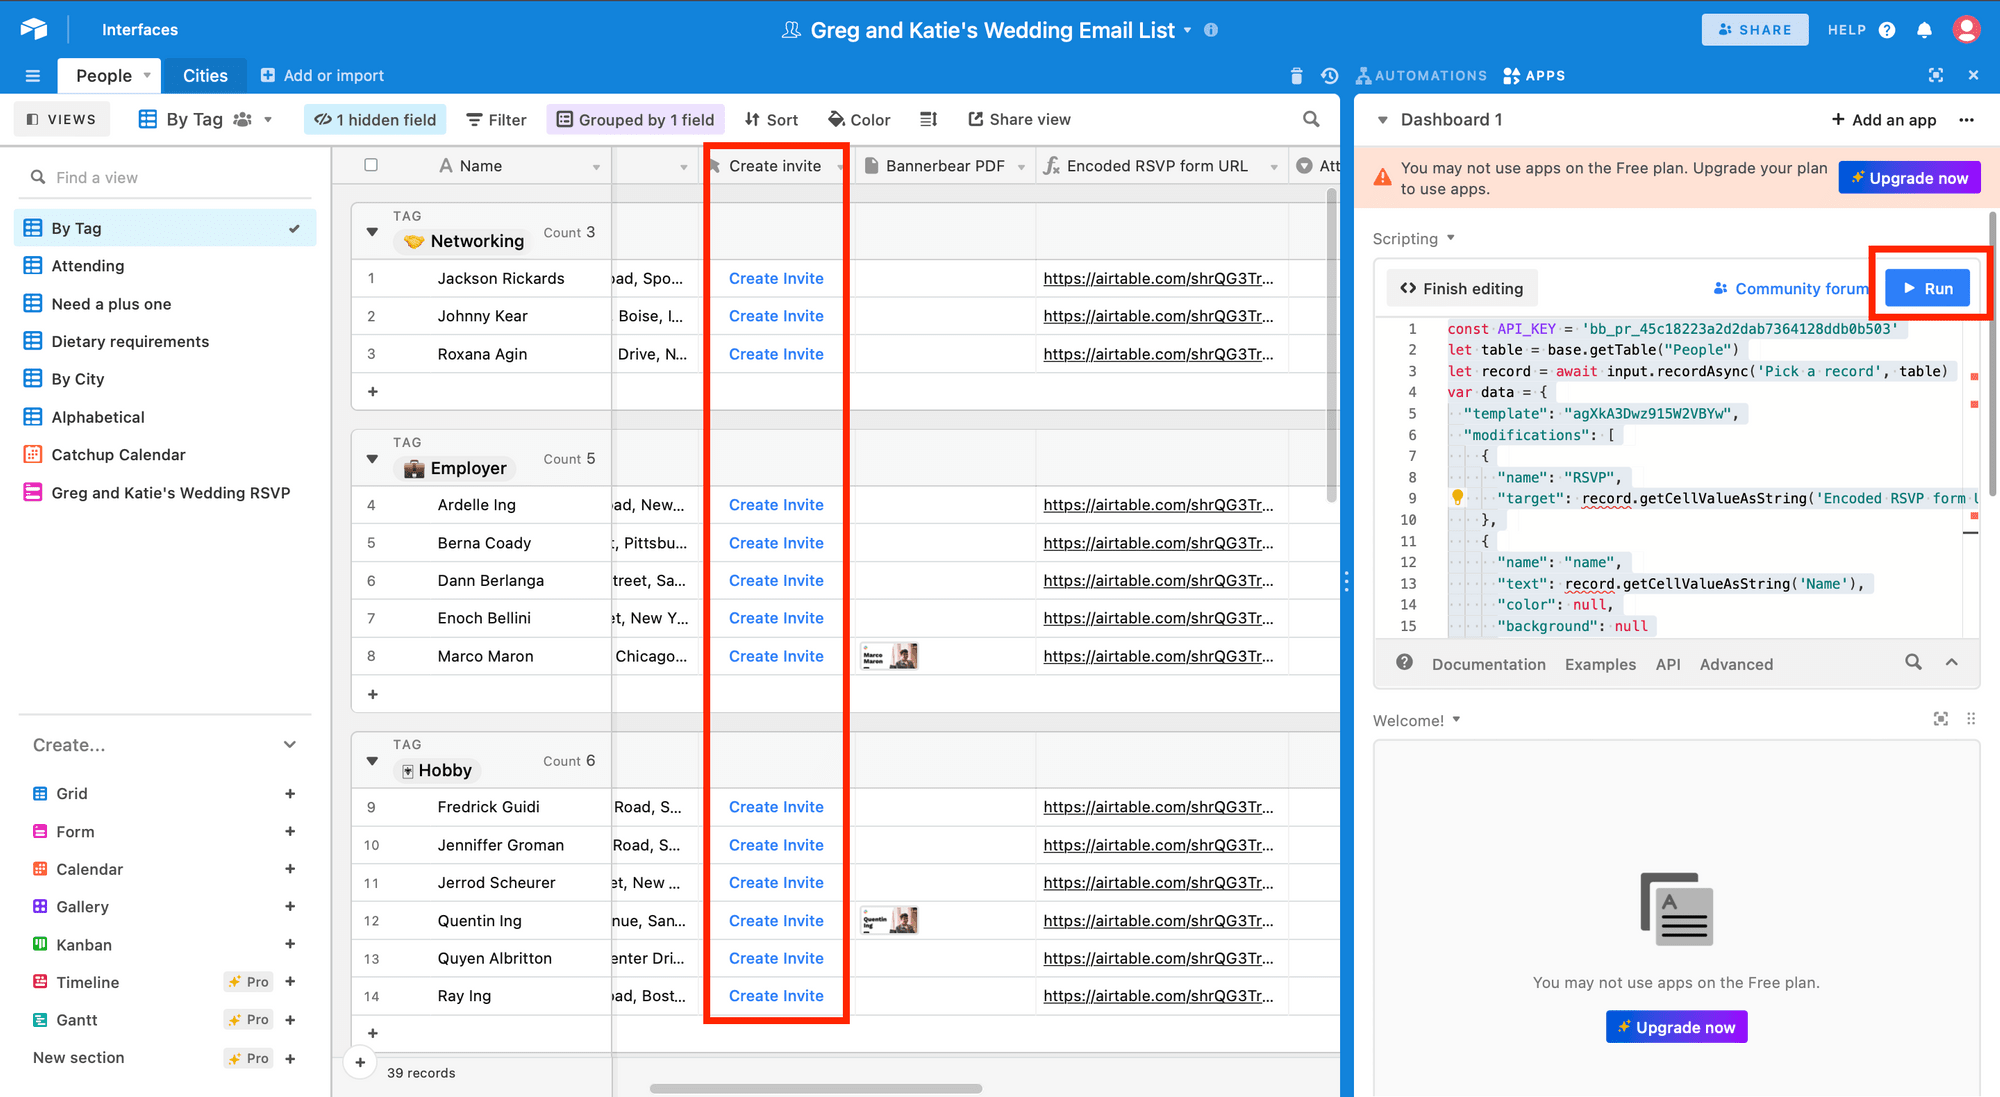
Copy and paste the code below to the custom code tab on the scripting app:
const API_KEY = 'YOUR_API_KEY'
let table = base.getTable("People")
let record = await input.recordAsync('Pick a record', table)
var data = {
  "template": "YOUR_TEMPLATE_UID",
  "modifications": [
    {
      "name": "RSVP",
      "target": record.getCellValueAsString('Encoded RSVP form URL')
    },
    {
      "name": "name",
      "text": record.getCellValueAsString('Name'),
      "color": null,
      "background": null
    }
  ],
  "render_pdf": true
}
let response = await fetch('https://sync.api.bannerbear.com/v2/images', {
  method: 'POST',
  body: JSON.stringify(data),
  headers: {
    'Content-Type' : 'application/json',
    'Authorization' : `Bearer ${API_KEY}`
  }
})
let respJSON = await response.json()
await table.updateRecordAsync(record.id, {
  "Bannerbear PDF": [{url:respJSON.pdf_url}],
});
Remember to change the variables to match the ones in your Airtable base and Bannerbear layers. Make sure that you have pasted your ID and your API Key ID on the code block above.
This script queries the Bannerbear API, then stores that data in the specified field.
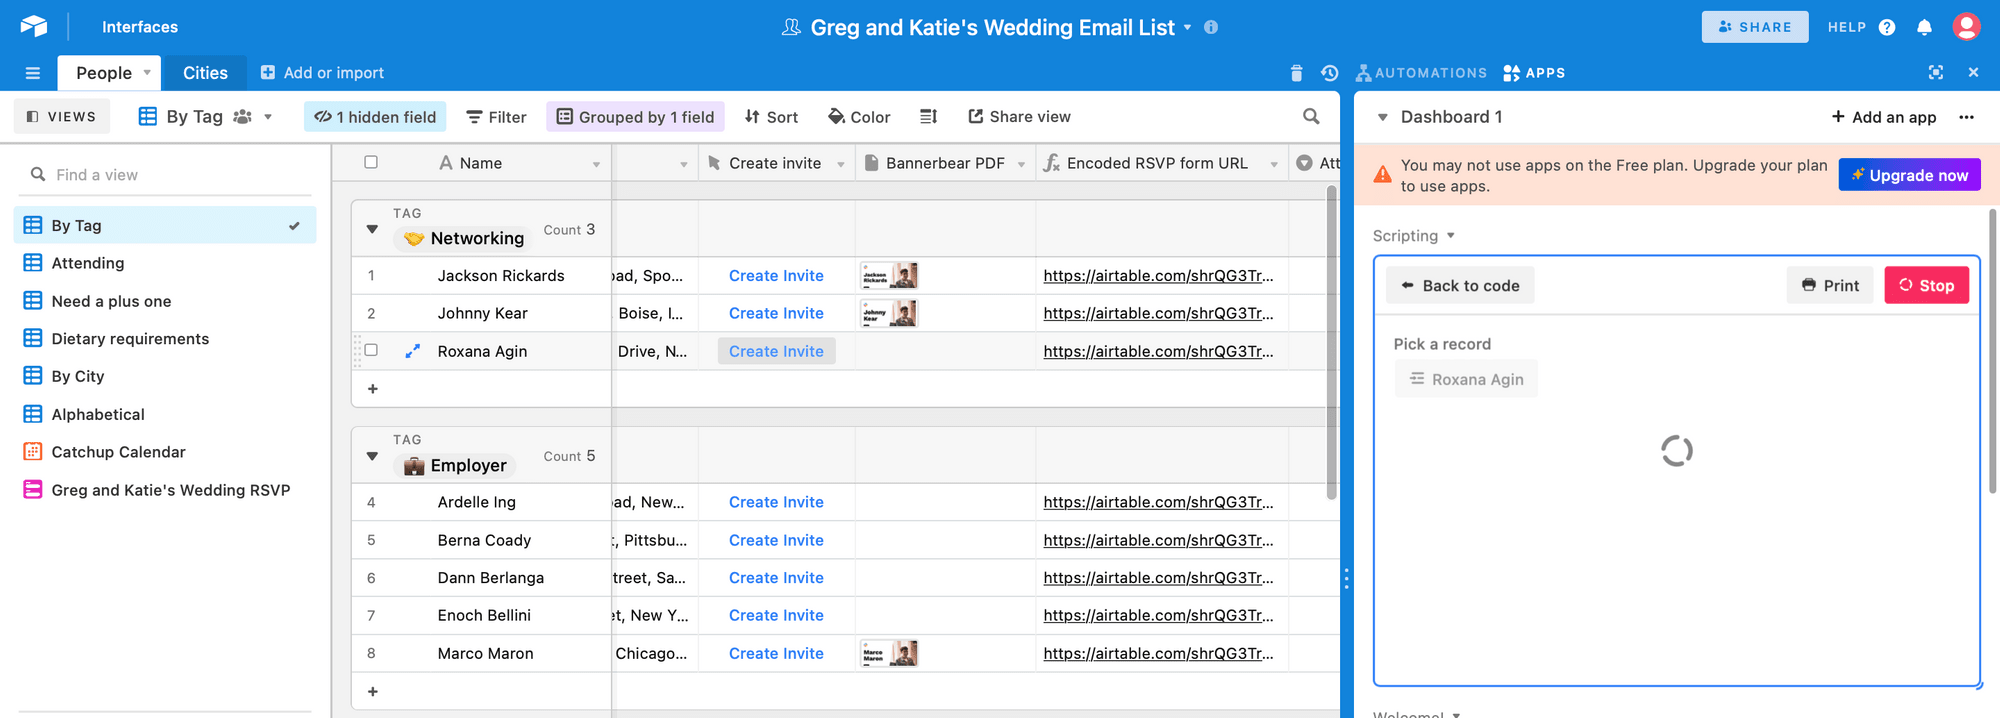
Running a script
When a script is run from a button field, the first recordAsync call in your script skips the prompt and automatically uses the record the button was clicked from.
To run a script, click the "Run" button in the right-hand results pane or "Run script" from a button field:
If you need to stop the executing script at any time, you can click the red "Stop" button:
When the automation runs successfully, Bannerbear will respond with PDF formats of the new image you have requested:

That's it! Now you can use this field type to run scripts directly. This will make scripts more readily accessible and seamlessly integrated with their existing workflows.
When the invitee select on the ‘RSVP’ CTA button on the PDF, it automatically transfers to the form to match the collected information entered to the corresponding Airtable field.
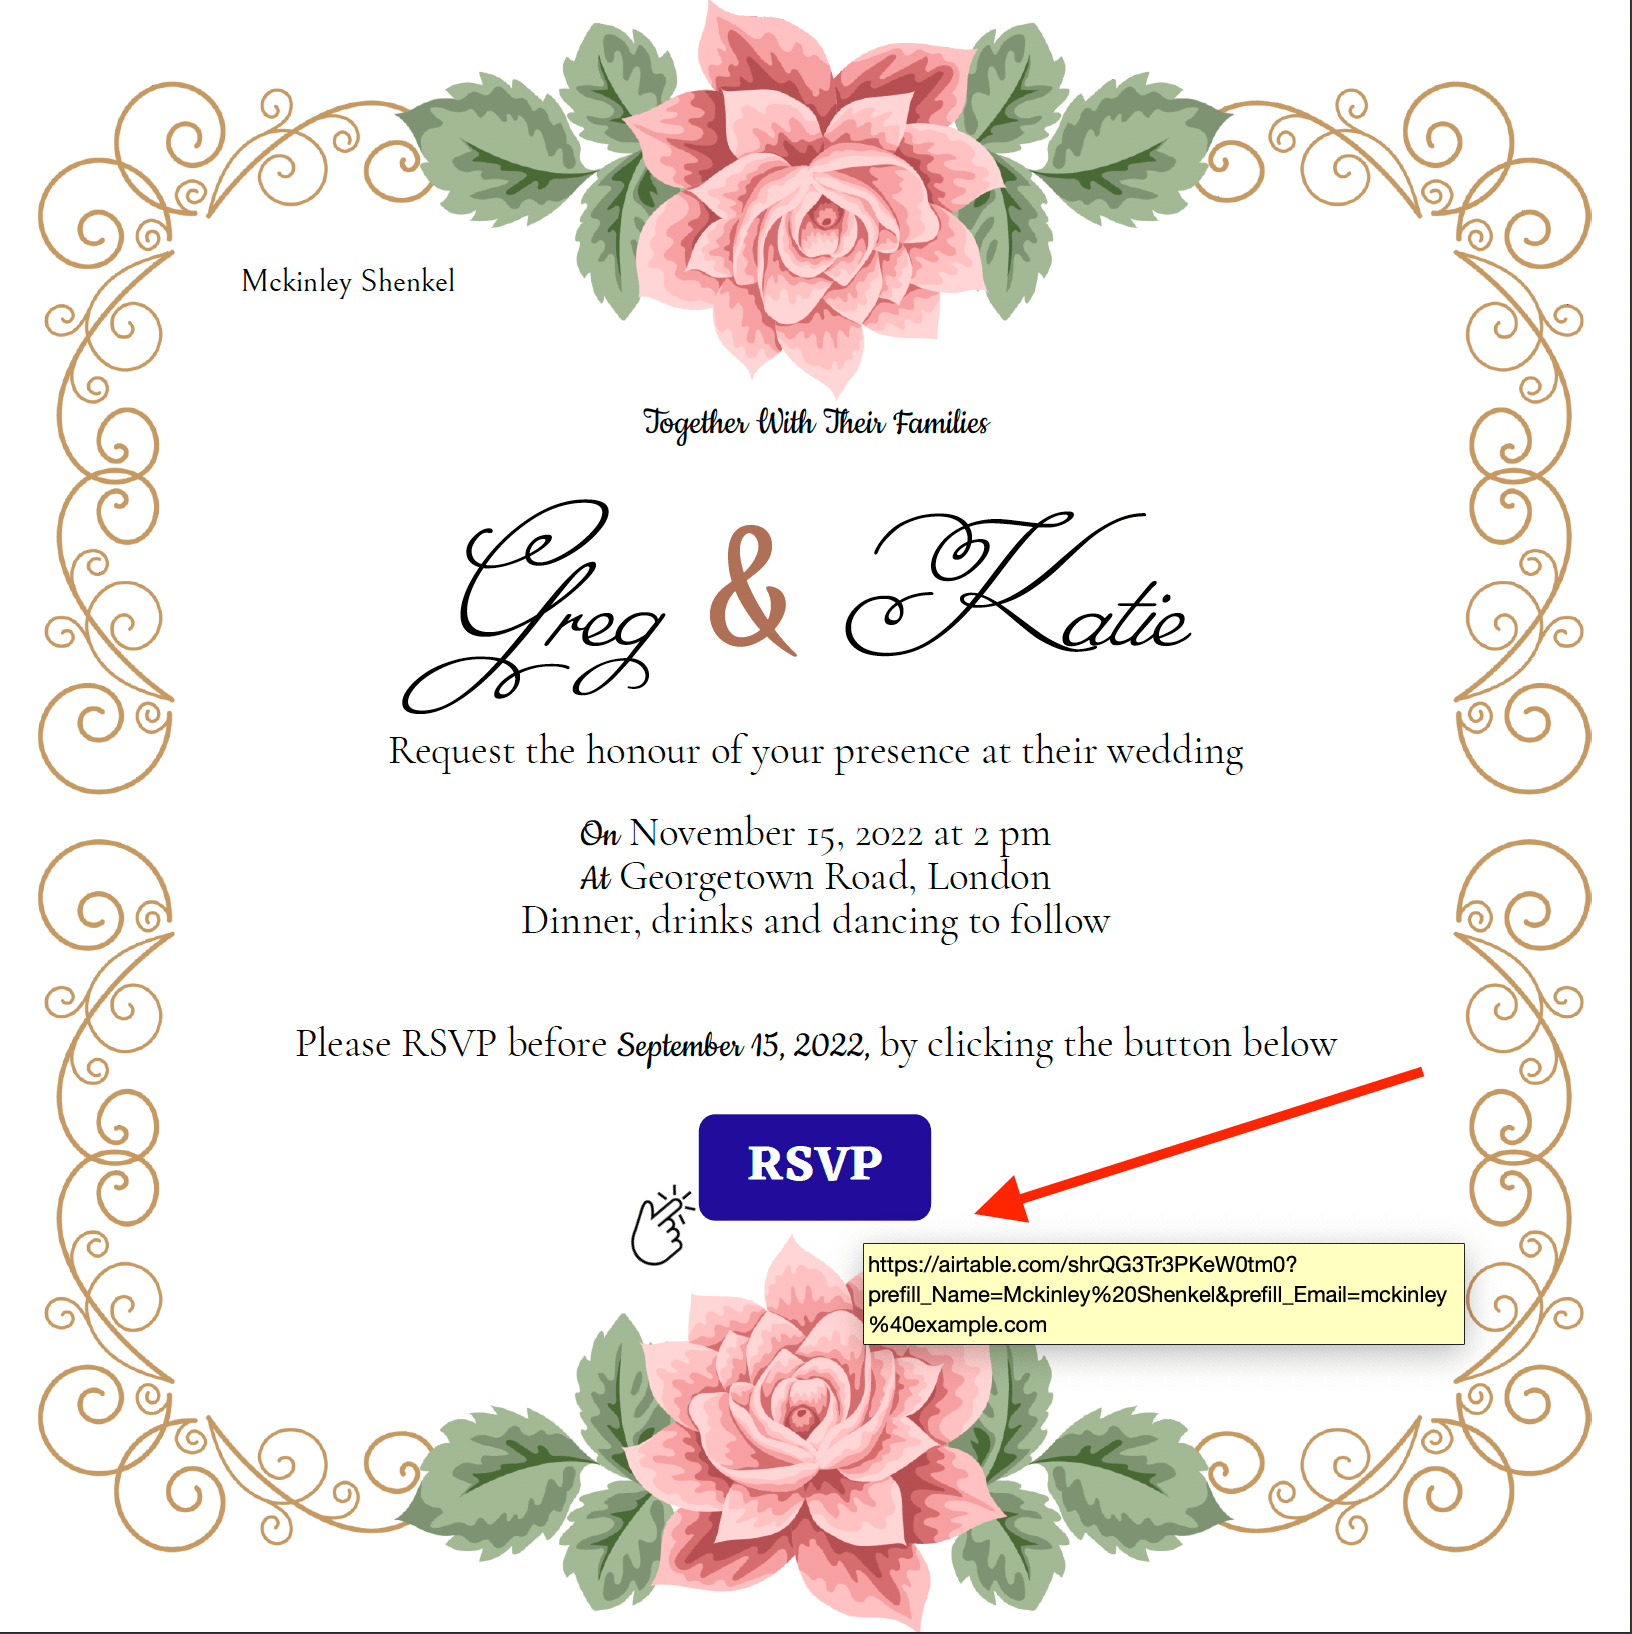 You can preview the link when you hover over the button
What to do Next
Send the Invite list emails
With the invite designed, the next step is to share the invitation with your guests. You can create a custom Airtable automation to do this:
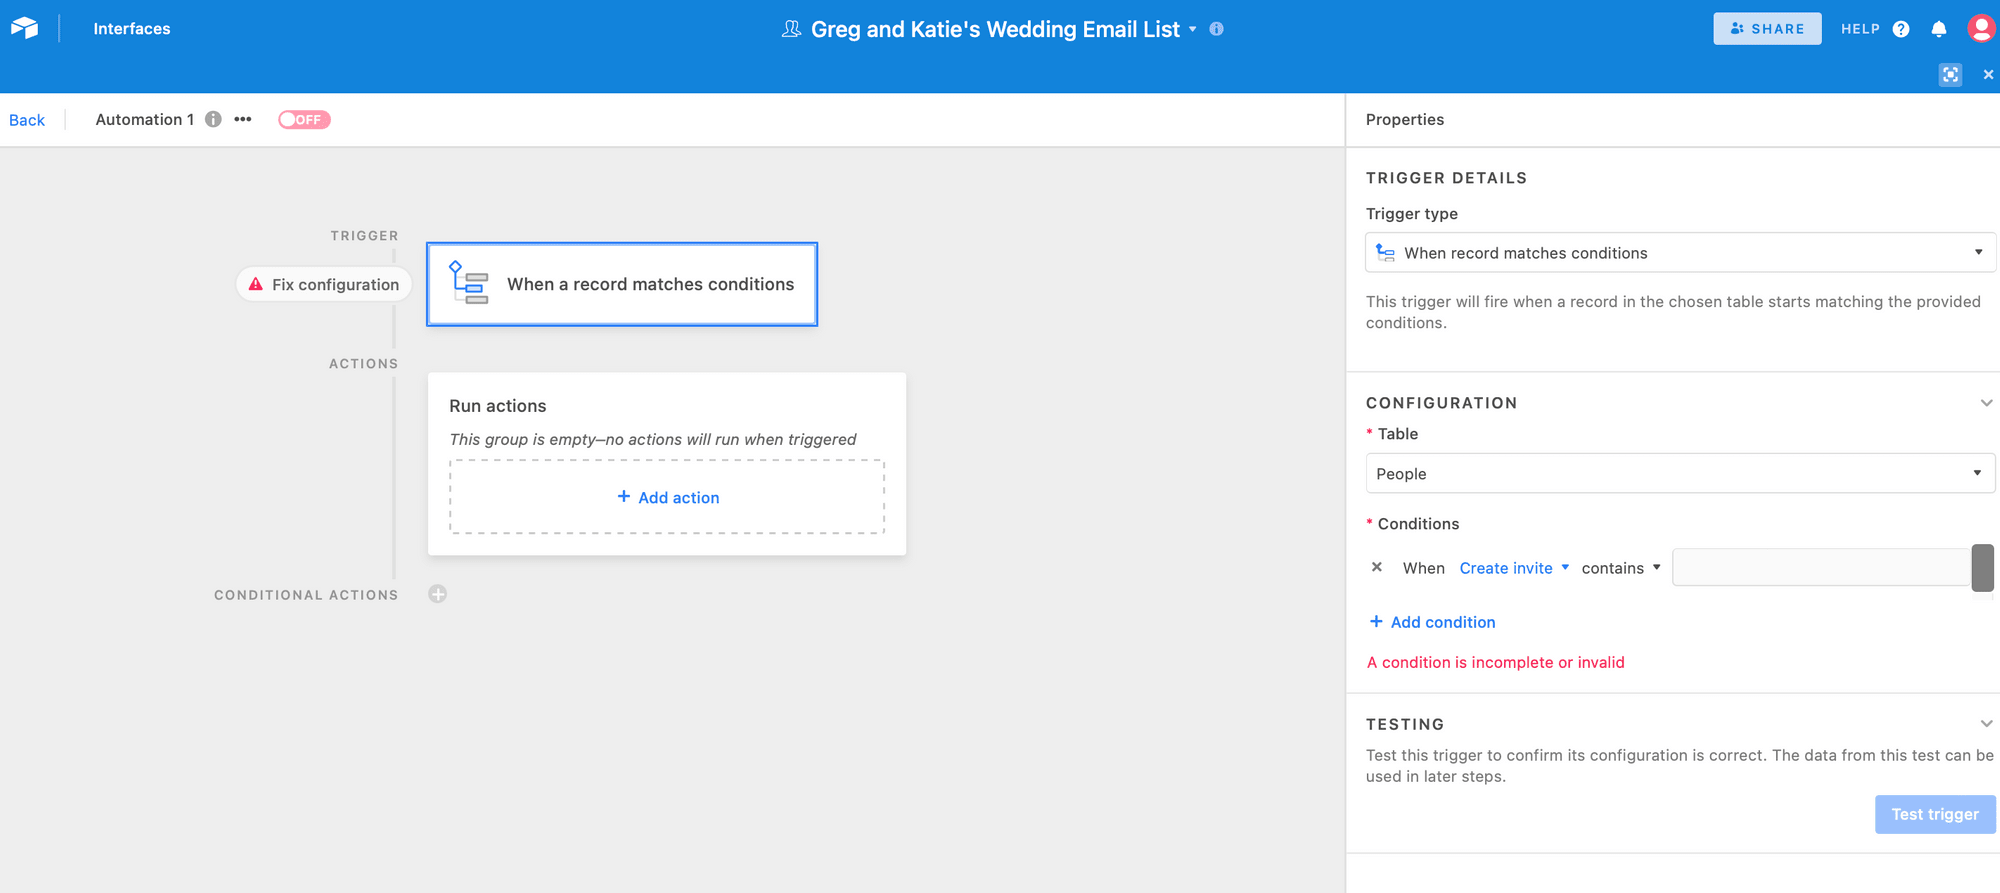
Update Responses
This automation can send the responses to Airtable so that there is no need to manually log each one as responses arrive.
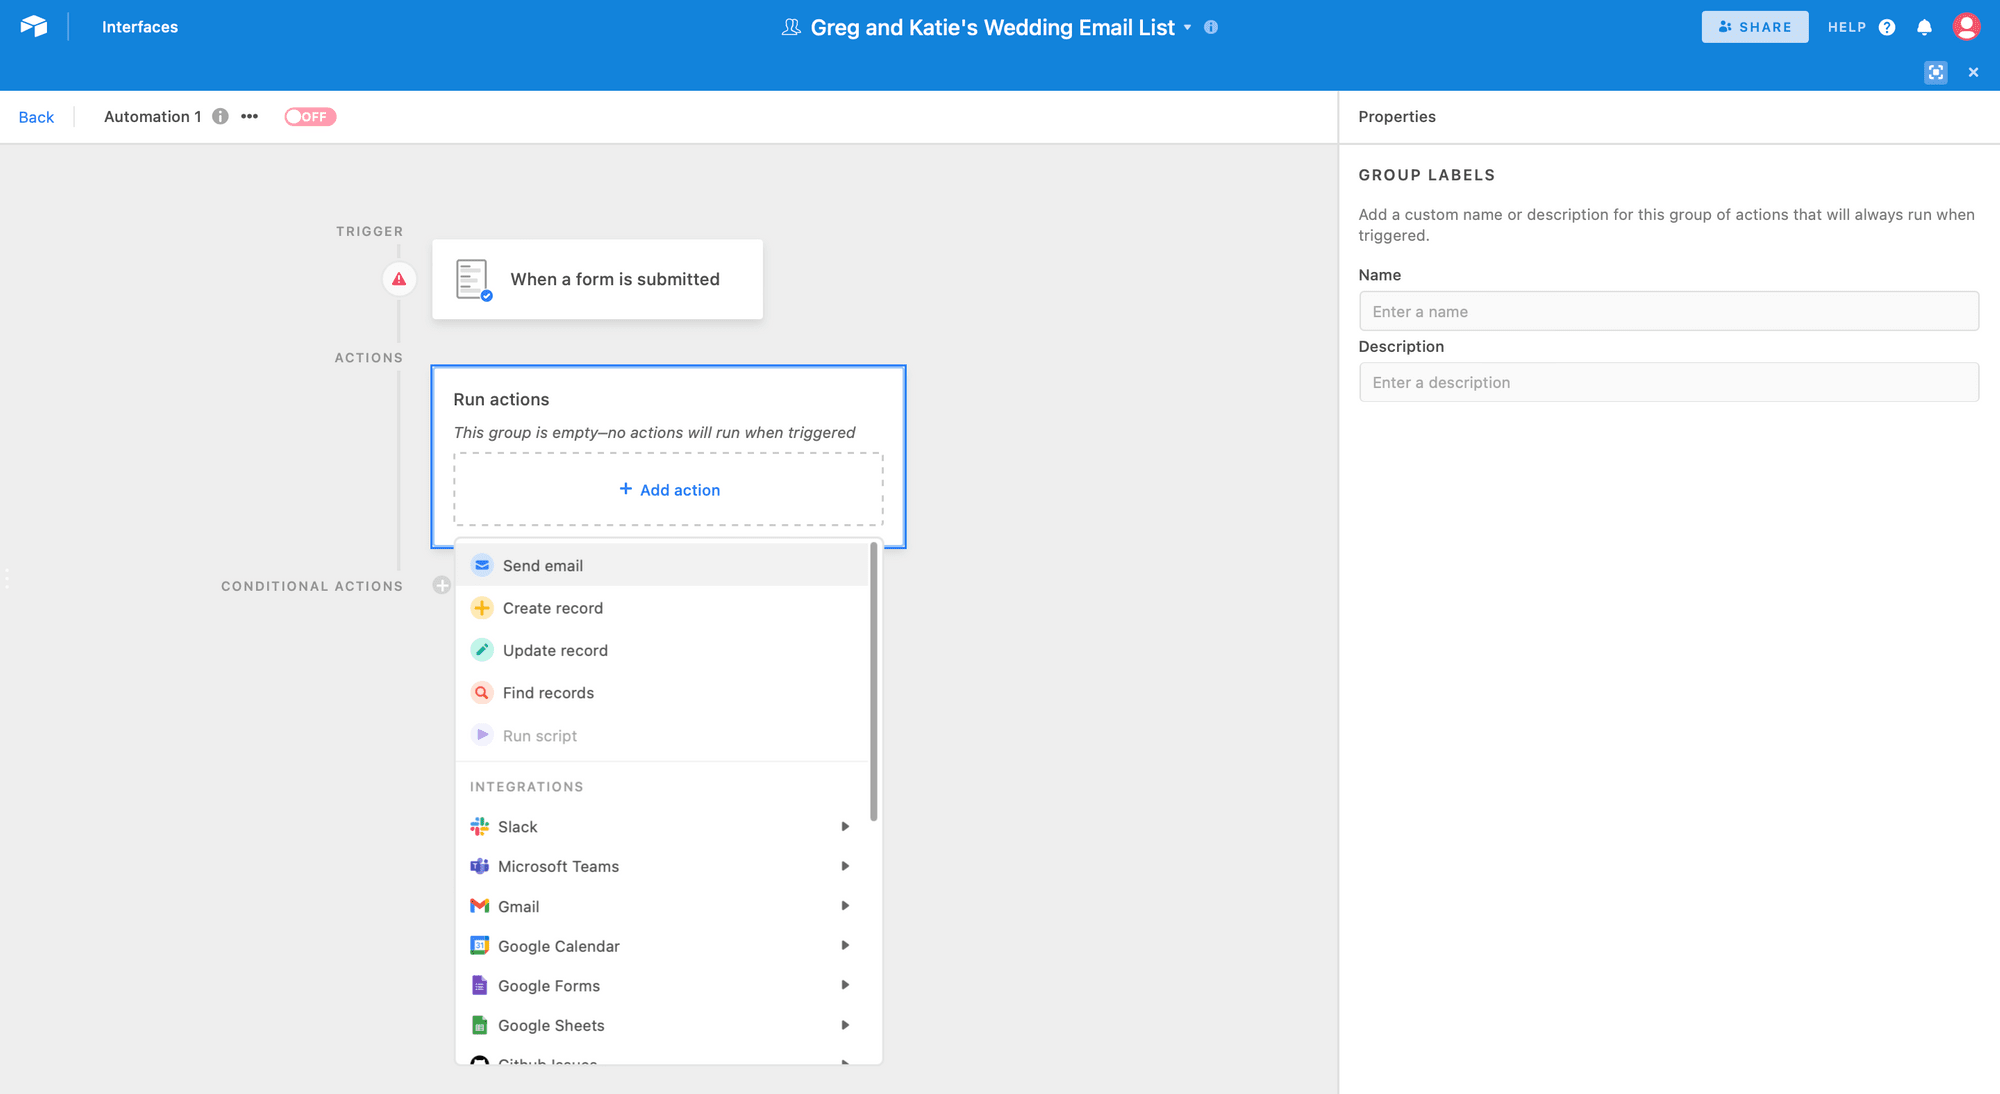
Send confirmation email with add-to-calendar links
When your users RSVP for your event, use your mail provider to send a confirmation email with automated "add-to-calendar" links embedded inside the confirmation email.
This email can also include all the important details that a guest can refer back to later, including the date, time, and location.
Send Reminders
Event hosts use RSVPs to get attendance confirmations from invited guests. You can add automation to remind your guests to uphold their commitment to the RSVP.