
How to Auto Generate Social Media Content with Integromat and Bannerbear
Contents
Bannerbear is an image generation API. Integromat is an API automation tool. Together, you can create some nifty automations that can save you time or even fully automate your business! Here's how.
2021 March: UPDATE!!!
Bannerbear now has an official Integromat integration - read this article to learn how to use it!
ORIGINAL ARTICLE CONTINUES BELOW
Bannerbear currently does not have an official Integromat app, but that doesn't stop you from using Bannerbear and Integromat together.
Since Bannerbear is a standard REST API, you can use Integromat's built-in HTTP app to send API requests to the Bannerbear API.
Auto-generate Instagram Posts from an RSS feed
Like any integration with Bannerbear, you need some kind of data source to start auto generating images from. In this tutorial we are going to use the NASA Image of the Day RSS Feed which is an XML feed that contains text and images.
We will use Integromat to consume this RSS feed, then send the data to Bannerbear to generate images that look like this. Once the integration is set up, you can leave it running and it will auto-generate new images whenever there is new RSS data.

Lets get started!
Adding the Bannerbear Template
If you haven't created a Bannerbear account yet, create one now (it's free!) and start a new project called NASA (or anything you like).
I have already prepared a sample template you can use for this tutorial, which you can find in the template library. Add this to your NASA project:
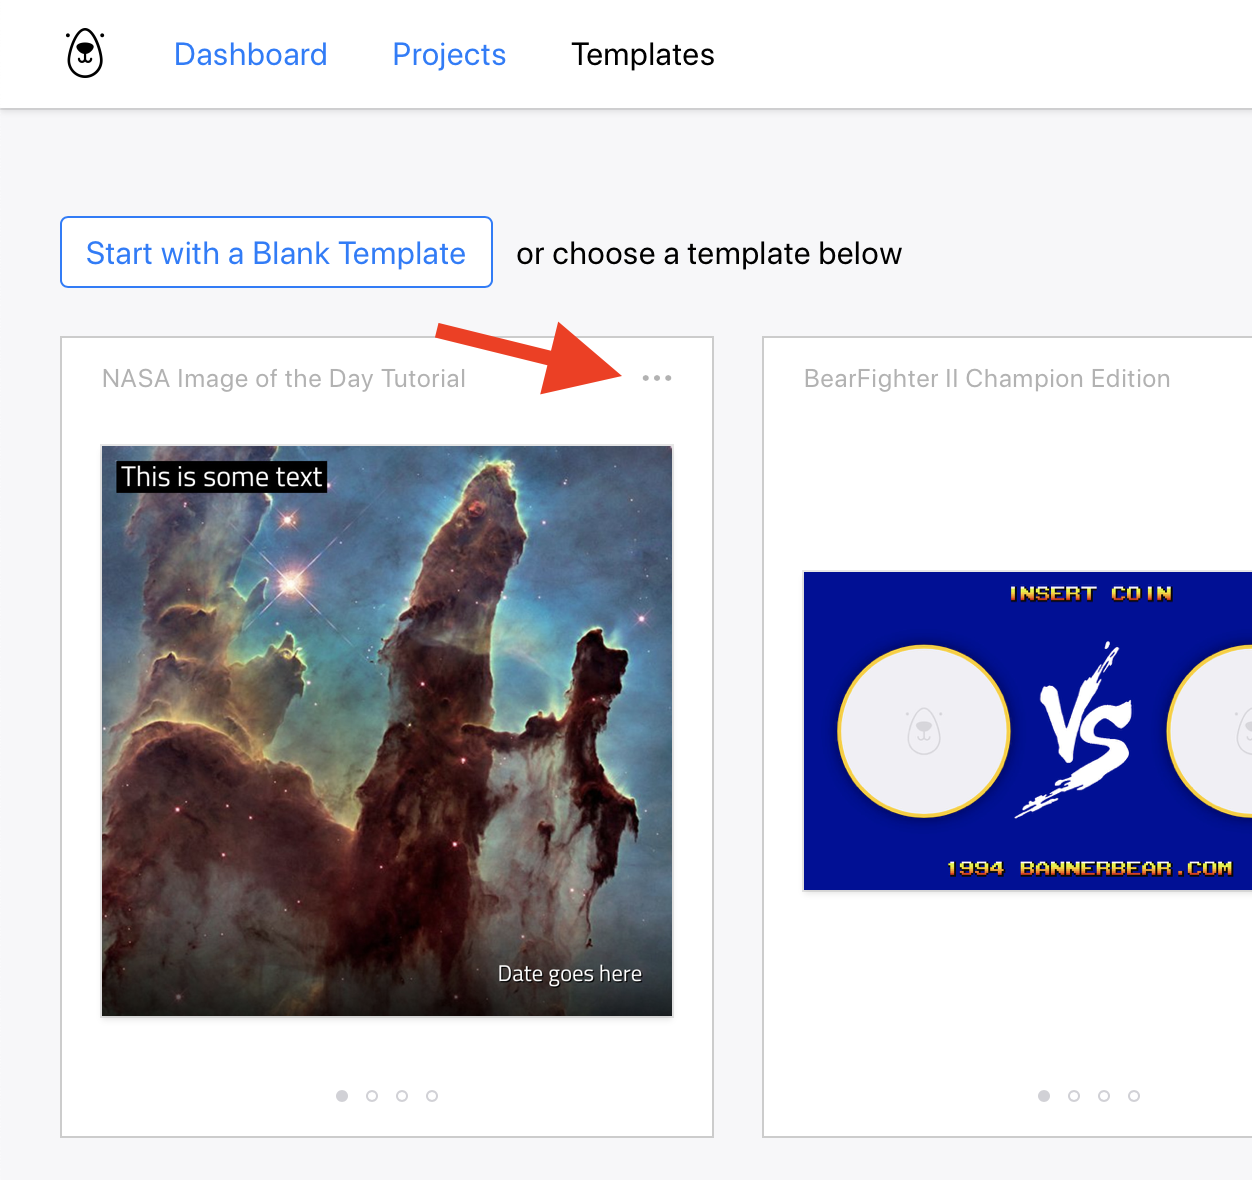
You are of course free to create your own template and follow along with this tutorial, just bear in mind that your template should have at least these 3 layers:
- Date: a text box
- Title: another text box (a larger one, for a title)
- Photo: an image rectangle
Once you have added the template to your NASA project, we can switch over to Integromat.
Getting the RSS Data
The NASA daily image RSS feed is here:
https://www.nasa.gov/rss/dyn/lg_image_of_the_day.rss
In Integromat, create a new Scenario and add the RSS module.
It will ask you for a RSS url so add the NASA one:
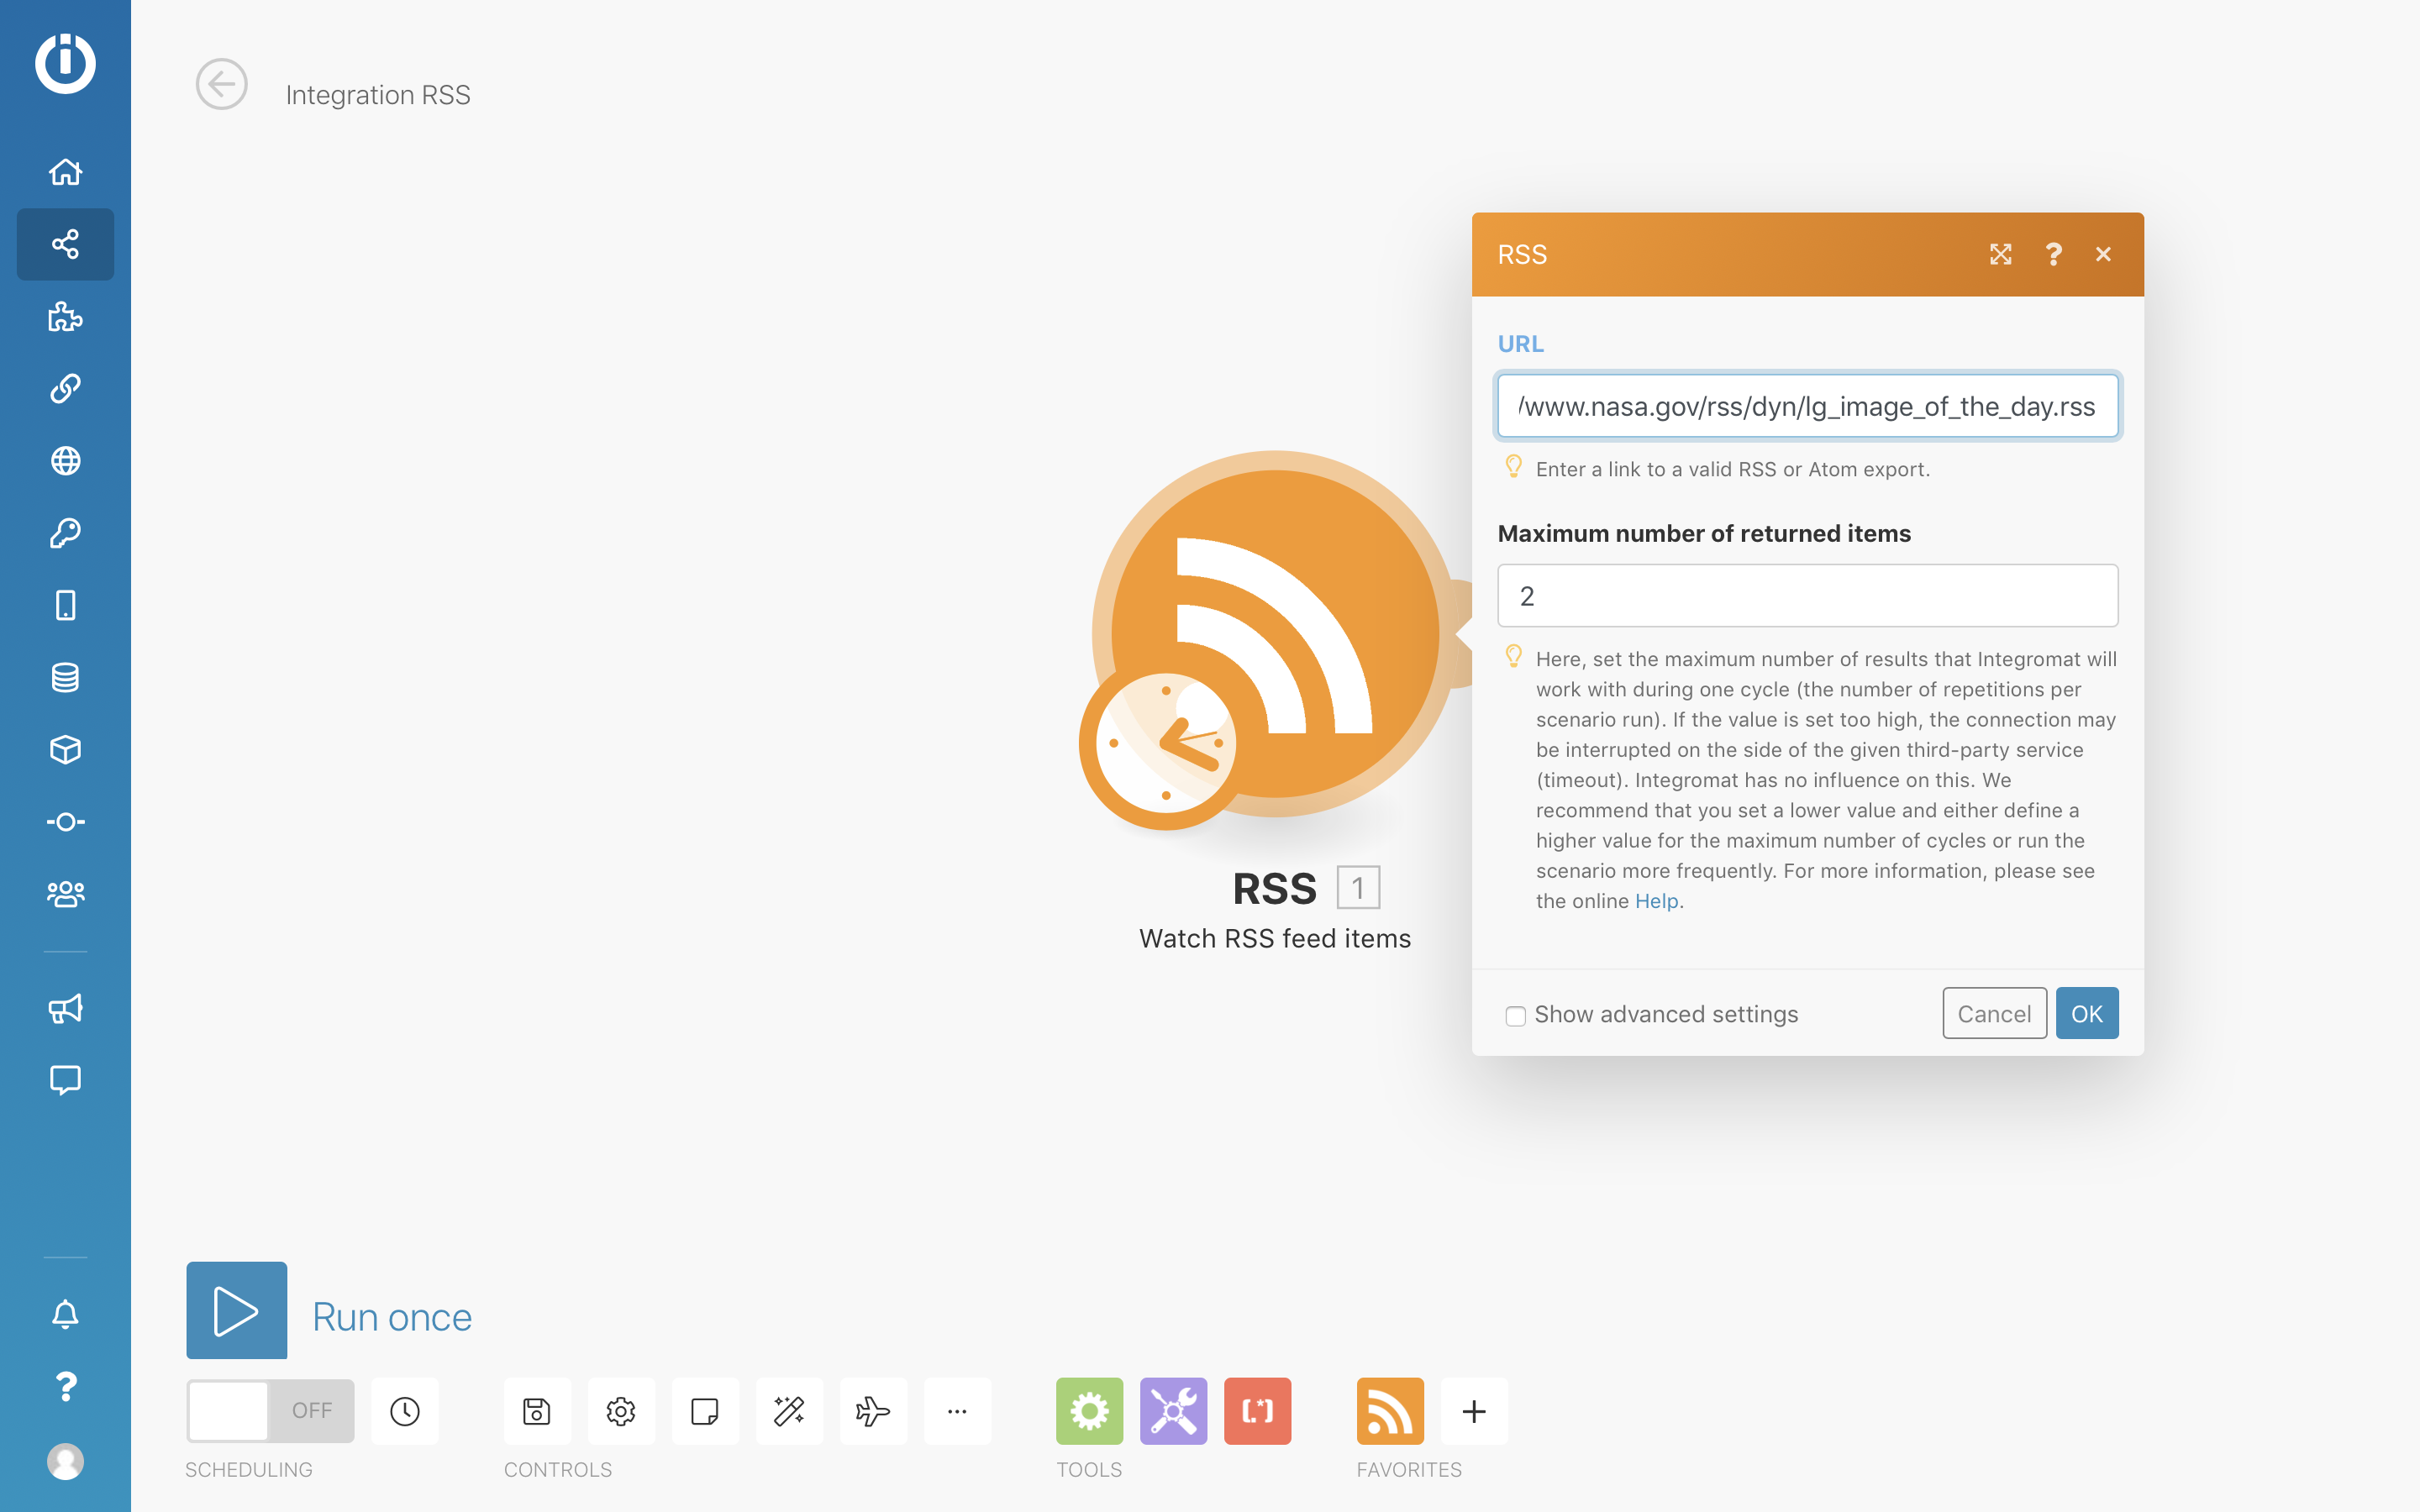
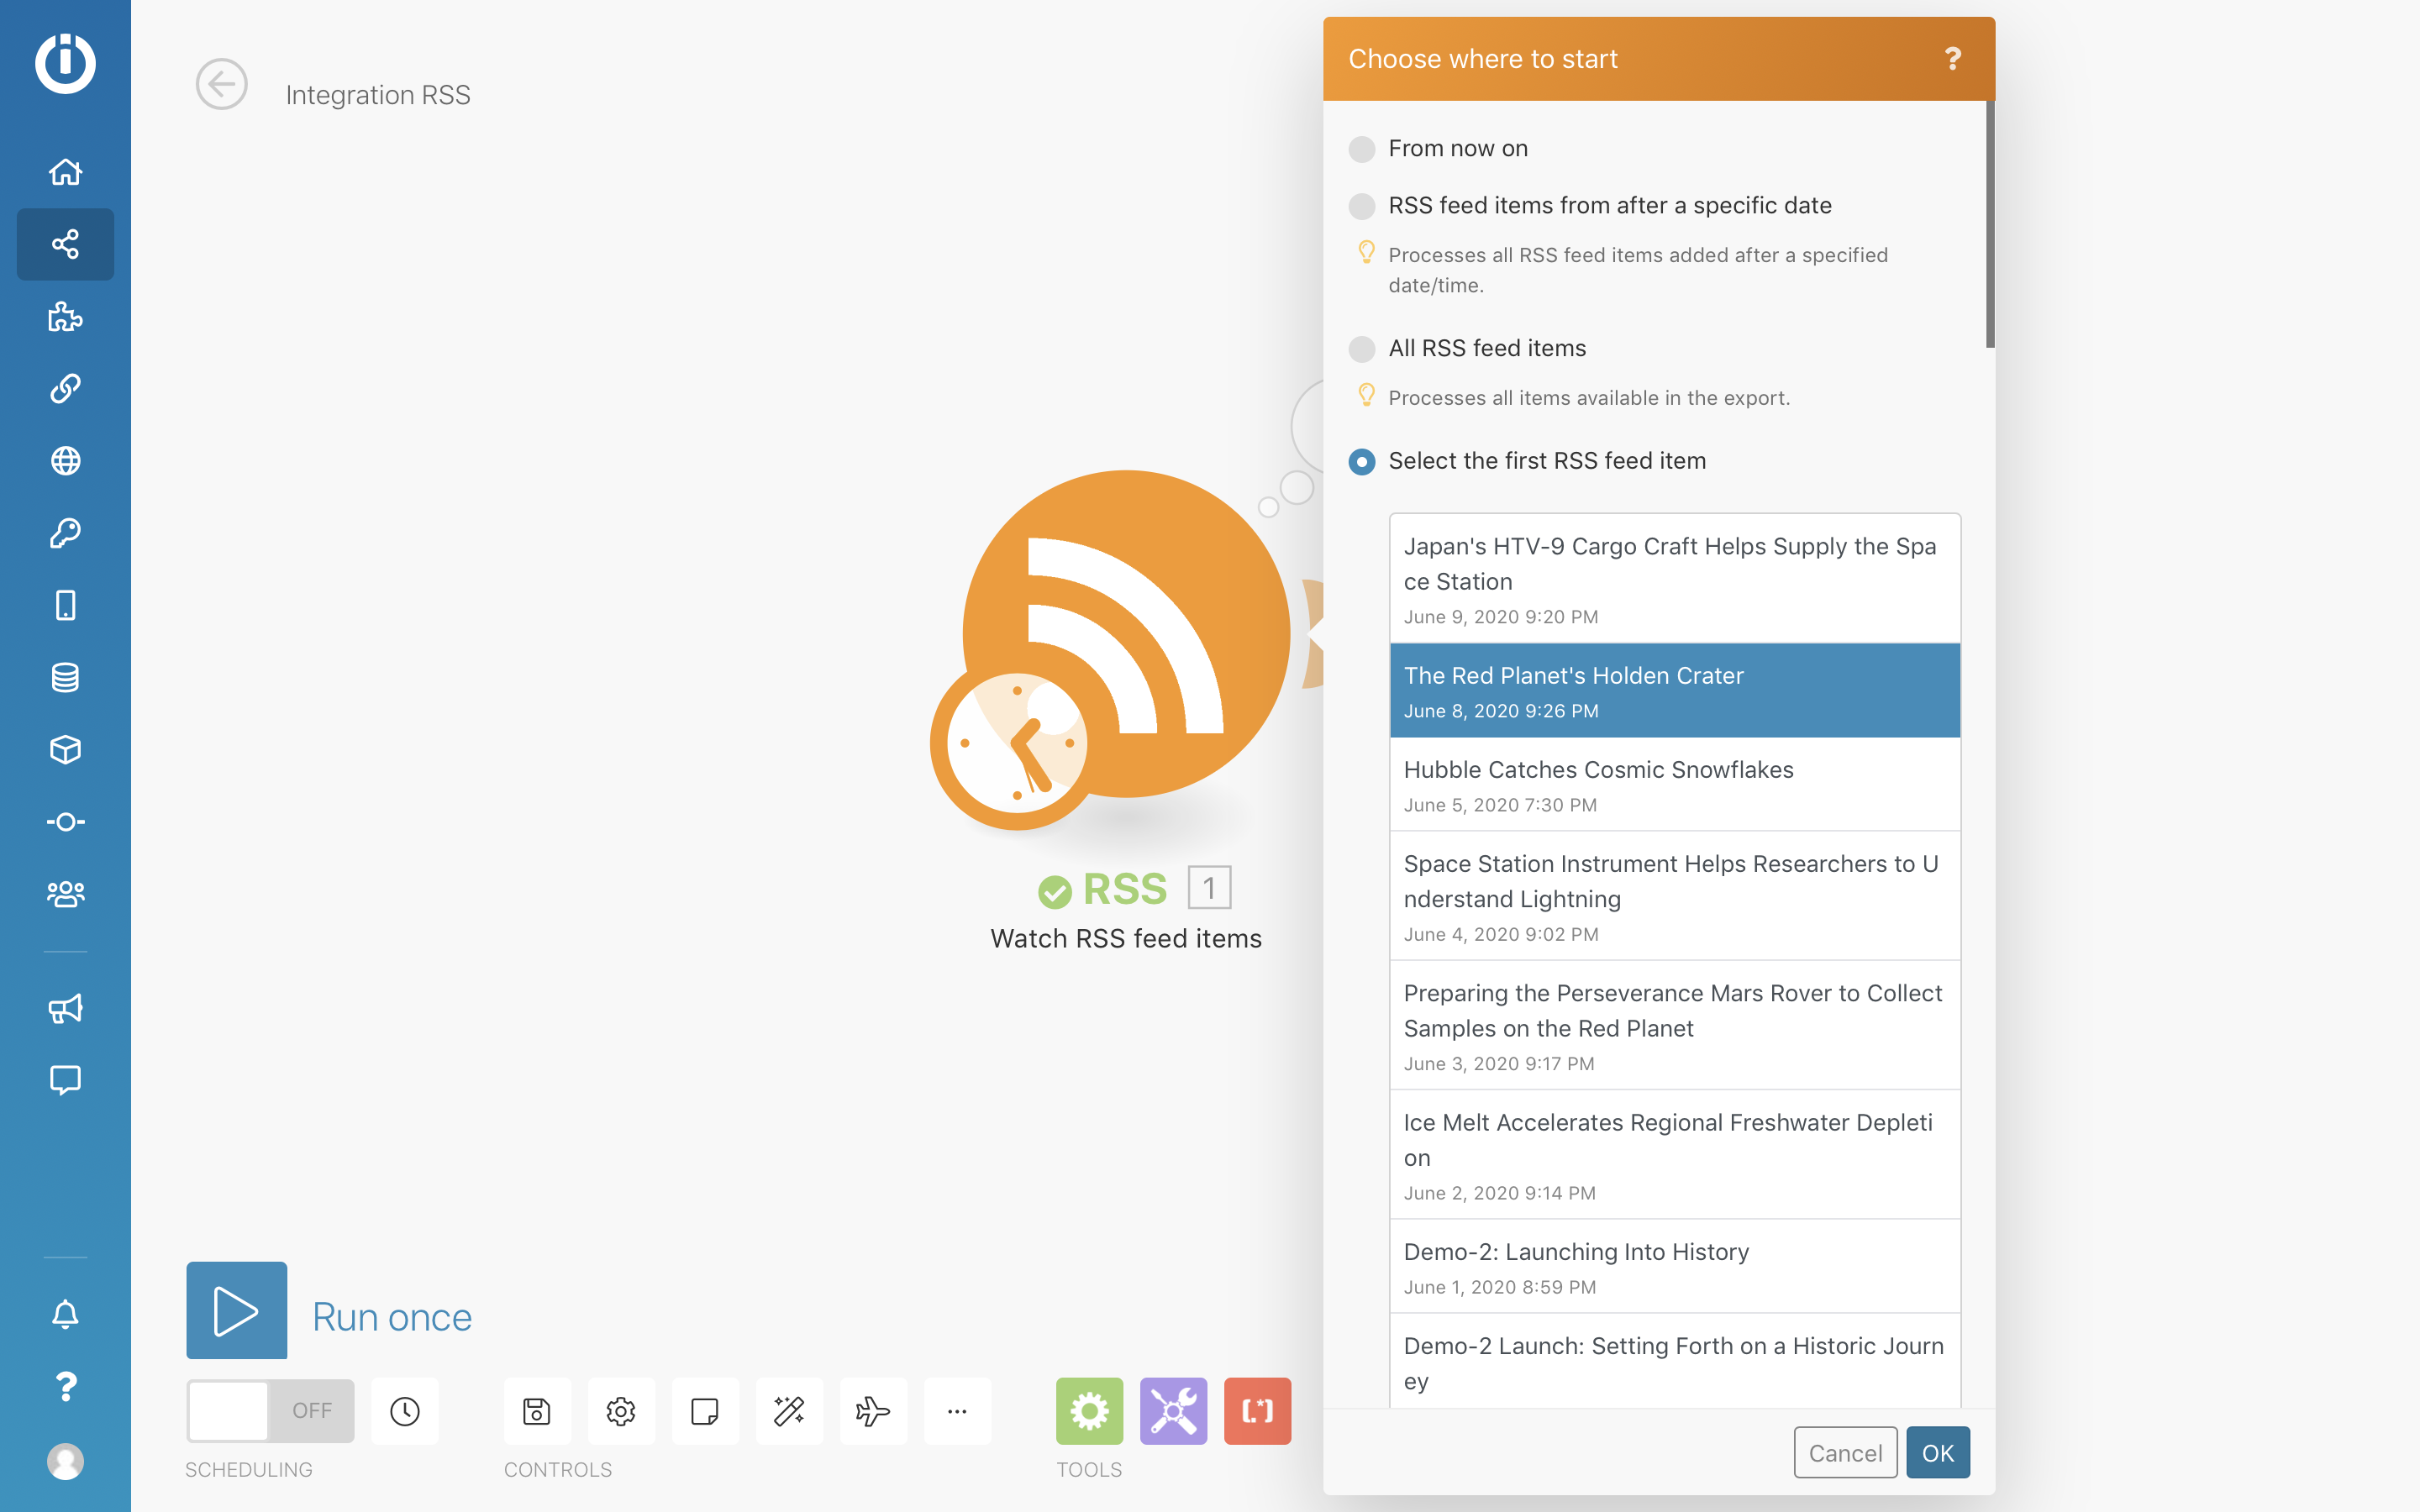
You will need to specify where you want the RSS feed importing to start from - for testing purposes you can just choose a random entry from the middle of the list somewhere:
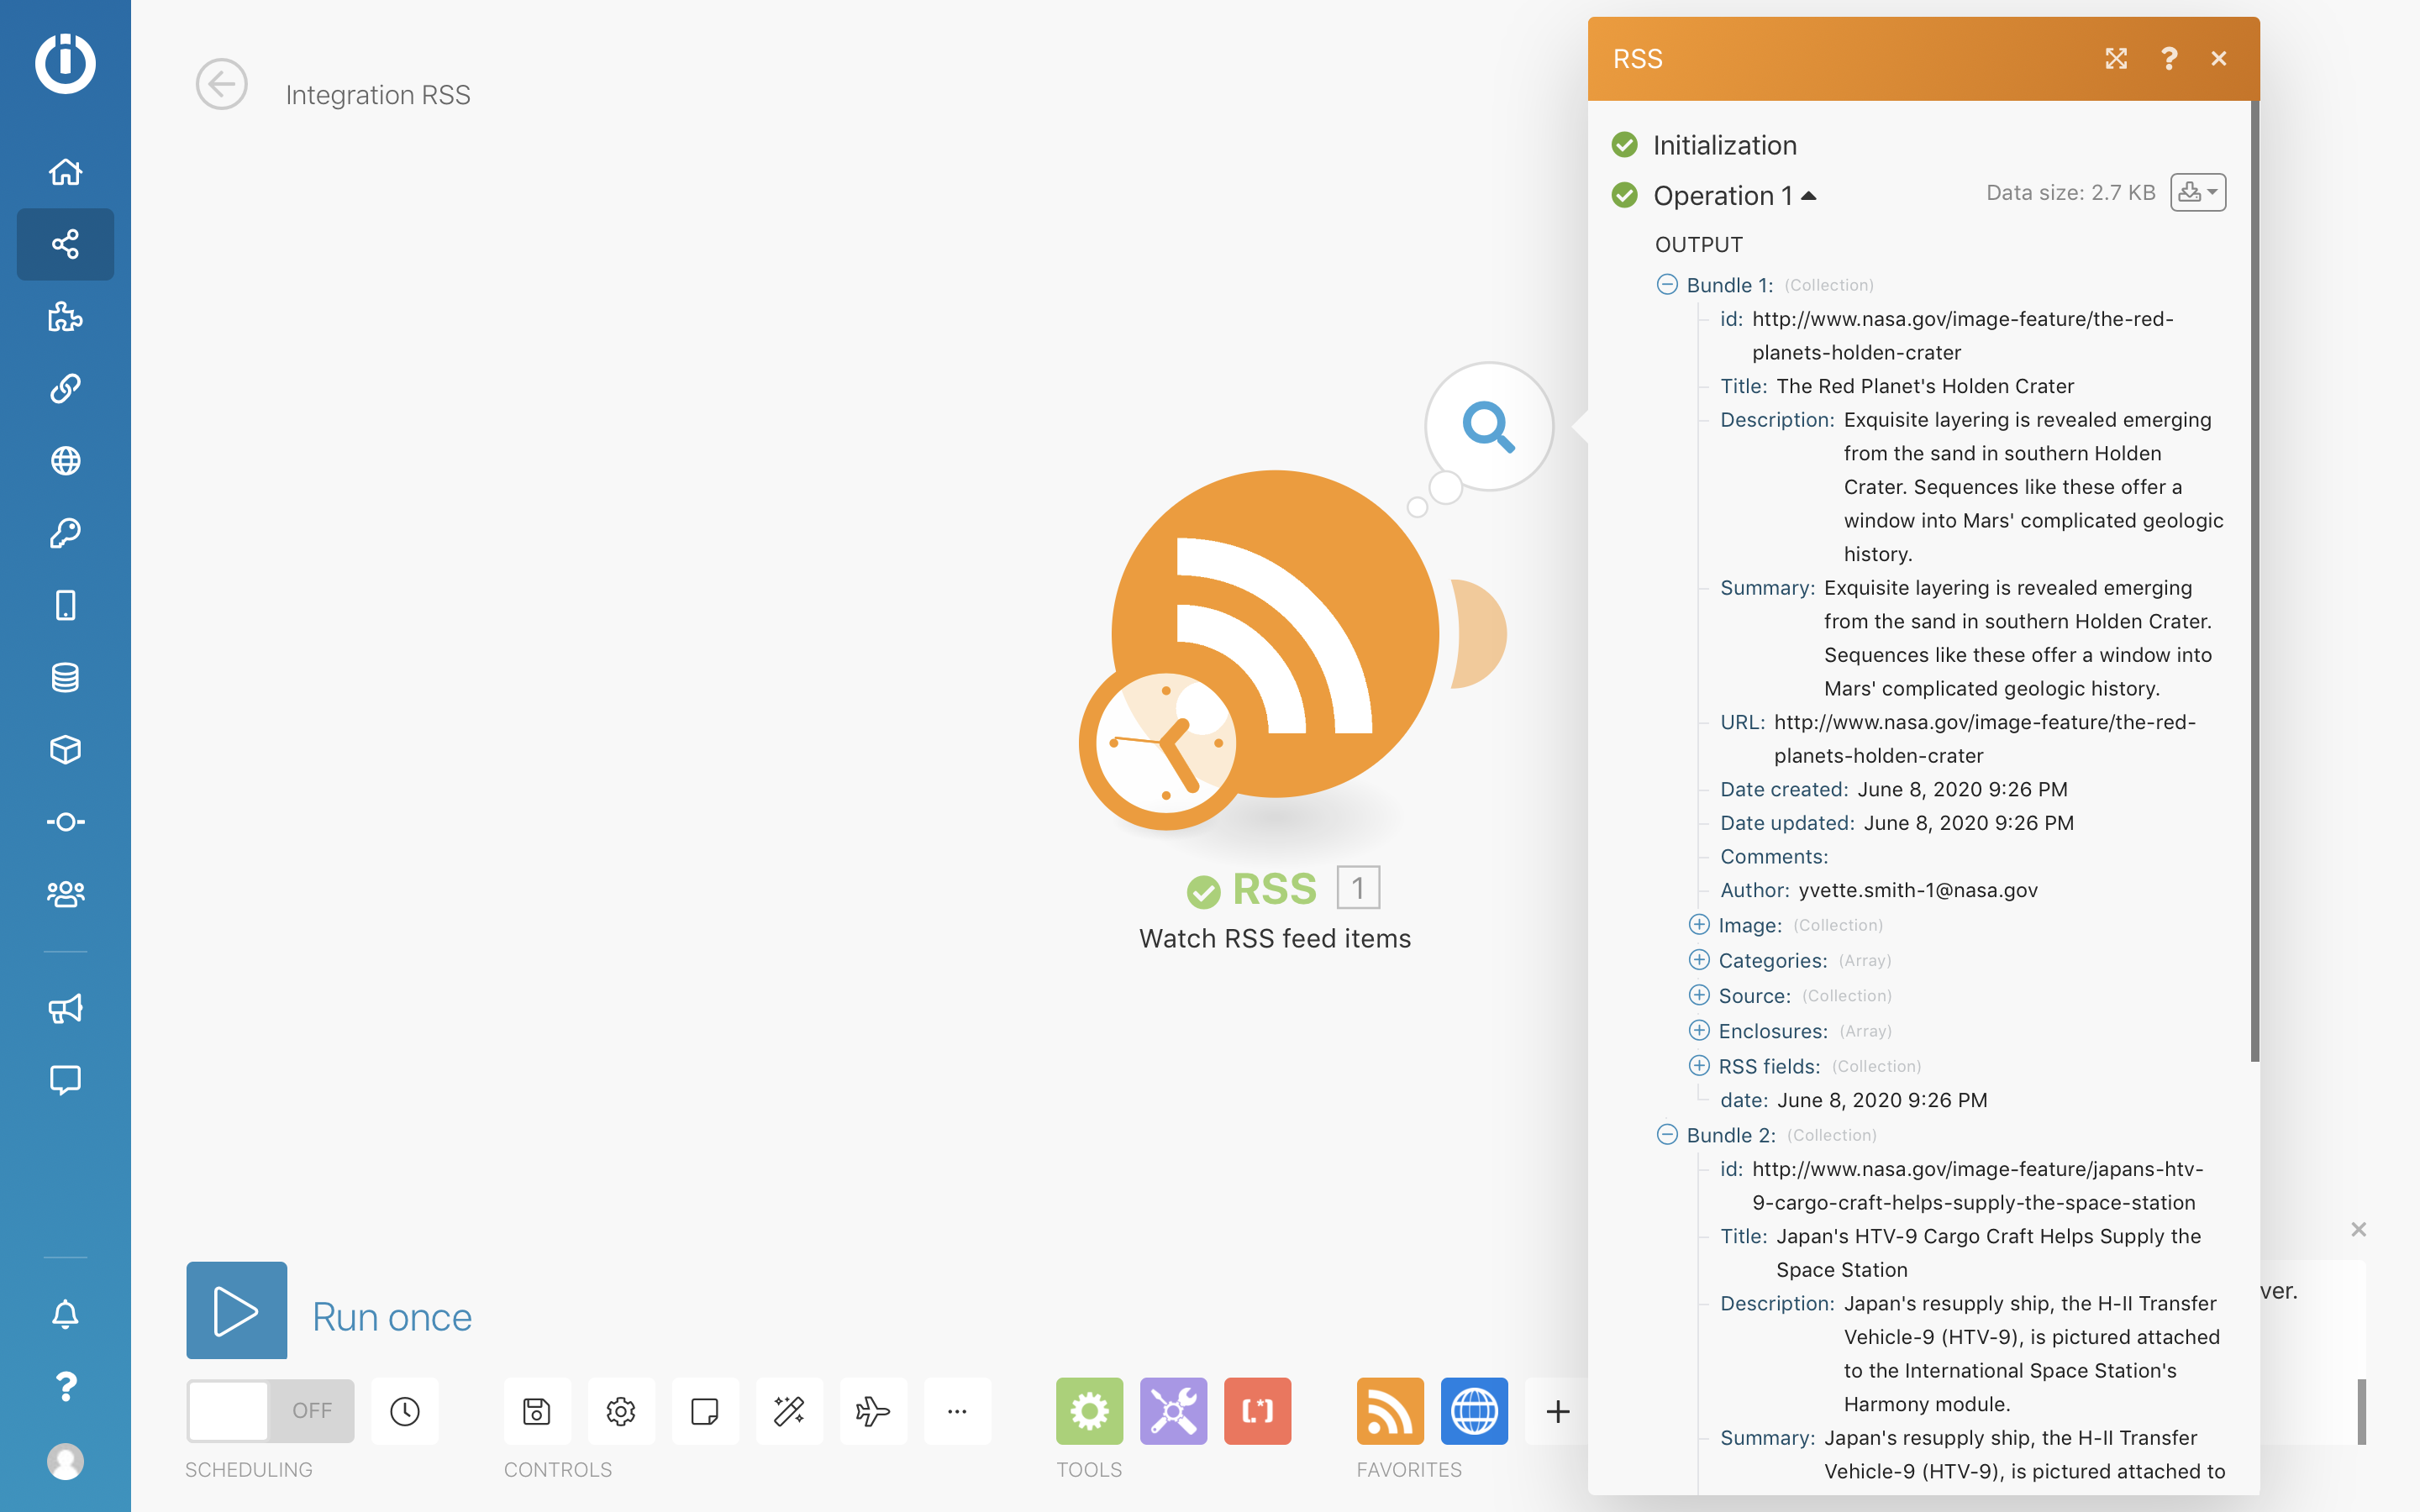
Once you have saved these options you can click the "Run Once" button to run the scenario. Since we are only importing an RSS feed at this point it's not super exciting, but at least it's good to check that the feed is being correctly imported:
Sending data to Bannerbear
In Integromat, to make generic API calls to services you can use the HTTP module. Add the HTTP module as the next step in the scenario.
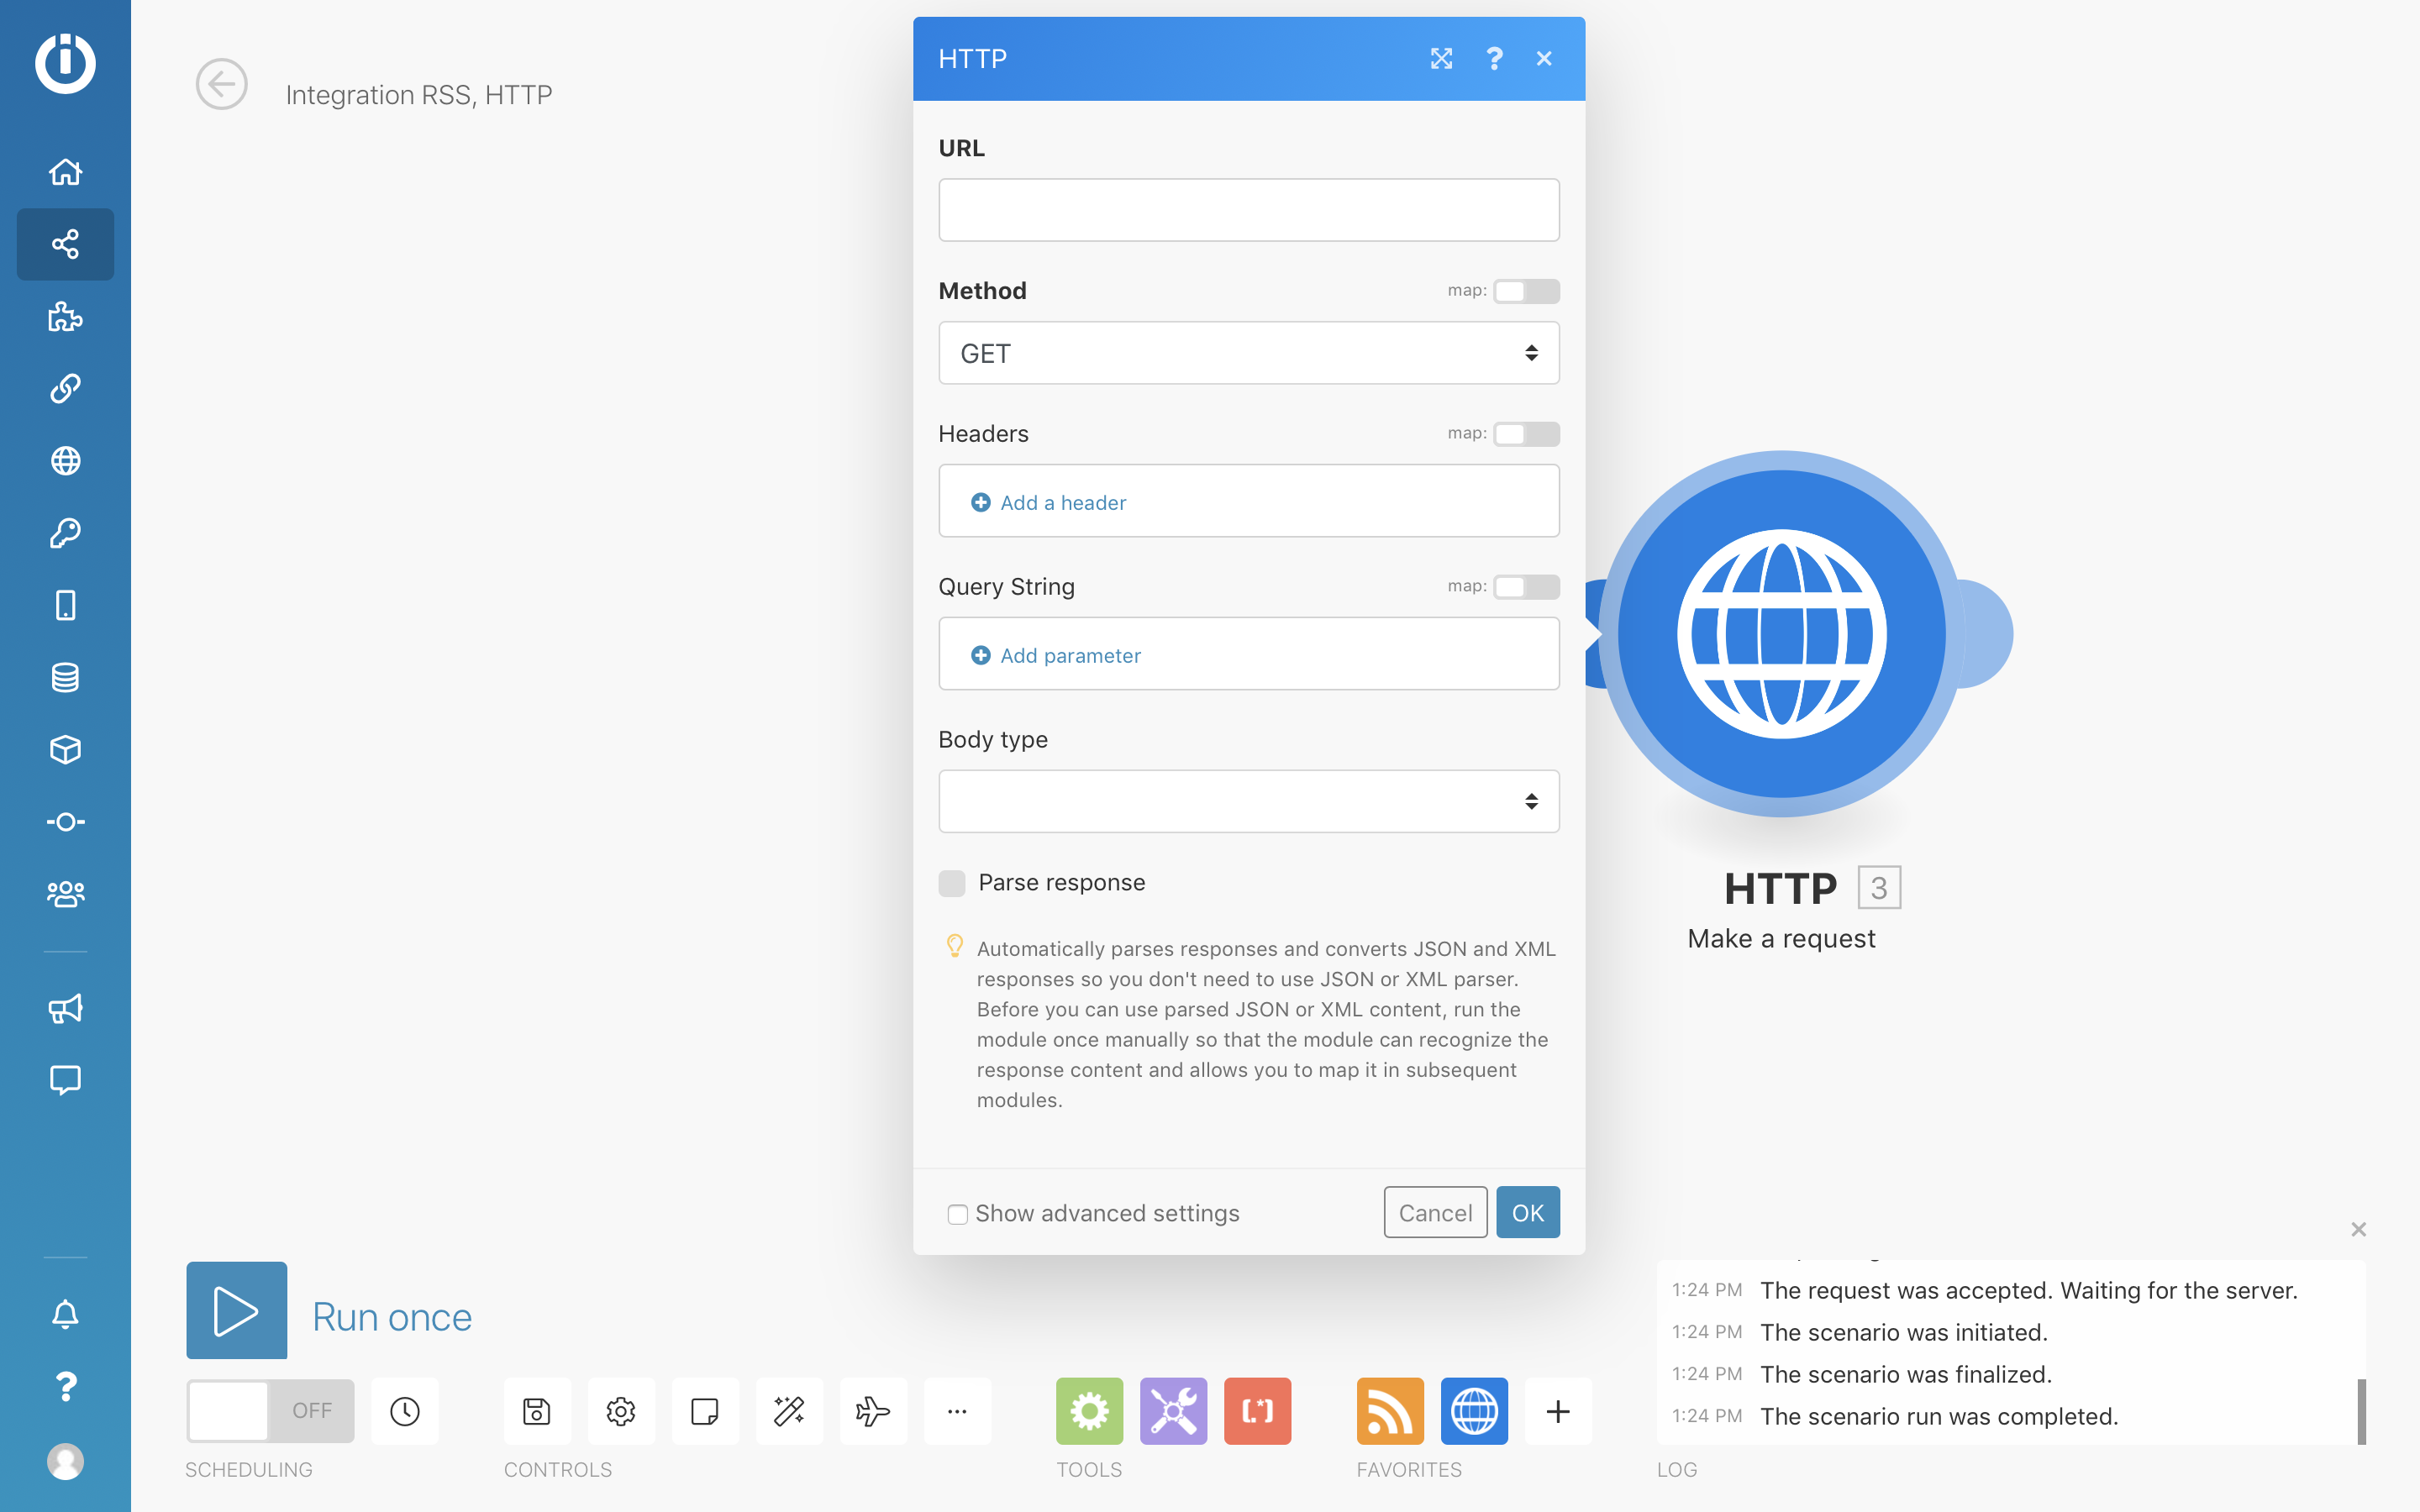
For the HTTP module settings, use these:
- URL: https://api.bannerbear.com/v2/images
- Method: POST
- Body type: Raw
- Content type: JSON
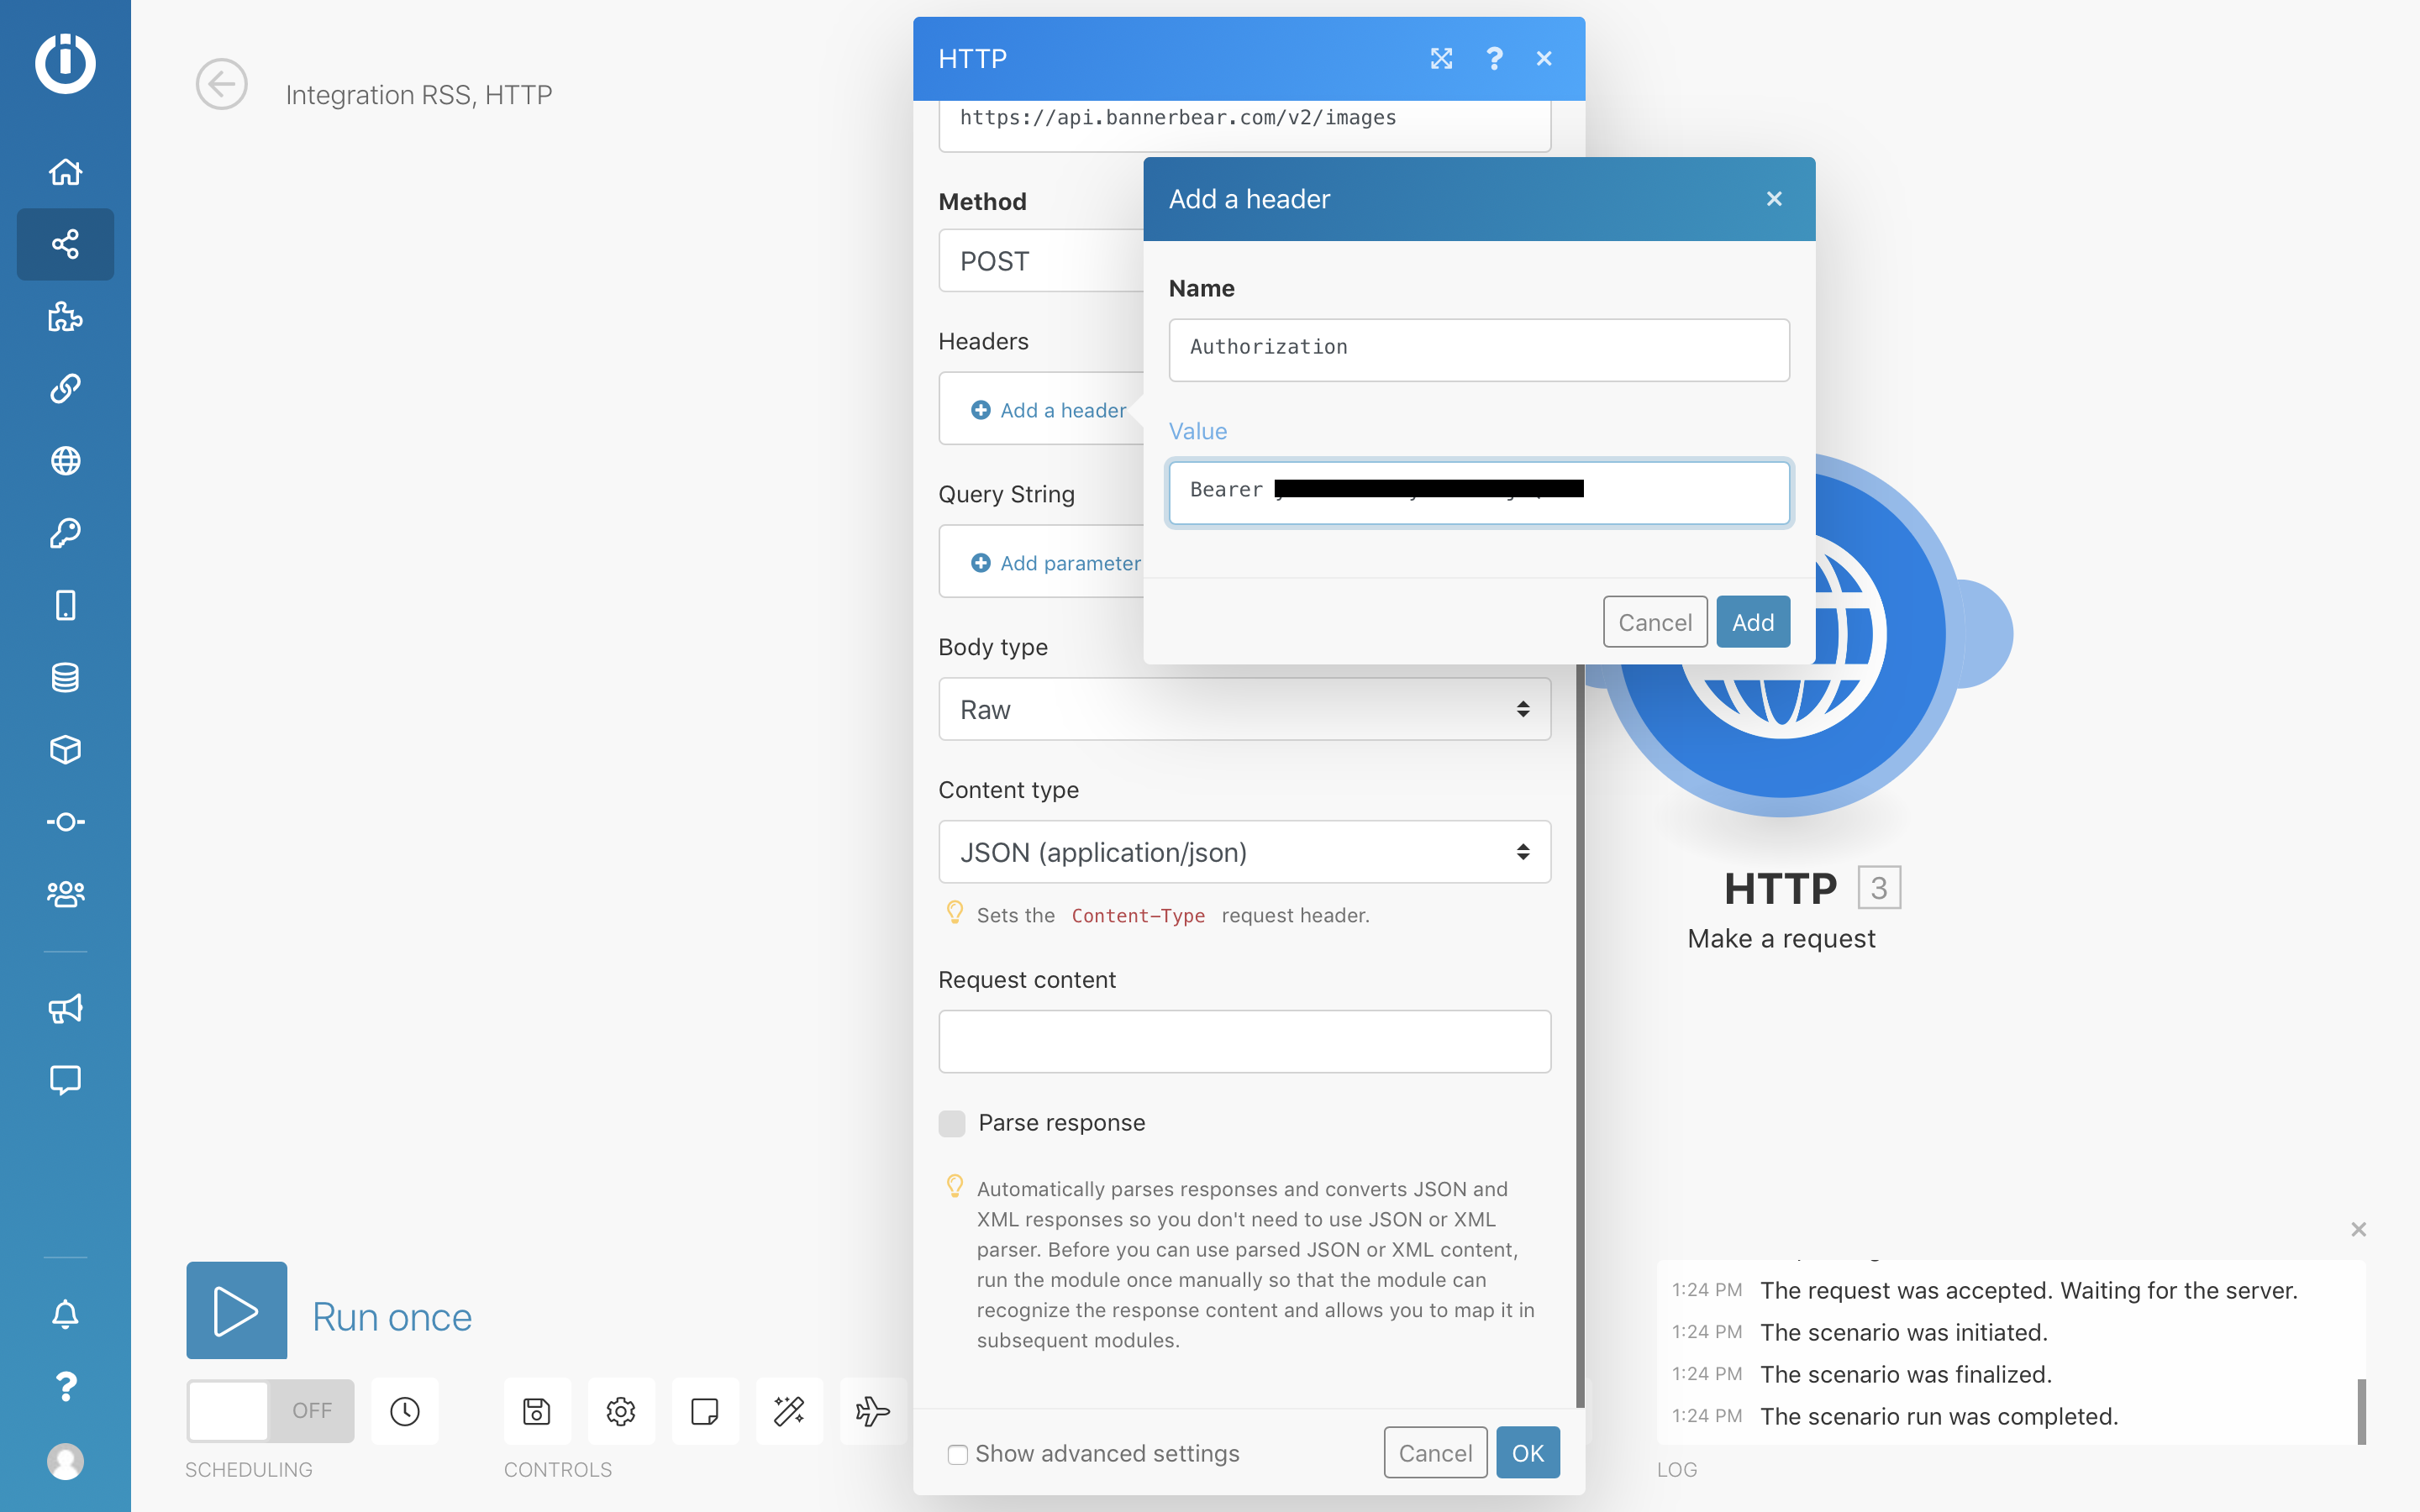
For the Headers section, you will need to add the Bannerbear project API key in a specific format. You can find your project API key in the project Settings page on Bannerbear.
Add the following header.
- Name: Authorization
- Value: Bearer (your project API key)
Request content
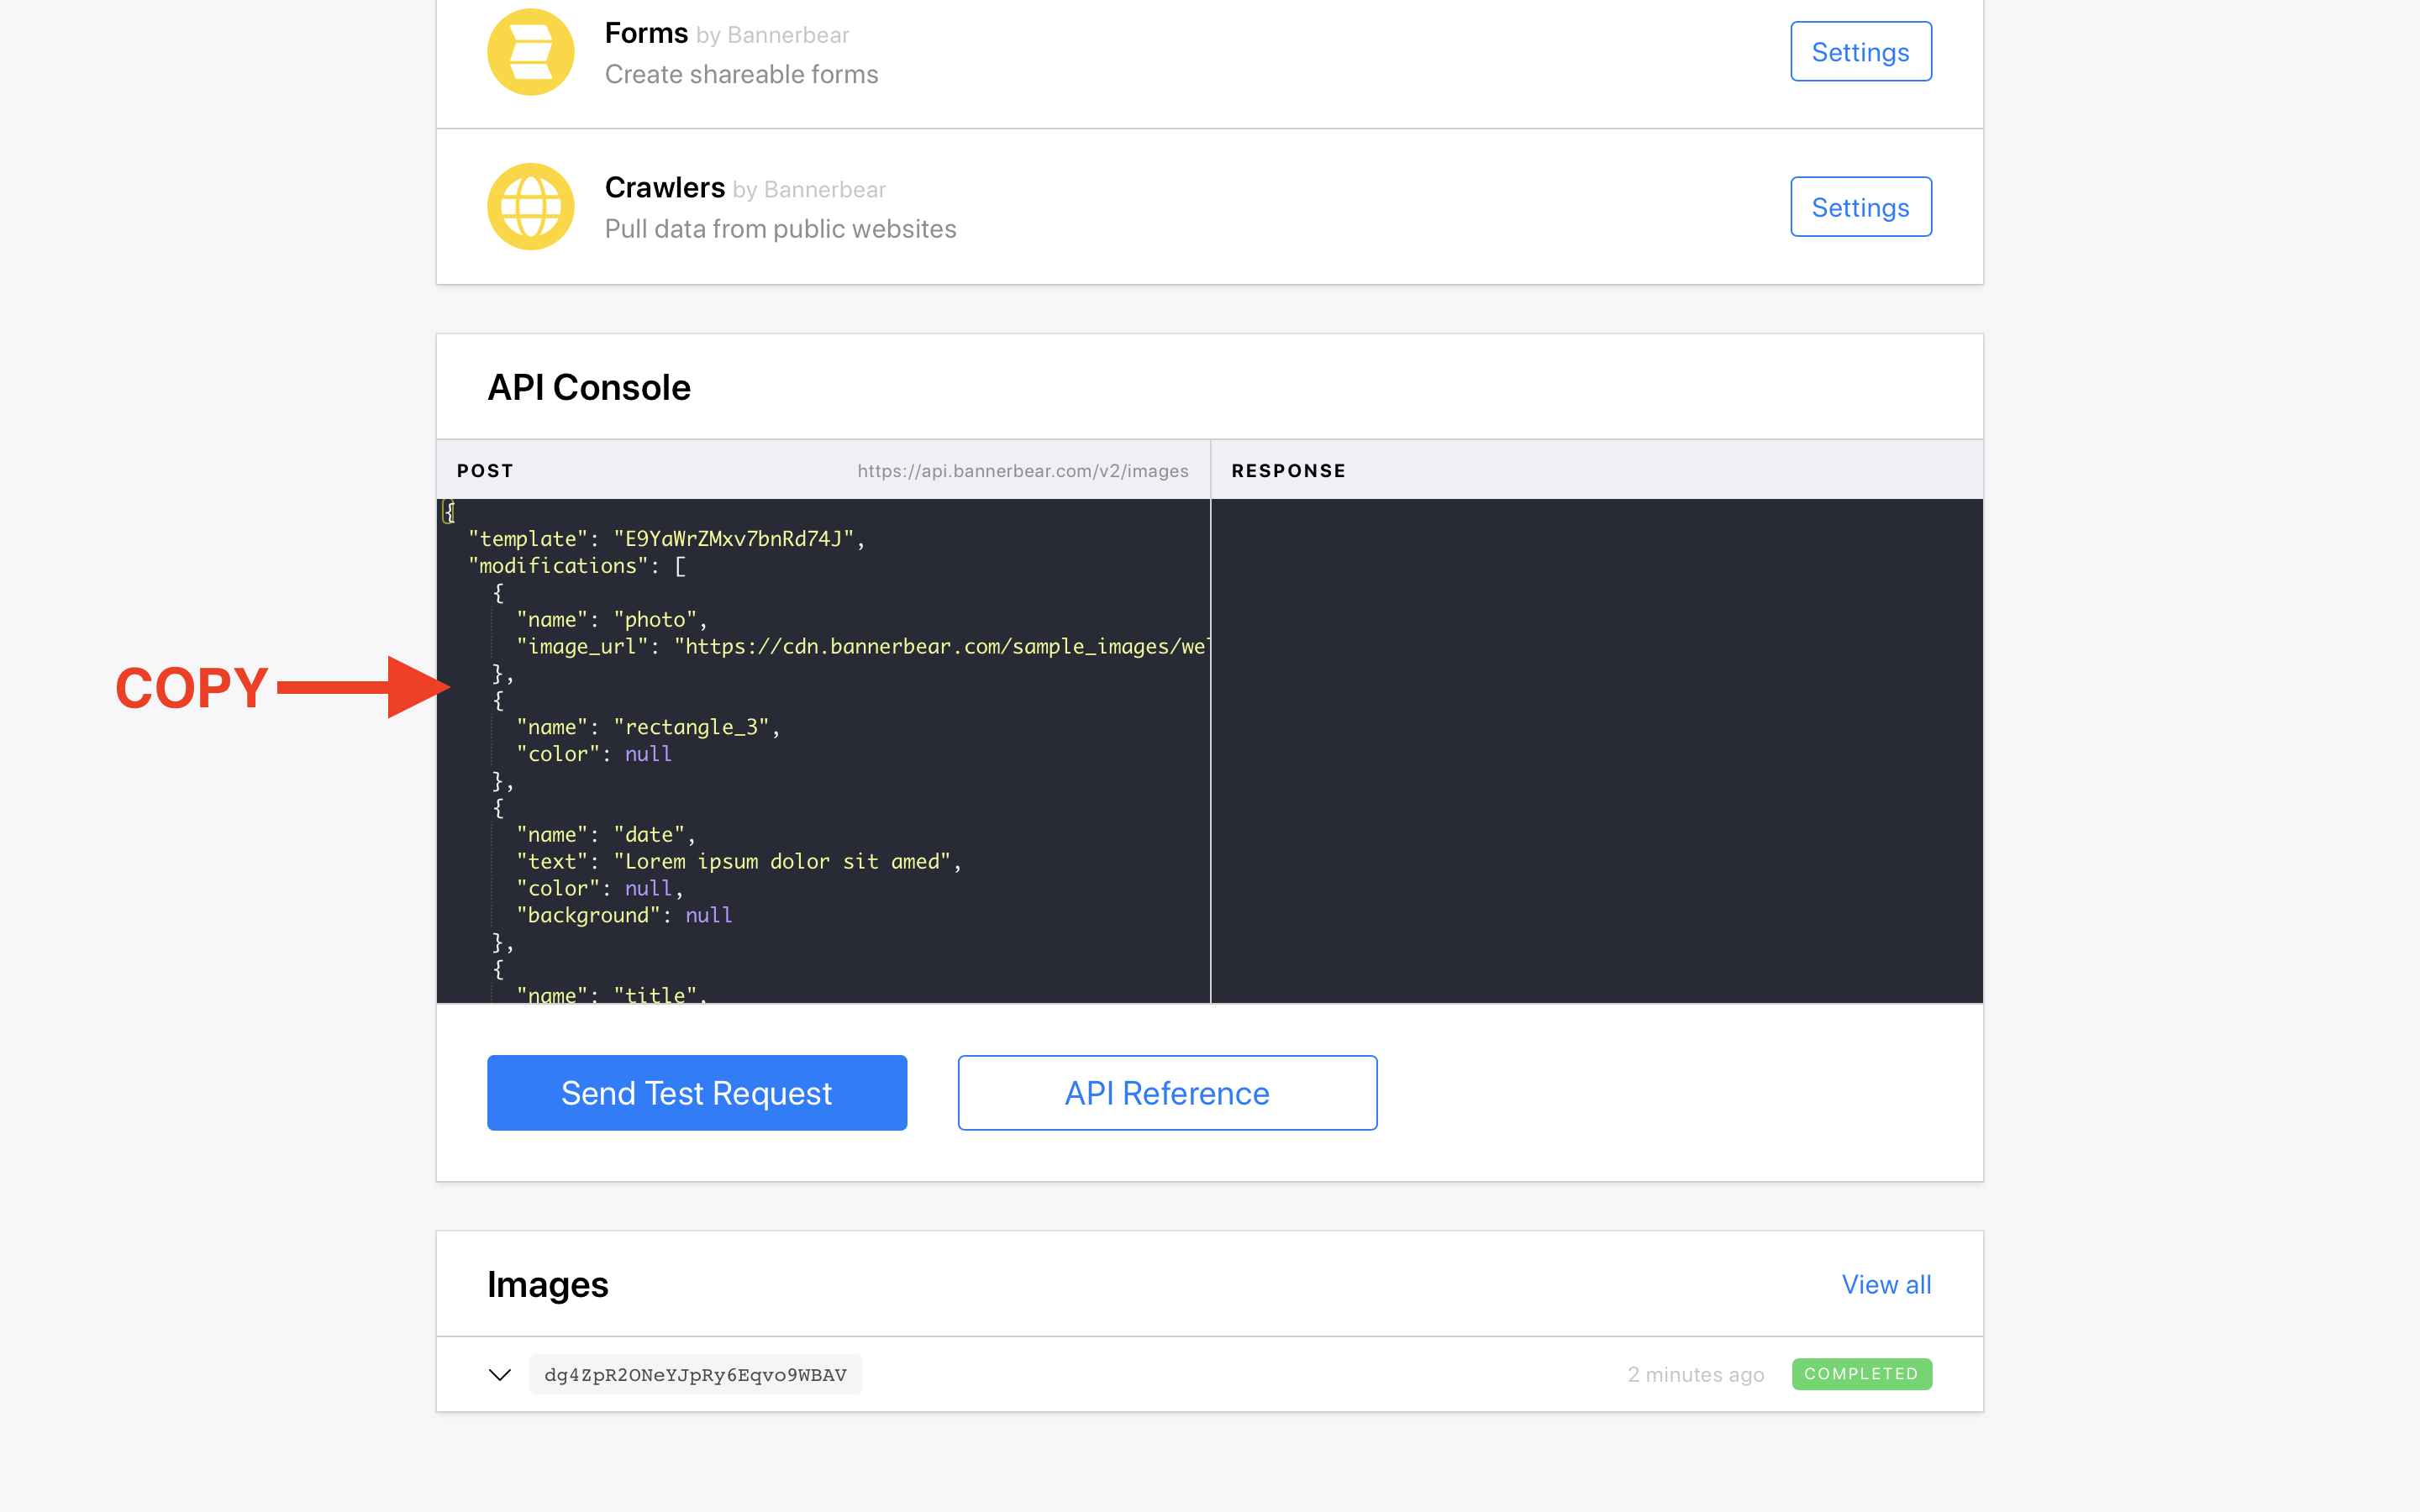
The key part to get right is the "Request content" part of the HTTP module settings. This tells the Bannerbear API what modifications you want to make to the base template.
Back in Bannerbear, find the NASA template you added and view the API console. The API console shows you an example of the formatting for this "Request content" section. Copy the code in the black box:
Here's the clever bit!
Paste the code into the "Request content" box in Integromat. Now, instead of the placeholder data for the text and images, we want to replace it with data from the RSS feed.
For the photo image_url, choose the Enclosures URL from the pop out panel. For the date text choose the date and for the title text choose either a title or description.
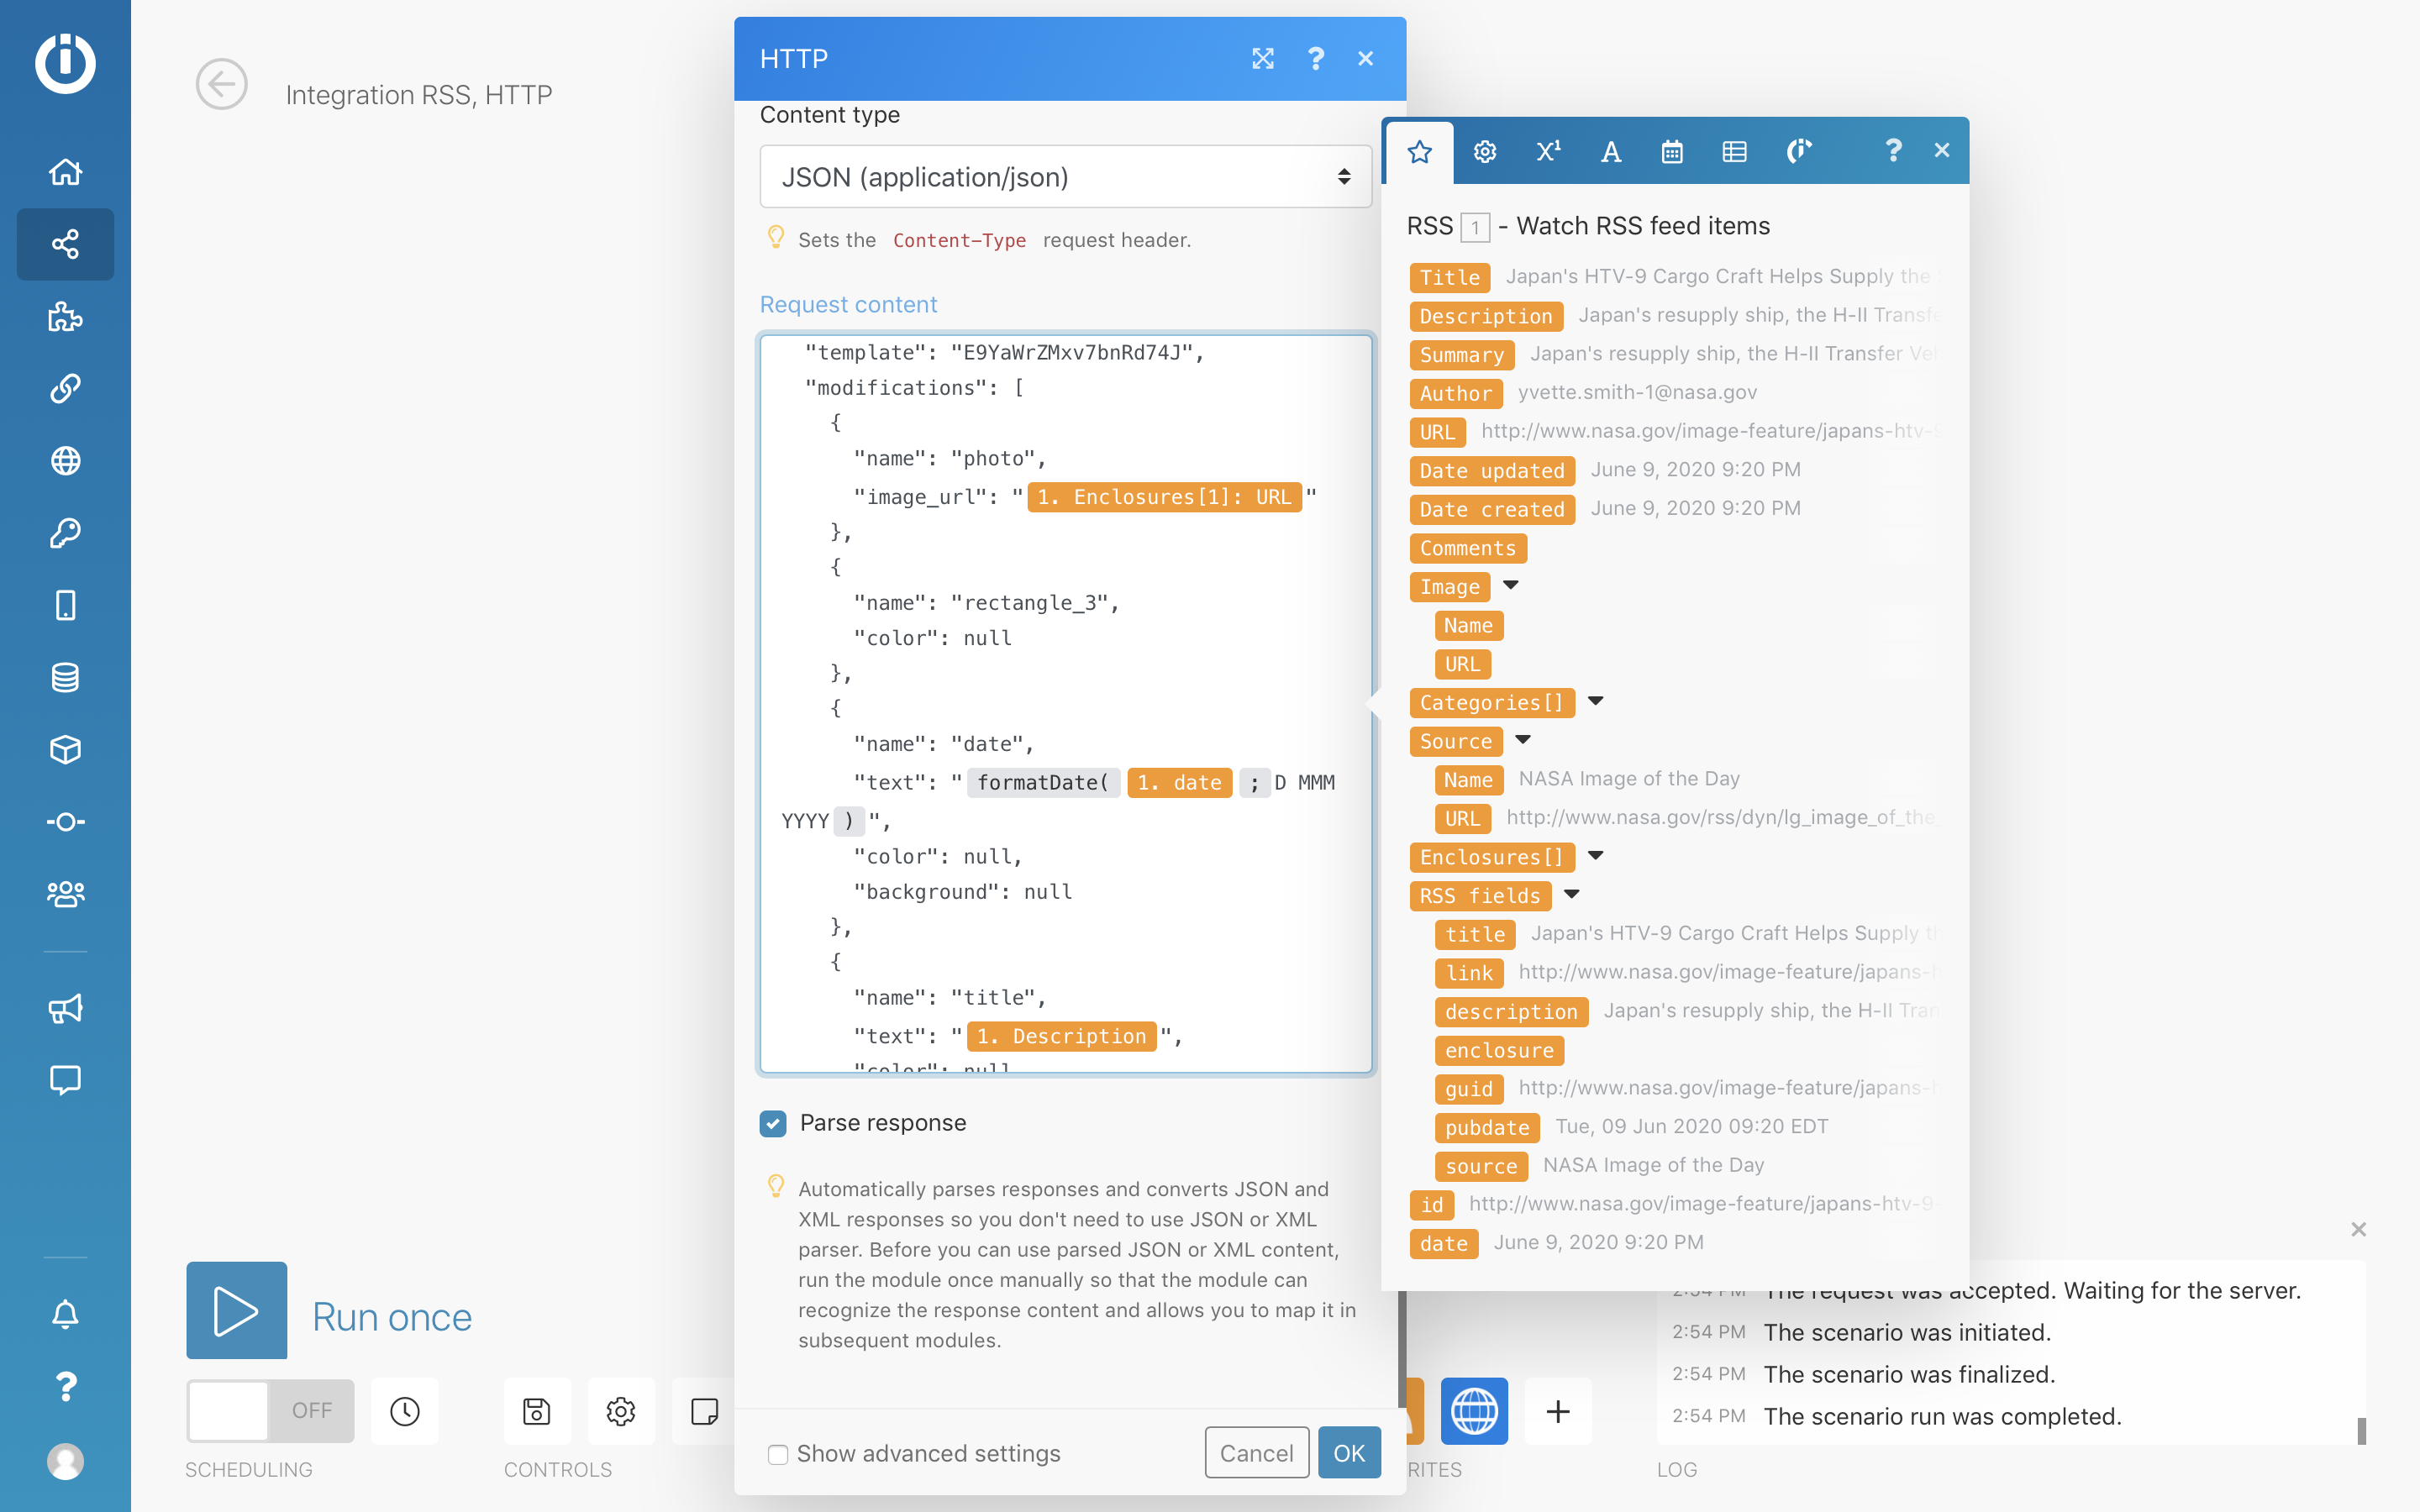
In the above example I actually went a step further and used one of Integromat's date formatting tools on the date… but you don't have to do that at this stage if you don't want to.
Important - make sure you don't forget the "quote marks" around the data items otherwise the data won't be sent properly.
Take a deep breath - click "Run Once" and watch the scenario run.
The data will get posted to Bannerbear and an image will get generated!
Verifying the Auto Generated Image
Switch back to the Bannerbear template page and click "View All" on the images list to see the latest image requests:

When images have completed rendering their status will show as "completed" and you can view them by expanding the list item:
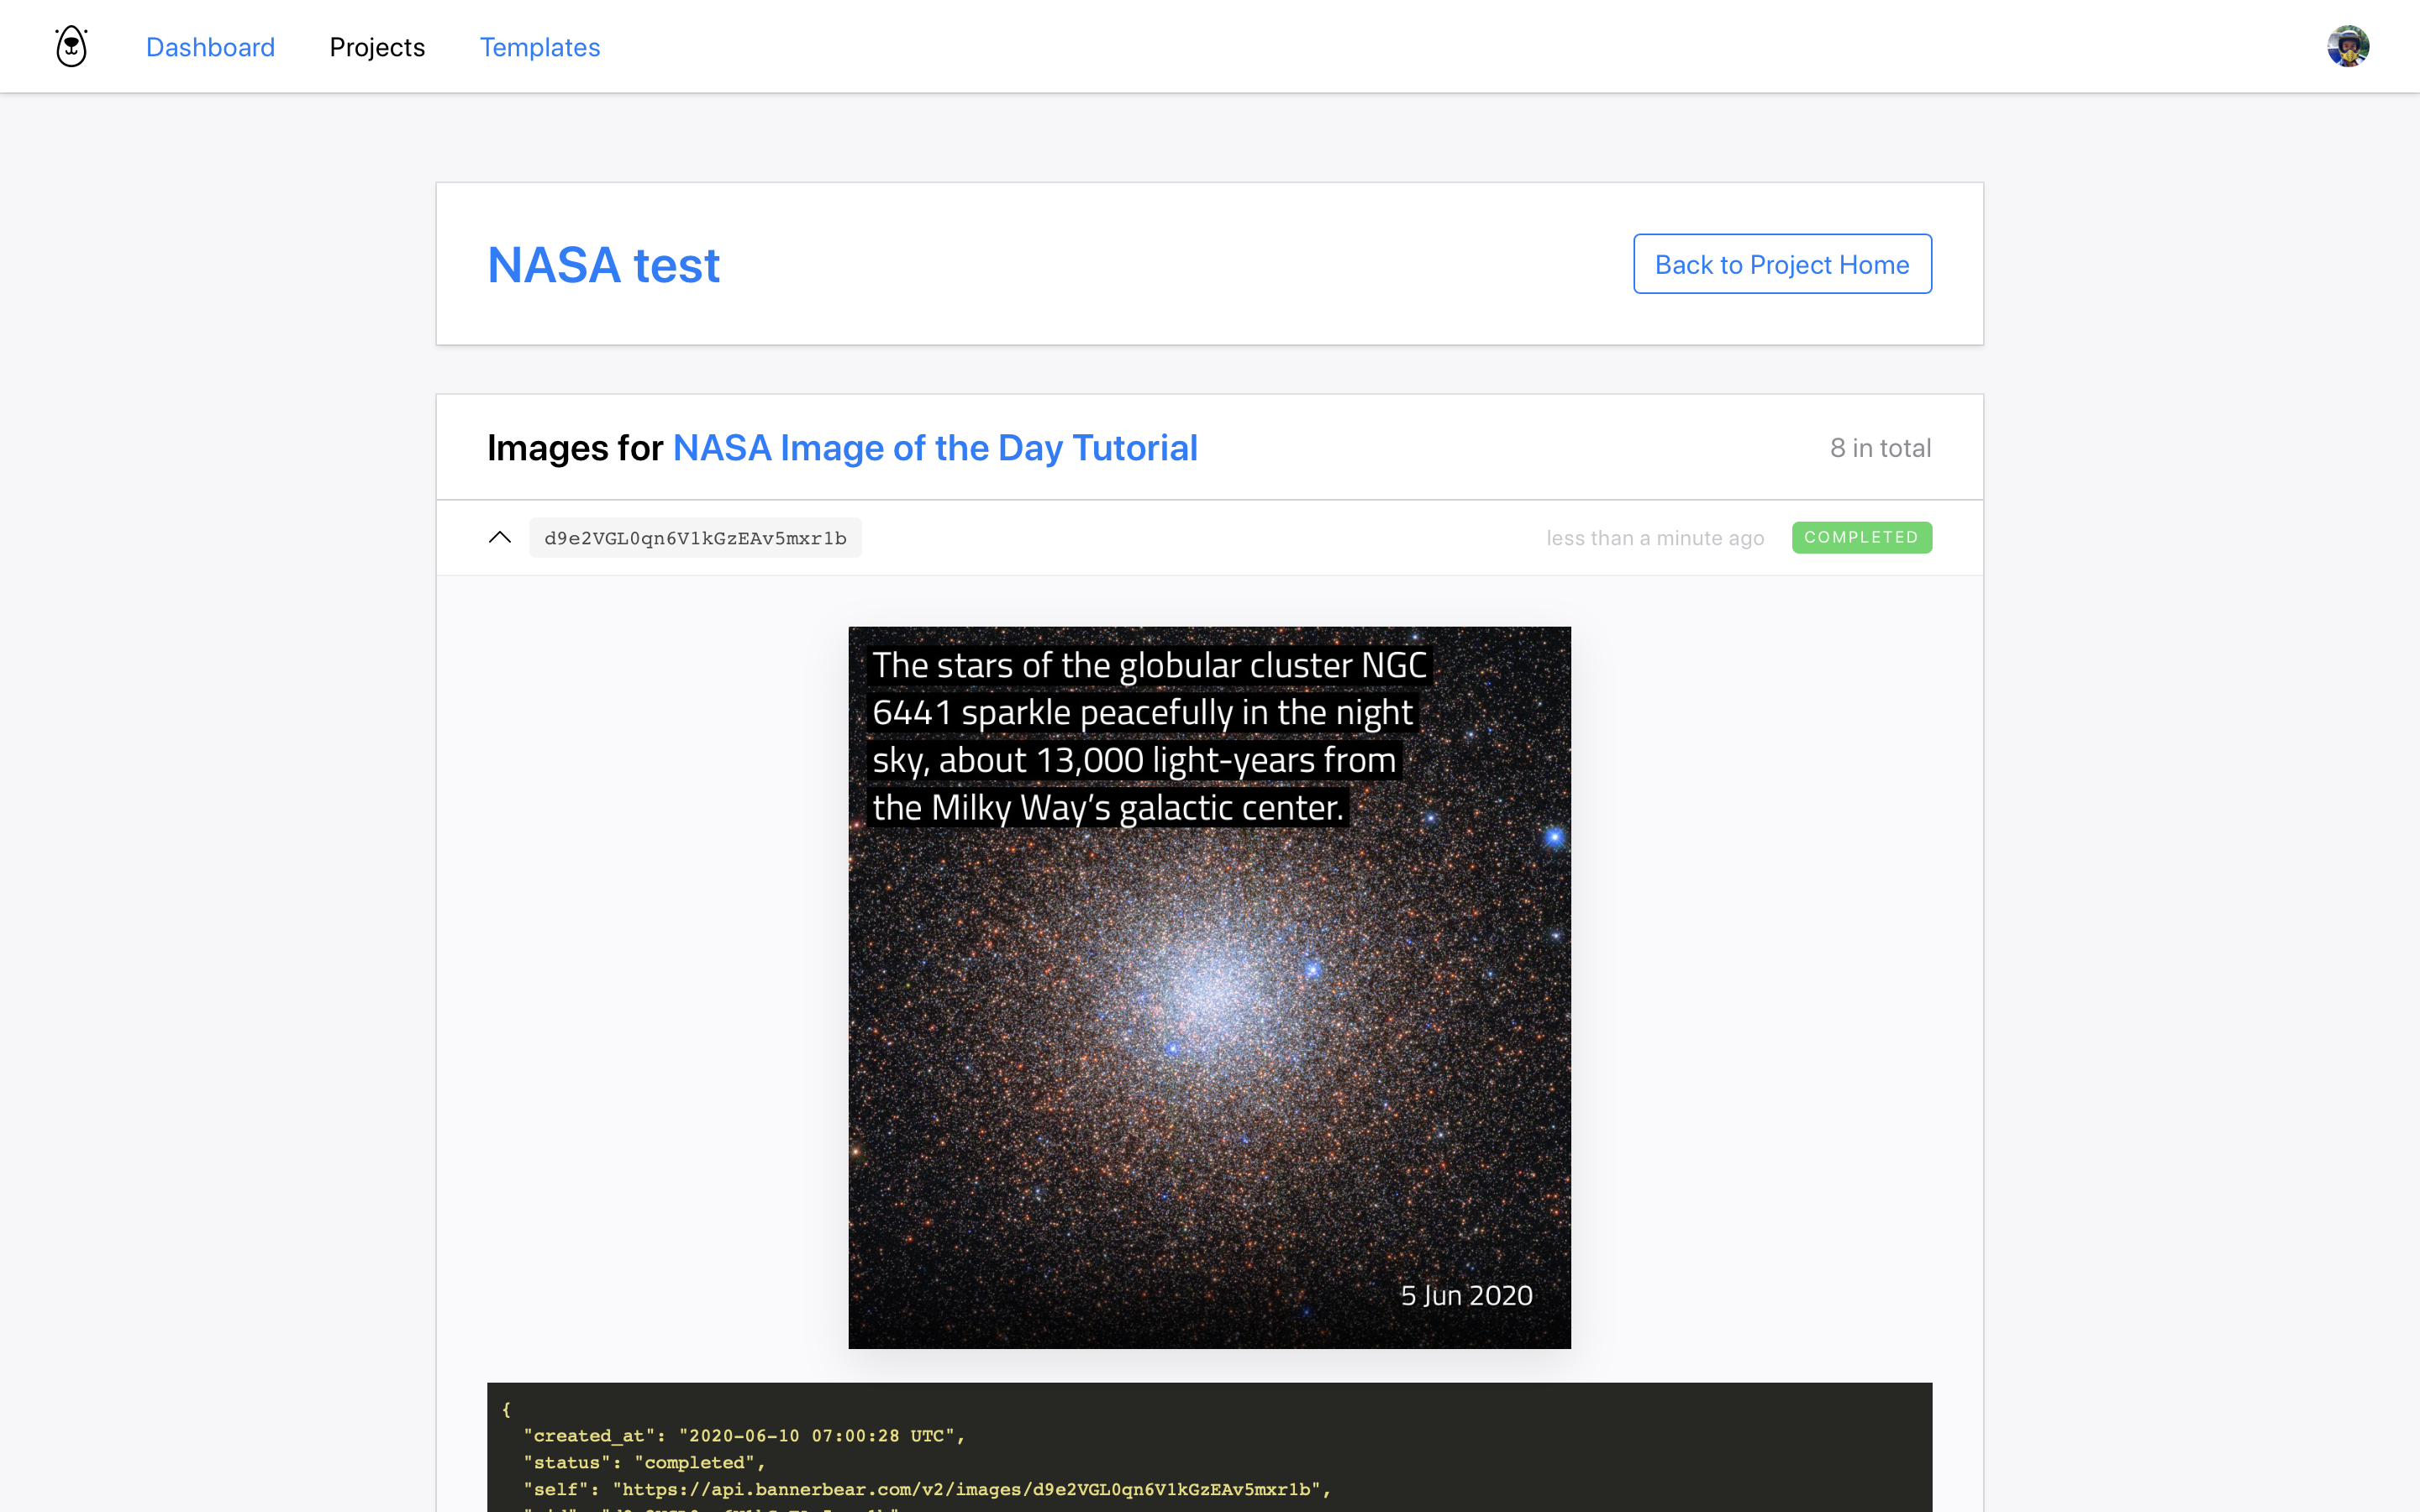
Congratulations! You are now auto-converting RSS data into visuals that you can use for social media and many other purposes!
Adding a Follow Up Step
Usually though, automated workflows won't just end there. You will most likely want to do something with this auto generated image in a follow up step in the Integromat scenario for example:
- Save the image to your Dropbox
- Post the image to your Twitter
- Post the image to Slack
etc
As a simple example, lets just create a follow up step to email the final images to ourselves.
Adding a delay
There's probably a more elegant way to do this in Integromat, but since Bannerbear needs a couple of seconds to generate the images, the next step in this Integromat scenario is to add a short delay. You can do this with the Tools > Sleep module:
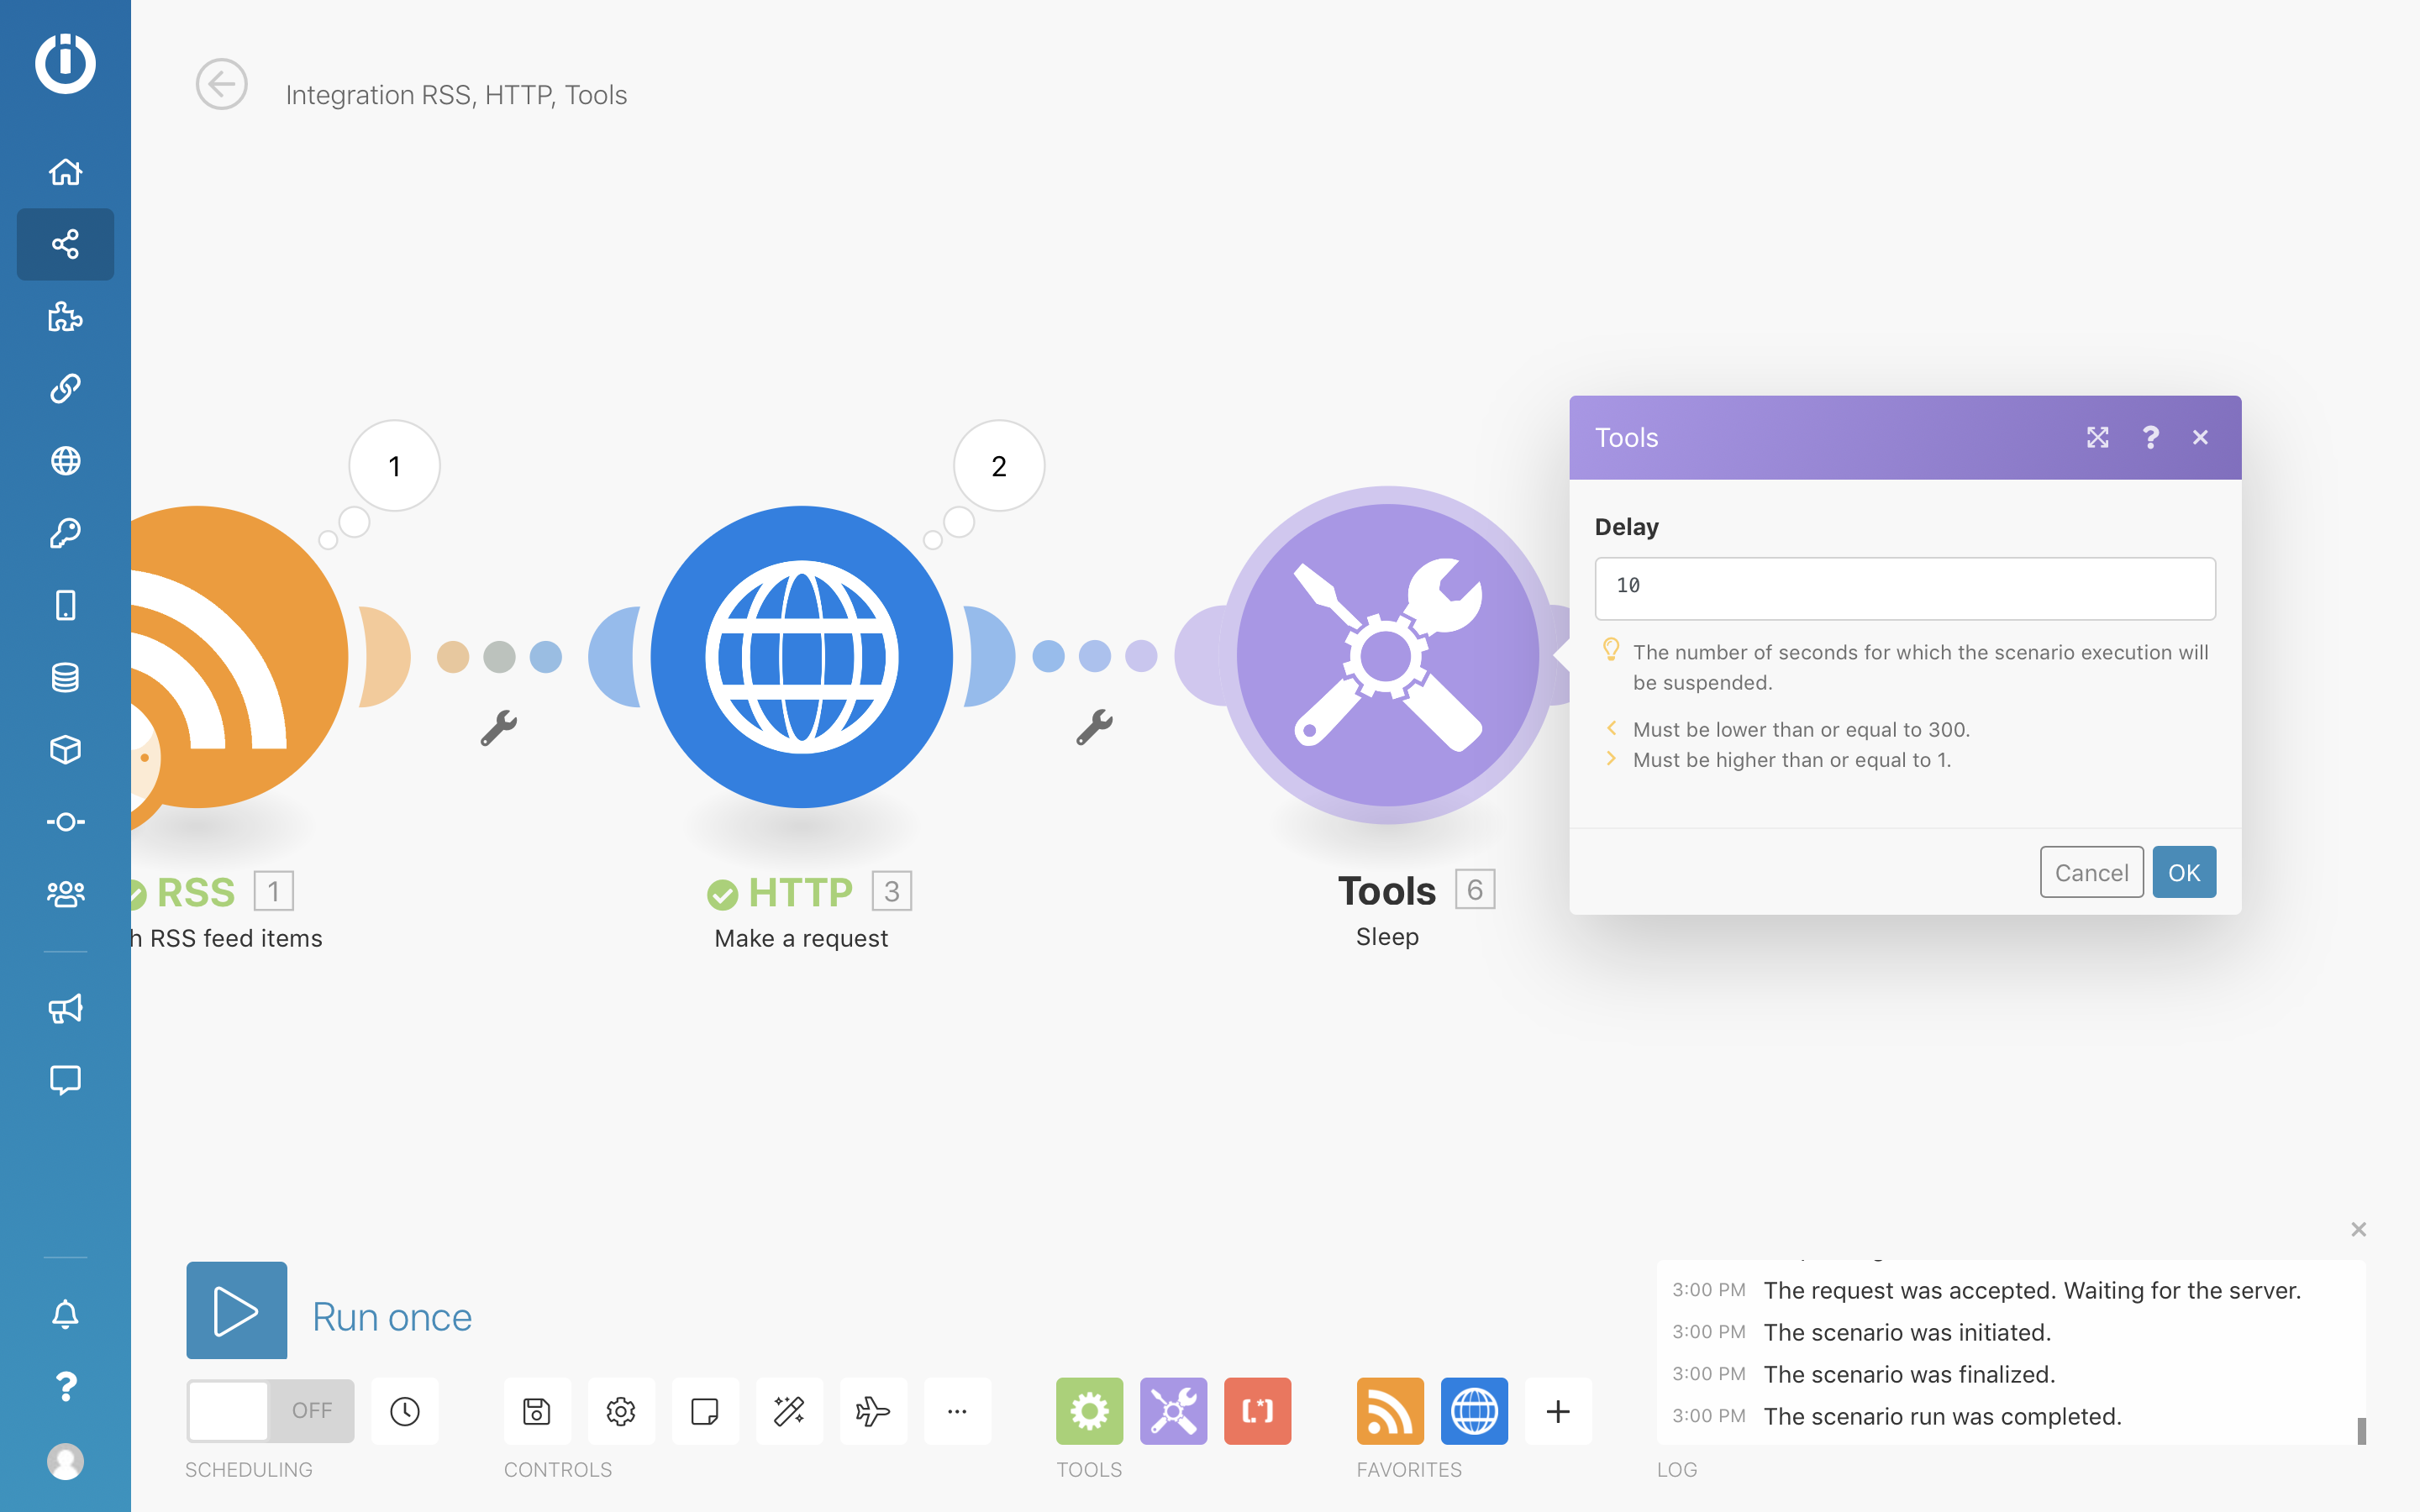
Usually images are rendered in just a couple of seconds, but I'm going to add a little bit of room and make the scenario sleep for 10 seconds before moving to the next step.
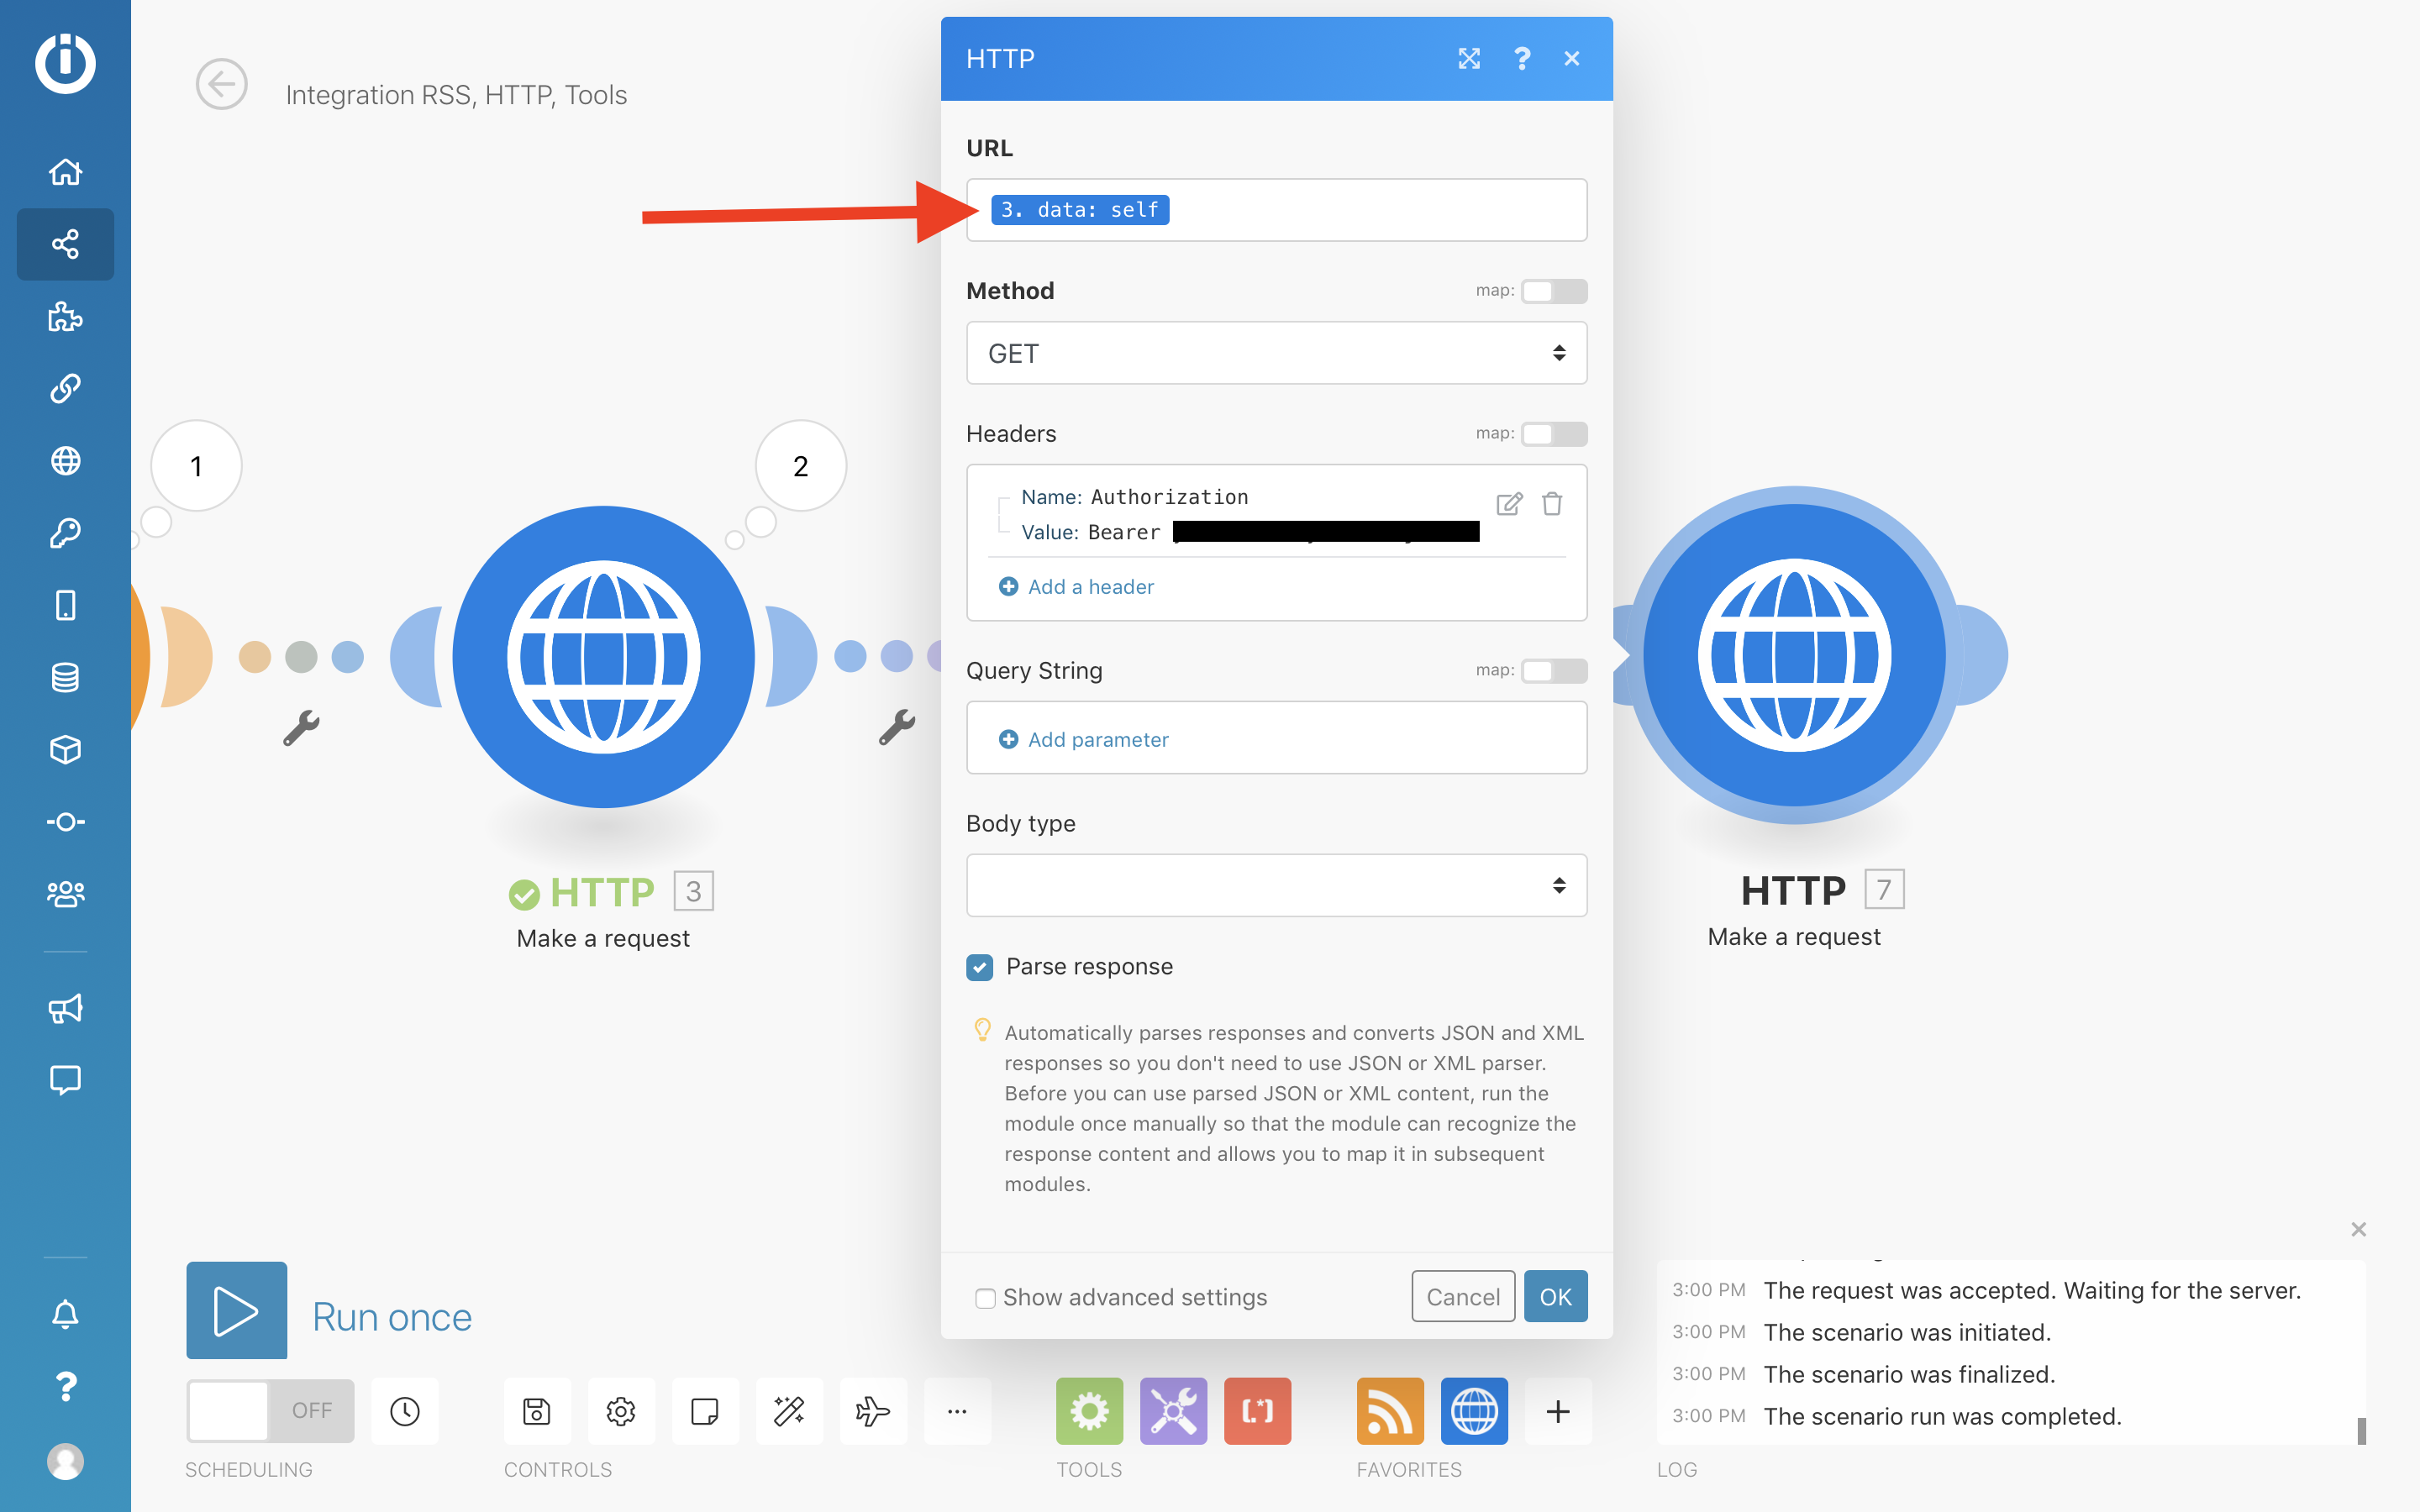
Calling the Bannerbear API for the updated Image object
After this delay the image should be generated already so it's time to fetch the image url.
We can do this by adding another HTTP module, this time simply issuing a GET request to the special url that was provided in the previous HTTP step's response. This special url is called "self". Remember to authorize as before:
Run the scenario and you will see the workflow pause at the Sleep step, then continue.
Sending an email
Time for the final step!
Add a "Send me an email" module to your Integromat scenario.
Pluck the image_url_png from the last step in your scenario and add it to the email content:
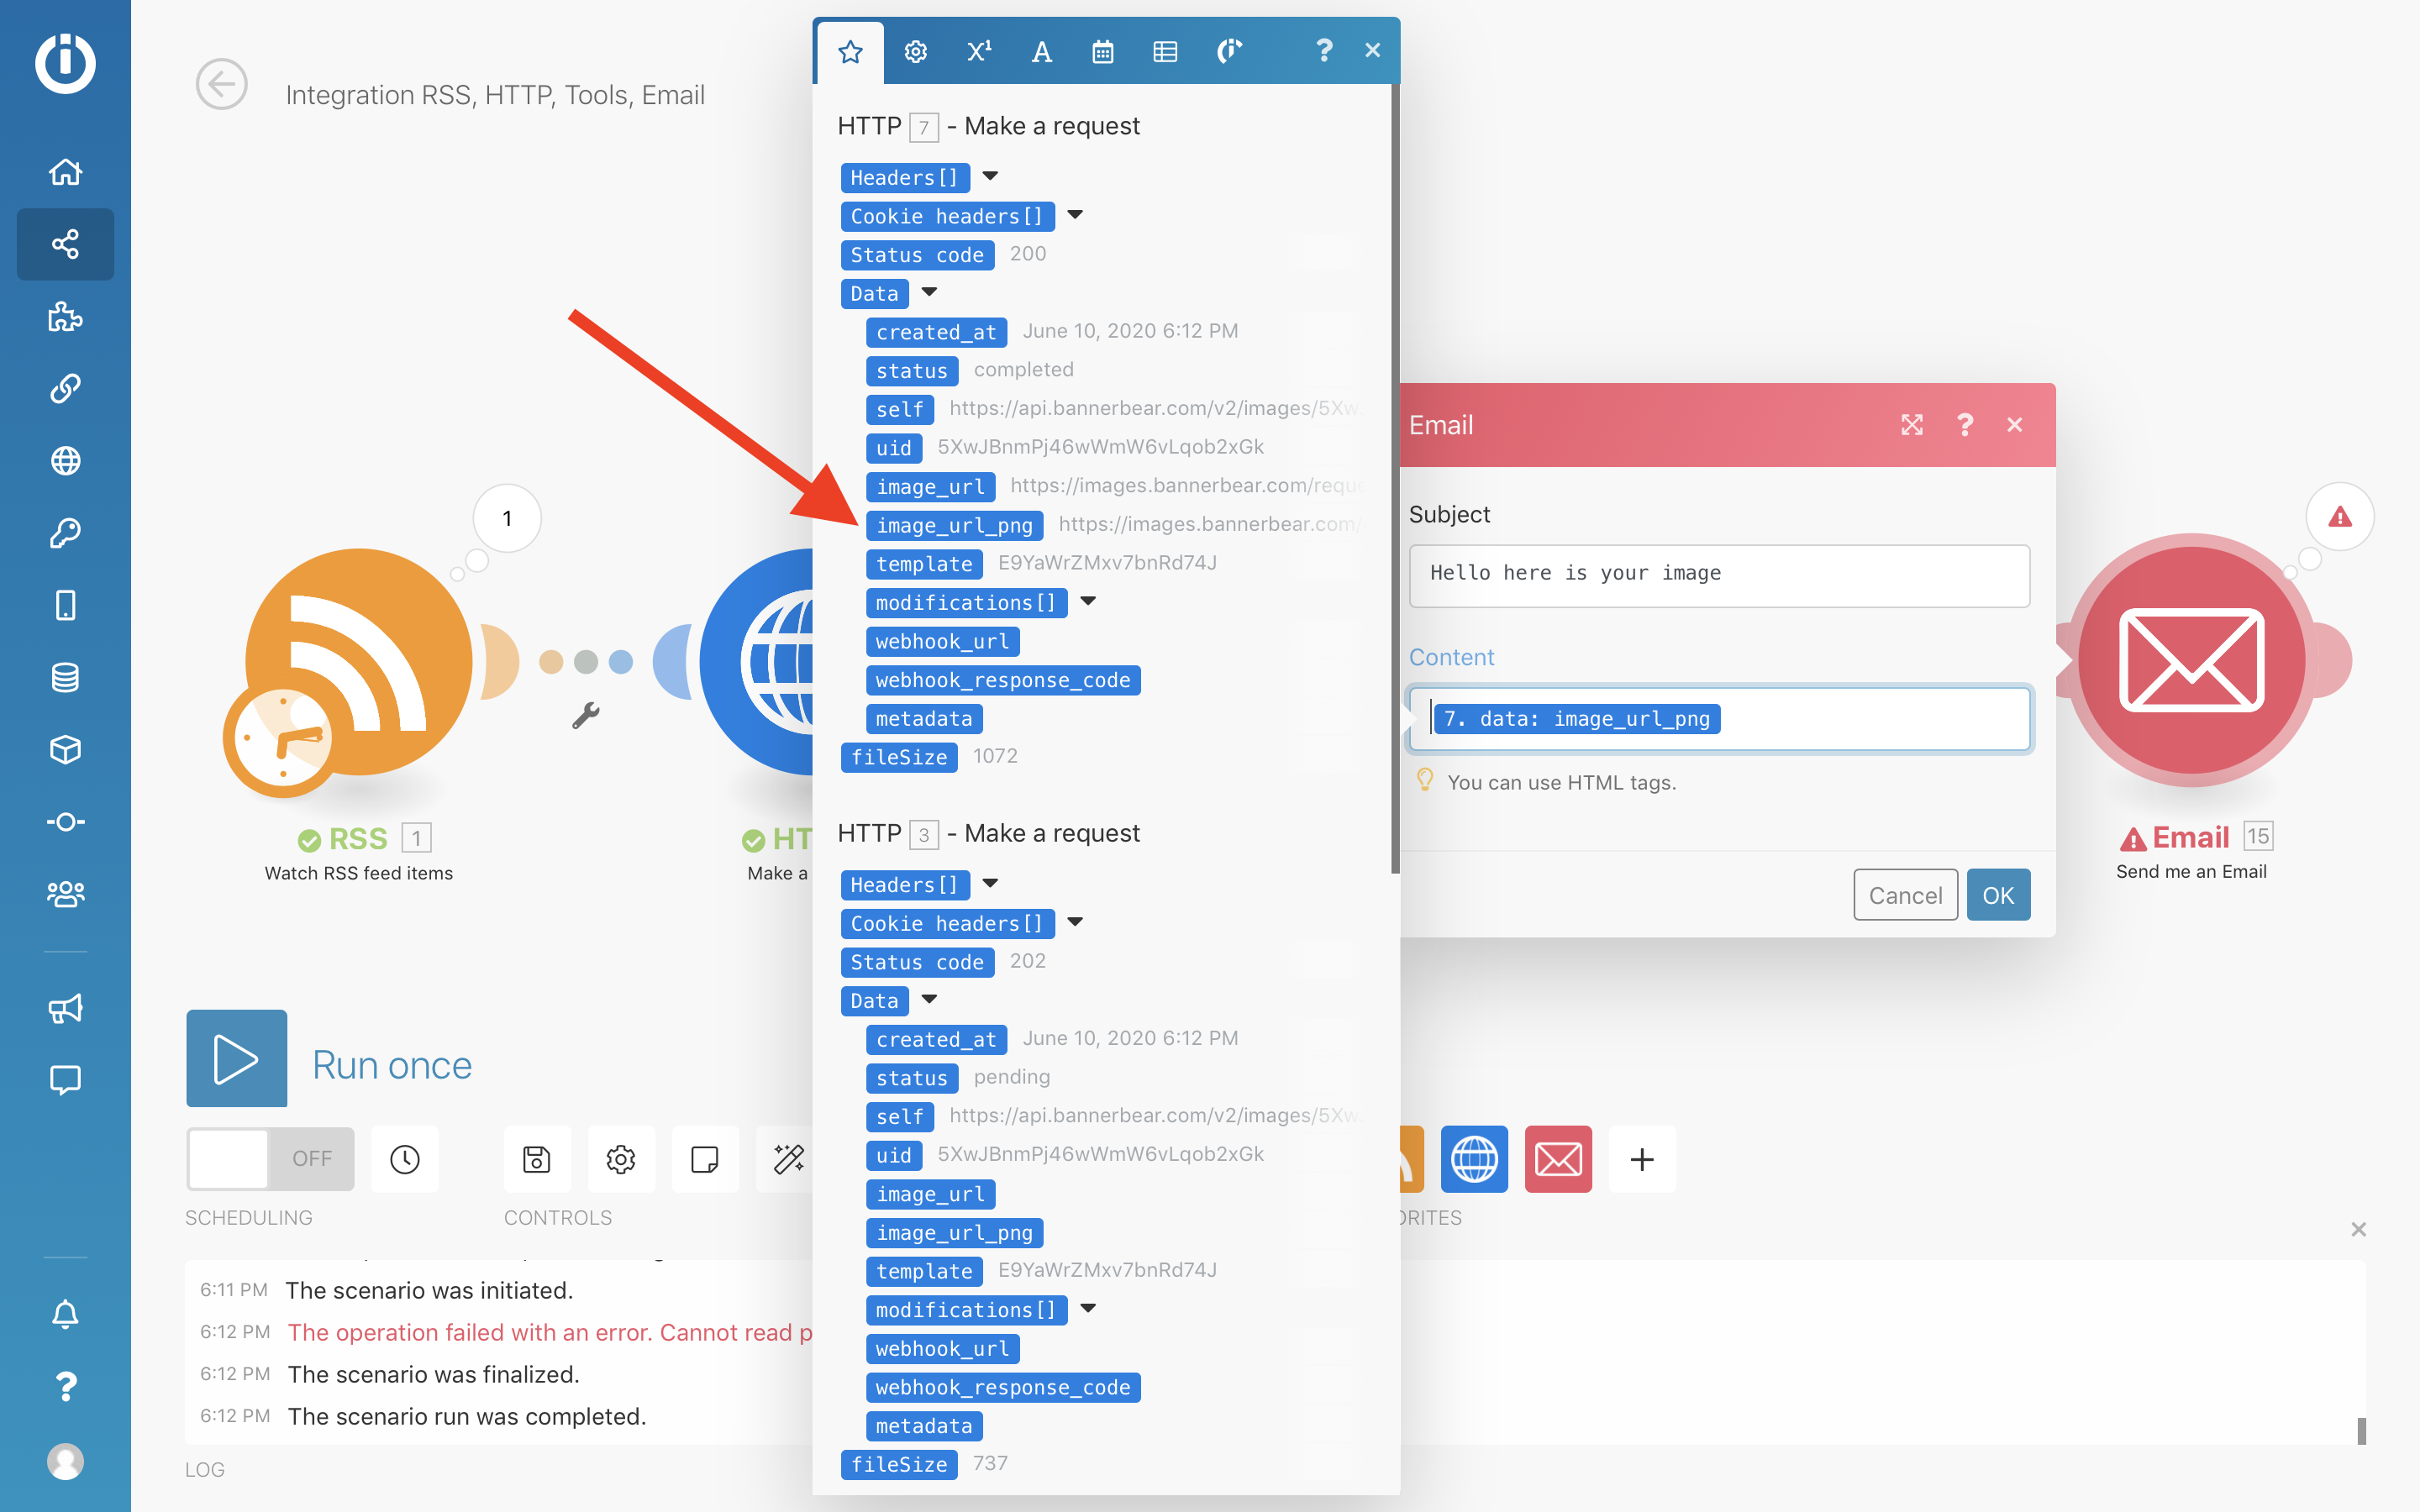
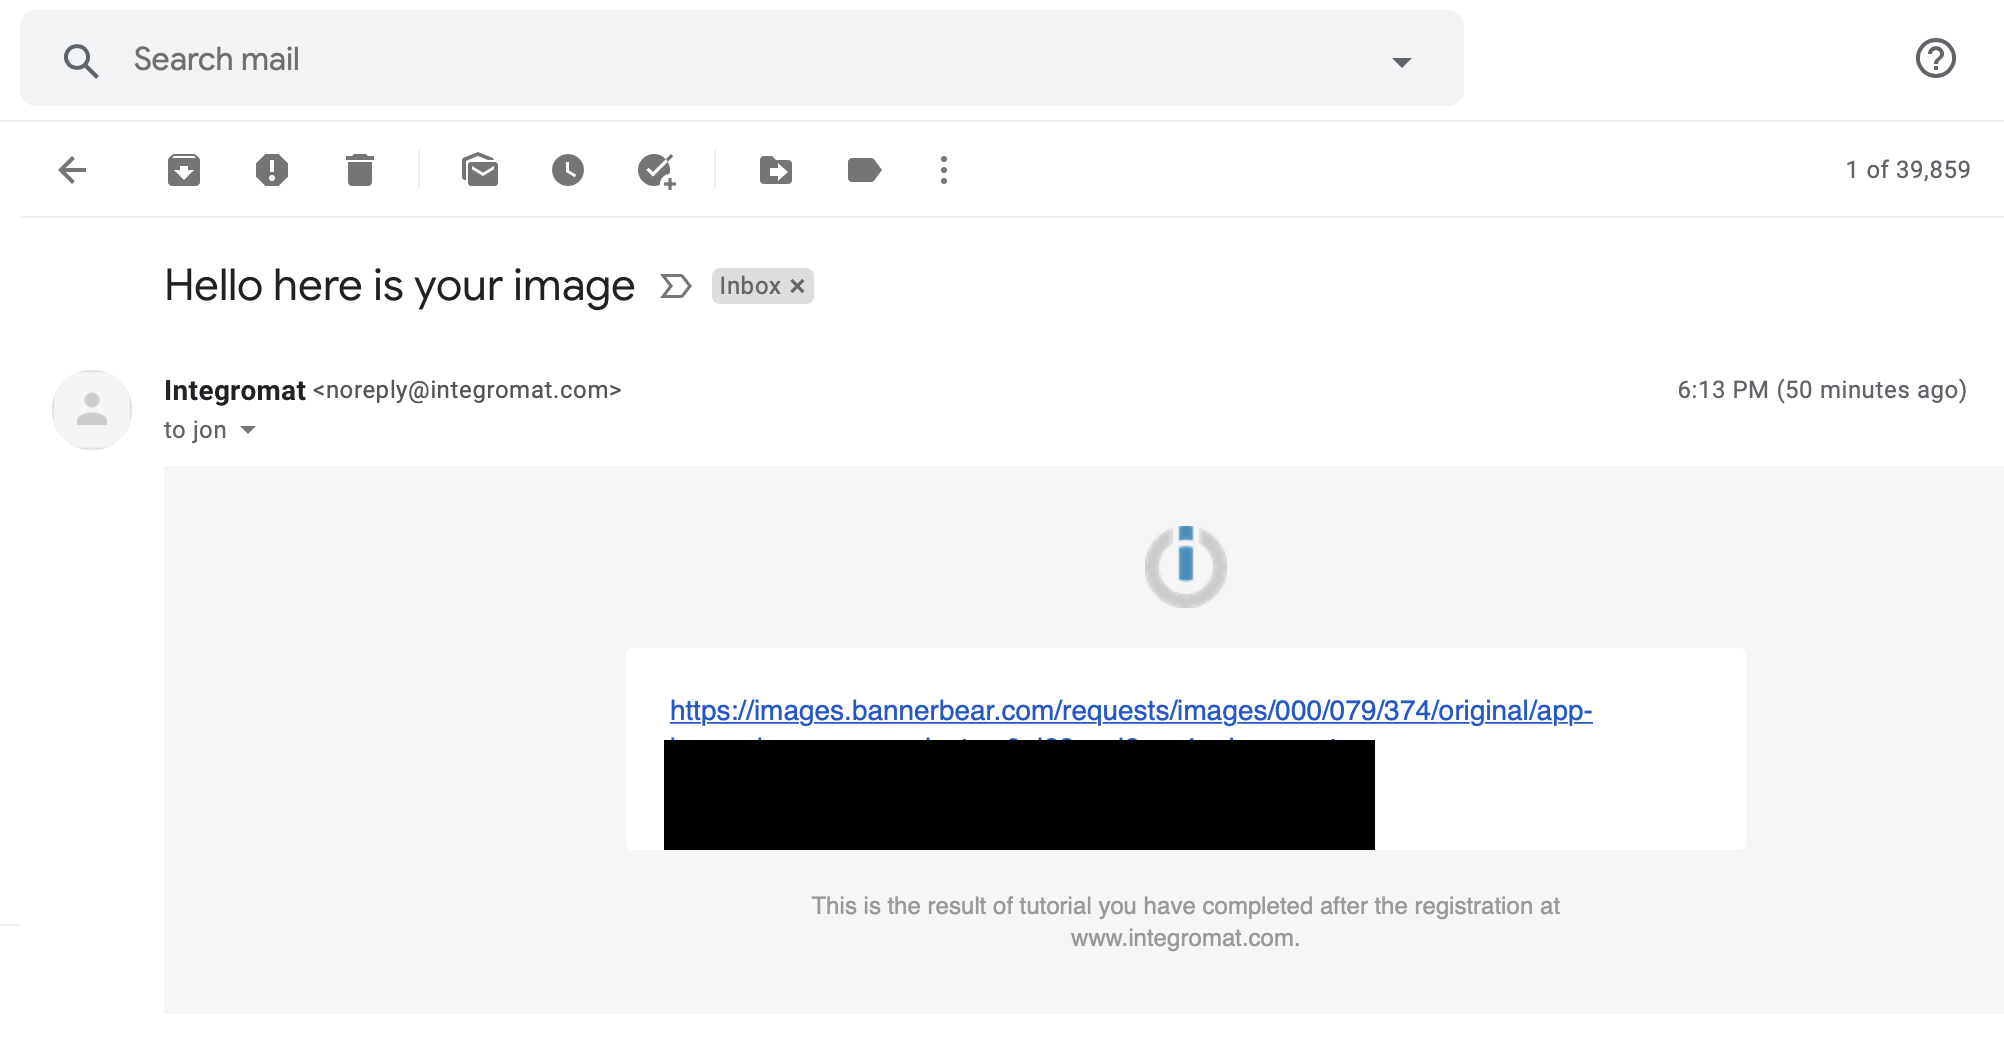
Run the scenario and you will see the workflow go from end to end, resulting finally in an email in your inbox that looks something like this:
With final images that look like this:

Congratulations! Now you can schedule the scenario to run once a day (or however often you like) and it will run through the workflow and generate images using Bannerbear :)
