
Auto Generating Images with Integromat
Contents
Bannerbear now has an Integromat integration to help you connect Bannerbear to thousands of other apps.
What is Integromat?
Integromat is an automated workflow creator that connects different apps together. Think of it as an automated and highly configurable import/export tool. You can export data from one place, send it to another, and perform different actions on that data.
What is Bannerbear?
Bannerbear is an API for generating images and video. You design a template (or grab one from the library) and then feed in data using the API to generate images / videos based off that template e.g. with different texts, colors and background images.
What can I do with Bannerbear + Integromat?
Integromat + Bannerbear is a powerful way of using the Bannerbear API without writing code. Using the Bannerbear Integromat integration you can send data from thousands of different apps into Bannerbear, to generate unique image / video content for your business (or your clients!).
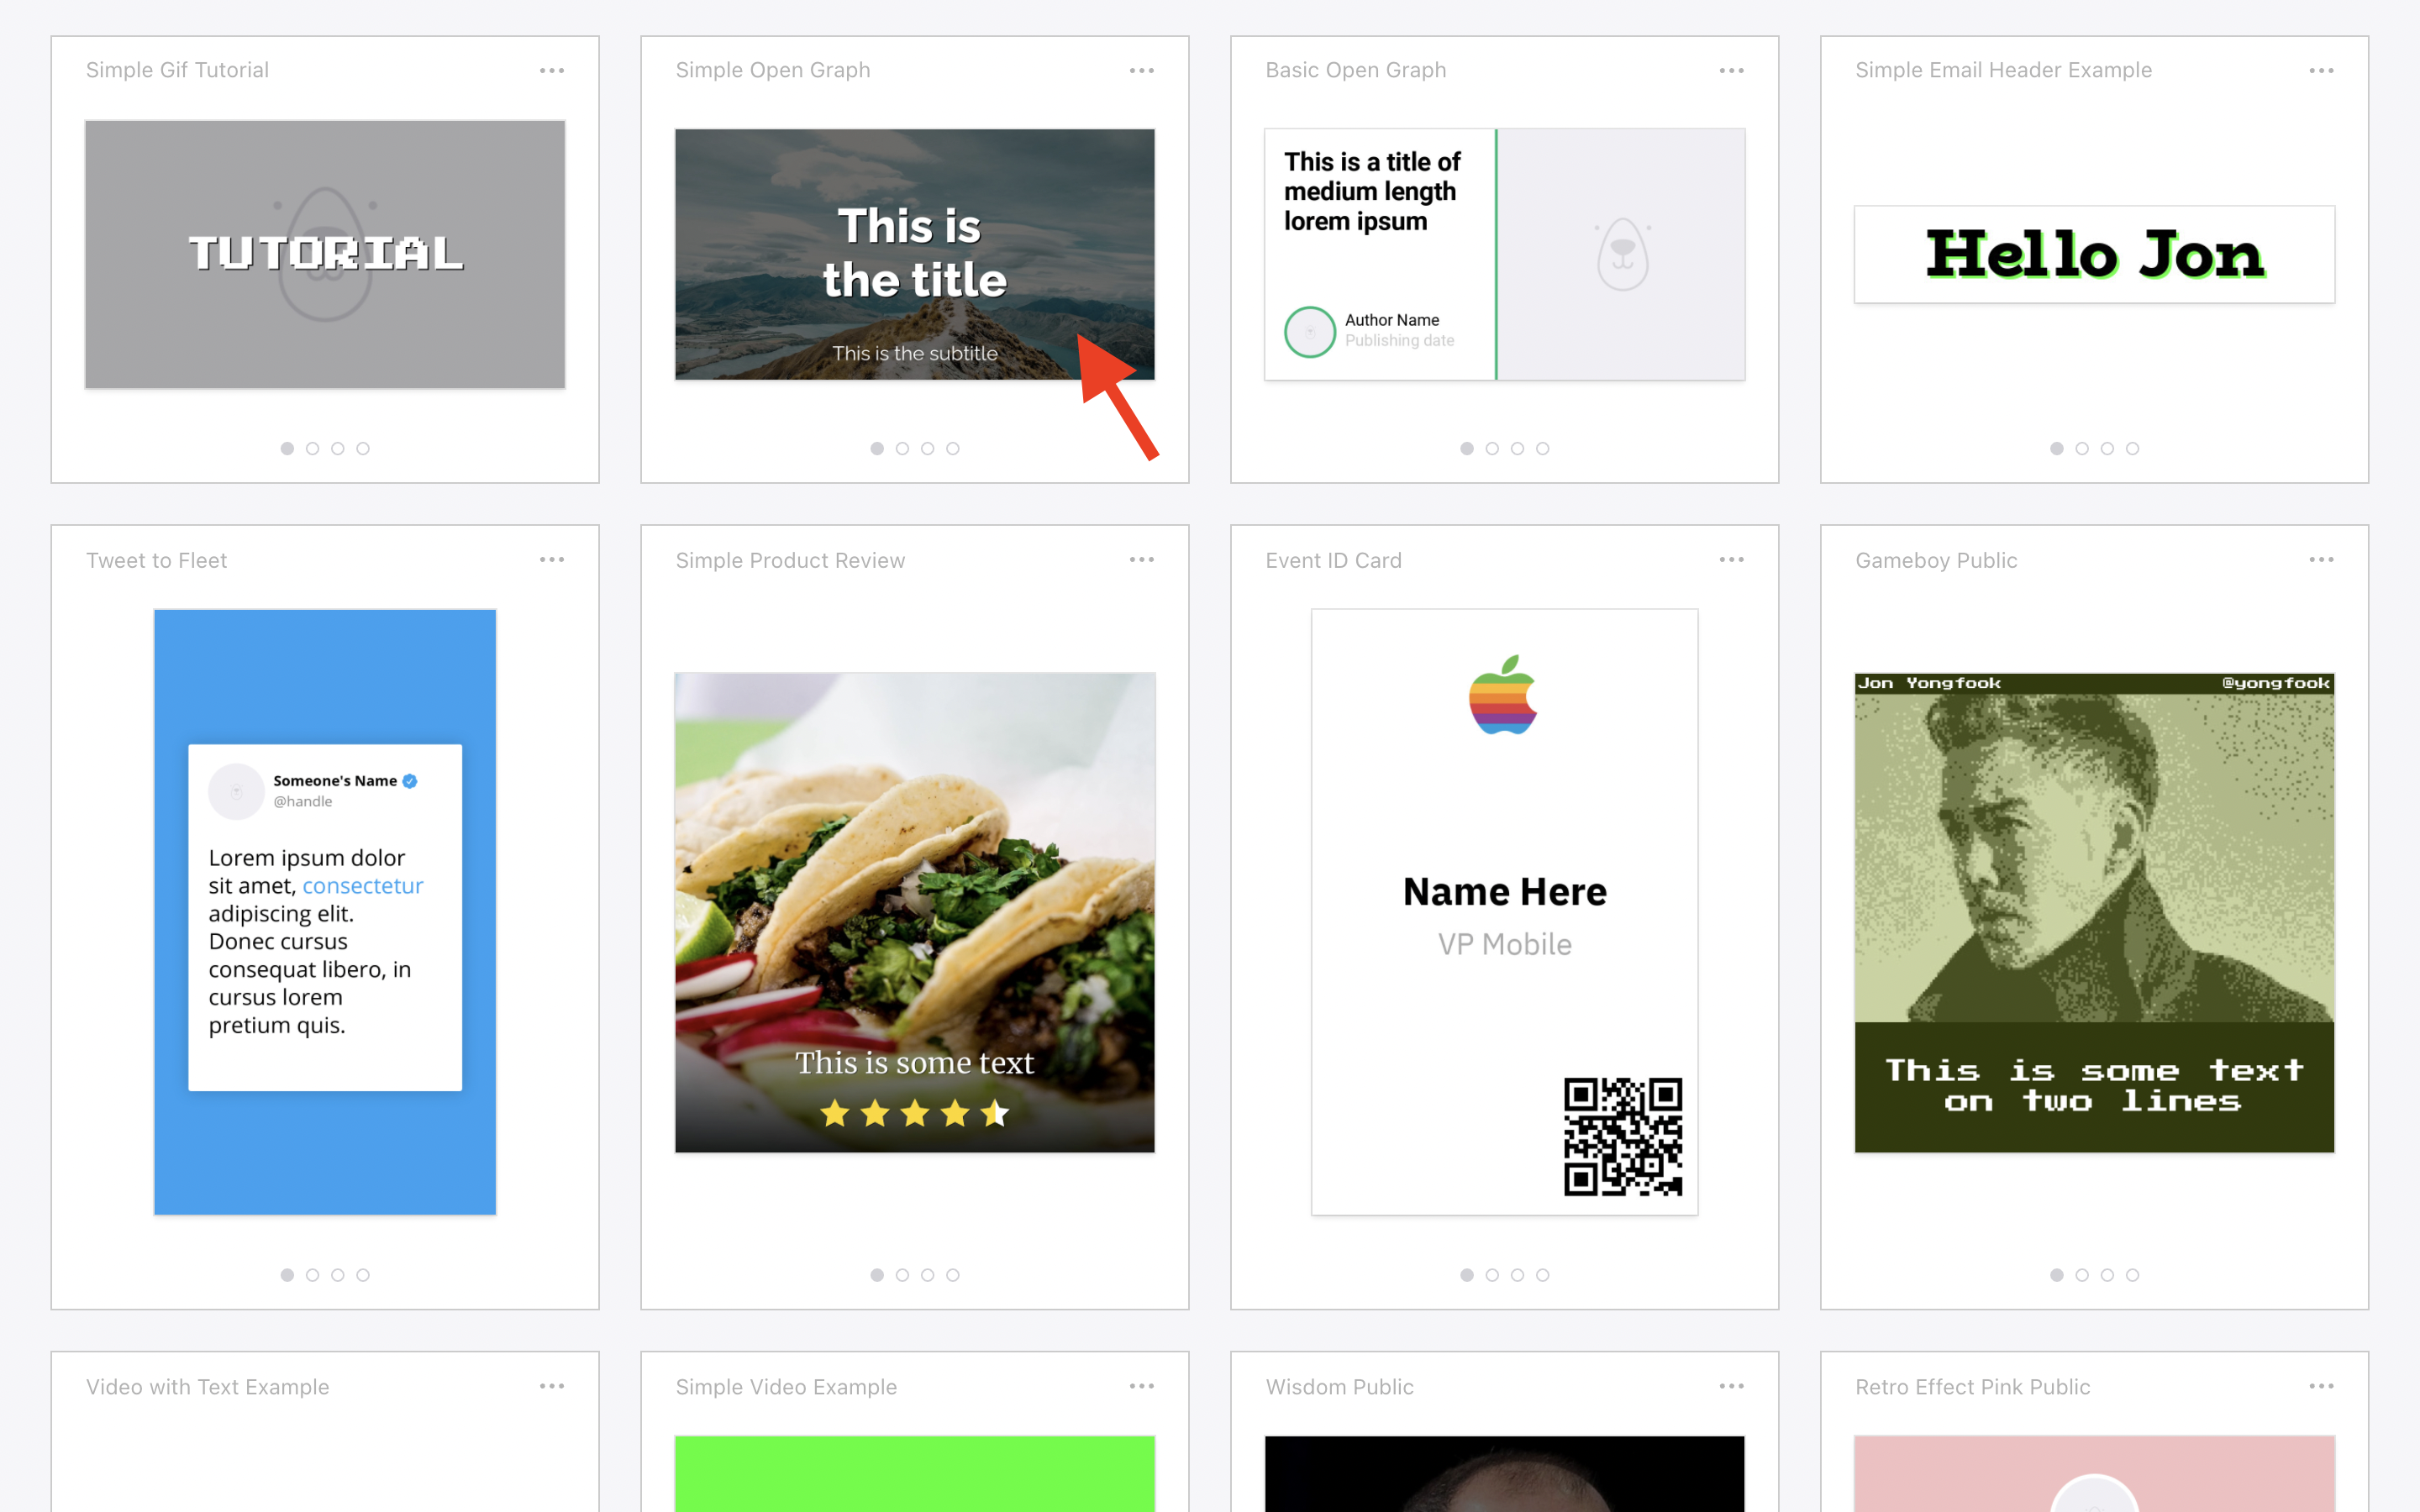
Sample image
In this tutorial we will create an Integromat scenario that takes an RSS feed of news articles (featuring a title, image, author etc) and generates poster images like this:

These could be then used for automated emails, open graph images, twitter cards… and more!
The Scenario overview
I'm assuming that if you're reading this you are already familiar with Integromat!
If that's the case and you just want to get a quick look at the full scenario, here it is:
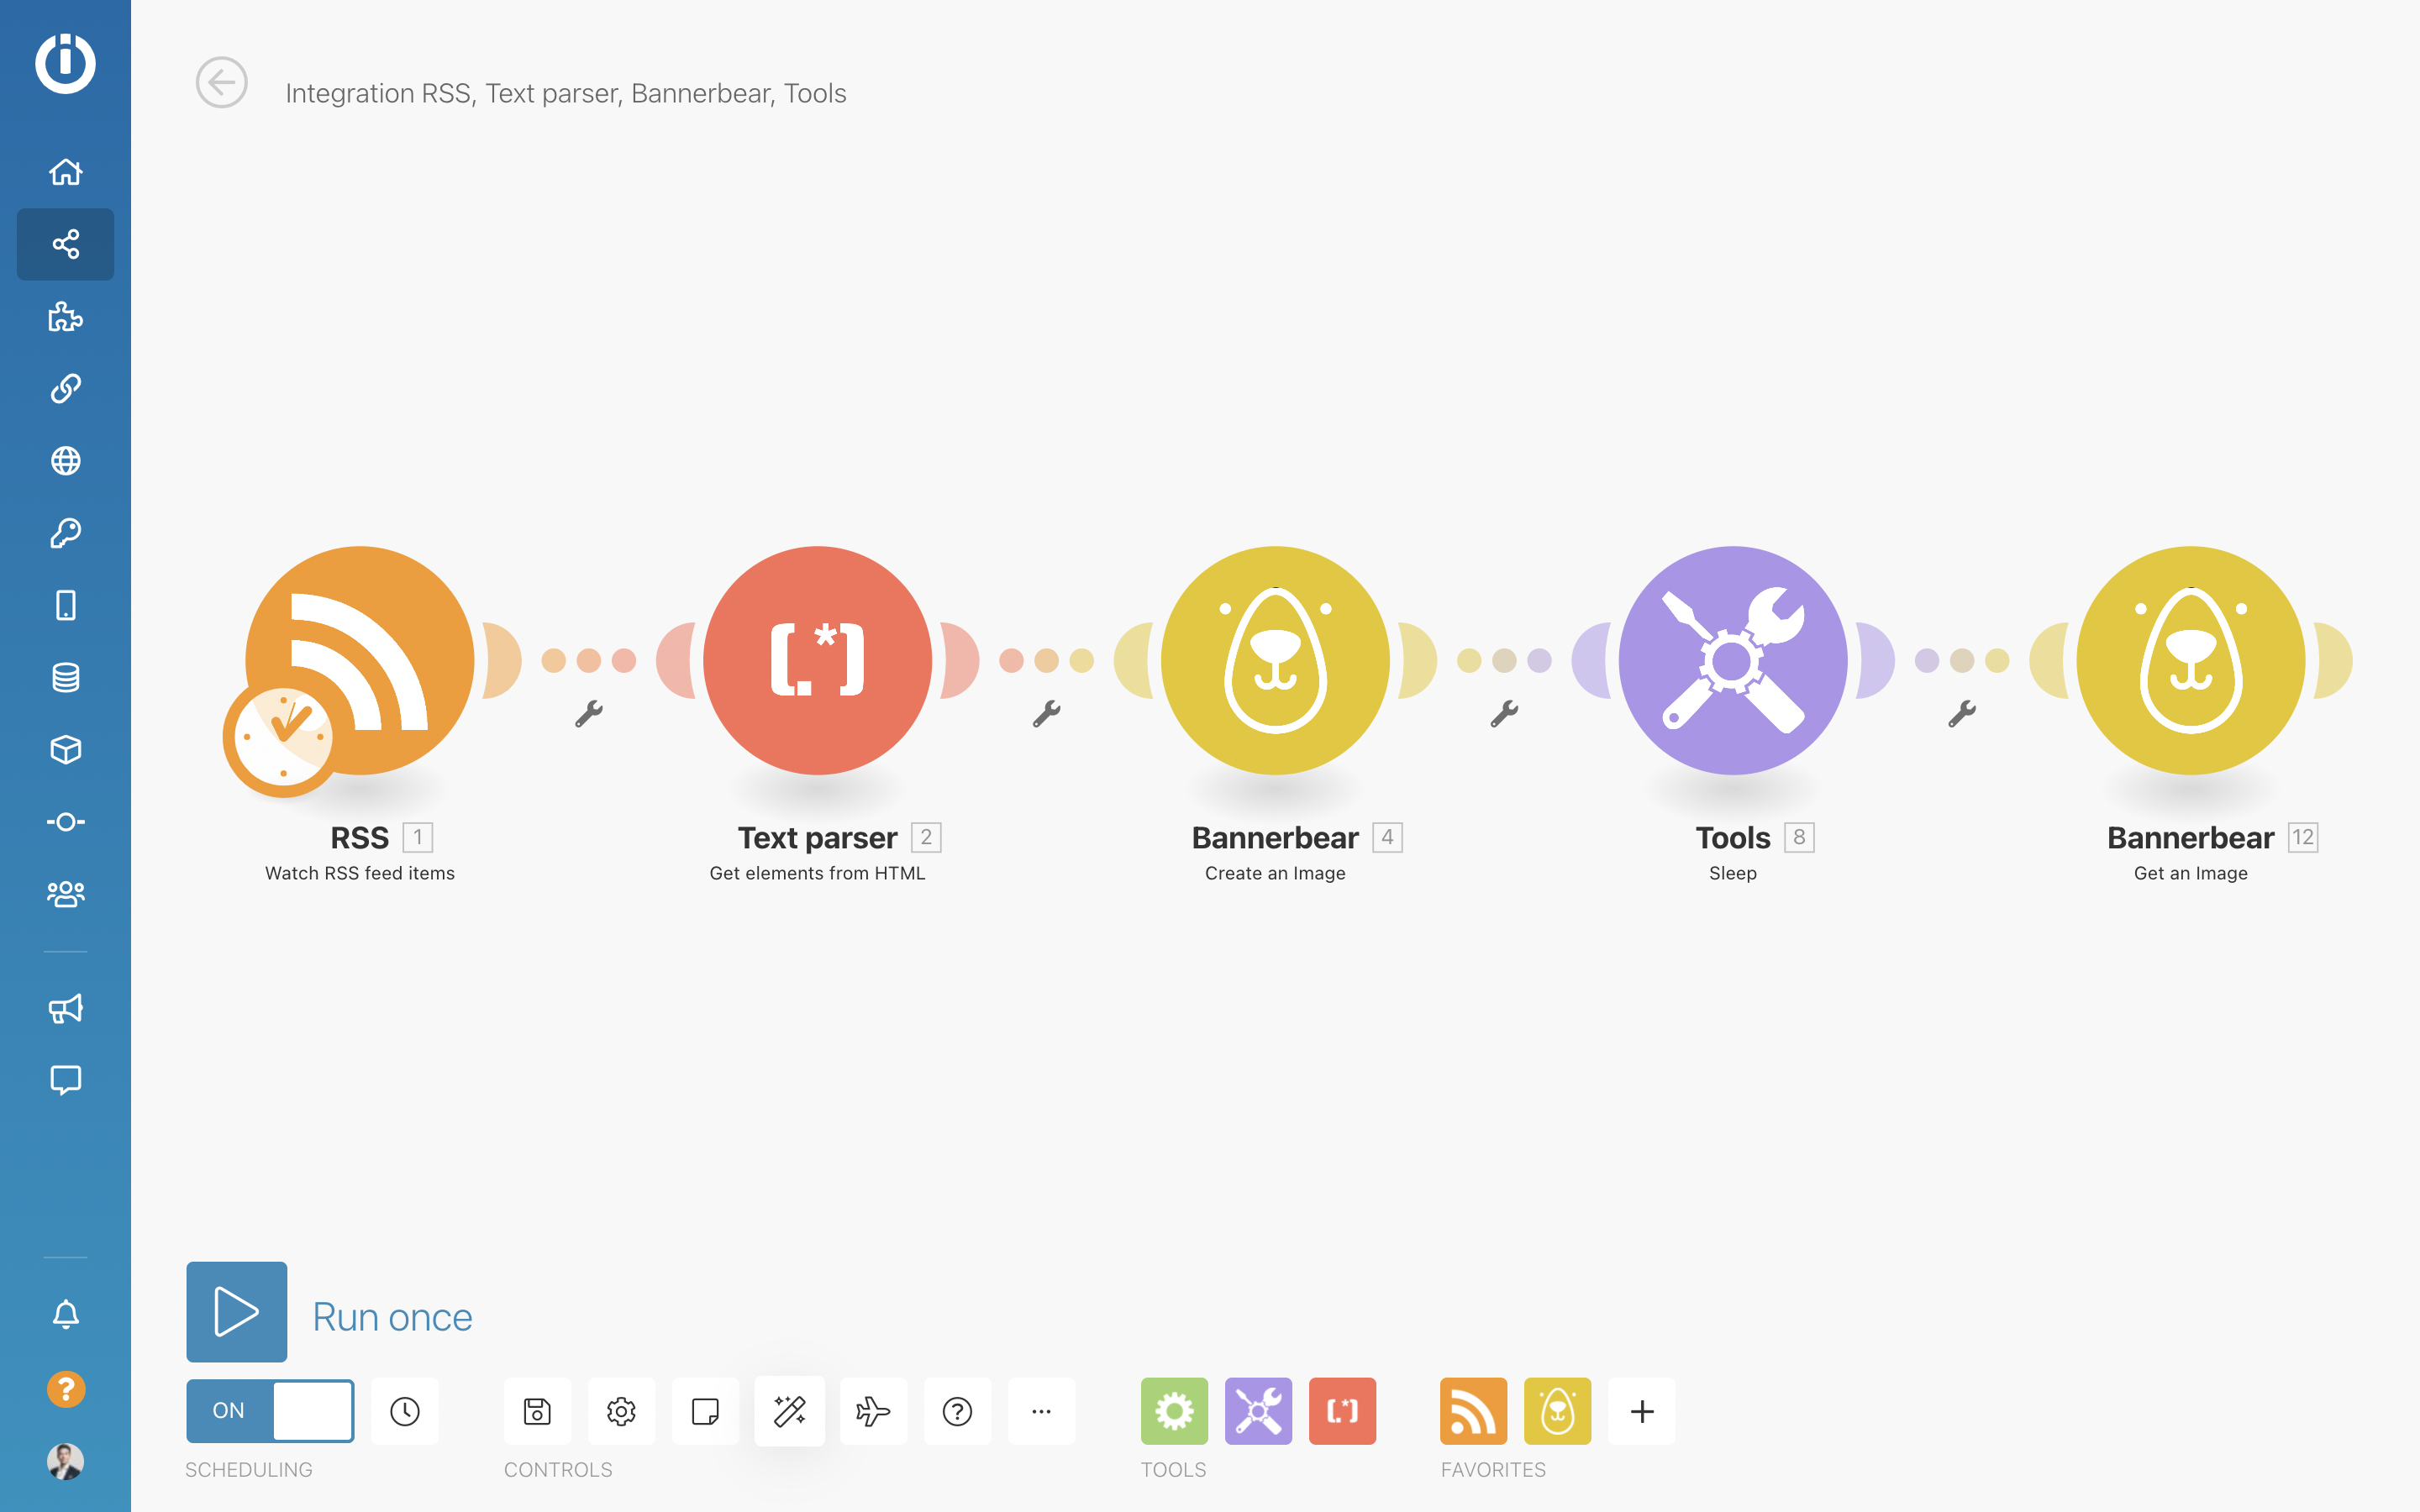
This is a sort of "Bannerbear 101" scenario. You can use the principles of this to build various other scenarios - but essentially what we are doing here is:
- Getting some data (in this case, RSS feed data)
- Sending the data to Bannerbear
- Sleeping for a few seconds while the image is generated
- Getting the final image data
In the real world, you would follow up the last step with more steps e.g. once you have the final image you probably want to post it somewhere, or store it in the cloud etc. I will leave that up to you!
Adding a Bannerbear template
The first thing to do is add a template to a Bannerbear project.
Templates can hold multiple layers of text / images, as many as you need - but for this tutorial we are just going to use a simple template that has a title, a subtitle and a background image.
Grab the Simple Open Graph template from the library and add it to a new project:
When you have added it to a project, scroll down on the template page to the API Console - this will give you information about the different layers of the template, which you will be referencing later in your Integromat scenario:

This template has 3 layers:
- photo
- title
- subtitle
It also has one called "overlay" but we won't be changing the properties of this layer - it is a dark tinted overlay over the background image, to help the text stand out.
Bannerbear API Key
Next you should copy your Bannerbear Project API Key to the clipboard - this is how Integromat will connect with your Bannerbear account. You'll find the API Key in the Project's "Settings / API Key" section:
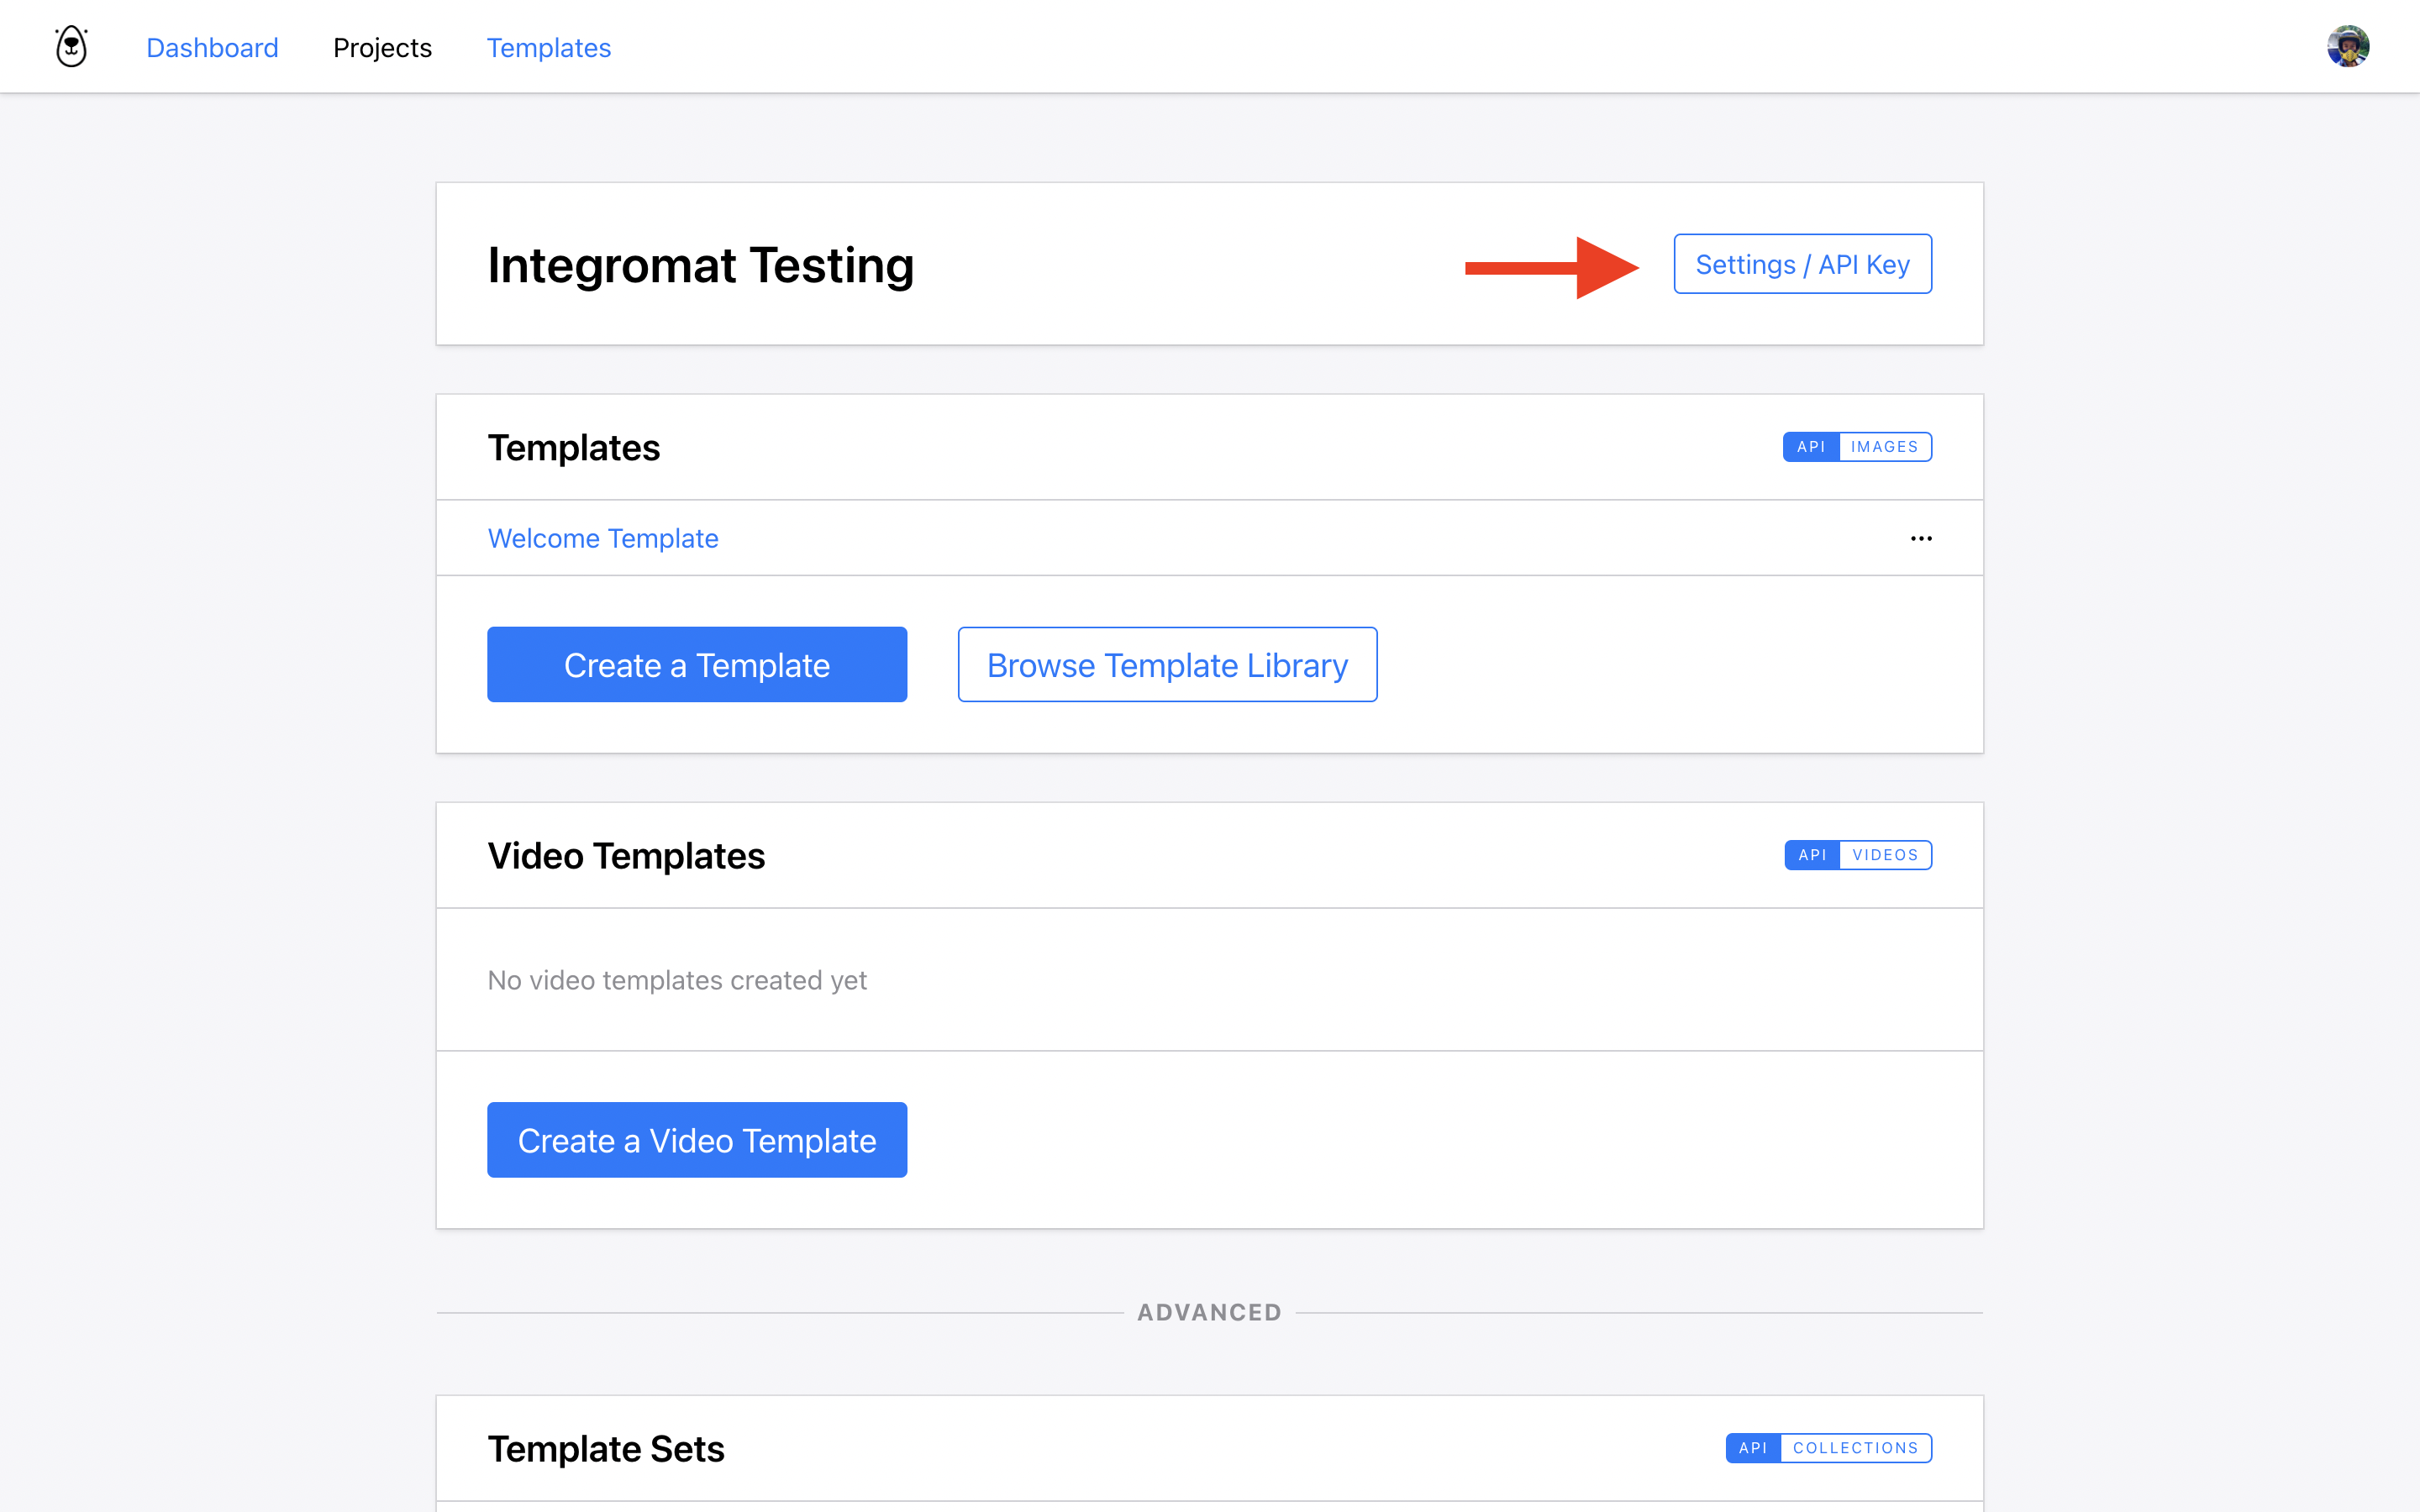
Copy the key and lets start creating the Integromat scenario!
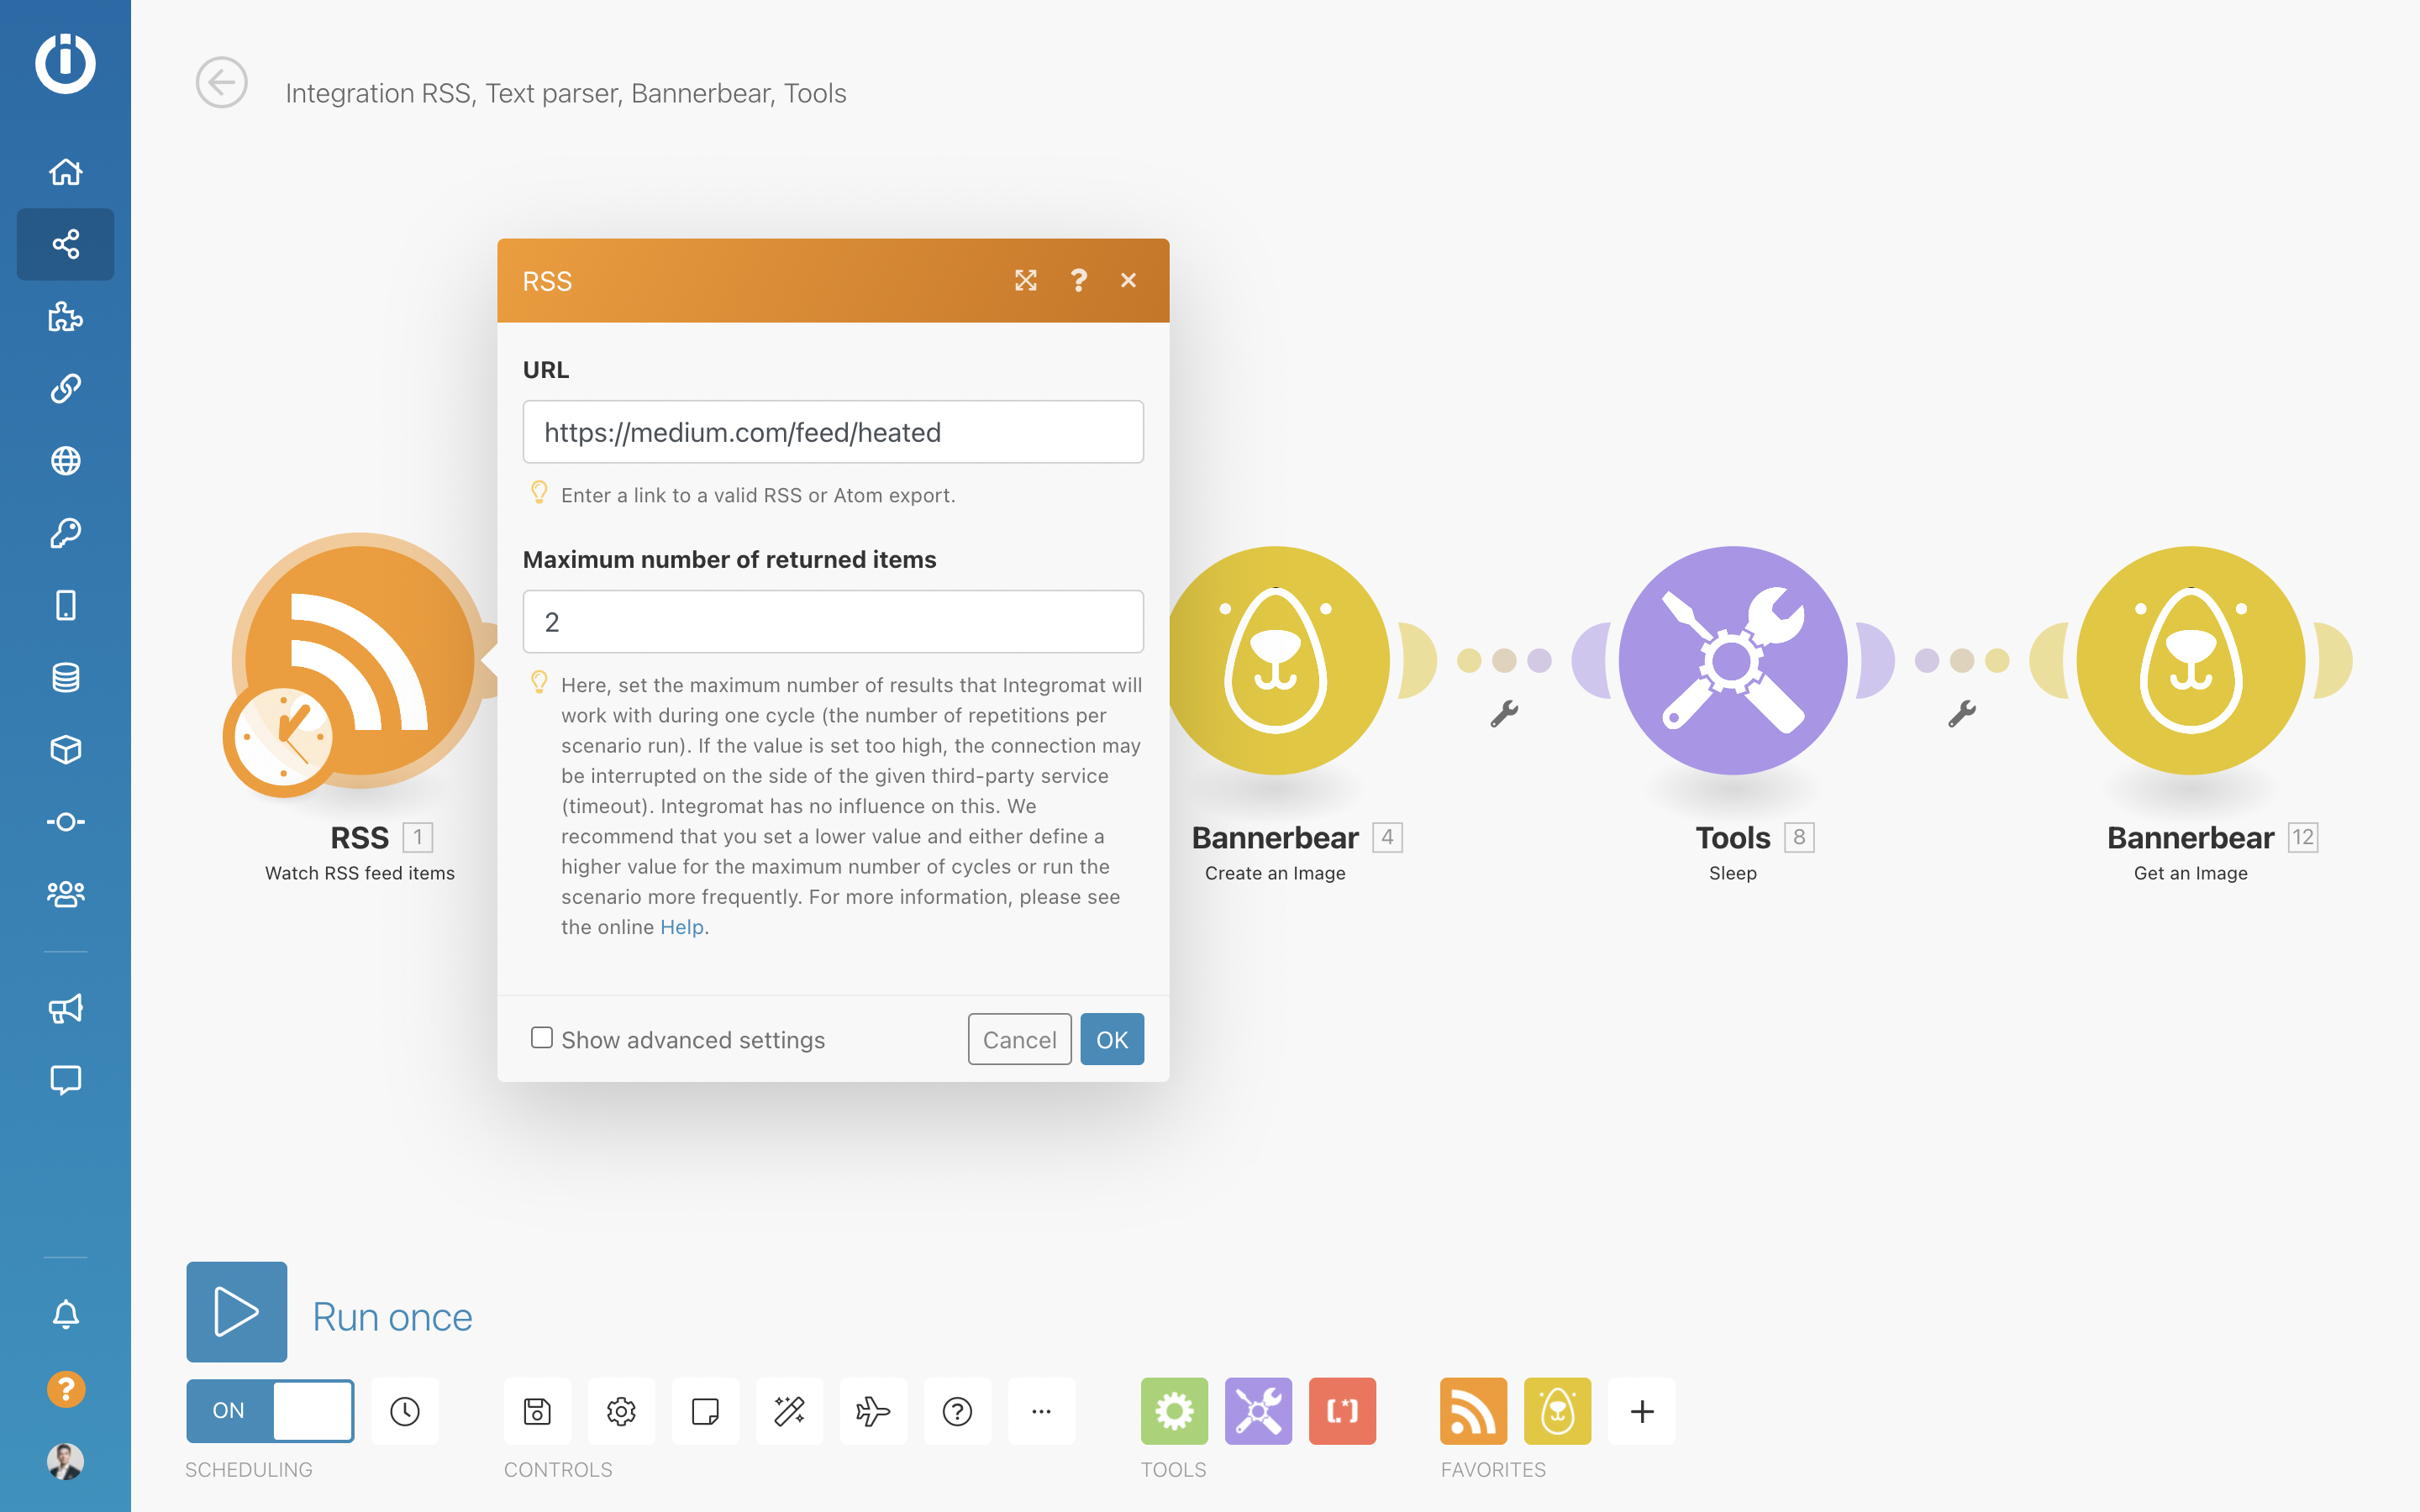
Fetching RSS Data
In this tutorial we will be pulling in data from an RSS feed.
The feed I'm using as an example is this one:
If you take a look at the raw feed you'll see that it's a standard RSS feed with one interesting attribute - it has embedded the article poster image as an img tag in the RSS article description property, which we will be grabbing later.
So for this step simply add the RSS Module and plug in this feed:
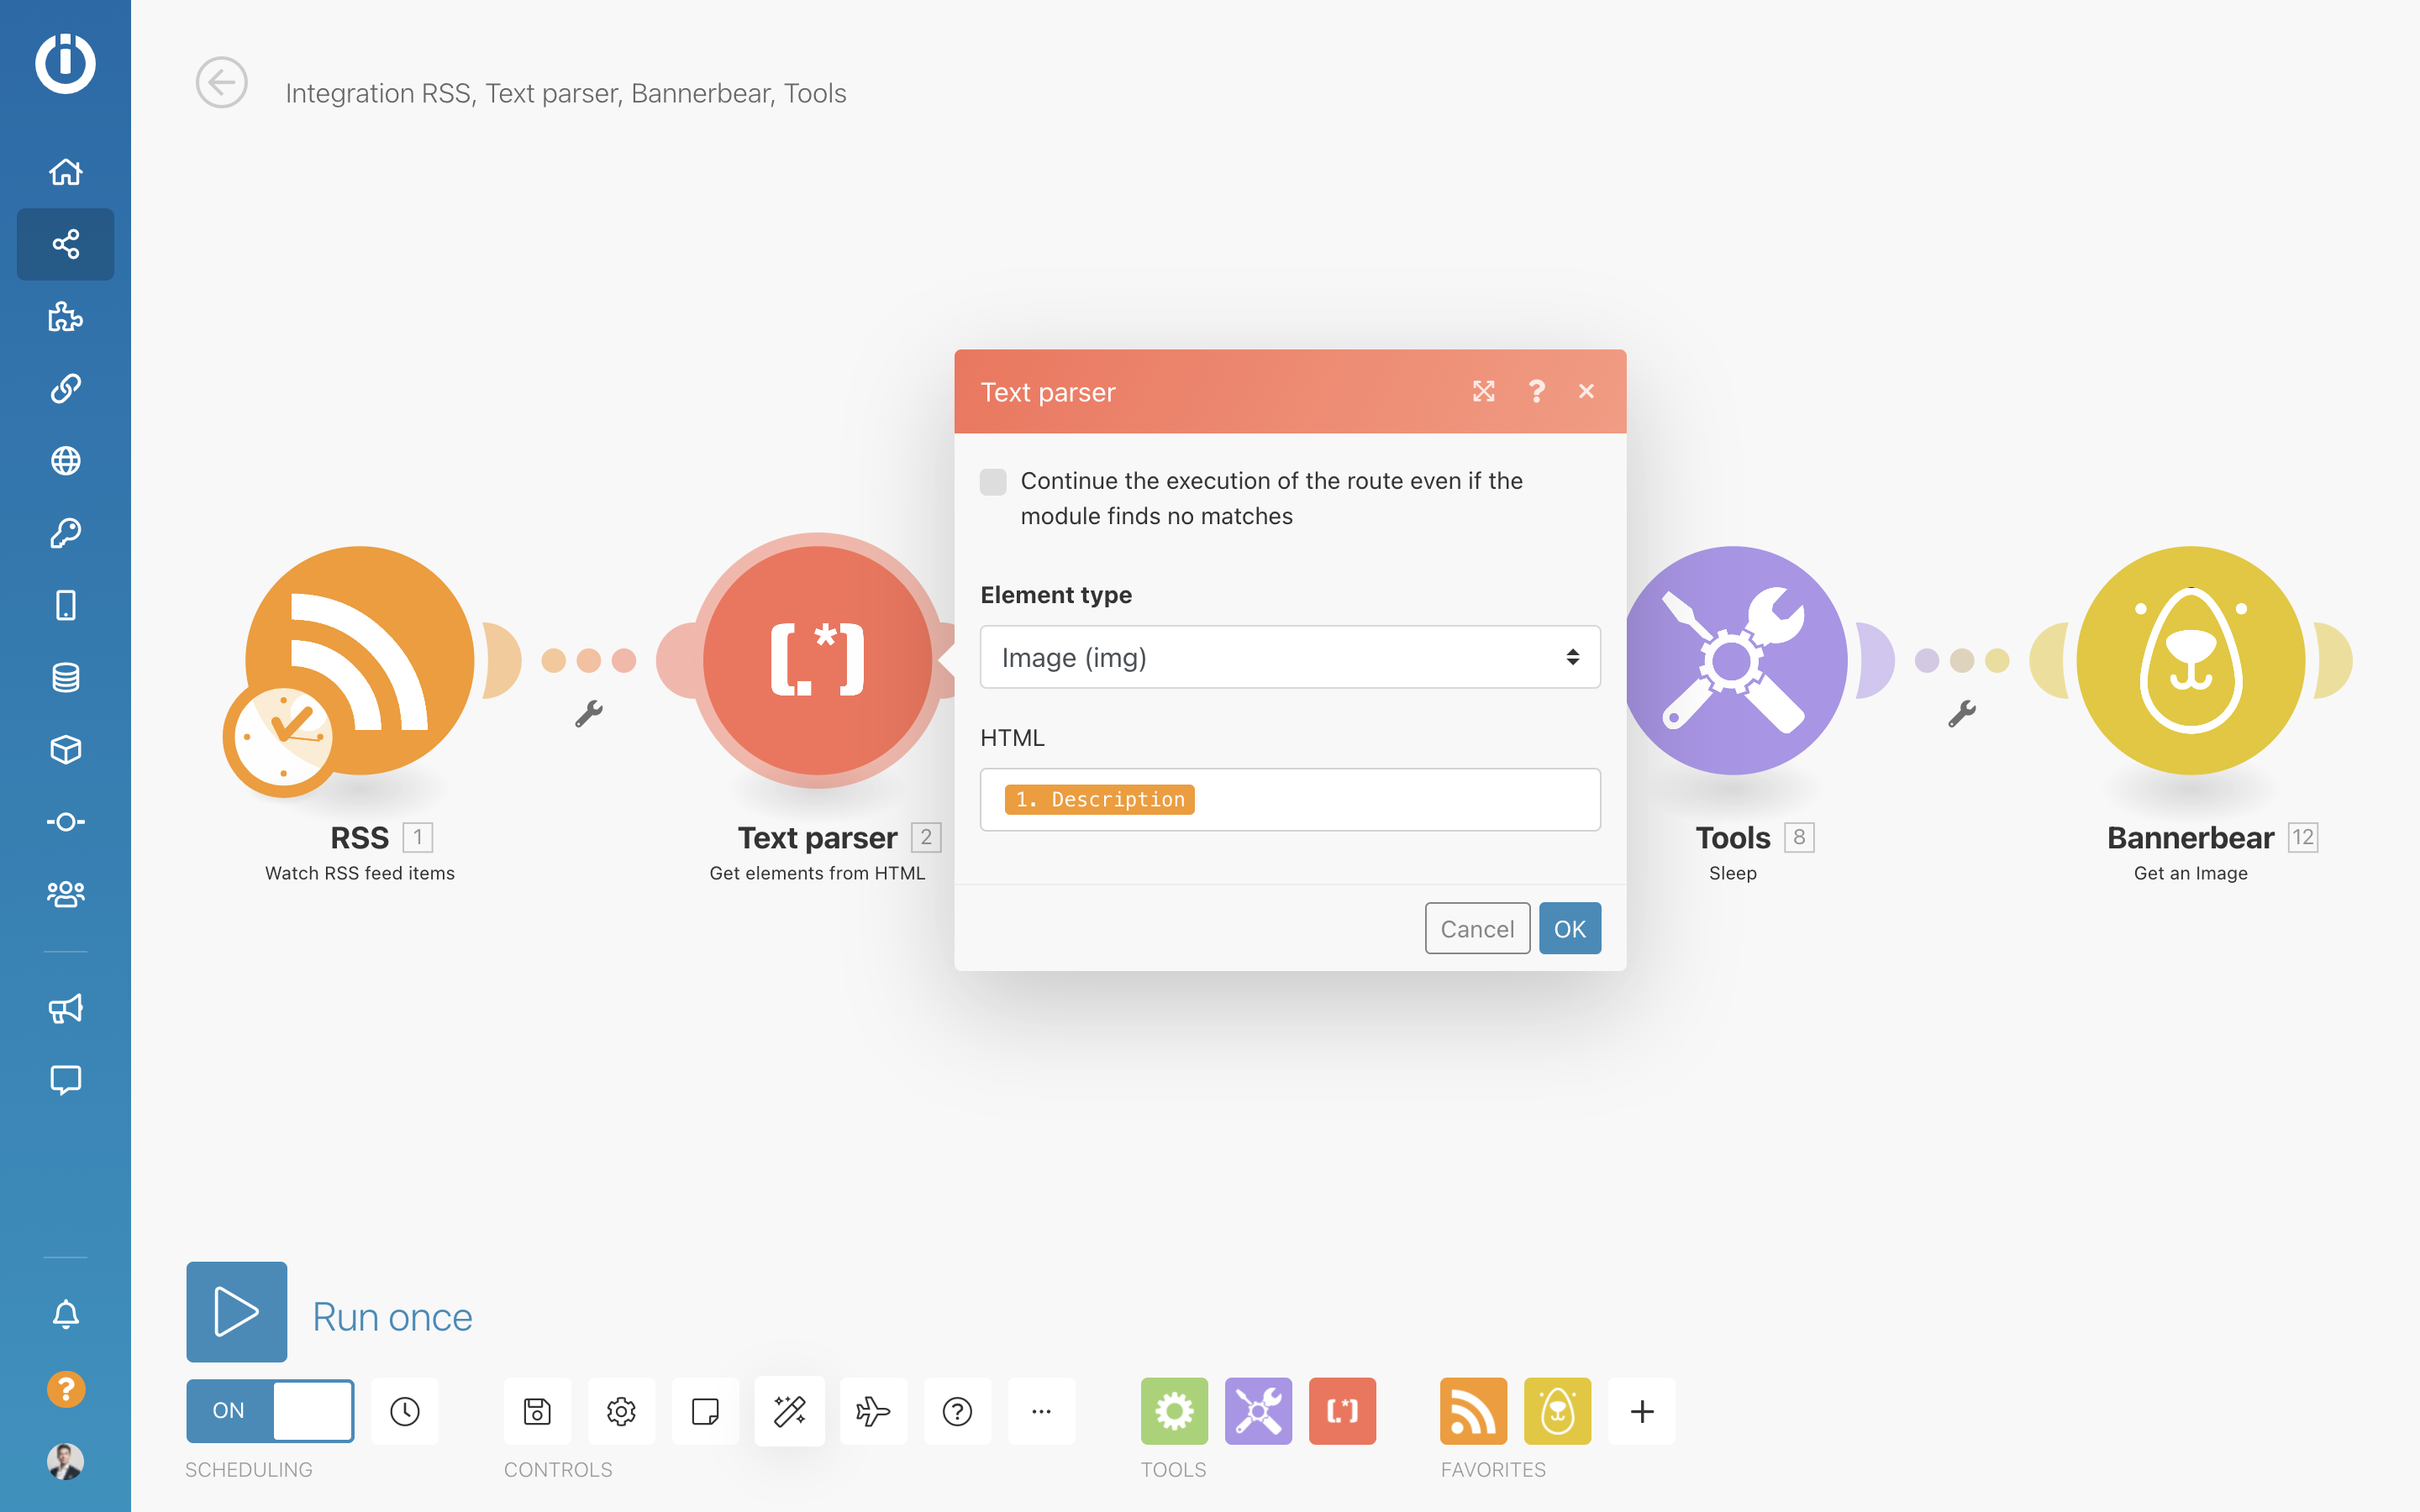
Parsing the article image
Next we want to grab that image embedded as HTML in the description property.
On Integromat this is as simple as setting up a Text Parser step and getting it to grab the image from inside the description:
Creating an image in Bannerbear
Now we have all the data we need, so we are ready to post to Bannerbear.
Here's what the settings look like:
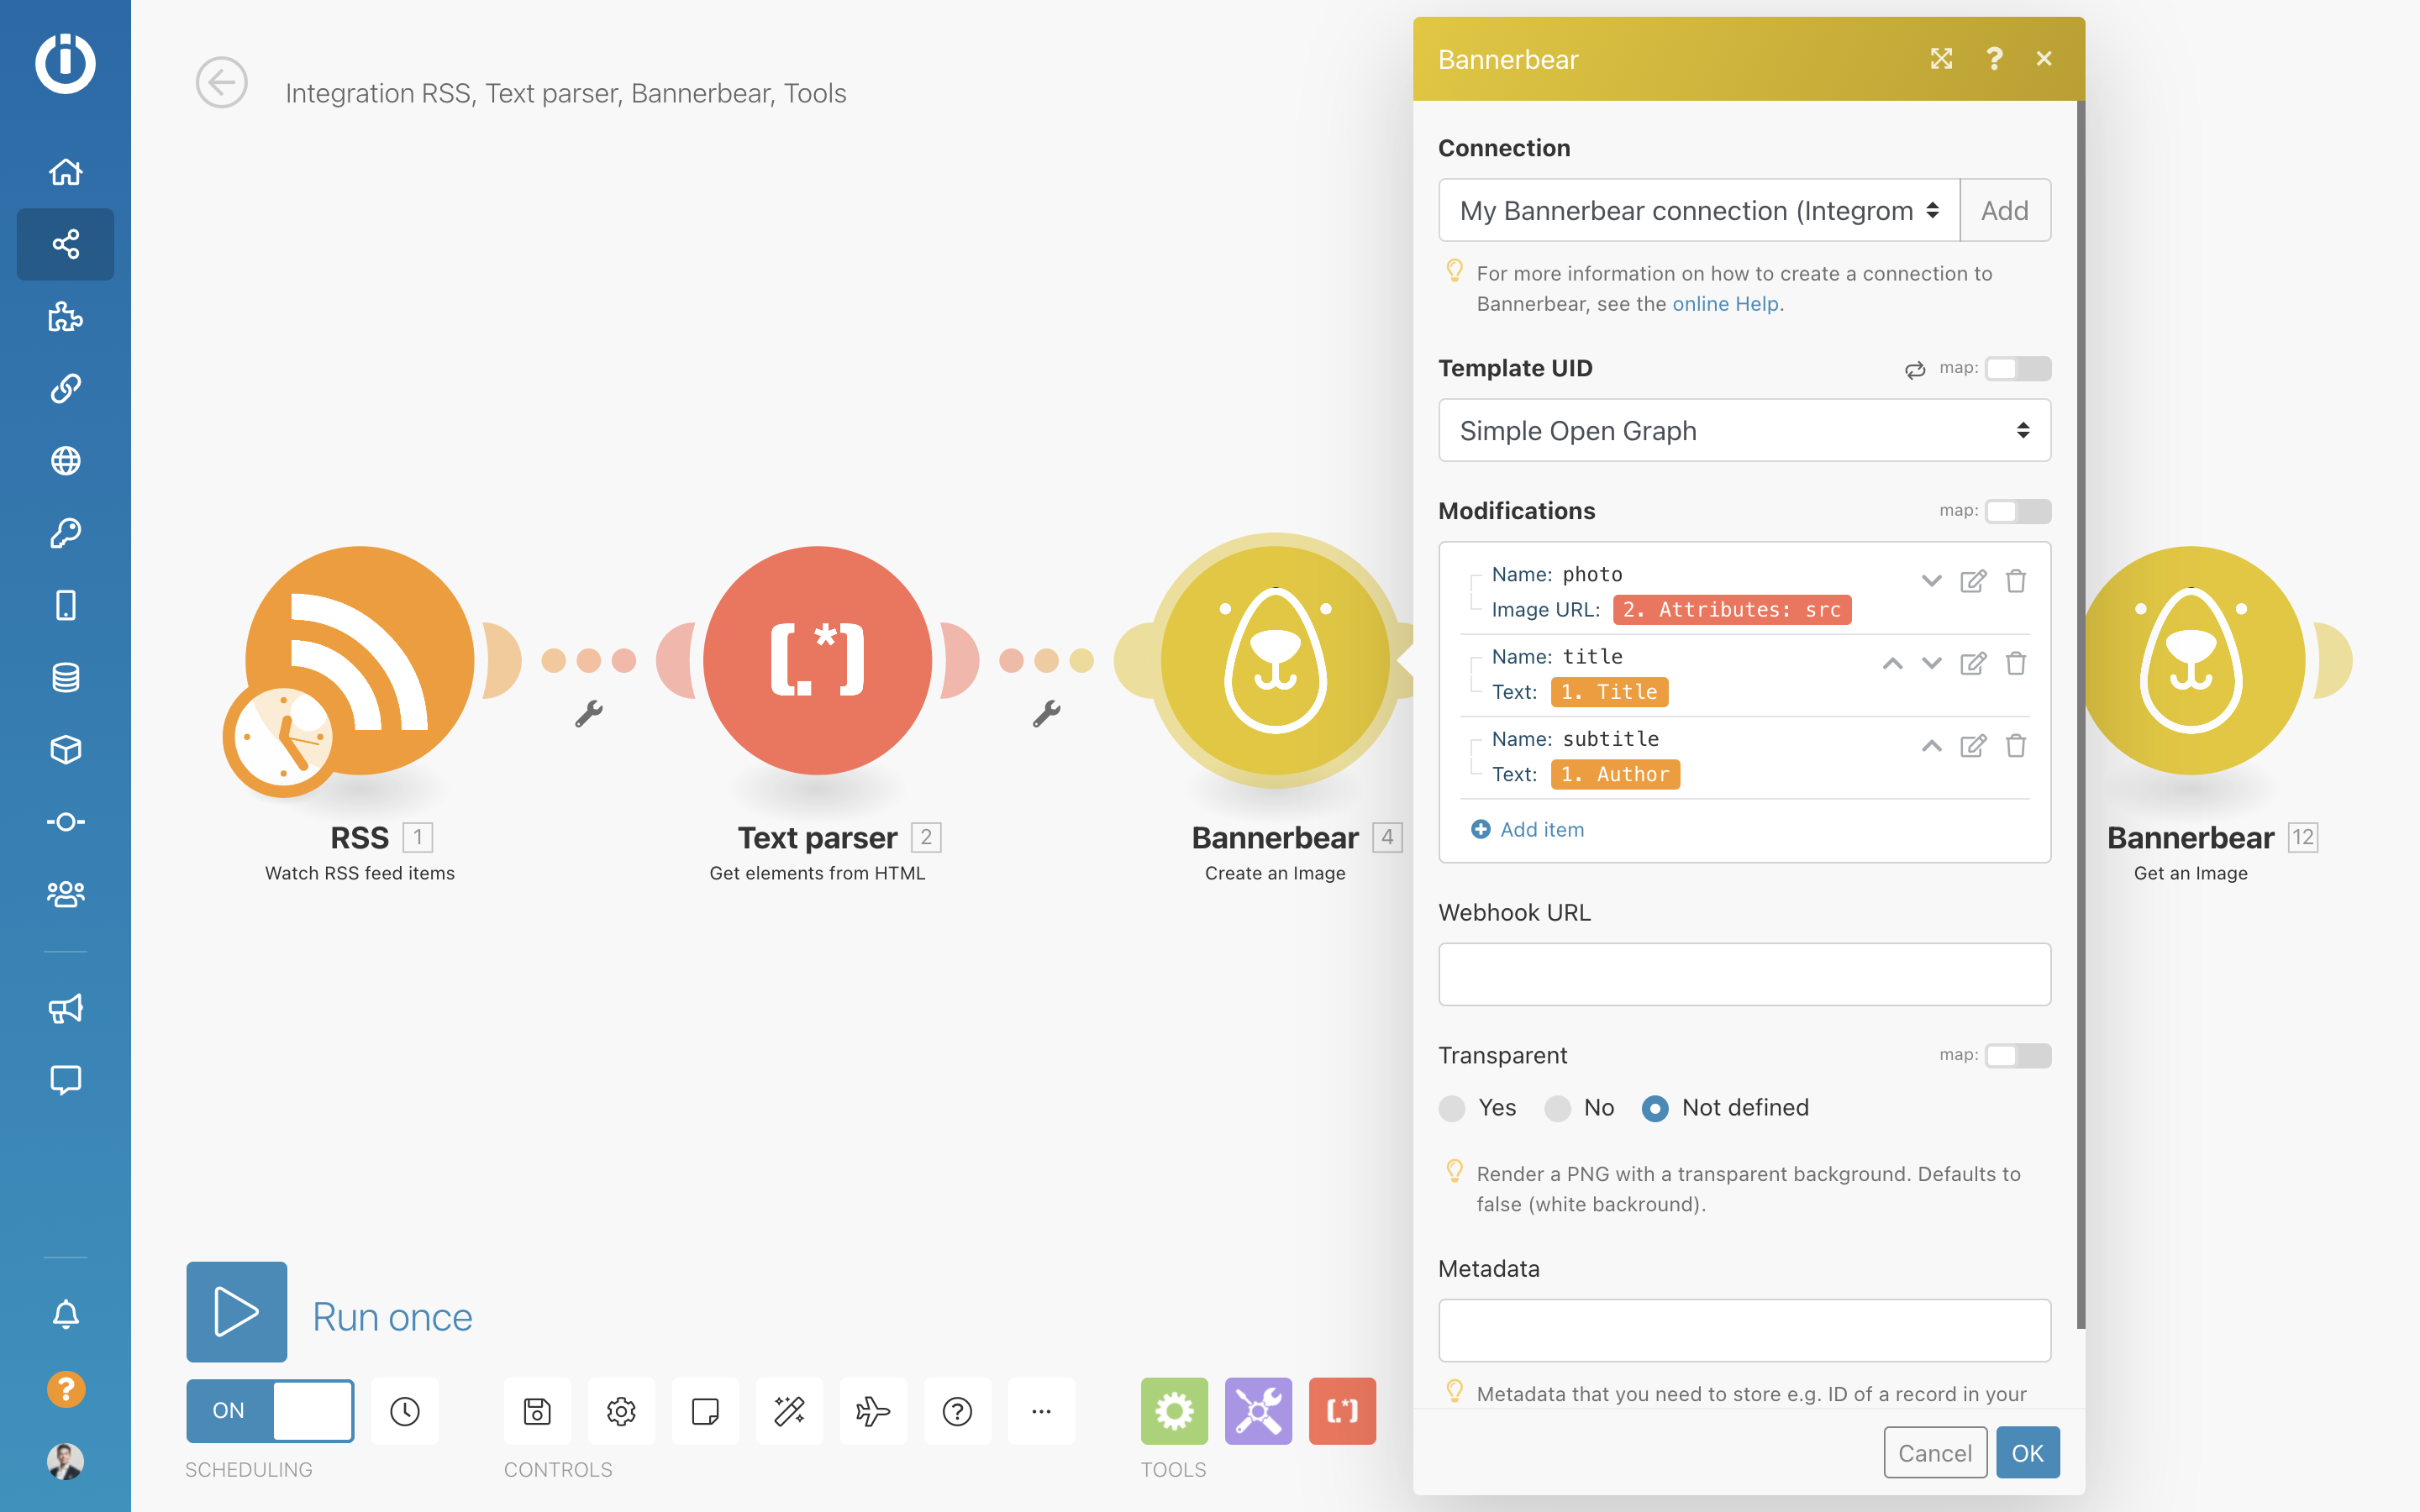
And here's the explanation…
Add a connection
First you will need to create a new connection to Bannerbear (click Add next to Connection) - this is where you plug in your Project API Key we copied earlier.
Choose a template
When Integromat connects to your Bannerbear project, it will load your templates into view. Select the one that we are using for this tutorial ("Simple Open Graph").
Add Modifications
Modifications are simply a list of changes you want to make to the template.
To change a layer in a template, you need to reference it by its name.
You can see all template layer names in the Bannerbear API Console mentioned above.
Remember how we said there are 3 layers we want to change?
- photo
- title
- subtitle
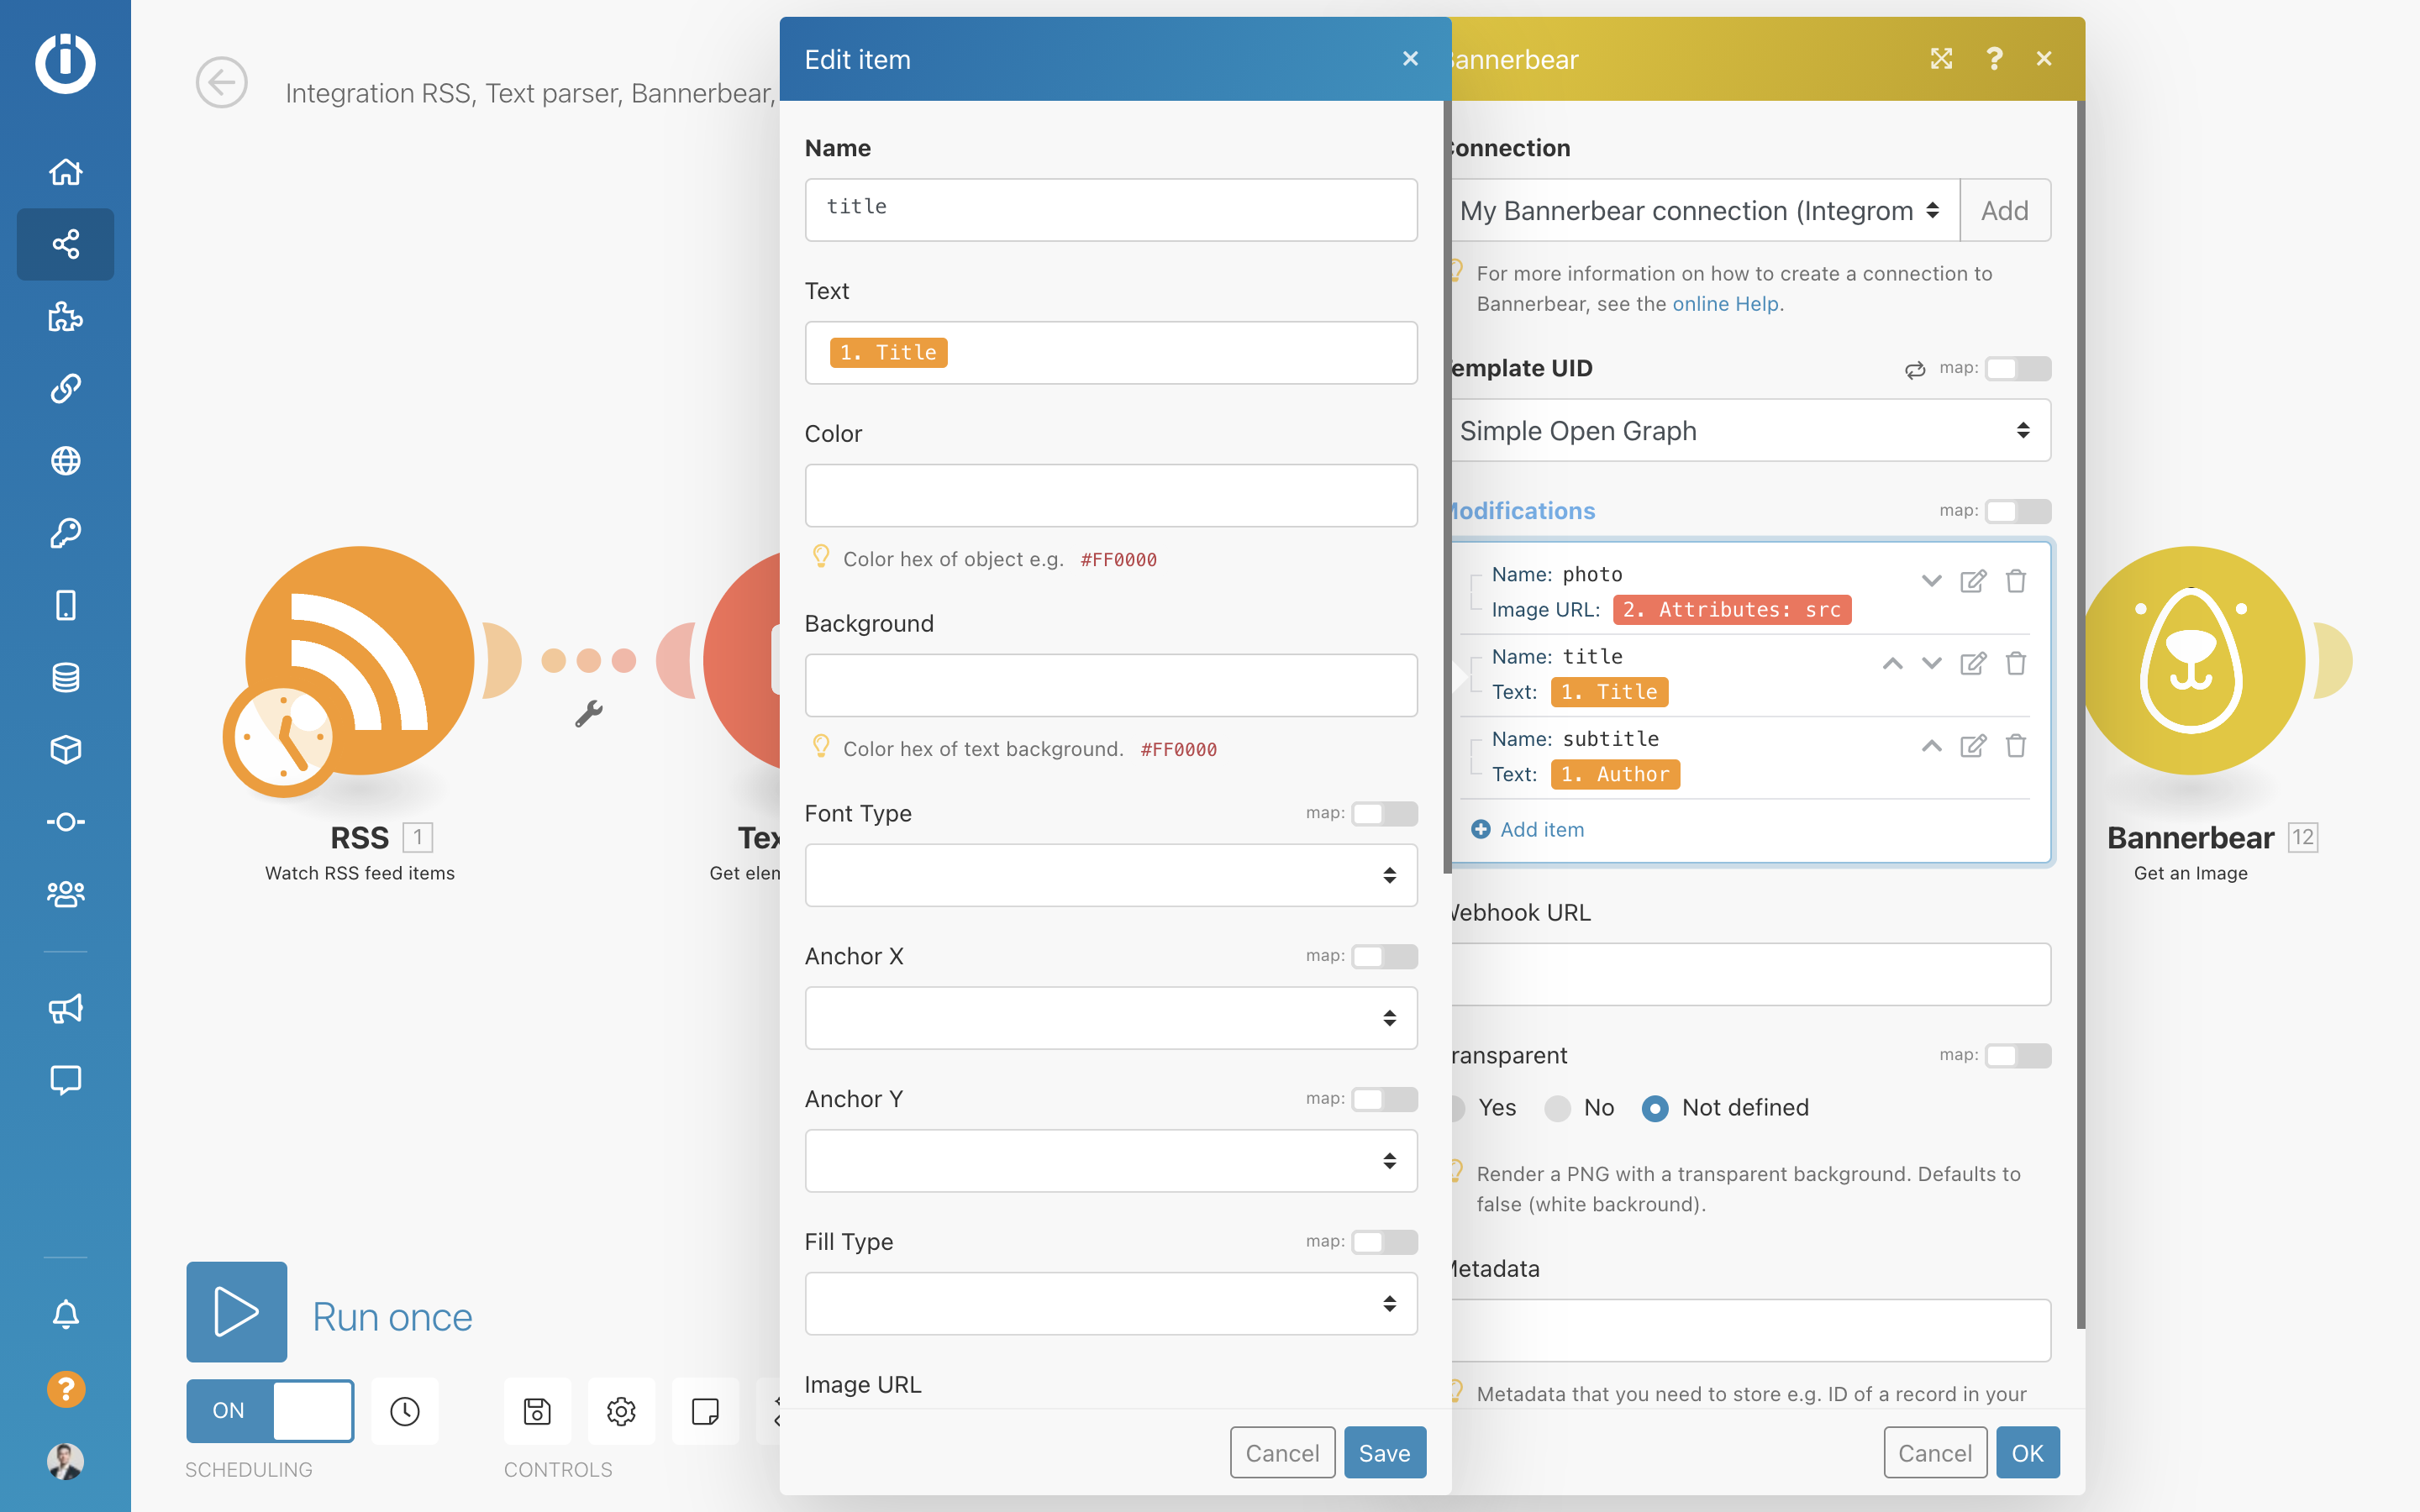
All you have to do is add the desired modifications for these one by one. For example for the layer named "title" I want to add the "Title" field from the RSS data as a "Text" property:
Then create 2 more modifications for:
- subtitle: add the author as a "Text" property
- photo: add the
srcfrom your Text Parser step as a "Image URL" property
Sleep
So here's an important thing to note.
Bannerbear API requests do not return the image immediately in the response. We believe it's better to have a fast-responding API rather than one that hangs / blocks.
So the previous Create Image step will return a pending status response and your scenario will need to wait for a few seconds while the image is generated.
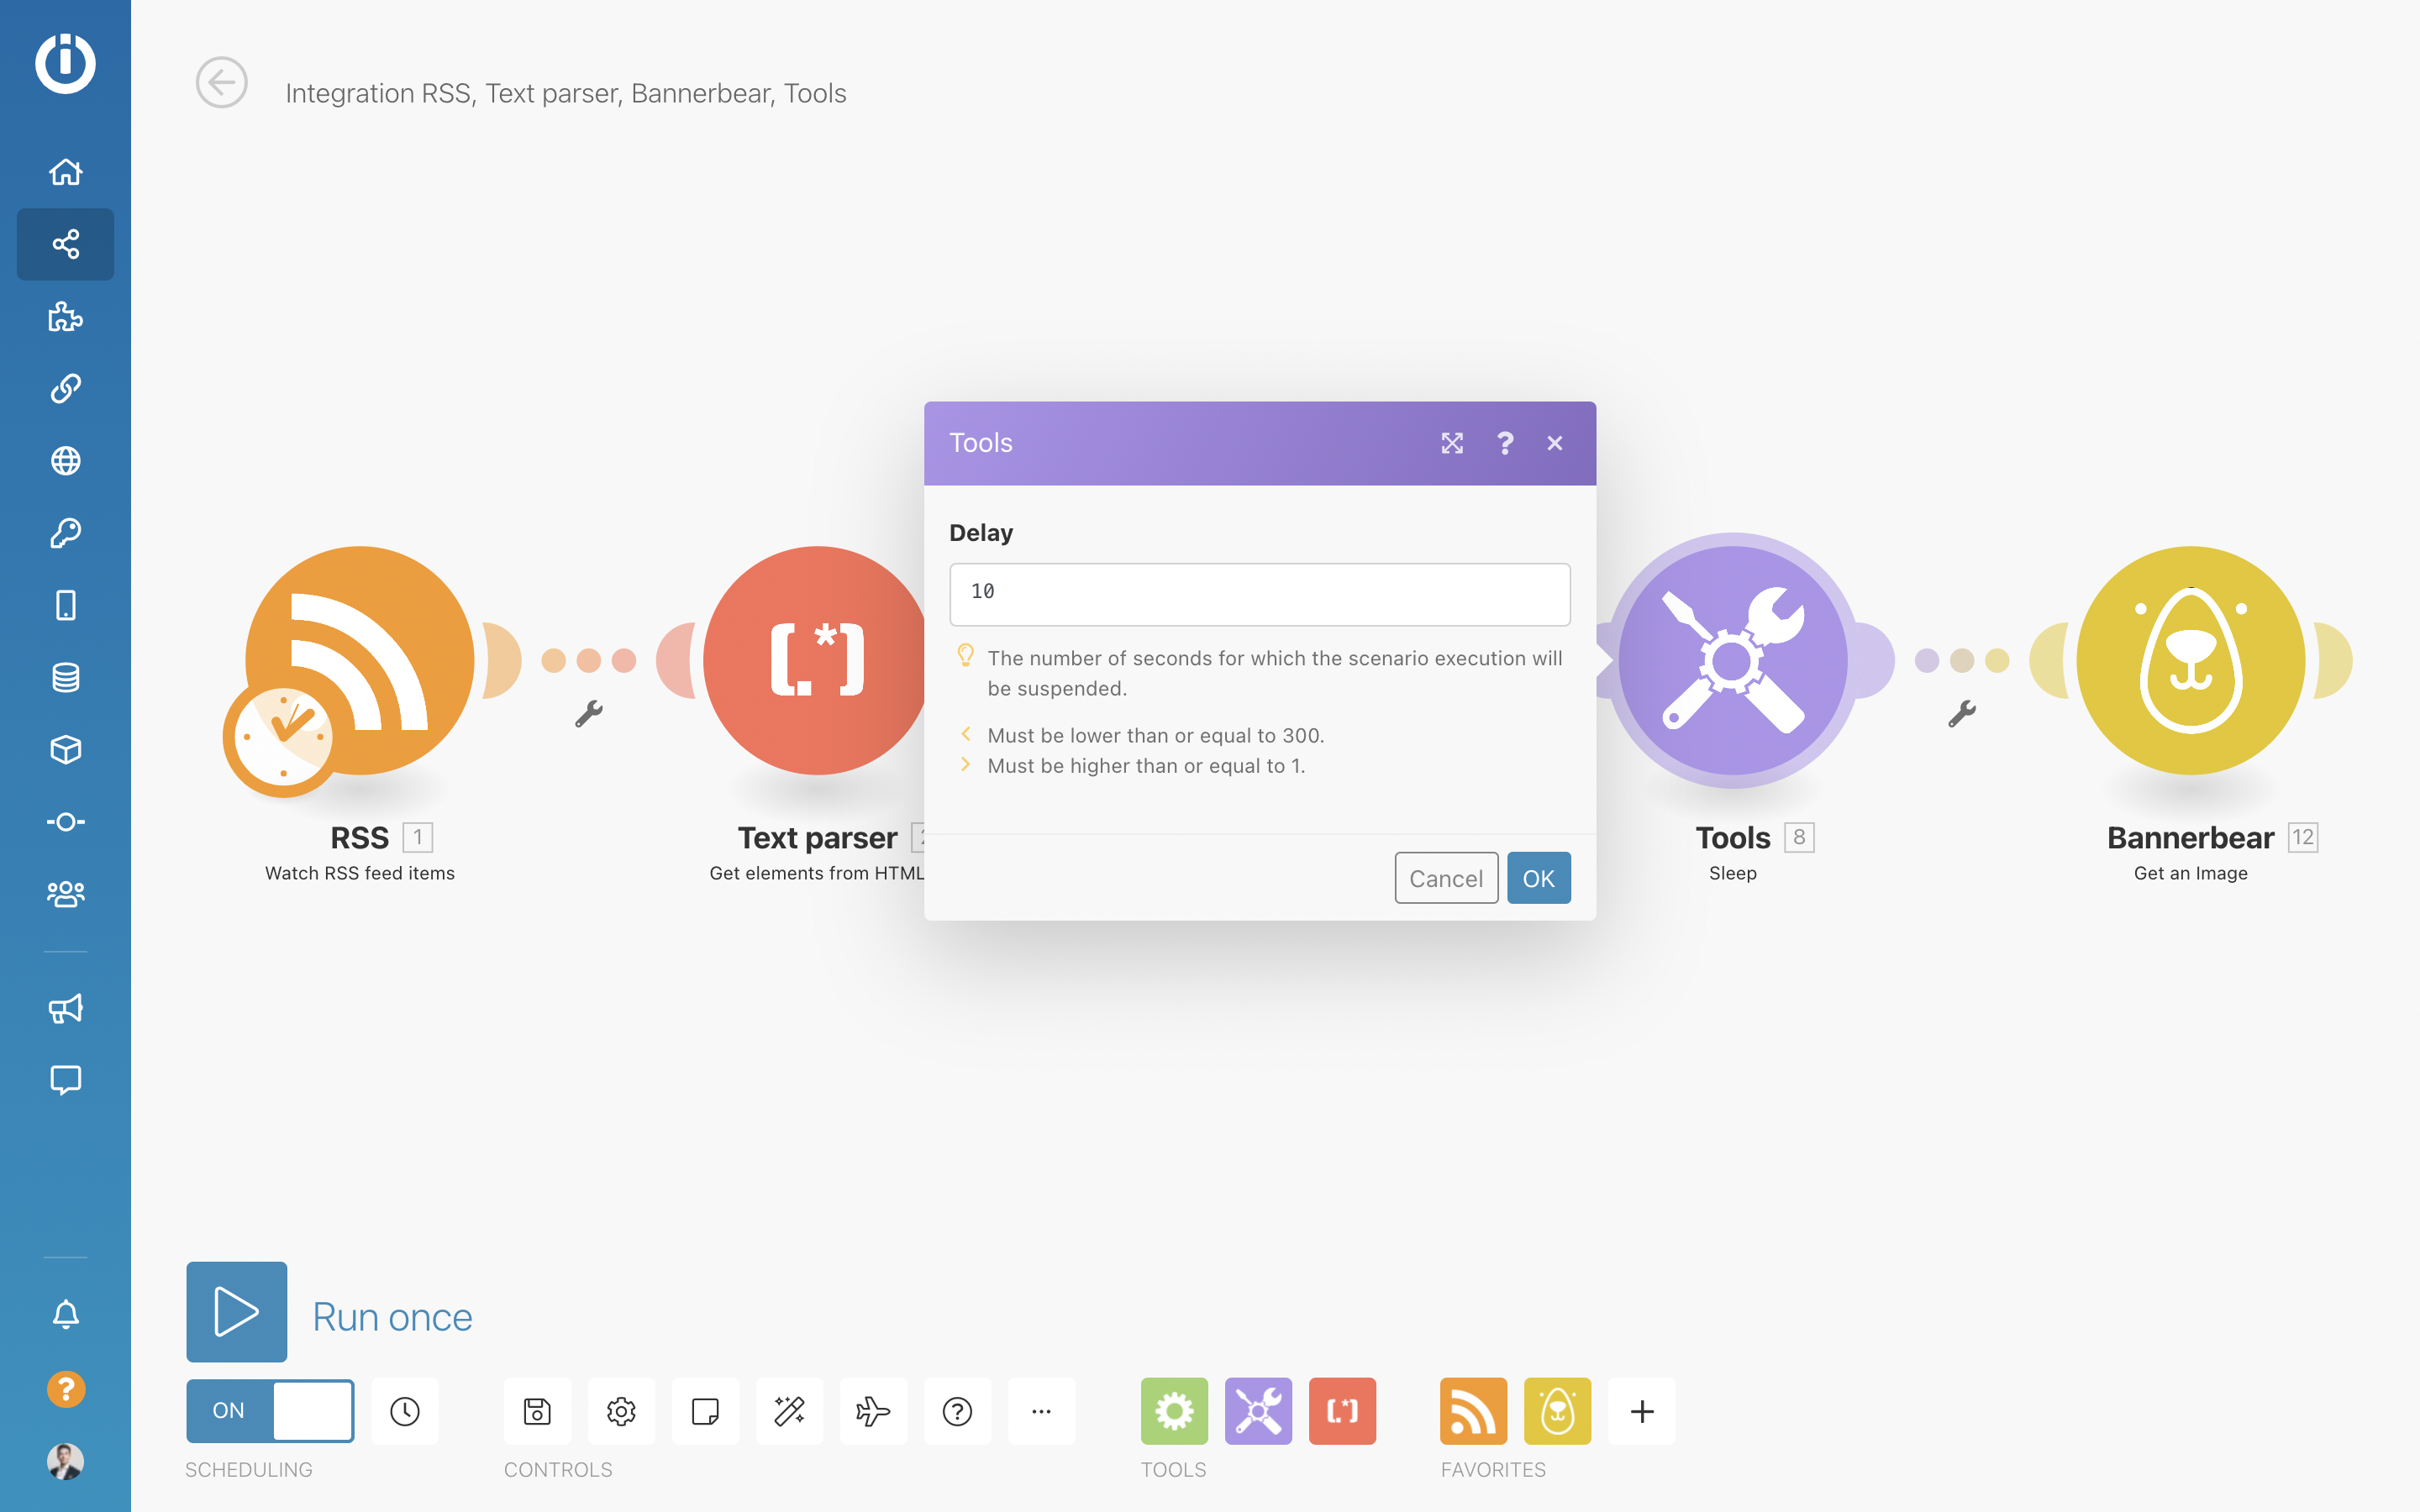
In general, images are rendered in a couple of seconds. But just to be sure I'm sleeping the scenario for 10 seconds. You could even get creative here and poll Bannerbear until the image is generated - but for now we will use a simple sleep step.
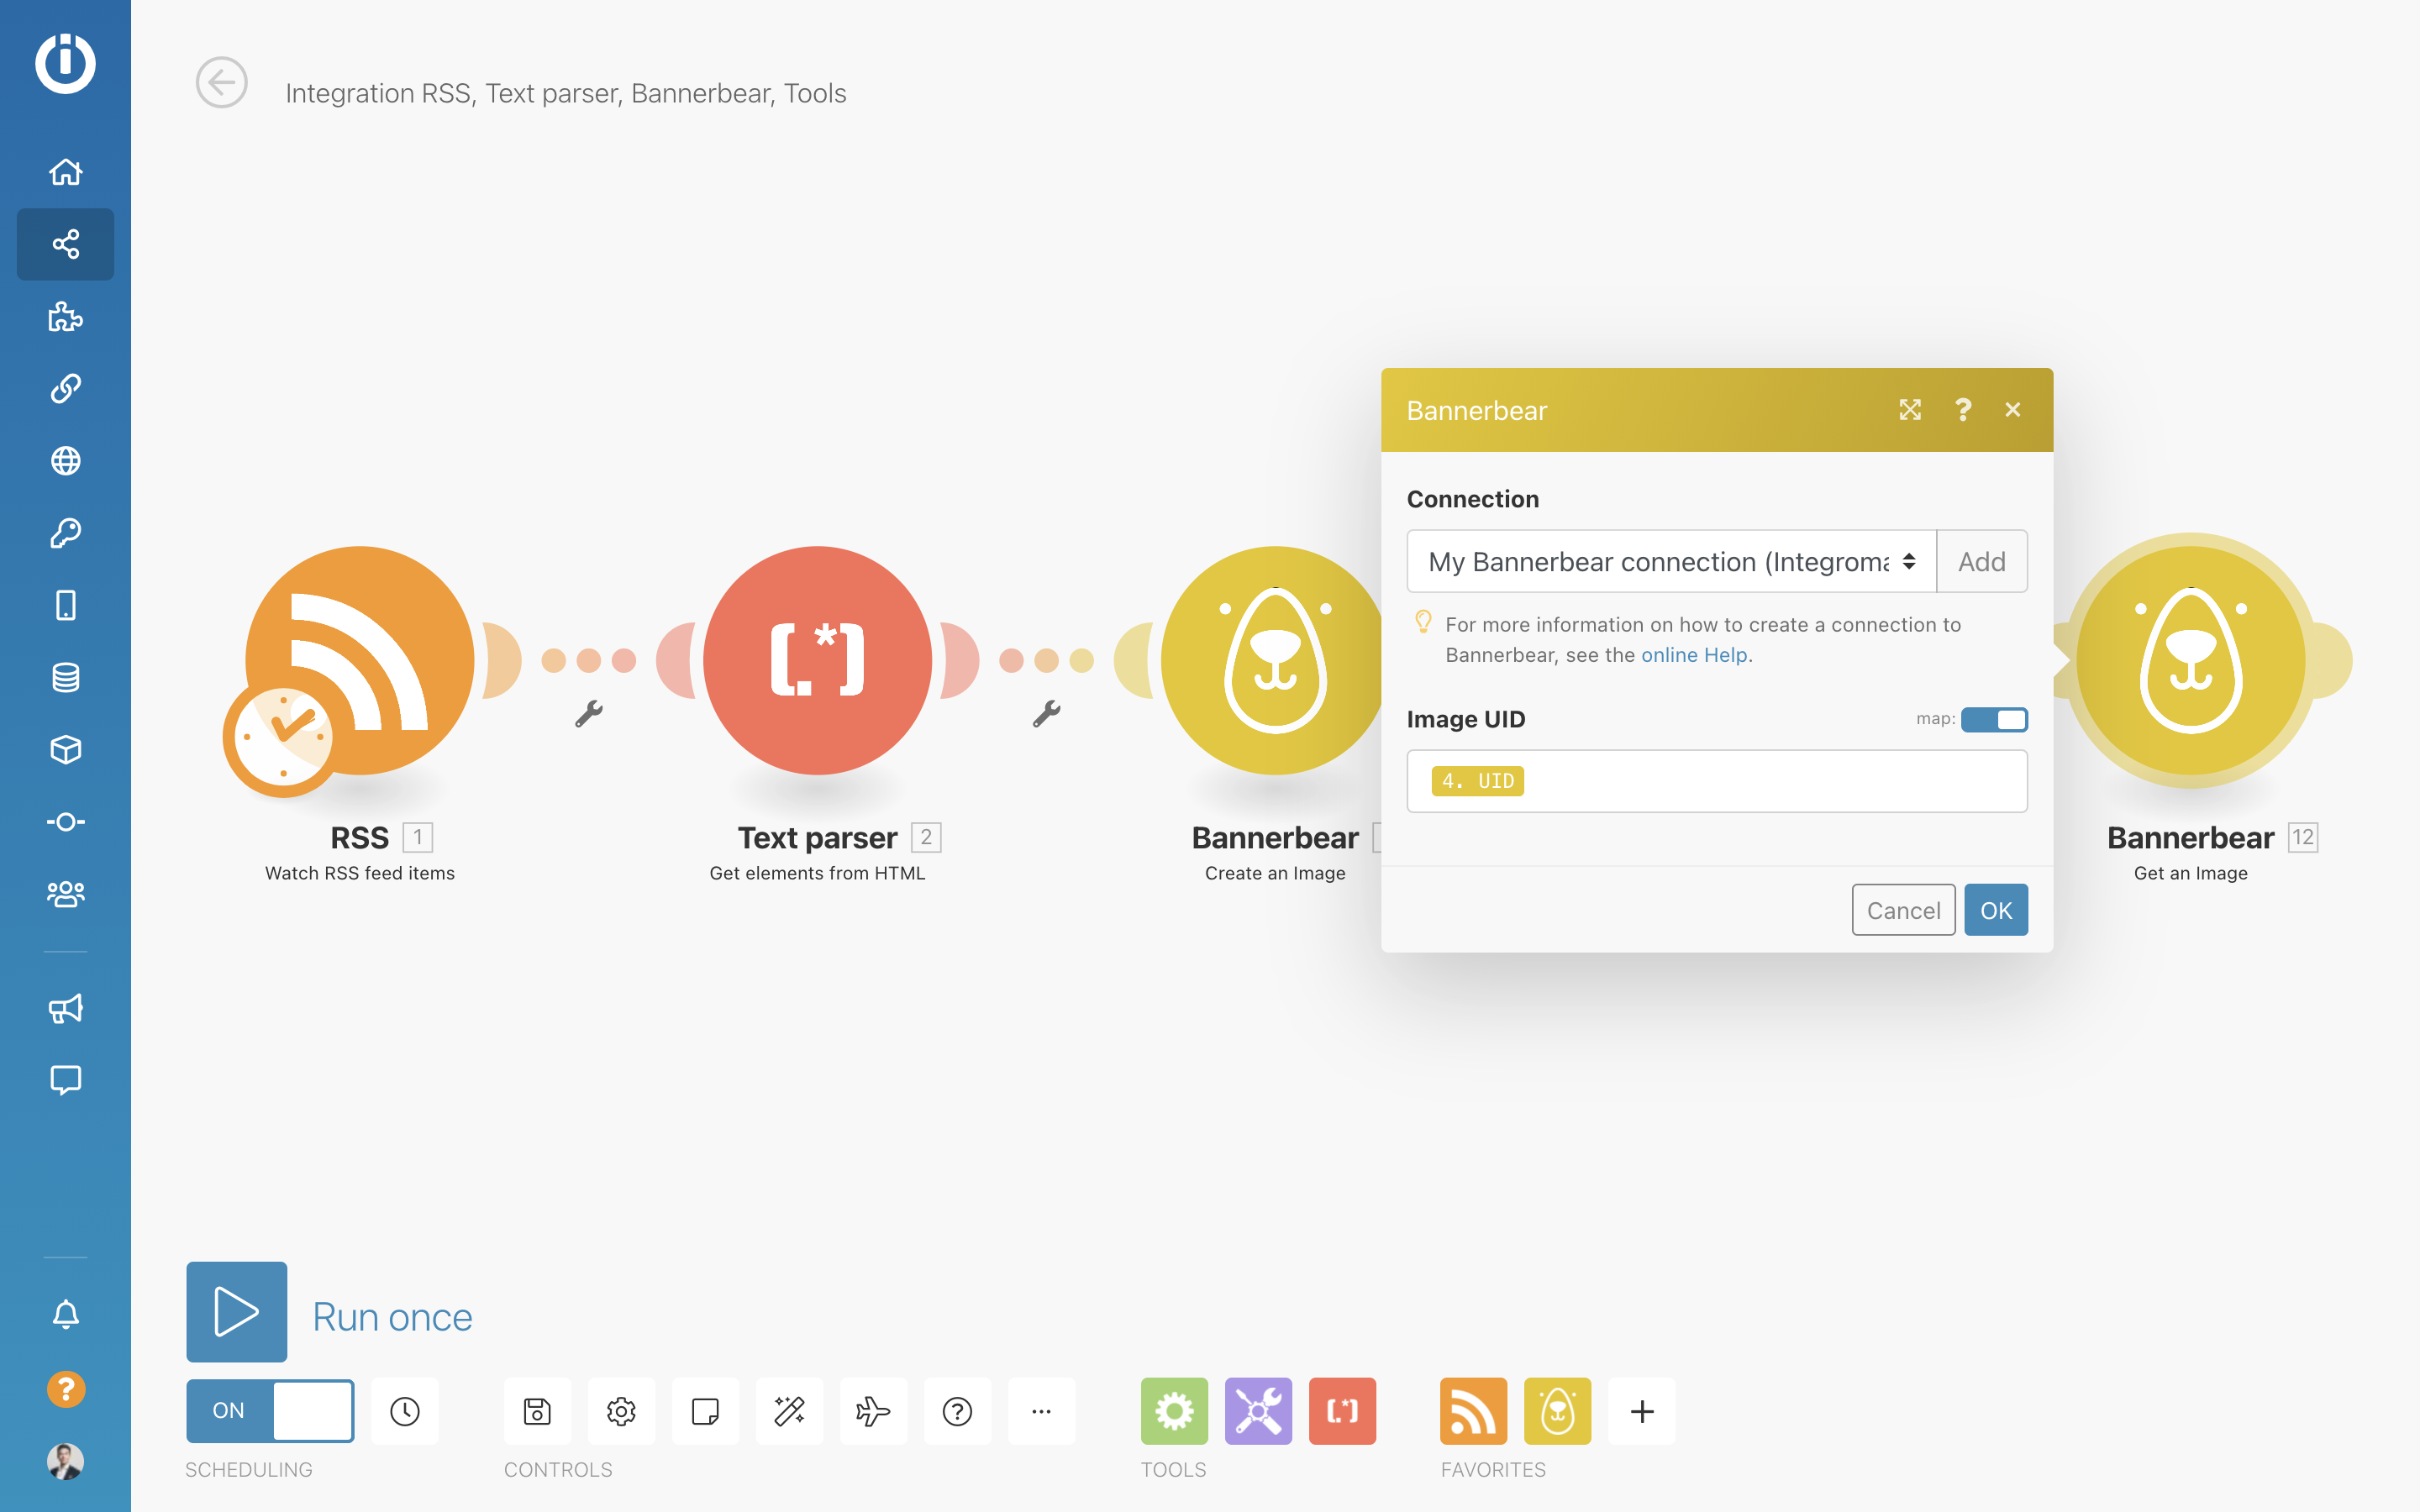
Getting the final image
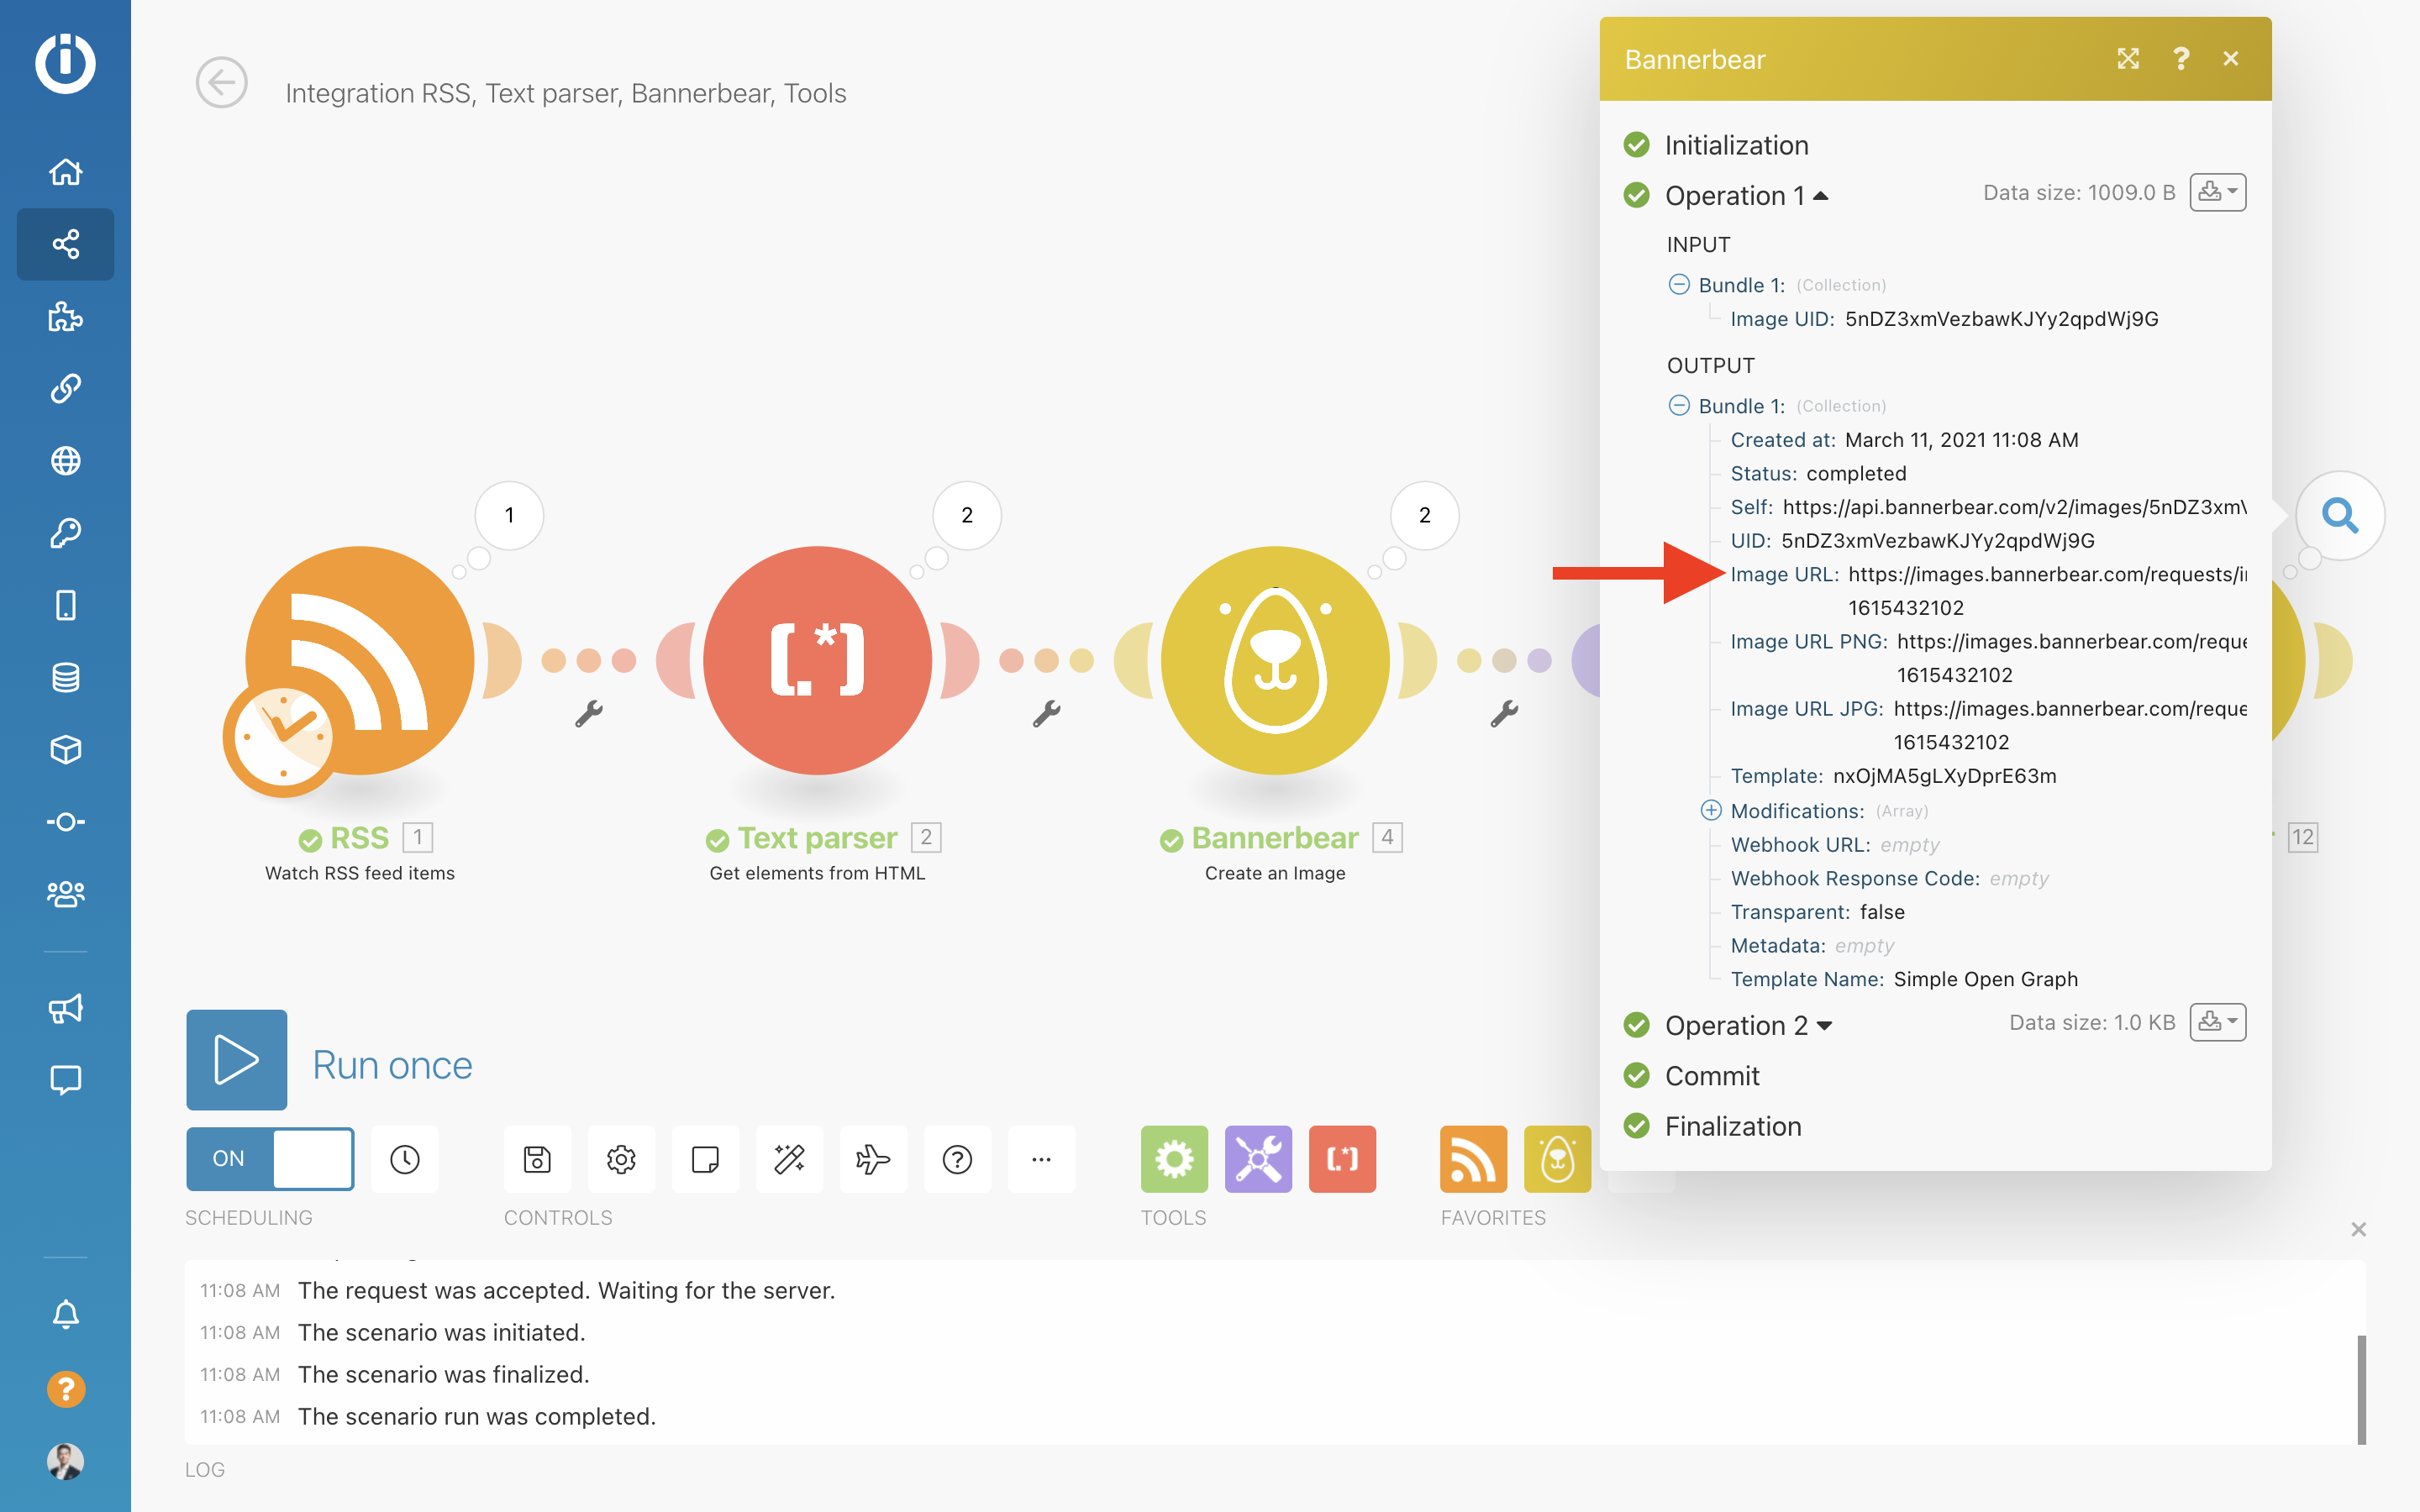
The image will now be sitting on the Bannerbear server so it's time to grab it. Use the UID from the Create Image step and perform a Get Image request:
The full data of the image response is now available - notably the Image URL property which is what you will want to use in your subsequent steps:
Next steps
So now you have the final generated image urls - you can do something useful with them!
How about trying:
- Save to Google Drive
- Post in a Slack Channel
- Post to Twitter
