
How to Add Personalized Images to Your Mailchimp Campaigns
Contents
In this tutorial we will add a Code Block to a Mailchimp template that will automatically generate a different image for every user in your Mailchimp audience.
Why Personalize?
One of the best ways to increase your click rate on email campaigns is through personalization.
With the Bannerbear Query Strings feature you can add dynamic, personalized images to your email campaigns that get auto-generated instantly when a user opens their email.
It's a way to add personalized email touches such as:
- Showing the recipient's name
- Showing their photo
- Showing a customized QR code
- Showing their last purchase
- etc
About this tutorial
In this tutorial we are going to add a code block to our Mailchimp template with a special tag that generates a customized greeting image with the recipient's name. This image will be displayed when the user opens their email.
Add the Email Header template
To get started, add the Simple Email Header Example template to one of your Bannerbear projects:
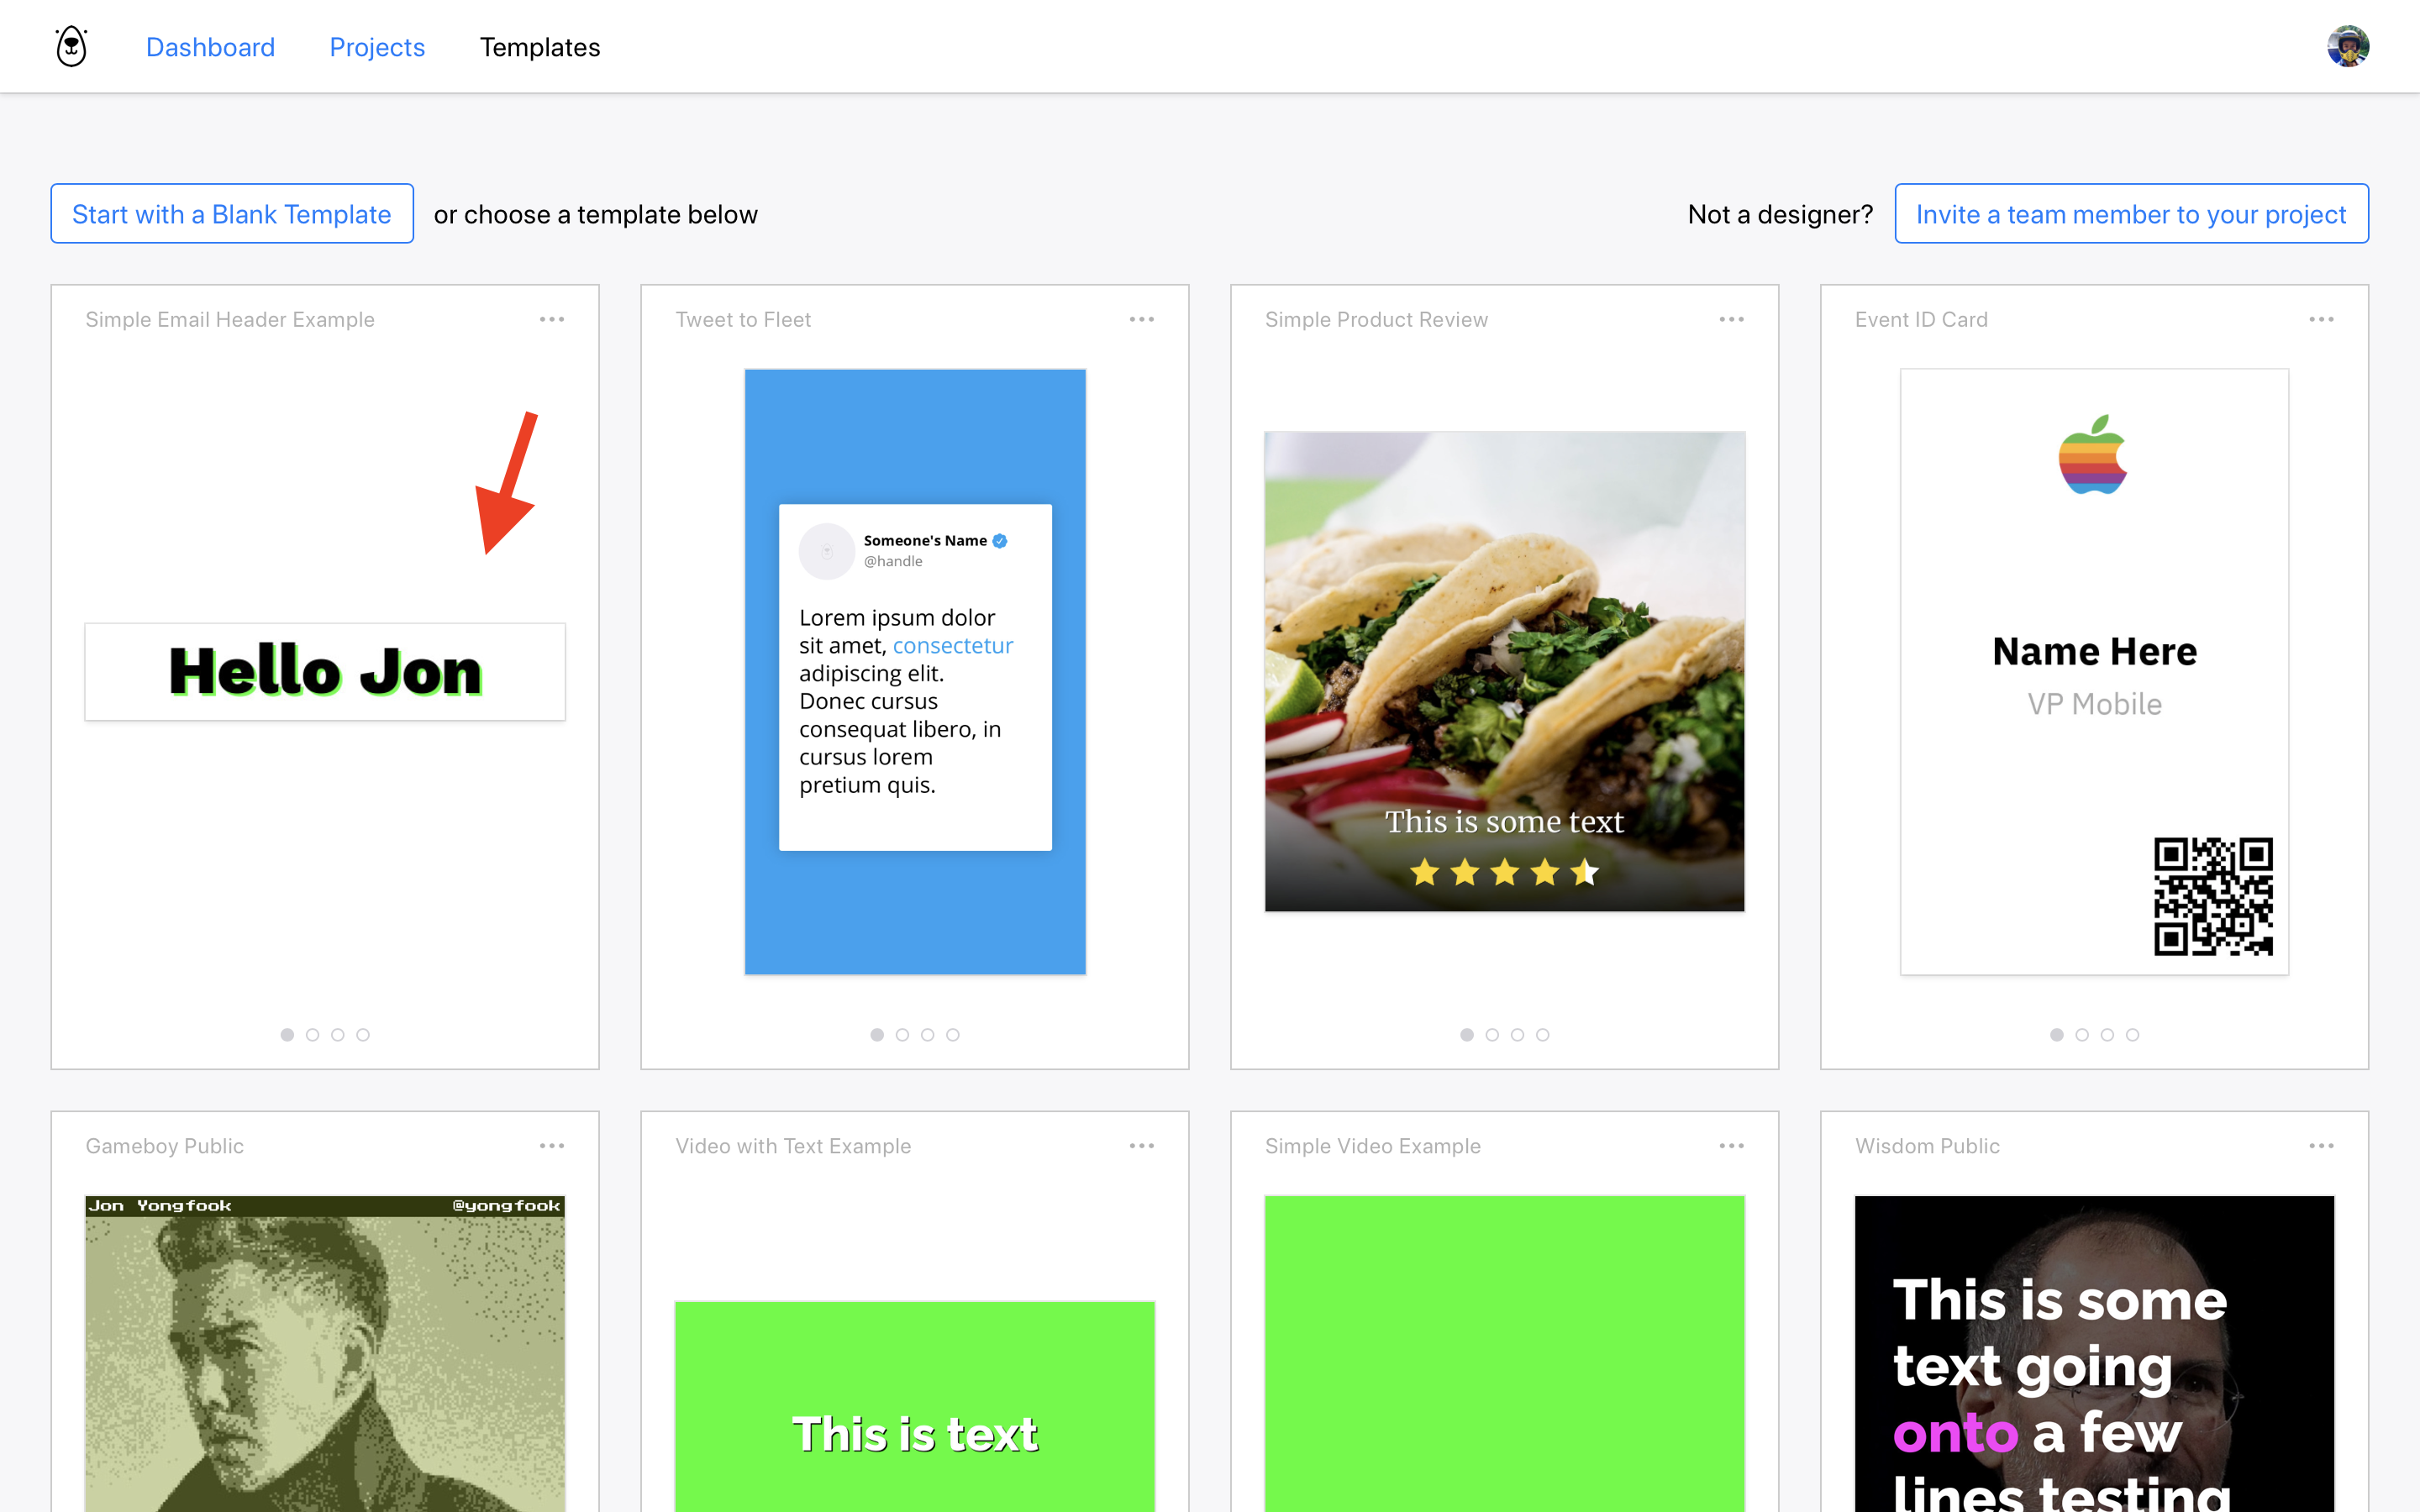
You can customize this template before proceeding, for example you could change the fonts, change the background color, add your company logo etc.
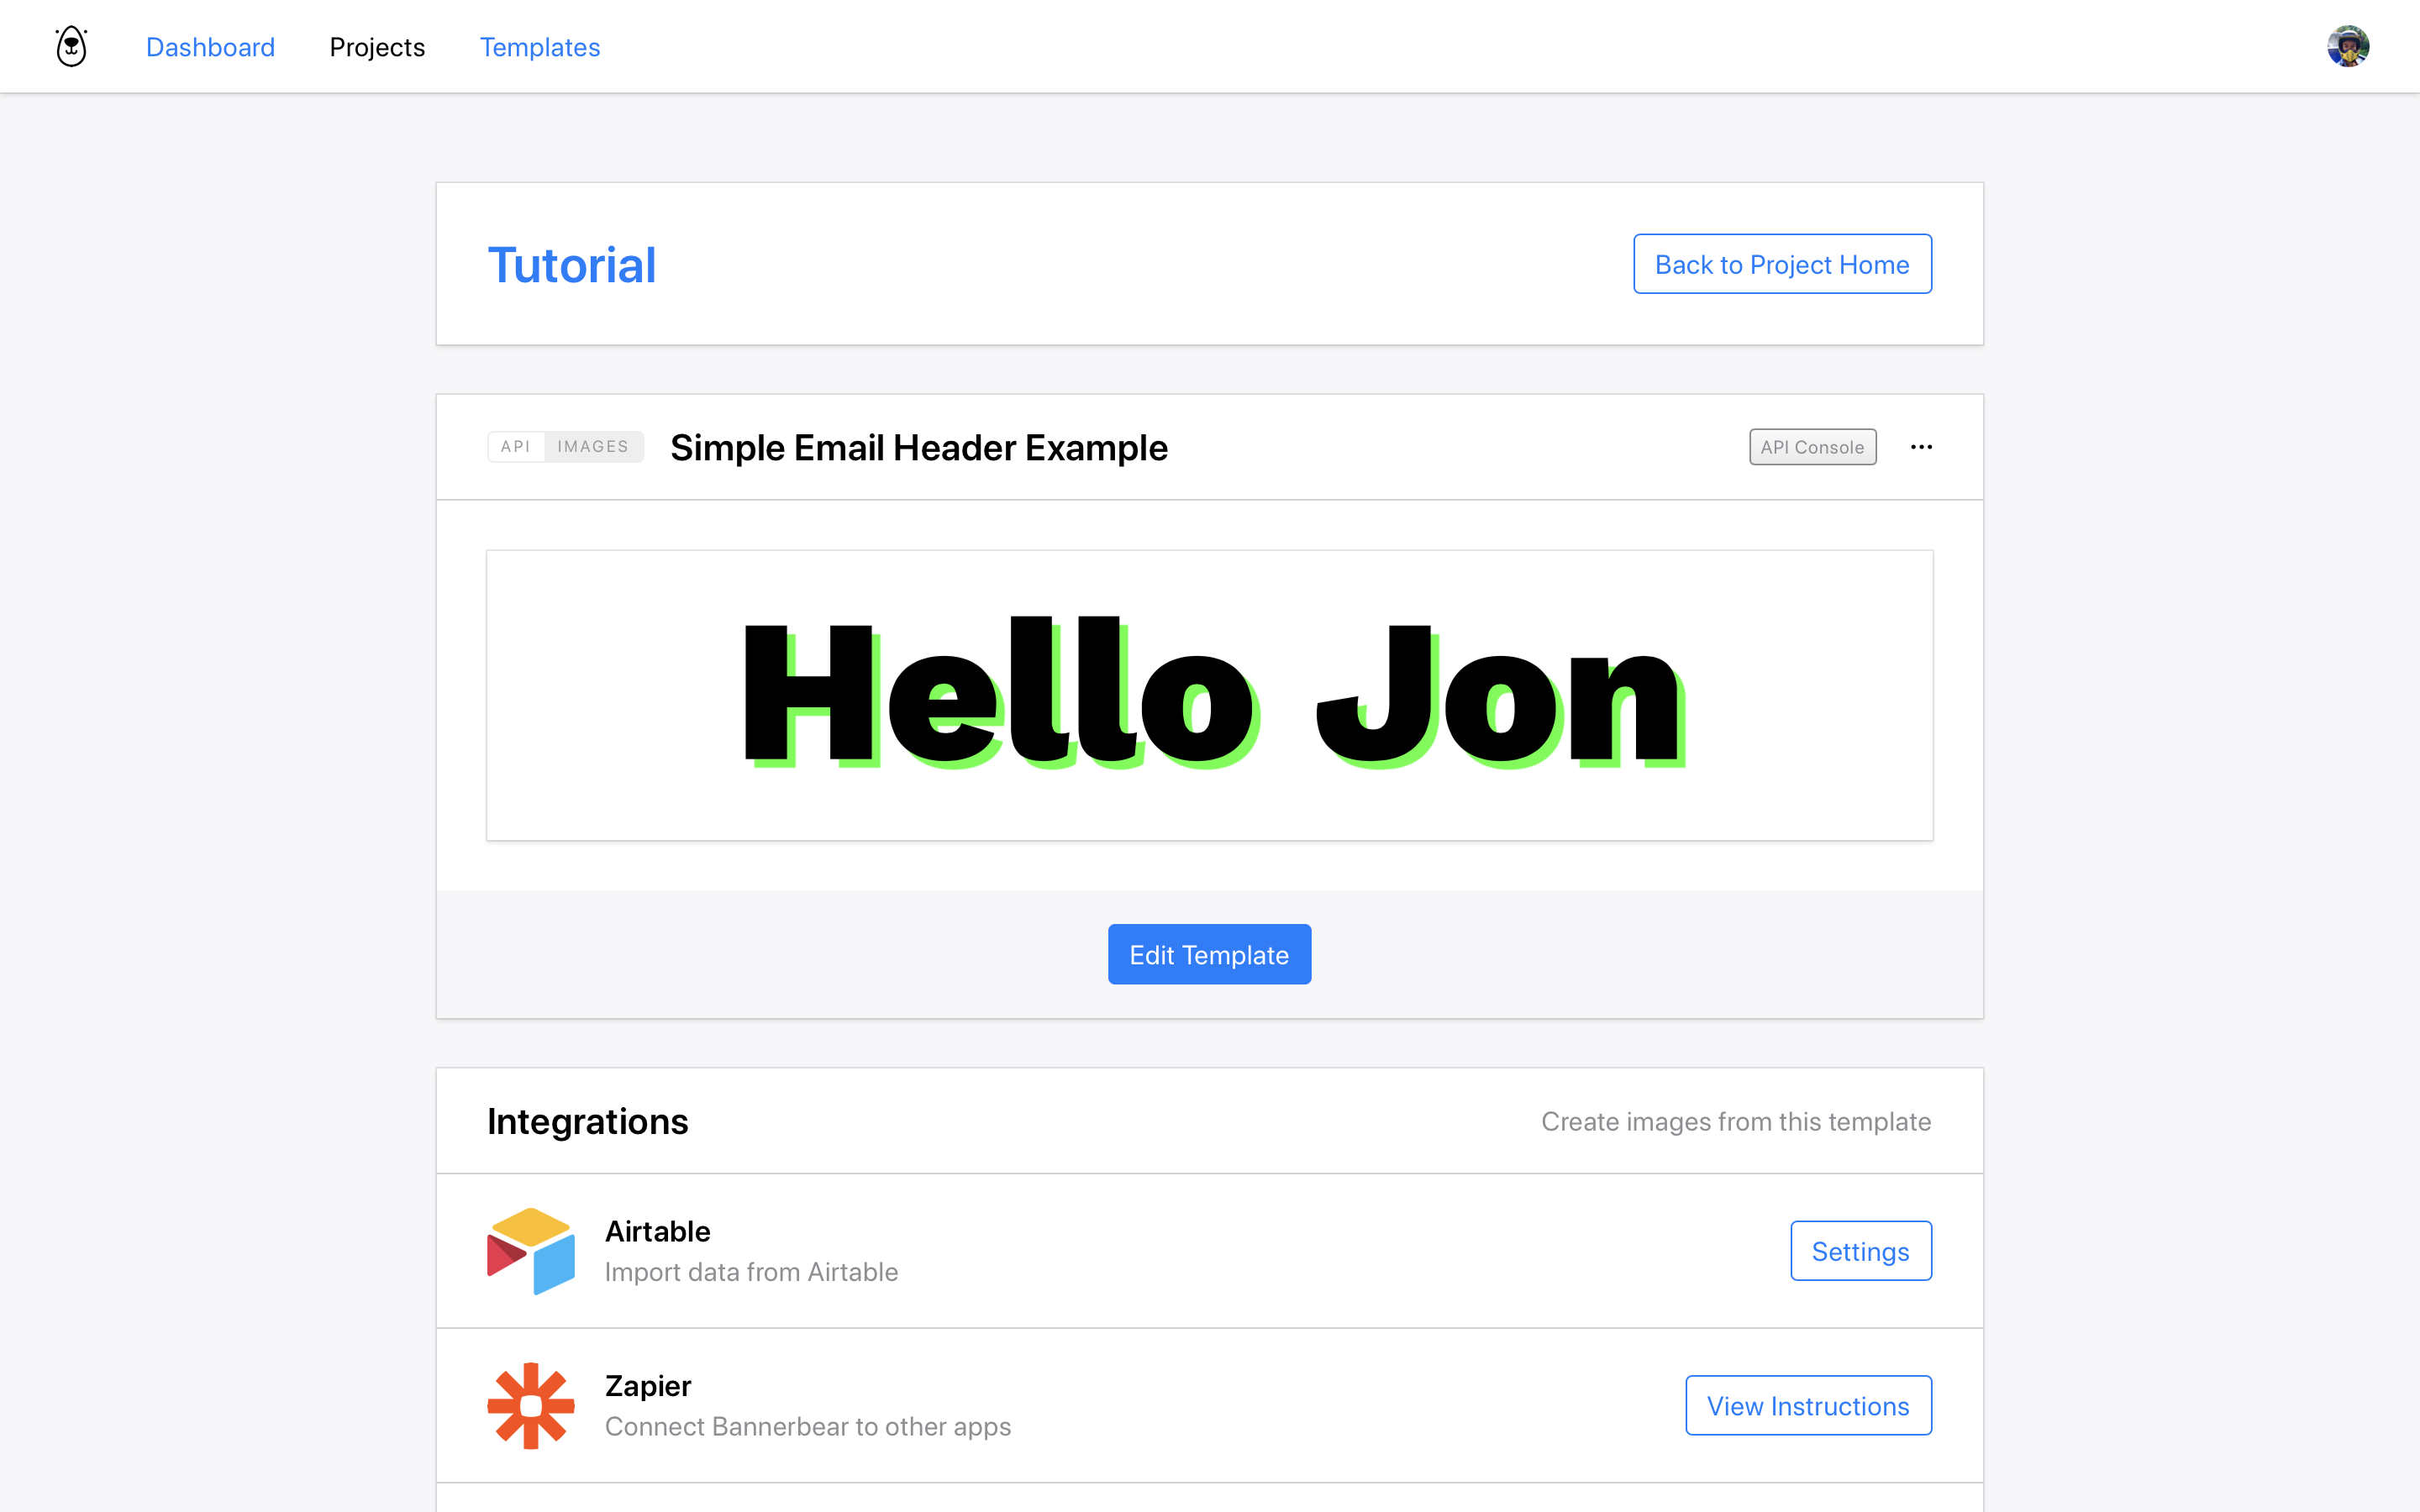
This is a very simple template, with just one text variable. Bannerbear templates can be a lot more complex than this, you can pass in multiple texts, multiple images etc - but for now lets keep it simple! You should see the template in your project:
Important Update - Simple URLs
Update: Bannerbear Query Strings have been replaced by a simpler (but just as powerful) feature called Simple URLs. The article that continues below uses Query Strings which are a legacy feature - you can learn more about how Simple URLs work in the Knowledge Base. The principle is very similar.
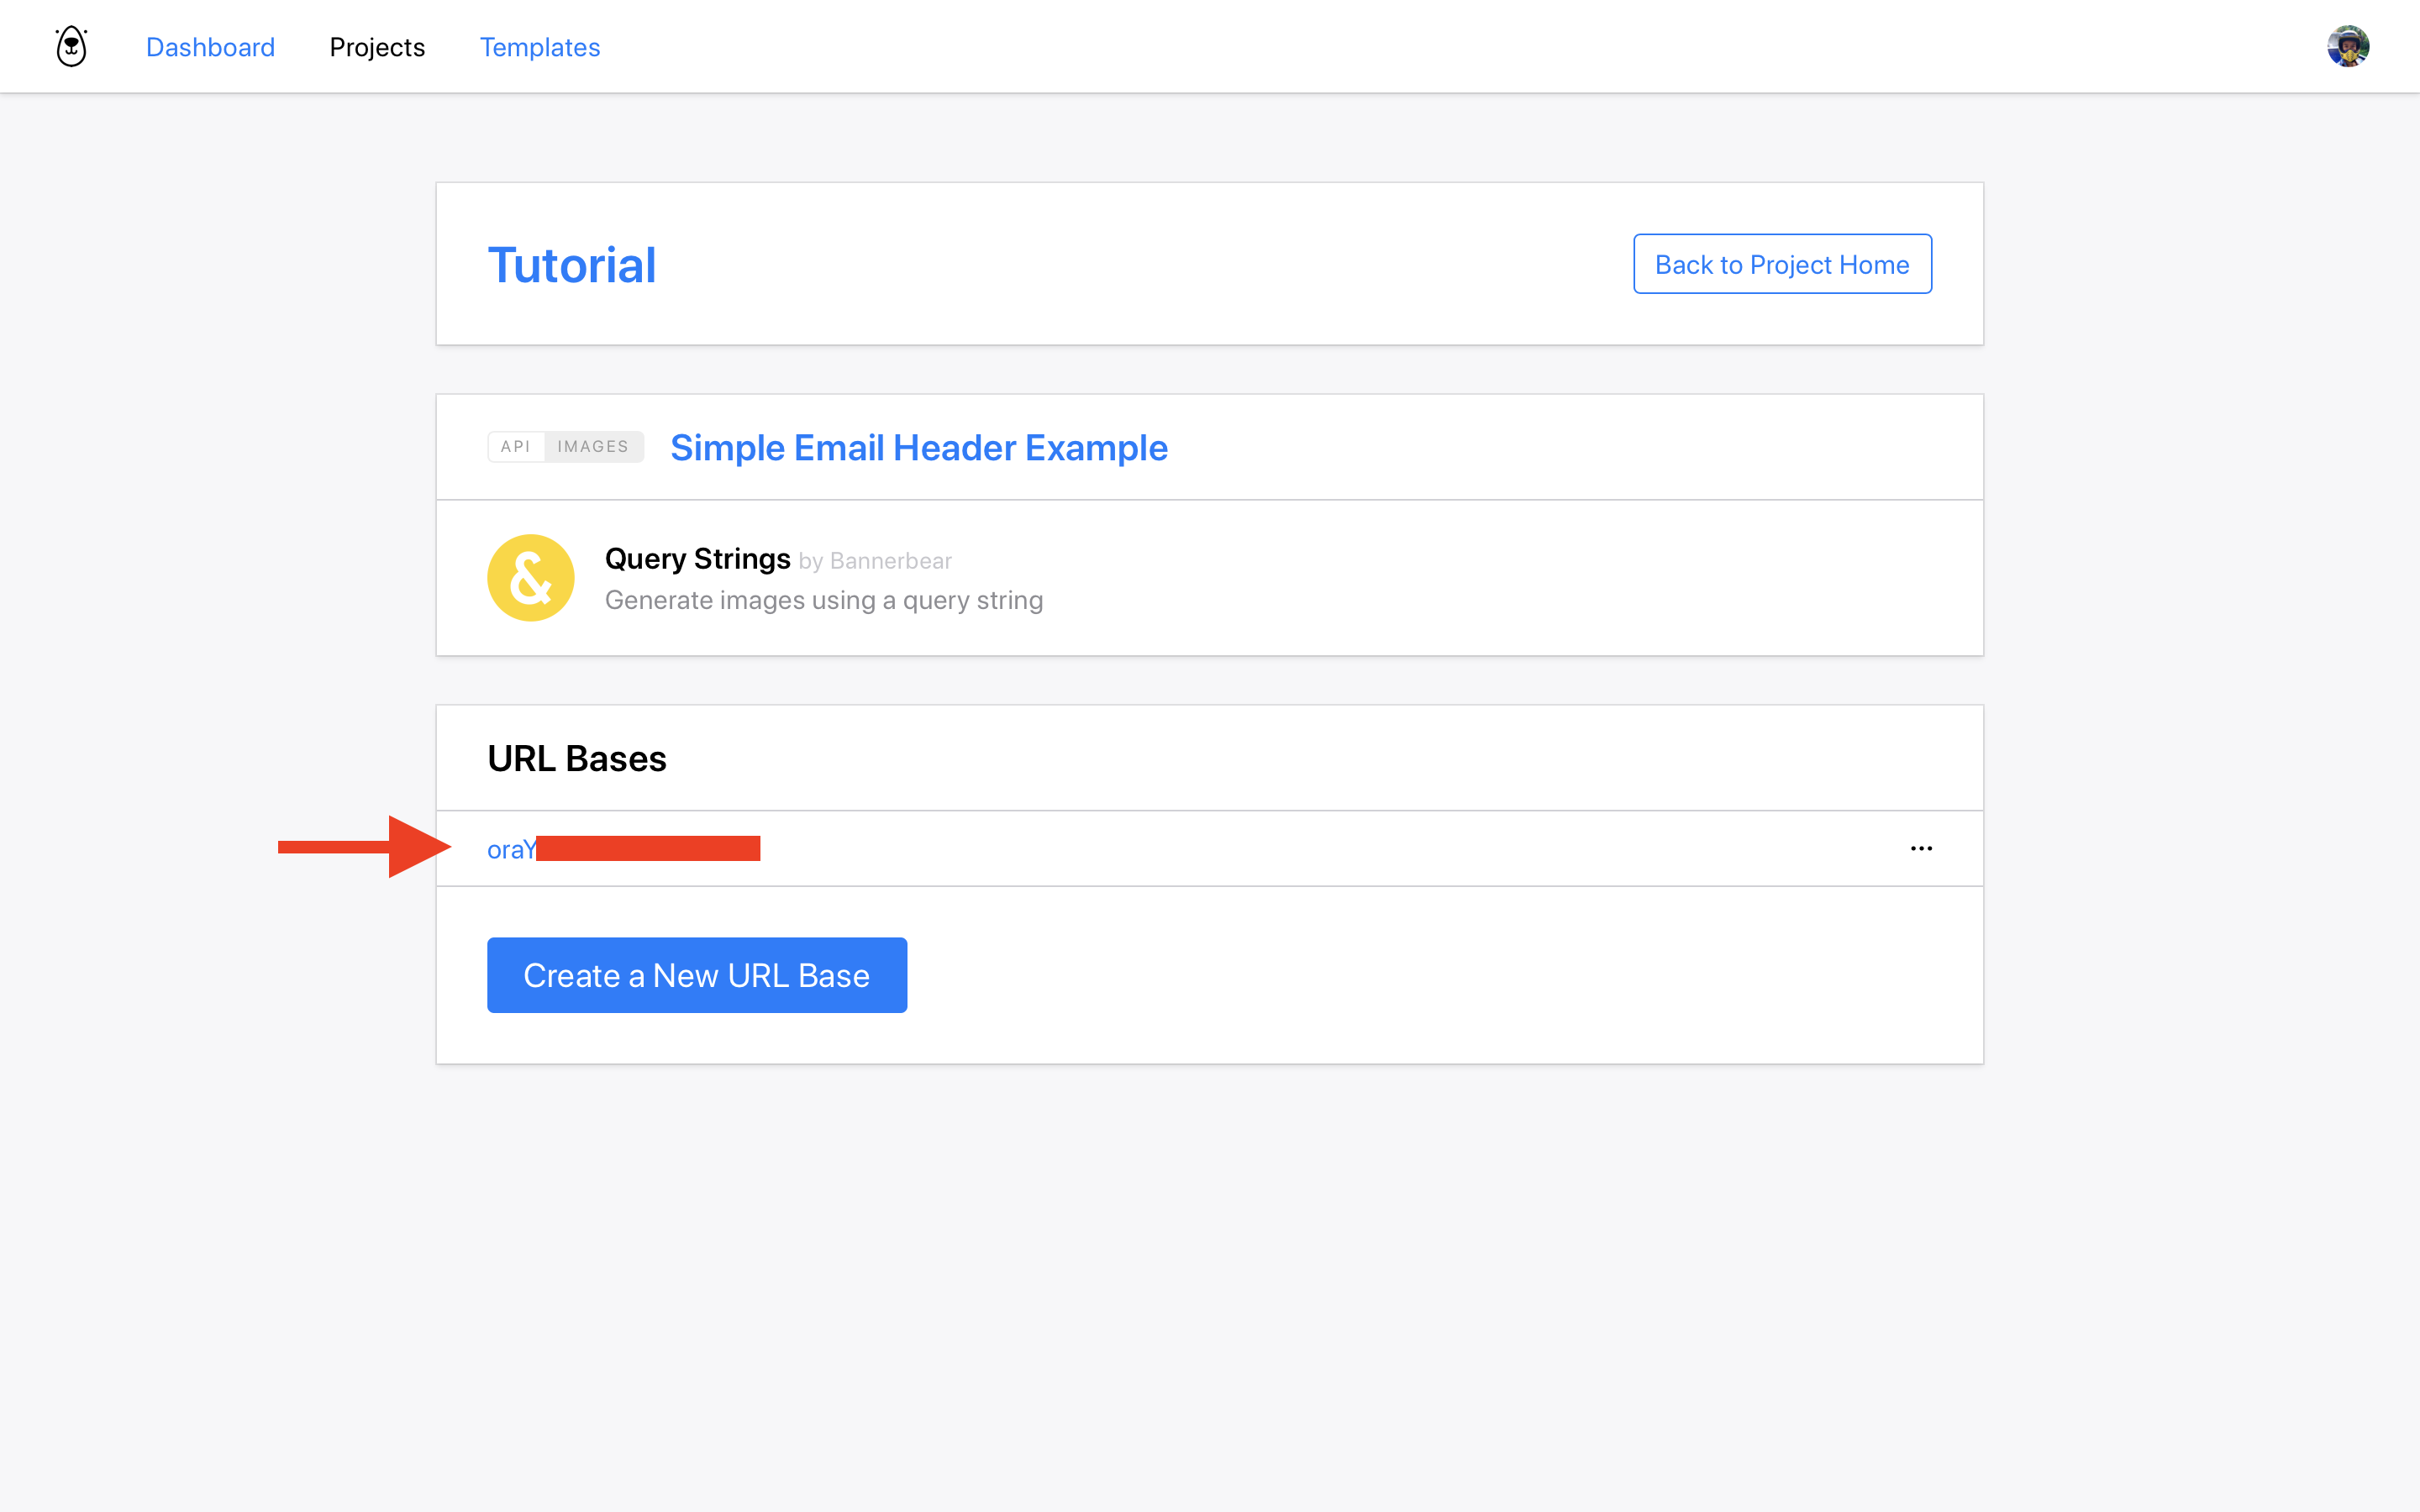
Create a Query String URL Base
To work with Email Service Providers like Mailchimp, you will want to use the Query Strings integration. This allows you to generate dynamic images simply by changing the query string of an image url. Scroll down to the template integrations and choose Query Strings:
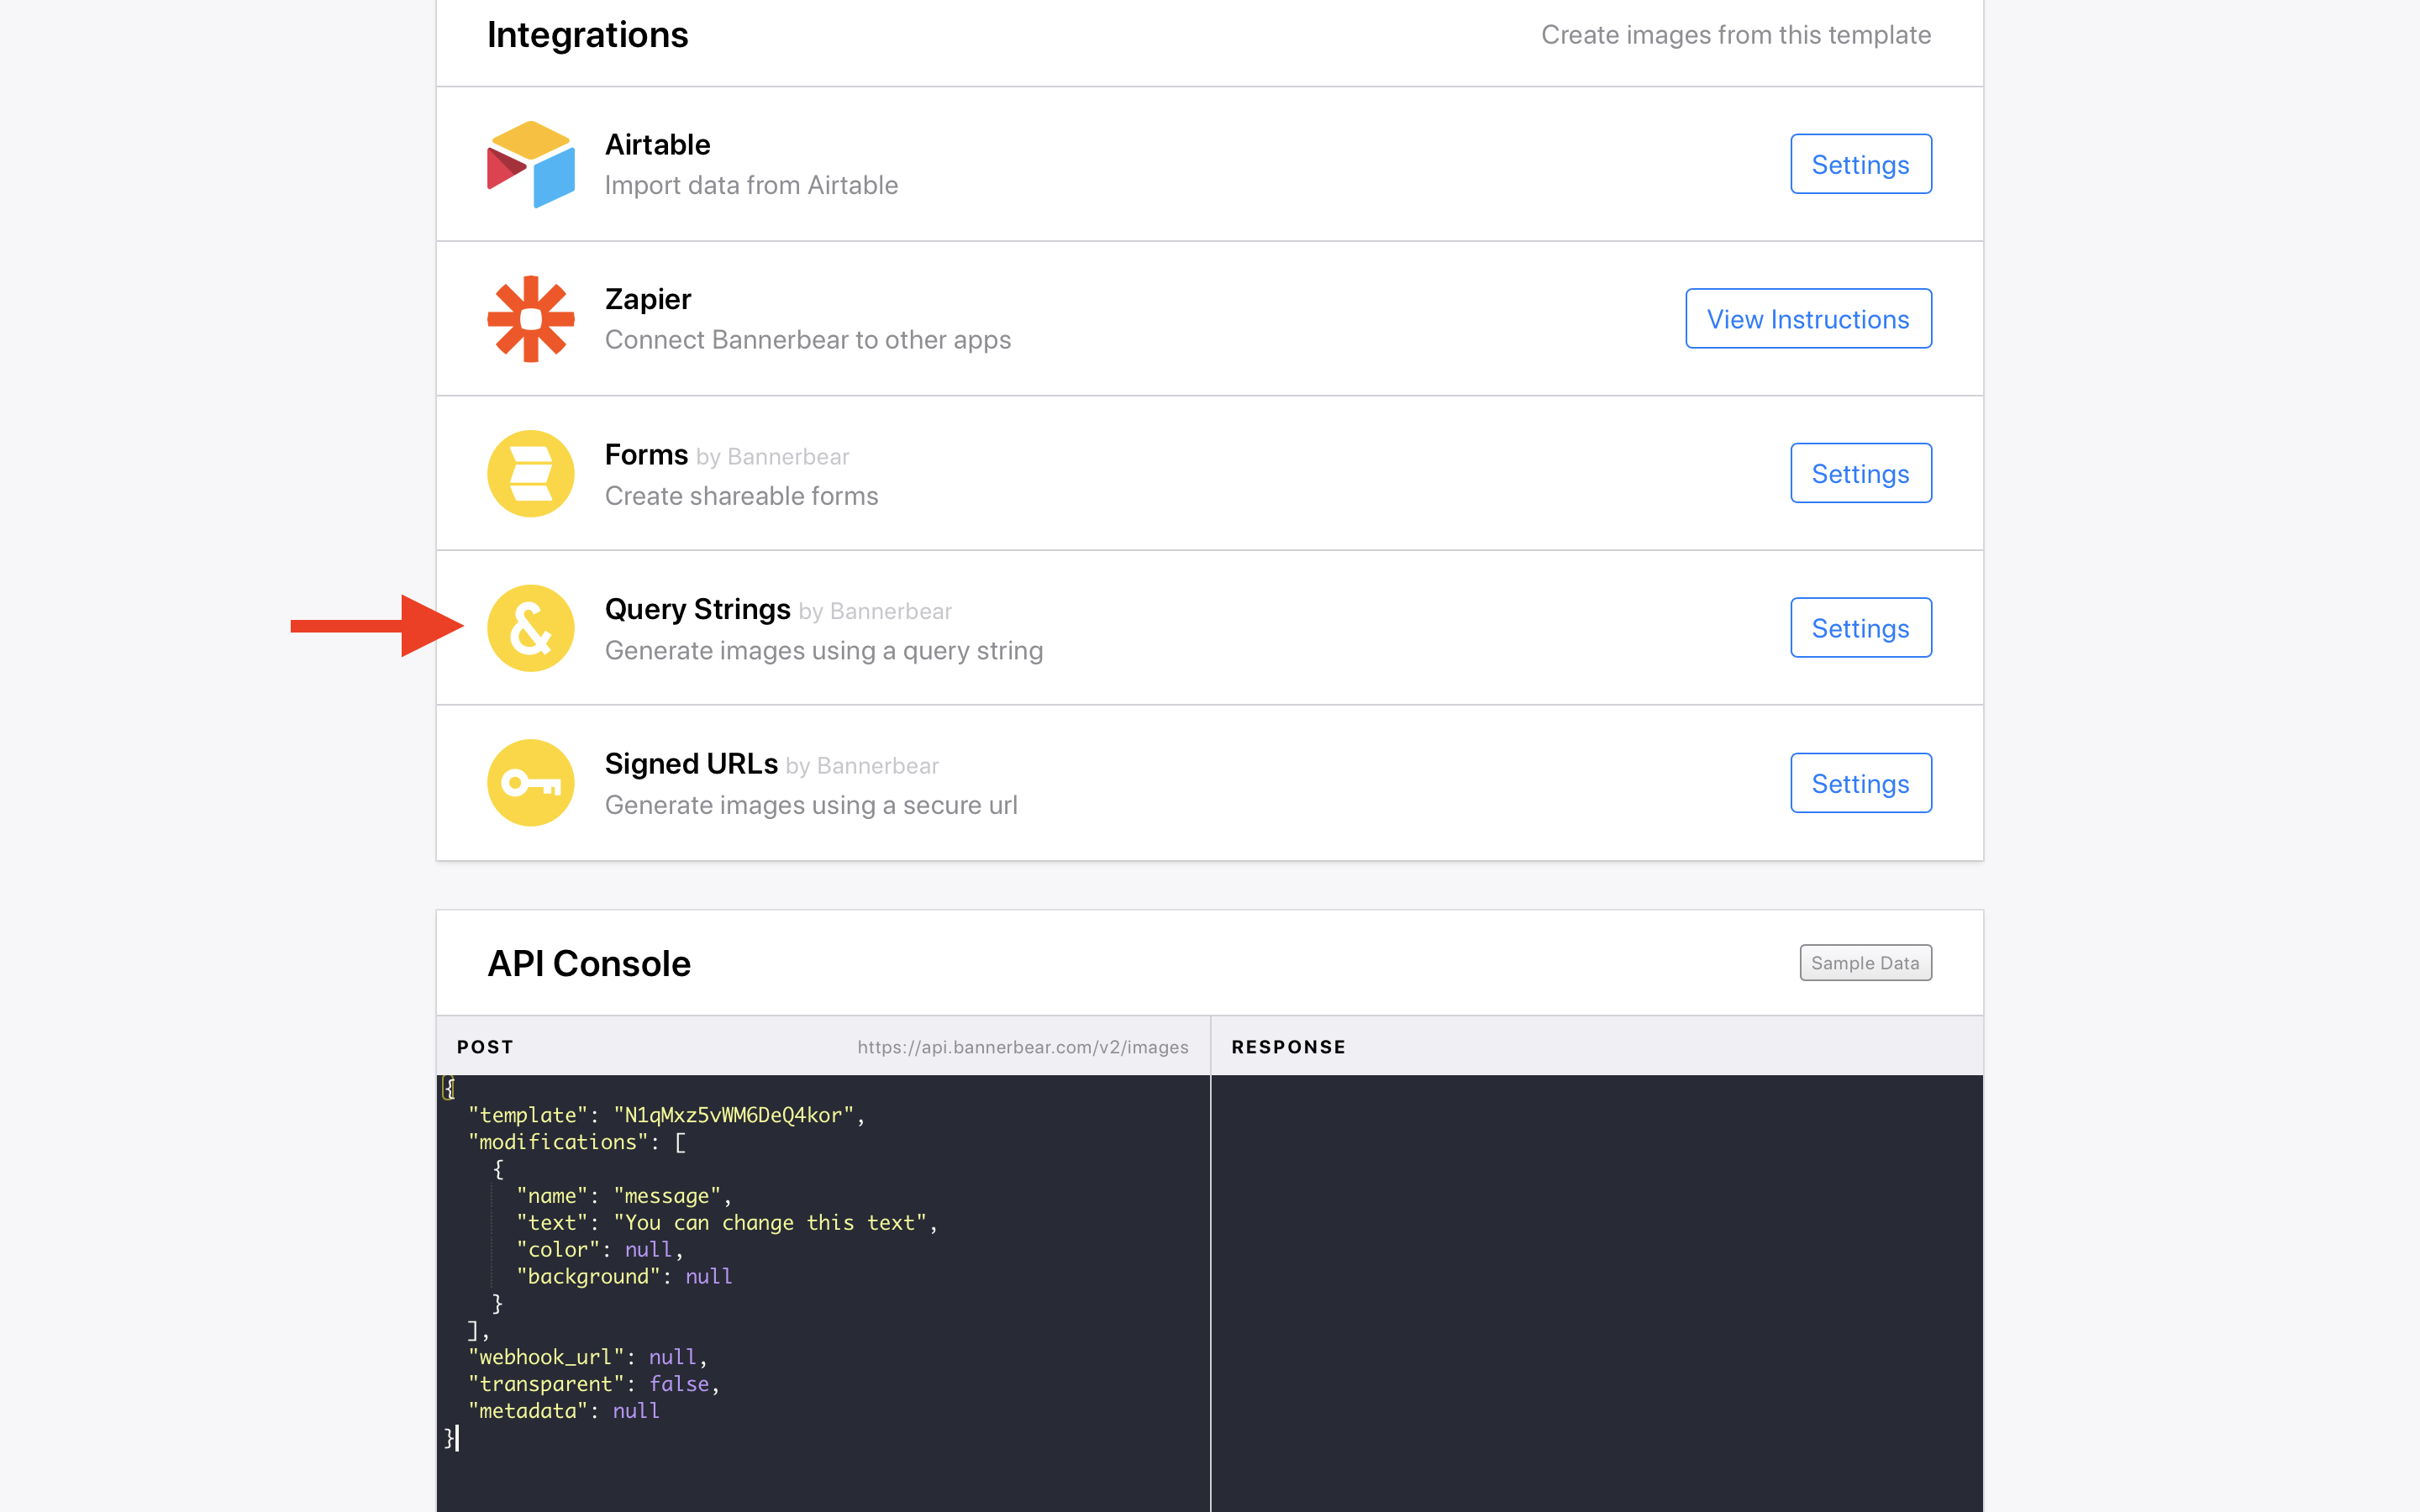
Create a new URL Base and click on it to view the documentation for that URL Base.
Ok so what did we just do?
When you create a new URL Base, you are creating a unique URL that can generate dynamic images based on the current template. It will look something like this:
https://ondemand.bannerbear.com/taggedurl/XXXXXXX/image.jpg
When you change the query string parameters of the URL, a new image will be generated. In this way, you can dynamically generate different images just by changing the query string. As an example that could look something like this:
https://ondemand.bannerbear.com/taggedurl/XXXXXXX/image.jpg?text=Marco
https://ondemand.bannerbear.com/taggedurl/XXXXXXX/image.jpg?text=Polo
… but actually in practice the query string will be a bit longer as you may use multiple variables, and the query string parameter names will depend on the names of the layers in your template.
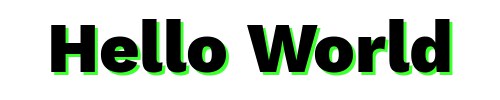
This is a simple template though, so it just has one parameter. If you click the example in your documentation page, an image with the text "Hello World" is displayed.
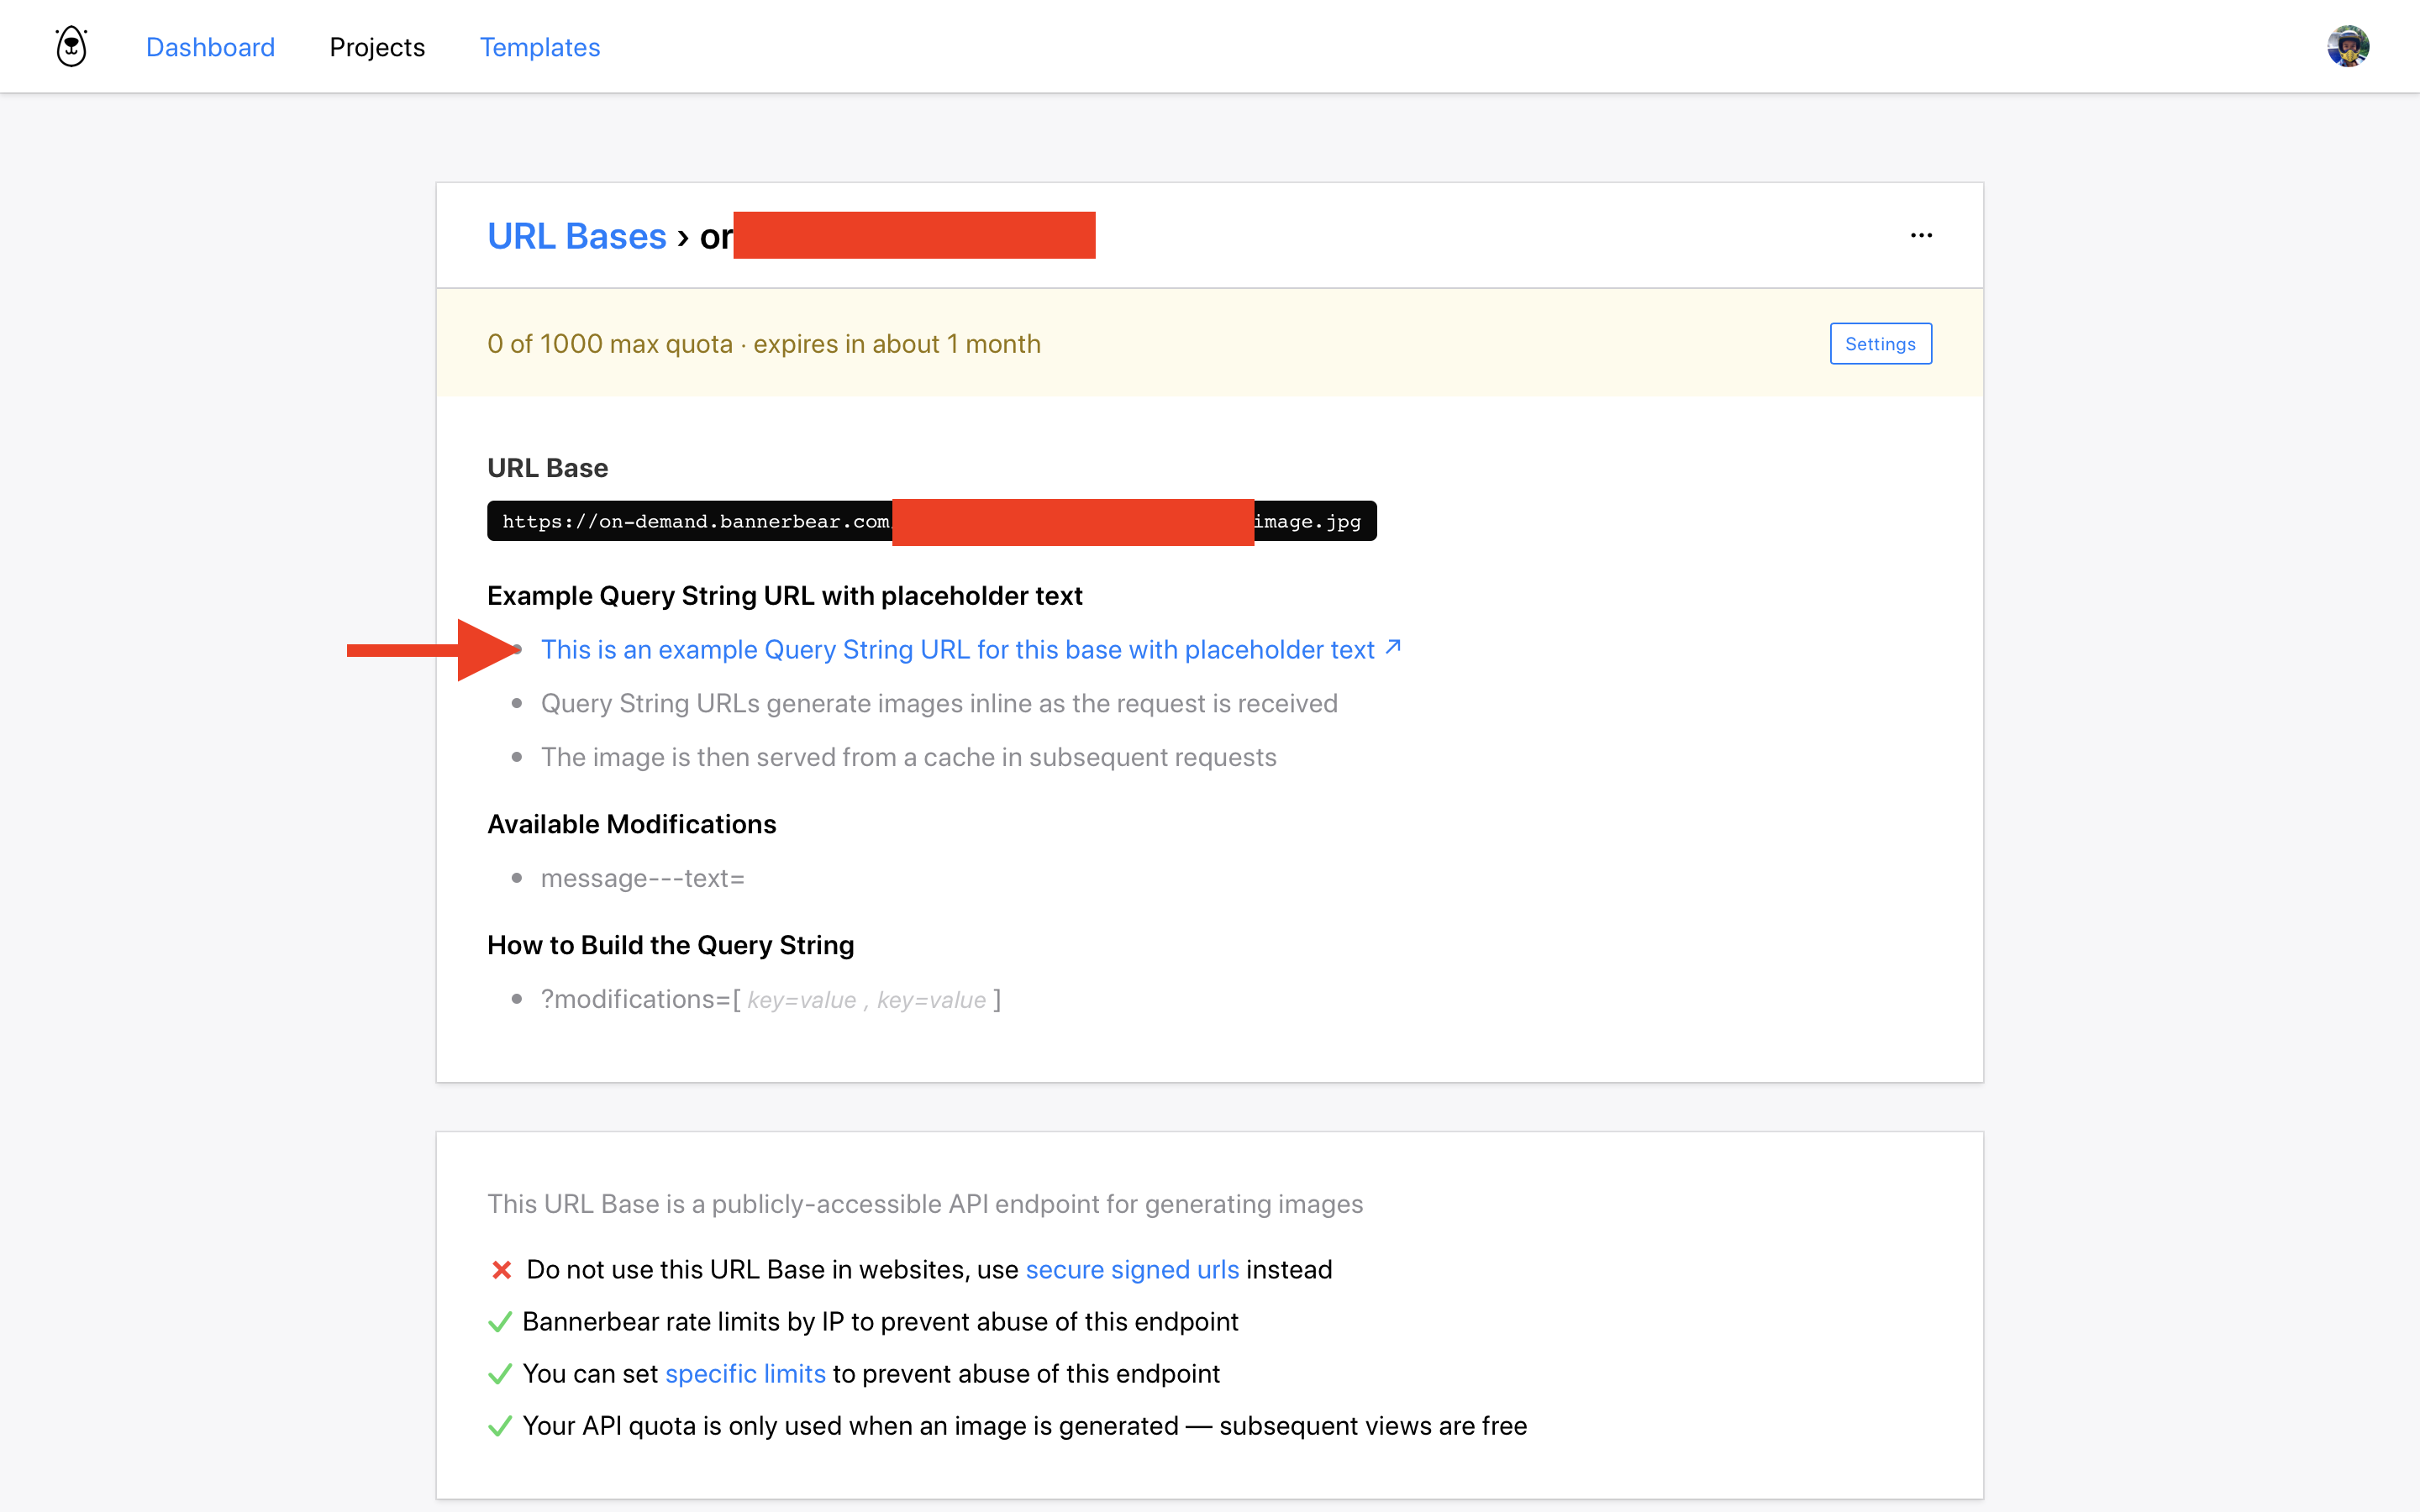
If you change the "Hello World" text in the query string, a different image is generated.

Copy the example url and move over to Mailchimp.
IMPORTANT! If you played with your query string and generated a few test images, you may trigger the built-in rate limit in the next step. Before going to the next step it's best to create a "fresh" Query String Base URL, copy that and then proceed.
There is more info on Rate Limits at the end of this tutorial.
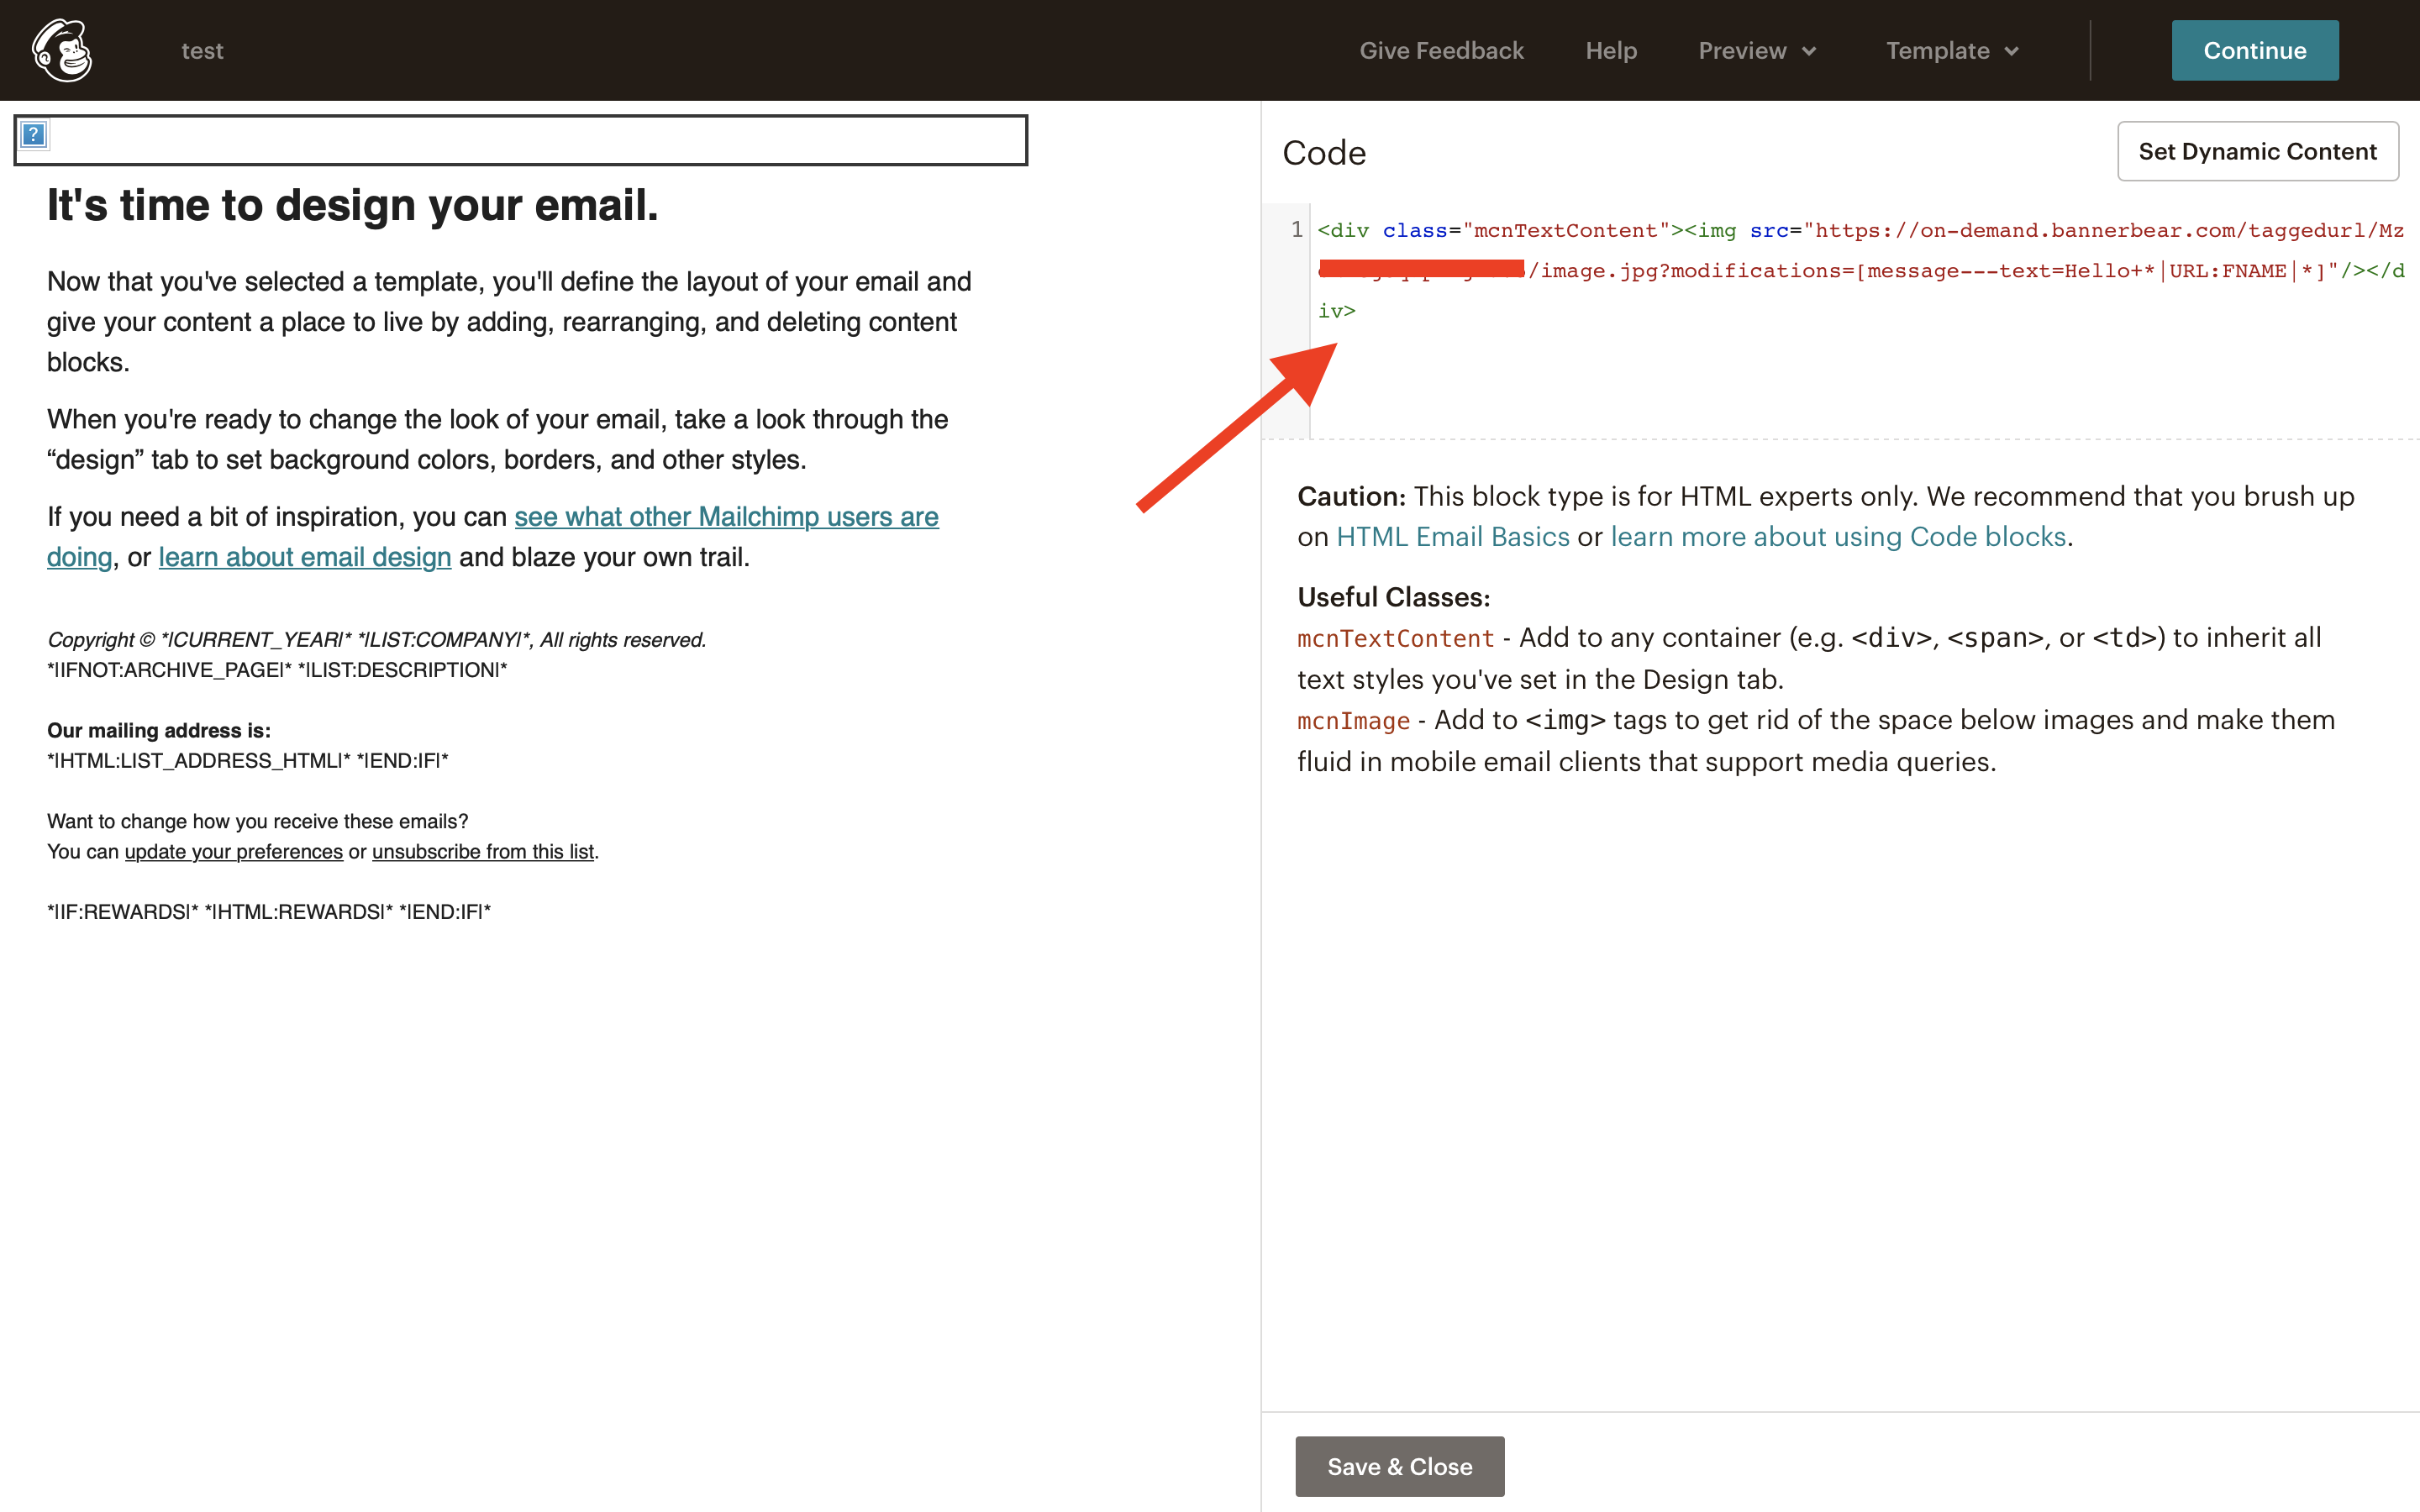
Creating the Code Block
In Mailchimp create a new campaign. I'm just using a simple template in this example:
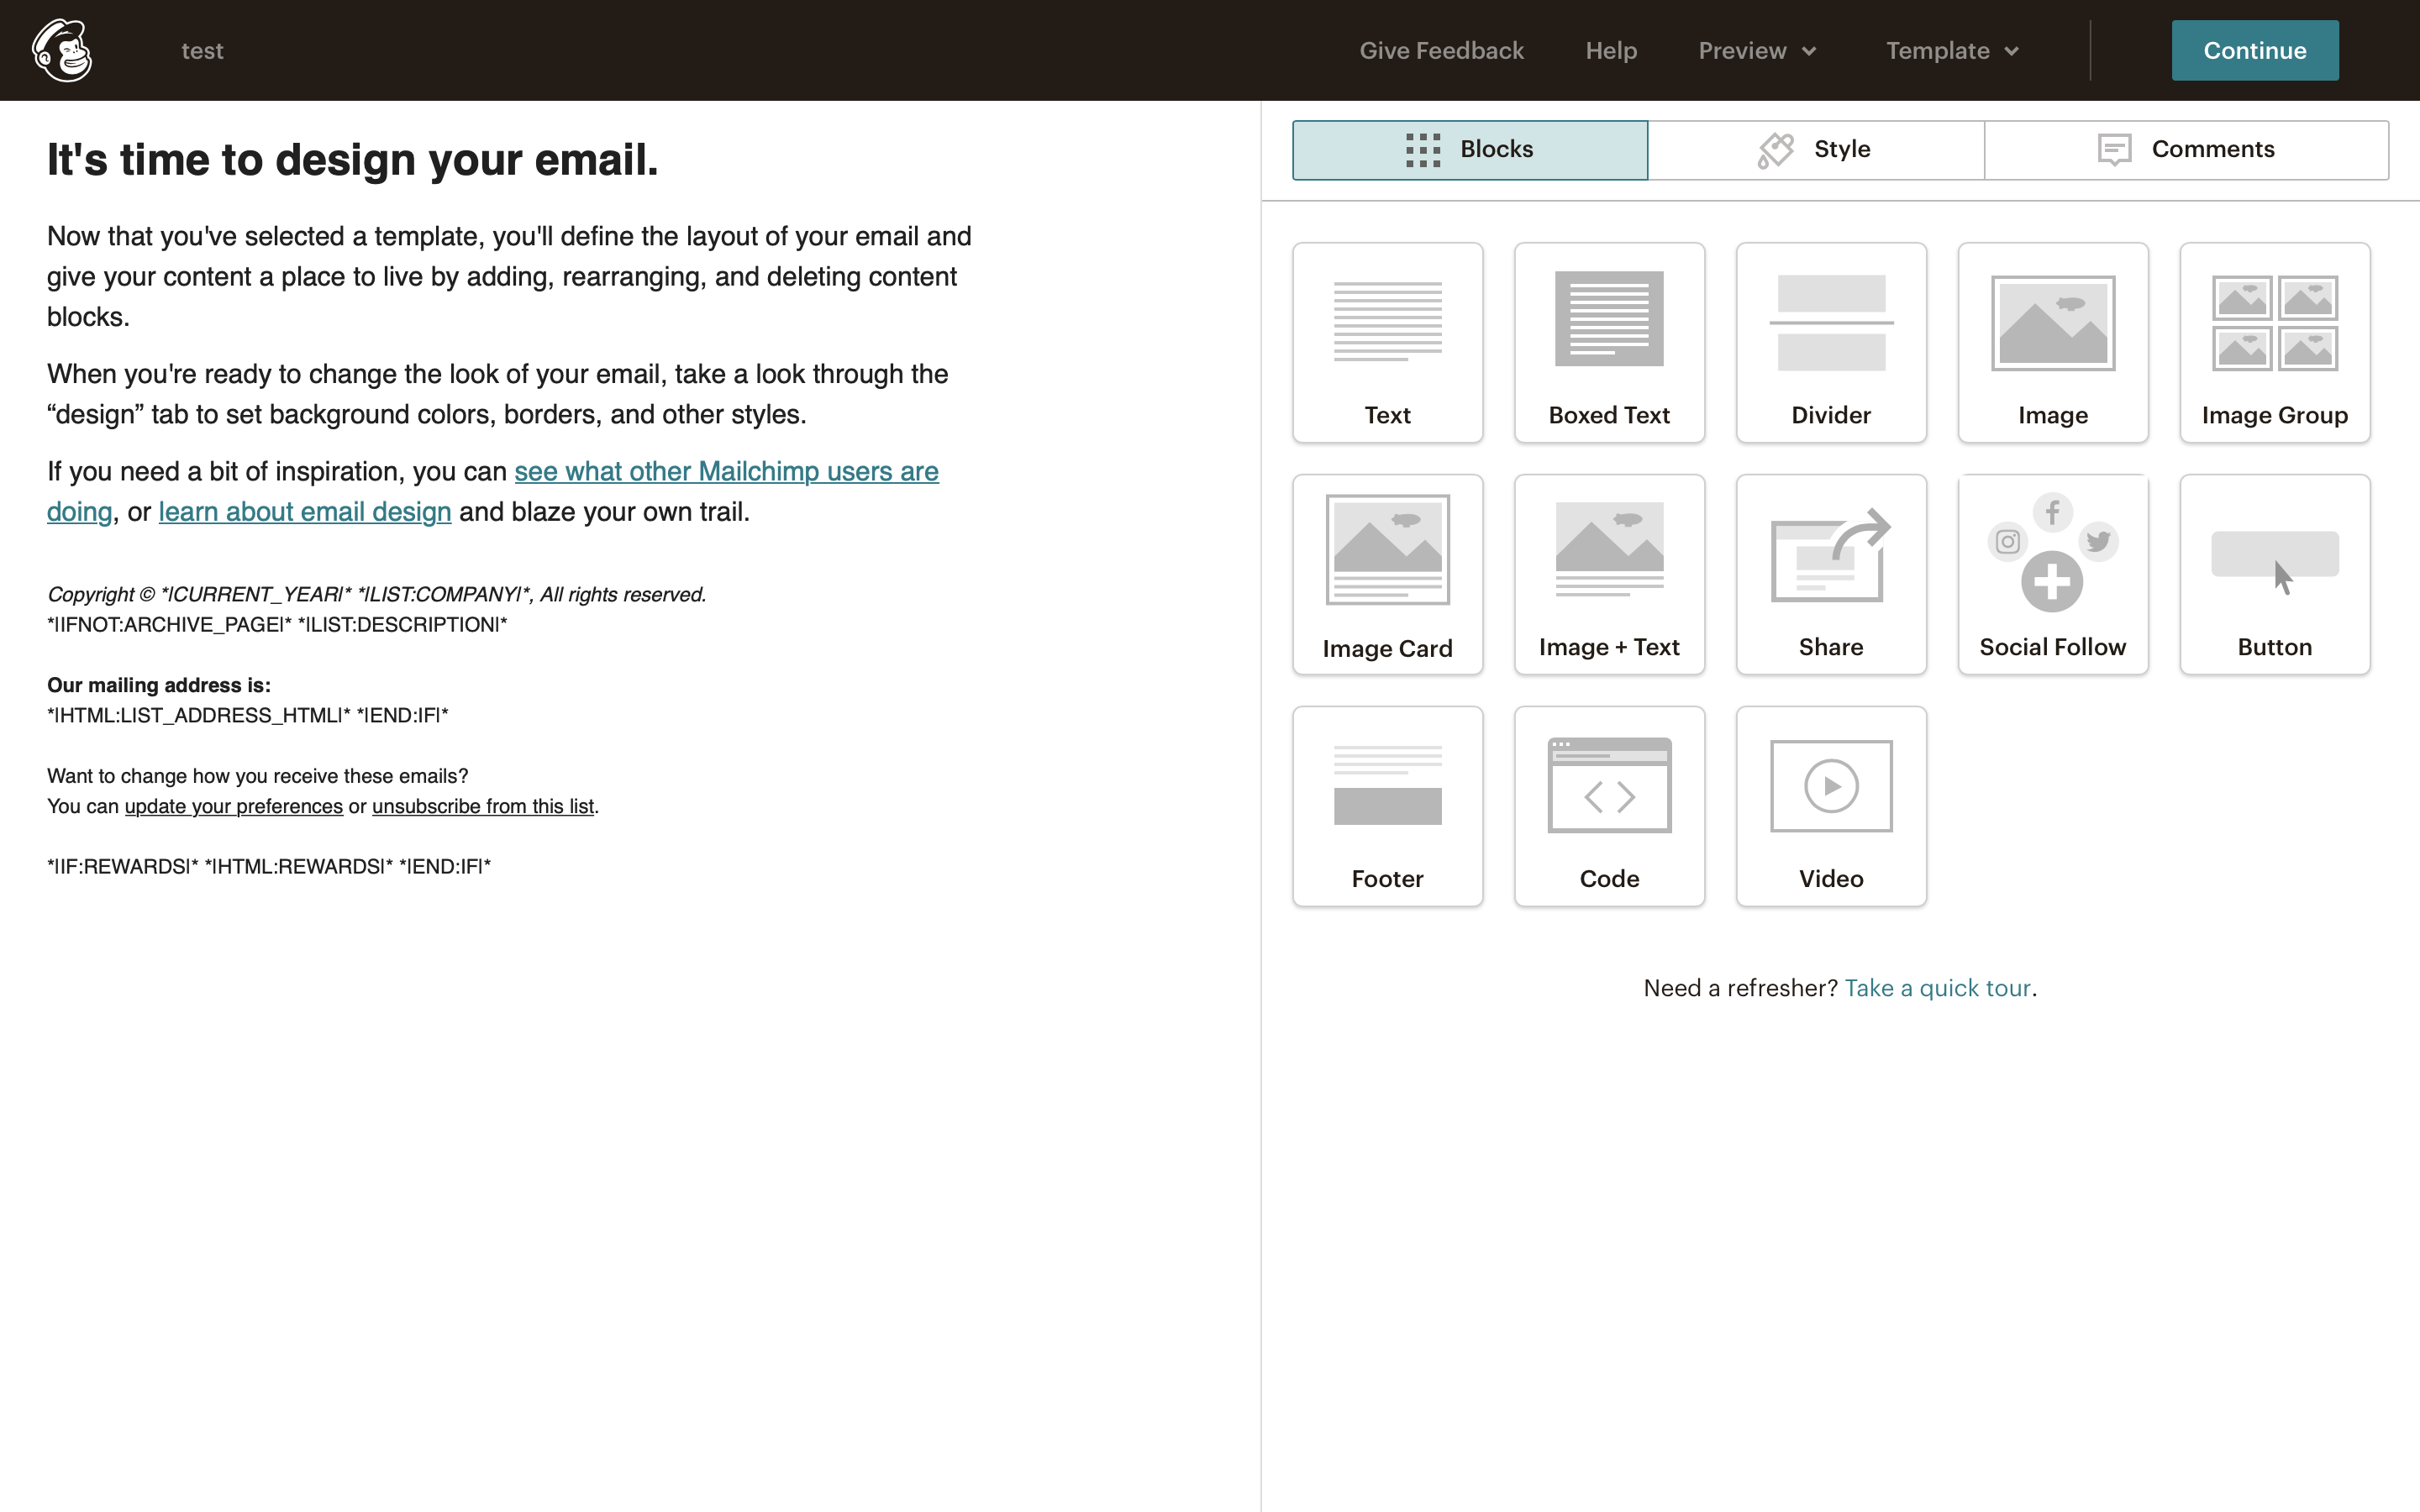
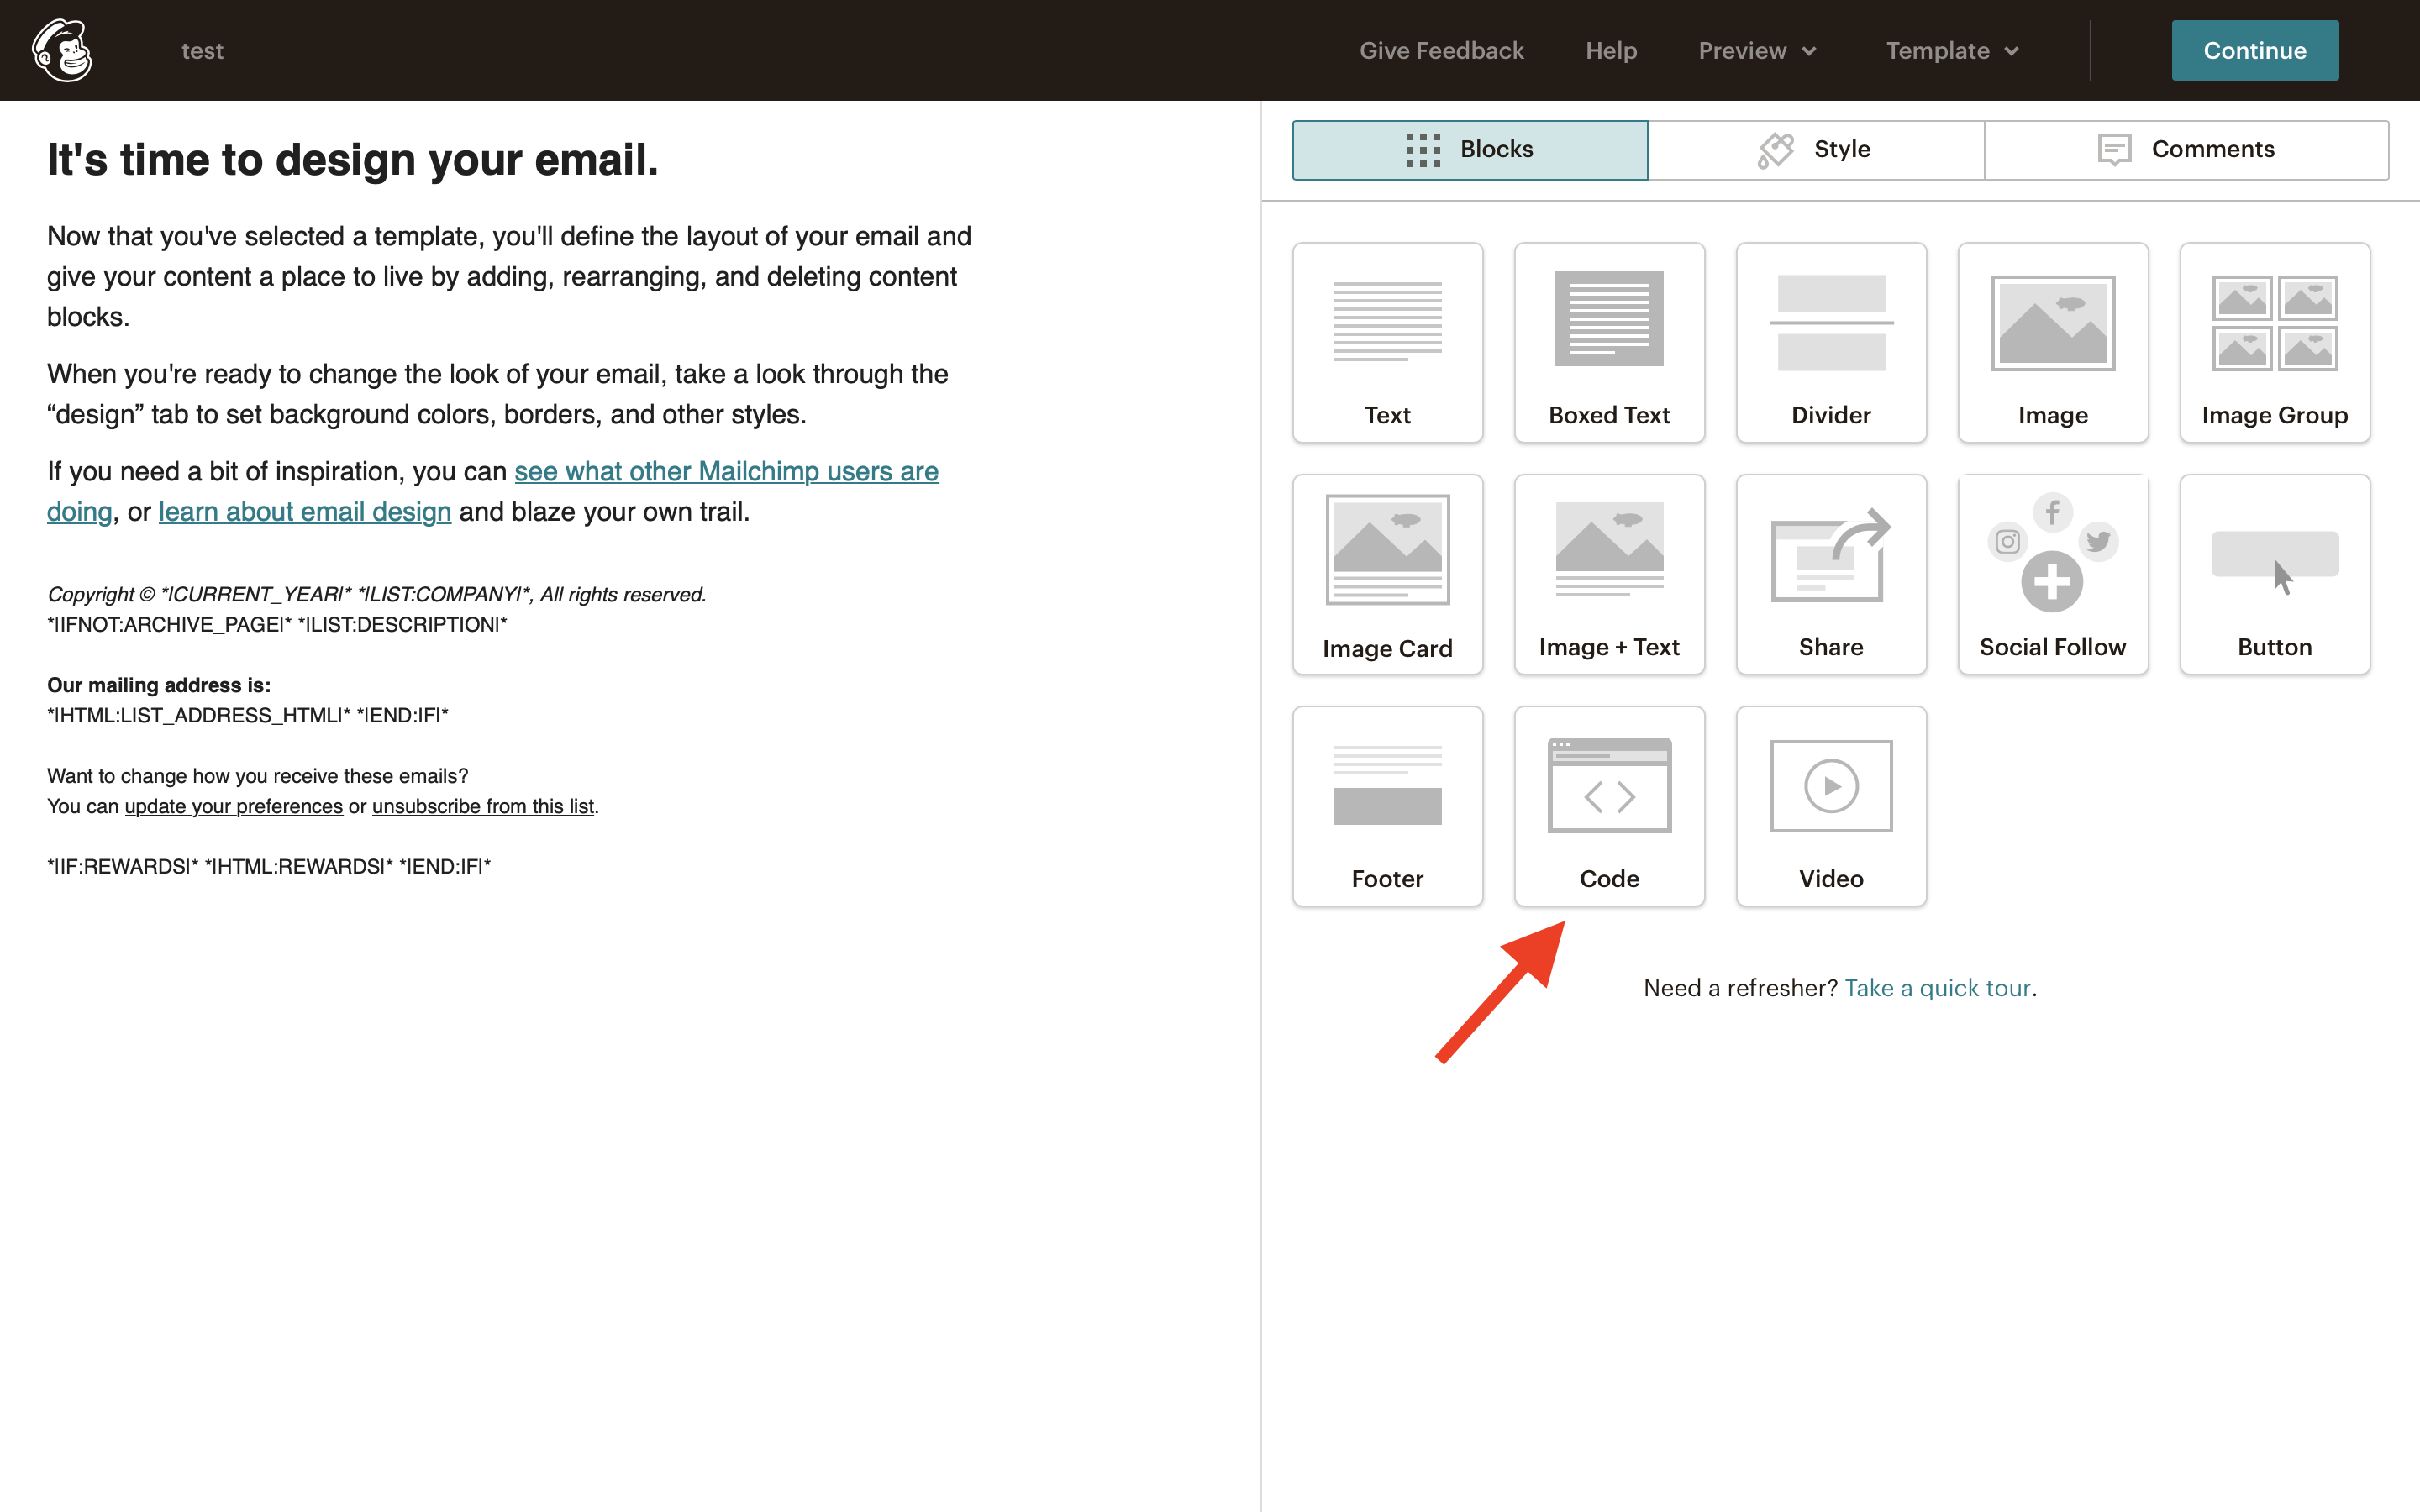
Add a Code Block to the campaign template:
In the code block, you will need to add some code that uses your special Query String URL Base with some dynamic tags so that Mailchimp populates the tag with different data for each audience member. Mailchimp calls these tags merge tags and you can see a full list of them here: Mailchimp Merge Tag Cheat Sheet
In this example we are just going to add the First Name merge tag to our URL base. The code block code should look something like this:
<div class="mcnTextContent"><img src="https://ondemand.bannerbear.com/taggedurl/XXXXXXX/image.jpg?modifications=[message---text=Hello+*|URL:FNAME|*]" /></div>
Where XXXXXXX is your URL Base ID.
When you paste this code into the code block, the image will be broken in the preview but that's ok, we will preview the real images in the next step.
Testing with your Merge Tags
Enter preview mode in Mailchimp and switch on Live Merge Tags.
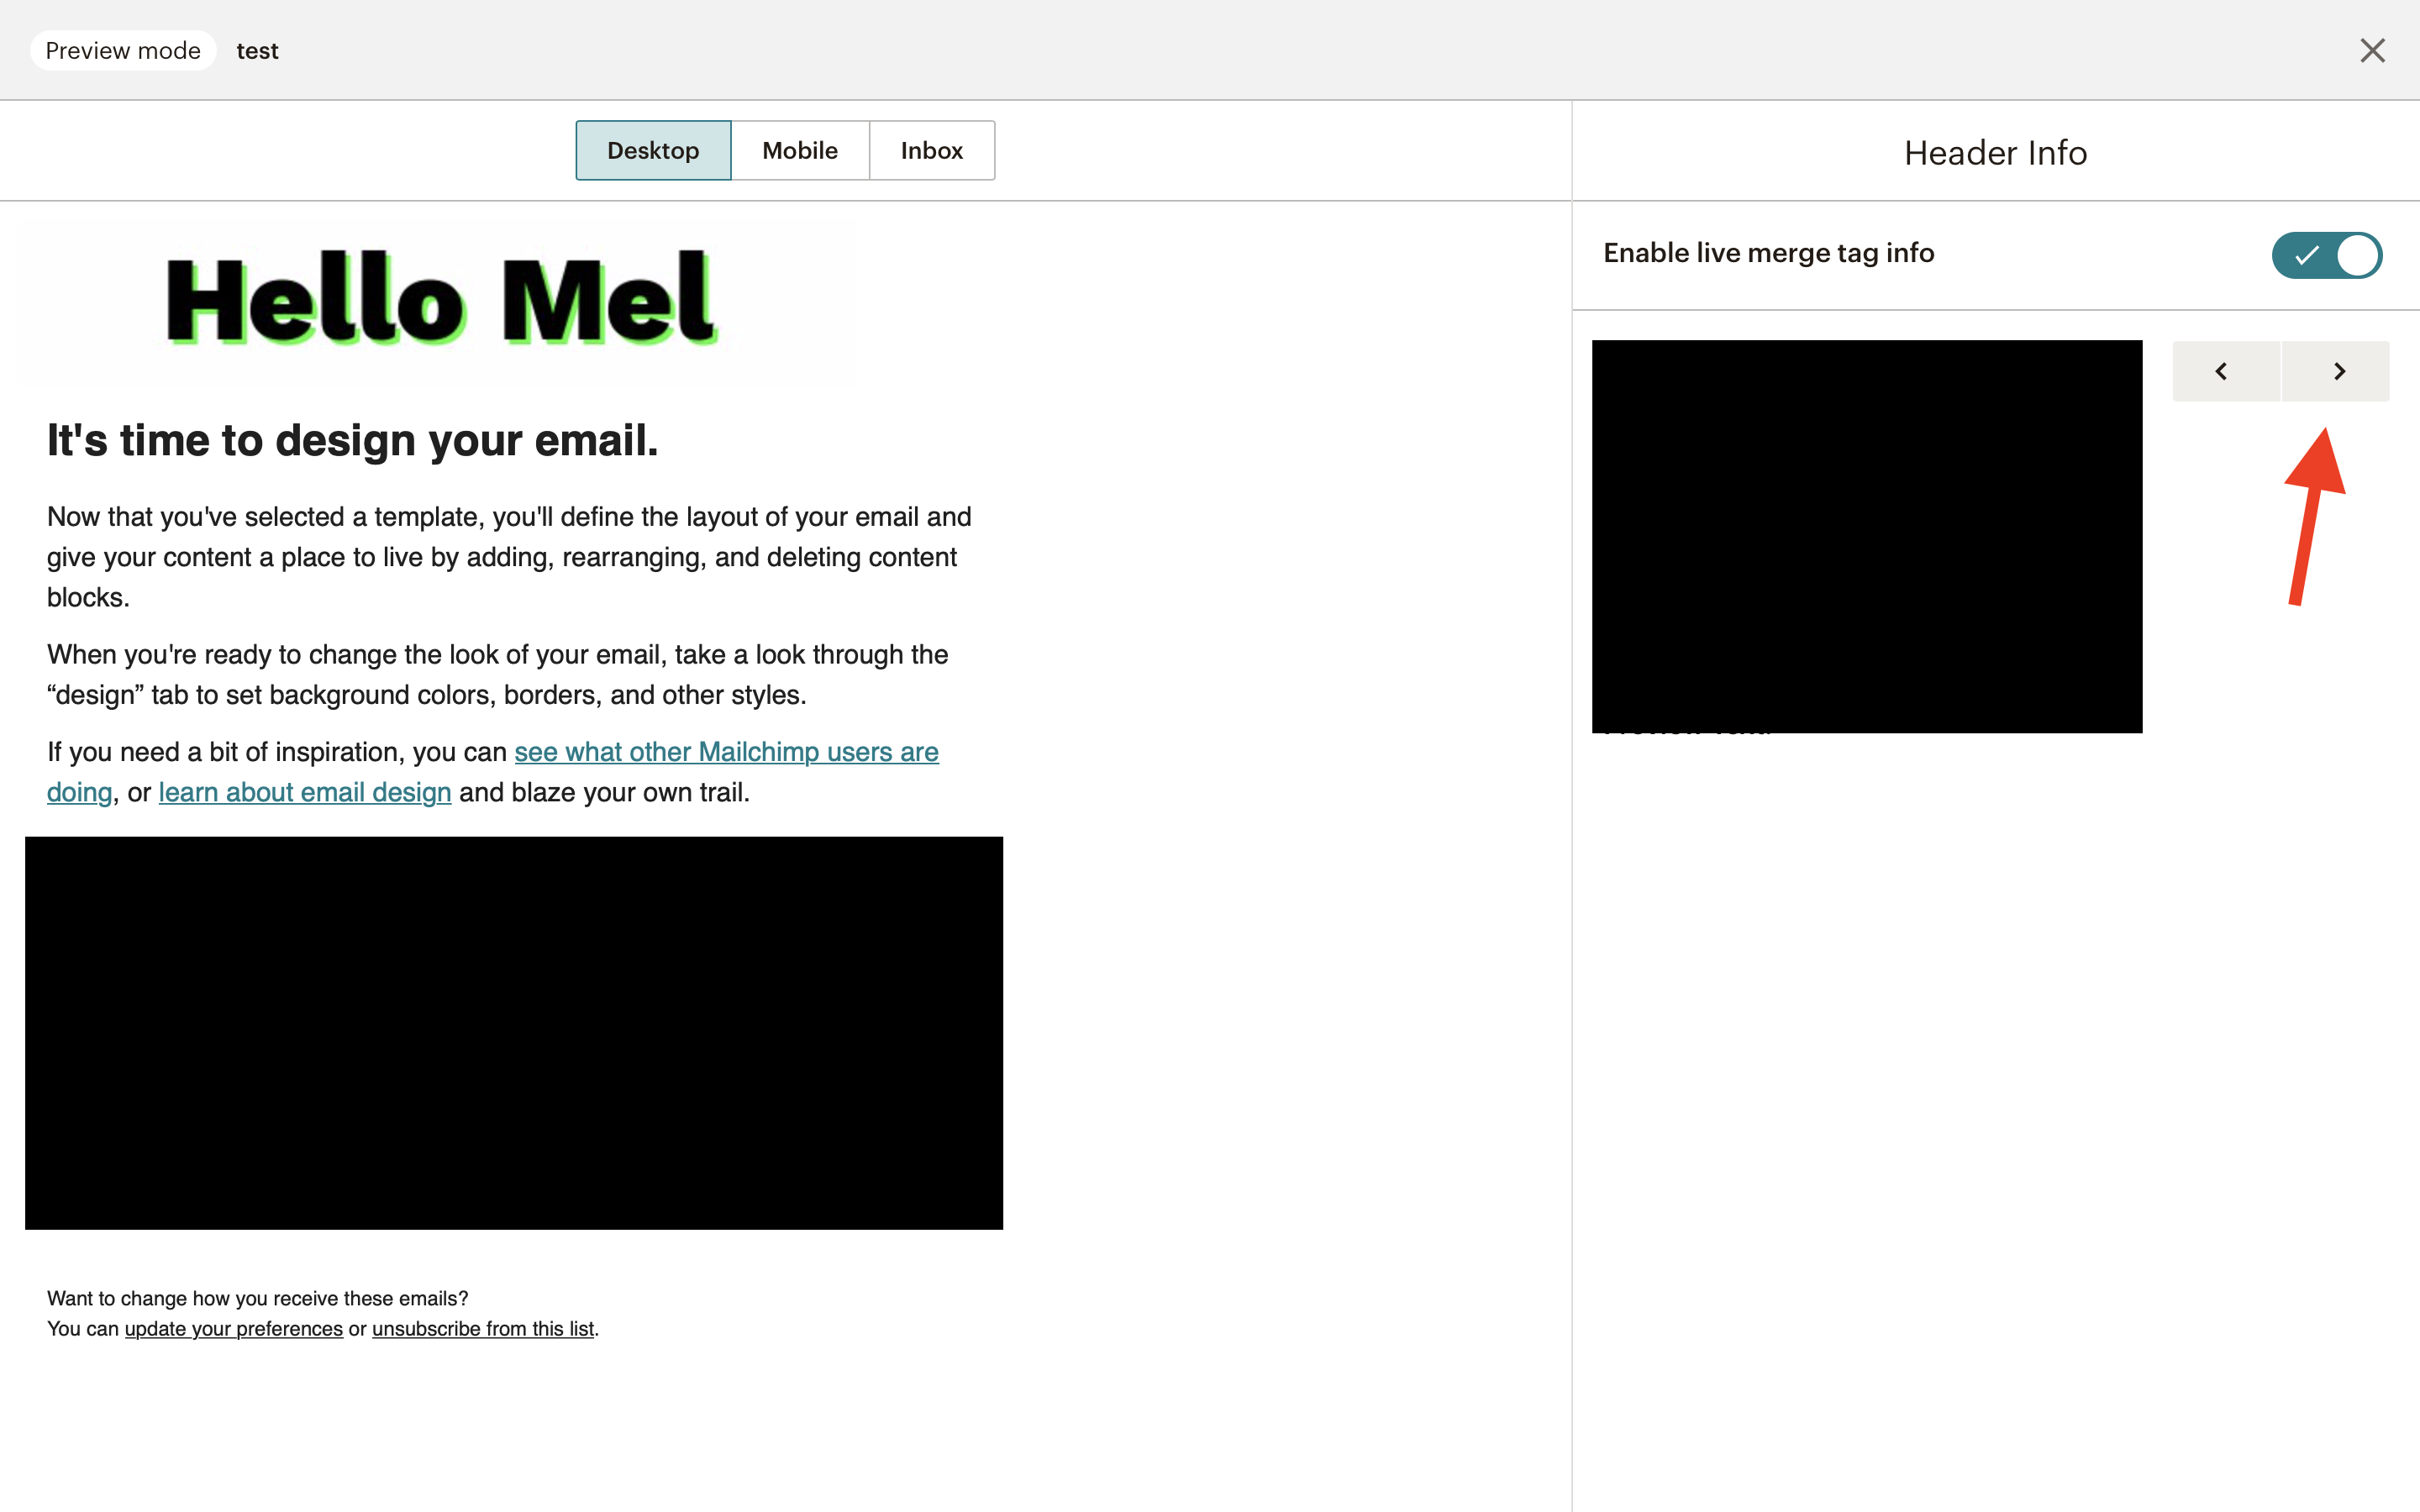
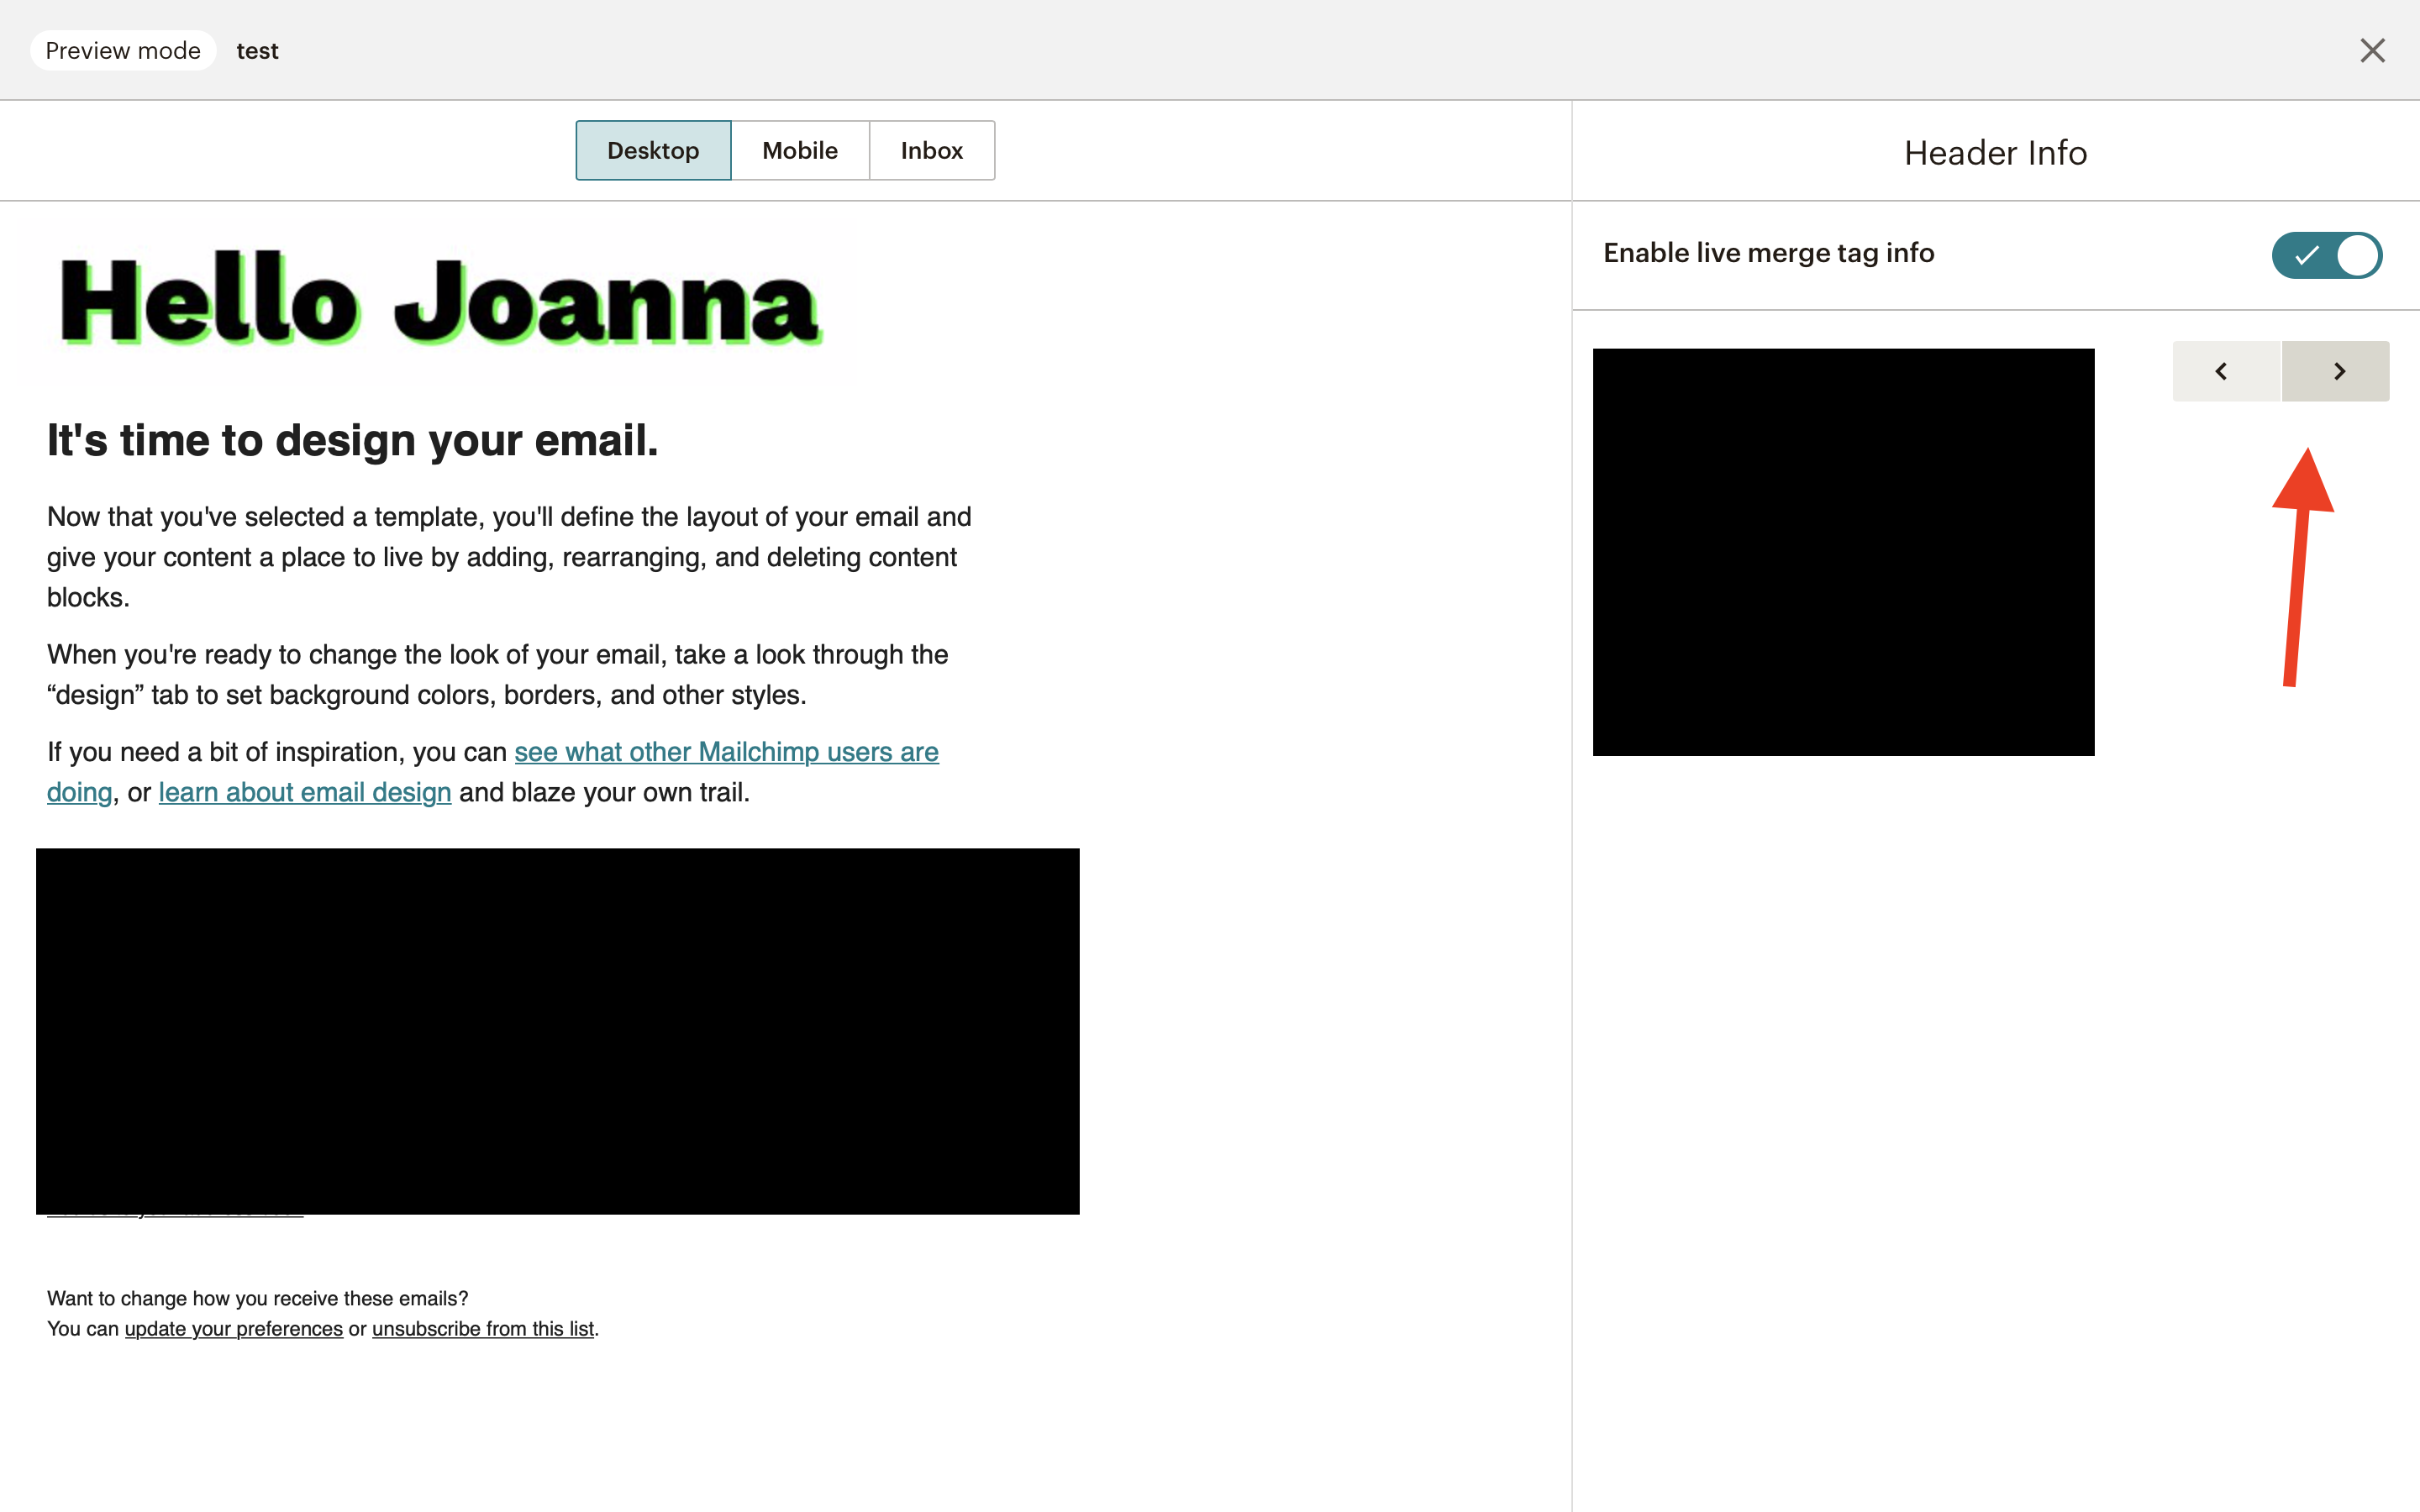
This will insert your merge tag data into the special Bannerbear URL and you will see the images get dynamically generated. You can test a few of these to make sure it is working, and then send your campaign as normal.
Sending the campaign
Send your campaign as normal. When a recipient opens the email, the header image will get dynamically generated (in one or two seconds) and display their personalized welcome message!
Rate Limits
Query String Base URLs give public access to generating images from the template that they are connected to. In most cases this will not be a problem, but it does mean that if someone inspects your email HTML code, they can find your image URL and generate their own images from this template (not sure why they would want to, but they can!).
To prevent misuse, Query String Base URLs have 3 levels of built-in protection:
- From a single IP address only 5 new images can be generated per hour
- You can set a max limit for the Base
- You can set an expiry date for the Base
