
How to Use the Bannerbear WordPress Plugin to Generate Dynamic Open Graph Images
Contents
In the tutorial How to Add Auto-Generated Custom Open Graph Images to WordPress Using Bannerbear, we have learned how to add a Bannerbear Simple URL to the header of a WordPress website via code injection to generate Open Graph images dynamically for WordPress posts.
The Simple URL is a highly customizable way to generate dynamic images automatically. You can pass any value, including variables that can be retrieved using WordPress Functions to your Bannerbear design template via the URL.
If the values are some common attributes of a WordPress post (eg. title, date, featured image, etc), there’s an easier and faster alternative. Let me introduce to you—the Bannerbear WordPress Plugin!
Bannerbear WordPress Plugin
The Bannerbear WordPress Plugin allows you to use Bannerbear’s Signed URL functionality on WordPress websites without having to add custom code. Similar to the Simple URL, it helps you to generate custom images that are exclusive to each post automatically.
The major difference between the two types of URLs is that a Signed URL is encrypted with HMAC while a Simple URL is not.
Using the plugin, you can create a Signed URL for your Bannerbear design template and configure value mapping for the modifiable dynamic objects in the template directly from the WordPress Admin Dashboard.
You can choose the values from a list of WordPress variables, map them to the dynamic objects, and choose where to display the images.
Pre-requisites
To use the Bannerbear WordPress Plugin, you will need a Bannerbear design template and its project API key. The template can consist of layers of static and dynamic objects like images, texts, shapes, etc.
The values of the dynamic objects are modifiable using API. In our case, we will only have to map the WP variables to these objects in the WP Admin Dashboard to modify the values as the plugin will do the work for us.
Bannerbear Design Template
Create a Bannerbear project and add a template to it. This will create a blank canvas and you can design it by adding layers of static and dynamic objects. Otherwise, you can duplicate this tutorial’s template to your project and modify it to your liking.
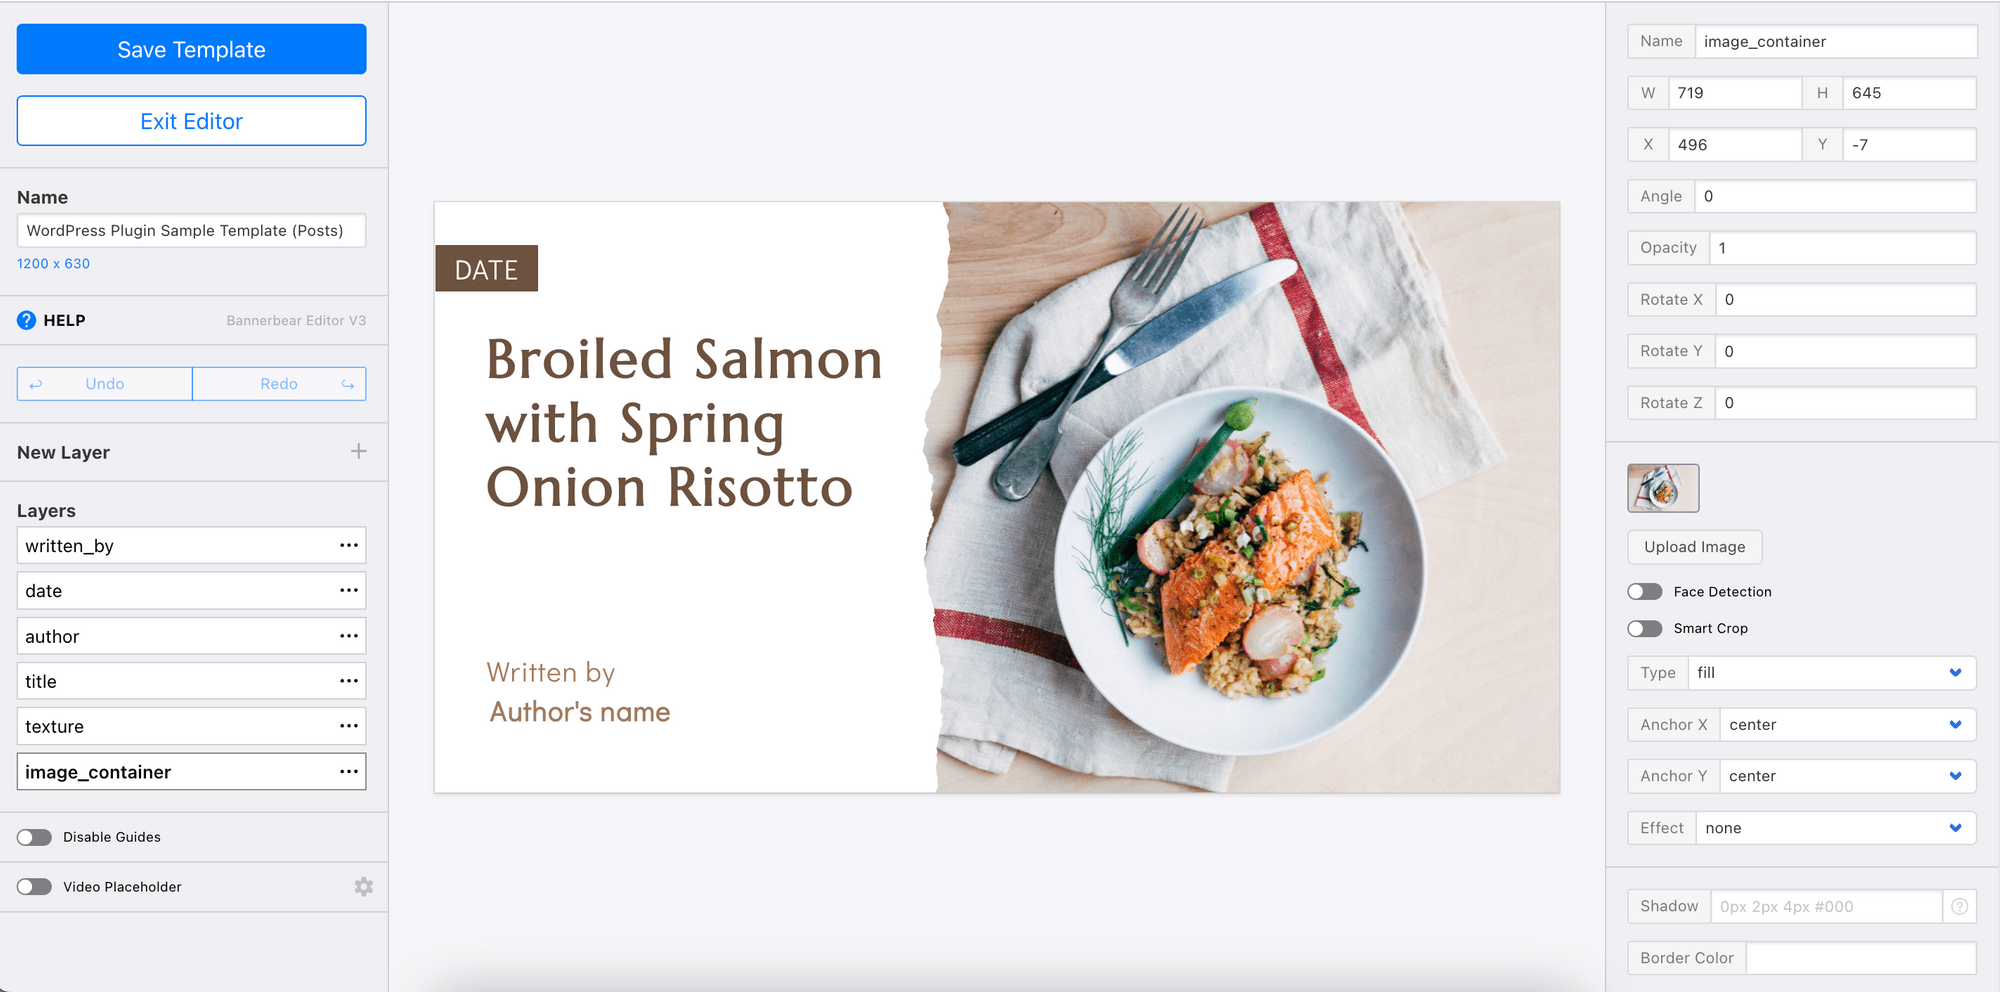
In the template, we have these modifiable dynamic objects:
- Text - title, date, author, written_by
- Image - image_container
They will be shown in the WP Admin Dashboard after you create a Signed URL using the Bannerbear WordPress Plugin. We will do this in the following section.
🎨 Find more readily available templates from our template library!
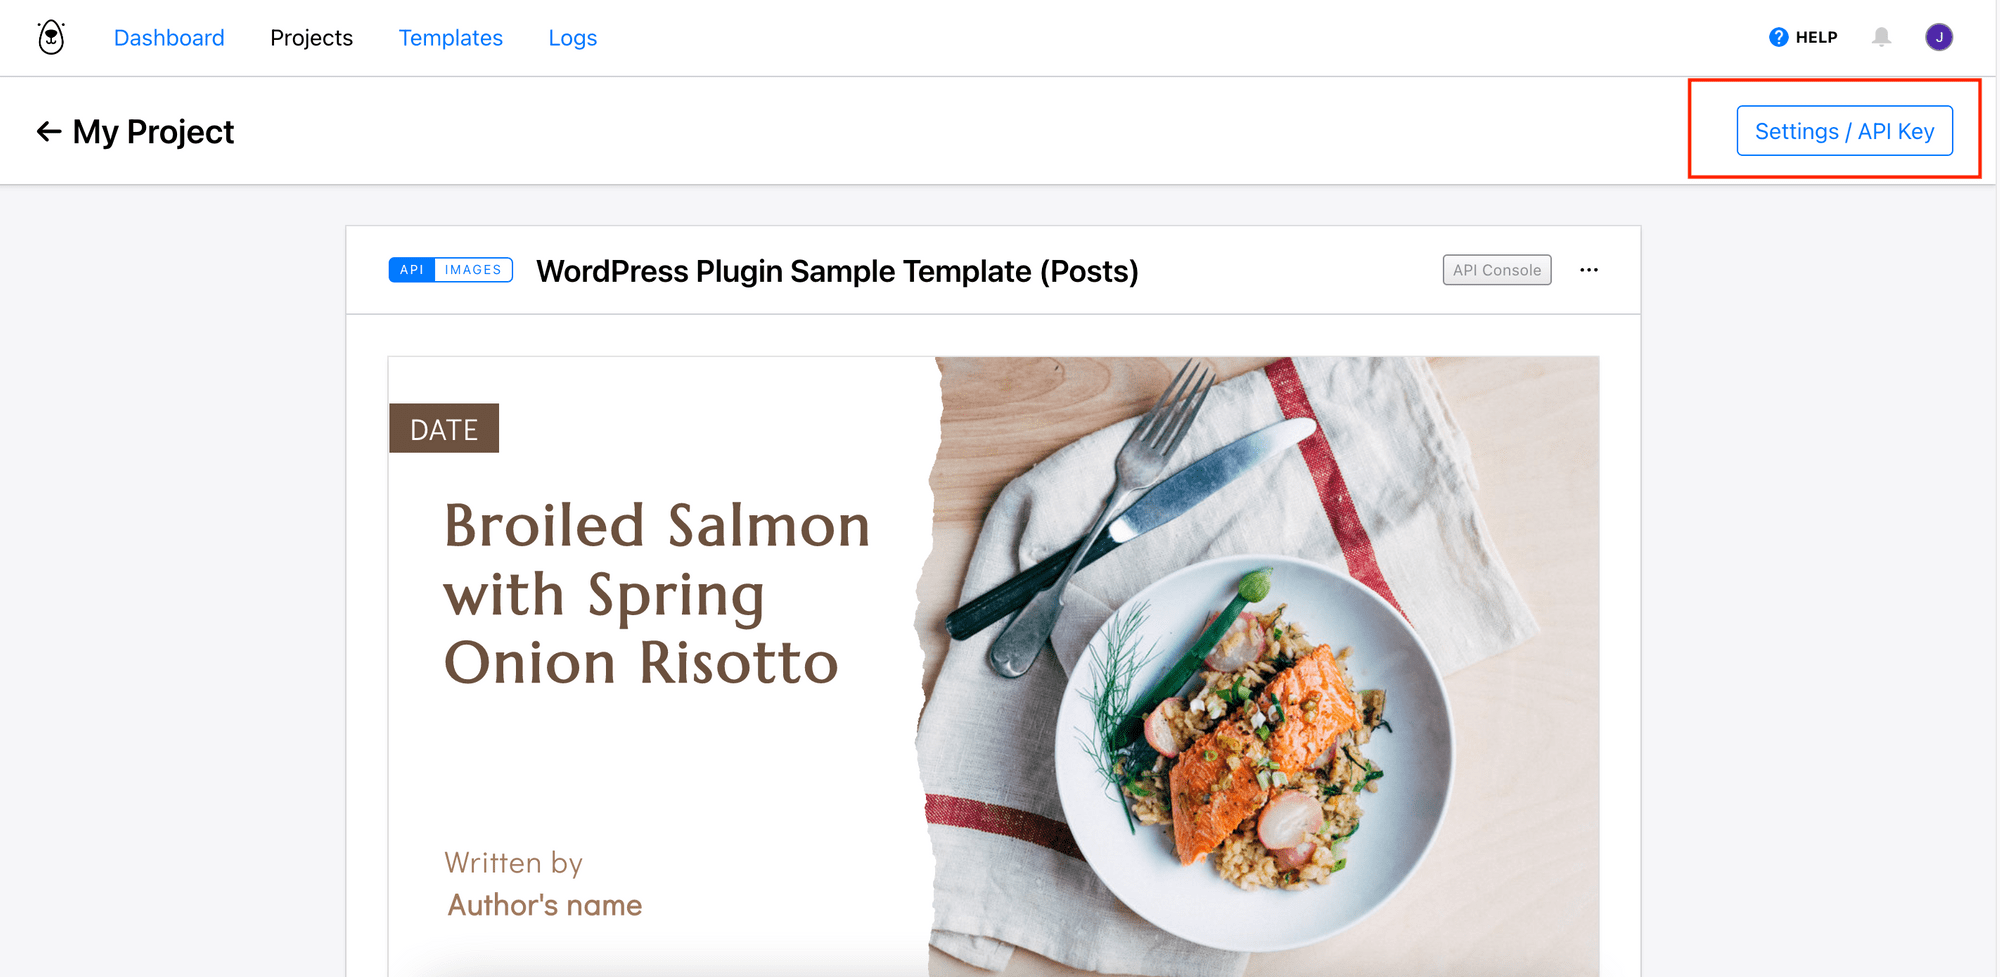
Bannerbear Project API Key
The project API key will be needed to access your Bannerbear project and design template from the WP Admin Dashboard. It can be found in the project’s Settings.
Using the Bannerbear WordPress Plugin
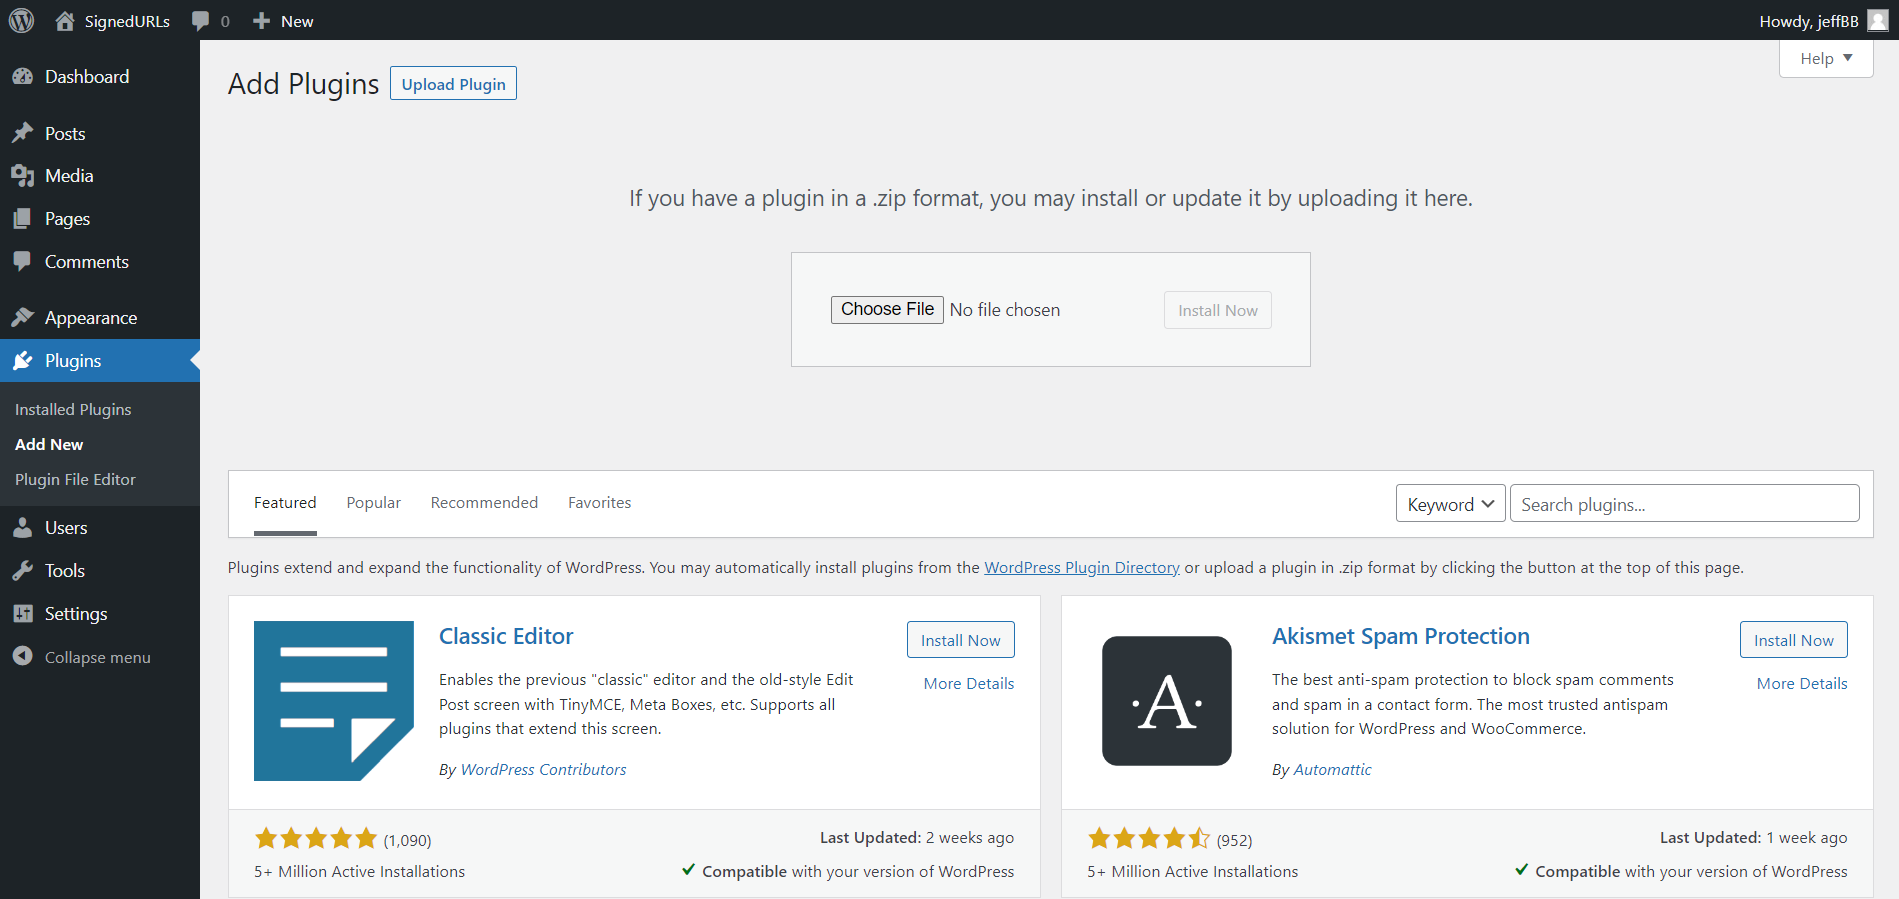
Step 1. Install the Bannerbear WordPress Plugin
Log in to your WP Admin Dashboard. In the Plugins tab, click “Add New” and search for the Bannerbear plugin. Click “Install Now” and activate the plugin after the installation is complete.
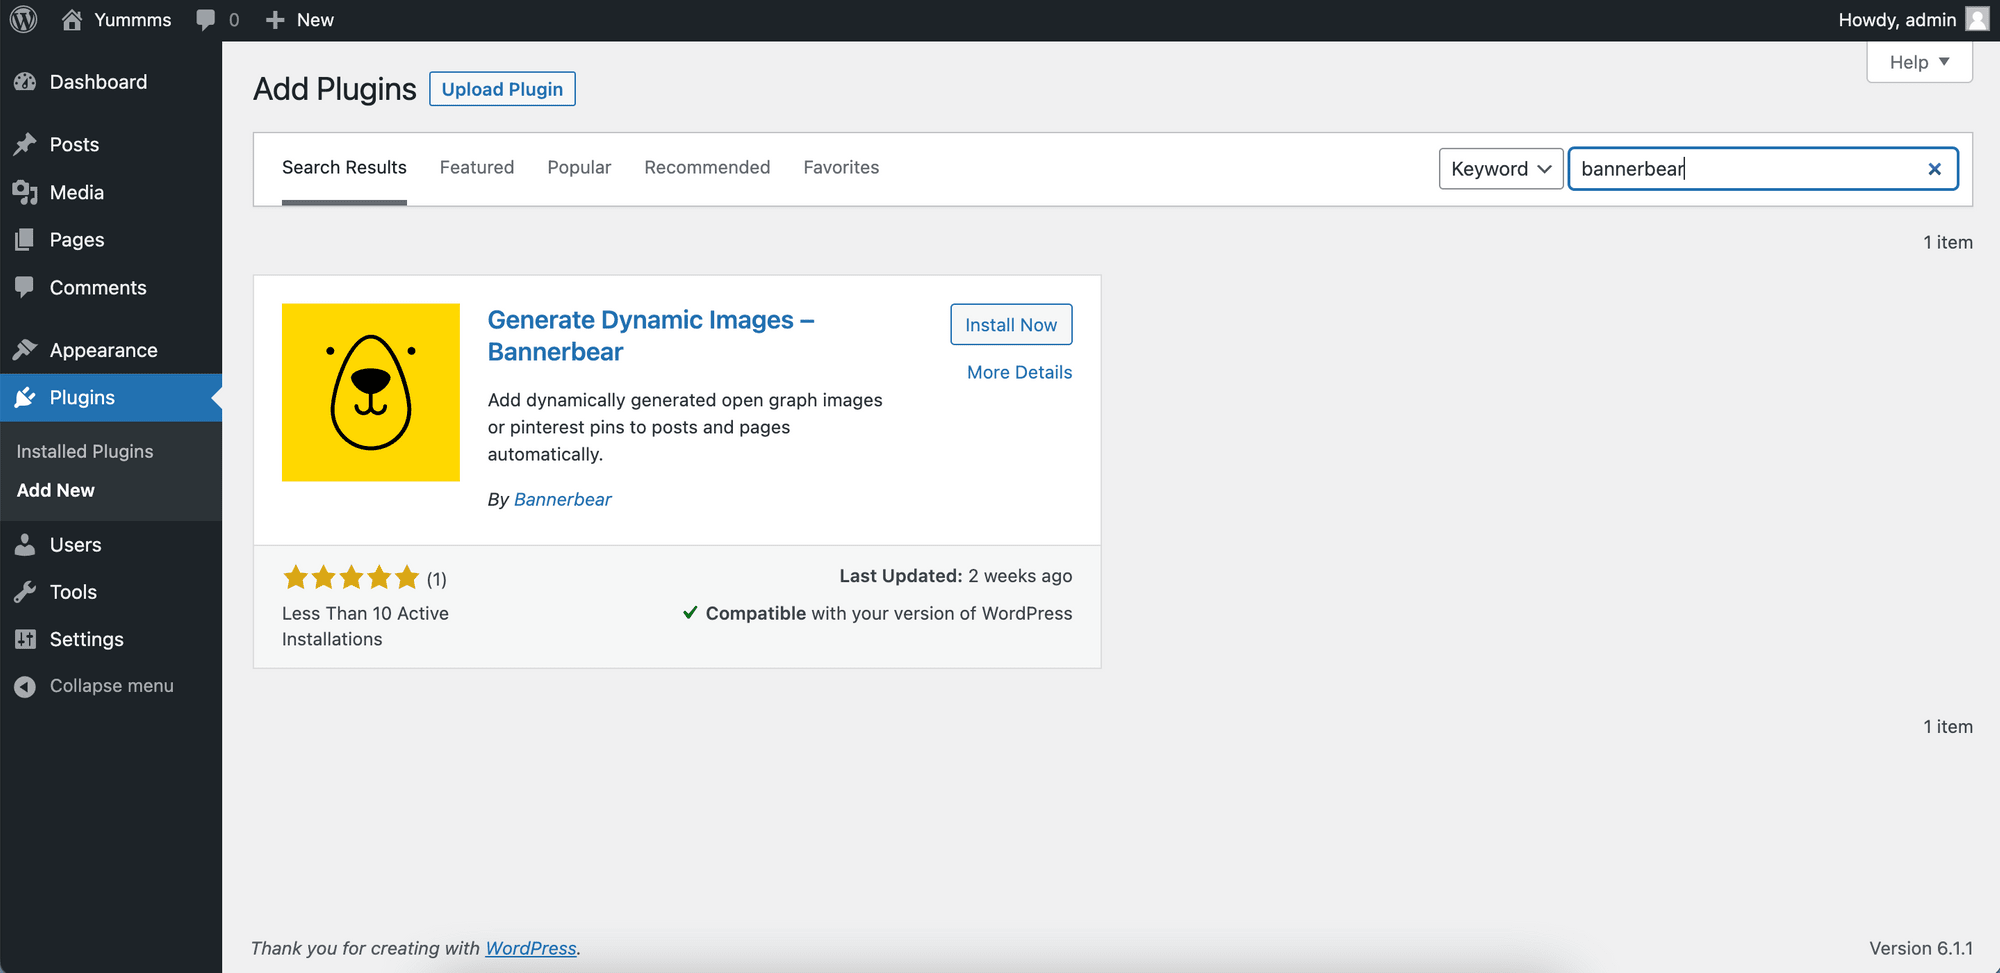
Alternatively, you can download the plugin in a zip file and upload it manually.

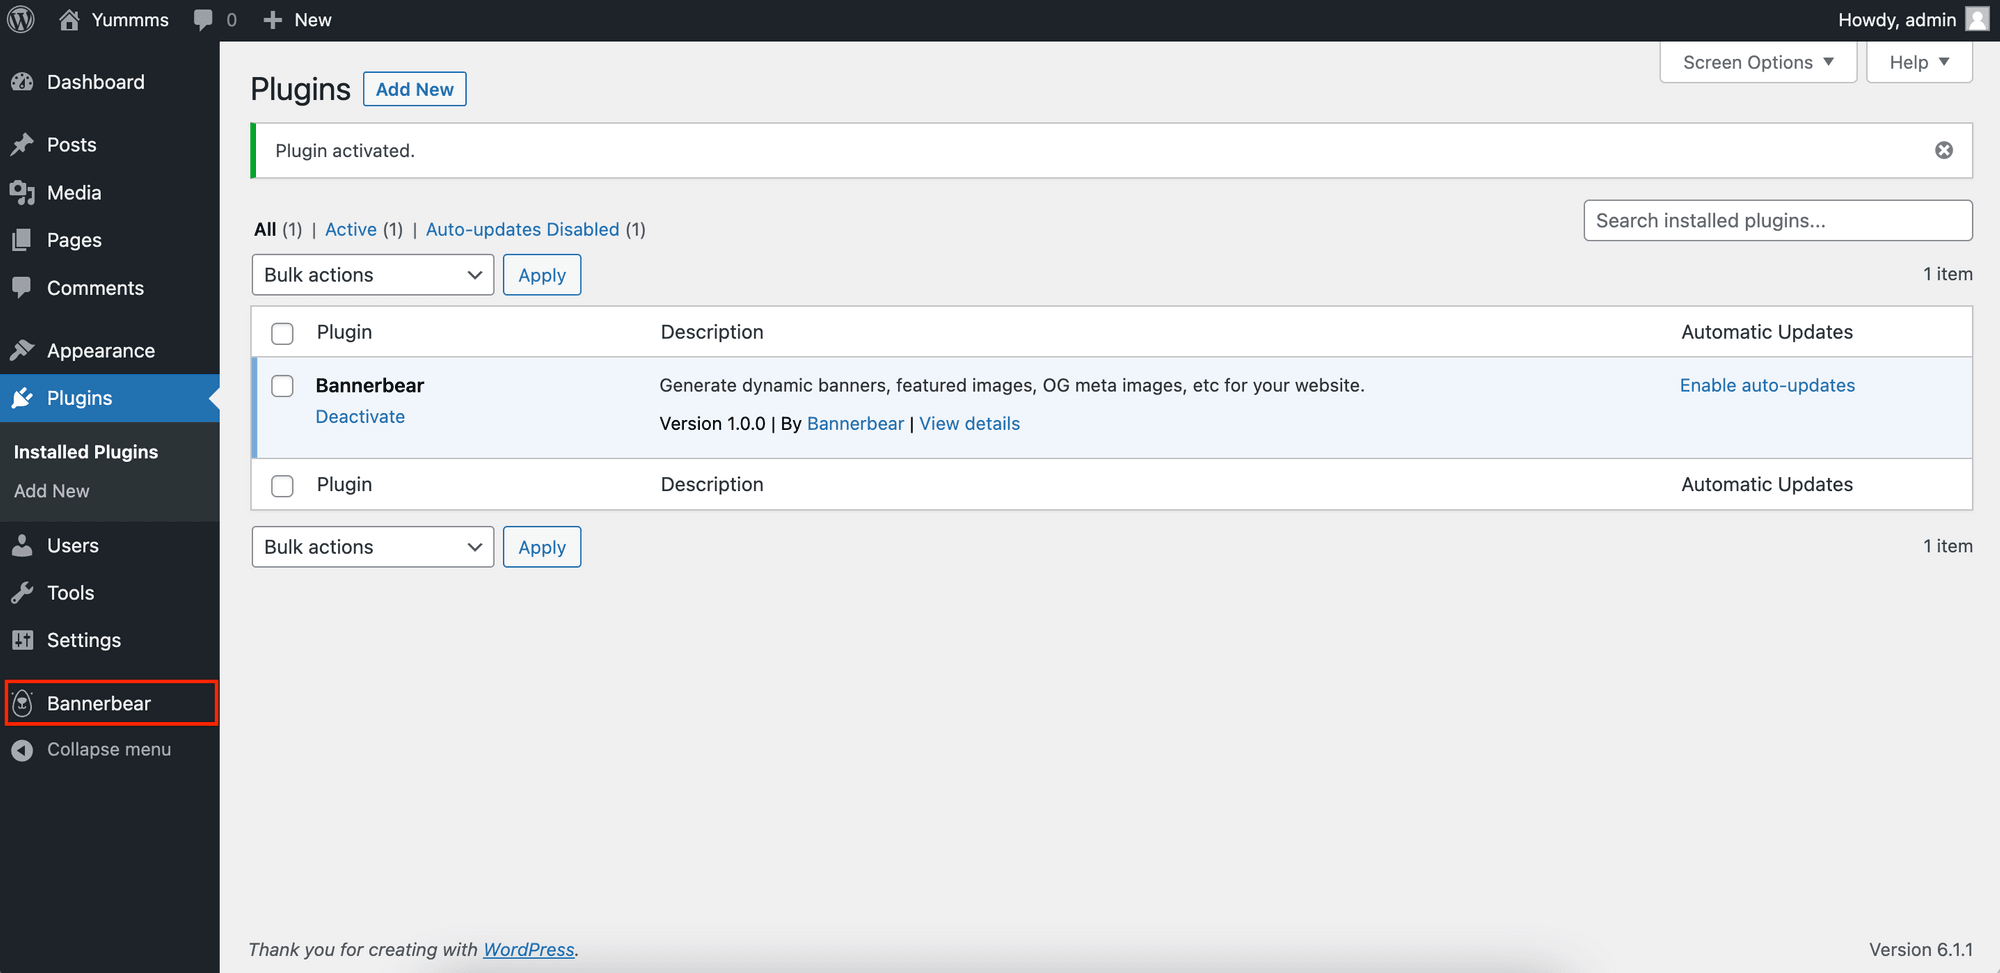
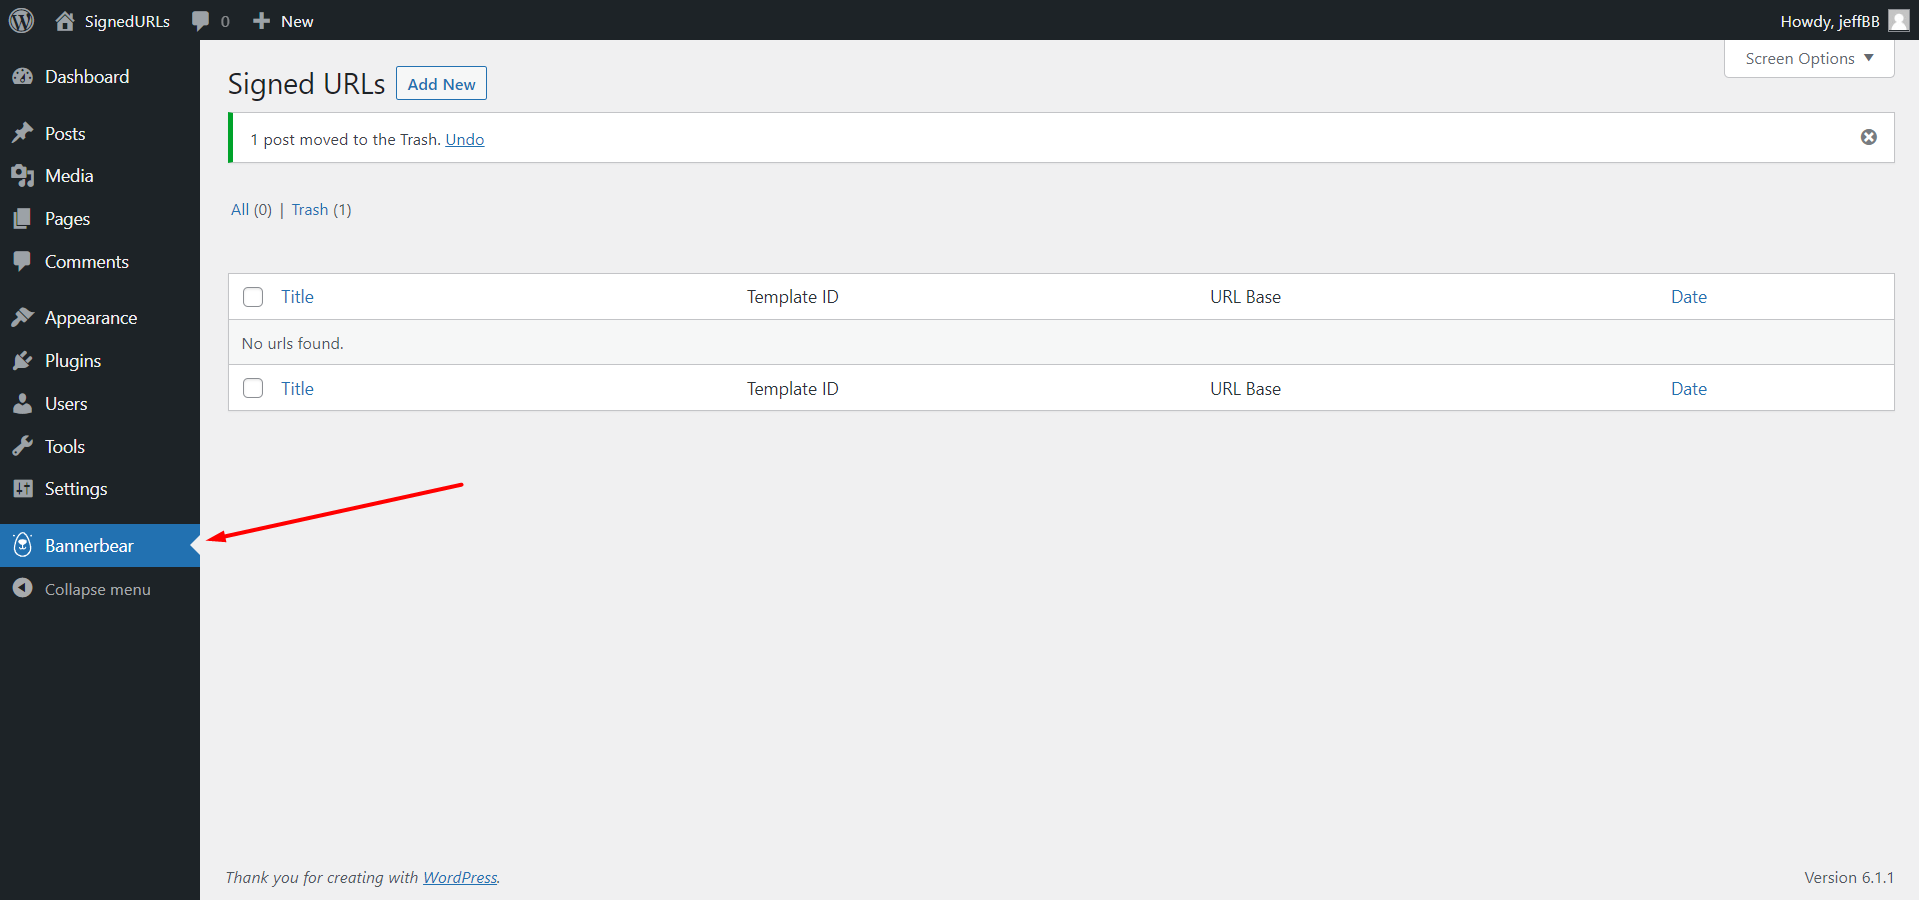
After installing and activating the plugin, you should see the Bannerbear tab in the admin menu.
Step 2. Create a Signed URL in WordPress
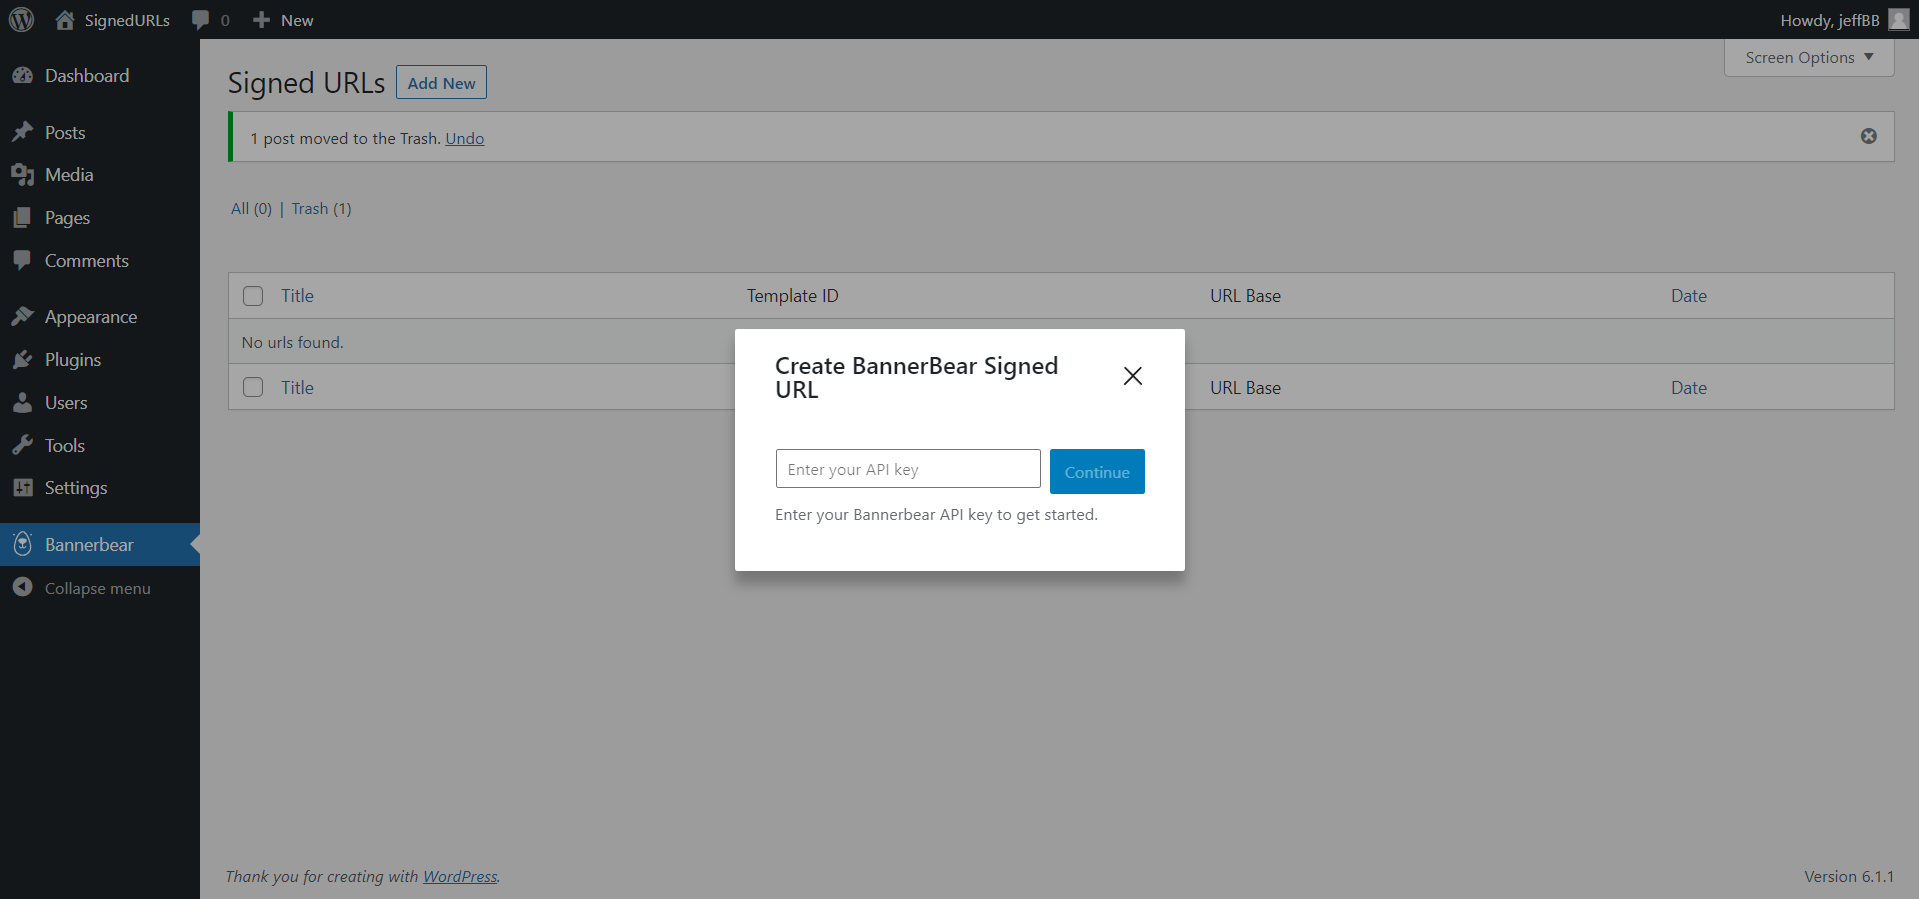
Normally, you will need to generate a Signed URL from your Bannerbear account dashboard but with this plugin, you can generate it directly in WordPress using your Bannerbear project API key.
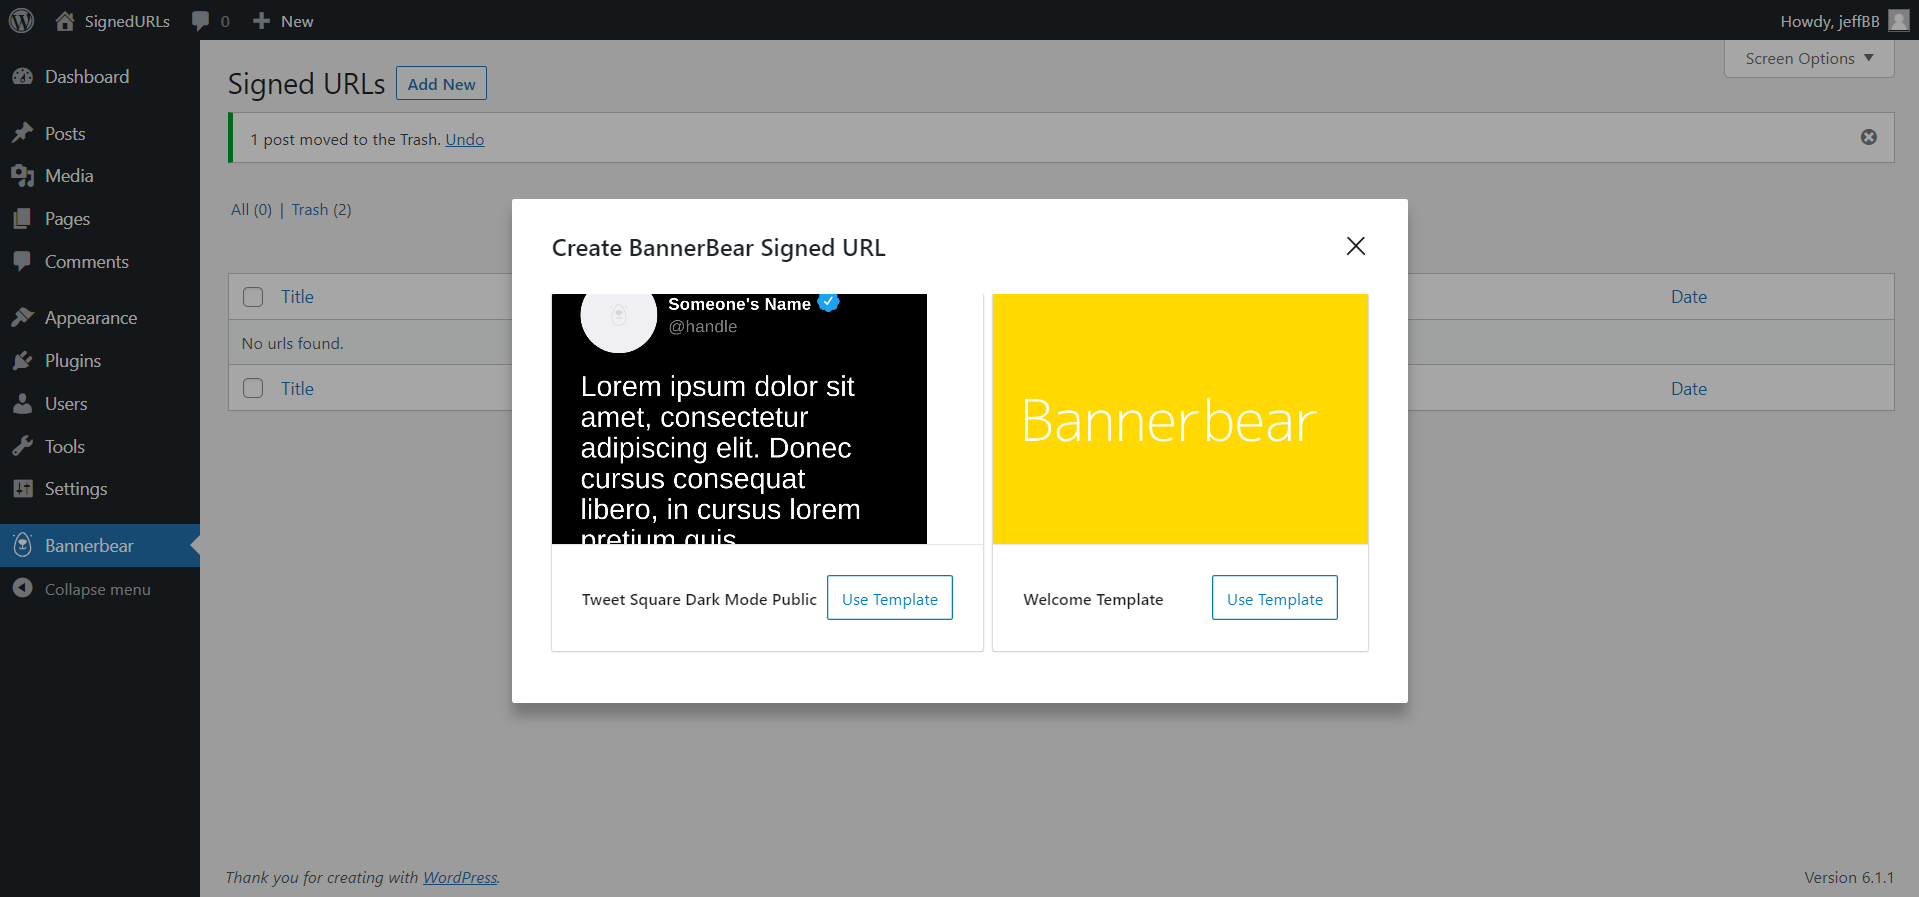
Go to Bannerbear Plugin.
Select "Add New" and paste your API Key.
All templates in the project will be shown. Select the template that you want to use to generate dynamic images for your WordPress website so that a Signed URL will be created for it.
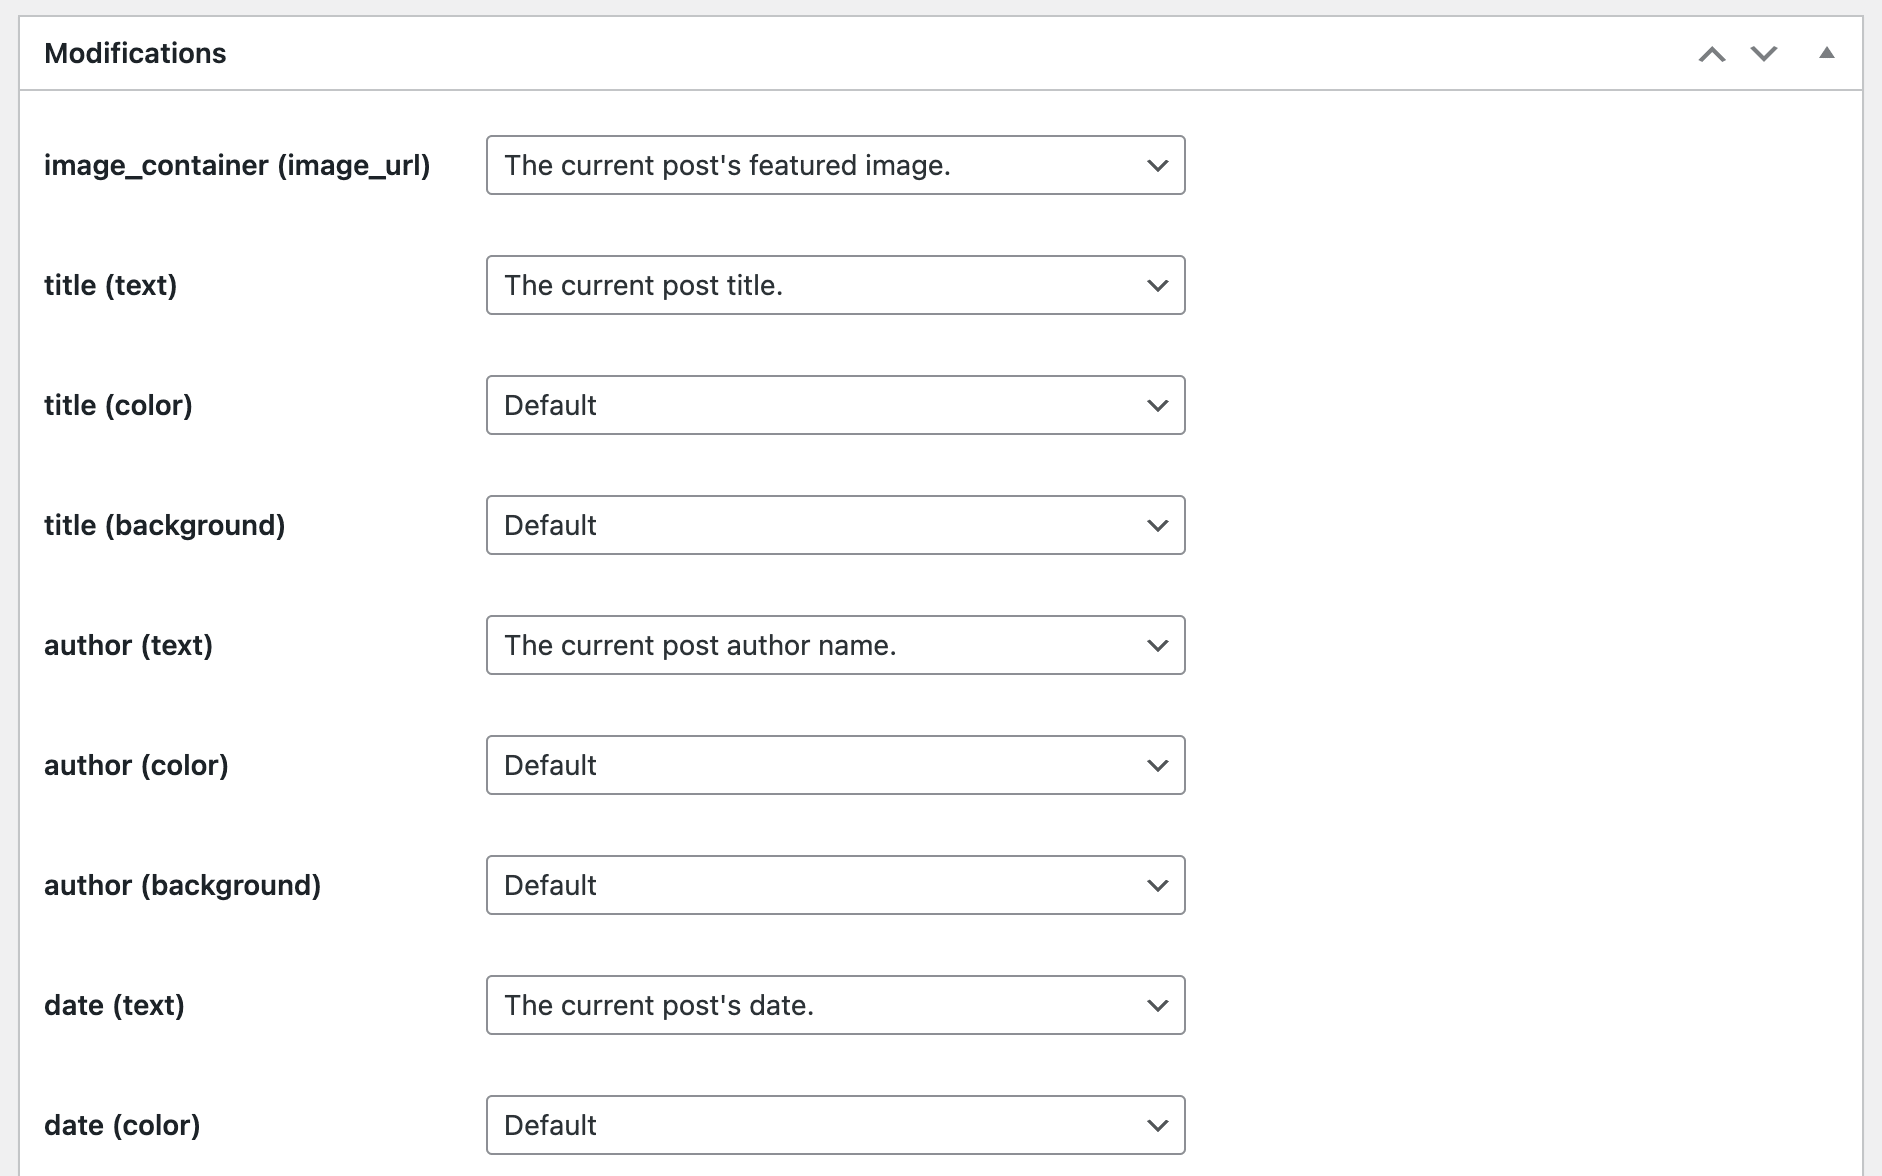
Step 3. Map the WP Variables to Your Template Objects
Click on the Signed URL created to configure the value mapping.
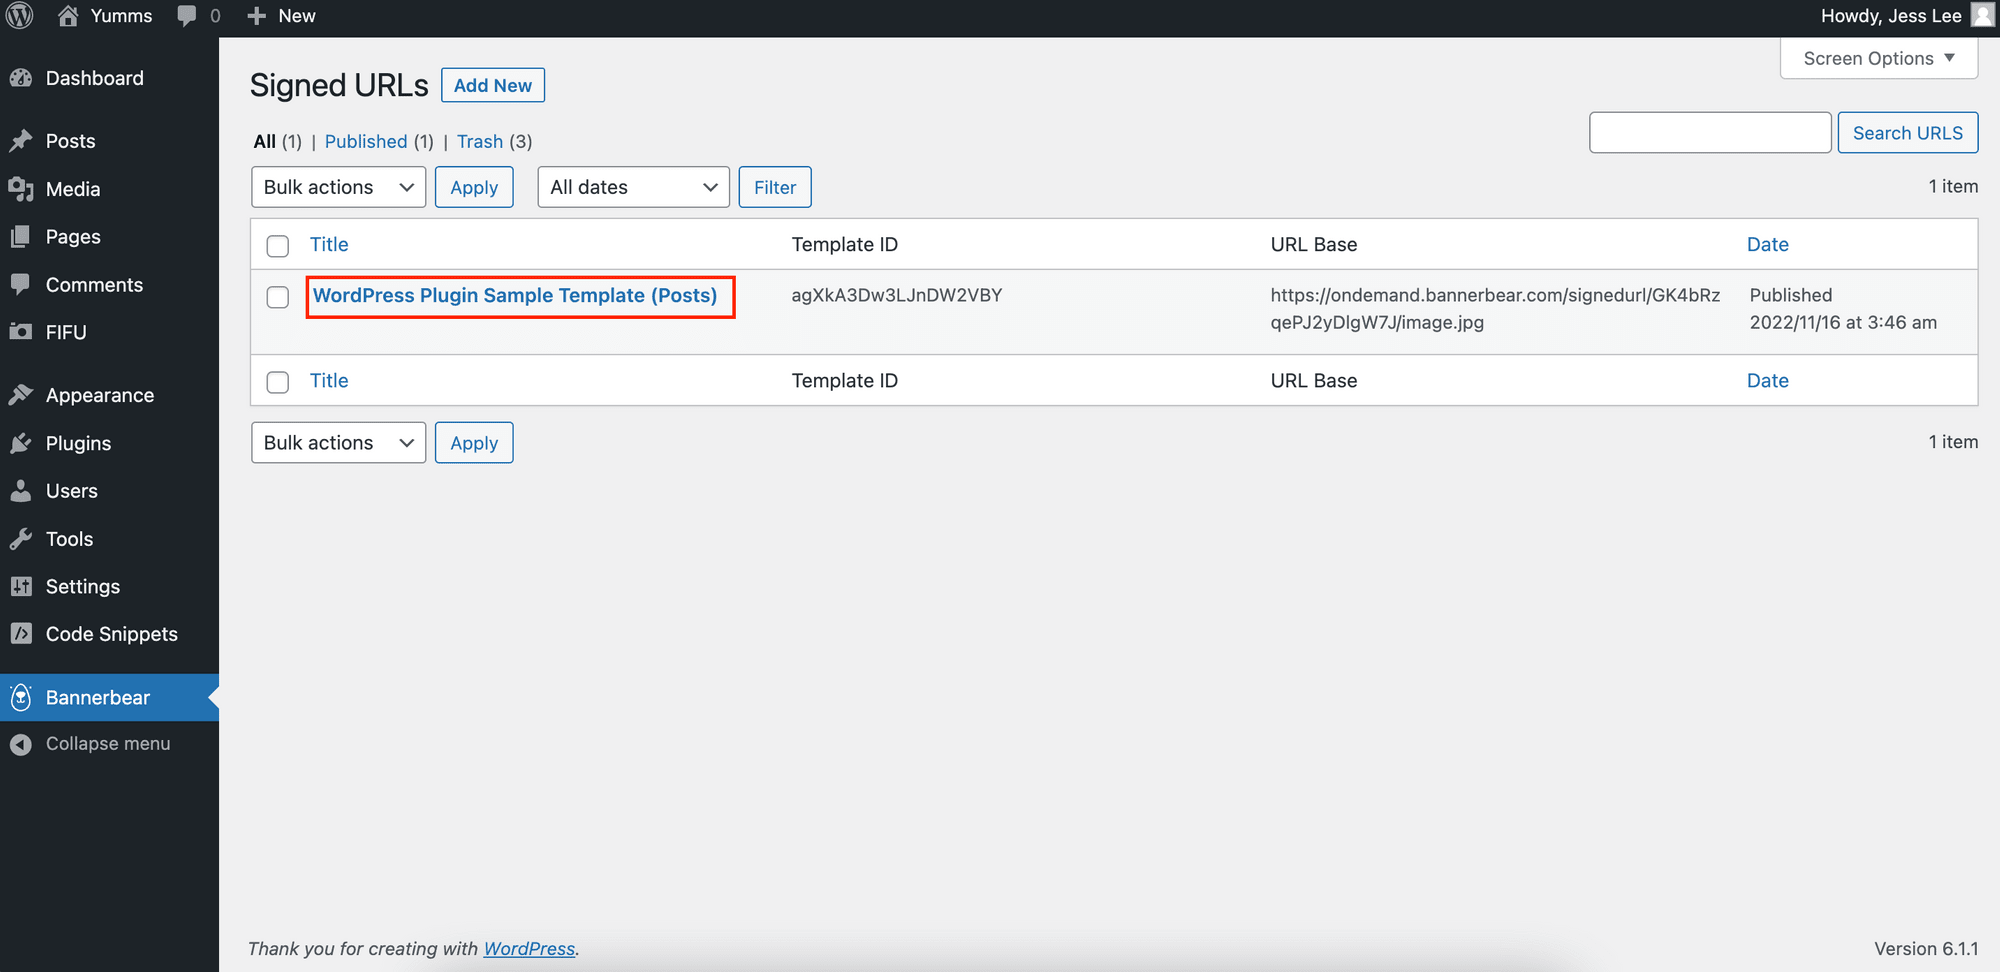
The modifiable objects/layers in the template will be listed and each of them will have a dropdown menu that shows a list of WP variables available for mapping.
The image below shows an example of mapping the URL of the current post’s featured image to the image_container object.
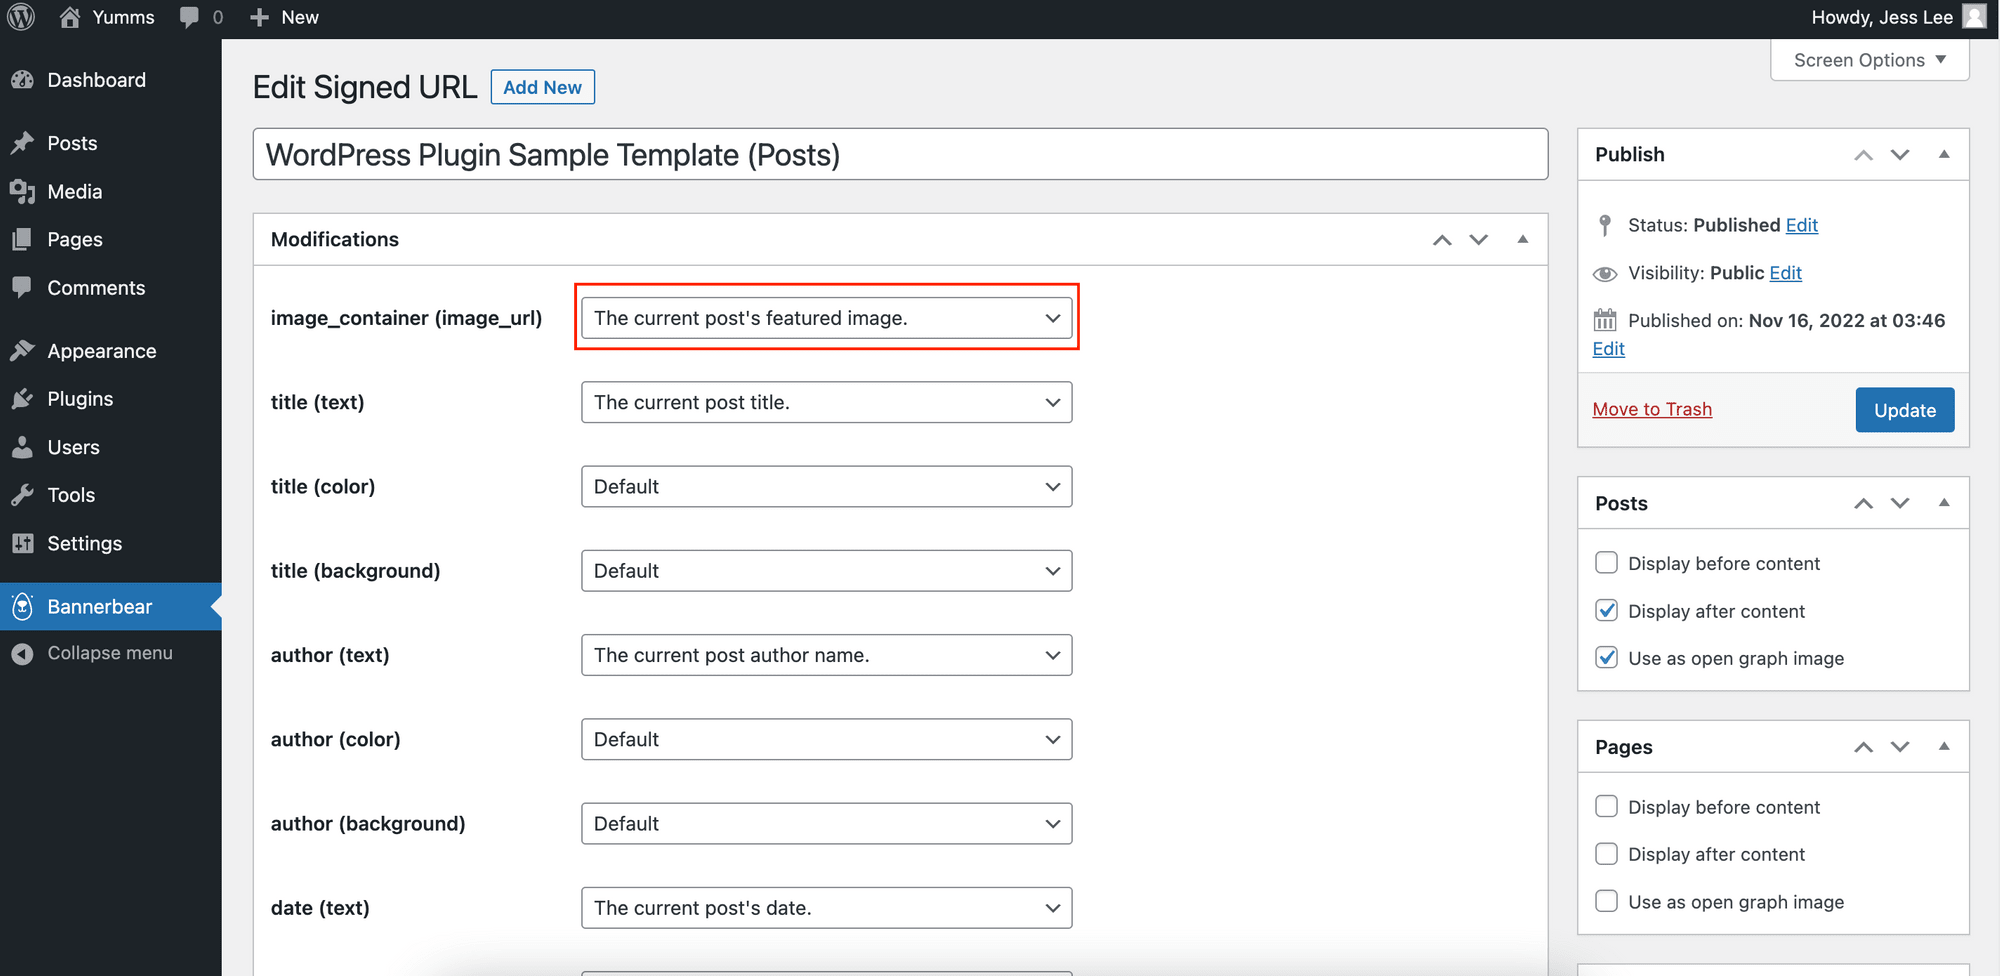

For text objects like title, author, date, and written_by, you will see additional fields for color and background. These selections allow you to set the colors for the text and its background, rather than using the original colors in the template.
For example, I want to set the text color to this shade of pink, which the hex code is #FF7474.

🐻 Bear Tips : You can get your hex color code using a color picker.
But the hex color code is not one of the available WP variables. What should we do?
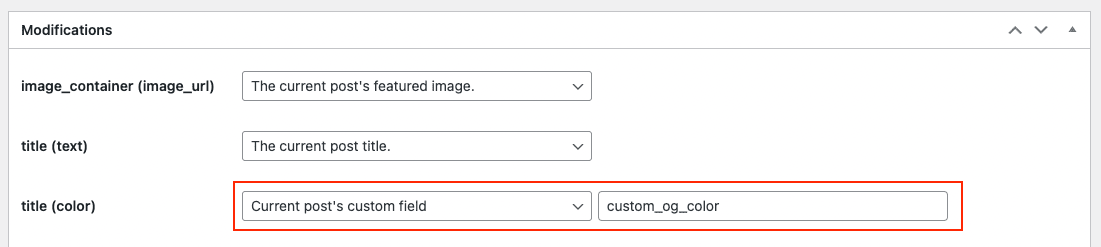
We can set it using Custom Fields. They are hidden by default but you can follow this guide to enable them.
After enabling Custom Fields, go to your post’s text editor and add a custom field named “_custom_og_color”. S_et its value to the hex color code.

Then, in the Bannerbear Signed URL configuration page, select “Current post’s custom field” for the title’s color and enter “custom_og_color” to map the hex color code (#FF7474) to it.
You can create more custom fields for other colors and use them for different text objects. The same goes for background colors.
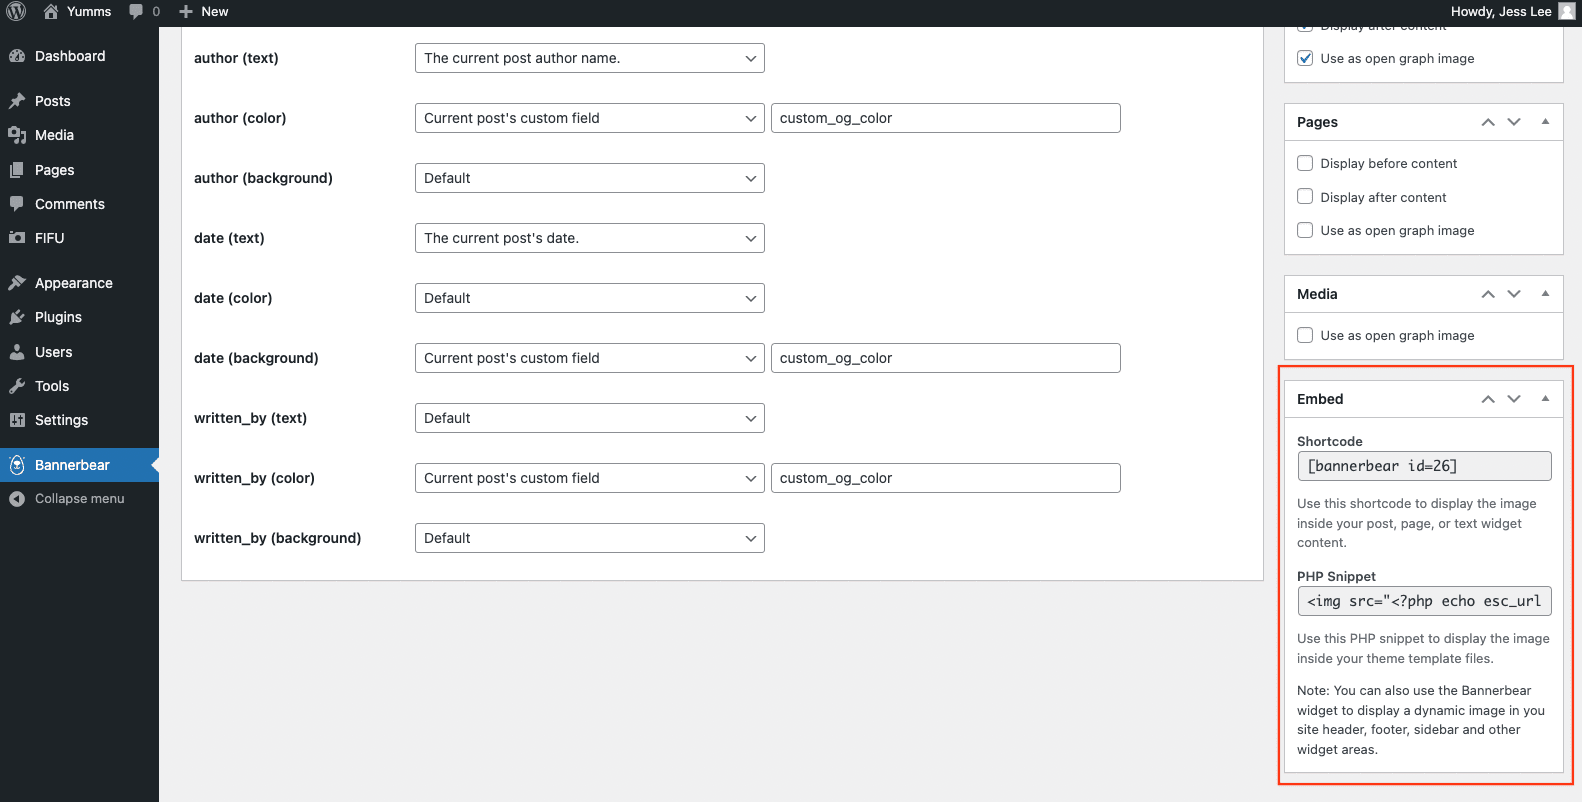
Step 4. Select Where to Display the Image
Choose where you want to apply the template/Signed URL to display the generated images. They can be displayed in the content of your posts/pages or used as the Open Graph image on social media.
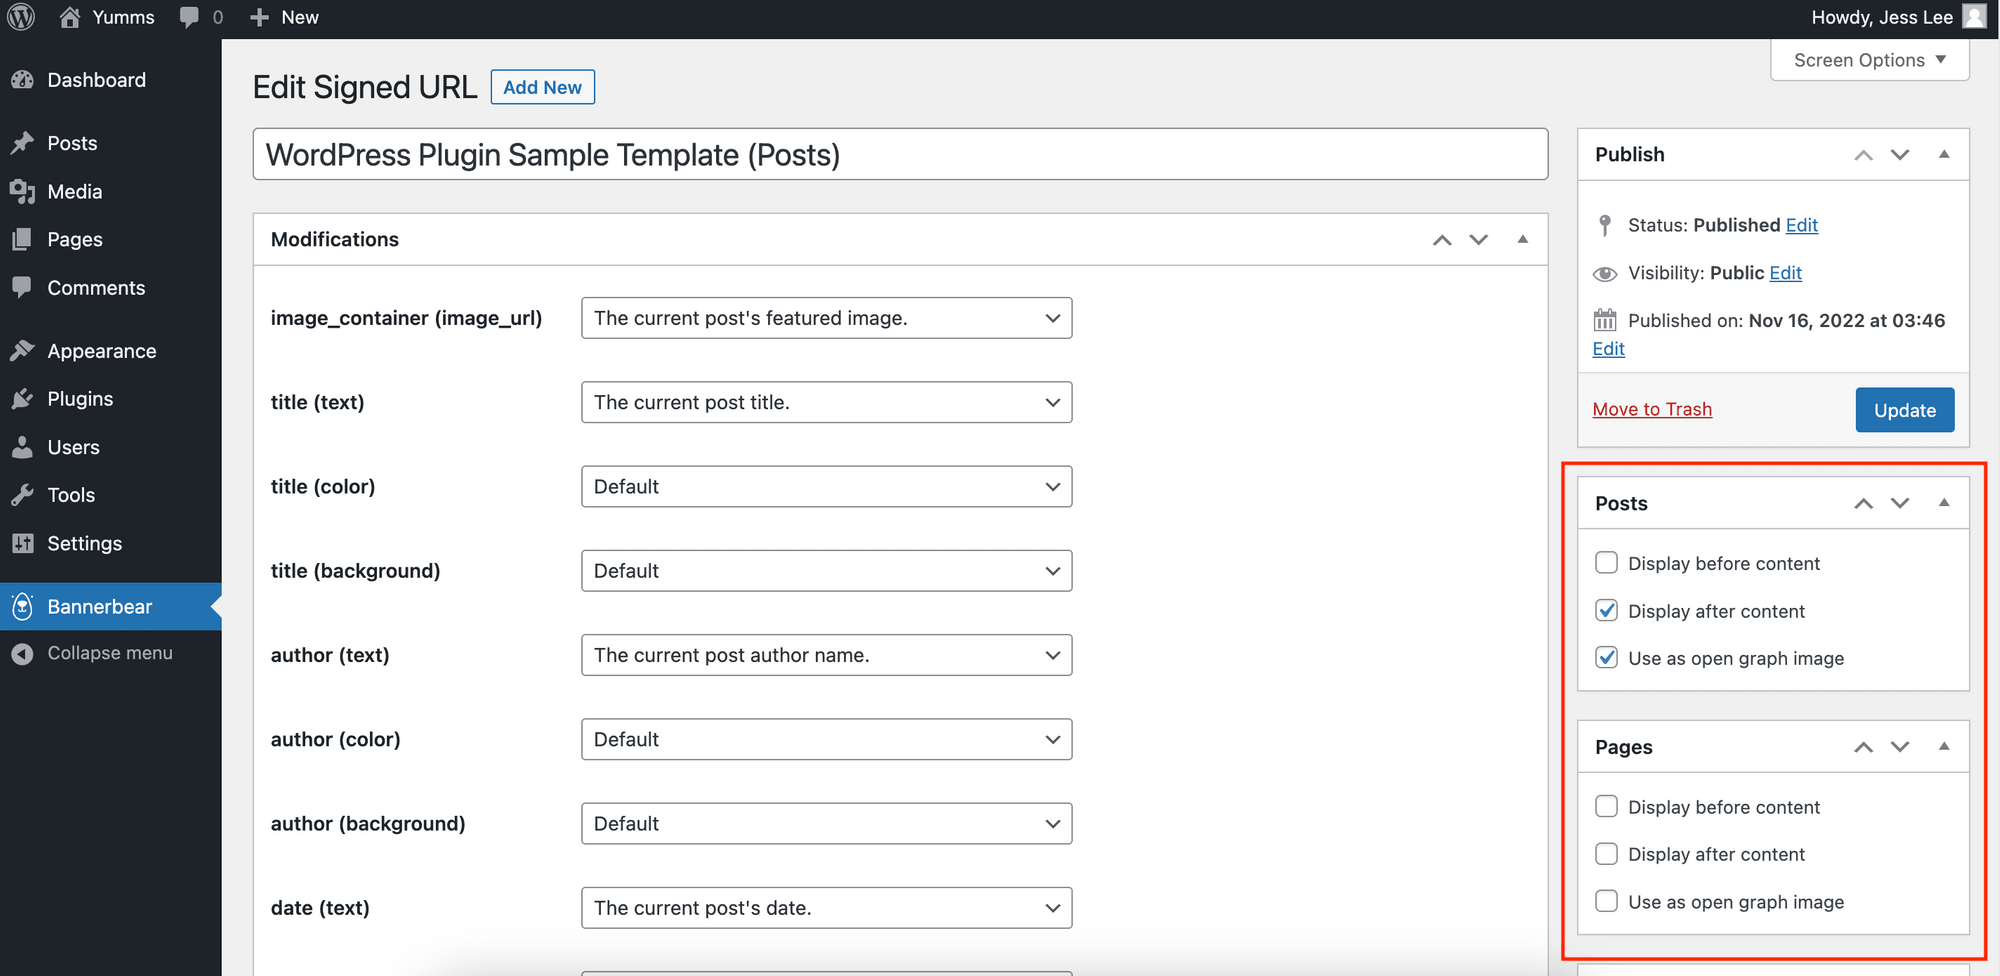
Other than selecting the options provided to display the images before or after the content, you can also display them in other places by embedding the shortcode or PHP snippet.
Both of them will be generated automatically after you create a Signed URL in WordPress. Copy and paste them into the text editor or your theme’s template files to display the images wherever you want.
Save the configurations and the Signed URL is ready to generate images for posts on your website on the fly!
Using the Dynamic Images
Display Before/After Content
As mentioned, you can display the images before or after your content by selecting the relevant options.
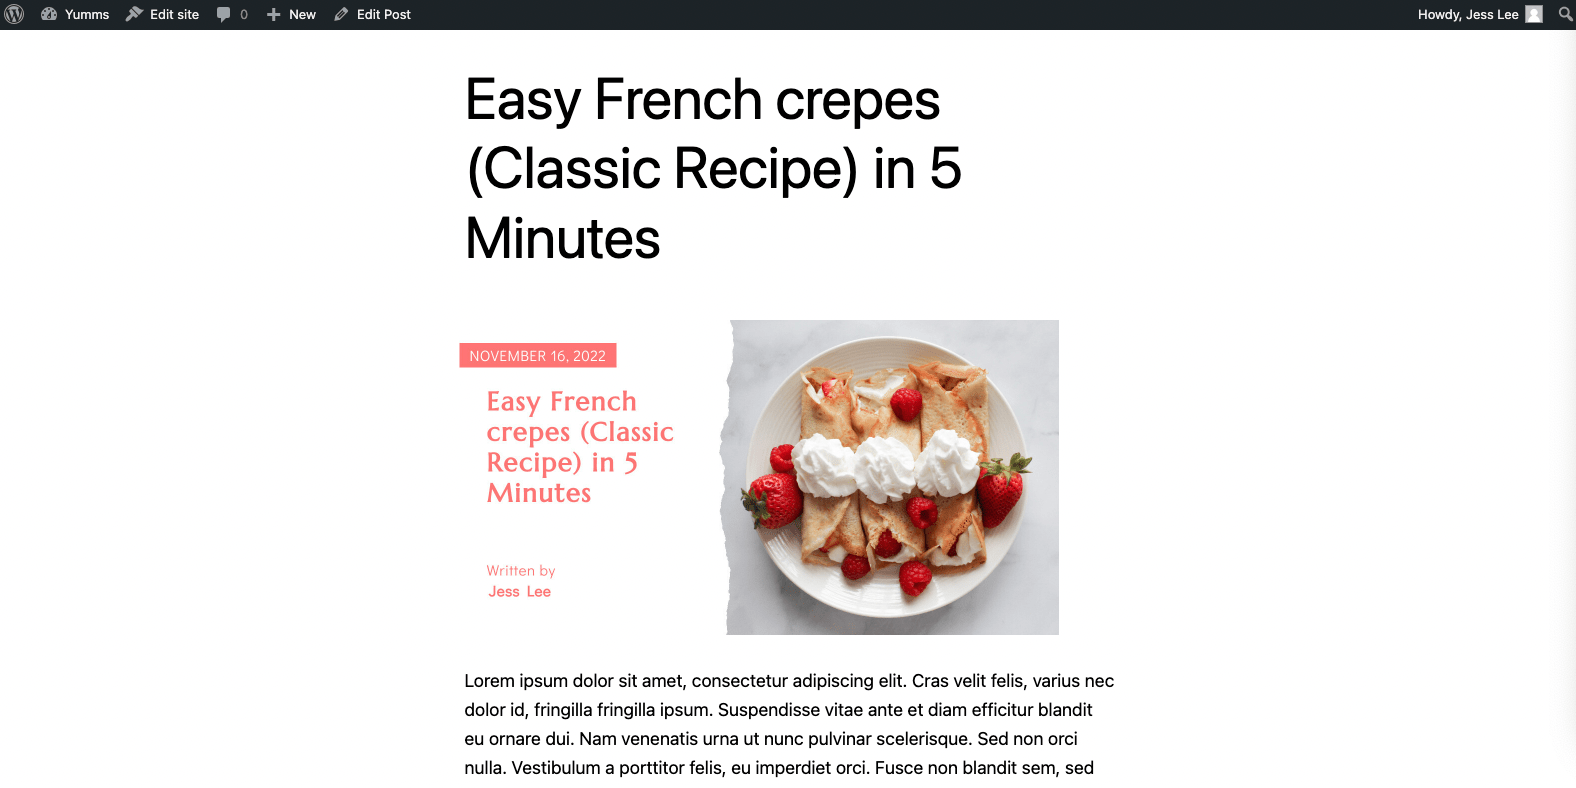
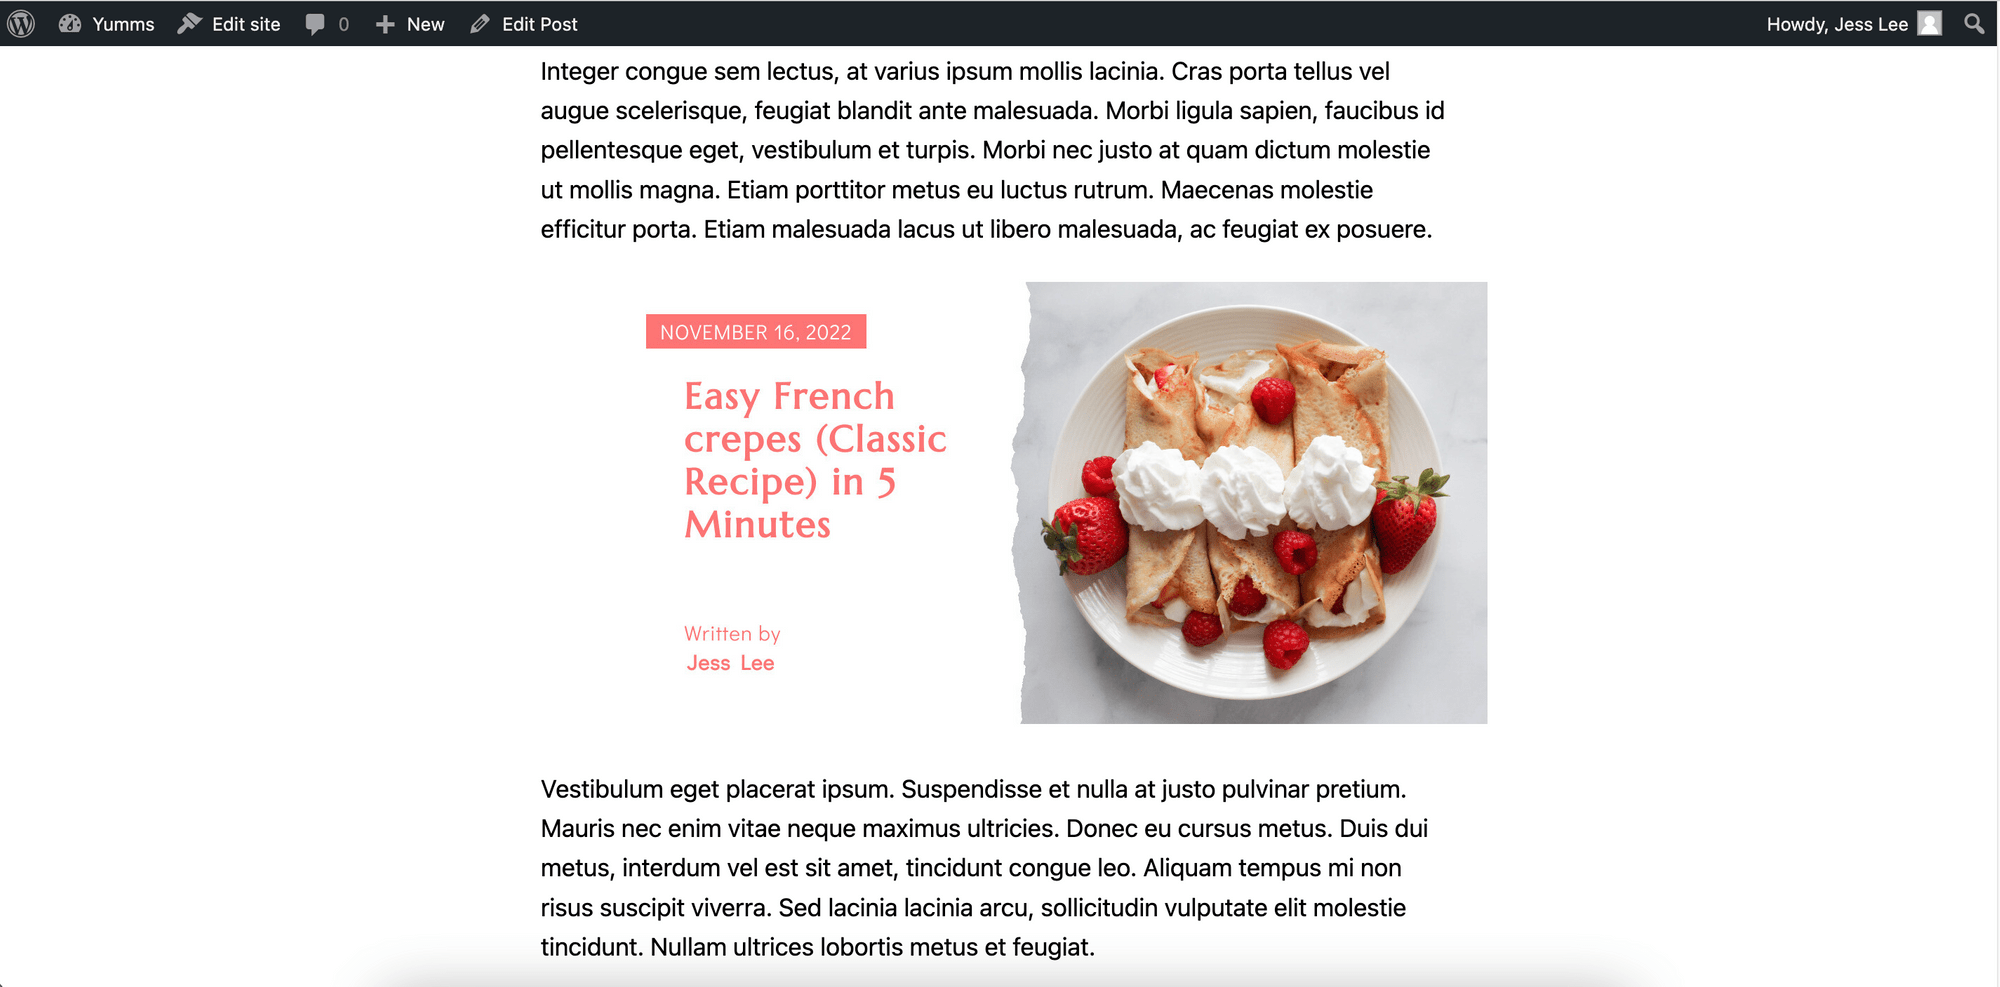
This is what it looks like when you select “Display before content” :
🐻 Bear Tips : Use CSS—depending on your WordPress theme, your images might not be centered-justified but you can always position them using CSS.
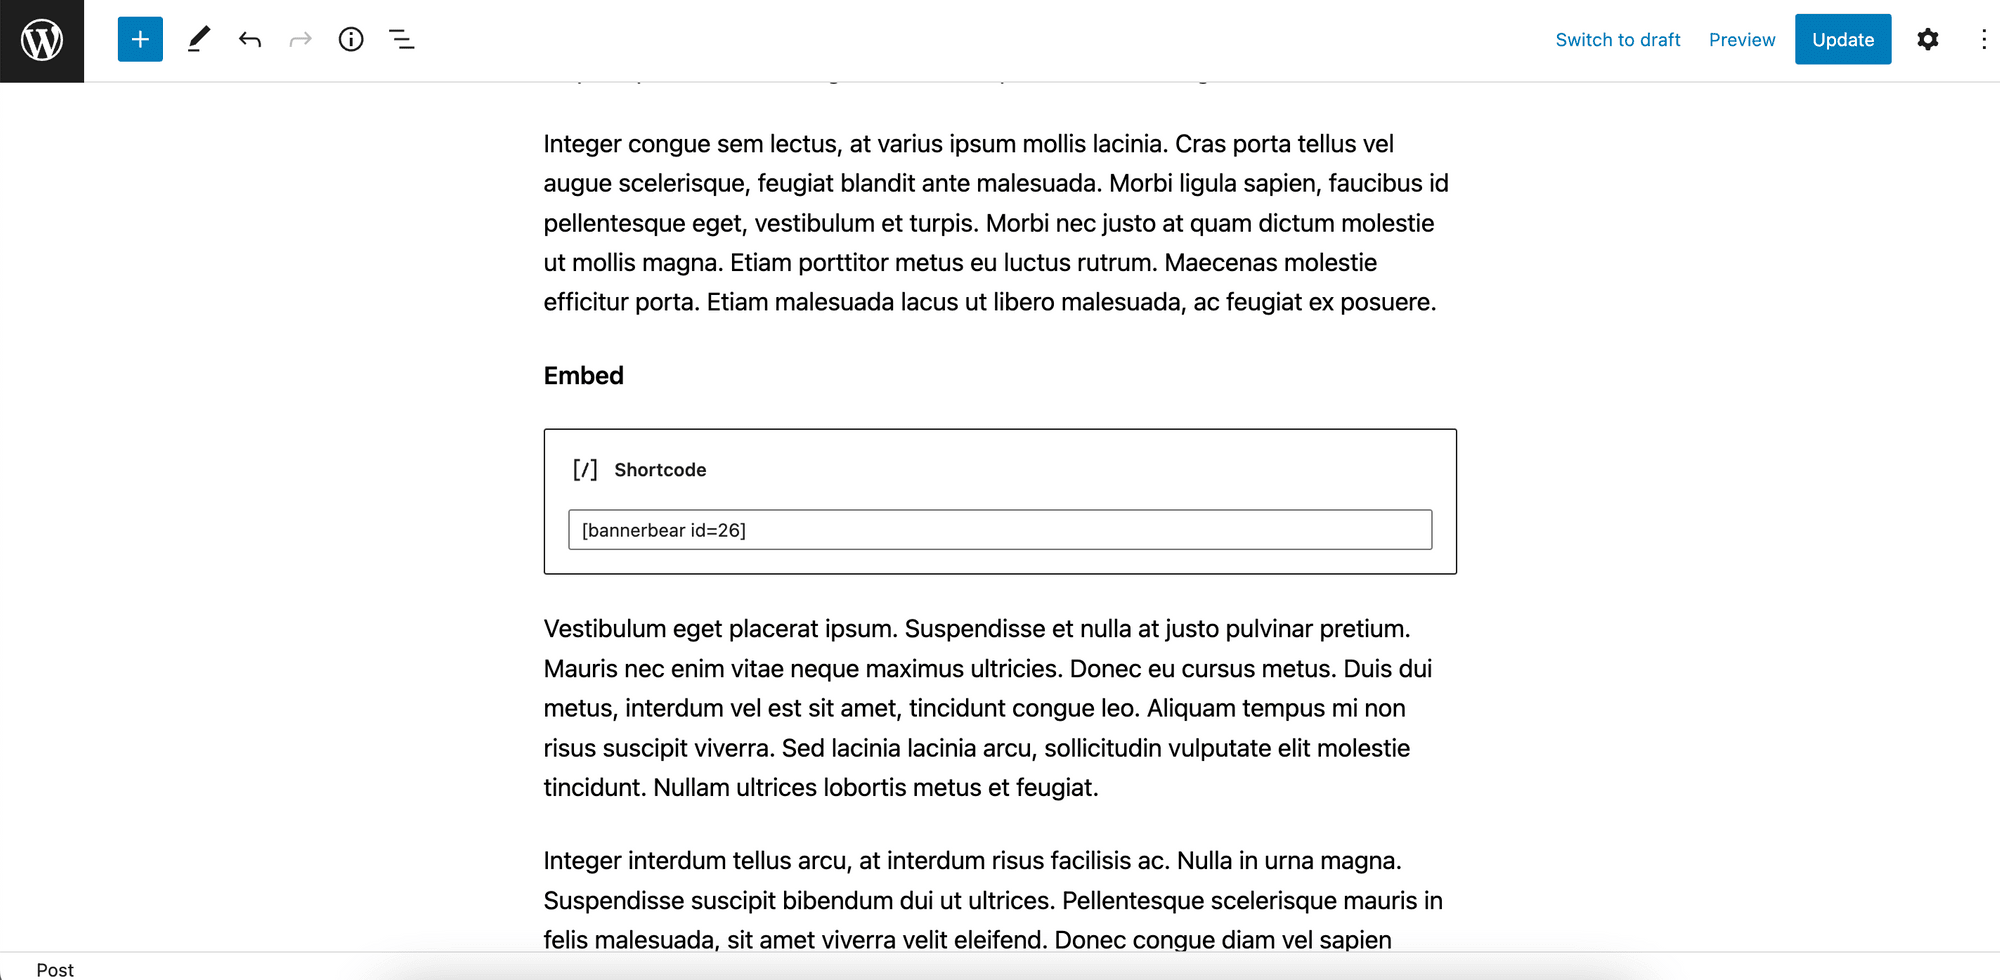
Display Within Content
Embed
In the Signed URL configuration, you have options to display the images before or after the content. If you want to display them within the content, you should use the shortcode or PHP snippet instead.
Block/Widget
Another option is to use the Bannerbear Image widget in the text editor. After adding the Bannerbear Image Block to the editor, you will see a list of Signed URLs created using the plugin. Select the one you want to use.
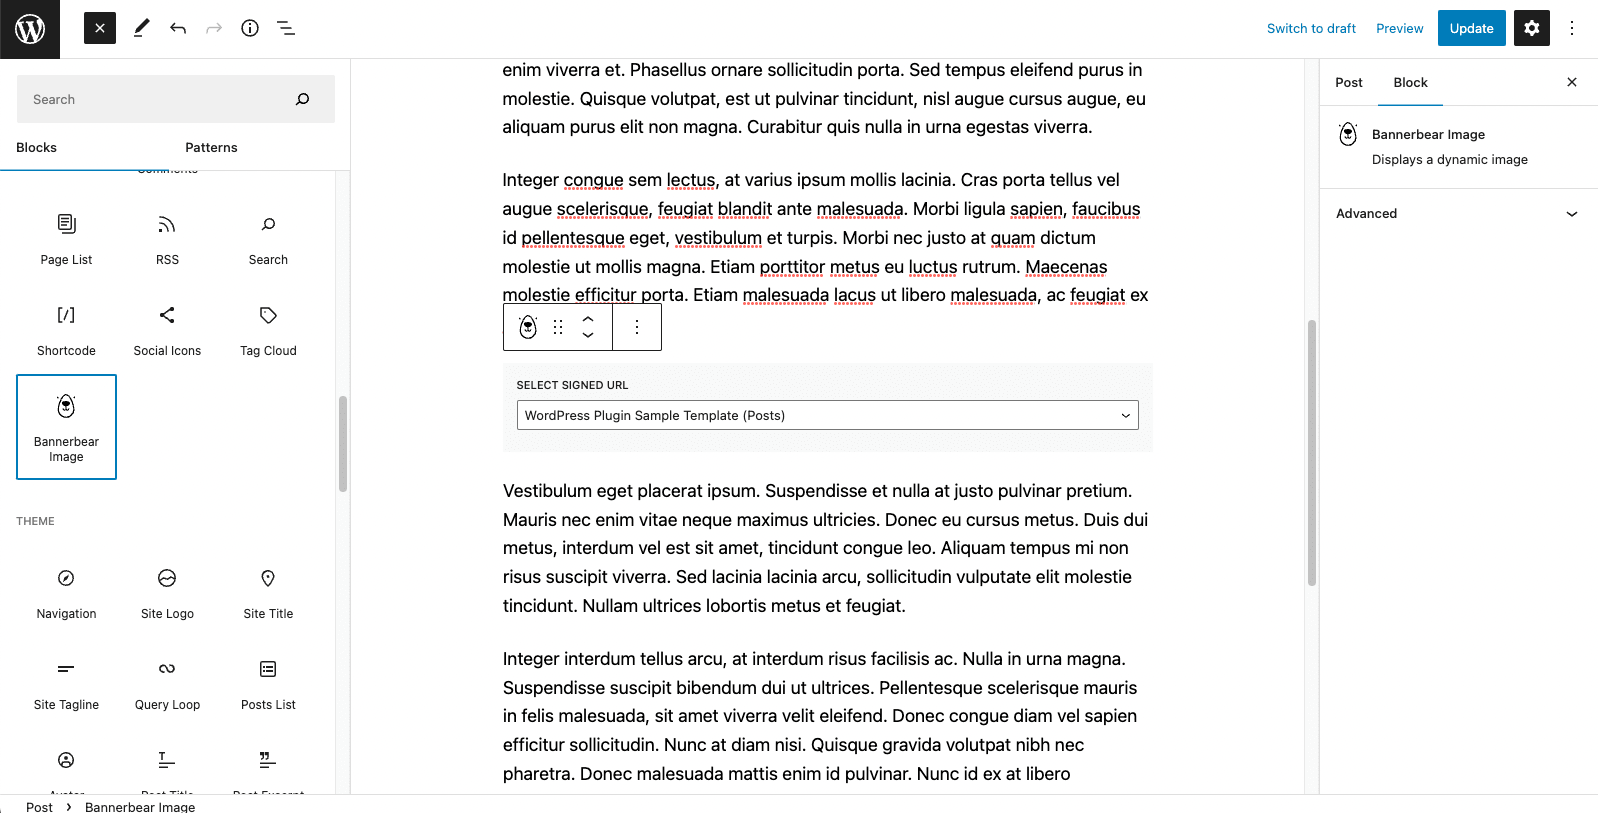
You can also use the Bannerbear widget to display them in your site header, footer, sidebar, and other widget areas.
This gives you the flexibility to choose where to place the images, so that your website and content will be more engaging.
Use as the Open Graph Image
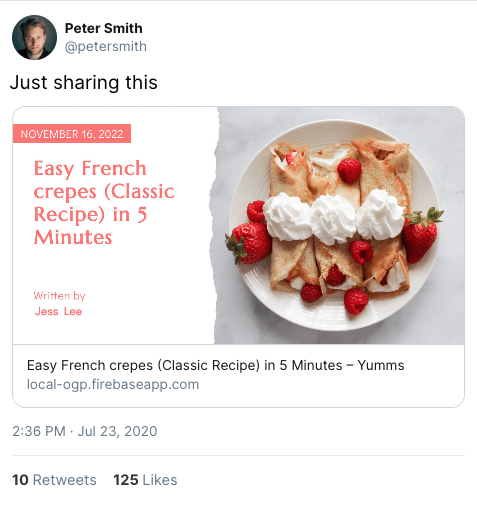
By selecting “Use as open graph image” , the image generated will be displayed when the post is shared on social media. It will give social media users a preview of what the post is about before clicking on the link.
You can use Twitter Preview Card Tool or Facebook Open Graph Preview Tool to preview how they will look like without actually posting on social media.
Here's a preview generated using the Twitter Preview Card Tool:
Get the Most out of Bannerbear
The Bannerbear WordPress Plugin helps you generate dynamic images quickly for WordPress websites without having to work with the API directly. However, if you only use the plugin, you may miss out on some of the more advanced functionalities that the API offers.
Using the API, you can:
👉🏻 Generate videos automatically
👉🏻 Transcribe a video with auto-transcribed subtitles
👉🏻 Use multiple templates to generate images at once
👉🏻 Create animated GIFs
… and more. If you want to get the most out of Bannerbear, check out the API documentation.
That said, the fastest way you can start generating dynamic images for your WordPress website is by using the Bannerbear WordPress Plugin. Add it to your website and try it for yourself now. Happy building!
