Automatically Convert a Tripadvisor Review into a Social Post with Bannerbear
Contents
Use Zapier and Bannerbear integration to easily turn a custom review into a social post.
The Bannerbear API helps you cut down on manual processes by auto-generating social media visuals, e-commerce banners, podcast videos and more.
Want an easy way to influence consumer decisions and strengthen your credibility? Use Zapier and Bannerbear integration to easily turn a custom review into a social post, whether it's for restaurants, hotels etc.
What you will build
In this tutorial, we will create a simple Zap that:
- pulls data between Bannerbear and Apify automatically.
- generates an image from the data extracted.
For this tutorial, we will extract data from Tripadvisor.com. Apify's Tripadvisor.com actor allows you to easily scrape reviews, pricing, contact details, amenities, awards, etc from restaurants and hotels.
This tutorial can apply to various use cases such as for ecommerce, real estate, fintech, etc.
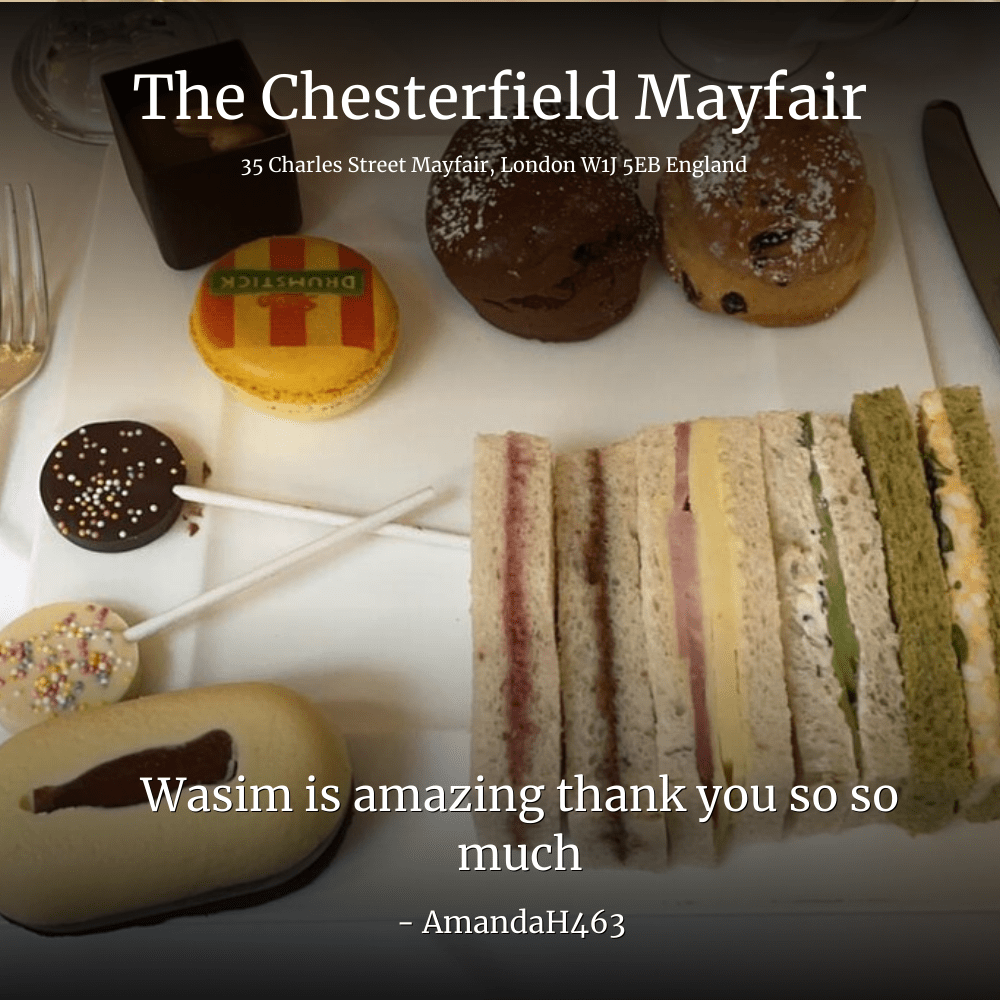
Example
The end result will look like this:

Add Bannerbear template
First, create a new project or add the tutorial template to one of your existing Bannerbear projects.
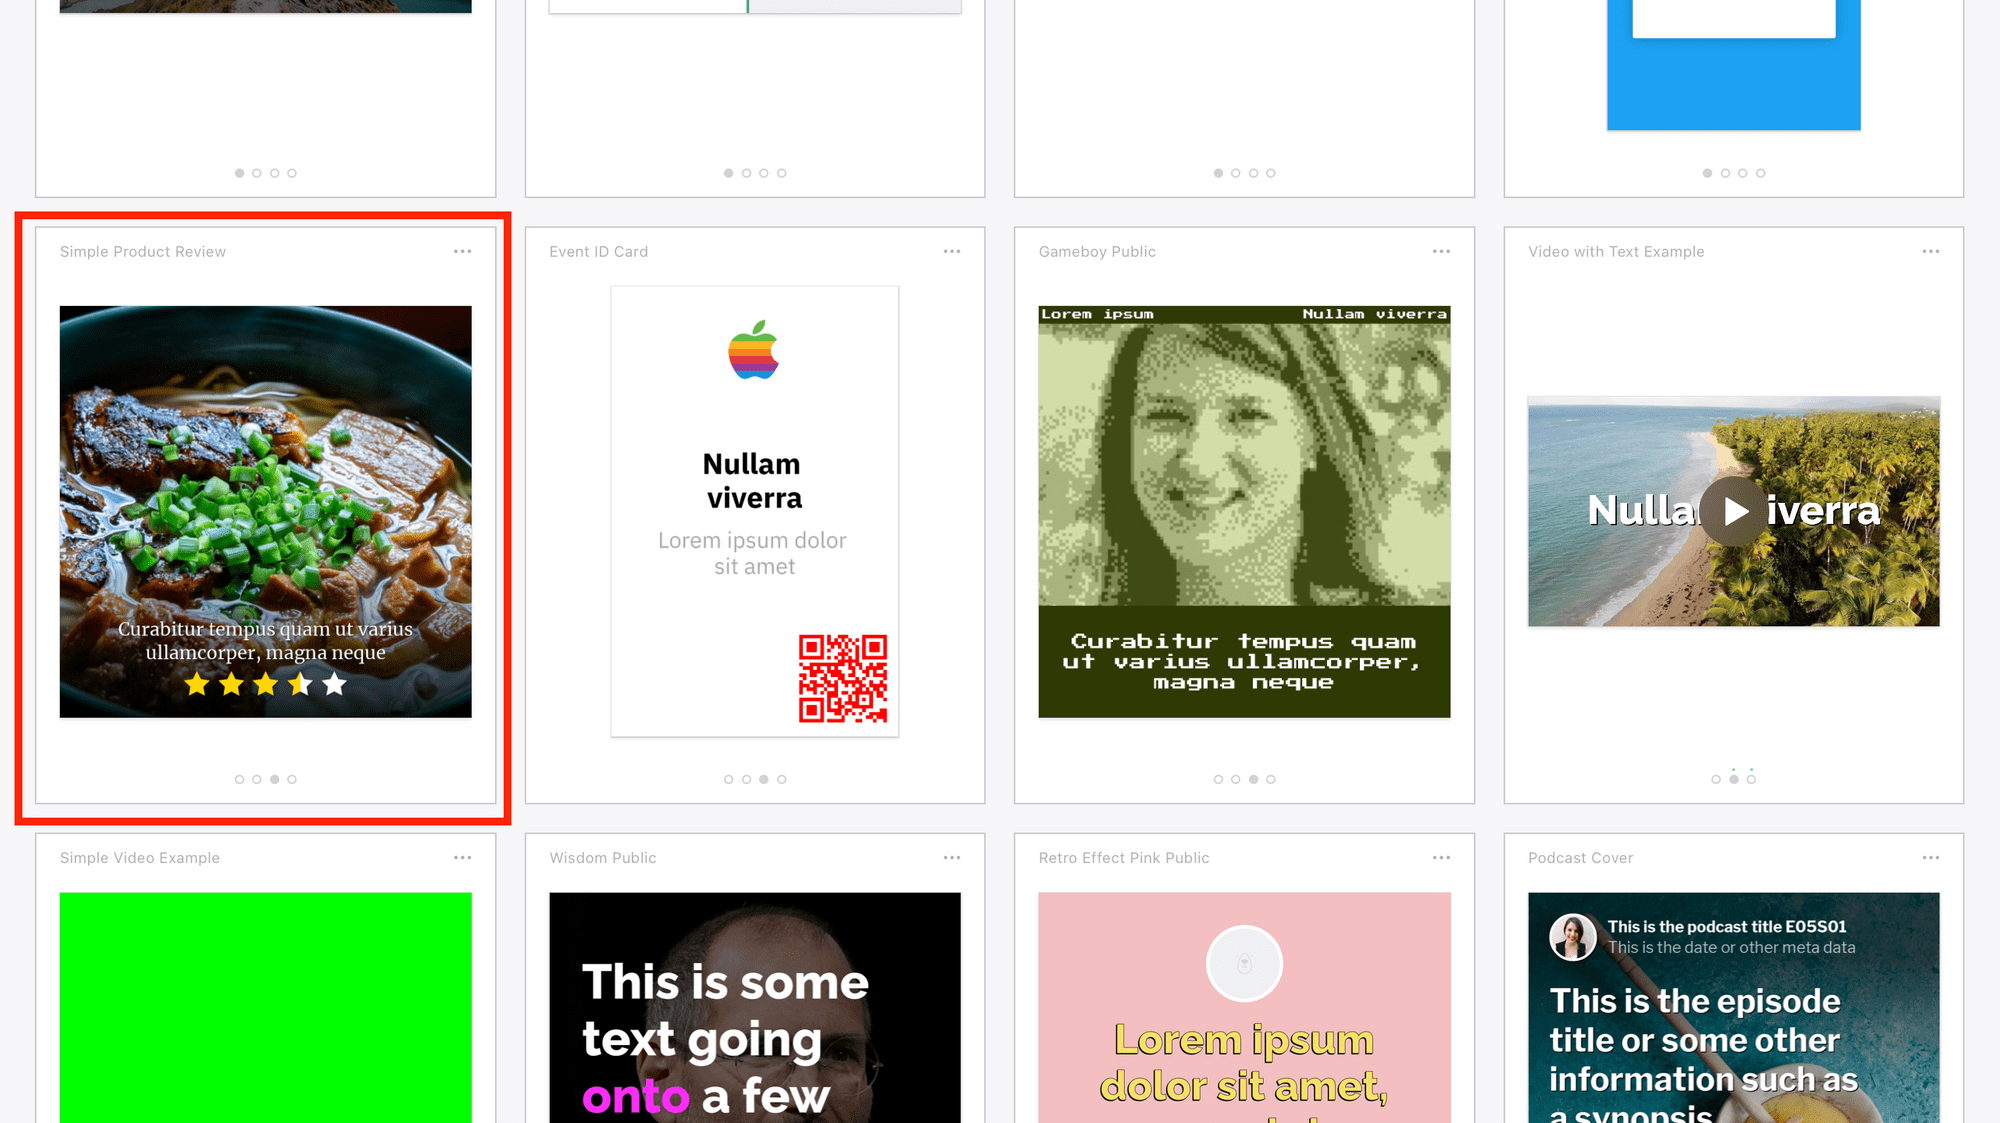
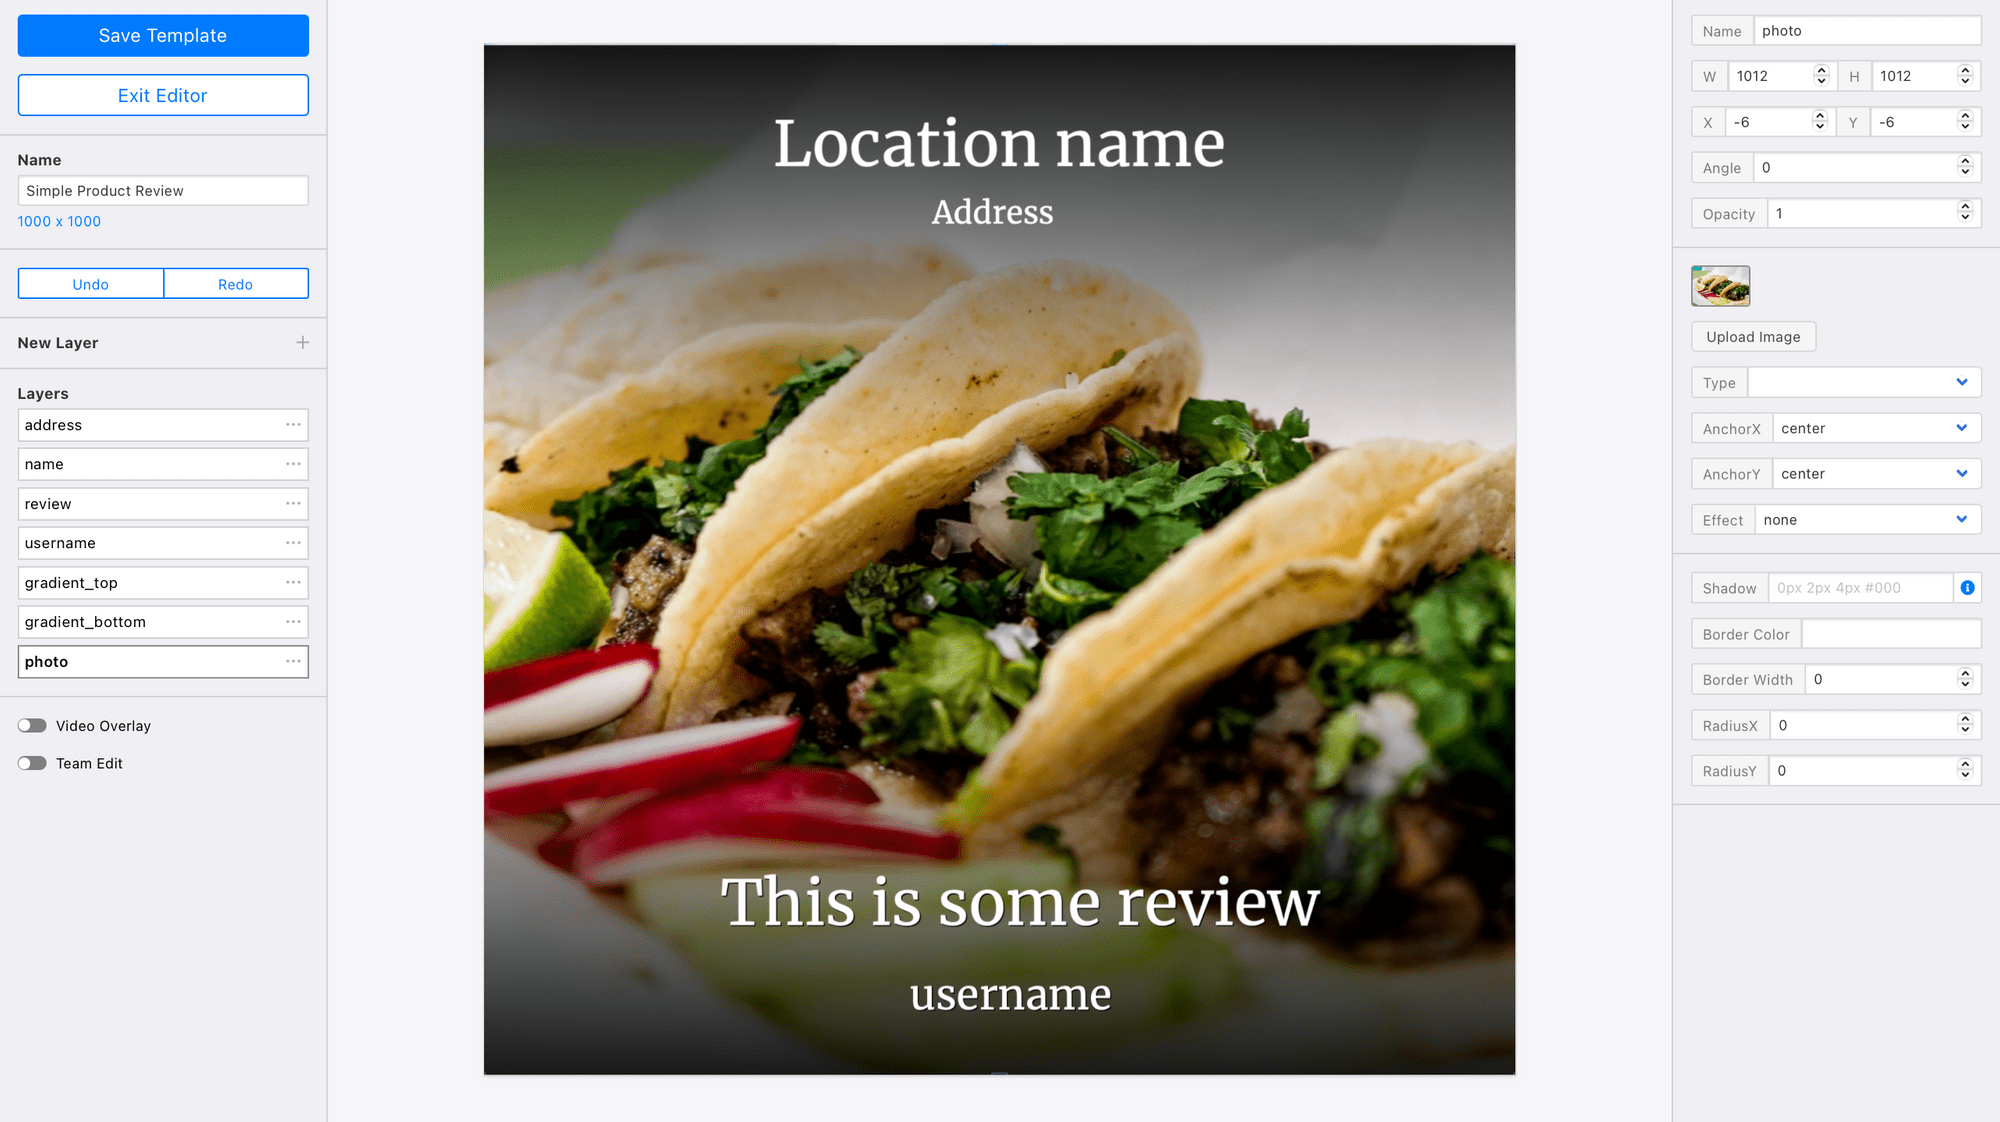
You can create images from any template on Bannerbear - including ones you create yourself. But for this tutorial we are going to use the Simple Product Review template:
Edit the template to fit the use case. Save template:
At this point you will also want to copy your Project API Key as you will need this later to authenticate with Zapier. The Project API key is found on the "Settings / API Key" page of your Project:

Scrape data with Apify
Apify is your one-stop shop for web scraping, data extraction, and RPA. Automate anything you can do manually in a browser.
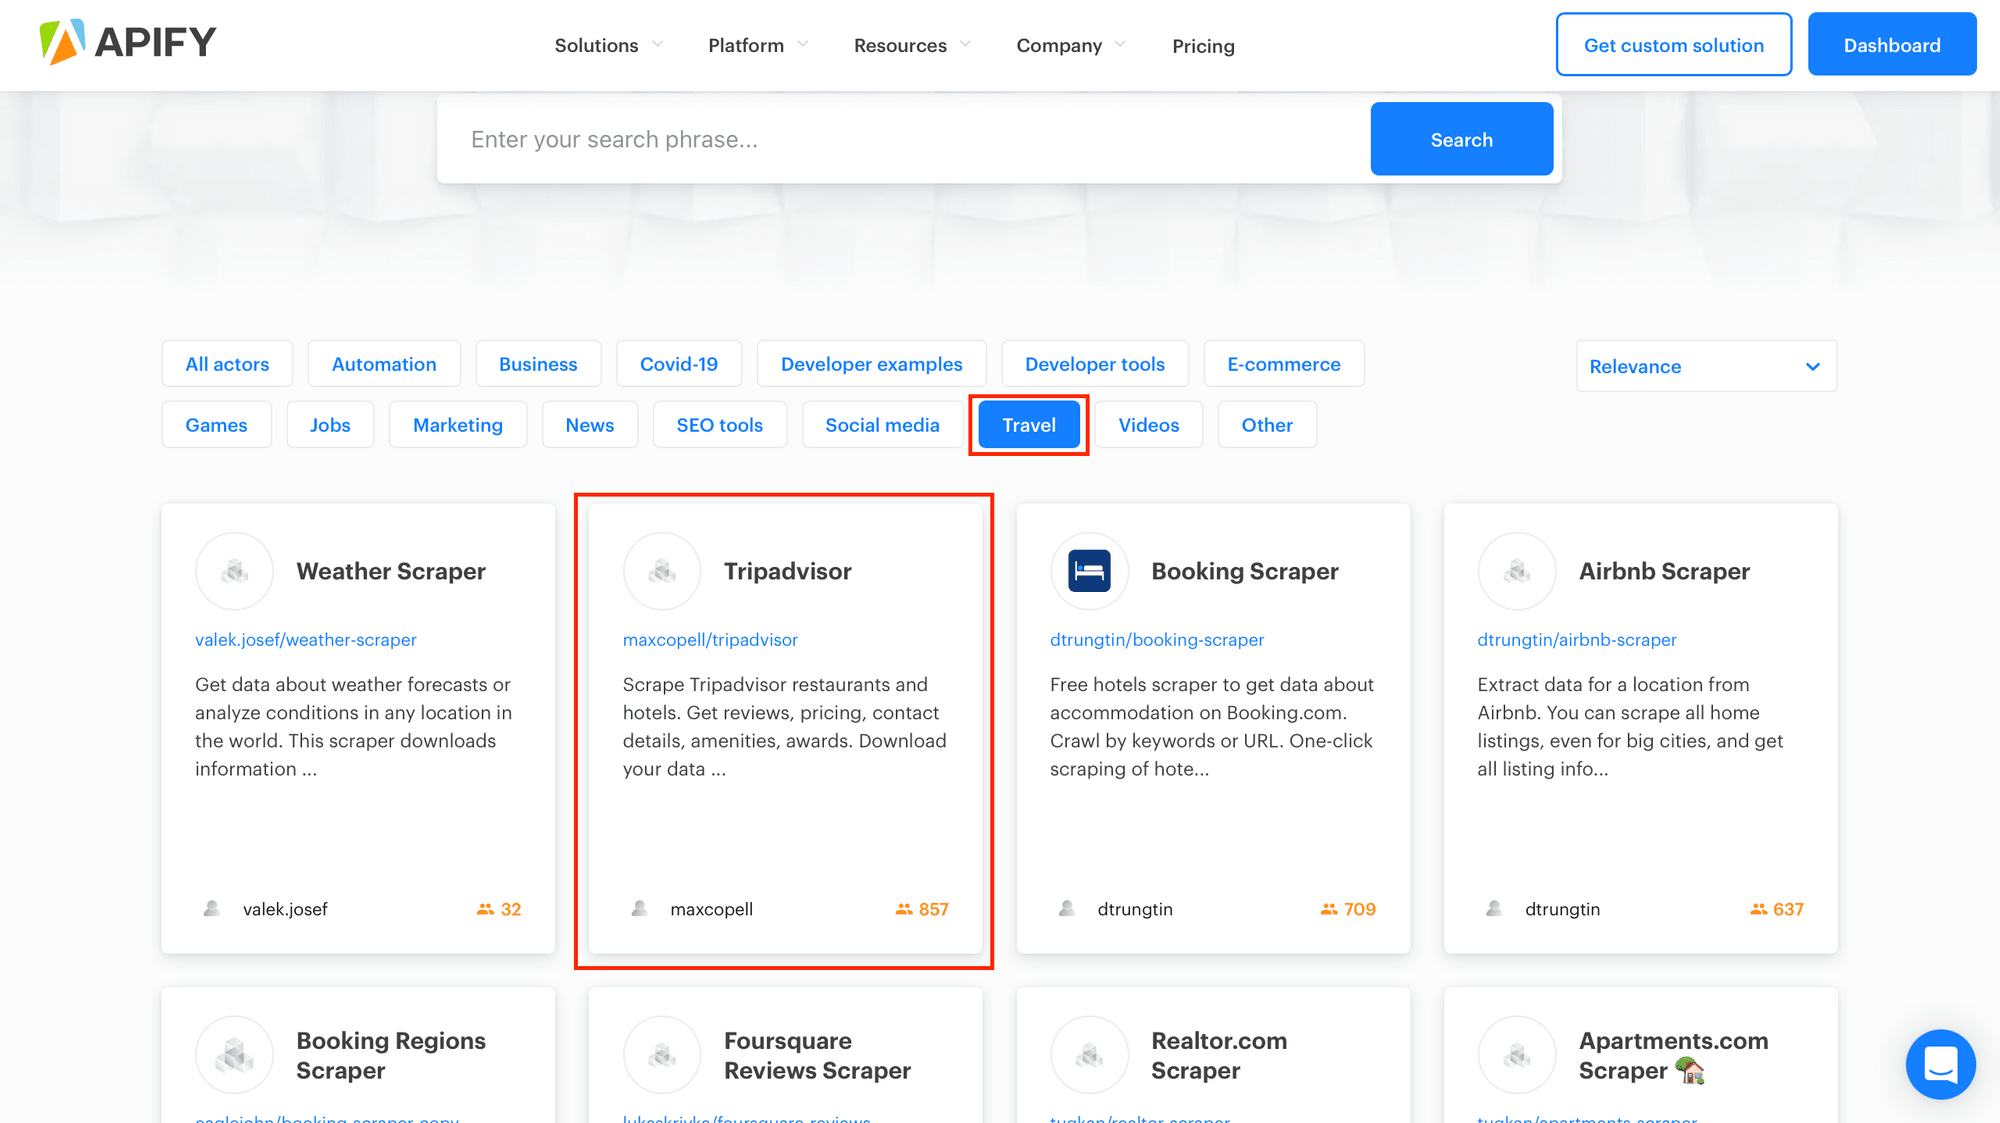
To get started with Apify, you will need to create an actor run in your Apify account. Sign in to your Apify account and head over to Apify Store, a collection of ready-made scraping tools.
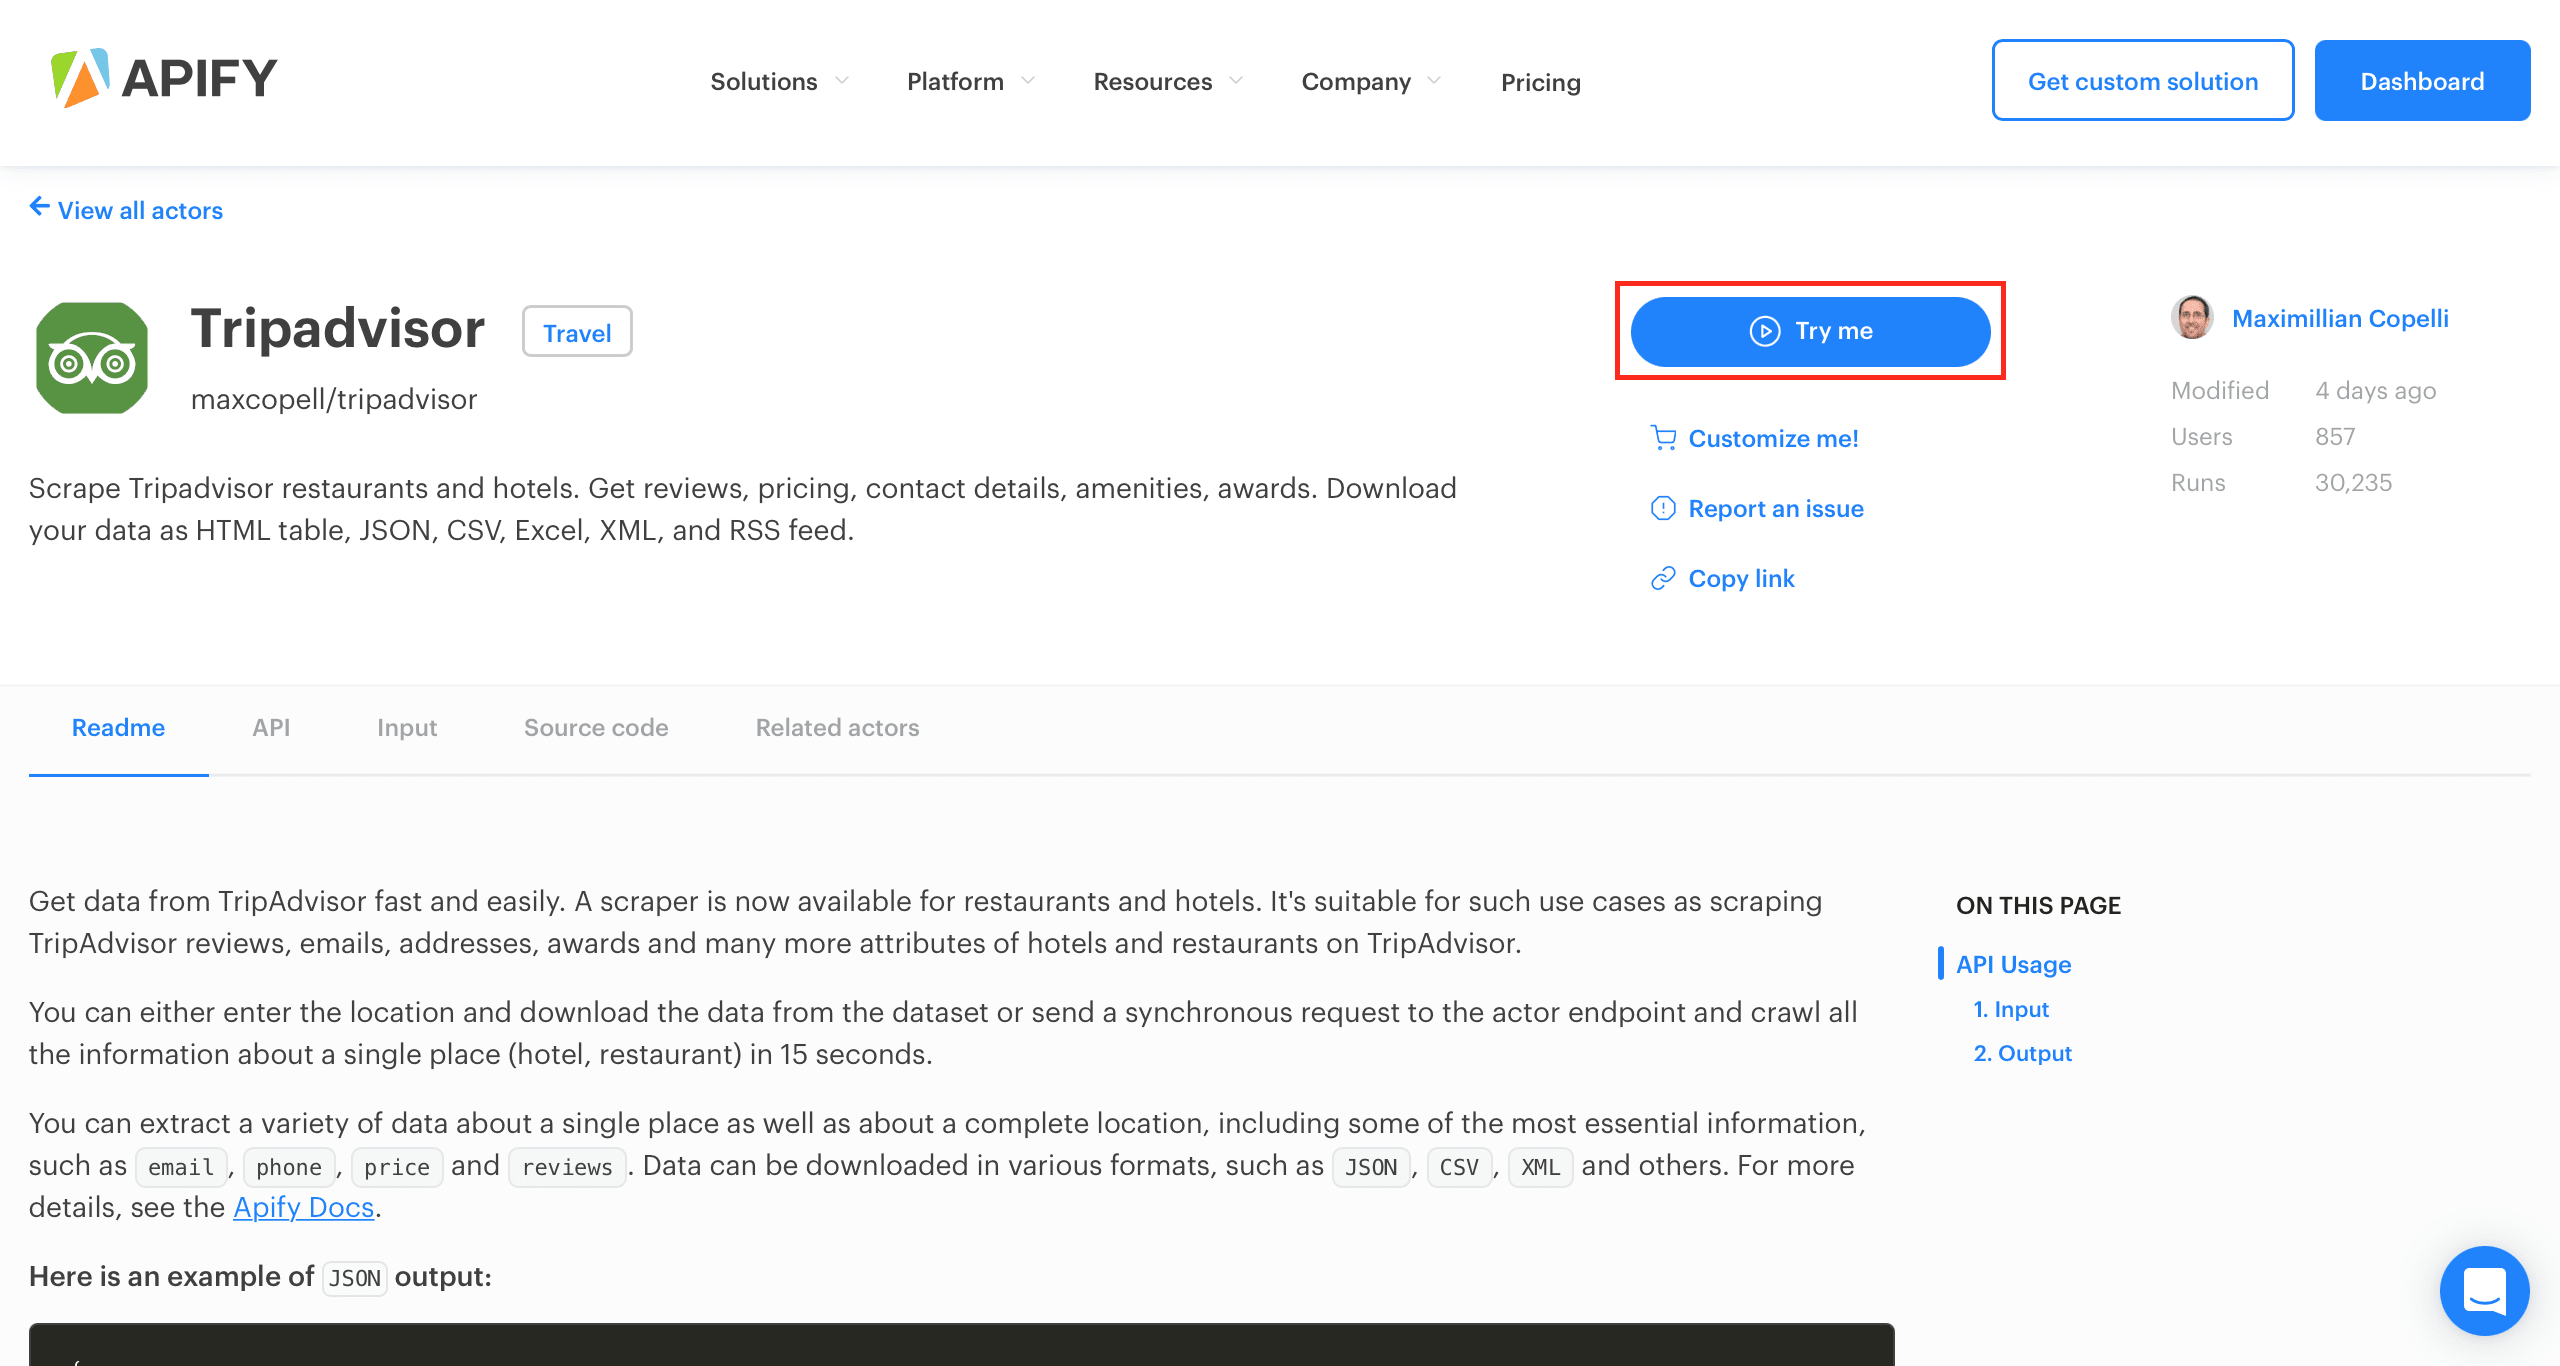
Navigate to the Travel section to find Tripadvisor scraper or type “Tripadvisor” into the search bar. Click on the Tripadvisor card to be redirected to this scraper’s own page:
Click on the _ Try me _ button:
Create an Actor run
You’ll be redirected to your Apify Dashboard where an actor task will automatically created for your Tripadvisor actor.
An Apify actor is a program that can carry out any task in a web browser. Actor tasks are configurations of an actor with particular settings that allows you to run an actor with the same settings multiple times without creating a new configuration.
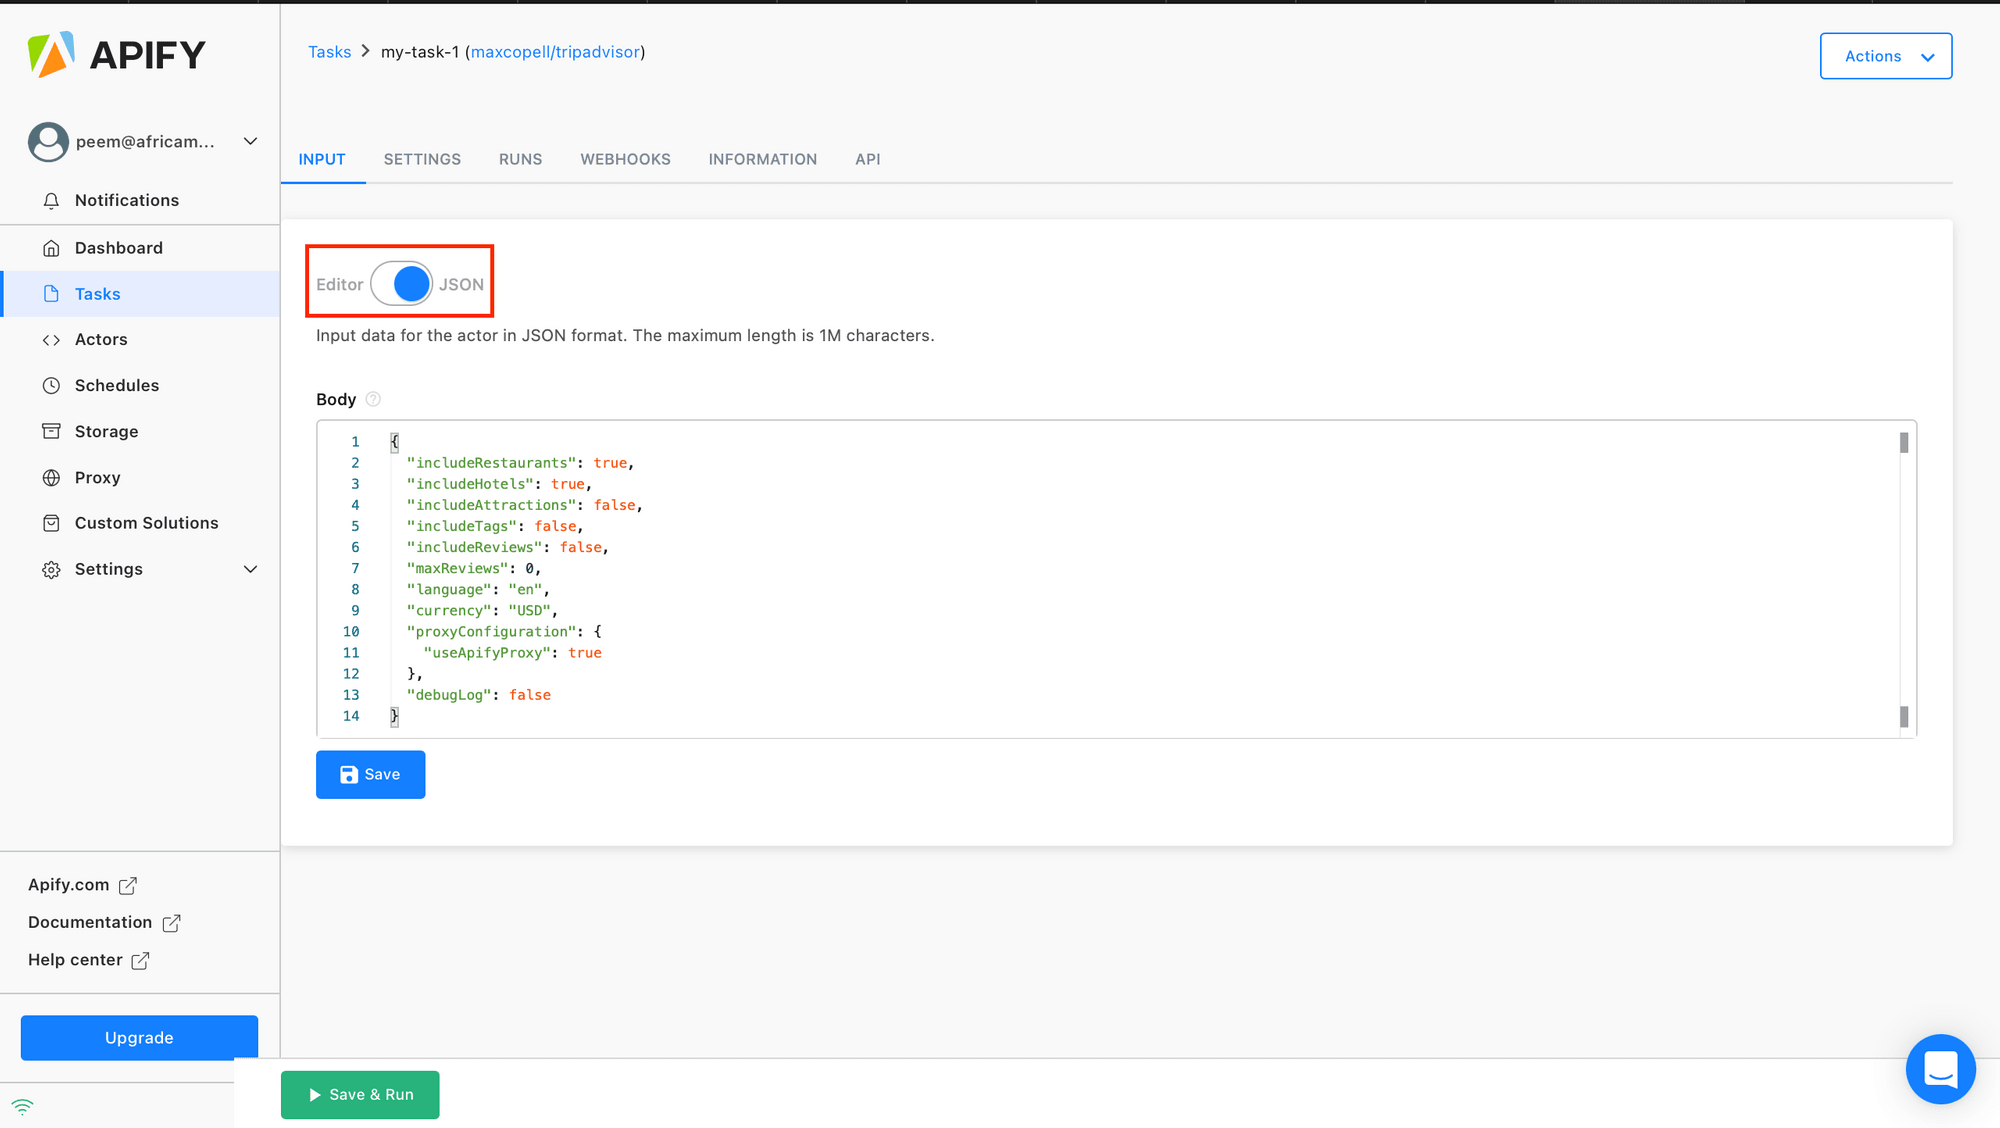
First, here are some input parameters you can configure before running the scraper:
locationFullName, location name as you would enter to TripAdvisor search.maxItems, limit the number of places scrapedincludeRestaurants,includeHotelsandincludeAttractions, if checked results includes restaurants, hotels and attractions for given locationincludeTagsandincludeReviews, if checked results includes review tags and reviews datamaxReviews, limit the number of reviews scrapedlastReviewDate, date where the scrapper stops loading older reviews in the yyyy-mm-dd formatlocationId,hotelIdandrestaurantId, your id can be found in your Tripadvisor website url. The id is the number after-din the url, e.g 192064 for The Chesterfield Mayfair.- Preferred currency and language
Next, switch the toggle from Editor to JSON:
To get information about single hotel the request body should be in this format:
{
  "locationFullName": "The Chesterfield Mayfair",
  "maxItems": 1,
  "includeRestaurants": false,
  "includeHotels": true,
  "includeAttractions": false,
  "includeTags": false,
  "includeReviews": true,
  "maxReviews": 1,
  "lastReviewDate": "2021-07-12",
  "hotelId": "192064",
  "language": "en",
  "currency": "USD",
  "proxyConfiguration": {
    "useApifyProxy": true
  },
  "debugLog": false
}
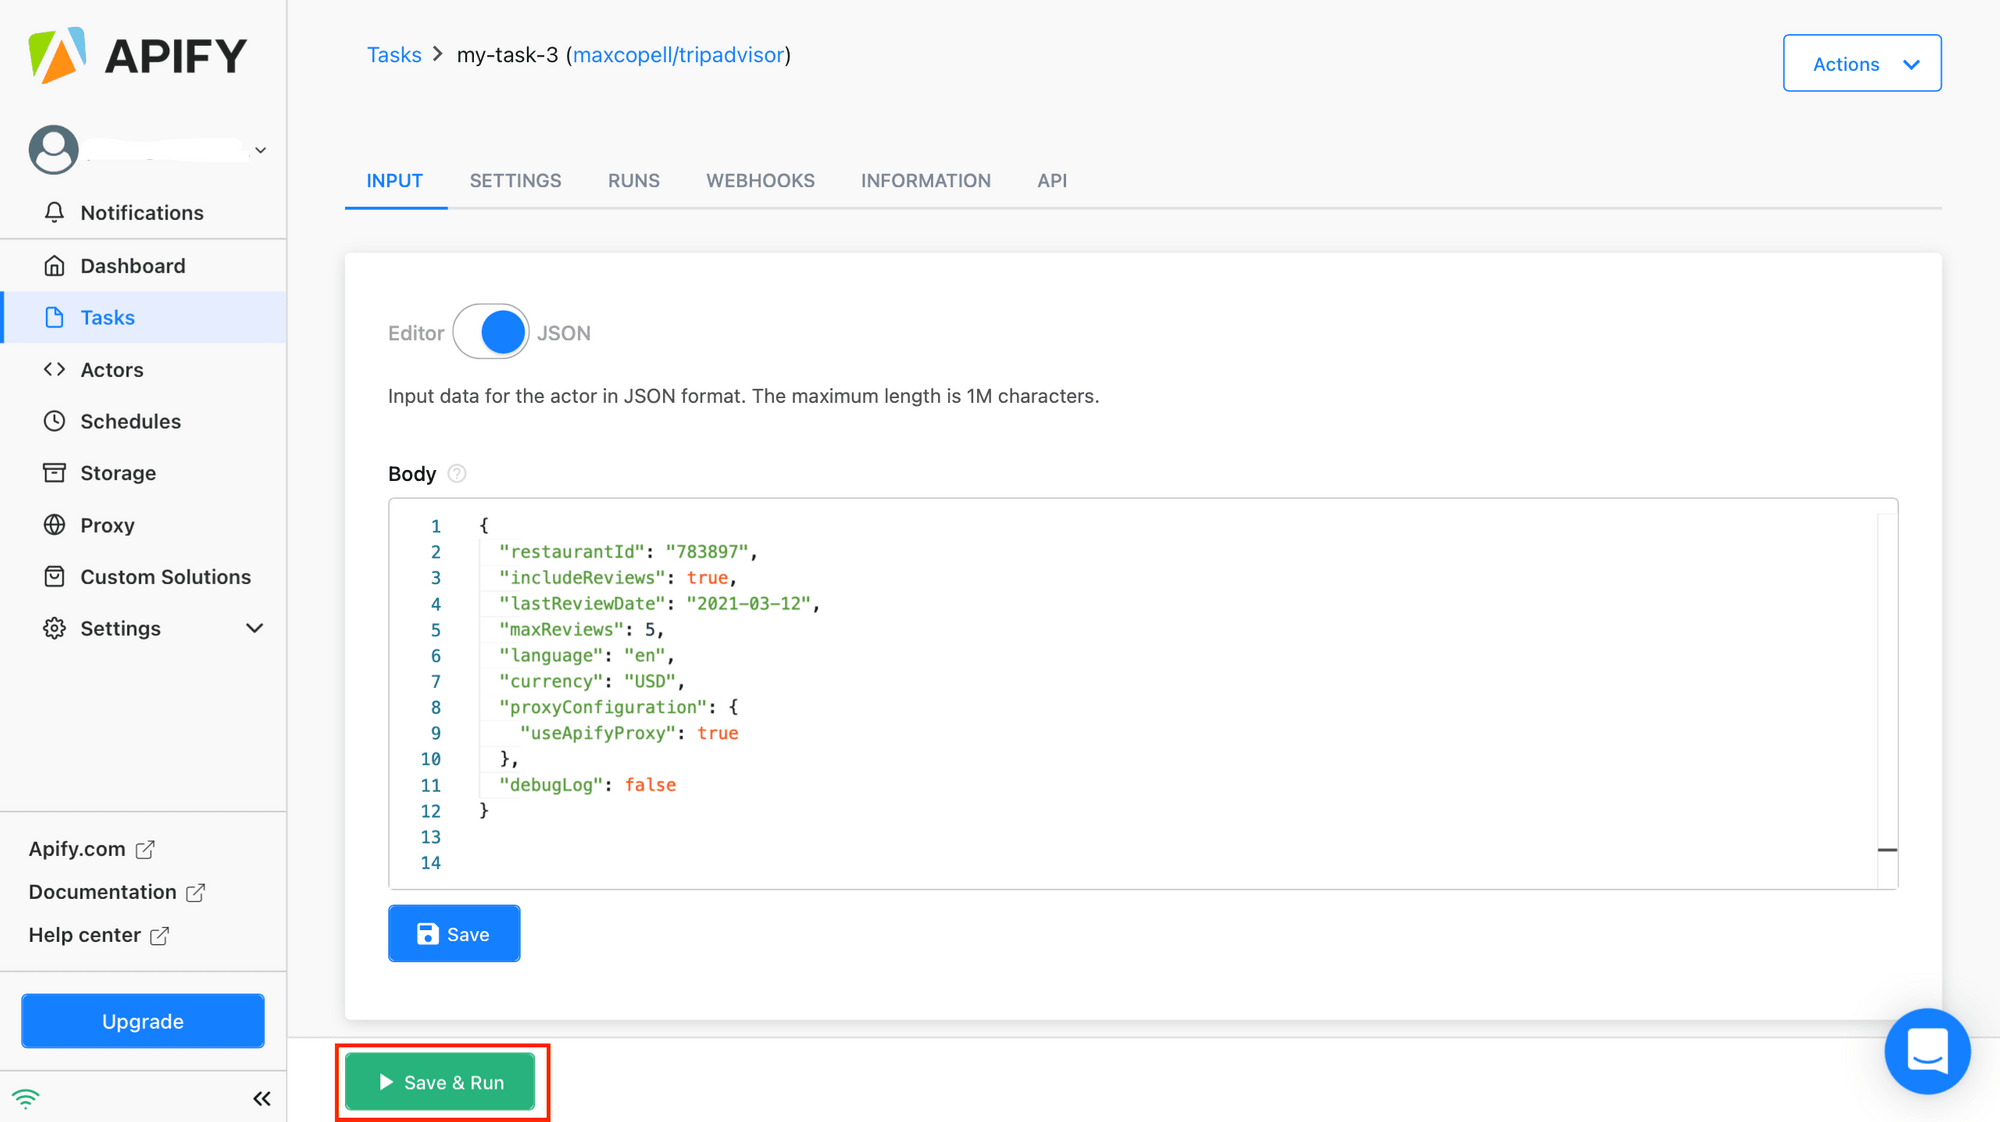
To get information about single restaurant the request body should be in this format:
{
  "locationFullName": "Indian Room",
  "maxItems": 1,
  "includeRestaurants": true,
  "includeHotels": false,
  "includeAttractions": false,
  "includeTags": false,
  "includeReviews": true,
  "maxReviews": 1,
  "lastReviewDate": "2021-07-12",
  "hotelId": "783897",
  "language": "en",
  "currency": "USD",
  "proxyConfiguration": {
    "useApifyProxy": true
  },
  "debugLog": false
}
When you’re done setting up your scraping parameters, click the _ Save & Run _ button:
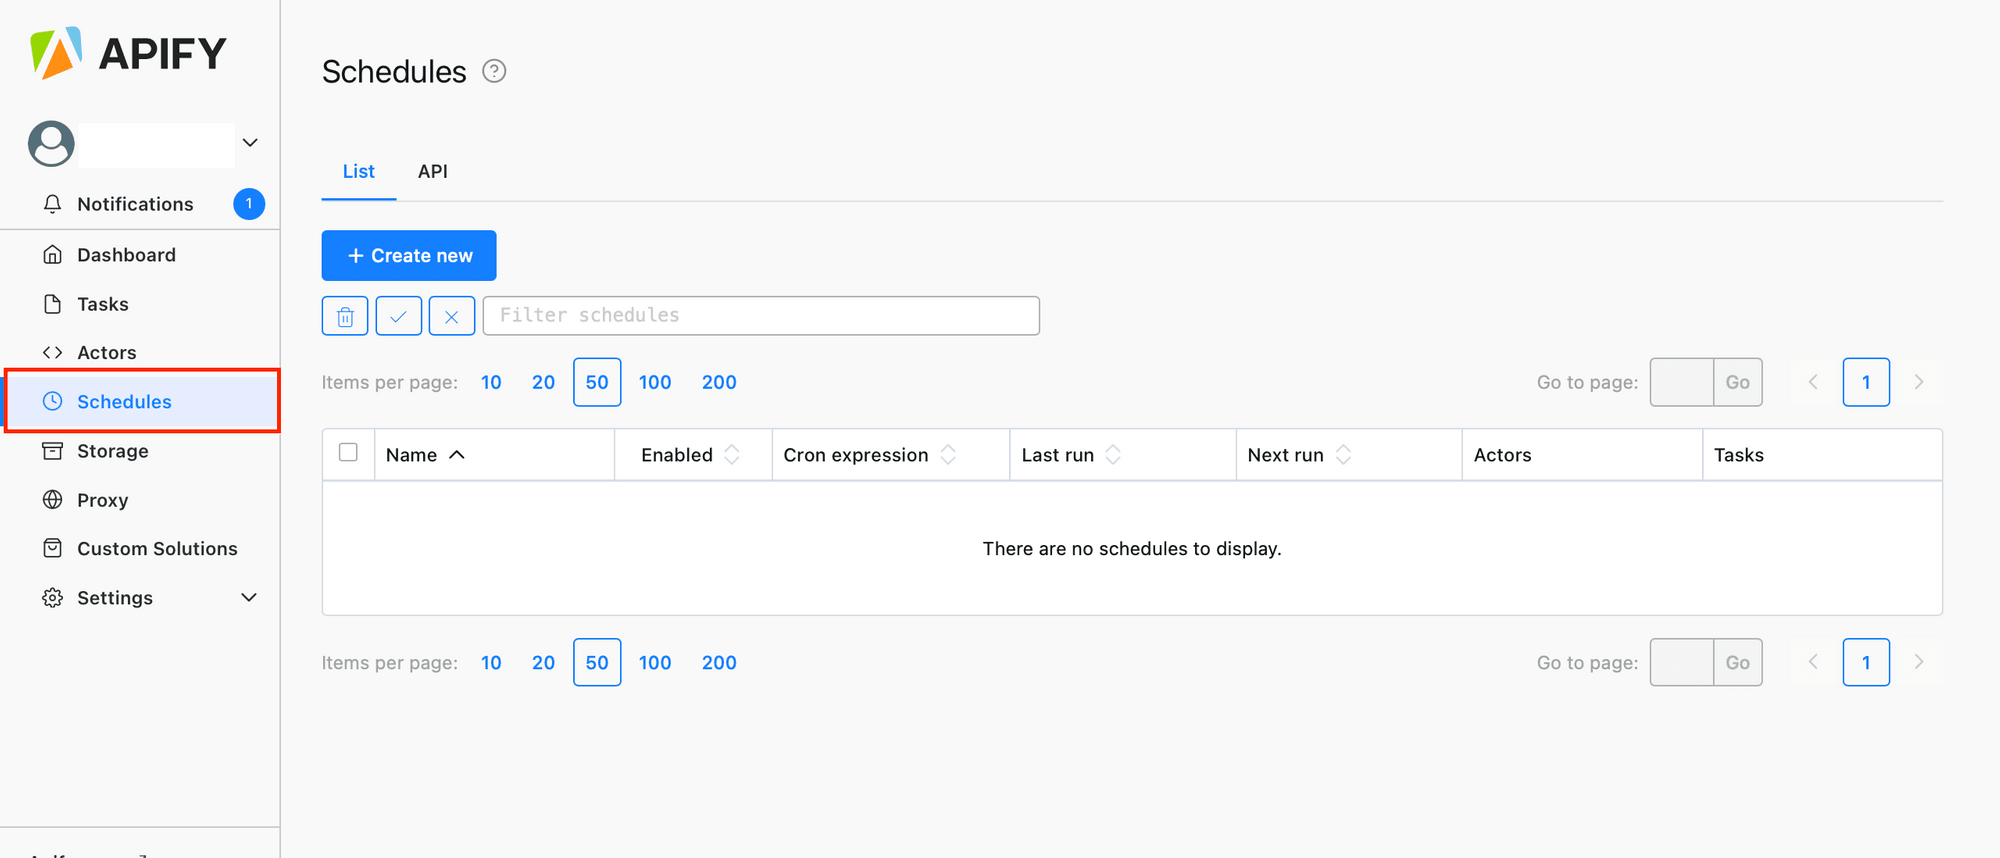
Schedule task run
Next, you can automatically run your actors and tasks at specific times from Apify. Apify Schedules allow you to set up and manage your schedules using cron expressions.
Click on the Schedules button in the left side menu, then click the Create new button:
In the Settings tab, configure how often you would like your actor or task to run:
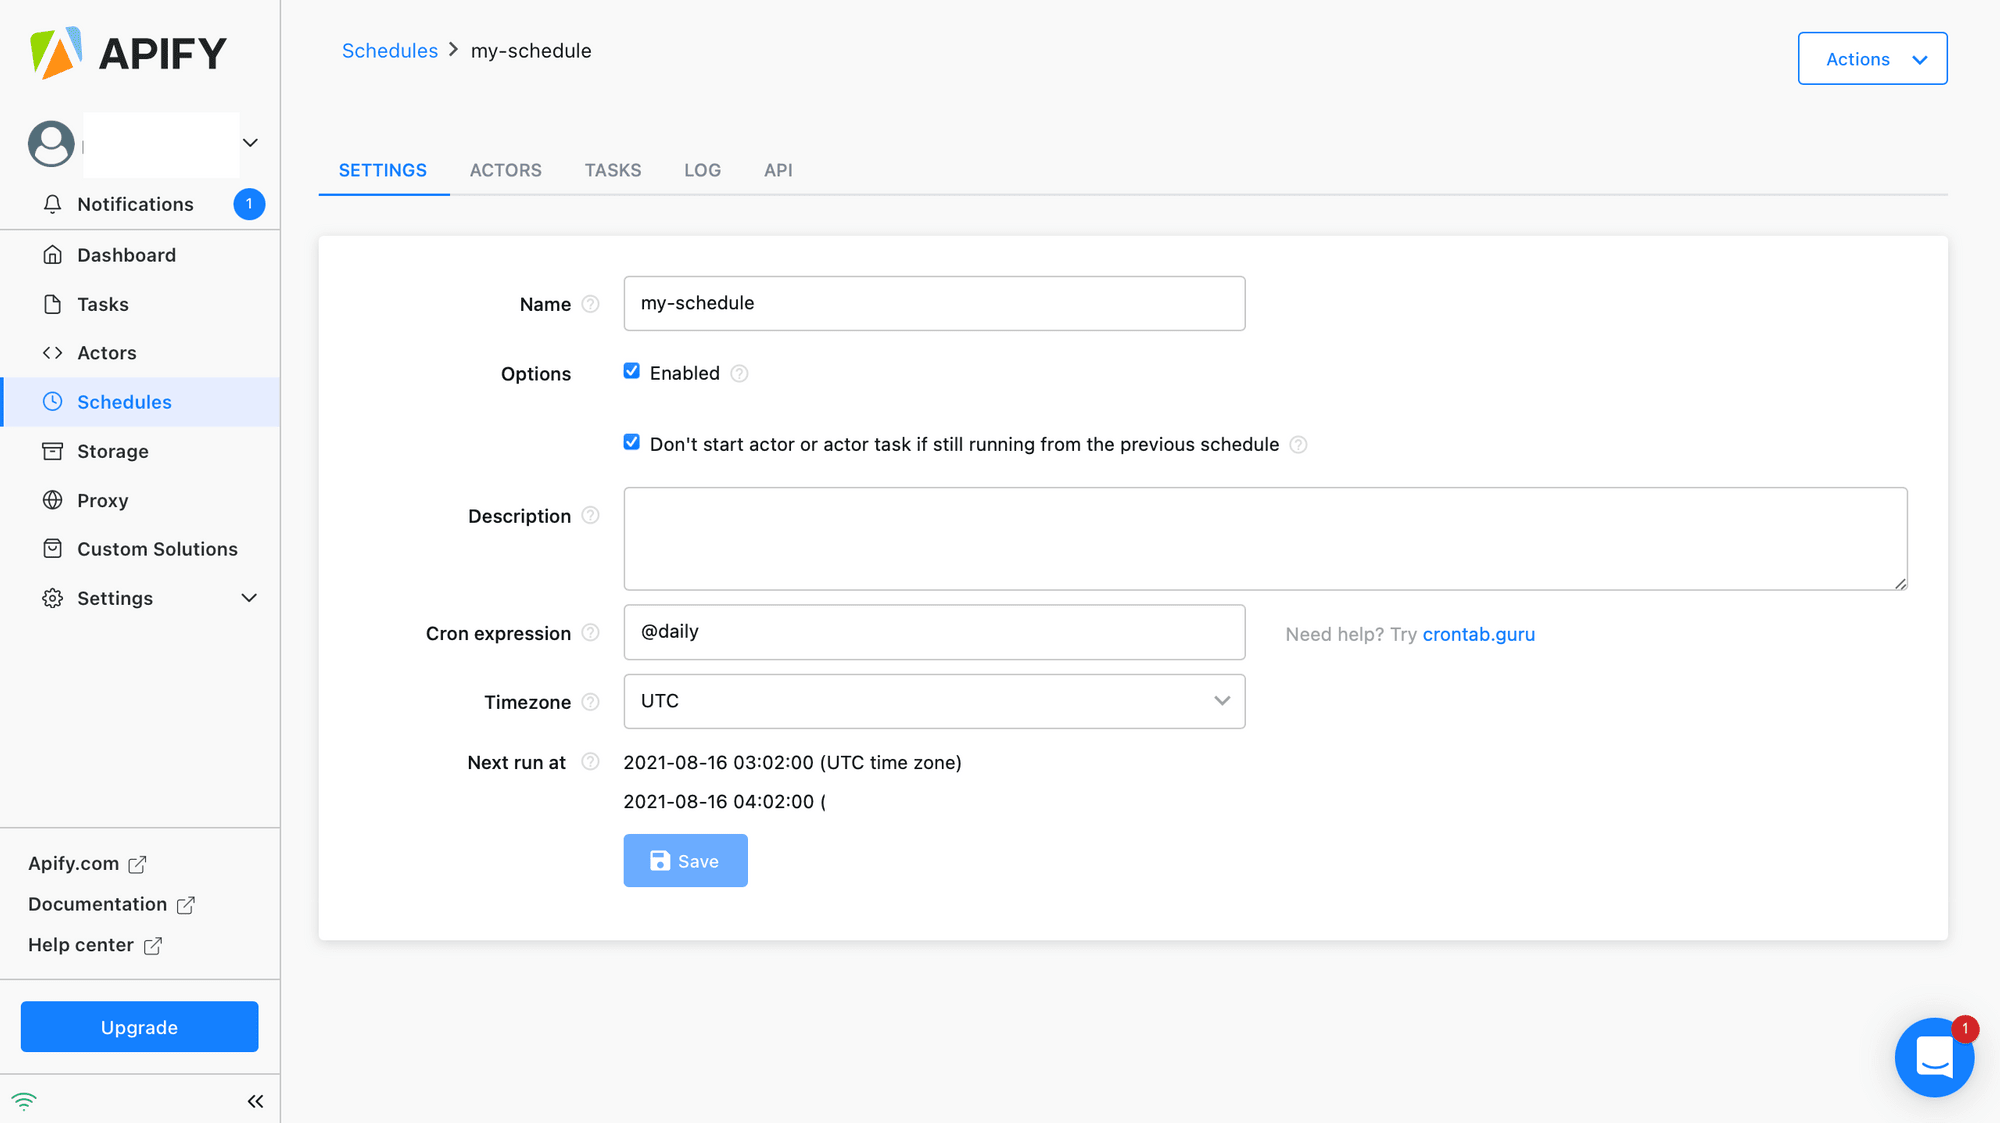
Click save.
Next, switch to the Tasks tab and click the Add task button:
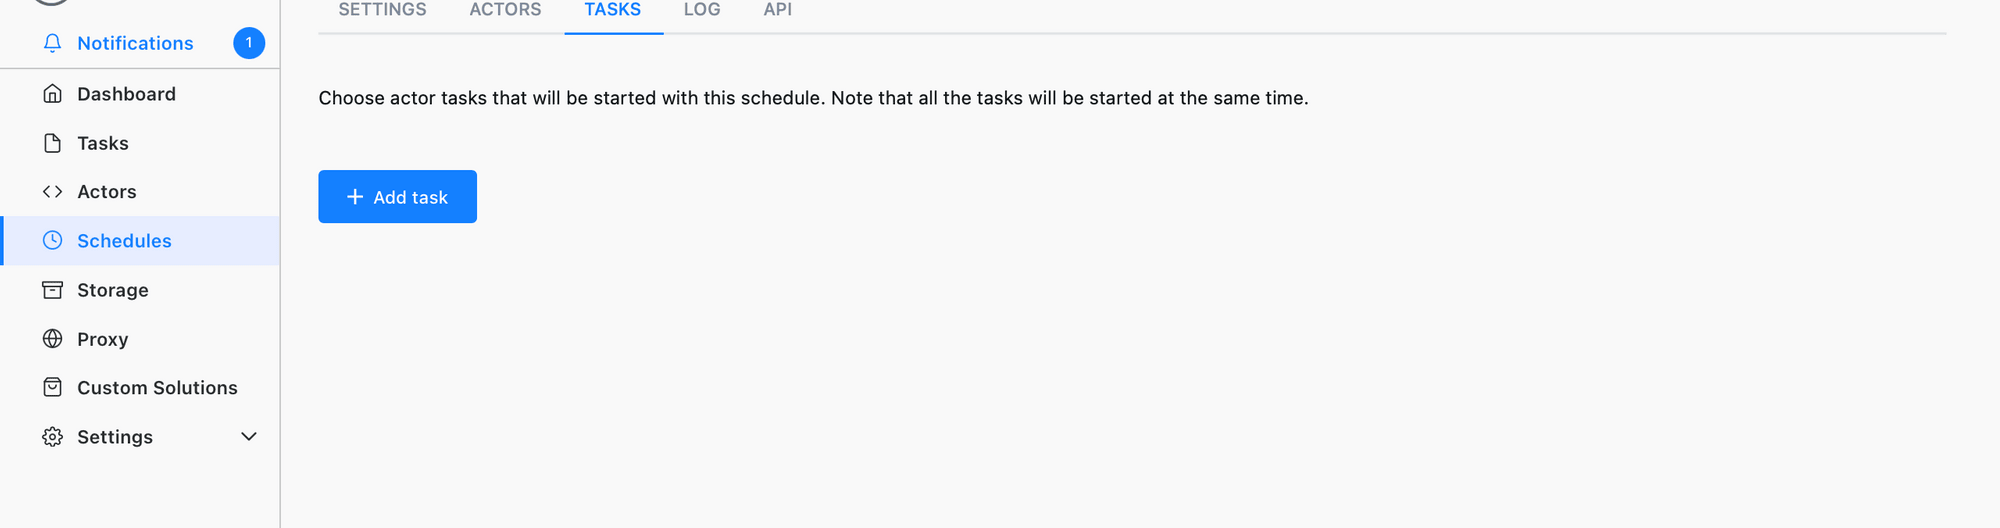
Select the task from the Task dropdown:
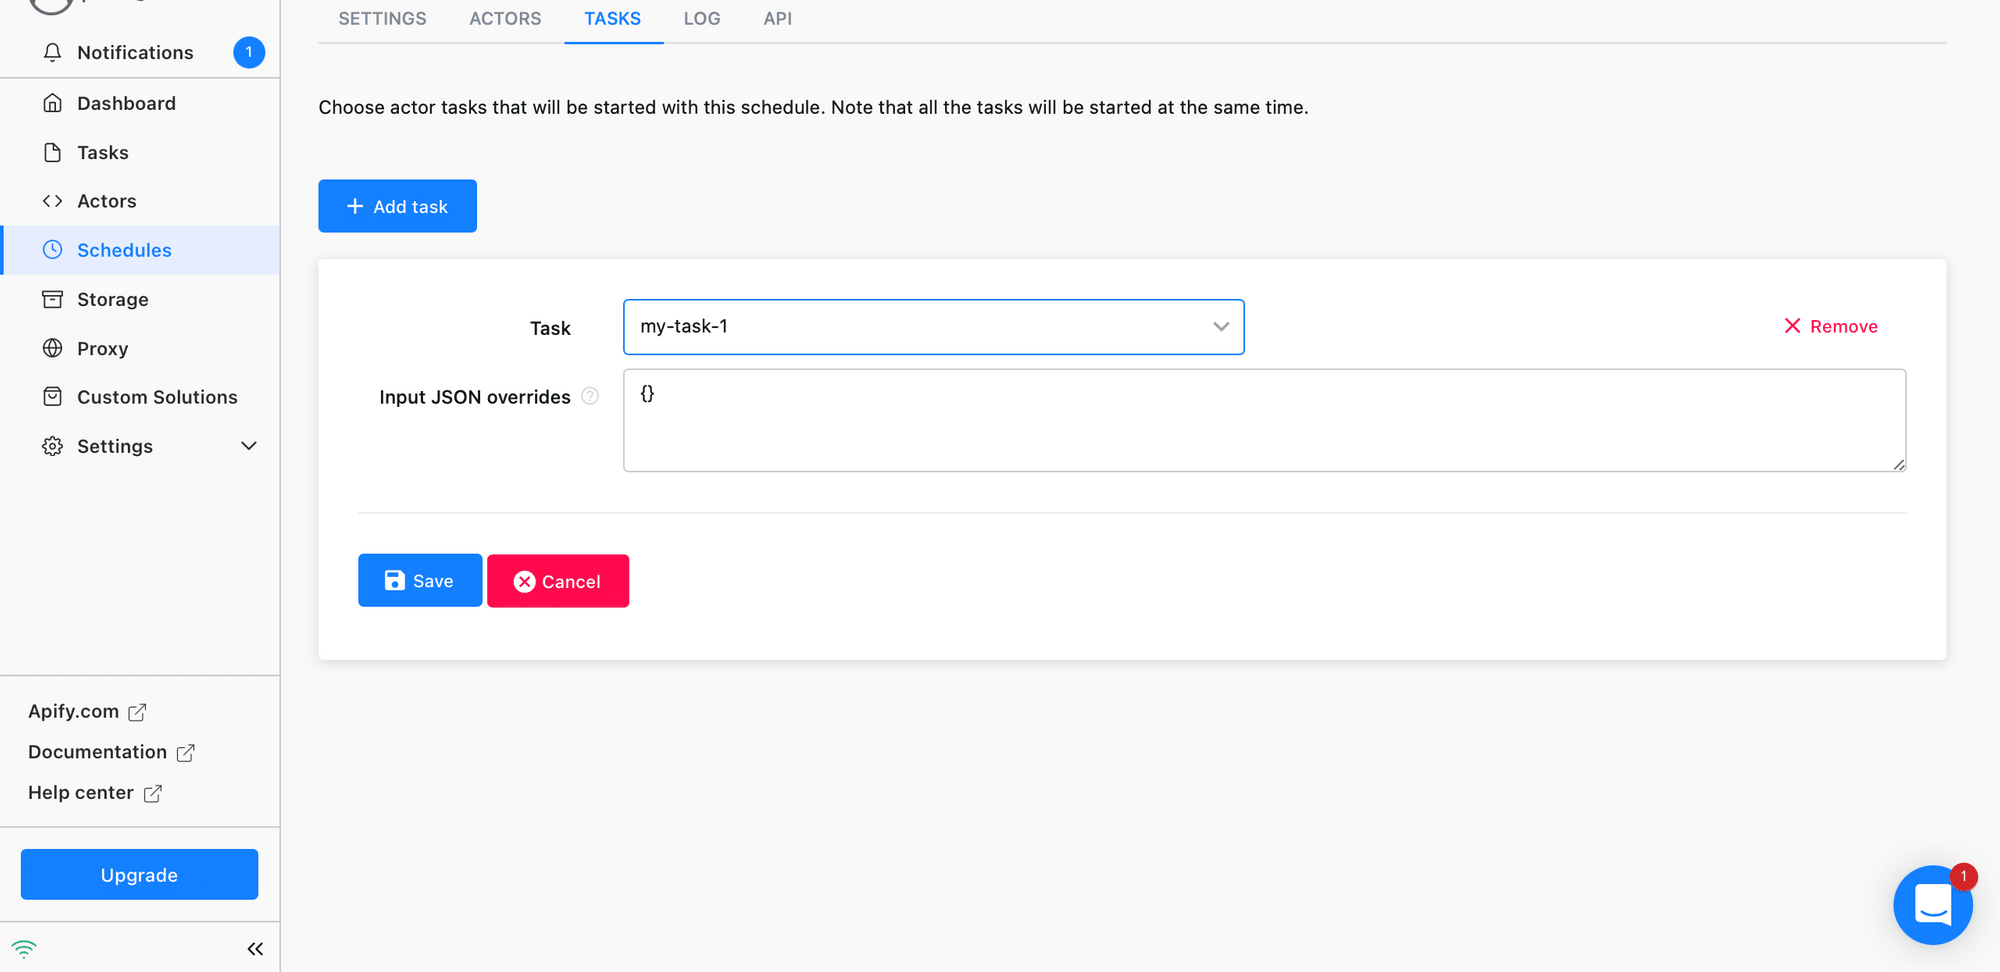
Click Save.
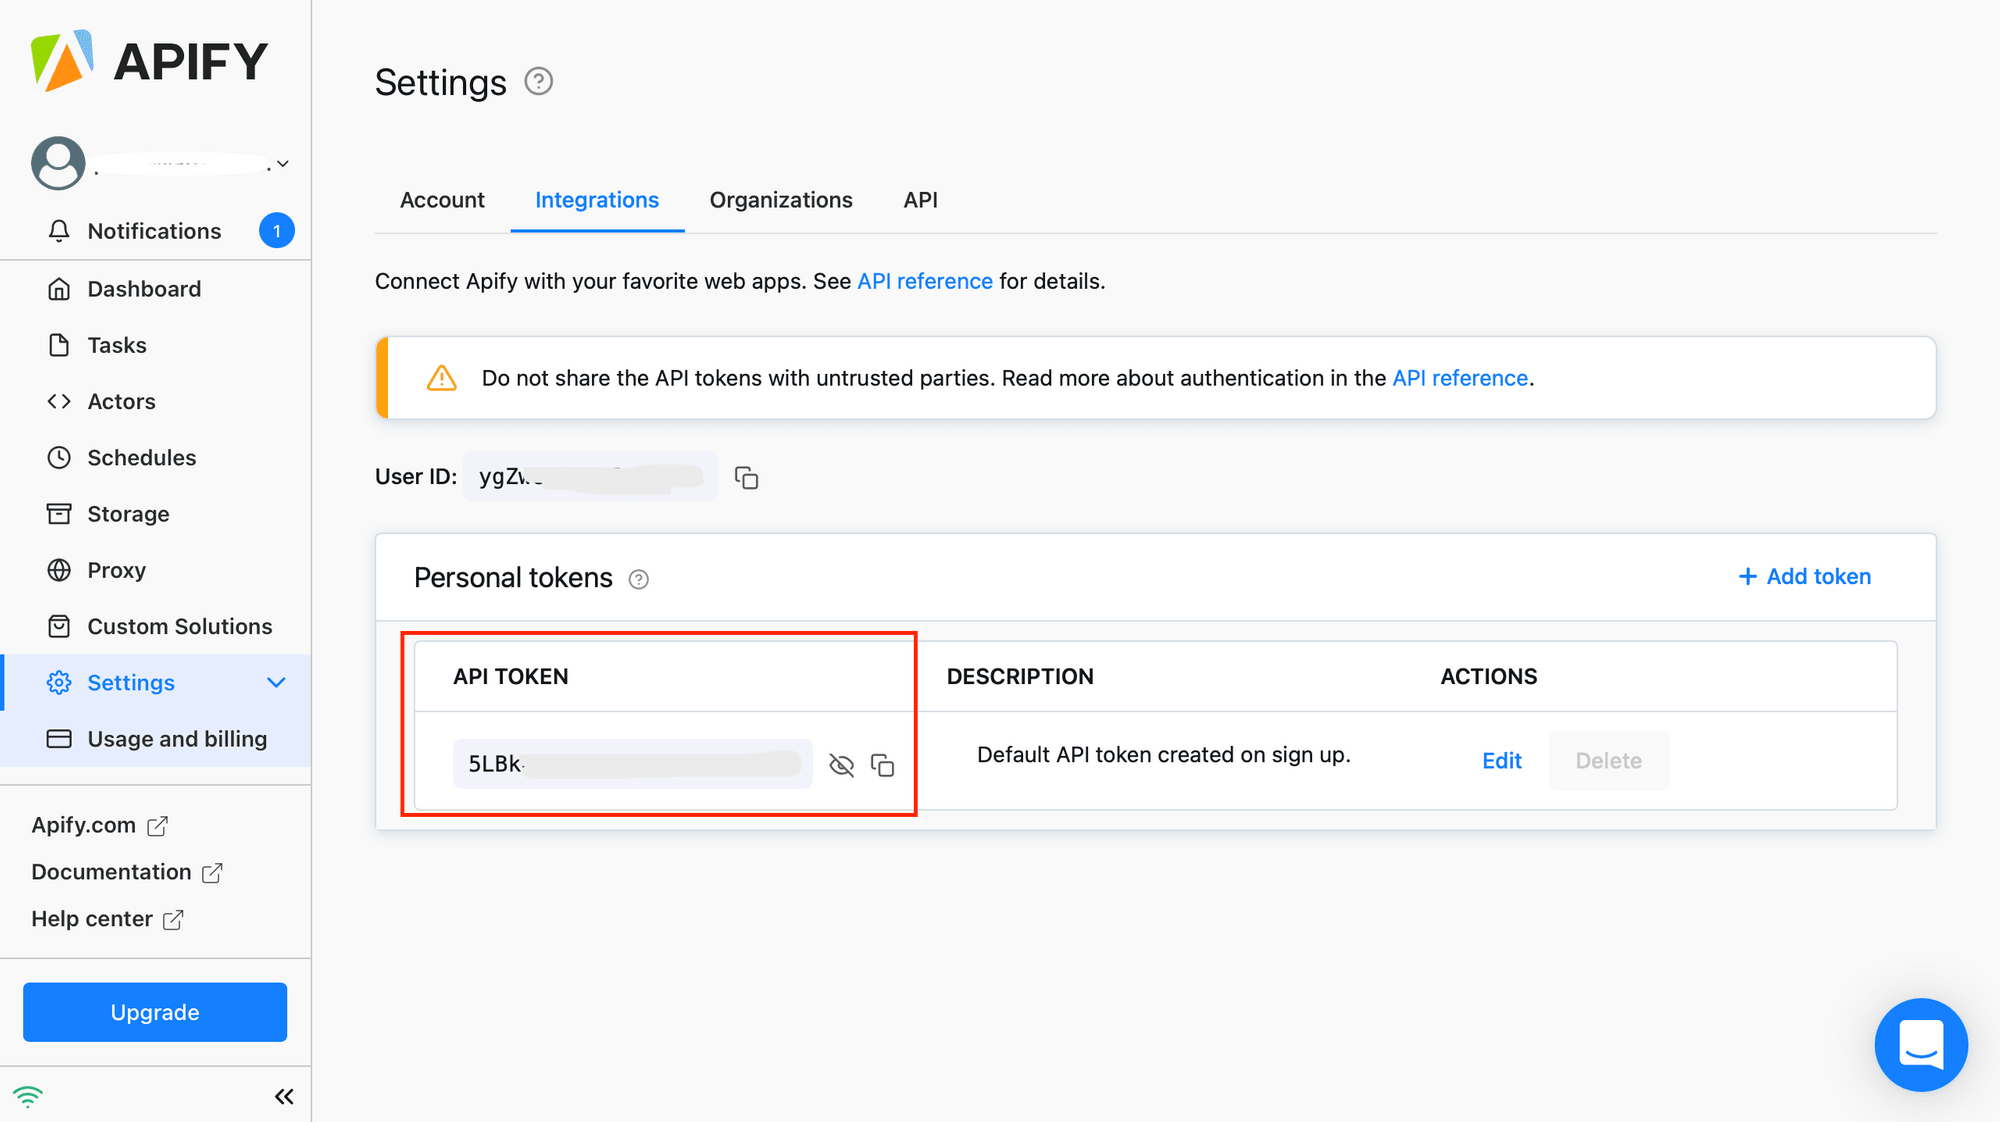
Get API Token
You will also want to copy your API token as you will need this later to authenticate with Zapier. You can find the API token on your Apify account page:
Integrate with Zapier
In Zapier, pick Apify app as a trigger which will kick off your automation. Choose create an image with in Bannerbear as the resulting action.
Set up Apify as the trigger Zap
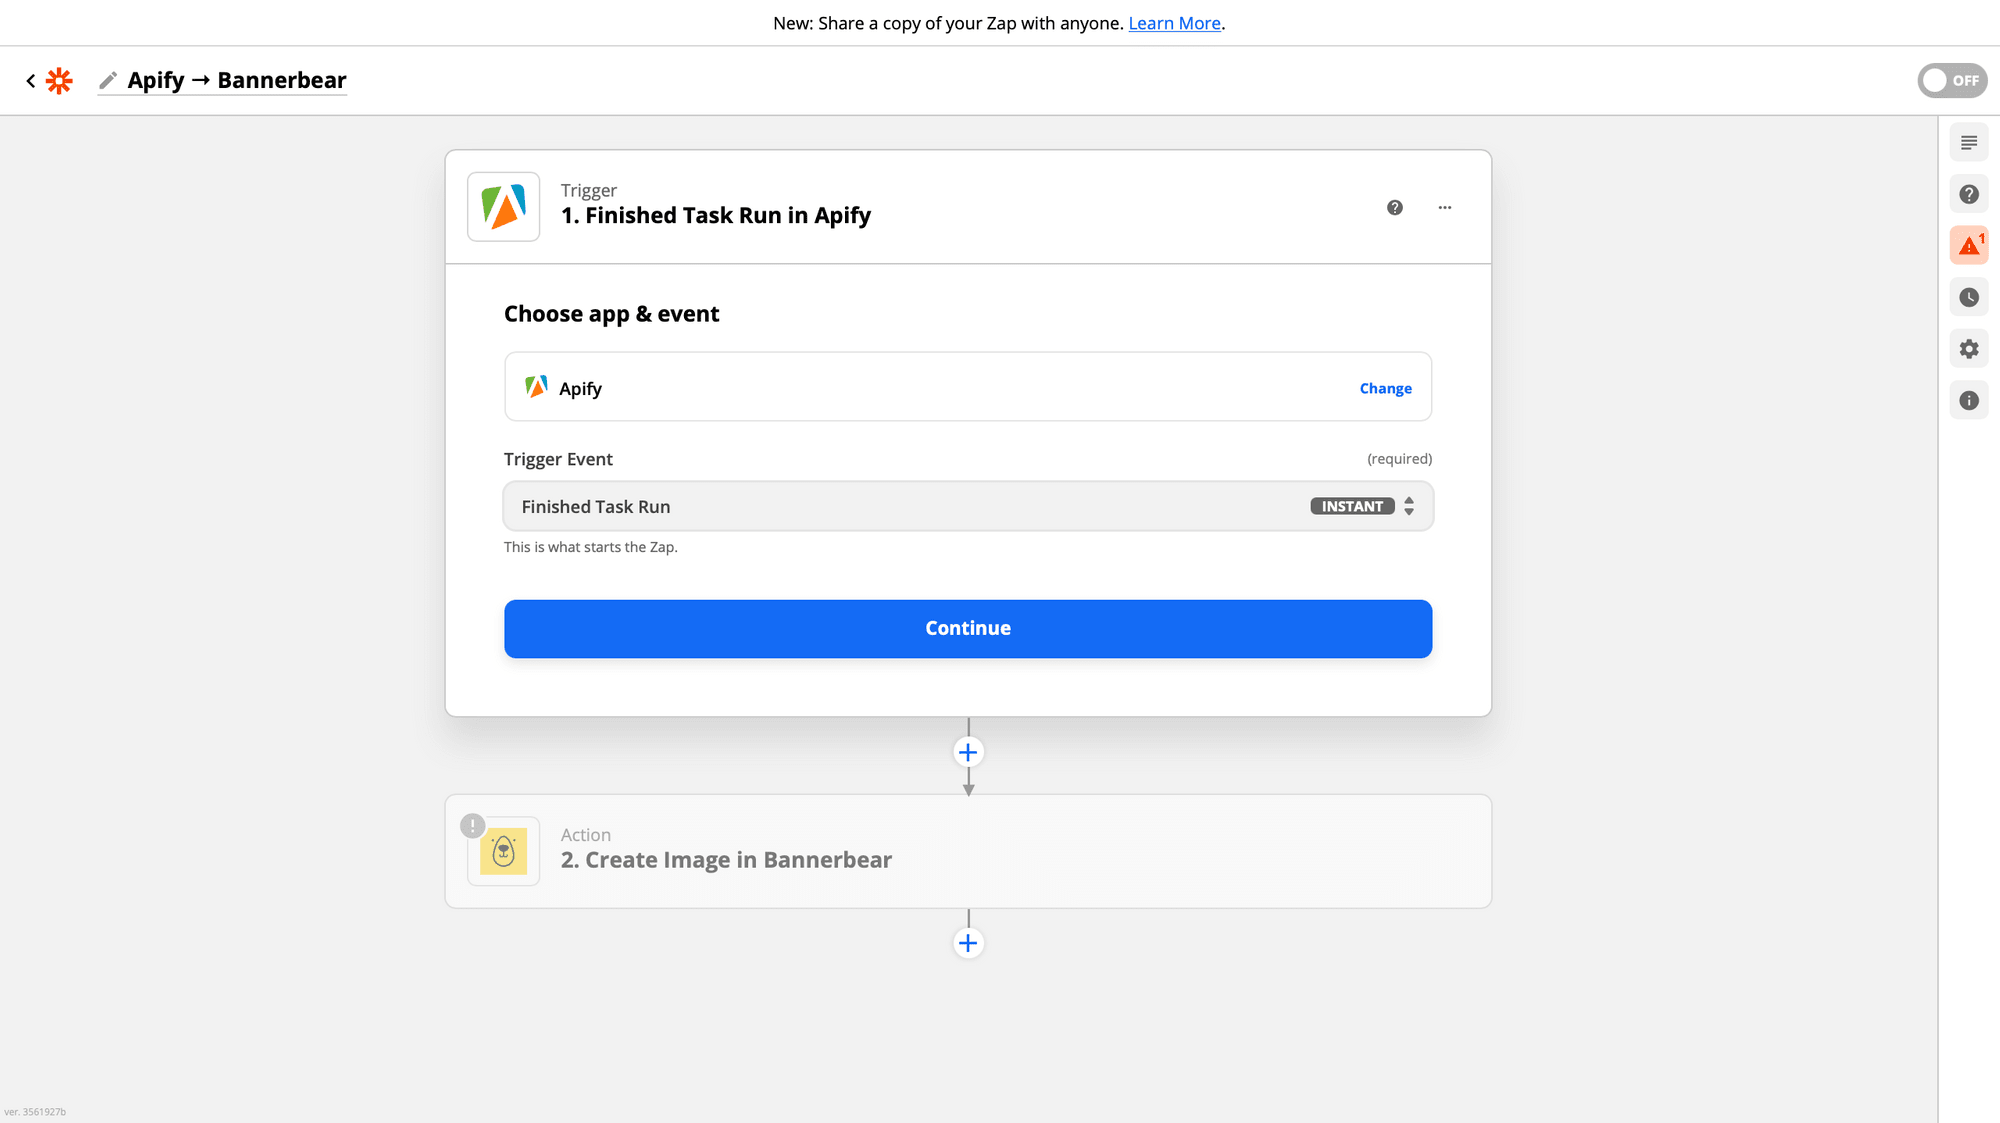
In the Zap editor, click the Trigger step. To pull in data, select Apify as the app and Finished Task Run as the trigger event. This will be triggered every time your Apify scheduled task runs.
Click Continue :
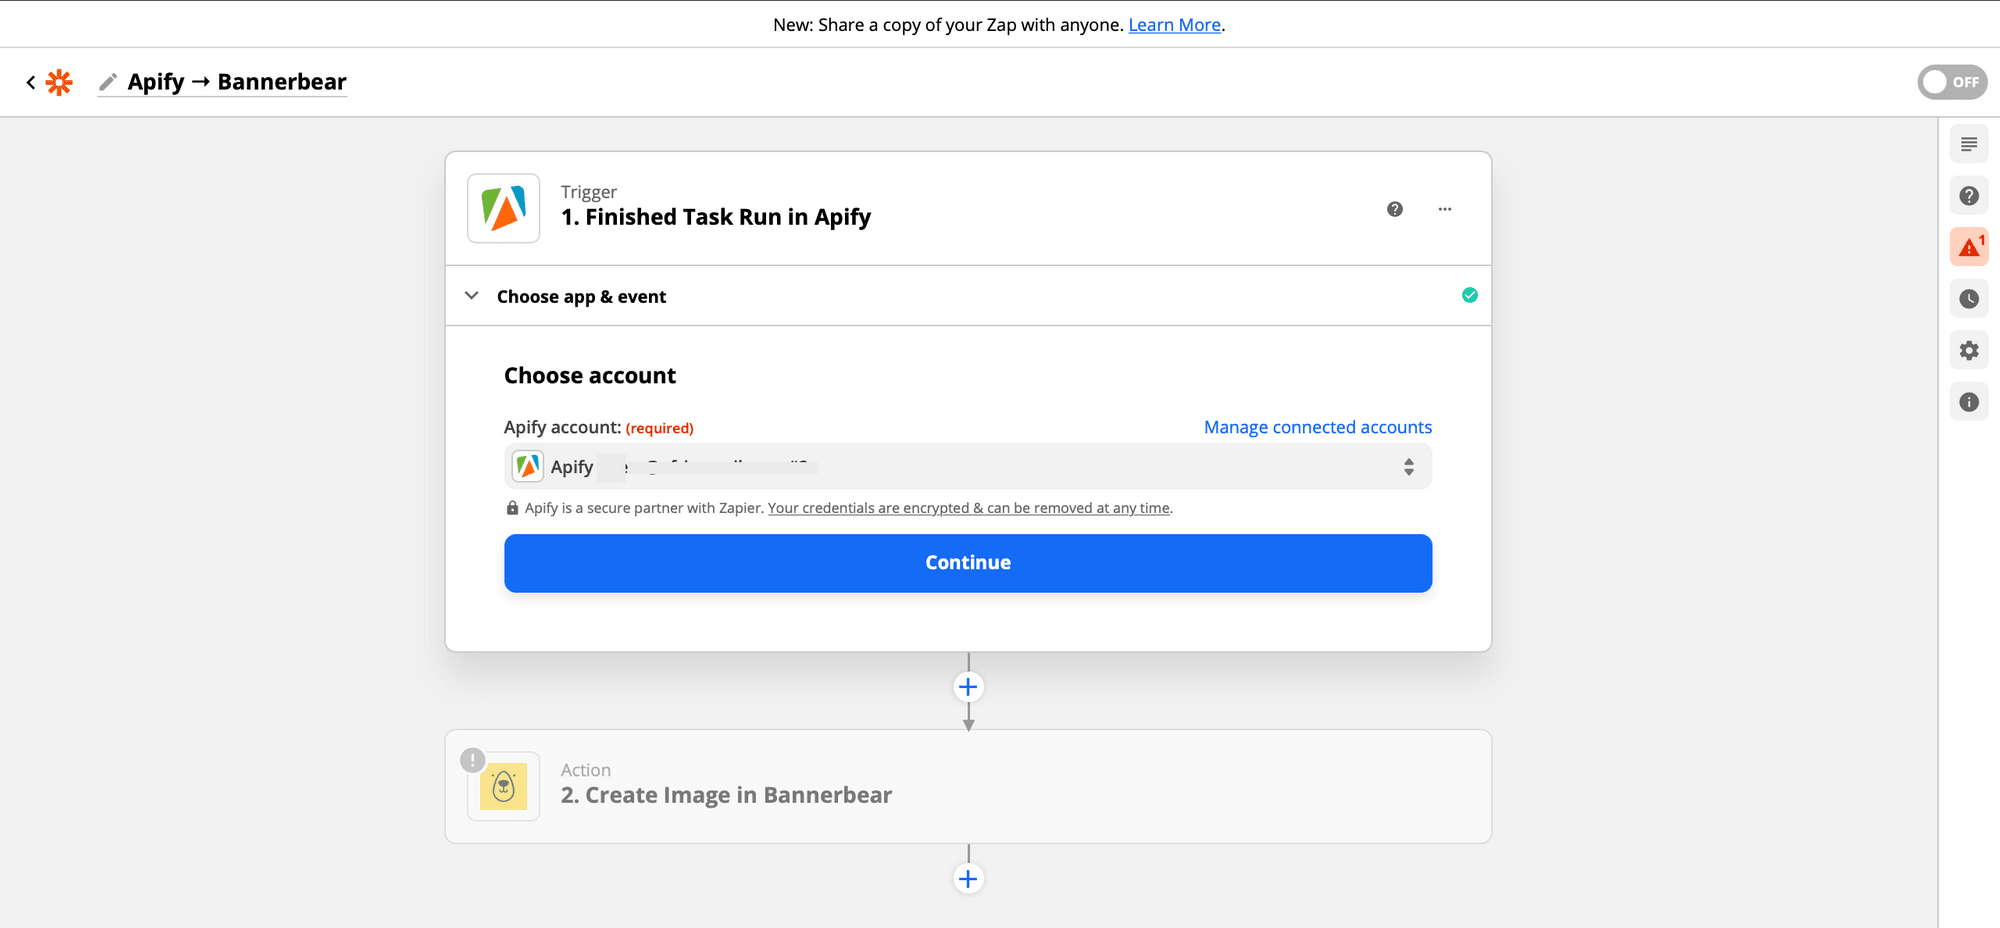
Connect your Apify account and click Continue :
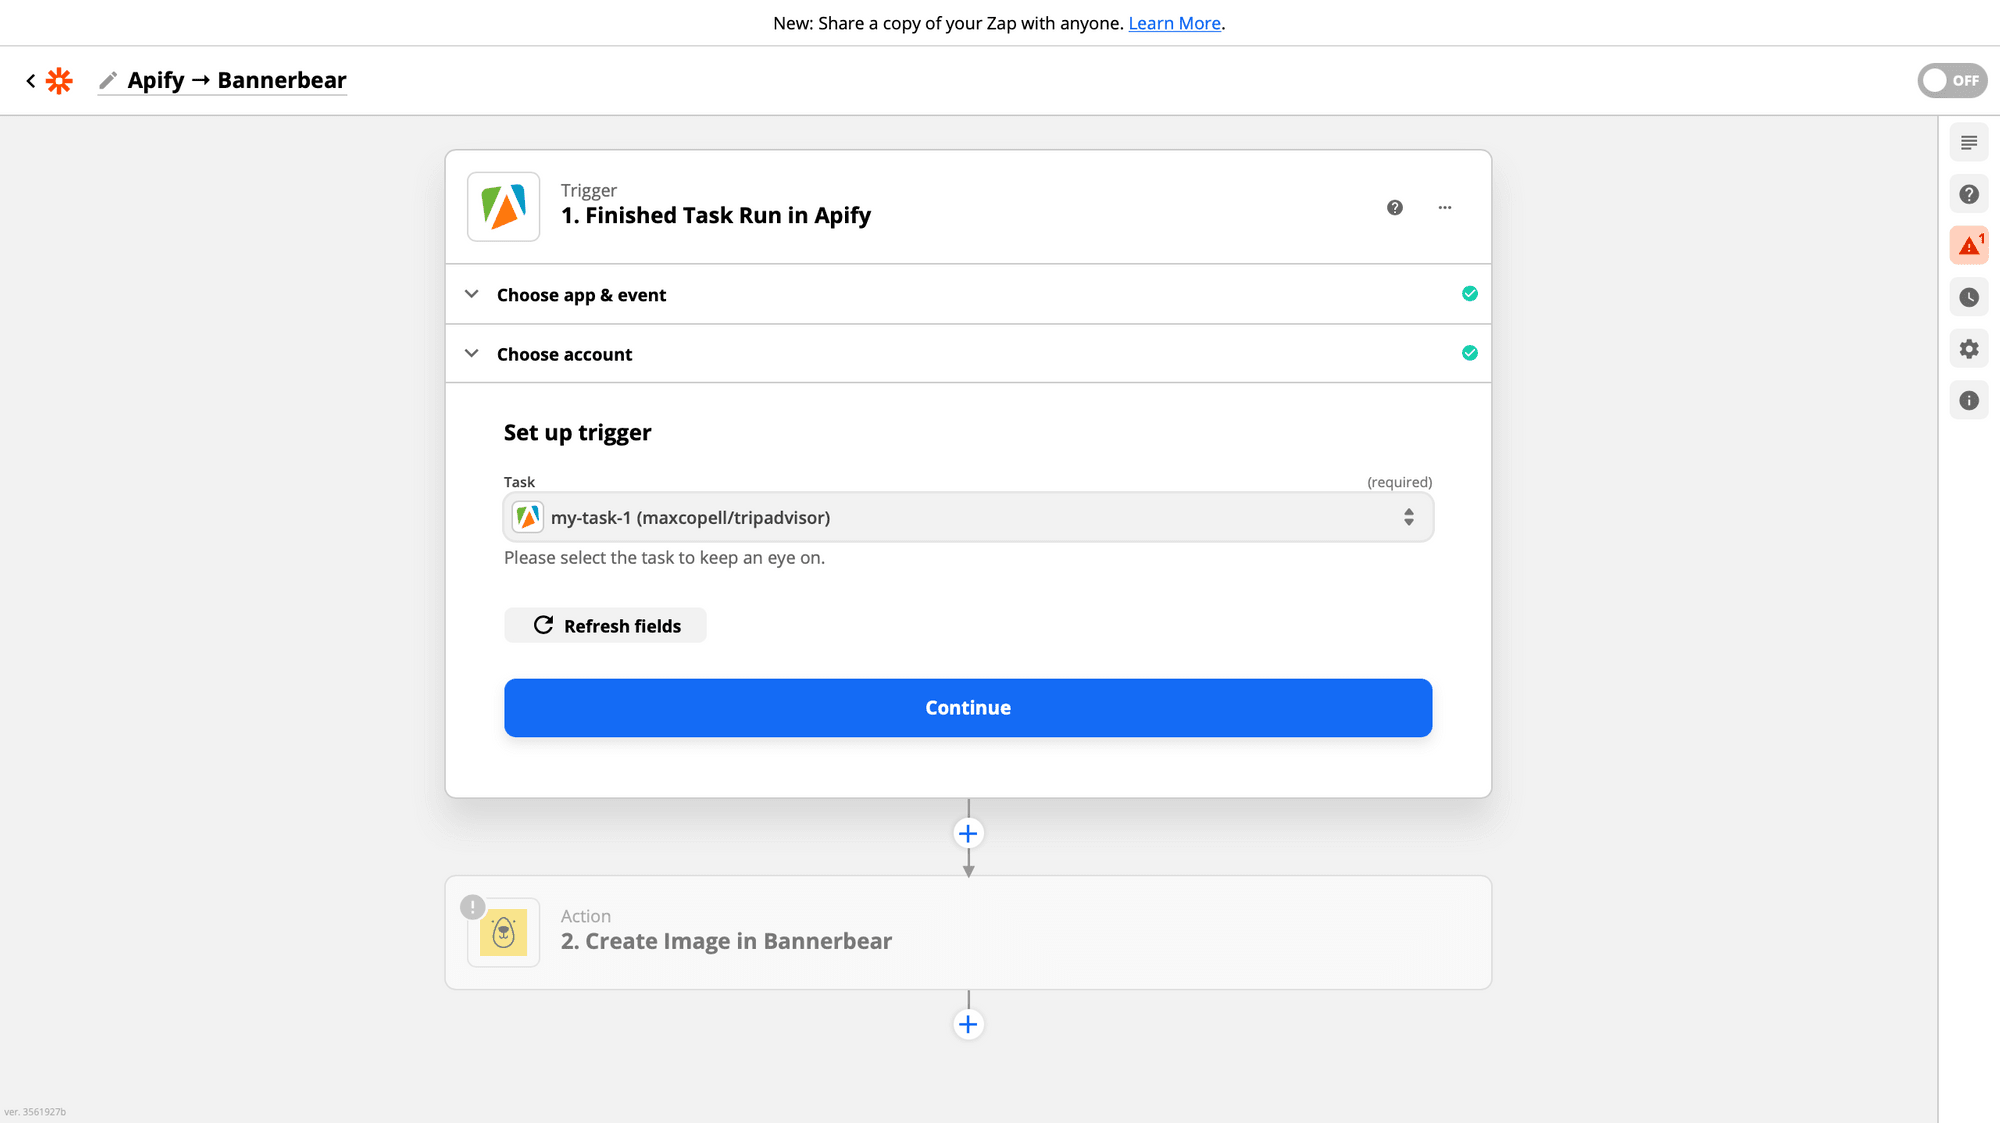
Next, select the task you want to use from the list of tasks presented and click Continue :
Zapier will run a test in your Apify account to confirm that the right account is connected and your trigger is set up correctly. Click Test trigger :
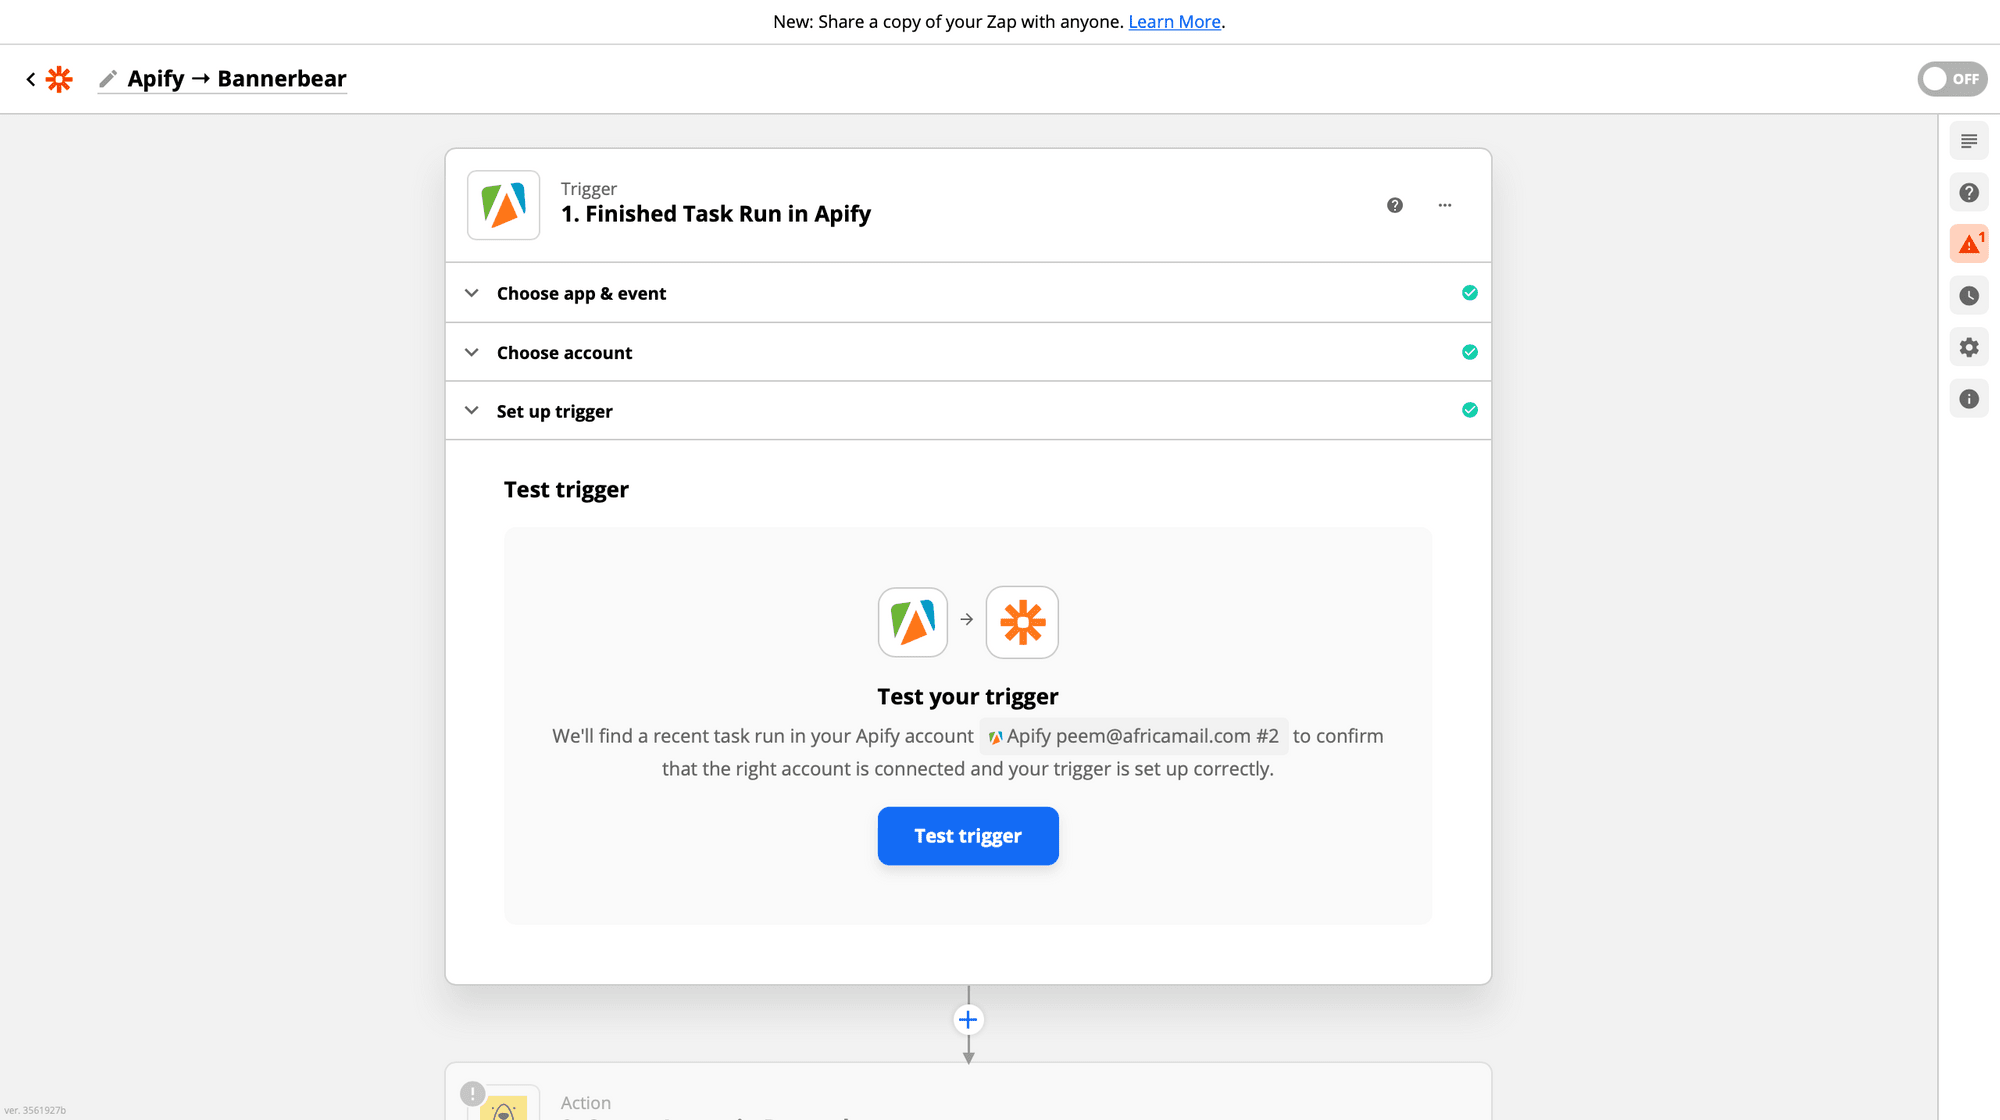
If a task run was found in your account with no errors, hit continue.
Next, add an action where the result of the Apify trigger will be used.
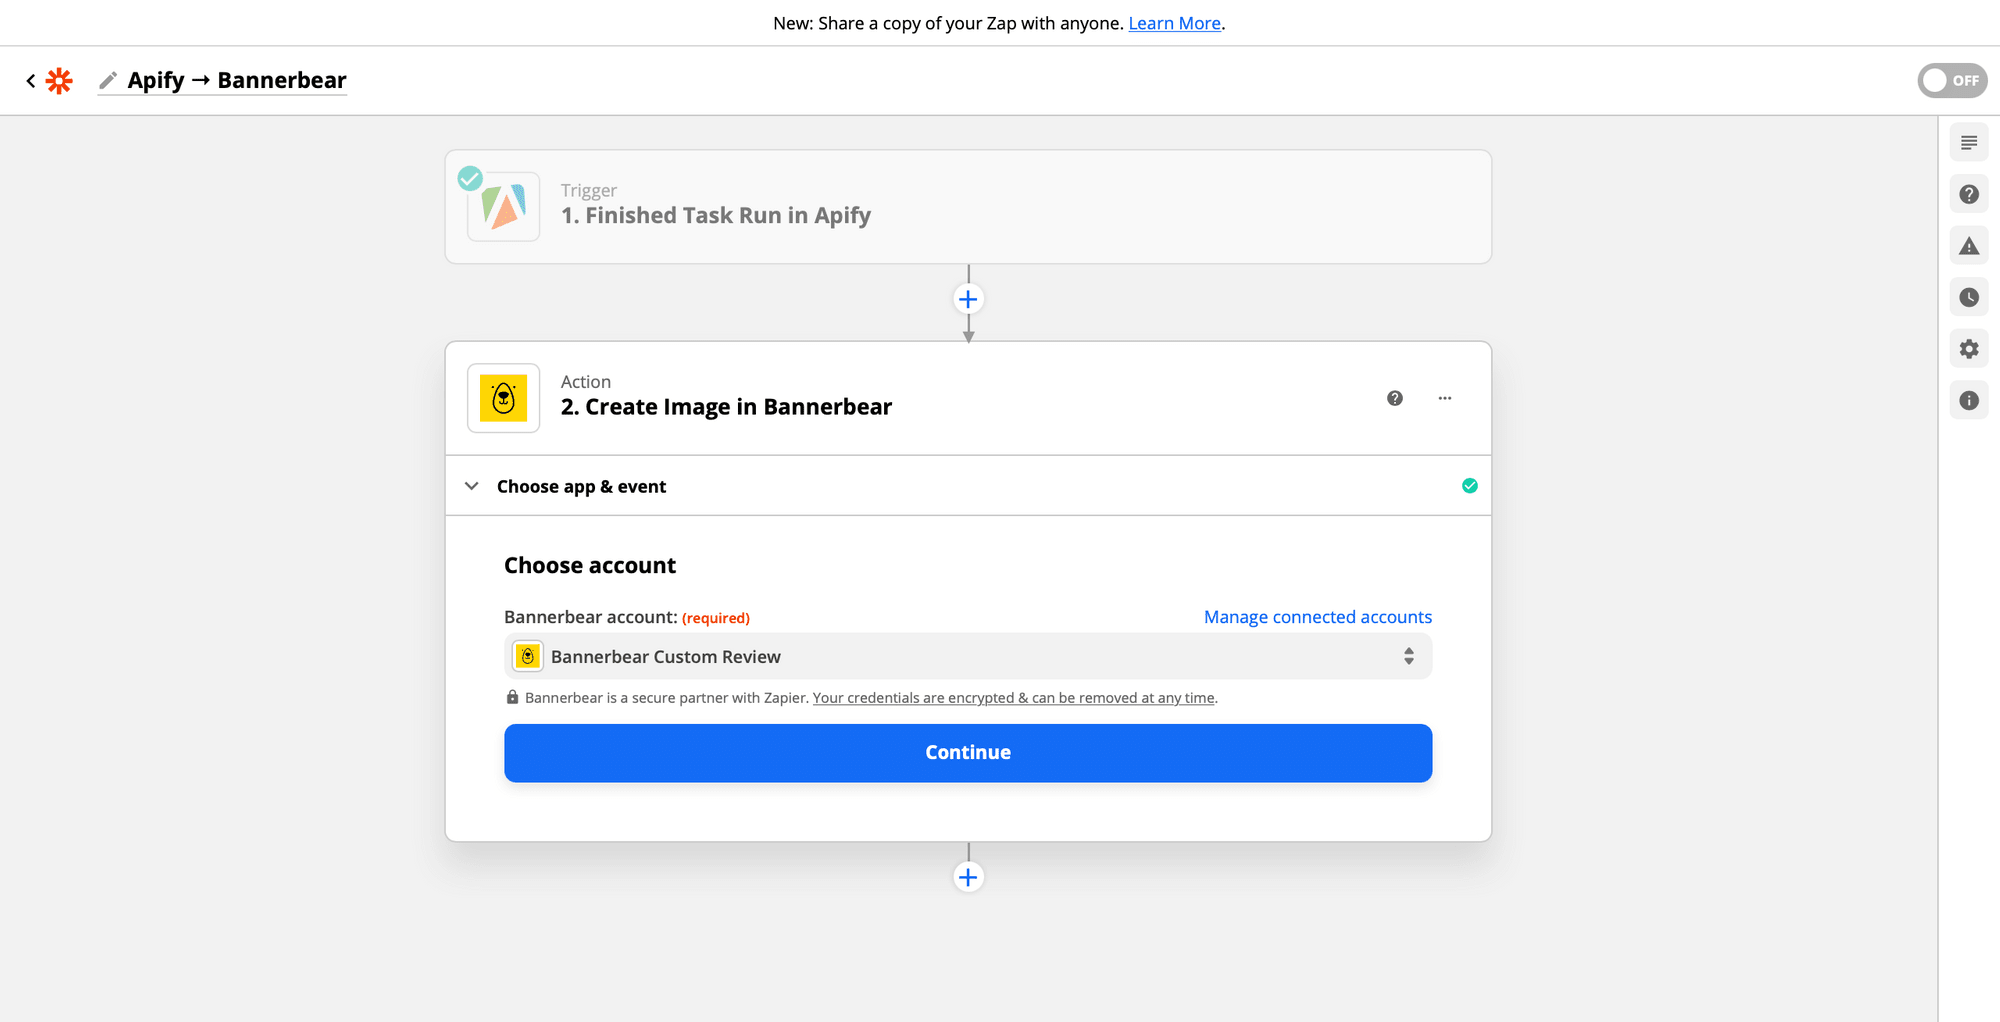
Connect your Bannerbear account to Zapier
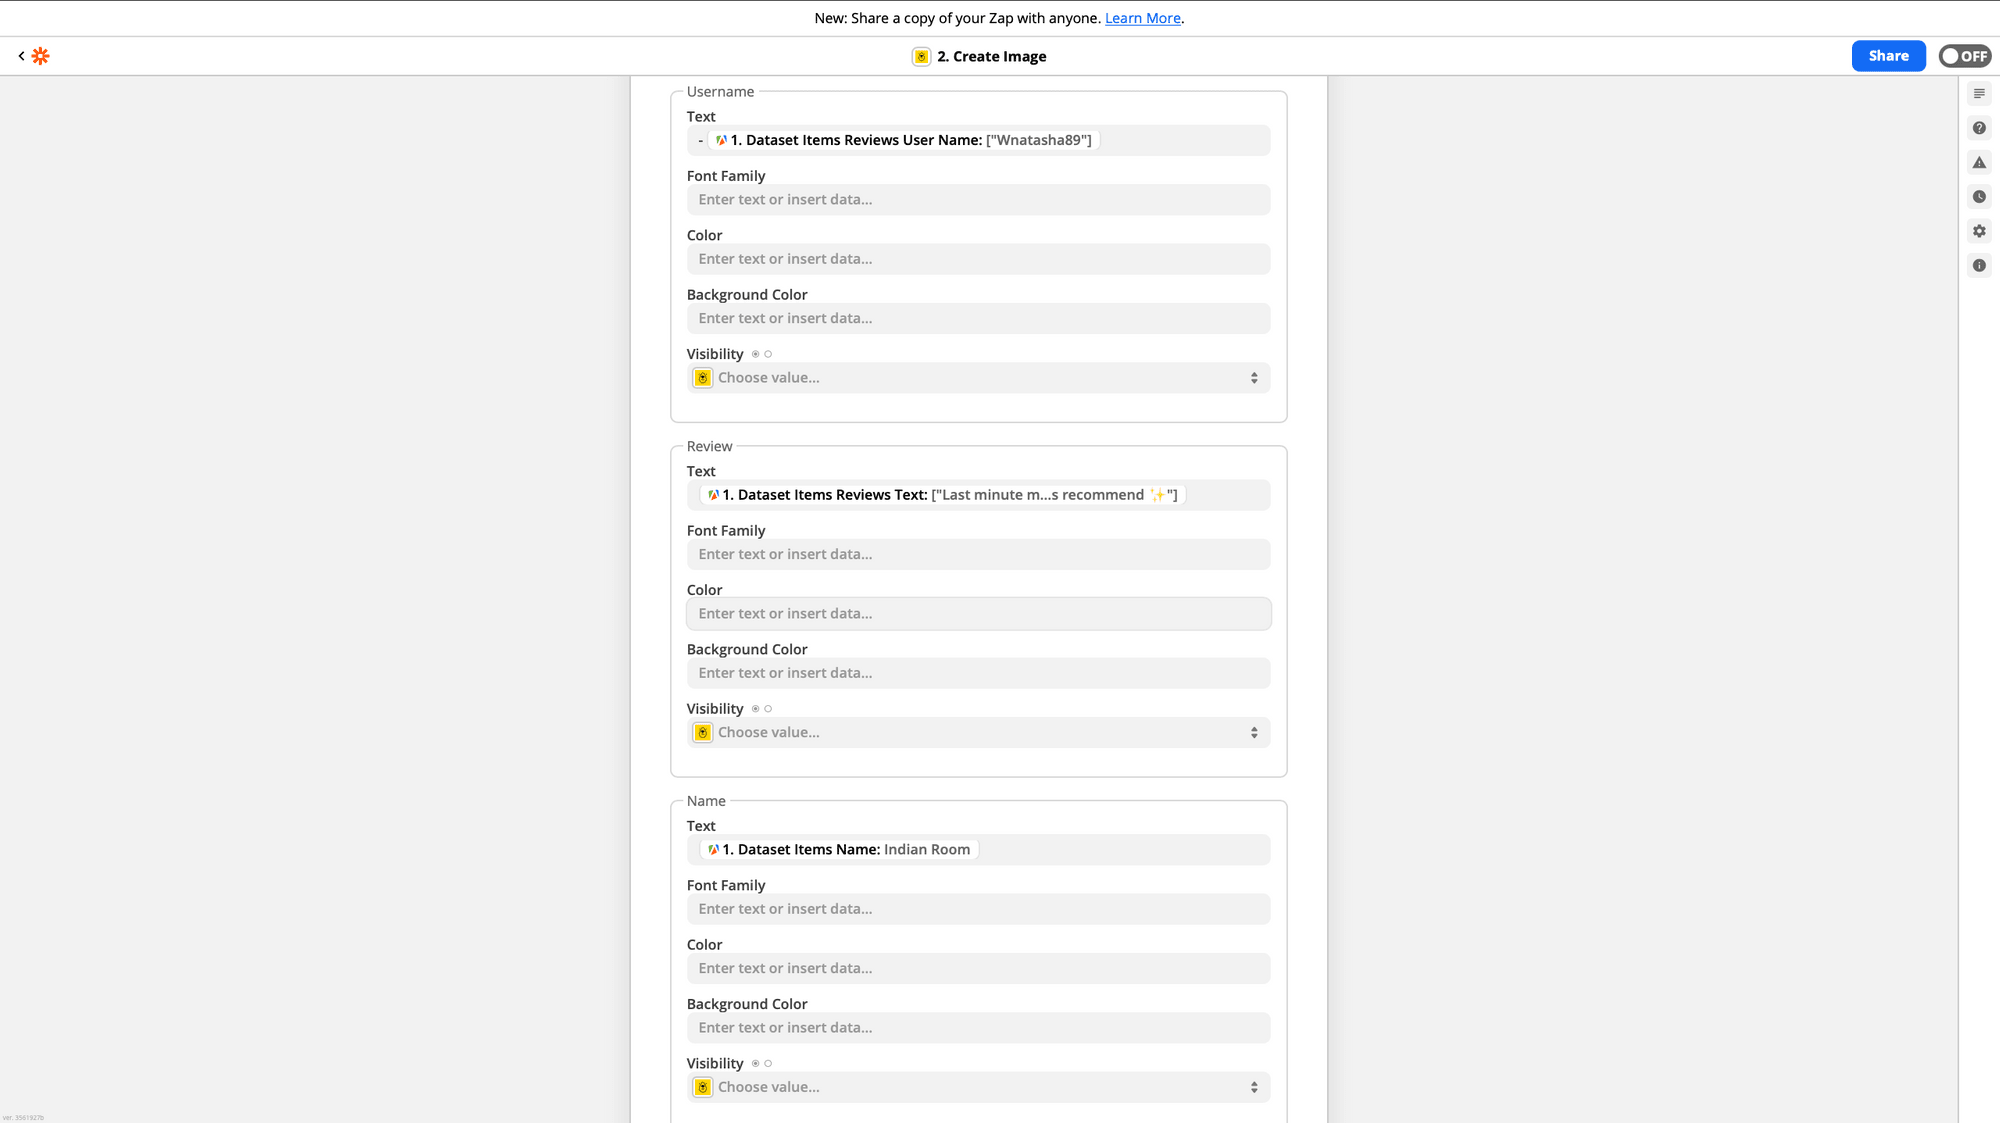
Next, configure a dynamic review, username and background image by passing in data from Apify.
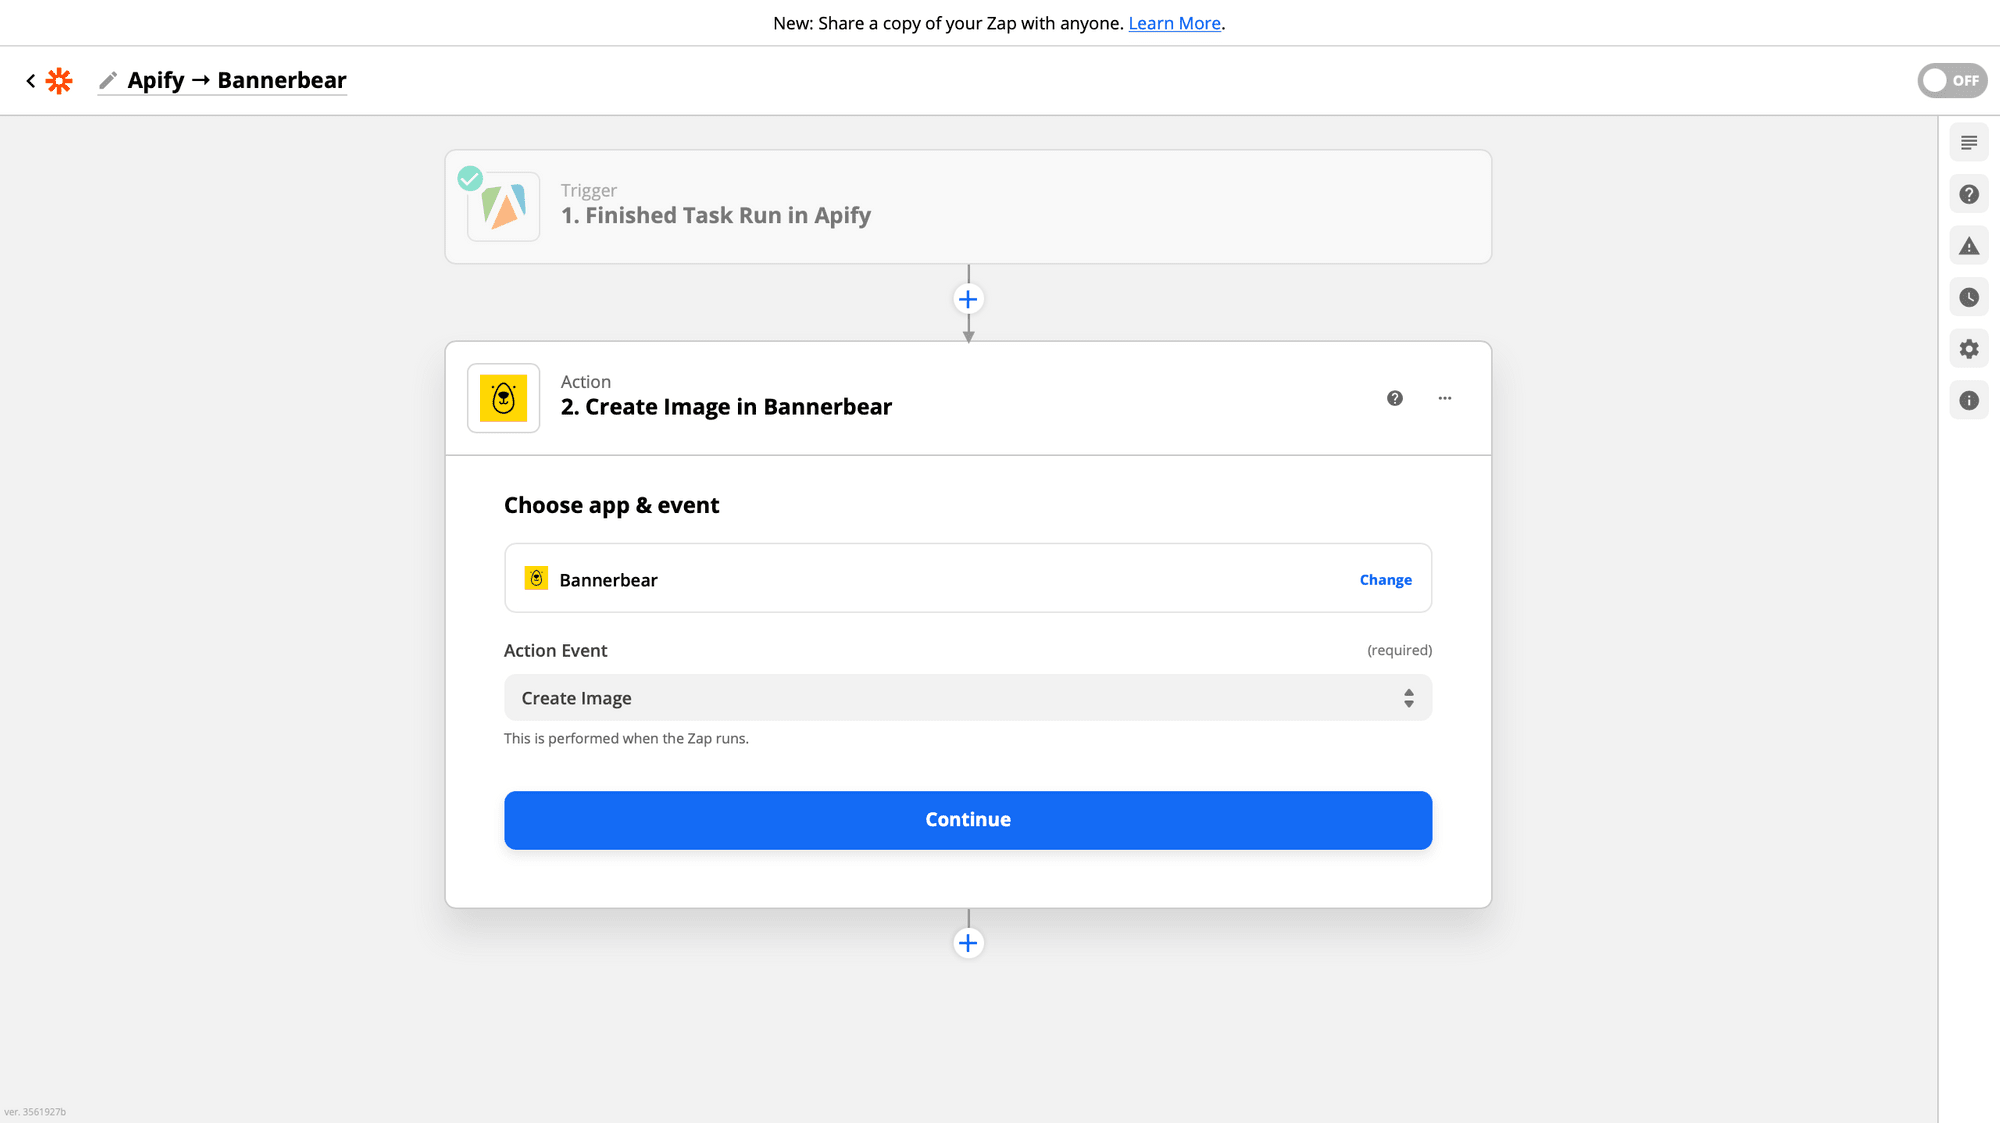
Choose Bannerbear as the app and Create image as the Action Event. Click continue :
Next, allow Zapier to access your Bannerbear Account by providing your API key. Click continue :
Select your Template ID and Match the Dataset Items Reviews Image Urls to an image in the dropdown menu:
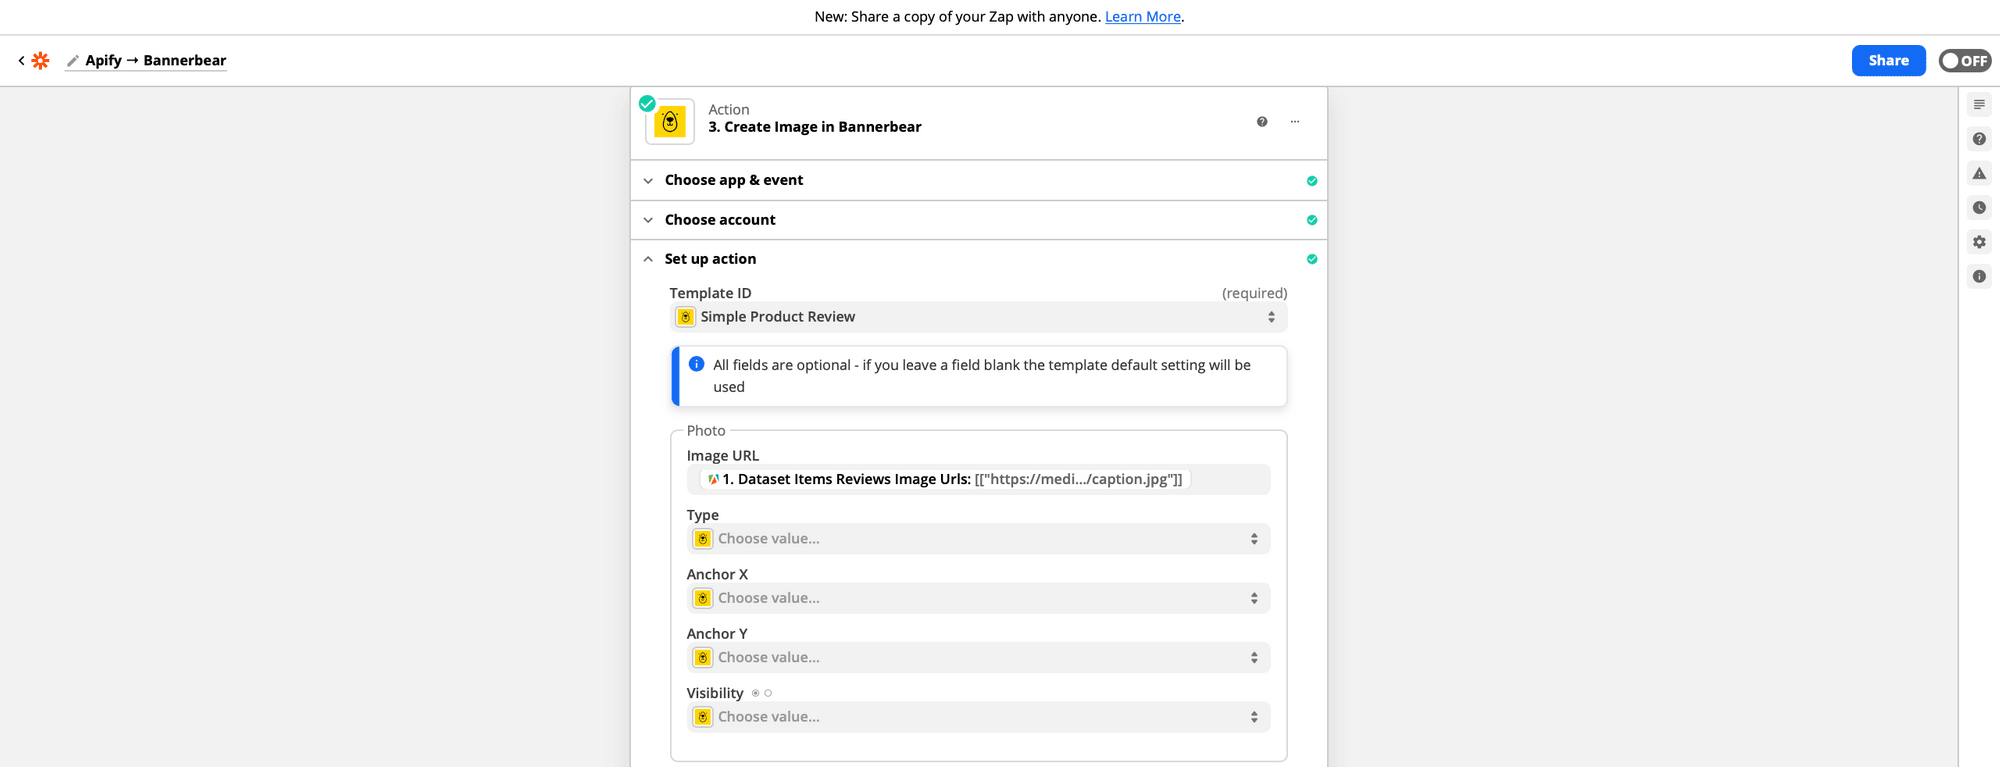
You can select the longer Dataset Items Reviews Text, alternatively you can use the shorter Dataset Items Reviews Title:
Click _ Test & Review _:
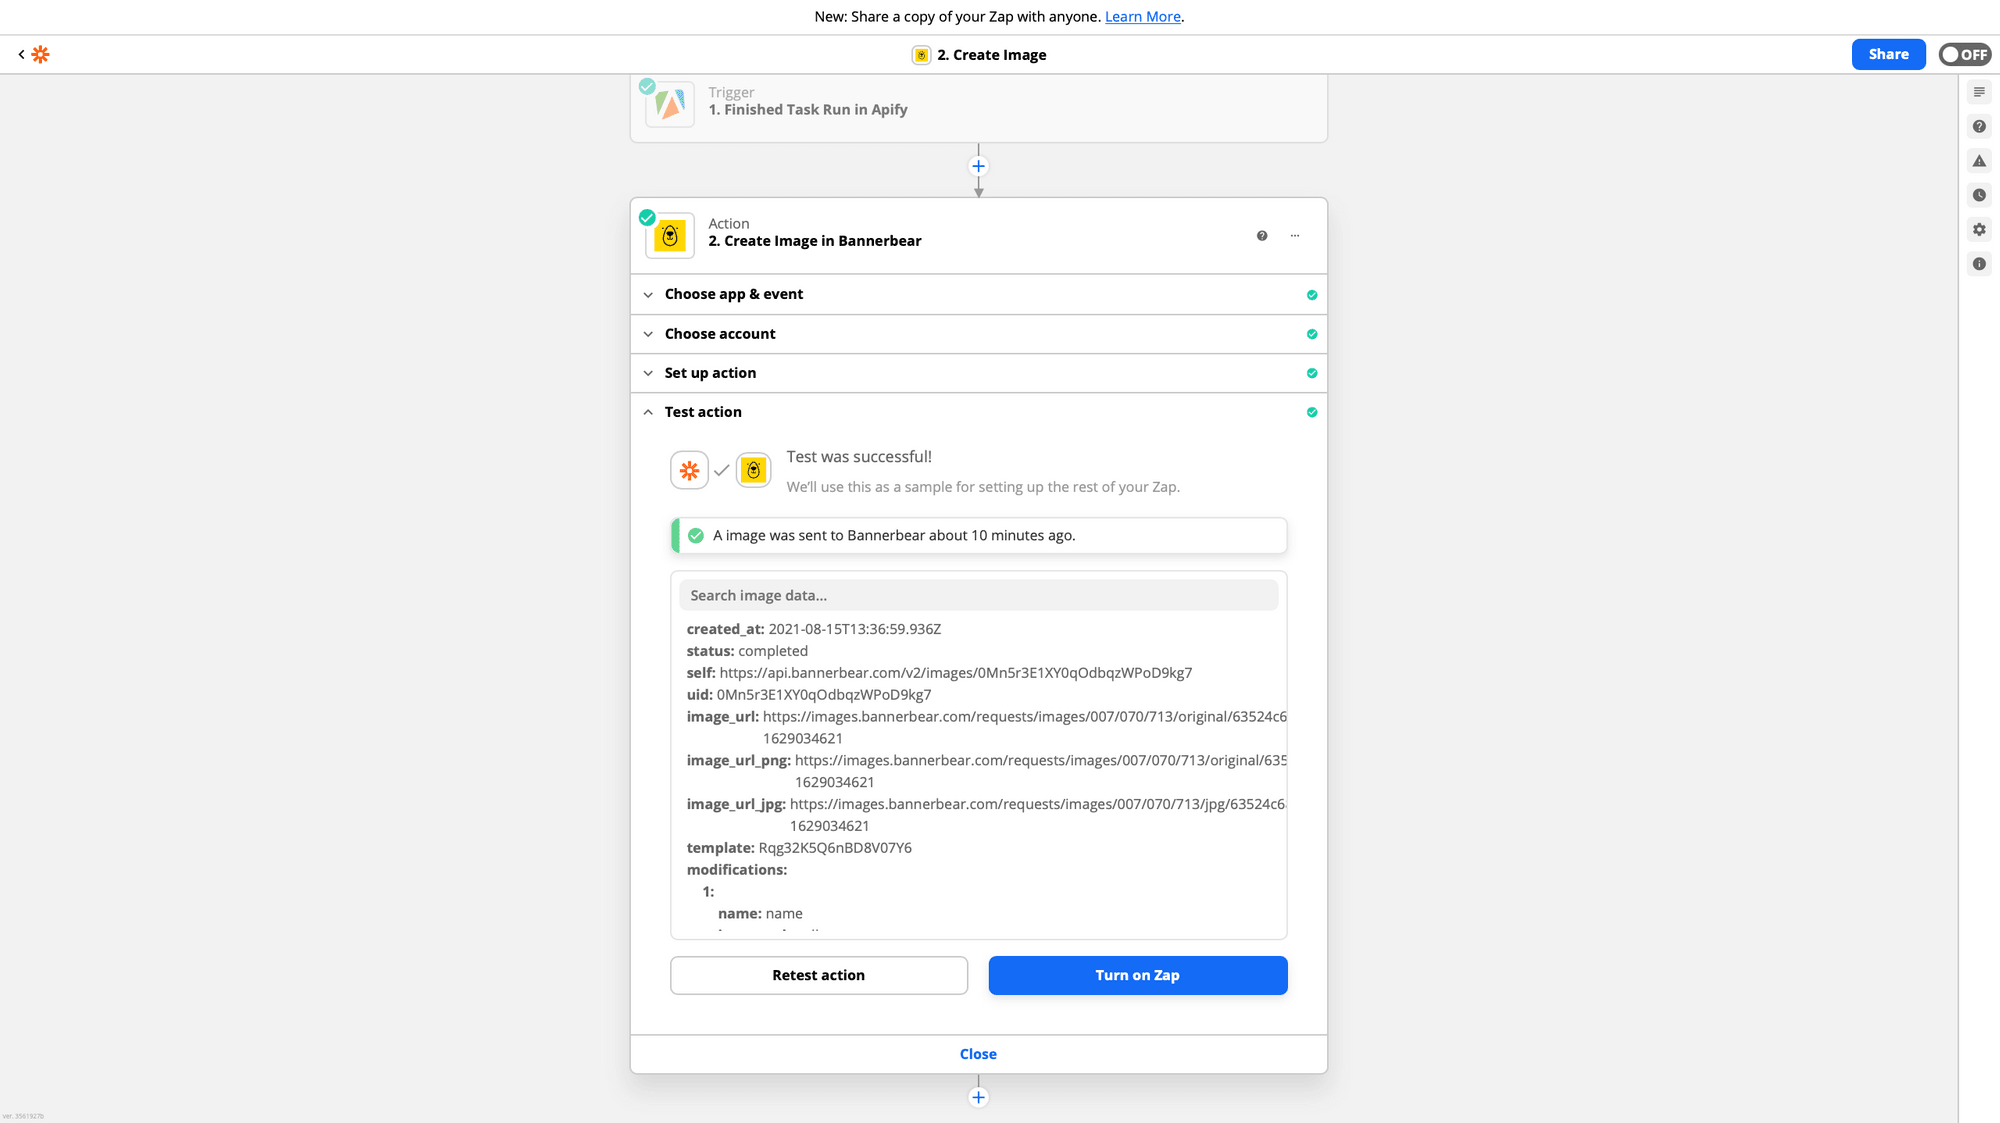
Turn on your Zap to test your automation!
You may want to send the final image to other social media accounts etc. To do this, simply add more Zaps.
Bulk process with Zapier Formatter
Instead of processing one review daily, you may prefer to scrape more reviews at once. To do this,
- increase the
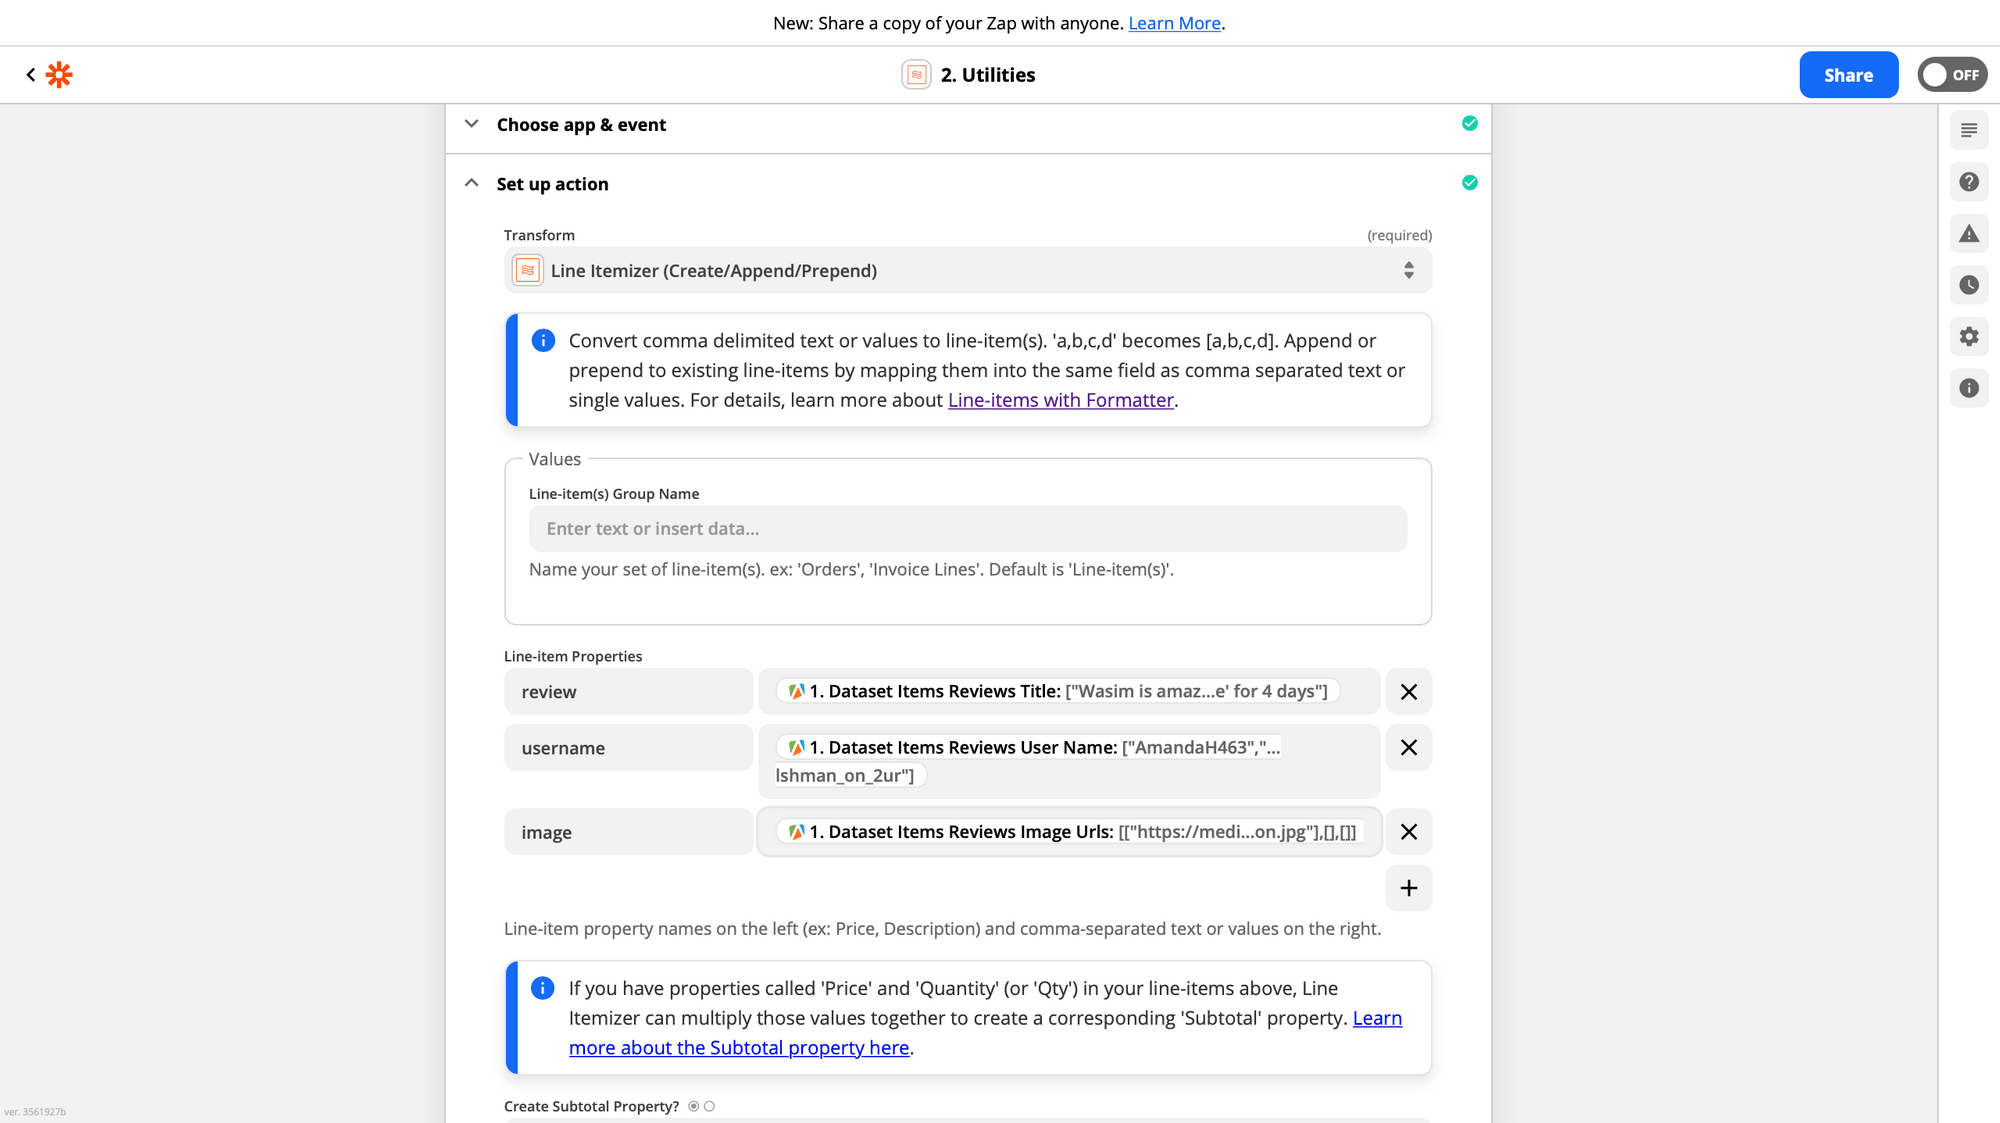
maxreviewscount in Apify - in Zapier, add an action after the Apify trigger to extract the data using the Formatter's Line Itemizer. This converts comma delimited text or values to create more than one set of line item(s), 'a,b,c,d' becomes [a,b,c,d].
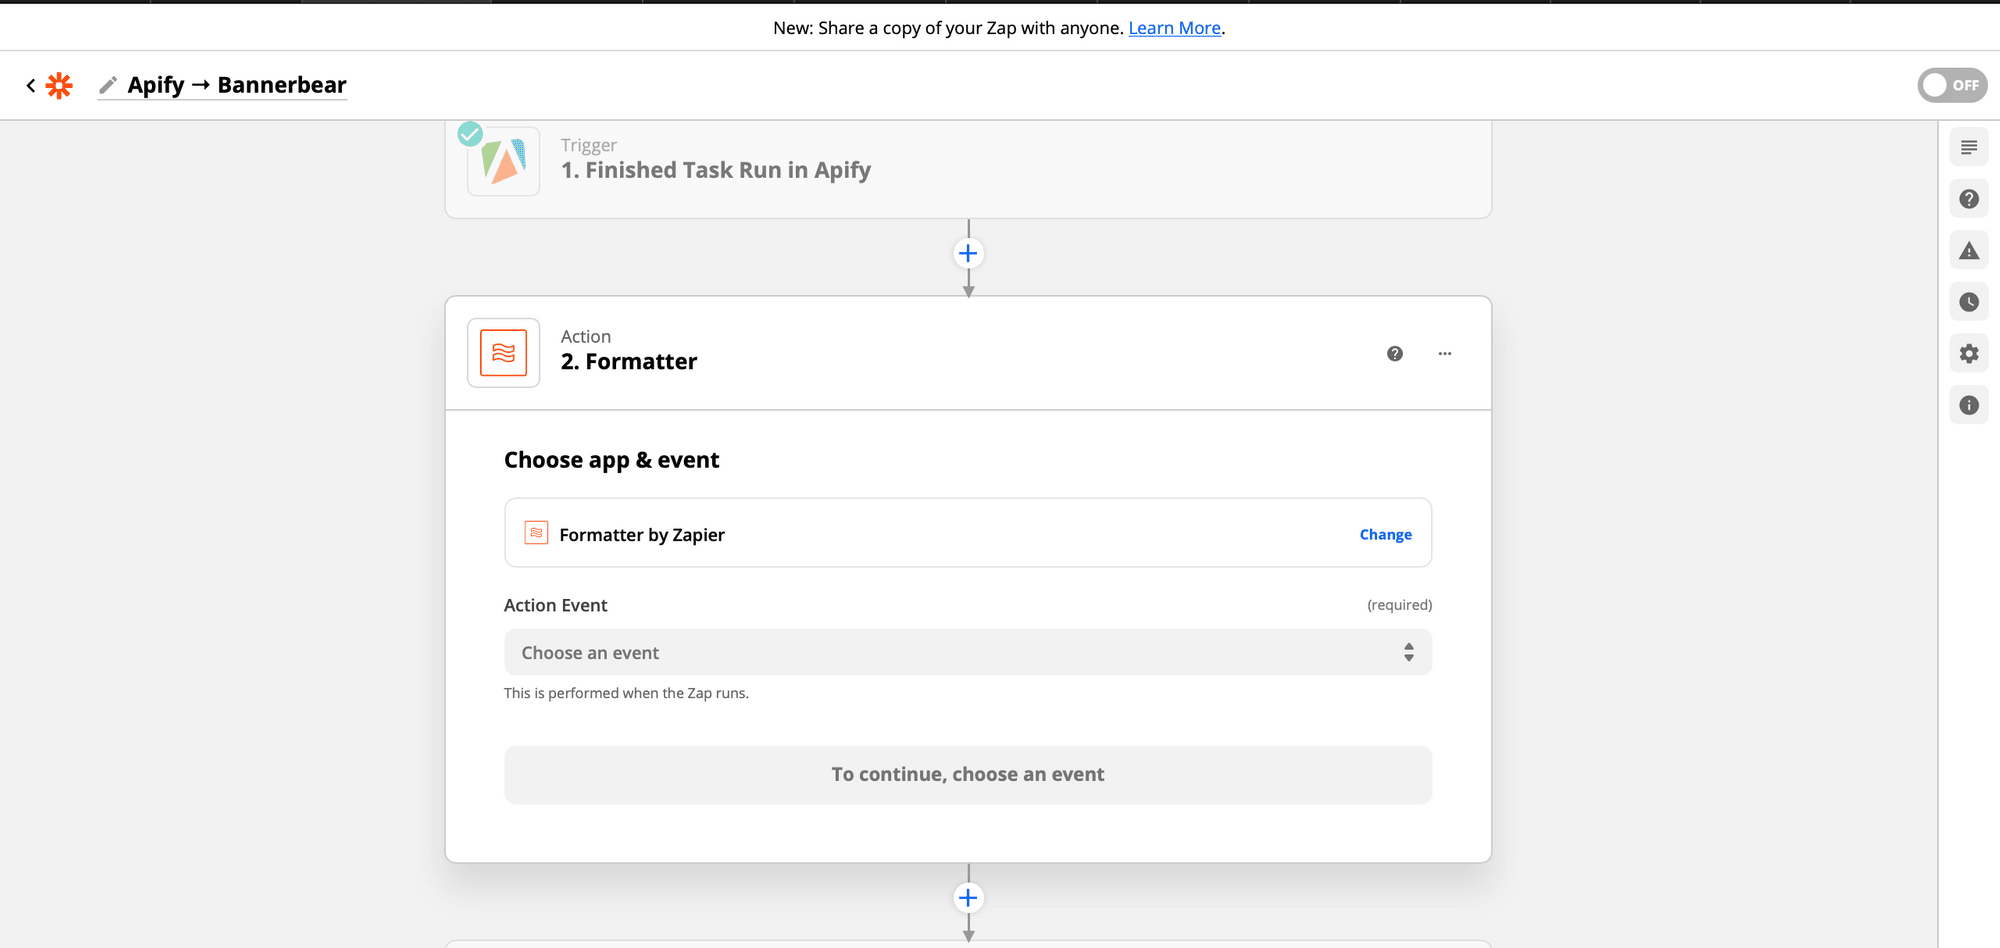
Choose Formatter by Zapier as the app. Click the Action Event dropdown menu and select Utilities:
In the Set up action section, click the Transform dropdown menu and select Line Itemizer (Create/Append/Prepend)__.
In the Line-item Properties section, add your line items:
- In the field on the left, enter a property name.
- In the field on the right, click the field and select a trigger field with information formatted as comma-separated values:
Note that: Formatter's line-items will only convert comma delimited text or values to line-item(s).
If the line item transformation is successful, the information from the trigger will be converted into line items.
Next, add a Bannerbear action where the result of the Formatter step will be used. In the Set up action section, click the dropdown menu for a field, then select a line item from your trigger step.
And _ Voilà! _
Next Steps
Why not try enhancing this workflow by replacing the images with auto-generated animated gifs? We have a tutorial that fits various use cases.
You might also want to create images with Apify Booking scraper, Airbnb scraper, or Booking Regions Scraper. The principles are the same!