How to Map Fields from an Airtable Base onto Bannerbear layers
Contents
This tutorial will show you how to pass data from your existing Airtable base, onto Bannerbear fields.
Bannerbear is an image generation API that helps save time. You can automate image creation for websites and social networks. With the free trial, you can generate up to 30 images.
This tutorial will show you how to pass data from your existing Airtable base, onto Bannerbear fields.
What you will build
Create Airtable fields in an existing base to match the Bannerbear template to be linked to. For this tutorial, we will be auto-generating product rating visuals. Bannerbear will pull data from Airtable and generate unique, branded image cards.
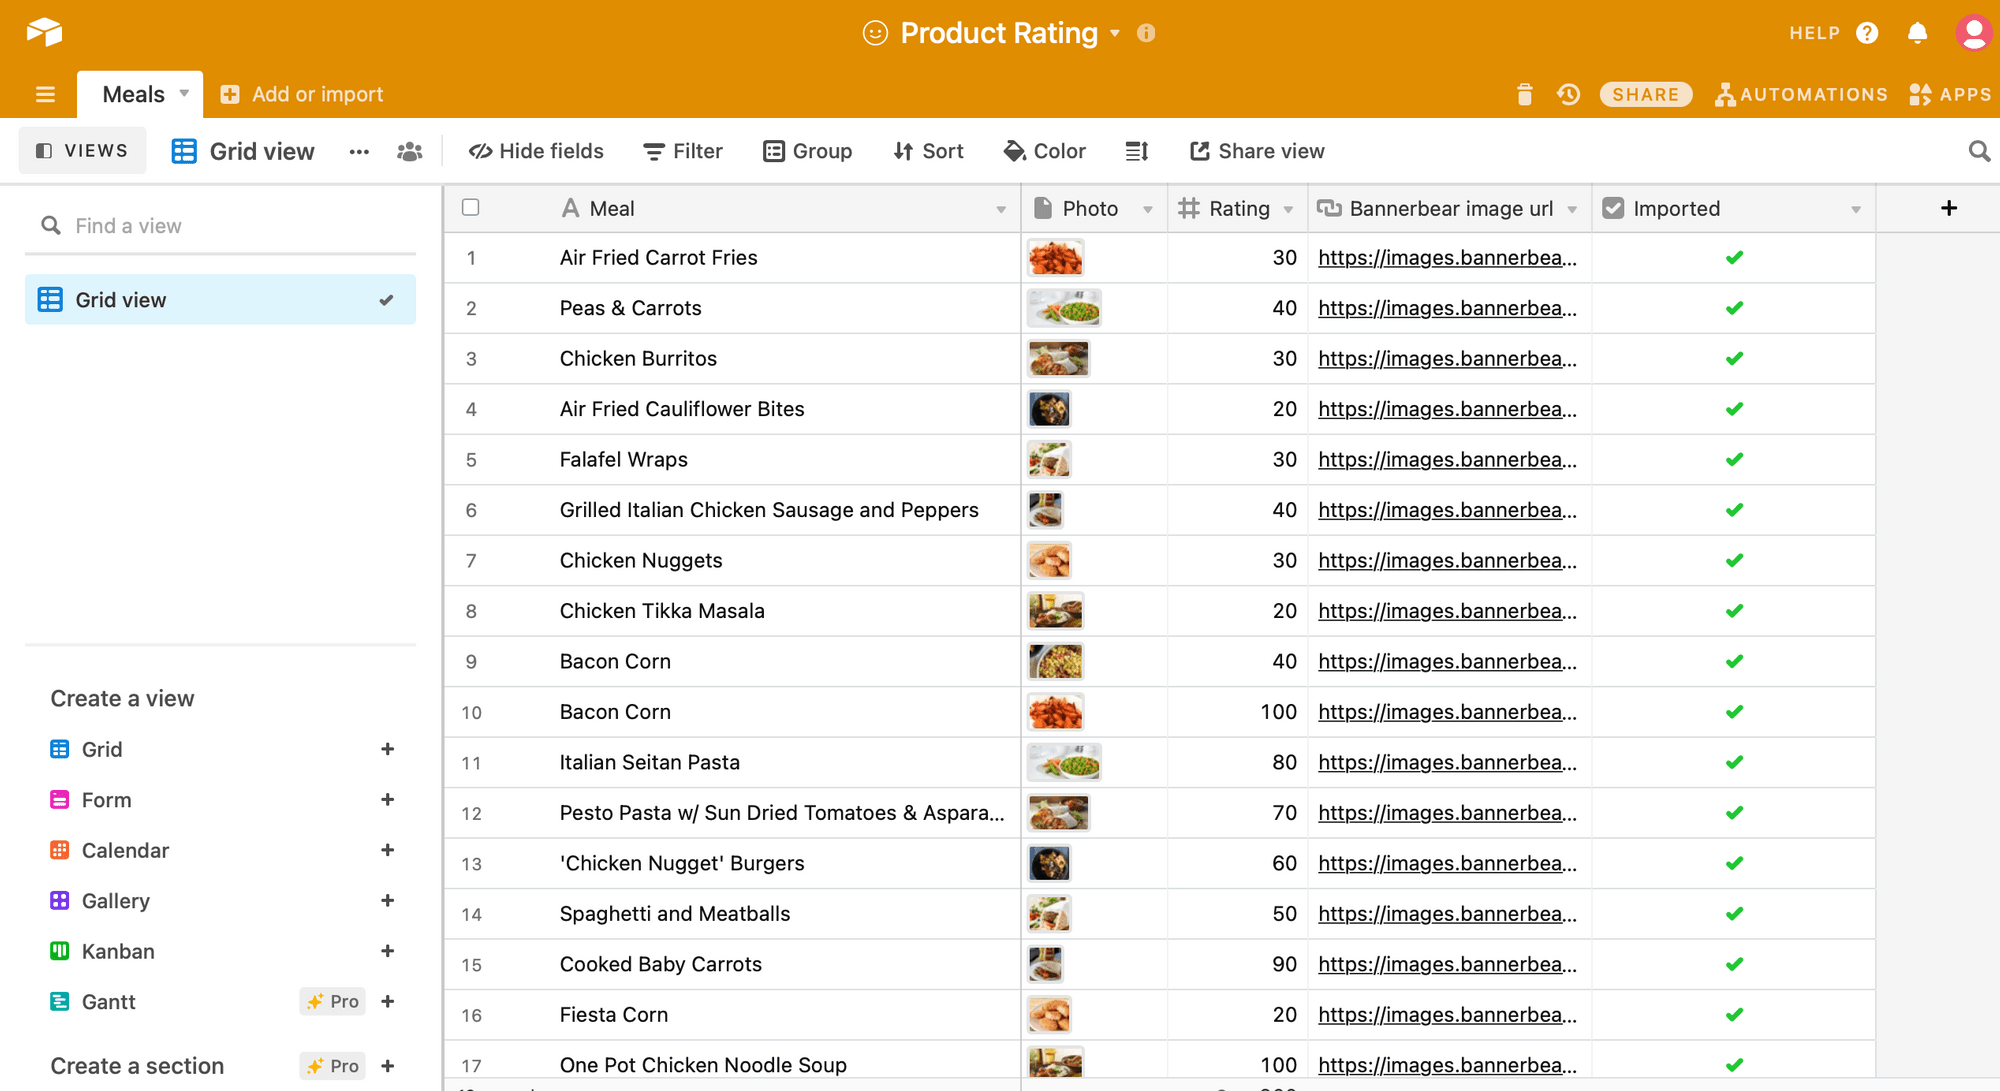
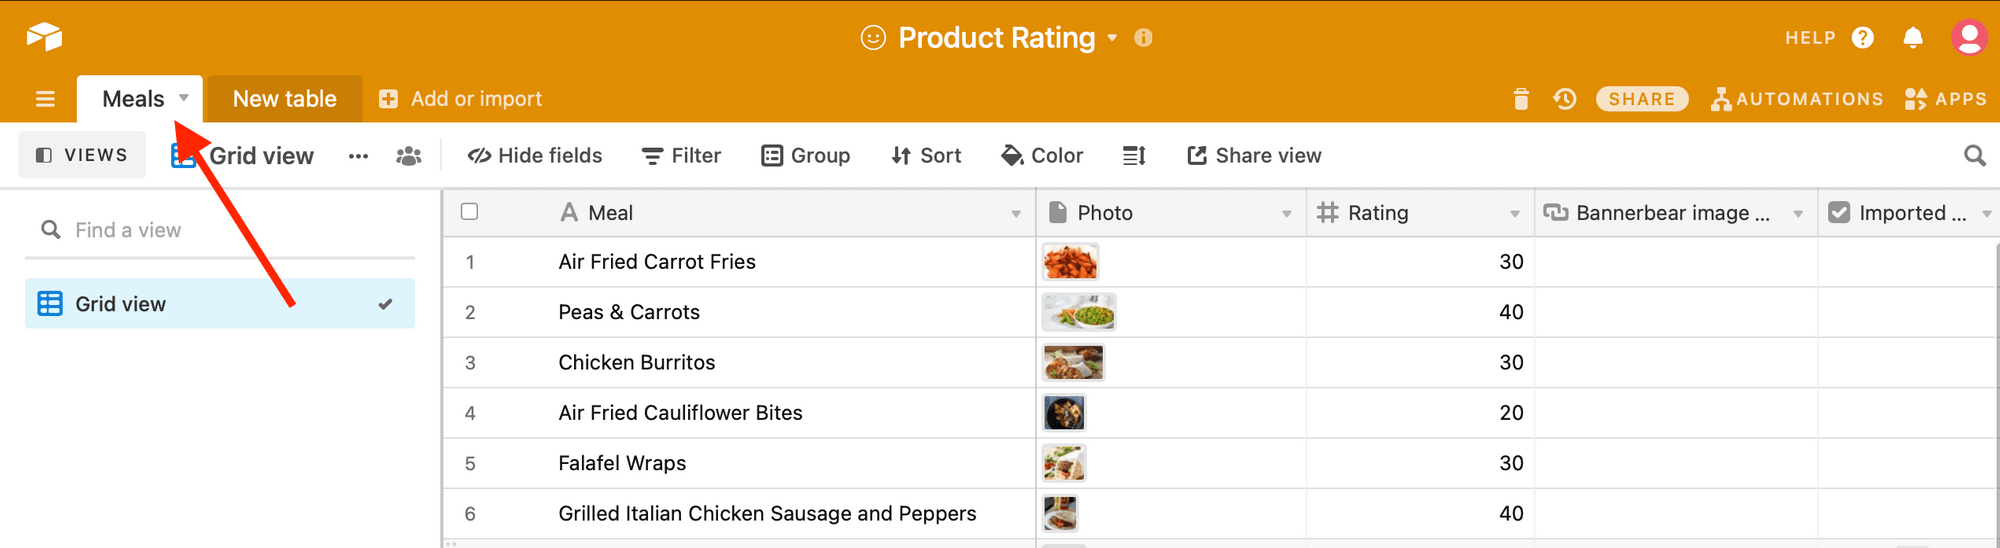
Here's what your Airtable base will look like:
Examples:
The end result will look like these:


Create Airtable fields
Airtable is a spreadsheet-database hybrid that allows you to manage your social media content, create a CRM database, build collaborative apps and more!
We will need a pre-populated Airtable base to get started. The Bannerbear template we will use later in this tutorial will take a few inputs - Meal, Photo and Rating. The photo will be the background image for each rating.
Create star ratings of any size or colour by sending a number from 1-100 into your Rating field. 20 represents one star while 100 represents five stars.
Create these fields in the Airtable base:

The fields are dynamic and can be replaced depending on the use case.
Additional fields to receive images
You can add additional fields to receive the static images generated on Bannerbear. This will export the generated images to Airtable.
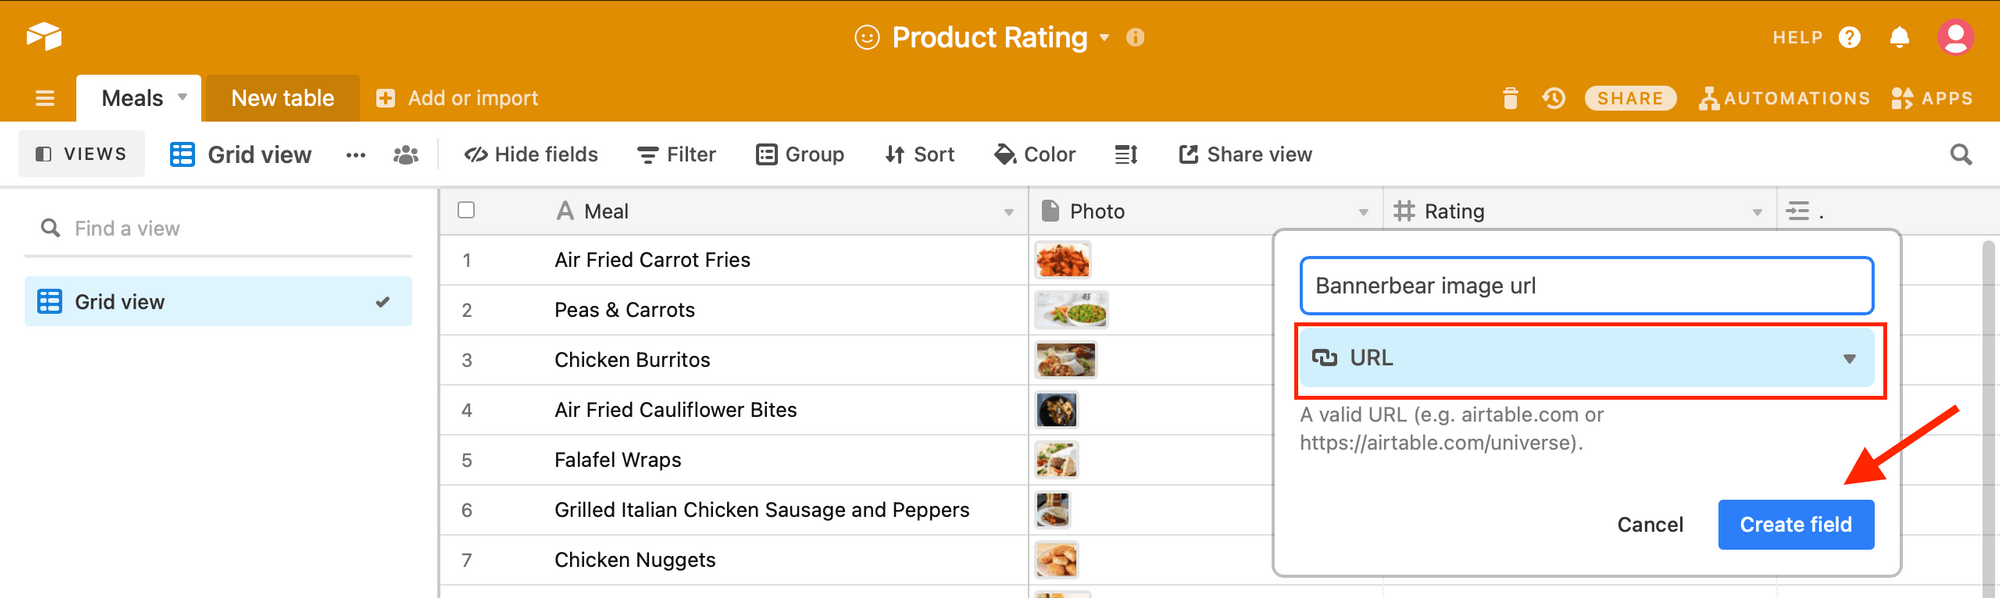
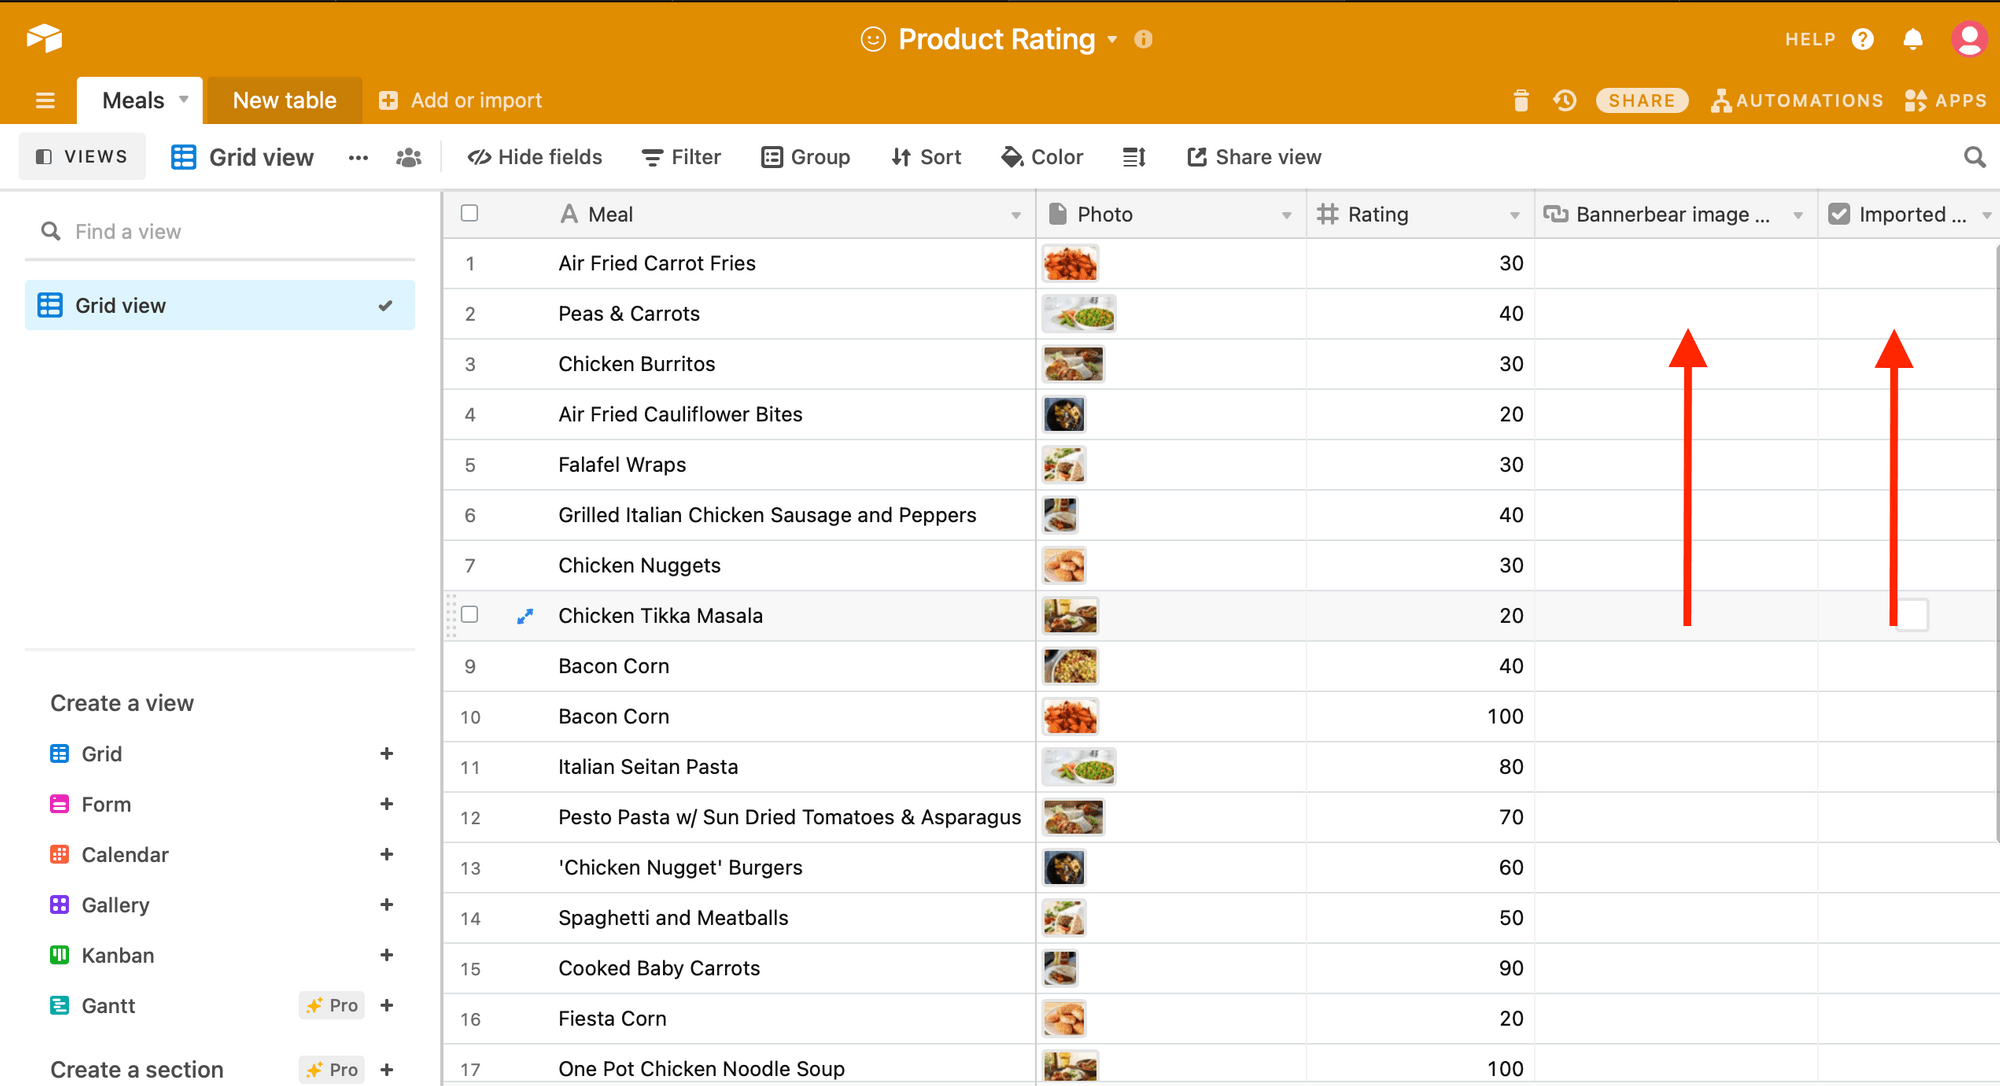
Create a URL field to receive the auto-generated images. Name this field ' Bannerbear image url':
Note that this is not a mandatory step as all your images will be listed in the Bannerbear dashboard.
Add a checkbox ☑ field named imported to your Airtable. The imported (checkbox) will show up as checked once Bannerbear has imported something. This is useful to prevent importing things multiple times, and also useful for re-importing (by unchecking) rows that you want to re-generate.
Copy Base ID and Table Name
Next you will need some Airtable credentials to pass data to Bannerbear.
Every Airtable Base has a special Base ID and Table Name that you need to use to connect with the Template.
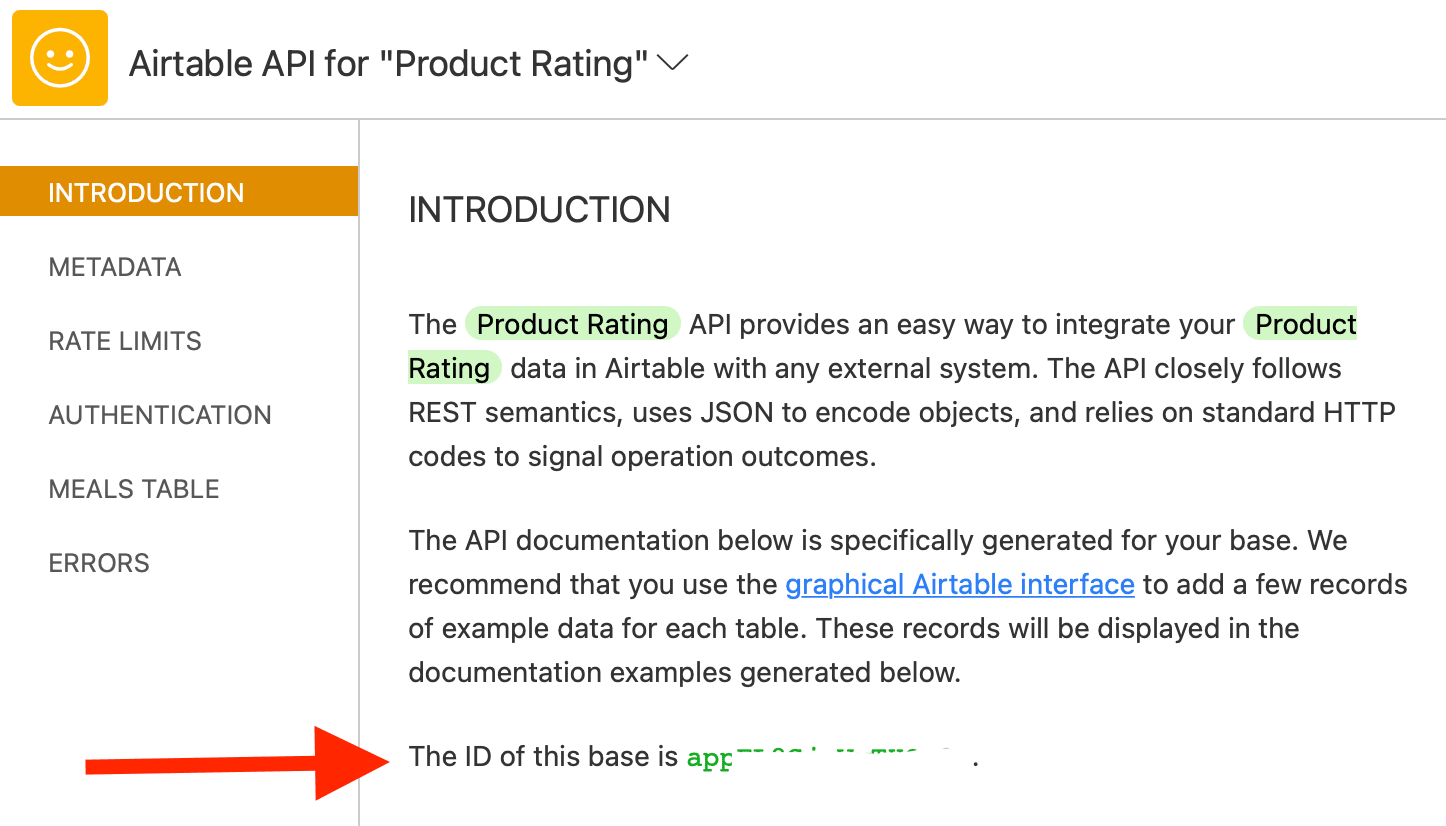
Navigate to the Help section on Airtable to find your Base ID. You can find the Base ID in the API Documentation :
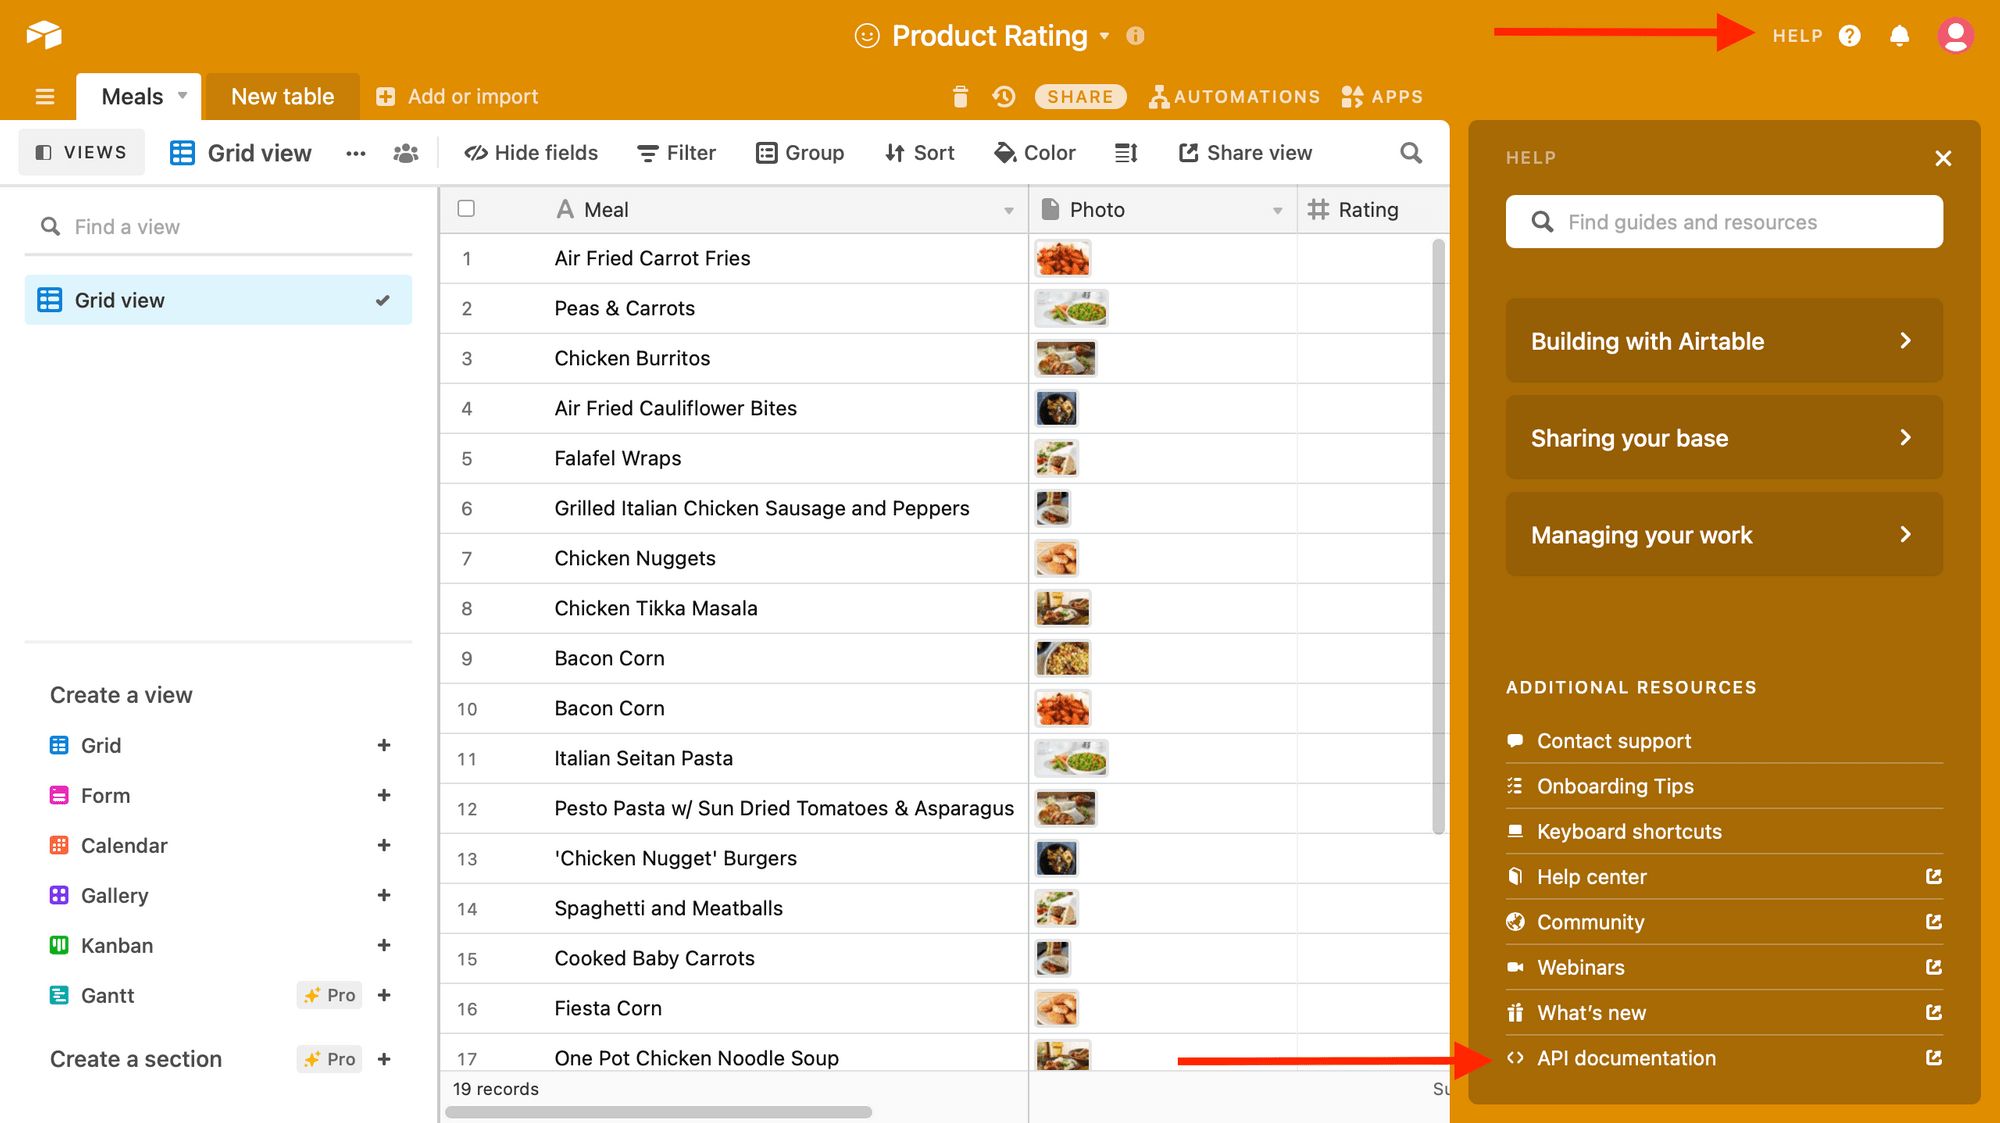
The Base ID is an alphanumeric ID with the word app at the start and is shown at the top of the Airtable API Documentation page:
The Table Name is the table inside the Airtable Base that you are using. In this case, the Table Name is “Meals”:
Copy the Base ID and Table Name to your clipboard.
Note that the name is case sensitive and may not be recognised by Bannerbear if varied.
Get Airtable API Key
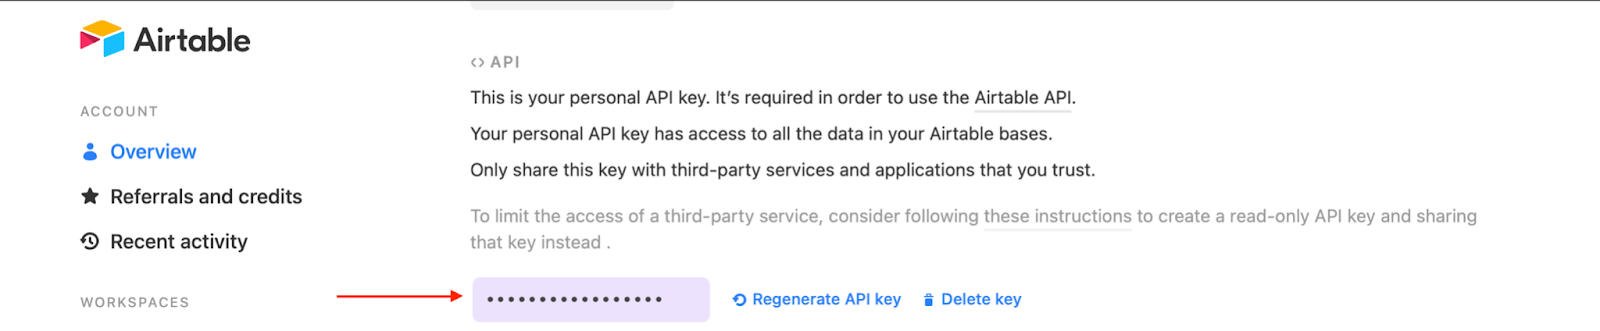
You will need to enter your Airtable API Key to integrate with Bannerbear. Your API key is on your account page on Airtable.
In your Account Overview page, under the API heading, Generate API key.
Copy the key to your clipboard:
Create a Bannerbear project
Navigate to the Templates section. Create a new project in Bannerbear called "Product Rating" (or any other name you like).
Add sample template
There are ready made templates on Bannerbear so you can choose to create your own template or Browse Template Library to add a sample template.
All templates in Bannerbear are image-based templates.
To match the data in the Product Rating Airtable base, add the Simple Product Review template to your projects:
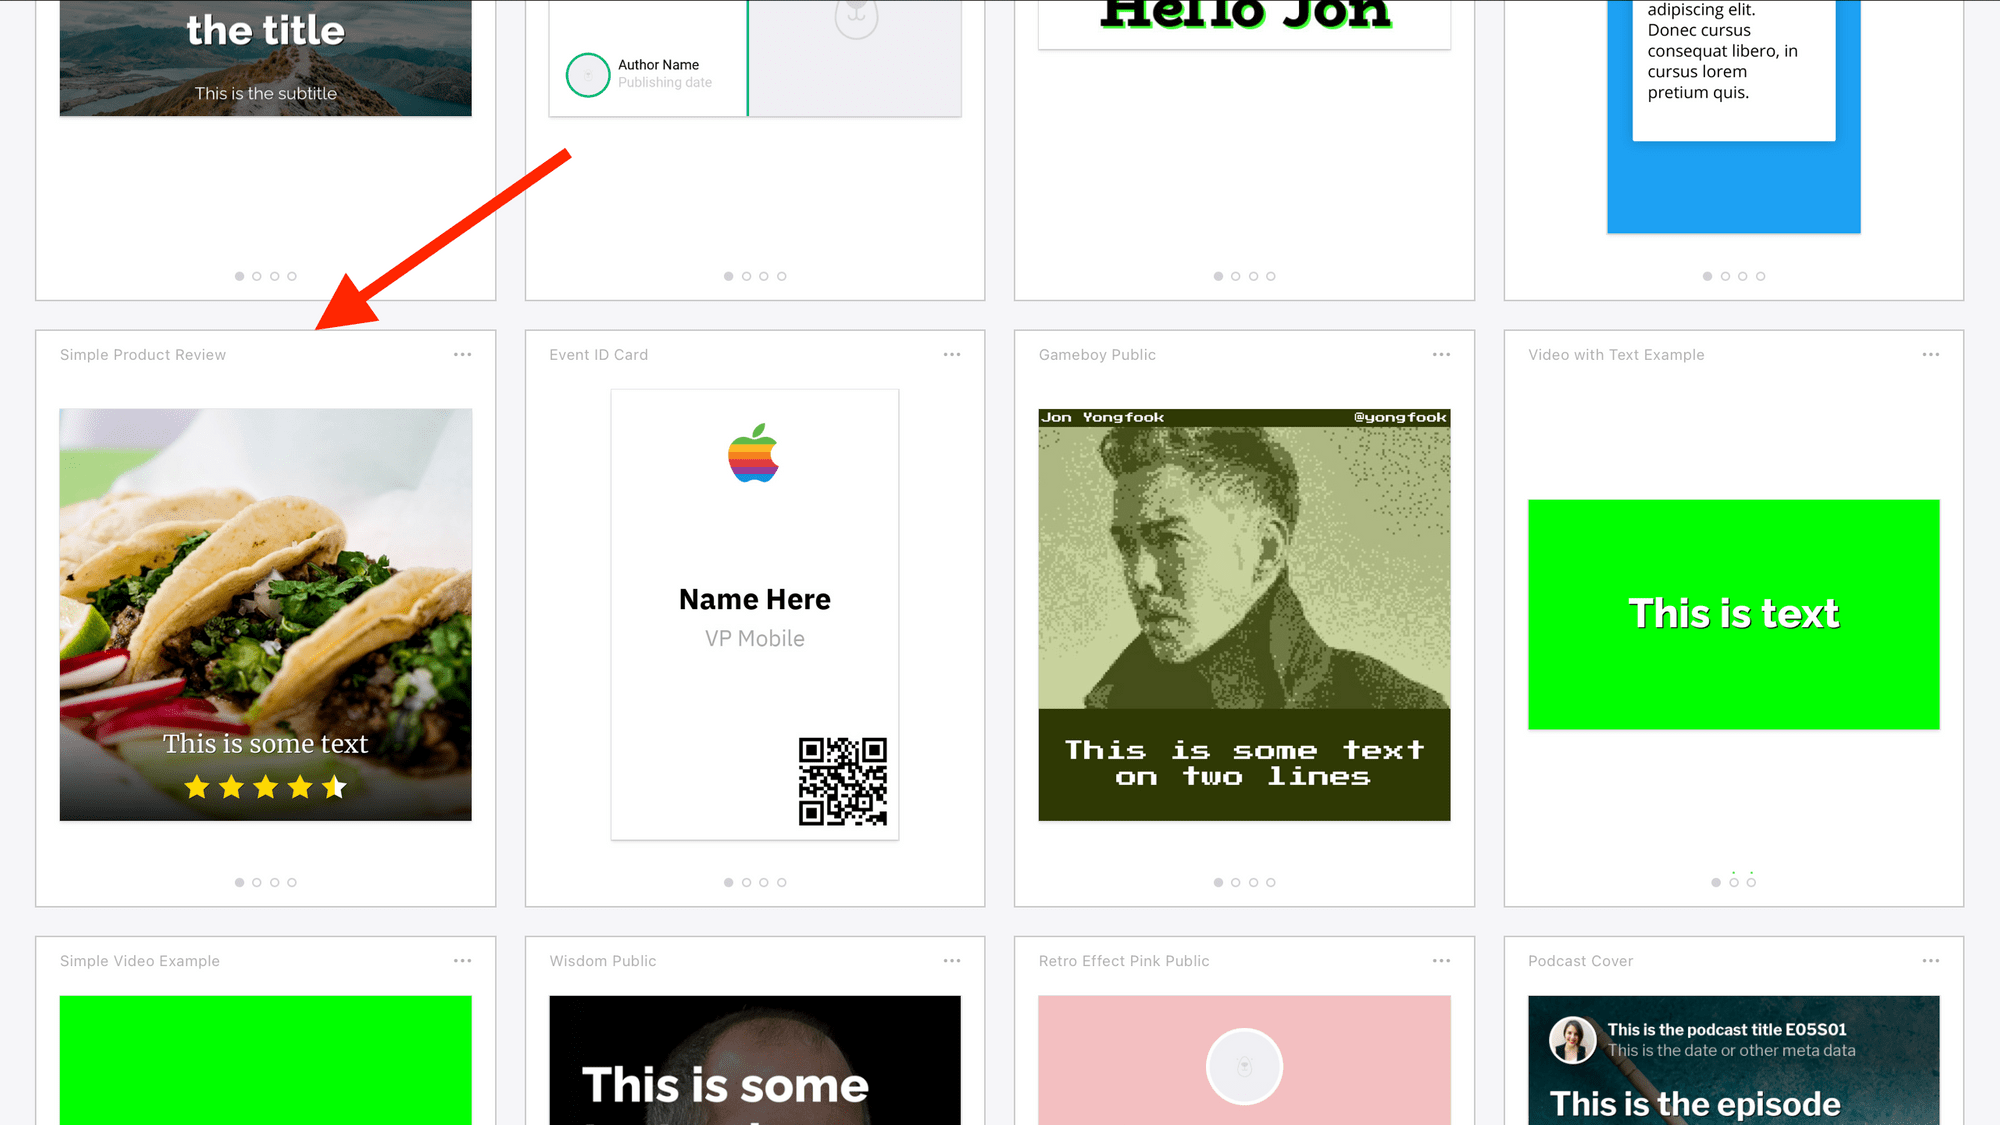
These conveniently have layer names that match the Airtable columns, which is how data gets imported from Airtable to Bannerbear.
Customize the template
If you want to, you can customize the template at this stage. Bannerbear allows the flexibility to customise an existing template according to your brand guidelines.
You can rename the layers to match the Airtable fields.
This is an optional step. You can simply come back at a later stage and edit the template to add some custom design elements.
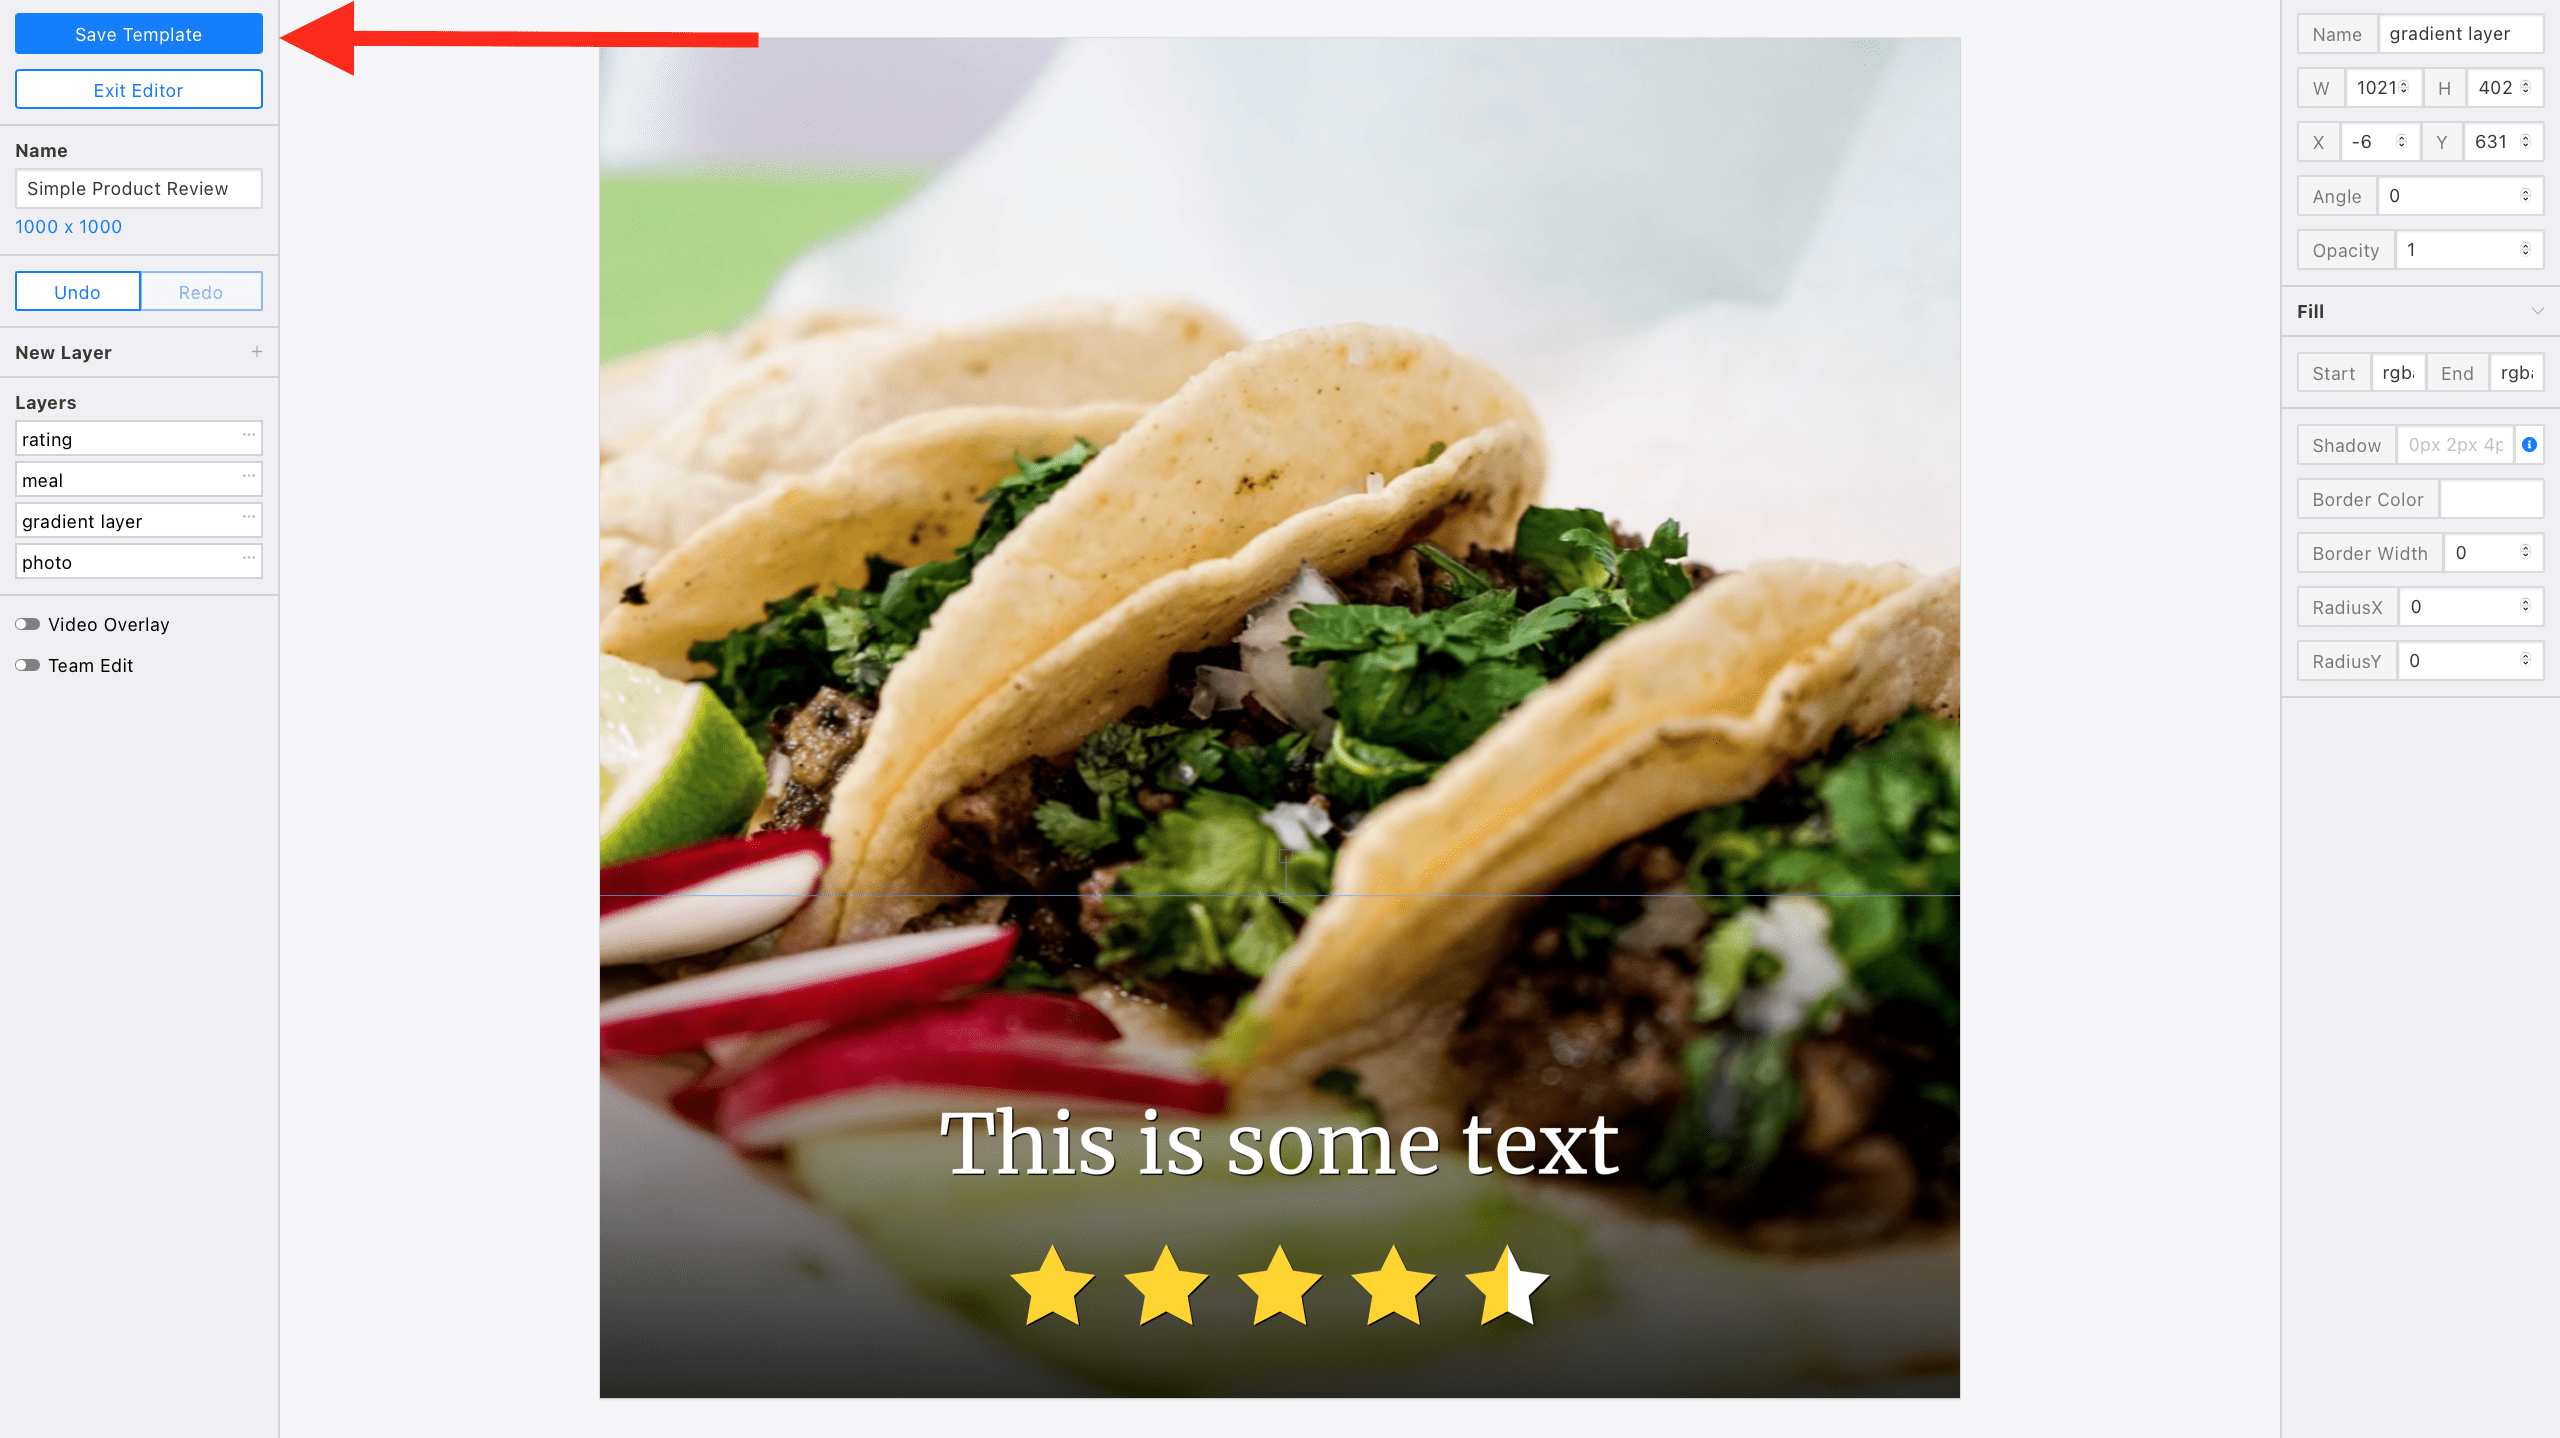
Save your template and exit editor.
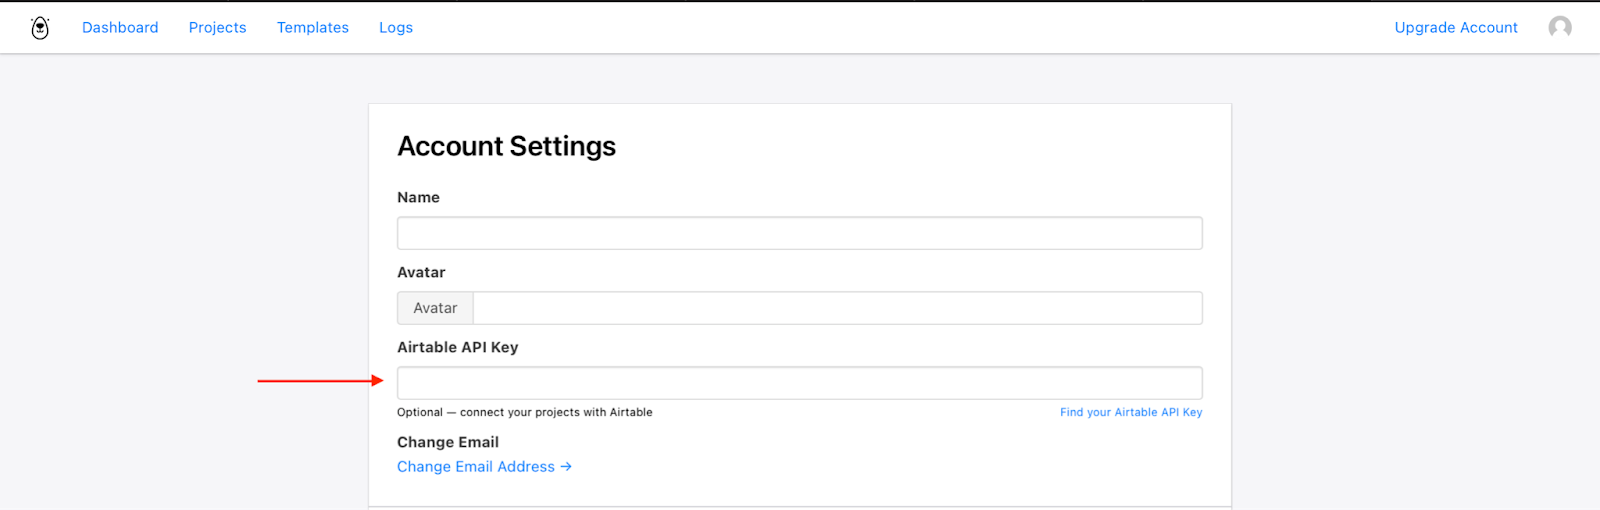
Pull data in from your Airtable base
Add your Airtable API Key to get started.
To fetch data from Airtable, add the copied Airtable API Key to Bannerbear in the Account Settings section.
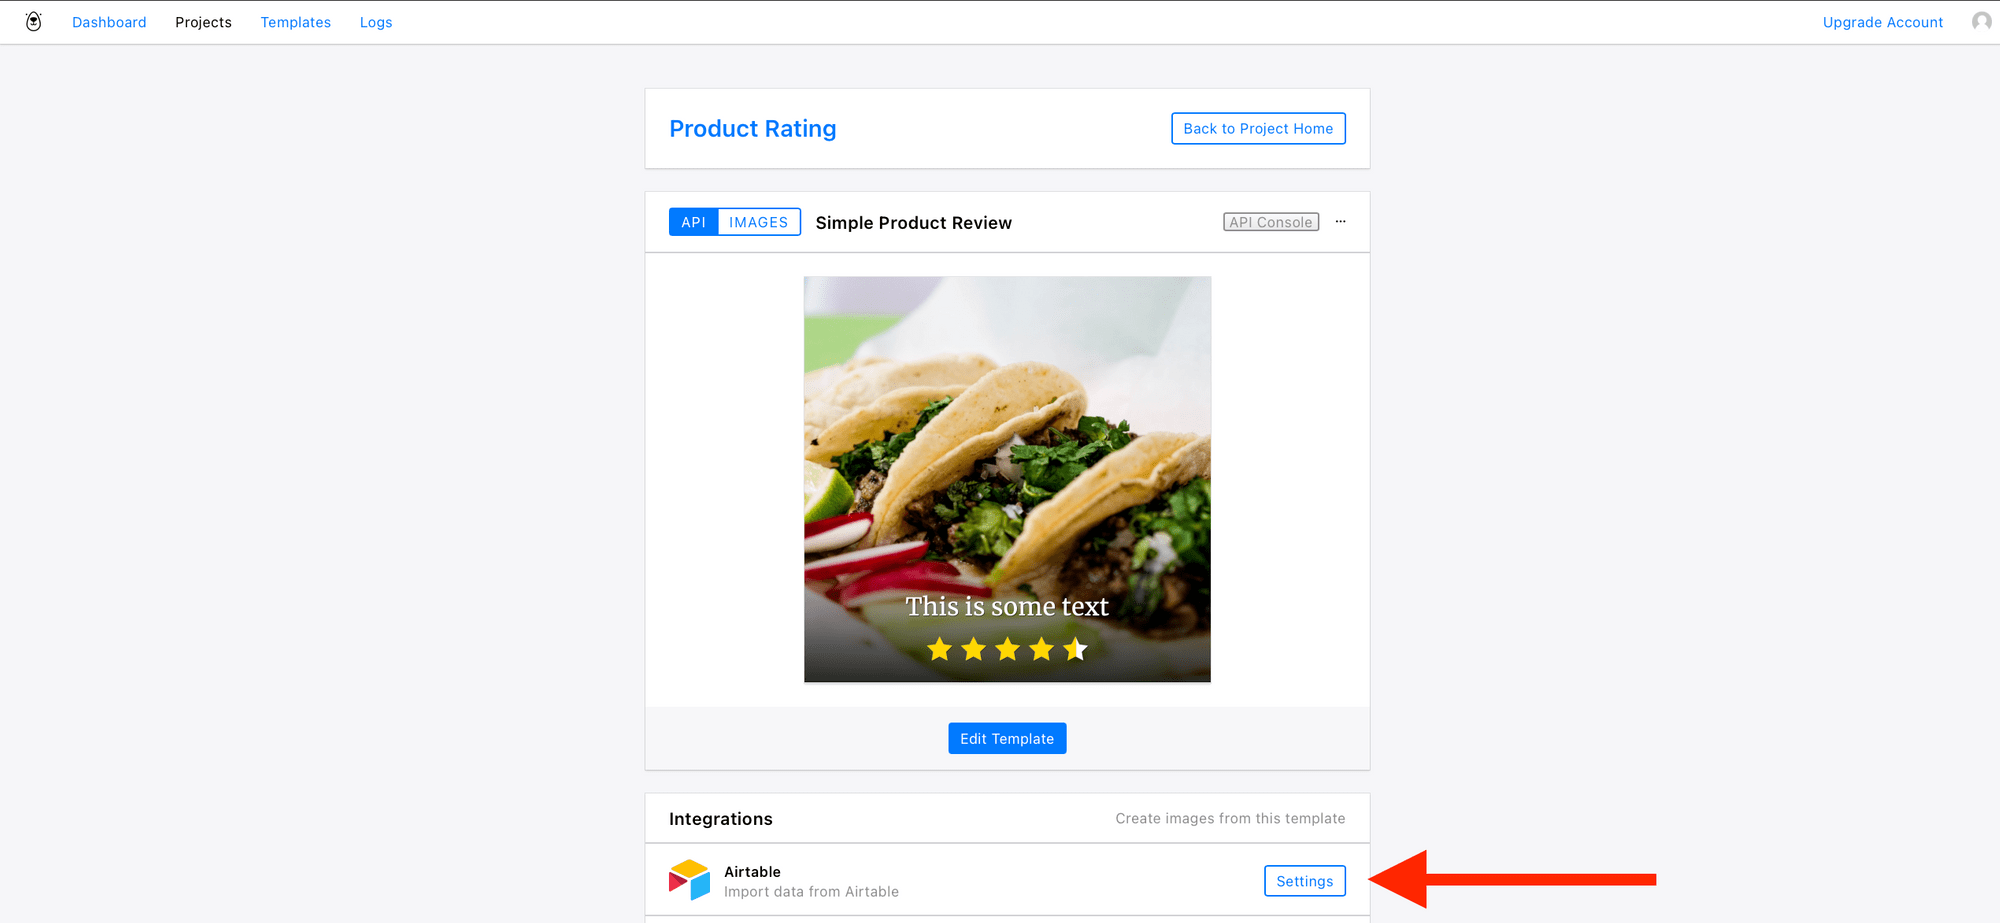
Connect Airtable to the template
Navigate to your Templates in the Projects page and scroll down to Integrations to find the Airtable icon - click on Settings :
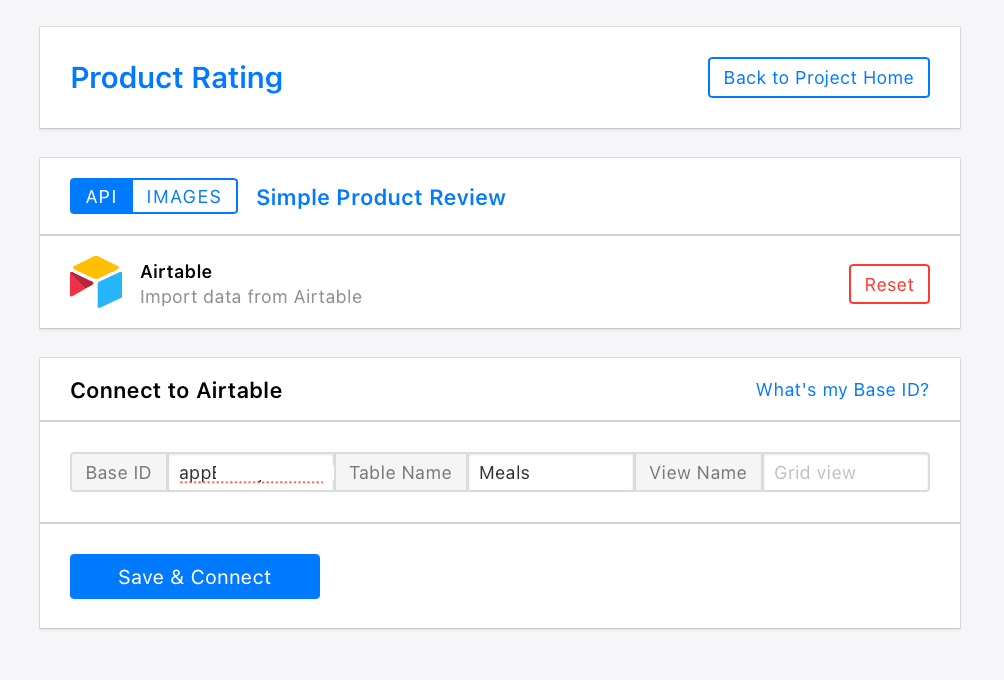
Go to the Airtable integration page and select Existing Airtable Base.
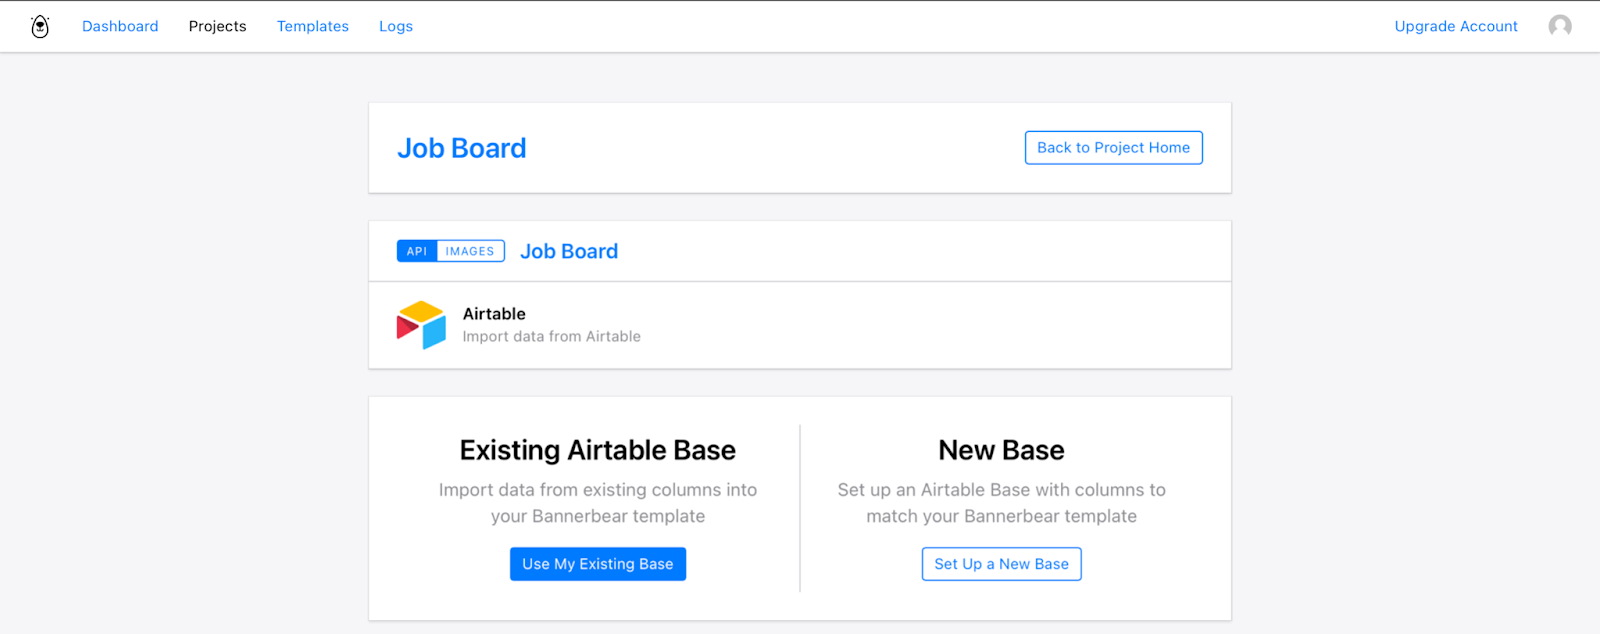
Paste the Airtable Base ID and Table Name. The default view name is Grid view, this can be changed depending on the view in use.
Map Airtable fields
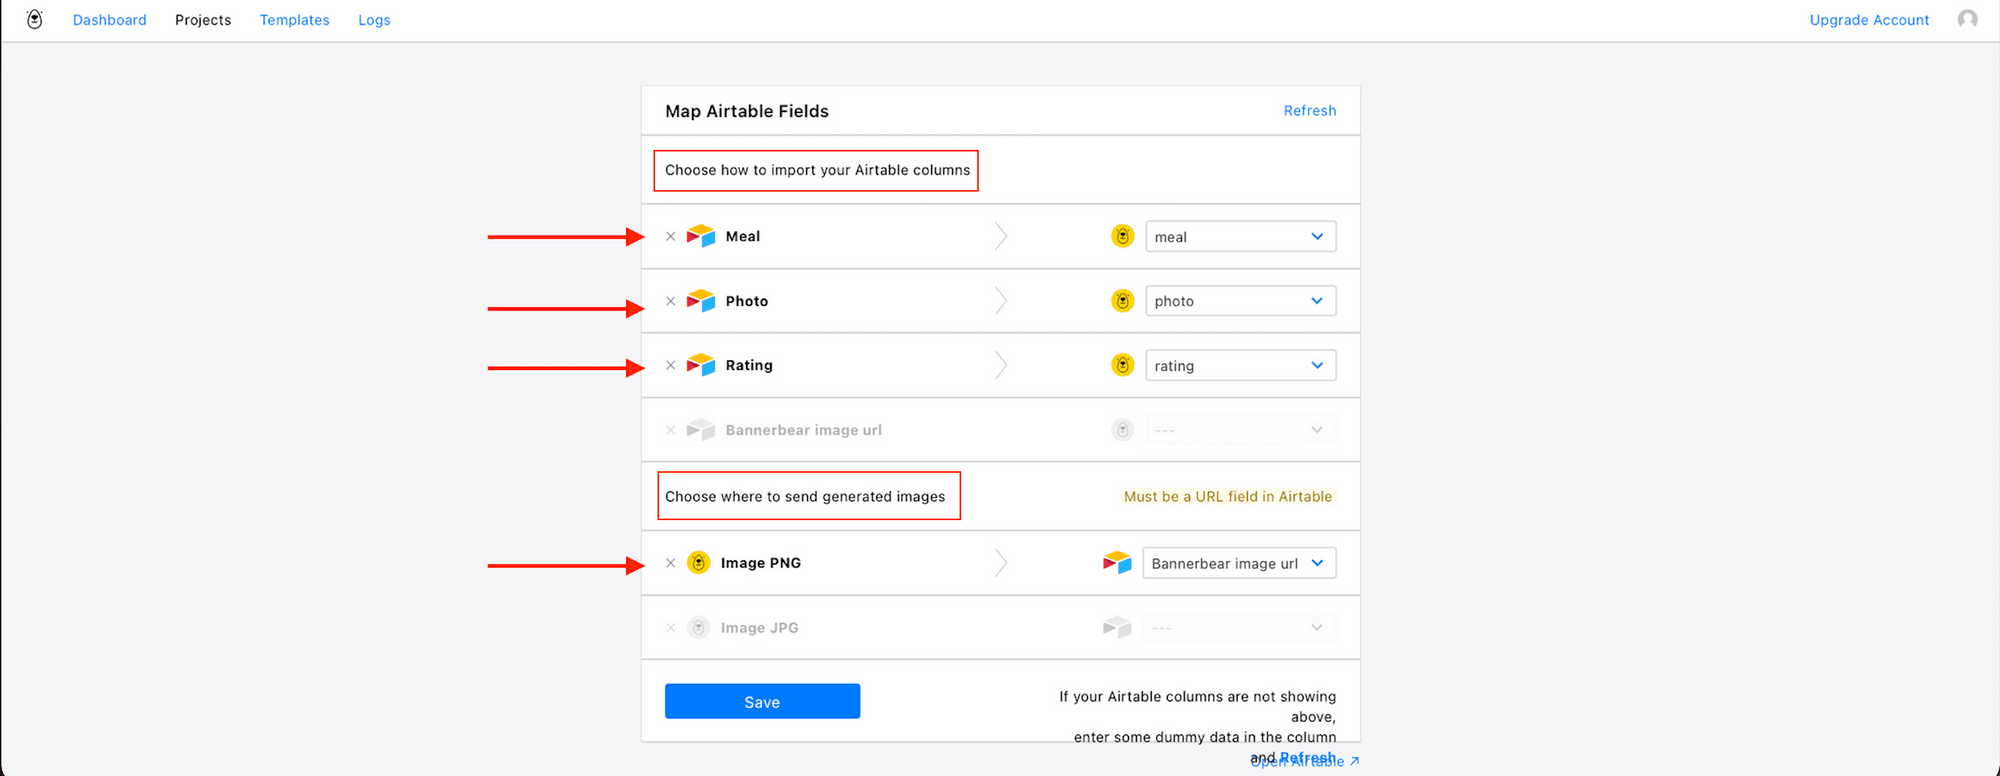
Next, link your Airtable columns to the appropriate Bannerbear fields.
First, choose how to import your Airtable columns. Match the fields to the dynamic layers in the Bannerbear template. Only the fields Meal , Photo and Rating will be passed in this tutorial. The Bannerbear image url will be disabled in the import section as we aren't importing Airtable data from the field.
Next, choose where to send generated images. Select the Bannerbear image url from the dropdown menu. This will send your generated images to the specified field on Airtable.
Note that Bannerbear doesn't see columns that have no data in them. So if all your columns do not show up in the mapping tool, put in some dummy data first into at least one row.
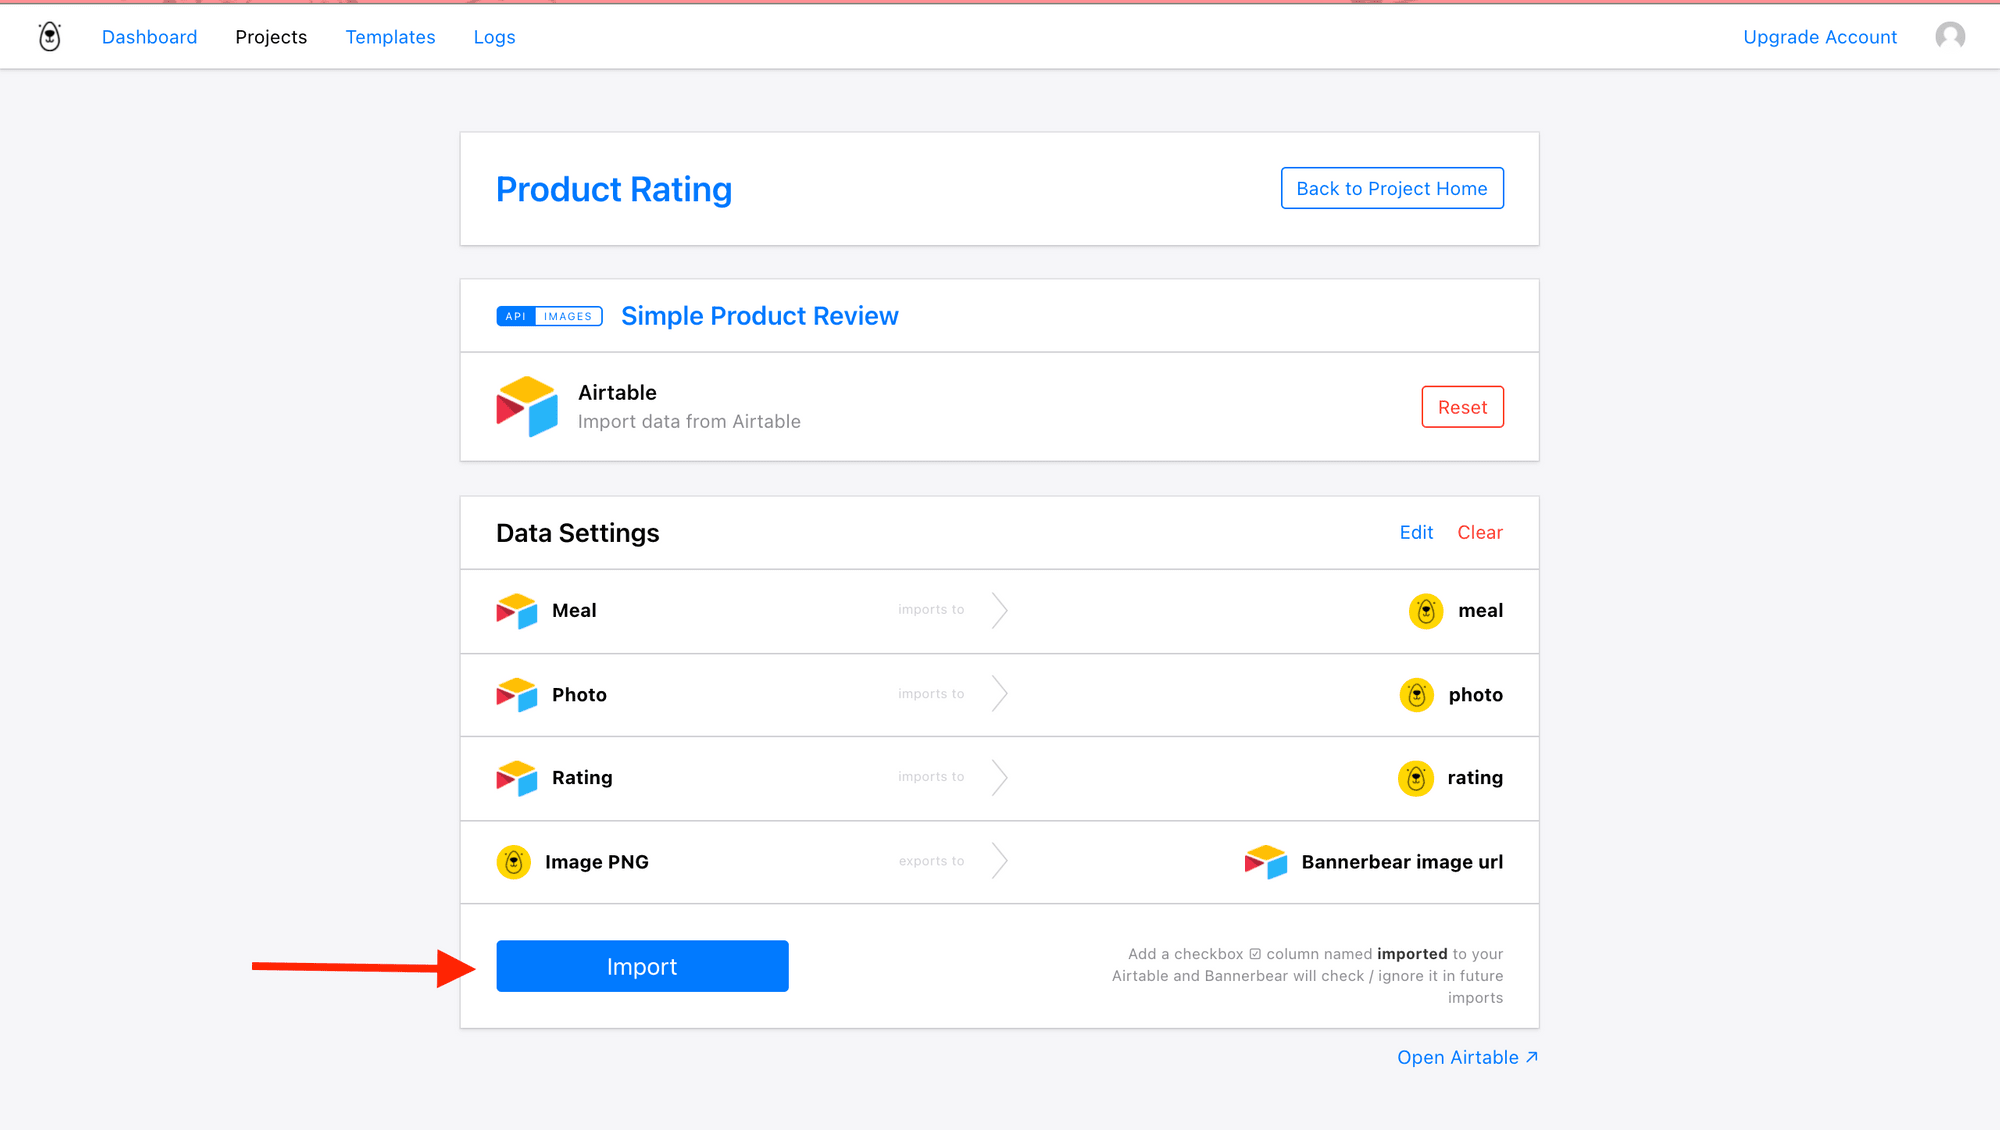
Next hit the Import button to import the desired Airtable columns to Bannerbear. This simultaneously exports the generated Image PNG to Bannerbear image url on Airtable.
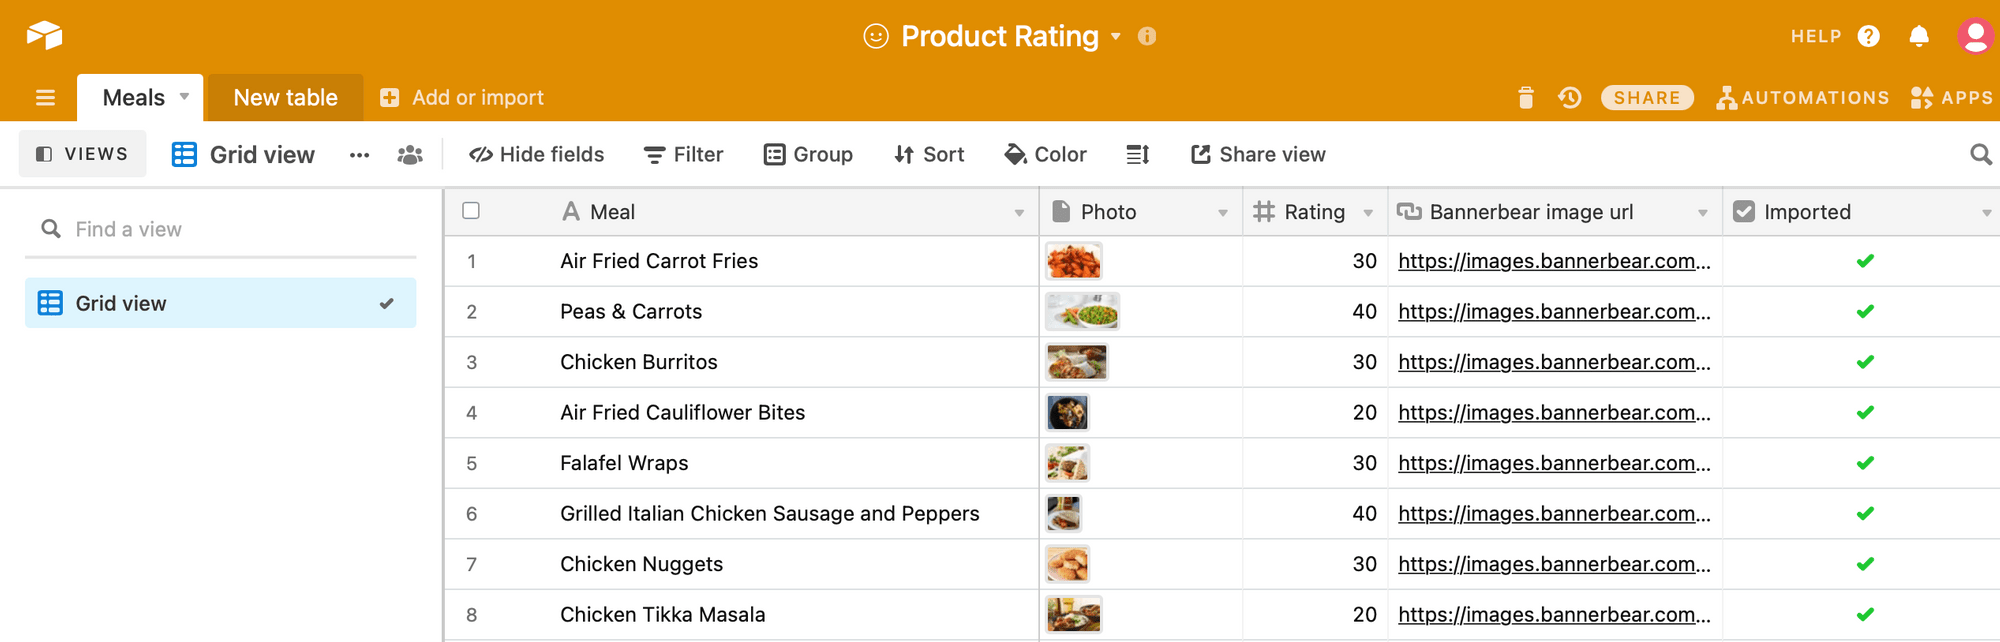
Export Image to Airtable
The Bannerbear image url field on Airtable will be populated with the final image that Bannerbear generates. The image urls appear automatically as Bannerbear generates the images.
Click on the individual URLs to view / download the newly-generated images.
And that's it! You now have a huge set of branded image cards generated in just a few seconds :)