
How to Automatically Merge Video Clips, Voiceovers, and Subtitles with Bannerbear
Contents
Video content has evolved quite a bit from what it was in the early days of the internet. Production quality has increased, different formats and trends have emerged, and how we consume content has changed.
As mobile devices become increasingly pervasive in our daily lives, videos are watched on the go, in the background, and on various devices. Watching conditions are often less than ideal. One result of this shift: 85% of Facebook videos are watched without sound.
People’s attention spans are dwindling; even interesting videos risk losing viewers who can’t follow along. But there’s good news: you can considerably increase the chances of your content being watched just by including subtitles.
In this article, you’ll learn how to create a beautiful, cohesive video by combining video clips and a voiceover audio clip. Automatic transcription will tie it together and ensure your final product is viewer-friendly. The best part? We’ll make it all happen with a nocode automation so you can produce similarly formatted videos over and over again!
What You Will Create
Transcripted videos allow viewers to follow along even if they can’t currently listen to the audio. We’ll be joining a few video clips with voiceover audio, then using Bannerbear’s transcription feature to automatically add subtitles designed to match our video template.
The tools you will use to do this are:
- Airtable : To store links to video and audio assets and trigger video generation
- Bannerbear : To create dynamic templates and generate video assets
- Zapier : To trigger actions in different programs based on pre-specified commands
By the end of the tutorial, you should be able to produce videos that look something like this:

Let’s get started!
How to Produce Videos with Auto-transcribed Voiceovers
Videos are an effective tool for educating and informing viewers, provided that content and delivery are tailored to them. Bannerbear’s video generation API makes it easy to join clips, add a voiceover, and insert subtitles automatically—all without code!
Here’s how to set up a workflow that auto-generates transcripted videos:
Create an Airtable Base for Asset URLs
A single Airtable base with two views will act as the database for your project, storing video and audio clips as well as the final generated asset URLs as they are produced.
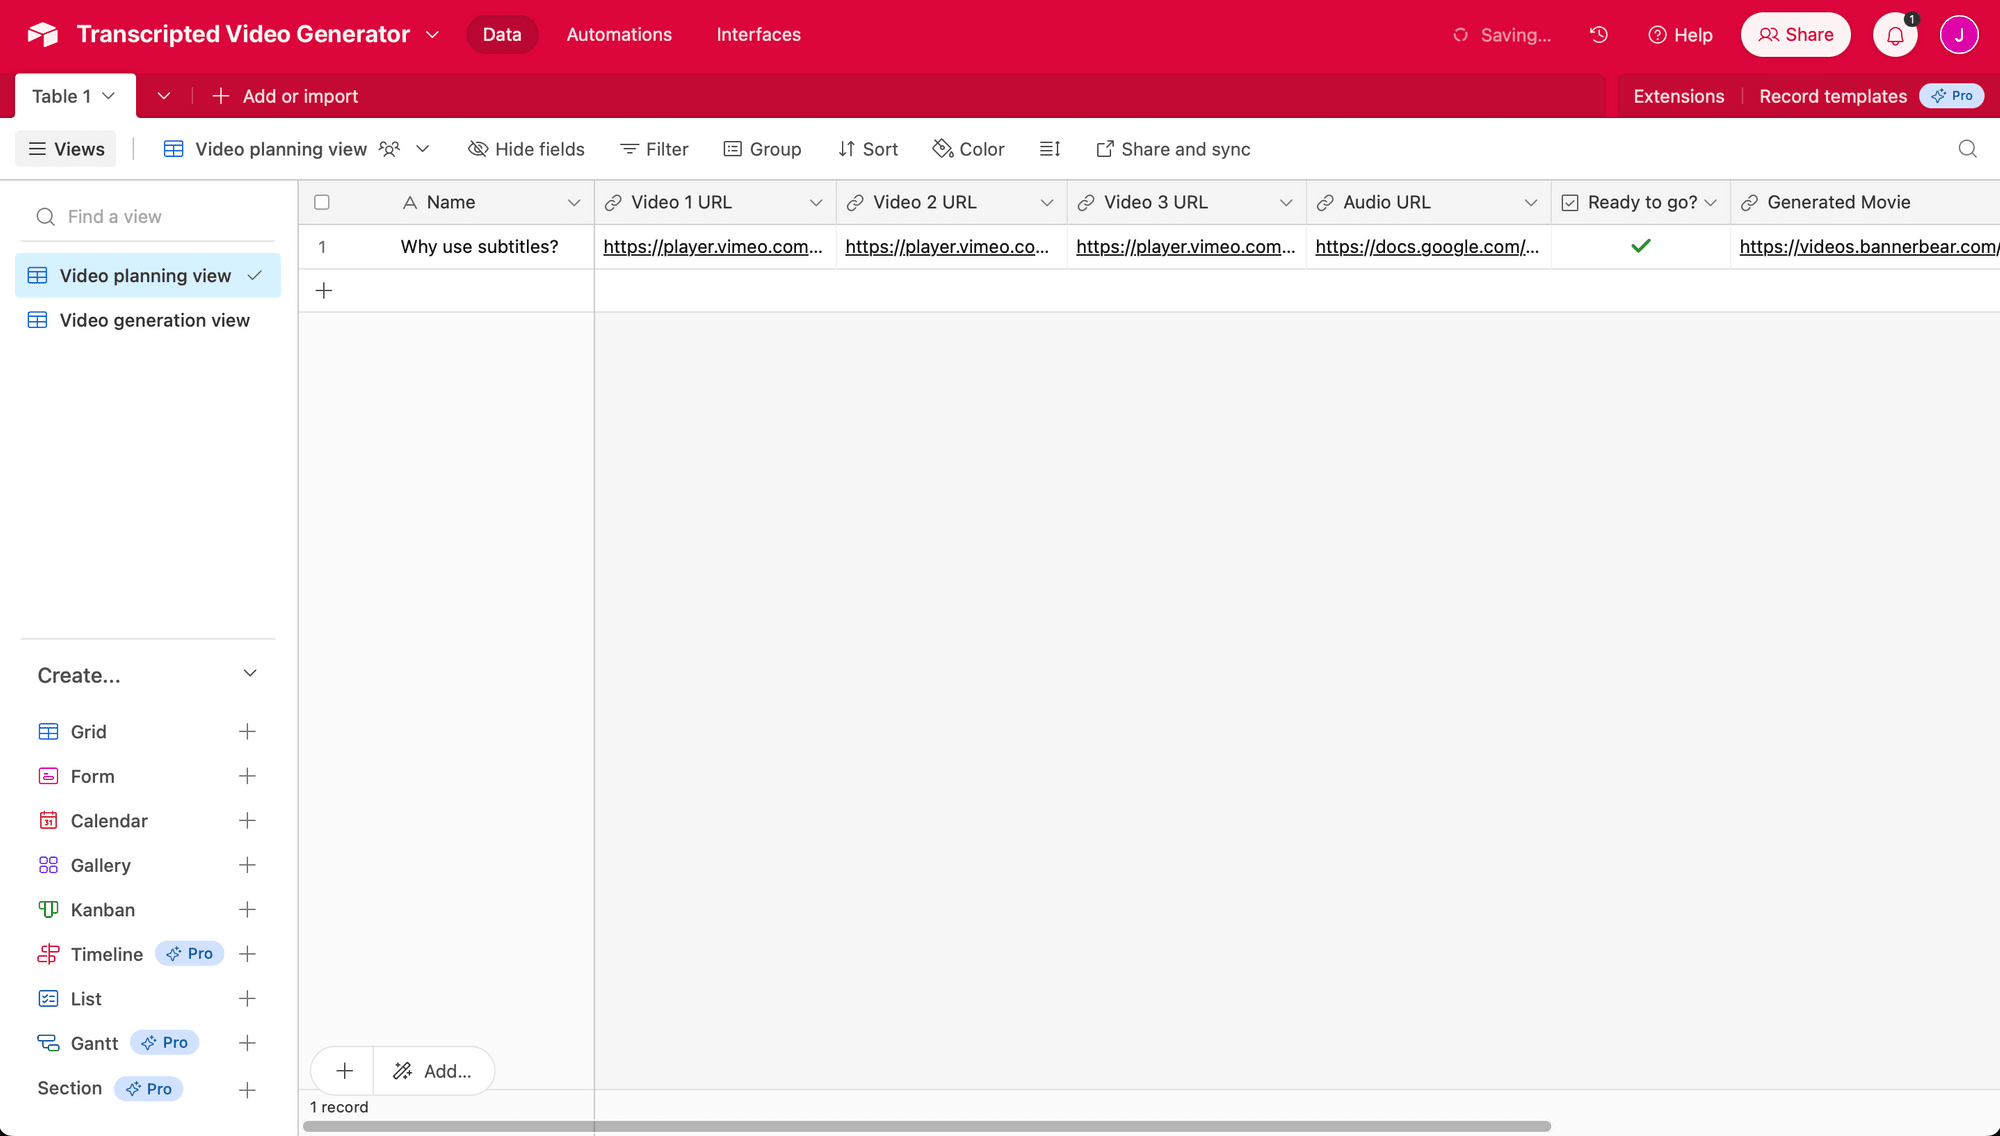
Log into your Airtable account, then create a new base for your project. On Table 1, set up the following fields:
- Name (Single line text)
- Video 1 URL (URL)
- Video 2 URL (URL)
- Video 3 URL (URL)
- Audio URL (URL)
- Ready to go? (Checkbox)
- Generated Movie (URL)
- Generated Video with Subtitles (URL)
You can use anywhere from two to 10 video clips.
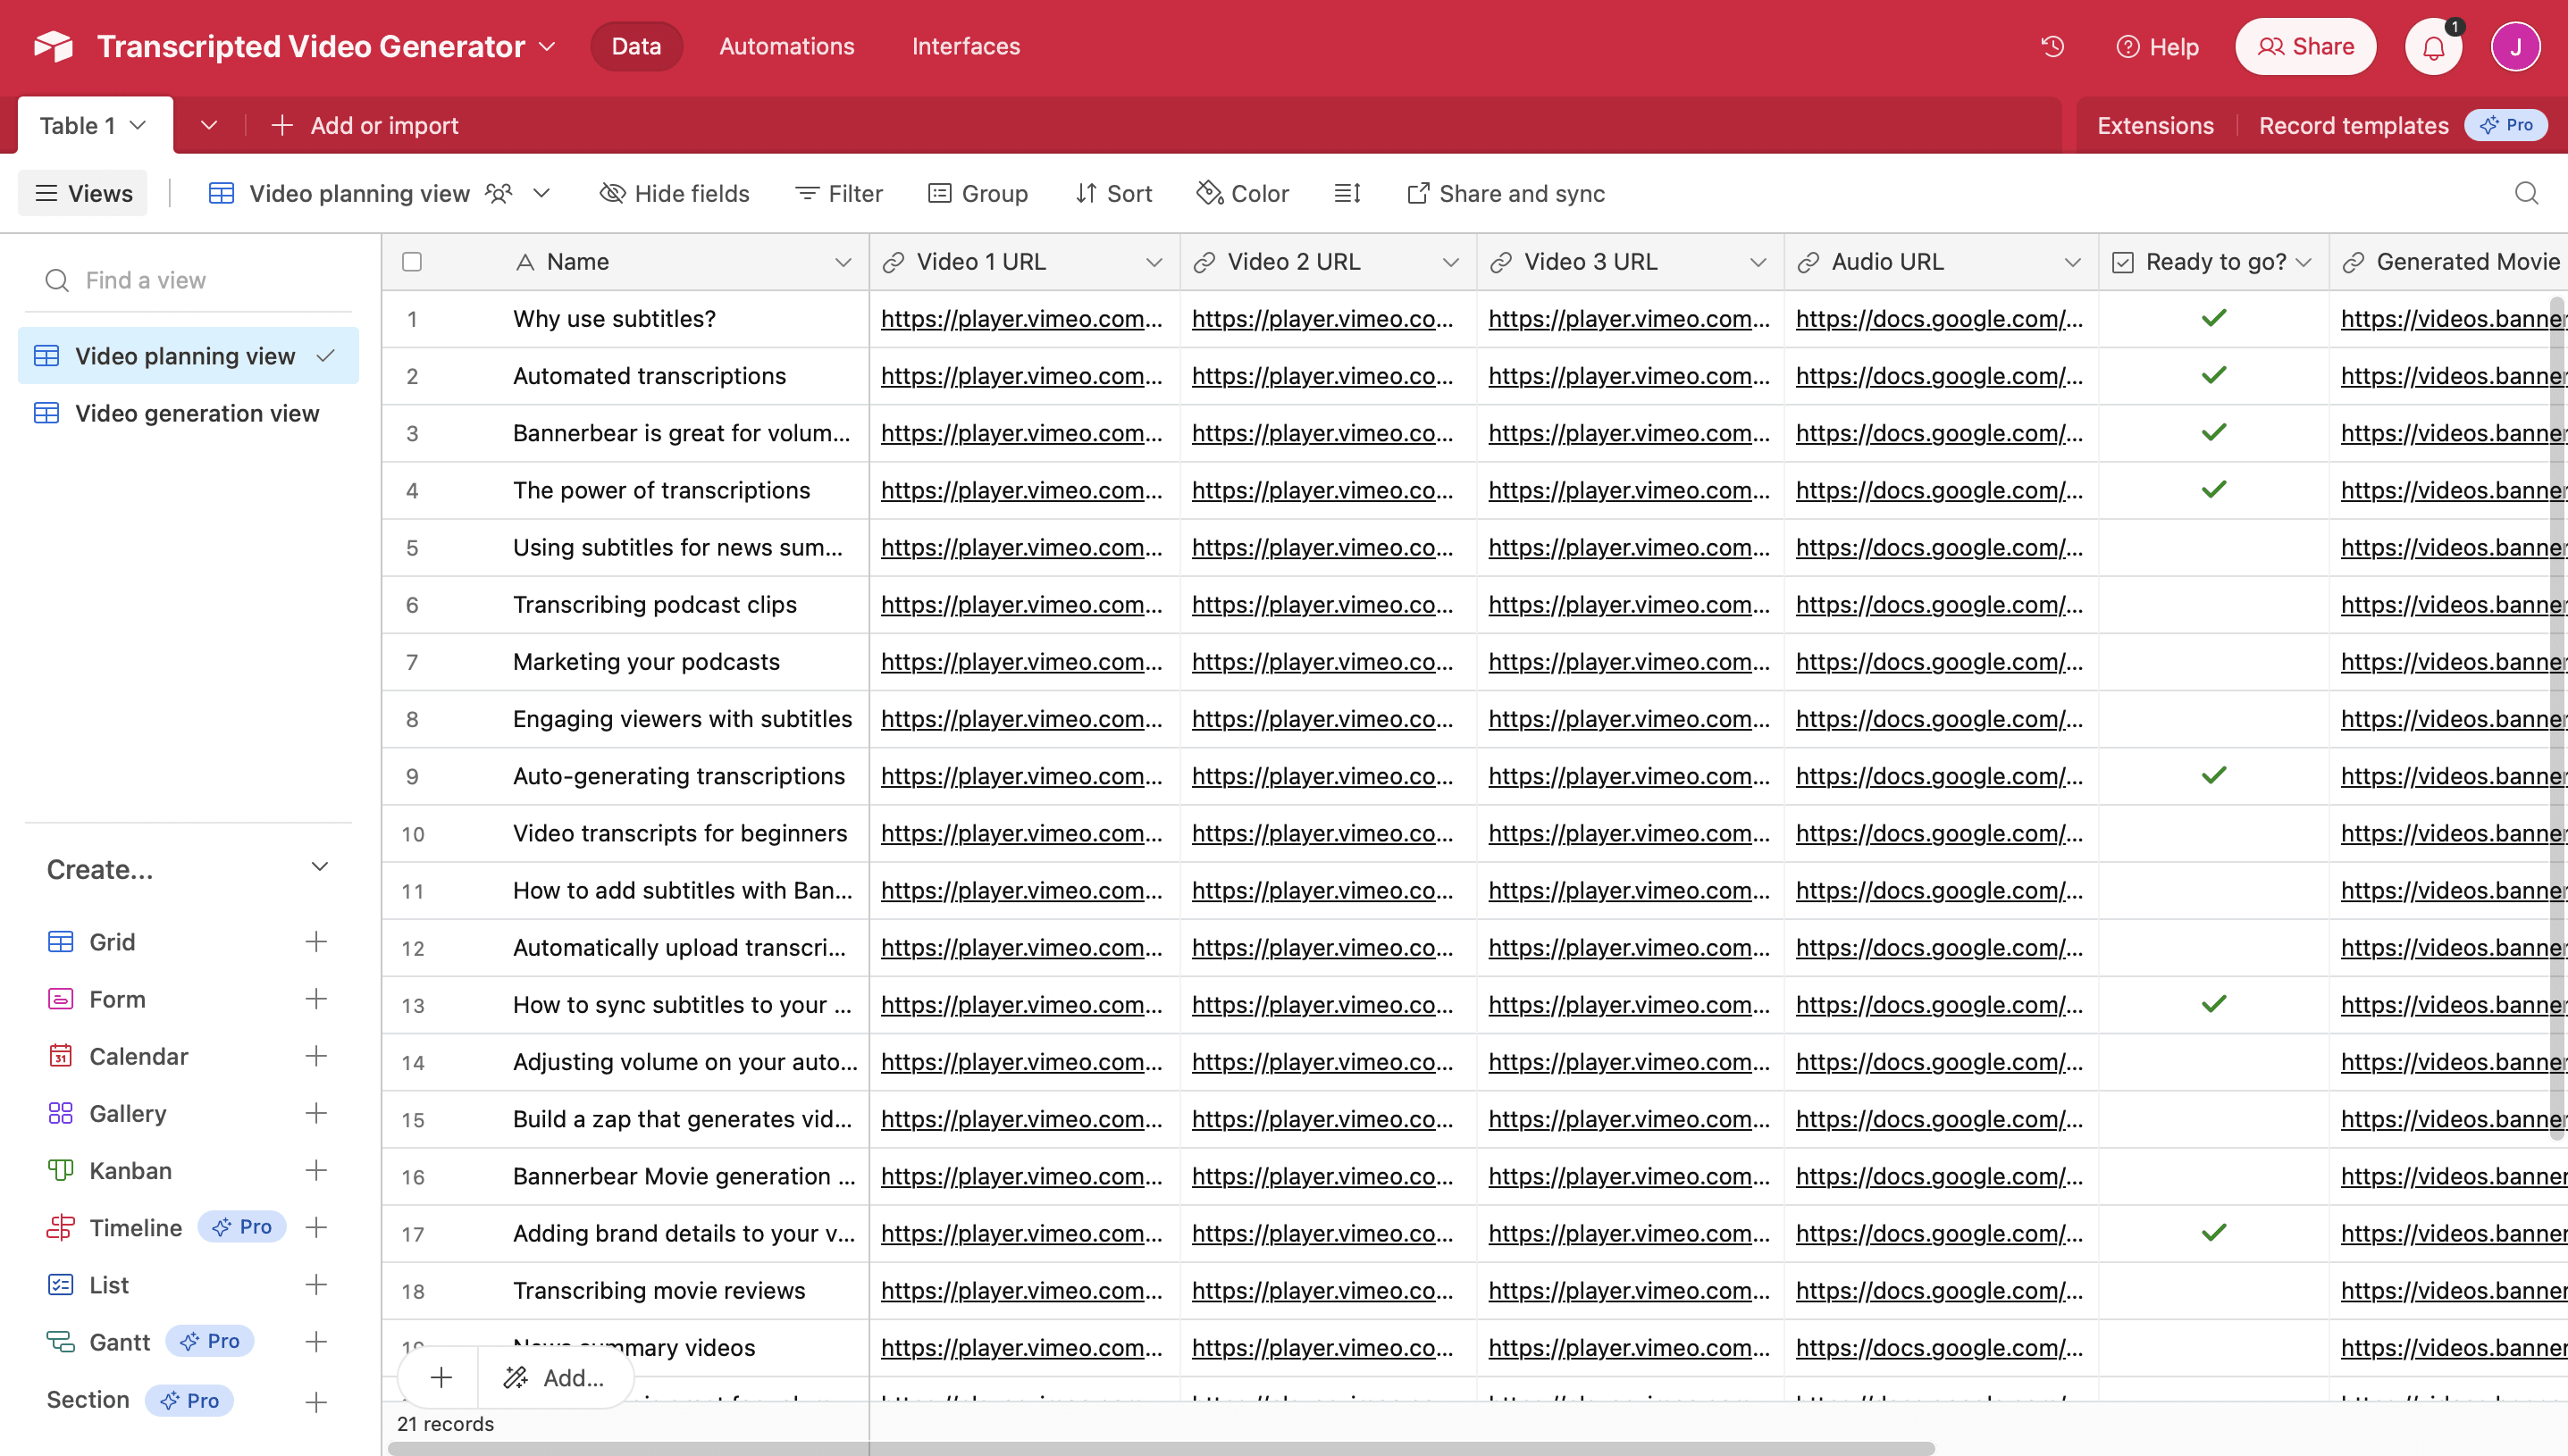
The setup should leave you with a base that looks something like this:
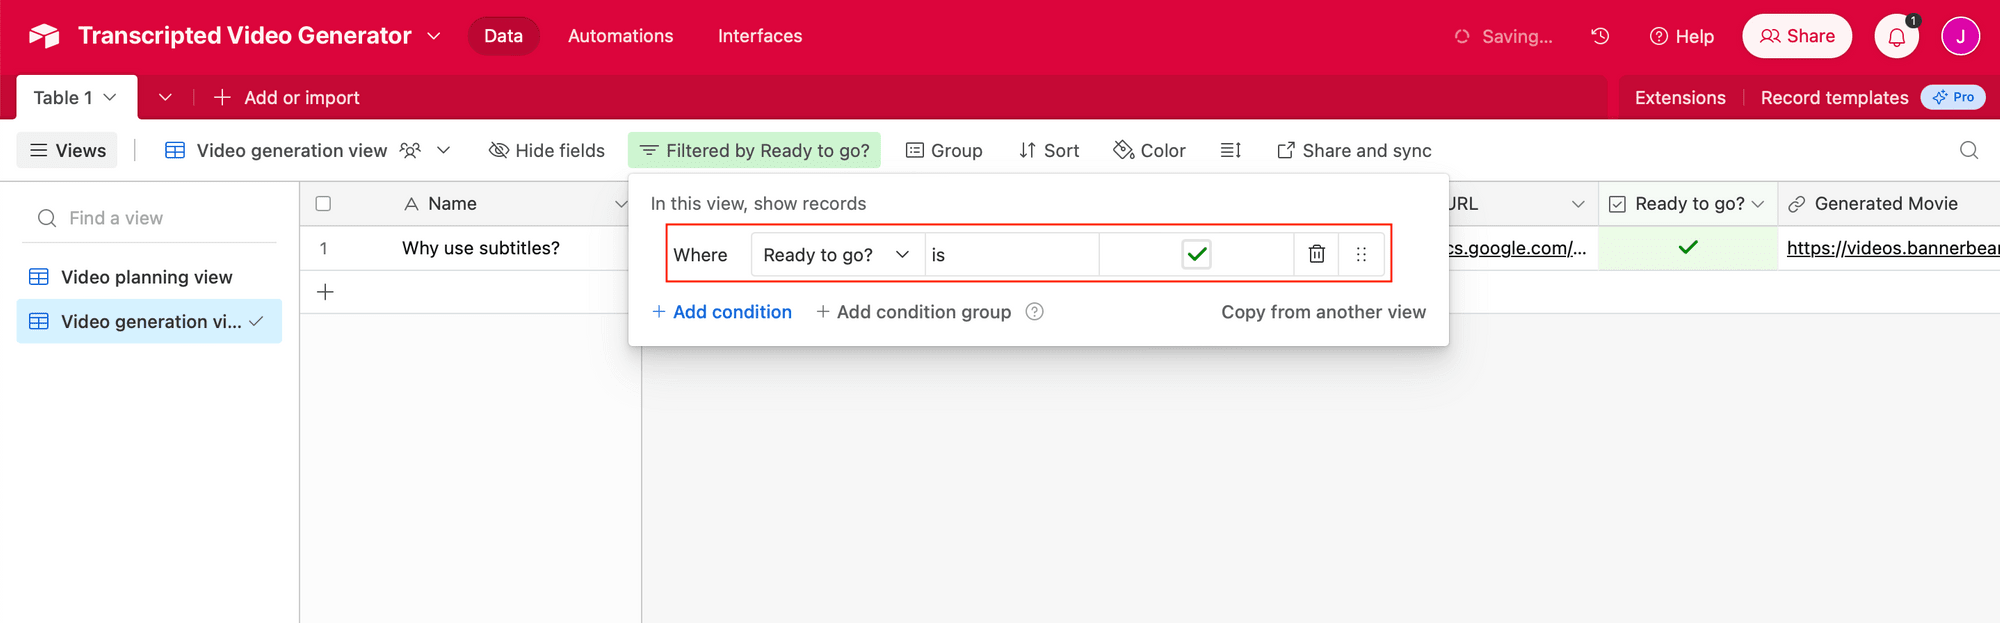
Now, you will have to create a view that only shows records ready for transcripted video generation.
Click the + symbol next to Grid on the left sidebar of your Airtable base. Name it, then add one filter: Where Ready to go is ✅ (checked).
Your Airtable base is now ready to be used! Populate a record with some sample data for testing (you will need a name, video clip URLs, audio URL, and a checked Ready to go? field), then move on to the next step.
Prepare a Bannerbear Video Template without Subtitles
Your first template will join video clips and voiceover audio, ensuring a seamless final product when subtitles are added.
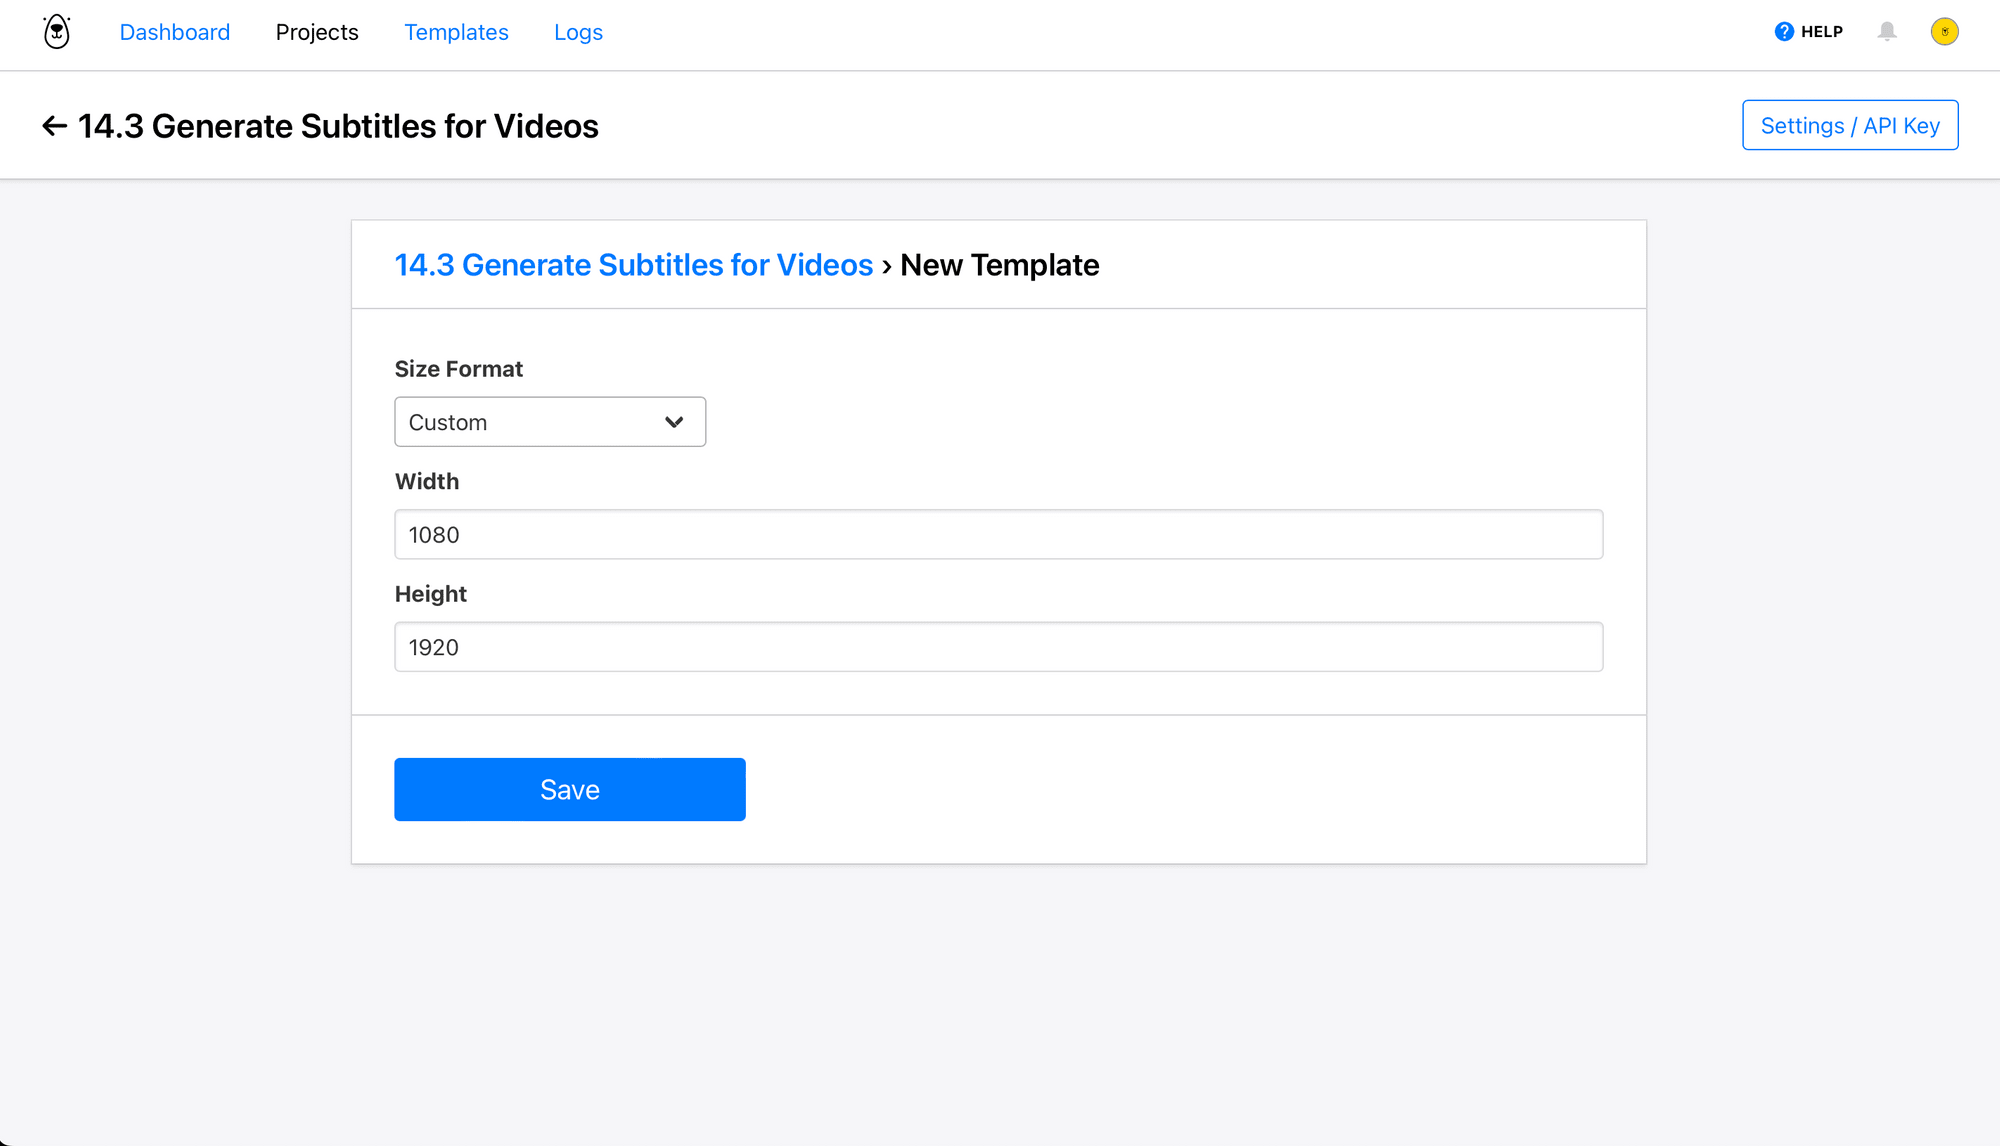
Log into the Bannerbear app (if you don’t have an account, sign up for 30 free API credits!), then create and name a new Project. From the project page, click Create a Template.
Specify dimensions suitable for your final product, then Save.
You should now see your template on the project page. Select it, click Edit Template , then toggle Video Placeholder on the left sidebar. This instructs Bannerbear to fill the container with video media when it’s converted into a video template.
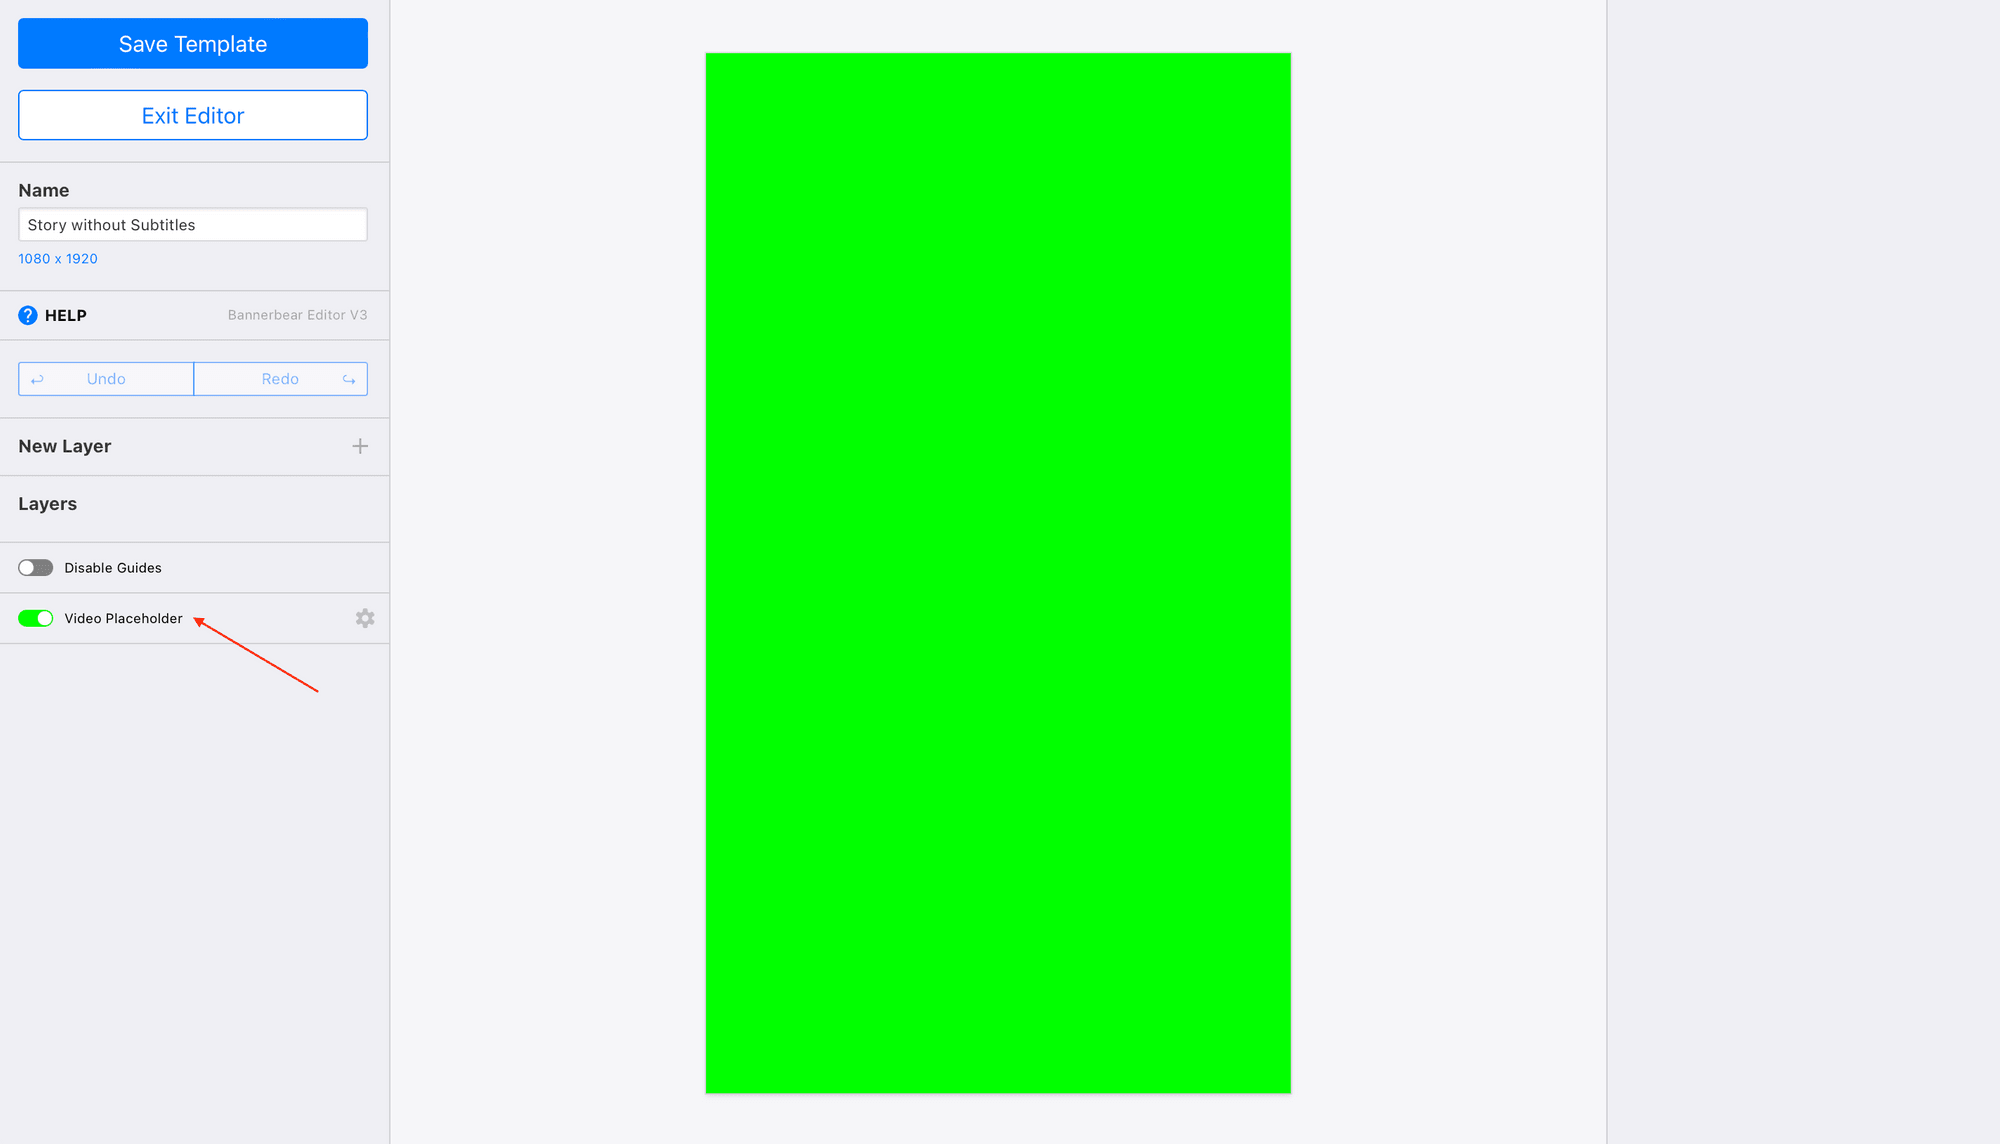
Click Save Template.
On your project page, click Create a Video Template.

Select your template and choose Overlay as the Build Pack.
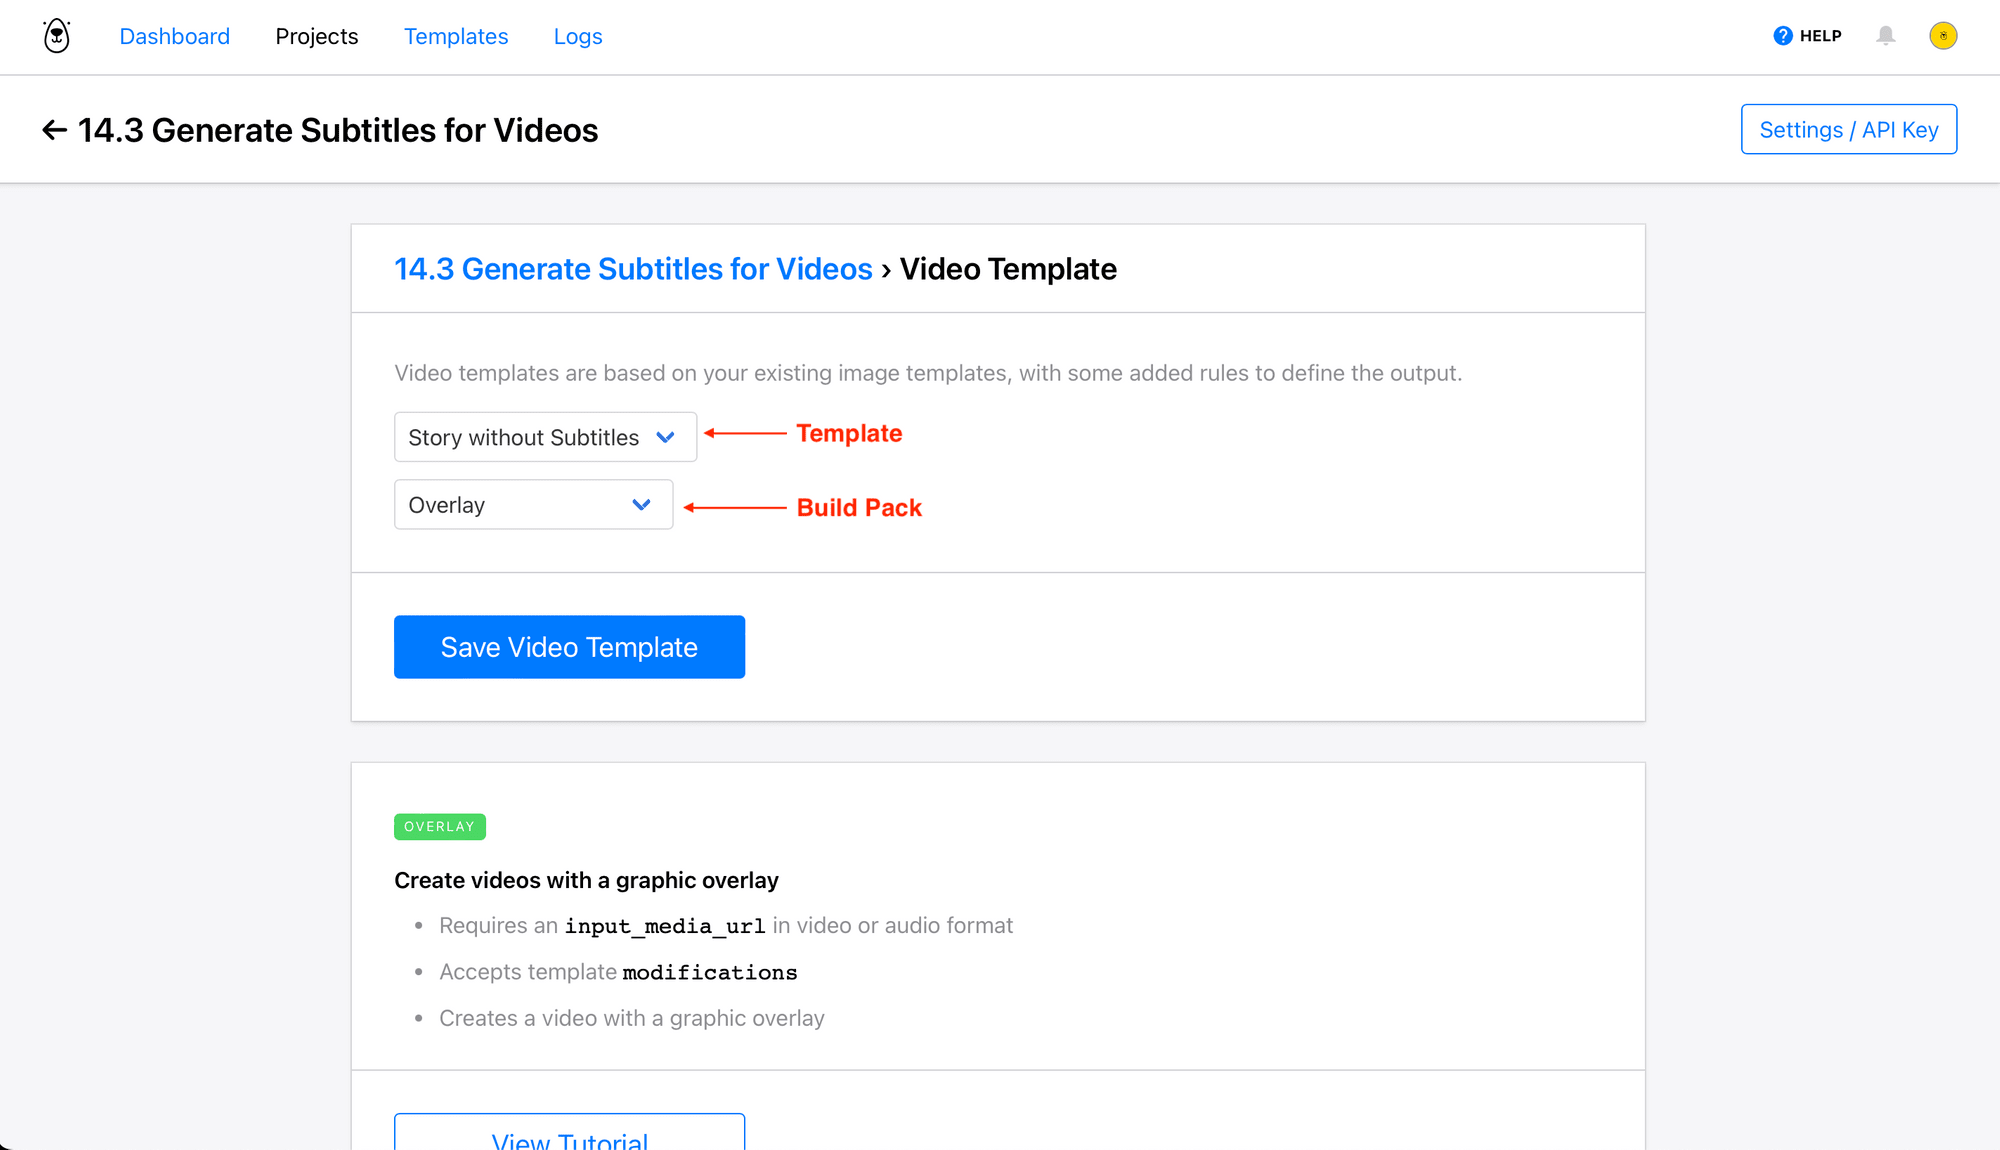
Click Save Video Template.
Prepare a Bannerbear Video Template with Subtitles
Your second template will automatically transcribe the video’s audio and apply any other visual elements you add.
From the same project page, click Create a Template. Specify dimensions matching your last template, then Save.
Open the editor, then add layers for any text, images, or shapes you want in your final product. This could be a brand logo, a watermark, or even just a fun illustration.
Make sure you have a dynamic text container for subtitles and toggle Video Placeholder on the left sidebar.
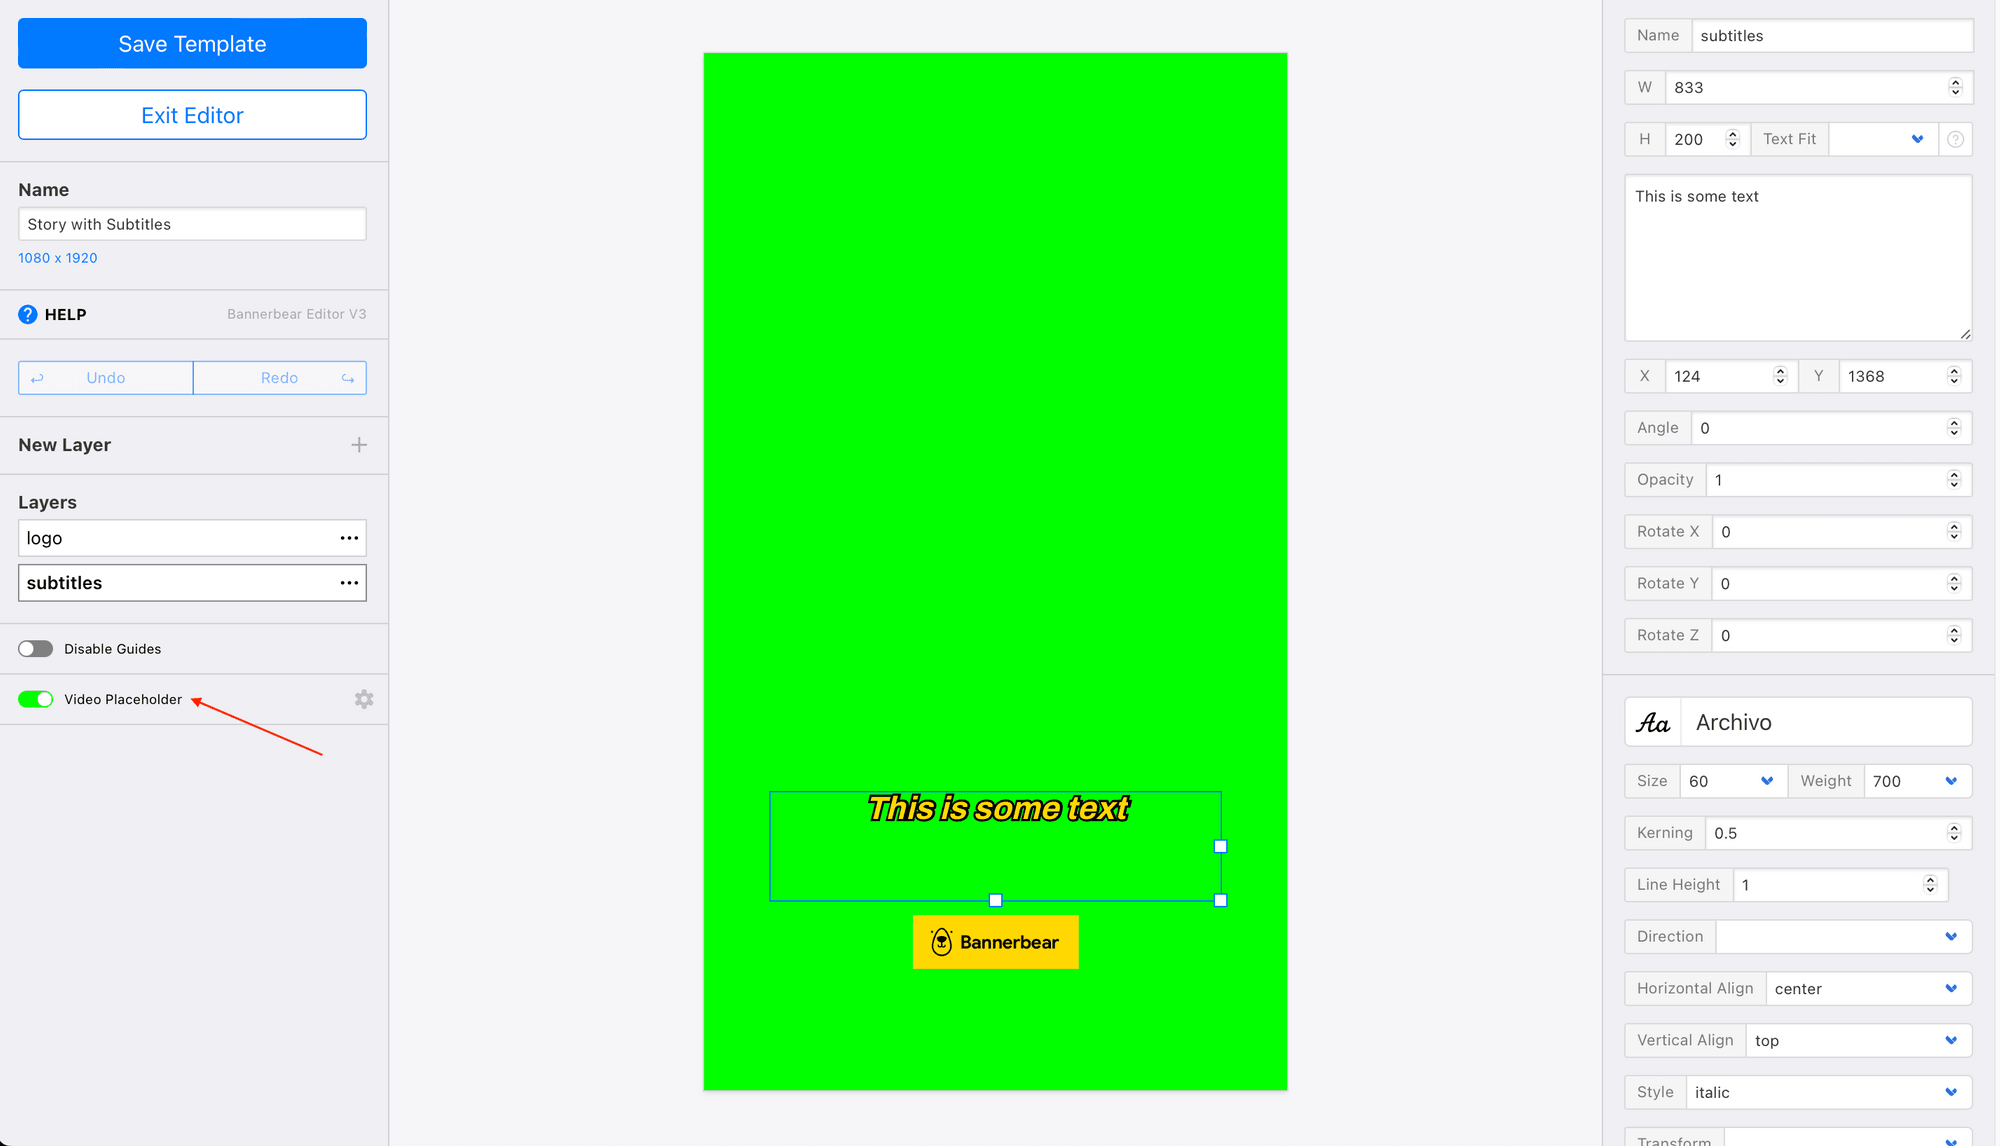
When you’re happy with your design, click Save Template.
Return to your project page, and click Create a Video Template.
Select the template designed for subtitles, and choose Transcribe as the Build Pack.
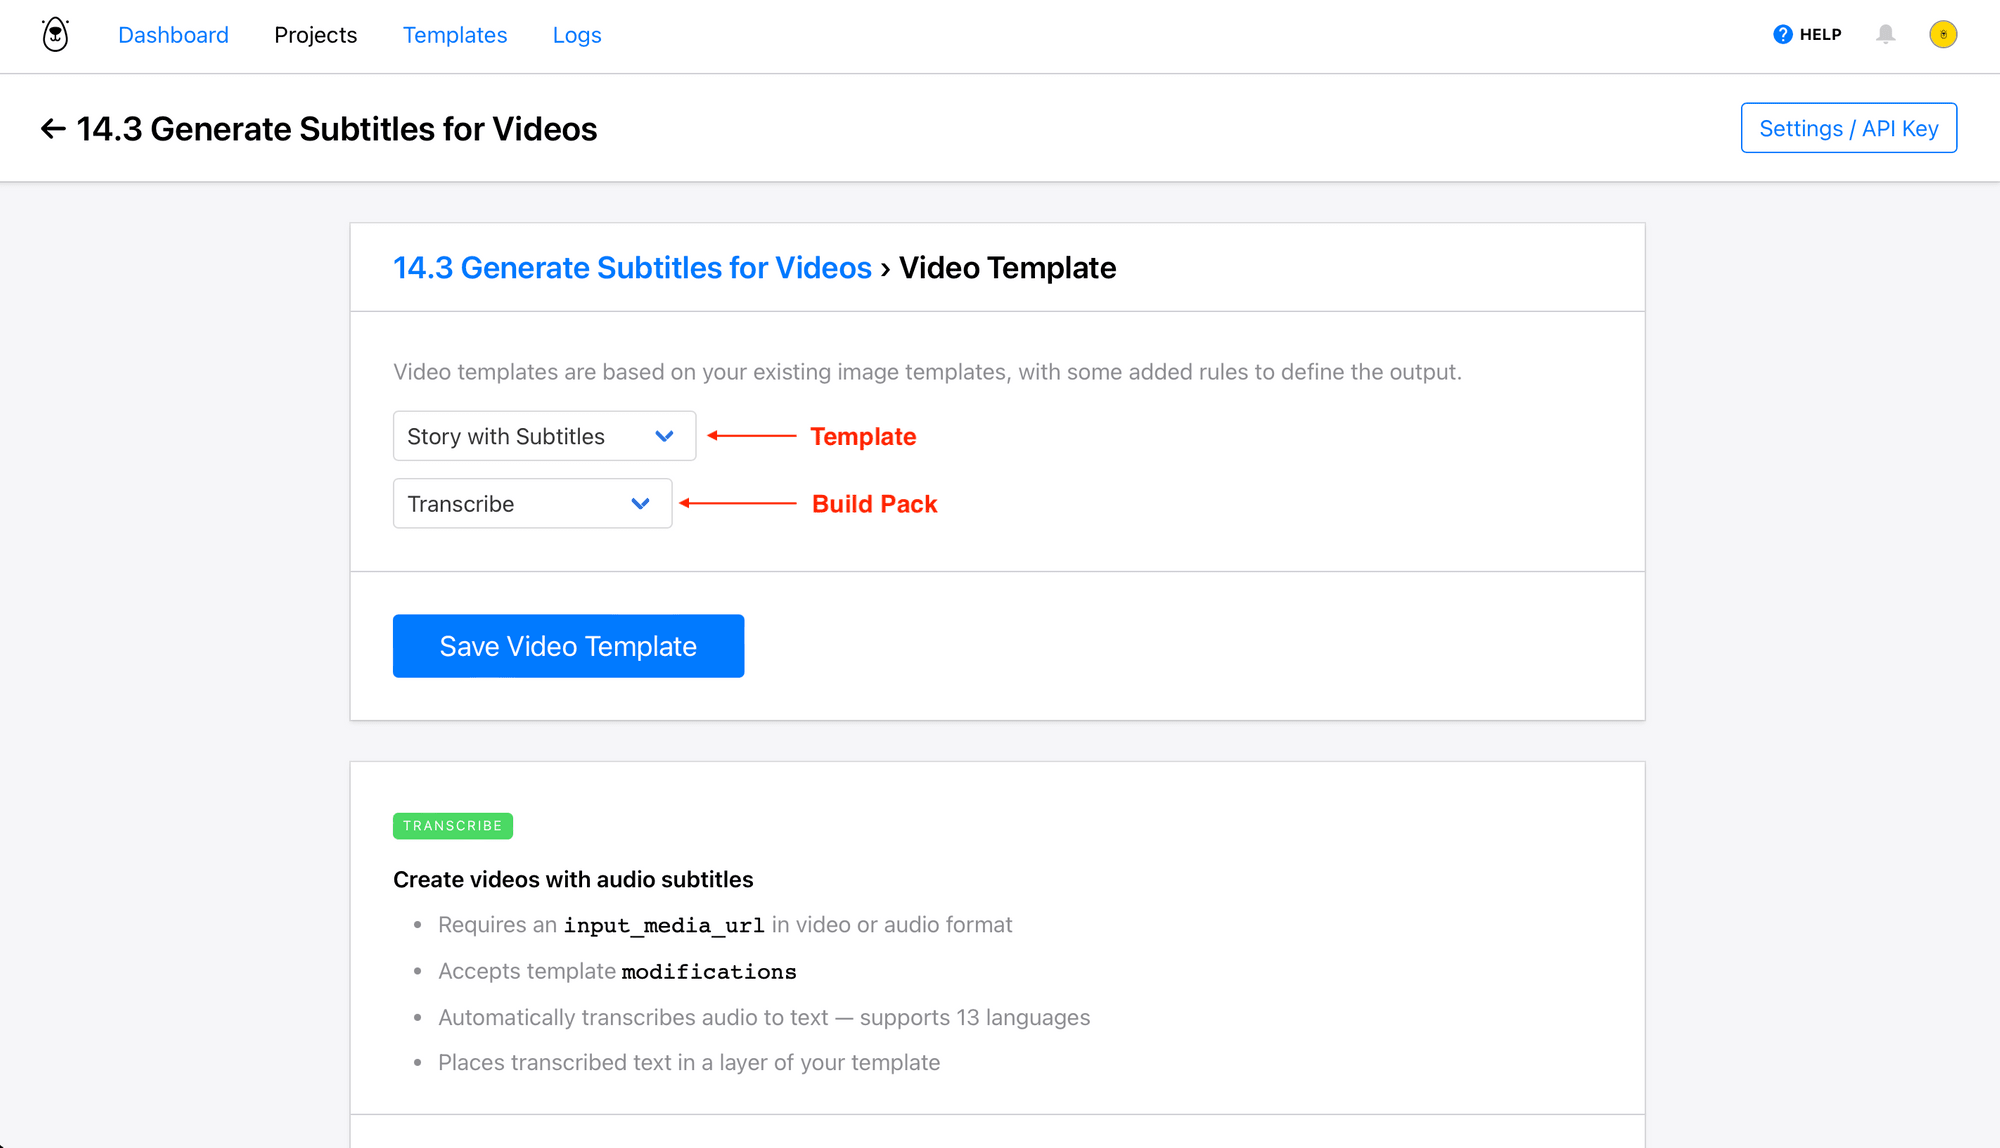
Click Save Video Template. Set up the Build Pack by specifying Max length in seconds , Transcription engine , Video frame word limit , Transcription layer , Transcription language , and Approval setting.
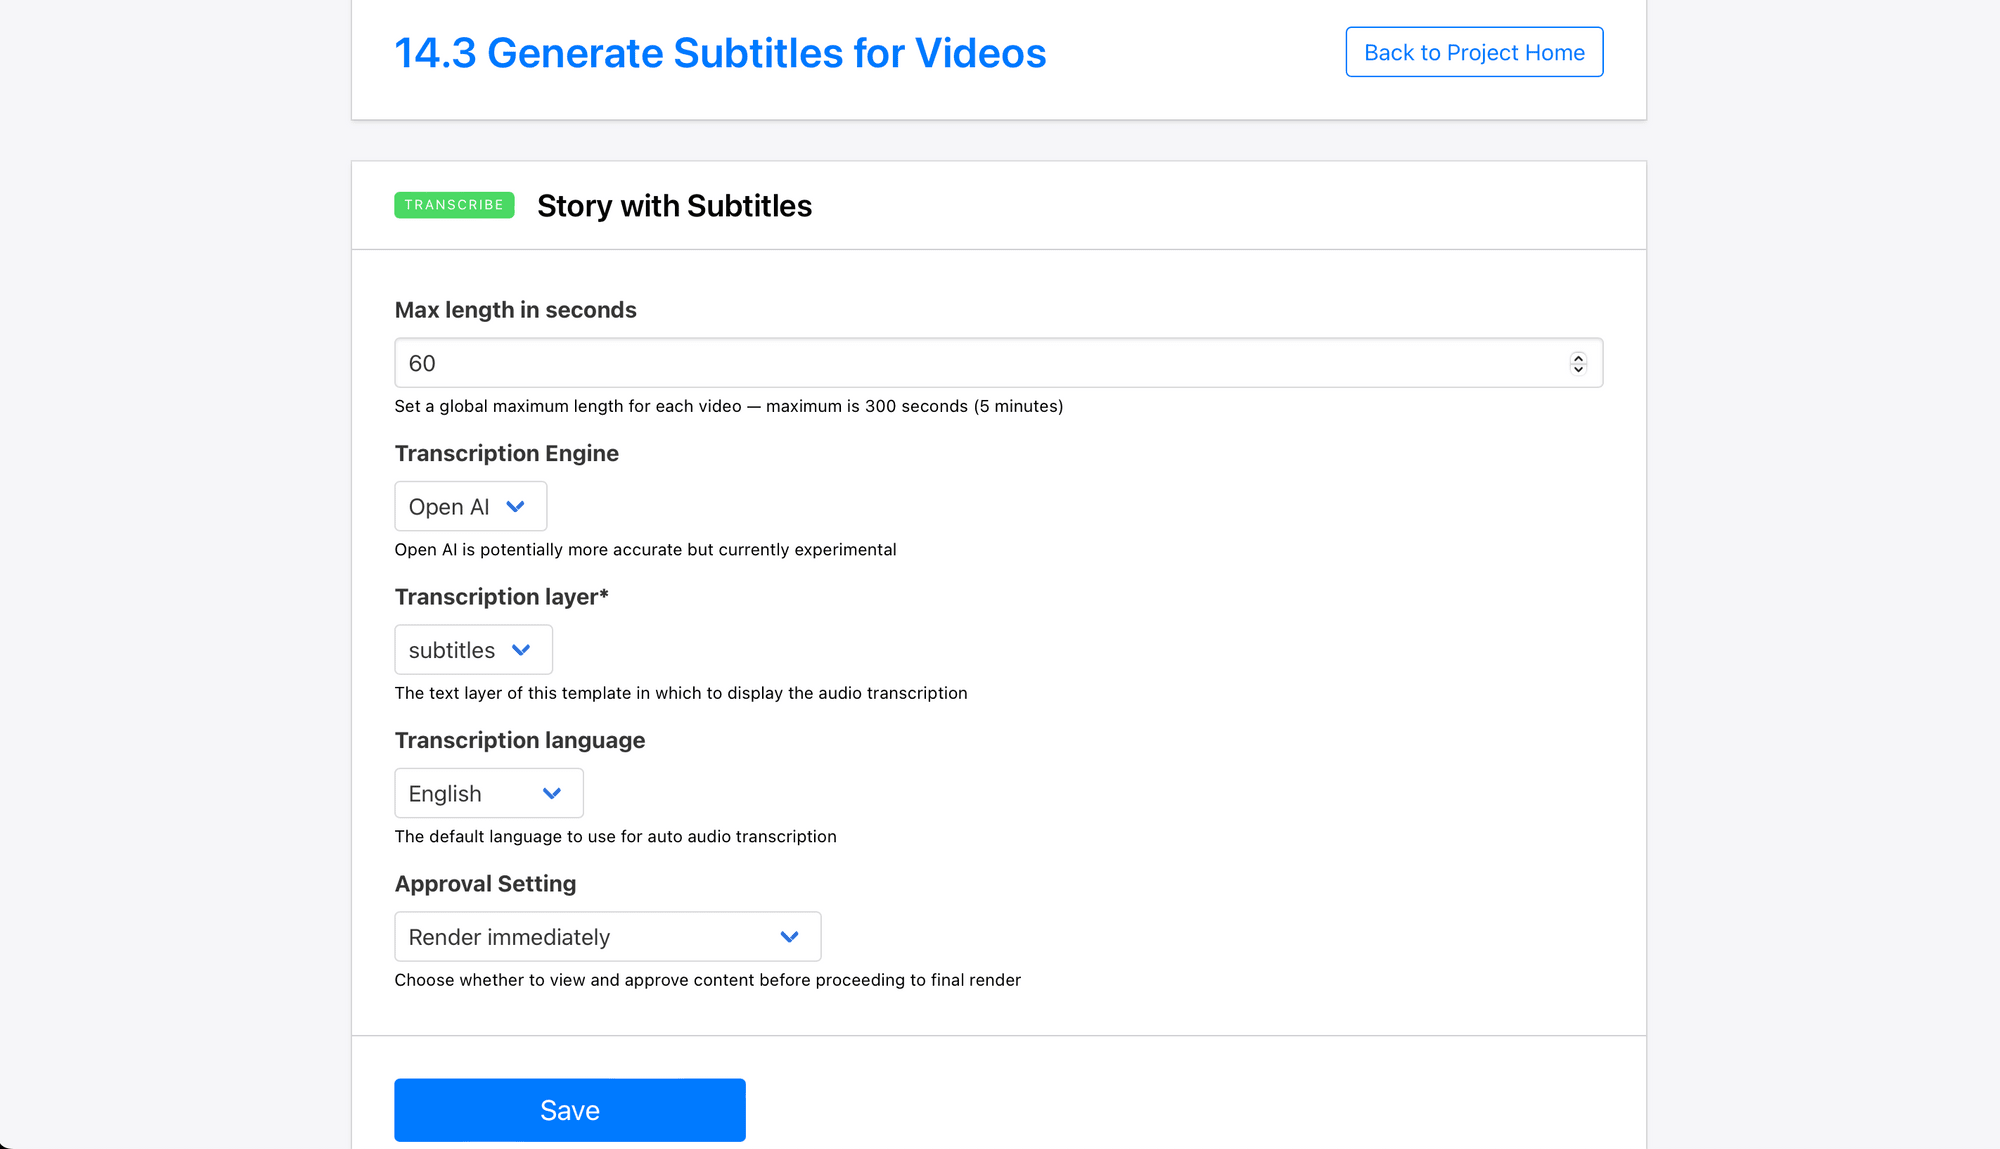
When you’re done setting up the Build Pack, save your settings.
Bear Tip 🐻: Learn more about setting up automatic transcriptions by reading How to Create Videos with Auto Subtitles in One API Request!
Set up a Zap to Join Video Clips and Audio
Your first zap will join video clips and audio using the template without any additional visual elements.
Log into your Zapier account, click + Create Zap , and set up the following events:
Trigger: New Record in Airtable
Choose Airtable as the app and New Record as the event. If you haven’t connected your Airtable account yet, you can do so using a personal access token.
Set up the trigger by choosing the right base, table, and view.
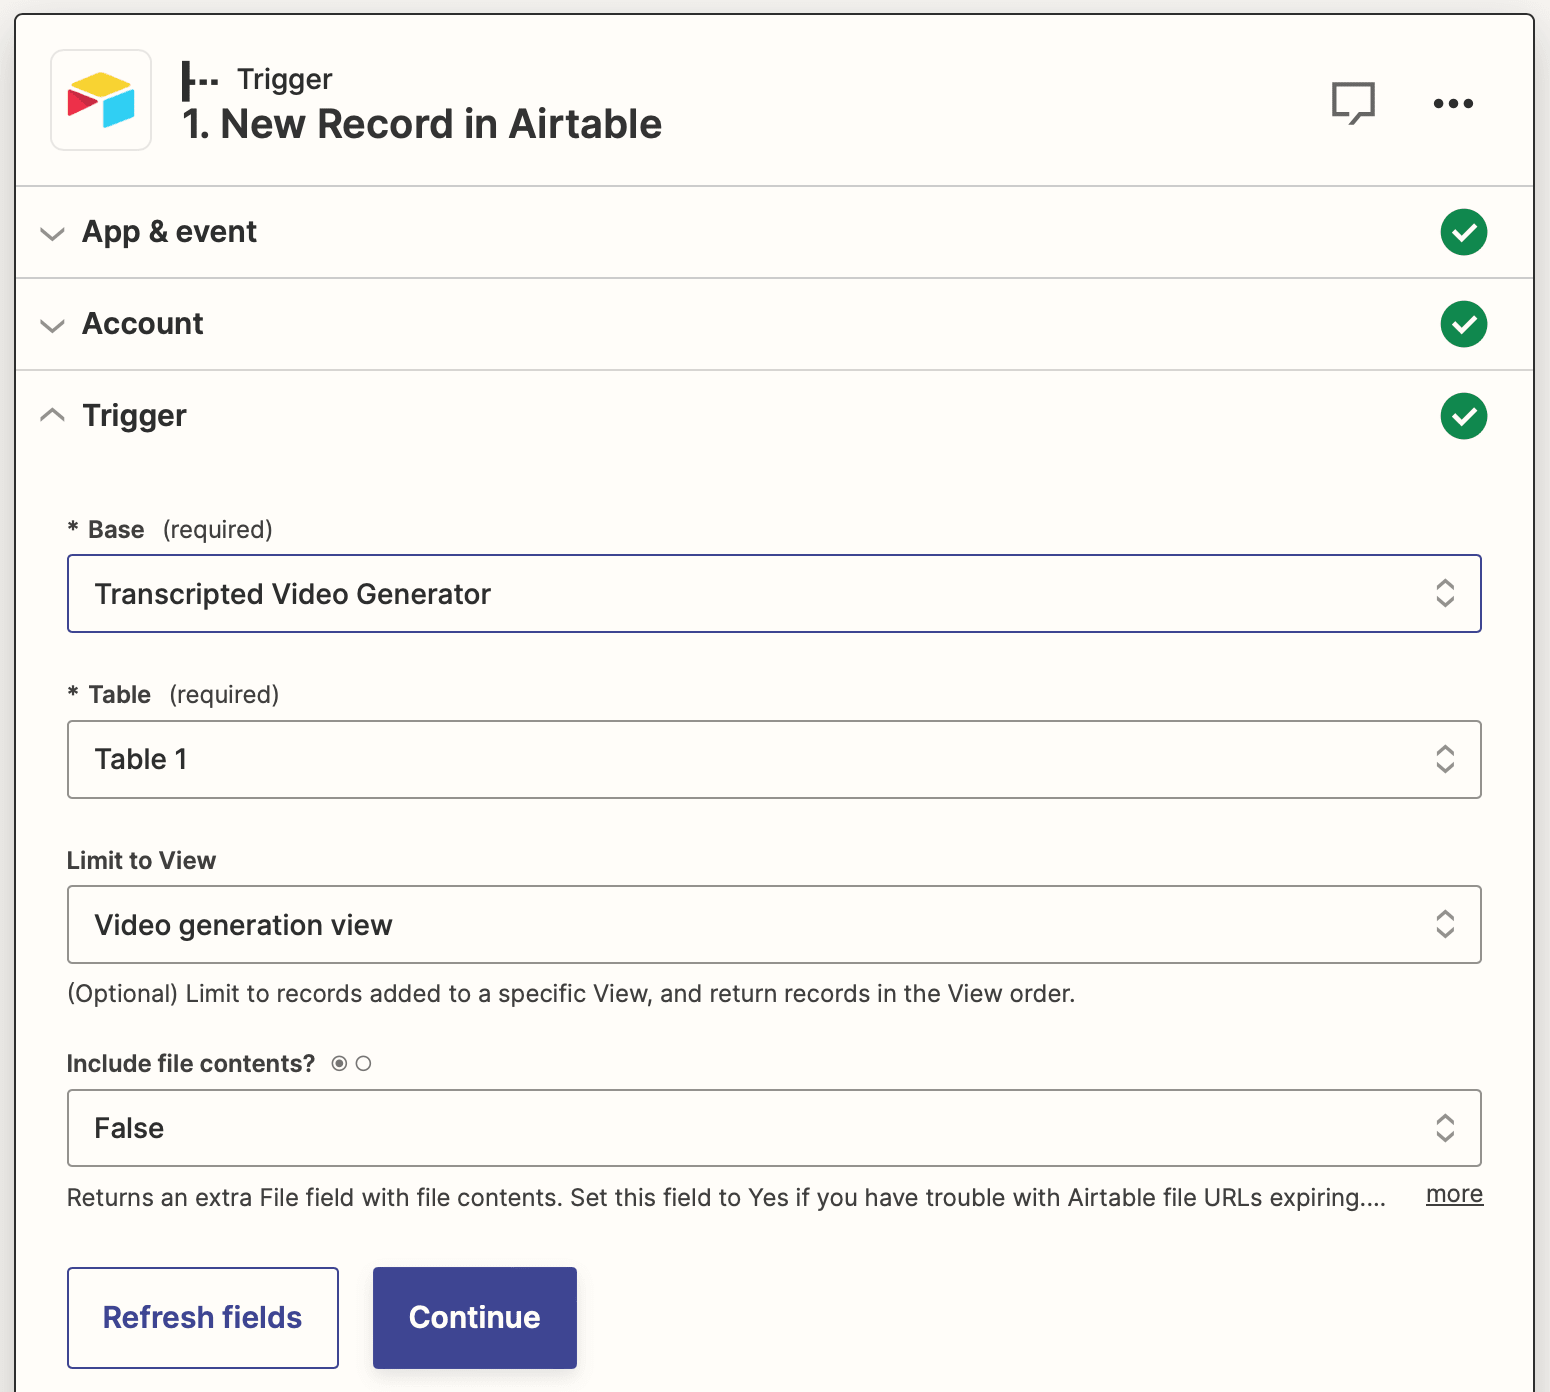
Test the trigger, then continue.
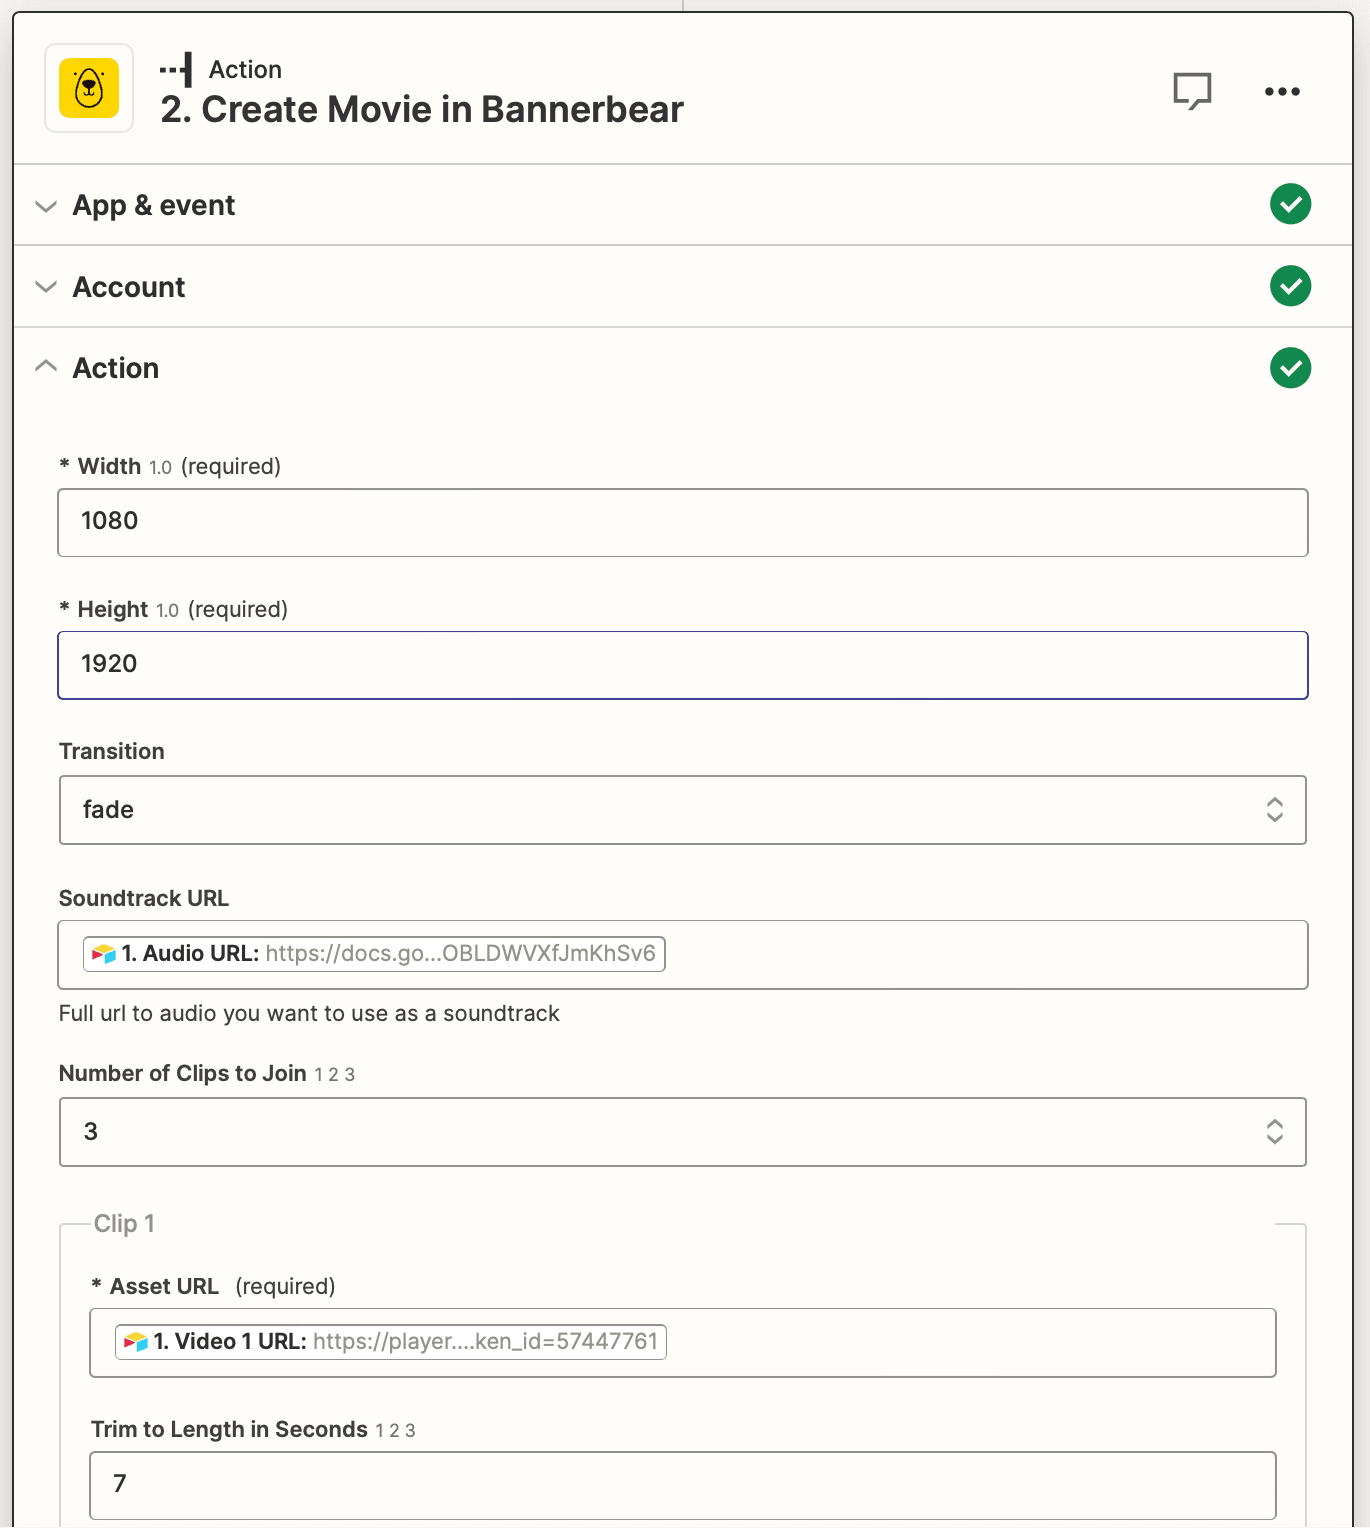
Action: Create Movie in Bannerbear
Choose Bannerbear as the app and Create Movie as the event. You will need to connect your account using the key found by clicking the “Settings / API Key” button of the corresponding project of the Bannerbear app.
Set up the action by specifying dimensions matching that of your template, choosing a transition, then mapping the video and audio URLs from your trigger.
You will also need to save the Airtable record ID as metadata.
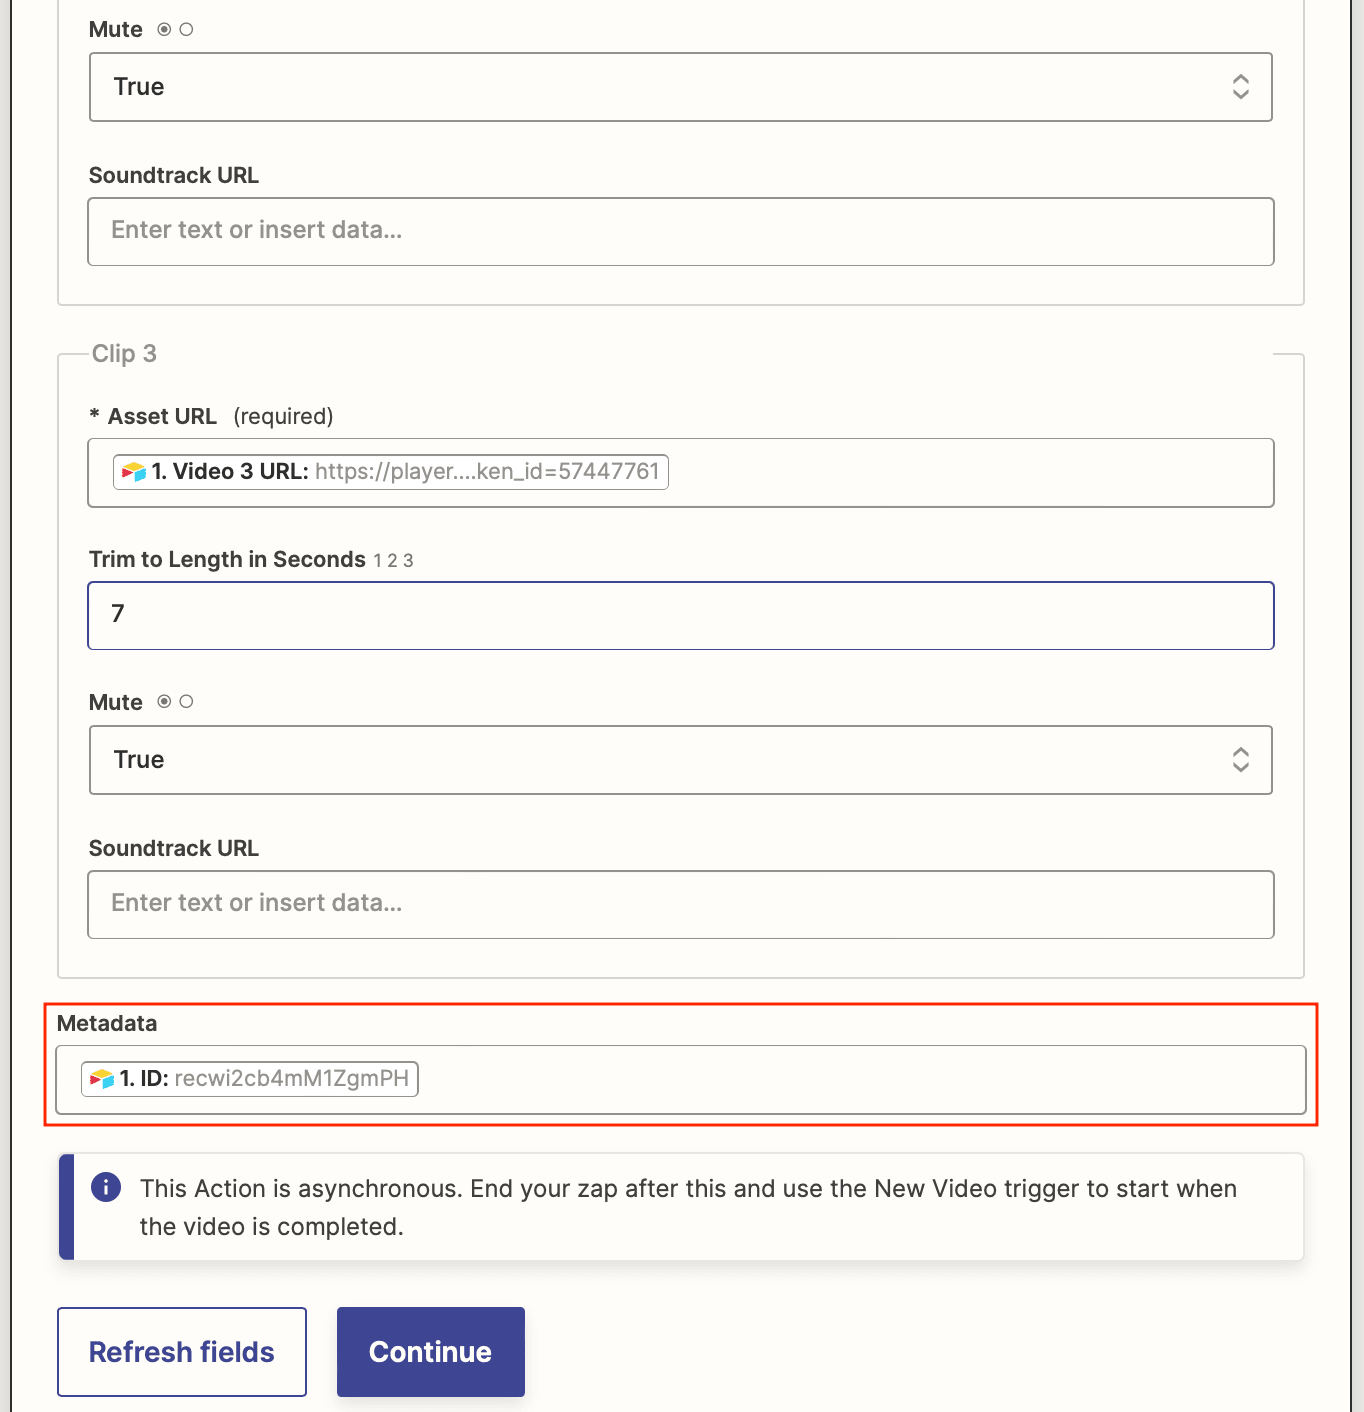
Test the action and check the Logs section of your Bannerbear account to ensure a video is successfully generated.
Bear Tip 🐻: Bannerbear allows you to join up to 10 video clips with their own audio. For the cleanest results, use one audio input for your voiceover and mute the individual clips.
Set up a Zap to Retrieve Movie and Generate Transcribed Video
Your second zap will save links of generated movies, then instruct Bannerbear to generate a video with transcriptions based on the second template.
Click + Create Zap , and set up the following events:
Trigger: New Movie in Bannerbear
Choose Bannerbear as the app and New Movie as the event. Set up the trigger by choosing the correct project.

Test the trigger, then continue.
Action: Update Record in Airtable
Choose Airtable as the app and Update Record as the event.
Set up the action by choosing the correct base and table. Use the metadata as the record identifier and map the movie URL to the Generated Movie field.
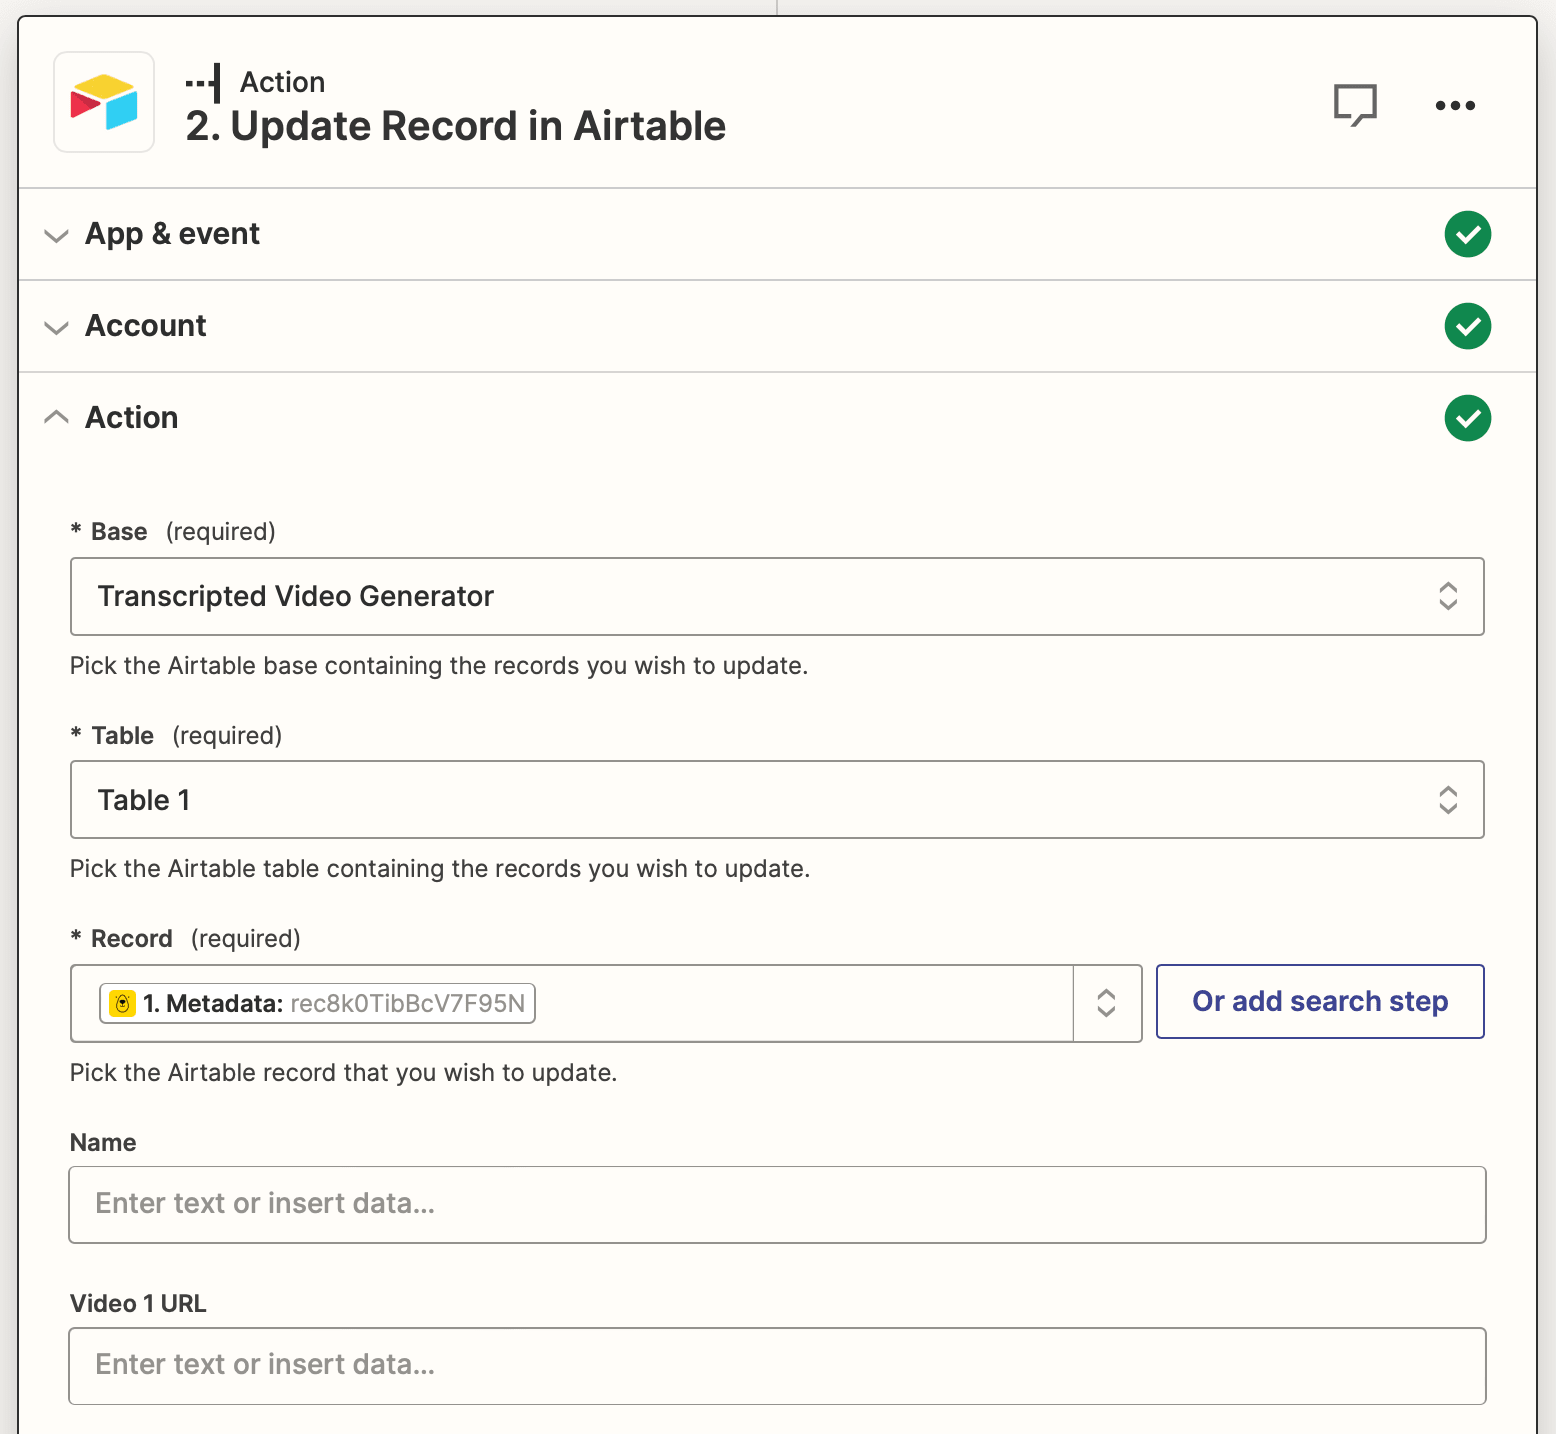
Test the action to ensure the link appears in Airtable.
Action: Create Video in Bannerbear
Choose Bannerbear as the app and Create Video as the event. Set up the action by choosing the correct video template, then insert the previously generated movie as the Media URL.
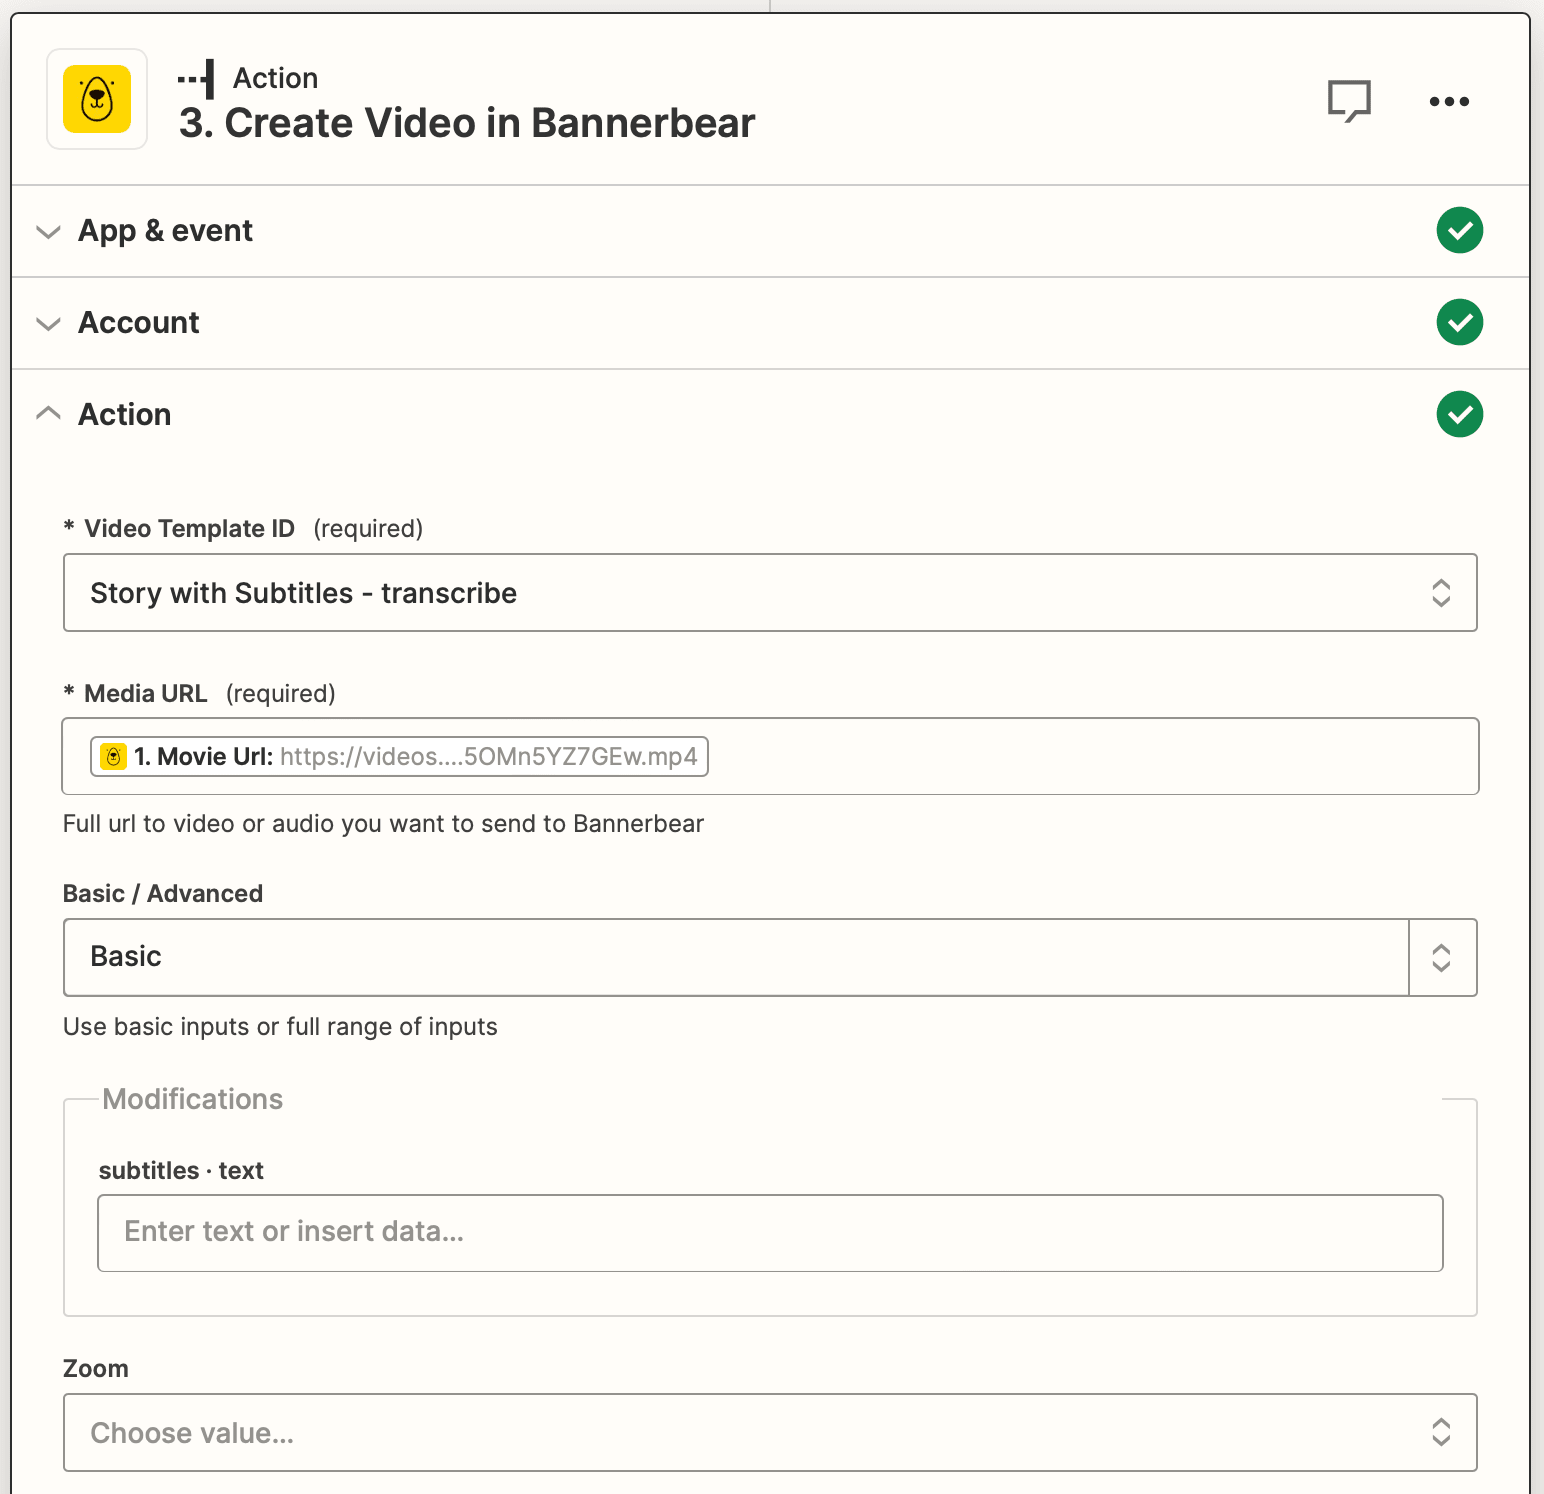
As with the previous step, save the Airtable record ID as metadata.
Test the action, and ensure a video is generated in your Logs.
Set up a Zap to Retrieve Transcribed Video
The final zap will retrieve links for transcribed videos as they are completed, depositing them in Airtable.
Click + Create Zap , and set up the following events:
Trigger: New Video in Bannerbear
Choose Bannerbear as the app and New Video as the event. Set up the trigger by choosing the correct project.

Test the trigger, then continue.
Action: Update Record in Airtable
Choose Airtable as the app and Update Record as the event.
Set up the action by choosing the correct base and table. Use the metadata as the record identifier and map the movie URL to the Generated Video with Subtitles field.

Test the action to ensure the link appears in Airtable.
Bear Tip 🐻: Make sure the metadata that links to the record is a dynamic link (found under Custom ) rather than a static record. Otherwise, only one cell will update with a new link every time the automation is run.
The URL should lead to a video that looks something like these:
And that’s it! Once you’ve made adjustments to ensure the final product is to your liking, publish all your zaps to take them live.
You'll now be able to generate transcripted videos by adding clips and audio to Airtable:
Every time a record is tagged as Ready to go , a video with clips, audio, subtitles, and any branding elements included in your template will be automatically created and ready for use!
Automate Viewer-friendly Video Content Production
Automated transcriptions are an easy way to enhance the effectiveness of your video content with little effort. This tutorial shows you how to add subtitles, join video clips, and include voiceover audio just by adding a few starter assets into your Airtable base.
A few ideas for further enhancing this workflow are:
- Setting up an additional zap that sources relevant video footage from Pexels
- Adding a step that schedules the content for publishing
- Generating transcripted videos in various dimensions optimized to the platforms they will be published on
Coding doesn’t have to be an automation prerequisite. Try it out for yourself!
