
How to Create Lead Generation Graphics with Zapier and Bannerbear
Contents
With this technique you can add a personal and attention-grabbing touch to your sales outreach emails - in a completely automated workflow!
Example
In this tutorial we will learn how to automatically take a lead name and a website URL from an airtable sheet like this:

…and generate animated gifs that look like this:

The gif can be used as an email header or twitter image, when reaching out to prospective clients. It combines an image of a person (you should probably replace this image with one of yourself!) a customizable message, and a customizable screenshot of a website that scrolls down the page.
We will be using two features of Bannerbear for this - screenshots and animated gifs.
What this Zap does
In this tutorial we will create a simple Zap that:
- Runs every time you add a URL to an Airtable sheet
- Generates a screenshot of the URL
- Generates an animated gif using that screenshot
- Sends the gif back to the airtable sheet
You will probably want to continue this workflow by sending an email with the image, or sending a tweet etc - but that is up to you to decide! For the purposes of this tutorial we will focus on the gif generation.
Add the template
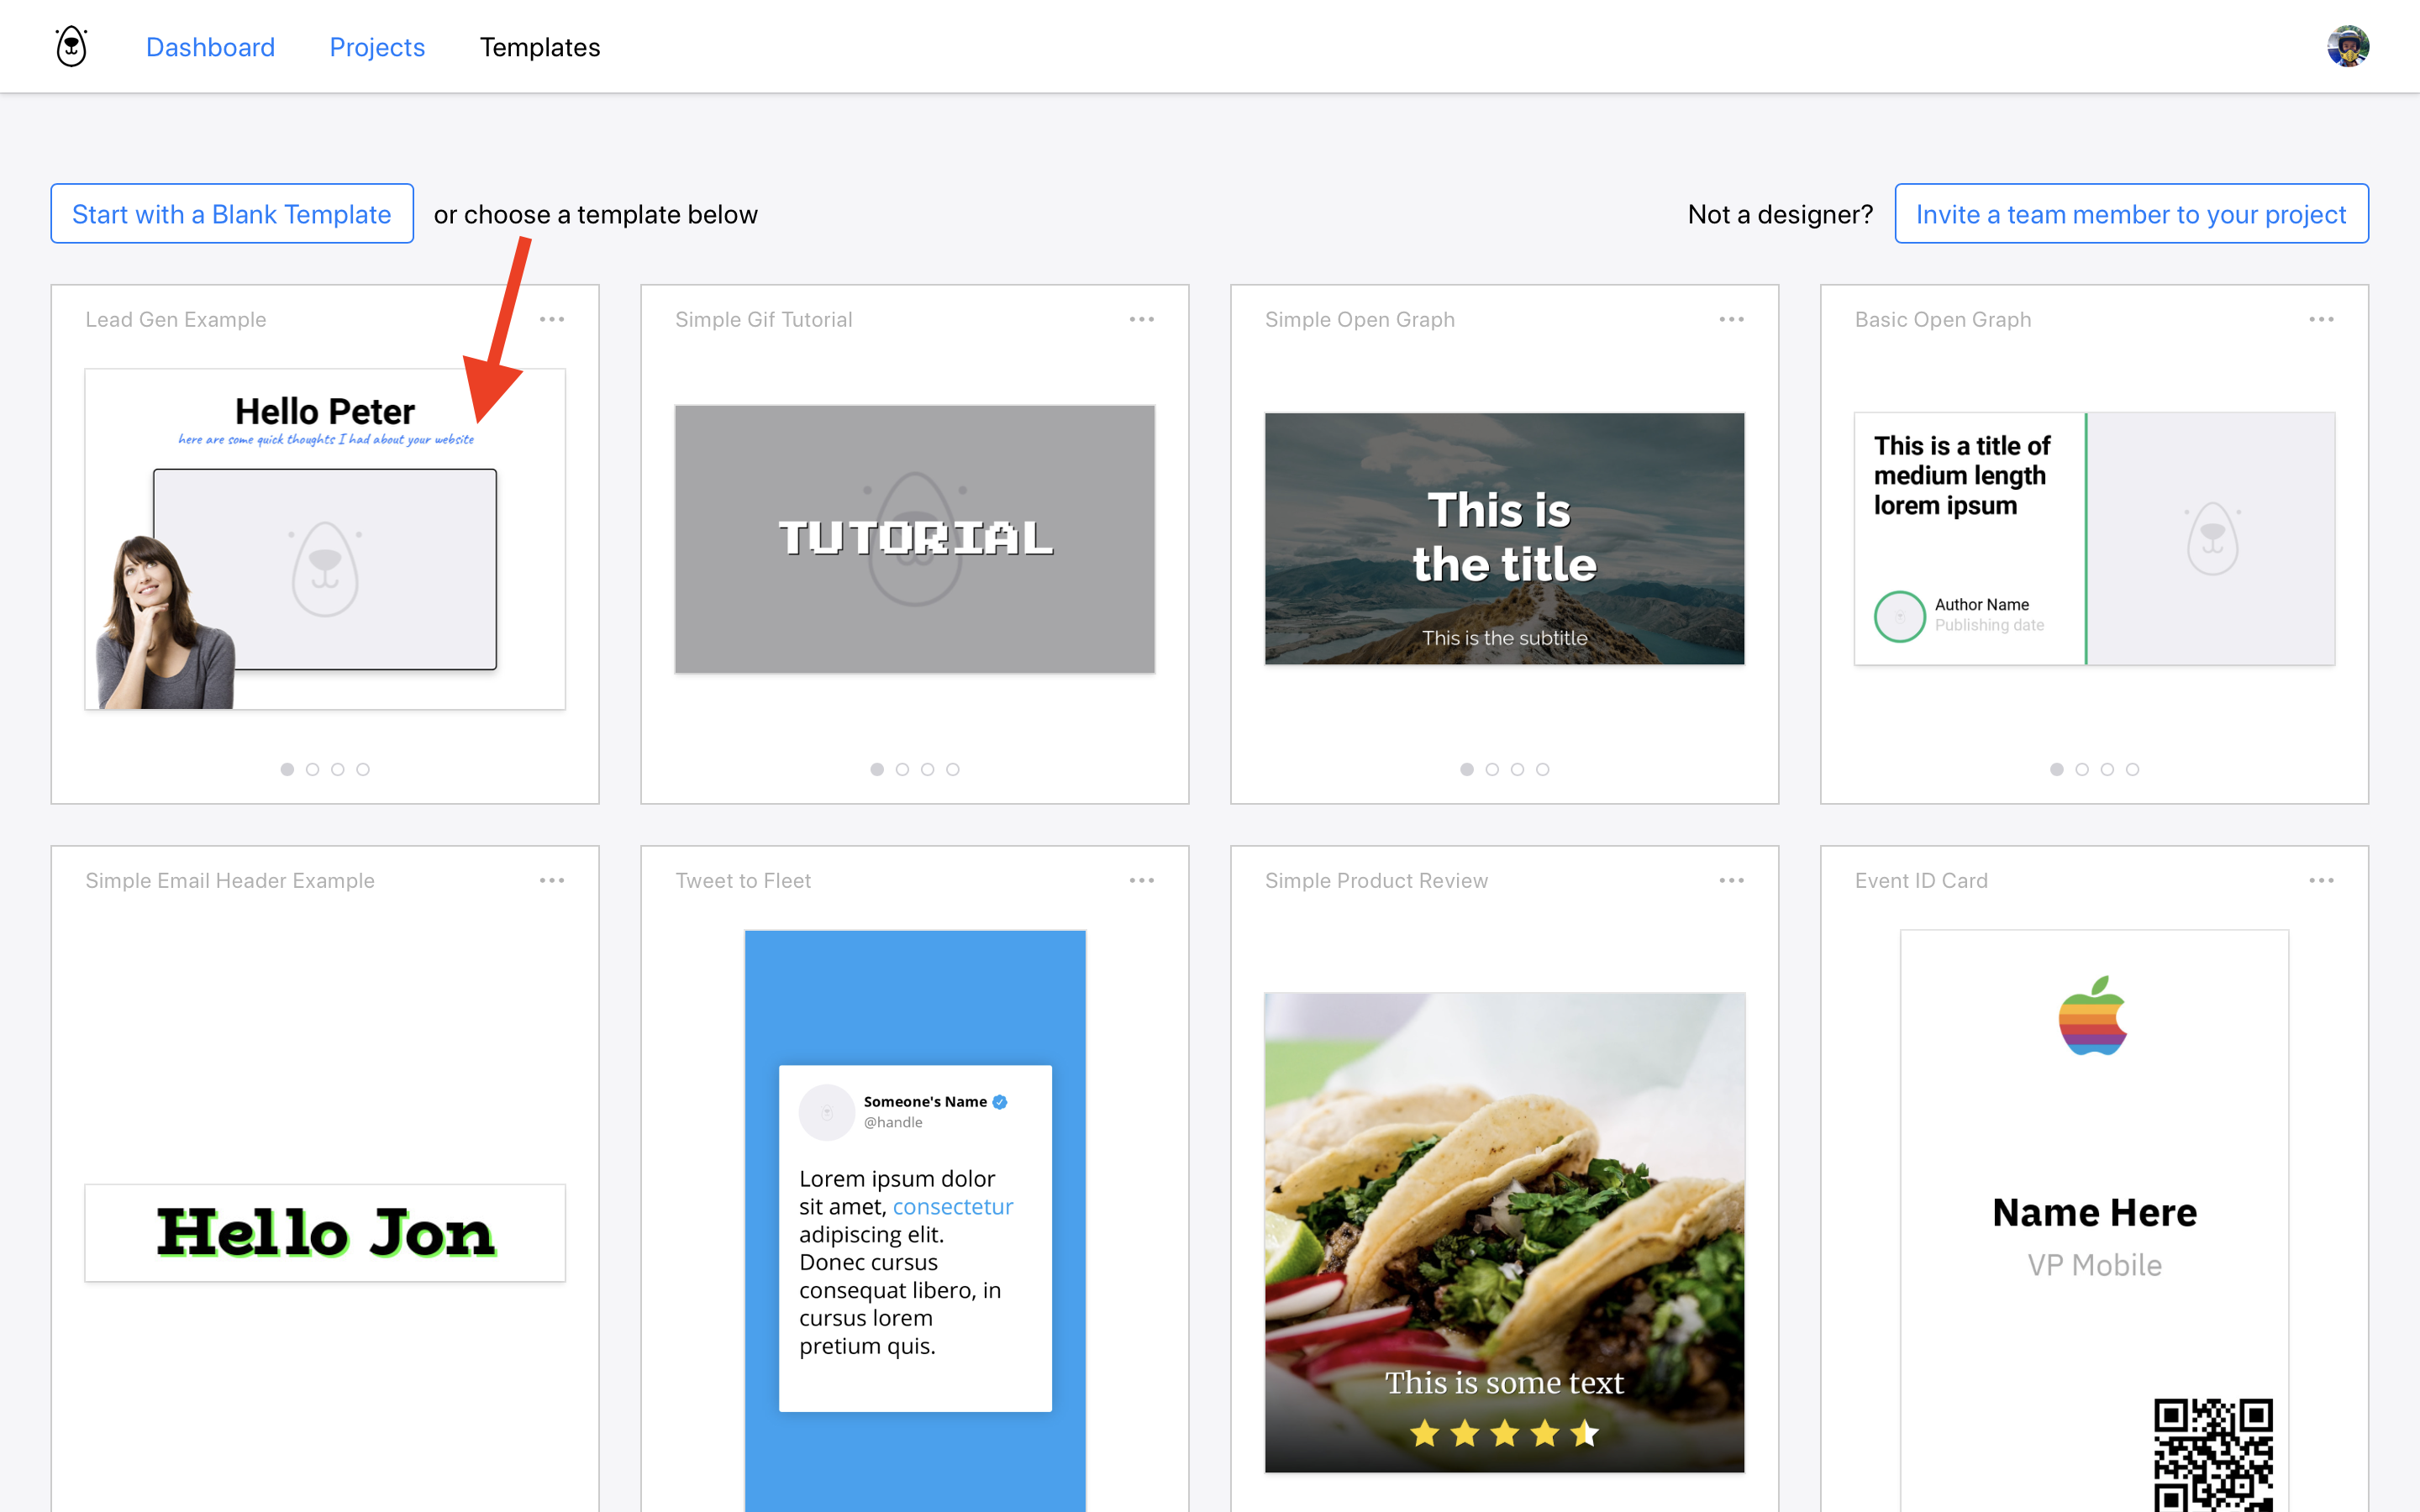
First add the tutorial template to one of your Bannerbear projects.
You can create animated gifs from any template on Bannerbear - including ones you create yourself. But for this tutorial we are going to use the Lead Gen template:
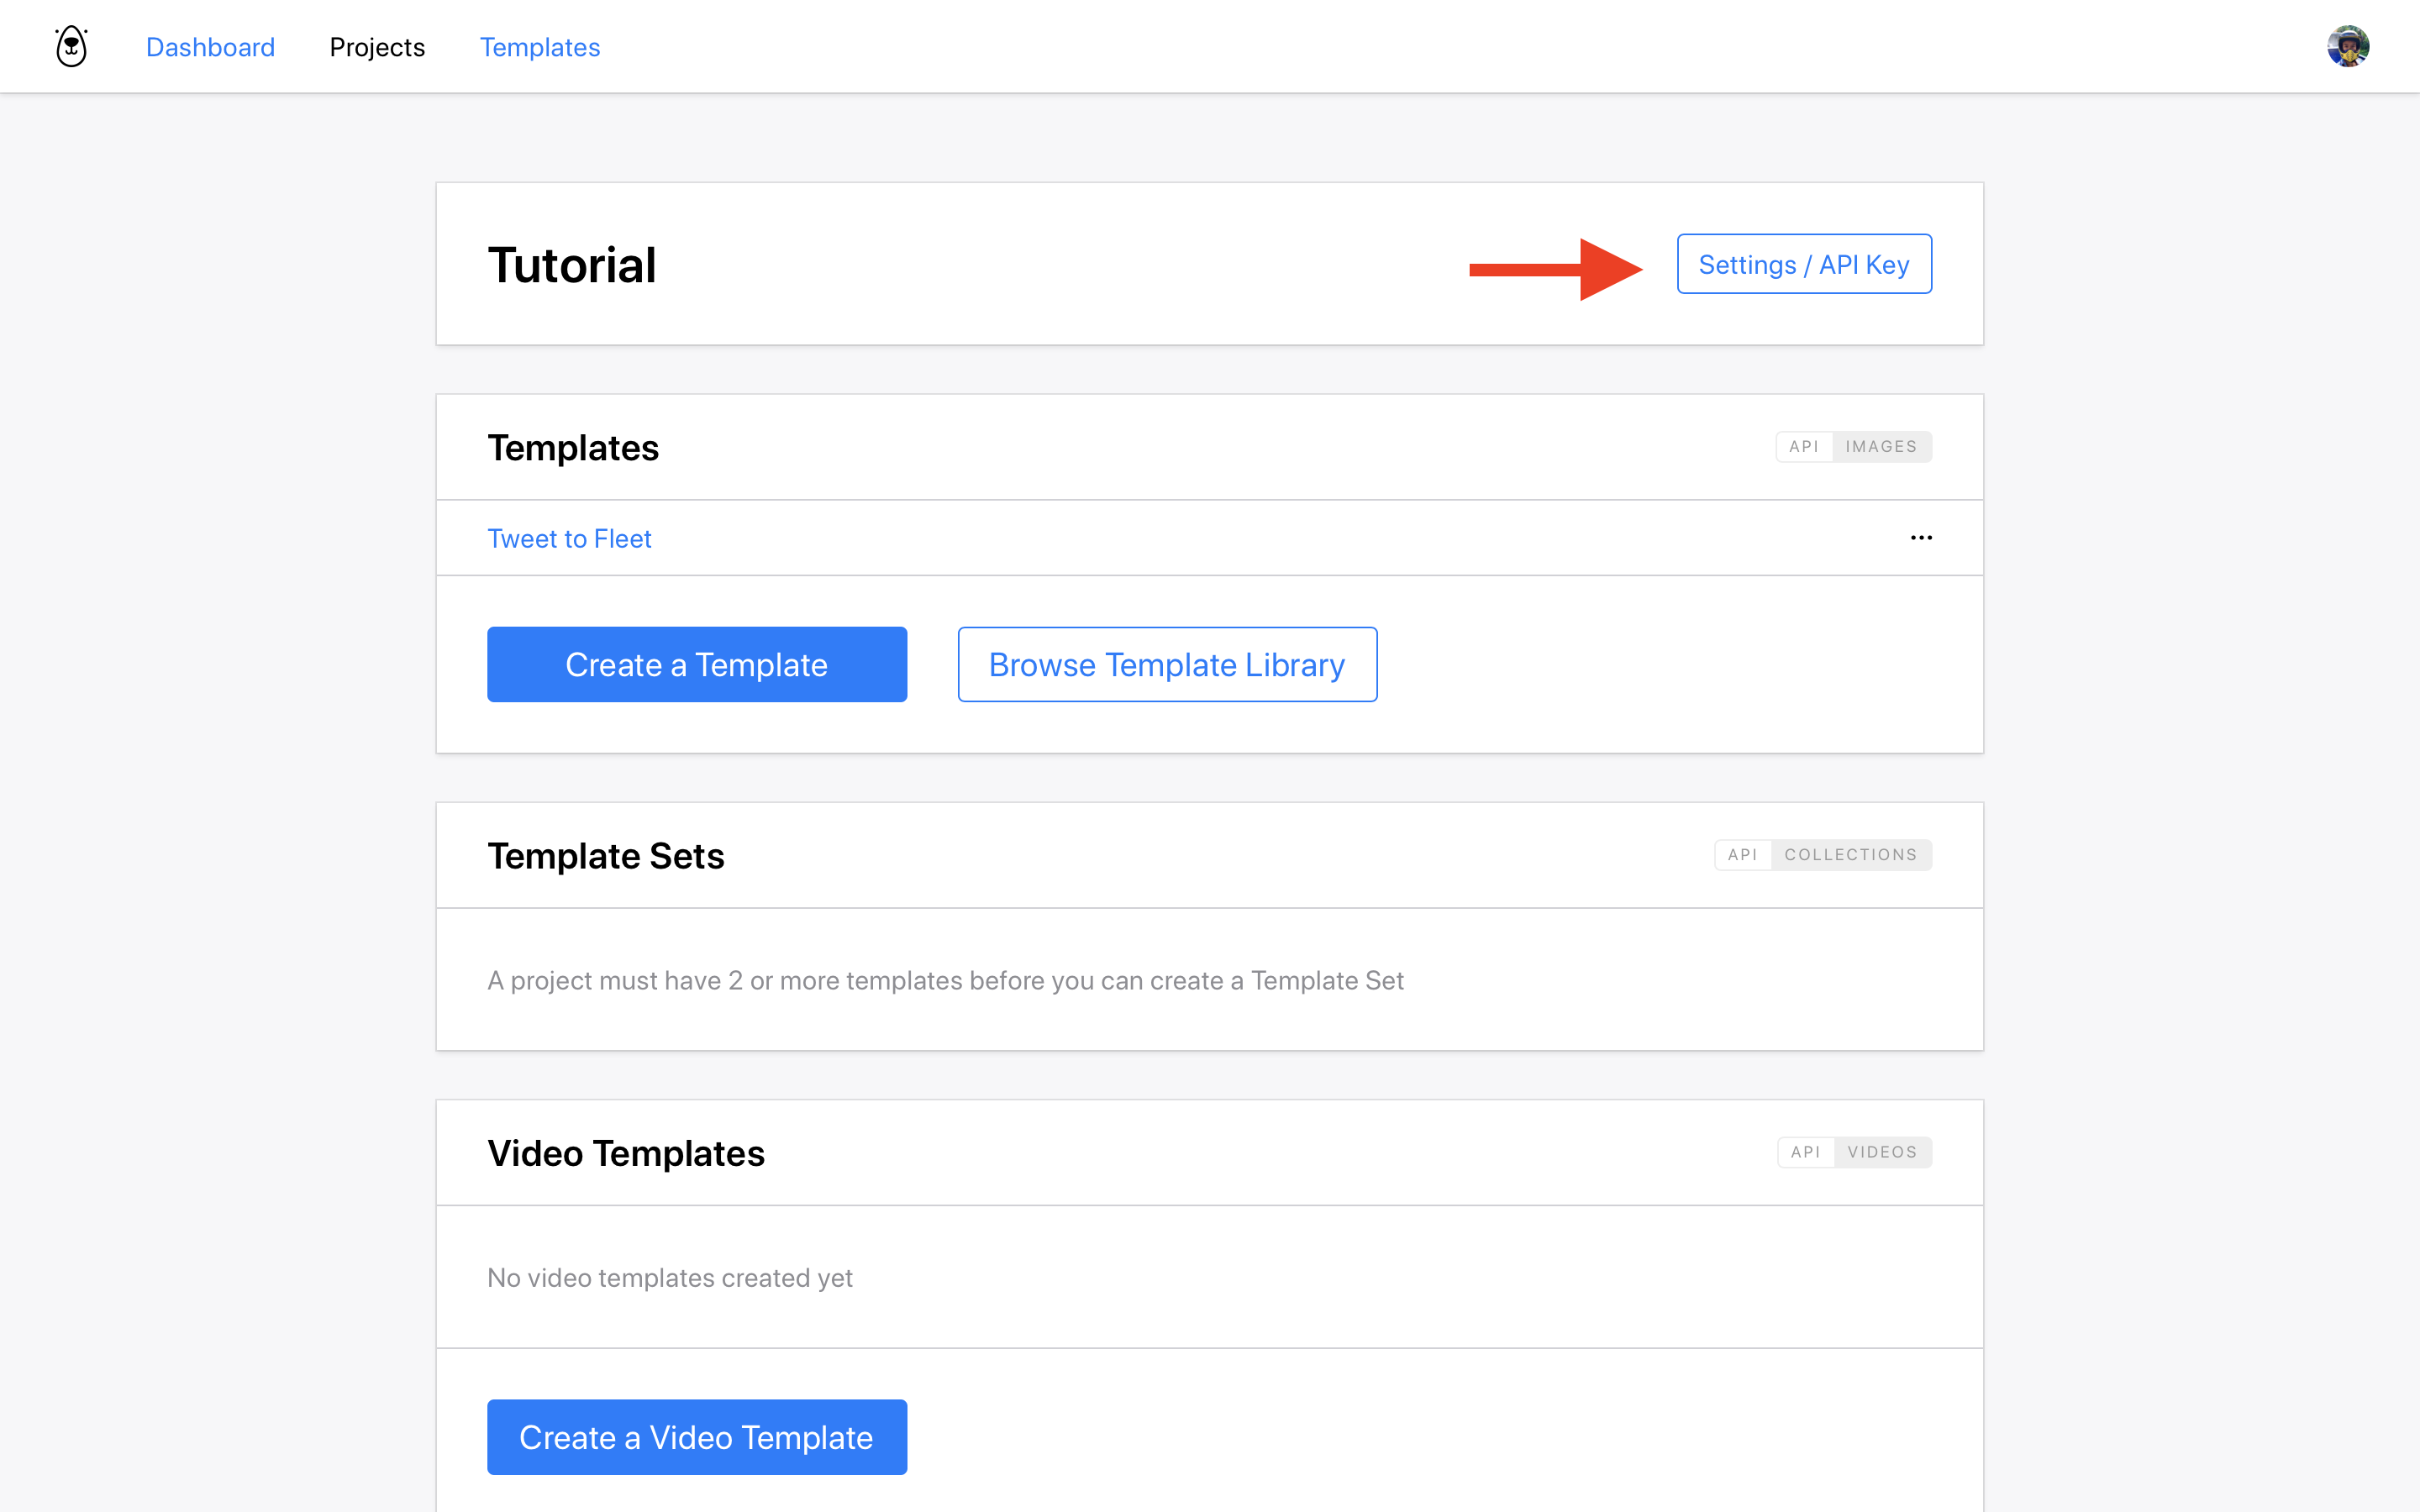
At this point you will also want to copy your Project API Key as you will need this later to authenticate with Zapier:
Set up a simple Airtable sheet
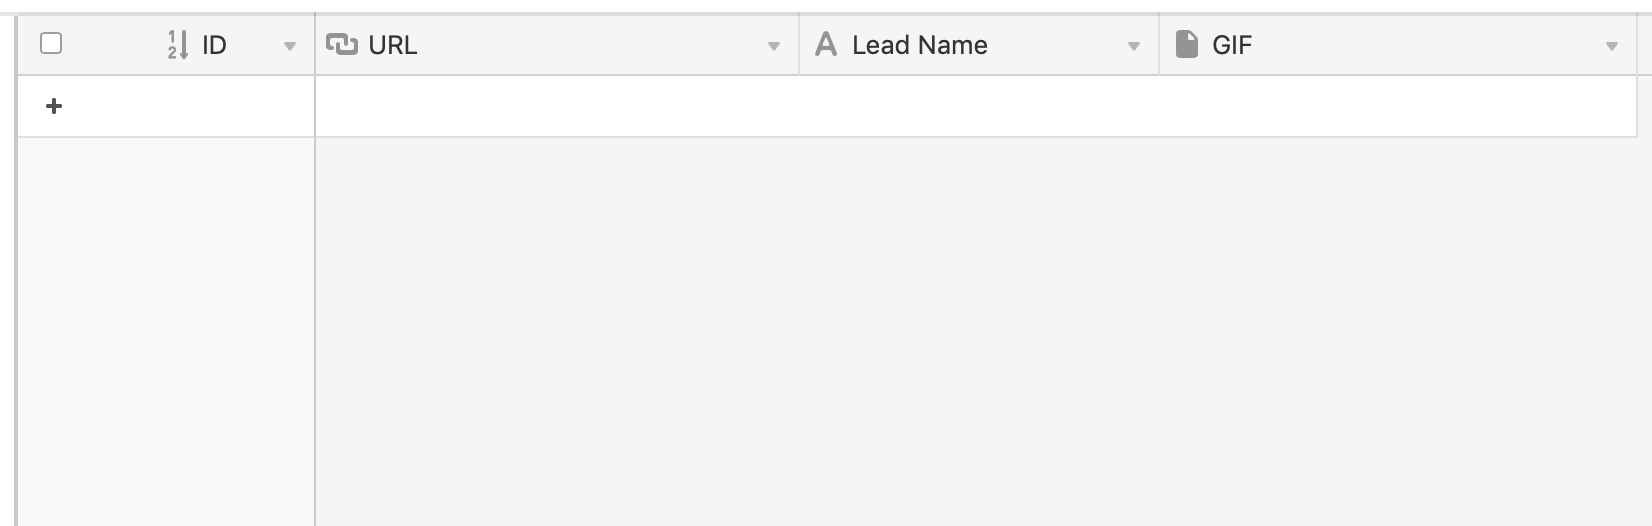
Create a simple Airtable sheet with the following columns:
- ID (auto increment)
- URL (url)
- Lead Name (single line text)
- GIF (attachment)
It should look something like this:
Set up the trigger Zap
In Zapier, choose Airtable New Record as the trigger.
Select your new sheet as the data source.
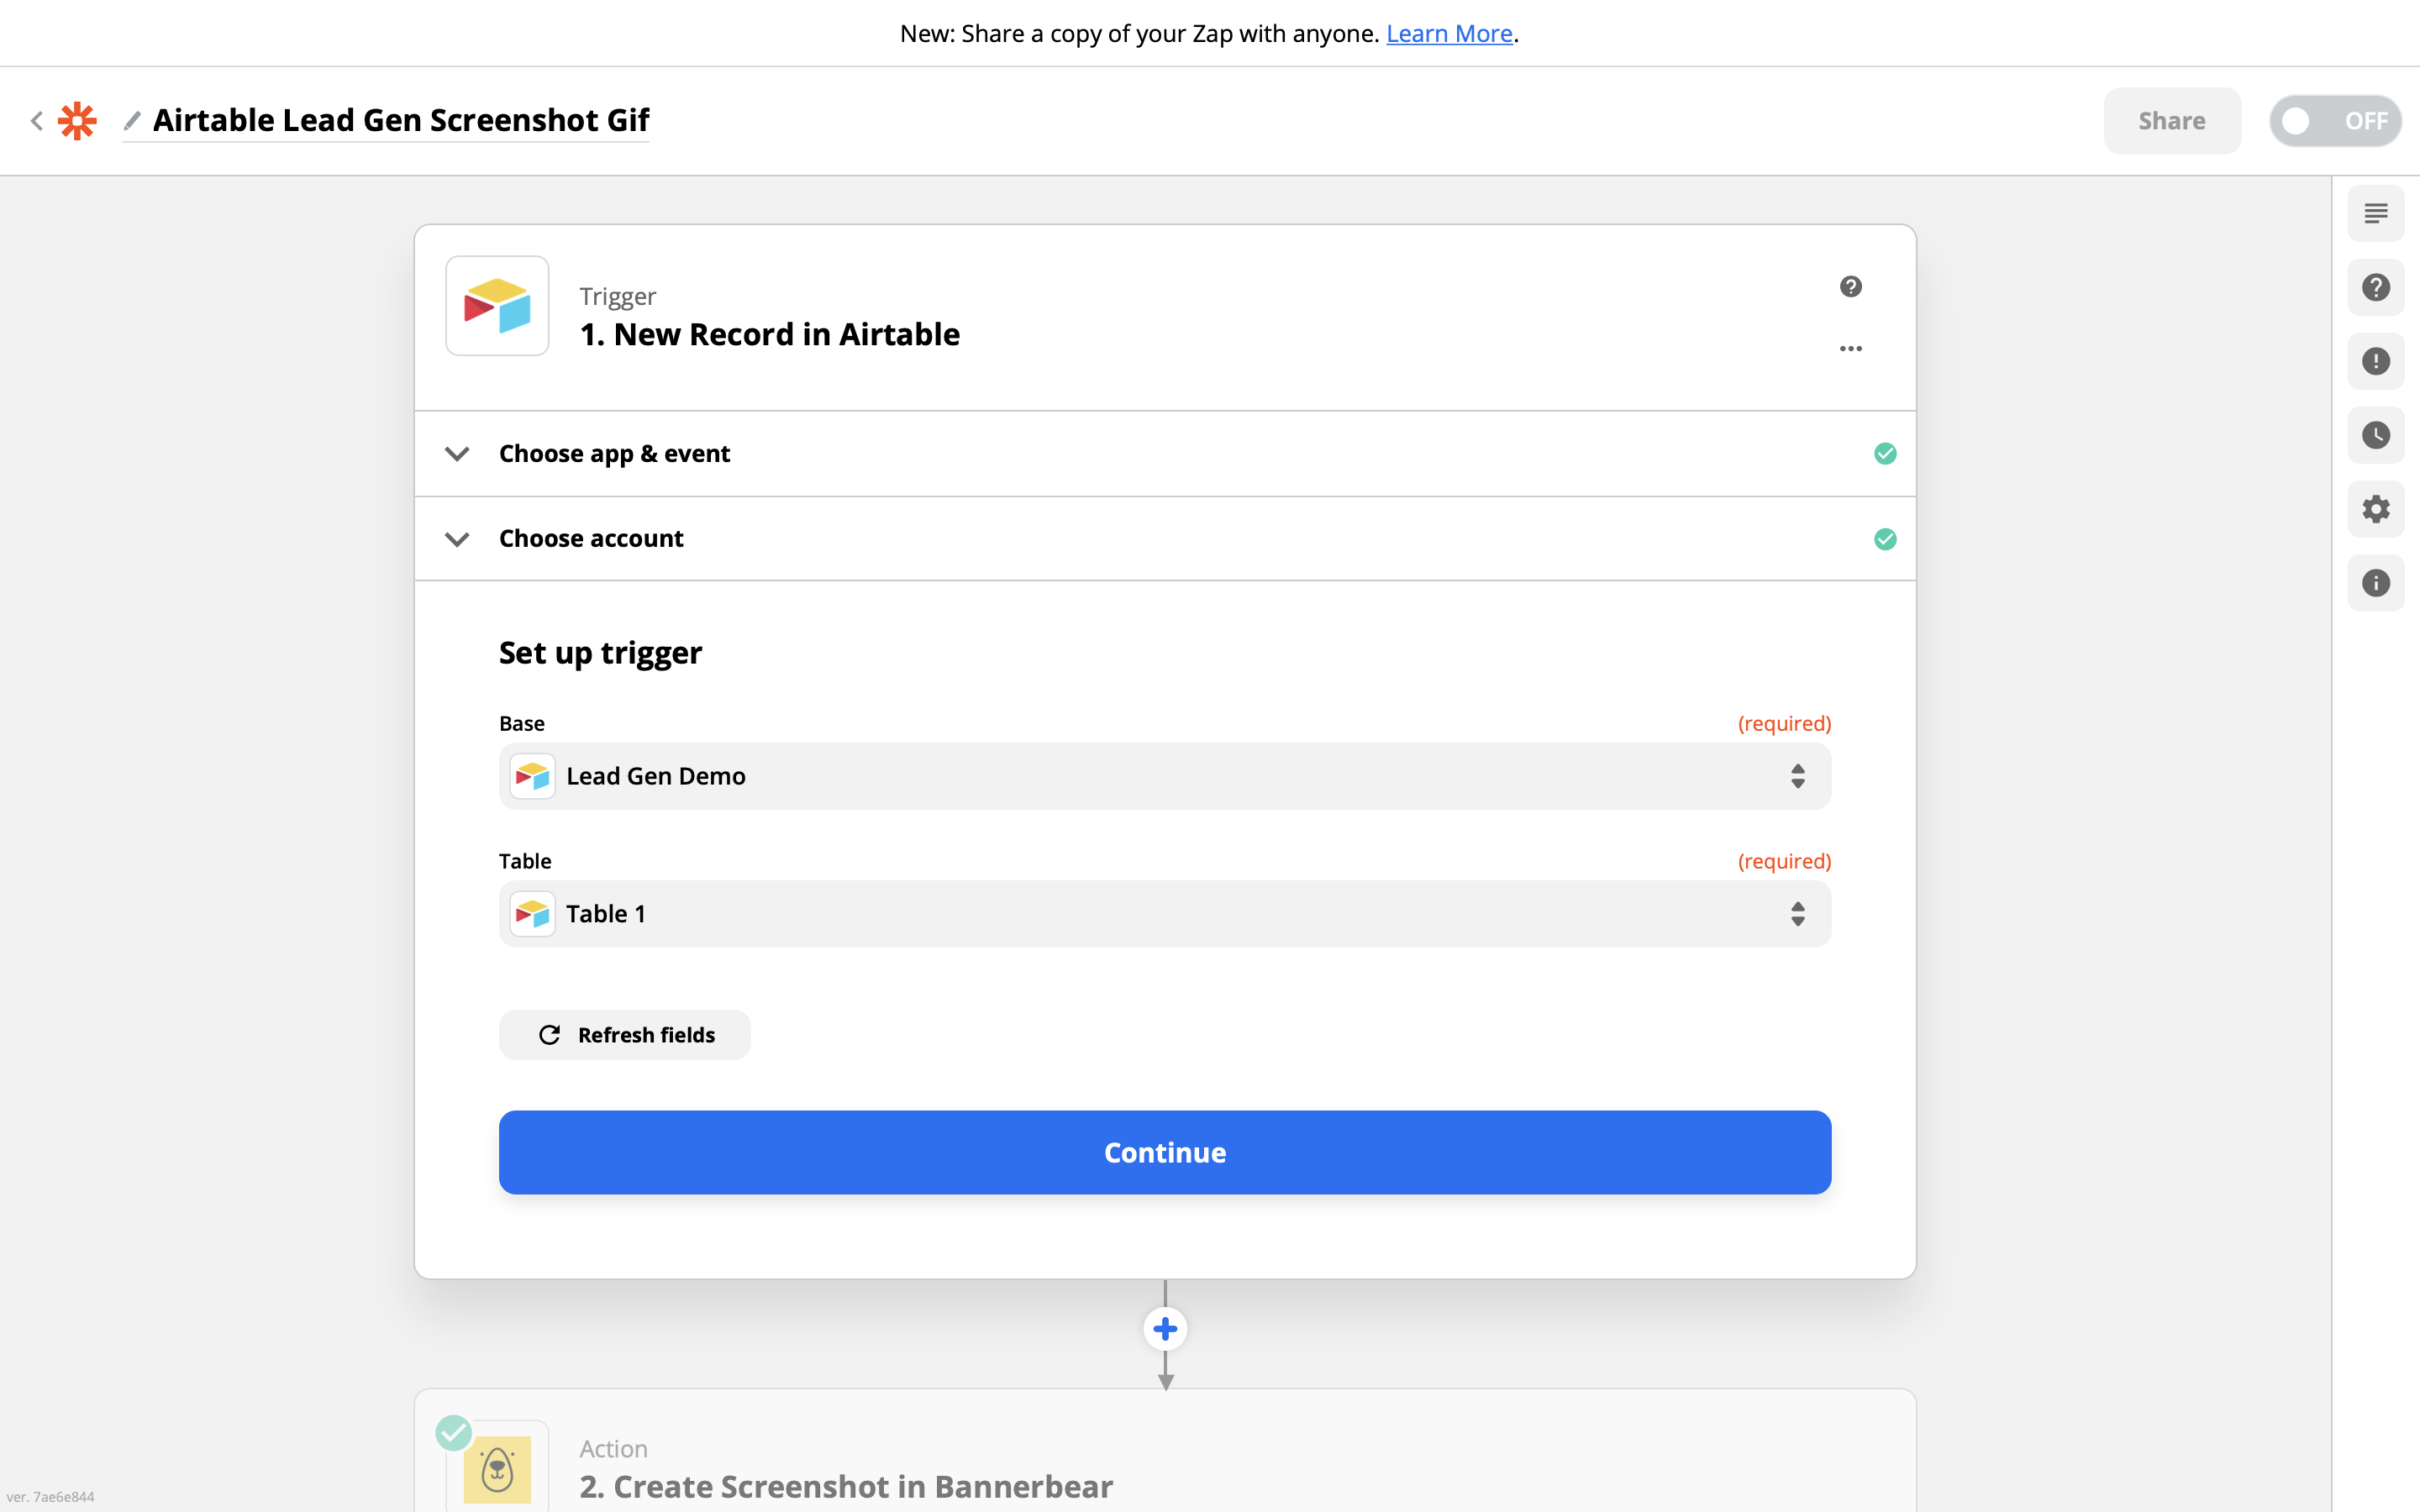
You can add some sample data in the sheet to run a test at this point. The URL should be a publically-accessible URL of any website you want to screenshot.
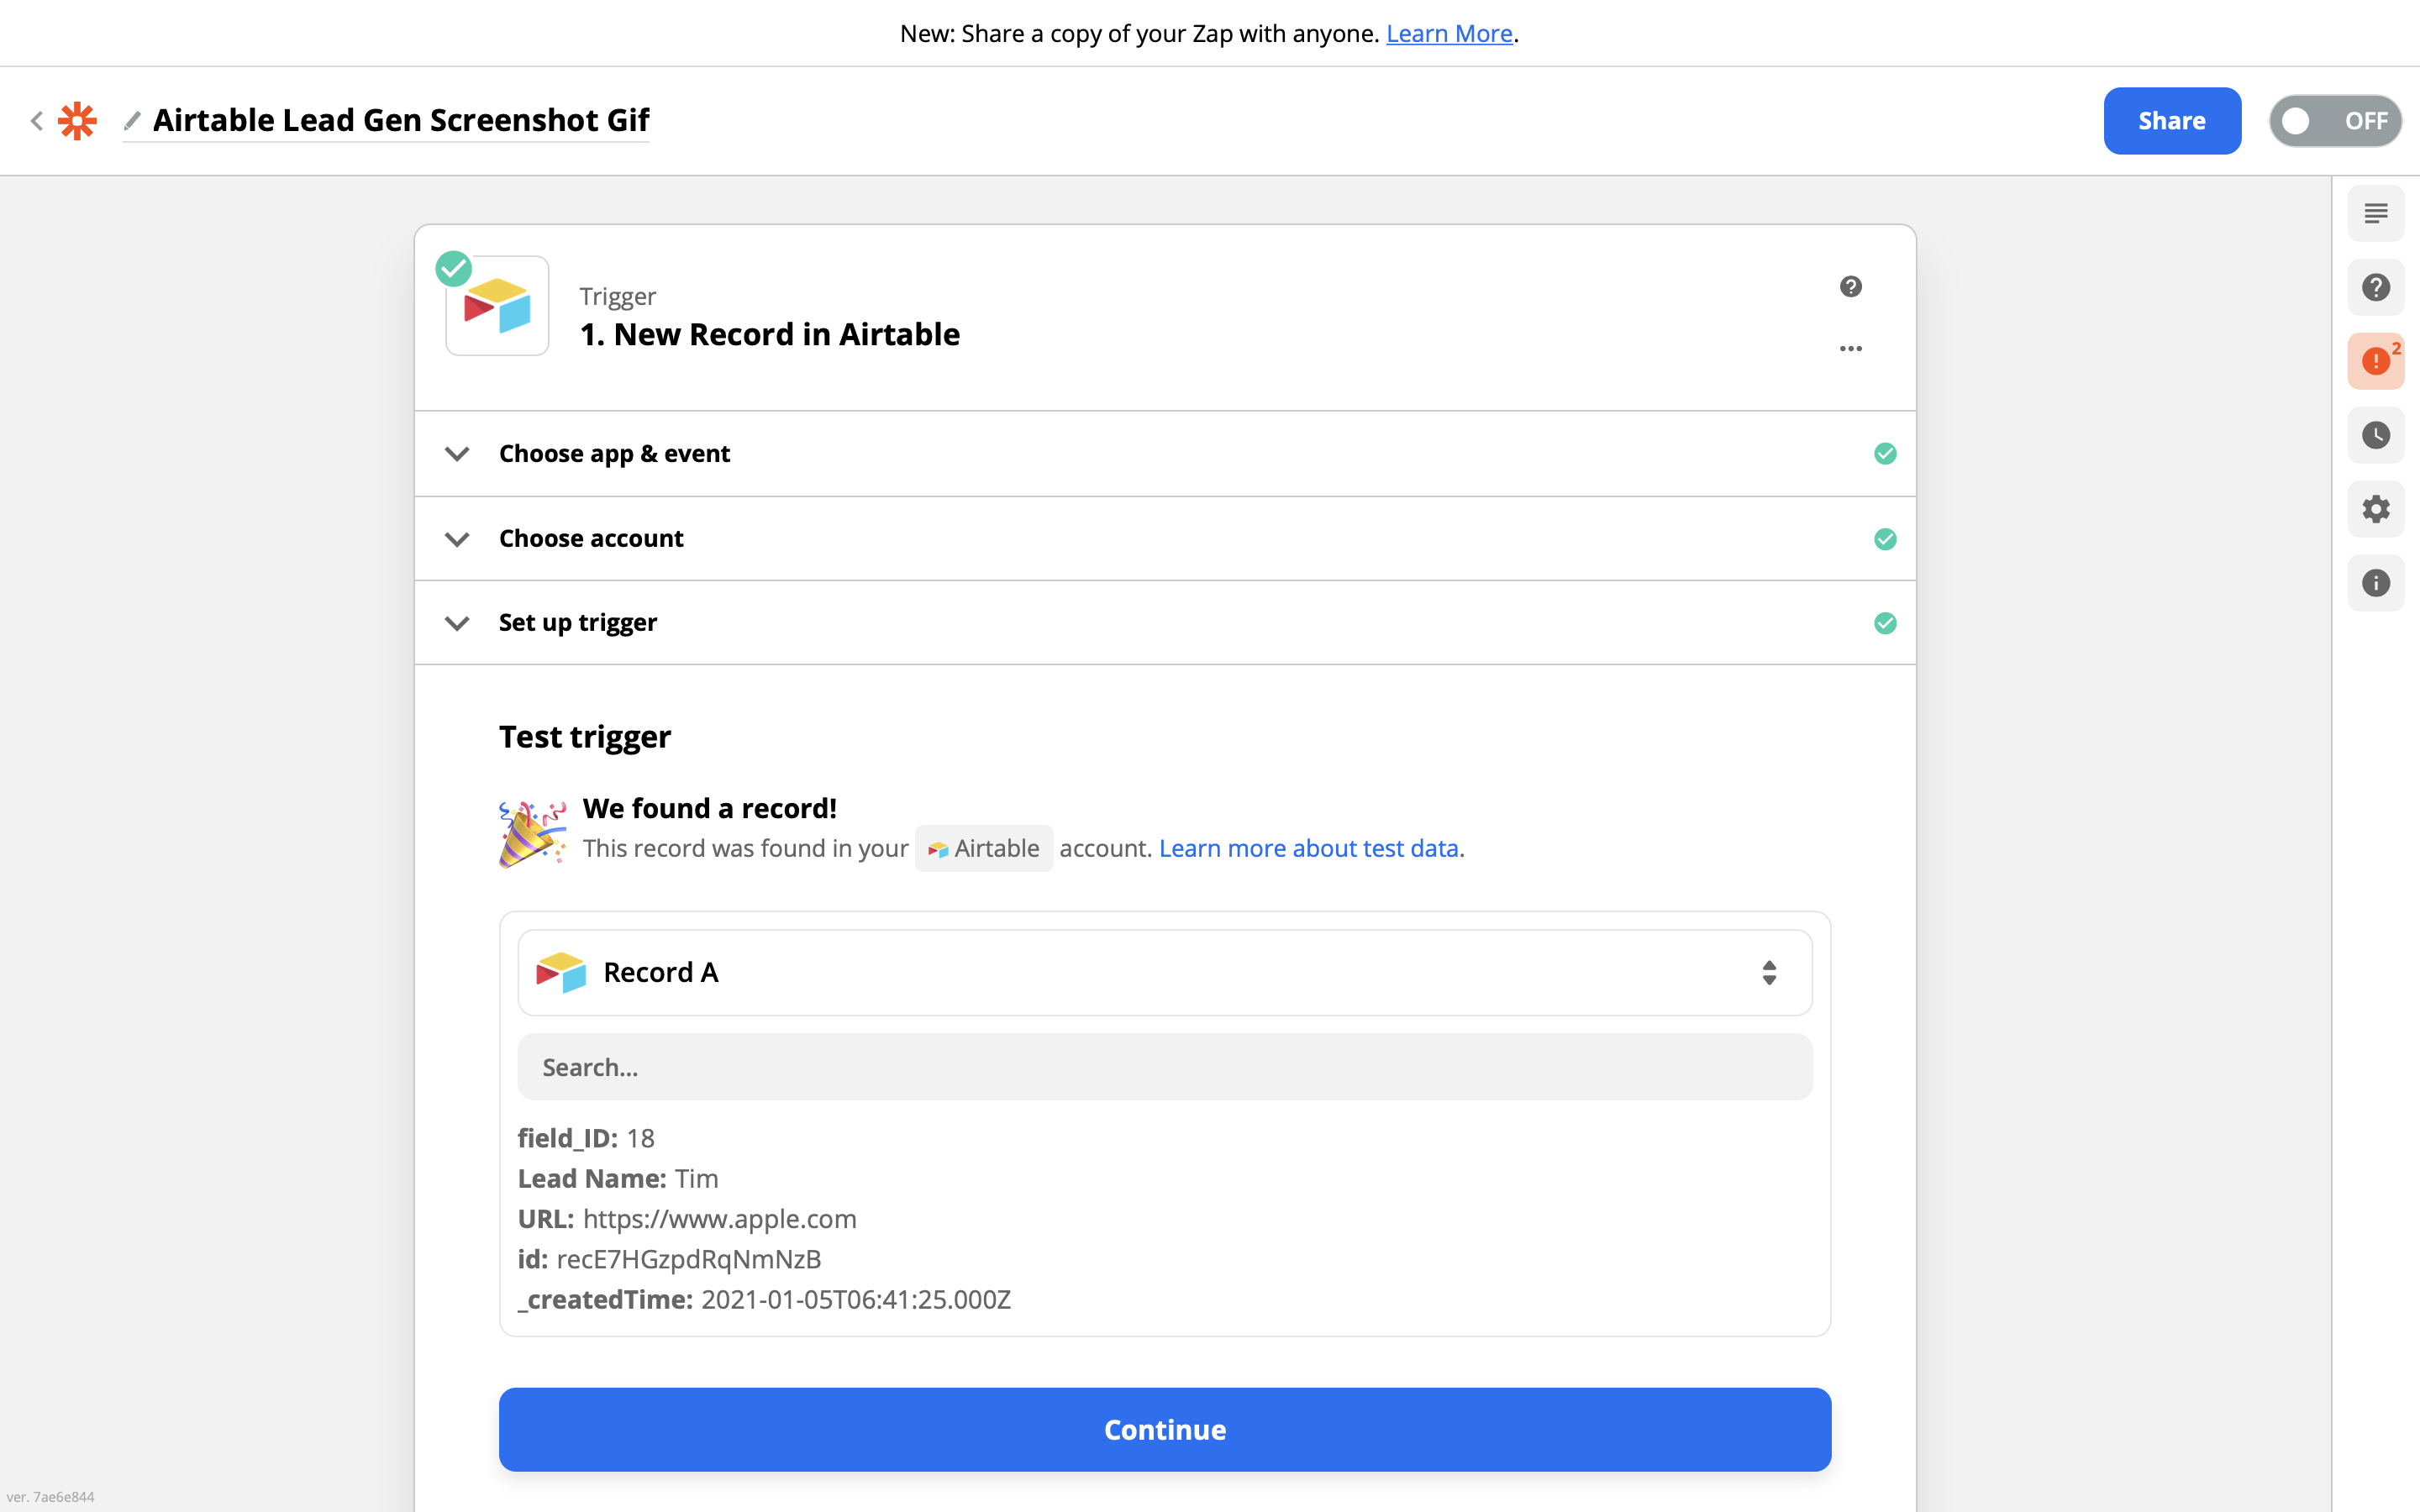
If you can see your Airtable data is being pulled in successfully, move to the next step.
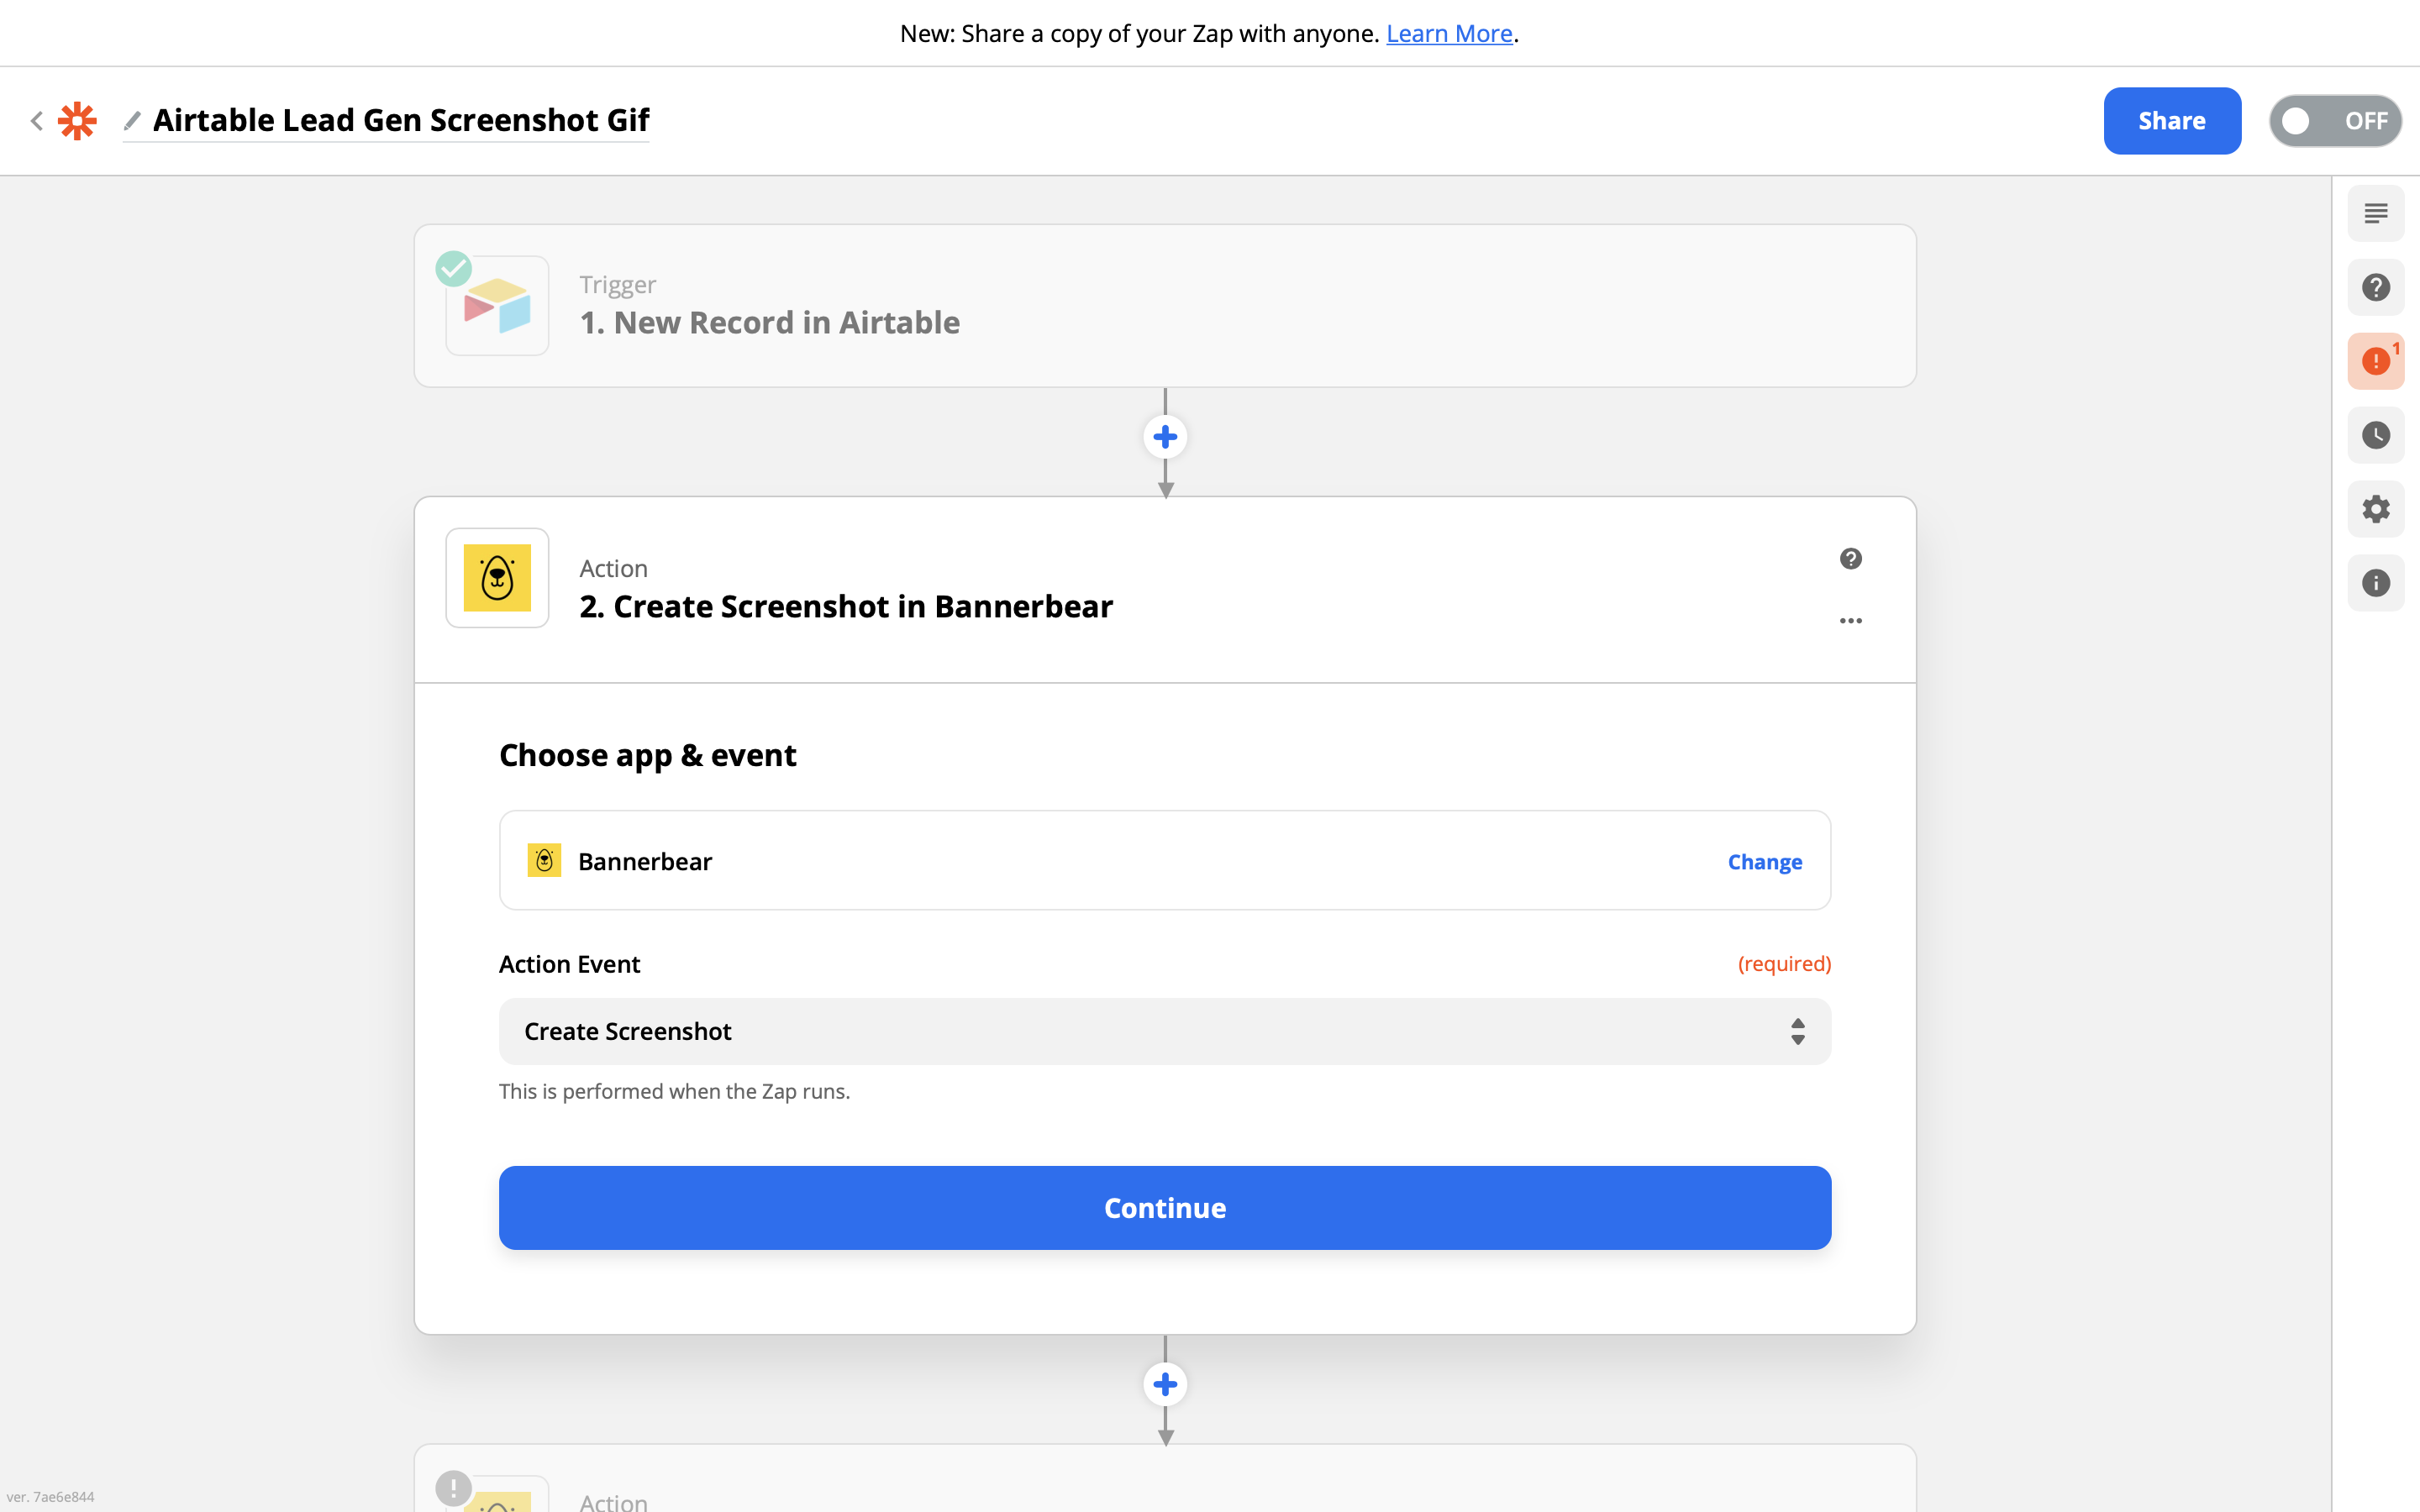
Set up the Screenshot action
Bannerbear can take screenshots for you using Zapier, which is useful if you want to capture a website screenshot and then pass it into one of your Bannerbear templates (which we are doing here).
Screenshots are only available on the Bannebear Zapier integration 2.1.0 and above! So if you are using an older integration, upgrade your integration first.
Zapier will ask you to authenticate with Bannerbear using your Project API Key. Use the key that you copied earlier.
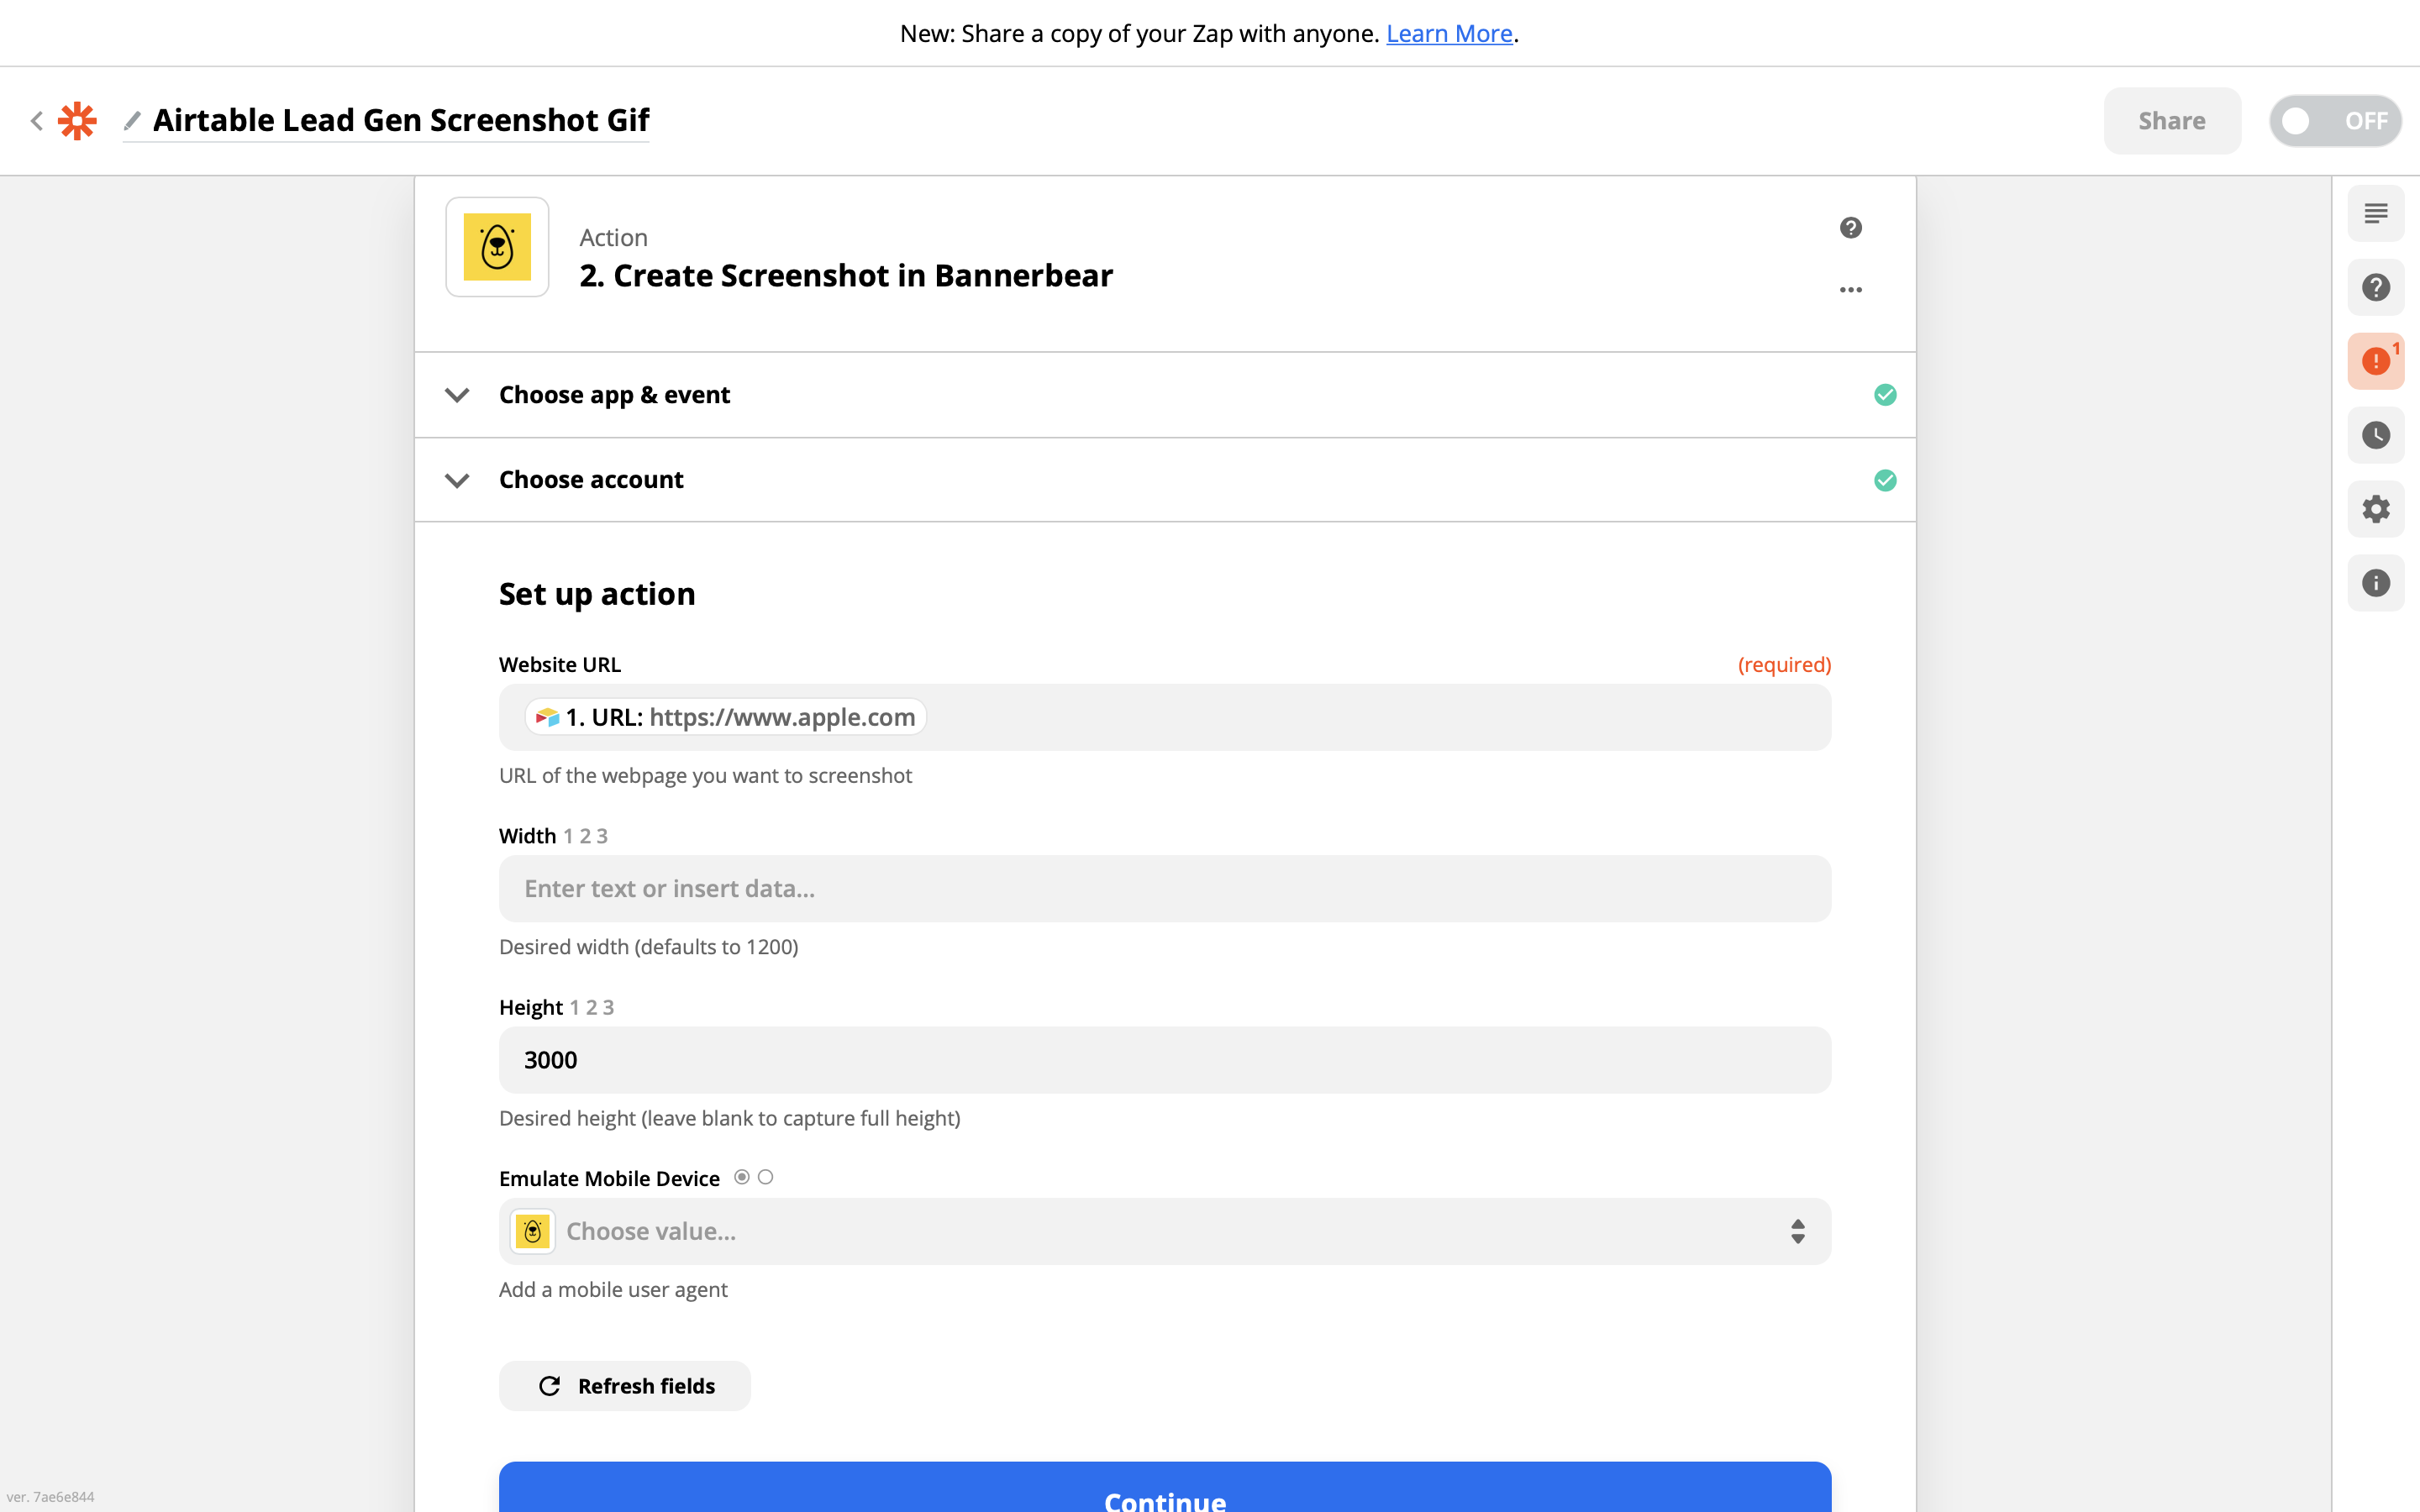
Use the URL from the Airtable step as the URL in this step.
For width and height, you can leave them blank - defaults will be used. If you leave the height blank, Bannerbear will take a full length screenshot. I'm actually going to set a height here, but this is up to you. The reason I'm setting a height is so that all my screenshots for this zap come out with a consistent height - this may or may not be important to you!
Run a test and you will see that Bannerbear returns an image screenshot of the URL.
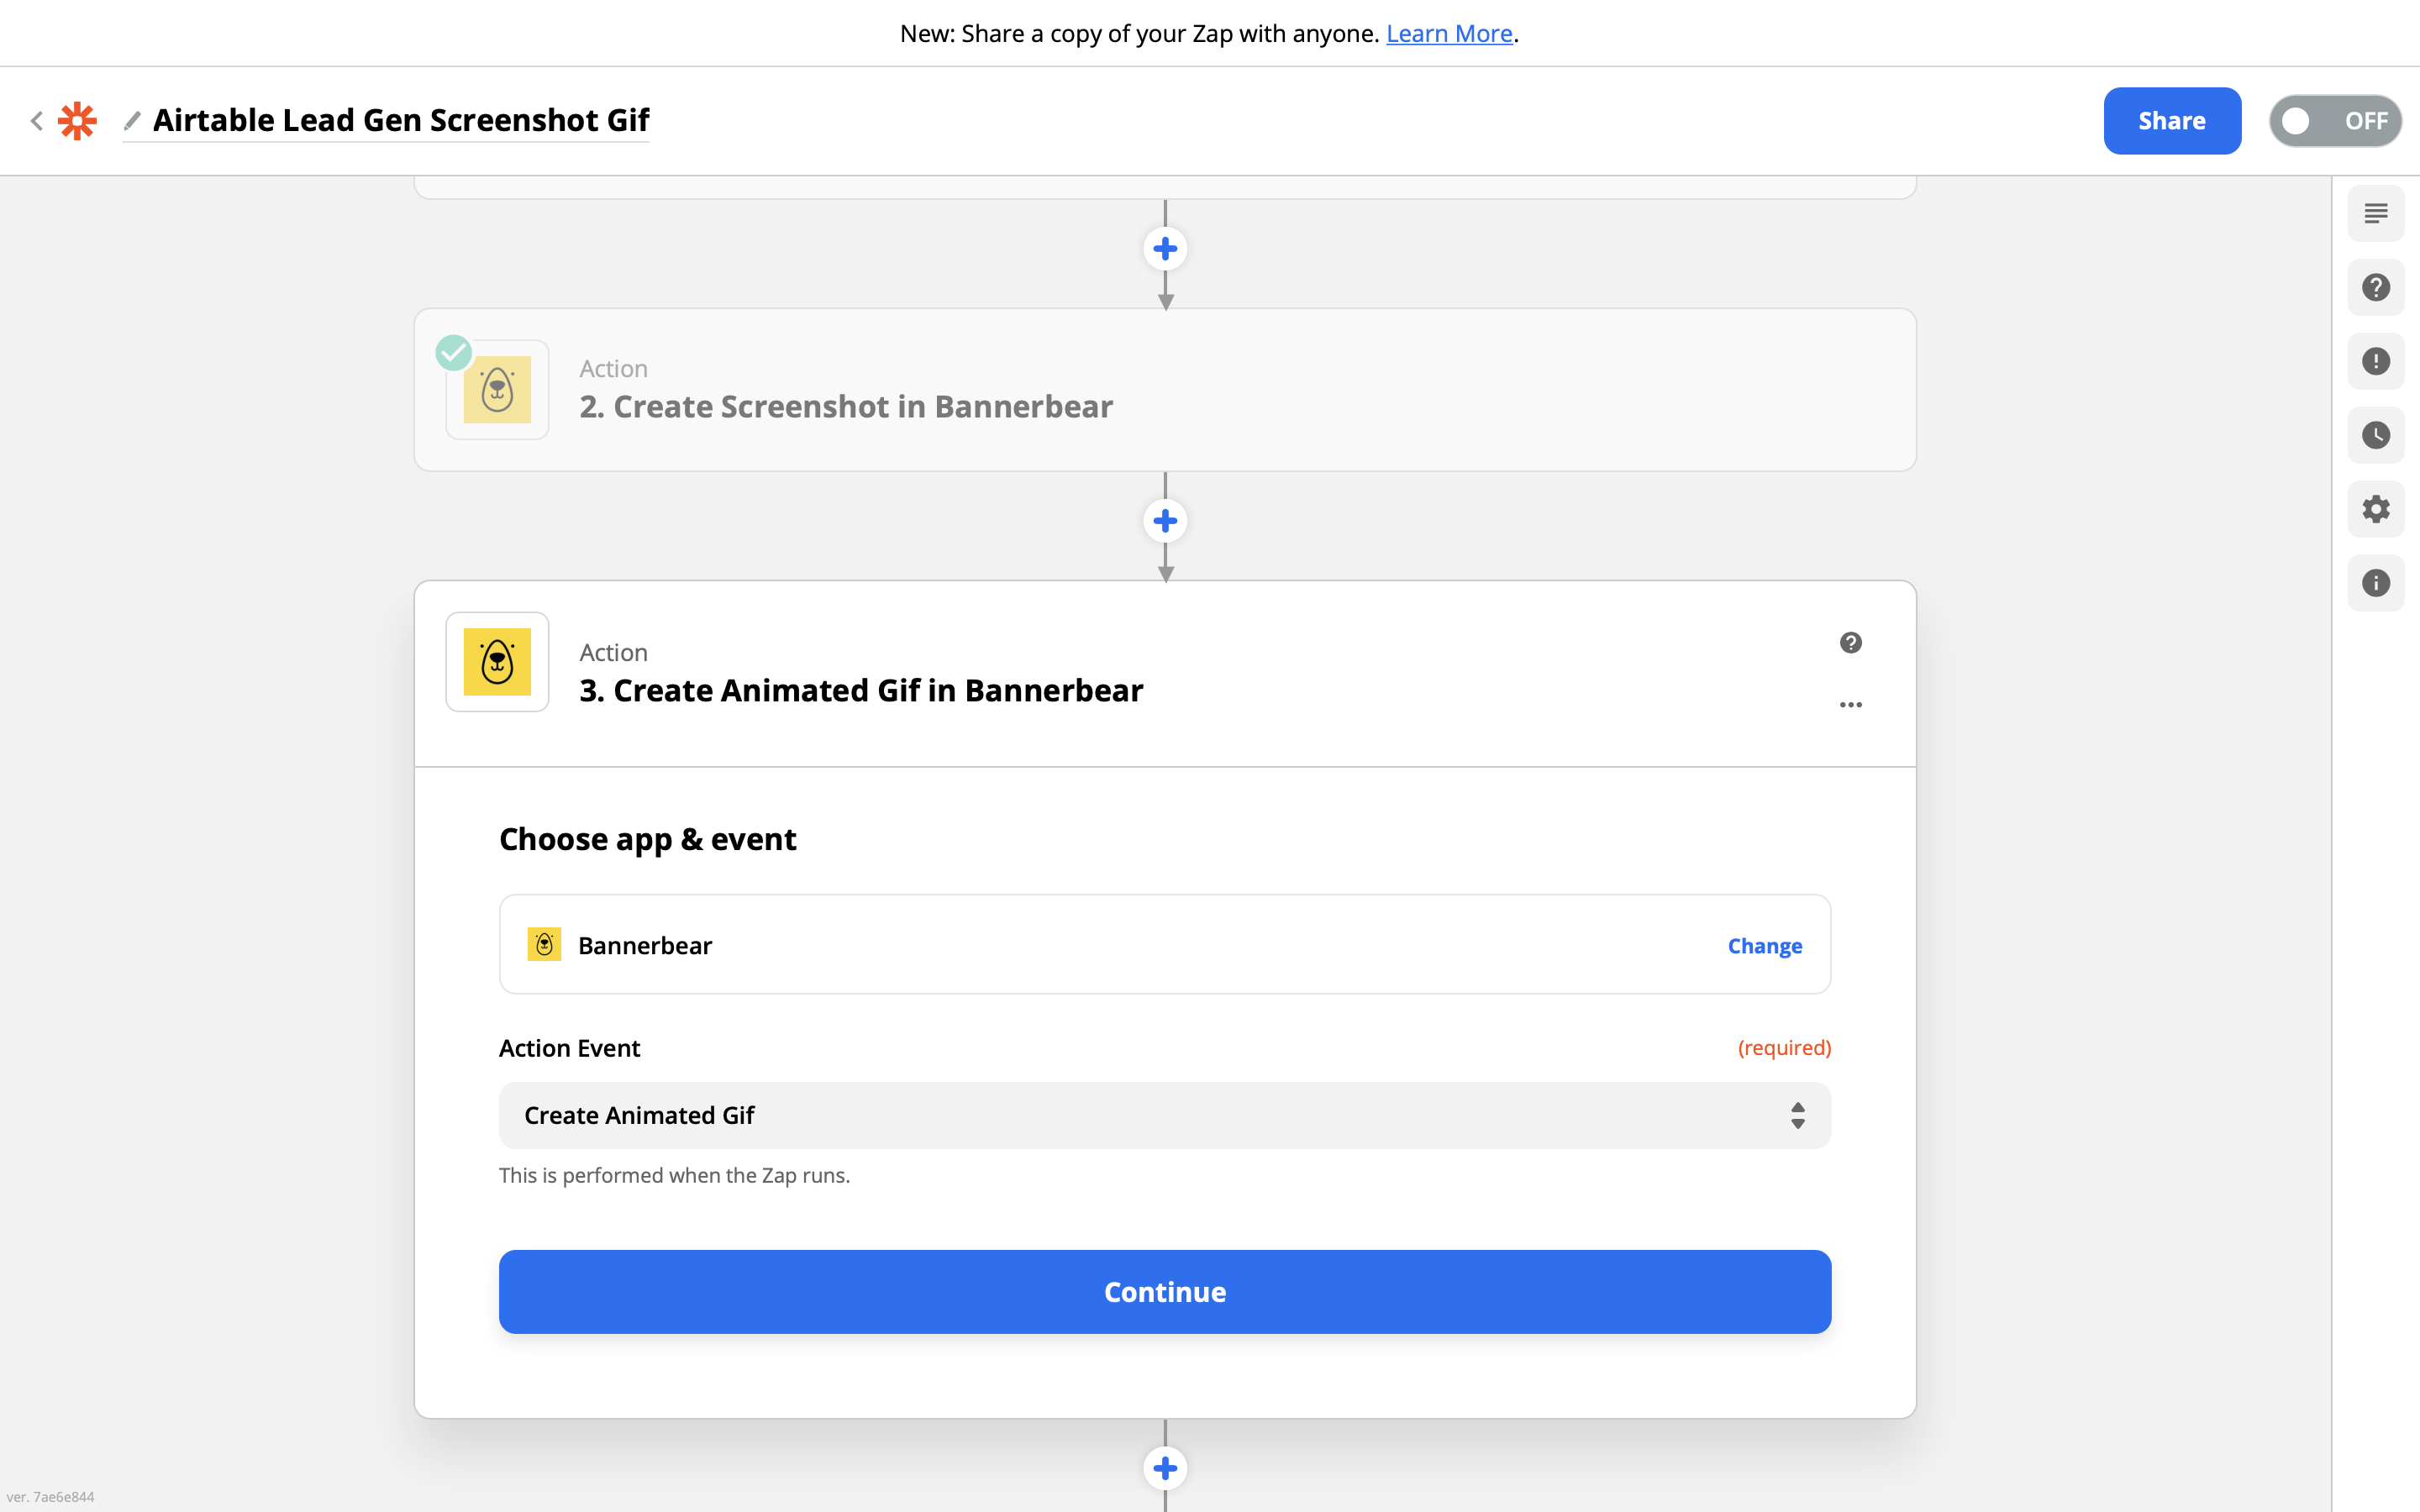
Configure the template data
Move to the next step and choose another Bannerbear action, this time Create Animated Gif:
How to add multiple frames of animated gif data to your template
Here's where the process is different from static images!
When creating a static image using Zapier + Bannerbear, we pass single bits of data into our templates.
When creating an animated gif using Zapier + Bannerbear, we pass multiple bits of data into our templates. To fit multiple bits of data on one line (so that we can pass it in via Zapier) we separate the data bits with a bar | character.
For example, passing in:
hello|world|how|are|you
Into a template text box would result in an animated gif with 5 frames, with the text:
- hello
- world
- how
- are
- you
In this tutorial we are going to pass data across 3 frames.
Inserting the data
Set the FPS as 1 (Frames Per Second).
For the Title Text, add:
Hello {Lead Name}|Hello {Lead Name}|Hello {Lead Name}
This is the same text repeated three times, separated with a bar | character.

For the Website Image URL, add the screenshot image url from the screenshot step - again, repeated 3 times and separated with a bar | character:
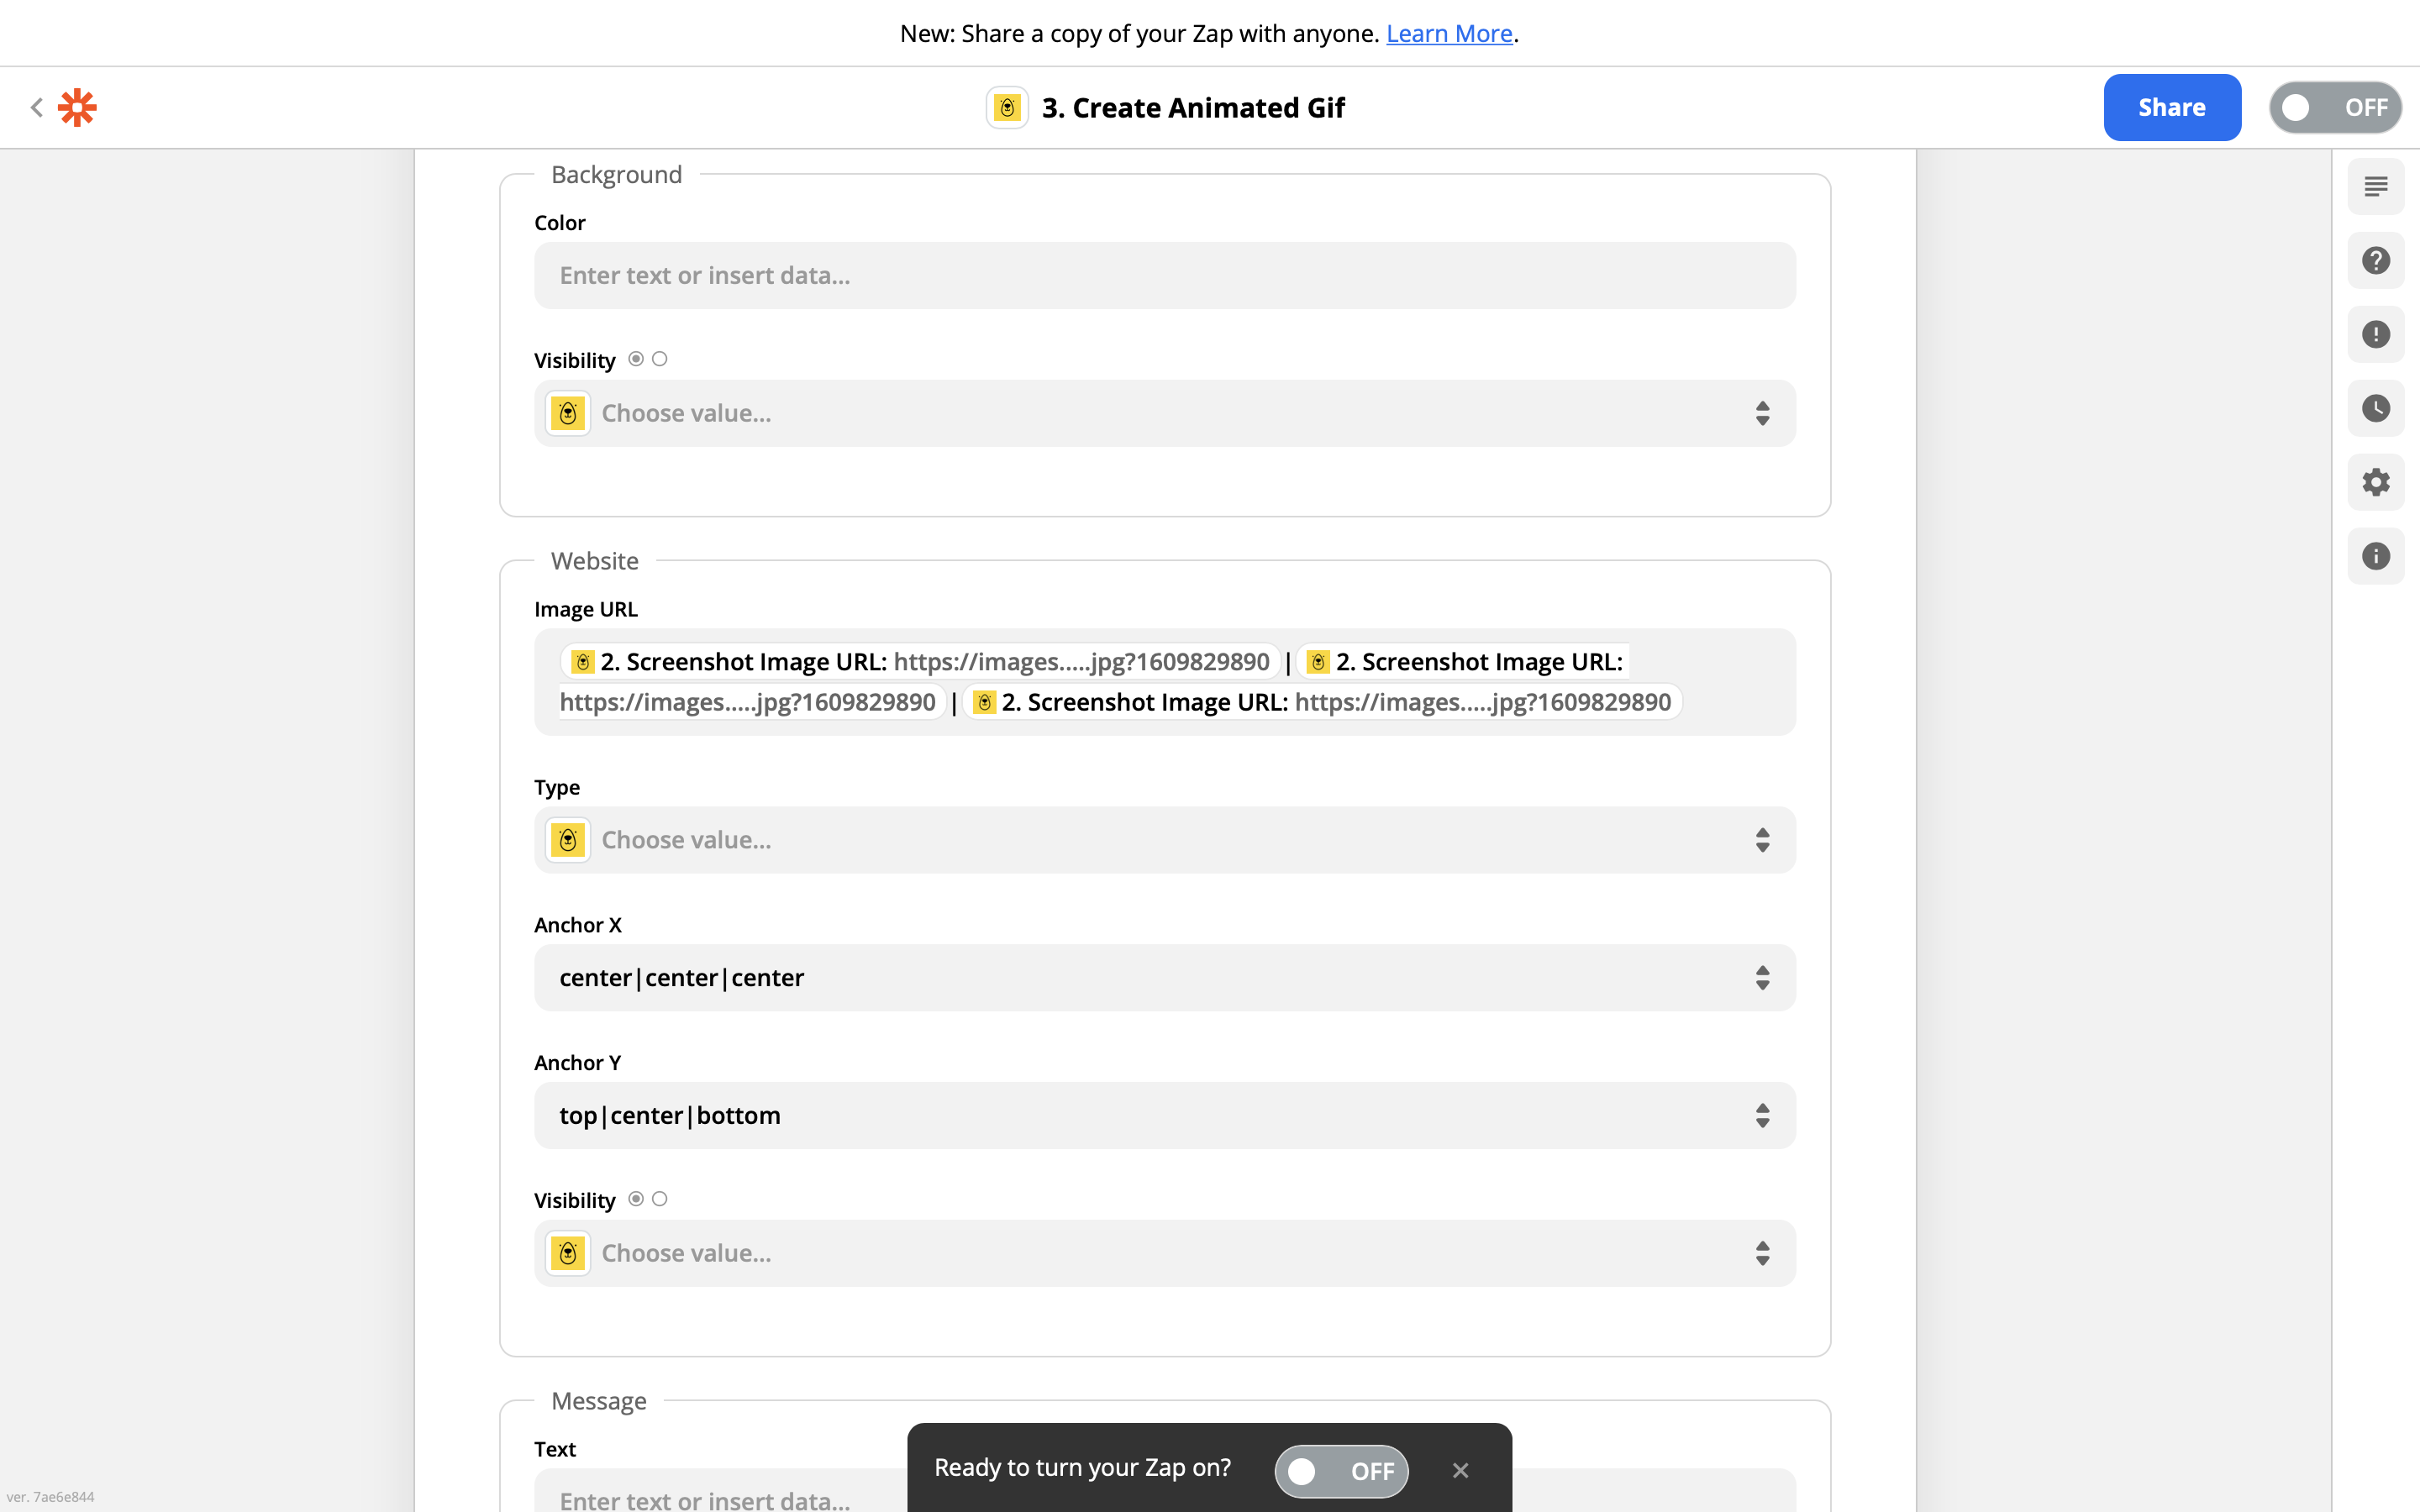
Now here's the interesting part!
To get the "scroll" effect across different frames, we are going to tell Bannerbear to orient the screenshot differently for frame 1, 2 and 3.
In Anchor X put the custom value:
center|center|center
In Anchor Y put the custom value:
top|center|bottom
Note you need to define both Anchor X and Anchor Y when using this feature of Bannerbear.
That's all for this step - you can test the step and move on.
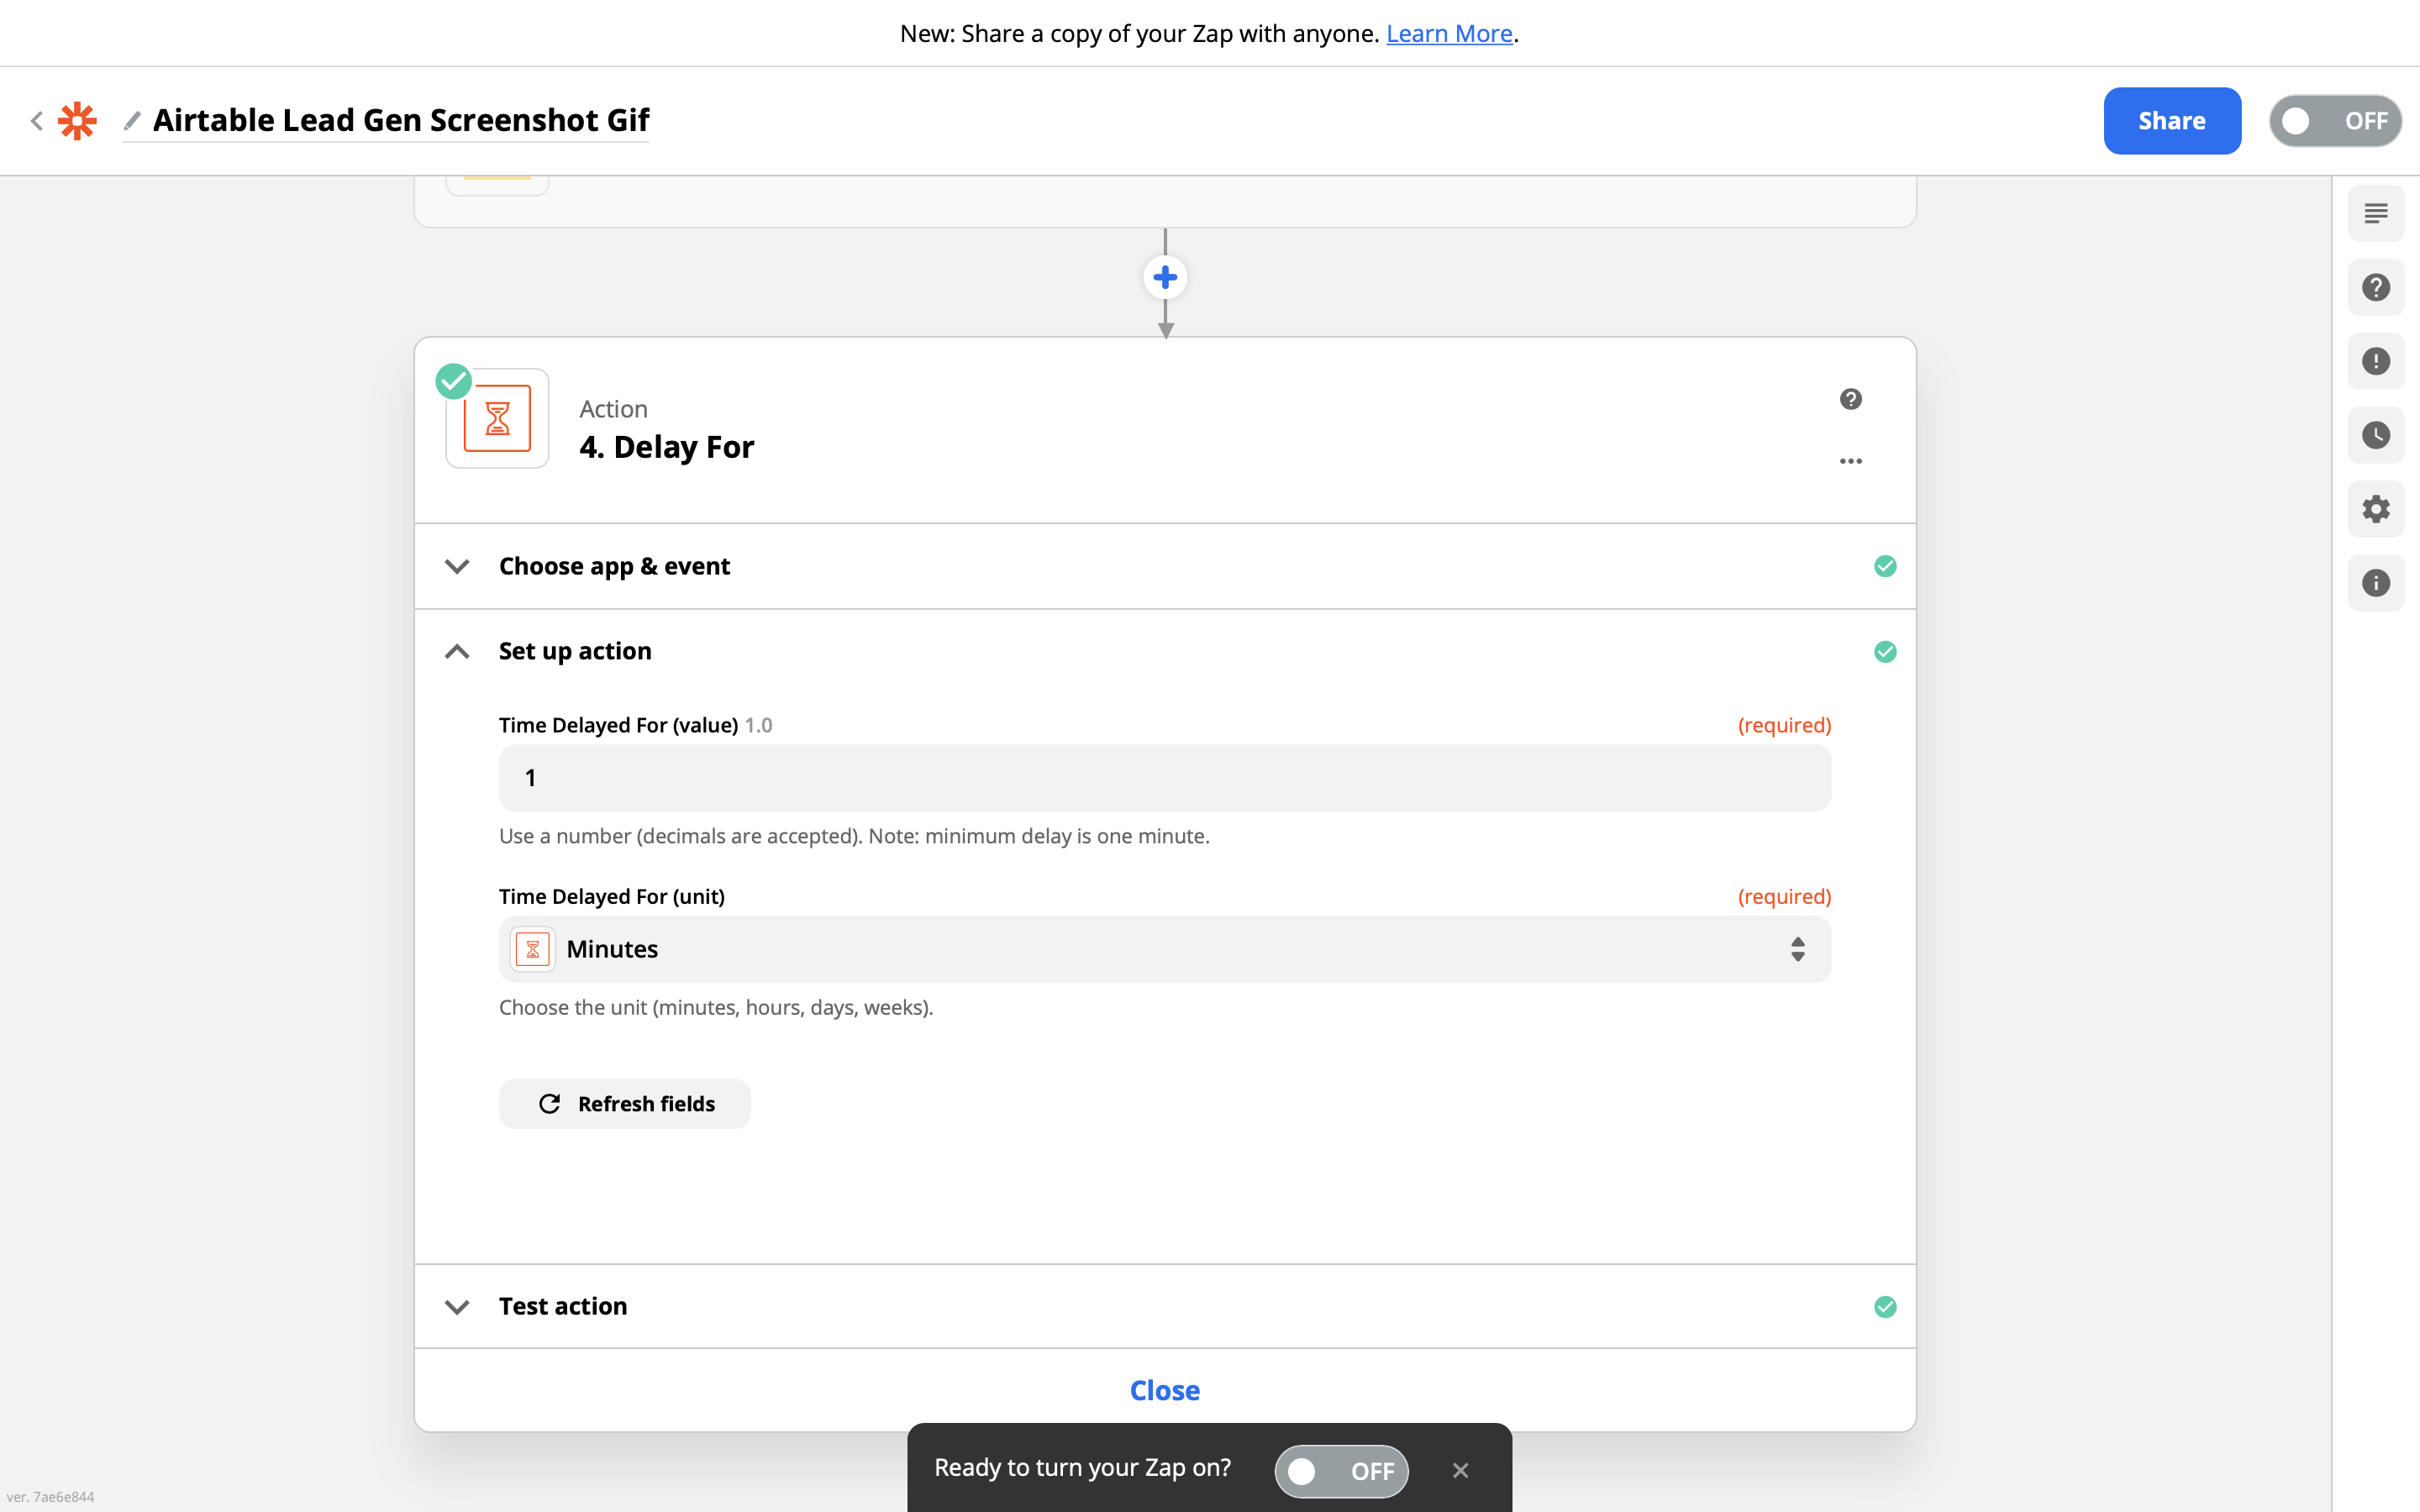
Add a delay
Animated gifs do not get returned instantly by the Bannerbear + Zapier integration, they take a few seconds to generate. To account for this generation time you can add a delay step here.
The gif will generate in a few seconds but Zapier's minimum delay is 1 minute. So set it as 1 minute.
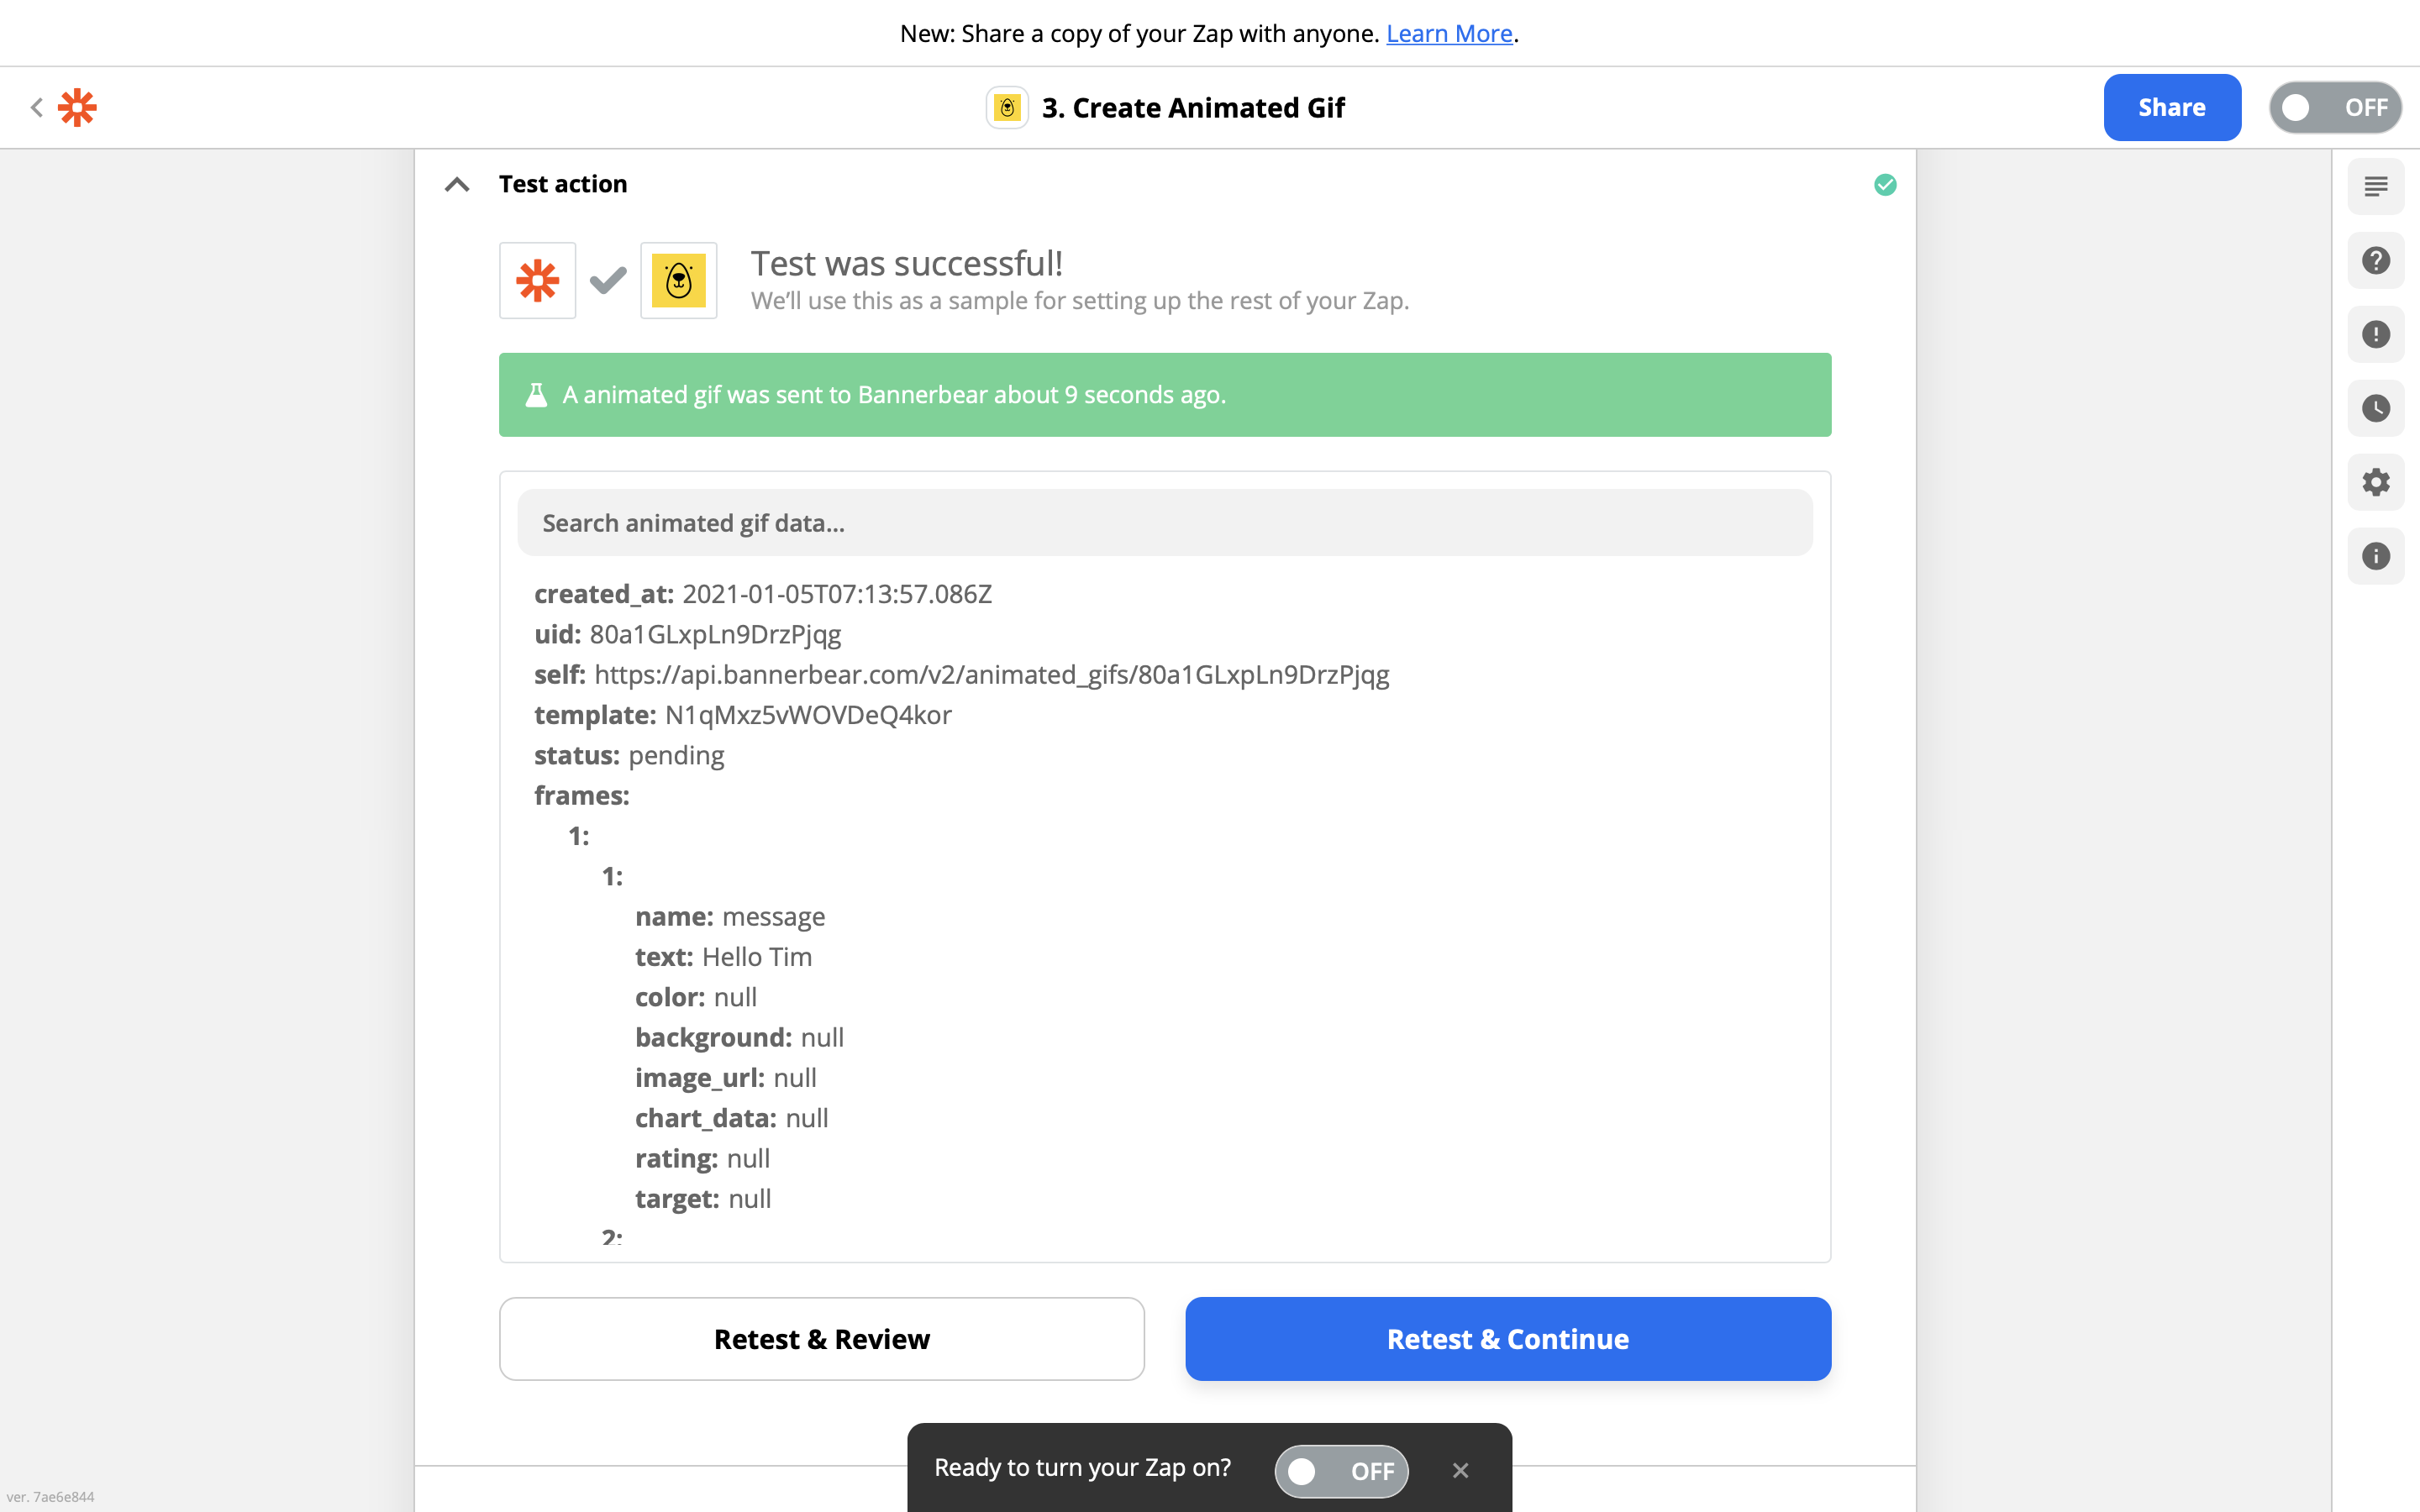
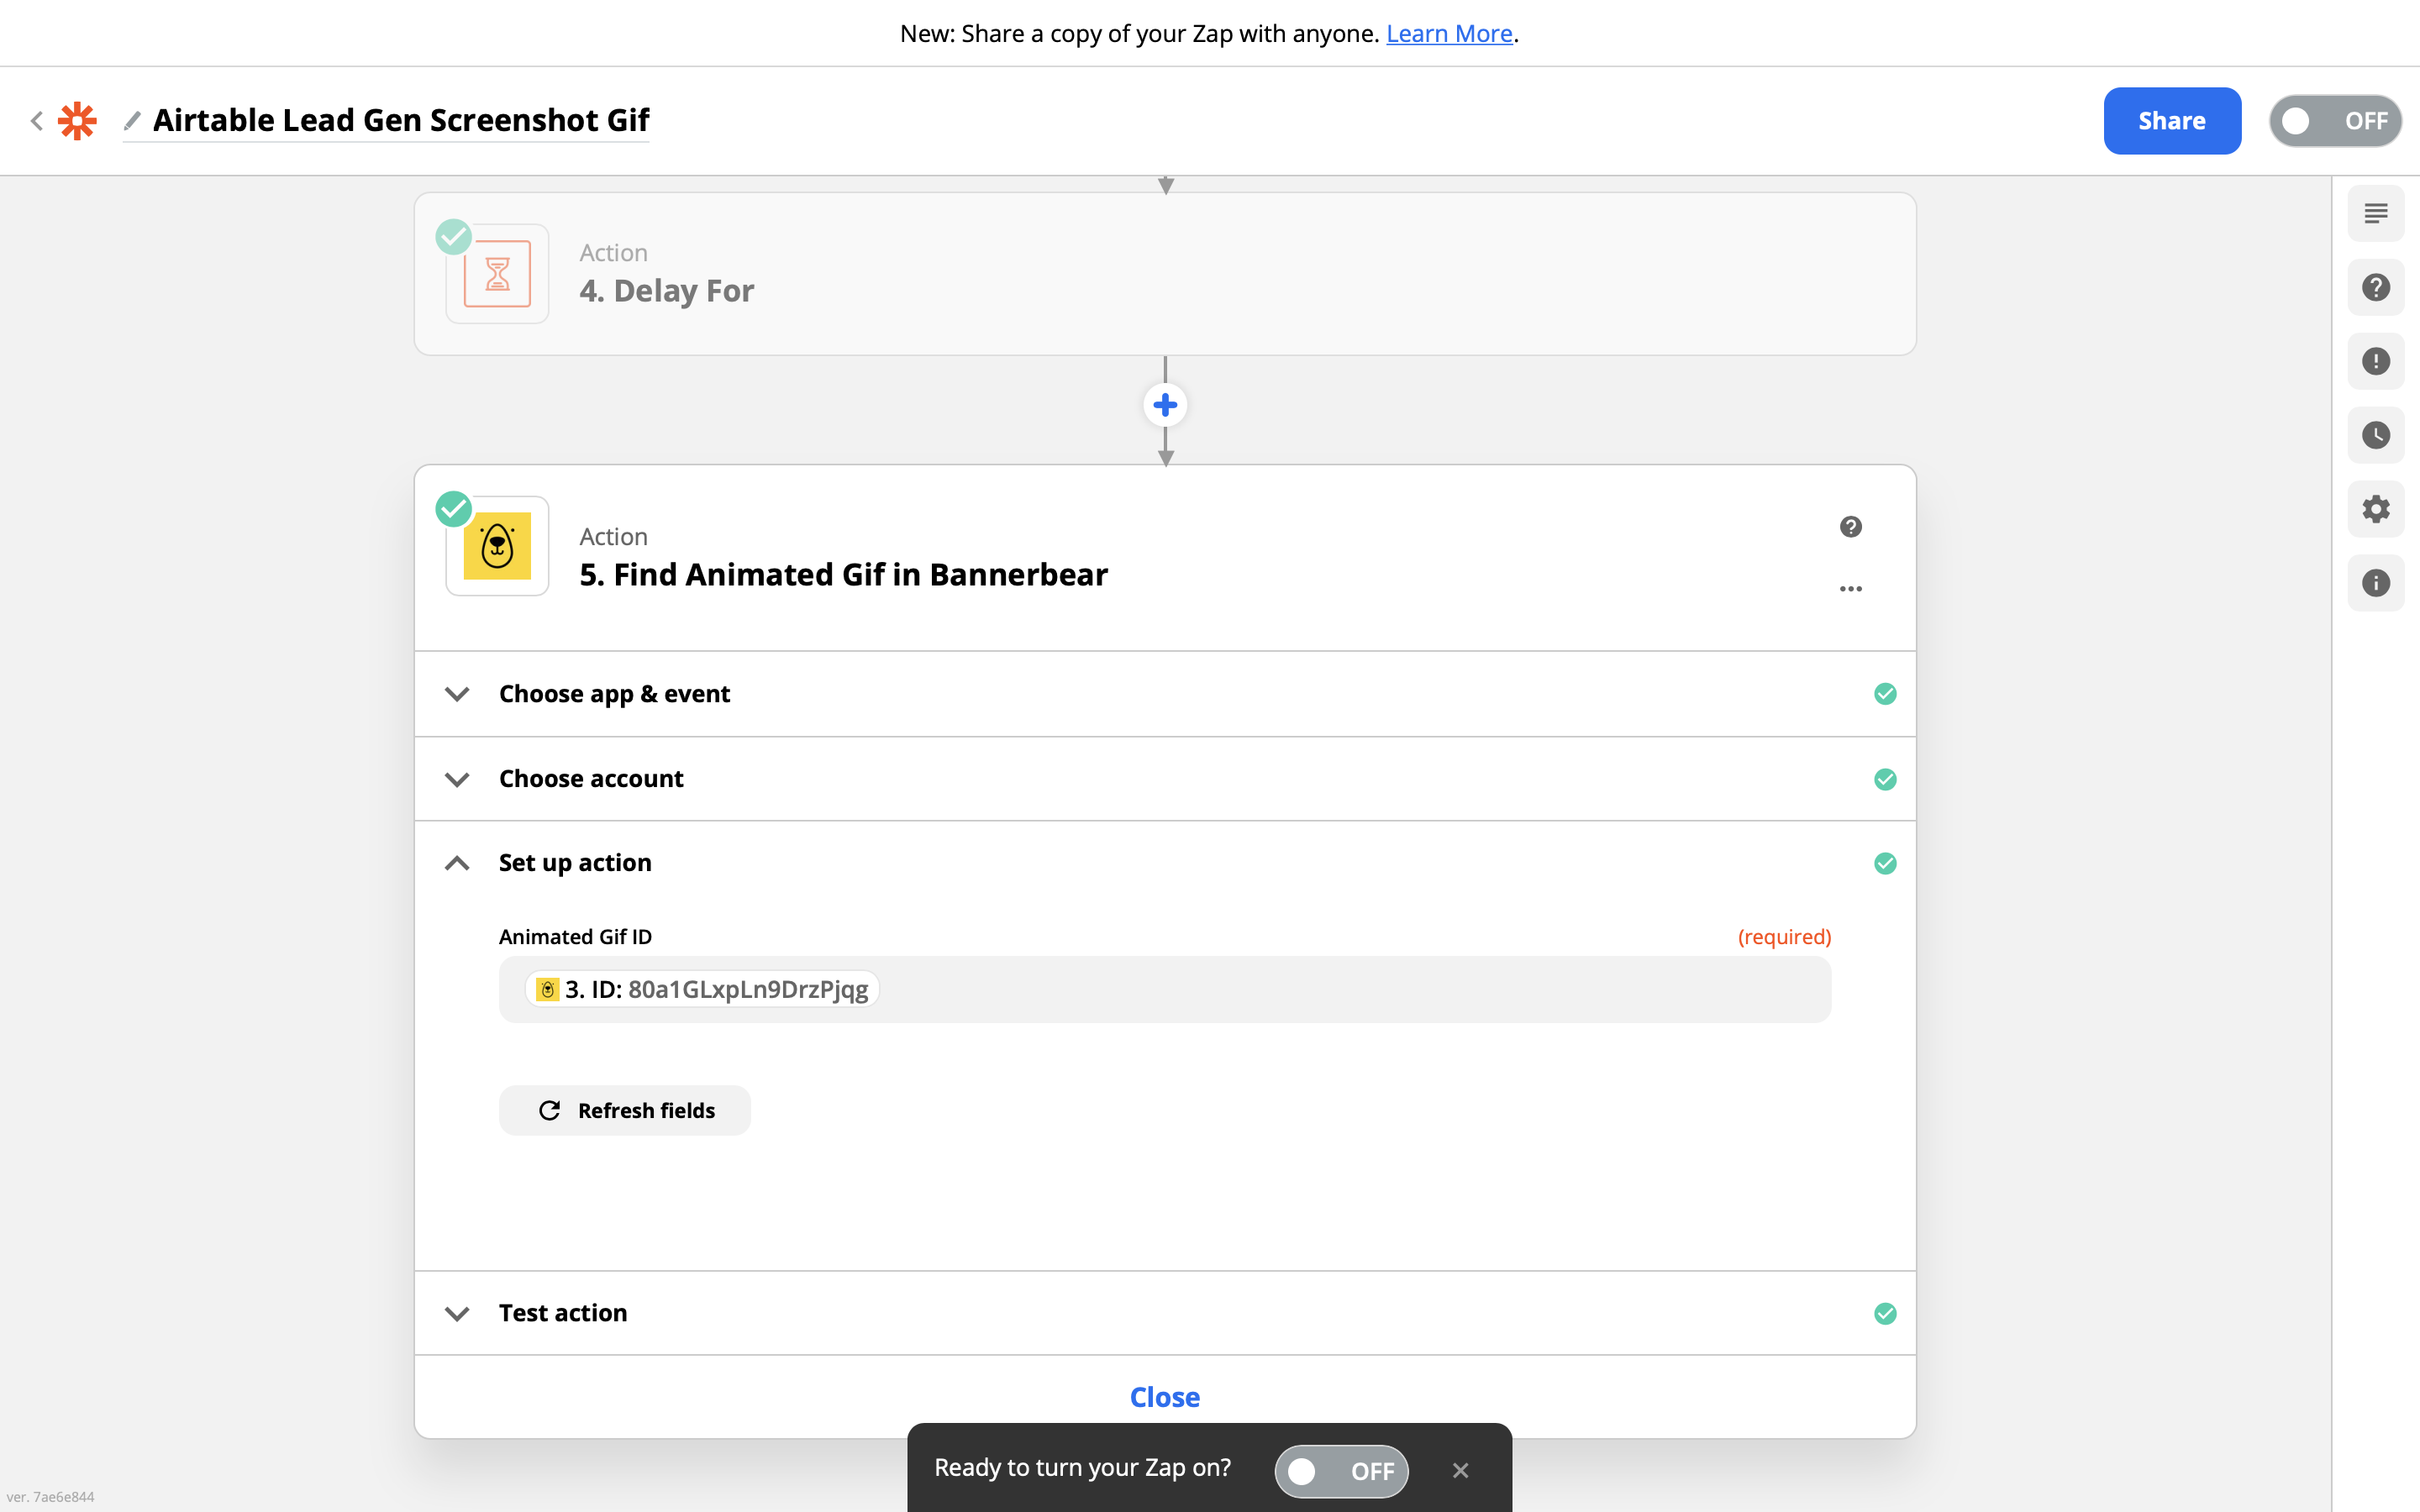
Get the Animated Gif
Now we need to retrieve the finished animated gif.
Use the ID of the animated gif from the previous step to perform a "find" action:
The finished animated gif can be found in the image_url property of the response.
Insert back into Airtable
Finally we are at the last step!
Set up an Airtable Update Record step and use the ID from the airtable record from the very first step, with the Image URL of the animated gif that we just retrieved:
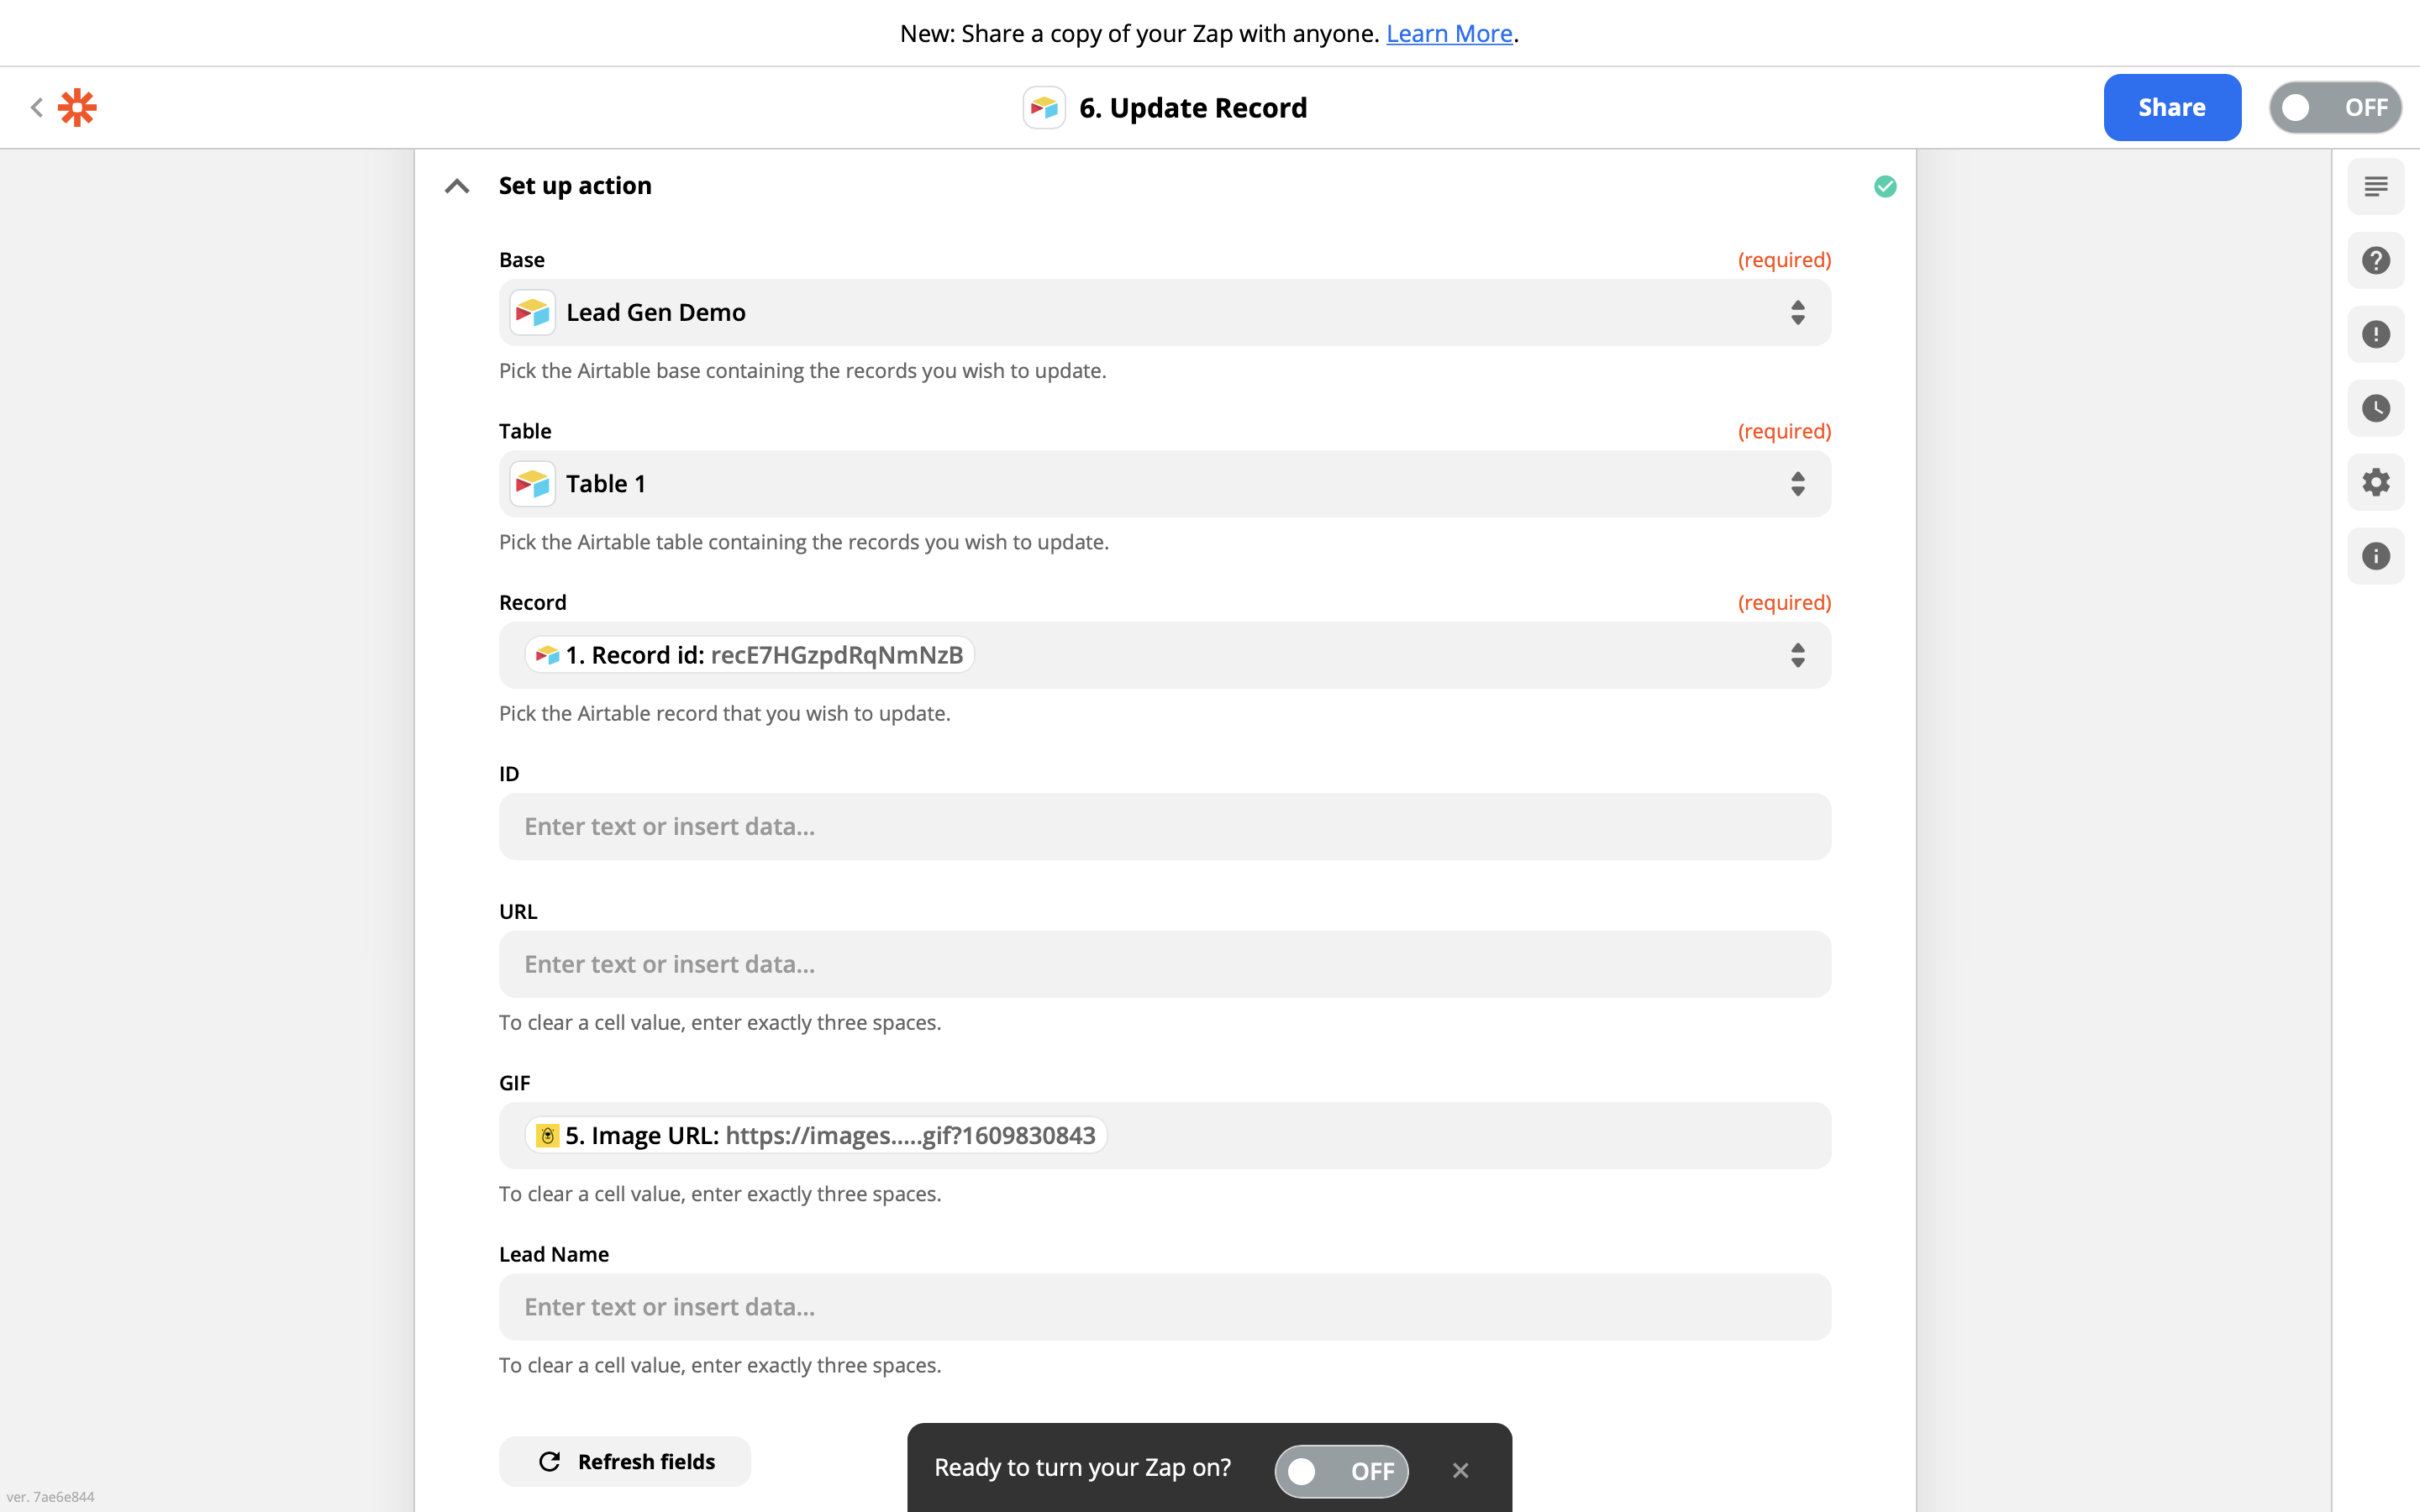
Test the step and you will see your Airtable update with the gif as an attachment!

Turn the zap on and voila, now you have an airtable sheet that you can simply fill with the website URLs of prospective clients / customers, and get an animated, attention-grabbing gif generated automatically!
Next Steps
As a next step why not try:
- Automatically adding the image to a draft email
- Adding another column to the Airtable sheet to control the blue text message
