
Creating a GIF Maker: How to Add Text to GIFs with FFmpeg
Contents
GIFs are fun and entertaining, they make online conversations and content interesting, engaging, and relatable. As most GIFs are user-generated, they often carry a touch of personal expression.
With its popularity and wide usage, integrating a free GIF-maker into your website, if relevant to your content or product, could be an effective way to attract traffic.
You can let your website visitors make GIFs from a video or a collection of images and then add text to them to add context and convey their messages. Let's learn how to add text to this GIF using FFmpeg:

What is FFmpeg
FFmpeg is a complete, cross-platform solution to record, convert, and stream audio and video. It can decode, encode, transcode, mux, demux, stream, filter, and play media files in any format. It is also highly portable—it compiles and runs in a wide variety of build environments, machine architectures, and configurations like Linux, Mac OS X, Microsoft Windows, etc.
FFmpeg contains multiple tools for end-users to convert, play, and analyze media files and libraries for developers to use in different applications, such as libavcodec, libavutil, libavformat, libavfilter, libavdevice, libswscale, and libswresample. When you download the FFmpeg packages/executable files to your machine, these libraries will be downloaded automatically.
Pre-requisite
Before we begin, make sure to download the latest version of FFmpeg from the official website. This tutorial is based on version 6.0 of FFmpeg.
Adding Text to GIFs using the “drawtext” Filter
We can add text to a GIF file using the “drawtext” filter, which uses the libfreetype library to draw a text string or text from a specified file (usually .txt) on top of the video.
Basic Command
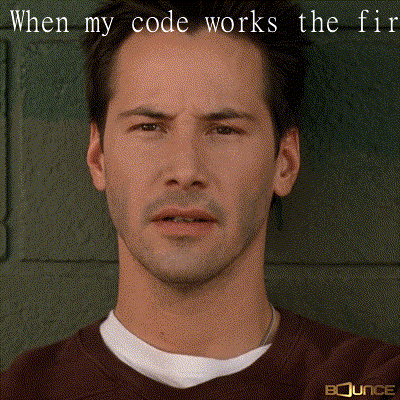
The command below adds the text specified to the (10,10) position of the input GIF:
ffmpeg -i input.gif -vf "drawtext=text='When my code works the first time':fontsize=30:x=10:y=10:fontcolor=white" output.gif
i input.gifspecifies the input GIF file you want to add text tovf "drawtext=..."is the filter used for adding text, with various options availabletextis the text string to be added to the GIFfontsizesets the font sizexandyare the positions of the text on the GIFfontcolorsets the color of the font
Note : If you encounter the No such filter: 'drawtext' error, it means your FFmpeg version does not support the libfreetype library. Ensure that you have the library installed by running the ffmpeg command in your terminal/command prompt.
After running the command above, this is the result:
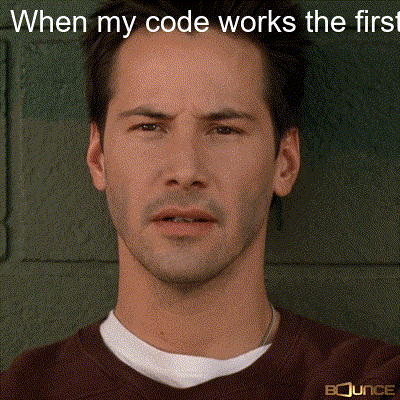
When the font style is not set, FFmpeg uses the default font. You can use a custom font by adding fontfile=/path/to/font.ttf to the filter chain and replacing /path/to/font.ttf with the path to a TrueType (TTF) font file on your system.
For example, to add text to the input GIF in the Arial font, use the command below:
ffmpeg -i input.gif -vf "drawtext=text='When my code works the first time':fontsize=30:x=10:y=10:fontcolor=white:fontfile=C:/Windows/Fonts/Arial.ttf" output_font.gif
Here’s the result:
🐻 Bear Tips: You can refer to the FFmpeg documentation for more filter options.
Splitting the Text Into Multiple Lines to Fit the GIF
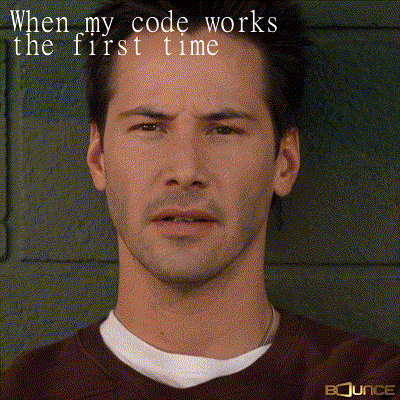
As you can see from the output file above, the text does not fit the GIF’s width. FFmpeg does not automatically resize or split the text string according to the input GIF’s width. However, FFmpeg allows you to split the text into multiple lines manually. By specifying different x and y values for each line, you can position them accordingly.
Here's an example command:
ffmpeg -i input.gif -vf "drawtext=text='When my code works ':fontsize=30:x=10:y=10:fontcolor=white,drawtext=text='the first time':fontsize=30:x=10:y=(10+text_h):fontcolor=white" output_break.gif
The text string will be added to the GIF in two lines:
While FFmpeg is a powerful tool, adding long text that fits within the GIF's width can be challenging—you need to do extra calculations to fit them automatically. To simplify this process, try Bannerbear, a tool that offers an API for generating custom images, videos, and more.
Using Bannerbear API
Bannerbear provides an API that allows you to generate and modify media files programmatically. As it offers a user-friendly drag-and-drop interface for designing the layout of an image, video, or GIF and allows you to modify the media files via API, it makes performing media manipulation tasks programmatically easier than ever.
Although there isn't a specific API for adding text to GIFs, you can use the Video API along with the create_gif_preview parameter to request a GIF output and achieve the same result.
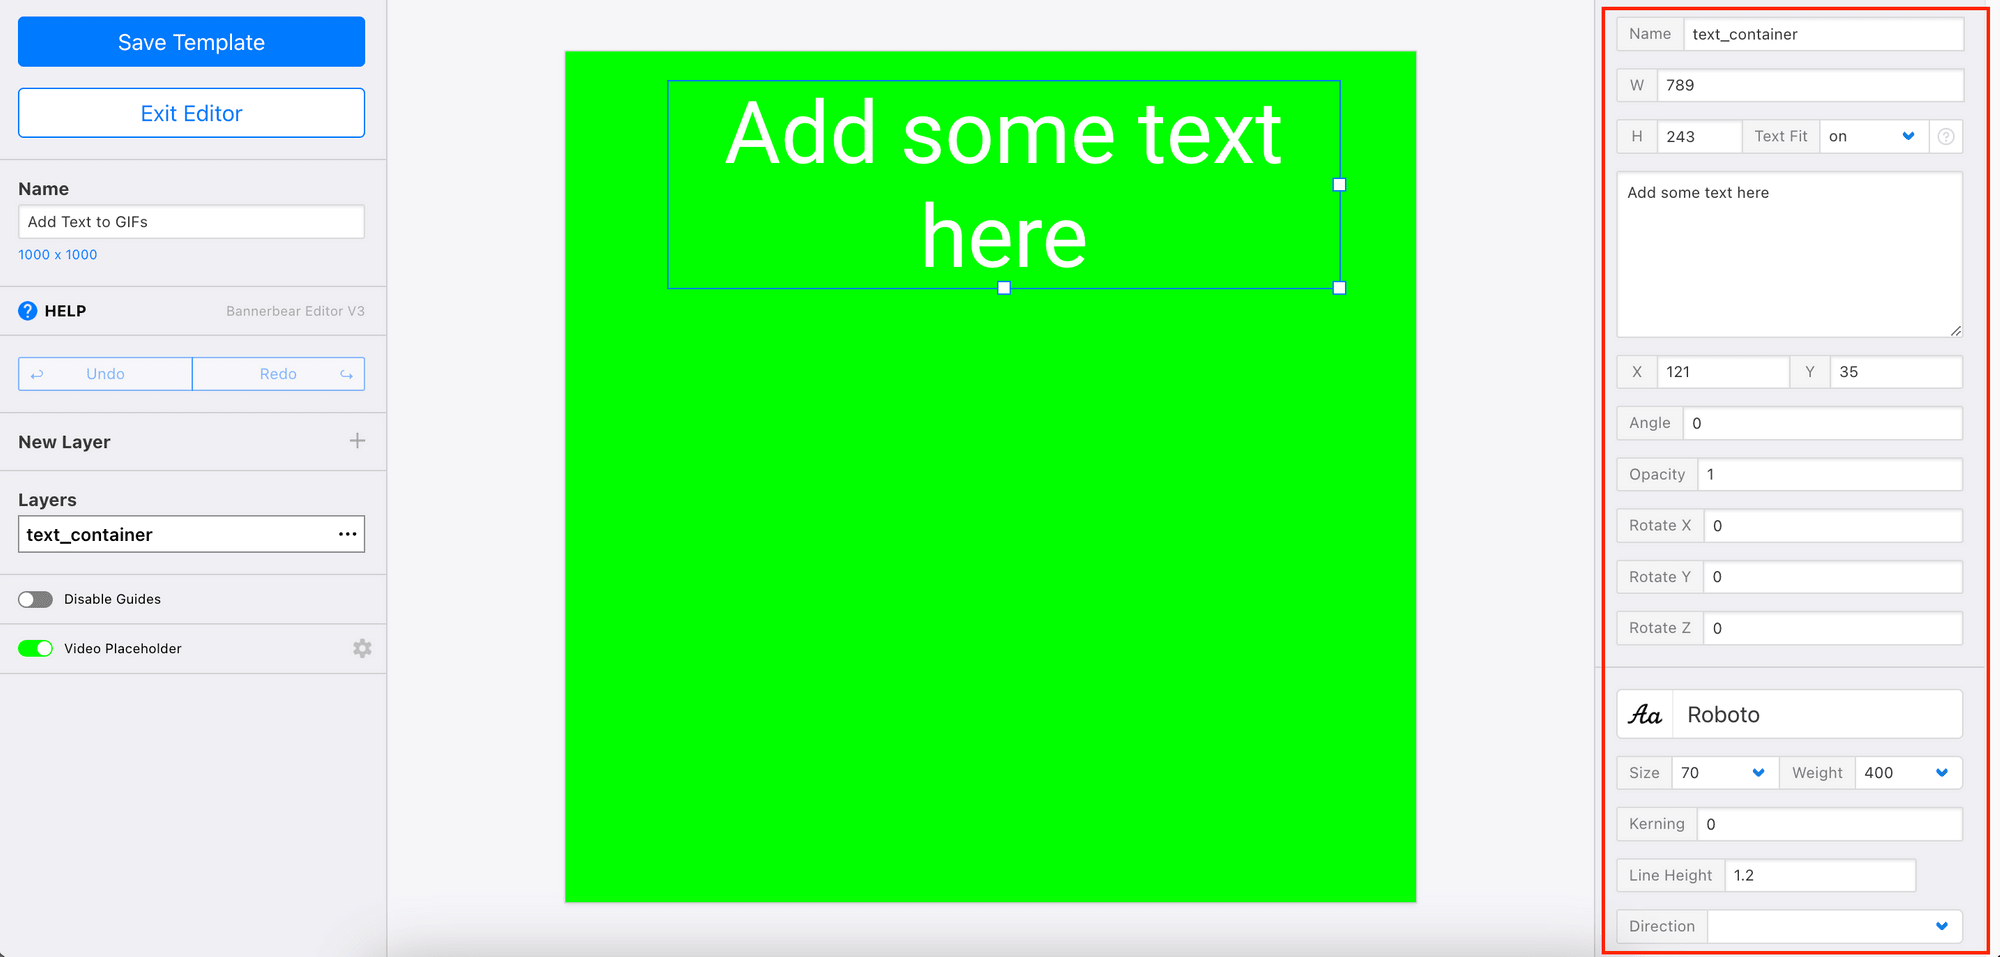
To get started with Bannerbear, create a free account here. Once you've created an account, create a new project + template from the dashboard and add a text layer to the template.
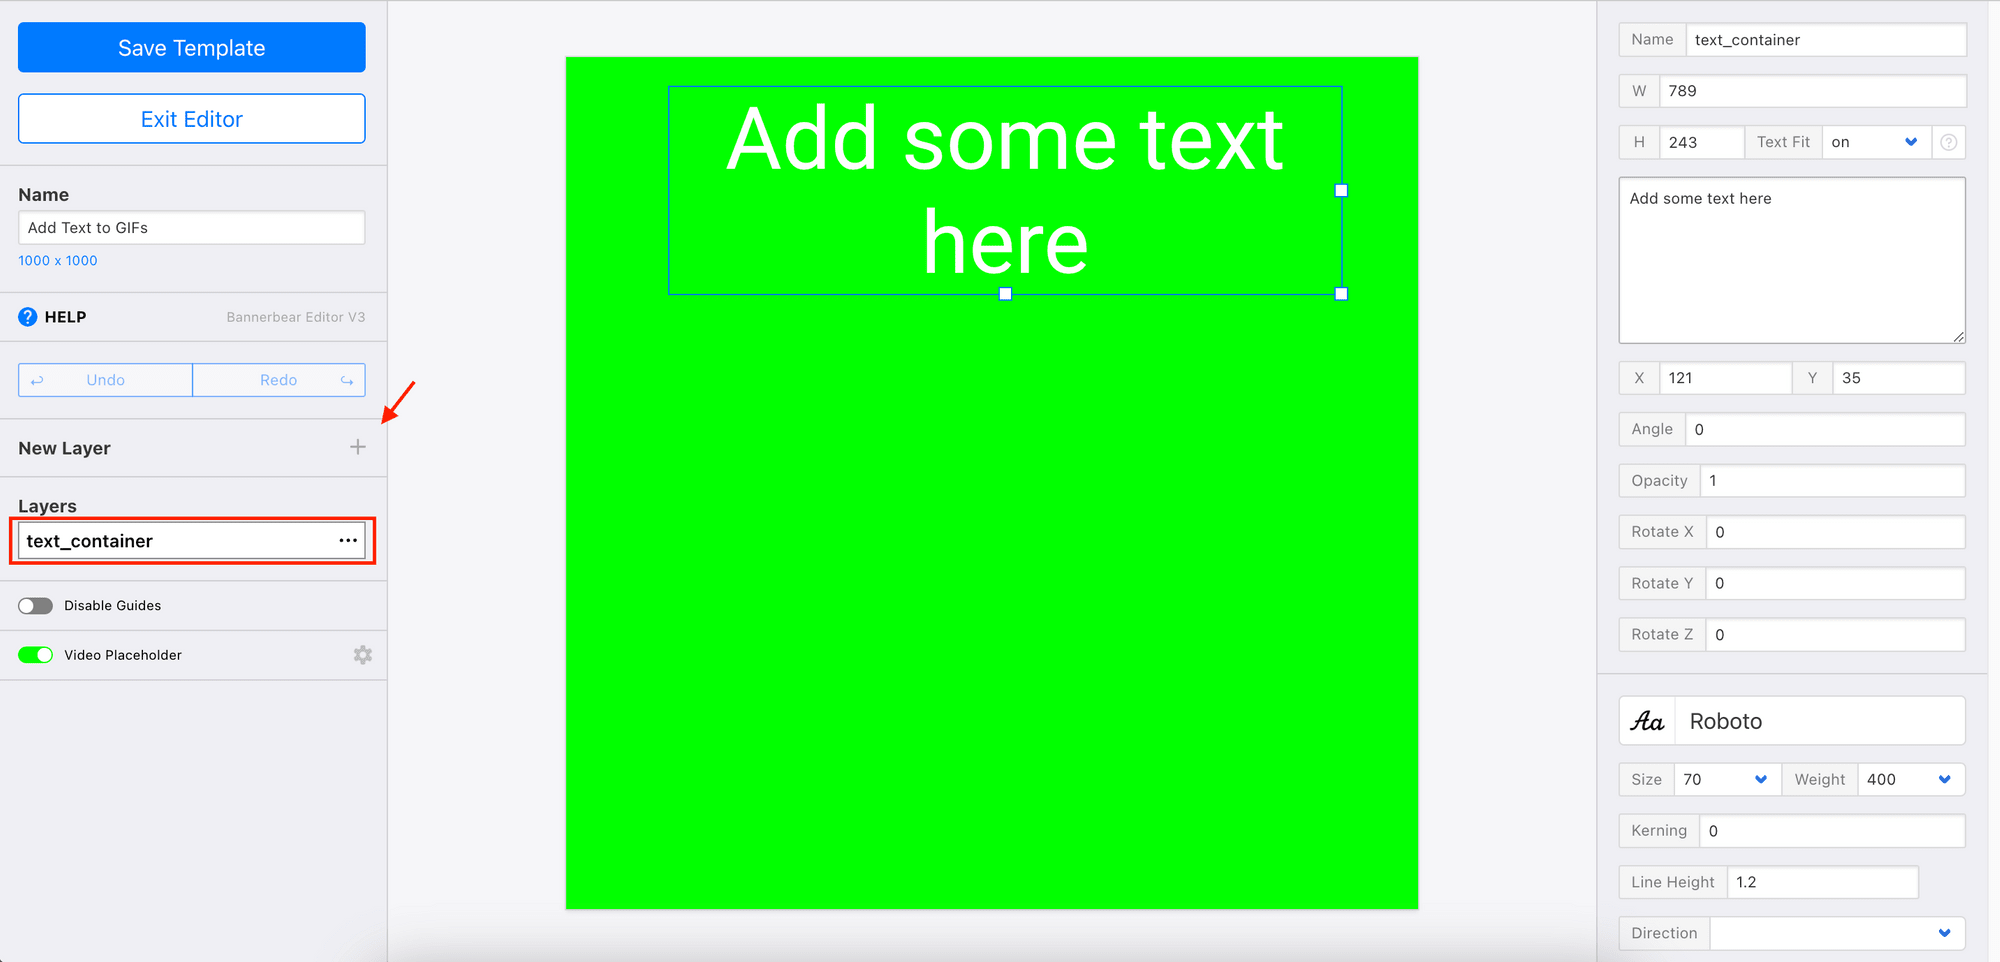
You can adjust the font style, size, weight, enable “Text Fit”, and other settings as needed on the right panel:
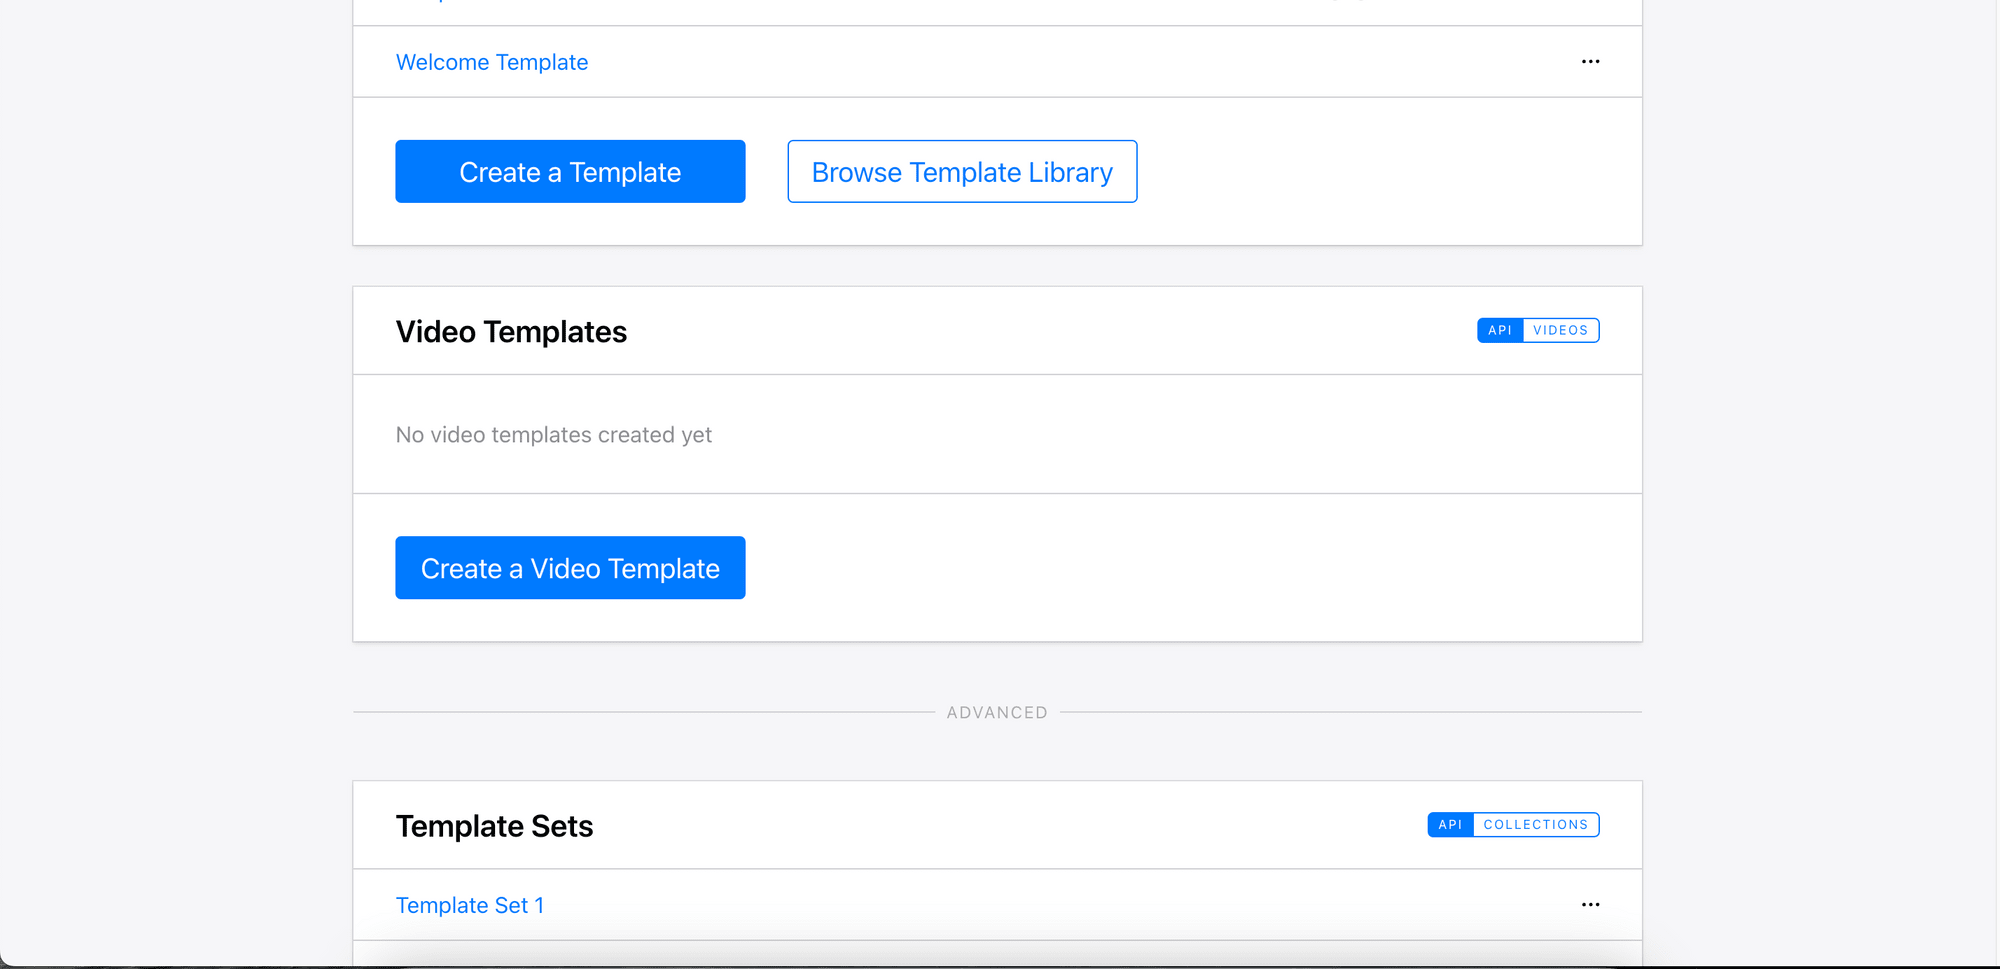
Save the template and go back to the project page. On the project page, scroll down to the “Video Templates” section and create a new video template:
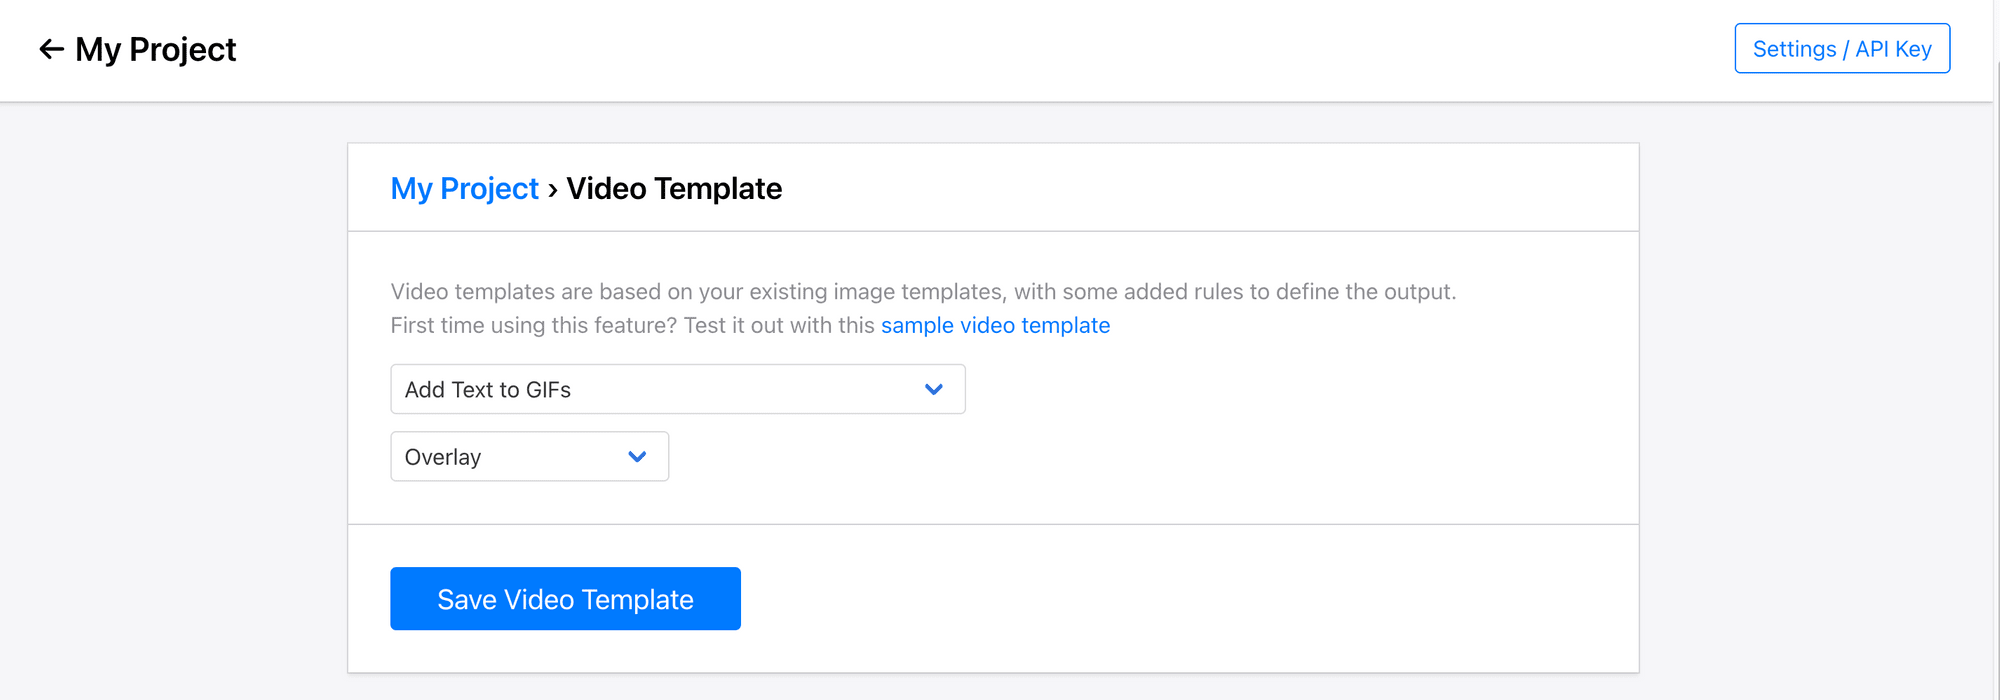
Choose the template created previously and select “Overlay” from the dropdown menu. This will overlay the input video with the text layer:
With the template set up, you can now make API requests from the dashboard to add text to your GIF. In the request data, include the create_gif_preview parameter and set it to true:
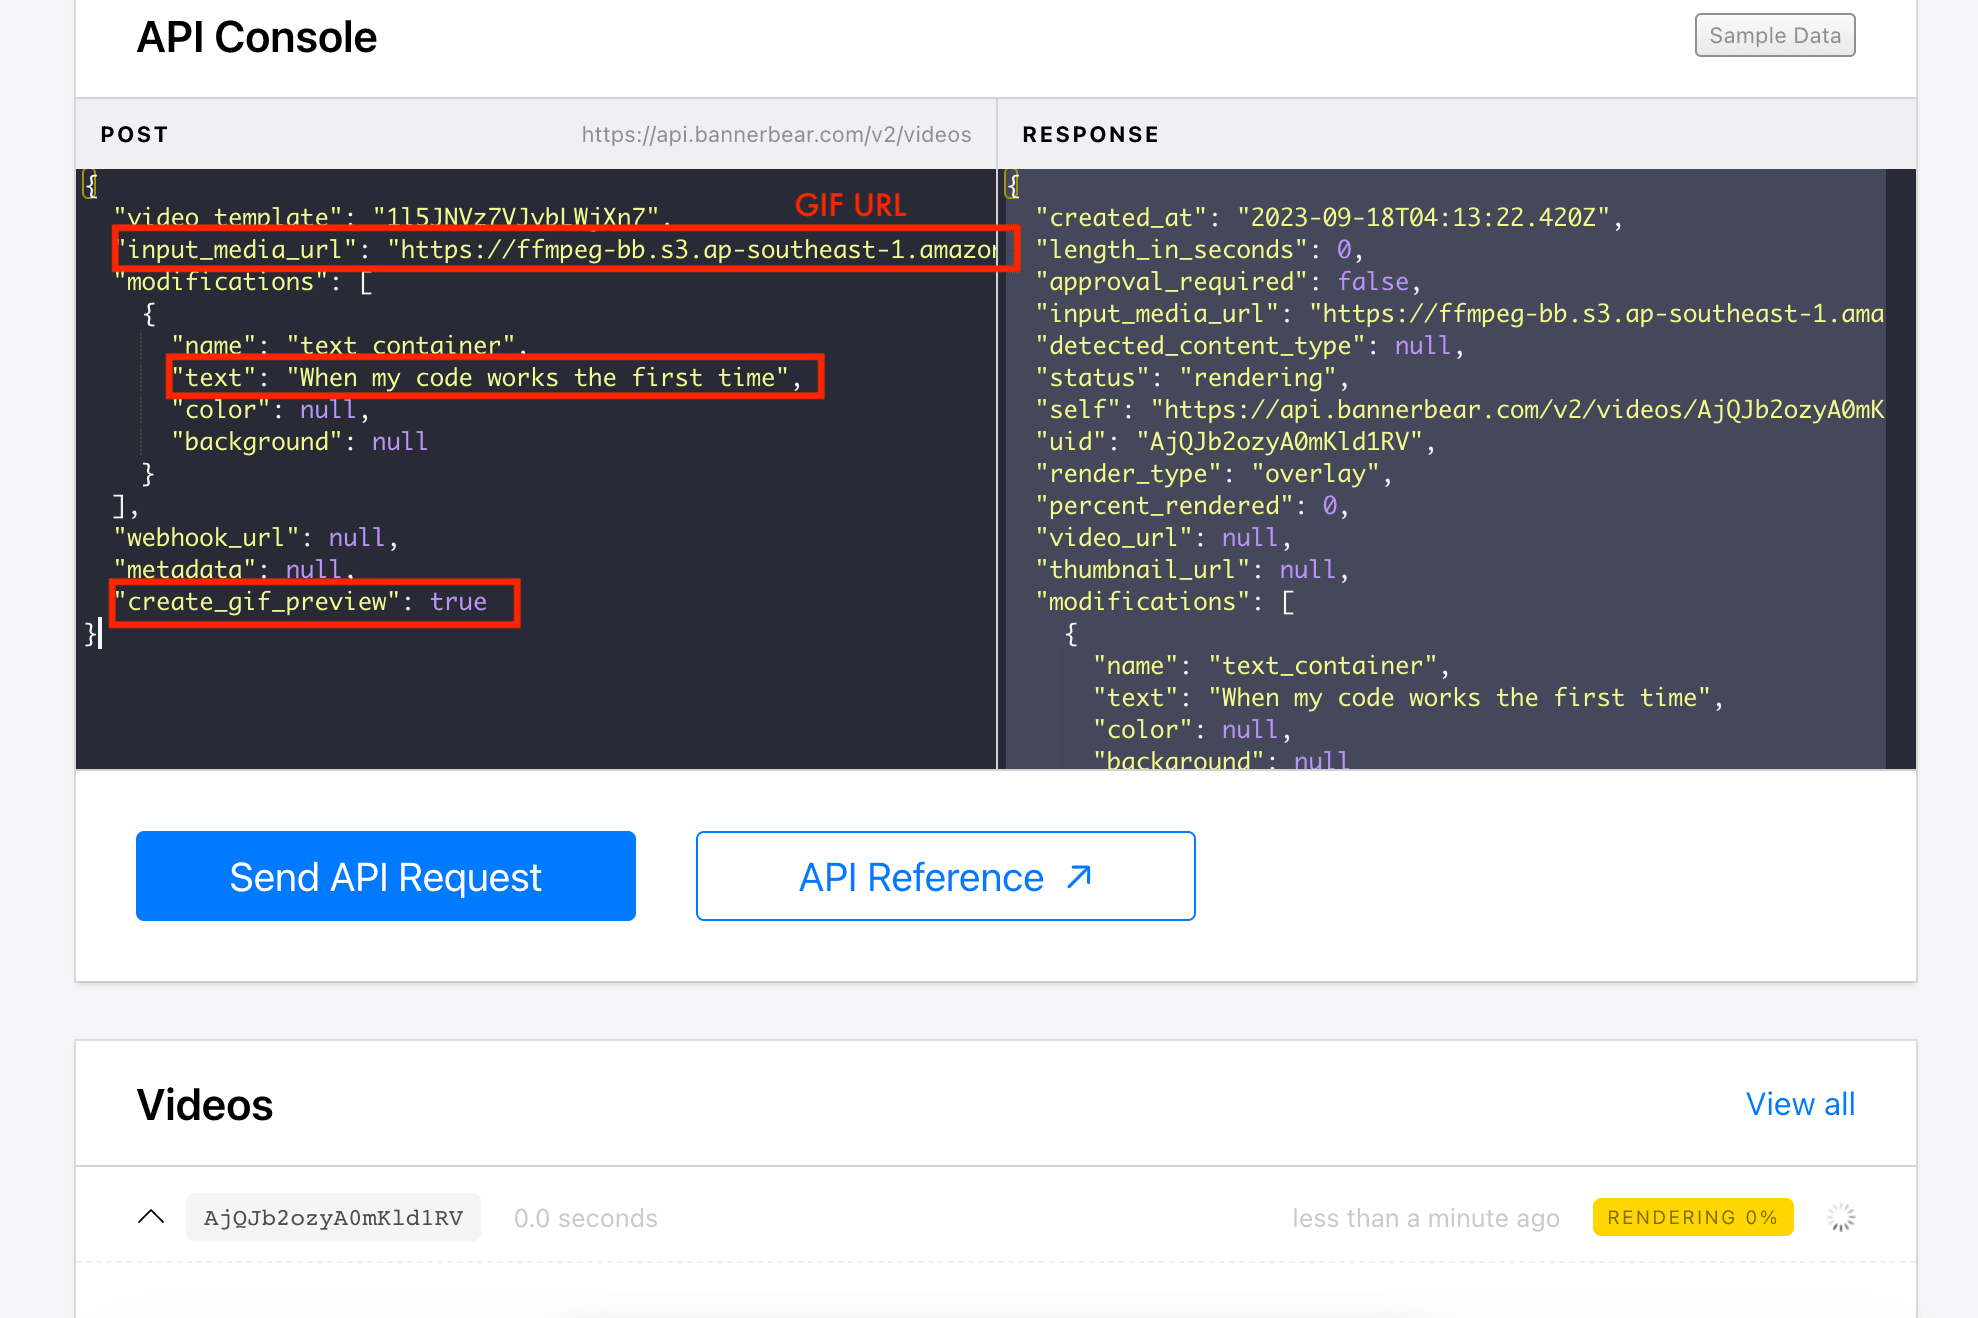
A GIF will be returned in the response:

Here’s the result:

When “Text Fit” is enabled (from the template editor), Bannerbear will automatically divide long text into multiple lines to fit the GIF’s width. Here’s another example with different text:

You can use the API in your code to add the functionality of adding text to GIFs to your application. The code below shows how to do it in JavaScript:
(async () => {
  var data = {
    video_template: `${VIDEO_TEMPLATE_ID}`,
    input_media_url: `${GIF_URL}`,
    modifications: [
      {
        name: 'text_container',
        text: 'Insert your text here',
      },
    ],
    create_gif_preview: true
  };
  const res = await fetch('https://api.bannerbear.com/v2/videos', {
    method: 'POST',
    body: JSON.stringify(data),
    headers: {
      'Content-Type': 'application/json',
      Authorization: `Bearer ${API_KEY}`,
    },
  });

  console.log(await res.json());
})();
What’s Next
FFmpeg offers more customization while Bannerbear simplifies the process with its user-friendly interface and powerful API. Whether you opt for FFmpeg's command-line approach or Bannerbear's API, make sure to understand their respective capabilities. To learn more about how to use Bannerbear API, you can register a free account and check out the API Reference.
