How to Automatically Generate LinkedIn Images for your Job Board
Contents
In this tutorial, you will learn how to automatically turn your job listing on Airtable into images ready for sharing on social media.
You have a job board and you’re thinking of increasing engagement with images that could be shared across various social channels? Or need to ease the stress of manual sharing all new job postings on Twitter and LinkedIn?
If you're reading this, you're already off on the right foot. Tweets with images get 150% more retweets and 18% more clicks.
LinkedIn updates with custom graphics can get130% higher engagement. With Bannerbear, you can automate image creation for websites and social networks from your Airtable listing.
This tutorial will teach you how to automatically turn your job listing on Airtable into images ready for sharing on social media.
What you will build
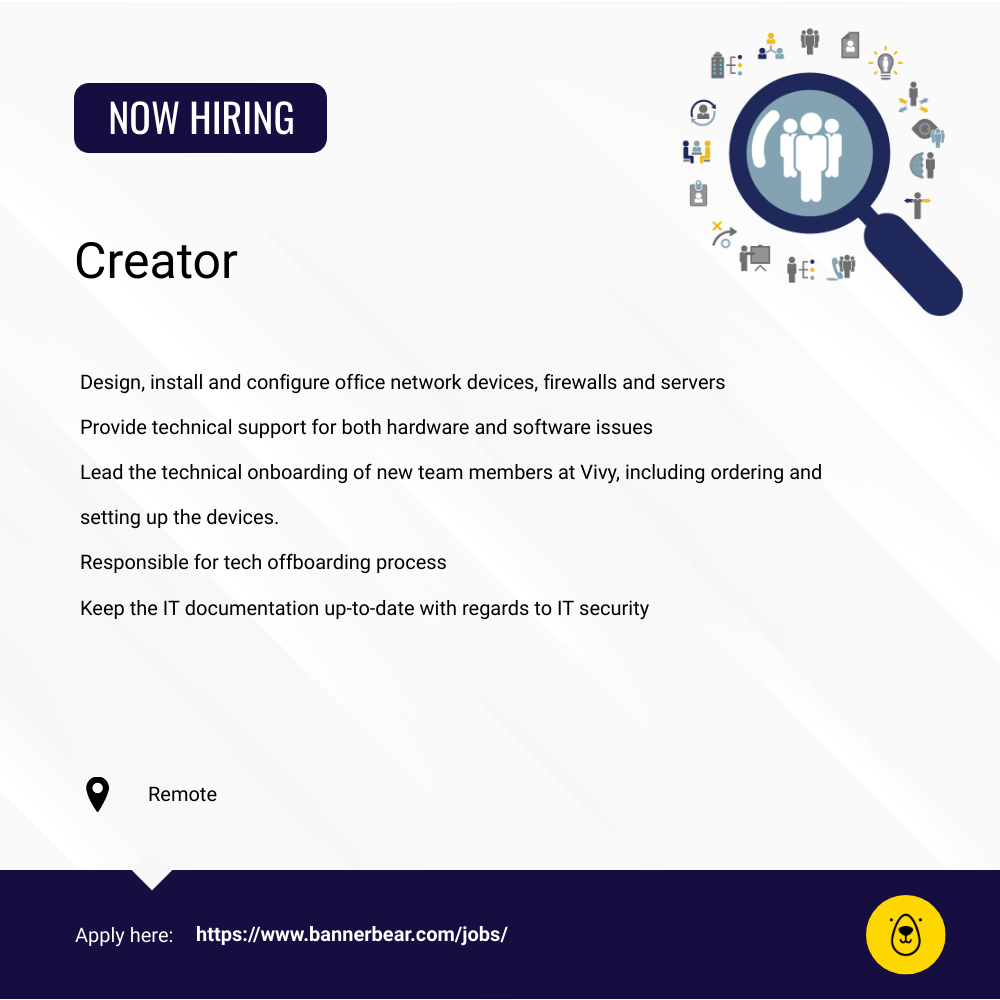
Bannerbear templates are fully customisable and allow you to add as many layers as you want. For this tutorial, we ideally want a minimalistic template with the Job Title, Company Logo, Location, Brief and Application URL. The aim is to maintain a clear and concise image.
With these in mind, in this tutorial we can set up a Zapier automated workflow so that:
- When a new job is added to Airtable, Zapier adds a new cover image to the post.
- Bannerbear generates images automatically
- Zapier schedules all new posts with freshly generated images for publishing on LinkedIn and Twitter.
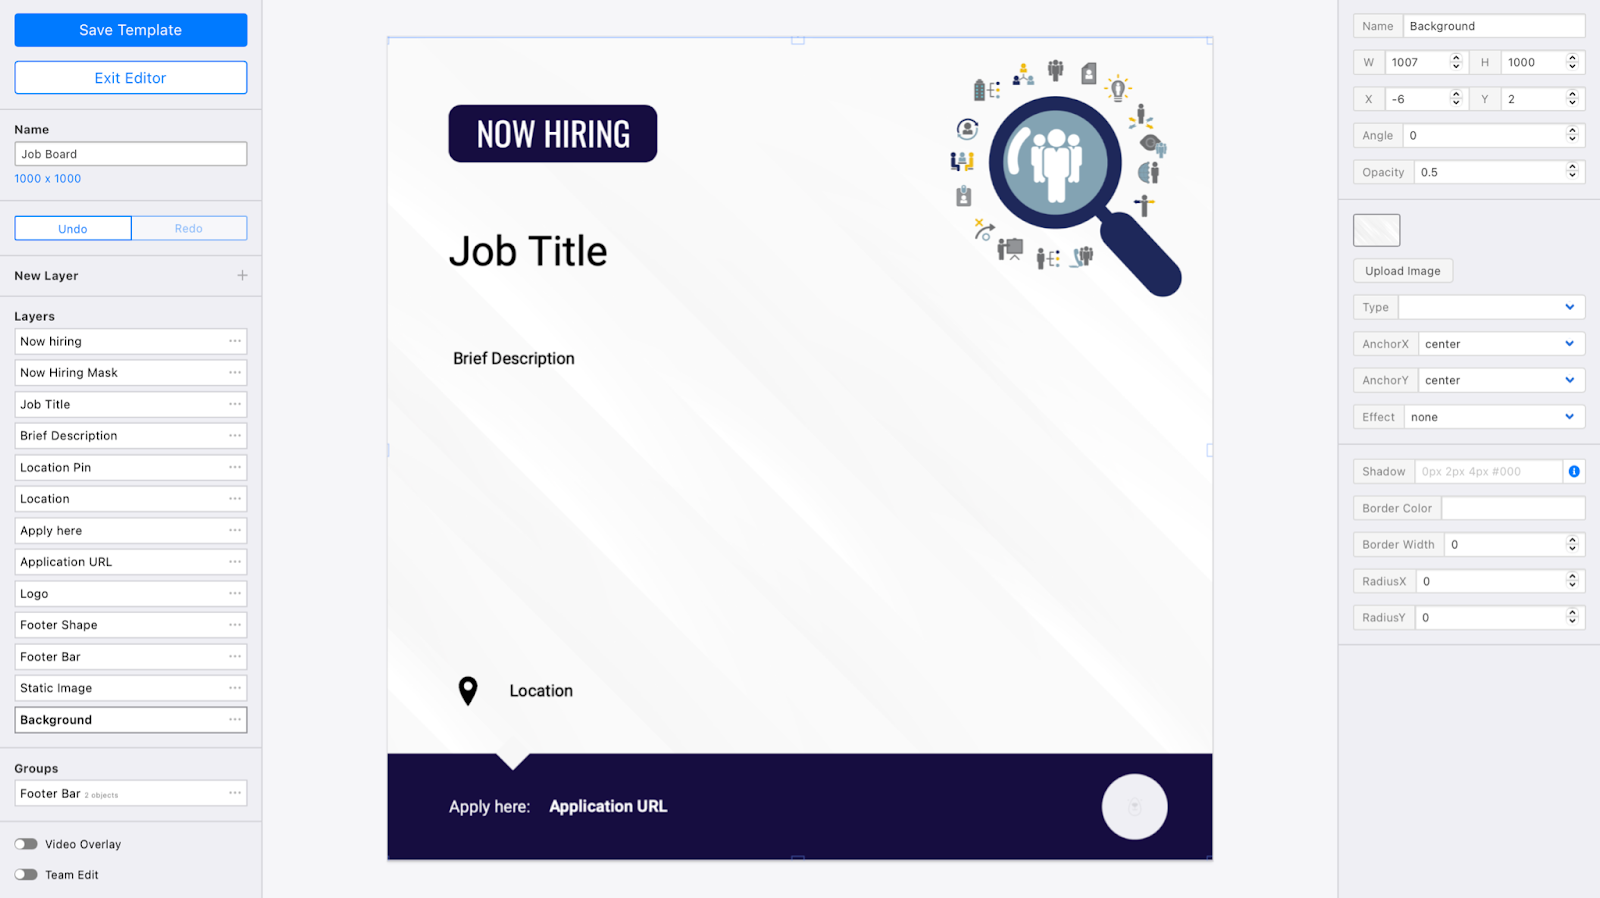
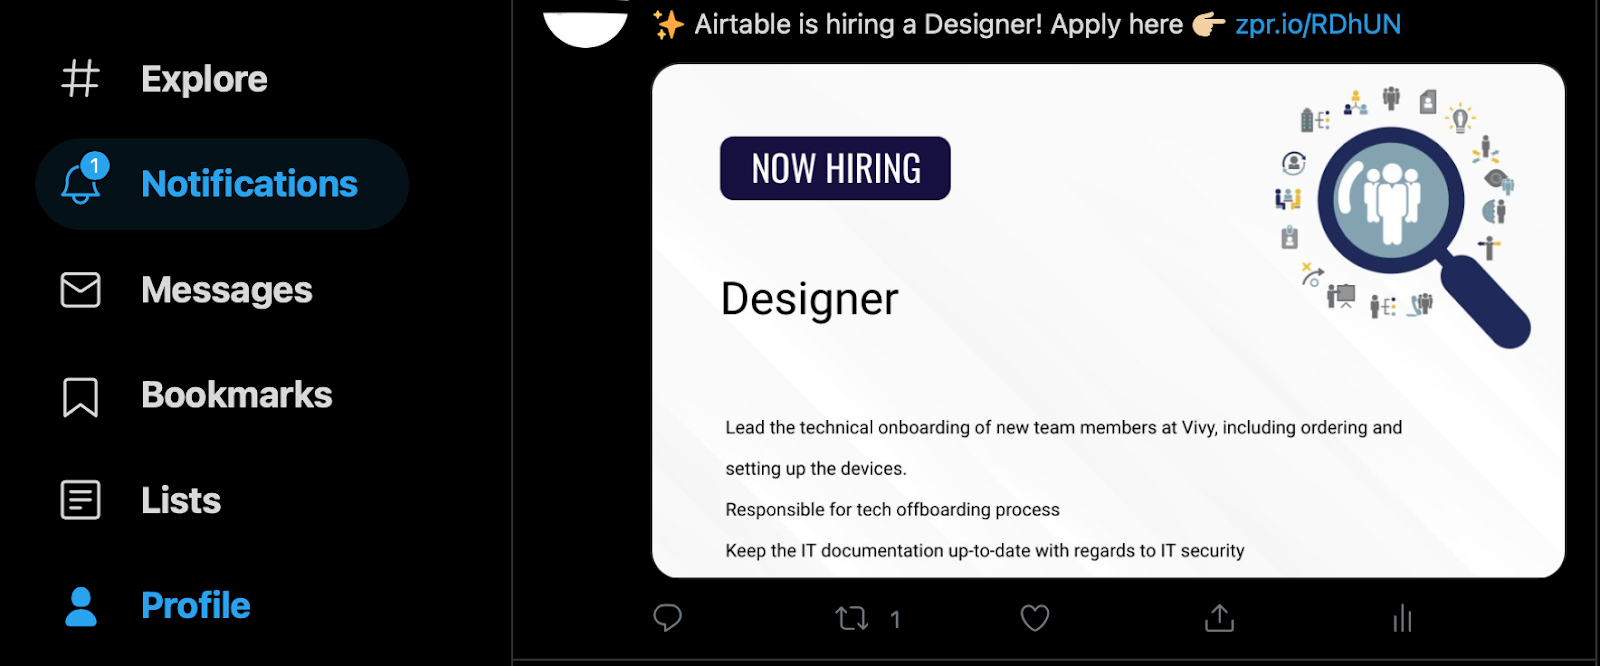
Example Image
When that’s done, we should have something that looks like this:
Create an Airtable base
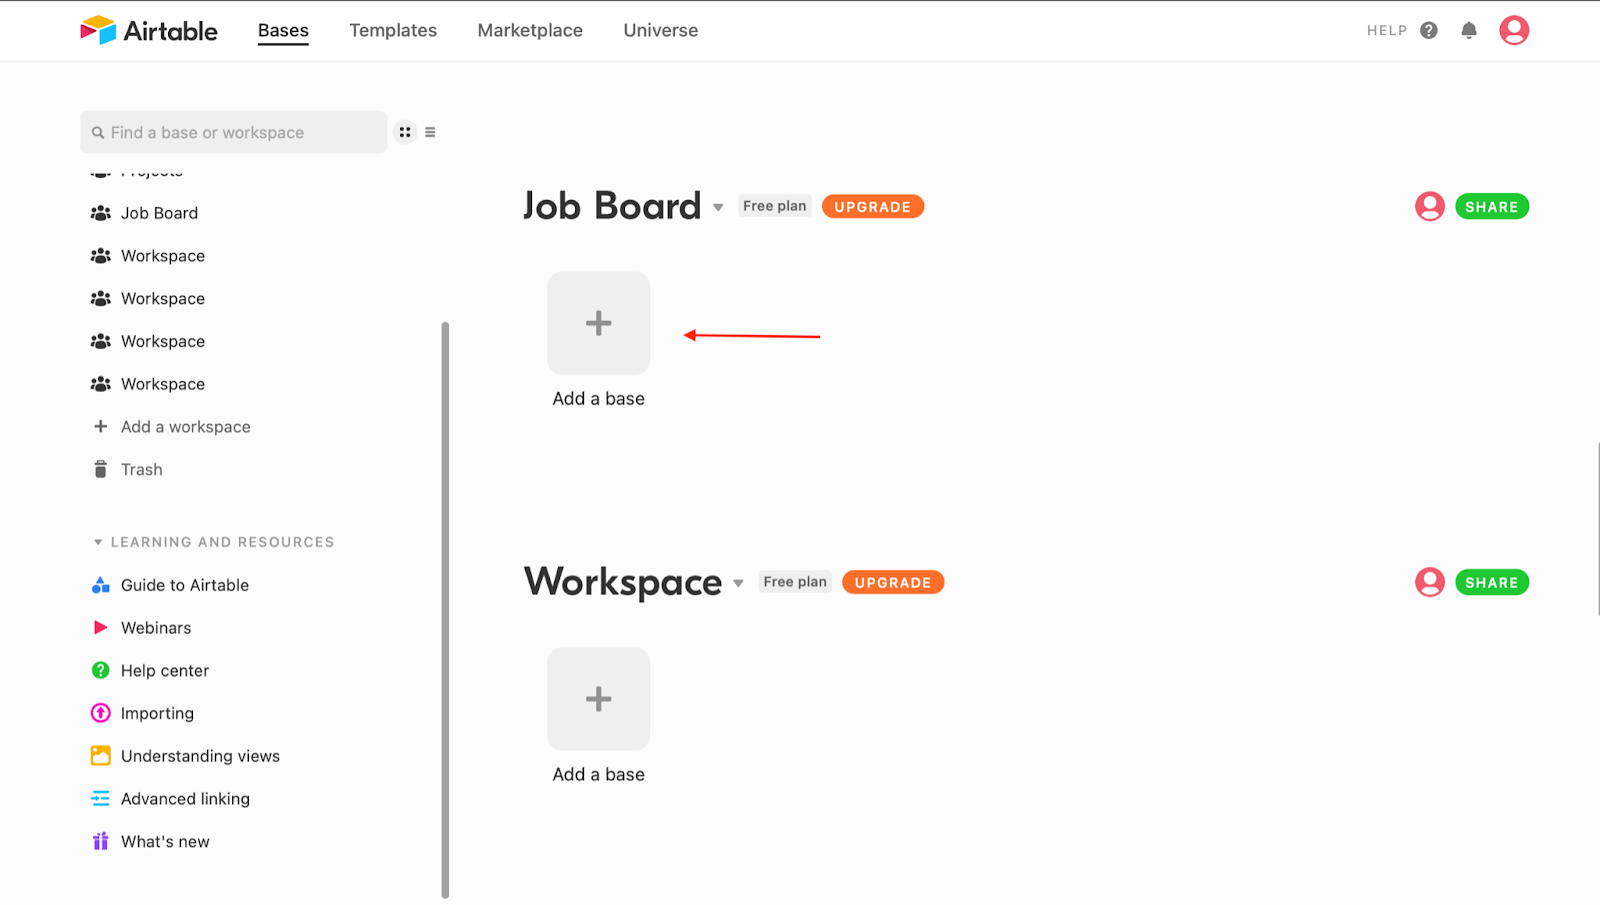
We will get started by creating a table with all the job listings. Add a new Airtable base to your workspace.
Required Airtable columns
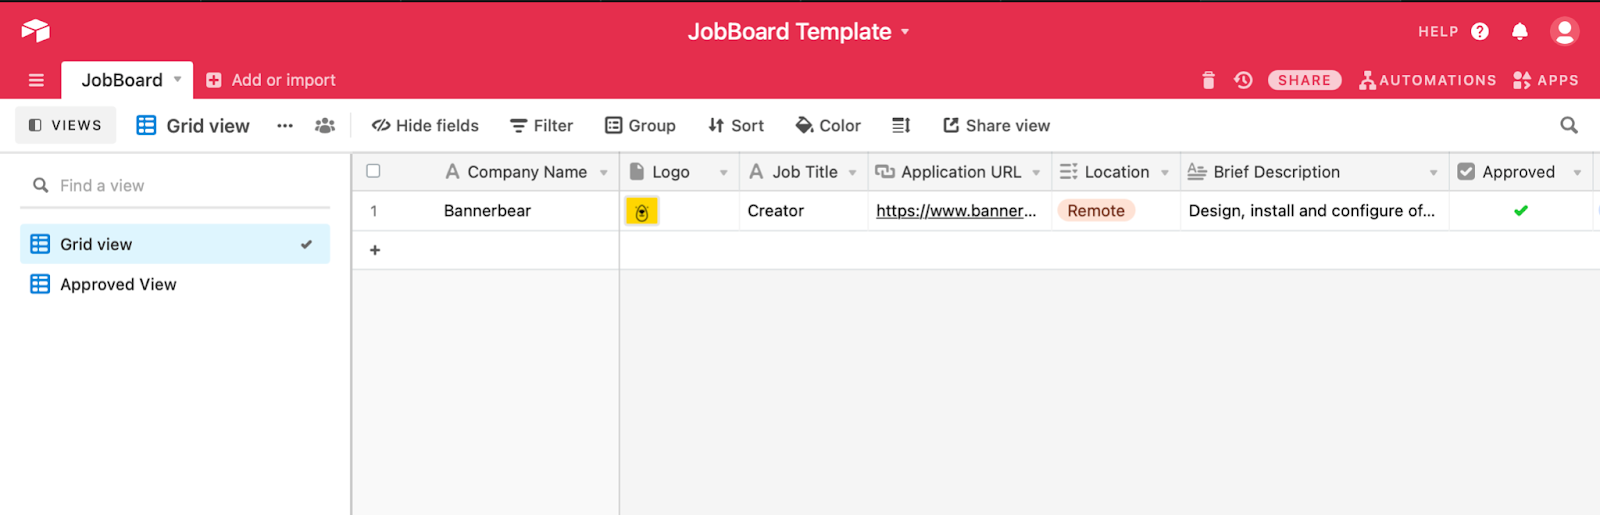
Staying true to the Bannerbear template we will use in this tutorial, add the following fields to your table:
- Job Title
- Company Logo
- Company Name
- Location
- Brief Description
- Application URL
- Approved checklist field
Adding more fields
You can add more dynamic layers to your Bannerbear template later depending on your template and the information to be displayed on the image.
Filter Airtable Views
If your job listing site has a submission form, you will need to manage the data pushed to Bannerbear to ensure that only the approved listings trigger Zapier.
We will create an Approved view that filters the data on the Grid view. This view will only show data that have been vetted.
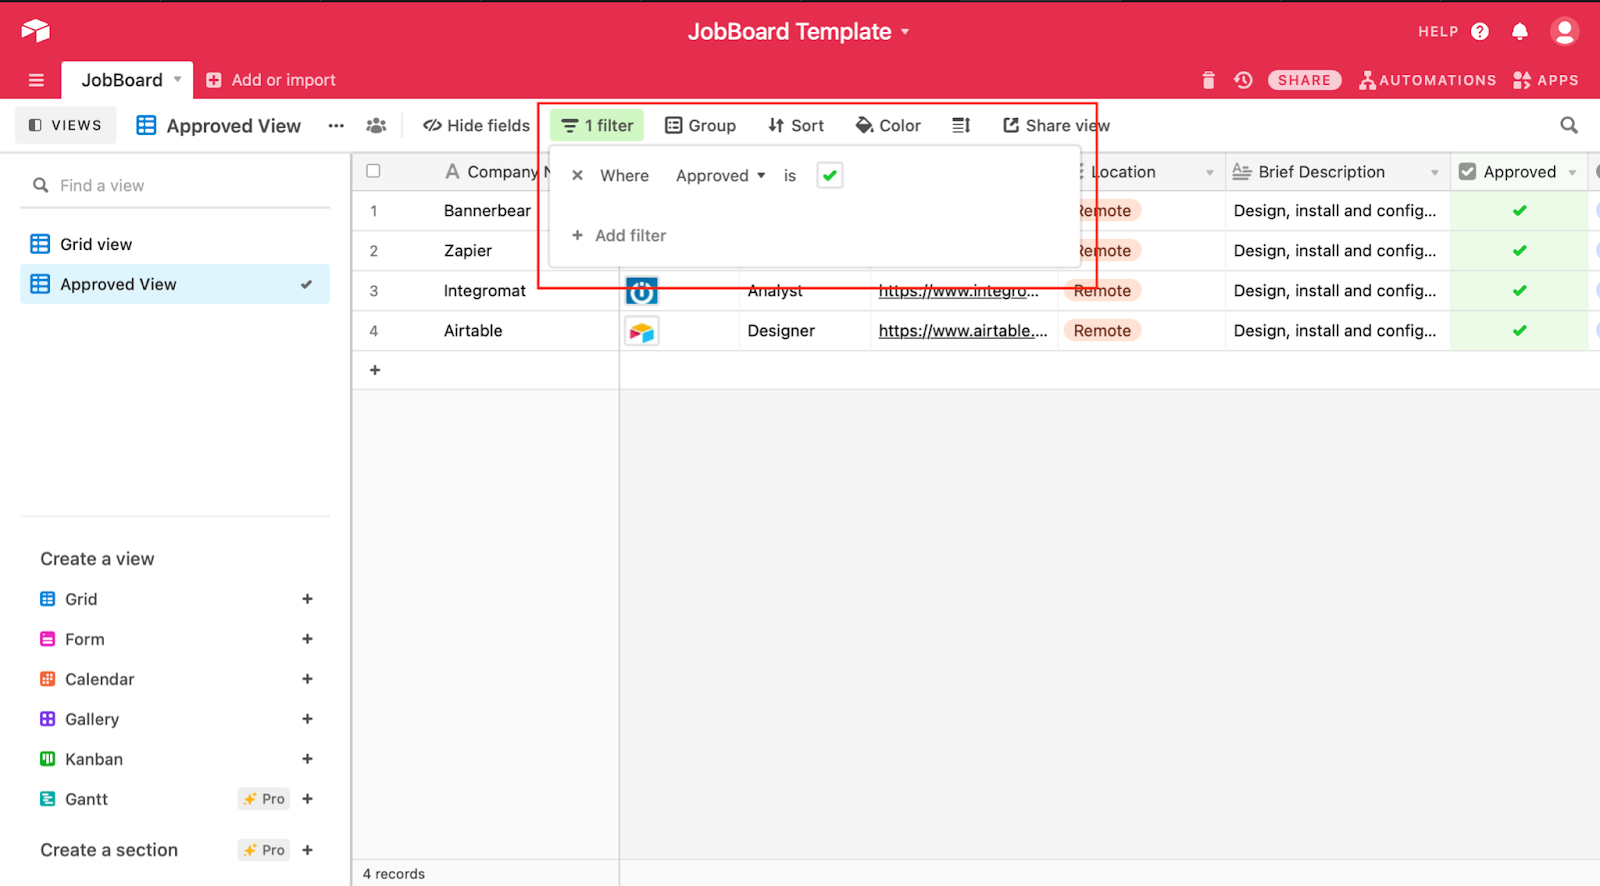
This will trigger Zapier only when the listing is confirmed as approved.
Create a Bannerbear project
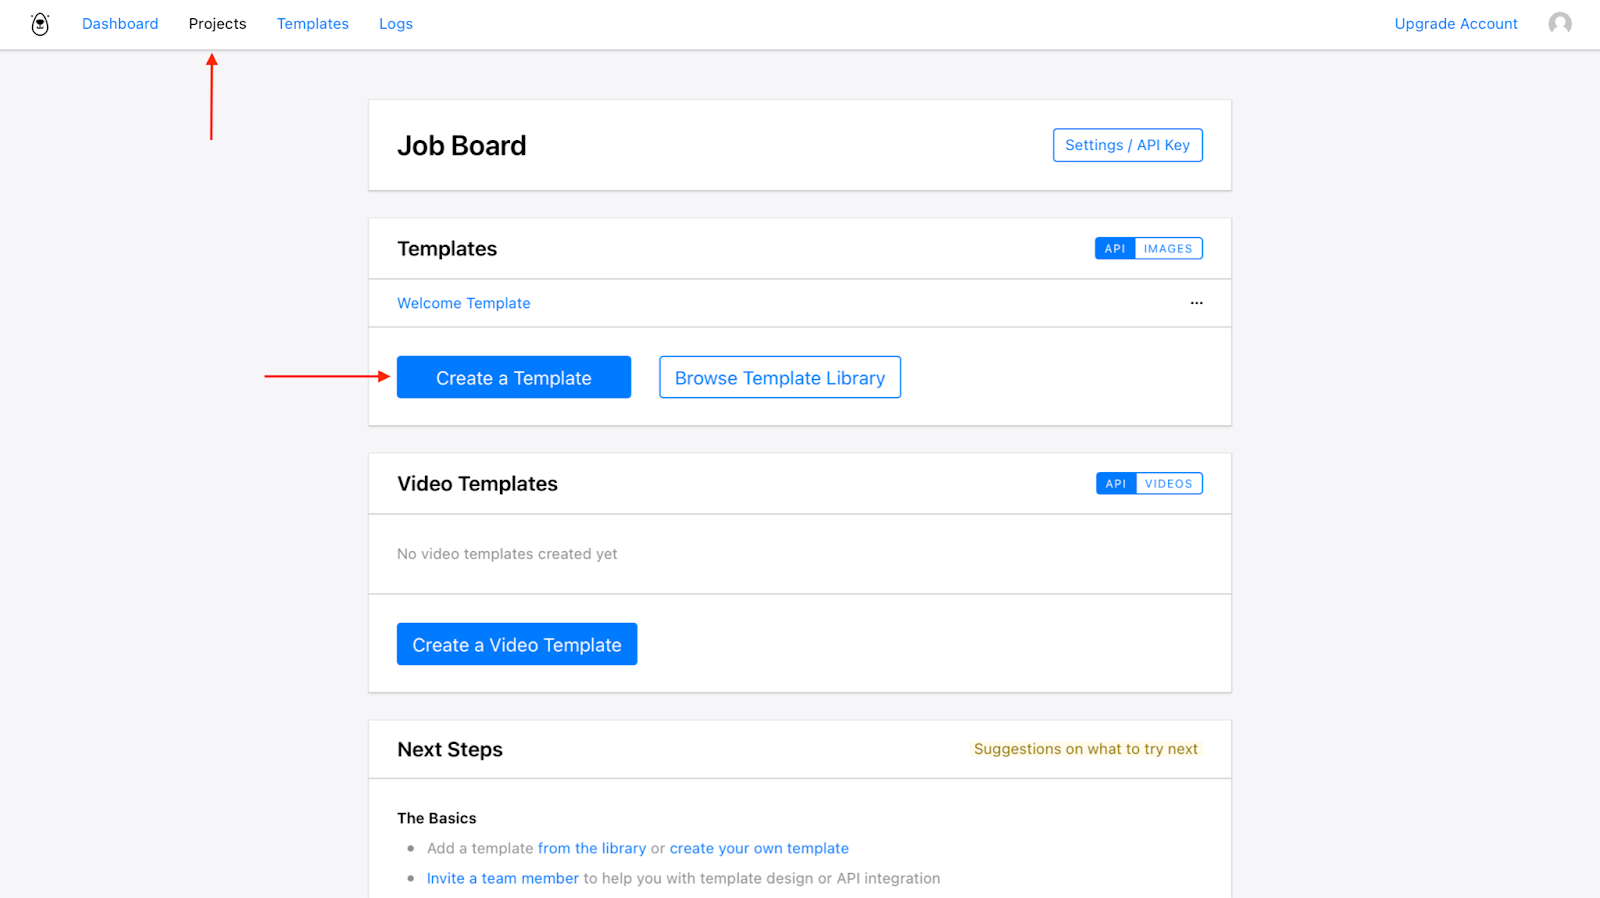
Navigate to the Projects tab and create a new project in your Bannerbear account. You will be prompted to name your project. This should ideally be “Job Board” or any name you prefer.
Create template
There are ready made templates on Bannerbear so you can choose to Create a Template from scratch or Browse Template Library.
For this tutorial, we will create a standard image template in Bannerbear and add the dynamic fields for every image.
This is an optional step. Bannerbear allows the flexibility to customise an existing template so you can choose to start with an existing template and adjust the layout, add layers, objects, colours, fonts, etc according to your brand guidelines.
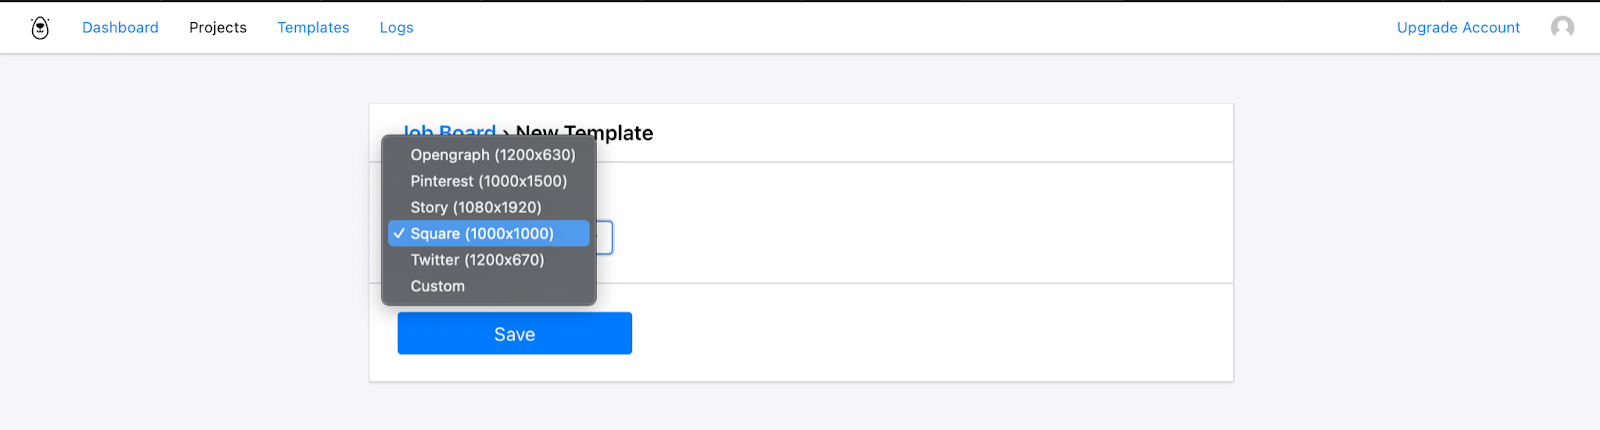
Select a Size Format
We will go with the square format for this tutorial. This is considering Instagram square size is 1080 x 1080 pixels (1:1 ratio) while facebook accommodates 1200 x 1200 pixels. Twitter’s new update allows full-sized previews of attached tweet images without cropping down.
These guidelines are best followed to avoid pixelation and image stretching.
Add Layers
Templates come alive after layers are added. Add a new layer by using your Airtable fields as a guide. The layers are to the left of your screen.
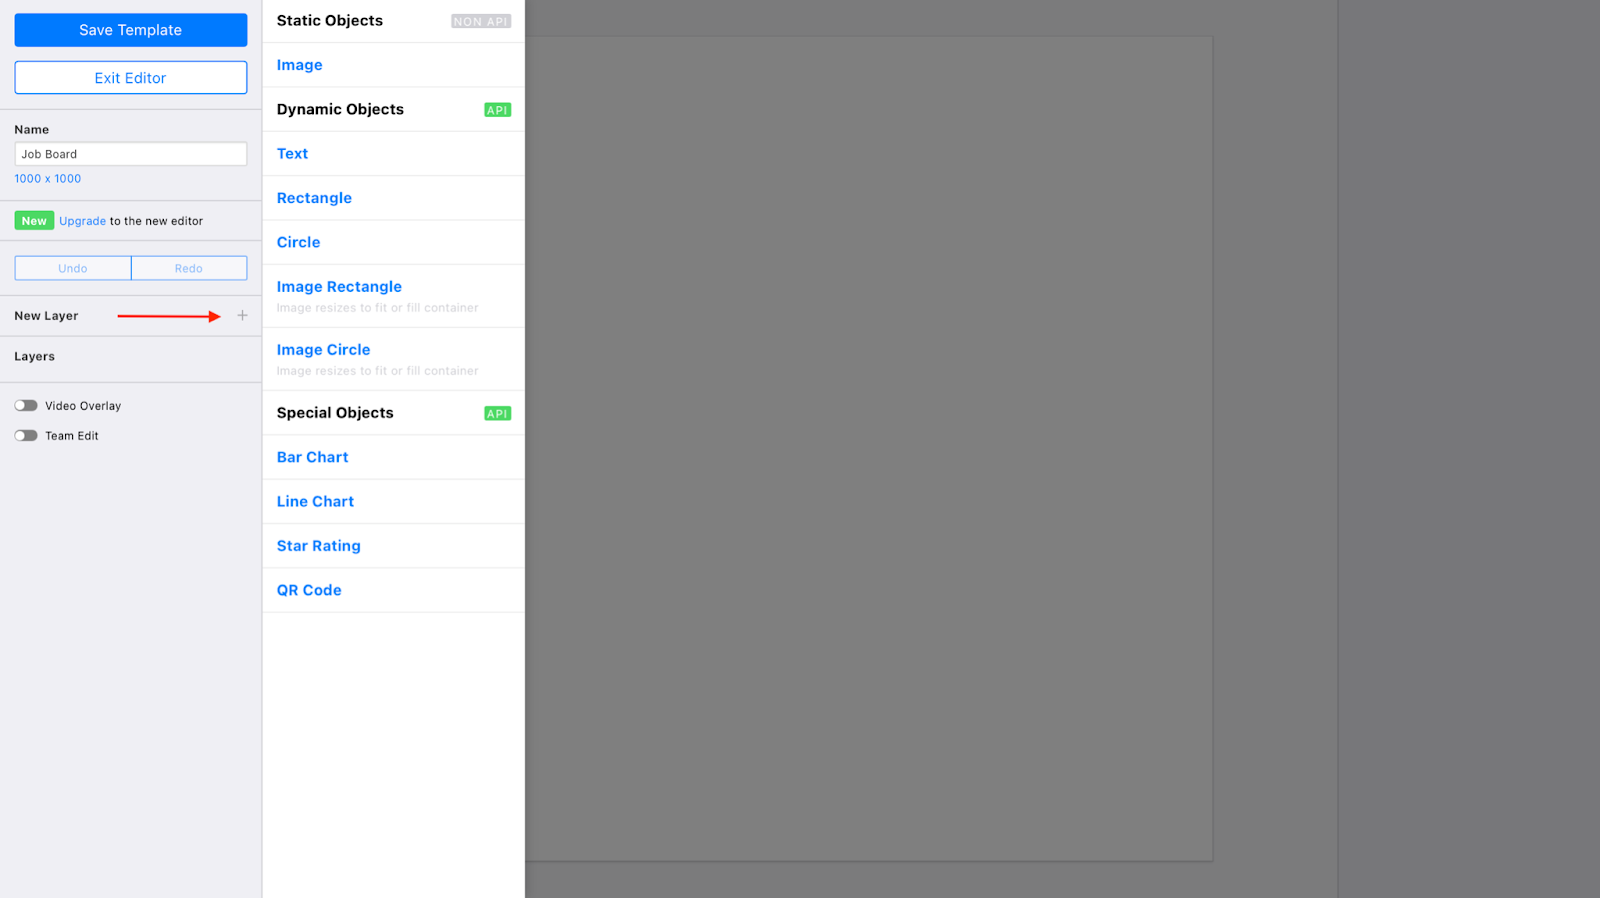
We would recommend renaming your layers using the Airtable fields as a guide as this will ease the process when matching your fields on Zapier.
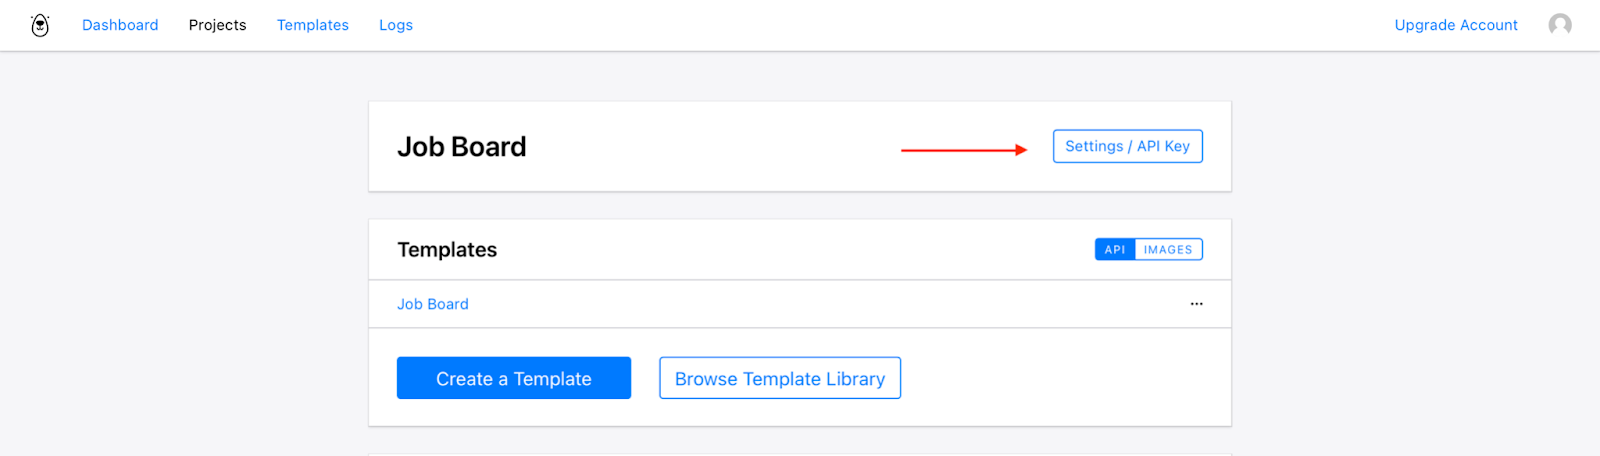
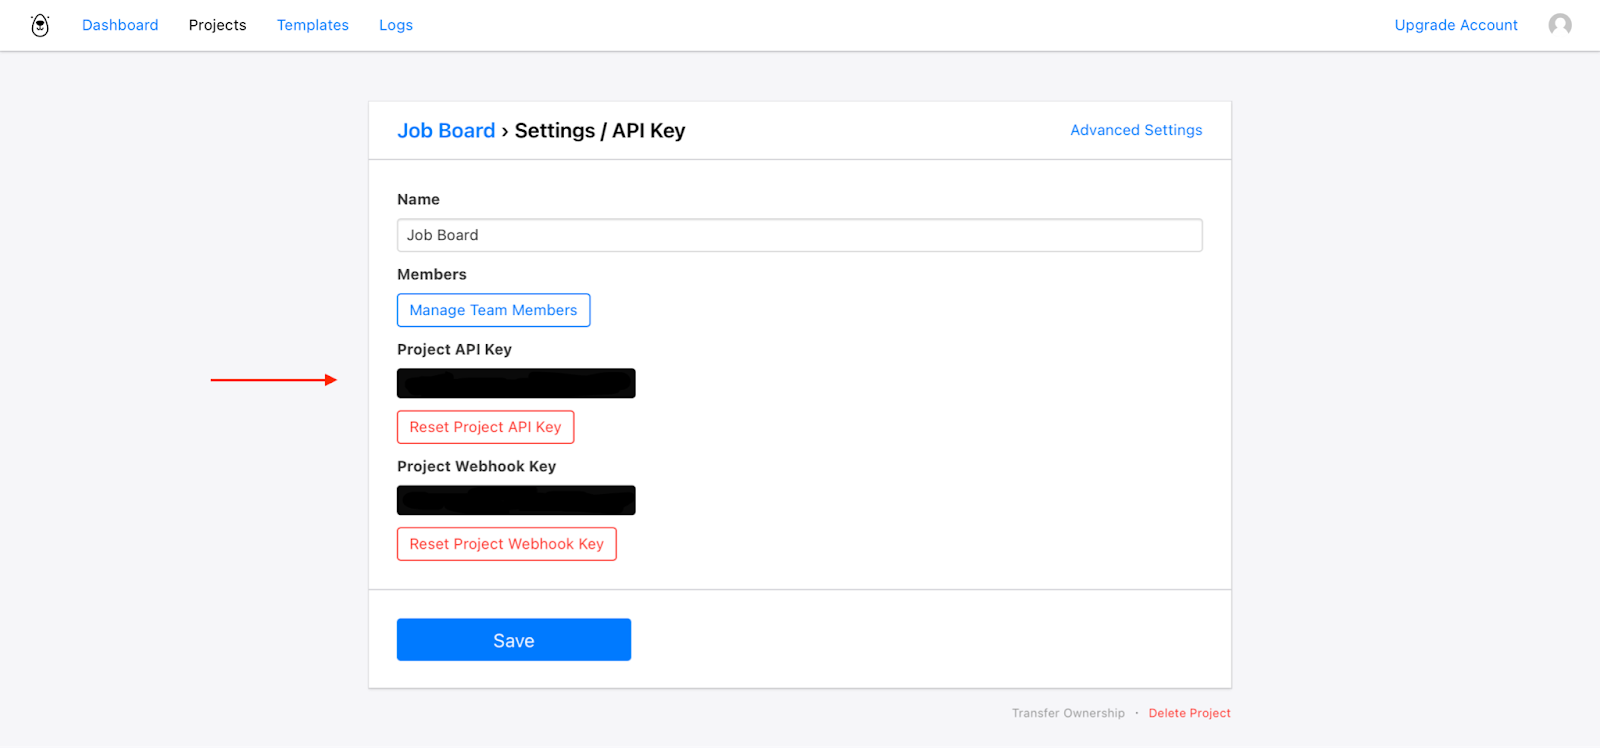
Get your Bannerbear Project API Key
You will need your Bannerbear API key at a later stage to authenticate with Zapier. The API key is unique for each project. The Project API key is found on the Settings / API Key page of your Project.
Integrate with Zapier
Now we can integrateZapier with your Bannerbear account to automatically share new images on Twitter when a new job is posted.
You will need to:
- Connect to your Airtable account
- Create an image with Bannerbear using the Project API Key
- Connect to Twitter or LinkedIn
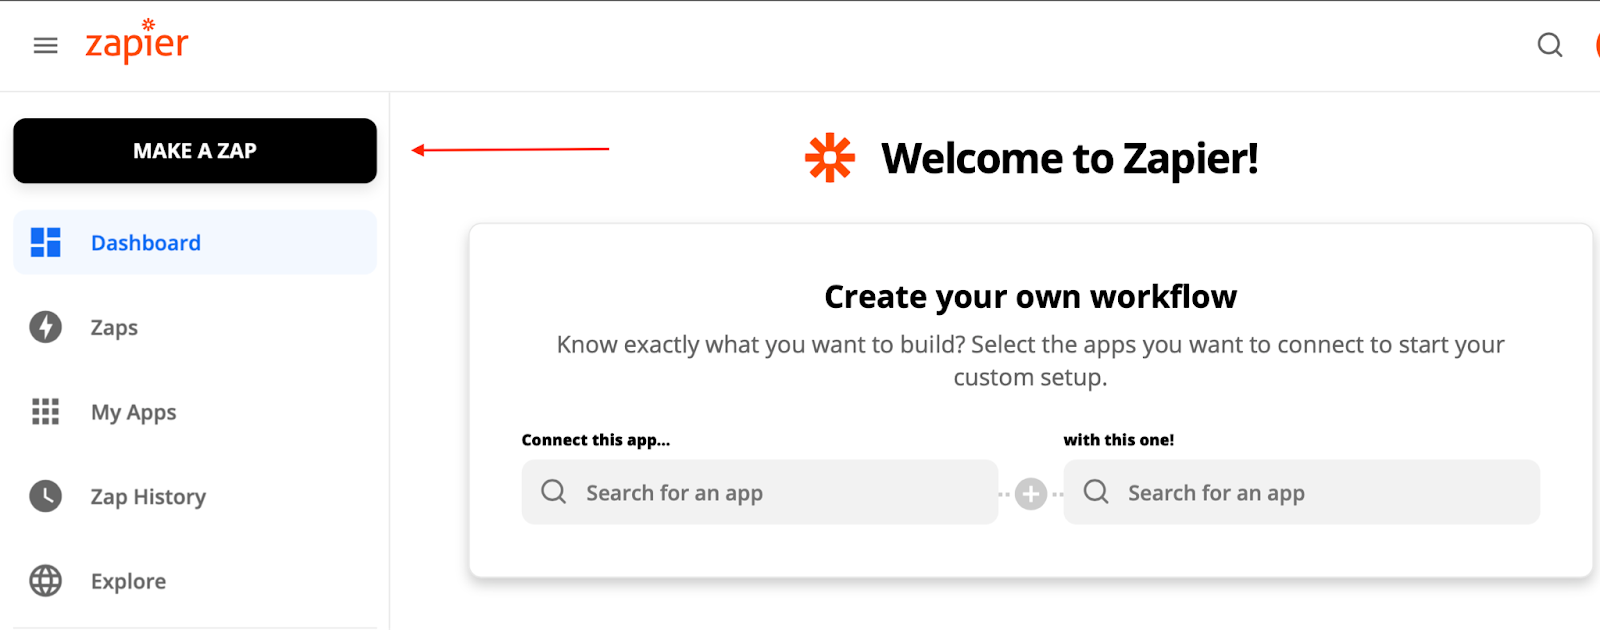
Make a Zap
Log in to your Zapier account and Make A Zap.
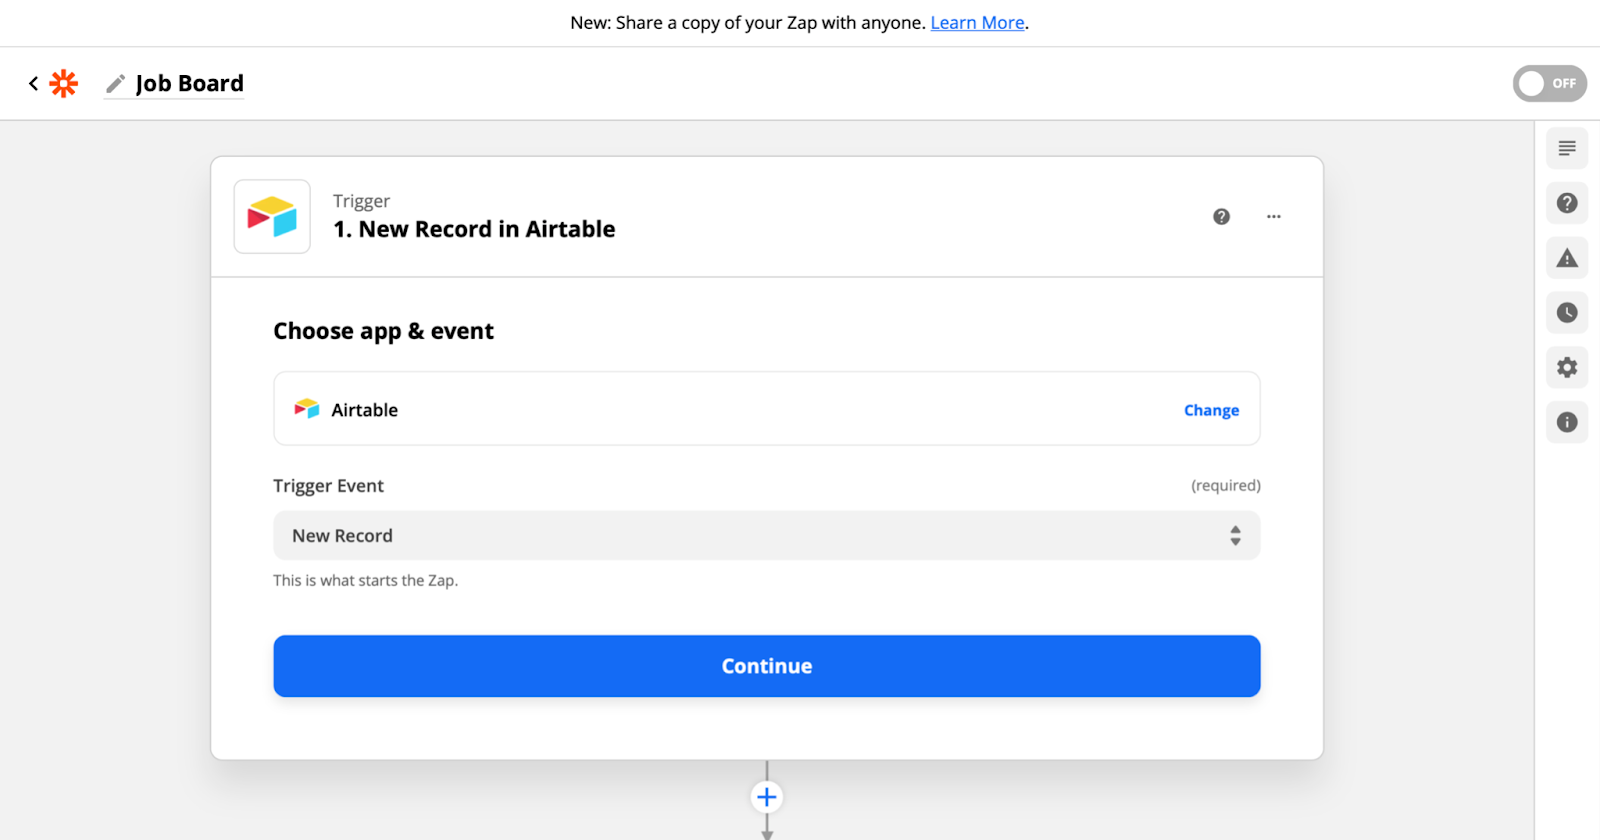
Create a Trigger
Name your Zap then choose a trigger event for your zap so that when a new record is added in the Approved view , a new image is created.
Choose Airtable as the app to be connected to and select New Record as the action event.
Connect the JobBoard Template base you created on Airtable and select your table.
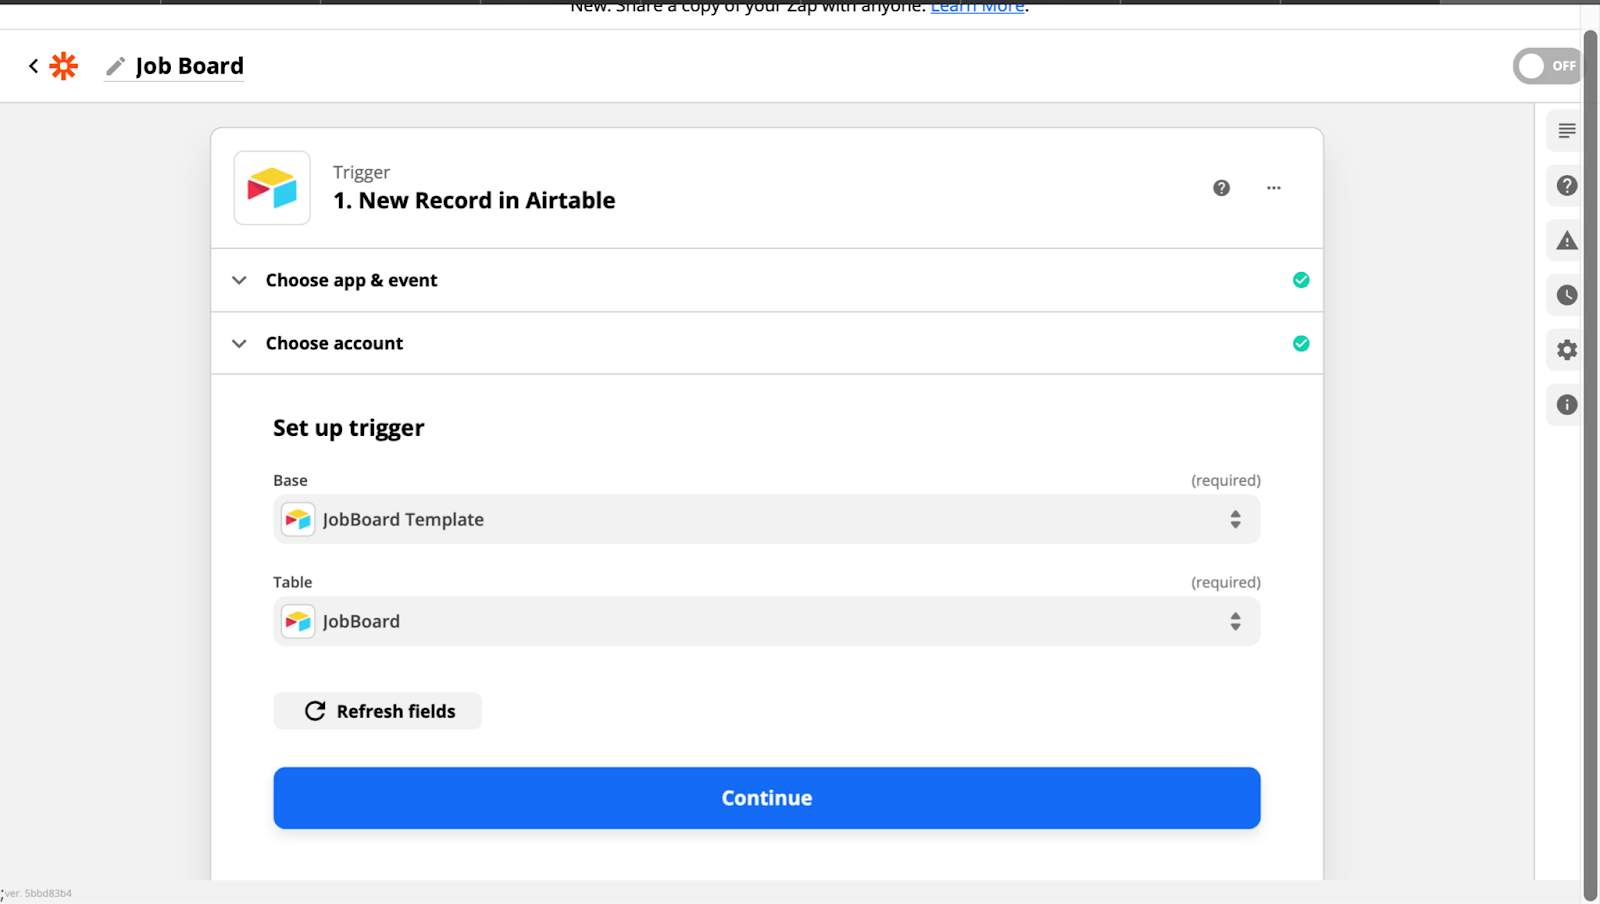
Test your trigger to ensure that the records match. That's Part 1 done! Now to set up what we want to happen.
Action 1: Create Image
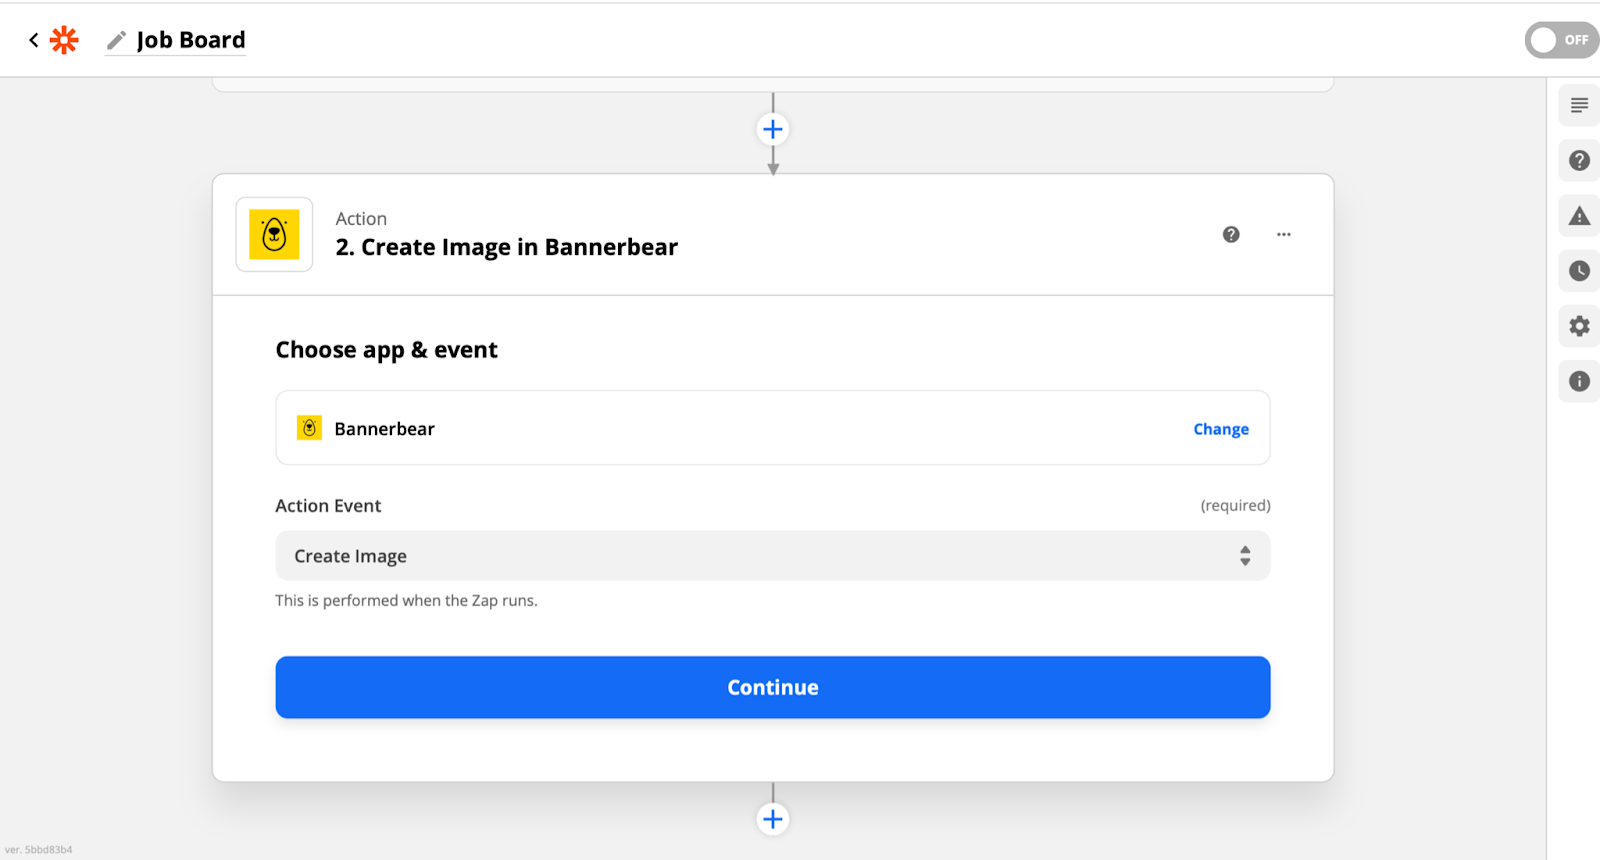
When the zap is triggered by a new record on Airtable we want to create an image in Bannerbear. You need the Project API key retrieved earlier to allow Zapier to access your Bannerbear account.
Choose Bannerbear as the app to be connected to and select Create Image as the action event.
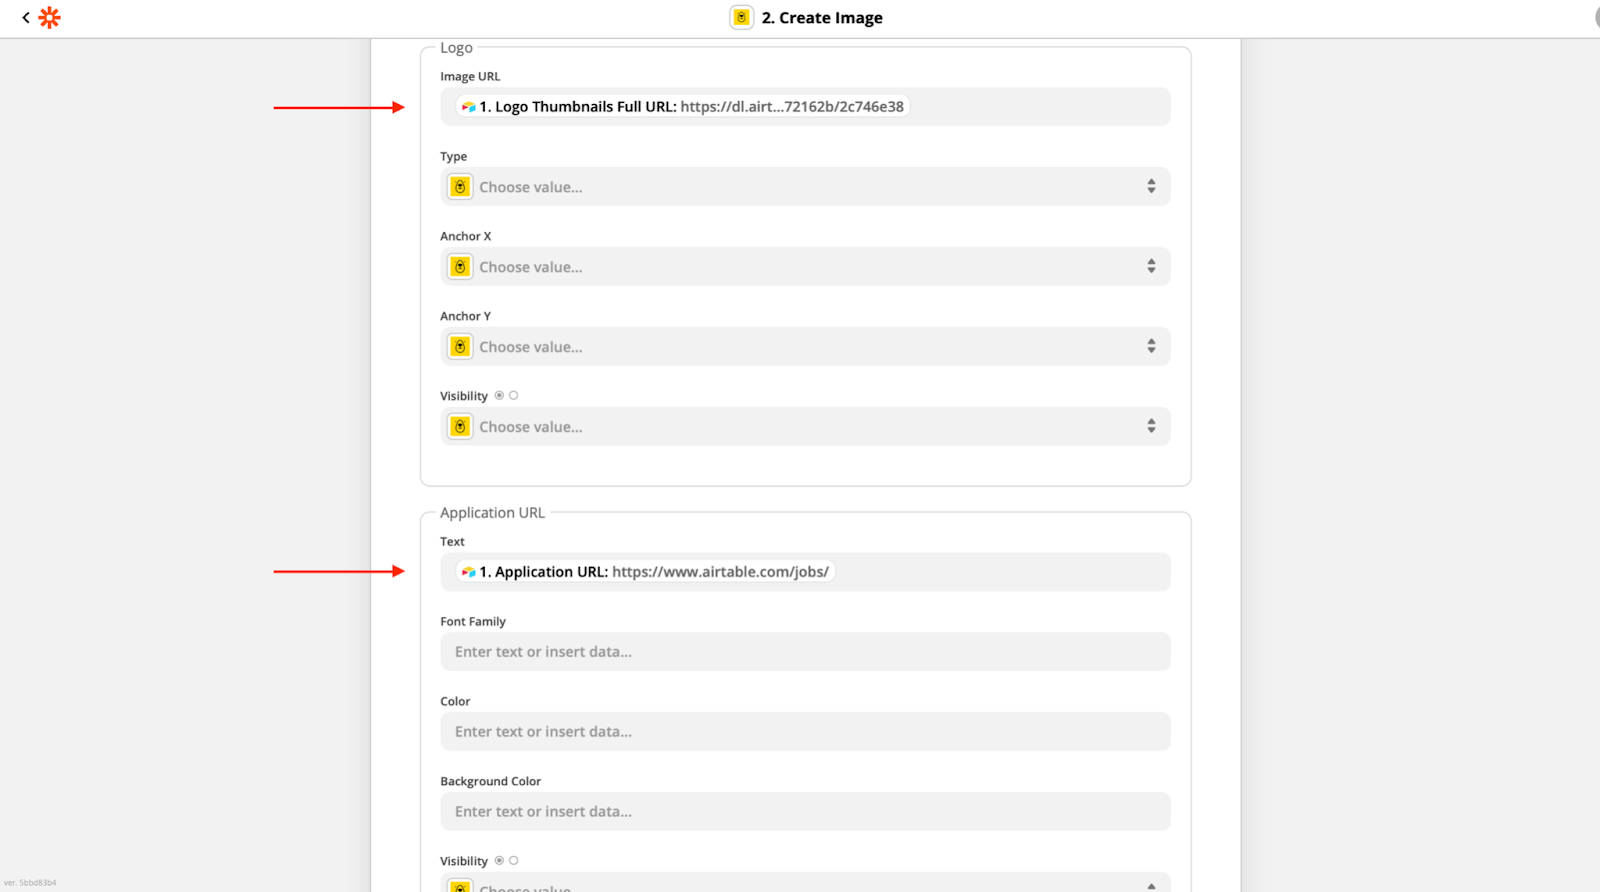
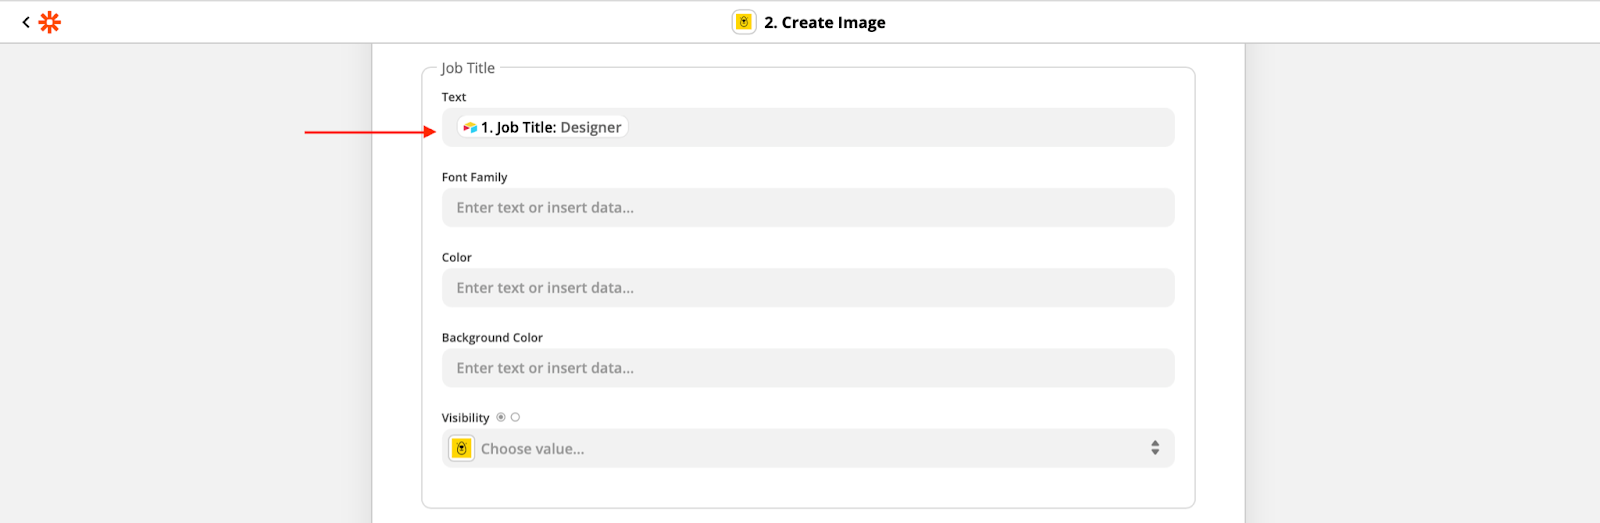
Zapier will load the template settings. Select the template ID. You will send the Airtable data to Bannerbear by adjusting the dynamic fields. The fields we need to populate are:
- Logo
- Job Title
- Application URL
- Location
- Brief Description
These should be easy to match considering the layers were named according to the Airtable fields. Match the Logo Image URL and Application URL Text.
Match the Location Text and Brief Description Text.
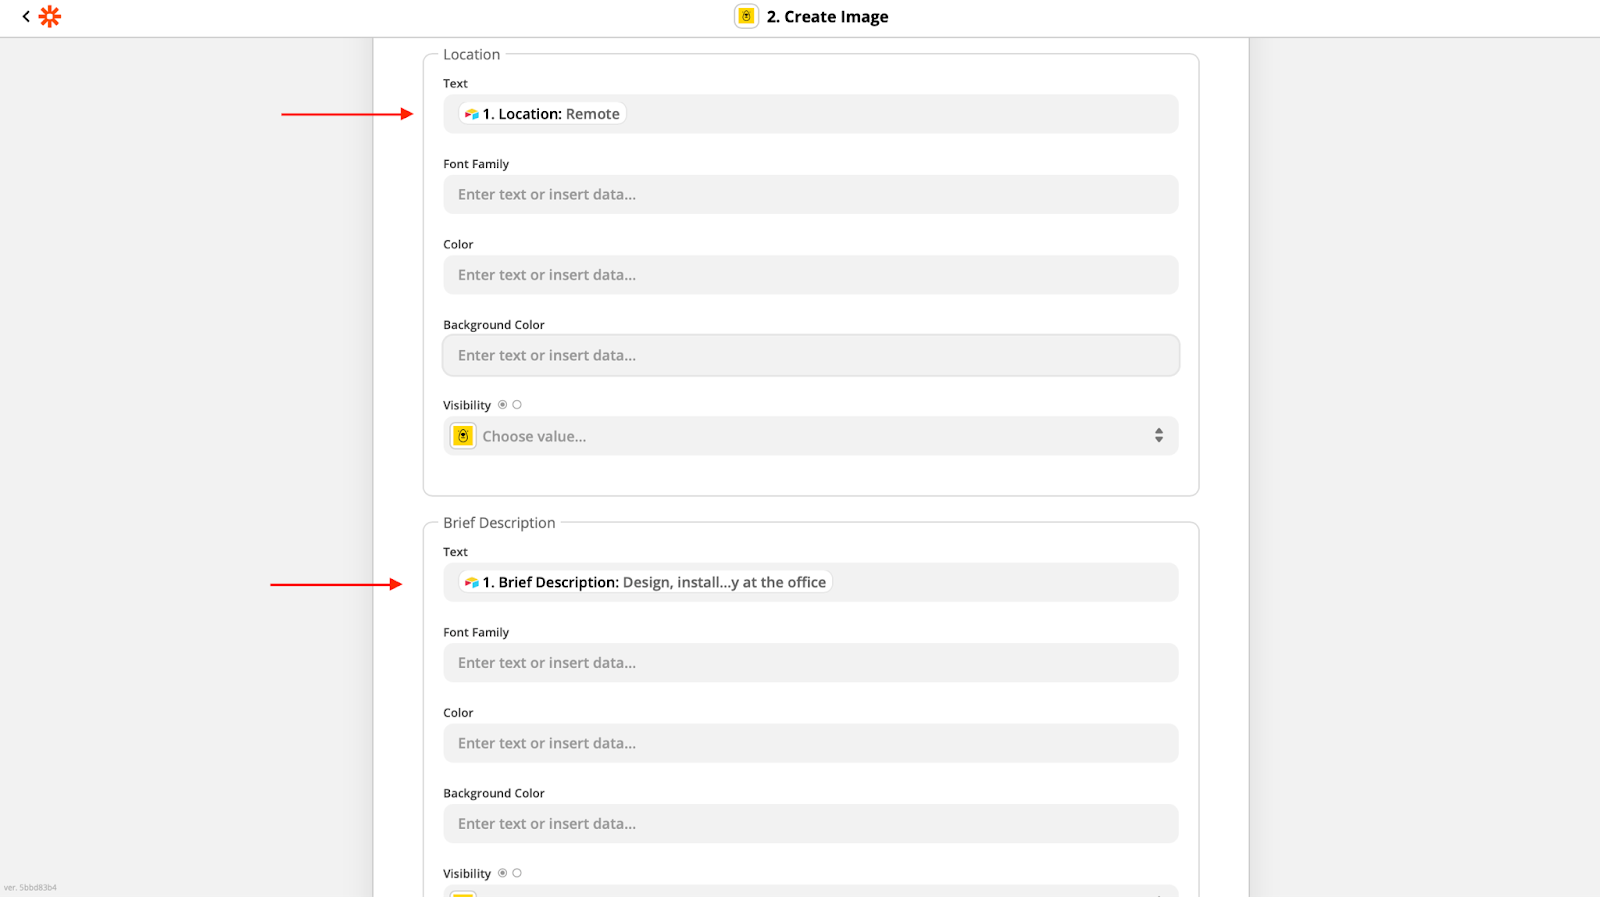
Match the Job Title Text.
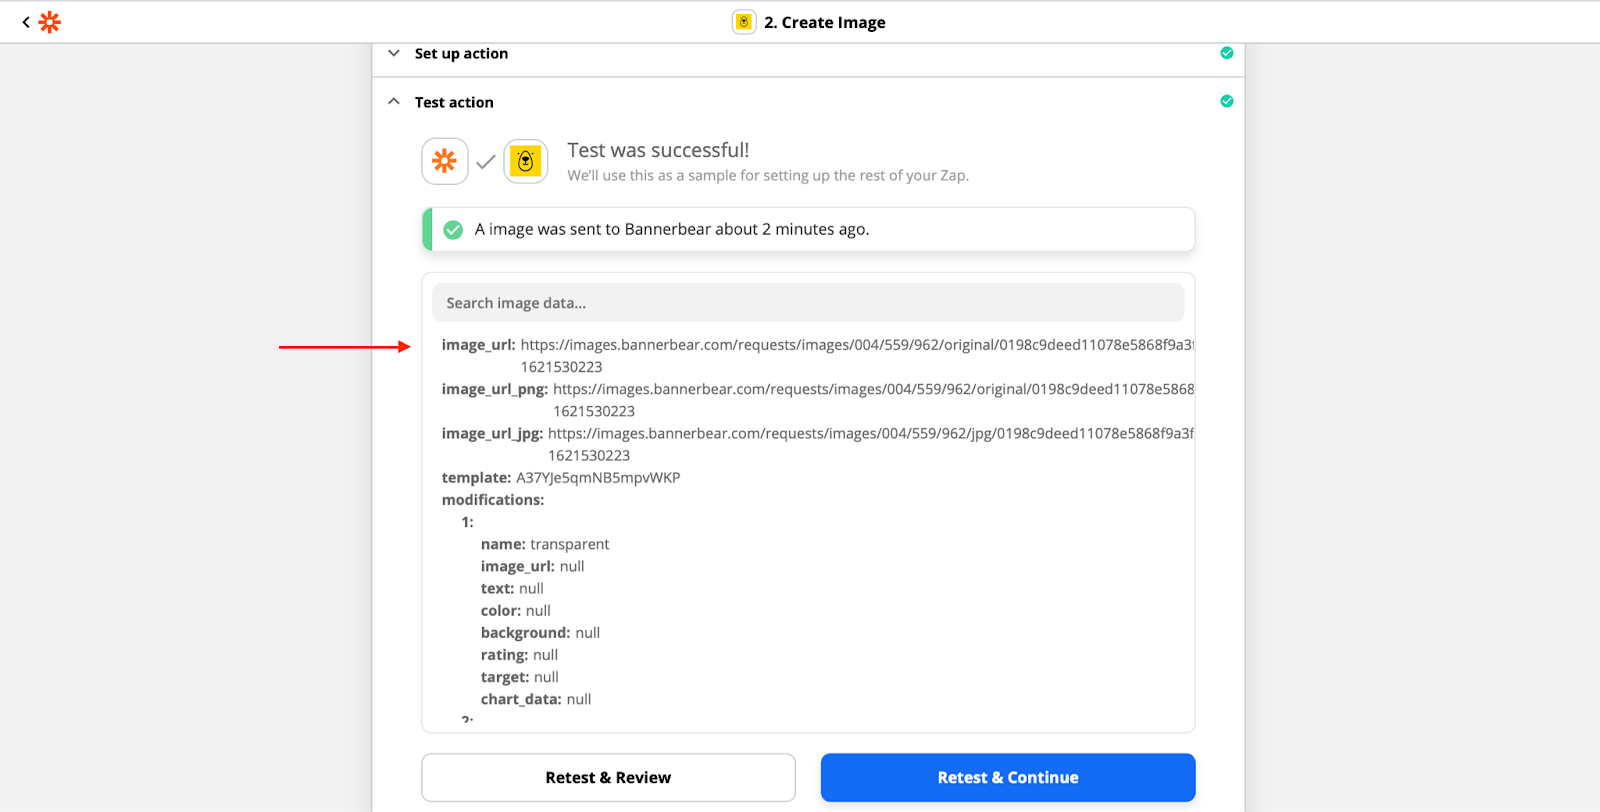
Test that the image is displayed correctly. Copy and paste the image_url to your browser. If everything works fine, Retest & Continue.
Action 2: Post on Twitter
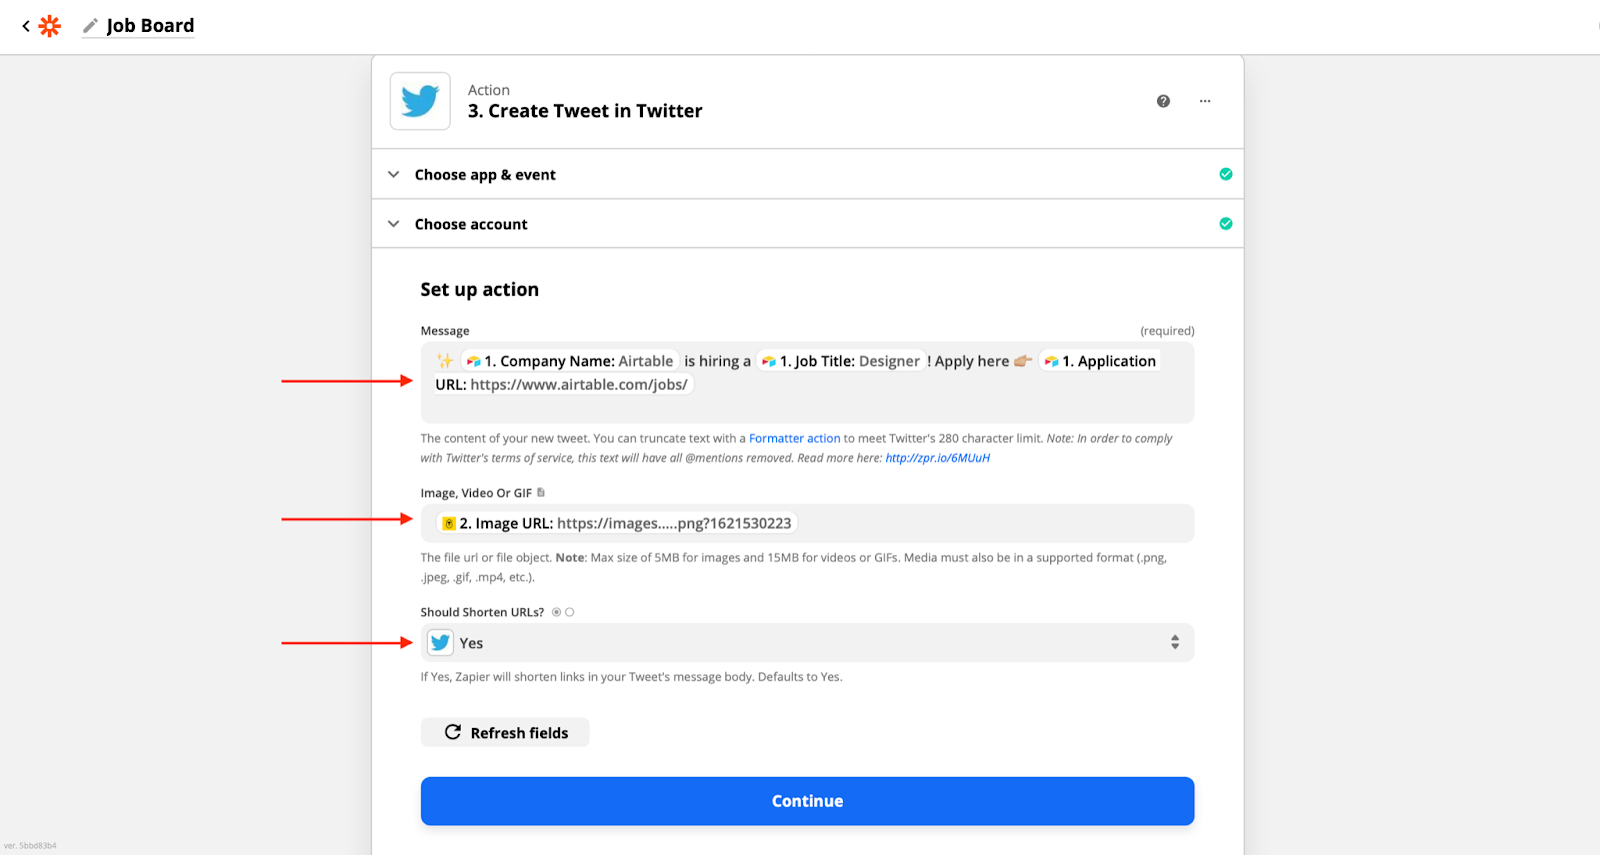
New zap. Choose Twitter as the app to be connected to and select Create Tweet as the action event.
The next step allows you to customise the tweet that will be published. We suggest that the tweets are best kept short as most of the details will be in the image. To do this, we will use some data from Airtable to compose a message. Company Name, Job Title and Application URL. We added in some emoji for extra touch.
The Image URL is the same one generated by Bannerbear.
You can now test the Zap you've just made, and viola!
You can choose to connect LinkedIn, Instagram or any other social channel.