
Auto Generating Videos with Integromat
Contents
Bannerbear now has an Integromat integration to help you connect Bannerbear to thousands of other apps.
What is Integromat?
Integromat is an automated workflow creator that connects different apps together. Think of it as an automated and highly configurable import/export tool. You can export data from one place, send it to another, and perform different actions on that data.
What is Bannerbear?
Bannerbear is an API for generating images and video. You design a template (or grab one from the library) and then feed in data using the API to generate images / videos based off that template e.g. with different texts, colors and background images.
What can I do with Bannerbear + Integromat?
Integromat + Bannerbear is a powerful way of using the Bannerbear API without writing code. Using the Bannerbear Integromat integration you can send data from thousands of different apps into Bannerbear, to generate unique image / video content for your business (or your clients!).
Sample video
In this tutorial we will create an Integromat scenario that generates a daily video like this:
The text and the video are combined automatically using Integromat and Bannerbear. These could be then used for automated emails, welcome messages, social media content… and more!
The Scenario overview
I'm assuming that if you're reading this you are already familiar with Integromat. If that's the case and you just want to get a quick look at the full scenarios, here they are:
Post data to Bannerbear:
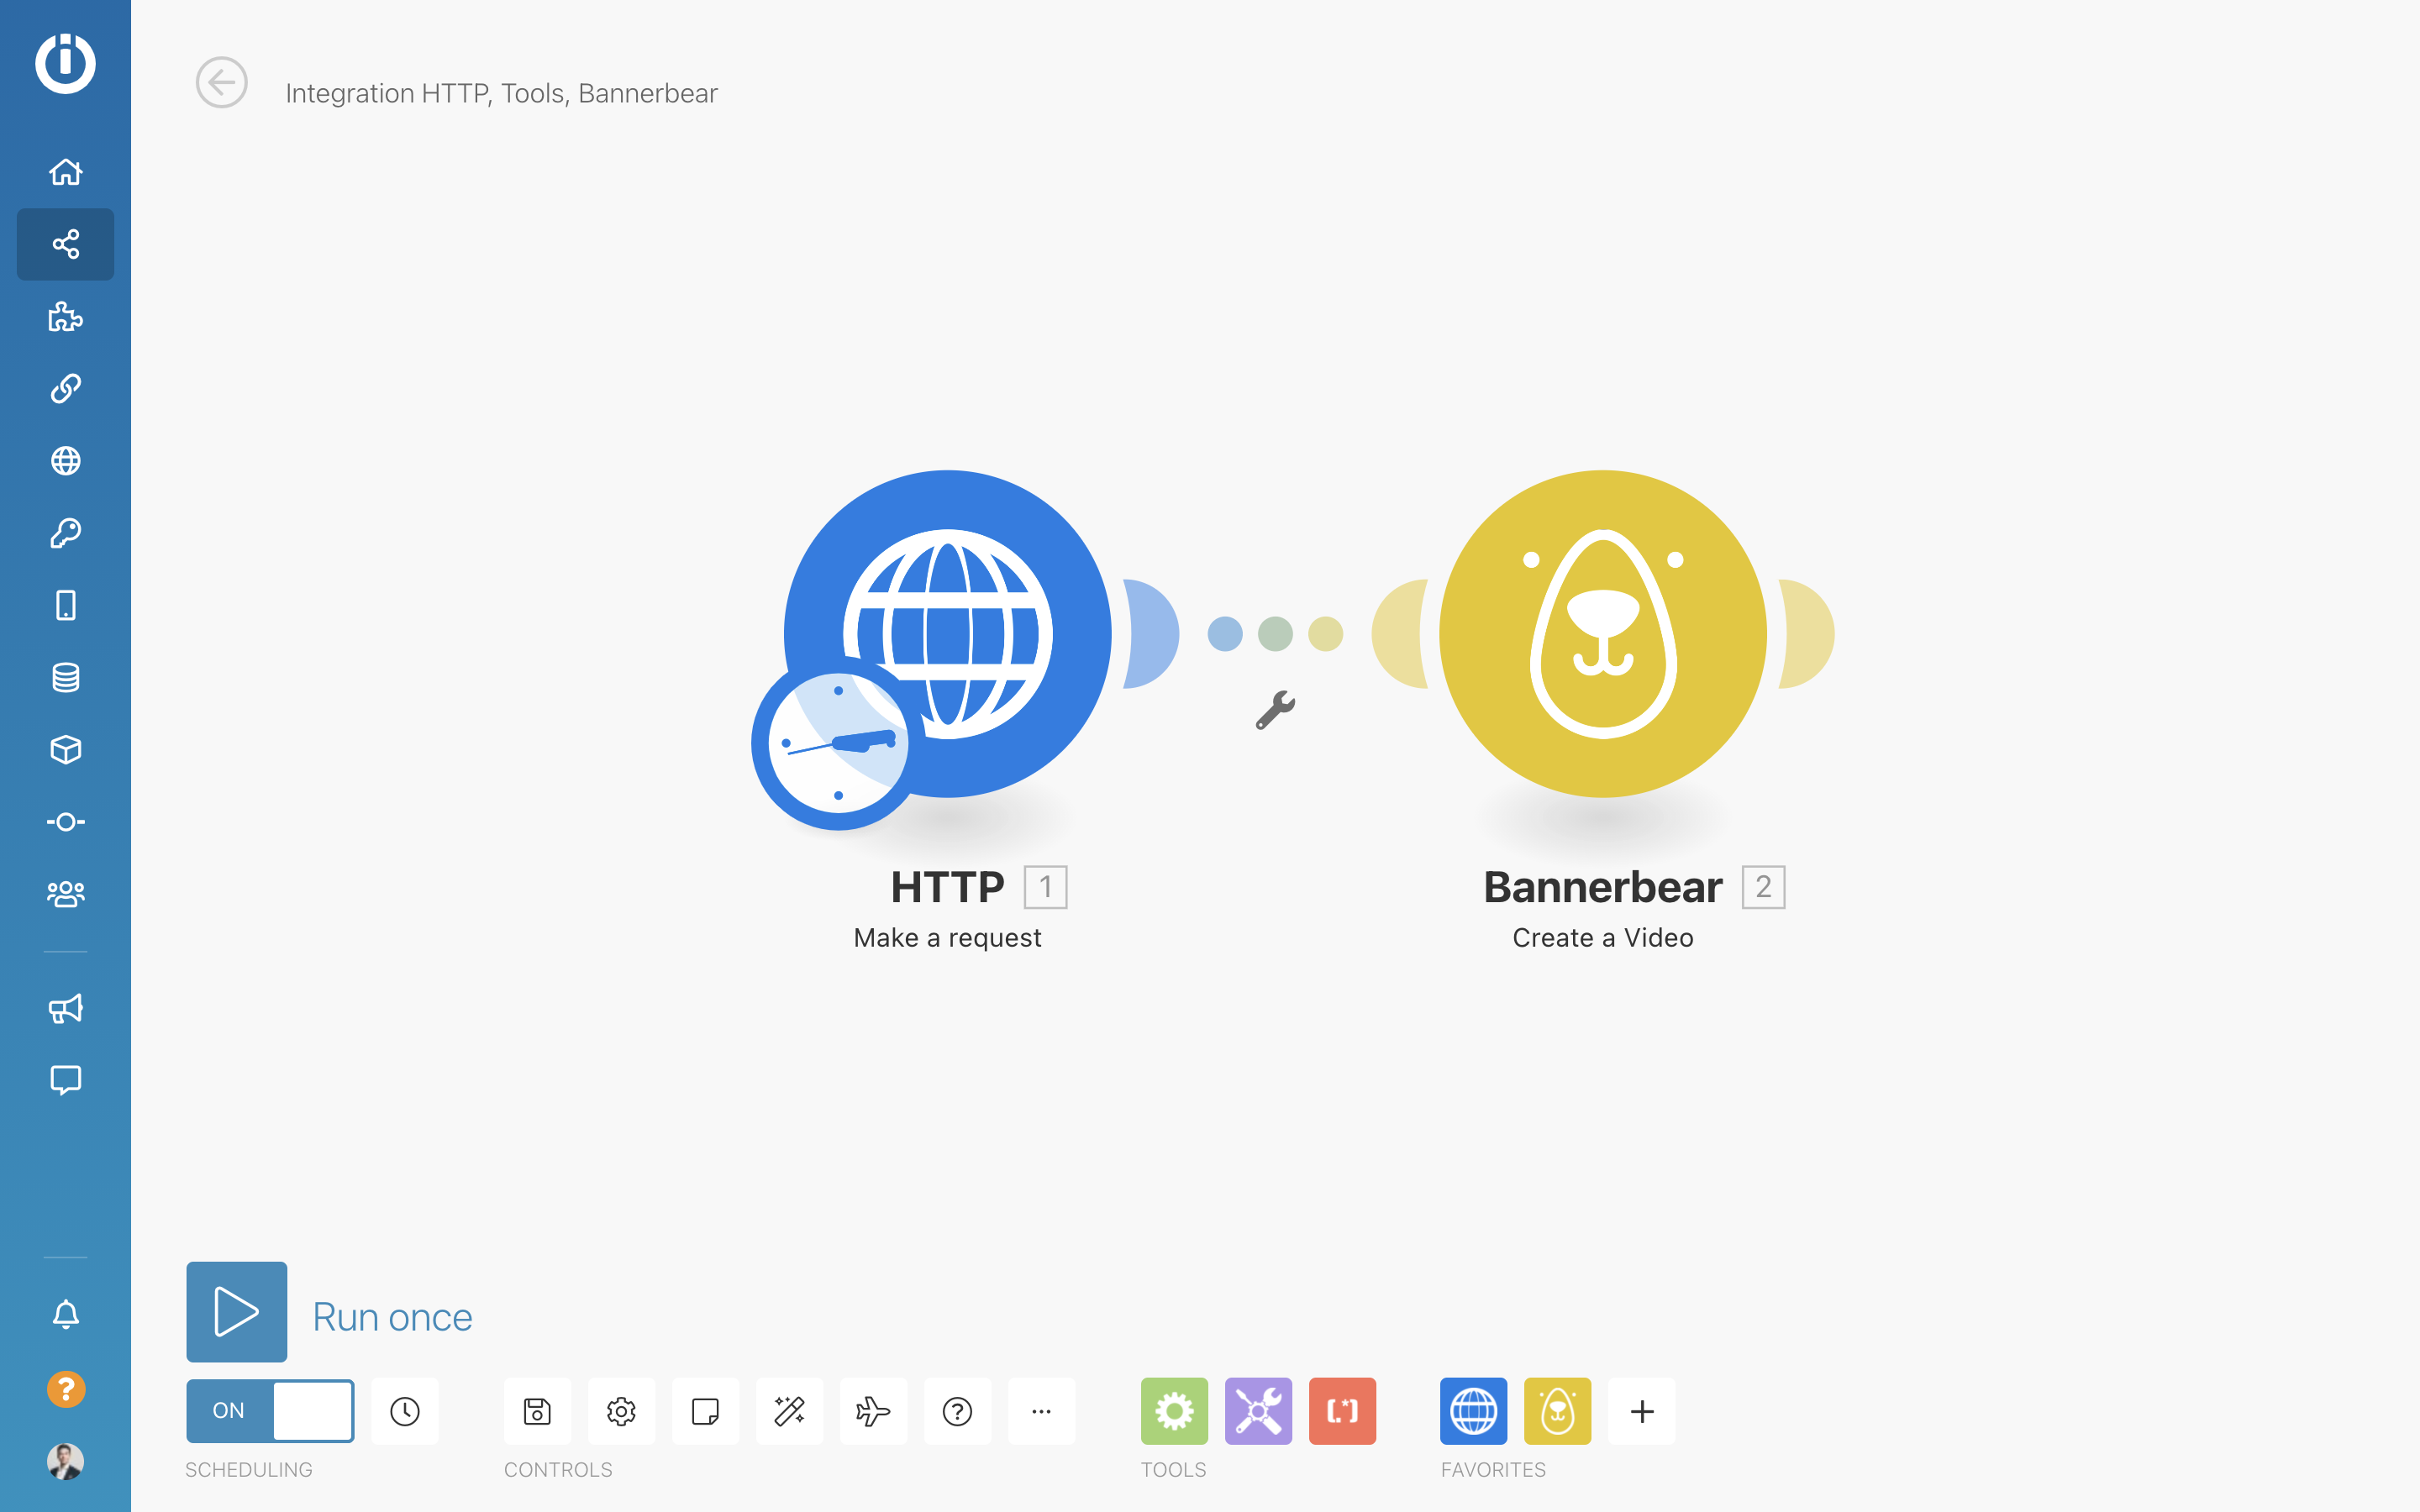
Handle the response by webhook:

This is a sort of "Bannerbear Video 101" scenario setup. You can use the principles of this to build various other scenarios - but essentially what we are doing here is creating two scenarios.
Scenario 1:
- Getting some data (in this case, a video from Pexels)
- Sending the data to Bannerbear
Scenario 2:
- Using a webhook to listen for completed videos
- Doing something with that video
Lets get started!
Adding the Sample Template
If you haven't already, sign up for a free Bannerbear account.
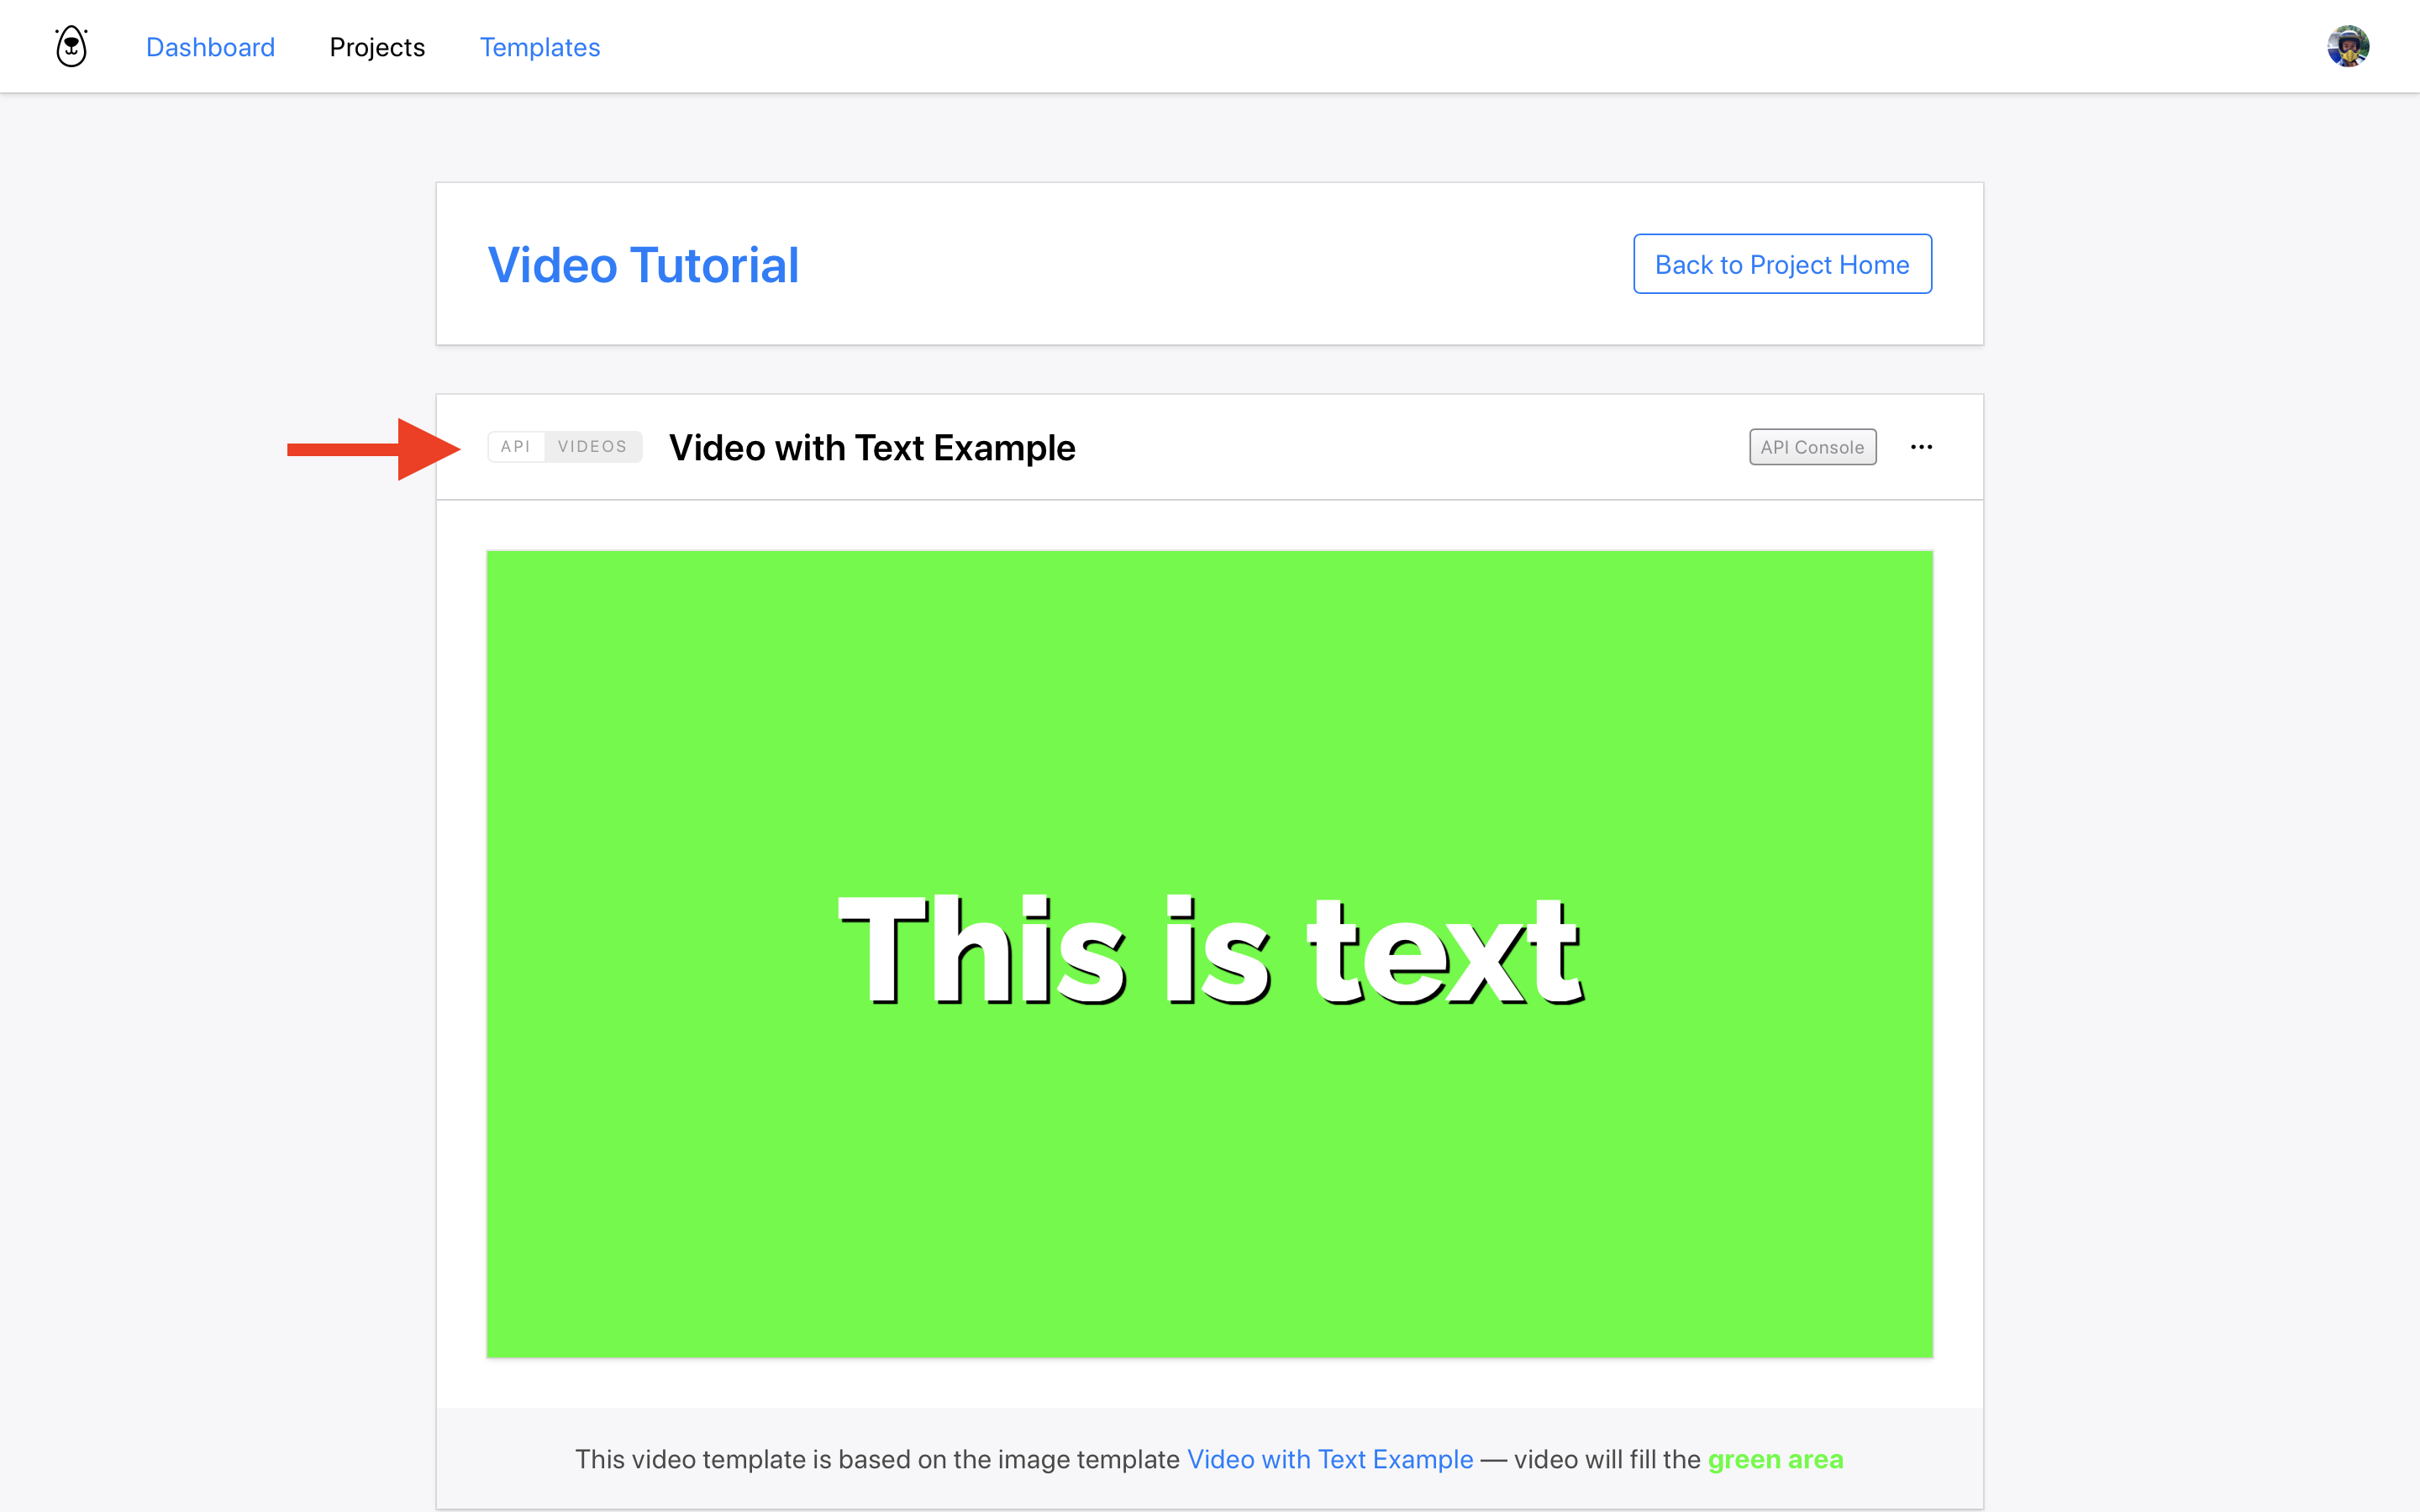
Add the Video with Text Example template to a new project.
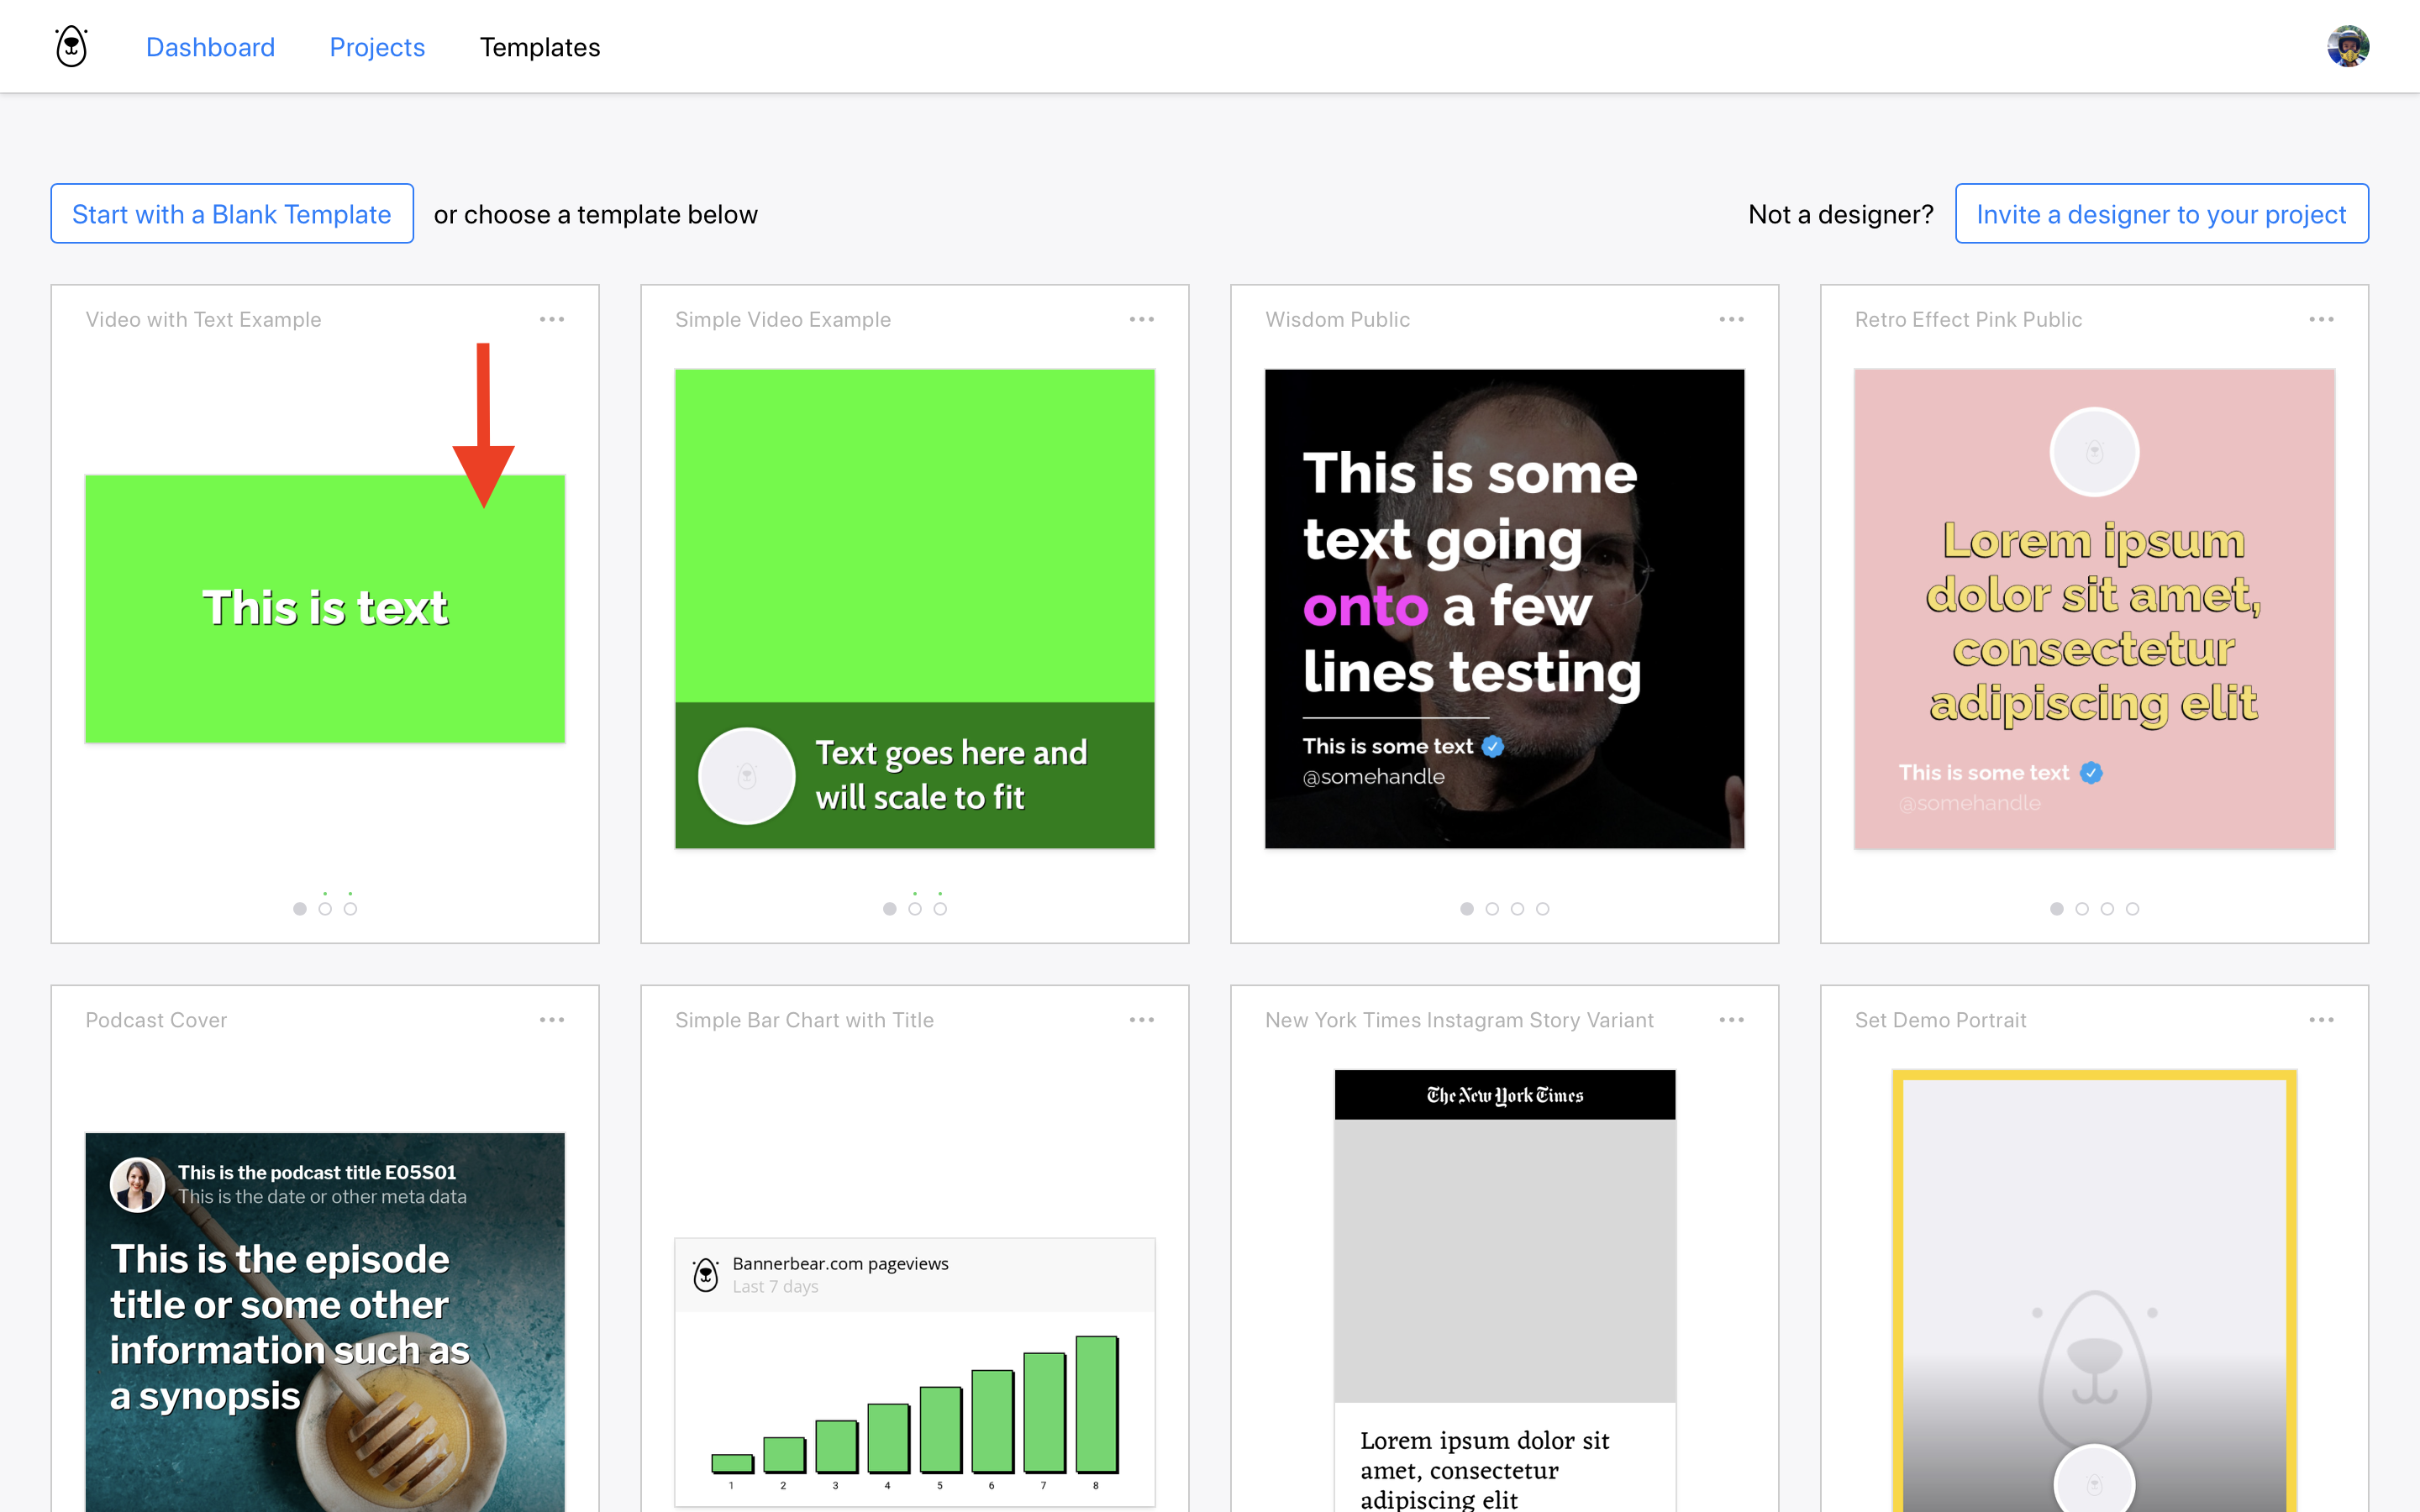
This is a deliberately simple template with only a space for a video background plus one text object. But you can add as many placeholder objects to your templates as you like, for images and text, to overlay on your videos!
(but lets keep it simple for now!)
Convert template to a video template
The template above gets added to your project as a standard Bannerbear template. This means at this point, all it can do is generate images - there is one more step for videos.
This is perhaps the most important takeaway from this tutorial. In order to start generating videos, you have to Create a Video Template based on this new template. It's a simple one-click process.
In your project's Home page you will see the Video with Text Example in the Templates section:
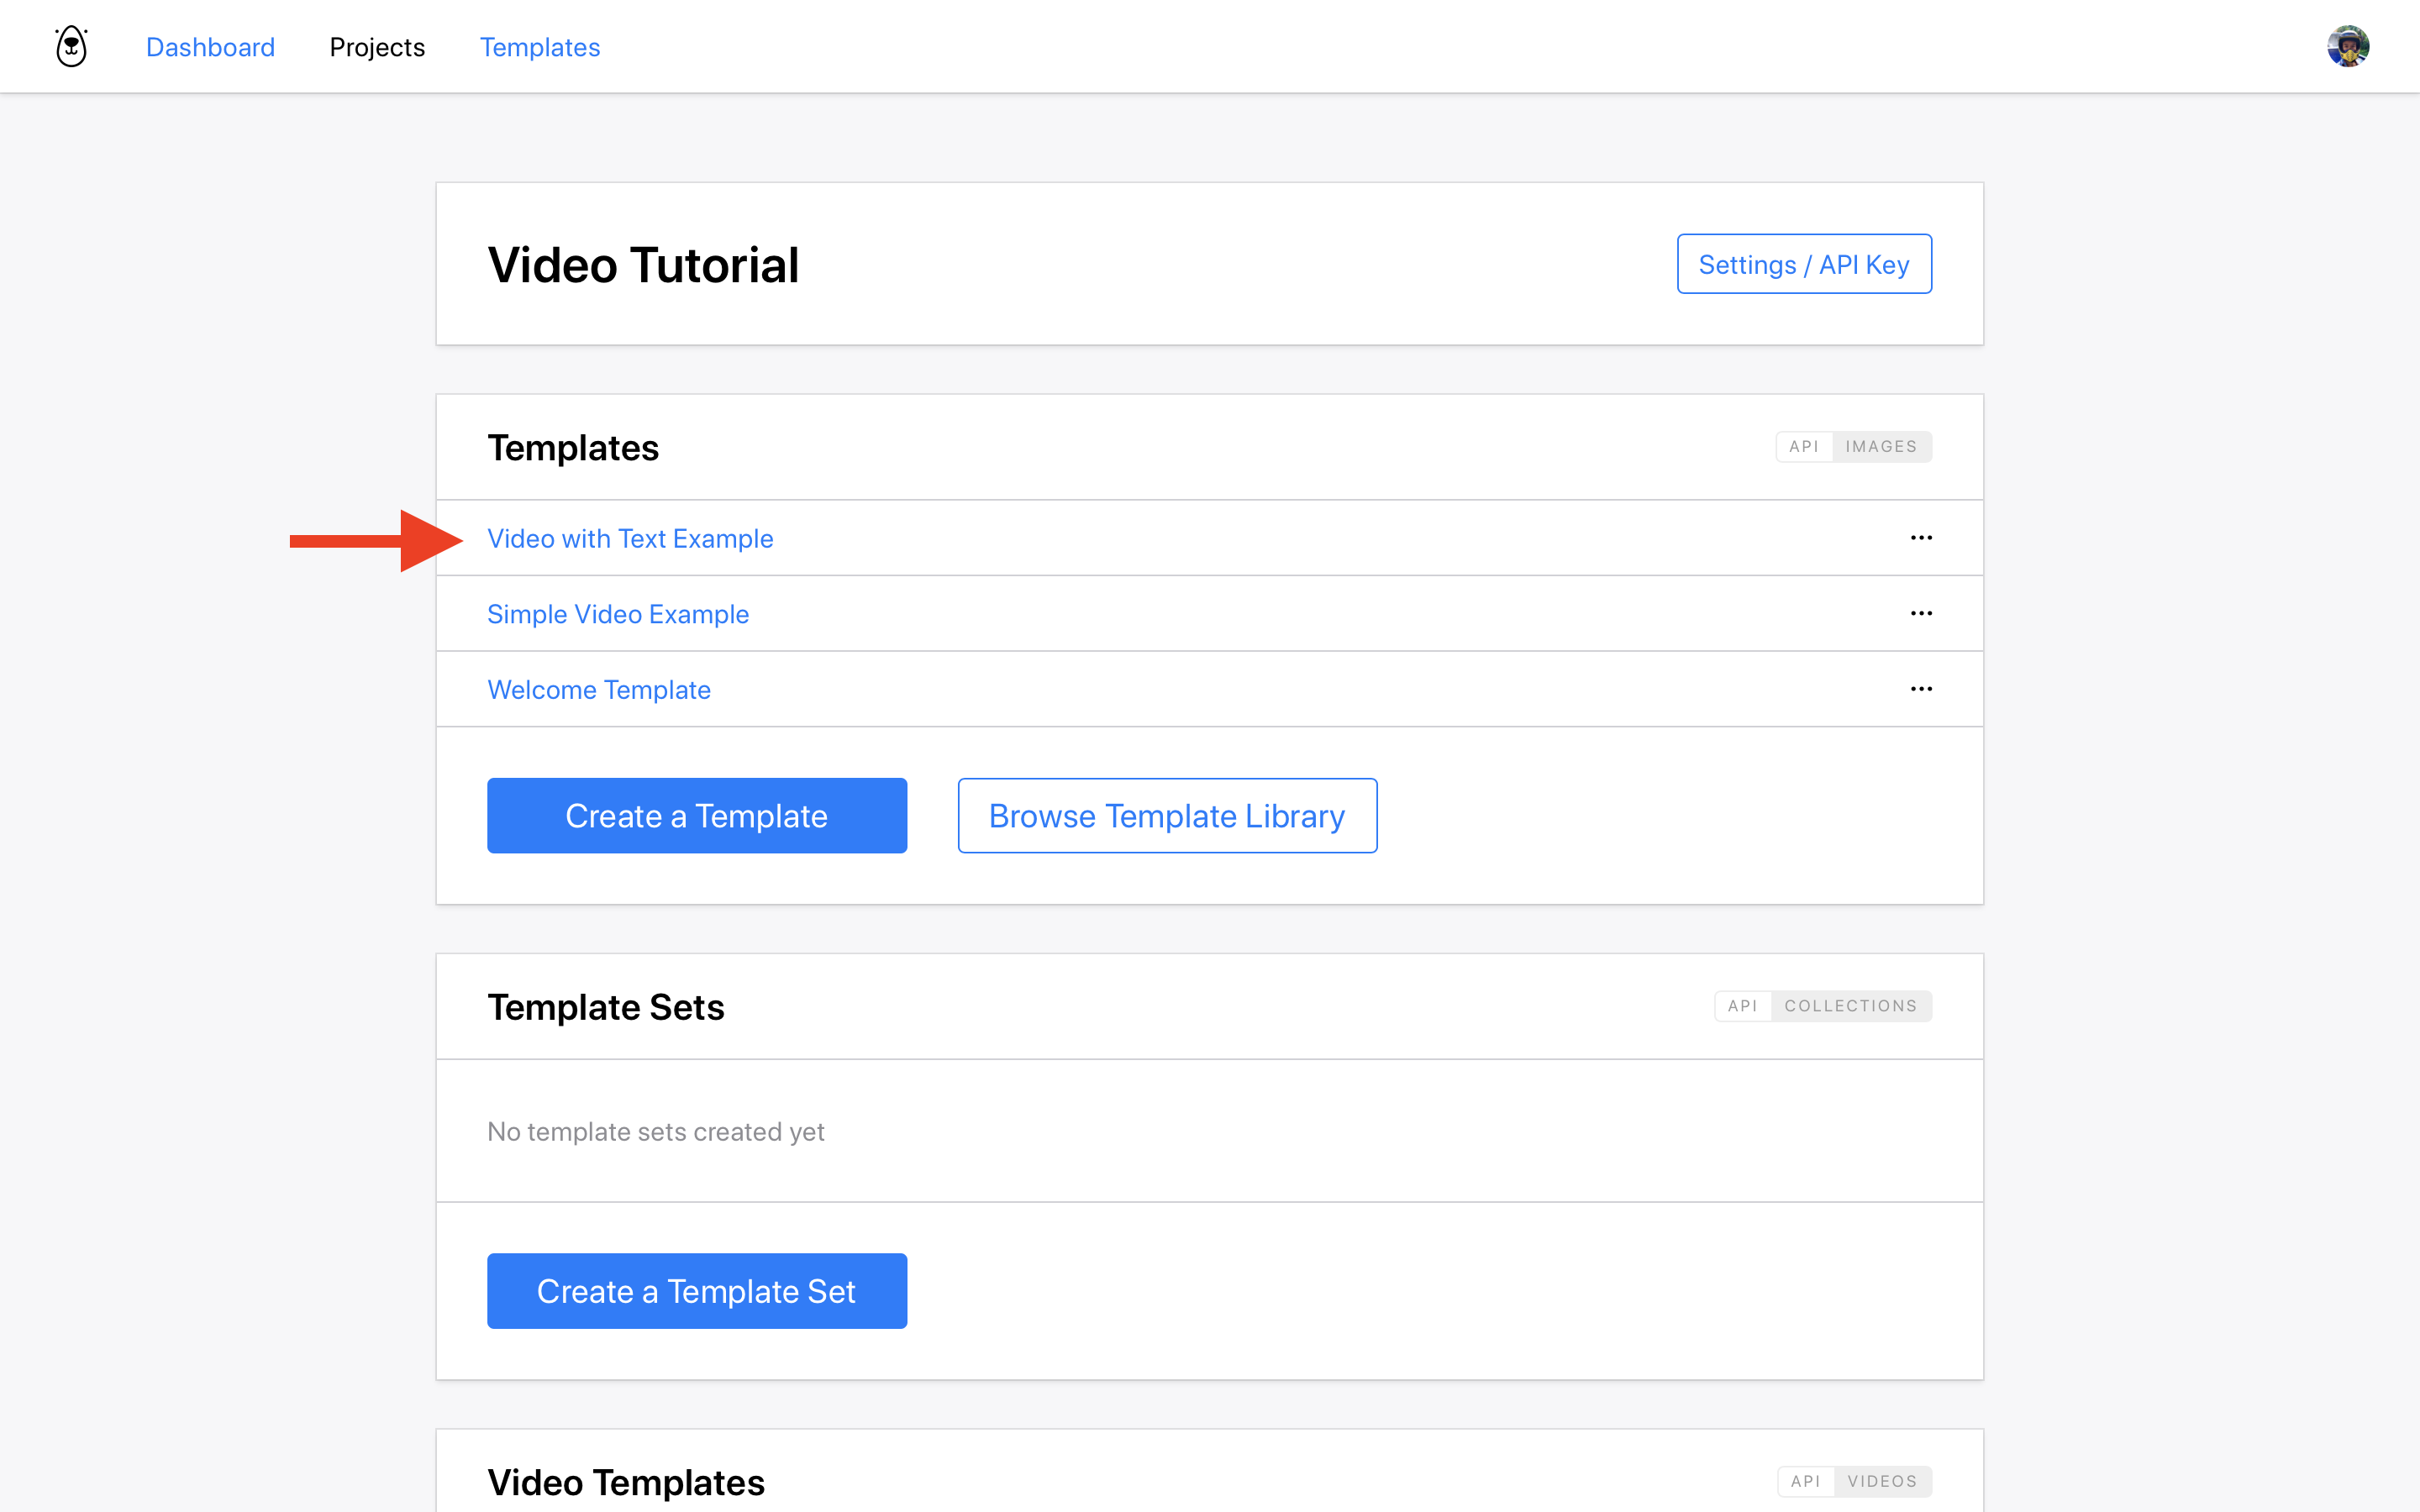
Scroll down to the Video Templates section:
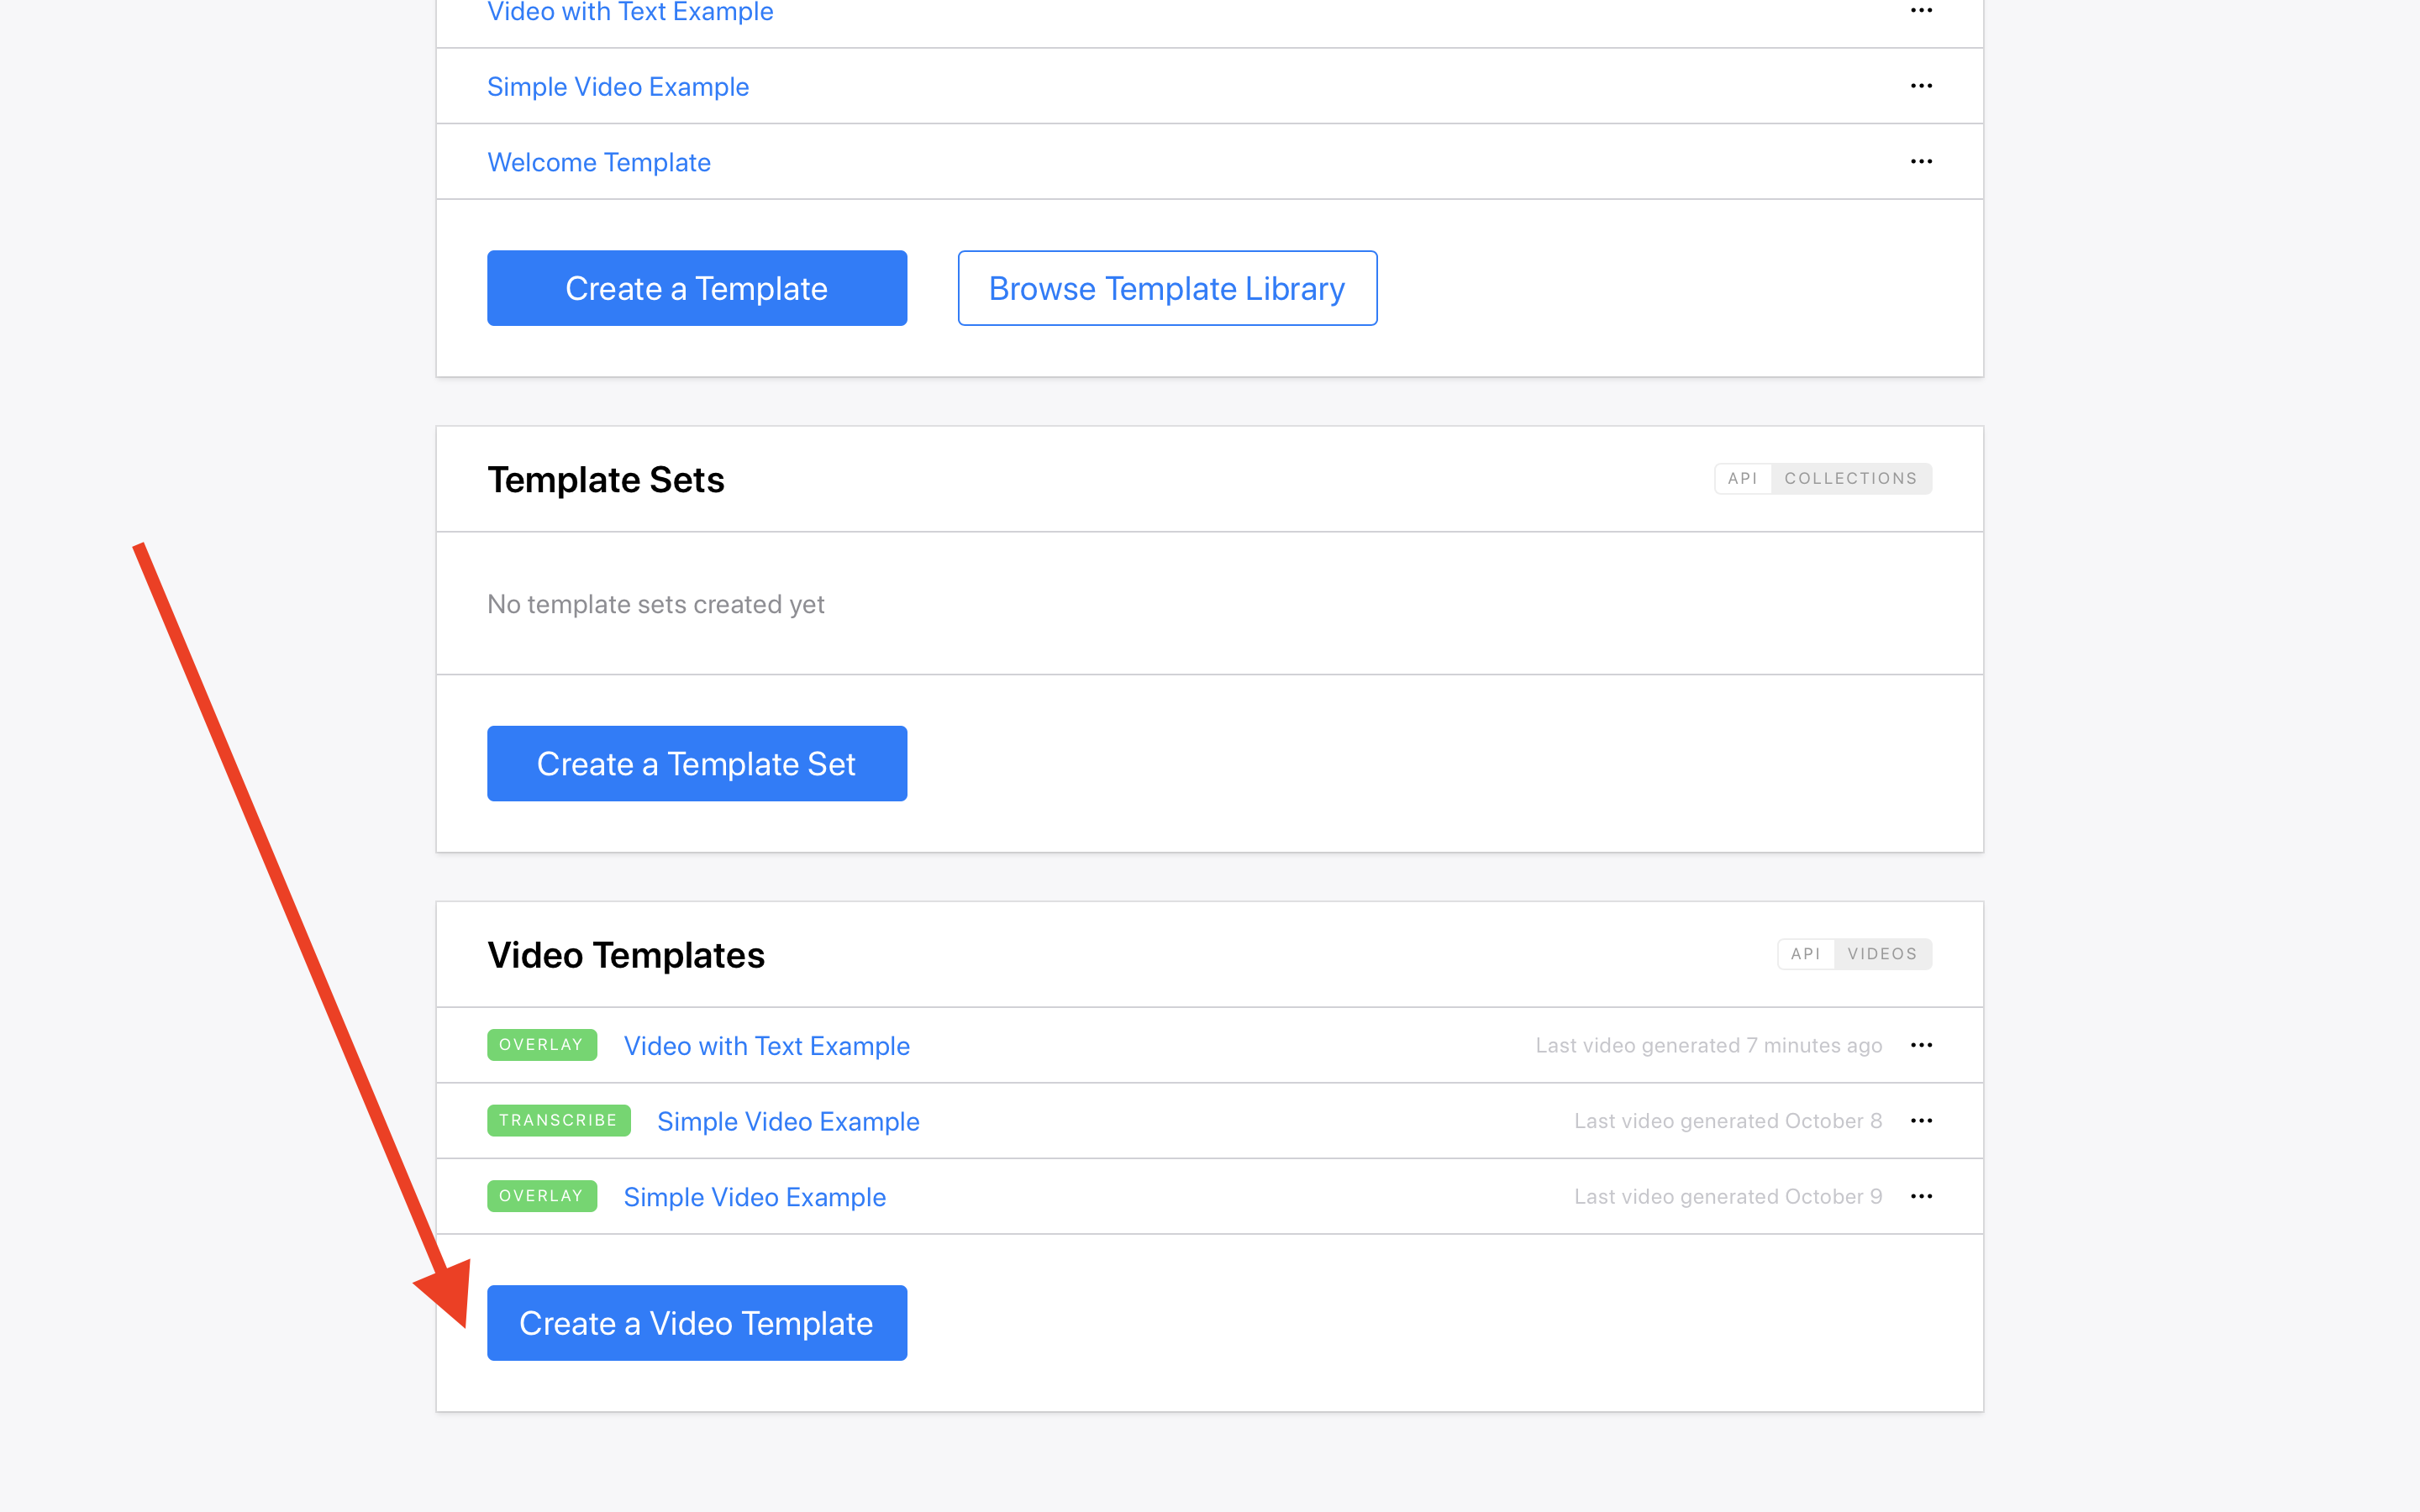
Hit Create a Video Template. Now choose the Video with Text Example template and for the build pack choose Overlay:
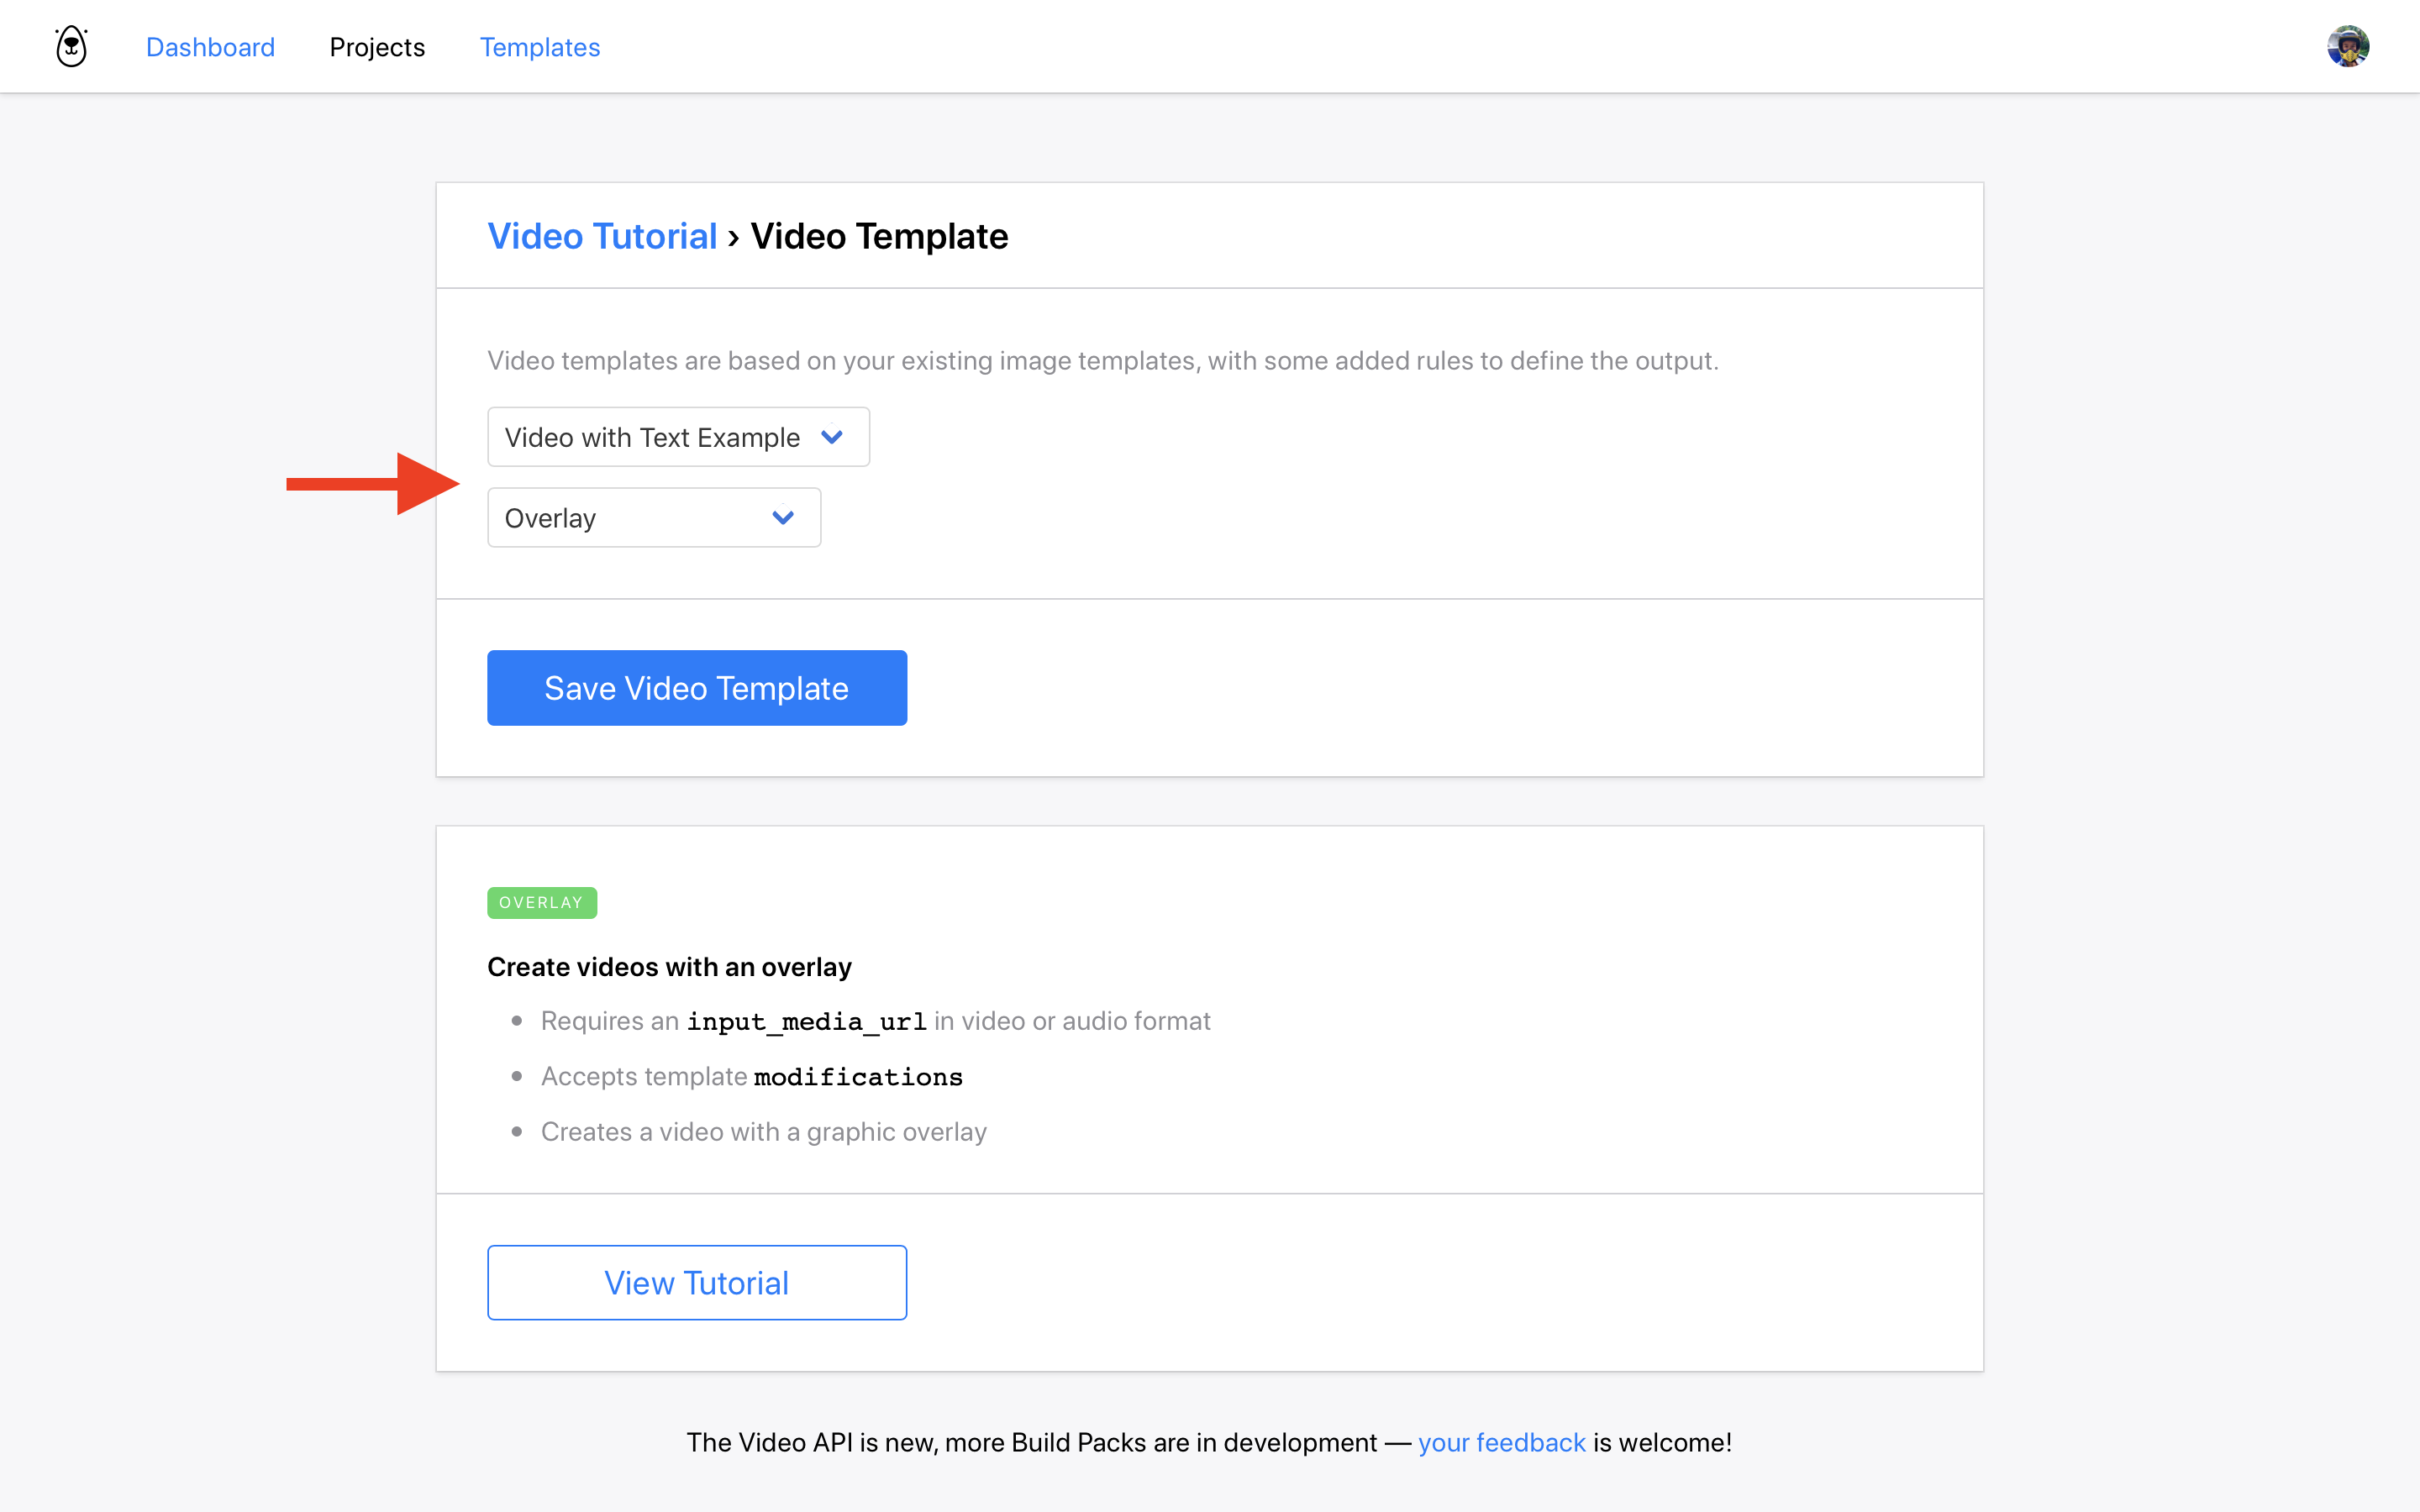
Hit Save and you will now be looking at your new Video Template - you can tell this template is for video (as opposed to images) as it will show "Video API" on the side:
Time to generate some videos!
Bannerbear API Key
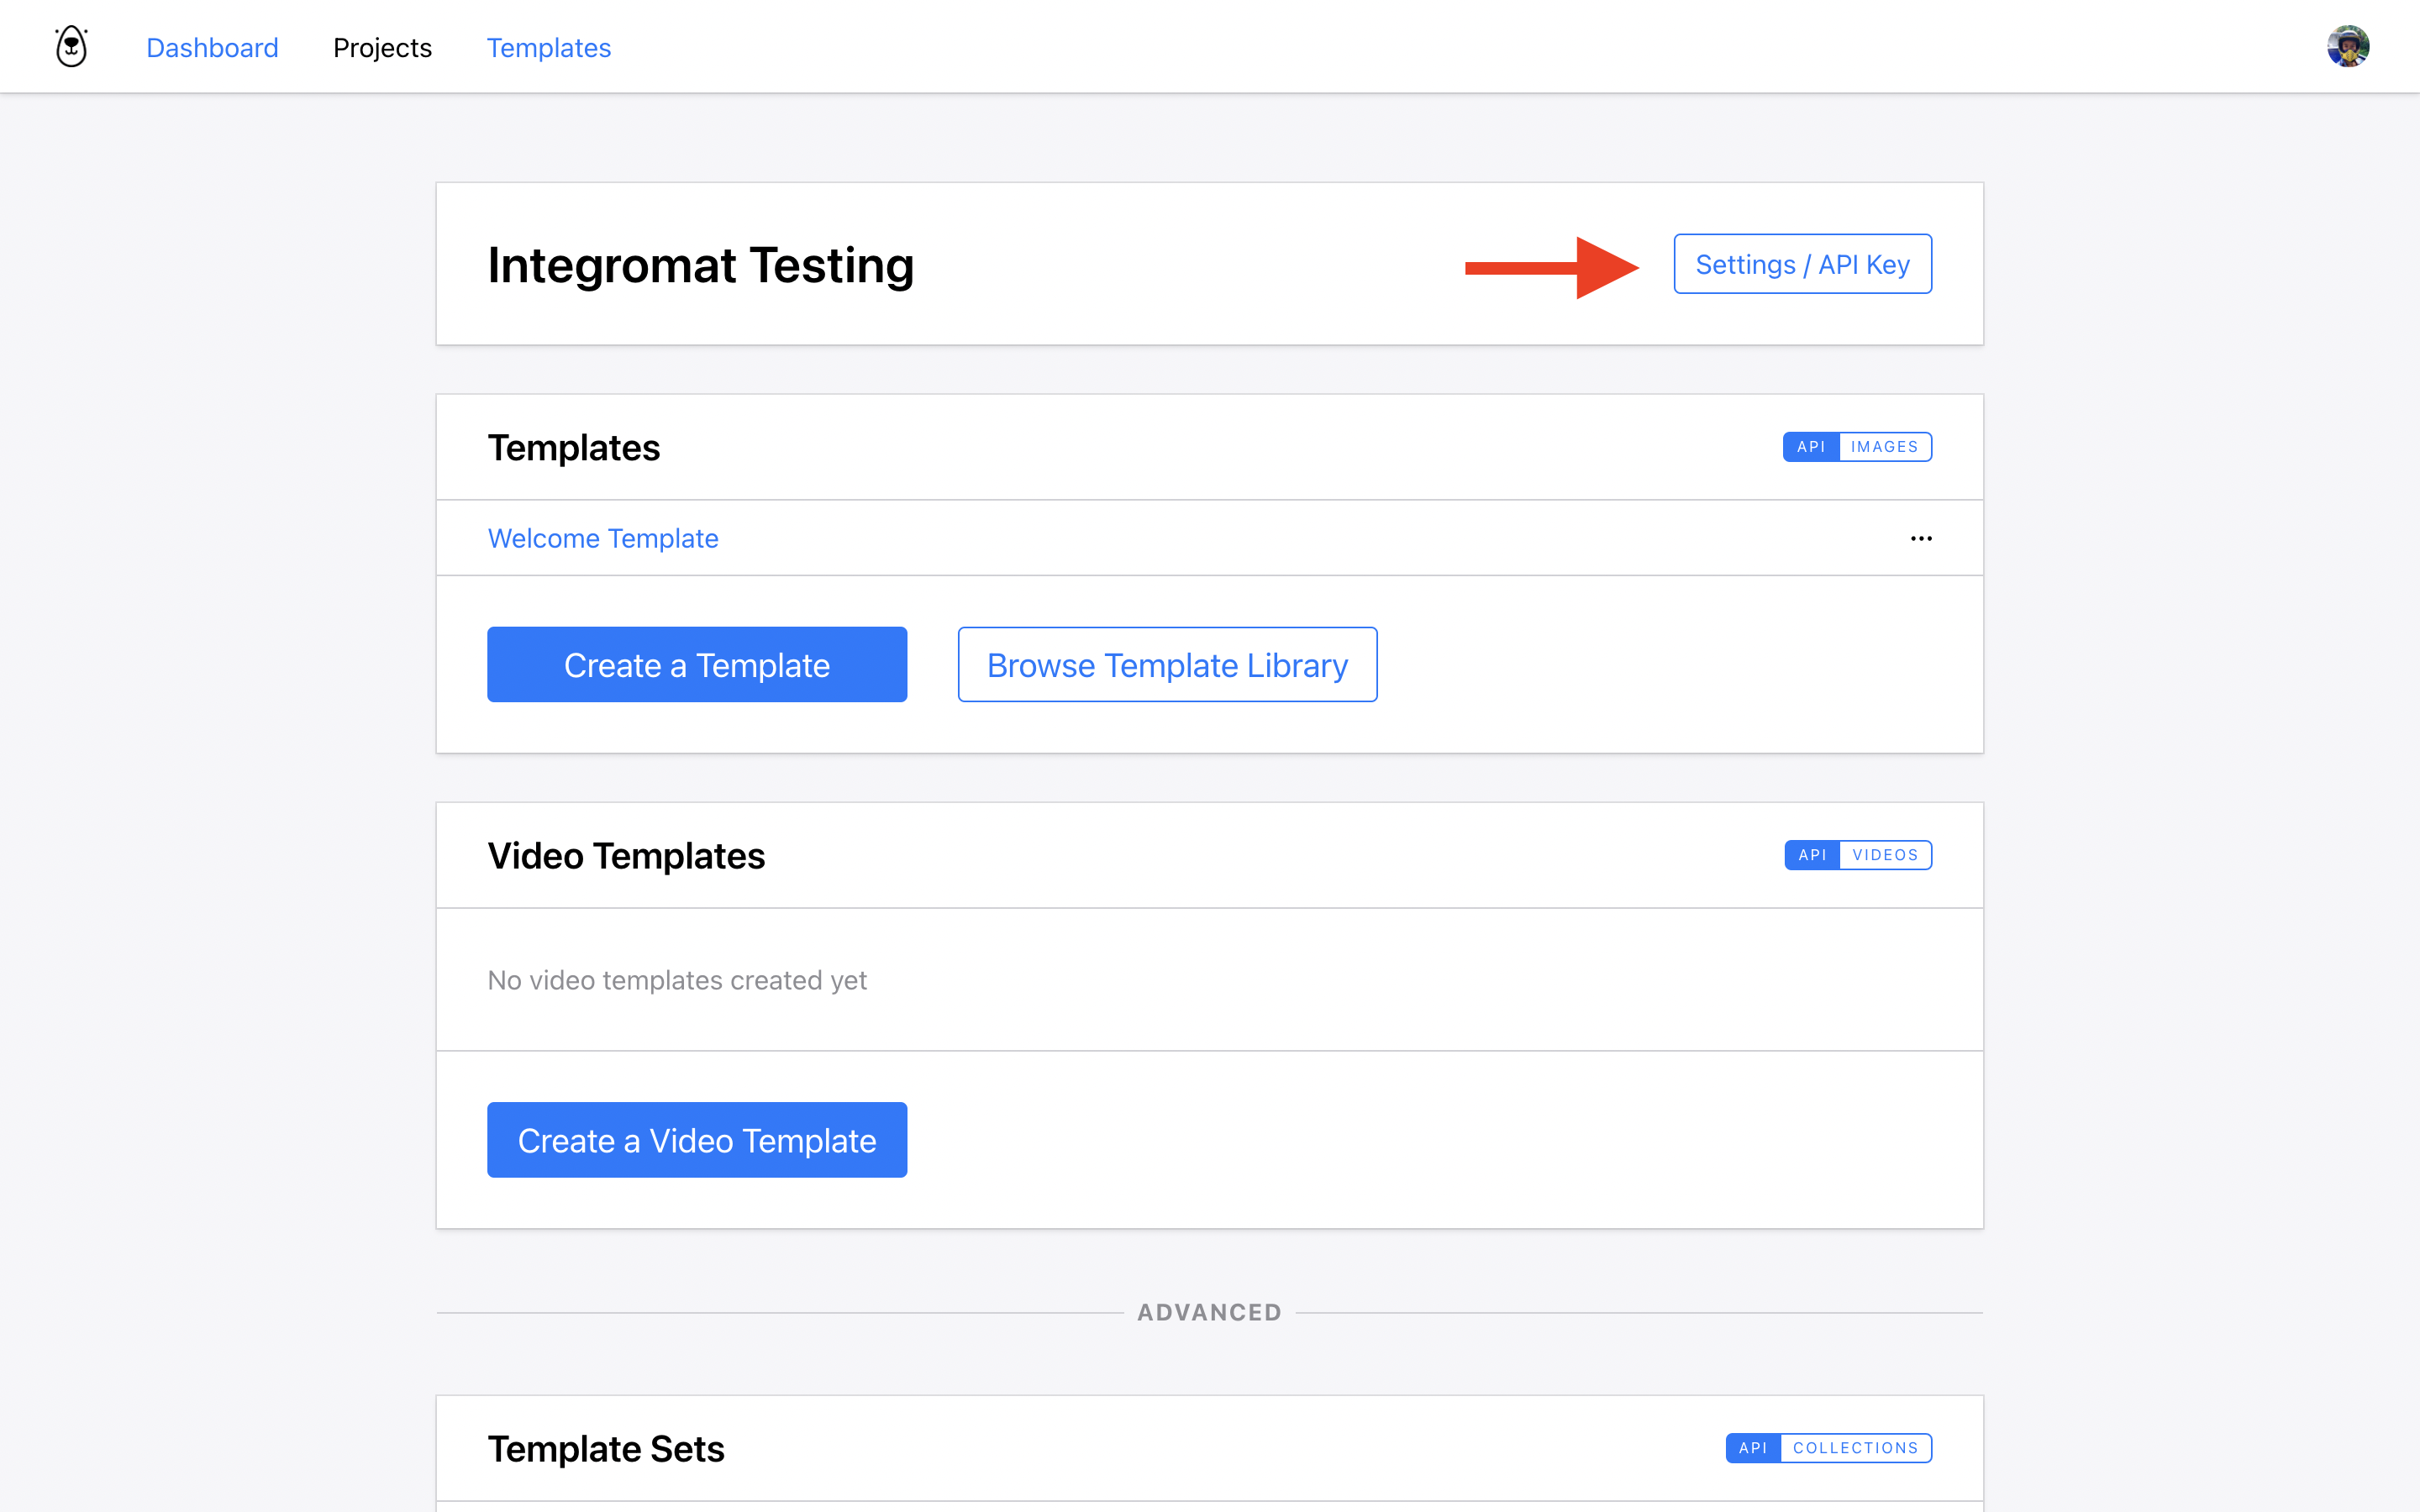
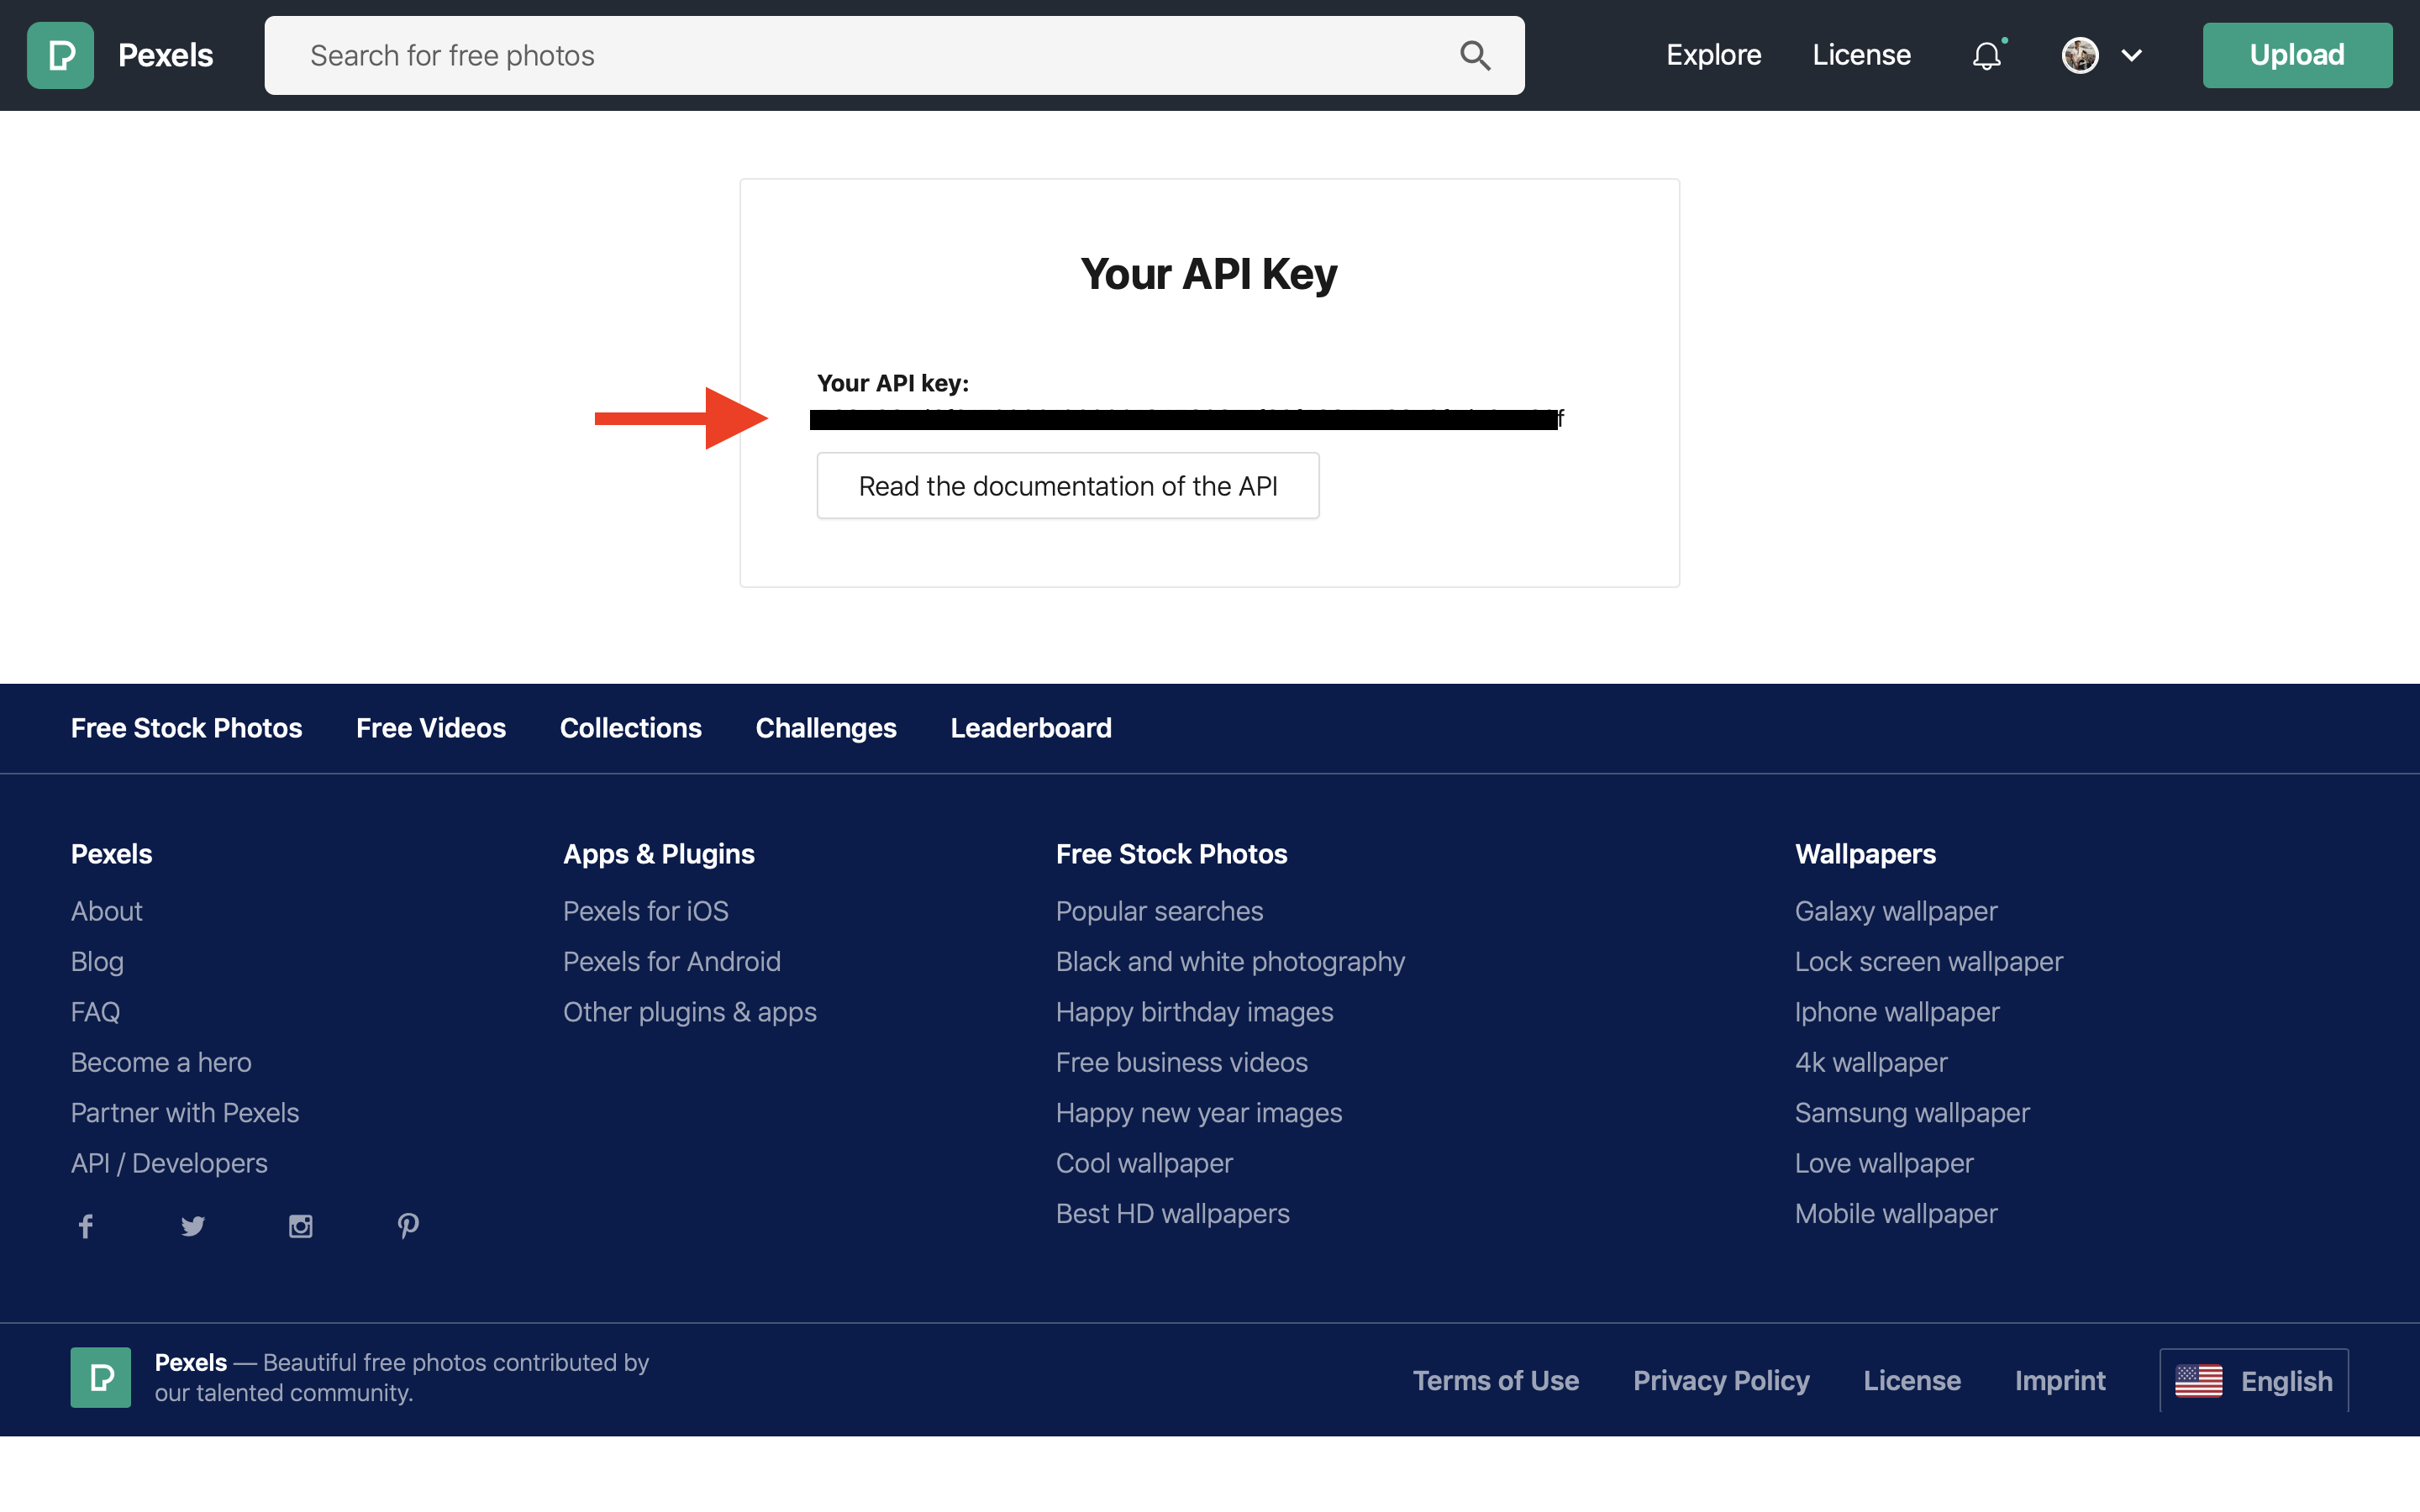
Next you should copy your Bannerbear Project API Key to the clipboard - this is how Integromat will connect with your Bannerbear account. You'll find the API Key in the Project's "Settings / API Key" section:
Create a Pexels API Key
In the Integromat scenario we are about to create, we will need to use the Pexels API. Pexels is a free library of stock images and videos, with a handy API to search through their database.
Go to https://www.pexels.com/api/ and sign up for an API key.
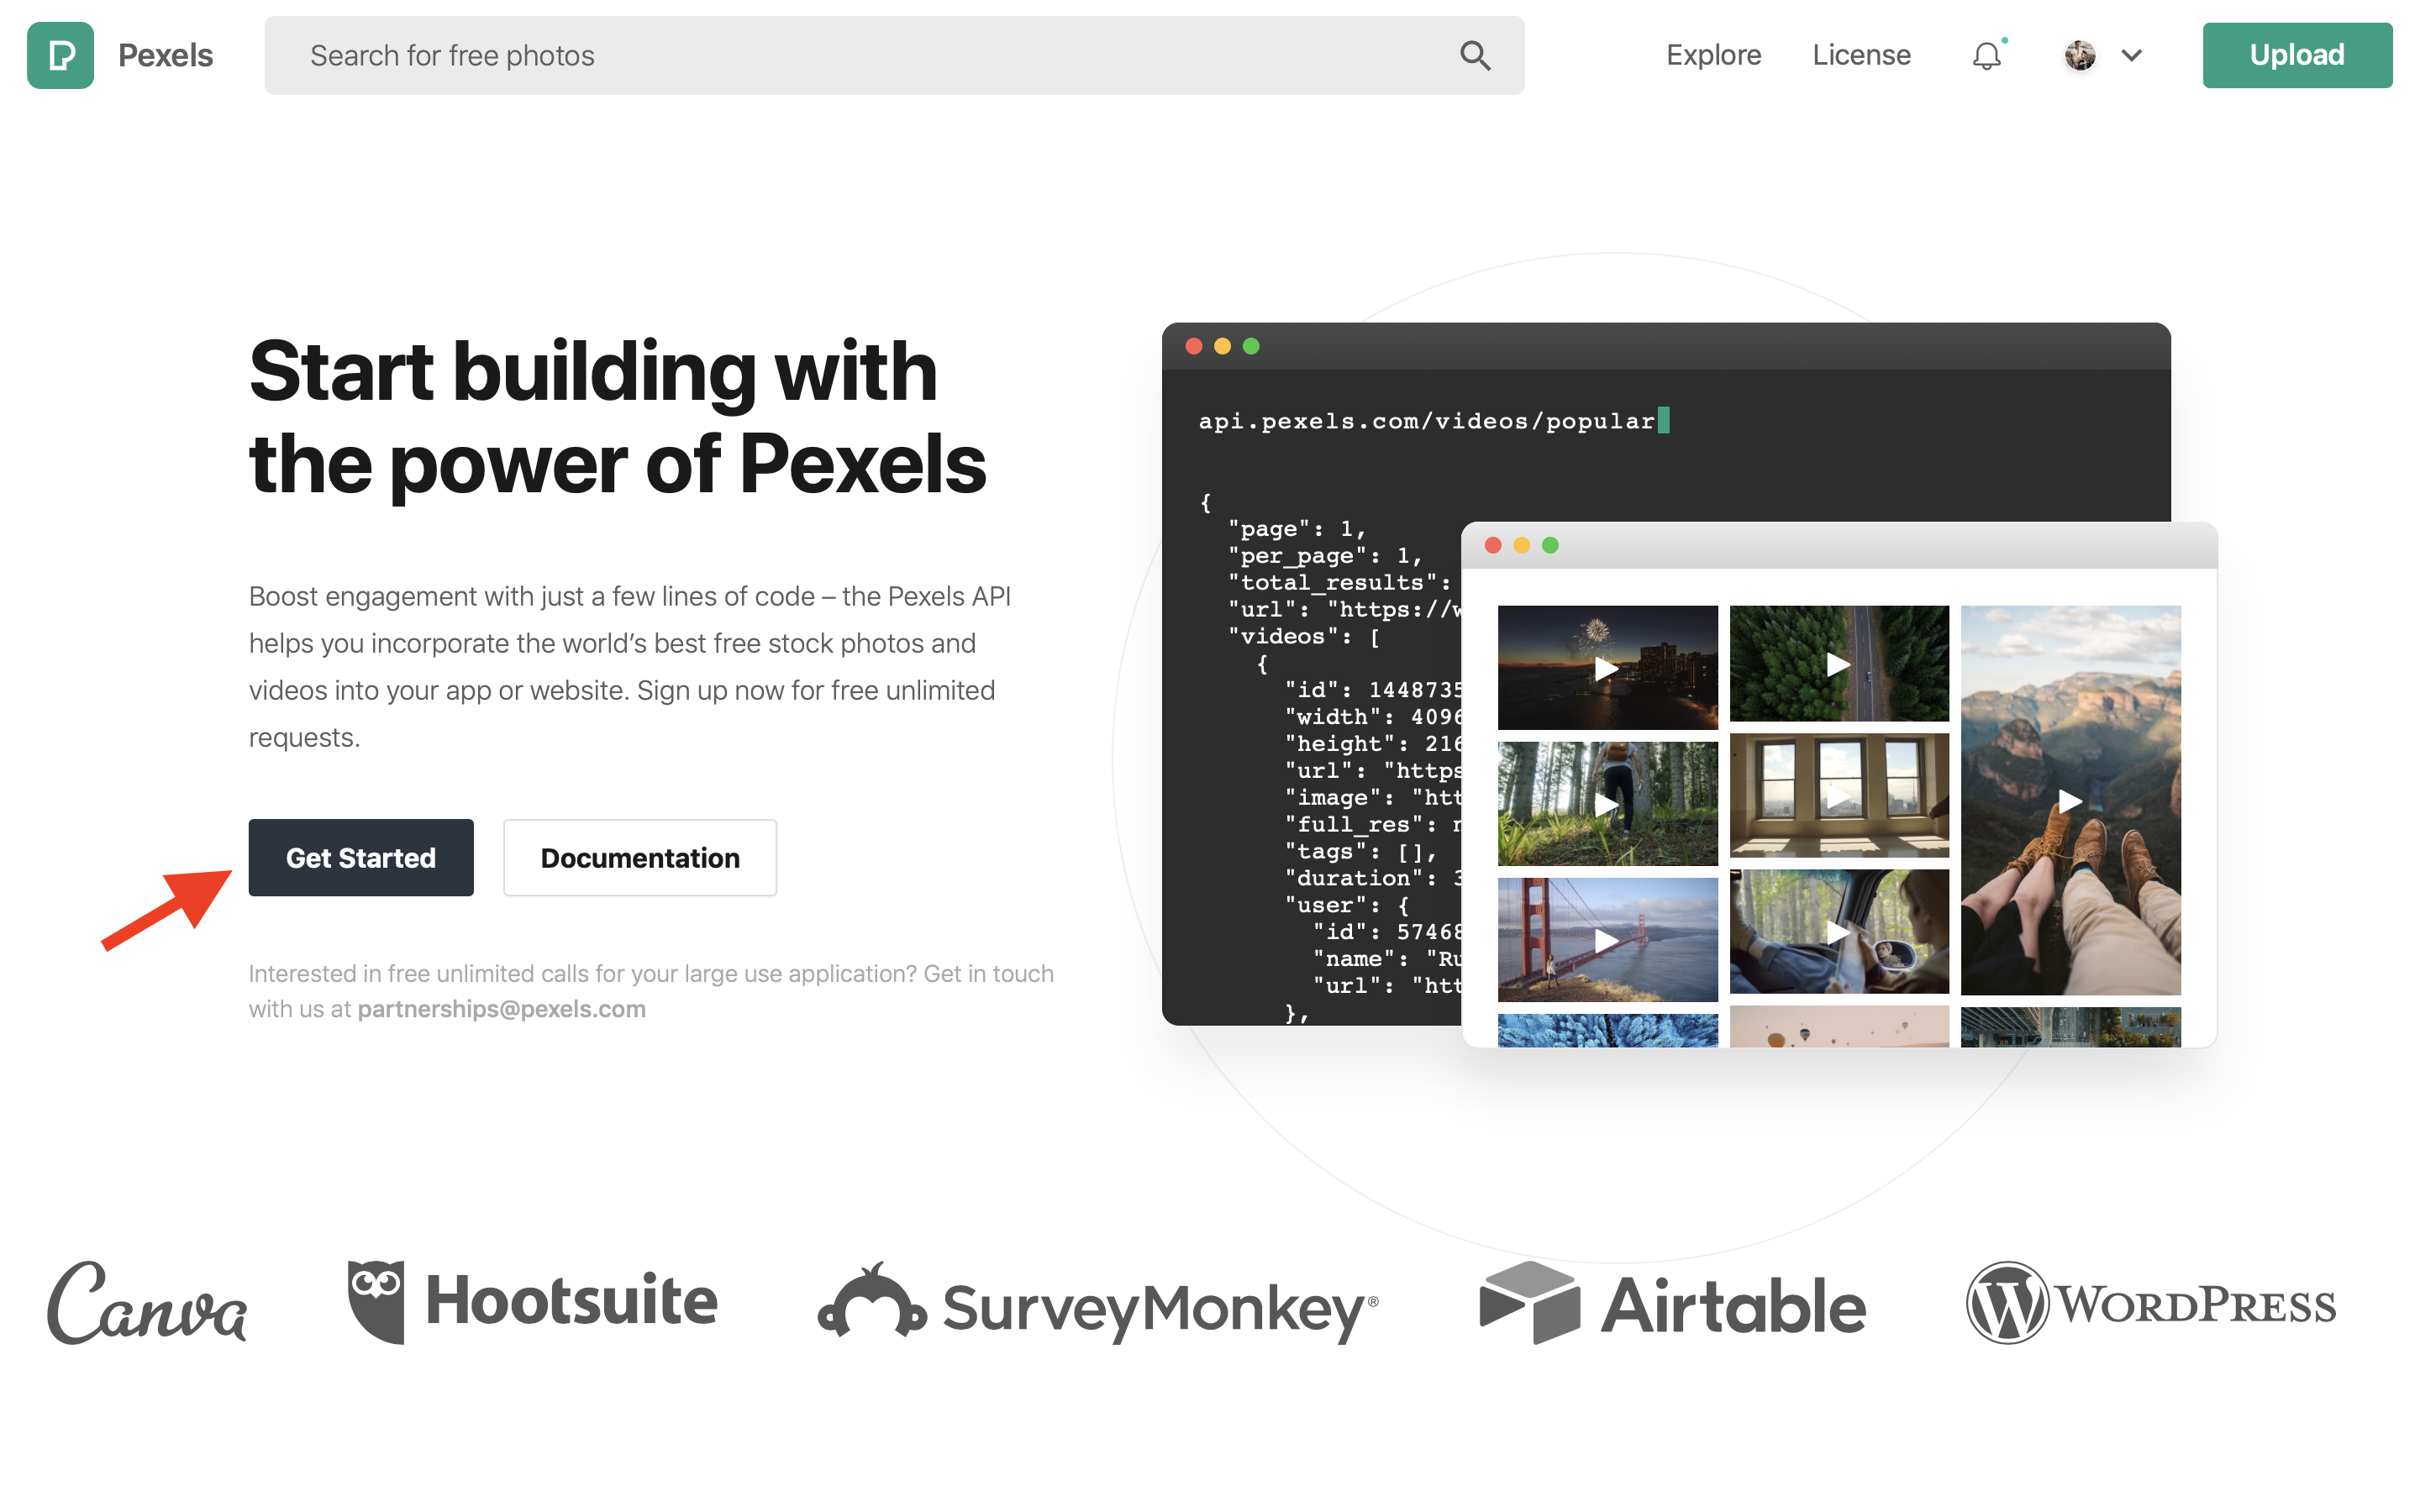
Keep this window open as you will be needing your Pexels API key in a later step:
Setting up a webhook on Integromat
The first thing we are going to do on Integromat is actually part of Scenario 2.
But this will become clearer later!
Create a new scenario on Integromat and add a webhook as the first module. Webhooks essentially give you a URL to post data to, so that the scenario will trigger. We are going to post data to this webhook every time a video finishes rendering on Bannerbear.
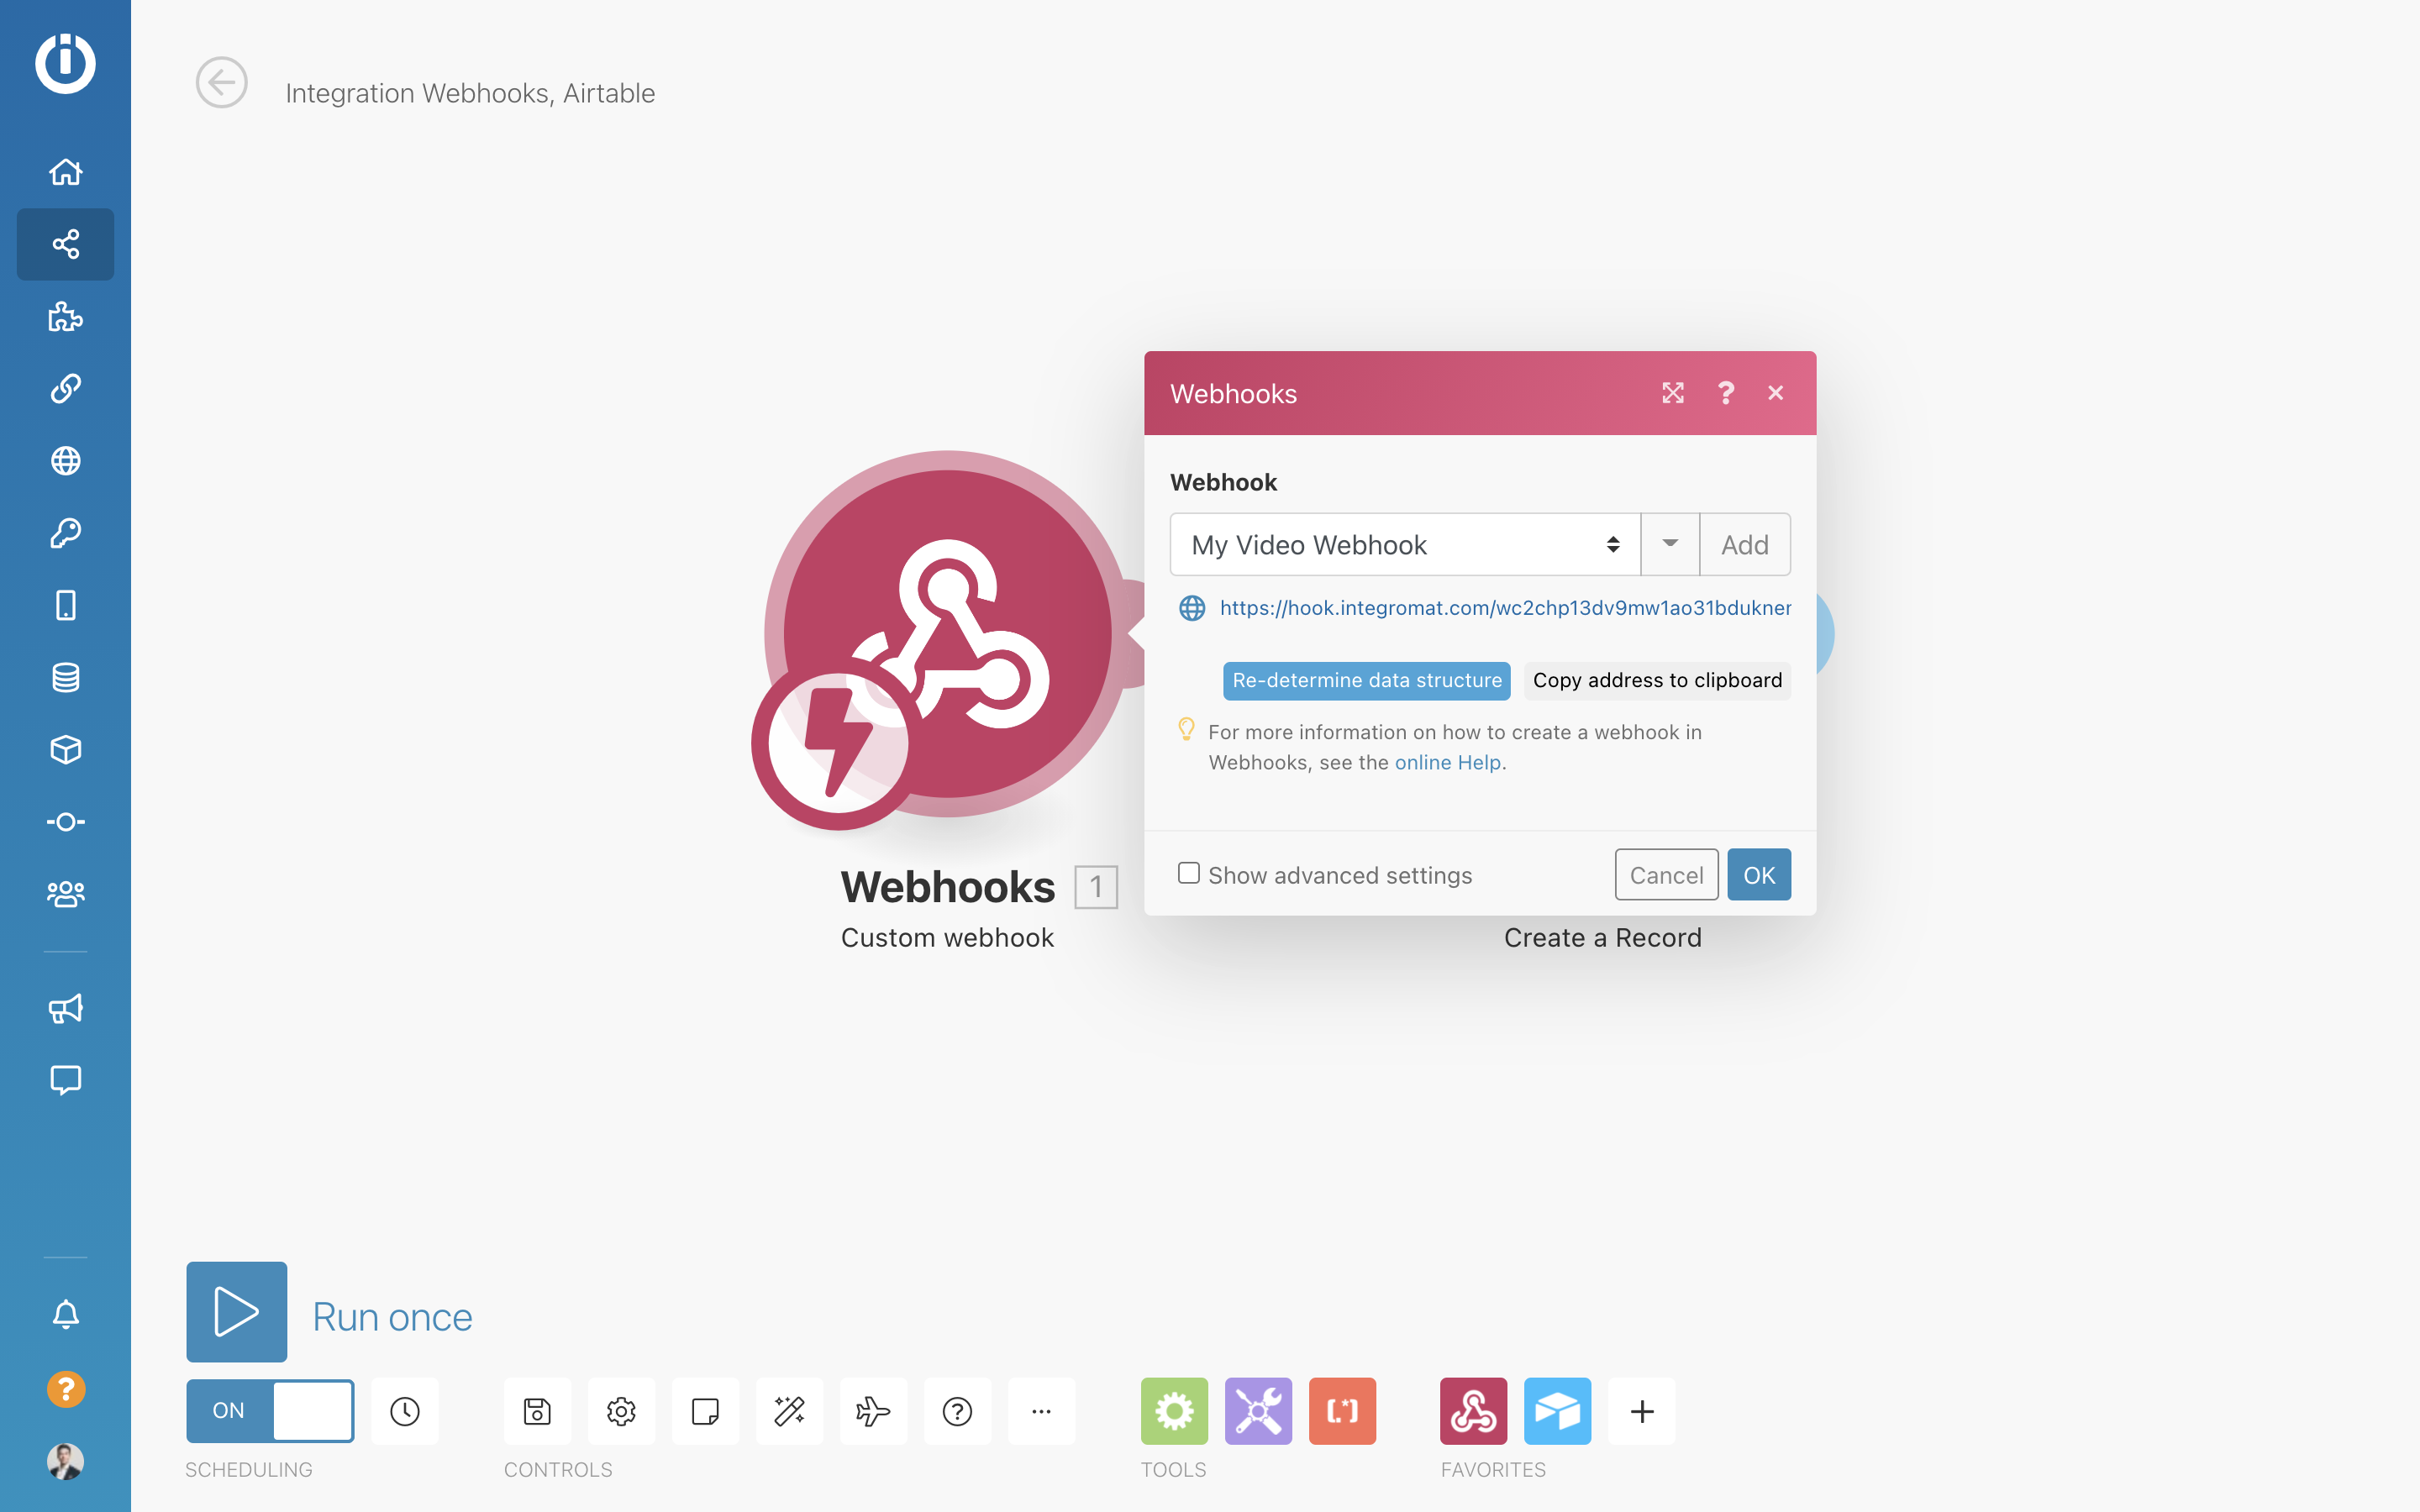
When creating a webhook on Integromat, you will be asked for a sample of data. The easiest way to do that is to generate a test video on Bannerbear and send the data to the webhook. Copy the webhook url, and lets send some test data from Bannerbear.
Generating a test video
On Bannerbear, ccroll down to the API Console / Sample Data panel and select some test data:
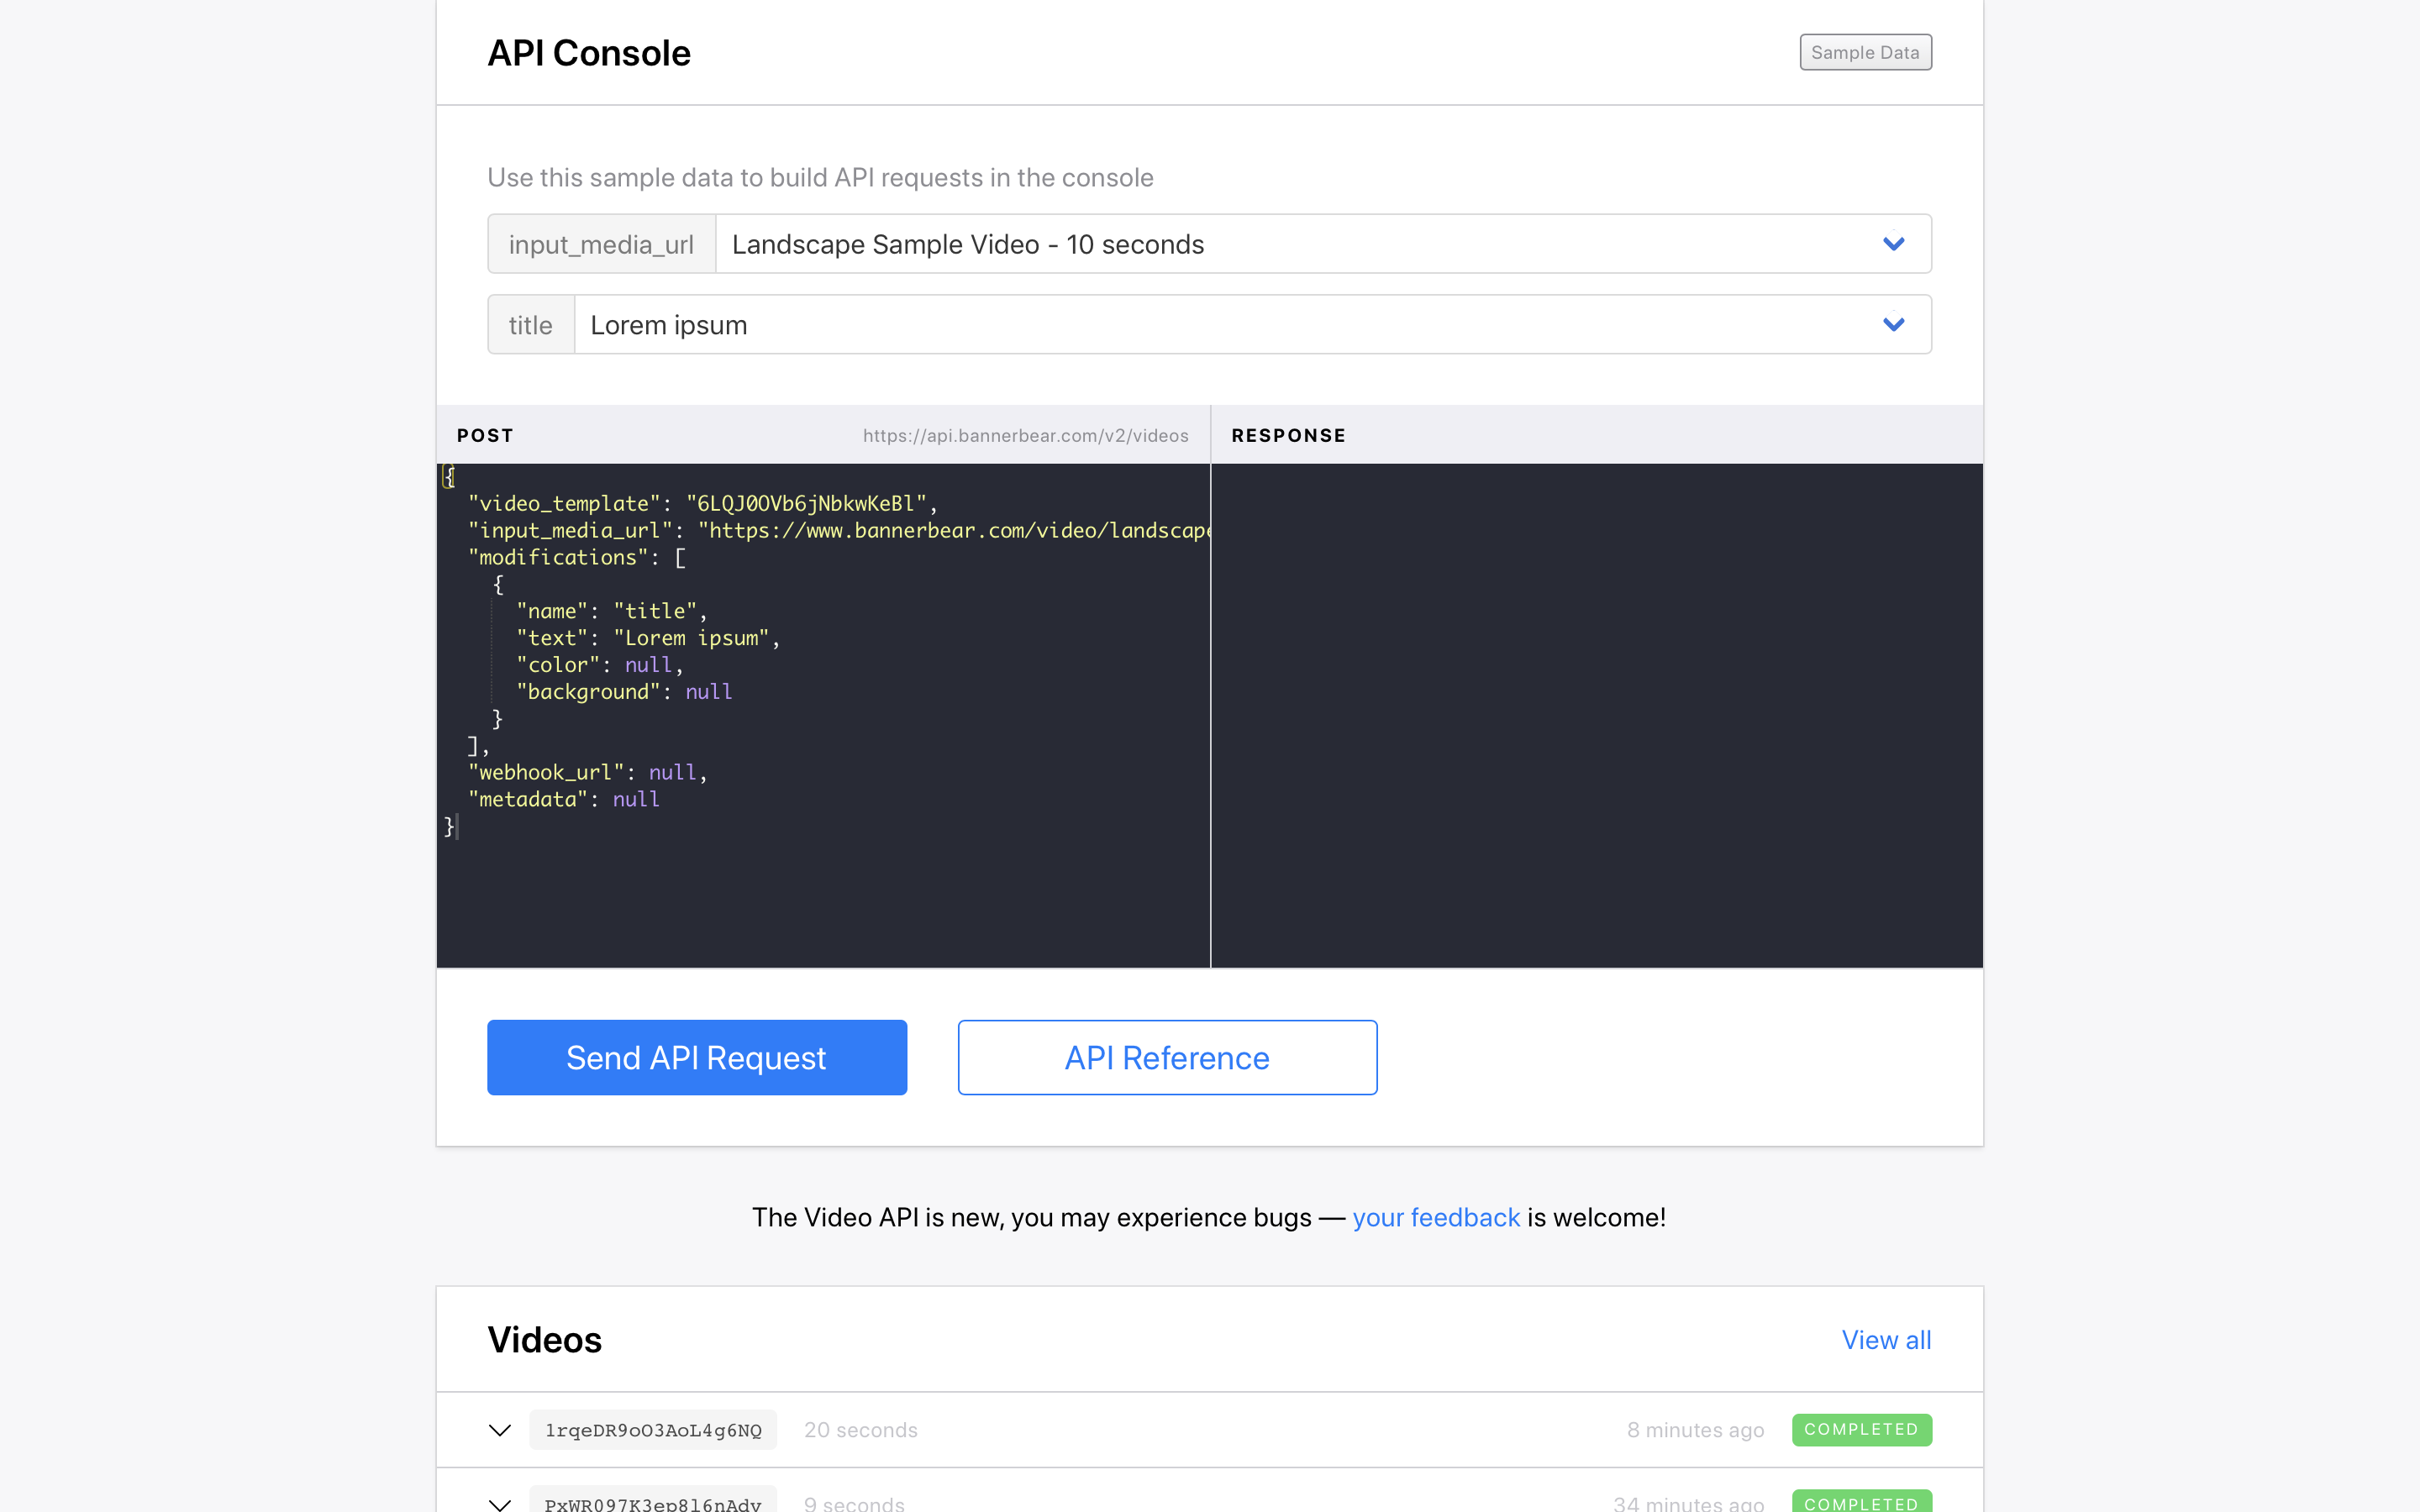
In the webhook_url property in the API console, add the webhook url from Integromat. Remember to add "quote marks" around the URL as it is a string.
Hit Send API Request and after a few moments you should have a new video based on the parameters you selected:
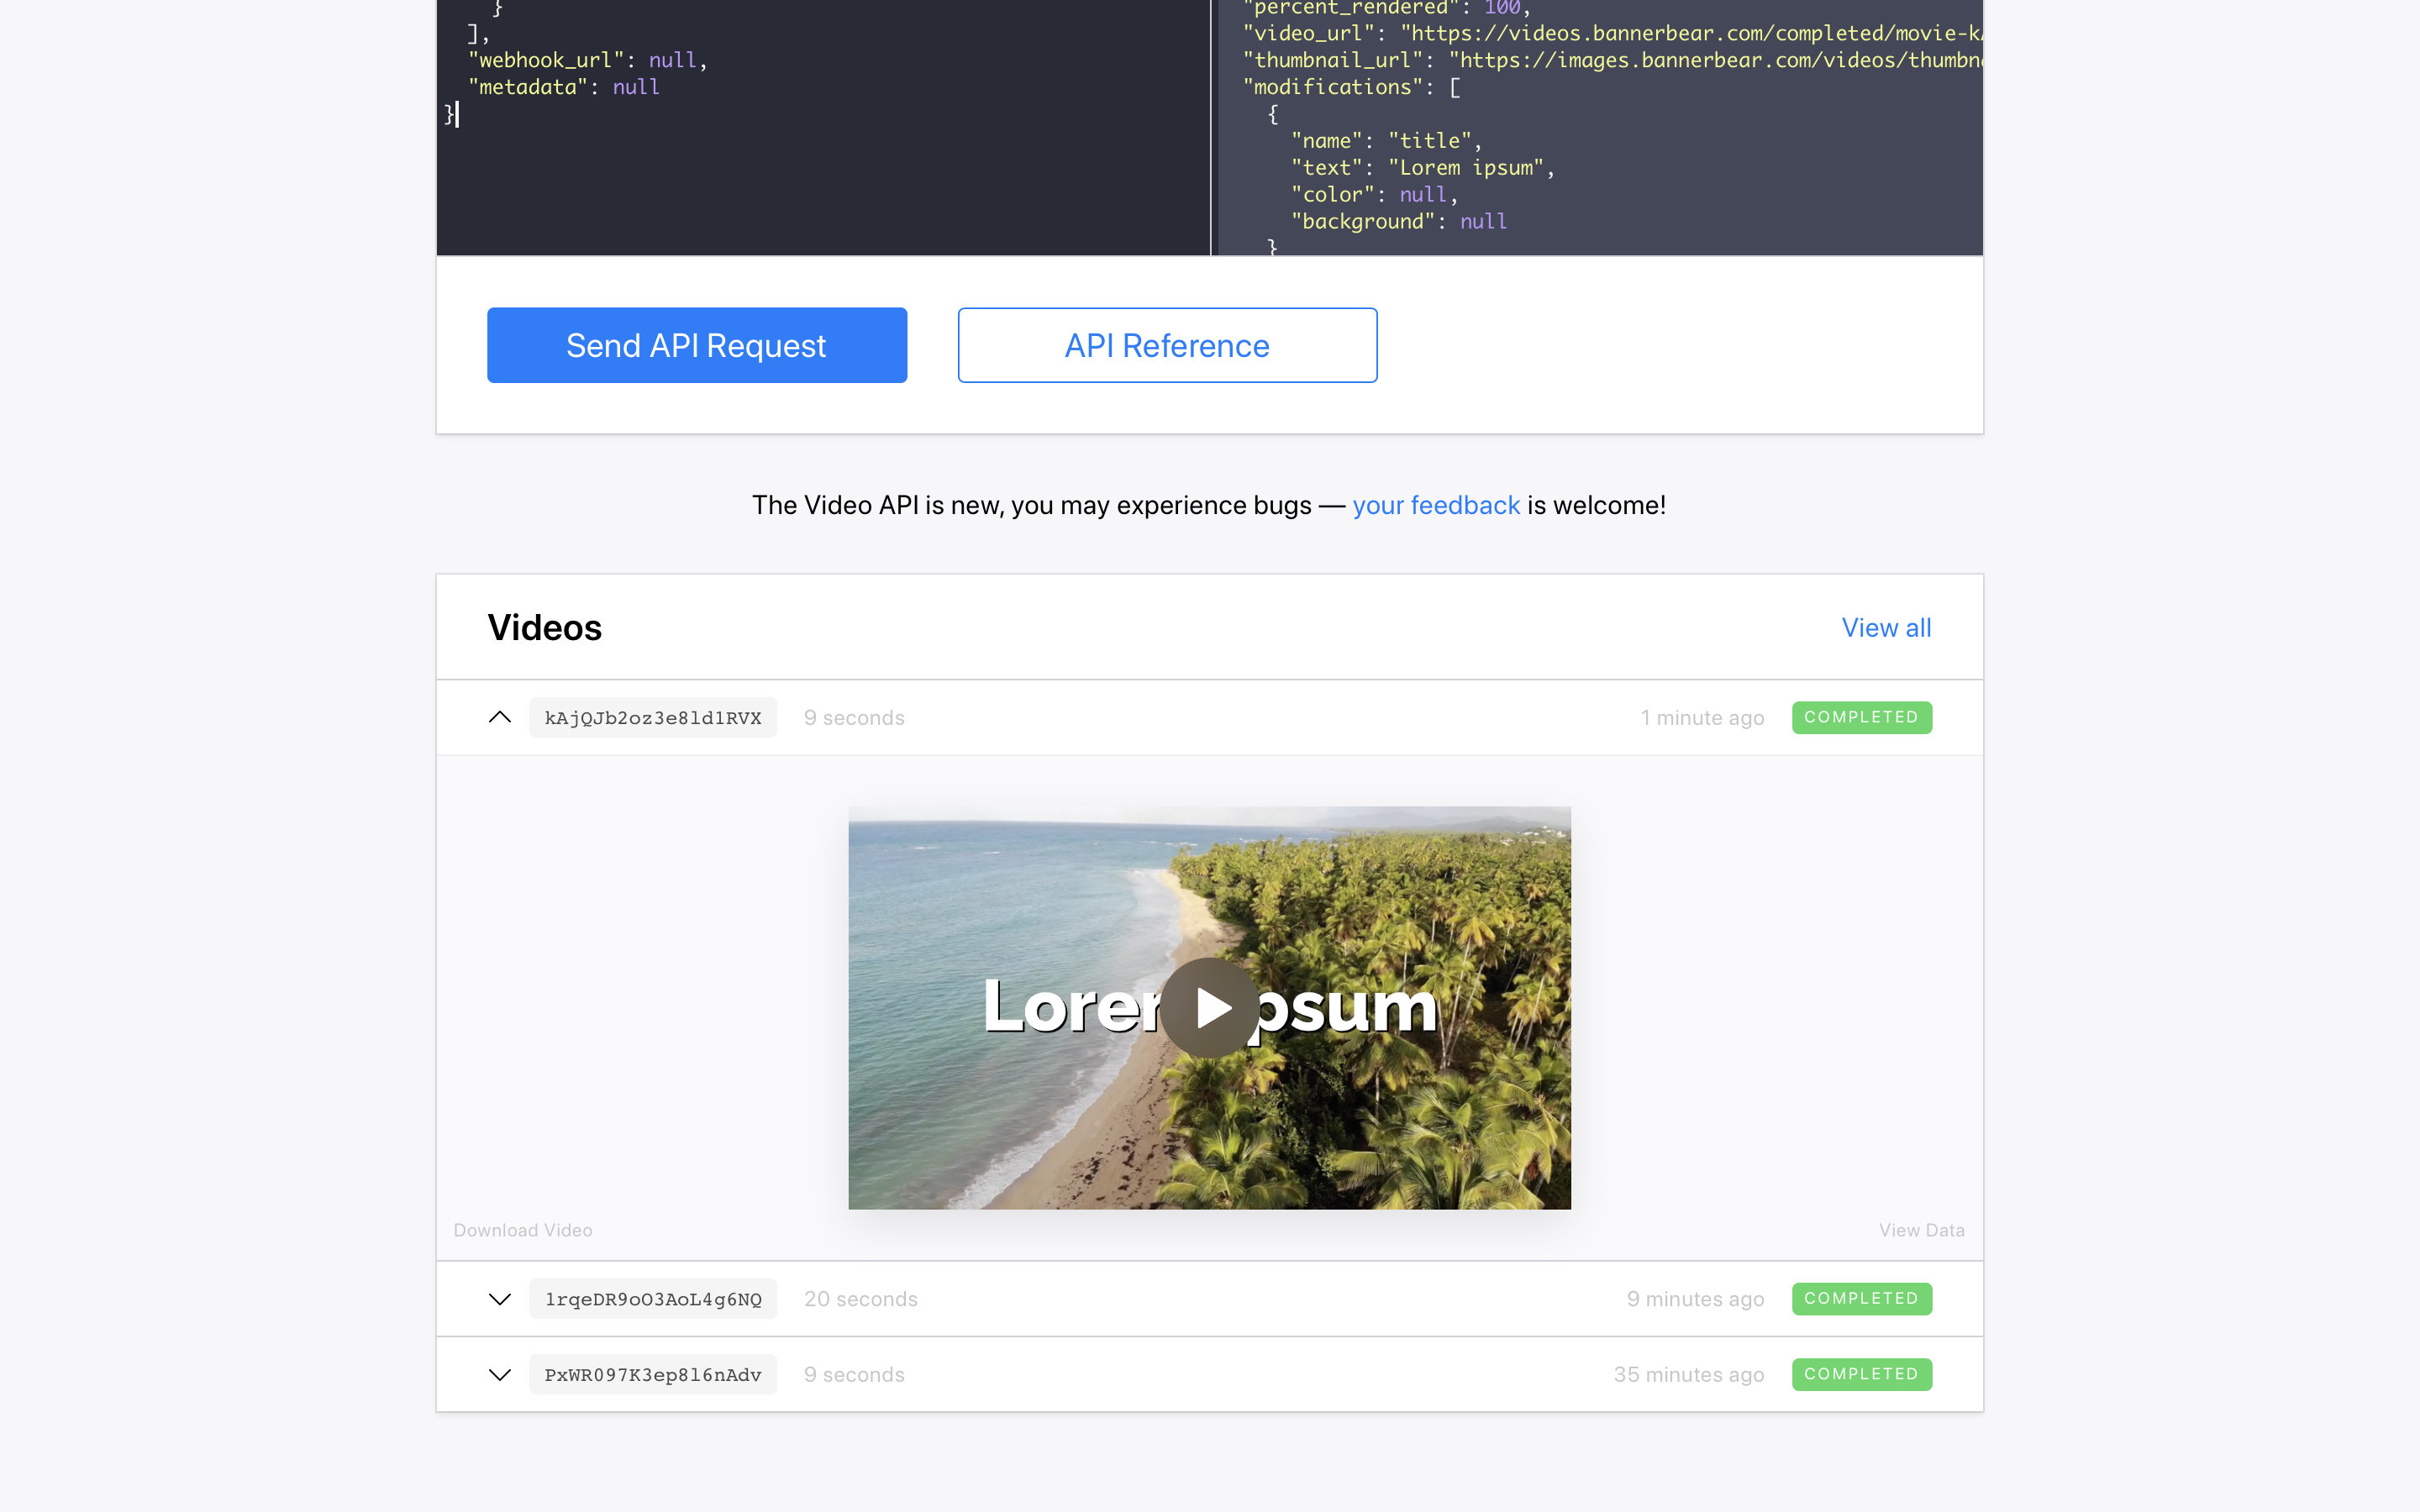
If you go back to Integromat you should see that in the background, Bannerbear has sent a package of data to Integromat containing the final video URL.
That's basically all we need for Scenario 2 at this stage!
Fetching data from Pexels
Create a new scenario in Integromat. This will be Scenario 1.
First we want to get some videos to use from Pexels. For that, we will use the HTTP Module:
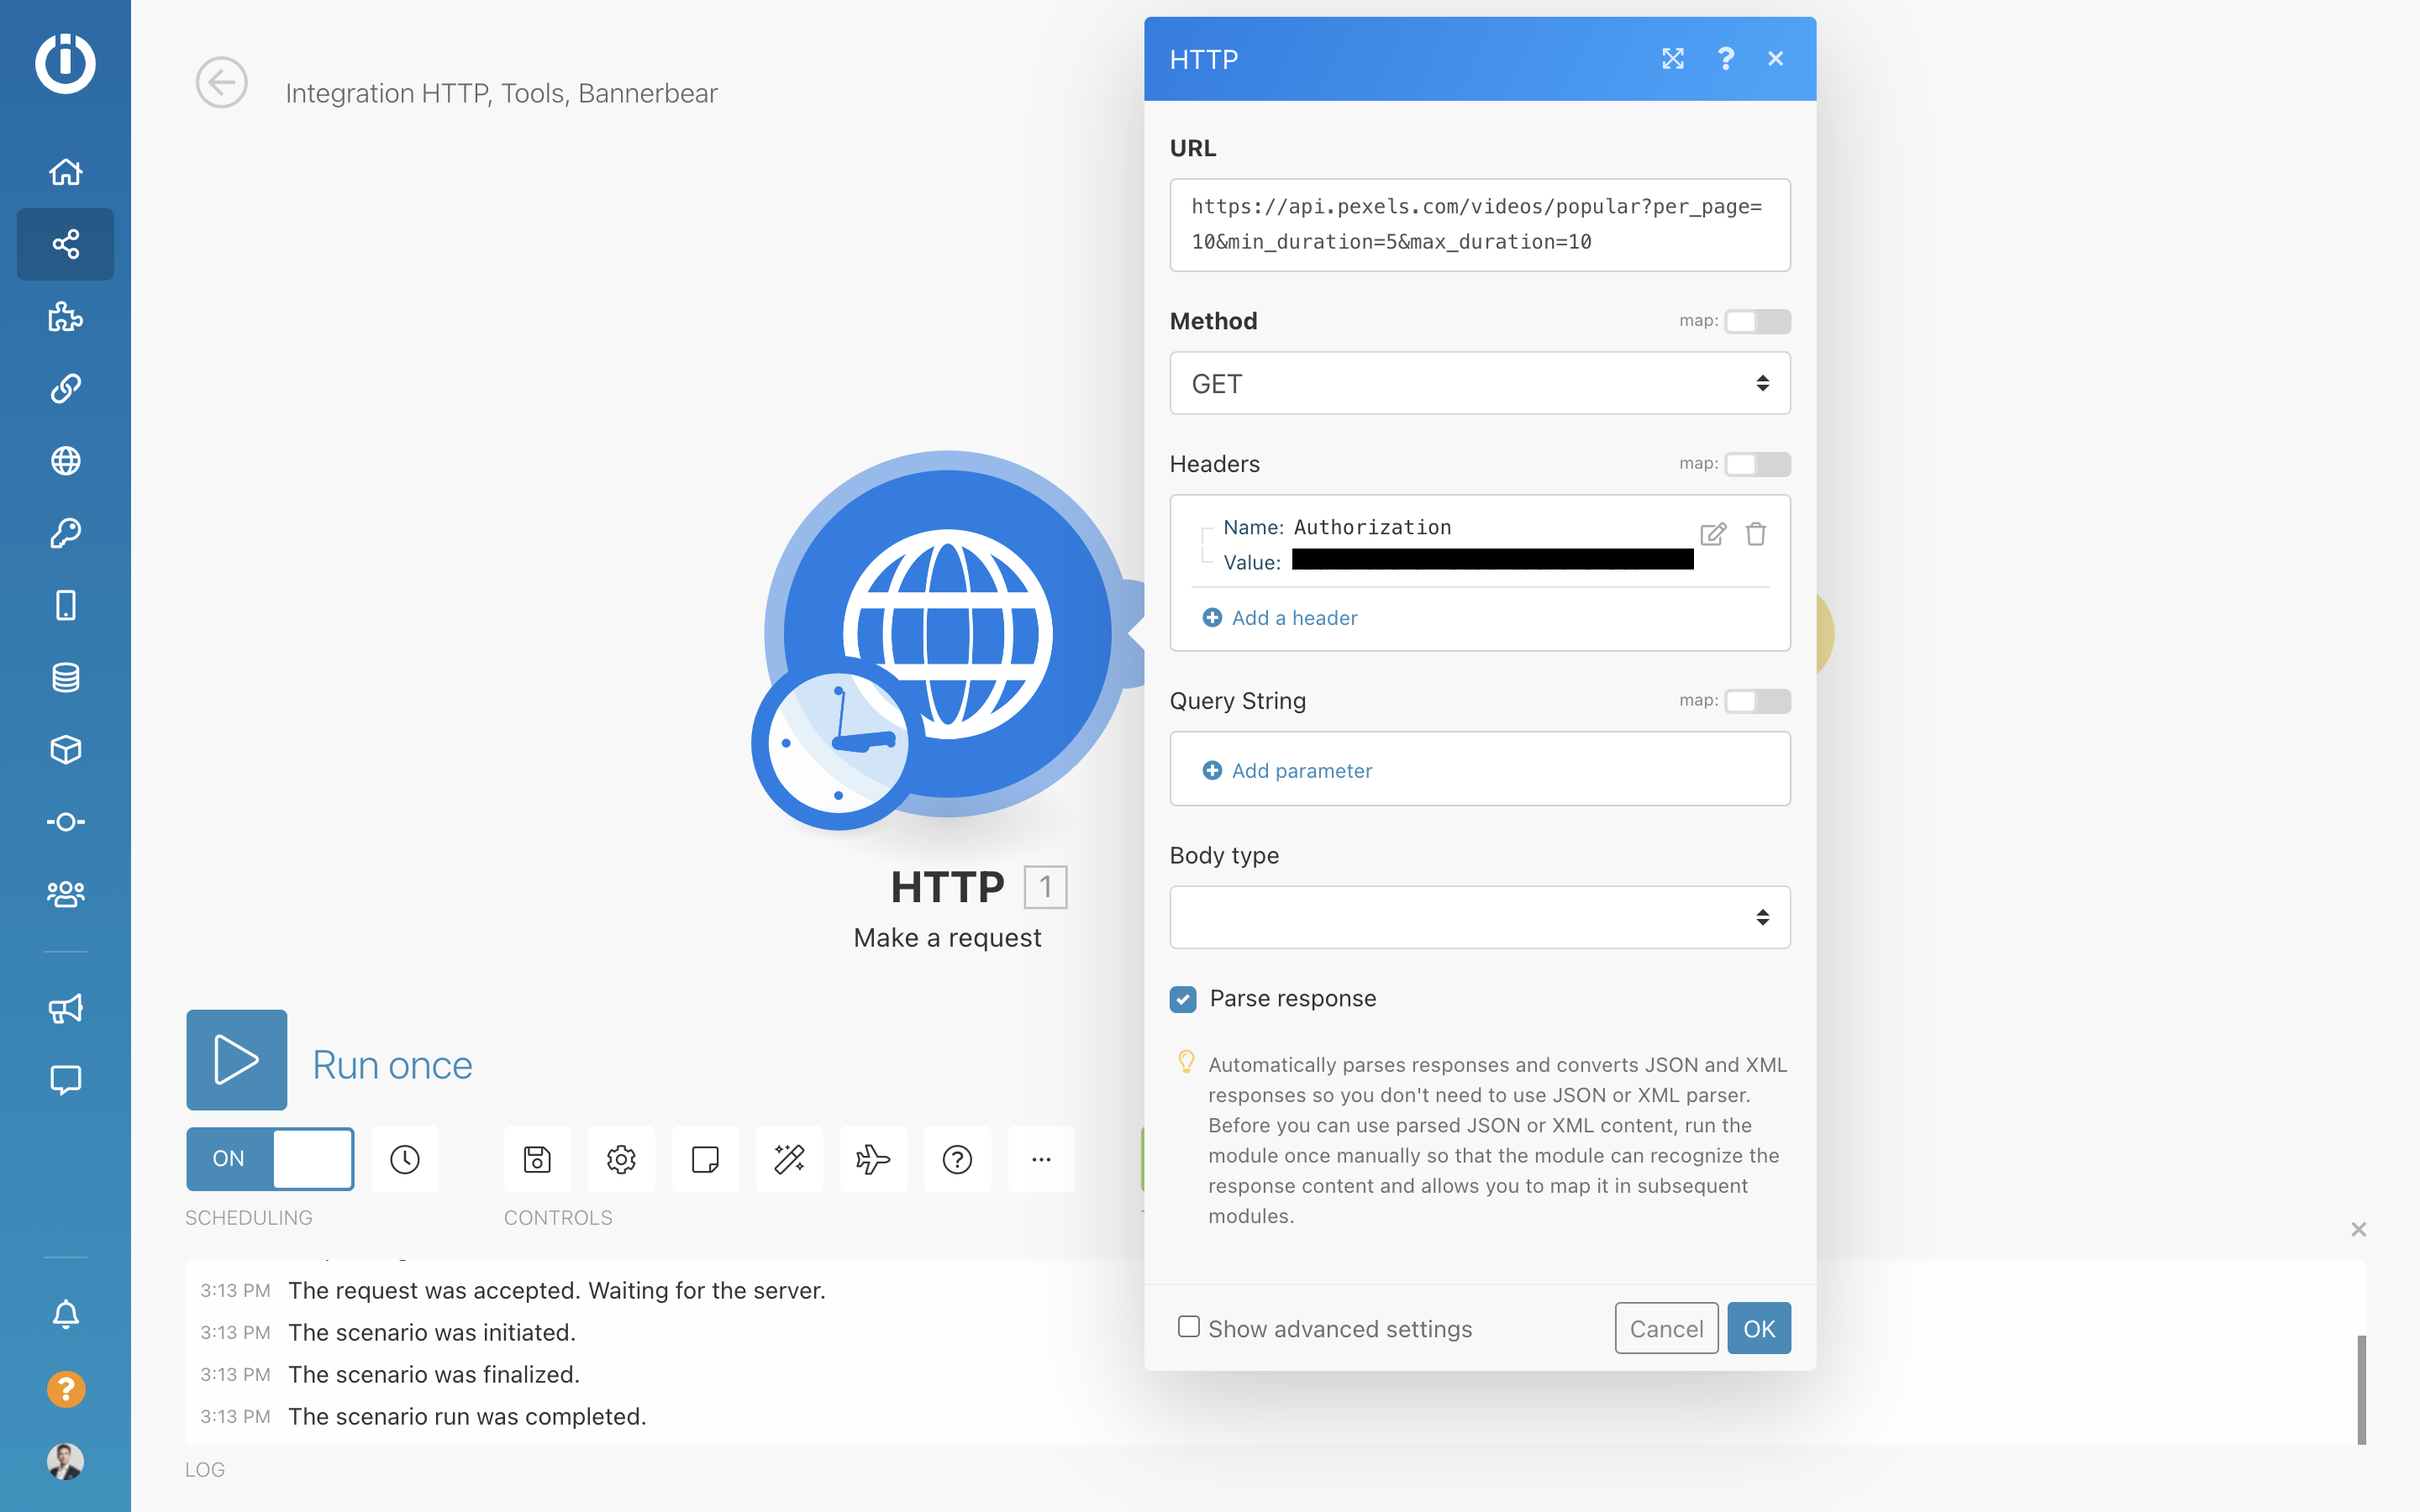
In the URL field you can use this url:
https://api.pexels.com/videos/popular?per_page=10&min_duration=5&max_duration=10
This API endpoint is just a list of popular videos on Pexels, within a certain duration (up to 10 seconds).
Add your Pexels API key as a header with the Name Authorizaton.
Check Parse Response as the response back will be a JSON object.
Posting the data to Bannerbear
Here's the config:
And here's the explanation…
Add a connection
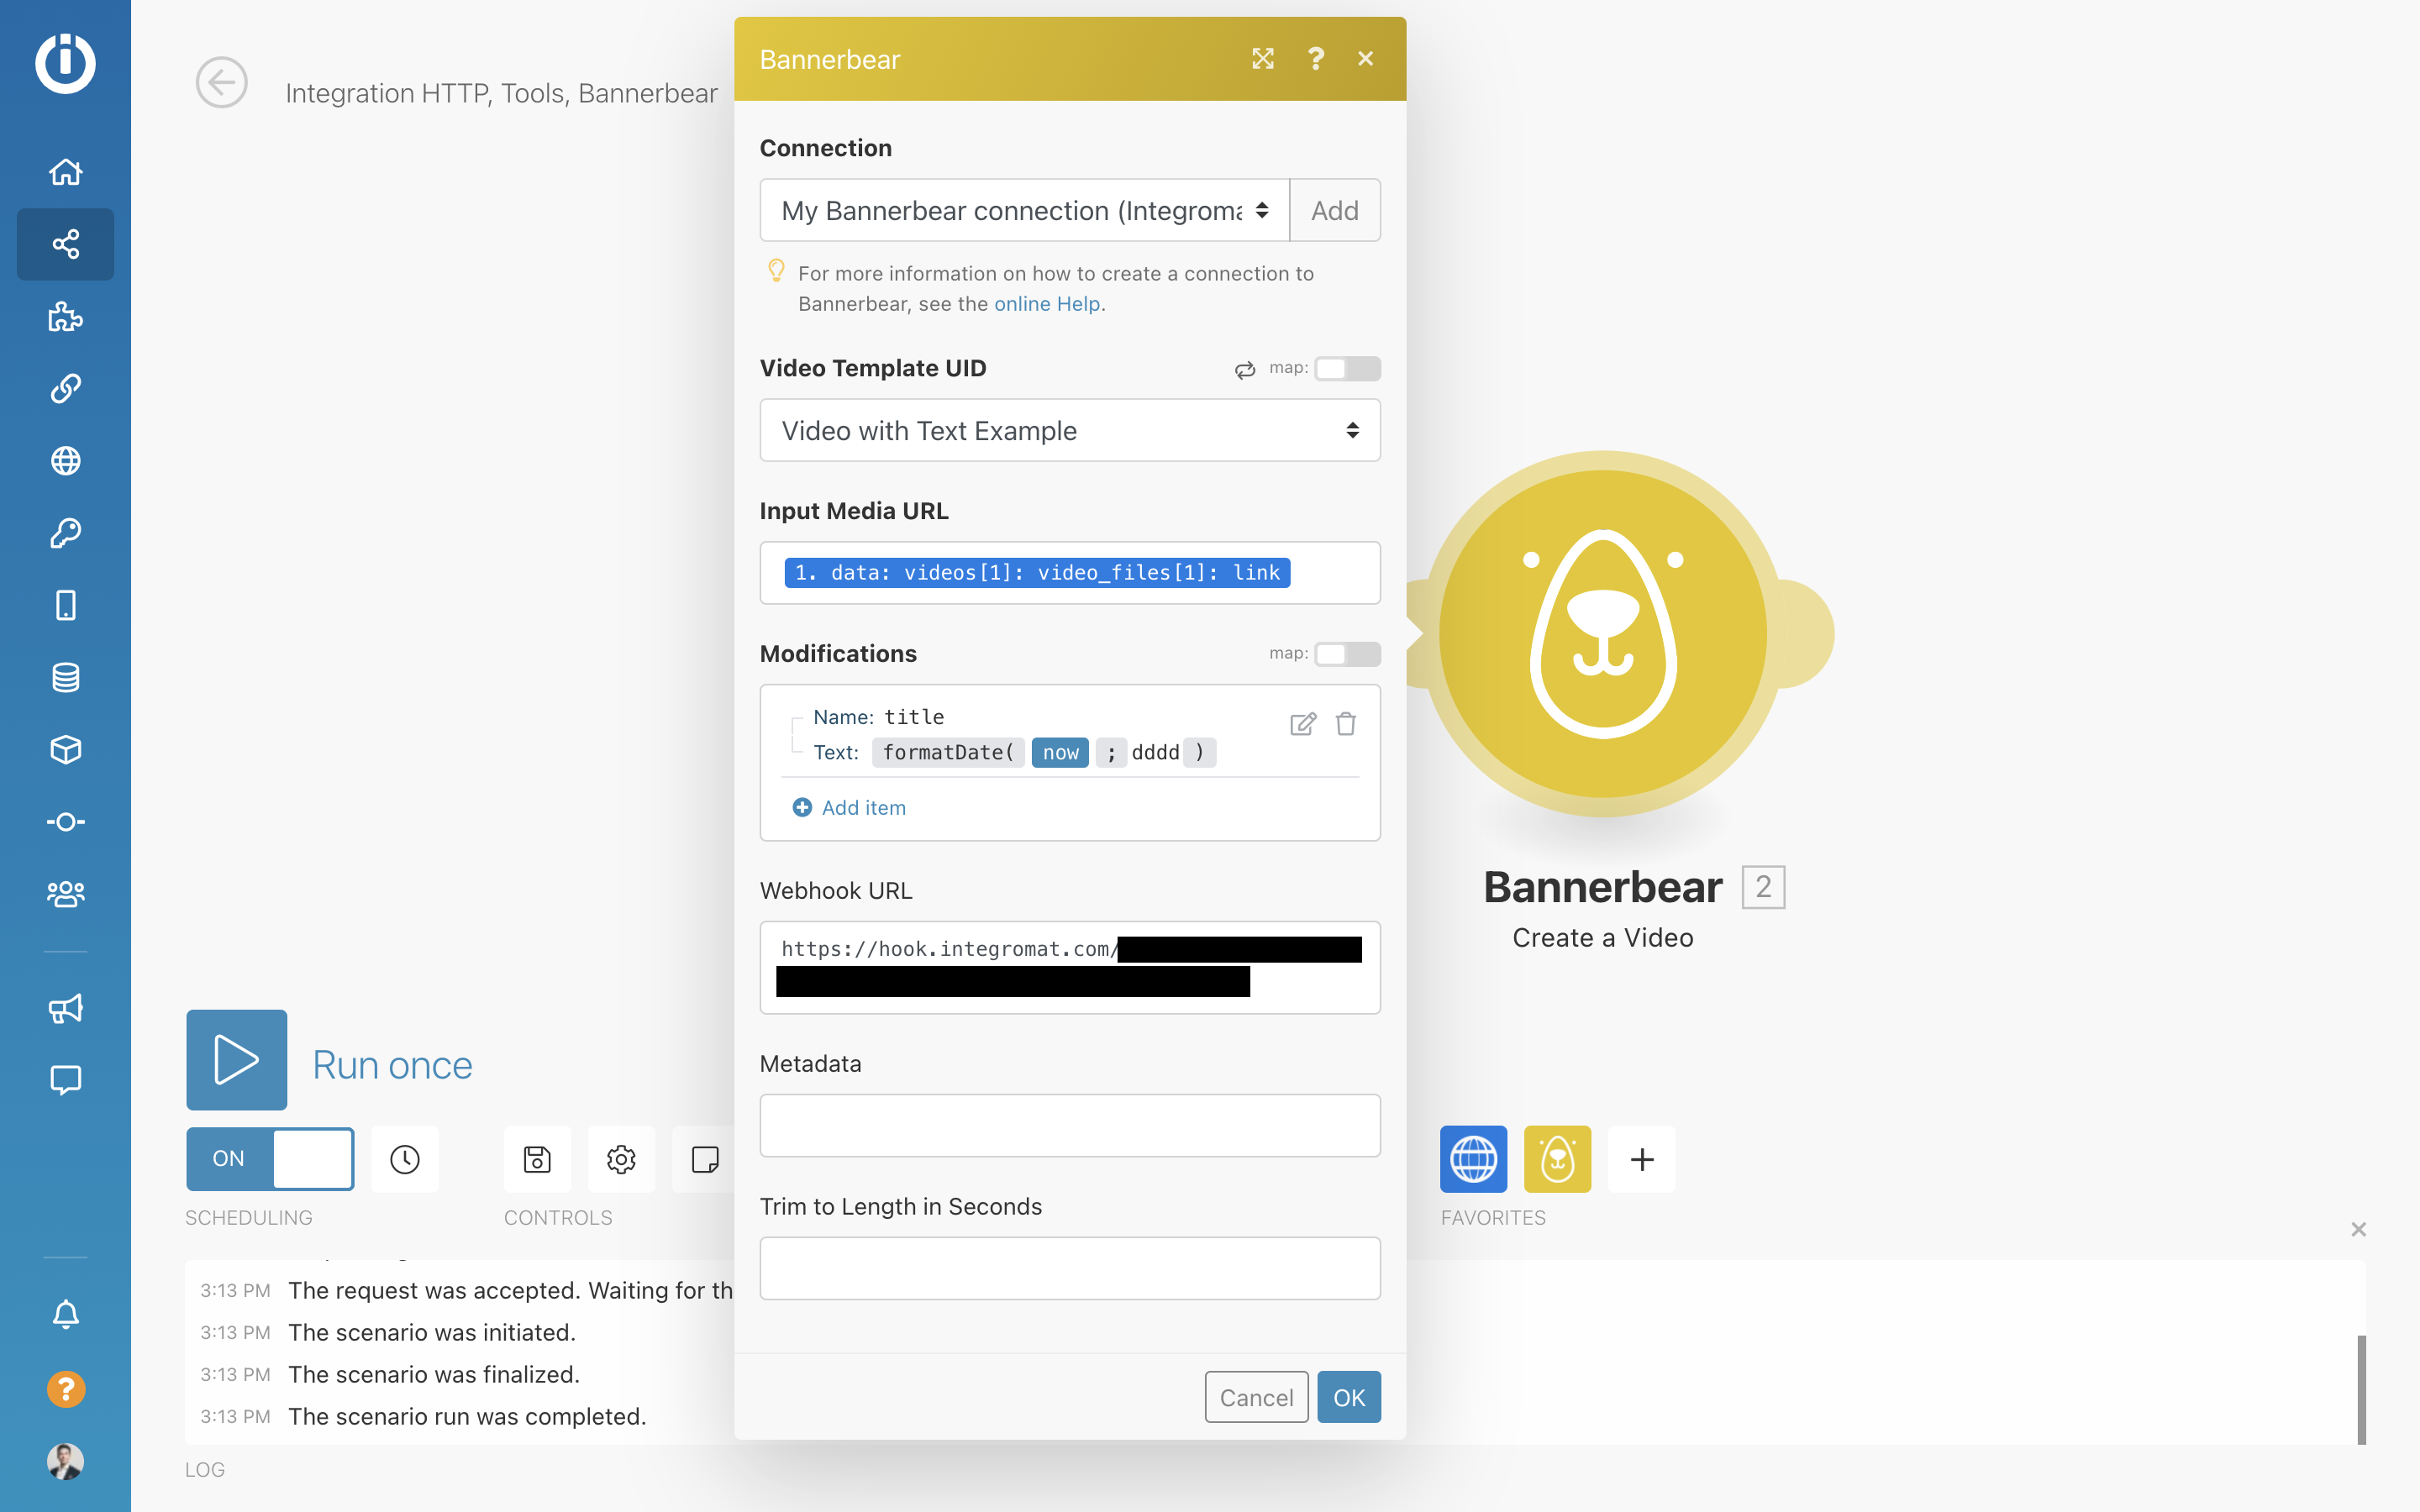
First you will need to create a new connection to Bannerbear (click Add next to Connection) - this is where you plug in your Bannerbear Project API Key we copied earlier.
Choose a template
When Integromat connects to your Bannerbear project, it will load your templates into view. Select the one that we are using for this tutorial ("Video with Text Example").
Input Media URL
Here click on the object you received in the HTTP Module. It is a JSON object and all we are going to do is choose data -> videos -> video_files -> link.
The way that Integromat works, it will give you the link of the first video in the collection.
You could get creative here and shuffle / randomize the array but for now lets just keep it simple.
Add Modifications
The only template modification we want to make here is to add the day of the week as text. This goes into a layer called "title" on the template. Click "Add Item" and enter title in the Name and for the text enter the function you can see in the screenshot above. This will output today's day name.
Add Webhook
Finally this is the part that ties it all together!
In the Webhook URL field, paste the Integromat webhook URL you copied earlier (from Scenario 2).
Running the scenario
In Scenario 1, the one that starts with HTTP hit the Run button.
You will see the scenario move through the steps and post data to Bannerbear.
To verify it is all working, you can flick back to Bannerbear at this point (refresh the page) and see that your video template is now rendering a new video. When the video gets to 100%, the webhook will be sent to Integromat…
…so flick back to Integromat and check the logs of Scenario 2. You should see that it successfully accepted an incoming request from Bannerbear, with the final video_url:
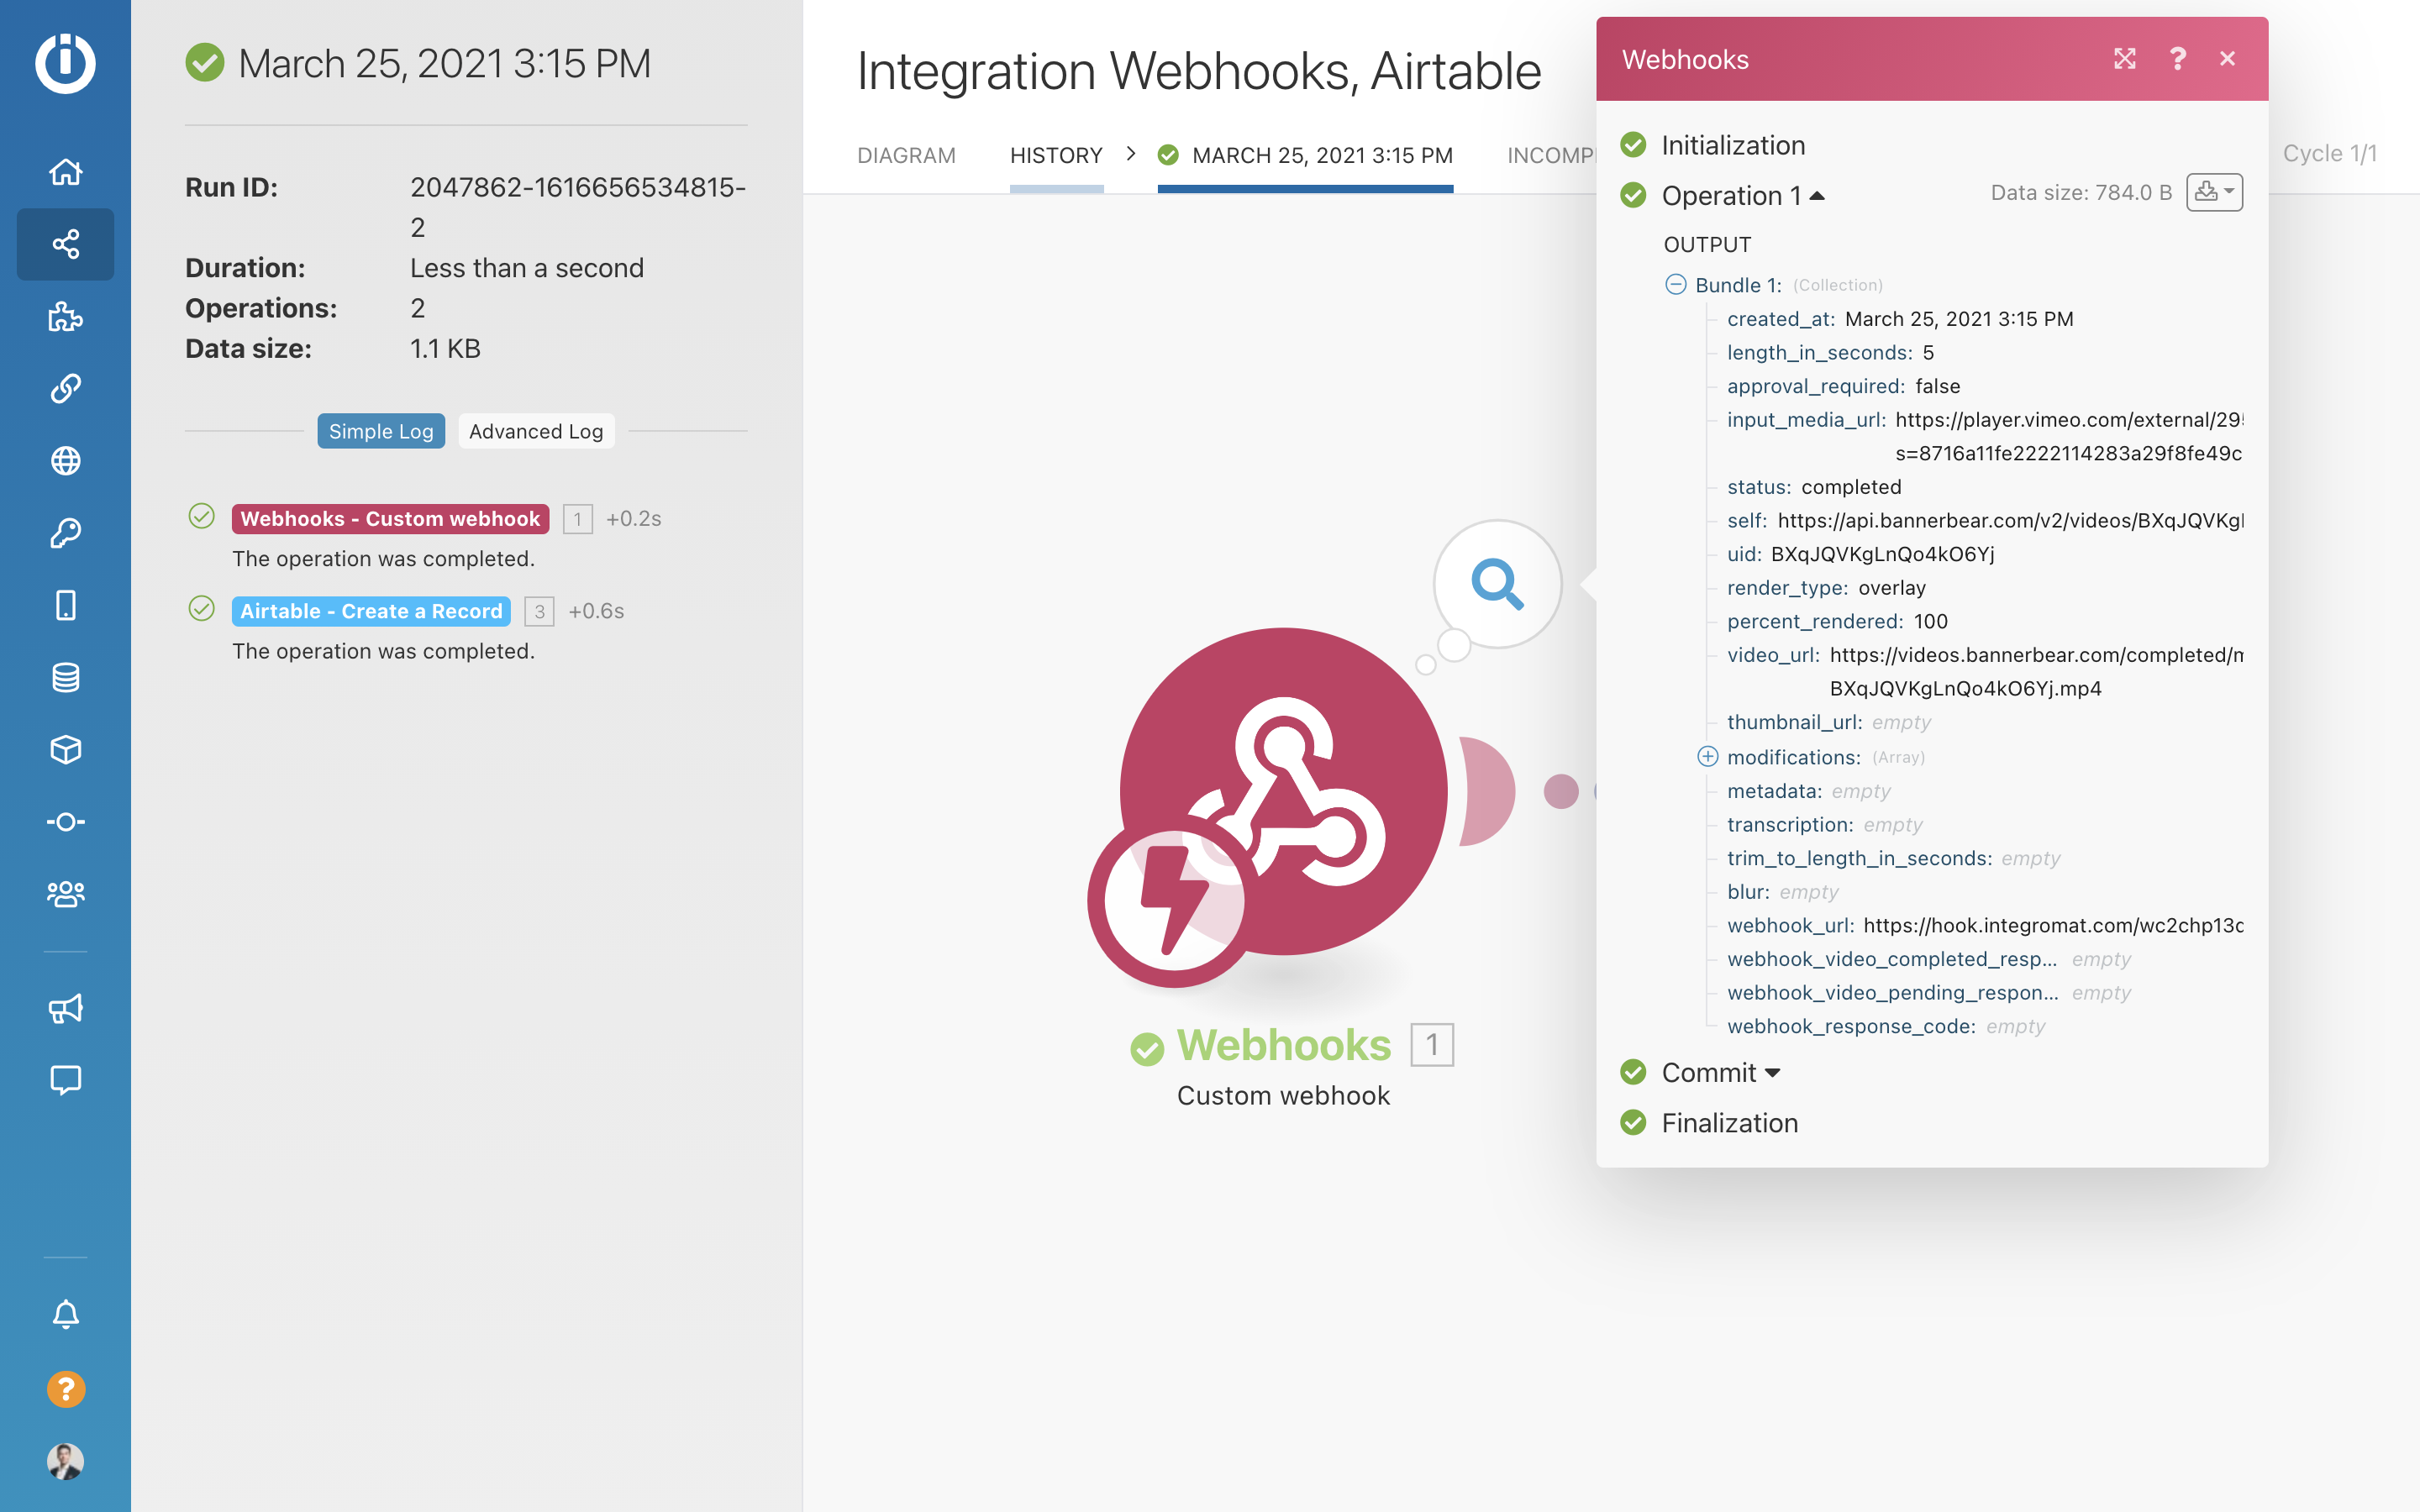
It's really up to you what to do next - in the example above I have added an Airtable module after the webhook, where I end up storing the video but the possibilities at this point are various. You could auto-post the video to social media, you could store it in cloud storage, send it via email to someone… etc!
Next steps
- Add a module after your webhook so that once Integromat receives the data, you do something with the data!
