How to Send an API Request to Bannerbear using an Airtable Button
Contents
With this tutorial, you can add a custom button in Airtable that allows you to send an API request to Bannerbear with just the click of the button.
Bannerbear is an image generation API that helps save time. You can automate image creation for websites and social networks.
Airtable is a spreadsheet-database hybrid, with the features of a database but applied to a spreadsheet. It allows you to manage your social media content, create a CRM database, build collaborative apps and more!
Before we begin
Note that, Bannerbear has a native Airtable integration meaning that you can easily set up Bannerbear <-> Airtable connections with very little config.
This tutorial is for setting up a more "Manual" type of integration, using the Airtable Button field. This may be useful in specific scenarios, when your integration has specific needs that the native integration does not cater to.
What this automation does
In this tutorial we will create a simple automation that:
- Pulls in image data from Airtable base
- Connects your base with Bannerbear by sending an API request with just the click of a button.
- Generates JPG and PNG formats of the new image you have requested.
- Stores that image in a specified Airtable field.
For this tutorial, we will automatically generate images in Bannerbear using the Scripting app on Airtable. This streamlines your workflows and makes it more user-friendly and easily customizable.
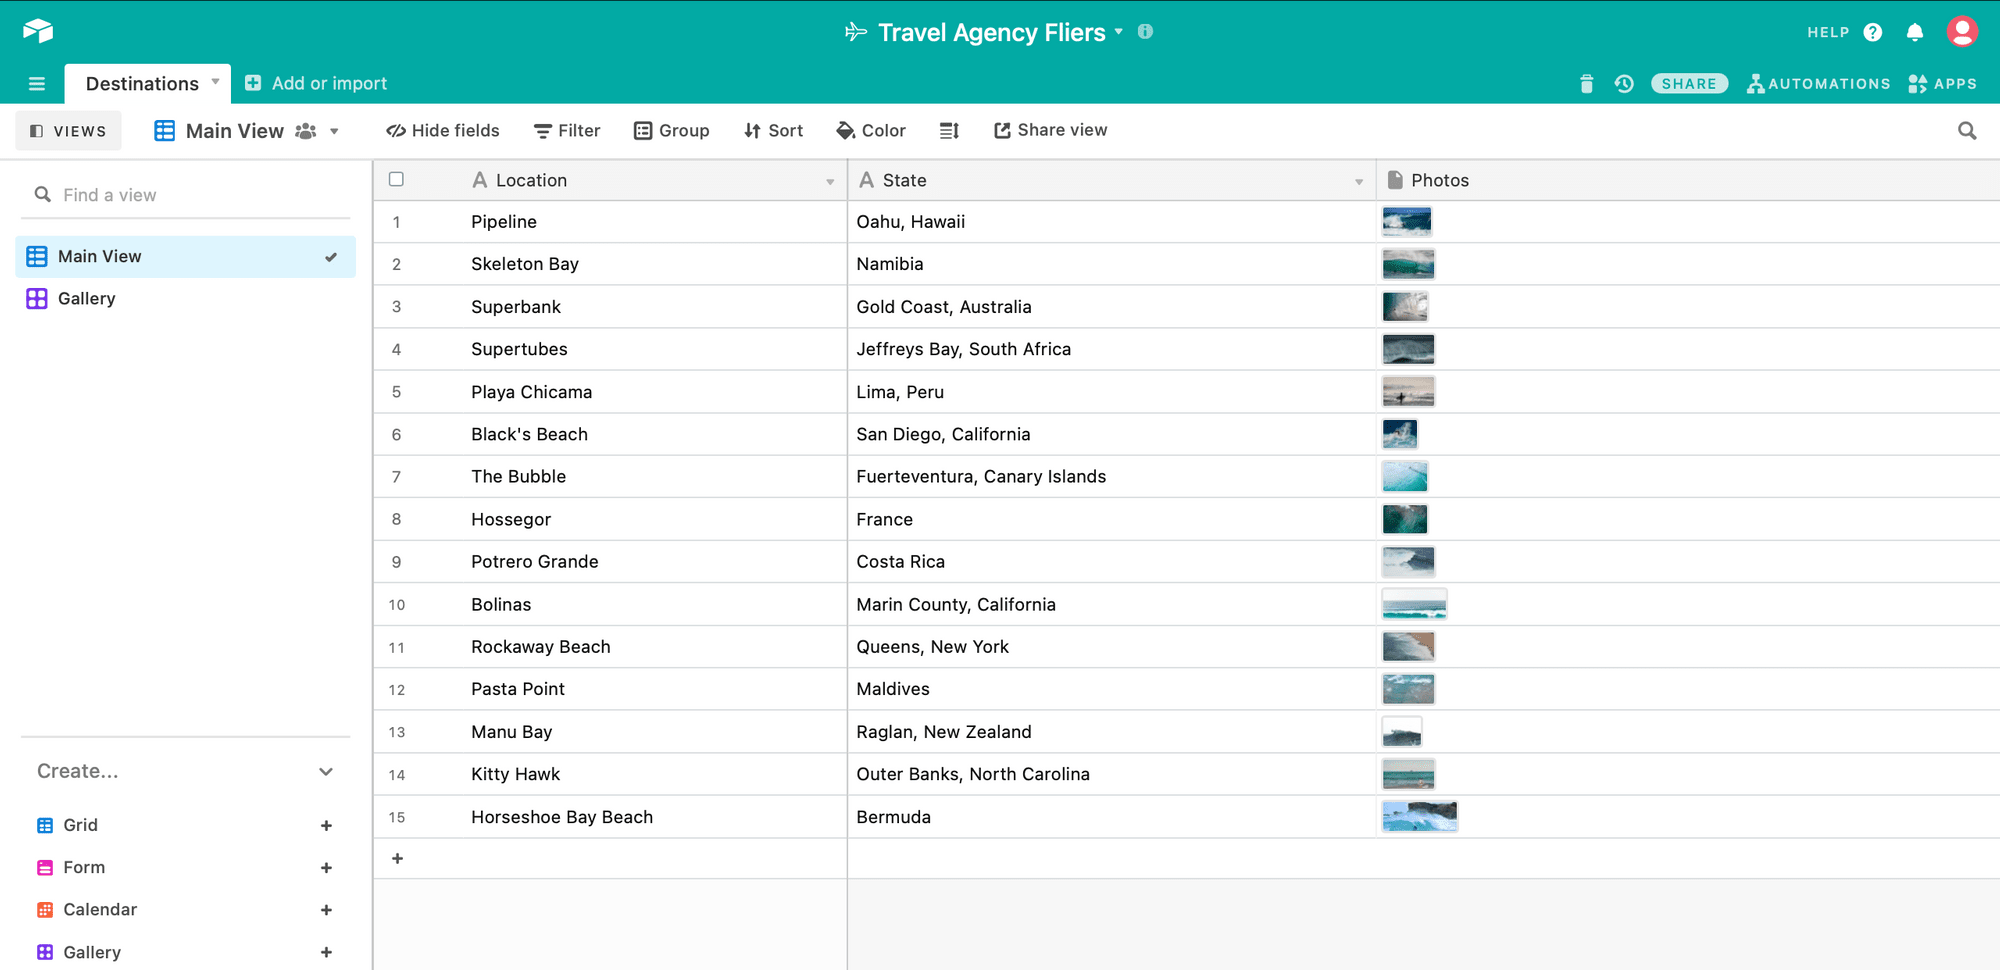
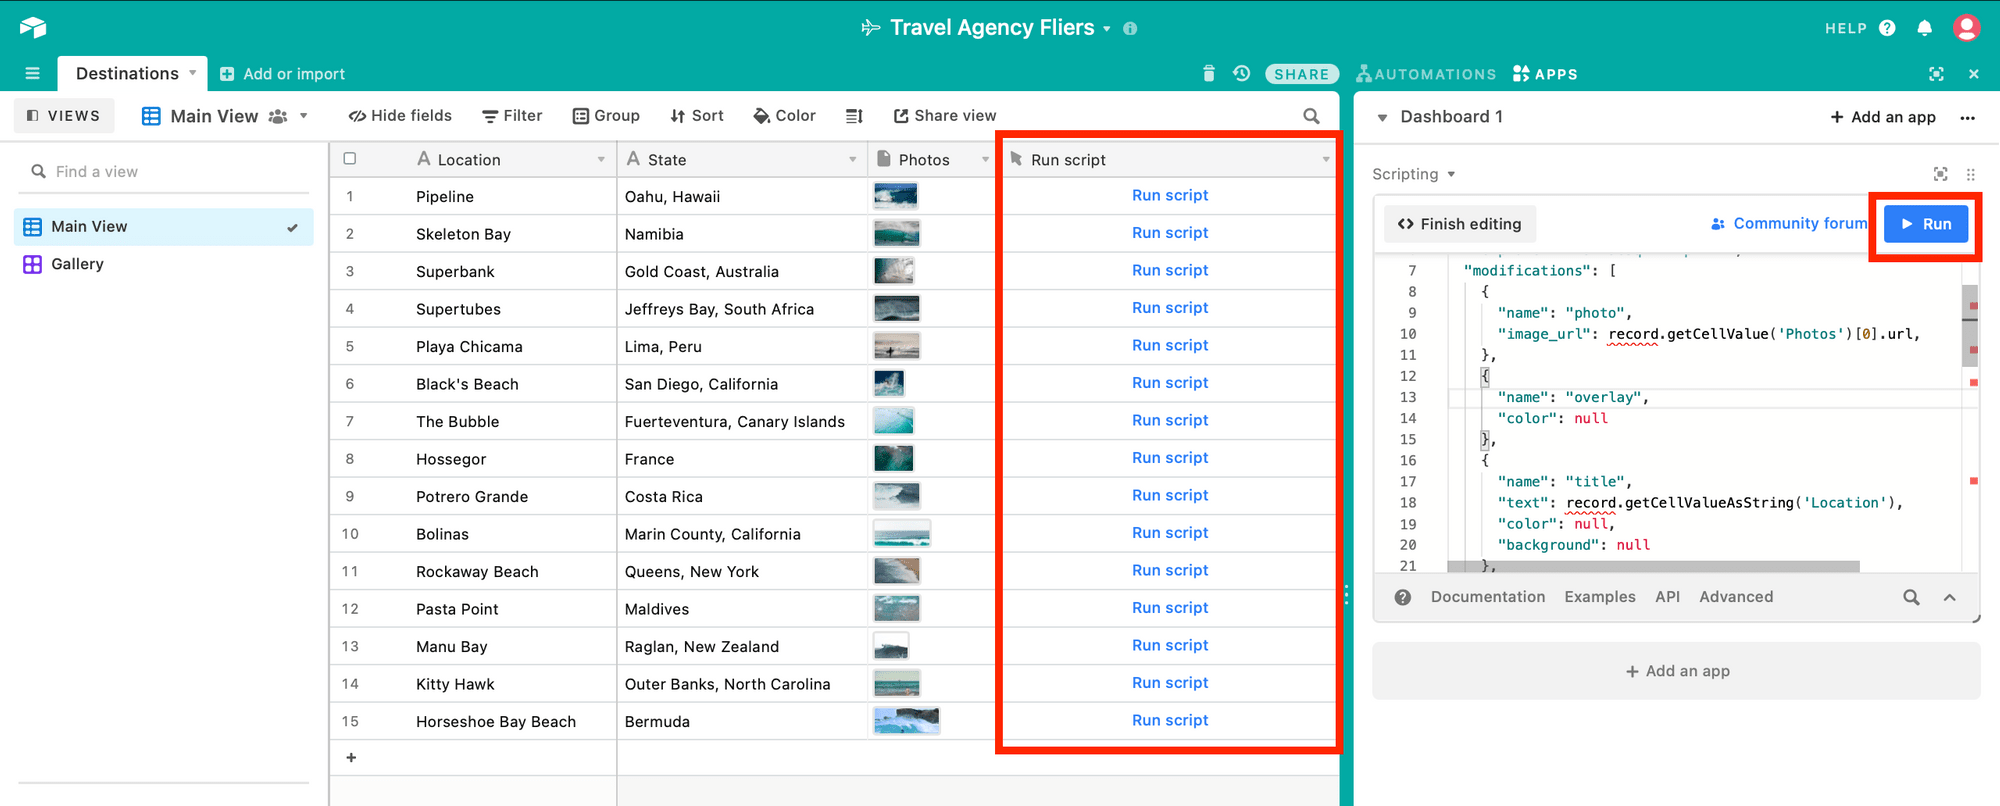
The table used in this tutorial looks like this:
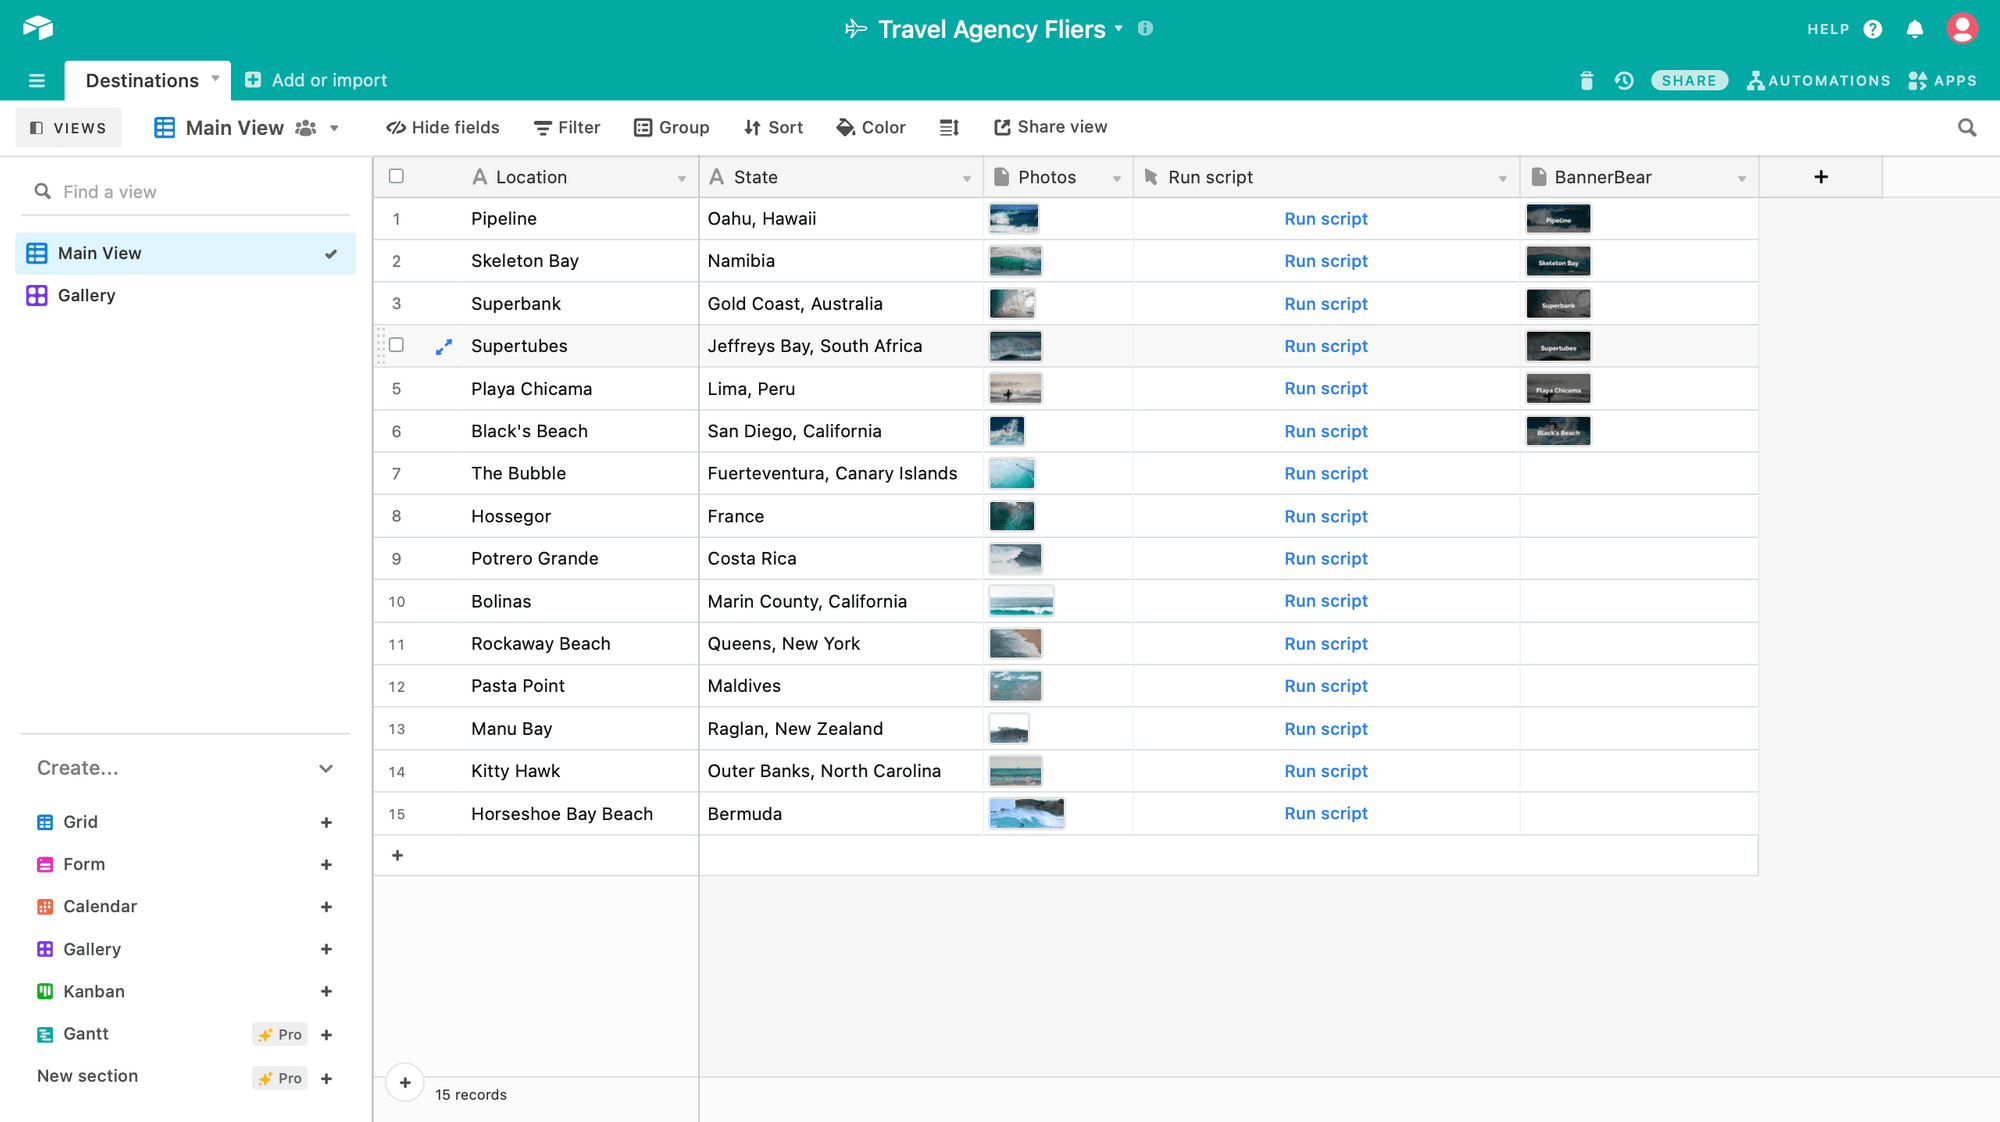
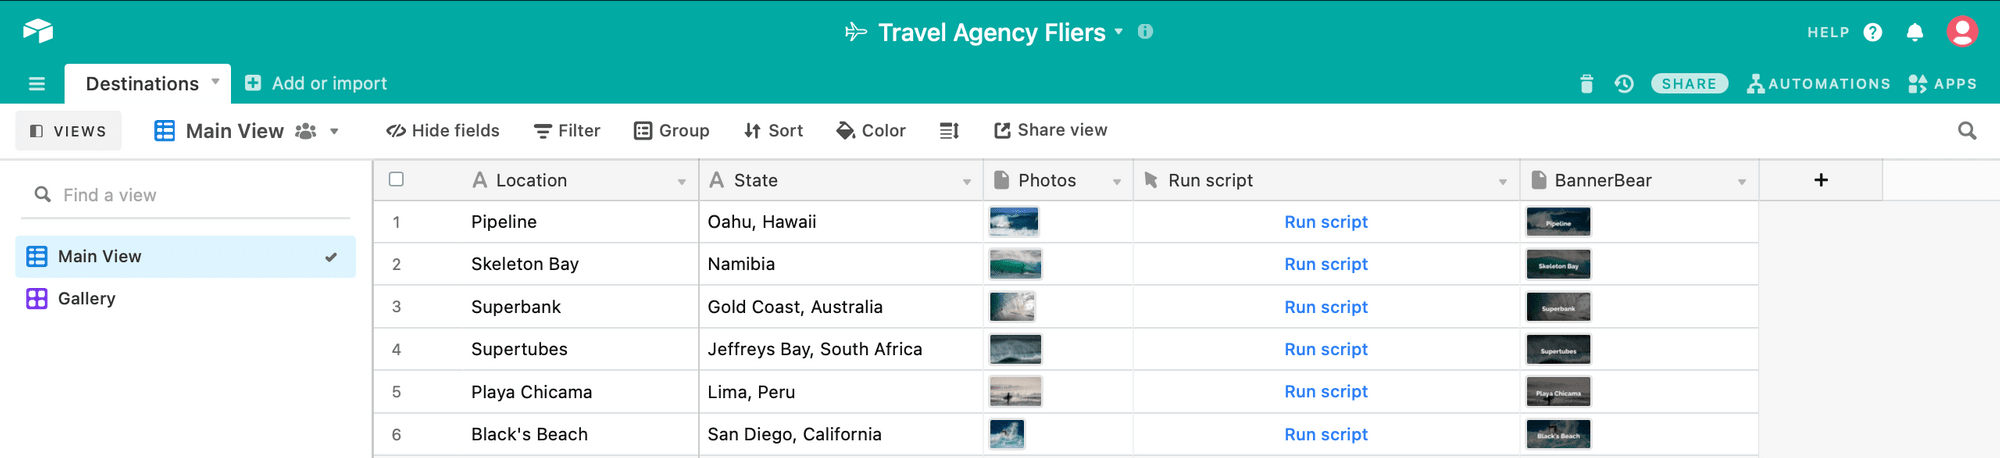
The end result will look like this:

This can apply to various use cases such as for e-commerce, real estate, fintech, etc.
Bannerbear Integration
Create a project in Bannerbear
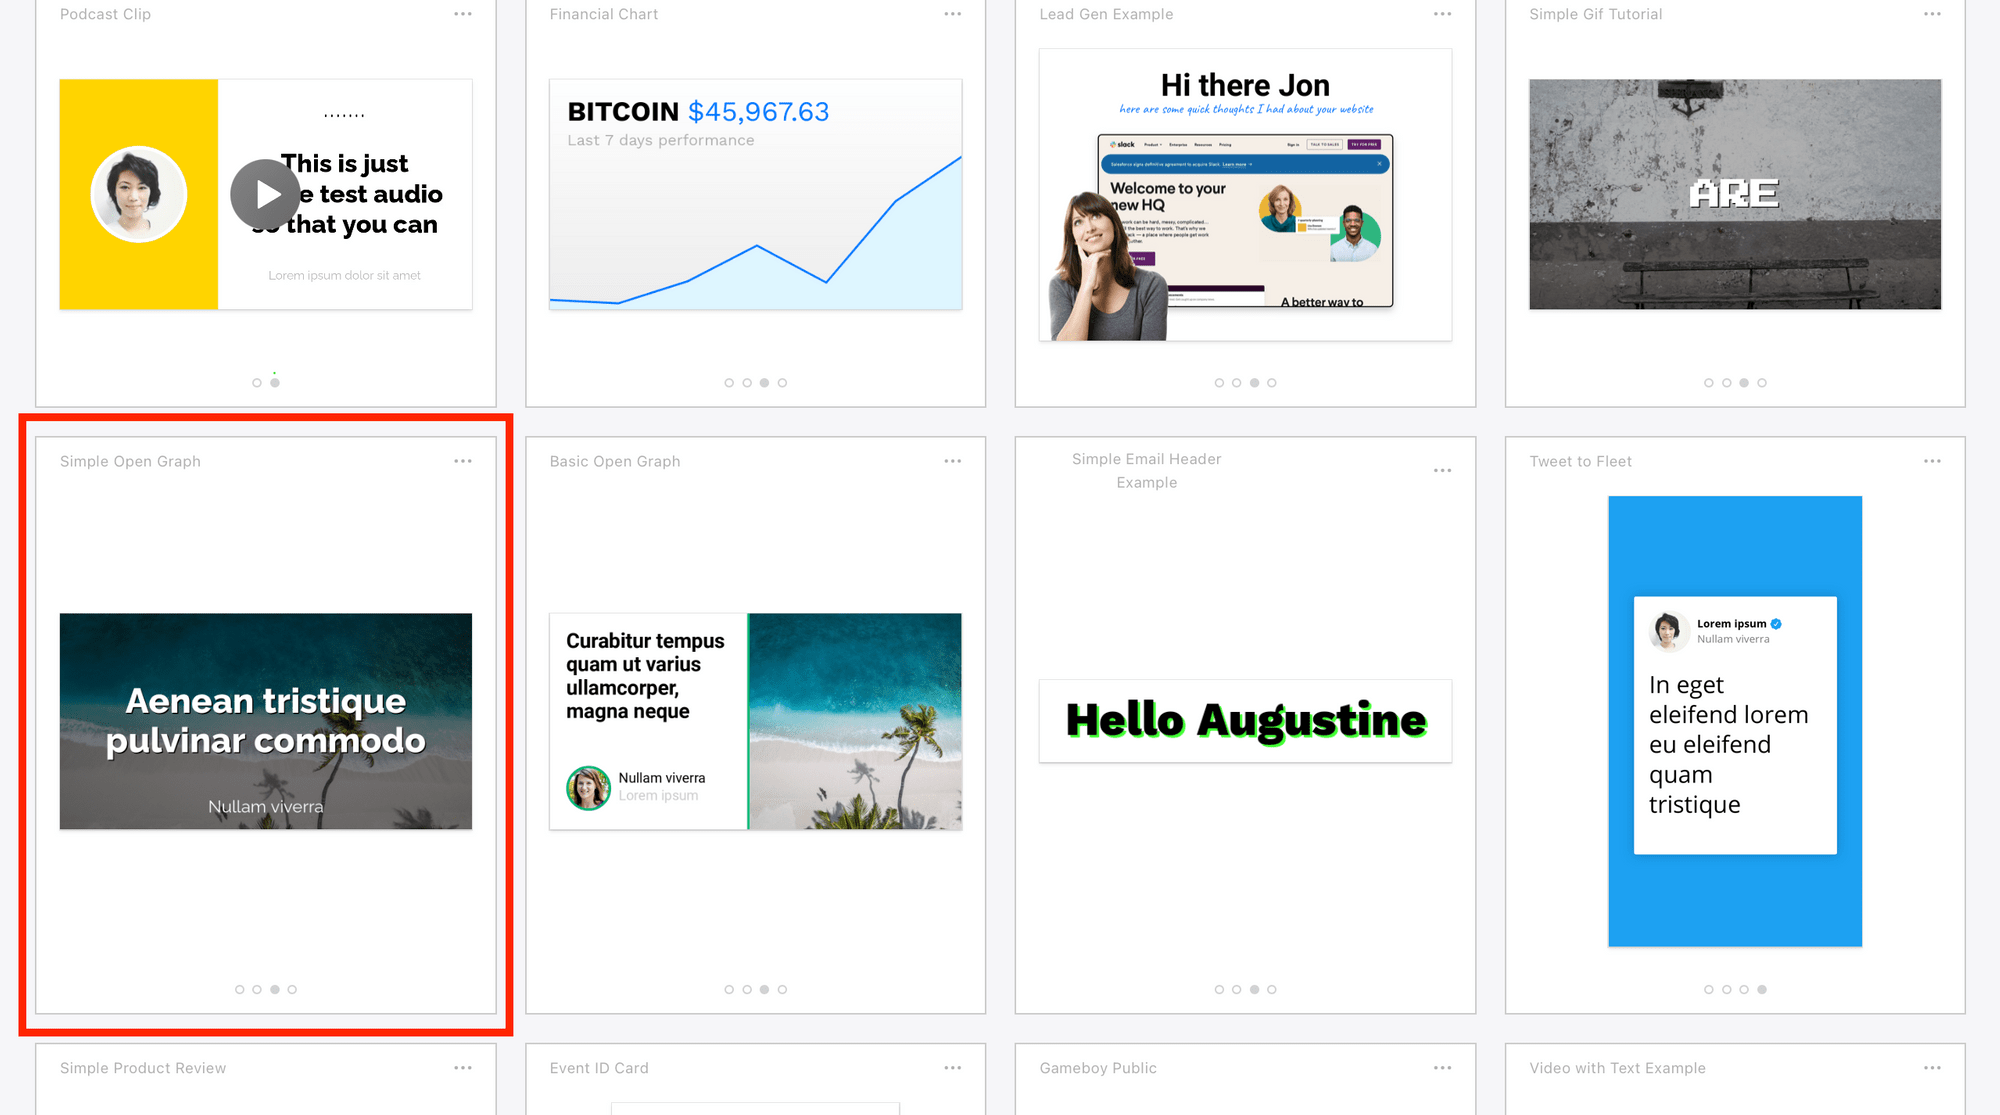
First, add the tutorial template to one of your Bannerbear projects. Browse Template Library to add a sample template from a selection of ready made templates.
Alternatively, Bannerbear allows you to create your own template.
For this tutorial, we are going to use a super simple template. Add the Simple Open Graph template to your project:
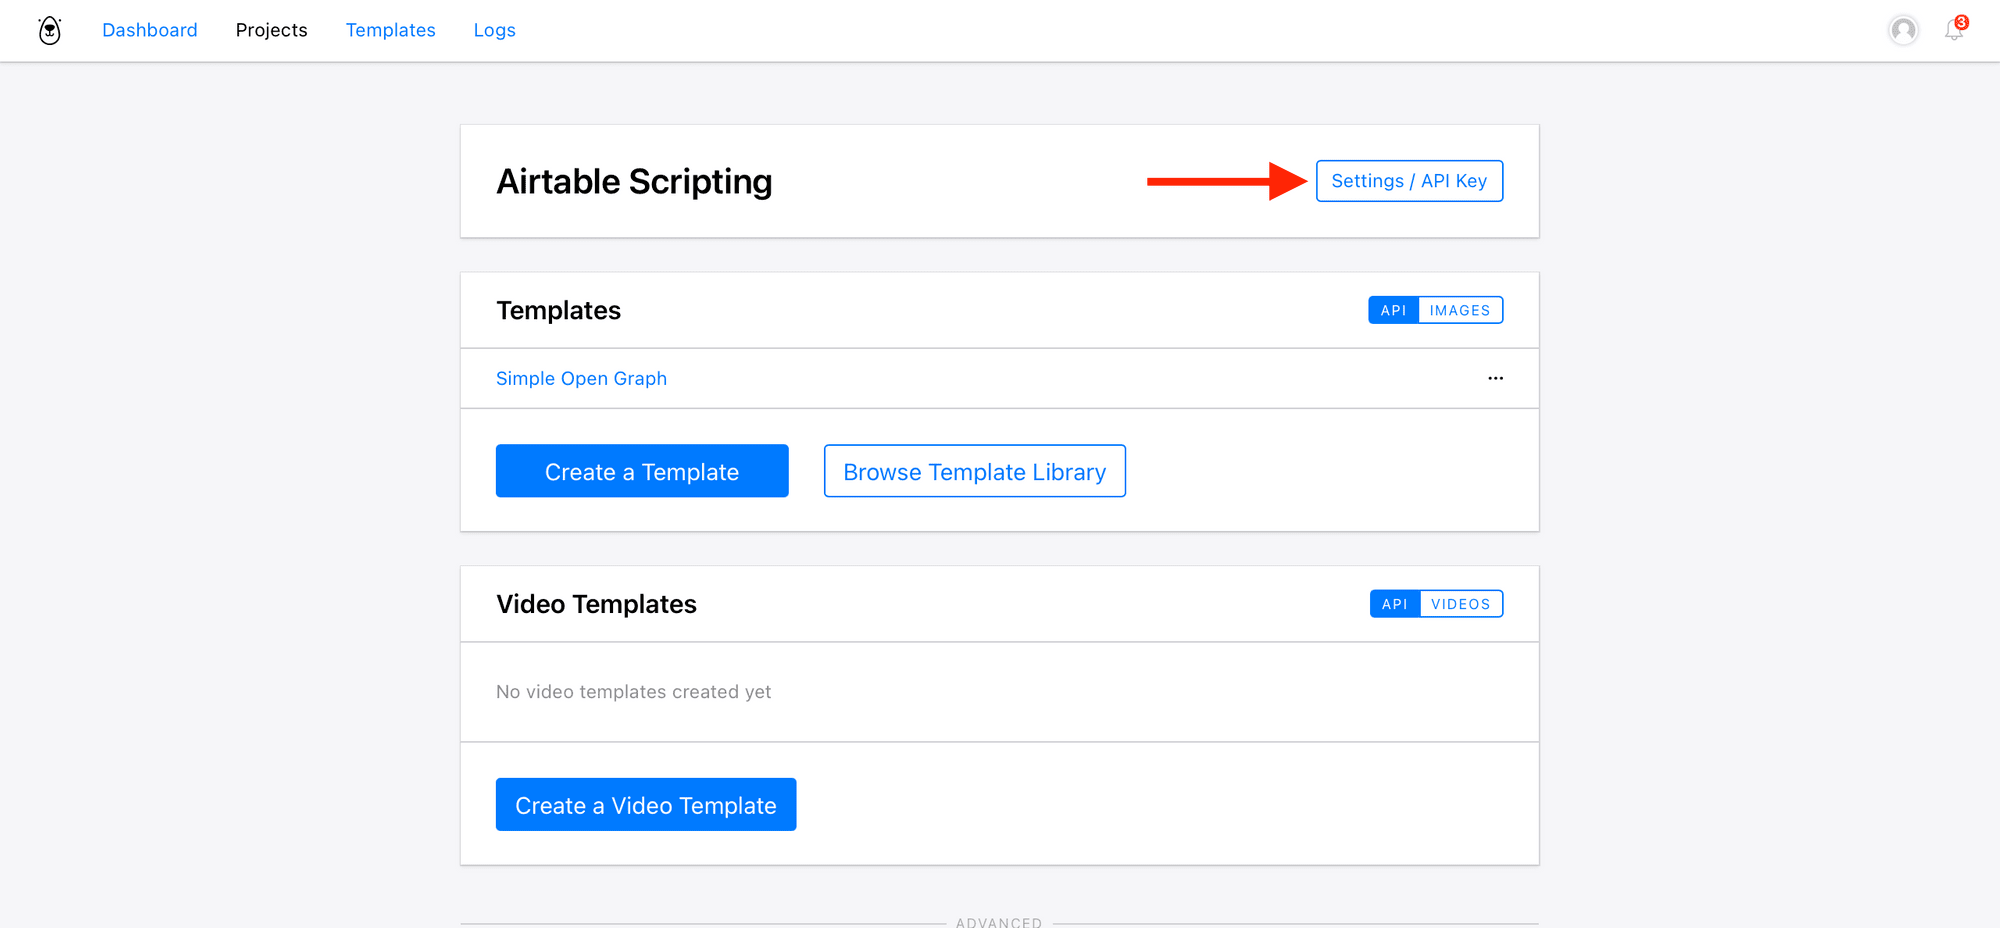
At this point you will also want to copy your Project API Key as you will need this later.
Get API key
Bannerbear uses API keys to allow access to the API. You can get your API key from Your Project → Settings / API Key:
Create Airtable fields
We will need a pre-populated Airtable base to get started. For this tutorial, we will create these fields in the Airtable base:
- Location (text field)
- State (text field)
- Photos (attachment field)
- Button field
- Bannerbear (attachment field)
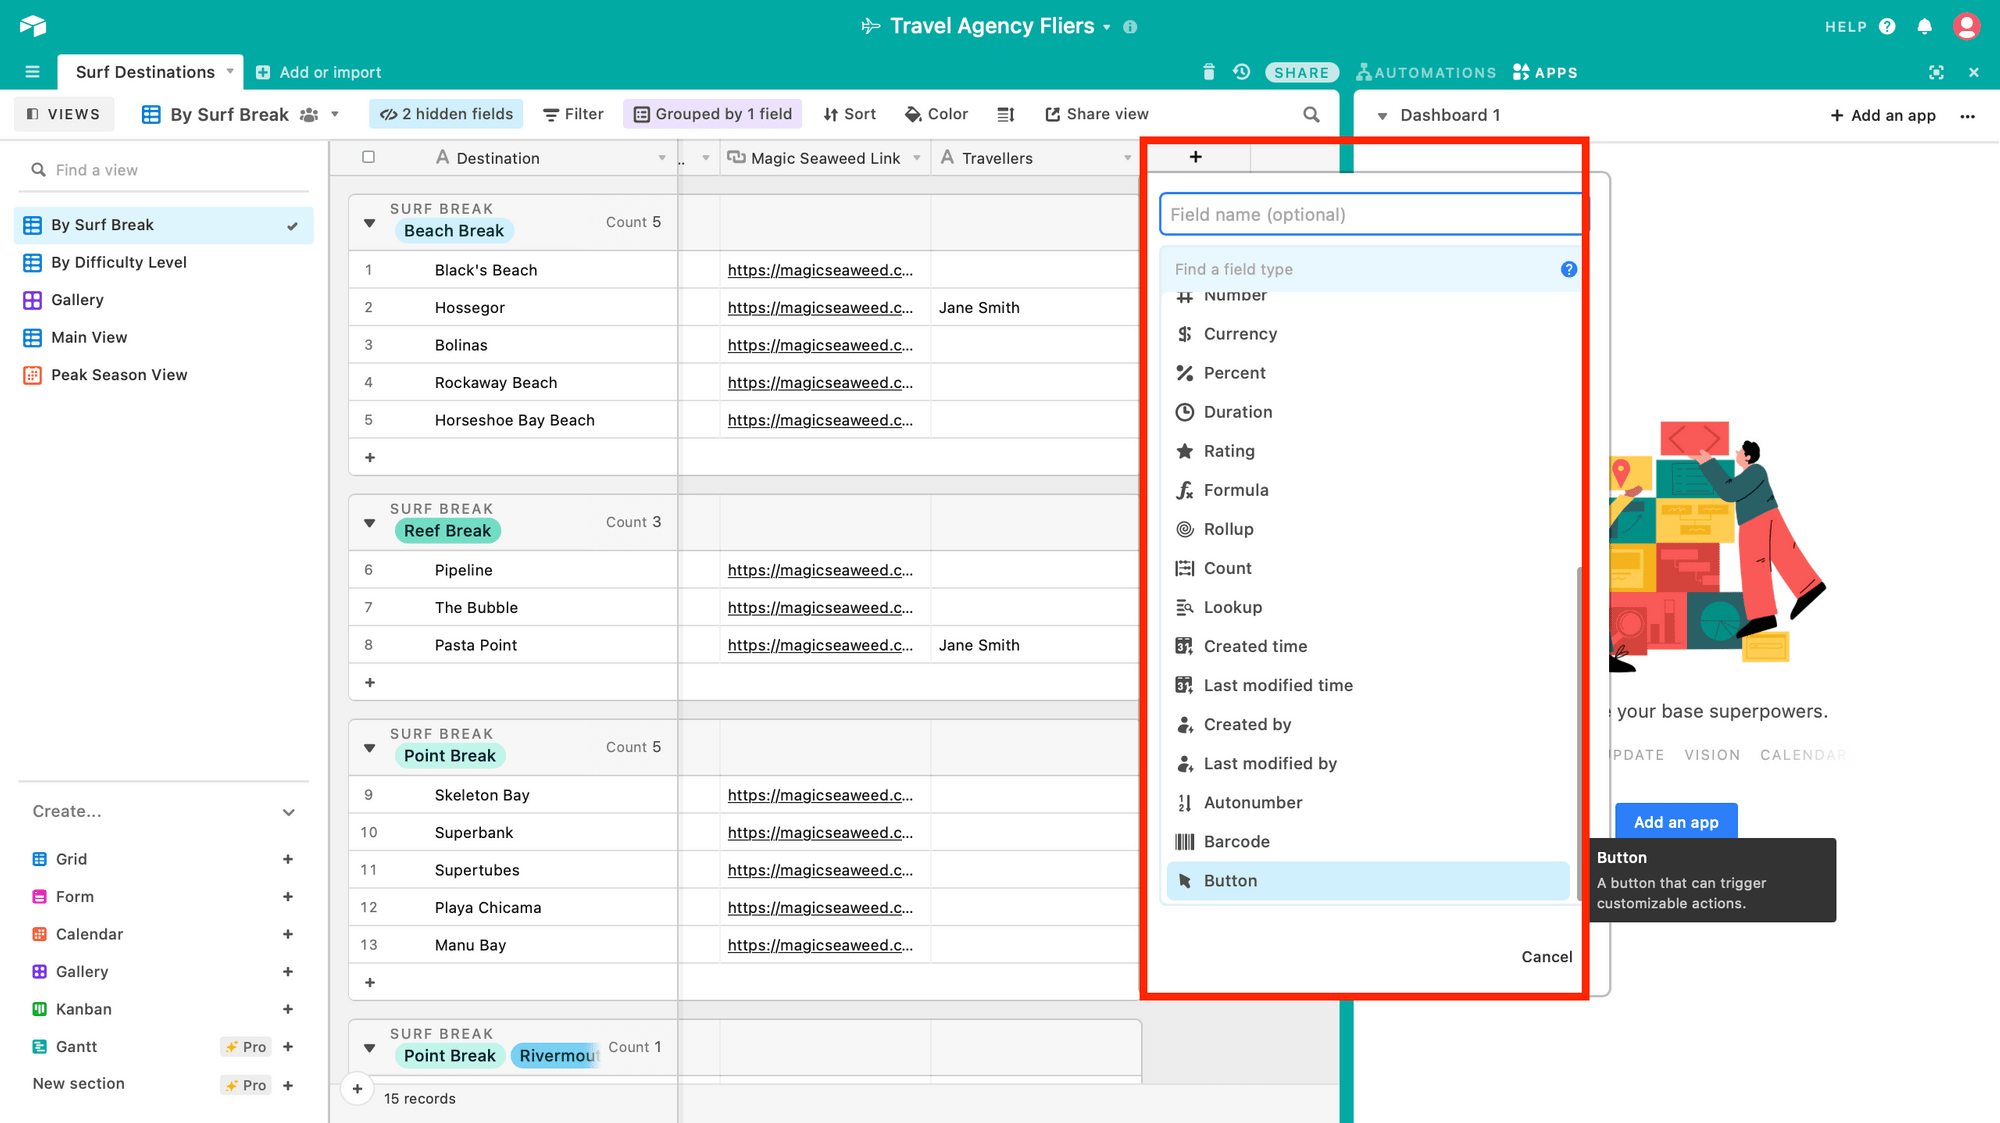
Create button field
Airtable button field is an interactive type that lets you trigger customisable actions directly from your base. These actions include:
- Open a new tab for a URL created with a formula within the button field
- Open page designer to display the current record
- Run the script selected
- Display the embed from a specific field with a URL
- Fill the email template for the selected SendGrid app
- Open the Send SMS app and trigger a preconfigured SMS
- Create a PDF or word document on Formstack based on data in the record the button was clicked from
- Search for stock photos on Pexels to attach to the record the button was clicked from
- Open custom app
- Open source record
For this tutorial, we will run the script selected. To get started, select the Button field from the list of field options:
In the field configuration dialog, you can set a label and style for the button. Use the "Run script" action:
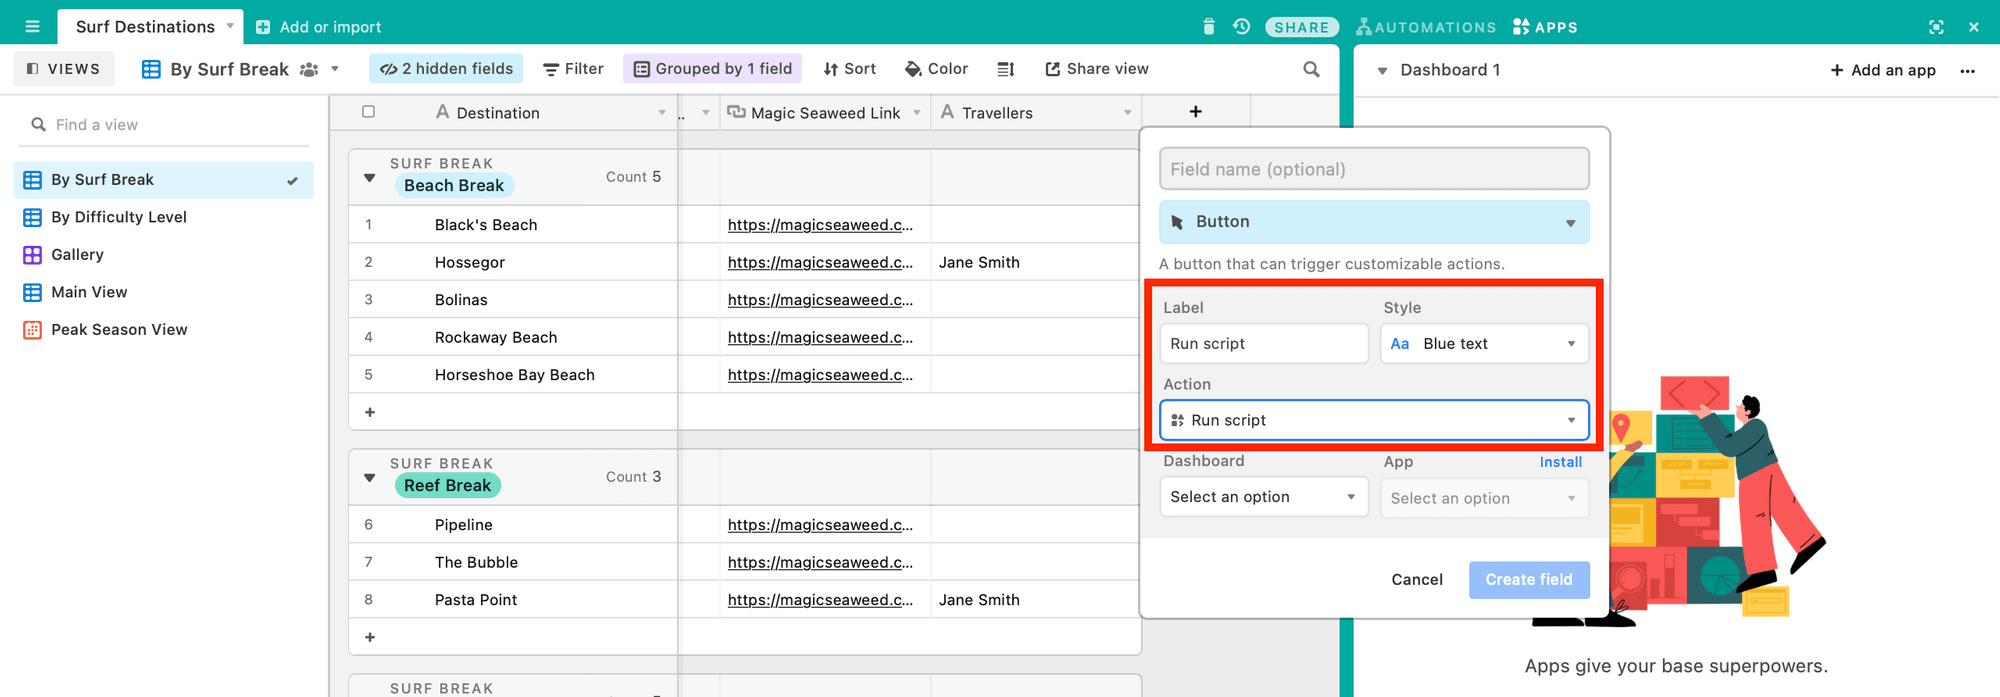
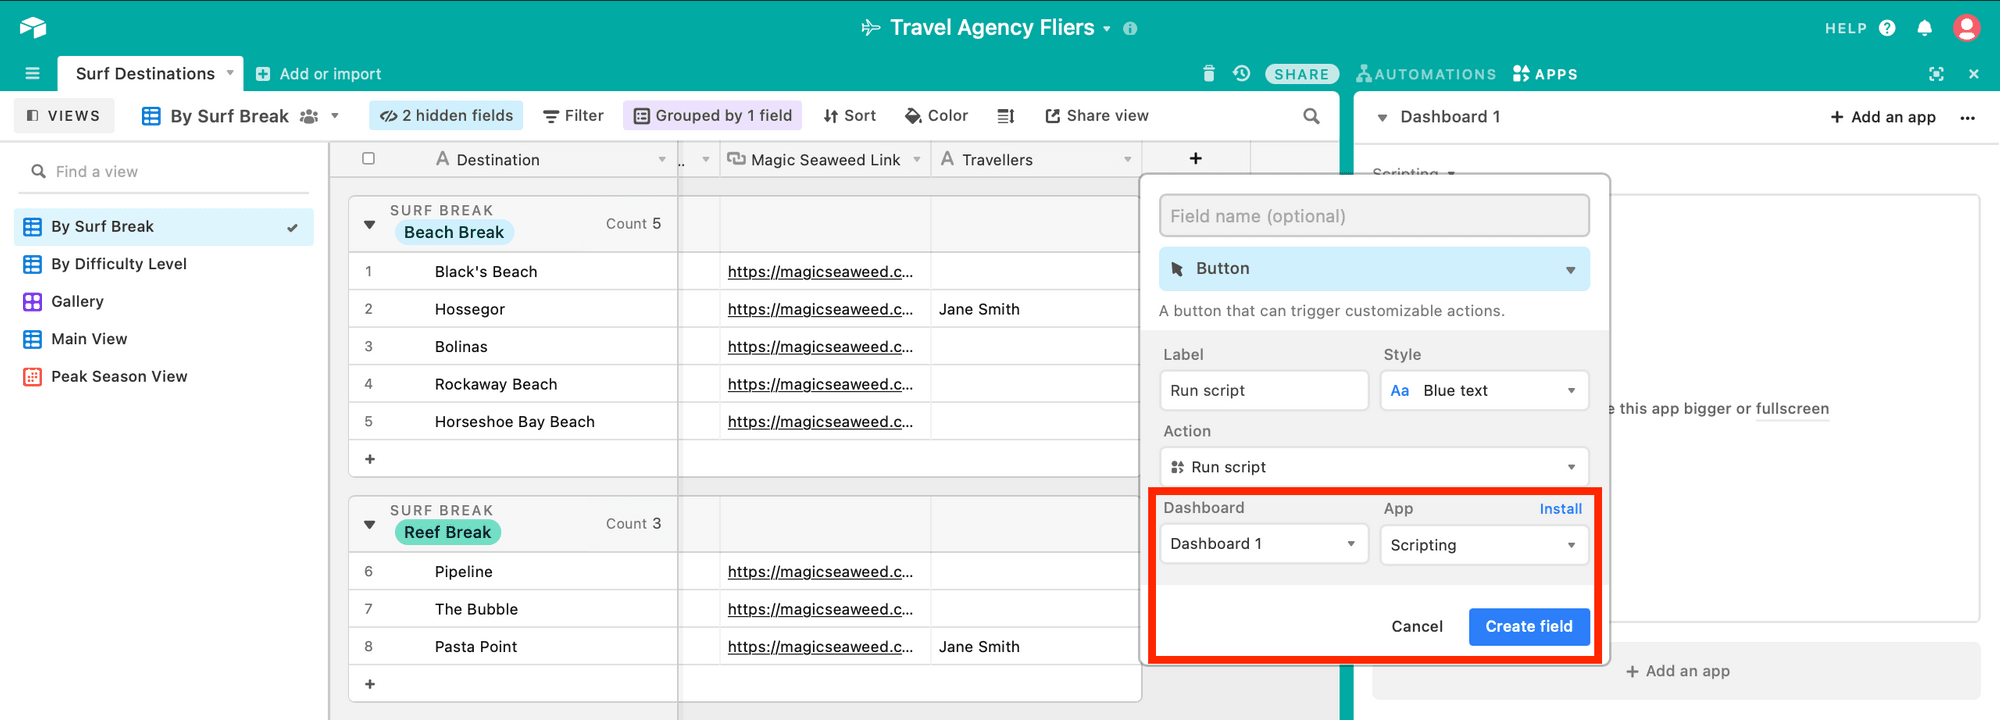
Next, select or install a Scripting app to add the app to a dashboard in your base.
Click create field :
Once created, the button field will appear in your table as a clickable button. This action opens the app and runs the script.
Add an empty field titled 'Bannerbear' to receive the new image generated:

Add a script
Next, we will generate images by:
- sending a POST request with a Bannerbear template uid and a list of template modifications you want to apply
- including the Bannerbear API key in all API requests to the server with the header:
Authorization: Bearer API_KEY - using webhooks or the synchronous endpoint to be notified when the resource has been generated with the header:
Authorization: Bearer WEBHOOK_KEY
The Bannerbear API is primarily asynchronous to keep the request / response cycle predictable. With this, the API responds immediately with the generated result. Alternatively, you can make a synchronous request which uses the synchronous base URL: sync.api.bannerbear.com. Here, the API waits until the media file has finished generating before responding.
To use the Scripting app to create an image on Bannerbear, you will need:
- your Airtable table and field names
- your Bannerbear API key
- Bannerbear template uid that you want to use
- list of modifications you want to make to the template layers, like changing the text, images, effect, fonts or the colors.
To use your script with the "Run script" action of a button field, use recordAsync with the same Table that contains the button field, or a View from that table.
Copy the following code and change the variables to match the ones in your Airtable base and Bannerbear layers:
const API_KEY = 'YOUR_API_KEY'
let table = base.getTable("Destinations")
let record = await input.recordAsync('Pick a record', table)

var data = {
  "template": "YOUR_TEMPLATE_UID",
  "modifications": [
    {
      "name": "photo",
      "image_url": record.getCellValue('Photos')[0].url,
    },
    {
      "name": "overlay",
      "color": null
    },
    {
      "name": "title",
      "text": record.getCellValueAsString('Location'),
      "color": null,
      "background": null
    },
    {
      "name": "subtitle",
      "text": record.getCellValueAsString('State'),
      "color": null,
      "background": null
    }
  ],
}

let response = await fetch('https://sync.api.bannerbear.com/v2/images', {
  method: 'POST',
  body: JSON.stringify(data),
  headers: {
    'Content-Type' : 'application/json',
    'Authorization' : `Bearer ${API_KEY}`
  }
})

let respJSON = await response.json()

await table.updateRecordAsync(record.id, {
  BannerBear: [{url:respJSON.image_url}],
});
This script queries the Bannerbear API, then stores that data in the specified field.
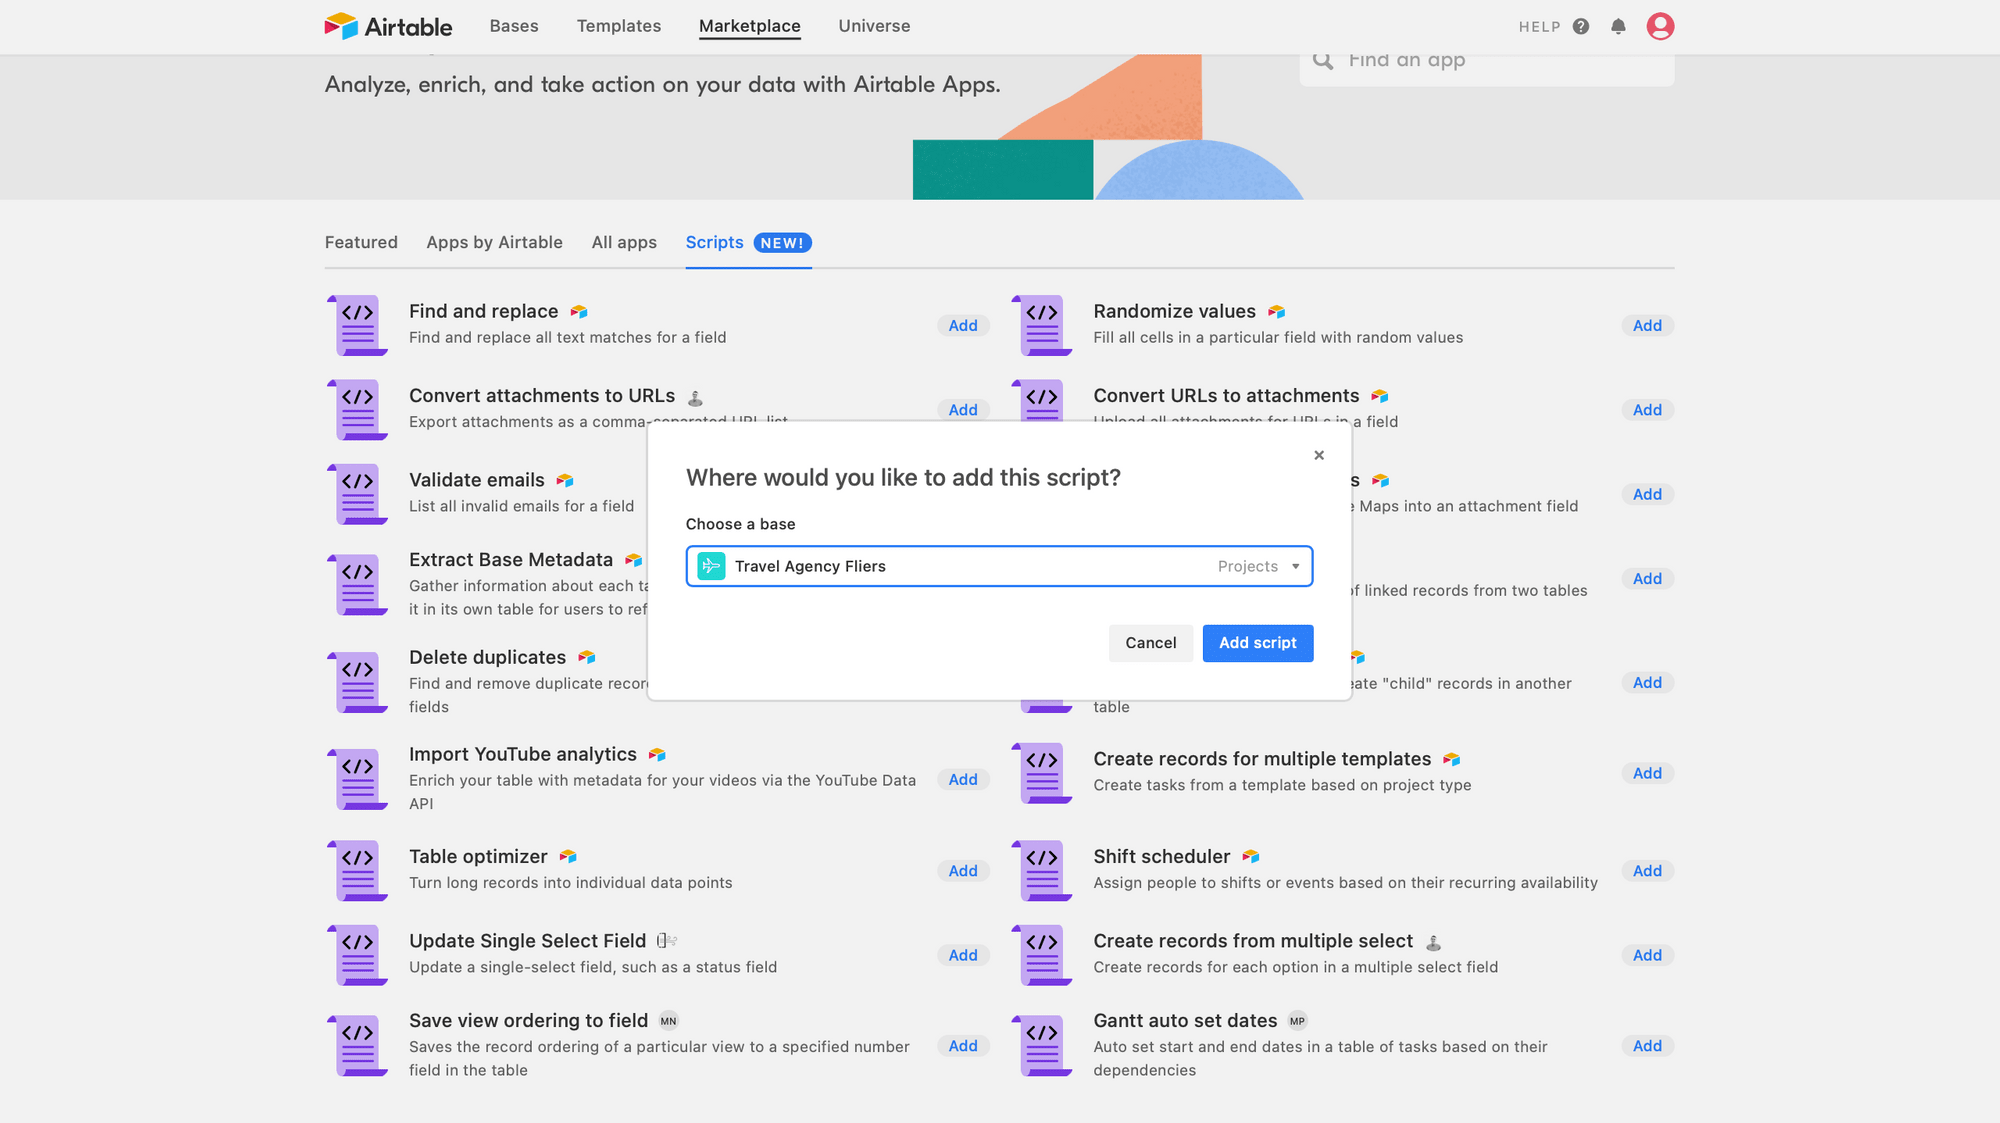
Alternatively you can install a pre-built script from Airtable apps marketplace. Visit the scripts section of the marketplace and browse through the available script templates. Add a script to your base and click the Add script button:
Running a script
When a script is run from a button field, the first recordAsync call in your script skips the prompt and automatically uses the record the button was clicked from.
To run a script, click the "Run" button in the right-hand results pane or "Run script" from a button field:
If you need to stop the executing script at any time, you can click the red "Stop" button in the upper right.
When the automation runs successfully, Bannerbear will respond with JPG and PNG formats of the new image you have requested:
That's it! Now you can use this field type to run scripts directly. This will make scripts more readily accessible and seamlessly integrated with their existing workflows.

Next Steps
This has been a quick intro into how to create an image on Bannerbear via this endpoint. The API is ready to accept your requests using the videos, collections, animated gifs, and screenshots endpoint - full API documentation can be found here. This technique will work with all of these media types!