Most property sales are a long game—weeks, even months of nurturing leads through a funnel before you ever sign papers. And long before negotiations begin, you need people through the (literal) door. Online marketing helps with that: showing what the property could mean for a buyer and their household, and acting as the first step in turning pre-qualified interest into booked viewings.
Flyers have their place, but static images don’t attract attention the way video does. The problem is time. Capturing footage, editing, designing a thumbnail, and assembling a finished video can take hours.
But what if you could skip that work? With one click in your database, your listing photos could become a polished video slideshow complete with a title animation and background music.
What You Will Create
This setup turns your listing records into finished video slideshows with minimal manual work. Your listing data—property details, photos, and everything else—stays in your database. Your animated template lives in Bannerbear, customized to your real estate brand. Once you’ve got an automated workflow set up, Zapier watches for a trigger in Airtable, tells Bannerbear to build a slideshow, adds music and animations, and returns the finished video to your listing record in moments.
Here are the tools we’re using:
- Airtable : To store listing data and trigger image generation
- Bannerbear: To design and render animated video slideshows at scale
- Zapier : To connect programs and automate the process
Every listing follows the same flow. Once a record is marked ready, the automation runs and the completed video appears back in your database. By the end of this tutorial, you’ll have an automated system that produces an animated property slideshow whenever you need it:
Now let’s build it.
How to Automate Animated Property Slideshows With Music
The workflow for generating slideshow videos doesn’t take long to set up, and it can be stacked with other workflows that require similar data—for example, real estate listing flyers. One click can equip you with all the materials you need to start advertising the properties on your roster.
Follow these steps to set it all up:
1 - Customize An Airtable Database
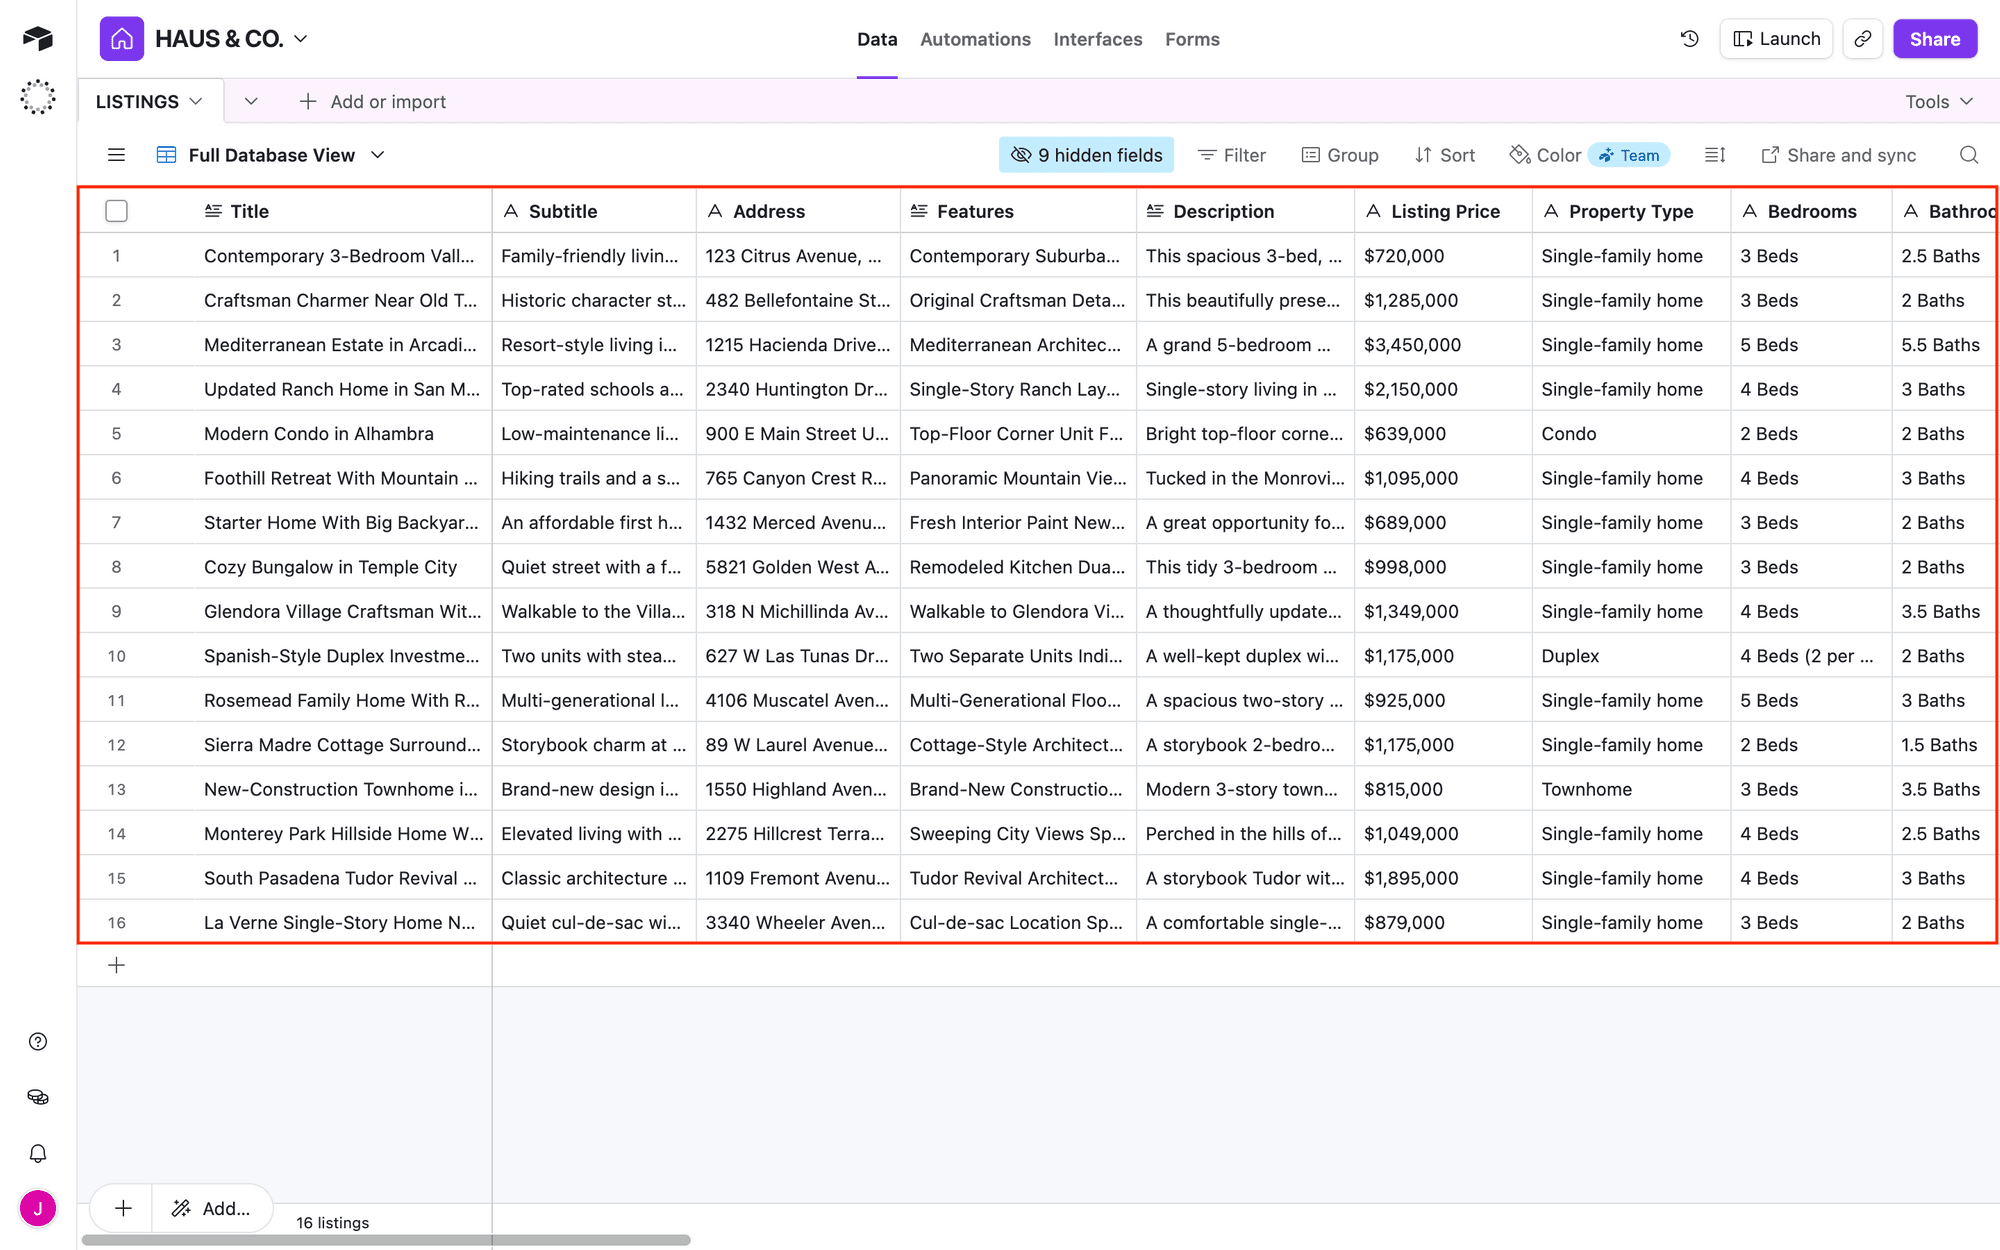
Prepare a base that holds everything your slideshow will need. You can build one from scratch or add fields to an existing base. Include fields for all of your data, including:
- Property titles, prices, addresses, and other details
- Photo fields (attachments or URLs—either works)
- A URL field to store generated video links
- A checkbox field to act as a manual “ready” trigger
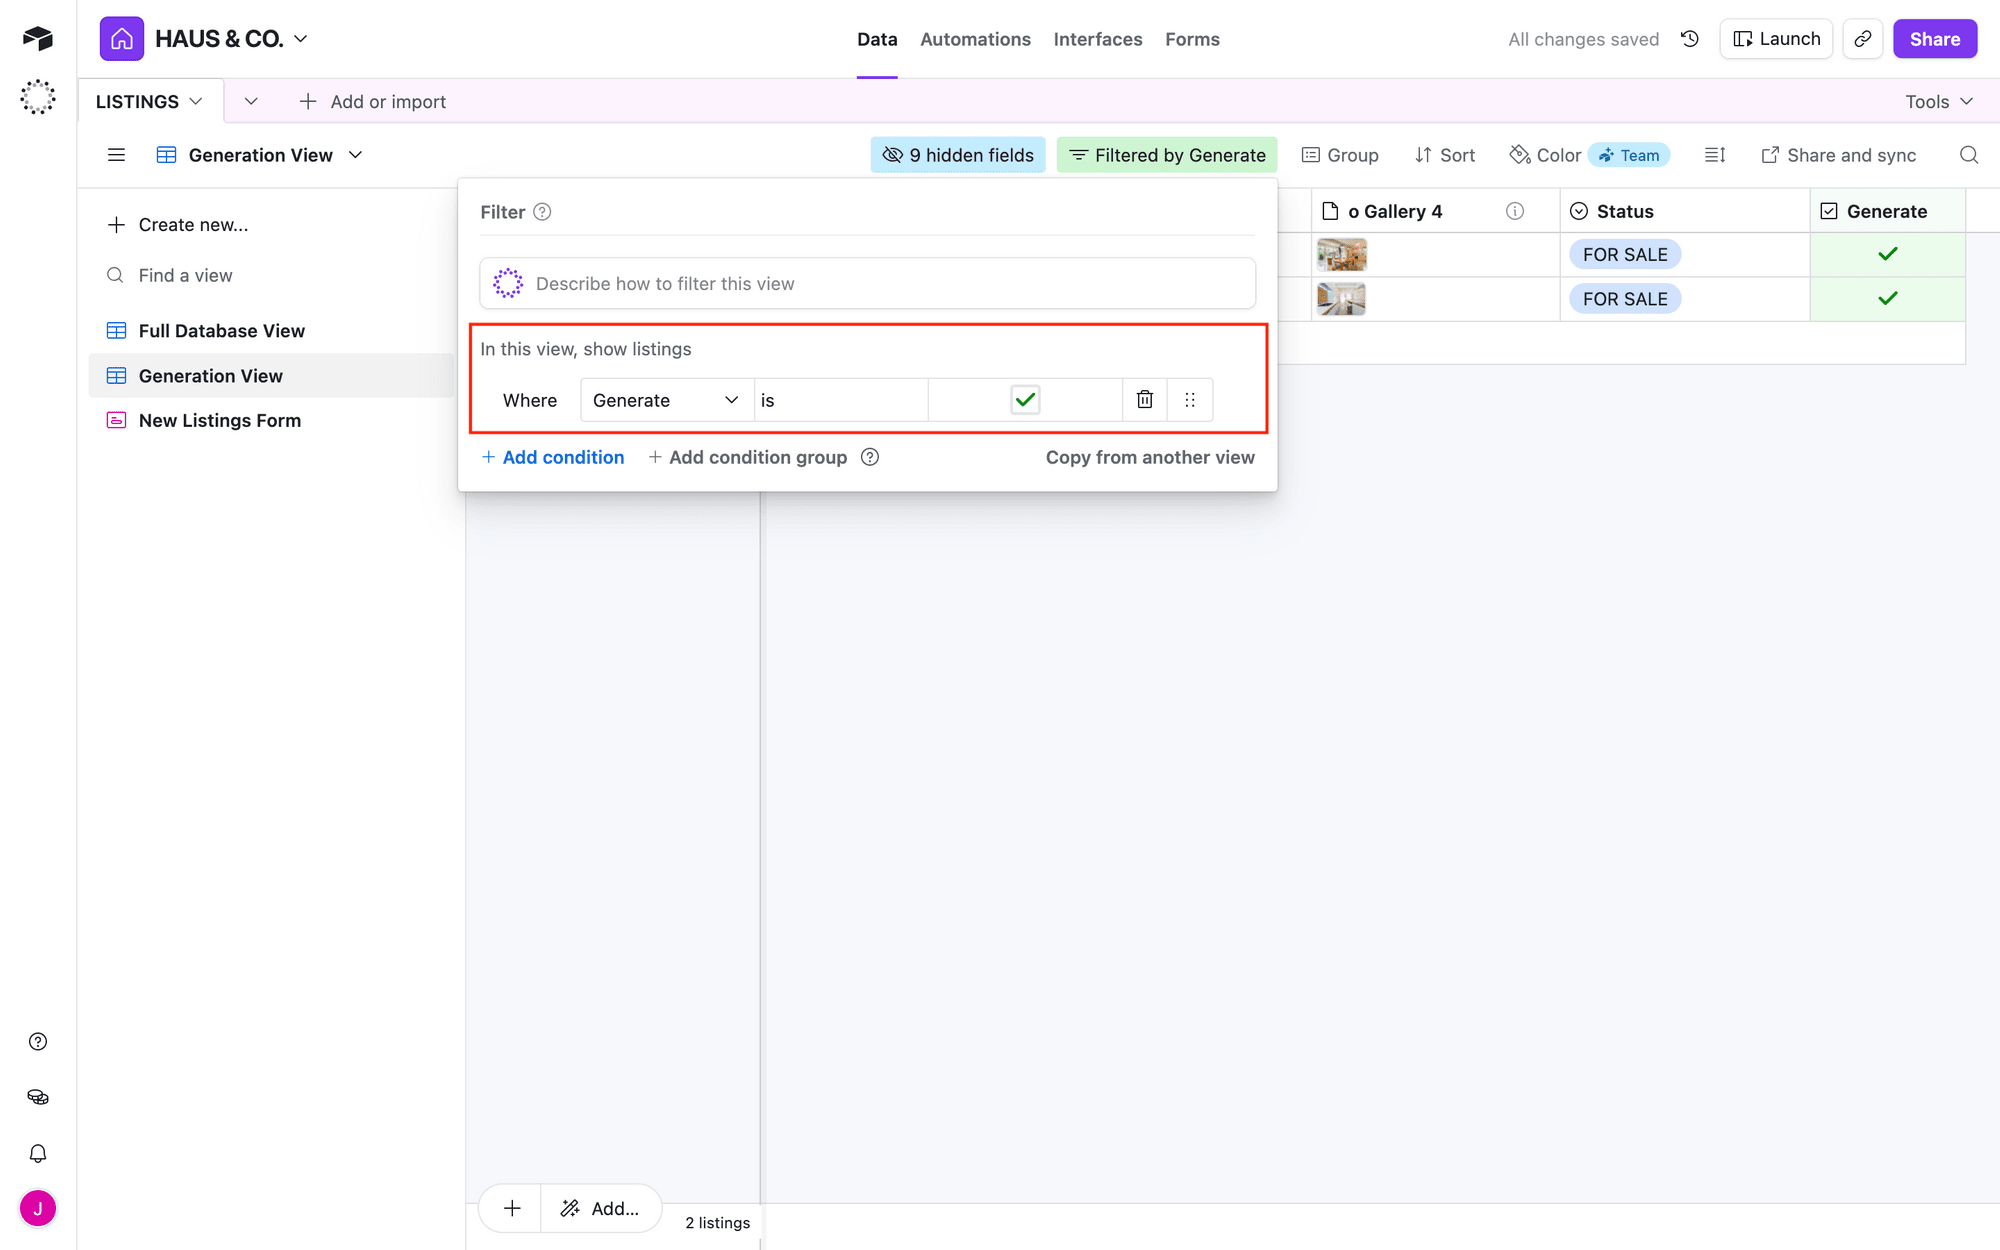
Use the checkbox to mark a listing when it’s ready for production. Then, create a view filtered to show only records where that checkbox is checked. This will be the view Zapier watches to trigger video generation.
Fill out at least one record to use for testing before continuing to the next step.
2 - Design a Bannerbear Animation Template
A short title animation helps introduce each property and gives the slideshow a polished, dynamic opening.
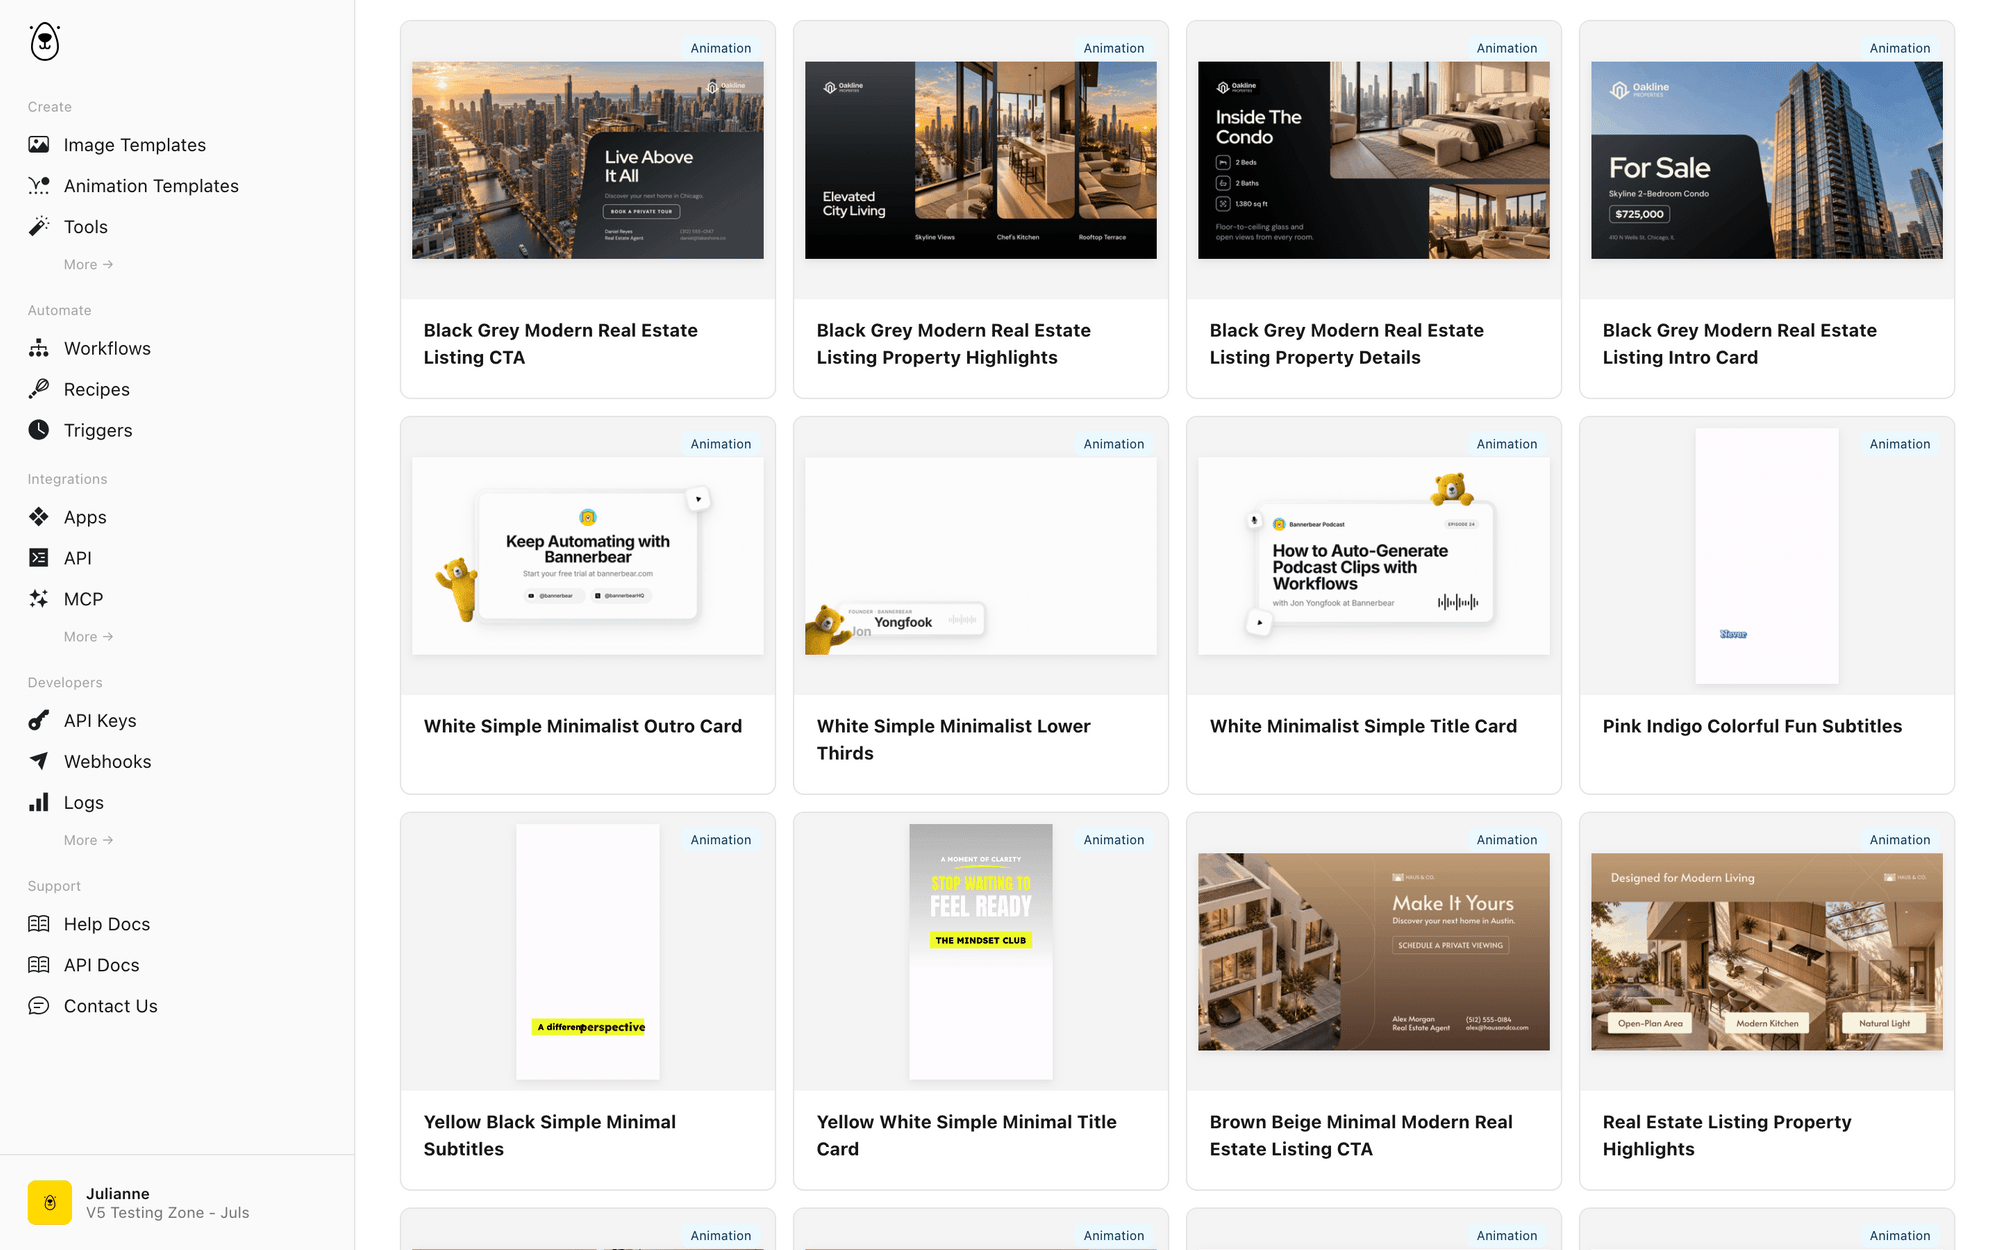
Log into your Bannerbear account, and click Animation Templates under the Create tab.
You can start from scratch, convert an image template, or pick a ready-made design from the library.
Once you’ve opened a template in the editor, build your scene by adding layers—text, shapes, images—and use keyframes to control timing, position, and movement for each element.
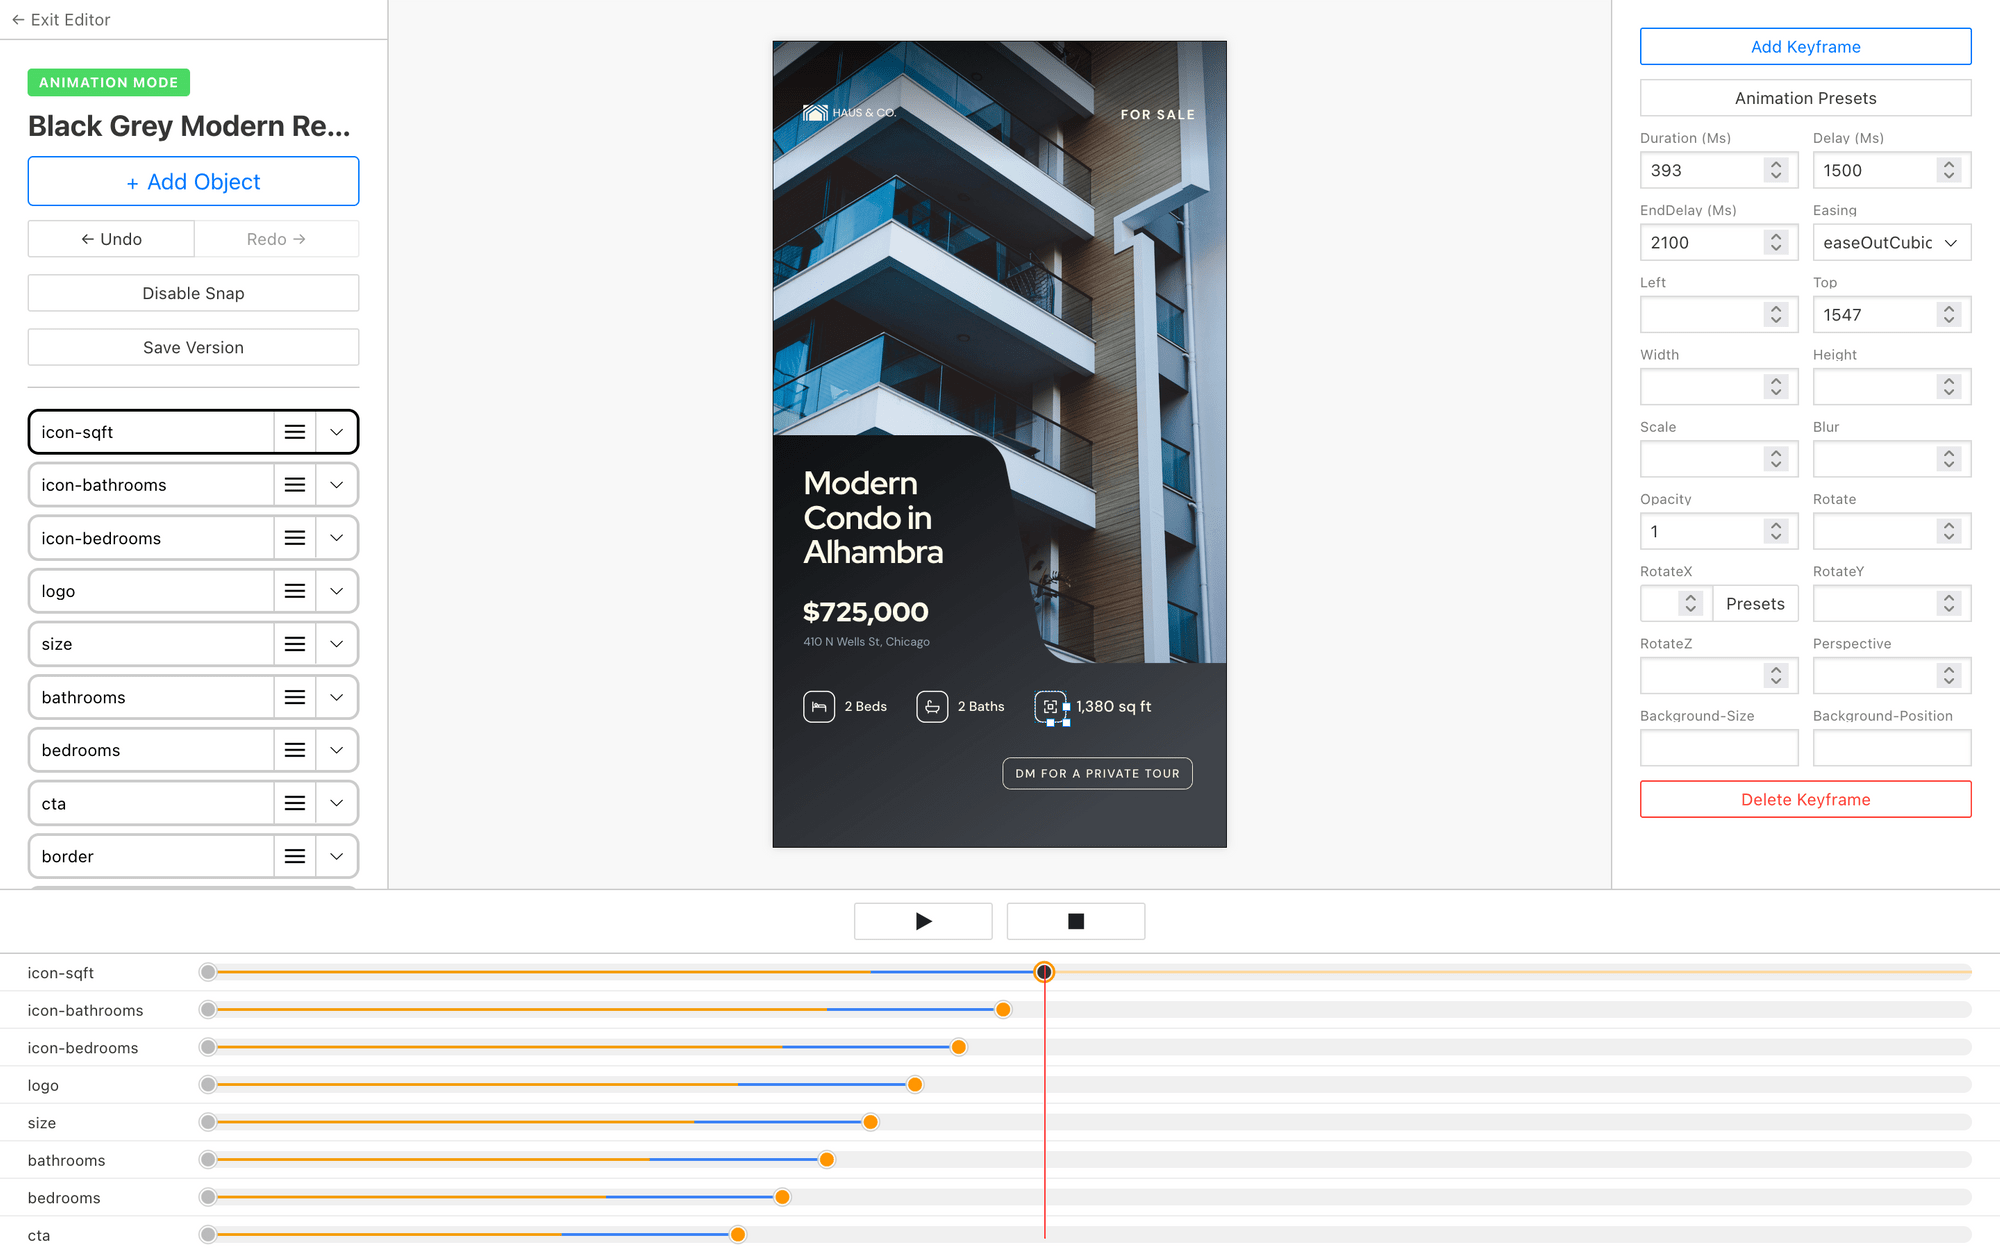
You can also get started more quickly by using the AI Animate feature; it applies basic motion automatically so you can refine instead of building every animation from zero.
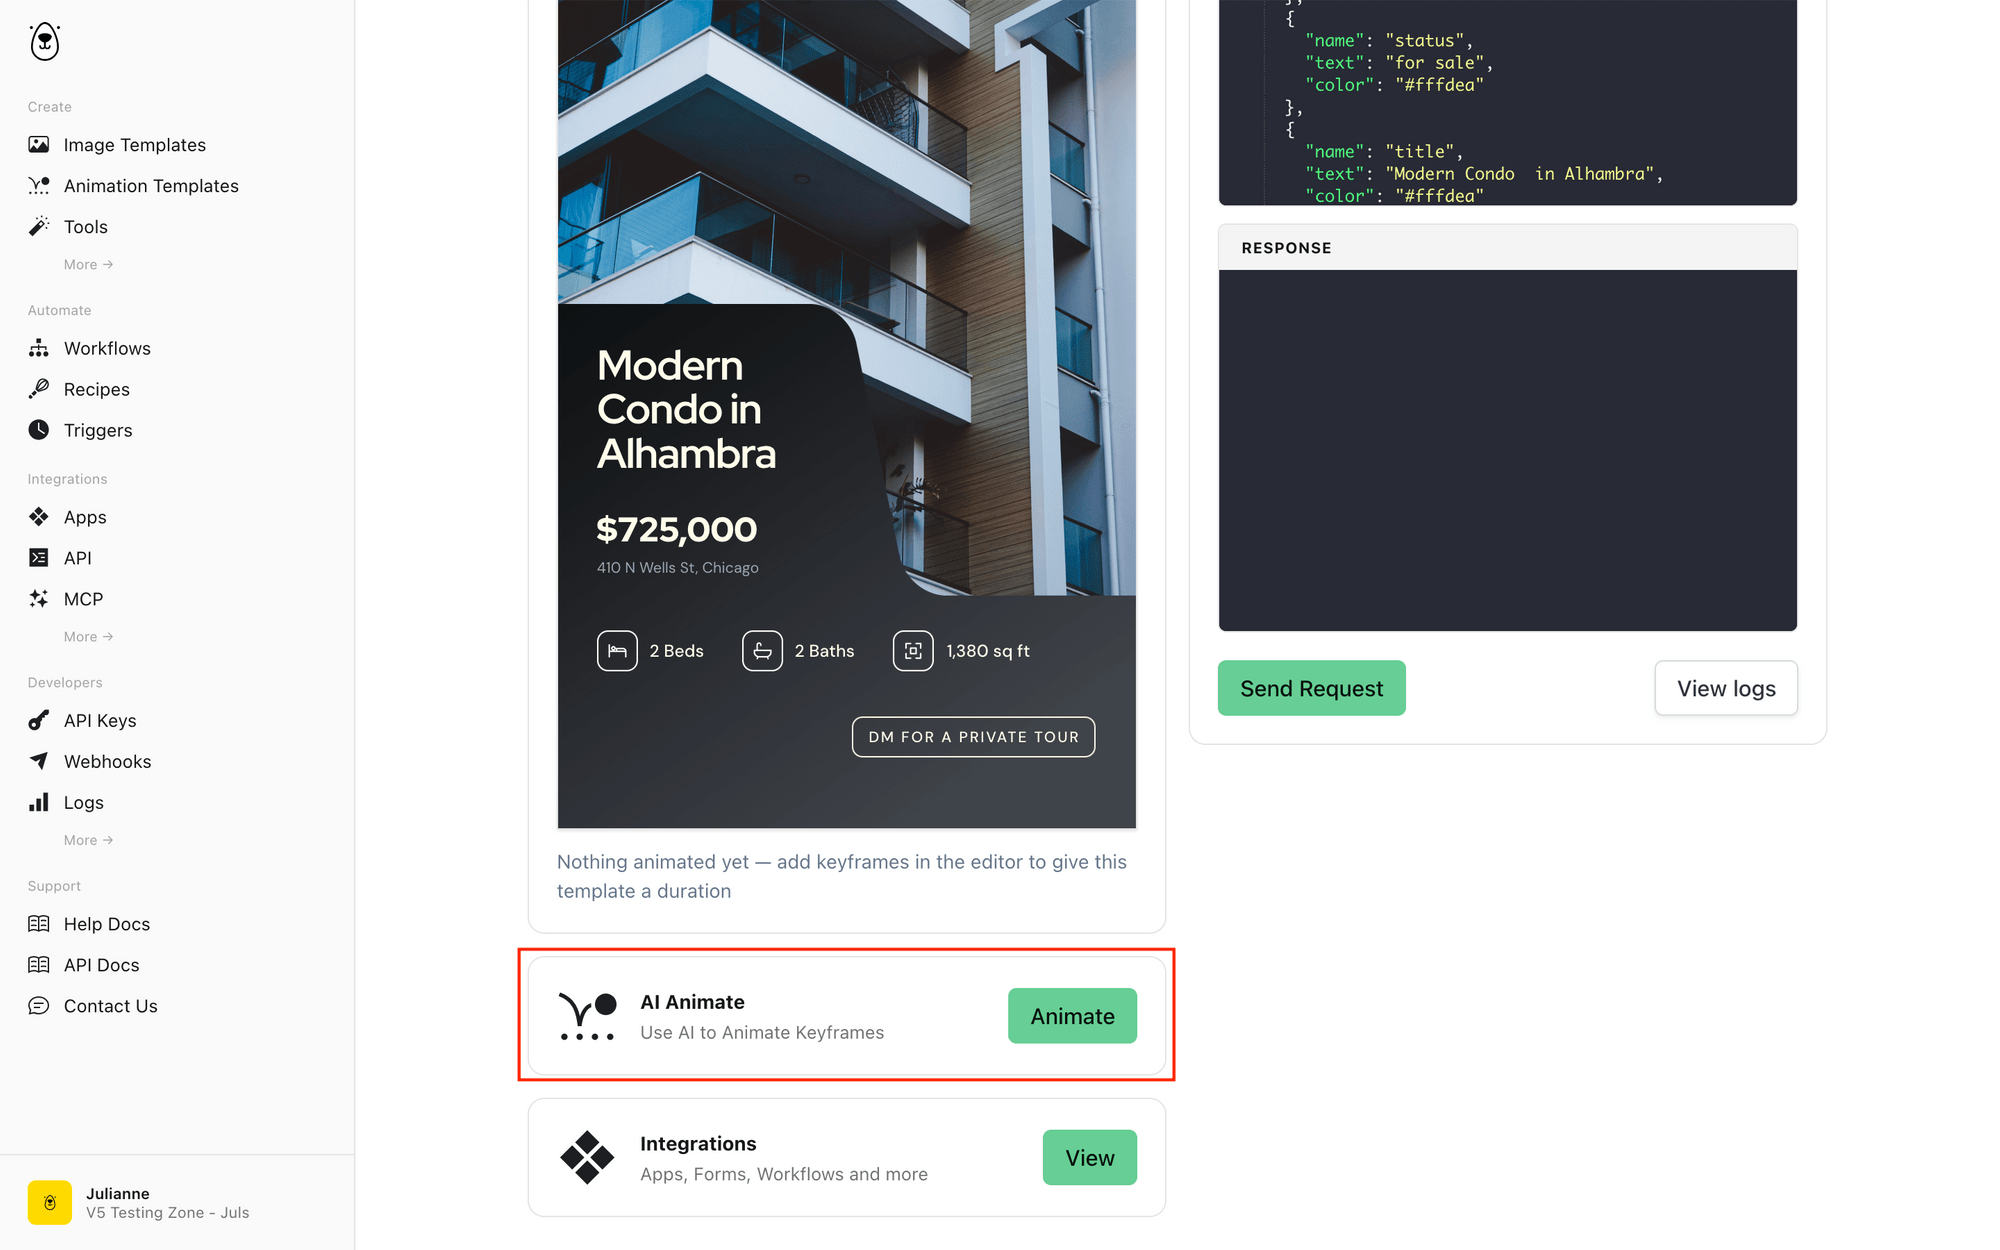
Preview your animation as you tweak layers and keyframes. When the timing and visuals match your vision, you’re ready to move on to the workflow setup.
3 - Set Up a Bannerbear Workflow
Bannerbear Workflow lets you chain image, video, and animation actions into one single pipeline.
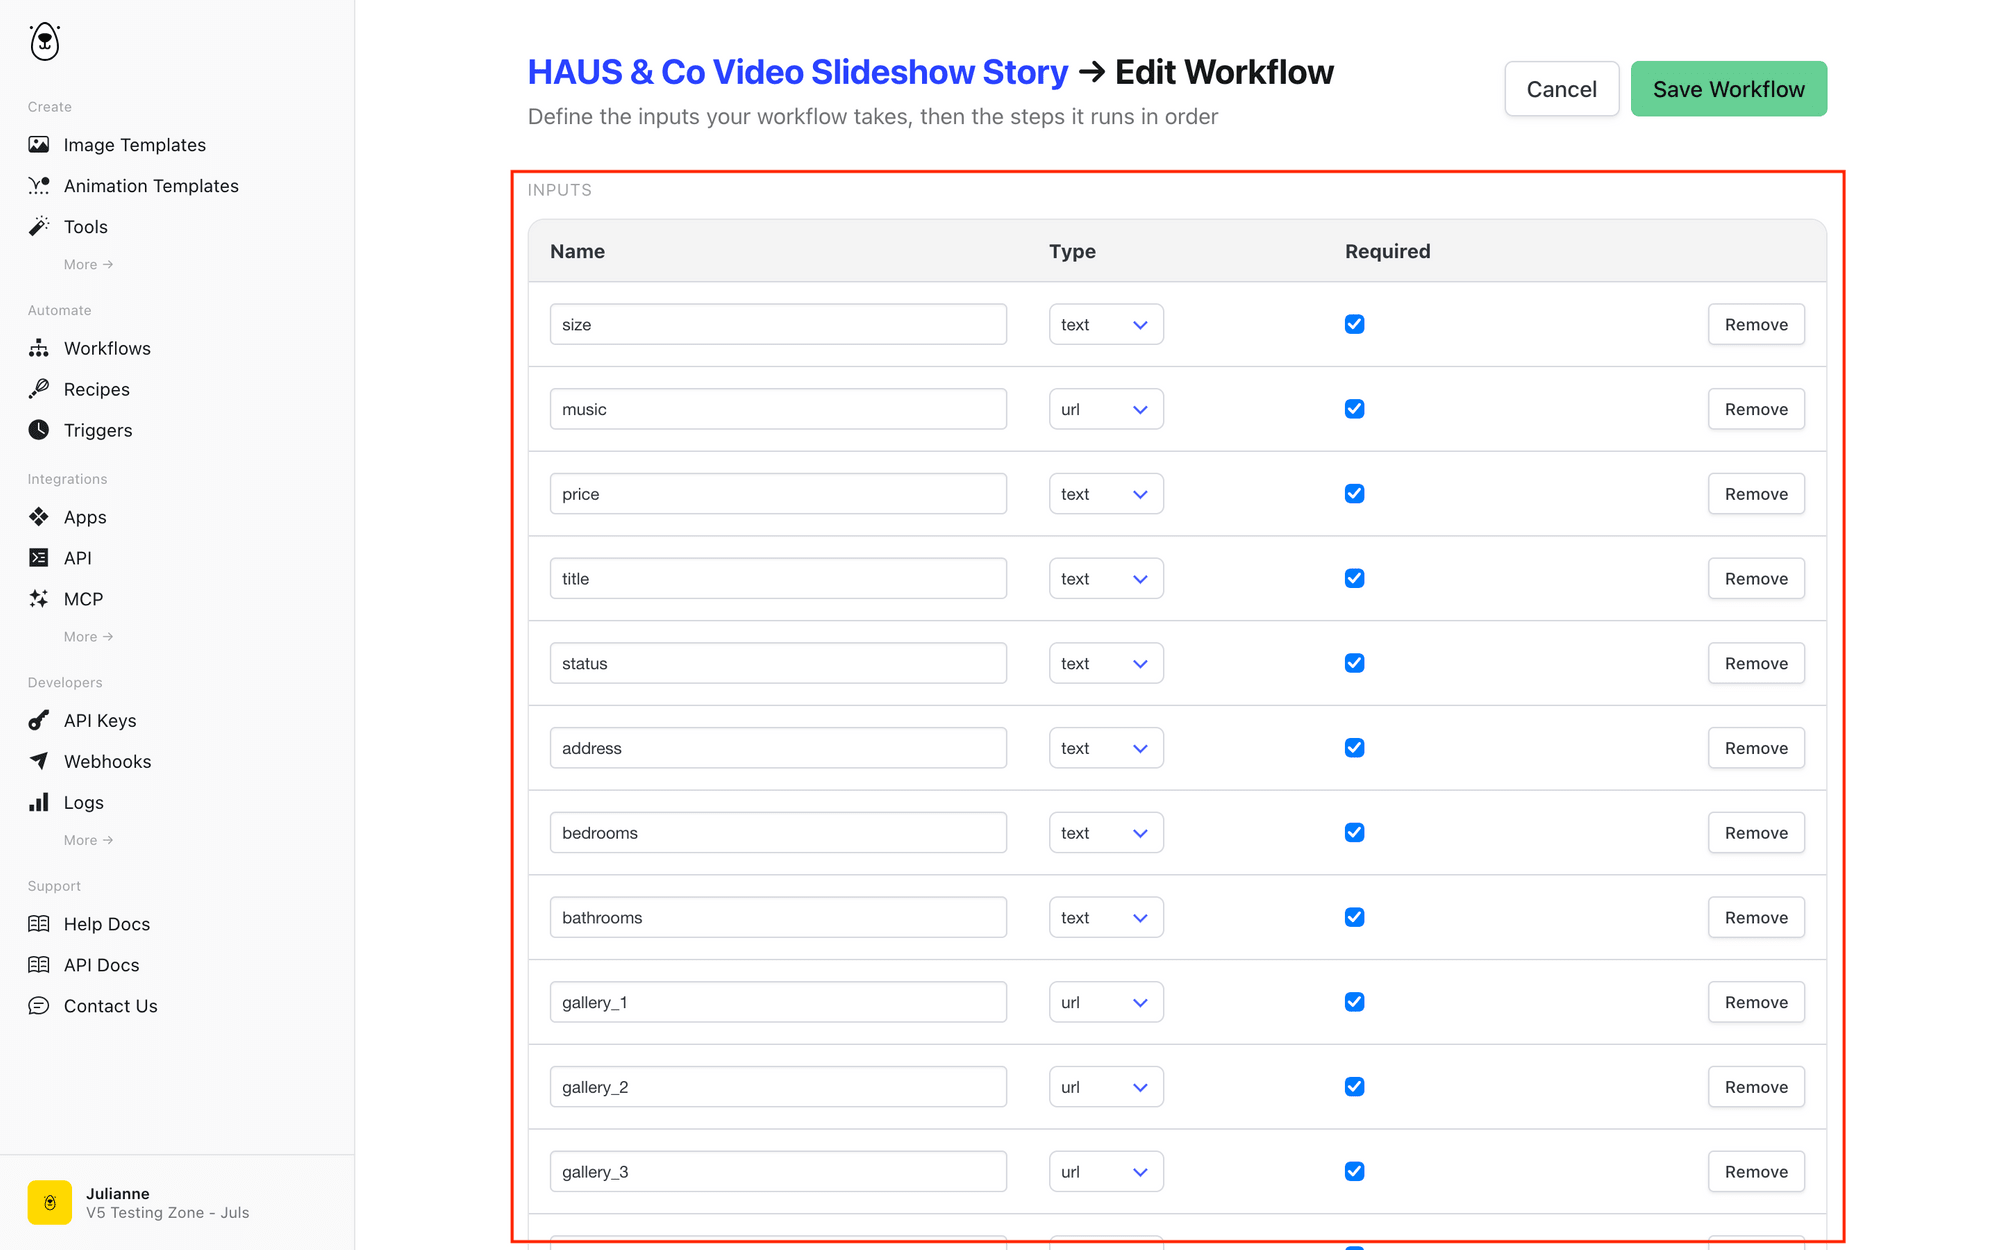
In the Workflows tab, create a new workflow and define the inputs the pipeline will need. For this example, we’ll use the following:
- Size (text)
- Music (url)
- Price (text)
- Title (text)
- Status (text)
- Address (text)
- Bedrooms (text)
- Bathrooms (text)
- Gallery 1-4 (url)
- Highlight image (url)
With inputs defined, build the workflow steps. This example renders a title animation, generates an image slideshow, crops and watermarks the video, and then joins everything together with music. Here’s the 6-step setup:
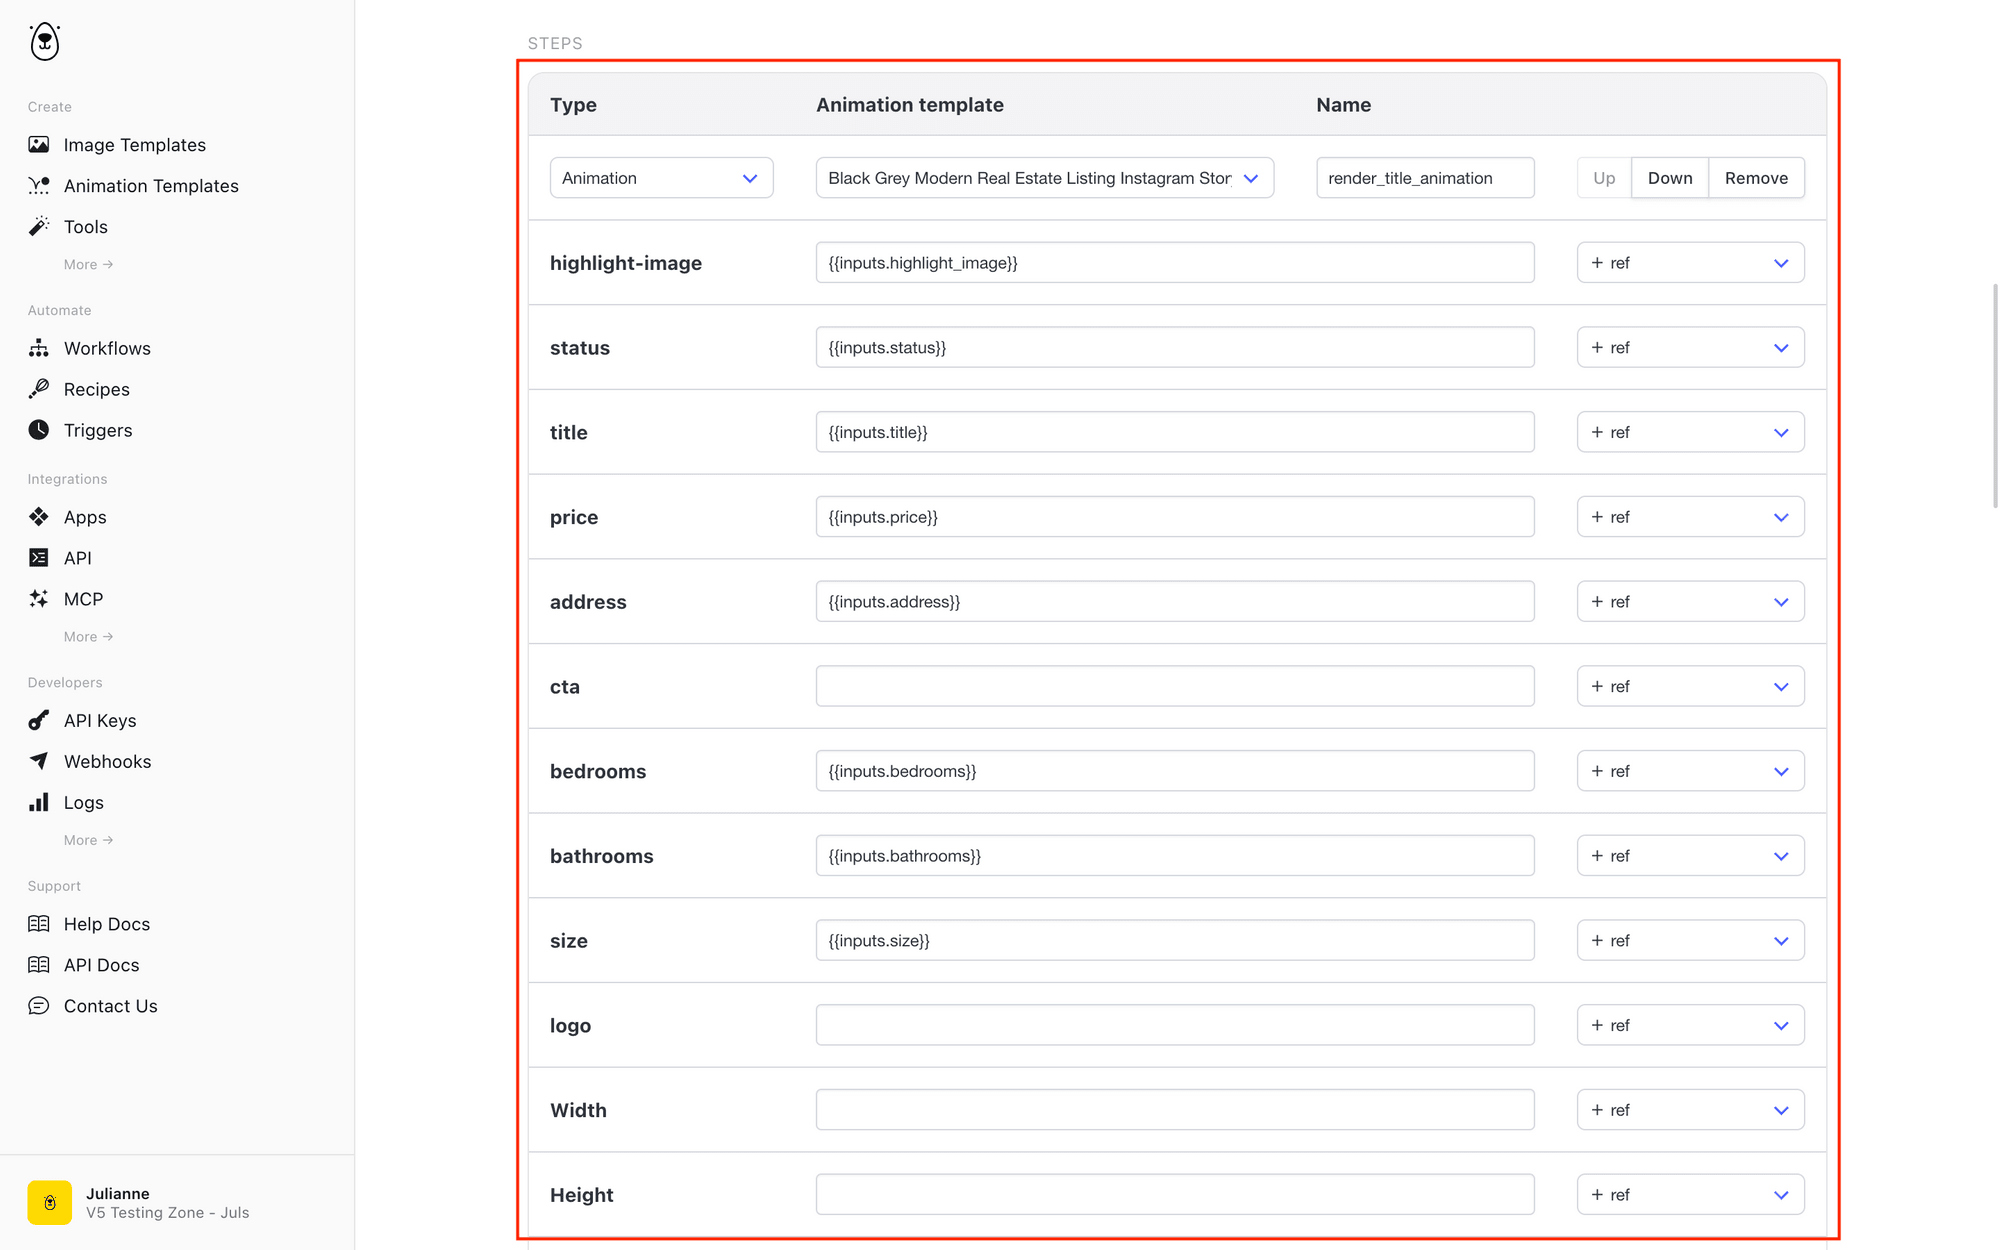
Step 1 - Render Title Animation
Add a Render title animation step and select the template you designed. Click + ref to reference each input field matching your template layers. If there are any static values, insert them directly.
Step 2 - Create Video Slideshow
Add a Create video slideshow tool step. In the Image URLs section, add links to all of the images you’d like to include.
Set the slideshow timing to match your preferred pacing. For this guide we used:
- Seconds per slide :
6 - Transition :
slideleft - Transition (seconds):
2
Insert your desired output width and height as well.
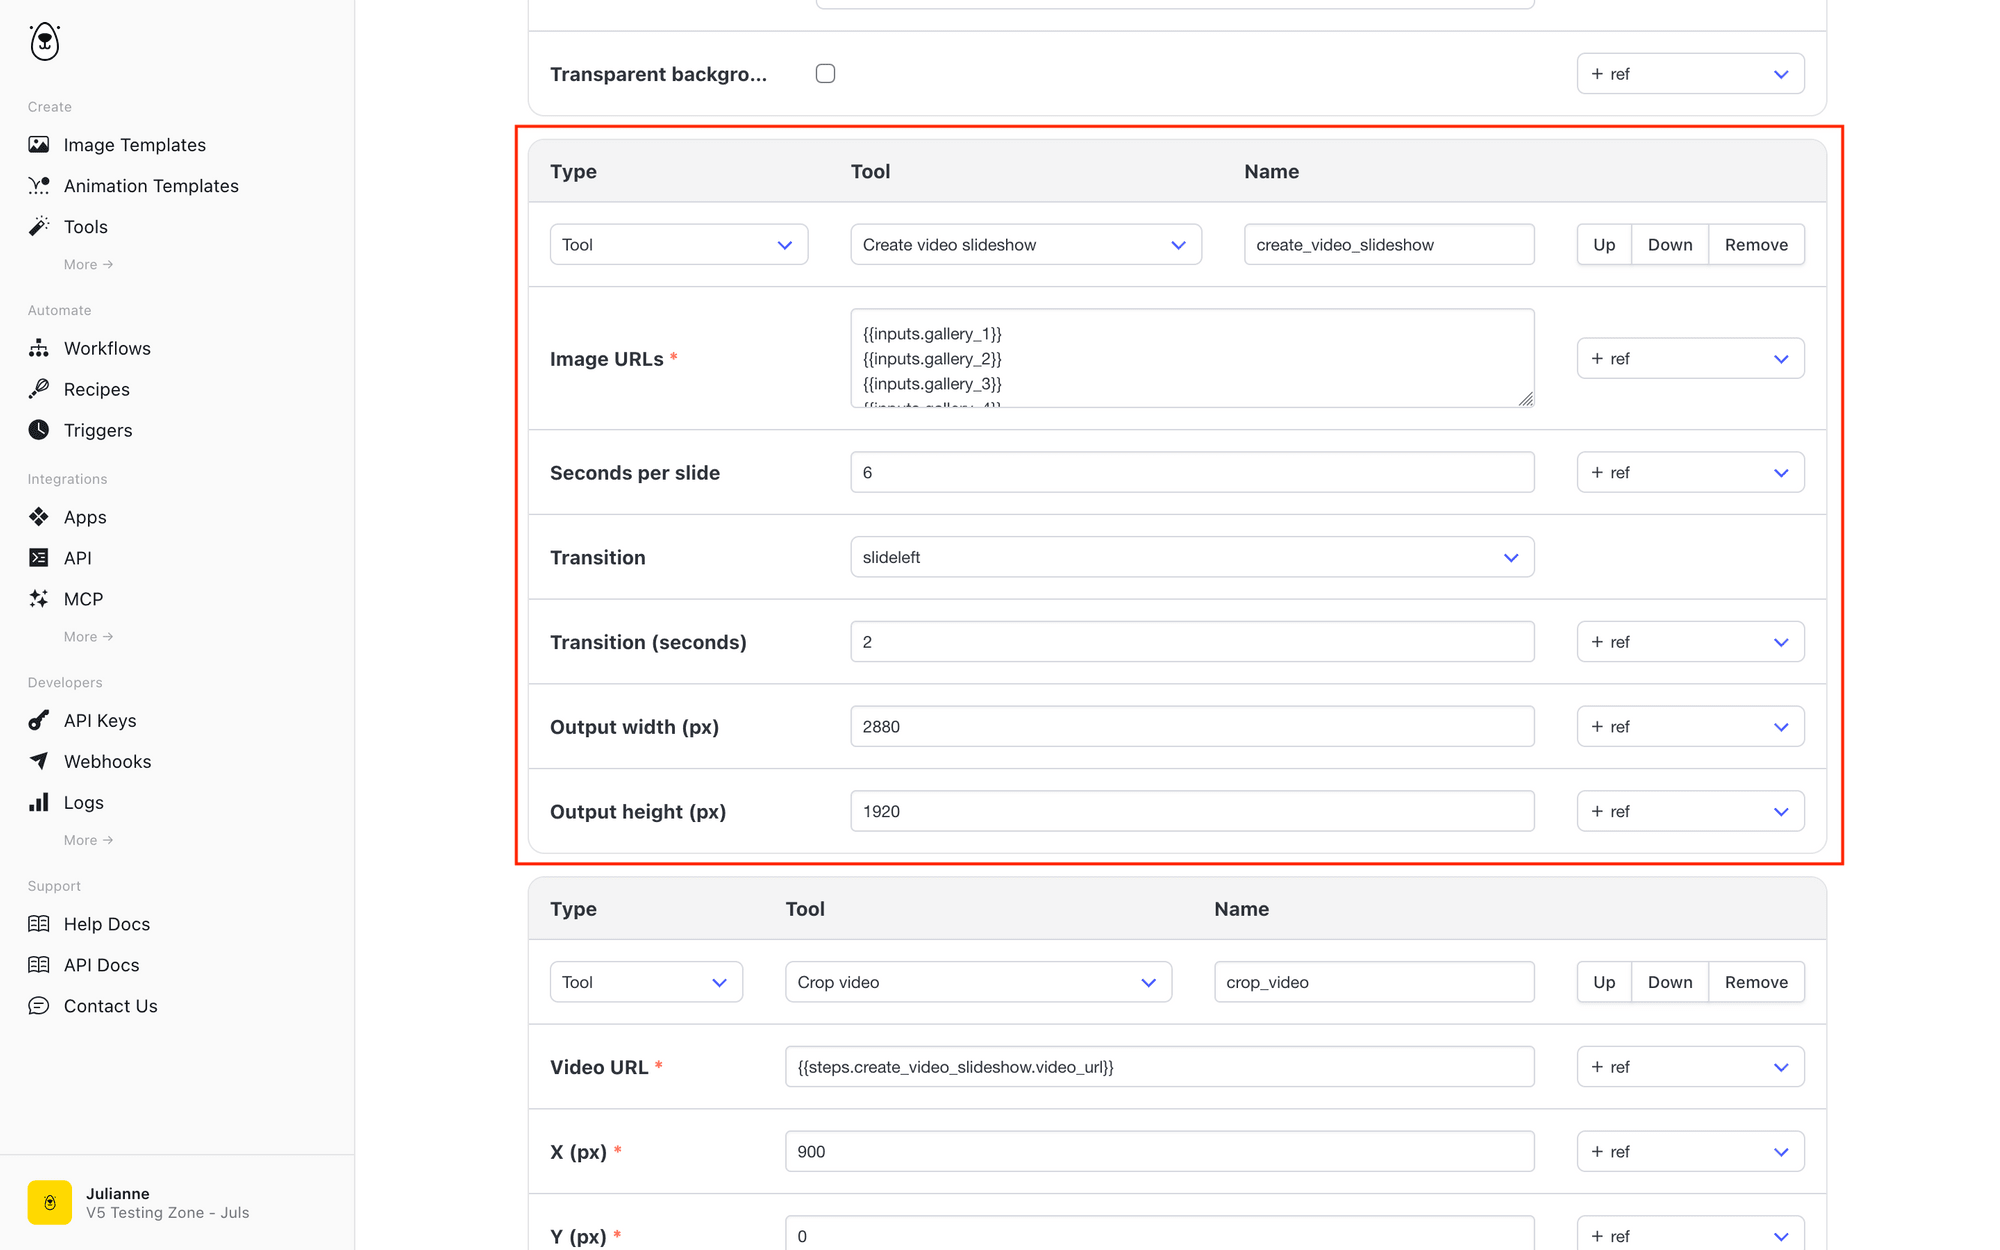
Bear Tip 🐻: To preserve the highest photo quality in your slideshow, make sure your output sizes at this step are at least as large as your final video.
Step 3 - Crop Video
Add a Crop video step and reference the slideshow output from Step 2. Set X (px) and Y (px) to define where the crop begins, and enter the desired output width and height.
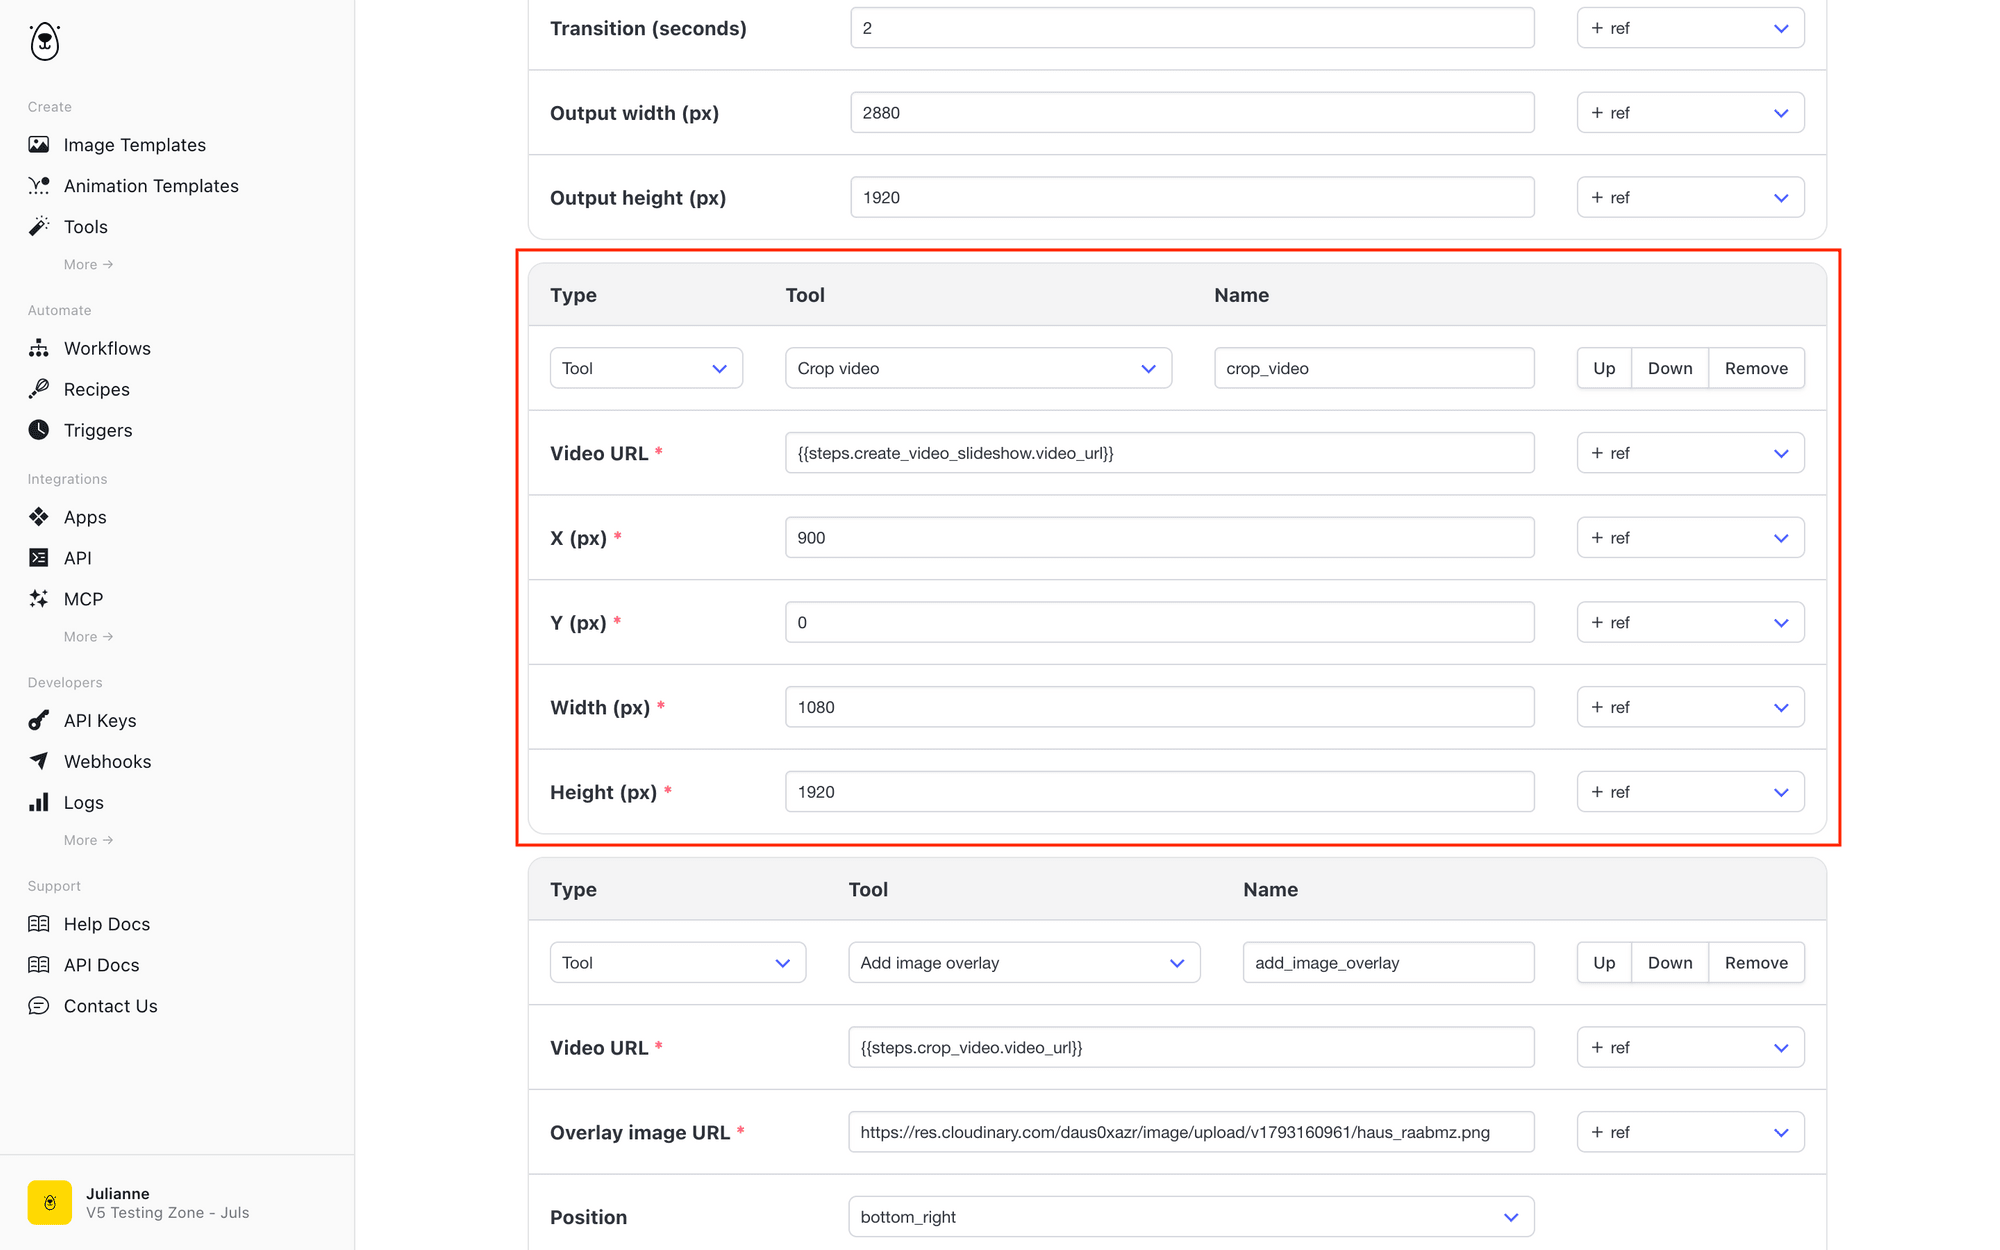
Bear Tip 🐻: If you want the crop centered, take the original width/height, subtract the final width/height, then divide by two to get X and Y.
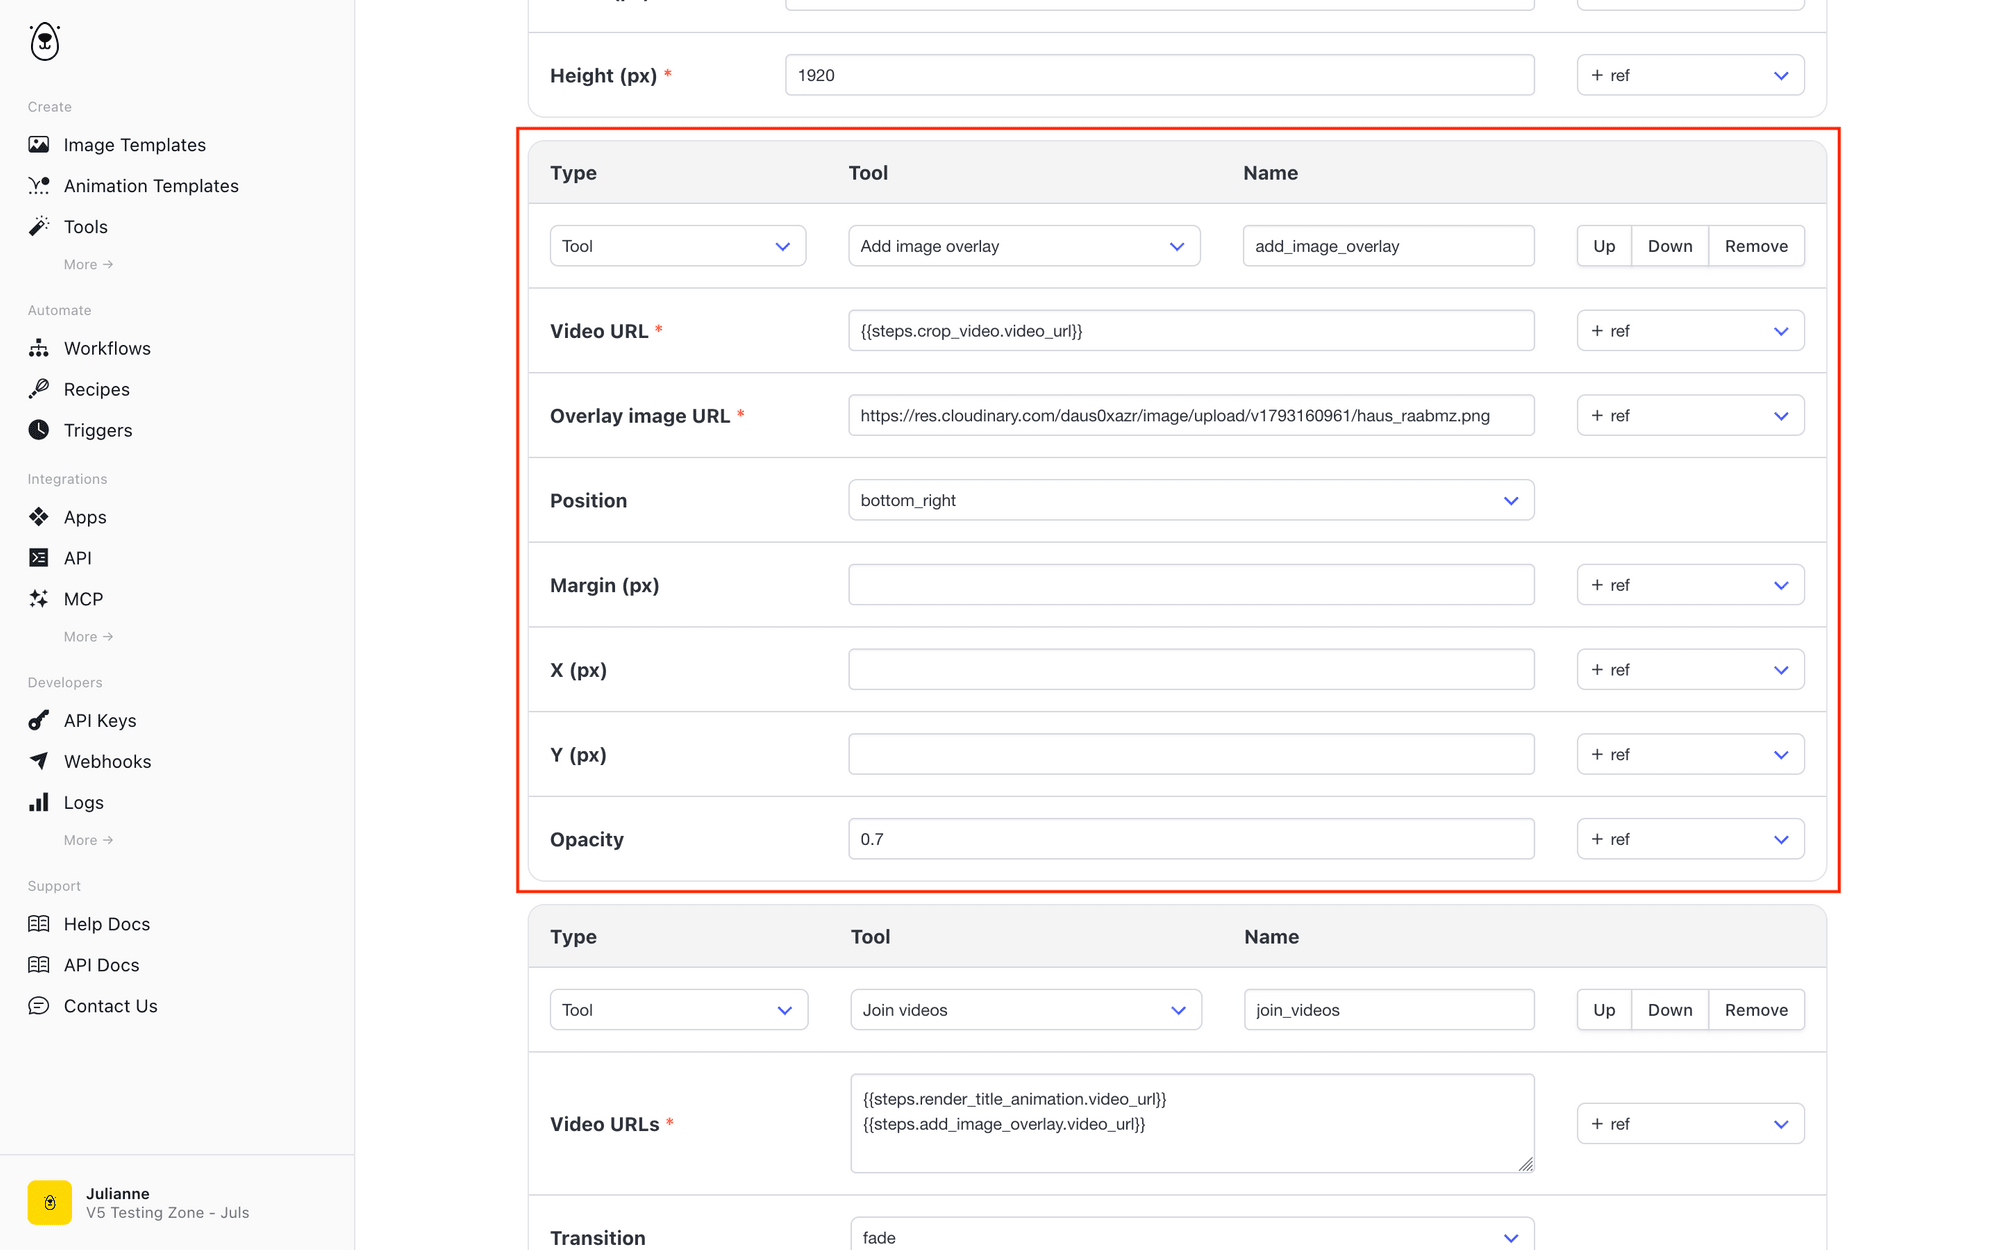
Step 4 - Add Image Overlay
Add an Image overlay step and reference the cropped video from the previous step. Provide the URL for your logo or watermark. Position it, size it as needed, and reduce opacity to 0.7 so it’s visible but unobtrusive.
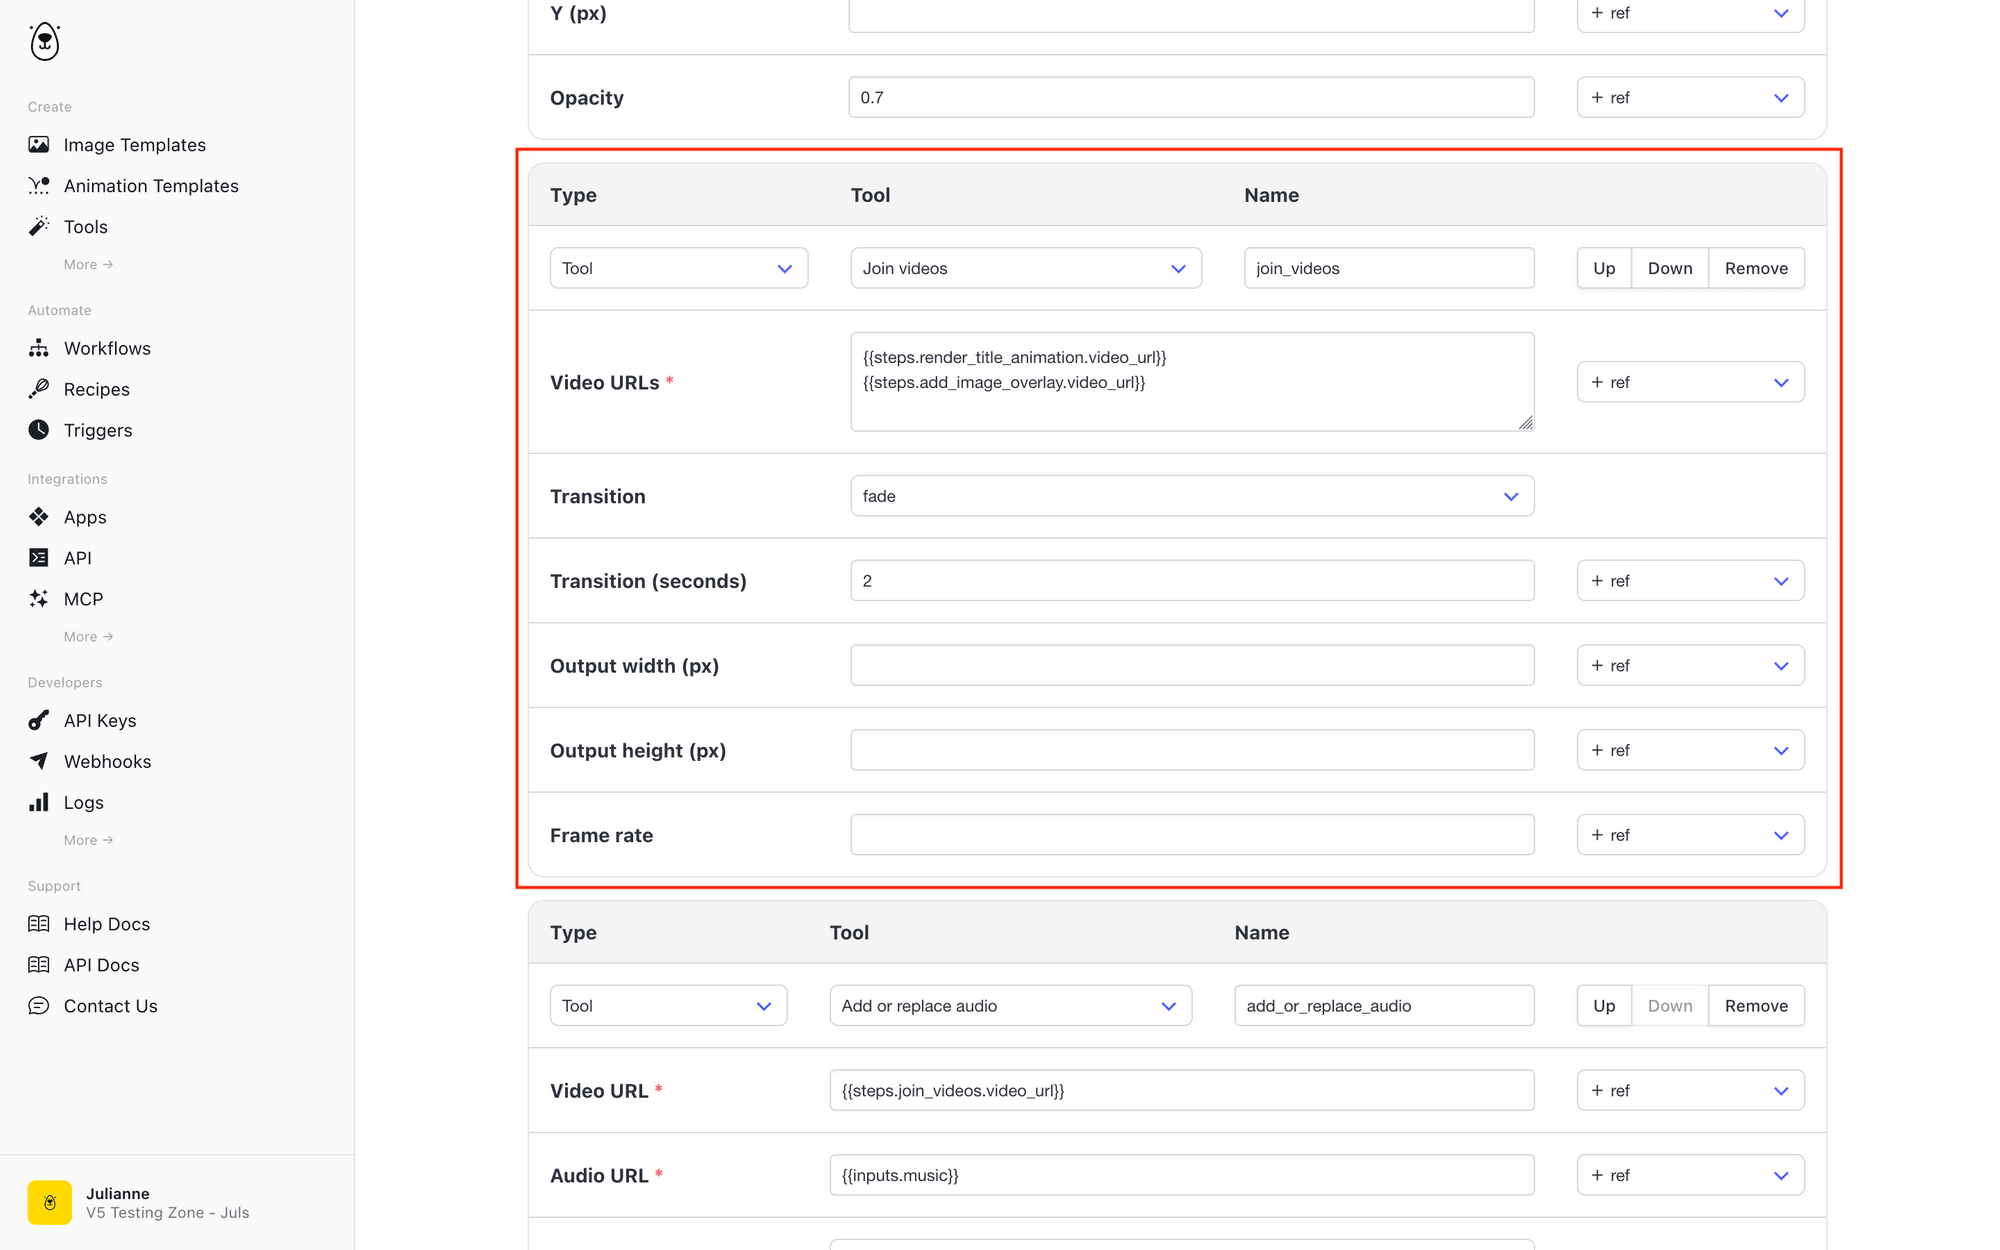
Step 5 - Join Videos
Add a Join videos step and reference the title animation from Step 1 and the watermarked slideshow from Step 4. Set a 2-second fade transition to move from title to slideshow.
Step 6 - Add or Replace Audio
Add an Add or replace audio step. Reference the joined video from Step 5 and map to your audio URL input. Use the Replace mode to ensure the final file contains your chosen background track.
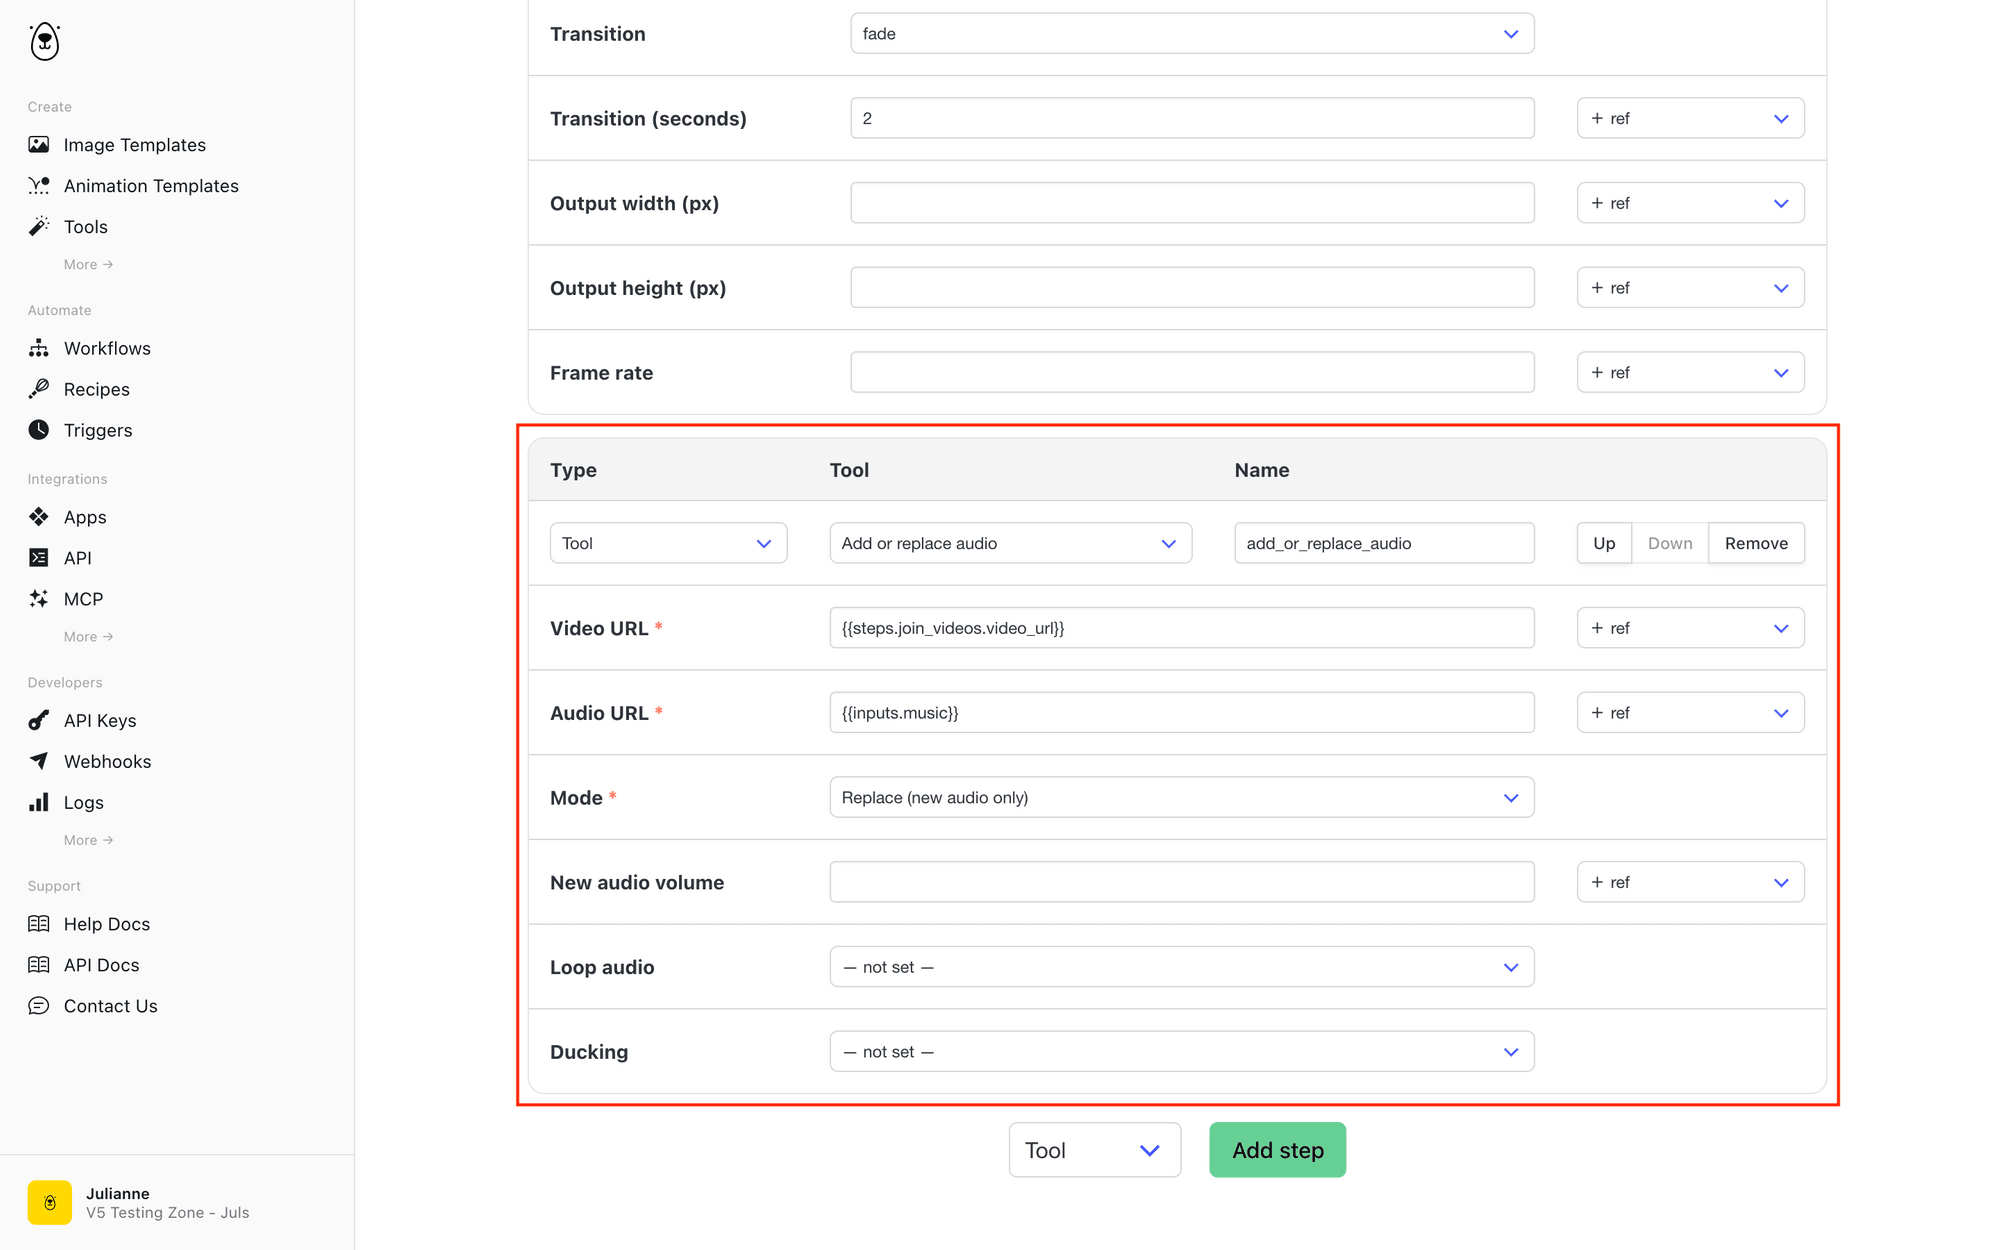
Save the workflow. At this point, it is able to take listing inputs, render an animated opener, build and format a slideshow, watermark it, join the pieces, and attach the selected audio—producing a completed property video ready to return to your database.
4 - Create a Zap to Generate a Video Slideshow
We have data and a workflow. Zapier ties the two together so videos are produced as soon as fresh data is ready.
Create a new Zap and set up the following steps:
Trigger: New Record in Airtable
Add an Airtable trigger and select New Record. Connect your account if needed.
Set the event up by selecting your base, table, and the filtered view you created earlier.
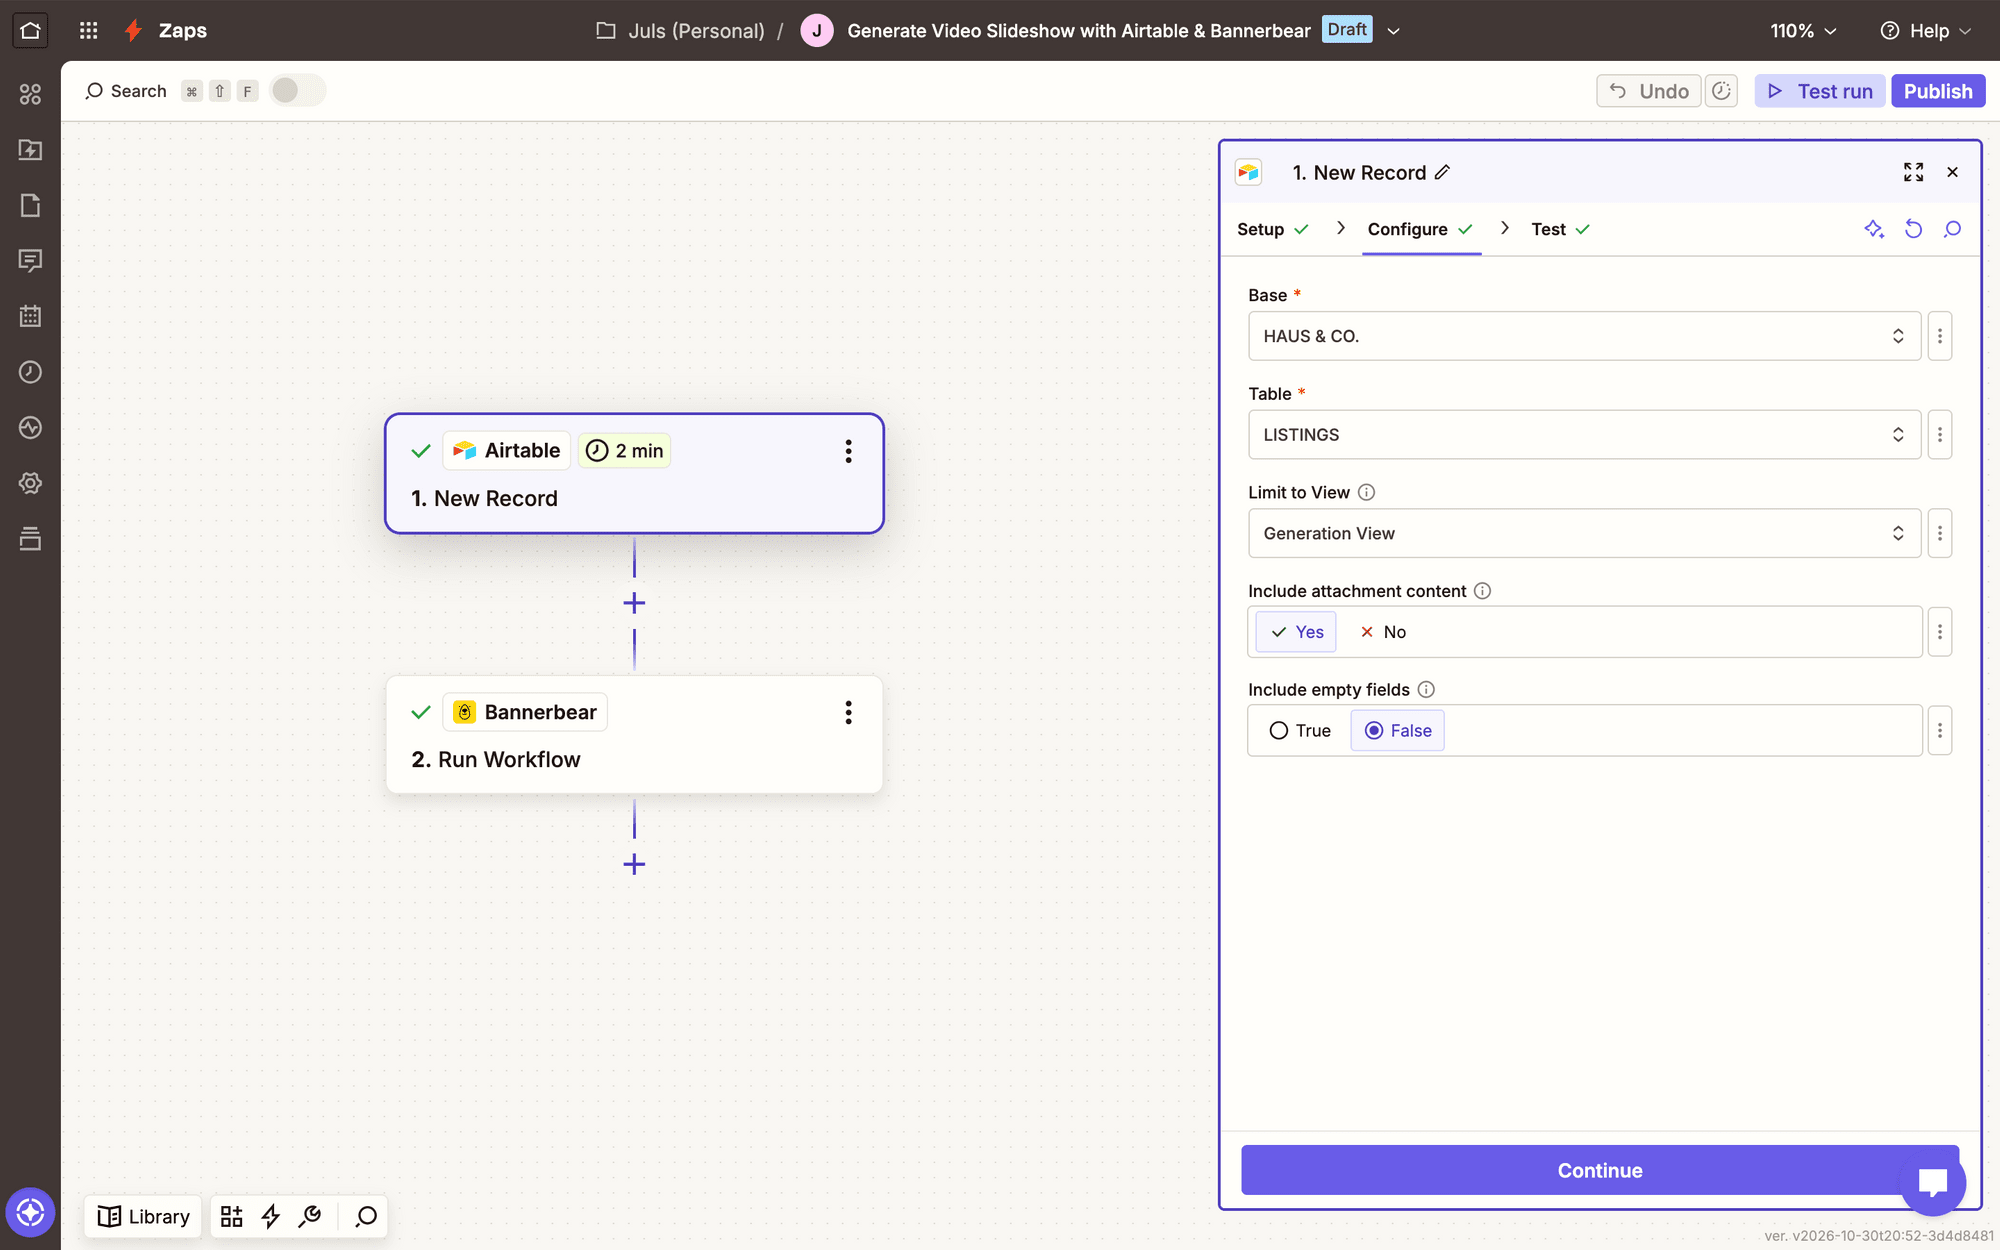
If some of your data is in the form of attachments, check Yes in the field to include them.
Test the event.
Action: Run Workflow in Bannerbear
Add a Bannerbear action and select Run Workflow. Connect your account with an API key if needed.
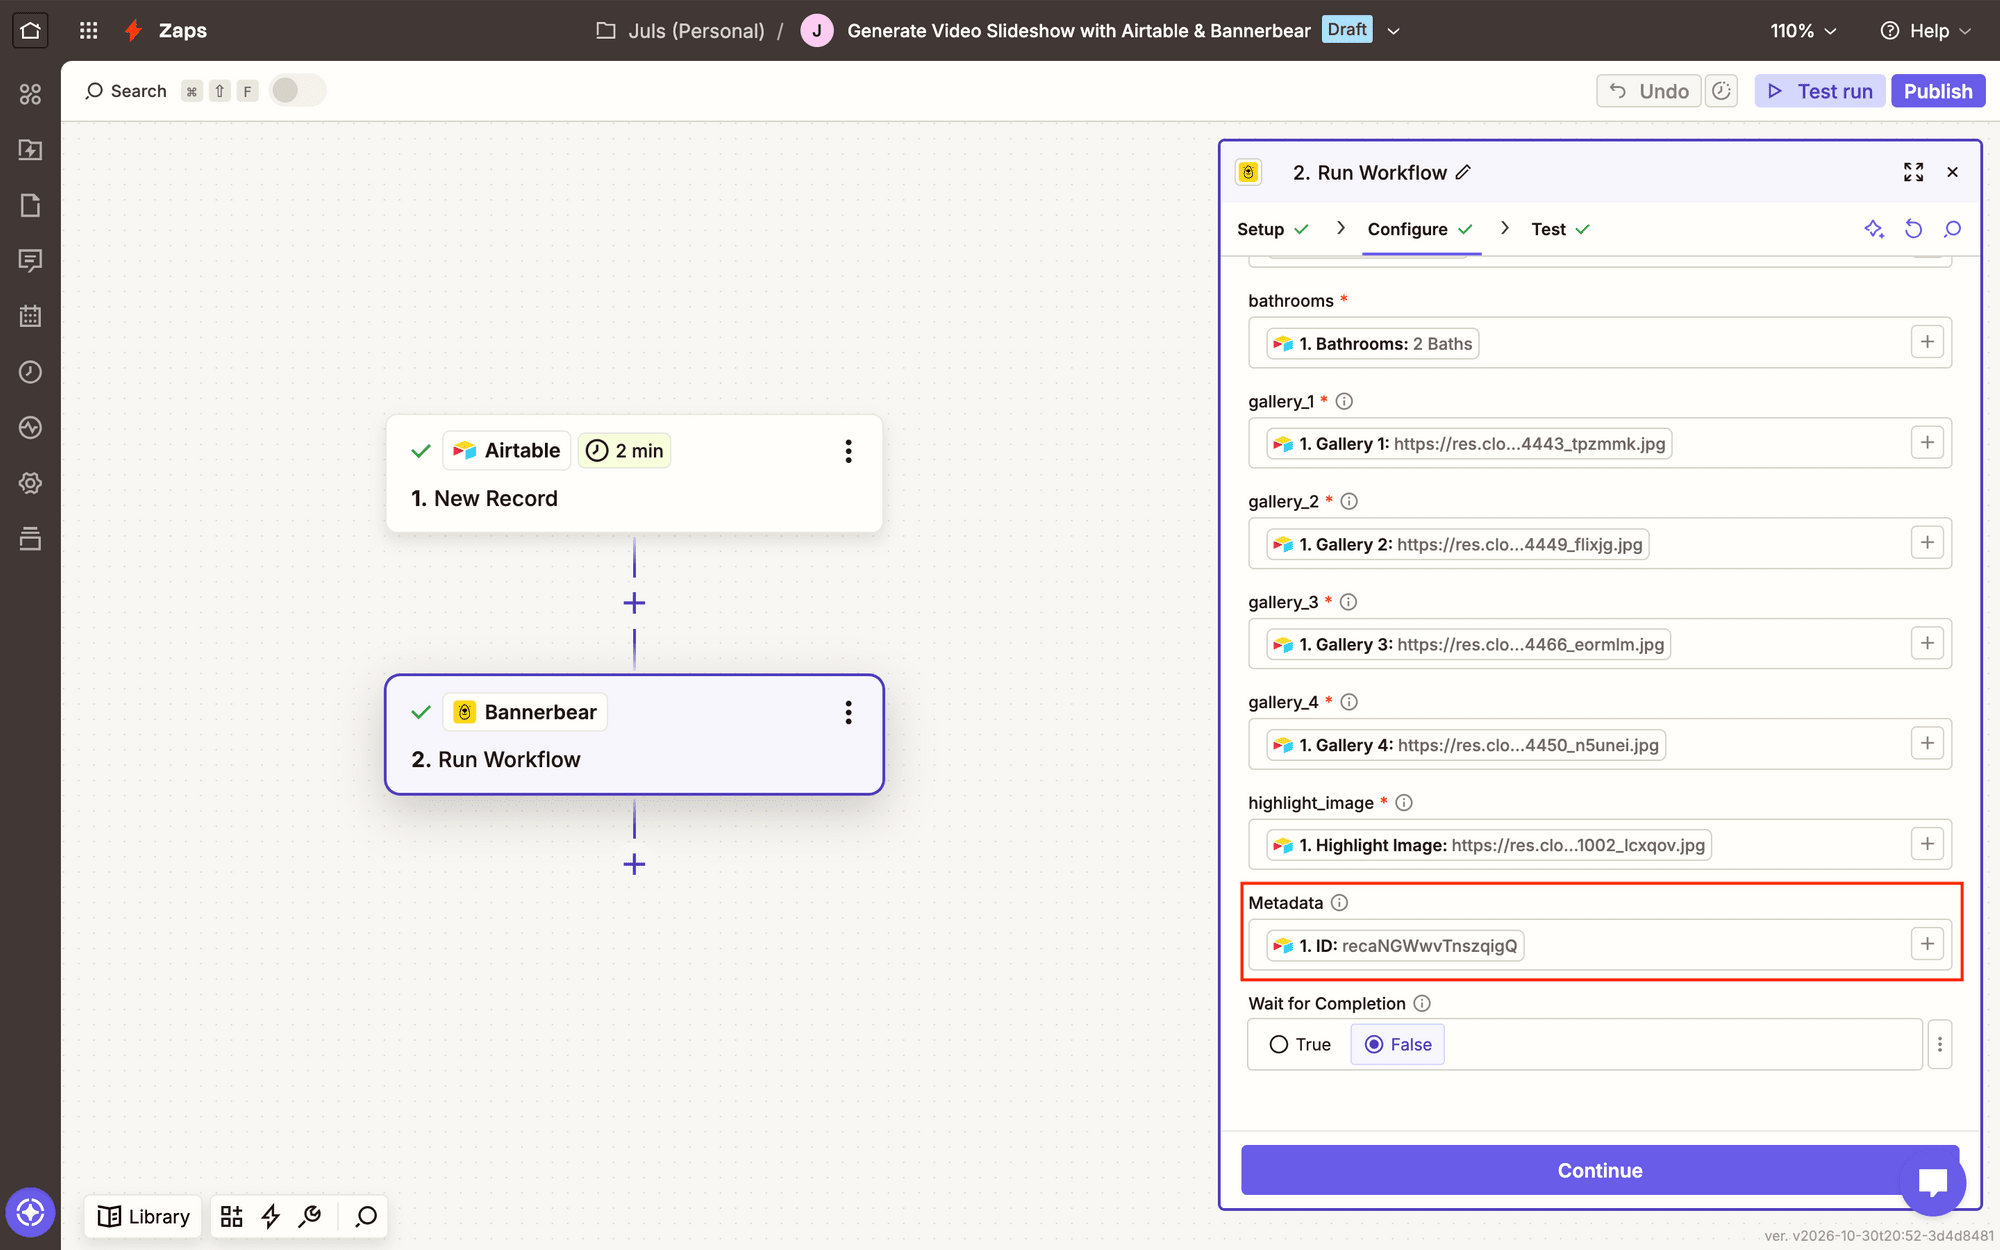
Select your workflow, then map each Airtable field to its matching Bannerbear input field.
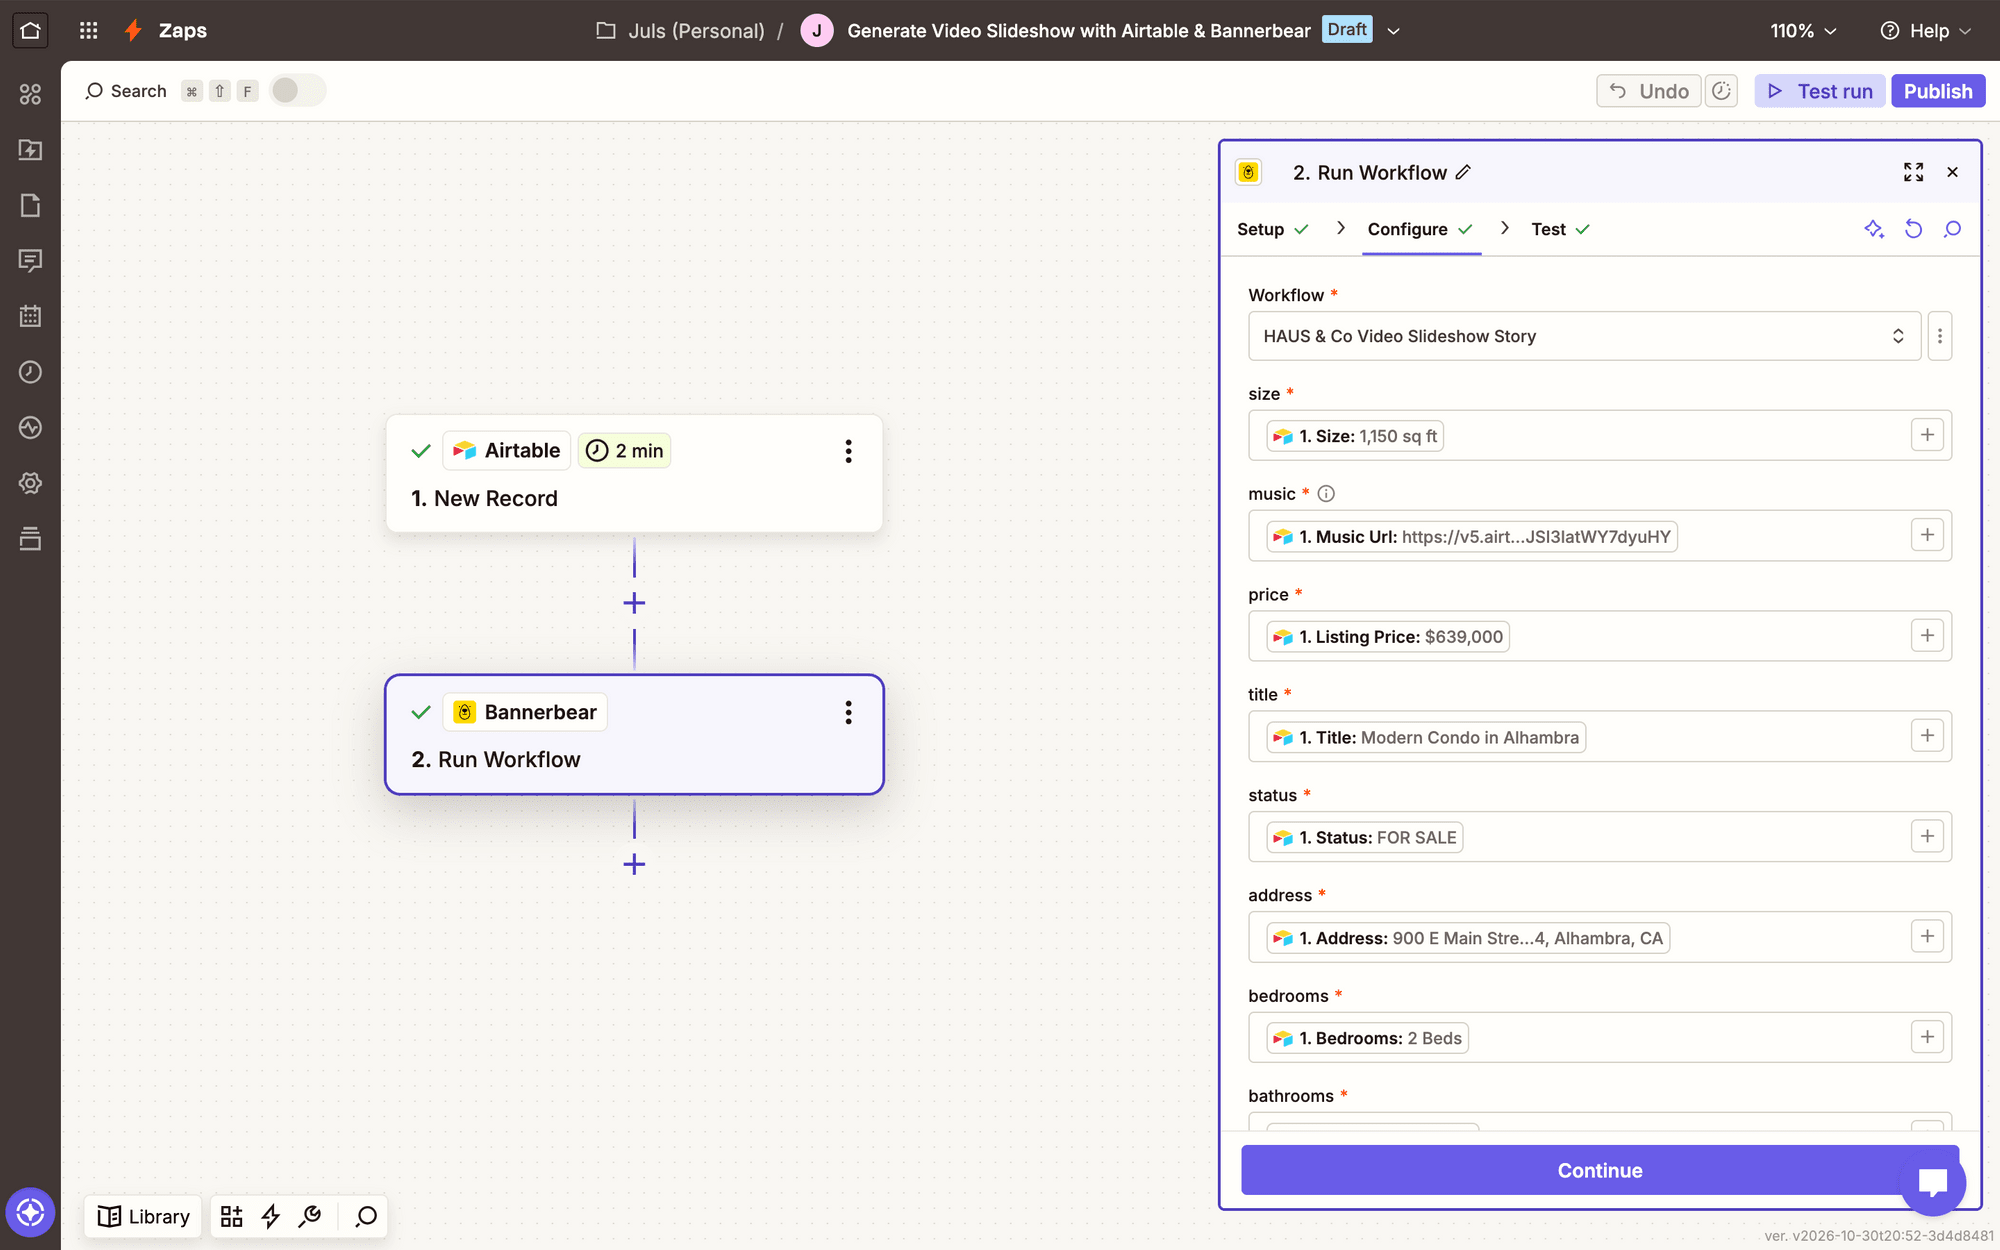
Including the Airtable record ID as the workflow’s metadata will allow you to locate it later on.
Test the action, and check your Logs to see the generated output.
5 - Create a Zap to Store the Video Slideshow
A separate automation will kick off when a video is generated, then store its output URL in your Airtable base.
Create another Zap and set up the following steps:
Trigger: Workflow Run Completed in Bannerbear
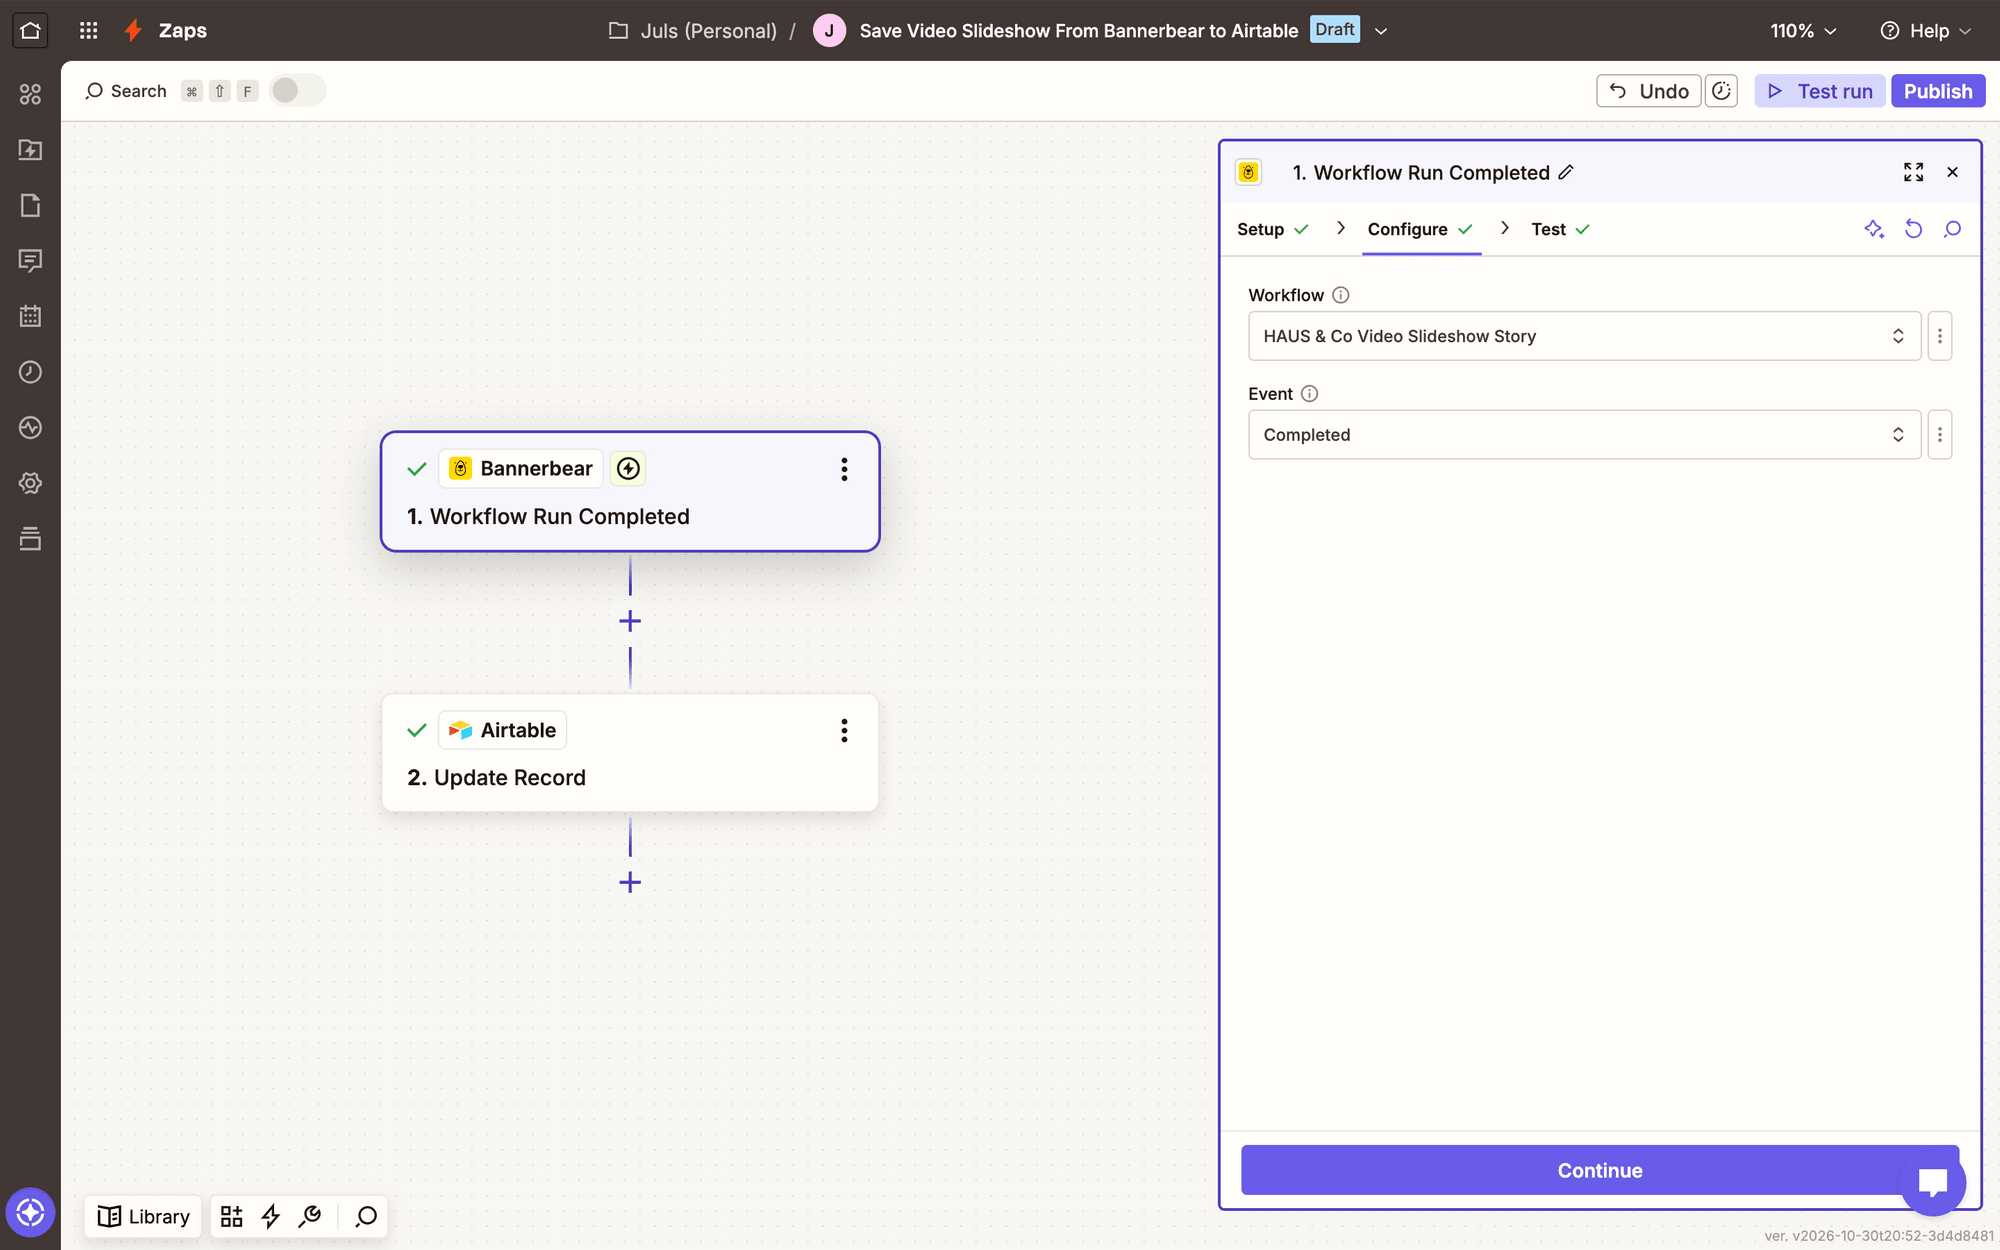
Add a Bannerbear trigger and select Workflow Run Completed.
Set it up by selecting your workflow, then test to confirm it finds your generated images.
Action: Update Record in Airtable
Add an Airtable action and select Update Record. Choose your base and table, then use the record ID metadata as the search value.
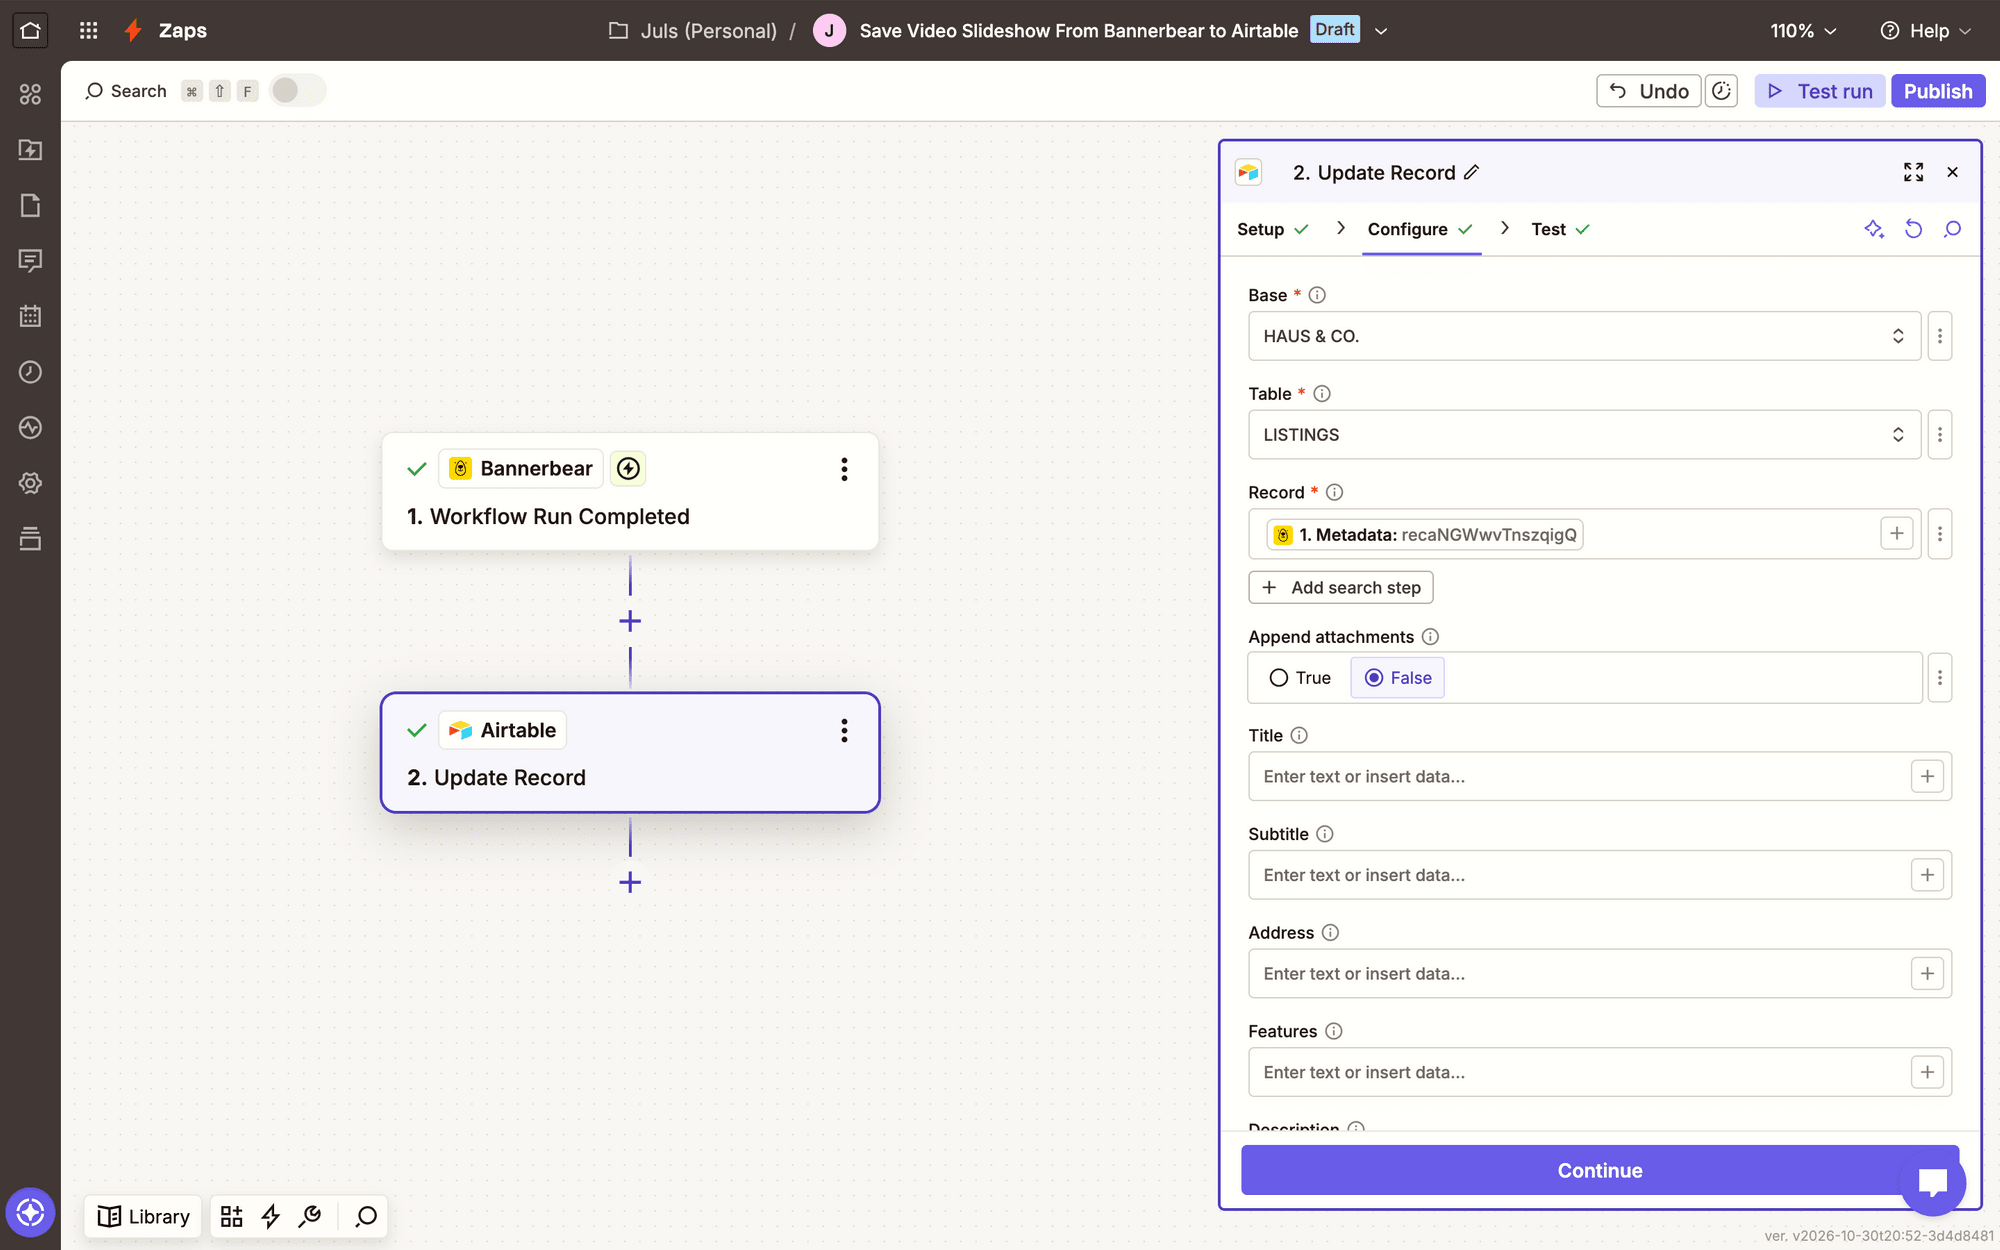
Map the rendered video output to its URL field in Airtable.
When you test the event, you should see the link appear in your database.
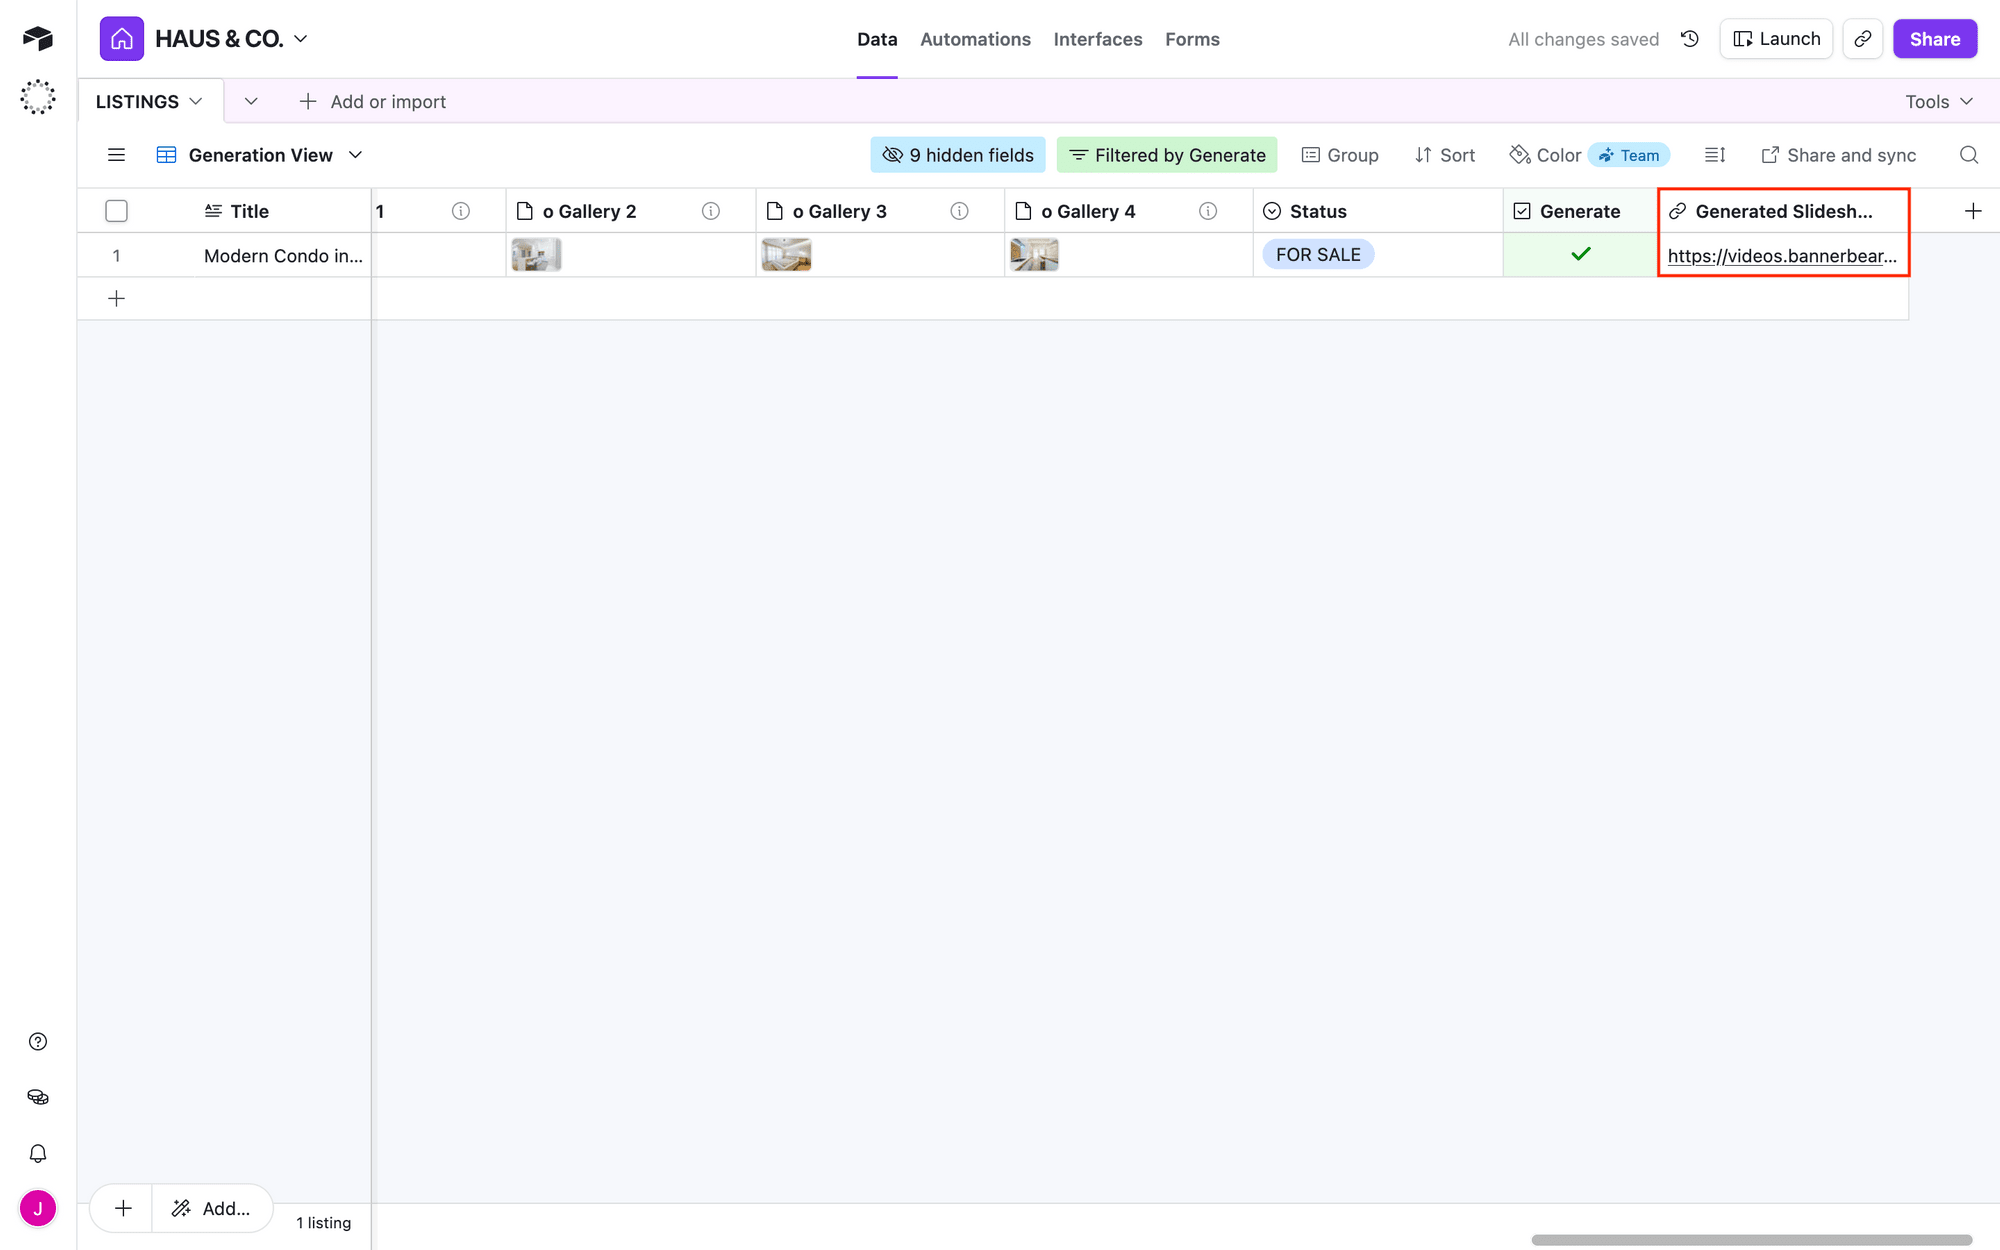
That’s it! Tweak the workflow until the output is consistent, and publissh your Zaps. You should then have property tour videos that look like this:
Conclusion
Automating property tour videos removes the repetitive busywork so you get polished, branded media into your marketing pipeline in moments. With Airtable holding the data, Bannerbear rendering the visuals, and Zapier bringing the steps together, you move from photos to shareable videos in just one click.
Ready to do more for your real estate company? Check out these other automation tutorials:
👉 Generate Polished Real Estate Listing Materials at a Click (Multi-template Workflow Automation)
👉 How to Automate Branded Shorts in Minutes (Bannerbear Workflows Tutorial)