How to Send Personalized Welcome Images to your Typeform Respondents
Contents
In this tutorial you will learn how to send a personalized image with Bannerbear whenever you receive a submission to your Typeform.
What is Bannerbear?
Bannerbear helps you create personalized images and videos at scale. Generate social media posts, ecommerce visuals, dynamic images for email with our API and integrations. You can choose from hundreds of images/videos and customize them with the desired text, colors, and background images.
What we will do in this tutorial?
In this tutorial, we will send an email with a personalized image whenever you receive a new submission on your Typeform. We will connect Typeform and Gmail with Bannerbear using Zapier.
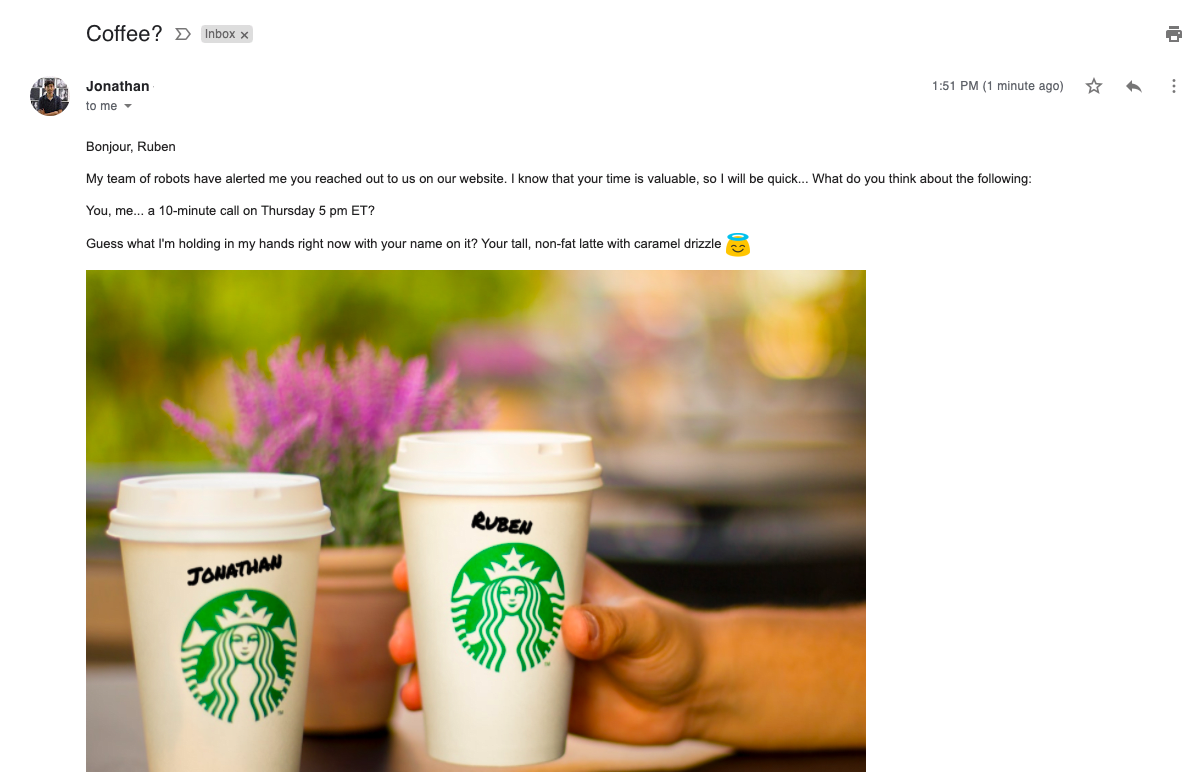
Here's how it will look:

Creating a Bannerbear template
Alright! Let's go to the templates. You can add from hundreds of designs present or create your own template.
For this tutorial we created a custom template:

Go to templates and choose from the templates displayed or click on "Start with Blank Template" button to create your own template.
Next, select the project you want to add the image template to.
You can edit the template and customize everything. From text, color, font, background to adding a new image, and much more.
Once your image is ready, save the template. We will use this template later in the tutorial.
You can also test out the image with dummy data right from the dashboard to make sure everything looks good.
Creating a new Zap in Zapier
Moving on to Zapier!
Let's create a new Zap and choose Typeform app as a trigger.
Choose "New Entry" from the list of events to run the zap whenever we receive a new submission.
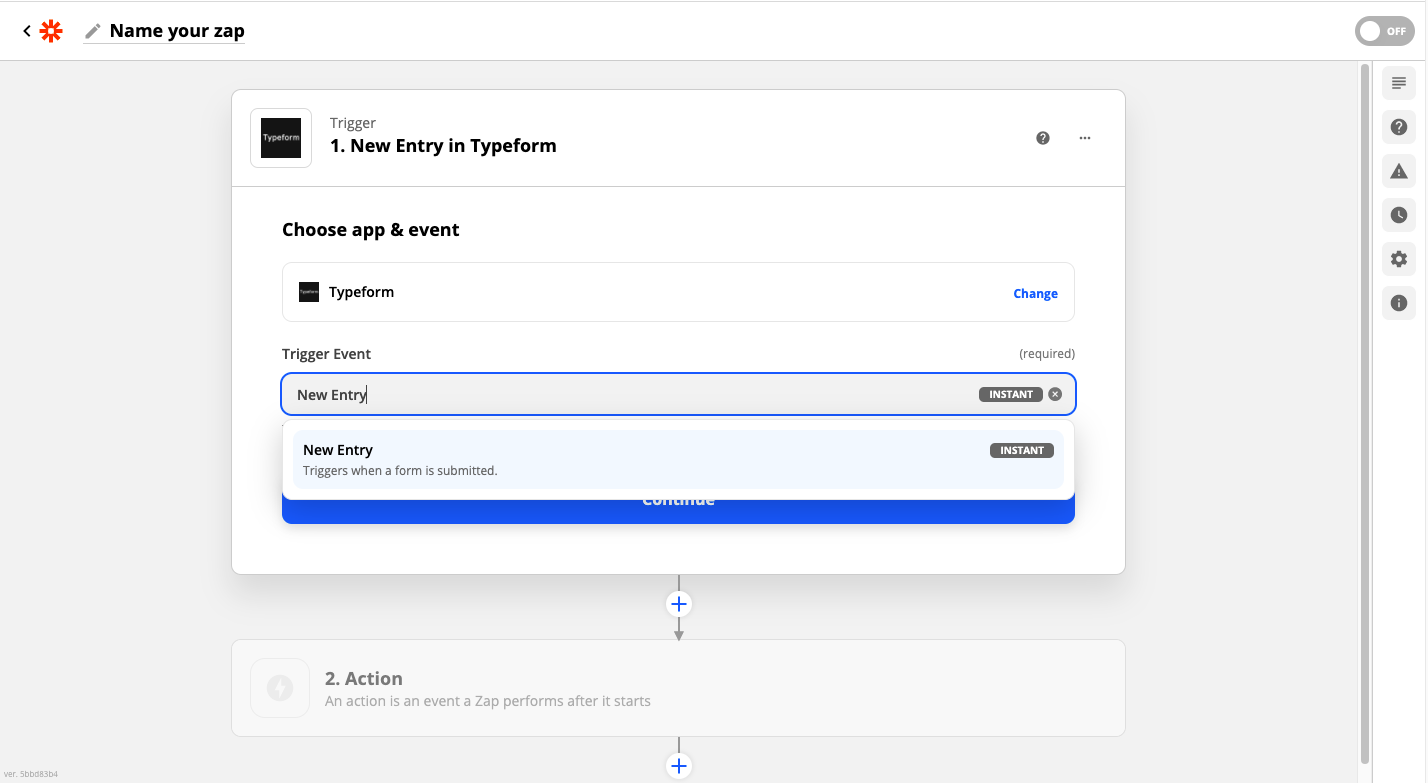
Now, Zapier will ask you to connect the Typeform account if you haven't already.
After connecting the account, select a form that you want to process from the list. Click on continue to save the step and proceed.
Connecting Bannerbear to Zapier
Okay, It's time for action!. Since Zapier is ready to trigger whenever there is a new entry, let's move on to the next step and connect Bannerbear.
Select Bannerbear from the list of the apps and choose " Create Image" as the action.
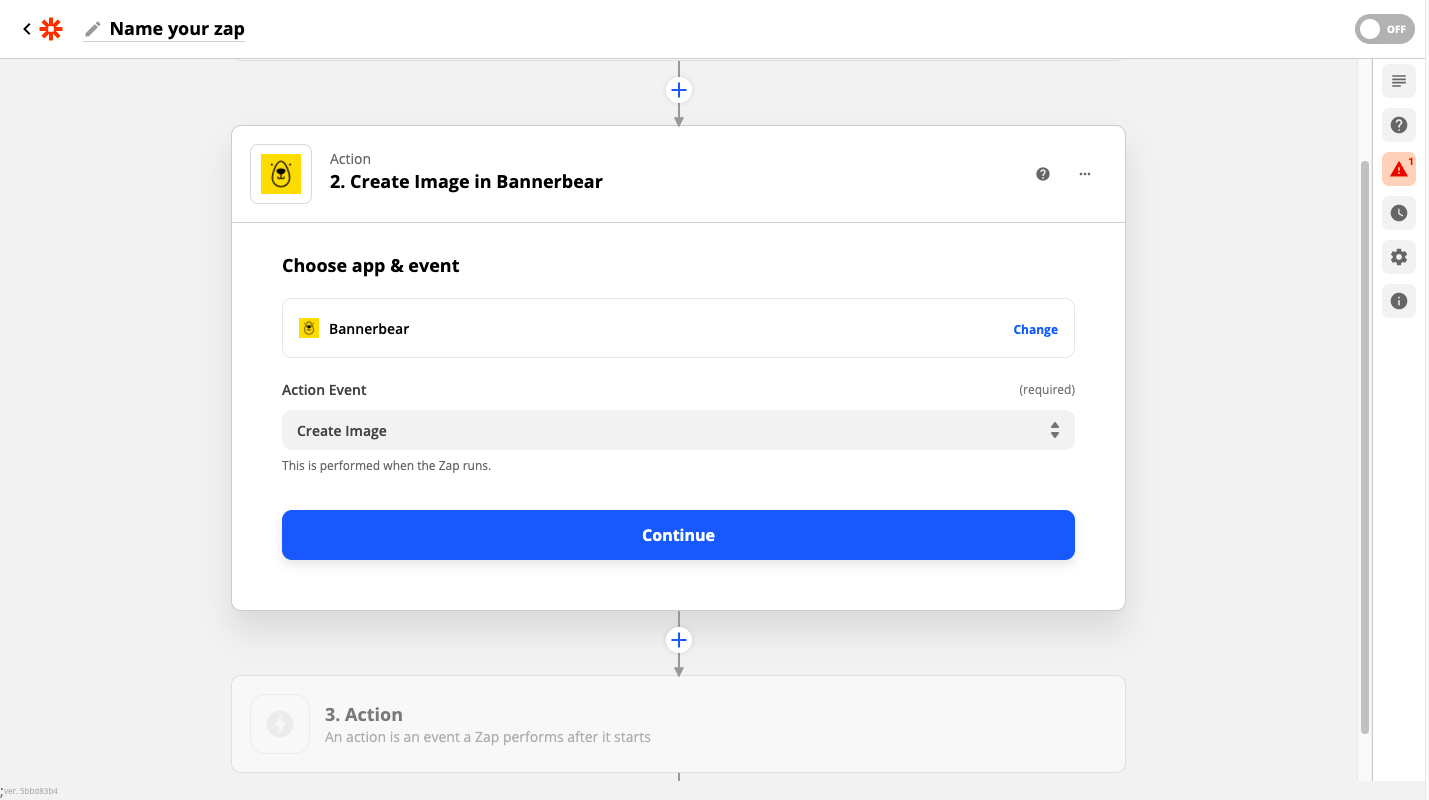
Now, let's connect the Bannerbear account. Every project is connected separately as accounts.
Select the project from the list or click on "Connect a new account".
If you are connecting a new account, you will be taken to a new screen. Enter the API Key of the project relevant to the subject. You can get the API key from " Settings / API Key" page of your Project

Now, we have connected the right project for the account. Let's customize the image
Customizing the image
After connecting the accounts successfully, choose the Template we created initially. The image details will load automatically in Zapier.
You can customize the background color, text, font family, font color, etc. for all the objects present in the template. And, yes all the image configuration settings are optional.
For this tutorial, let's change the text to personalize the image.
Enter the text for the object you wish to change. You can pick the fields from Typeform response to personalize it.

Okay, now let's move to the next part to test the image! Click Continue.
Viewing the test image
Click on "Test & Review" to generate a test image. After a successful test, a green bar will appear with the API response.
You can review the image in Bannerbear as well. Go to Bannerbear and select the template from the project we connected earlier.
Scroll to the images section and check if you got the image as you want.
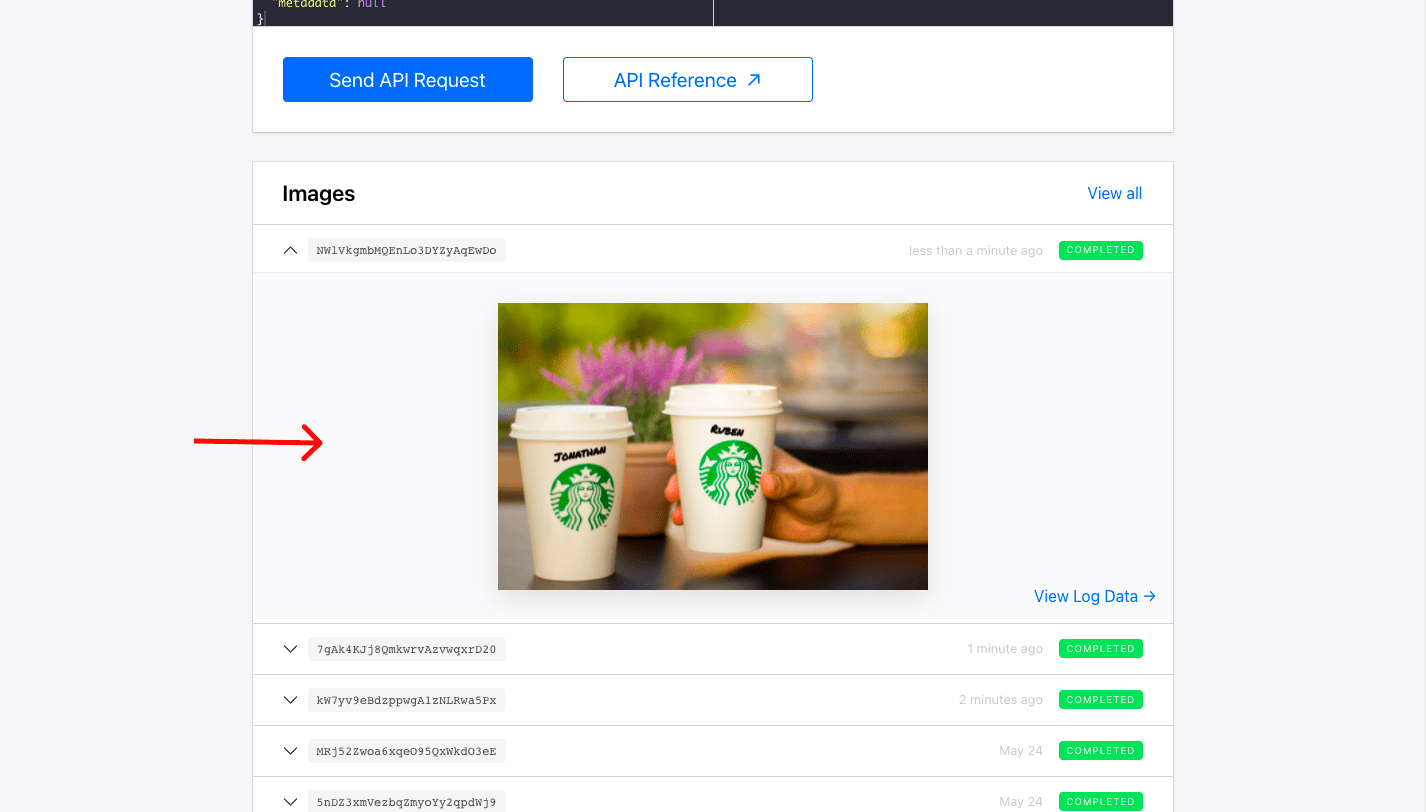
The image looks right. It's time to send the personalized email to your Typeform entry.
Send email to Typeform entry from Gmail
Let's send the guest an email with a personalized image for them.
While you have the option to select any app for sending the email from. For now, let's send it from Gmail.
Select Gmail app from the list and choose "Send Email" as the action event.
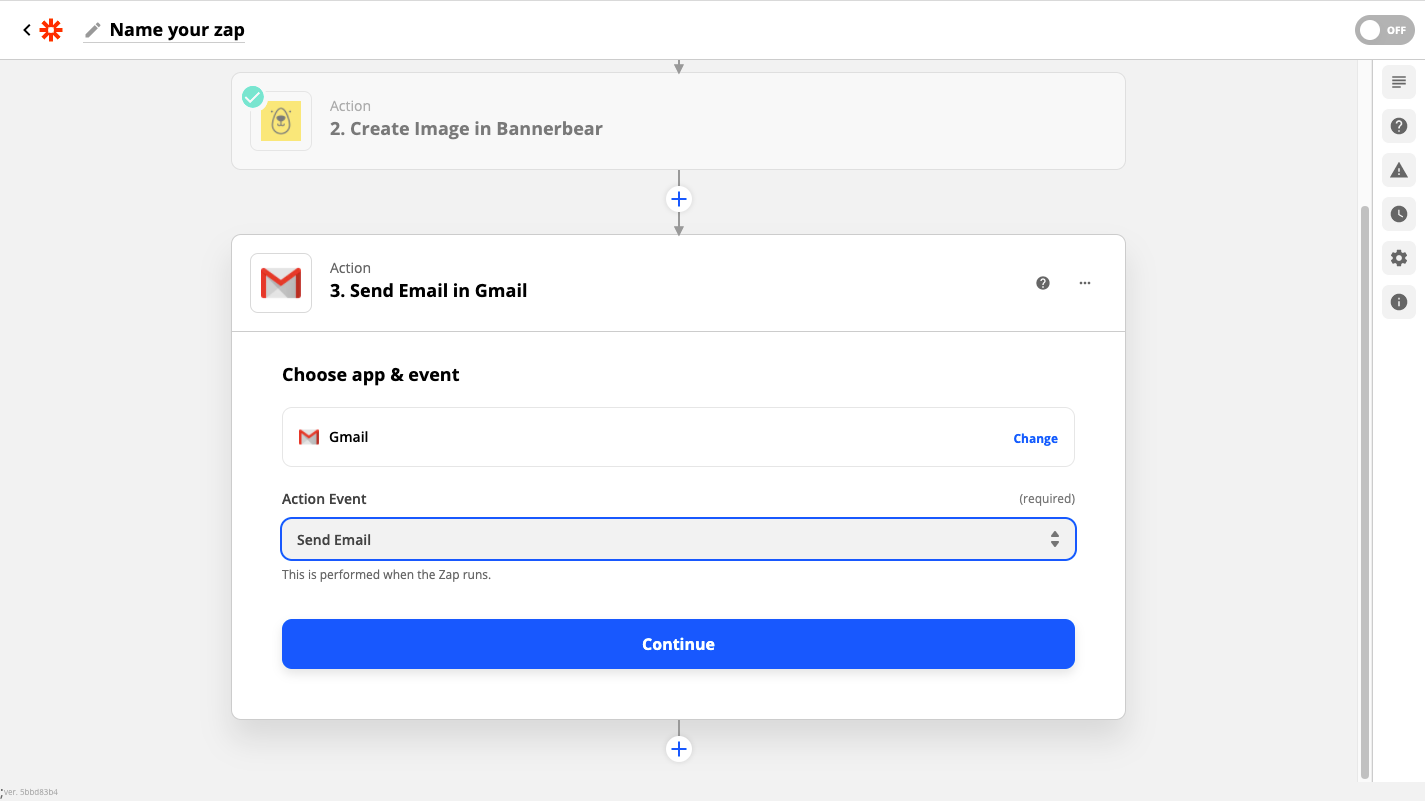
Connect the account from which you want to shoot the email. Enter the necessary details like the email address you wish to send the mail to, from name, subject line, etc.
For this tutorial, we have placed the image inside the email. You can add the image as an attachment too.
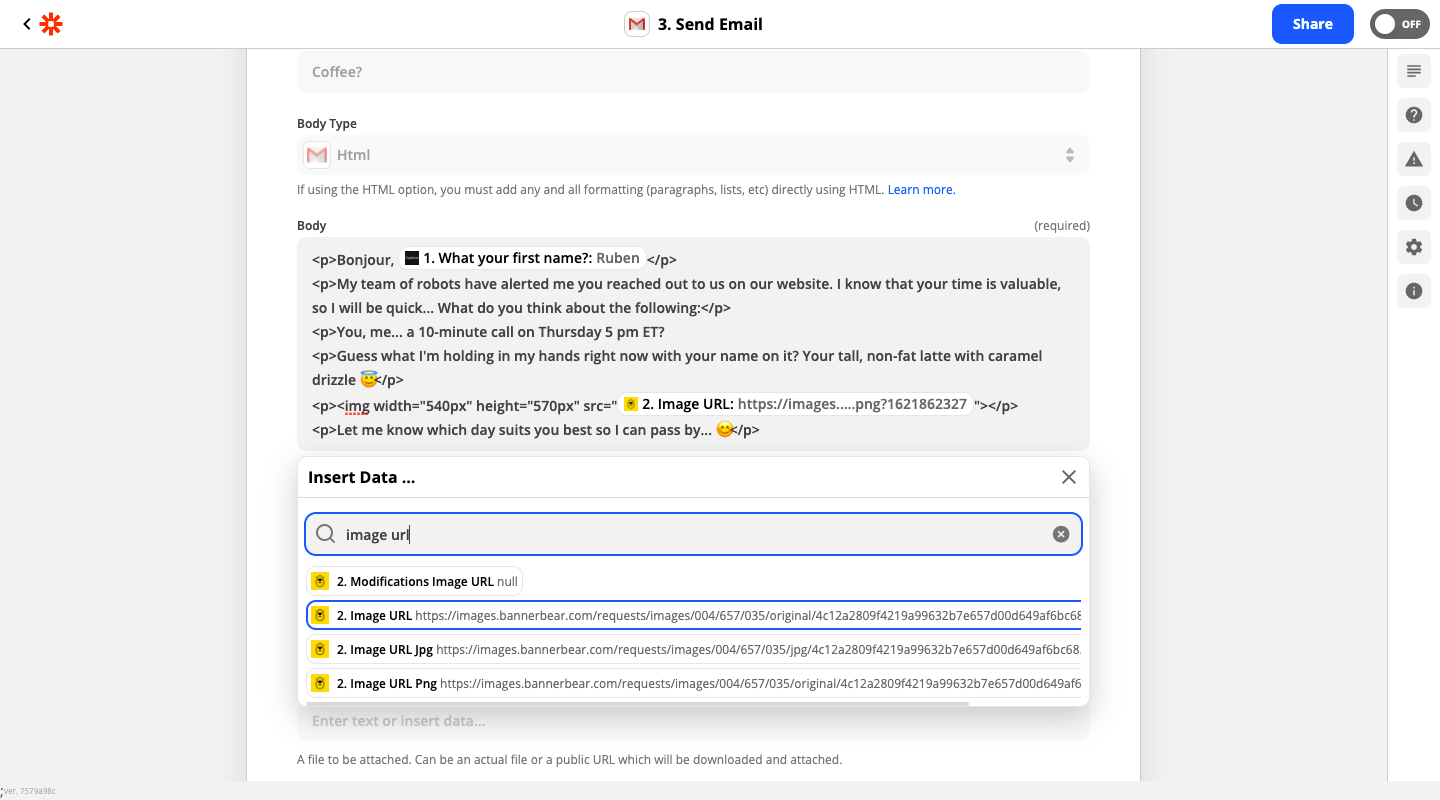
Now we are all set. Let's check if everything is working. It's better to send a test email to yourself before turning on the zap.
Click on "Test & Review". You can go to your inbox and check for the email you triggered. If it looks good, turn on the Zap!
Conclusion
We have come to the end and you have got yourself a zap that can help you automate your emails with personalization at scale. You can even add a personalized video in your email from Bannerbear. The possibilities of this automation are endless.
Next Steps
This is just an example of how you can create a personalized email for your prospects. You can get as creative as you want with your campaigns. You can try these things out next:
- Play around with the image editor to customize the image for your company
- Add a personalized video in the email