
Routers & Filters: How to Process Your Data Conditionally on Make.com
Contents
Not all workflows follow a single path—sometimes your data needs to take different routes depending on what it contains. When clear logic dictates which actions to take, you can use conditional logic to create workflows that run only when needed and apply actions only where appropriate.
When it’s thoughtfully implemented, conditional logic helps you:
- Prevent duplicate data
- Accurately organize data
- Minimize unnecessary costs
- Route information only to teams that need it
Make includes built-in data processing features that enable conditional logic. In this article, we'll explore two of them: routers and filters —what they do and how to use them in your workflows.
Let's jump in!
When Do I Need to Use a Router?
Routers are used when your workflow needs to branch into several possible paths based on specific conditions. They work best when:
- Your logic is straightforward and rule-based
- You need to route data without complex decision-making
- You have a manageable number of branches
- You want to create a fallback route for data that doesn’t meet other conditions
Examples of possible scenarios where routers can be beneficial are:
- Generating graphics with different template designs based on product type
- Sending submission data to different databases based on country
- Notifying different teams based on support ticket type
You can use a single router or chain multiple routers together to handle increasingly complex workflows.
When Do I Need to Use Filters?
Filters work to separate data that matches your conditions. In some scenarios, you may need to only work with bundles that fit specific criteria, rejecting the rest or processing it in a different way.
When you add a filter between two modules, it checks whether the incoming bundles meet your specified conditions. Bundles that match are passed to the next module, while those that don't are stopped from processing further.
Filters can be used throughout your Make scenario, but in this guide, we're focusing on how to use them to set conditions for each route.
How to Set Up a Router on Make
A router is added into a scenario at the point where you want conditional logic to be applied so any proceeding actions can branch off.
Let’s illustrate with an example. A community music event is being held, and attendees can sign up using an Airtable form. They can register as performers or as guests, and they will receive different confirmation emails depending on their category.

An Airtable base will receive event submissions containing sign-up information and—the data with which we will be basing our logic on—the type of ticket being purchased.
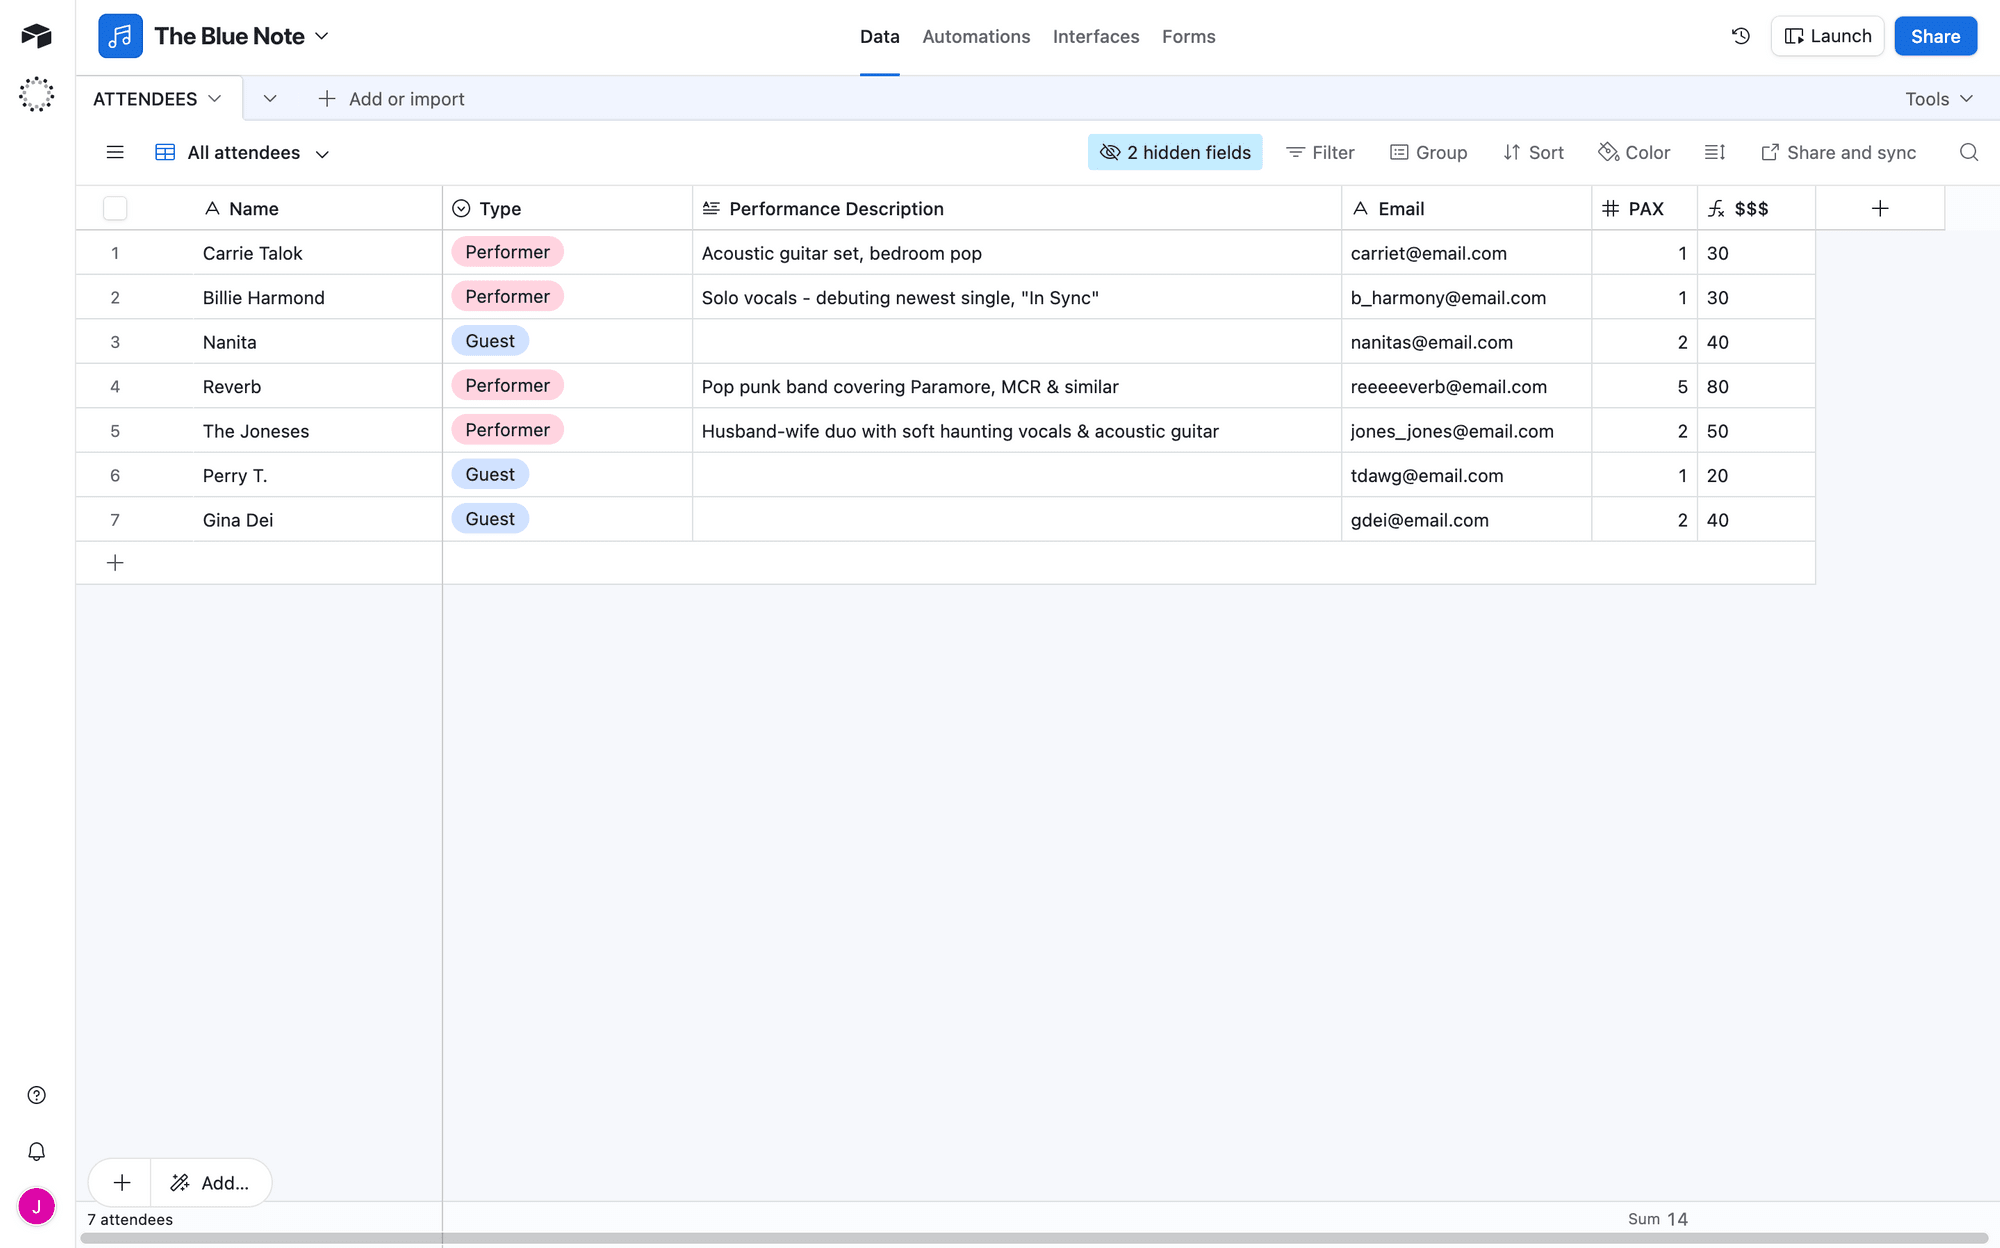
Bear Tip 🐻: The Make module we’ll be using to monitor records requires a Created Time or Last Modified Time field to sort records. Make sure you have one of these fields in your table.
Now, let’s set up a Make scenario that filters incoming data, then sends it down one route or the other depending on response.
Log into your Make account, create a new scenario, and then set up the following modules:
Module #1: Airtable - Watch Records
We’ll use an Airtable module with a Watch Records action to monitor the base, triggering the automation once a guest or performer submits their form.
Add the module to your scenario. If you haven’t connected your Airtable account yet, you will be prompted to do so.
Select the base and table you’re using to keep track of event attendees. Choose Created as your trigger field, and Name as your label field. Limit the returned records to 10.
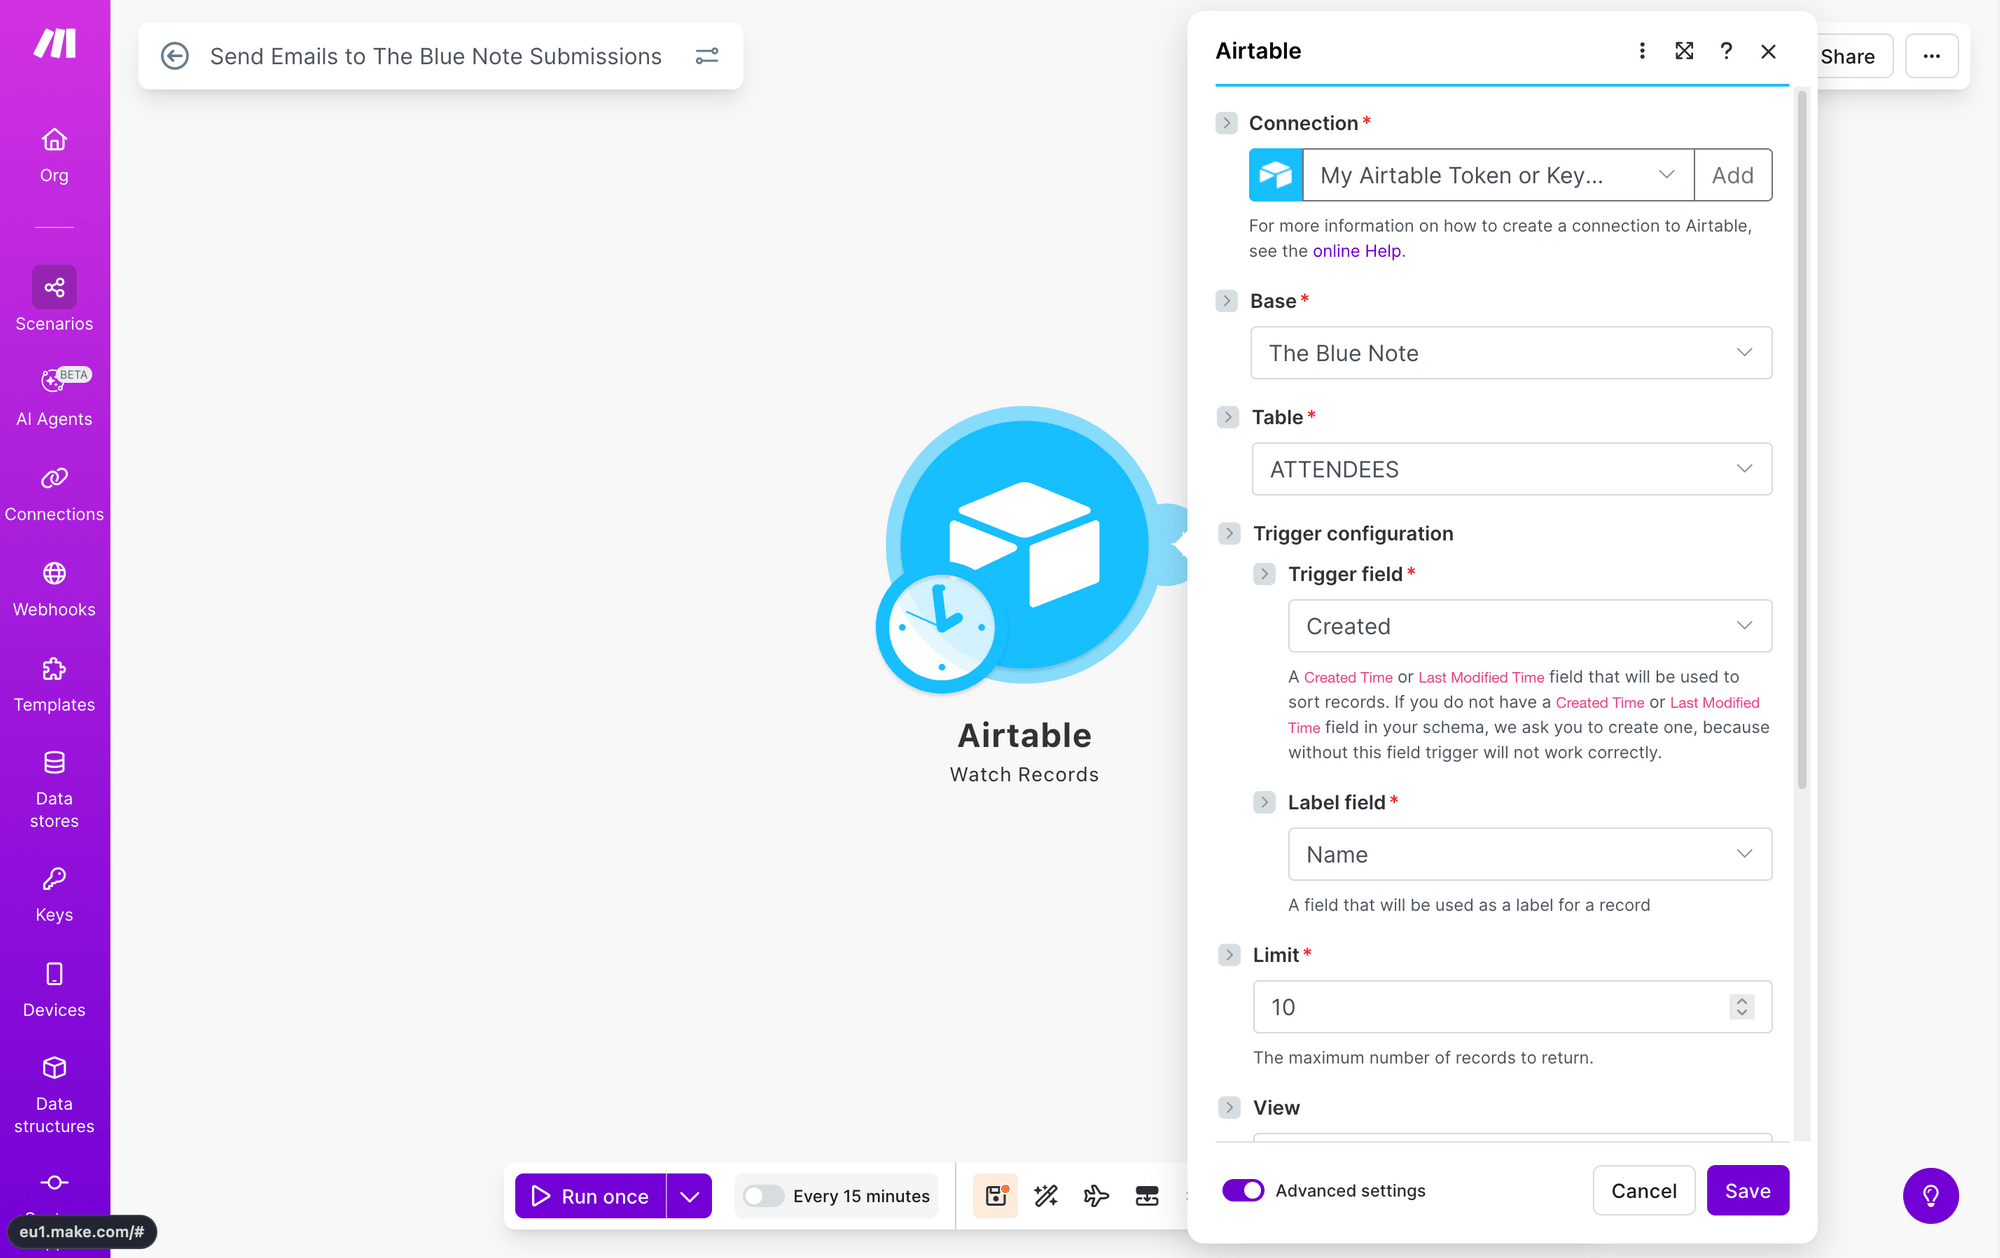
Testing this module should give you a record with submission data that you can use in proceeding steps.
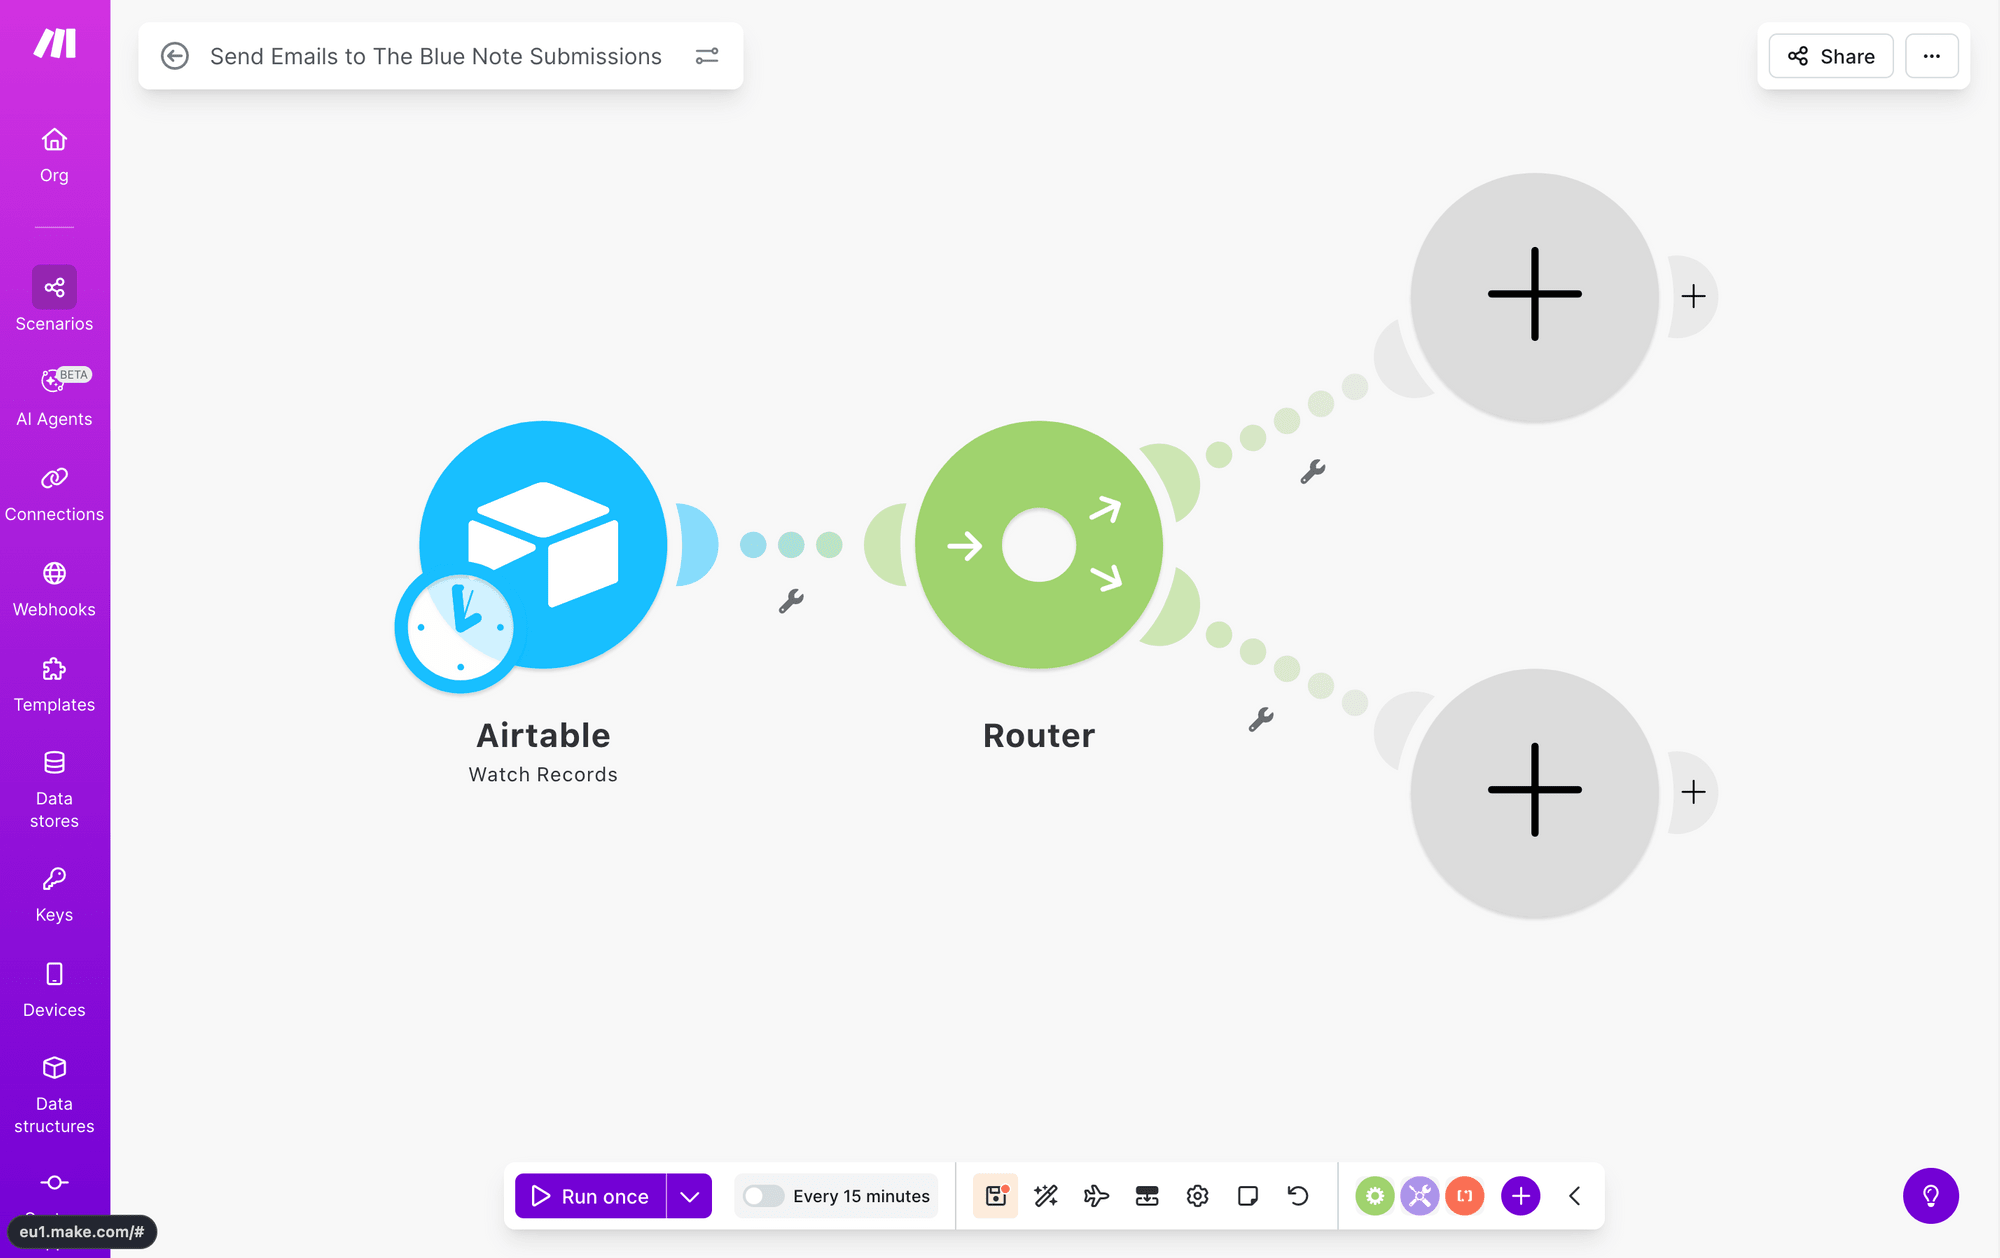
Module #2: Router
The Router module is a type of Flow Control module, and adding it to your scenario will give you two branches to work with. You can add as many or as few as you’d like, but in this example, we’ll keep it simple with two.
Setting Up Your Filters
Adding the Router module is easy, but what actually makes it branch out into different paths is the filters.
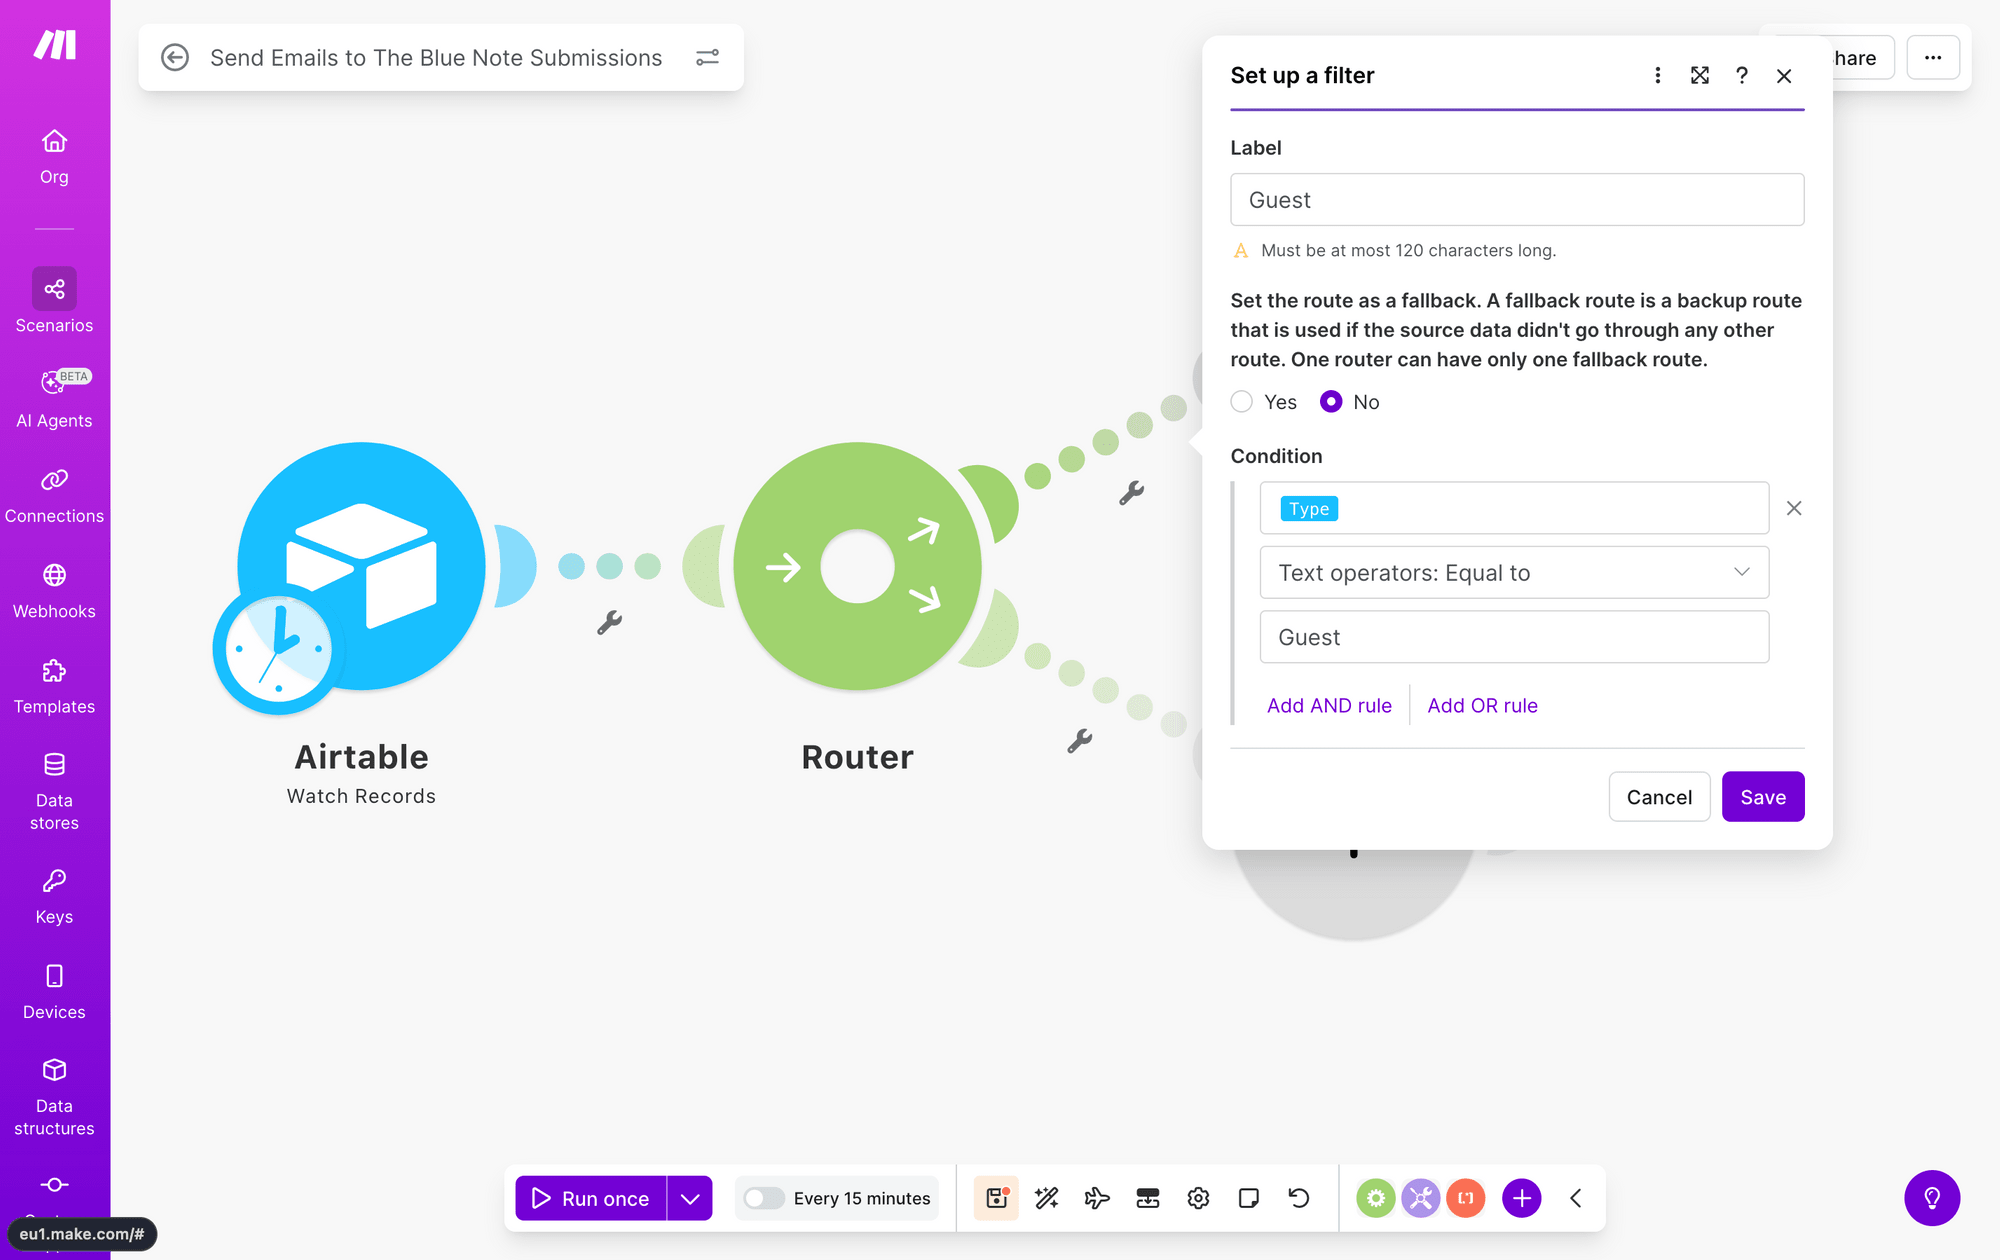
Click the tool symbol on the path from the router to one of the branches, then click Set up a filter.
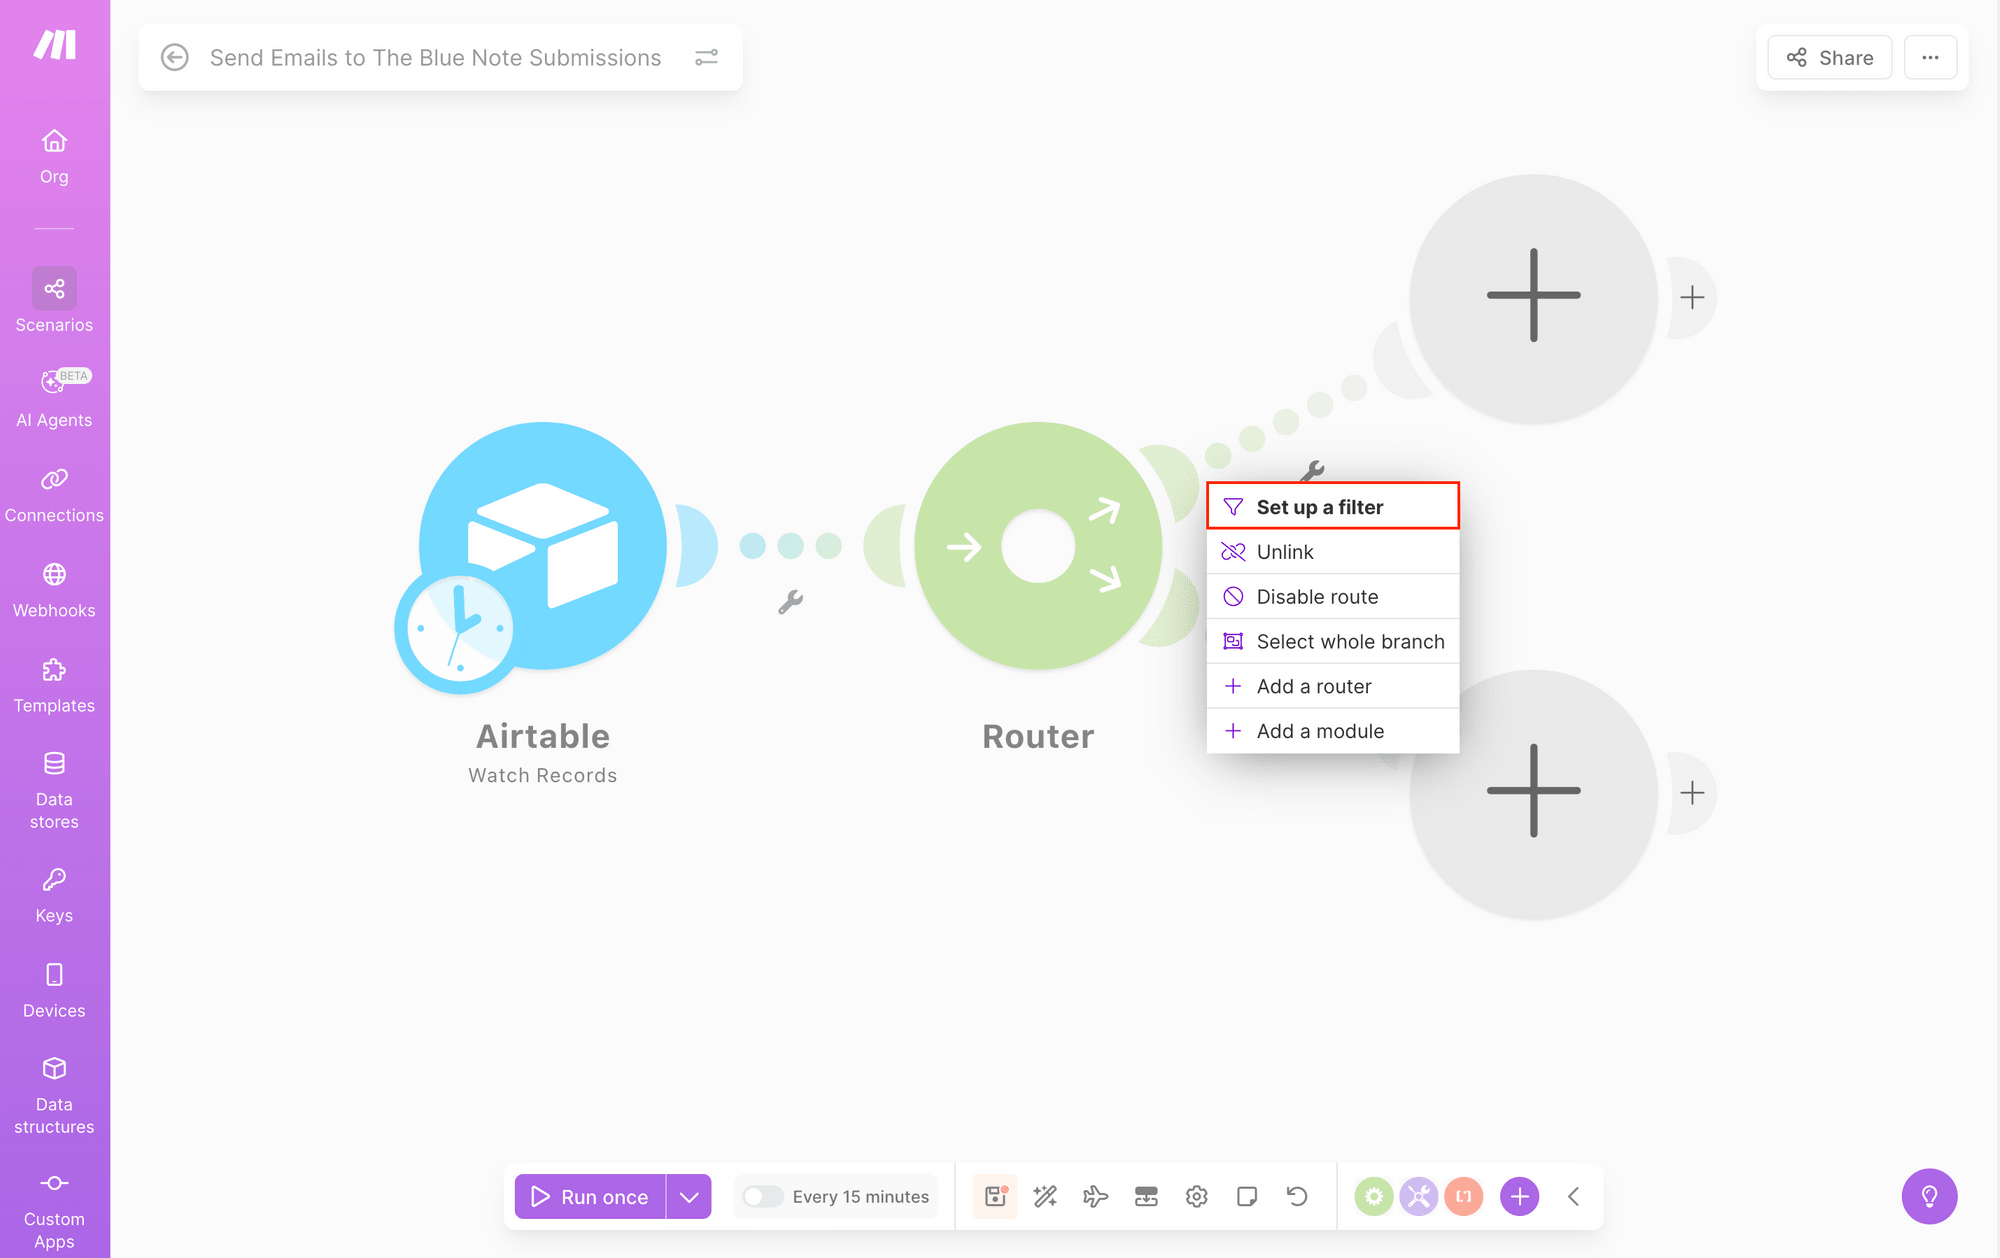
Here, you can add a label and set up conditional logic that processes incoming data, only sending what meets the rule on through the branch.
Map the submission type output to the first condition field, then use Text operators: Equal to as the rule. Insert Guest into the third field.
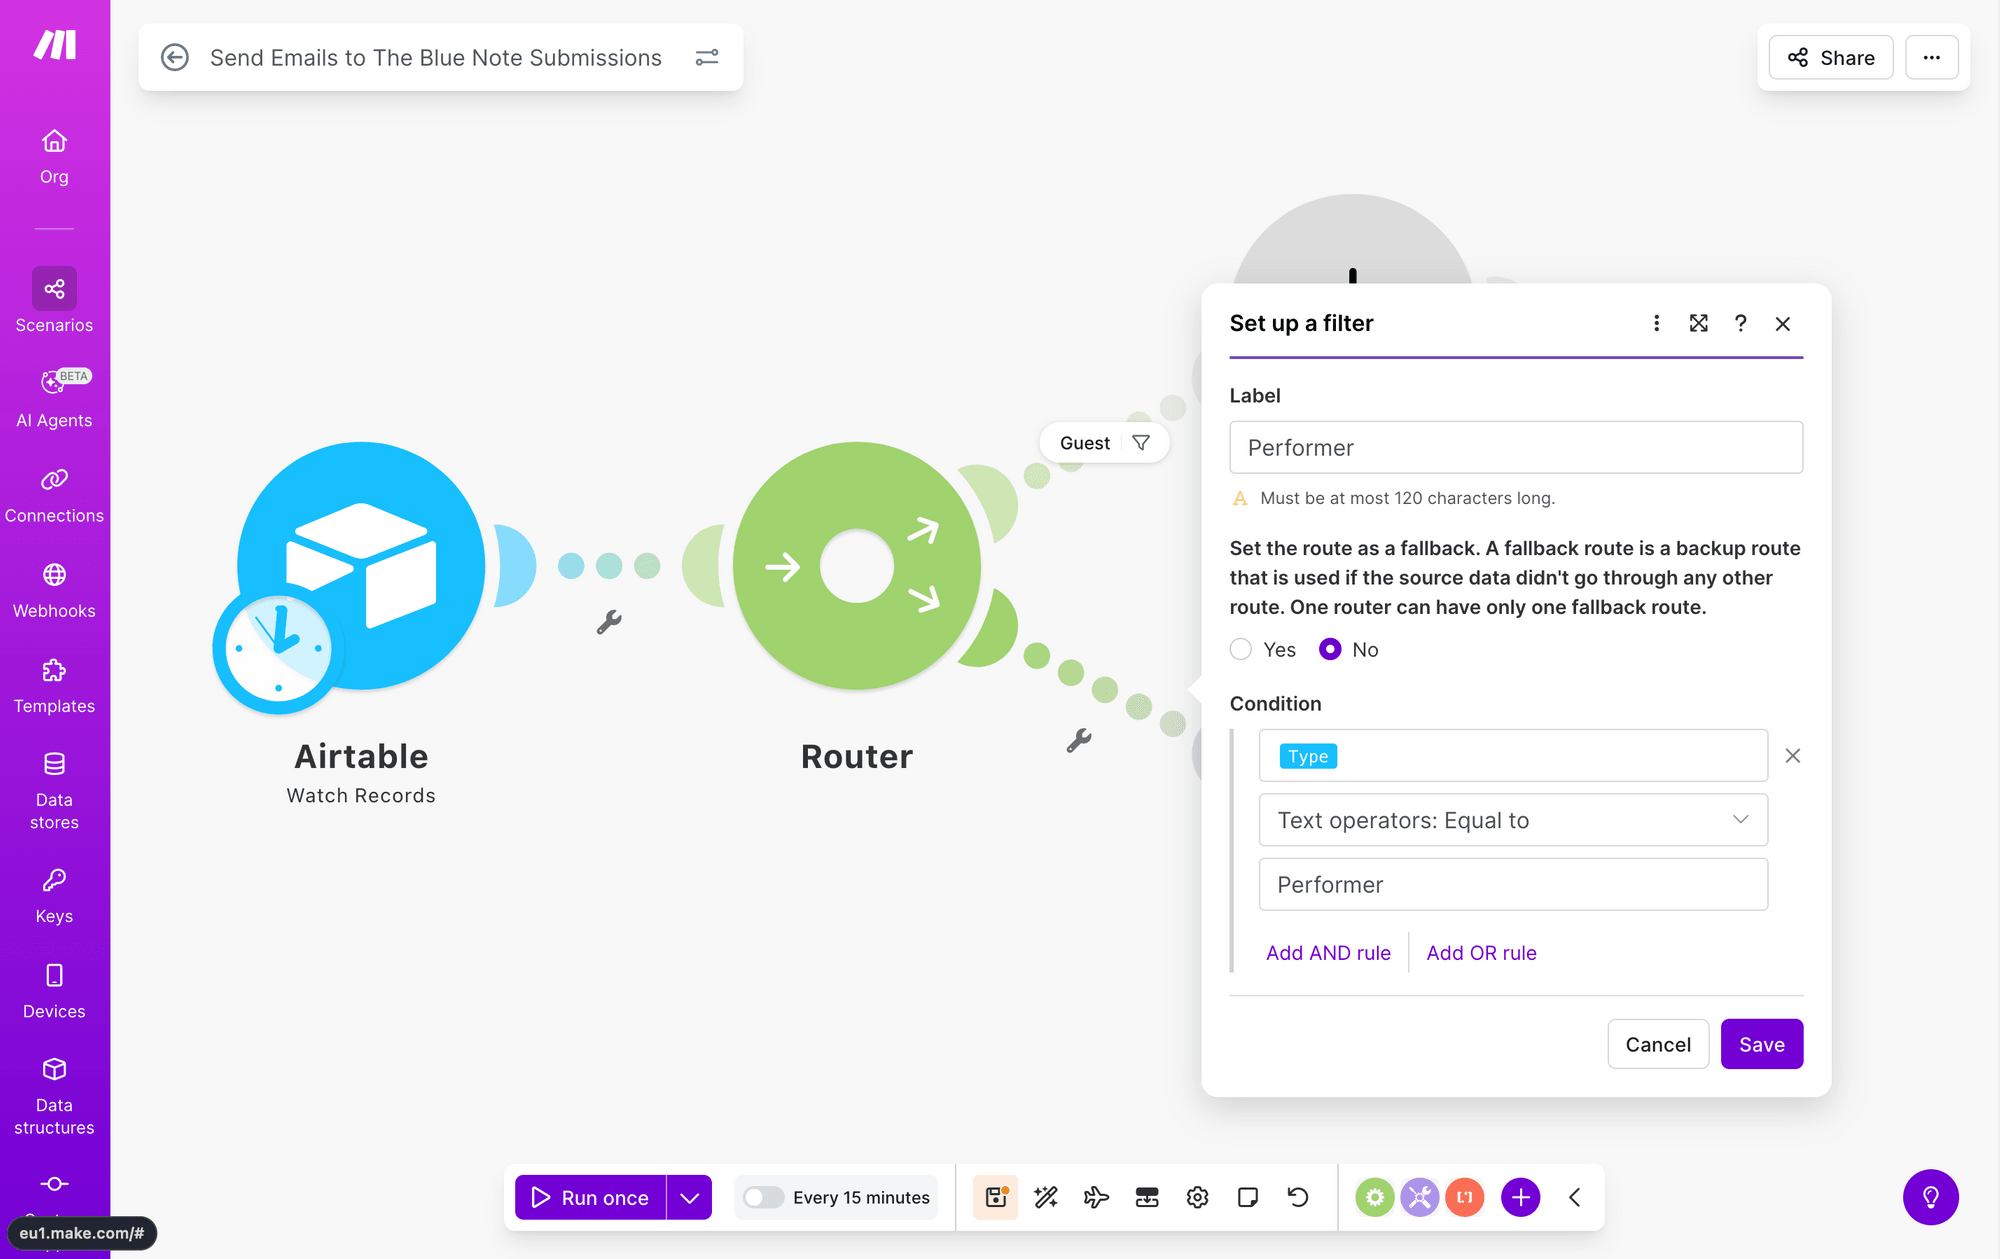
Save, then repeat this with the second branch, using Performer as the rule instead.
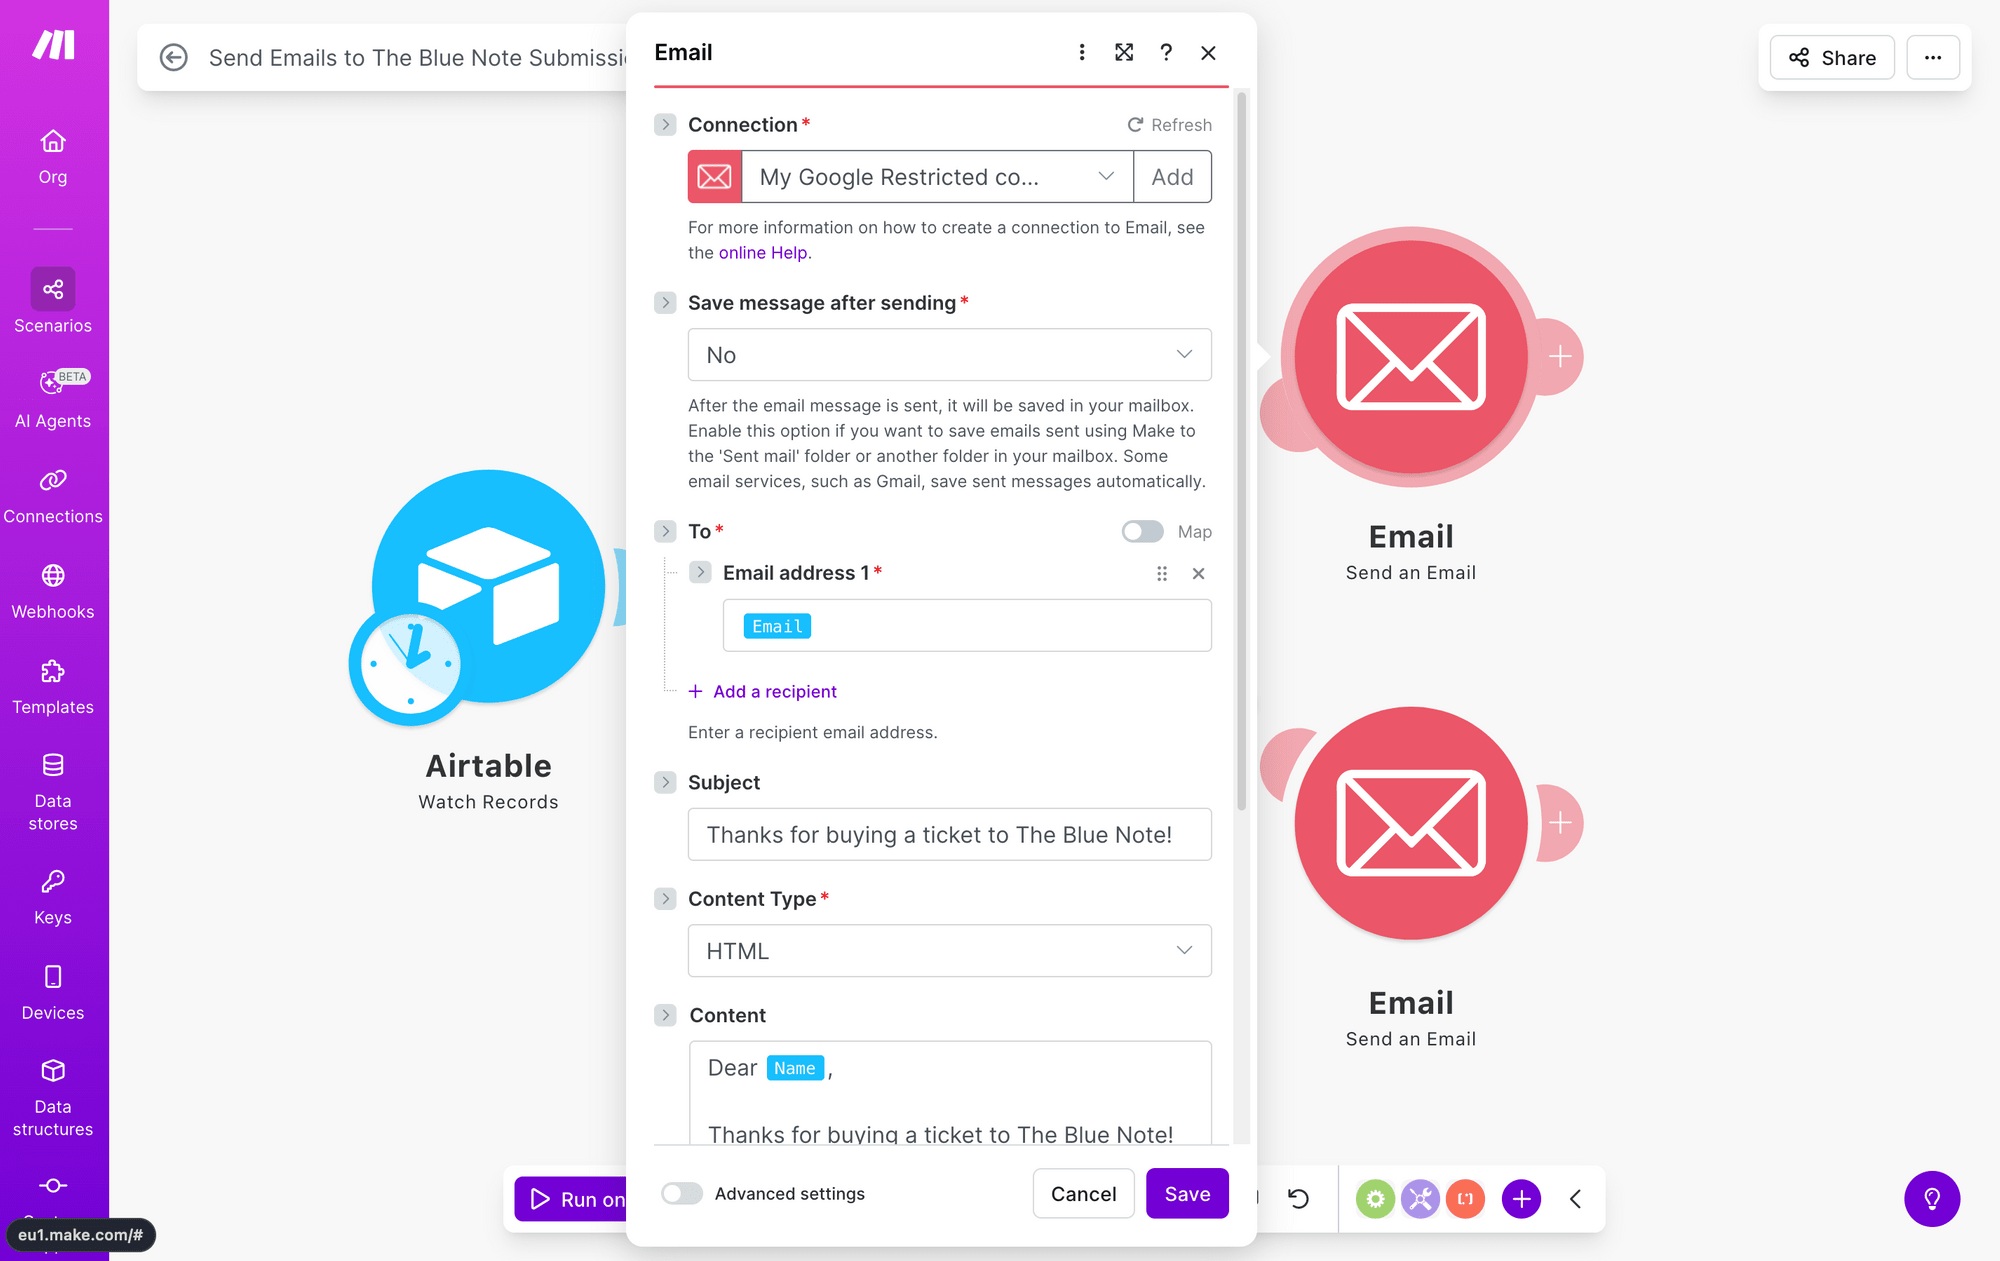
Module #3-4: Email - Send an Email
The two following modules will look fairly similar, with the only difference being the content sent to the attendee.
Add an Email module with a Send an Email action to the Guest branch of your scenario. If you have not connected an email account, you will be prompted to do so.
Set up the module to send a message to the guest’s email address, and customize the subject, content, and attachments as needed.
Click Save. Repeat this step on the Performer branch, and customize the content to suit them instead.
Run the scenario to ensure the correct email is being sent based on your test record.
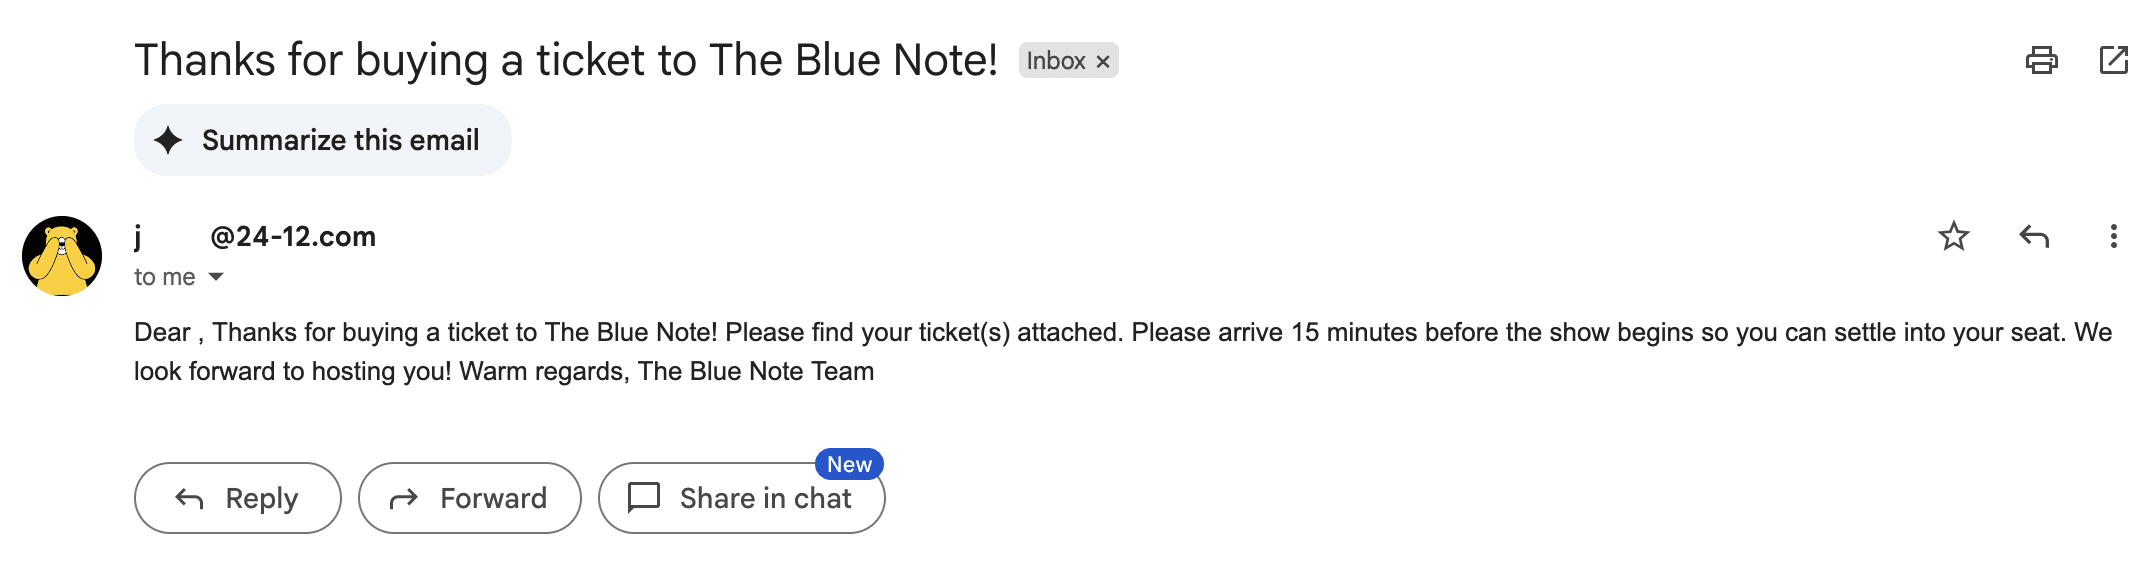
It’s as simple as that!
What About Fallback Routes?
A fallback route is a backup route that is used if the source data doesn't match any other route. In our music event example, it may not be necessary because the Airtable form only contains two submission types: Guest or Performer. Since the form restricts submissions to these two options, all incoming data will match one of your router branches.
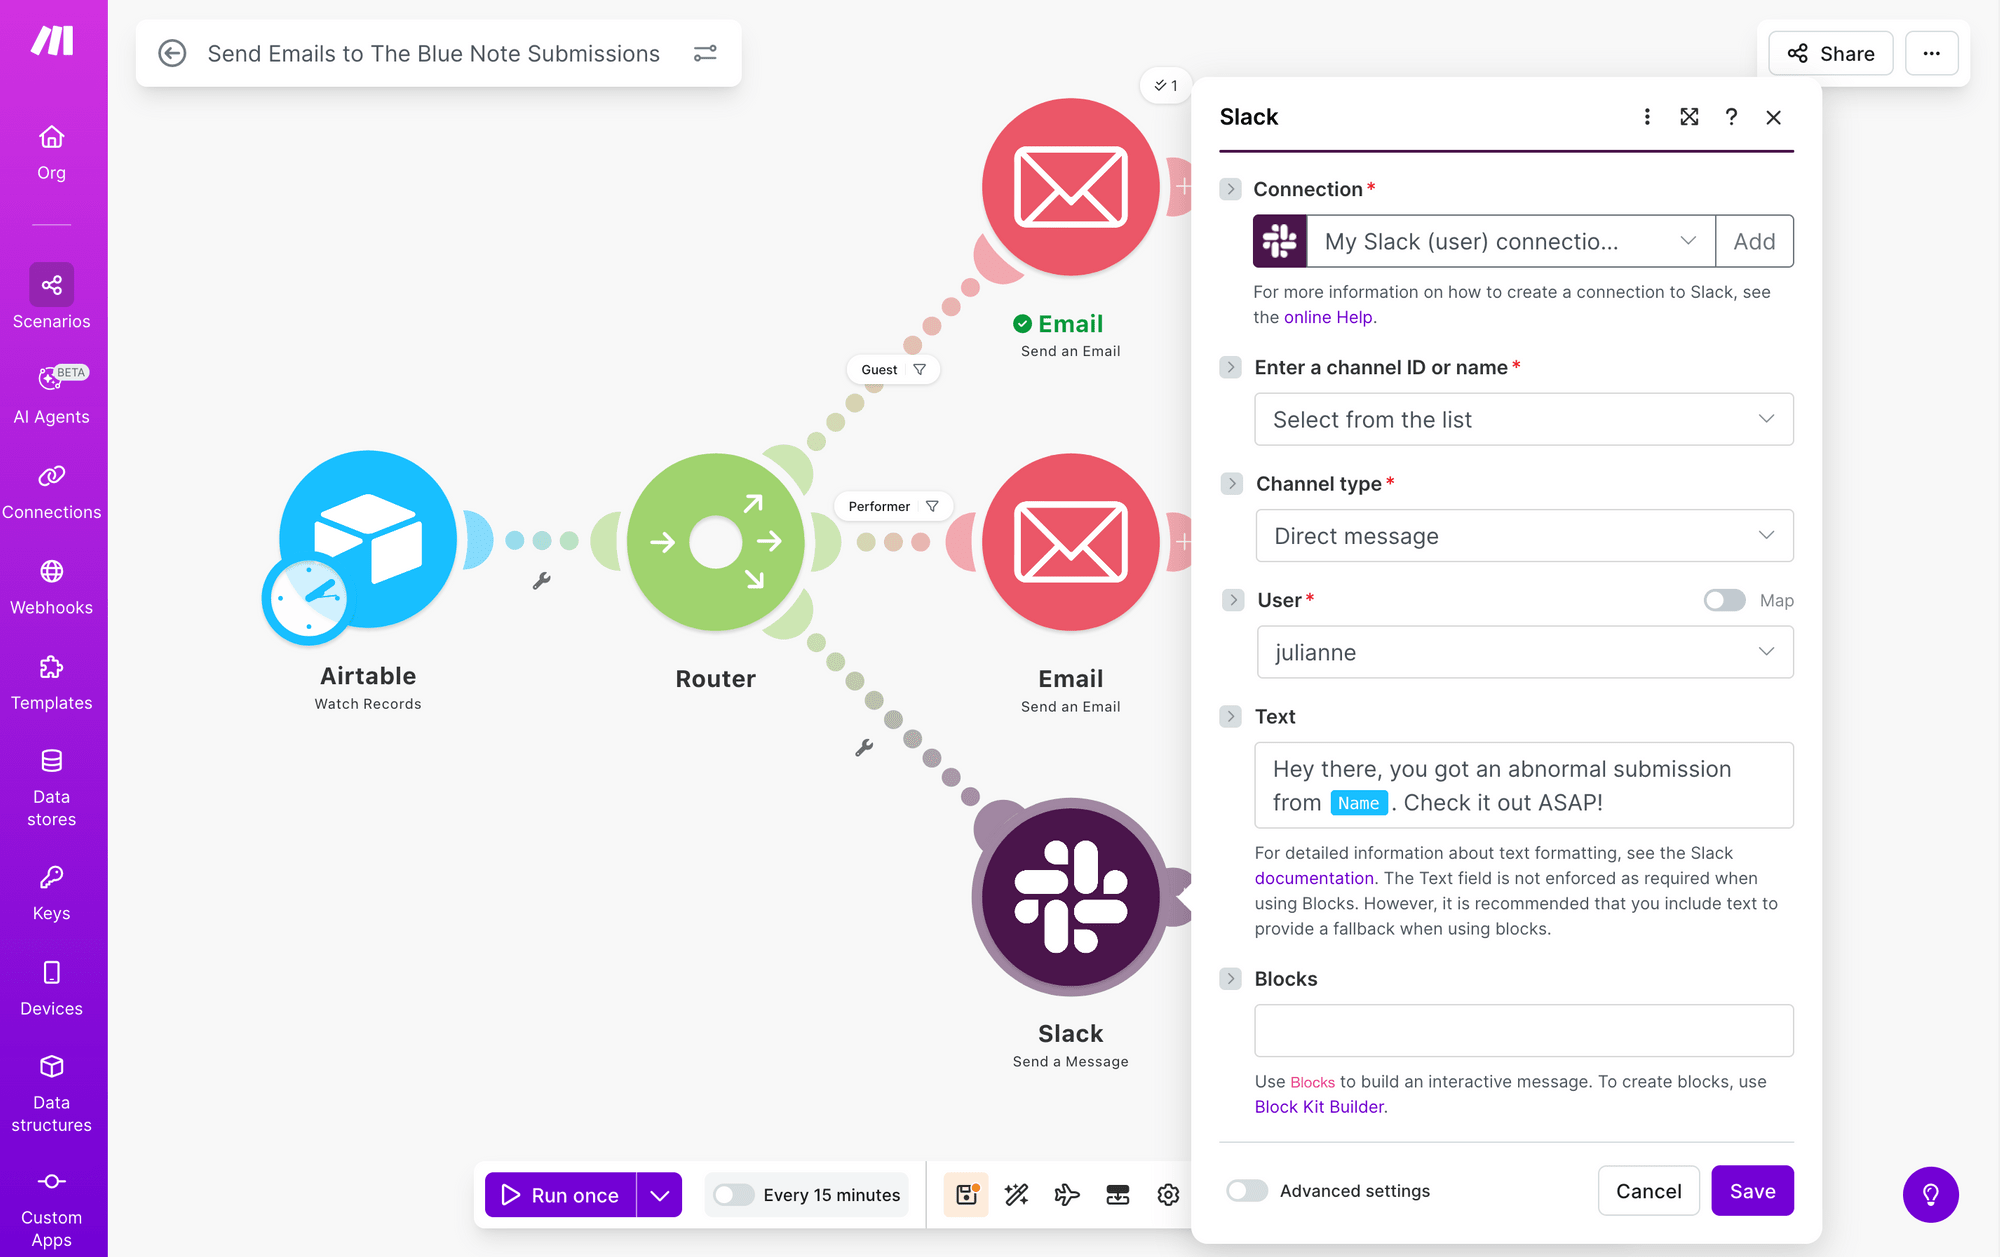
However, fallback routes become valuable when dealing with unpredictable data sources. One practical use is creating a notification system to flag issues. For example, you can add a Slack module with a Send a Message action to alert your team when unexpected data arrives, allowing you to investigate manually.
You will also need to add a filter that shows the route is to be used as a fallback.
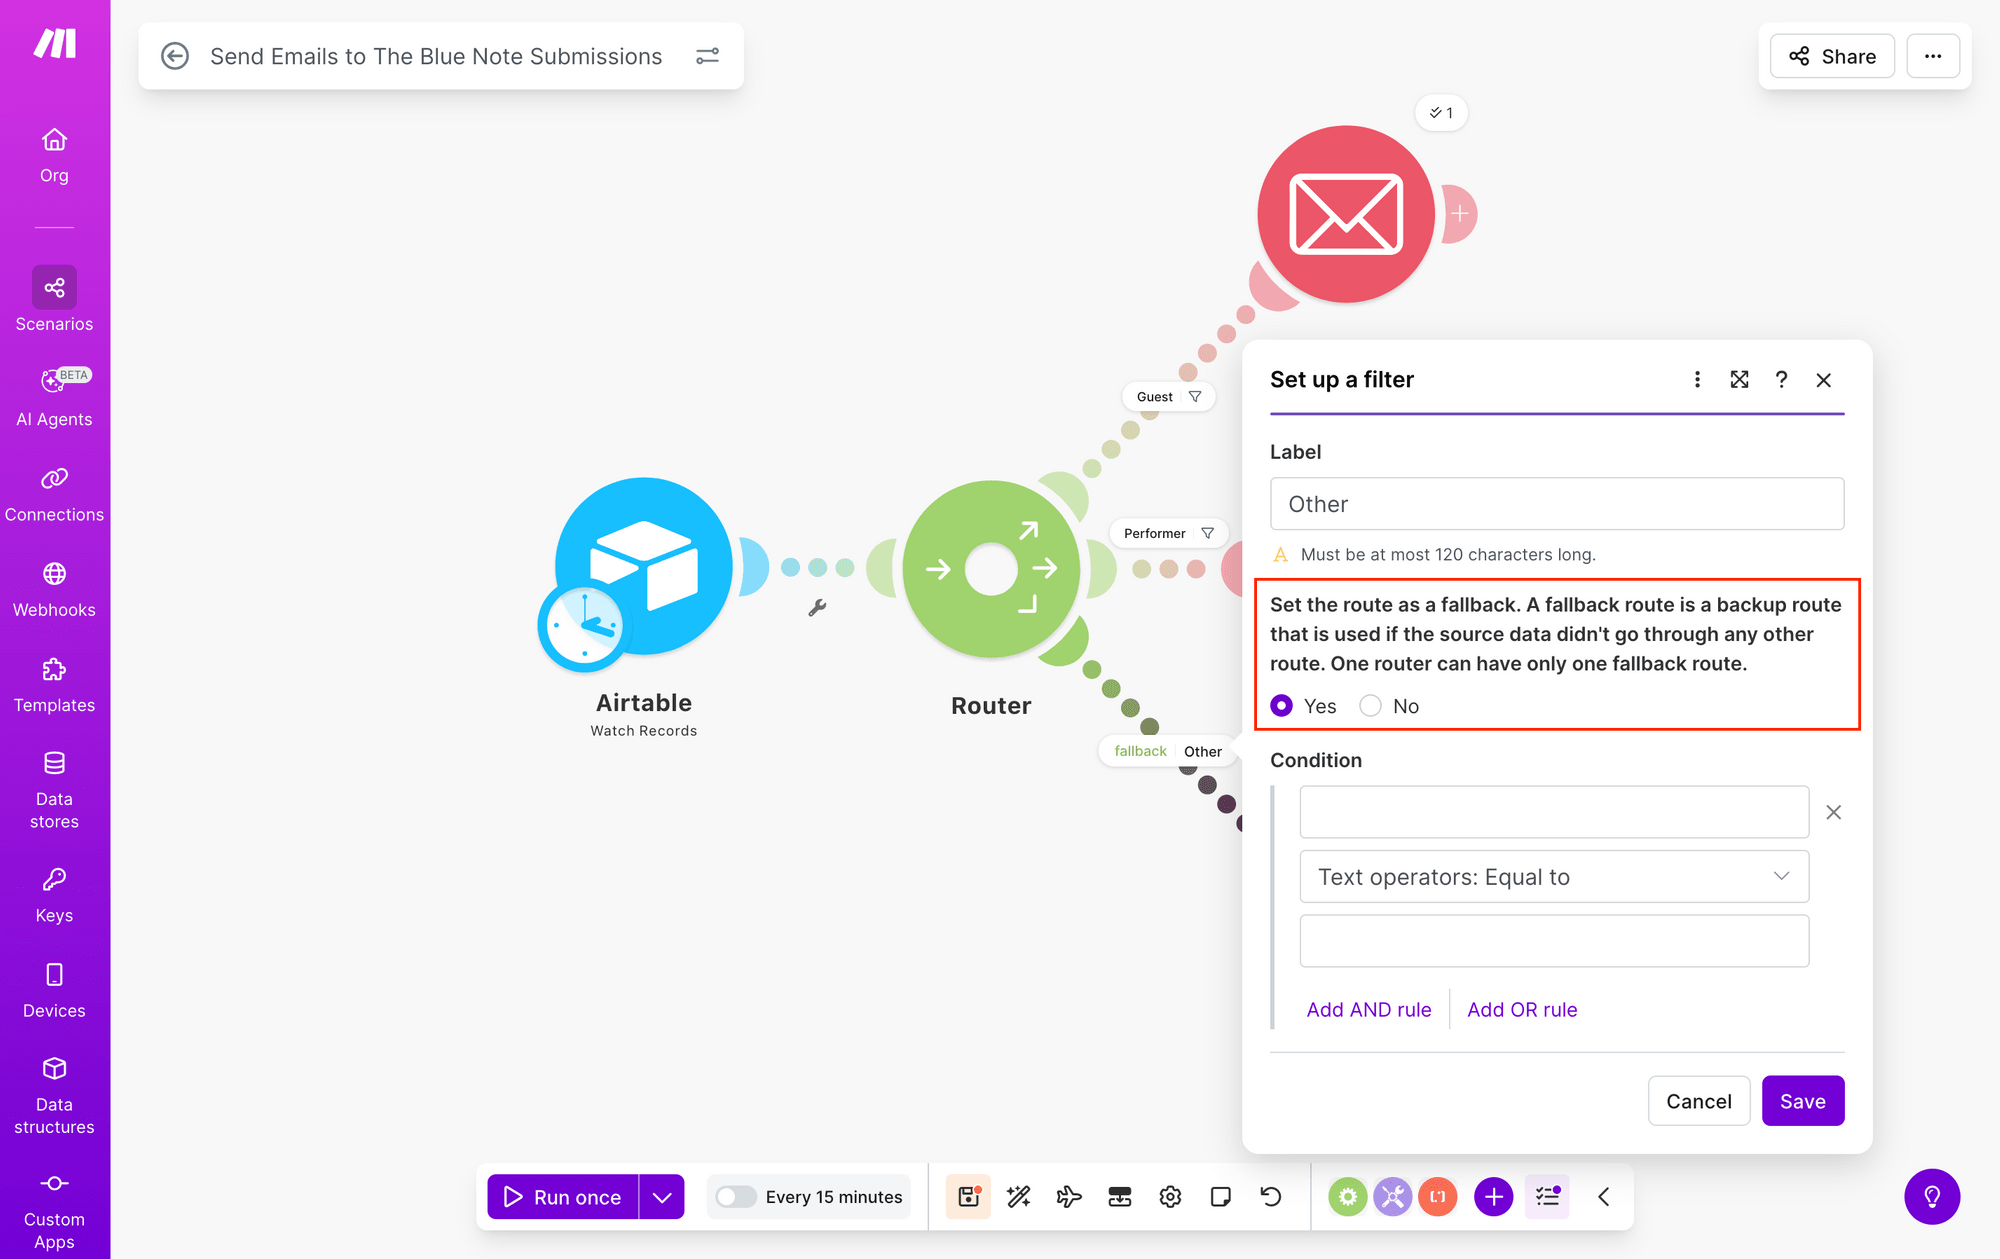
Keep in mind that you can only add one fallback route per router.
By building workflows that anticipate edge cases and bringing in human feedback when appropriate, your automations will be more resilient and reliable.
Conclusion
Make.com’s routers and filters are powerful tools for building workflows that respond to your data. By using routers to branch your logic and filters to set precise conditions, you can create automations that work smarter—not just harder.
Whether you're sending documents to the right teams or flagging unexpected data for review, these conditional logic features help you build workflows that scale with your needs and adapt to your data. Start simple, test thoroughly, and watch your automation capabilities grow.
Just getting started with nocode image generation workflows on Make.com? These tutorials will walk you through some principles and get your first scenarios up and running!
👉 How to Automatically Create New Podcast Episode Cover Art (withMake.com)
👉 How to Set Up a Make Workflow for Generating Quote Graphics
