
How to Use Webhook.site to Test Webhooks
Contents
Webhooks allow you to send real-time data to other applications but they can be challenging to test and debug. In this article, we'll introduce you to Webhook.site, a platform that makes it easy to test and troubleshoot webhooks.
Webhook.site is an open-source and free service that generates a unique URL for you to receive webhooks without having to set up and maintain your own infrastructure. Using Webhook.site, you can see what data is being sent and how it is formatted. Although the code is completely open-source, there’s a paid version that is hosted on the cloud and provides more features like creating a schedule with the unique webhook URL, exporting all requests to a CSV file, running custom actions on each request, and more.
Whether you're a seasoned developer or new to web development, this article will provide you with the information you need to get started with Webhook.site and start using webhooks in your projects. So let's get started!
What Is a Webhook and How Does It Work?
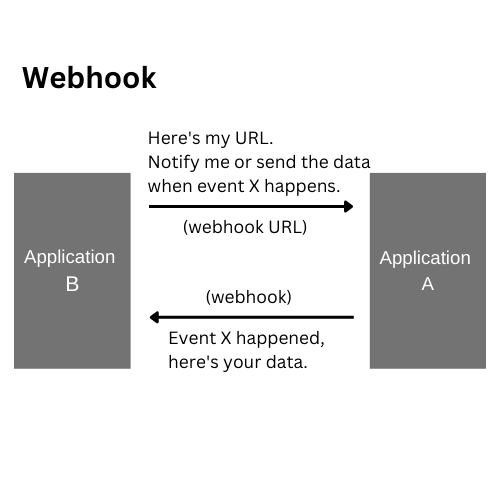
A webhook is a communication mechanism for one application (Application A) to automatically send a message or information to another application (Application B) in response to a specific event. The event could be the completion of a task, the submission of data, or even a scheduled trigger.
Webhooks are often used when multiple applications need to work together. For example, when using Bannerbear, an image generation API to generate images, you can provide a webhook URL to receive the result when the image generation is done. You can then use the image in your application or other applications to perform subsequent tasks.
Similarly, you can also add webhook integration to your application and send a webhook to the URL provided by your users when a specific event occurs on your application. This will benefit both you and your users as it makes it easier for them to use the data from your application and integrate it into their own application or workflow.
The diagram below illustrates how a webhook is used for sending data between two applications:
Webhook vs API
Webhooks and APIs can confuse novice developers as both are used for communications between applications but they are different.
As defined by Oxford Languages, an API is:
“a set of functions and procedures allowing the creation of applications that access the features or data of an operating system, application, or other services”.
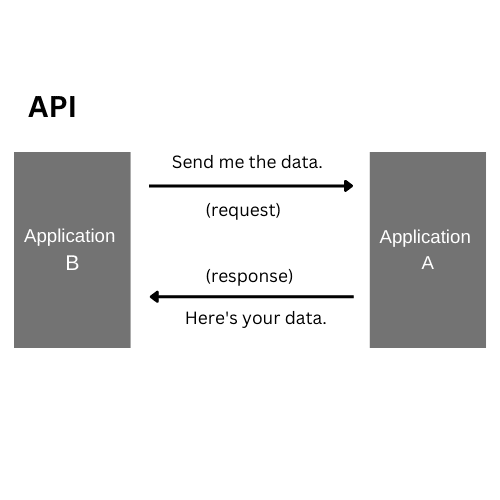
Using an API, an application can request and receive data and information from another application. Extending from the previous example, Application B will have to make an HTTP request to Application A to receive the data or get notified of the latest changes.
This shows the major difference between a webhook and an API. A webhook allows an application to get the latest data automatically. API, on the other hand, requires it to make HTTP requests for the data.
Webhook Examples
Adding webhook integration into your application will give you an advantage over other competitors as it can help users in many ways while using it, like getting real-time updates, getting notified when a specific event occurs, creating an automated workflow, and more.
Many companies have enabled webhook integration in their products, here are some of them:
GitHub
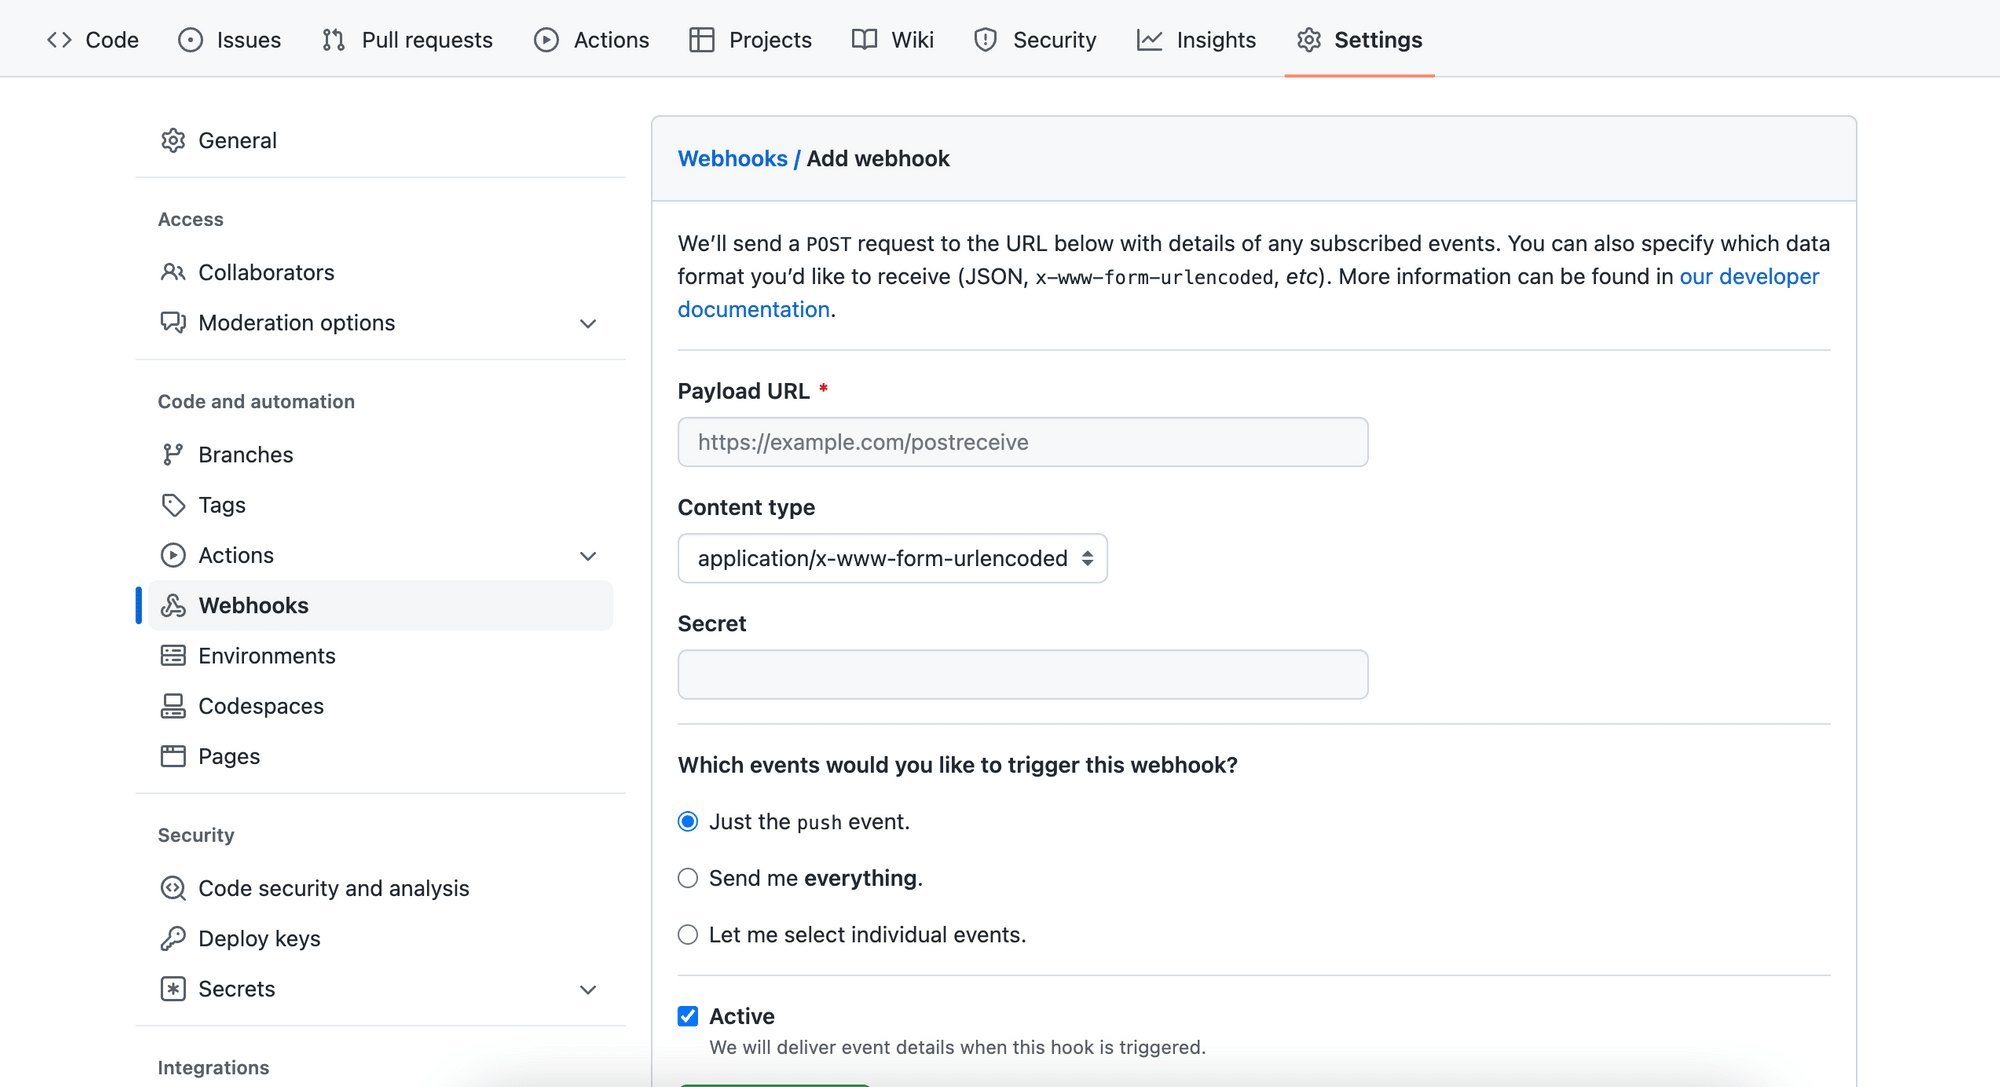
GitHub’s webhook allows users to subscribe to certain GitHub events and perform actions when the event is triggered, such as updating an external issue tracker, triggering CI builds, updating a backup mirror, deploying to a production server, etc.
When one of these events occurs, a POST request will be sent to the Payload URL (webhook URL) provided by the user.
Webhooks can be created and installed on the organization and repository levels. Besides that, it can also be installed on a GitHub App. Regardless of the installation target, the maximum number of webhook that can be added for each of them is 20.
Discord
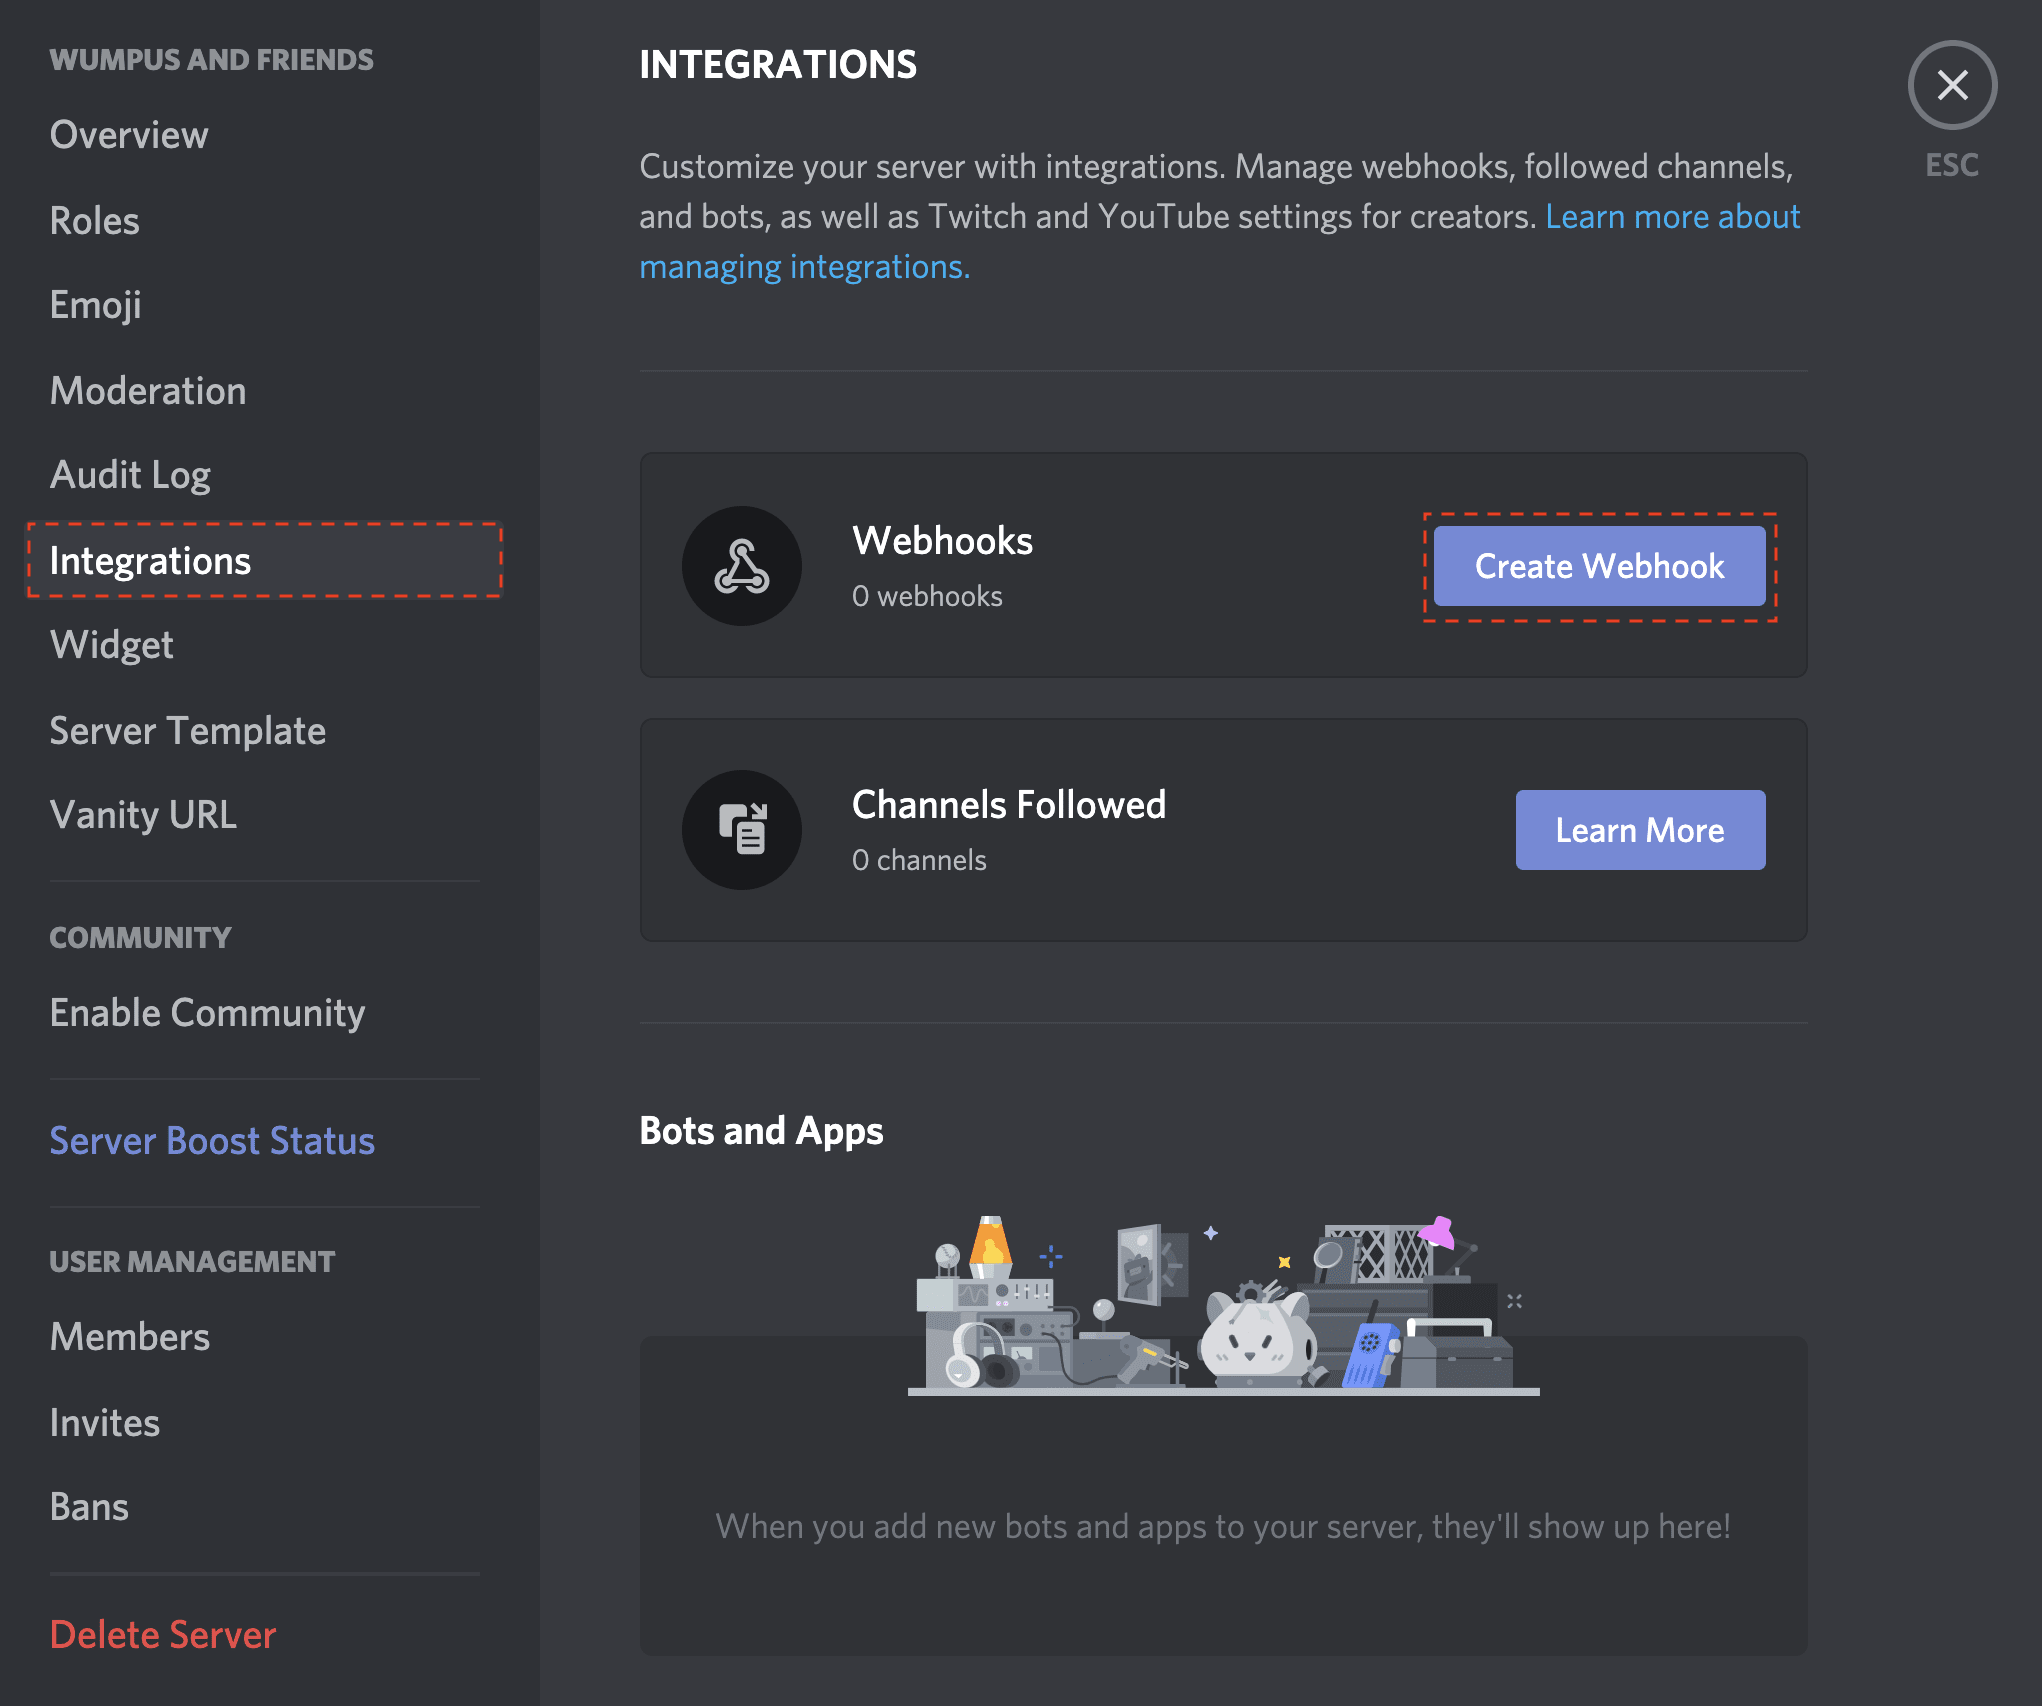
Discord is a cross-platform communication app that allows users to create and join virtual "servers" where they can communicate with each other via voice, text, and video. Being one of the most popular platforms for online communities, its built-in webhook helps server owners send automated messages to text channels in their server easily. This helps them share the latest updates and information from various sources like GitHub, Twitter, Youtube, and more with their members automatically.
By creating a webhook endpoint in the server, the server owner will get a webhook URL that can be used on other platforms that send webhooks to link the two.
 source: Discord
For example, the webhook URL can be used as the Payload URL for GitHub’s webhook. When there’s a new commit on the GitHub repository, it will trigger the webhook and send a message to the server automatically.
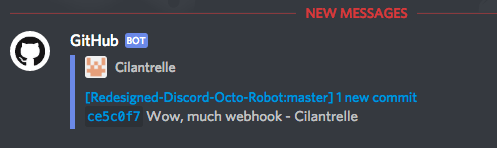 source: Discord
Zapier
Zapier is a web-based automation platform that enables users to connect various online services/applications and create automated workflows. Applications that are available will be listed on Zapier and users can select multiple of them to create a streamlined workflow that passes data from one to another.
However, not every application is available on Zapier. With Webhooks by Zapier, applications that are not listed on Zapier can be integrated into a Zapier automation as they can send HTTP requests to other available applications using a webhook and vice versa.
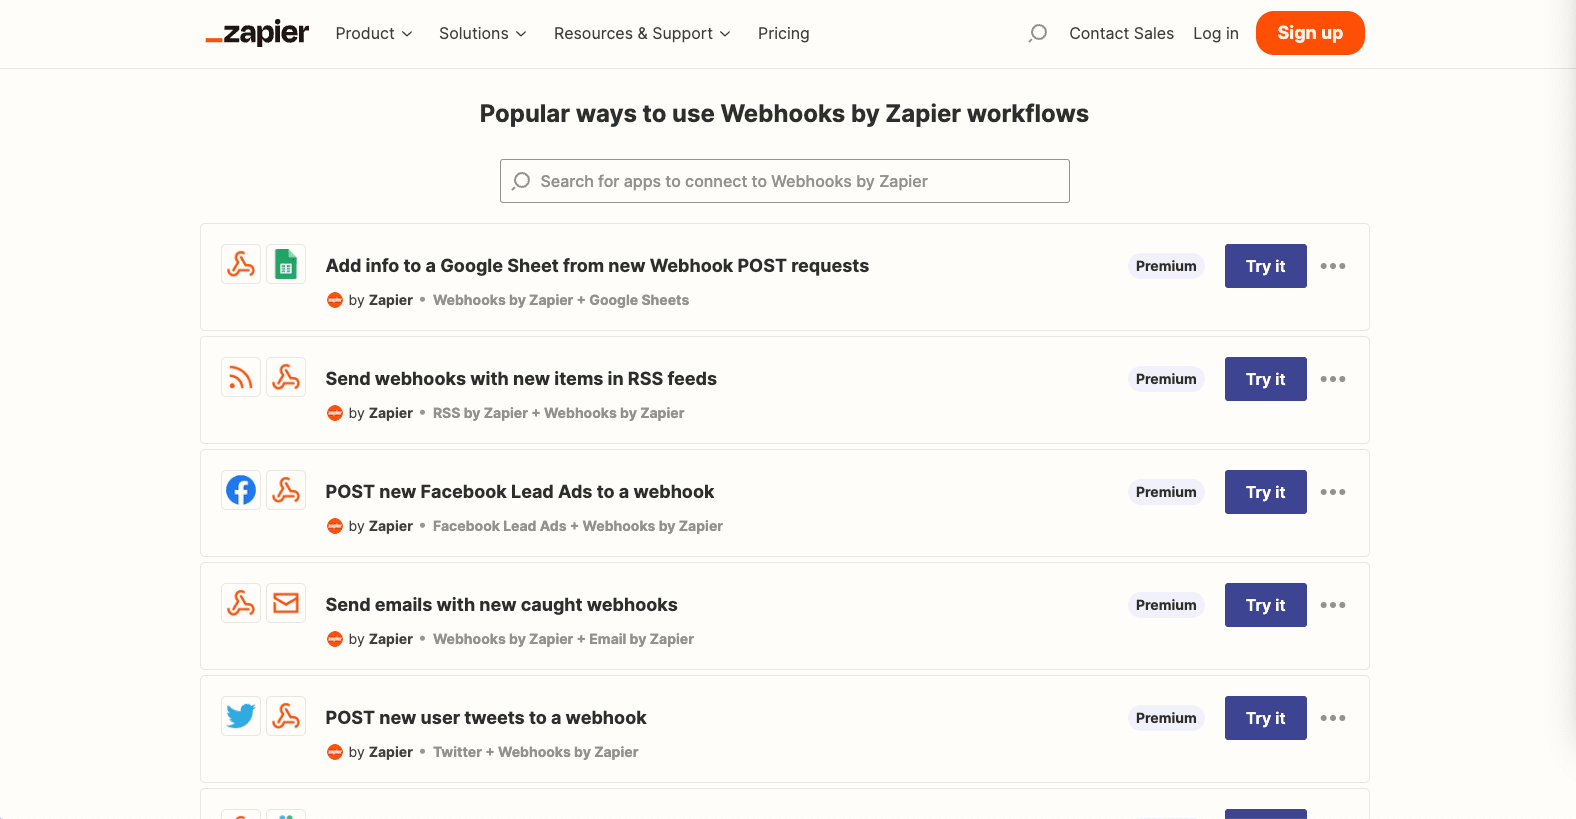
Here's an article that shows some great examples of when and how to use Webhooks by Zappier:
📌 When to Use Webhooks by Zapier in Your Automations (For Nocoders)
🐻 You can connect Bannerbear with 5000+ apps on Zapier and generate images and videos automatically using Bannerbear Integrations!
How to Test Webhooks Using Webhook.Site
Step 1. Go to Webhook.site
Webhook.site has a very simple interface. When you arrive at its home page, you’ll see a unique webhook URL you can use to receive webhooks.
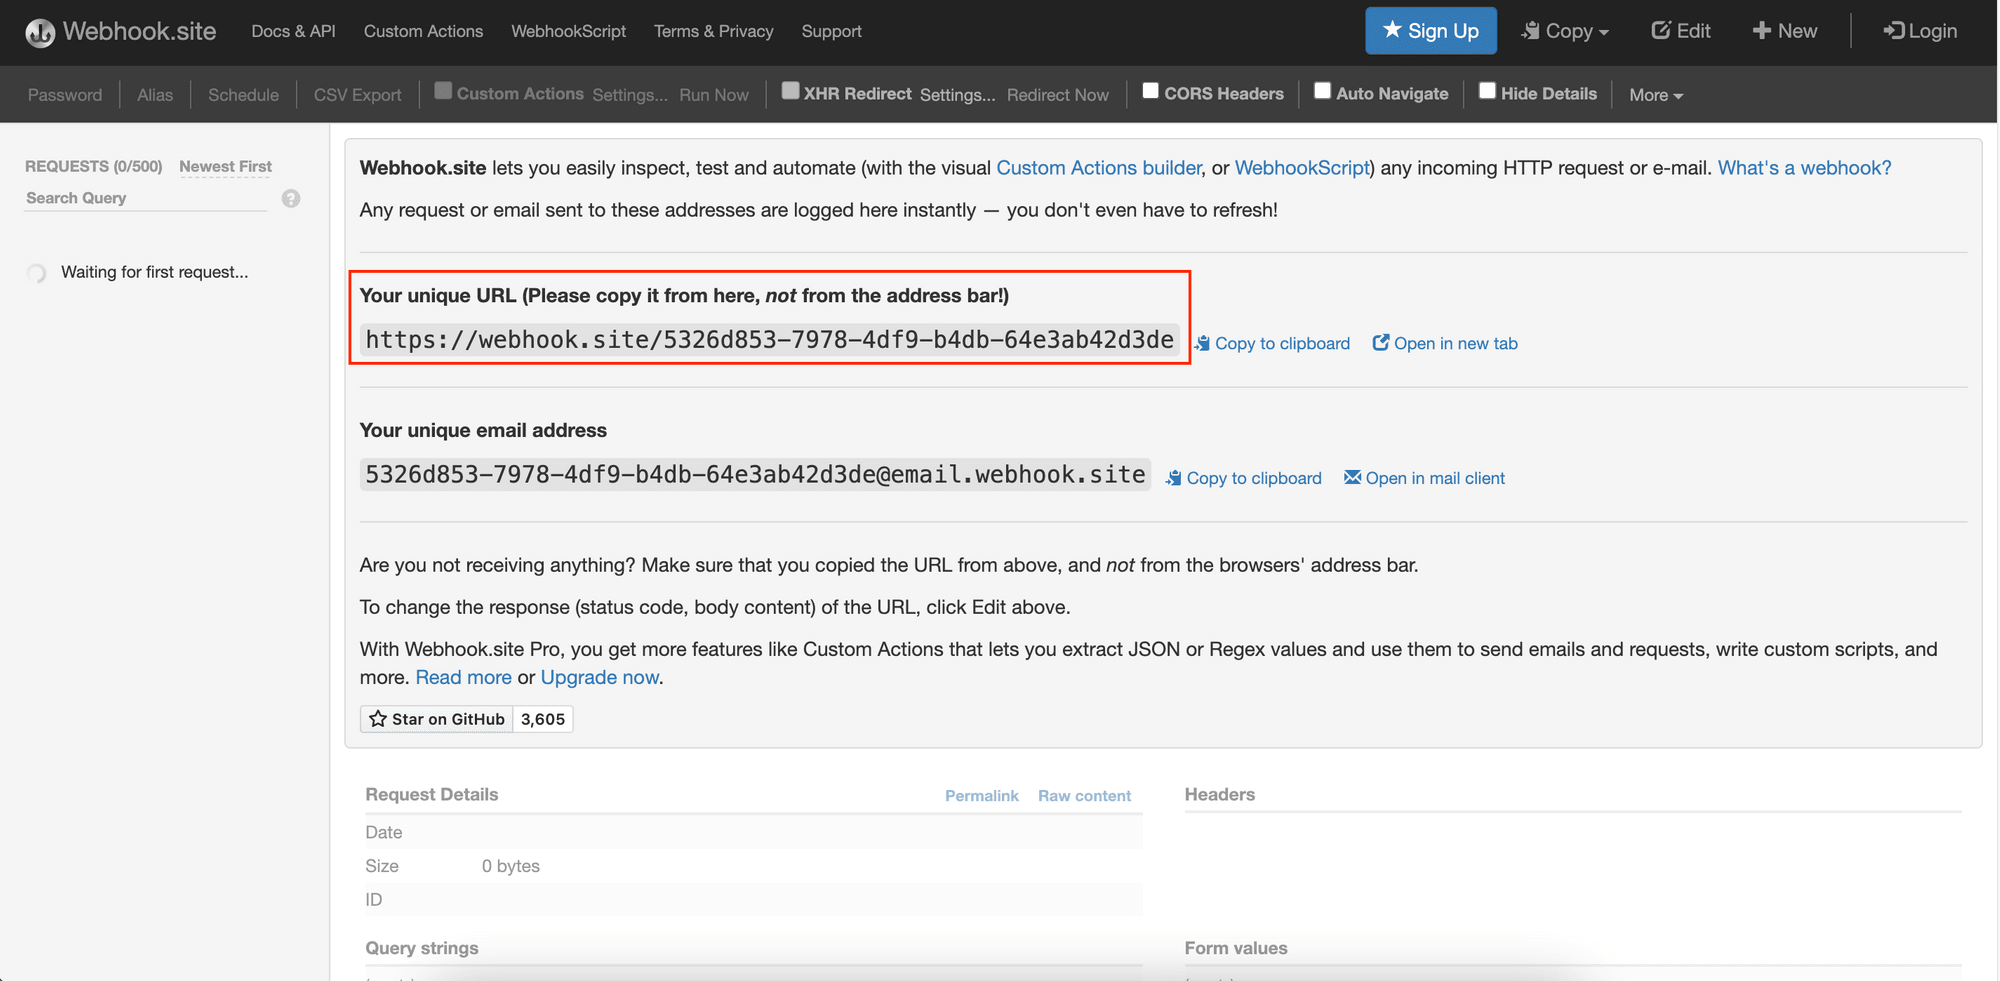
You can make an HTTP request to the URL to test your application’s webhook. If your application is receiving data from other third-party services instead, you can use it to receive webhooks without an internet-facing web server.
Any HTTP request sent to the URL will be logged instantly at the bottom section on the same page.
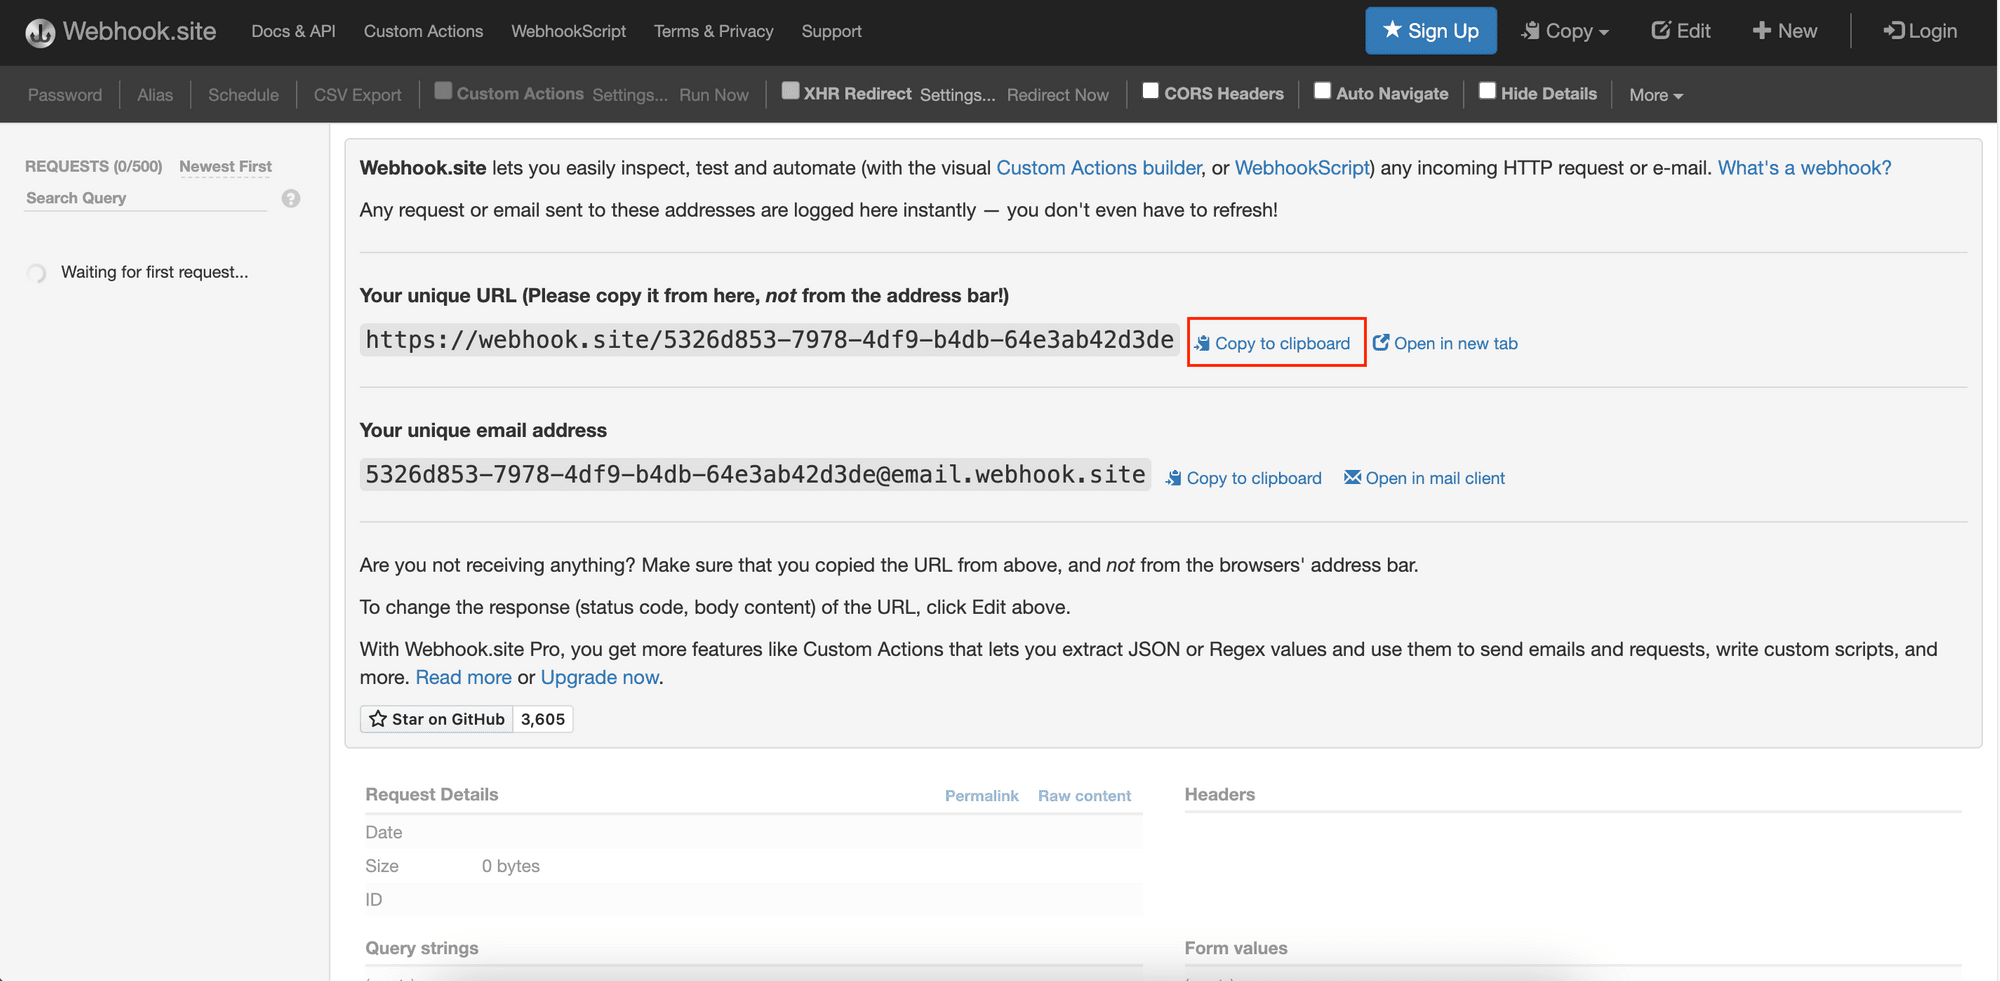
Step 2. Copy the Webhook URL
Copy the unique URL as shown and use it to test webhooks.
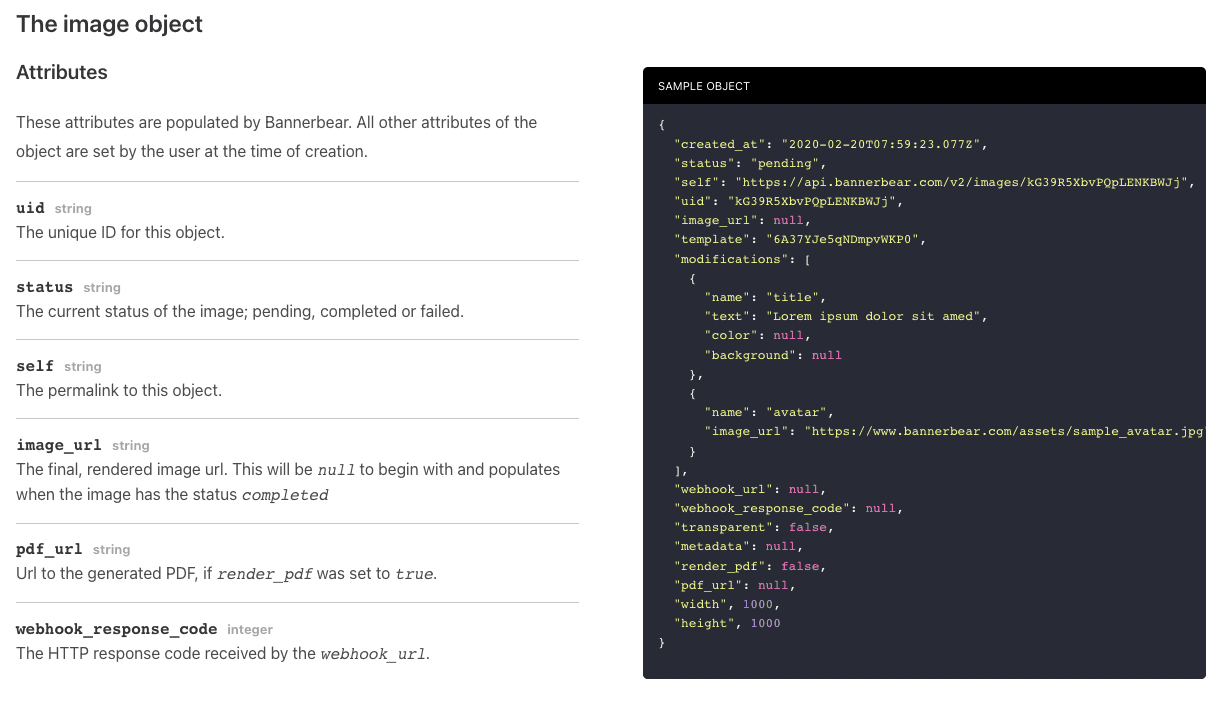
Let’s test webhooks received from a third-party service like Bannerbear. Bannerbear’s Image Generation API enables webhook integration. When you include a webhook URL in your API request, it will post the result, which is the full Image object to the URL when the image generation is done.
The screenshot below shows an example of the Image object and you should get this object in Webhook.site if a webhook URL is provided:
🐻 You will need a Bannerbear account to use the API. You can use this article as a reference to test webhooks from other applications or create a free account to follow along this tutorial.
Step 3. Send a Test Request
Go to the Bannerbear dashboard. In the “Projects > Templates” page, select a template. In the API console of the template, you can find the pre-populated JSON body.
Look for webhook_url, paste the webhook URL copied from Webhook.site, and click “Send API Request”.
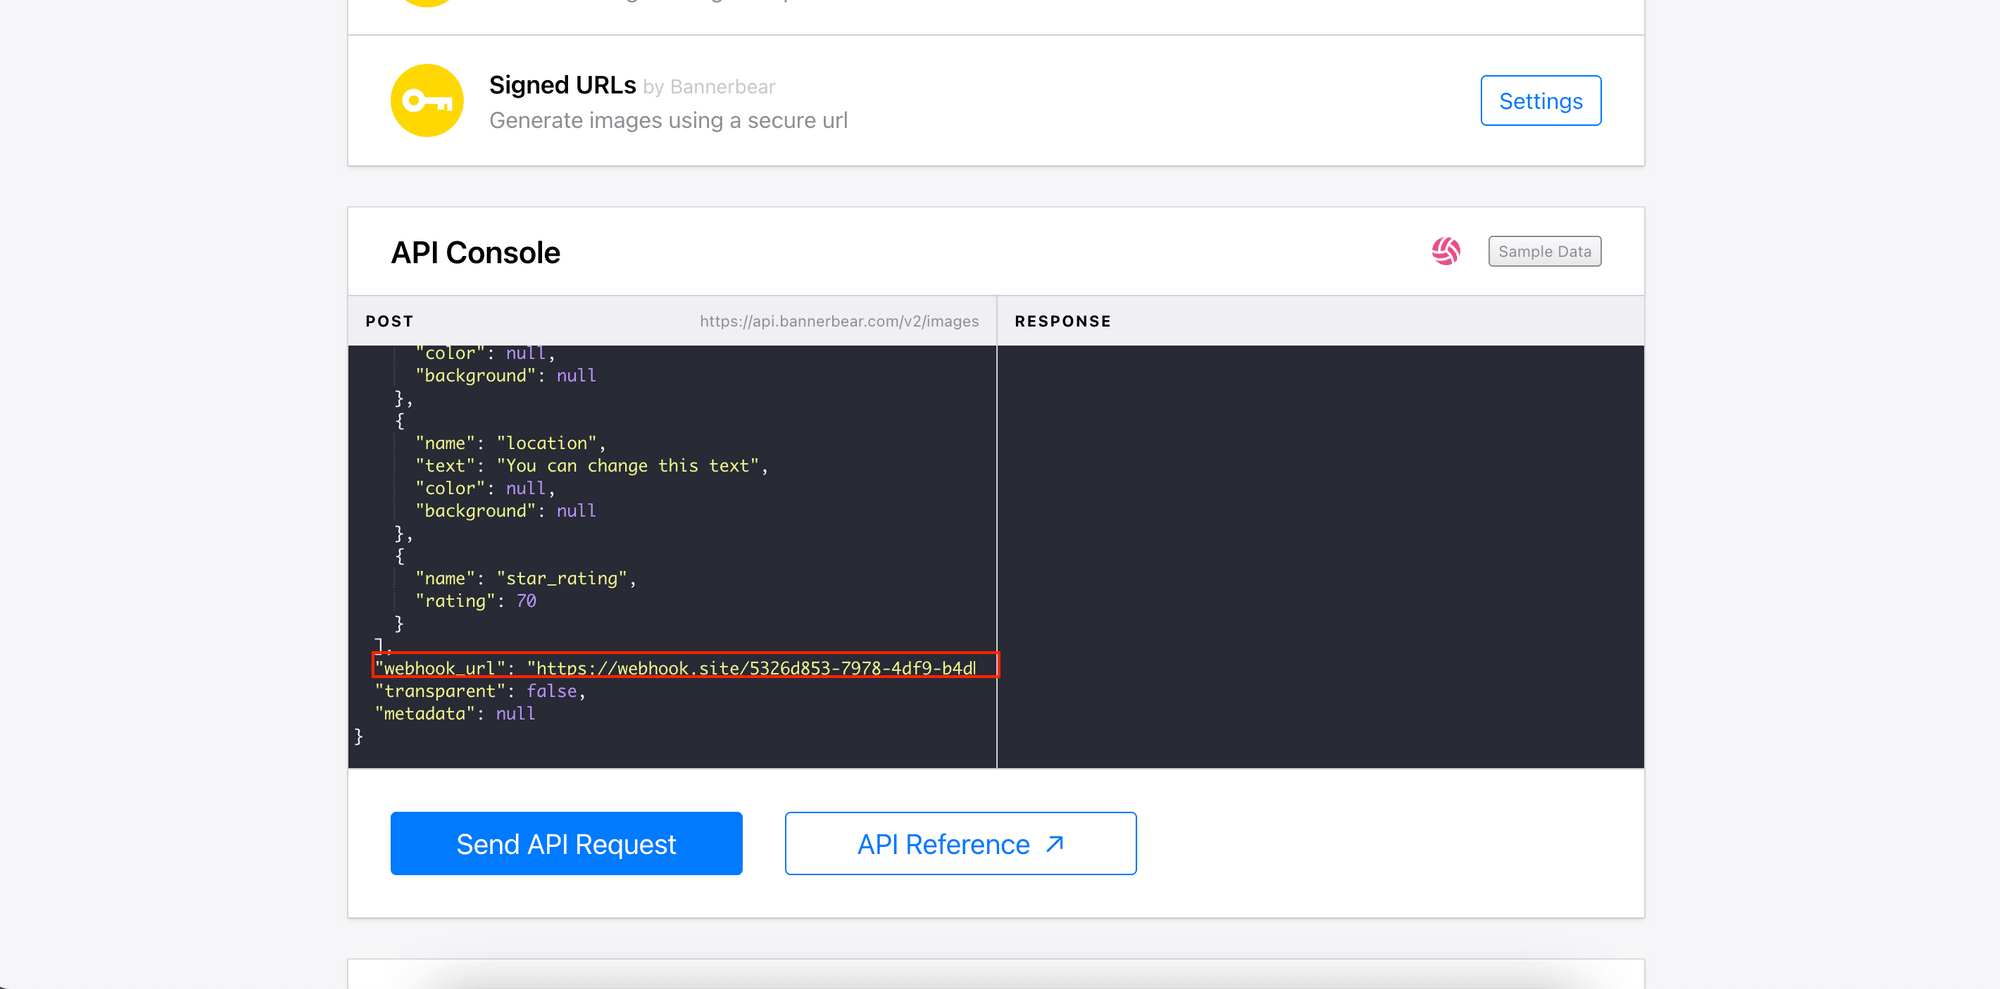
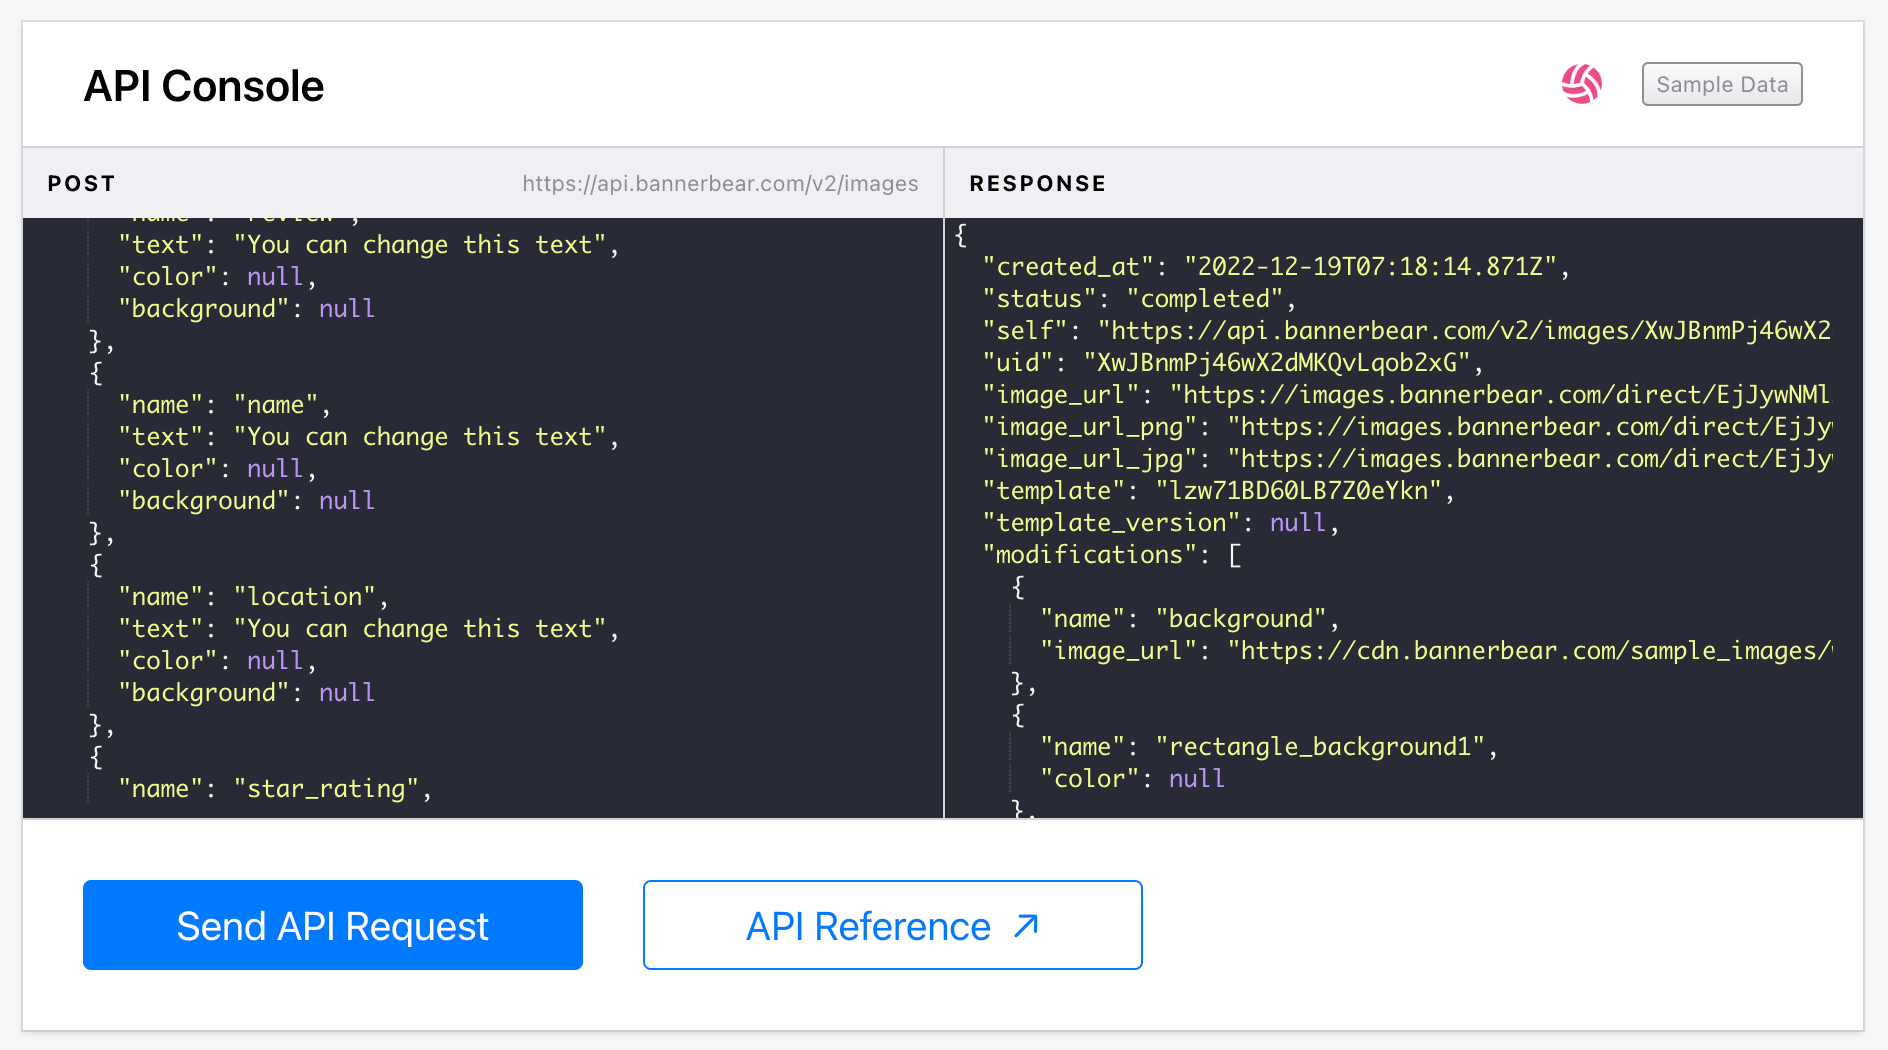
The response will be displayed on the right side of the console.
🐻 If you want to test webhooks sent from your application, just send a request to the webhook URL when a specific event is triggered.
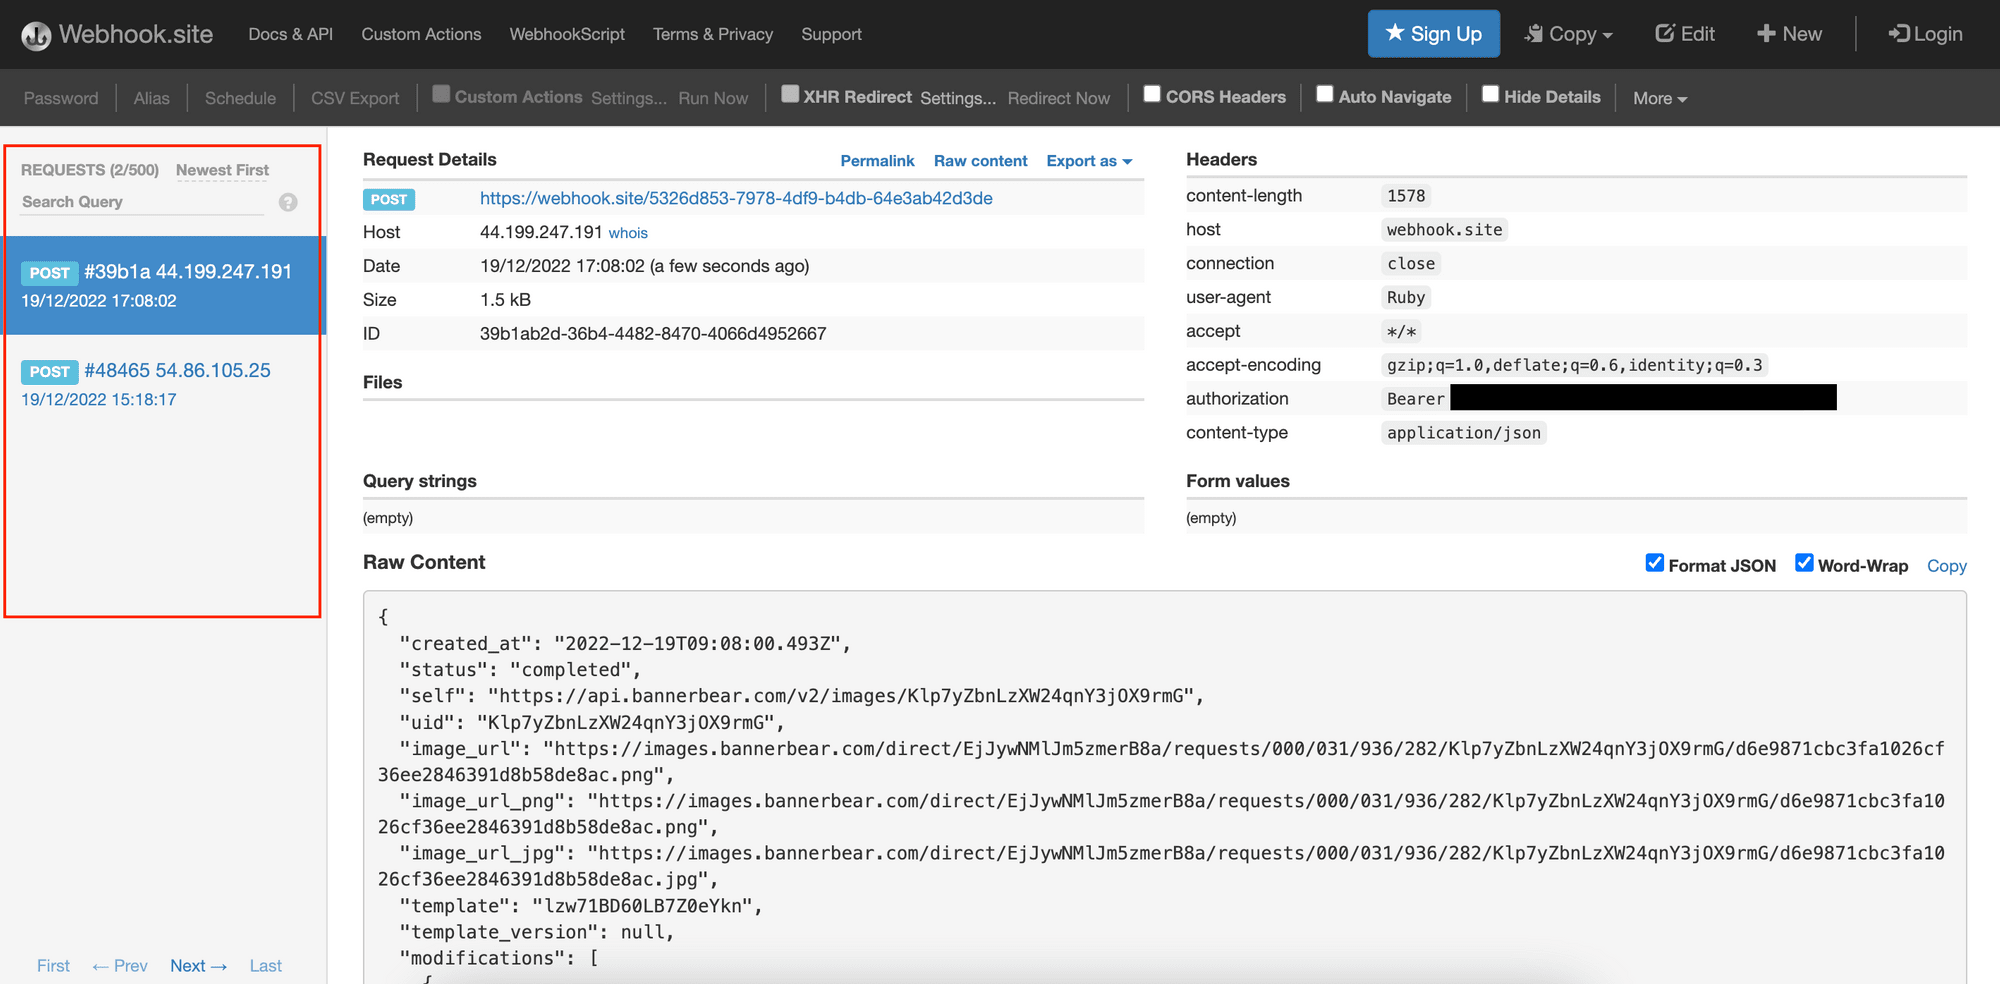
Step 4. Check the Response on Webhook.site
The same POST request and its result should be shown in Webhook.site. Other information like the request details, headers, files, query strings, and form values will also be captured and displayed.
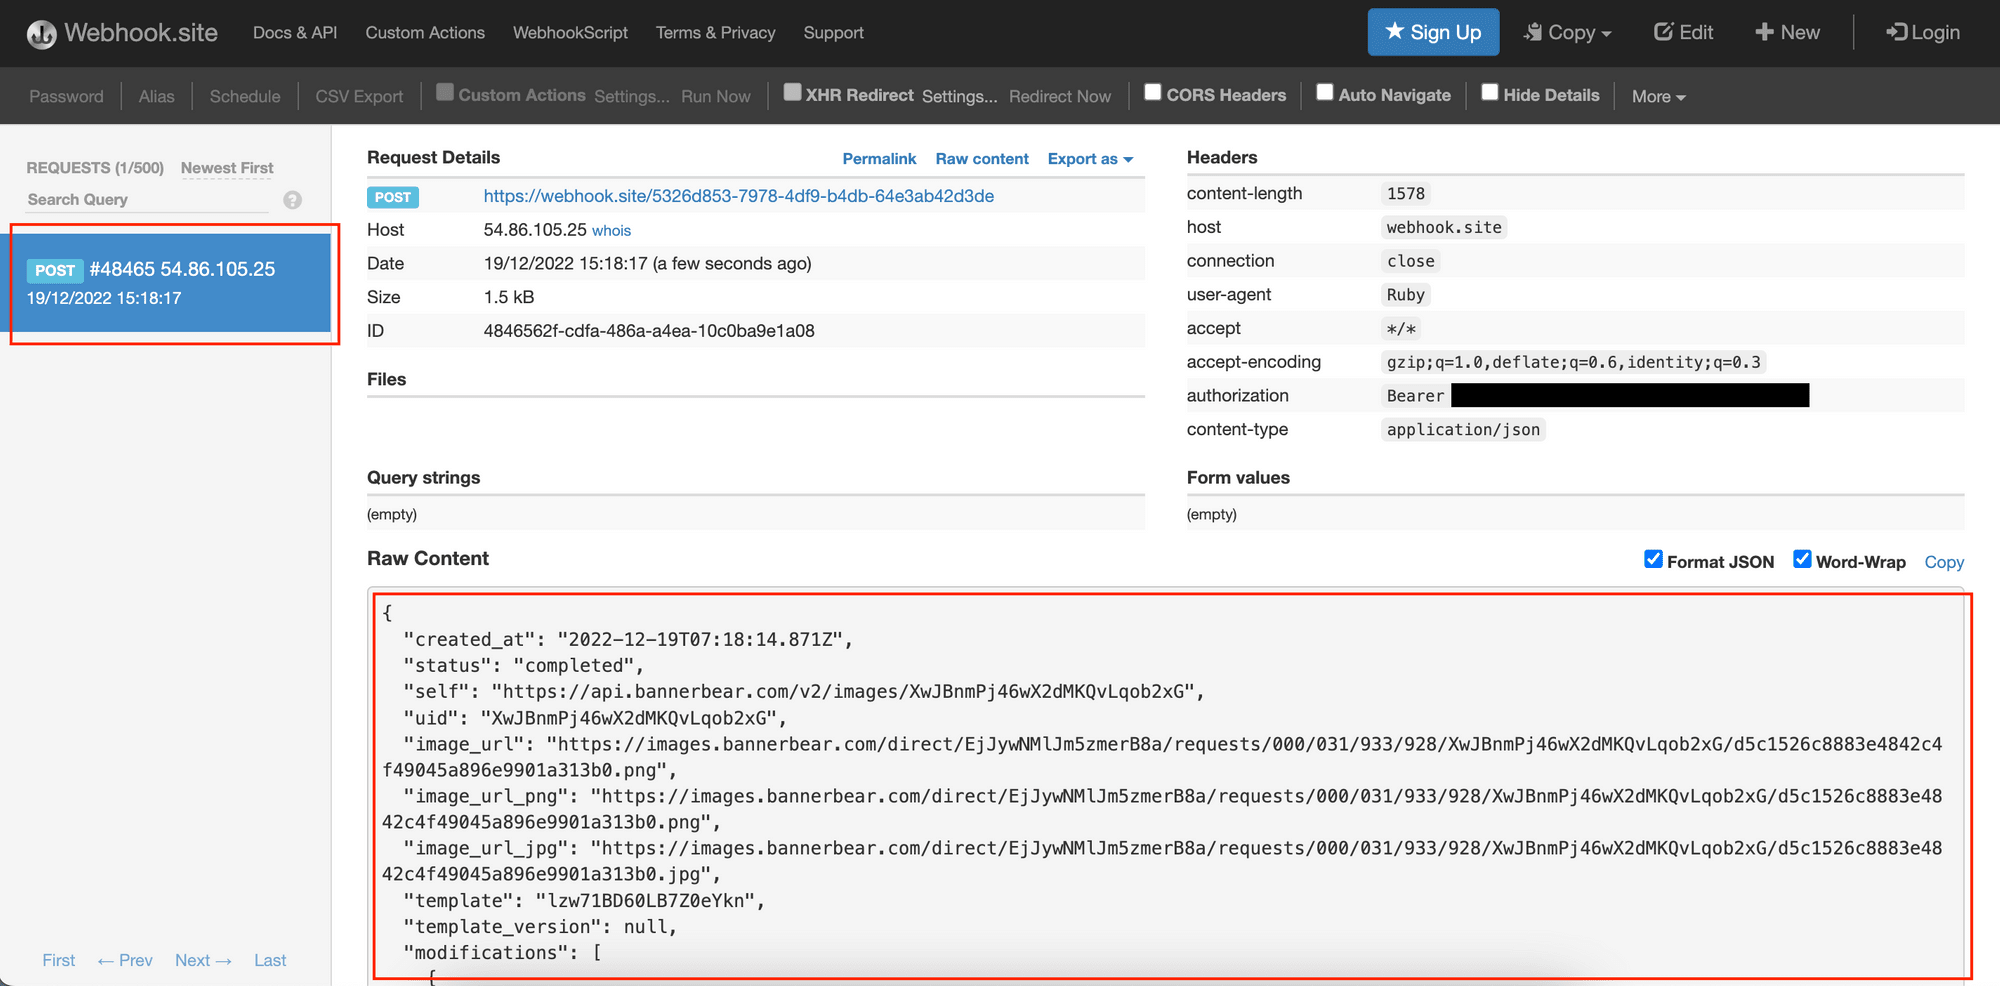
All webhooks sent to the webhook URL will be listed on the left panel. This allows you to switch between the requests and inspect their results quickly.
Conclusion
That’s how you use Webhook.site to test webhooks. There are more features available but they require you to subscribe to a paid plan to use them. Nonetheless, Webhook.site is a valuable tool for testing webhooks and improving your development workflow even with the free features.
With its intuitive interface, it’s easy to test webhooks and ensure that the data sent are correct. If you are working with webhooks in your application, I encourage you to give it a try and see how it can help to simplify your webhook testing.
