
How to Generate Bannerbear Images Based on Conditional Logic (Make.com Tutorial)
Contents
Not all data deserves processing. Some updates don’t need to trigger notifications, some information only needs to be categorized in the background, and some reviews shouldn't become marketing material. Conditional logic lets you build workflows that respond intelligently to what they receive—running actions only when appropriate, and ensuring data is only routed where it matters.
When it's thoughtfully implemented, conditional logic helps you:
- Prevent wasted resources (generation credits, storage space, computational power, human monitoring)
- Route information only to teams that need it
- Accurately organize and process your data
- Build automations that scale
If you use Make.com, knowing when and how to apply conditional logic can transform your automated workflows. In this guide, we'll explore the features and logic you need to build rule-guided processes that actually work.
Make’s Conditional Logic Features
There are 2 key Make features that power conditional logic: routers and filters.
Routers are used when your workflow needs to branch into several possible paths based on specific conditions. You can use a single router or chain multiple routers together to handle increasingly complex workflows.
Filters work to separate data that matches your conditions. In some scenarios, you may need to only work with bundles that fit specific criteria, rejecting the rest or processing it in a different way.
Bear Tip 🐻: Our article on Make’s routers and filters will walk you through adding these modules to your scenarios step-by-step.
How to Use Conditional Logic for Image Generation
Not every piece of data deserves an image. Conditional logic lets you generate only when it makes sense, to ensure you aren’t wasting credits, storage, and processing time.
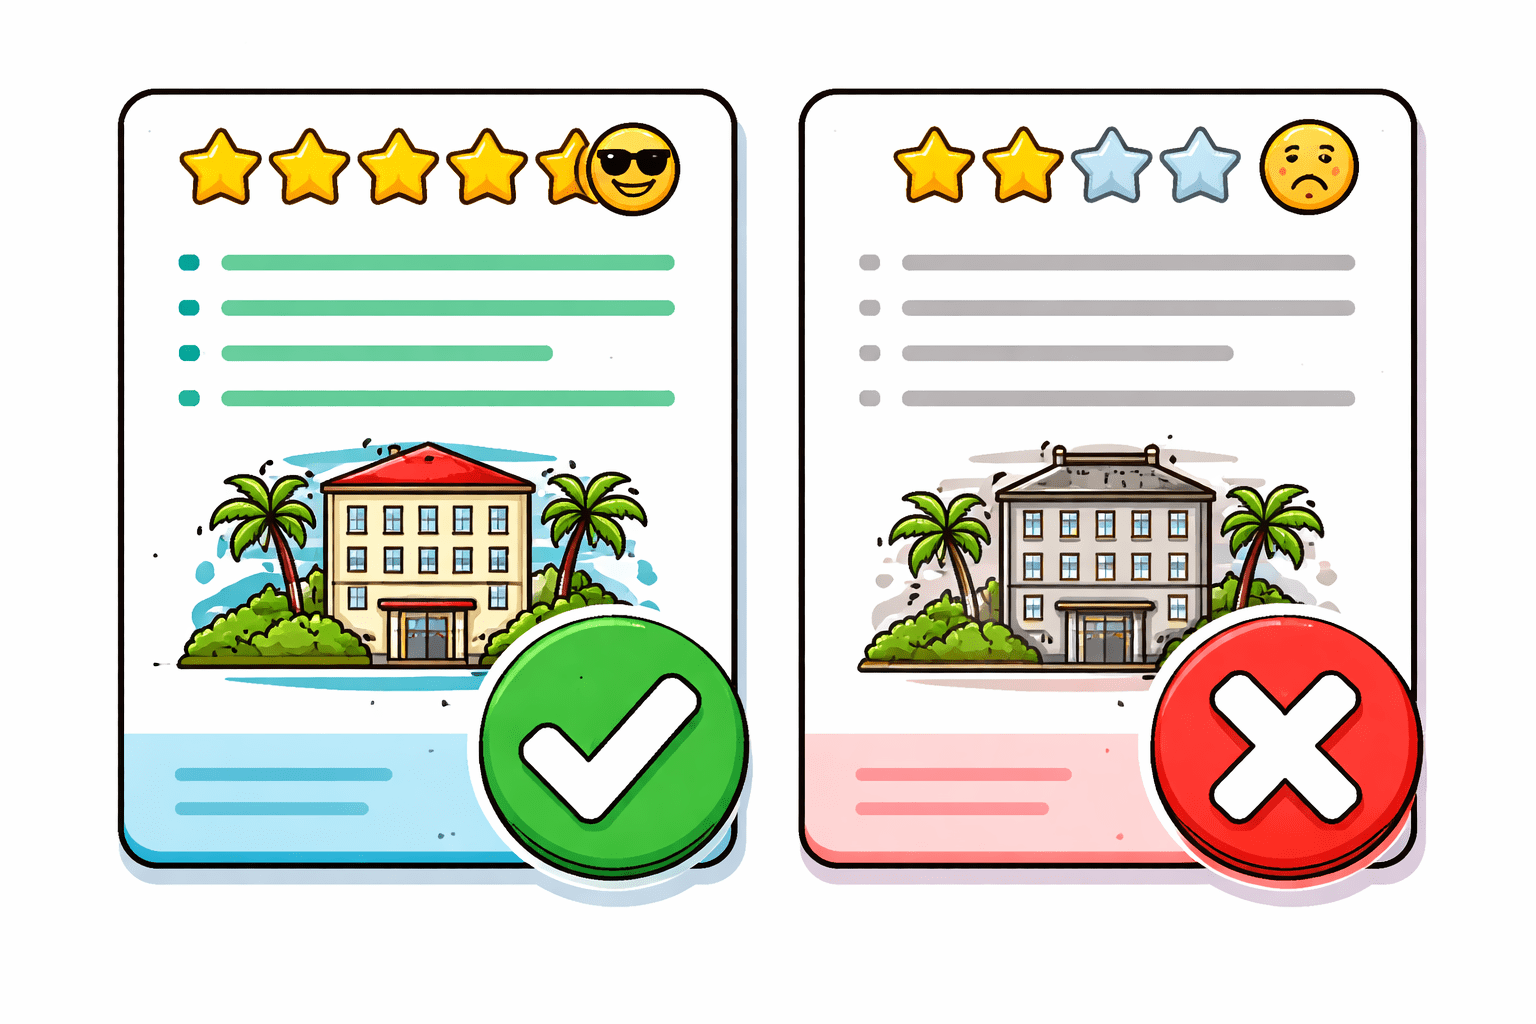
Let’s use an example: a hospitality business pulls reviews automatically and wants to create promotional images from them. But not all reviews are promotion-worthy; only 4+ star reviews should become images. That's your decision point, and that's where conditional logic kicks in.
So how do we turn this use case into a rule-based automation? Let’s walk through it.
Deciding Where to Filter Your Data
You have two choices: filter before the automation or build the logic into your workflow.
Pre-automation filtering works best for one-off runs or when you can cleanly separate data at the source (like a spreadsheet column marking which reviews to use). It's simple and keeps your workflow lean.
In-workflow filtering makes sense when data arrives automatically and you have only a few conditions to check. In our review example, pulling from Google My Business and filtering by star rating is lightweight. A single router that splits into two paths with filters costs little and keeps everything in one place.
The key question: How many decision points do you actually need? If all you’re doing is separating 4+ star reviews from the rest, one filter does the job. If you're also separating by language, media type, and template, you're building complexity that might belong upstream.

Structuring Your Logic
Once you've decided where to filter, map out your branching:
- Identify your decision point. In the review example: is the star rating 4 or higher?
- Define your routes. High-rated reviews → generate Bannerbear image. Low-rated reviews → skip or handle differently.
- Place the filter before generation. This prevents wasted credits. If you generate first and sort after, you've already spent resources that could be easily conserved.
- Test each path. Make sure data actually flows where you expect it to. Double-check that your router is pulling from the right source.
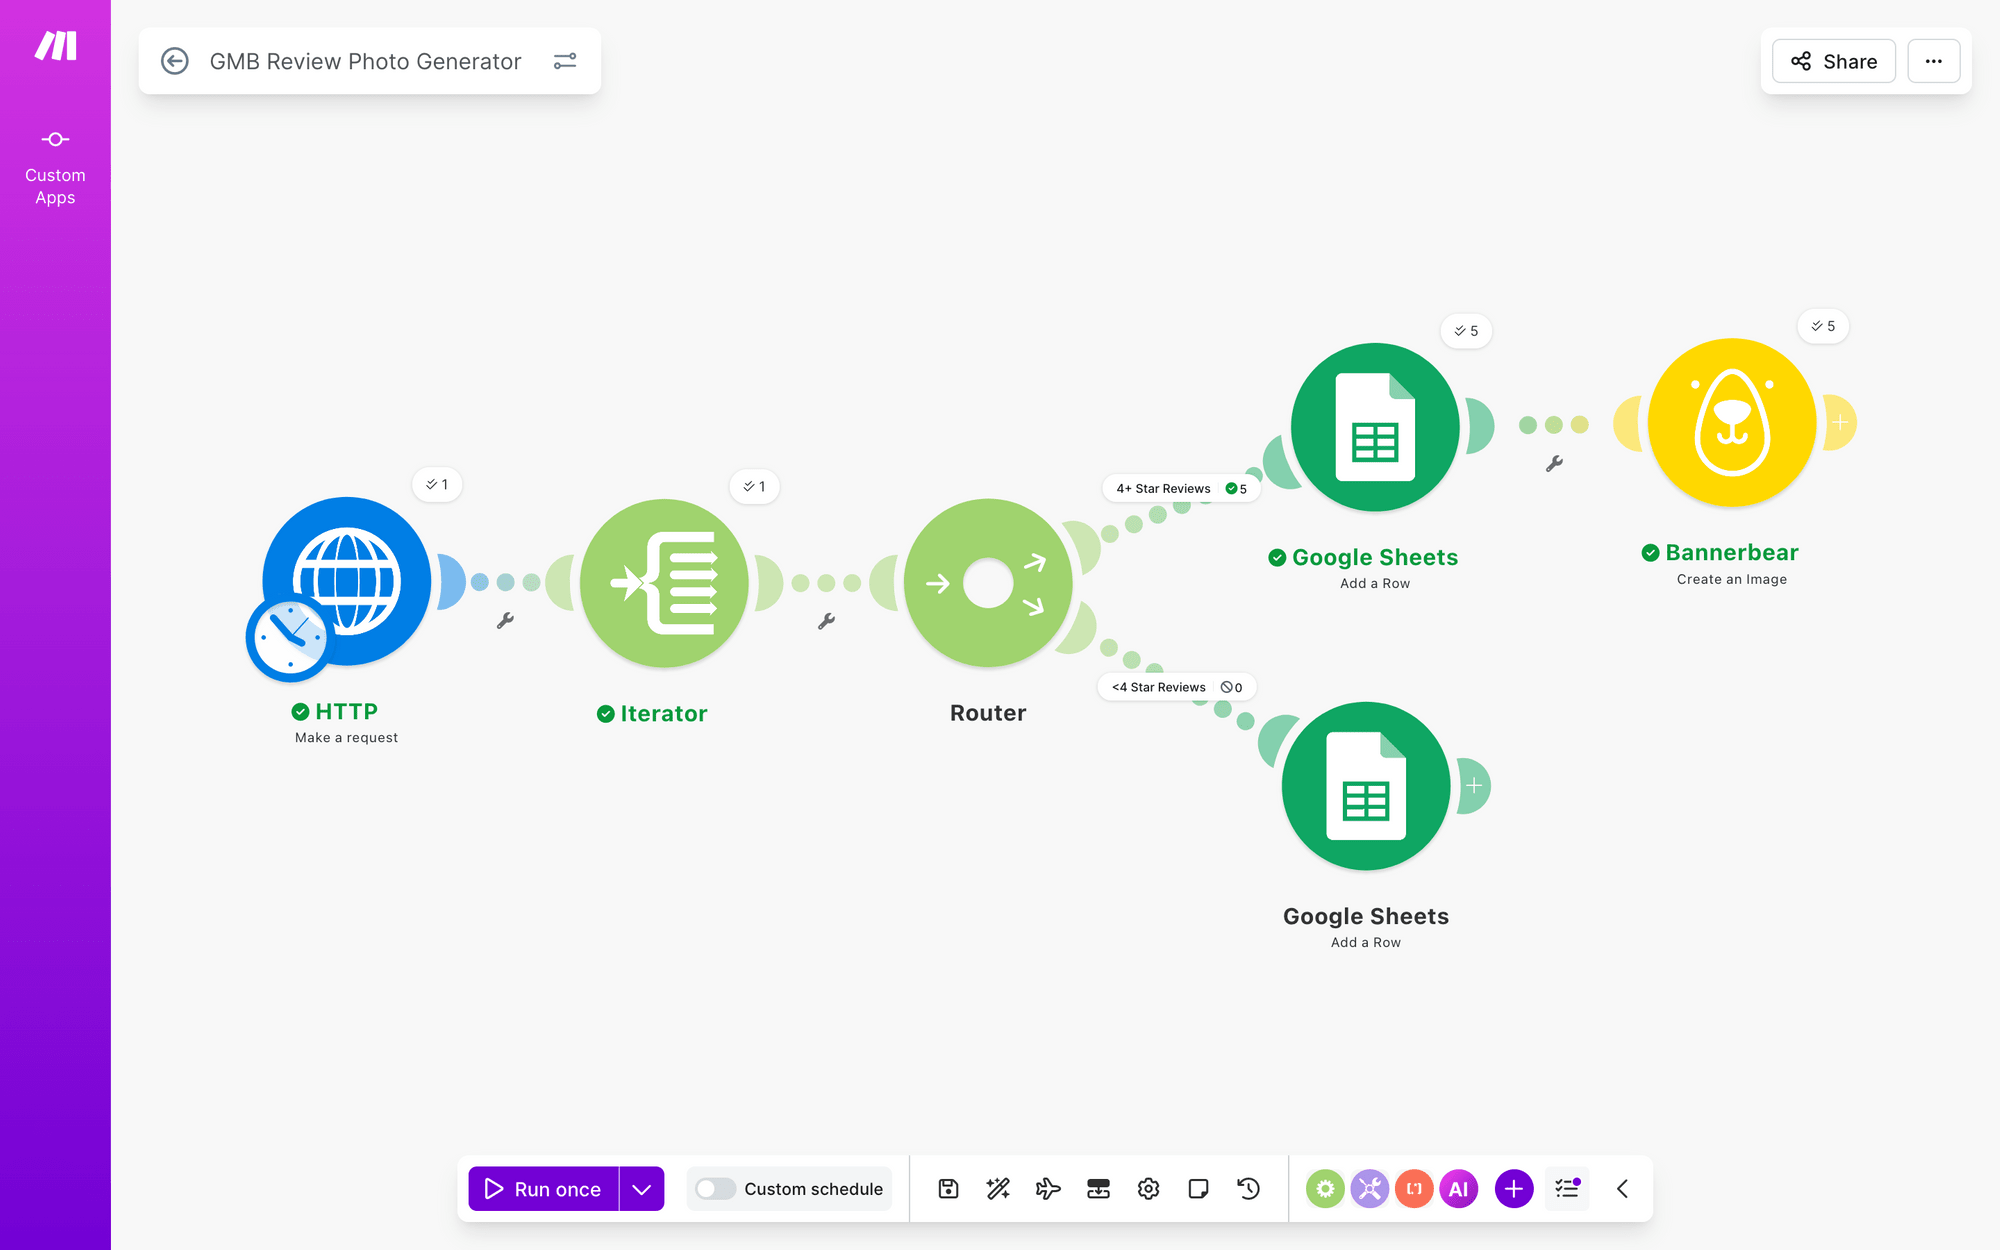
Using the hotel example, our workflow looks something like this:
Once your logic makes sense, all that’s left is to make it bulletproof.
Strengthening Your Automation
Establishing the rules will make up the skeleton of your workflow, but you’ll get more out of it if you take a look at the use case from a wider view. Some things you can do are:
- Set up a fallback route for edge cases (malformed data, missing fields)
- Verify each module is referencing the correct data source
- Test, test, test
Another key part of strengthening your automation is carrying it forward to where your generated images need to go. Since conditional logic means not all input data gets images, storage deserves care.
Use metadata (like the original review ID or star rating) to track which records generated output and which didn't. Store images in a way that makes retrieval easy: spreadsheet columns, cloud folders organized by criteria, or tagged database records. This matters more with conditional workflows because gaps in output are now intentional, not mistakes.
With all of these things in mind, you can build workflows that actually generate promotional images you want to use.
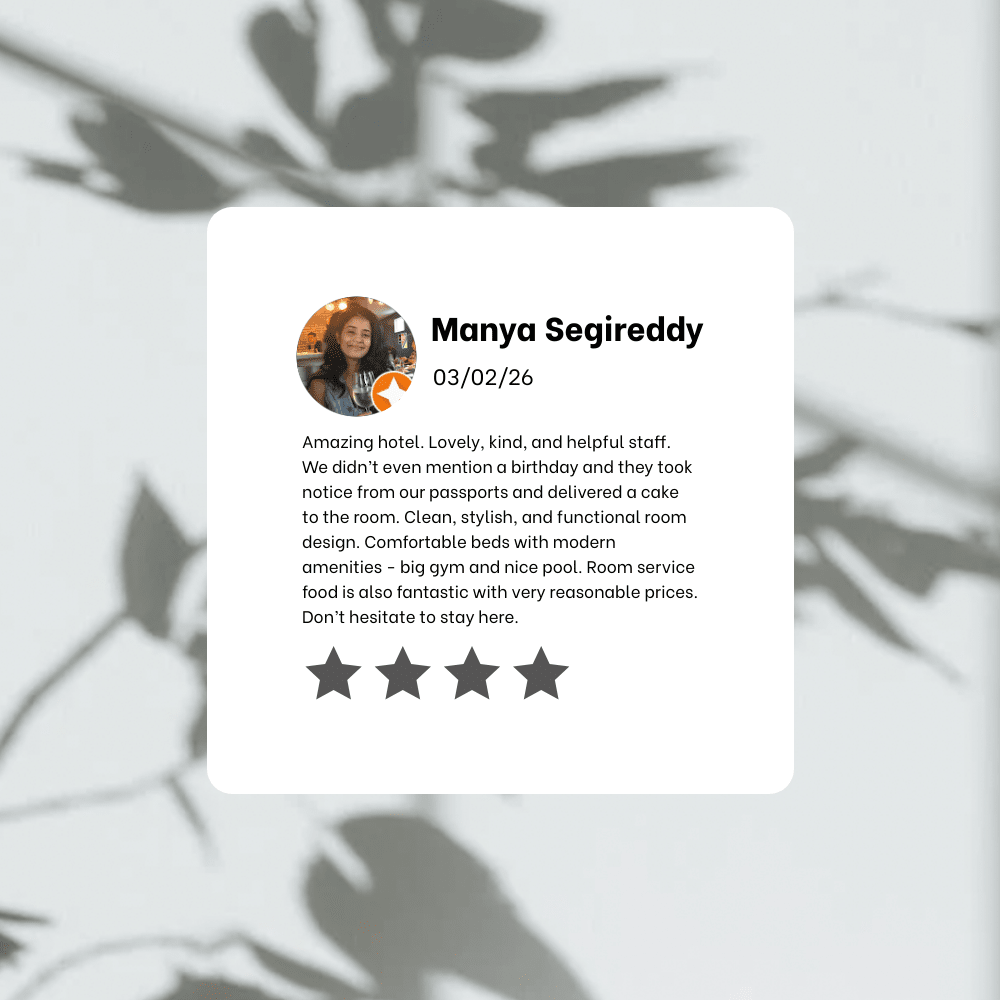
Review data from The Standard, Bangkok Mahanakorn's public Google My Business profile
Conditional logic can help you avoid wasting resources on reviews that are malformed or just not worth it. That way, you can put more towards the things that actually make an impact to your business.
Conclusion
Make.com's routers and filters let you build workflows that generate images only when it matters. By filtering before you create, and structuring your logic clearly, you save credits, reduce clutter, and build automations that work smarter—not just harder.
The strategies we've covered—identifying decision points, choosing where to filter, and strengthening your logic with fallbacks—apply whether you're processing reviews, user submissions, or any data stream. Start small with a single condition if you're new to Make's conditional features, then layer in complexity as you get comfortable.
Remember that the goal isn't to automate everything; it's to automate thoughtfully. When you route your data strategically, you'll find that your workflows become more efficient, your resource costs drop, and your output quality actually improves.
