
How to Create Dynamic Price Graphics with No Code Automation
Contents
Price is a powerful factor in consumer behavior, which explains why it’s so often emphasized in promotional material. Brands that produce, sell, or build communities surrounding certain product types inevitably have to showcase prices in some way.
You can use pricing graphics to illustrate:
- Promotional deals
- New products
- Pricing changes
- Clearance sales
- And more!
However, managing and marketing a wide product range or frequently changing prices can be time-consuming. This is where automation comes in to streamline these tasks.
Automated workflows can simplify data collection, organization, and image generation. They can even go so far as to distribute them without manual intervention. That’s why in this tutorial, you’ll learn how to build a workflow that pulls data from a cloud database to generate dynamic pricing graphics that can be easily distributed to your audience.
What You Will Create
Pricing graphics can influence your audience to take action. They can be distributed in mass or customized to each person, depending on your goals.
To auto-generate pricing graphics, we’ll be using the following tools:
- Airtable : To store, clean, and organize pricing data
- Bannerbear : To produce dynamic pricing graphics
- Zapier : To build automated workflows with multiple apps
By the end of the tutorial, you should be able to create branded pricing graphics that look like this:

Let’s start from a template.
Design a Bannerbear Template
Bannerbear templates are designed for you to generate different images based on incoming data. You can define fields as dynamic or static, and customize them however you want.
To design a dynamic template, you need a Bannerbear account (create a free trial account if you don’t have one—no credit card required! 🎉). Log in, then click the Projects tab.
Click New Project , then decide whether you want to start from scratch or use one of the templates in our pre-made template library, such as this one:

Add dynamic fields for any data that will vary from image to image. We’ll use the following:
- Product name
- Description
- Price
- Brand
- Image
Bear Tip 🐻: Use a dynamic QR field if you’d like your audience to scan a link directly from the graphic.
Then, set up any static fields, such as:
- Promoter logo
- CTA
Set up any background images, fonts, colors, and anything else you’d like to include.
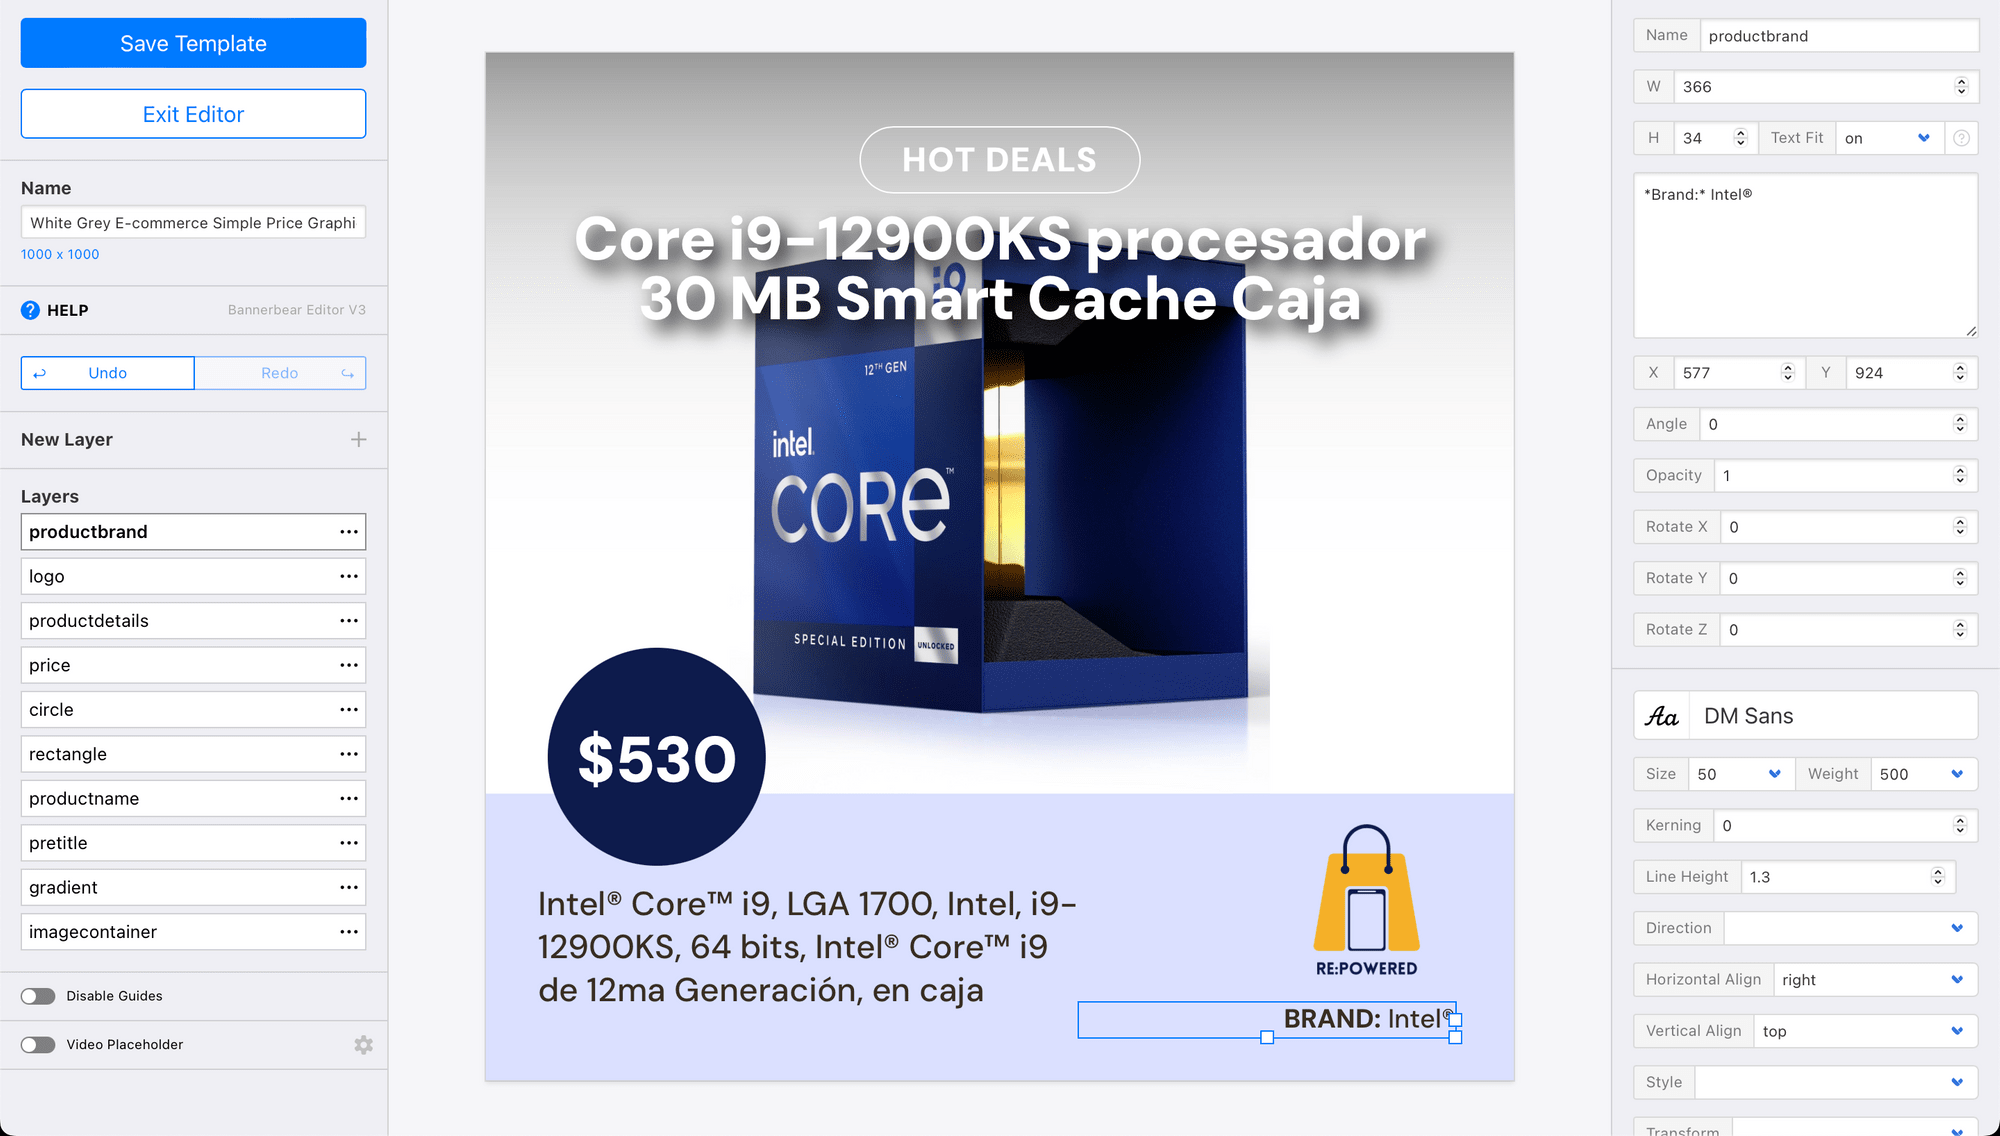
Click Save Template once you’re happy with your design.
Prepare Your Pricing Data on Airtable
Now that your template is ready, it’s time to prepare your data for use. There are several ways to clean and format your pricing data: your database’s formatting tools and Zapier’s formatting actions, among others. You can use either or a combination of methods. But in this tutorial, we’ll simplify the zap by using database formulas and filters.
Let’s assume that your pricing data has already been saved to a cloud database—in this case, Airtable. You can format various data types in different ways, including:
Formatting Currency
Currency fields can be used for numbers, and they can be used to choose a symbol, decimal plates, separators, and more.
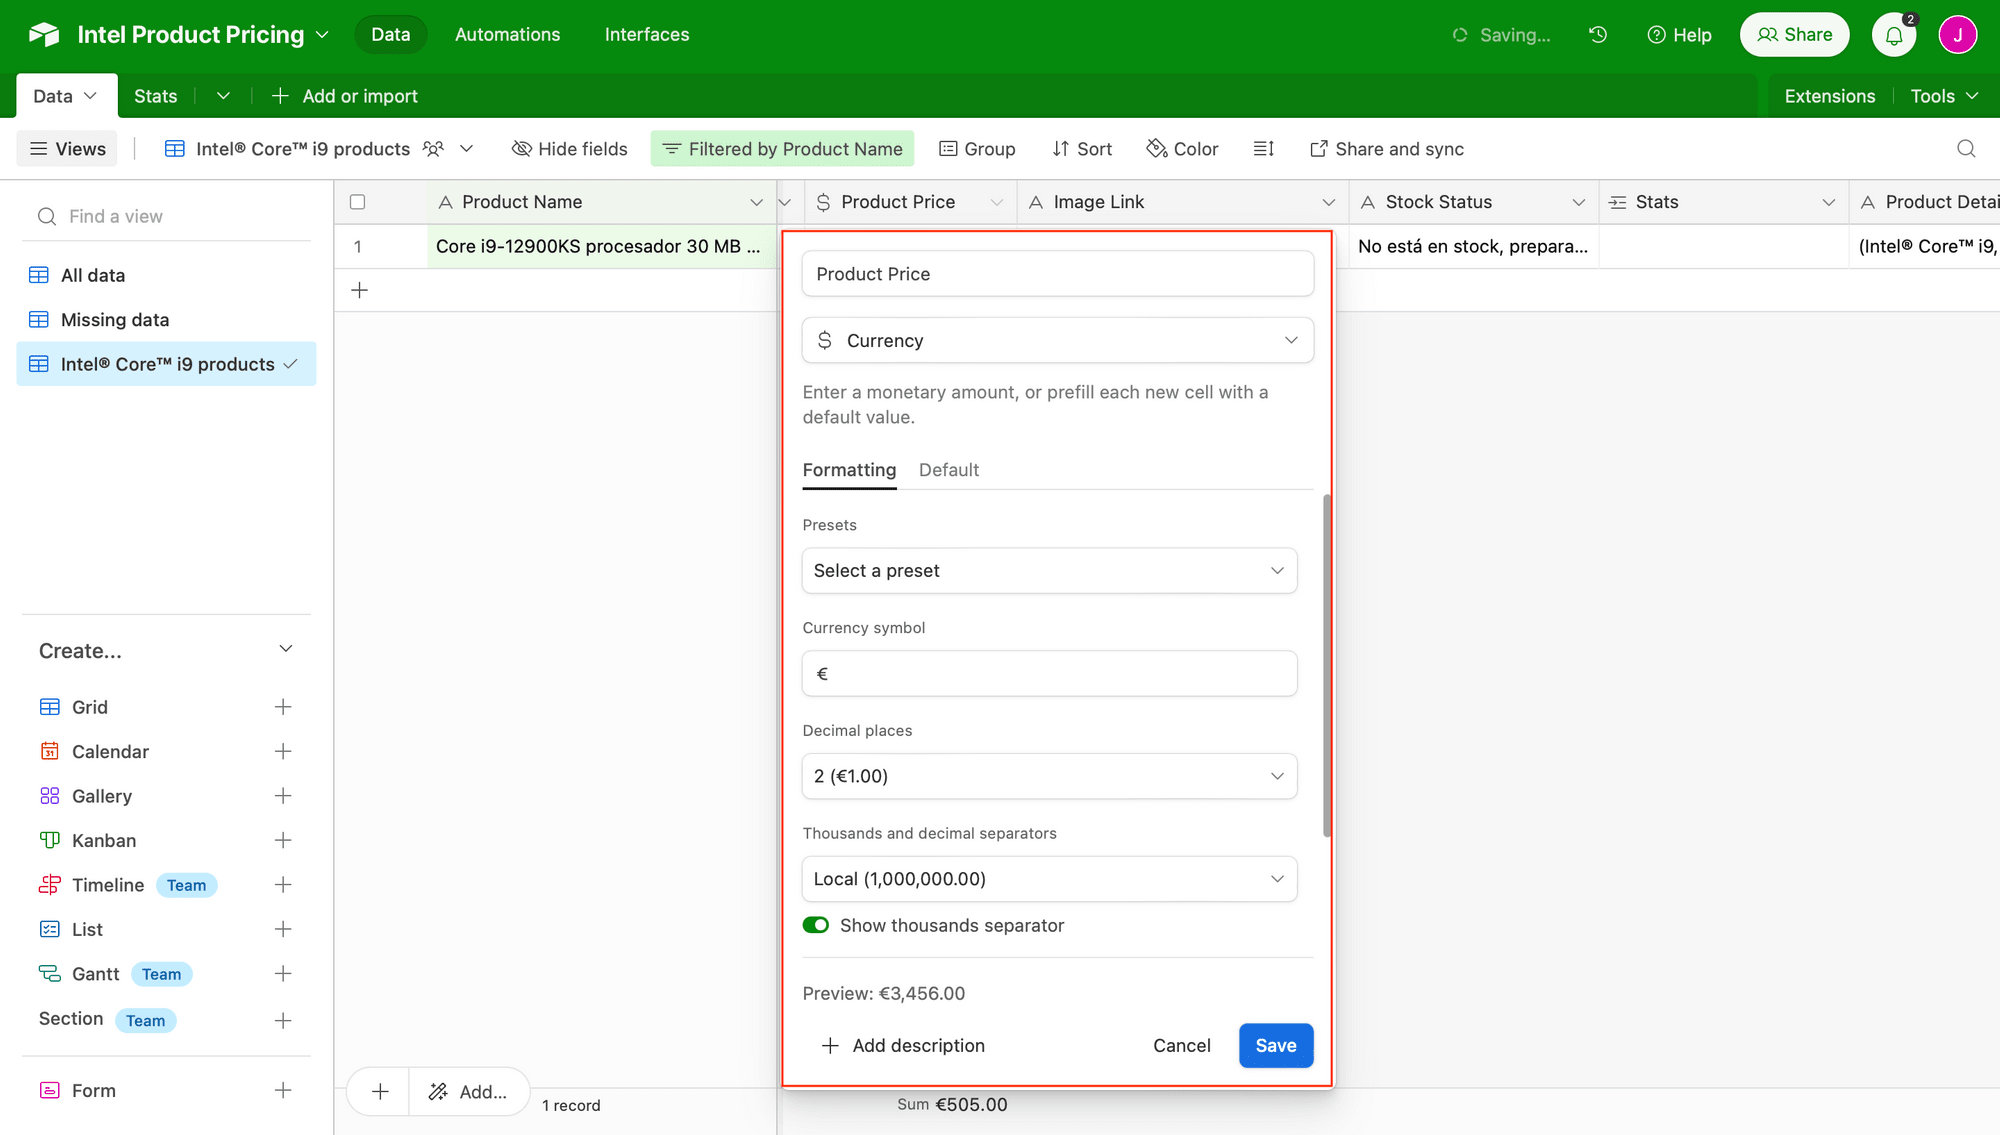
If your raw pricing data includes currency symbols, abbreviations, or other characters that prevent them from being recognized as numbers, you may need to create a formula field to eliminate these characters before applying a currency field to format your prices appropriately.
Bear Tip 🐻: Airtable’s number-based fields (including currency, percentage, rating) are formatted with characters for display in the app, but they are passed to Zapier as numbers. You might have to add currency, percentage, or rating symbols using Zapier formatting tools or in your template.
Removing Unnecessary Characters
Airtable’s Formula fields offer a wide variety of functions and operators to help you generate your desired output. You can use one or a combination to remove unnecessary characters. For example, a substitute formula can be used to omit words, phrases, and characters that you might not want in your final result.
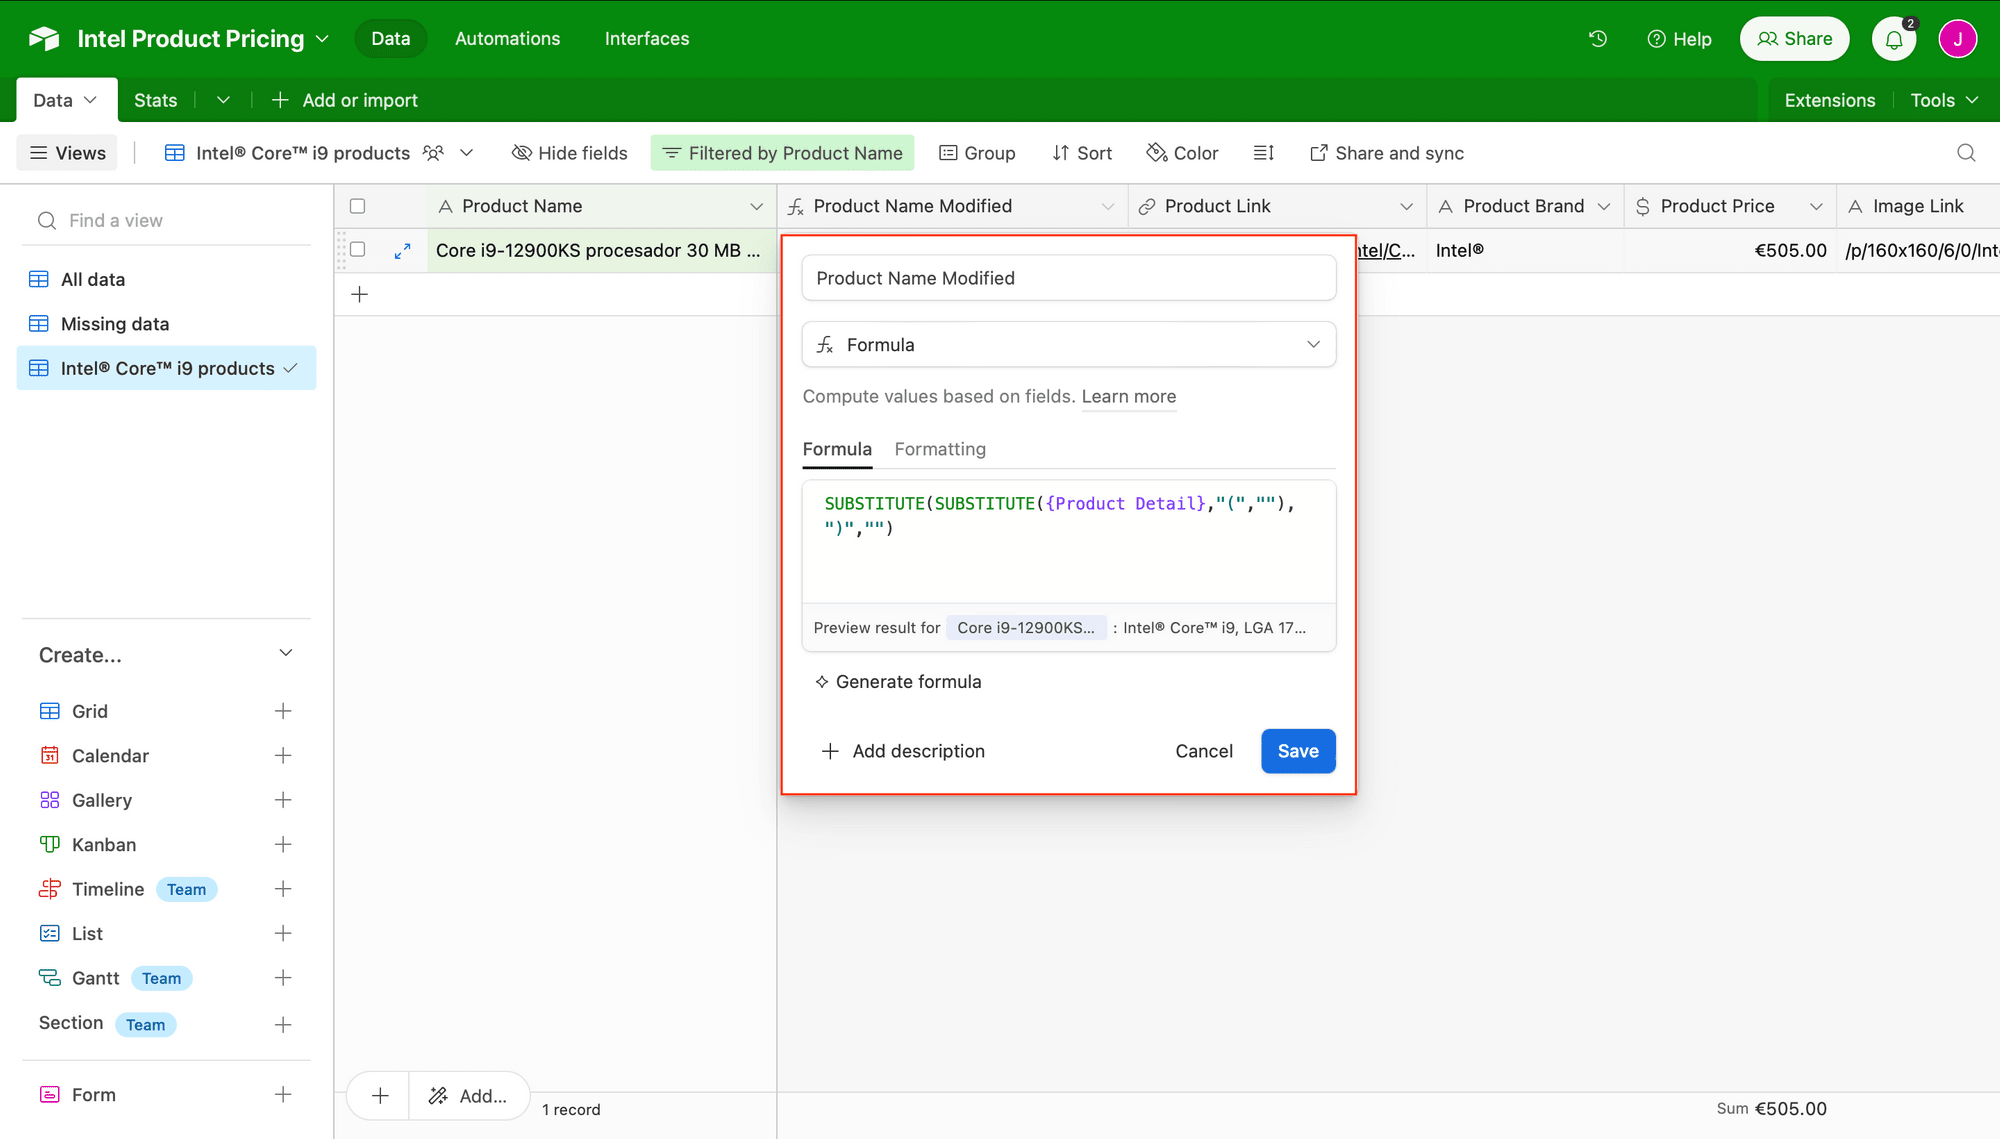
Depending on the raw data you’re working with, you might also be able to use right, left, mid, replace, or a combination of formulas to extract only a portion the original string.
Concatenating Links
When extracting links, if you only have the path and not the full URL, you can use the concatenate formula to create a complete link. This full link can then be used for images, QR codes, or social media captions.
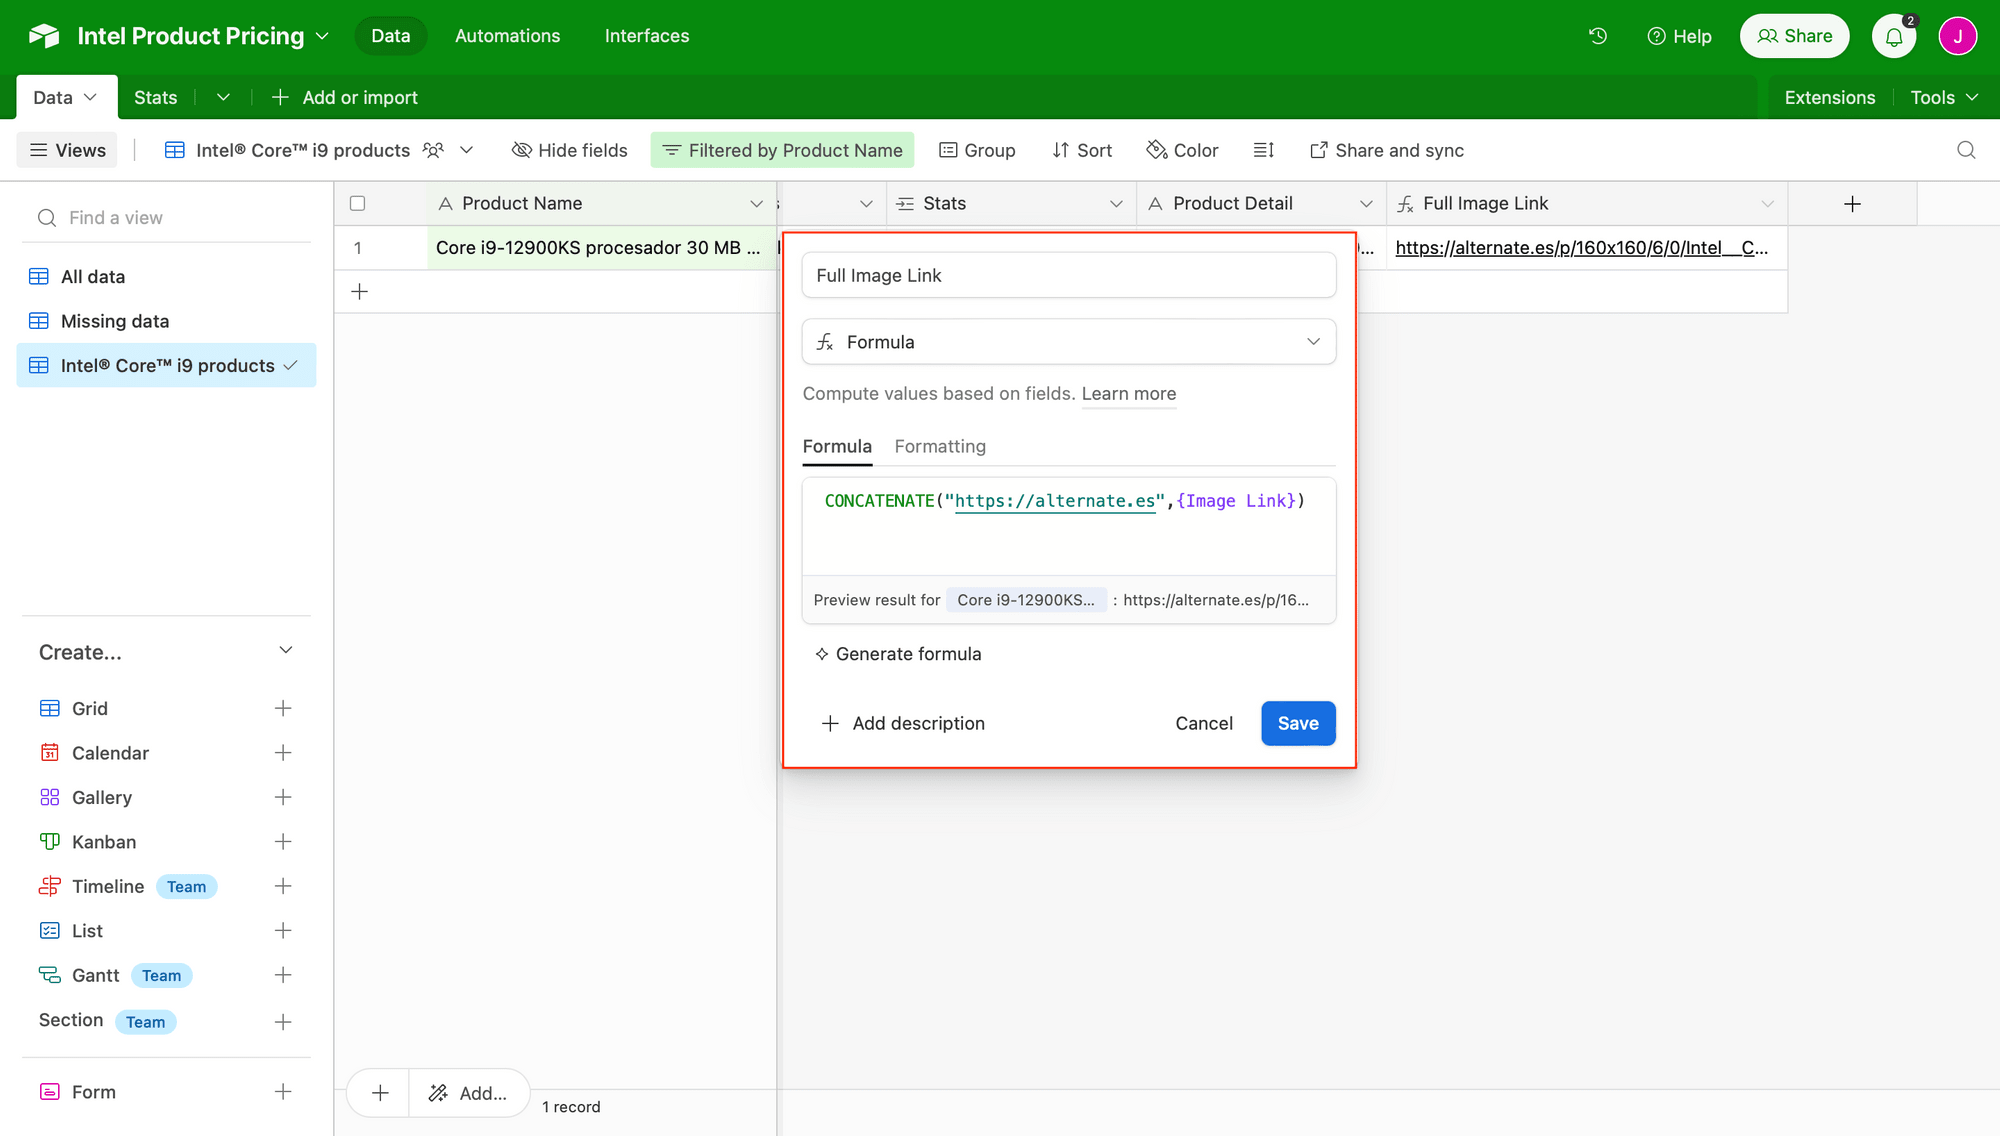
You can use this formula to join a fixed string of text (eg. https://bannerbear.com/blog) or reference a different column with dynamic data.
After your data is properly formatted, let’s also create a view that filters for products fitting certain specifications. This will trigger image generation and make it easy to see which items match requirements. Click the + button next to Grid.
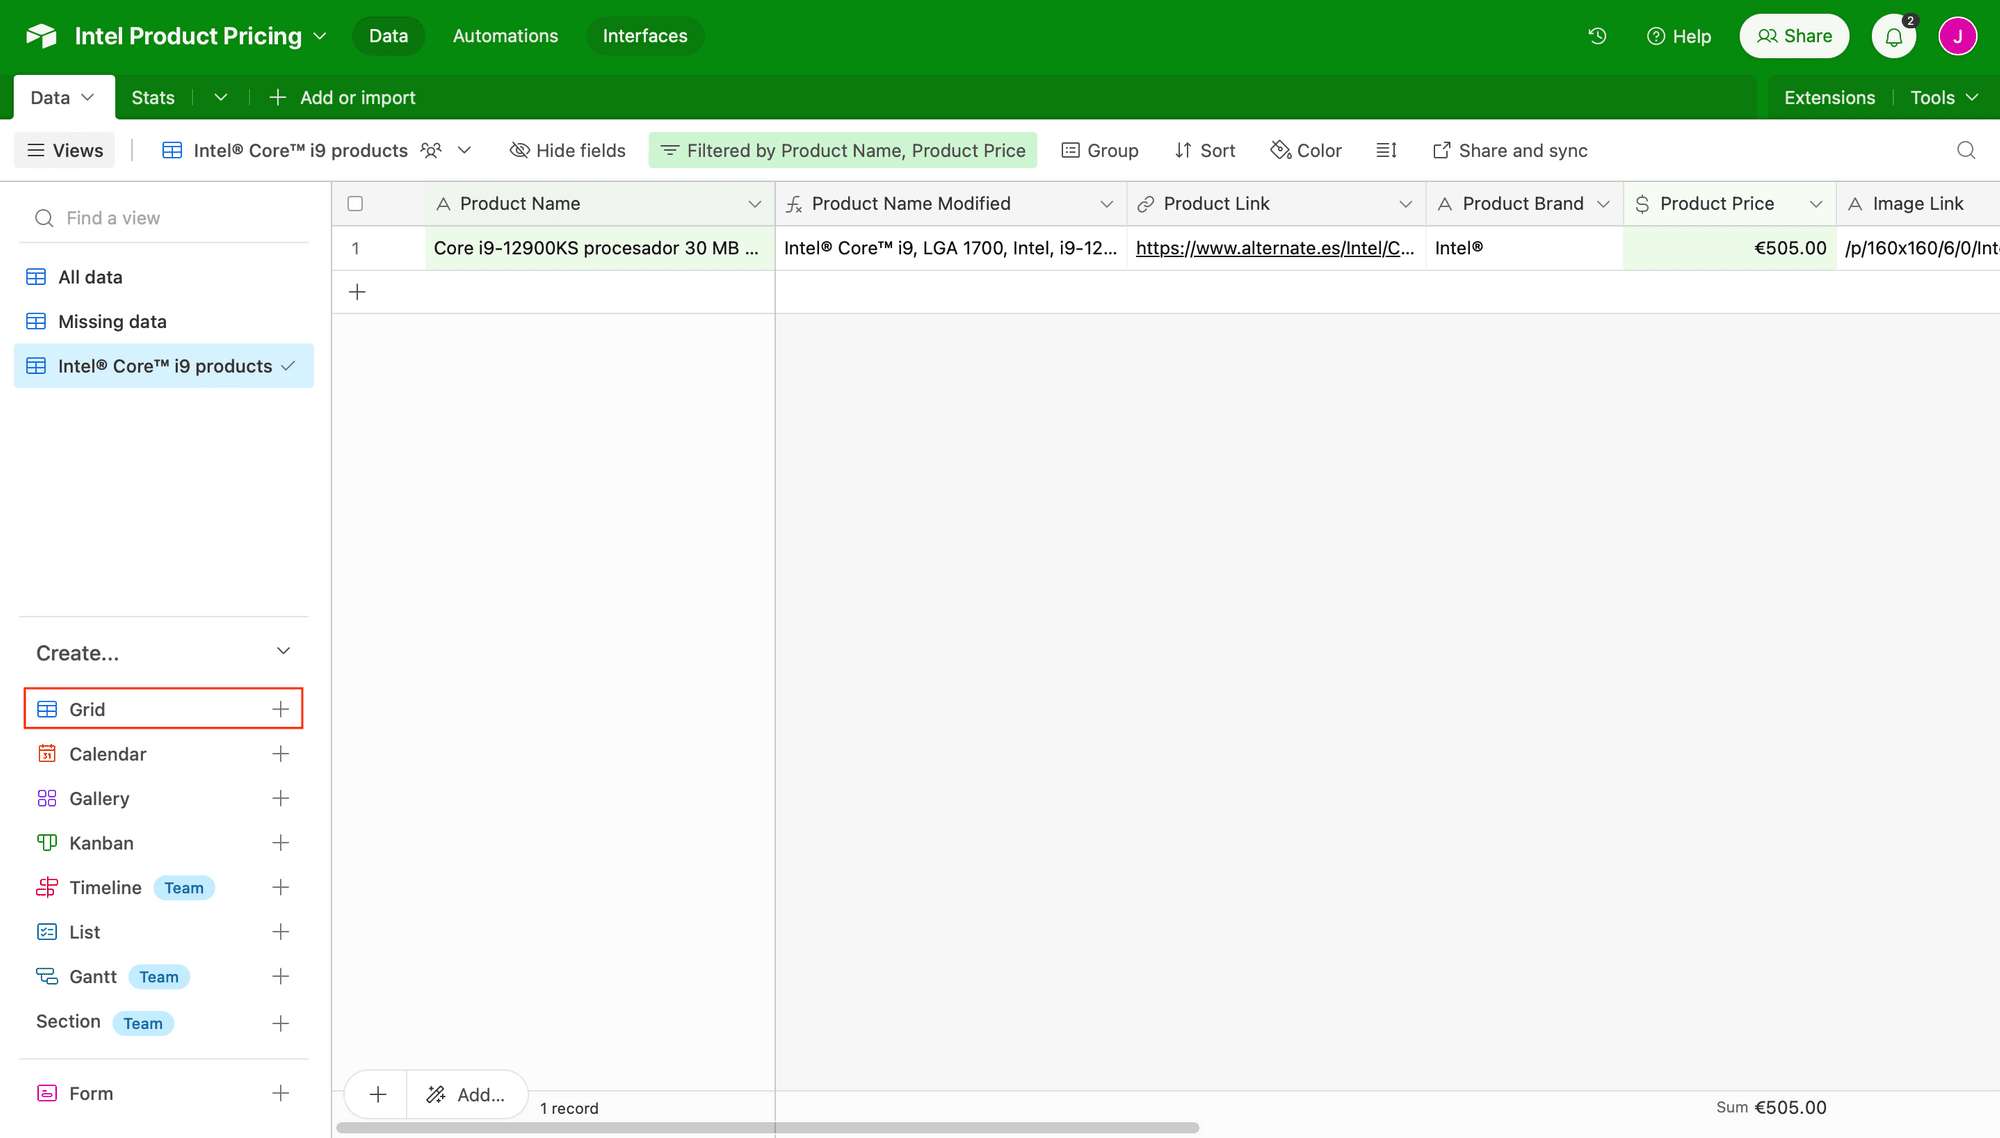
Add filters for the requirements you want to set, which might include specific brands, price ranges, and even stock status.
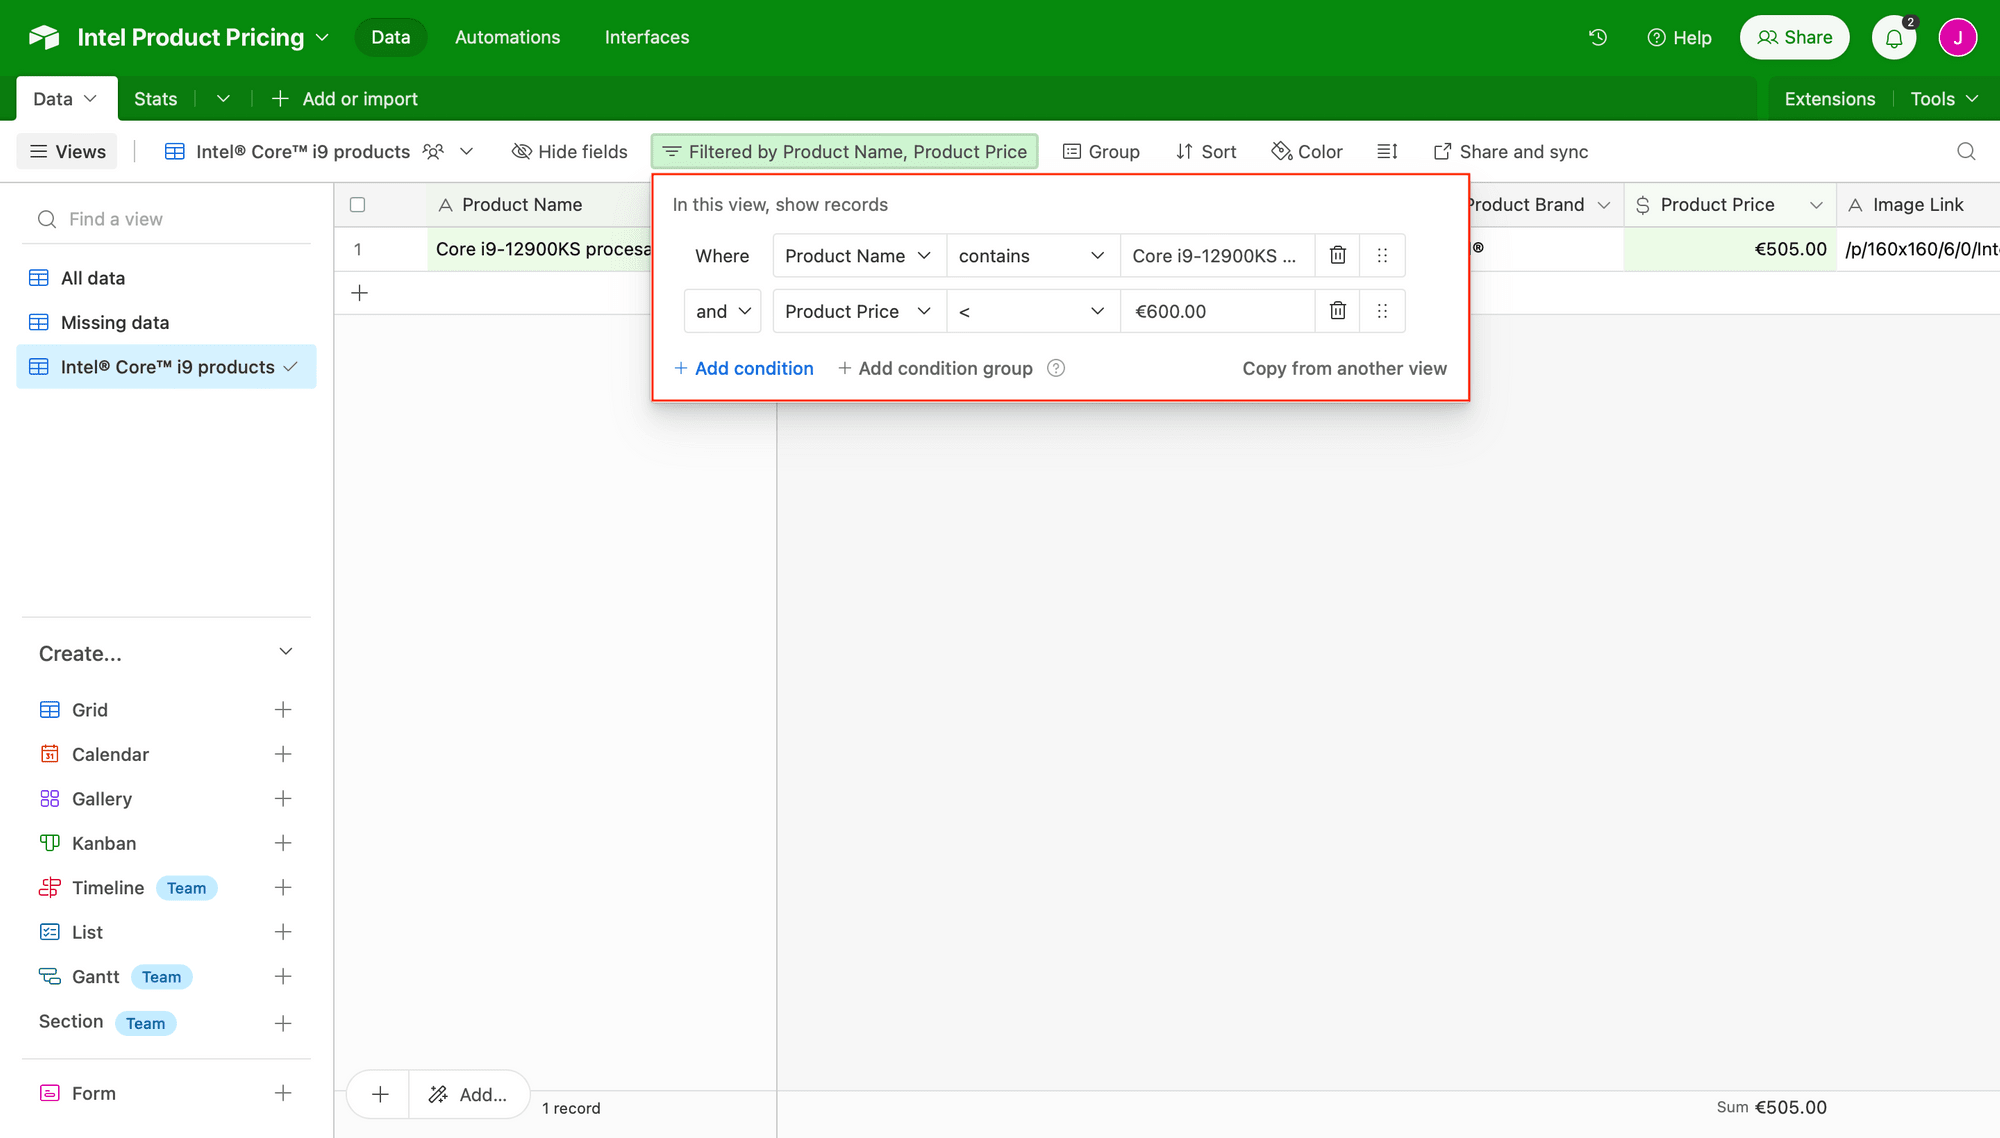
Make sure you have at least one record in the view to test your automation later on.
Bear Tip 🐻: Automate price data monitoring and collection by using a web scraping app like Browserbear.
Set up a Zap to Auto-generate Graphics
The final piece of the puzzle is a zap that pulls data from your Airtable base, then generates images.
Log into your Zapier account, click + Create Zap , then set up the following steps:
Trigger: New Record in Airtable
Choose Airtable as the app and New Record as the event. If you haven’t connected your account yet, you will be prompted to do so.
Set up the trigger by specifying the base, table, and view that contains your filtered items.
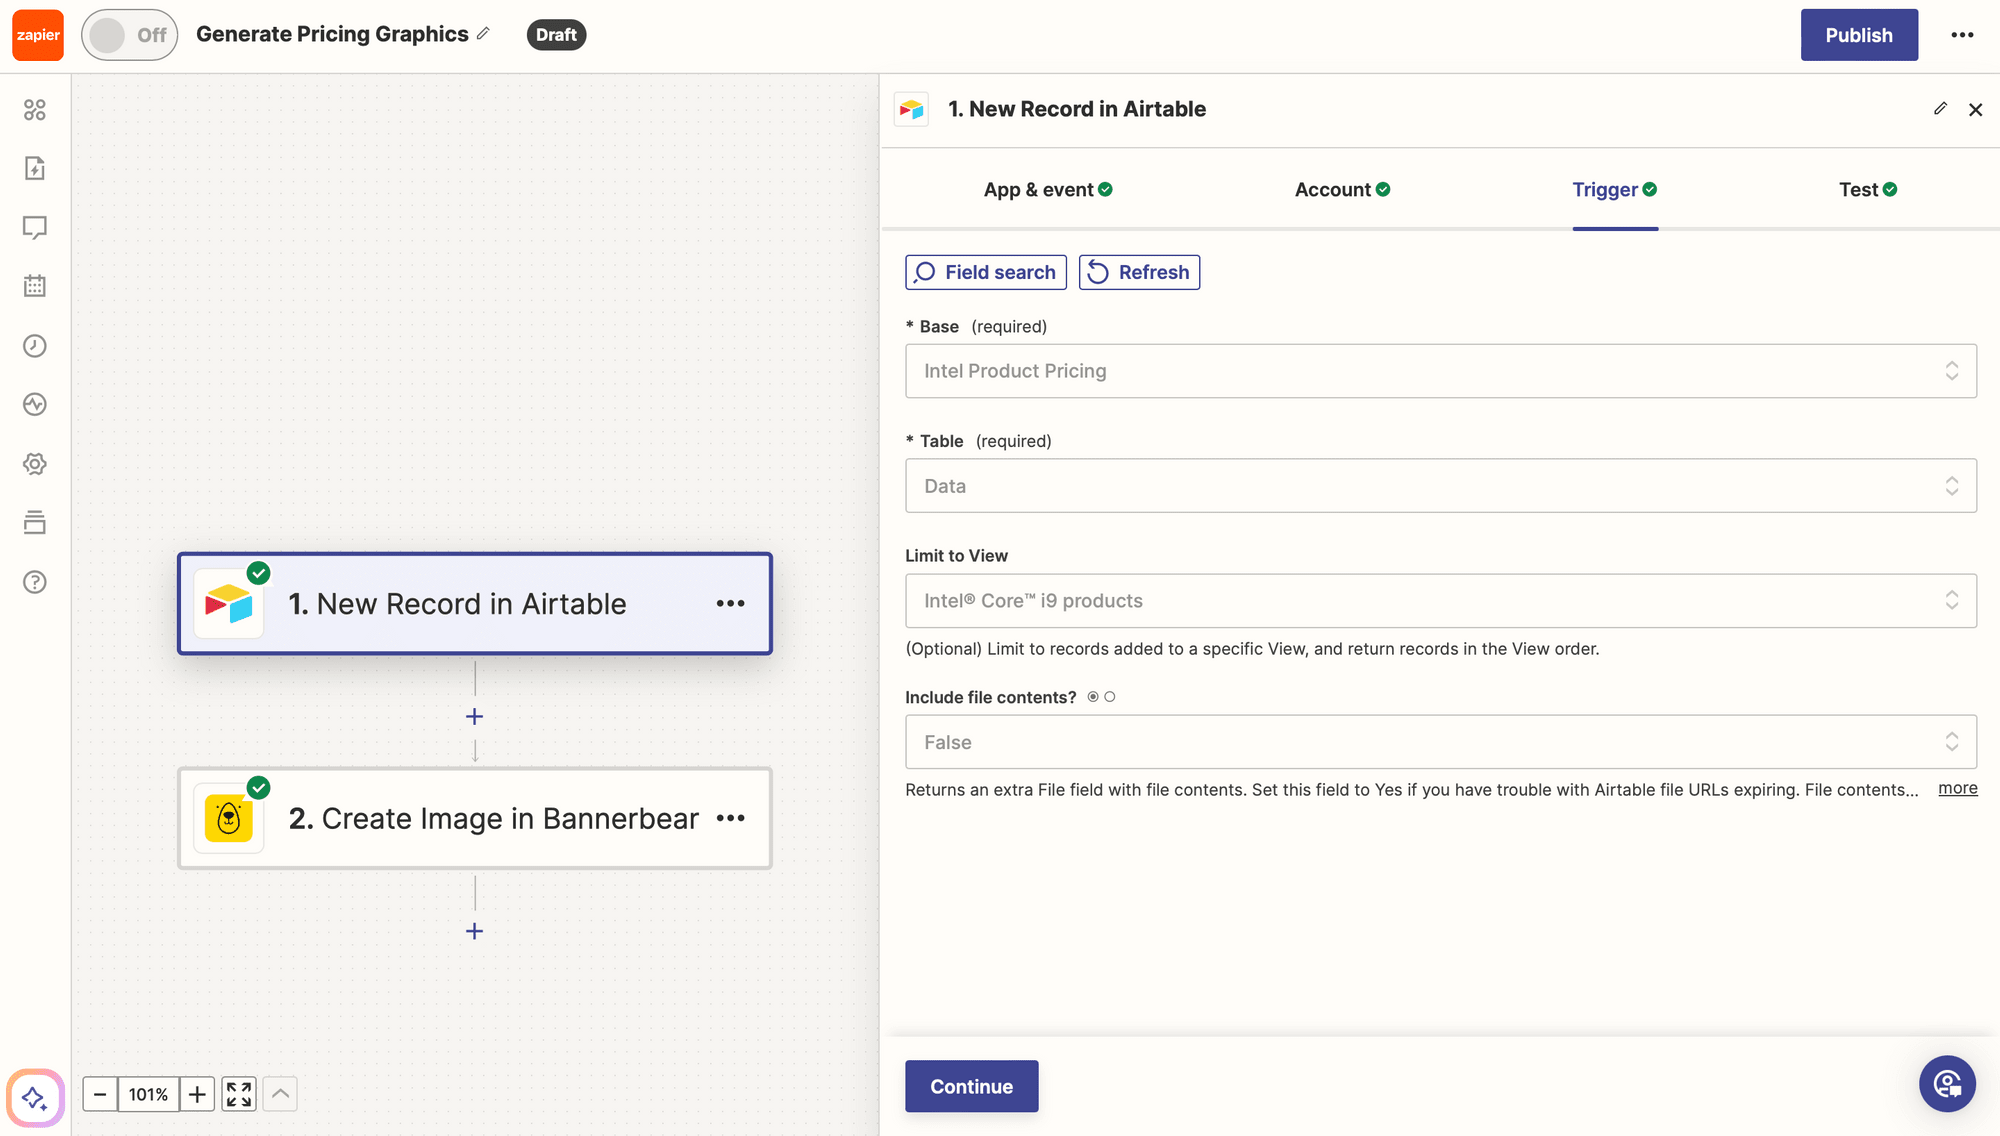
Test the trigger, then save.
Action: Create Image in Bannerbear
Choose Bannerbear as the app and Create Image as the event. You will need to connect the project using the key found on the “Settings / API Key” page of the corresponding project on the Bannerbear app.
Set up the action by selecting your template and mapping your database values to their corresponding fields.
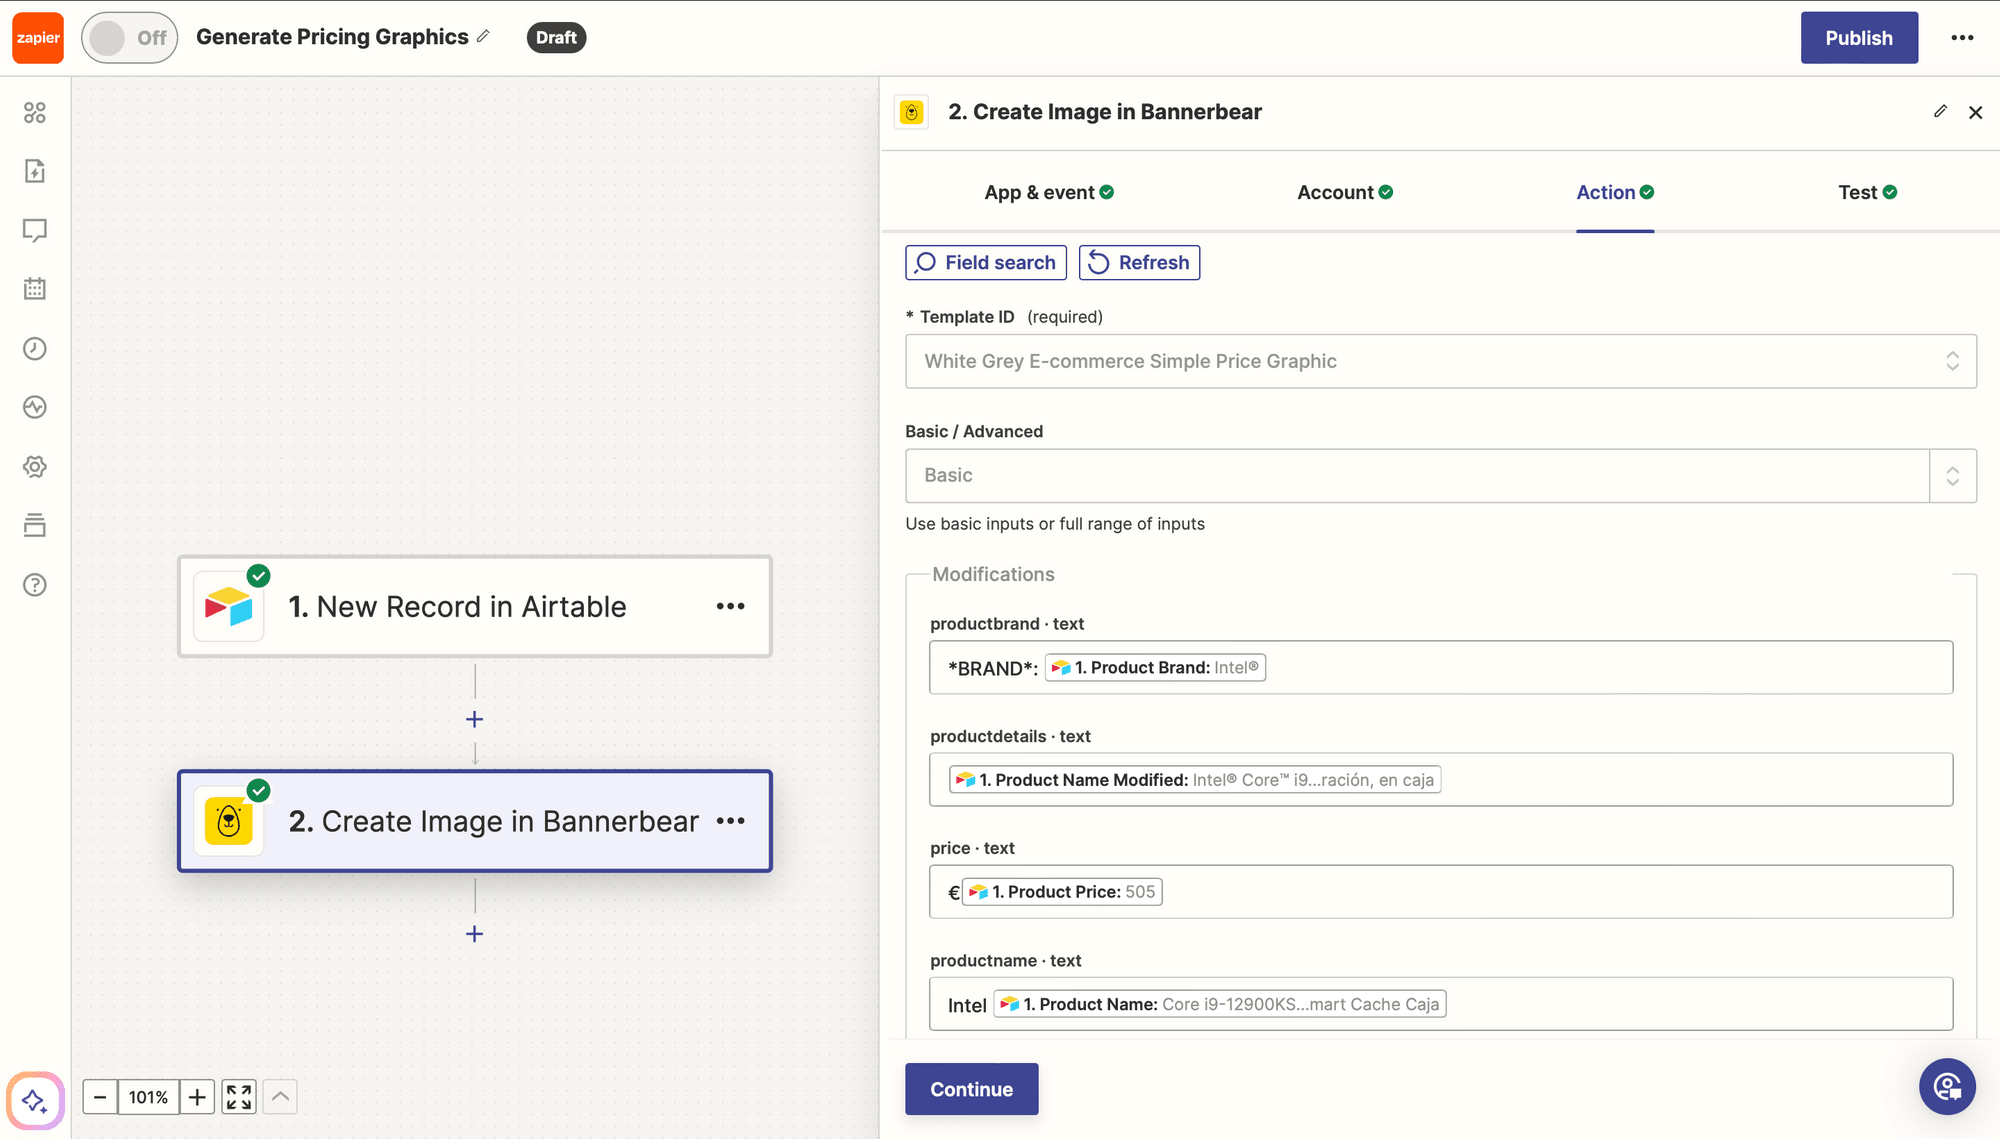
Test the action. An image should be generated, which you can view from the zap test results or in your Bannerbear log.

Illustrating Prices With Dynamic Graphics
Beautifully designed graphics will draw a lot more attention compared to text. But for use cases like these, there’s no need to create every image from scratch.
Data dynamically pushed through to an image generation tool like Bannerbear can ensure you always have graphics to promote to your audience. You can even take the process a step further with these ideas:
- Post the graphic to a social media audience (eg. Twitter, Instagram, Discord, etc.)
- Send the graphic to a social media management app for future posting
- Save the generated image links to your Airtable database for reference
- Add the graphic to an email campaign
- Send the graphic directly to followers (eg. Telegram, Messenger, etc.)
Try it out for yourself!
